Let us know how access to this document benefits you. Follow this and additional works at:
|
|
|
- Marshall Cunningham
- 5 years ago
- Views:
Transcription
1 University of Montana ScholarWorks at University of Montana Graduate Student Theses, Dissertations, & Professional Papers Graduate School 2008 Digital Photography Julie F. Whipple The University of Montana Let us know how access to this document benefits you. Follow this and additional works at: Recommended Citation Whipple, Julie F., "Digital Photography" (2008). Graduate Student Theses, Dissertations, & Professional Papers This Professional Paper is brought to you for free and open access by the Graduate School at ScholarWorks at University of Montana. It has been accepted for inclusion in Graduate Student Theses, Dissertations, & Professional Papers by an authorized administrator of ScholarWorks at University of Montana. For more information, please contact
2 Darkroom to Digital A transition of photography from the wet lab to the computer By Julie F. Whipple B. F. S. Weber State University 1993 Professional Paper Presented in partial fulfillment of the requirements for the degree of Master of Arts The University of Montana July 2008 Approved by: David A. Strobel Dean, Graduate School Dr. James Kriley Creative Pulse, School of Fine Arts, University of Montana Dr Randy Bolton Creative Pulse, School of Fine Arts, University of Montana Karen Kaufmann Creative Pulse, School of Fine Arts, University of Montana Jennifer Sorenson Committee Member, Snowcrest Jr. High School, Utah i
3 Whipple, Julie F. M.A. Summer 2008 Fine Arts and Integrated Arts and Education Darkroom to Digital : A transition of photography from the wet lab to the computer Director: Dr. James D. Kriley I have enjoyed teaching photography classes in high school for many years. At the end of my first year in the creative pulse program, I decided to introduce a digital computer unit into my existing photography wet lab curriculum. To my amazement it was received well with positive and promising results. Later in the year I received information that I would be teaching a full class in digital photography that would start at the beginning of the following school year. I began to research and work on curriculum that would best teach and inspire students to make the transition from the wet lab to the computer. I wanted to be able to inspire them to create interesting and meaningful projects. I am by no means a Photoshop expert. It is not my main intentions to teach students a particular computer program. It is my desire to inspire the creative instinct in each student to create meaningful images, and to teach them how to achieve them. Photography is in a huge transition at this time. The phenomenal development of electronics is growing by leaps and bounds every day. Just as you begin think you have learned the current new technology and can teach it, something newer is being introduced on the consumers market that is better. Progress is never ending, and it takes a great deal of time and effort to try to keep up with the continual new developments of the technical field of electronics. The method of teaching photography by using wet lab techniques is a fading art skill and is becoming a dieing process. Materials and cameras are becoming harder and harder to find. The world of digital photography is here and here to stay. Photography has existed for centuries. It is both an art and a science. As an art, it expresses a personal vision. As a science it relies on technology. This double nature is not unique to photography. Every kind of creative expression, such a music, dance or painting, has both a purely artistic side and a more scientific or technological side as well. It is my desire to create a blend of teaching that incorporates the skills of printing in the darkroom to the extremely powerful tools of the computer while still focusing on the ability of captivating the creative imagination of the student. ii
4 Acknowledgments I would like to thank the many people that helped and supported me during the last two years of my continuing educational progress. My growth and development has been amazing during this time. I would like to thank Jennifer Sorensen for sharing the information about the Creative Pulse program and encouraged me to register in it. Also many thanks to the inspiring instructions given by the instructors that has taught the Creative Pulse program. I want to thank my principal for approving my proposal of initiating a beginning digital photography class in our school schedule for this last year. I appreciate his continuing support of the digital classes for next year. Also I want to give many thanks to my colleagues for their suggestions and words of encouragement. I also want to thank my family for their understand and patients during the last two years. I appreciate their sacrifice of me being away from home for the last two summers and the many extra hours spent on the computer. And last to my students that so willingly and graciously shared their creative projects with me for this paper. iii
5 Contents Abstract ii Acknowledgments...iii Contents.. iv Images. v Chapter 1. Overview of Photography Photography History Introducing the Digital Class Choosing a Camera Taking Better Pictures Lesson # 1 Cropping Lesson # 2 Filters Lesson # 3 Emphasis Lesson # 4 Environment Lesson # 5 Improving your Pictures Lesson # 6 - Personal Collage , Back-up Summary References.. 44 iv
6 Images Figure # 1 Simplicity. p. 13 Figure # 2 S Curve. p. 14 Figure # 3 Diagonal Lines p. 15 Figure # 4 Triangle Line.. p. 16 Figure # 5 Beach Boy.. p. 17 Figure # 6 Balance p. 18 Figure # 7 Framing p. 19 Figure # 8 Mergers p. 20 Figure # 9 Border Merger.. p. 21 Figure # 10 Example of Cropping.. p. 24 Figure # 11 Crop a Picture. p. 25 Figure # 12 Fun Filters. p. 28 Figure # 13 Emphasis... p. 30 Figure # 14 More Emphasis. p. 31 Figure # 15 Environment.. p. 33 Figure # 16 More Environment.p. 34 Figure # 17 Levels. p. 36 Figure # 18 Brainstorming.. p. 37 Figure # 19 Collage... p. 38 Figure # 20 Second Collage p. 39 Figure # 21 Student s Paper p. 40 Figure # 22 Collage and Paper p. 41 Figure # 23 Back-up.. p. 42 v
7 Overview of Photography Photography arose from the work of artists, scientists, and technologists in the 19 th century, and has grown to become a medium that touches every part of human activity. From the earliest black-and-white prints to the latest digital images, photography has the power to challenge, inspire, inform, and amuse. Photography is a medium that is made up of three interweaving major strands. The artistic movement was one which spread among photographers throughout the world. These creative pictures gave a separate identity that separated photography from the other visual arts. Cultural exchanges between photography and society came next, which had a lasting effect in newspapers and magazines, which have broadened public knowledge and understanding with issues and events. Last is the technological developments such as the explosion in digital image capture and manipulations in the late 1990 s which have enabled photographers to continue to break new ground in the world of photography. Like the phases of a personal history, different aspects of photography vary in importance with the stages of its development. The early impact of photography was entirely restricted to the wealthy. The cost of materials such as silver and handmade optical equipment was far too expensive to allow the average person to take advantage of the new technology. Once photography became industrialized in the 20 th century, it was able to reach the mass market becoming accessible to all but the poorest and most disadvantaged. 1
8 Photography influence on social awareness became very powerful by its ability to change laws, create national parks, and sell products. From the early use of the camera obscura, which was used as a drawing aid, to the discovery of the first chemicals that made images permanent, new technology has been at the forefront of artistic creativity. The arrival of roll film and miniature cameras in the early 20 th century freed photographers from the studio and started a new age of photojournalism, documentation of scientific discovers, and the candid pictures of families. With the introduction of color brought new challenges, both artistic and technical. Photographers were now able to cover subjects with greater realism. As technology continued to move forward, the development of long focal-length lenses, and large-aperture lenses revolutionized nature and sports photography by greatly extending the optical reach of the cameras. More recently, the emergence of computer technology has exploded the world of images. Even people with little interest in photography can take pictures instantly on their cellphone cameras and then share them via the internet. On a larger scale satellite imaging has given us new insights into the universe and our planets. Photography in the 21sst century is more widespread and diverse than at any other time in our history. Modern photographers are in an enviable position, and can enjoy the many facets of picture taking. The interplay of artistic, cultural and technological influences is perfect for creativity and innovation. 2
9 Photography History Photography took several hundred years to reach its present state. No one person can be credited with its invention. Many inventors worked on new processes and improvements of their equipment. There were many failures. Most failed because the new techniques were too complex, requiring great skills and took endless hours. Through the perseverance and determination of many inventors we eventually came to the photography that we know and use today. The camera obscura (Latin for darkened chamber or black box ) was a building block in the development of the camera. It was a box with a hole in one side through which light enters and projects onto the opposite side, creating an upside down image of the scene. The earlier versions to this device were mainly used by artist to assist them in their paintings. The first breakthrough in light sensitive material came in A German physicist, Johann Schulze found that when certain silver salts were exposed to light they changed color and left an image on surfaces that were experimented upon. The images were not permanent and quickly turned to black once additional light was exposed to them. About forty years later, photography started to make a lot of advances. A number of people began trying to produce a photographic image that would be permanent. In France, Joseph Niepce developed a method that produced an image on paper, but his images soon faded and were lost. Meanwhile, a painter in Paris named Louis Daguerre was also trying to produce a camera image. After many failures he got in touch with Niepce and 3
10 the two worked together on the problem. Niepce died poor and discouraged after working with Daguerre for a few years. Daguerre was convinced that silver was the key to producing a better image. In 1835 his conviction paid off. He discovered a combination of chemicals that he called fixer that made an image permanent. Daguerre called his prints daguerrotypes and his process was soon being copied and used in several countries. At first, the need for very long exposures made the process somewhat impractical for portraits. Few people were willing or able to sit perfectly still for up to twenty minutes. Within a year a new camera lens was introduced by Josef Petzval which transmitted 16 times more light. This reduced the exposure time to the length of a minute or less. Once sitting time was drastically reduced by the adoption of the Petzval lens, daguerreotype portrait studios became common. Each daguerrerotype image was unique, a one-of-a-kind image. The only way to obtain an additional copy was to photograph the original image. Eventually the daguerreotype would be replaced by the more flexible negative/positive system discover by William Talbot in the early 1830 s. By discovering and refining the negative/positive system, Talbot altered the direction taken by photography. Instead of being limited to unique, one-at-a-time images, photographers could now make as many copies as they wanted from each negative. A whole new kind of photography was born. Improvements, modifications, and new discoveries continued to pour out of history over the next few years. Photographers changed from using the wet plate method to using the dry plate method. Photography changed from single 4
11 plate picture taking to a rolled film method. Cameras were being made smaller so that you no longer had to go to a studio and have your picture taken. The Photographer was now freed up by being able to transport his equipment to the outside environment. This gave the photographer the ability to taking pictures of the public out side the studio, which increased the ability of taking picture other than just portraits. Photojournalism was introduced by two brave photographers that took their studio camera out to the field of battle during the Civil War in Mathew Brady and Roger Fenton documented history and inspired many other photographers to follow their example. Illustrated newspapers were soon to follow and by the early 1900 s and photography in newspapers became routine. George Eastman as a young man was very interested in photography. He took photography up as a hobby in the late 19 th century. It was still an expensive pastime that required cumbersome equipment and complicated techniques of mixing chemicals. Eastman began to experiment with ways of making the process simpler and more affordable. In 1888 he invented the Brownie camera. It was the first camera that was produced for the masses. He loaded it with rolled film, which he invented and marketed it to the public with the slogan, You press the button, we do the rest. This was the first camera that was put in the hands of everyone. His invention was immensely popular resulting in the birth of the Kodak Company with many more improvements to come, such as color film and motion pictures. 5
12 Photography without film seemed to burst upon the public in the late 1990 s. The digital camera was invented for use around 1969 when it was used on the space shuttle Apollo 11. In 1984 a Japanese photojournalist used an electronic still camera, to document the opening of the 1984 Olympic Games in Los Angeles, California. Through the remainder of the 1980,s various Japanese camera makers and Eastman Kodak, introduced digital products. The high cost and low resolution of the images restricted the market initially. In the early 1990 s however, digital photography began to be a serious competitor to film. By 2004 digital cameras were finally able to exceed 35 mm film image quality. From the first digital camera that Kodak launched called the DCS-100, which weighted a back-breaking 55 lbs. at the cost of $30,000 with 1.3 mega pixels, to the current day digital camera at 6 oz, 10 mega pixels with the cost of $179.00, you can see the progression and public demand for improved cameras. The power of the photo image has now been launched. Investigative photography has now come into play. The documentation of situations has made public awareness possible to create new laws to better serve the people of our civilizations and cultures. Child labor reform laws from the legislation were one of the first laws to be created because of a photograph. It was followed by exposing poverty, which brought about providing welfare and government relief programs. Majestic lands were soon to be preserved and made into national parks all because of a photograph that had been taken and sent to Washington D.C. 6
13 As photography became less expensive and more widely available, a diverse range of people have found their voice in visual images. Propagandists and social reformers alike use photography to spread their messages. Artists have also been quick to take advantage of new equipment and use innovative techniques to push the boundaries of self-expression. 7
14 Introducing the Digital Class You are about to embark on the wonderful world of digital photography. Photography isn t just about snapping the cameras shutter by pushing a button. It goes much deeper than that. It s about the Why s of the picture. It s about capturing an emotion, a feeling, a mood or an event in time. It s all about learning how to see things differently by examining each new object carefully and asking yourself the Whys of taking the picture. Planning what you take is extremely important and you will find that you will spend more time planning what you take than actual taking the picture. Patient waiting and careful planning are important keys to successful photography. You want to look for interesting angles and different distances of your subject. Your light is very important and you may want to carefully plan what time of day is best to take your pictures, and to give you the best highlights, lines, and shadow angles. Usually early in the morning or late in the day, like early evening, will give you the best pictures. These times will give you interesting shadow images and softer edges. Try to avoid taking pictures at noon because there are no interesting shadows, and the sun is very harsh. Bright sunlight will cause the loss of details in light objects. Other keys to success are taking lots of pictures. One of the advantages of taking digital pictures over using a film camera is that you are not going to run out of film. It s a lot easier to carry an extra compact flash card than carrying 20 rolls of film with you. Be sure to have a special case to put your compact flash cards in. Leaving them loose will result in damaging the connectors and will 8
15 create a loss of your pictures. It s very beneficial to have lots of picture choices to make decisions from. Don t limit yourself to just one or two pictures of a subject to choose from. It is often difficult to view pictures you have taken by looking in the camera s monitor or LCD screen. Better decisions can be made about which pictures you want to keep and which ones to be deleted, by viewing you pictures on a large computer screen. By following a few special guides you will soon see how these will assist you to in taking better photographs. The more you use photography skills the sooner you will be able to experience and see the development of your own creativeness and personal self-expression. 9
16 Choosing a Camera Selecting a digital camera can be somewhat confusing. There are basically two different kinds of cameras to choose from. First is the automatic camera which is a point and shoot camera. Automatic cameras have a delayed shutter and you often miss the shot you are trying to capture. The second one is an SLR single lens reflex camera, which has many more capabilities and features over the automatic camera. It takes pictures immediately without any delay of the shutter. The automatic camera is a much smaller camera, where as the SLR is a larger camera and looks like the old film cameras. The SLR camera has lens changing capabilities and the options of manual control settings. The SLR is used by most professional photographers, and is more expensive. Deciding which camera that is best for you is purely a personal decision. You first need to know what you are going to use it for. You wouldn t want to take an SLR camera on a hiking trip because it would take up too much room and add weight to your back pack. You also wouldn t want to use a small automatic camera in a portrait studio situation. If it is financially possible, it s nice to have one of each. When choosing a digital camera, the main thing to consider is which camera is going to give you the most options for your money. Almost all cameras come with high mega pixels and good quality lens. Choose a camera with the most optical zoom. A high zoom lens does not give you a quality picture when you use the zoom. It s the optical zoom that gives you the most clarity in 10
17 your pictures. With a regular zoom lens it is better to take the picture without using the zoom and crop it closer in the computer. Your picture will be clearer when you print it. Batteries are another item to consider. It is best to select a camera with a rechargeable battery pack. Cameras that require AA batteries are costly, inconvenient and will not hold the charge as long. Buying an extra battery pack is always a good investment, especially for extended trips, and a full day of shooting.. Another thing to consider is a camera with a stabilizer in it. There is nothing worse than a blurry picture. When taking pictures you never know when a little breeze will come up and that great shoot of a flower will be ruined. As long as you are breathing and you heart is pumping, the camera is always moving. The stabilization feature on cameras is a great option to consider when making your purchase. To get maximum clearness in your pictures, always use a tripod. When a tripod is not possible do the second best thing which is to take a depth breath and hold it. You will be surprised how well this works. Most people want to buy a decision free camera that they don t really have to give a lot of thought to. There is nothing wrong with that. A camera that is too complicated will often take the pleasure away from picture taking. Our society wants quick, easy, and fast. Cell phones are becoming another option. They have increased the mega pixels to 5 and more now and the convenience of having a camera with you al all times can be a real advantage. Pick the camera that fits your needs, and gives you the most for your money. Never go into debt 11
18 for a camera or any other electronics because tomorrow there will be something new and better on the market that you will want to invest in. 12

19 Taking Better Pictures Understand the 6 Guide Lines for Taking Better Pictures will change you pictures from snap shots to photographs. By following these few simple guides you will soon see an improvement in your pictures. 1. Simplicity a. One subject. b. Uncomplicated backgrounds.. c. Move in close. 13

20 2. Line Lines lead the eye through your picture. a. S curves slows the eye down. b. /\ Triangle placement of subjects connects subjects and creates unity. Use overlapping. c. Diagonal lines create harmony and are the most pleasing to look at. 14

21 More examples of lines and how they lead your eye through the picture. 15

22 Triangle lines connect several images. They keep you eye in the picture causing you to move from one object to another. Notice how much longer your eyes look at this picture simply by using the triangle format of your image. 16

23 3. Rule of Thirds. a. Place your main subject off center rarely in the center. b. Leave space in front of your subject. Give your subject some place to go. Place your horizon line either higher or lower but never in the middle. 17

24 4. Balance Balance is the arrangement of shapes, value, and color. a. Symmetrical balance is the same on both sides. b. Asymmetrical balance is different on each side. 18

25 5. Framing The use of framing is putting something in the foreground of you picture. It creates depth, and increases the interest in your photograph. a. The use of organic things, such as overhanging tree limbs. b. Using buildings, doorways, bridges or other objects in the foreground. 19

26 6. Mergers Often a photographer gets so involved with setting up the light, camera settings, and the main subject that they forget about the backgrounds. Avoid shooting mergers. Mergers are things that conflict with your main subject. a. Border Mergers - Cutting off heads or feet. b. Complete Mergers - Backgrounds interfere with the subject. 20

27 Guides The six guide lines are keys to better picture taking. Once you learn how to use them you will start to see improvements in your picture taking skills. Your snap shots will turn into photographs. Remember these are just guides and not rules. Don t be afraid to combine more than one guide line in your picture. It will only enhance your photograph. One of the best ways to learn the guide lines is by practical application. The following projects are designed to help students reinforce the foundations of good picture taking. 21
28 Cropping Lesson 1 Objective: The student will create several good compositions from a single picture by using the foundations and principles of the 6 guide lines. Introduction: Cropping is taking out what you don t want. The camera is a good place to crop your picture, however the computer also works well. The computer gives you a bigger image to look at, and you can take more time to make final decisions. You want to concentrate on creating a good composition that is pleasing to look at and that will hold the viewers interest. Composition is the selection and arrangement of a subject within a picture area. Anticipatory Set: Do a quick demonstration of cropping a picture. Show good and bad examples by cropping of the same picture several ways. Discuss what makes it good and what makes it bad. Review the 6 guide line as your crop the picture. Directions: Take several original pictures of anything you like or find an image in a magazine and scan it into the computer. Save it to your school hard drive or put it on your flash drive. 1. Save your picture using 300 resolutions. Name it so that you can find it easily. 2. Make a duplicate copy of it Image > duplicate > OK Close original picture. 22
29 3. Make 3 more duplicate copies and crop each to make a total of 4 different good compositions. 4. On the Options bar, set the size - height 4.5 and width 3.5 and 300 resolutions. 5. Open a new document. File > new > 8.5 x 11 and 300 resolutions. 6. Paste all four of your pictures on the new document by clicking on your picture and Select > all (Ctrl+A) > Edit > copy (Ctrl+C). Click on your new document and Edit > paste (Ctrl+ V). Use the move tool from the tool box (or press V) to move the pictures where you want them. Be sure you are on the correct layer to move your pictures around on the page. 7. Turn in your original picture in along with your four cropped pictures (total of 2 pages). Note: Remember there are many methods of doing the same things in Photoshop. The above instructions are just one of them. Evaluation: Checking for understanding will be done by a class critique of every student s work. Test will be given at the end of the unit. 23

30 Examples of Student s Cropping Assignments 24

31 Another Example of Student s Works 25
32 Filters Lesson 2 Objective: Students will explore the use of different filters in their image. Anticipatory Set: Open Photoshop and demonstrate the use of filter on an over head projector. Change some images so that they become outrageous. Introduction: Photoshop is an enormous program. I don t think there is anyone that knows everything you can do with it. In this lesson I want you to play with the different filters and explore some of the different things that you can do with the programs options and selections. Directions: Open Photoshop and pull up the picture of Buster. You may also use a different close up picture of your choice. 1. Duplicate the picture Image > duplicate > click OK Close the original picture. Duplicate the picture 5 more times. 2. Crop each picture. Set the size to width 3.3 and the height to 3.5 with 300 resolutions. Place the curser in the top left hand corner. Click and drag to the bottom right hand corner. You may adjust the size by clicking on a corner handle and dragging it. Move the entire image by using the arrow keys. When you have the picture cropped the way you want it, Click the Crop tool > OK. 3. Apply different filters to make 6 different pictures. 26
33 4. Place pictures on a new document. From the Menu Bar click on File > new. Choose 8.5 x 11. 5, Click back on your filtered picture and Select > all (Ctrl+A) > Edit > copy (Ctrl +C). Click back on the new document and Edit > paste. Select the move tool and place the picture so that you can put the next 5 on your new document. 6. Repeat process. Be sure to leave a little space between your pictures so that you can type which filter/s that you used. 7. When all your pictures are on your paper, select the T (type tool) to label your work. Type can be moved by using the move too or arrow keys. Evaluation: Class critique will be held with all student s work. 27

34 The variety of student s work was amazing. Students shared ideas with each other and the big question for the day was, How did you do that? Students learned that the possibilities of different things that can be achieved on Photoshop are endless. Students enjoyed this assignment and I enjoyed watching the interactions of students having fun while they were learning. 28
35 Emphasis Lesson 3 Objective: Students will create a center of interest by using emphasis in their photograph. Introduction: Emphasis is a compositional tool that makes some element/s of a picture stand out and capture the viewer s attention. It can be accomplished by using: size, value, or color. By emphasizing a single element of the photo, you are creating a center of interest. Your center of interest is what usually sends a clear message to the viewer. Directions: 1. Take a minimum of 50 or more pictures. More is always better. 2. Make a contact sheet of your work. File > automate > contact sheet. 3. Select a picture and duplicate it. Image > duplicate > OK. 4. Crop your picture to an 8x10 with 300 resolutions. 5. Change your color picture to black and white. Image > mode > gray scale. 6. Open a new document. File > new > 8 x 10 > RGB. 7. Click on your picture and copy and paste it to your new document. 8. Select the paint brush tool from the tool palette. a. Select a color you want to use from the color picker. 29
![b. Adjust the Hue/Saturation from the dialog box. (about 144). c. Choose the brush size. Use the short cut [ & ] to do this. d. Change the opacity and the flow to achieve softness. e.](/docs-images/95/124621427/images/36-0.jpg "Give your finish picture a title. f. Turn in you contact pages and 3 finished different prints. Note: You can blend beautiful colors by keeping your opacity and flow low.")
36 b. Adjust the Hue/Saturation from the dialog box. (about 144). c. Choose the brush size. Use the short cut [ & ] to do this. d. Change the opacity and the flow to achieve softness. e. Give your finish picture a title. f. Turn in you contact pages and 3 finished different prints. Note: You can blend beautiful colors by keeping your opacity and flow low. Start with your lightest color and add darker colors over the top for shading and reflected light. Follow the light and dark of your photograph to make it look natural and soft. Evaluation: There will be a class critique and discussion of student s work.. 30

37 More samples of student s emphasis photos. 31
38 Environment Lesson 4 Objective: Students will understand how to extract an image and place it in another picture. They will learn how to soften and clean up edges and make it look natural and real. Anticipatory Set: Present a demonstration on the computer using the projector, to show students different ways to achieve finished work. Introduction: Understand that there are many different ways to extract an image and paste it into another picture. These are a few different ways. 1. Regular lasso creates a freehand-drawn selection. 2. Polygonal lasso creates only straight lines. 3. Magnetic lasso - finds the edges of your object. Directions: Students will put them selves in 3 different environments. 1. Take 50 or more pictures to select your projects from. 2. Magazine pictures may be used, but no internet pictures. 3. Open Photoshop and open your environment picture. Crop and enhance it. Duplicate environment picture. 4. Open the picture of yourself and lasso it. Edit > copy. Click on your environment picture and Edit > paste. 32

39 5. Edit > transform will more your picture and change the size of your image so that it will look natural. Place it where you want it. 6. Clean up edges with the Eraser tool. Zoom in so that you can really see what you are doing. Select brush size and opacity. Soften you edges because you don t want it to like a cut and paste. Make sure you are on the correct layer to make any changes. 7. Write a one page paper about your environments. Turn in: 1. Your contact sheet/s. 2. Your typed one page paper. 3. Your final 8x10 print page and one page with your two 5x7 s on it. The two 5x7 s are, one of your environment and the picture of you that you put into your final print. Remember there are 3 final environments due. Samples of Student Work 33


40 Student s Work Continued Figure 16 34
41 Improving Your Print Lesson 5 Objective: Students will explore the different ways to improve the light of a photo. Introduction: It is difficult to get the perfect lighting exposure with every picture you take. You have the ability to come close to it with accurate camera setting and careful planning. Sometimes careful planning is not an option especially when you are taking pictures of family and children. You have the ability to fix pictures in Photoshop, so that you can save that cute picture. Light adjustment can be made by: a. Image > adjustment > Brightness/Contrast b. Image > adjustment > Curves c. Image > adjustment > Levels Anticipatory Set: Open the picture of the child on the deck and show a demonstration of different light adjustments using the above 3 adjustments. Directions: 1. Have students open up the picture of the child on the deck. 2. Duplicate the picture. Image > duplicate > OK. 3. Keep both pictures on the computer screen so that you can compare your changes. 35

42 4. Explore all of the light adjustment. Small adjustments are best. Don t get too extreme. Figure 17 Notice how you lost the details in the background. You will want to use the burn in tool to get the trees to show up, or lasso the little girl and cut and paste her in the original picture. 36
43 Personal Collage Lesson 6 Objective: The students will design a personal collage page. They will learn additional Photoshop skills including: layers, sizing, balance, and opacity. Introduction: You will design a personal collage page that is all about you. Include things that you like, things that you have done, your interest or hobbies, etc. Directions: 1. Create a brainstorming page. This will give you the direction of how to plan your design and what pictures you need to take. Figure 18 37

44 2. Take 50 or more pictures. Take your subject at different angles. This will make your choices for you final project a lot simpler. 3. Create a contact sheet of your pictures. File > automate > contact sheet. 4. Place your pictures on an 8x10 size file and beginning to design your page. Check for: balance, size, opacity, hard edges, etc. Edit what works and what doesn t work. Be sure you are on the right layer to make changes. 5. You may add text to your picture if it enhances your design. 6. Create a written one page paper typed about you collage. Turn in: a. Your contact sheets. b. A written one page paper about your collage. c. Your 8x10 print. With at least 10 different images on it. Evaluation: There will be a class critique of student s work. Each student will take a few minutes to talk about their picture and their design. Figure 19 38

45 Student s Collage 39
.")
46 This is the student s paper that goes with (figure 20). 40
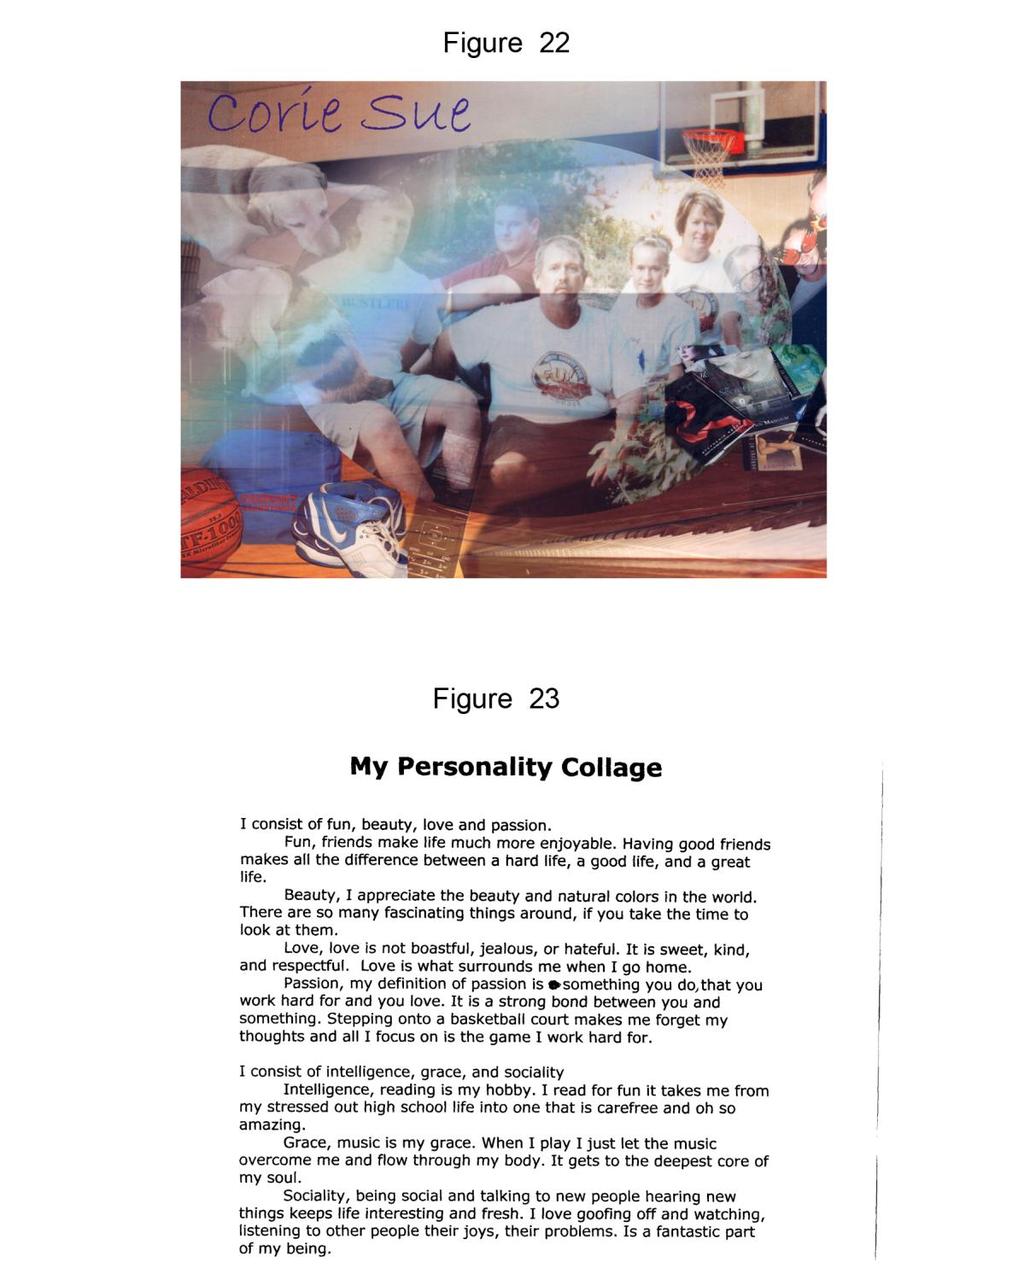
47 41

48 Saving Your Work I can t stress enough the importance of saving your work. Students get so involved in doing their projects that they forget the basic important procedures that should be followed. The first thing is your picture set up. Set the size, resolutions, and duplicate your image. Save often as you are working. Our power goes out at our school quite often, and I still have a lot of unhappy students that have lost their work and have to do it over again. Next is the care of your memory card. Don t force, jam or push too hard when you are using a card reader or putting your card back in your camera. Last of all, save your work in several different places. Use the computer, flash drives, and C D s. Save your pictures is several different ways. The more backup s you have the better it is. Figure 23 42
49 Summary As I come to the end of my project, I feel as if it s just the beginning of my journey to develop curriculum for digital photography classes. This experience has been challenging for me to develop a sequence of learning that reaches all students yet not overwhelm them. One of my goals is to inspire and motivate them to reach for higher levels of meaning in their work. Each student comes into the classroom with different degrees of knowledge, and I have designed my lessons to try to reach each learning level. Creating interesting lesson plans that will reach all students has been the most challenging for me. There are hundreds of books that have been written about how to learn the Photoshop program, but until you engage the students in a personal way, Photoshop is just boring and frustrating. My intent has not been to teach a computer program, but to teach the student how to create projects that holds personal meaning for them. There is nothing more discouraging to me as a teacher than to see a student put their work in the trash can at the end of the term. I was very encouraged, at the end of this school year, to have an almost empty trash can. Teaching is a challenge because there are no constants, only variables, which change as often as the skies. I totally love teaching students. Photography is a journey, how will you remember the trip? Cannon 43
50 References Bidner, Jenni. The Kids Guide to Digital Photography. New York: Lark Books, Davies, Adrian. The Digital Photographer s Handbook on Nature. Switzerland: Roto Vision Book, 2004 Ephraums, Eddie. Darkroom to Digital. London: Aurum Press Ltd., Freeman, Michael. The Complete Guide to Digital Photography. New York: LarSterling Publishing Co., Inc., Kelby, Scott. The Digital Photography Book. United States of America: Peachpit Press Kelby, Scott. The Photoshop Channels Book. United States of America: Peachpit Press, Klasey, Jack. Photo and Digital Imaging. Tinley Park, Illinois: The Goodheart- Willcox Company, Inc., O Brien, Michael. The Photographic Eye. Worcester, Massachusetts: Davis Publications, Sheppard, Rob. PC Photo Digital SLR Handbook. New York: Sterling Publishing Co.,Inc., Vandome, Nick. Digital Photo Projects. New York: Barnes & Noble, Watkins, Pete. Learning Photoshop CS3. Tinley Park, Illinois: The Goodheart- Willcox Company, Inc., White, Ron. How Digital Photography Works. Indianapolis, Indina: QUE.,
Digital Photography for Rail Fans By David King
 Digital Photography for Rail Fans By David King A Little History The world of digital has affected almost everything thing that we use in today s world and that is very true in photography. Over a hundred
A Brief History of (pre-digital) Photography
 Photography") A Brief History of (pre-digital) Photography The word photography comes from two Greek words: photos, meaning light, and graphe, meaning drawing or writing. The word photography basically means, writing
A Brief History of (pre-digital) Photography The word photography comes from two Greek words: photos, meaning light, and graphe, meaning drawing or writing. The word photography basically means, writing
Gianluca Maver: History camera process photography
 Beginnings Photography started with a camera and the basic idea has been around since about the 5th Century B.C. For centuries these were just ideas until an Iraqi scientist developed something called
History of Photography. grade eleven
 History of Photography grade eleven There is no single correct answer to the question of how and when photography began. No one person can be credited with inventing it. Instead, it emerged through centuries
Pinhole Photography. Martin Henson Photography
 Over the last year or so I have been doing more and more pinhole photography than any other type. I have in my collection of cameras 35mm to 4x5 sheet film, the lens are among some of the best, a Zeiss
Students will be able to create movement through the use of line or implied line and repetition.
 Title of Unit Digital Imaging Title of Lesson Self Portrait Montage in Photoshop Course Graphic Design 1 Instructor Heidi Stachulak hstachulak@hf233.org Objectives: Composition Students will be able to
HAJEA Photojournalism Units : I-V
 HAJEA Photojournalism Units : I-V Unit - I Photography History Early Pioneers and experiments Joseph Nicephore Niepce Louis Daguerre Eadweard Muybridge 2 Photography History Photography is the process
H Photography Judging Leader s Guide
 2019-2020 4-H Photography Judging Leader s Guide The photography judging contest is an opportunity for 4-H photography project members to demonstrate the skills and knowledge they have learned in the photography
Name Digital Imaging I Chapters 9 12 Review Material
 Name Digital Imaging I Chapters 9 12 Review Material Chapter 9 Filters A filter is a glass or plastic lens attachment that you put on the front of your lens to protect the lens or alter the image as you
Lightroom- Creative Cloud Tips with NIK
 Lightroom- Creative Cloud Tips with NIK Motion Sequence Make several images in your camera on burst mode without following the subject. Let them move past your field. It is best to use a tripod, but not
CTE BASIC DIGITAL PHOTOGRAPHY STUDY GUIDE
 CTE BASIC DIGITAL PHOTOGRAPHY STUDY GUIDE VOCABULARY Histogram a graph of all tones in an image Image/adjust (hue/saturation, brightness/contrast) hue: color name (like green), saturation: how opaque (rich
DIGITAL PHOTOGRAPHY GRADES THE EWING PUBLIC SCHOOLS 2099 Pennington Road Ewing, NJ 08618
 DIGITAL PHOTOGRAPHY GRADES 11-12 THE EWING PUBLIC SCHOOLS 2099 Pennington Road Ewing, NJ 08618 BOE Approval Date: August 29, 2016 Michael Nitti Written by: Computer Teachers Superintendent In accordance
UNDERSTANDING LAYER MASKS IN PHOTOSHOP
 UNDERSTANDING LAYER MASKS IN PHOTOSHOP In this Adobe Photoshop tutorial, we re going to look at one of the most essential features in all of Photoshop - layer masks. We ll cover exactly what layer masks
Key verse for the class
 Key verse for the class Col 3:17 And whatsoever ye do in word or deed, do all in the name of the Lord Jesus, giving thanks to God and the Father by him. Photography can be used anywhere! Family Sports
PALOS VERDES PENINSULA SUMMER SCHOOL HIGH SCHOOL COURSE DESCRIPTION
 PALOS VERDES PENINSULA SUMMER SCHOOL HIGH SCHOOL COURSE DESCRIPTION Course Title: Digital Photography 1 (UC, CSU) Grade Level: 9-12 Credit: 10 credits (year) - CTE Prerequisite: none Textbook: Photo Course:
Tutorial Another Rainy Day
 For this tutorial I wanted to take people through the process that I go through when painting buildings. In this tutorial I will be showing you how to paint A Rainy Day in four easy to follow steps...
silent seat ecourse & ebook
 silent seat ecourse & ebook Heyyyy!!! Welcome to learn manual mode, a momtographer crash course. I am seriously so excited to help you take your camera out of auto and into manual and start getting those
Introduction to Photography
 Topic 1 - The History of Photography Learning Outcomes In this lesson you will learn about the earliest work that led us to the photographic devices we have today. To fully appreciate the potential and
Key verse for the class this year!
 Key verse for the class this year! Col 3:17 And whatsoever ye do in word or deed, do all in the name of the Lord Jesus, giving thanks to God and the Father by him. Photography can be used anywhere! Family
Photographing Marquetry Revisited Again By Dave Peck
 Photographing Marquetry Revisited Again By Dave Peck This article was originally published in a fall 1996 issue of Marquetry Society of America. It was revised for the Spring 2009 issue of the American
from tool of the artist to visual communication medium...
 from tool of the artist to visual communication medium... THE BEGINNING OF PHOTOGRAPHY - was the result of the work of many scientists and artists and not the discovery of one single person. Each person
Photoshop Elements 3 Panoramas
 Photoshop Elements 3 Panoramas One of the good things about digital photographs and image editing programs is that they allow us to stitch two or three photographs together to create one long panoramic
AF Area Mode. Face Priority
 Chapter 4: The Shooting Menu 71 AF Area Mode This next option on the second screen of the Shooting menu gives you several options for controlling how the autofocus frame is set up when the camera is in
Abstract & Creative Landscapes Using Intentional Camera Movement. with Stephanie Johnson
 Abstract & Creative Landscapes Using Intentional Camera Movement with Stephanie Johnson Seeing Things Differently Beyond Form Abstract photographic images, created through the applied use of ICM, show
Presented to you today by the Fort Collins Digital Camera Club
 Presented to you today by the Fort Collins Digital Camera Club www.fcdcc.com Photography: February 19, 2011 Fort Collins Digital Camera Club 2 Film Photography: Photography using light sensitive chemicals
PHIL MORGAN PHOTOGRAPHY
 Including: Creative shooting Manual mode Editing PHIL MORGAN PHOTOGRAPHY A free e-book to help you get the most from your camera. Many photographers begin with the naïve idea of instantly making money
HISTOGRAMS. These notes are a basic introduction to using histograms to guide image capture and image processing.
 HISTOGRAMS Roy Killen, APSEM, EFIAP, GMPSA These notes are a basic introduction to using histograms to guide image capture and image processing. What are histograms? Histograms are graphs that show what
Chapter 1-Possibilities
 Chapter 1-Possibilities An Introduction to Digital Imaging All images from the Why is photography so important to Remember the past Record the present you? Makes any subject more interesting Explain any
Pictures are visual poems, the greatest of which are those that move us the way the photographer was moved when he clicked the shutter.
 VISION IN PHOTOGRAPHY By Deb Evans, 2011 vi sion noun 2. the act or power of anticipating that which will or may come to be Vision is the beginning and end of photography. It is what moves you to pick
Photography 11 - *Approved BAA Course
 Photography 11 - *Approved BAA Course *More admin detail on BAA requirements at end of this document Course Synopsis: This course has been developed to introduce students to digital photography. Students
Combine Black-and-White and Color
 Combine Black-and-White and Color Contributor: Seán Duggan n Specialty: Fine Art Primary Tool Used: Smart Objects Combining color and black-and-white in the same image is a technique that has been around
Name Digital Imaging I History of Photography and Chapters 1 5 Review Material
 Name Digital Imaging I History of Photography and Chapters 1 5 Review Material History of Photography The two main countries involved in the discovery of photography were France and England. In 1727 Johann
Intro to Photography. Yearbook Mrs. Townsend
 Intro to Photography Yearbook Mrs. Townsend To begin with Photography is about telling a story. Good photographers use an image to make a point without words. People remember pictures of events long after
METERING FOR A BETTER PHOTOGRAPH
 METERING FOR A BETTER PHOTOGRAPH By Janet Steyer 2 8 15 INTRODUCTION This program is geared toward the photographer who has a camera with manual controls. Most of this information is based on the controls
In the past year or so, just about everyone I know has gone out and purchased
 In This Chapter Having some fun with your digital camera Getting out and shooting Chapter 1 Jumping Right In Transferring images from your camera to your computer Opening images in Photoshop Printing and
Transforming Your Photographs with Photoshop
 Transforming Your Photographs with Photoshop Jesús Ramirez PhotoshopTrainingChannel.com Contents Introduction 2 About the Instructor 2 Lab Project Files 2 Lab Objectives 2 Lab Description 2 Removing Distracting
Photoshop Elements Hints by Steve Miller
 2015 Elements 13 A brief tutorial for basic photo file processing To begin, click on the Elements 13 icon, click on Photo Editor in the first box that appears. We will not be discussing the Organizer portion
Preparing Images For Print
 Preparing Images For Print The aim of this tutorial is to offer various methods in preparing your photographs for printing. Sometimes the processing a printer does is not as good as Adobe Photoshop, so
copyright B. Moose Peterson / WRP 2012
 Where does the viewer s eye go first in your photograph? More importantly, where do YOU want the viewer s eye to look first in your print? These are very important questions and the answers directly affect
Basic principles of photography. David Capel 346B IST
 Basic principles of photography David Capel 346B IST Latin Camera Obscura = Dark Room Light passing through a small hole produces an inverted image on the opposite wall Safely observing the solar eclipse
Basic Image Processing for Digital Photography
 Basic Image Processing for Digital Photography Basic Image Processing for Digital Photography Digital cameras have serious flaws - they see what is there, not what the photographer sees in imagination
Introduction To Photography
 Introduction To Photography THETIPS STORYTELLING POWER OF PHOTOGRAPHY FOR TAKING BETTER PHOTOS WITH YOUR PHONE What is photography? Photography is a tool that allow us to share inspiring and important
Turning Photograph Into Cartoon-Style Picture. Digital Media I West High School Susan M. Raymond
 Turning Photograph Into Cartoon-Style Picture Digital Media I West High School Susan M. Raymond Part 1: Creating Outline Wondering how those guys on the internet turn photograph into a nice cartoon-style
H Photography Judging Leader s Guide
 2017-2018 4-H Photography Judging Leader s Guide The photography judging contest is an opportunity for 4-H photography project members to demonstrate the skills and knowledge they have learned in the photography
Painting Special Effects on Photographs
 TUTORIAL 7 Painting Special Effects on Photographs In this tutorial you will learn how to transform a photo into a striking color composition with paintbrushes, masks, blending modes, color, and paper
Focus Stacking Tutorial (Rev. 1.)
") Focus Stacking Tutorial (Rev. 1.) Written by Gerry Gerling Focus stacking is a method used to dramatically increase the depth of field (DOF) by incrementally changing the focus distance while taking multiple
Focus Stacking Tutorial (Rev. 1.) Written by Gerry Gerling Focus stacking is a method used to dramatically increase the depth of field (DOF) by incrementally changing the focus distance while taking multiple
Autumn. Get Ready For Autumn. Technique eguide. Get Ready For
 Get Ready For Autumn Blink and you may have missed it, but our summer is behind us again and we re back into the short days and long nights of autumn. For photography however, the arrival of autumn means
BRUSHES AND LAYERS We will learn how to use brushes and illustration tools to make a simple composition. Introduction to using layers.
 Brushes BRUSHES AND LAYERS We will learn how to use brushes and illustration tools to make a simple composition. Introduction to using layers. WHAT IS A BRUSH? A brush is a type of tool in Photoshop used
Color Correction and Enhancement
 10 Approach to Color Correction 151 Color Correction and Enhancement The primary purpose of Photoshop is to act as a digital darkroom where images can be corrected, enhanced, and refined. How do you know
If you re like most Americans (indeed, like most residents
 Introduction If you re like most Americans (indeed, like most residents of civilized countries today), you own at least one digital camera. It may be an easy-to-carry point-and-shoot model, a fancy-shmancy
One Week to Better Photography
 One Week to Better Photography Glossary Adobe Bridge Useful application packaged with Adobe Photoshop that previews, organizes and renames digital image files and creates digital contact sheets Adobe Photoshop
Intro to Digital Compositions: Week One Physical Design
 Instructor: Roger Buchanan Intro to Digital Compositions: Week One Physical Design Your notes are available at: www.thenerdworks.com Please be sure to charge your camera battery, and bring spares if possible.
Adobe Photoshop CS5 Tutorial
 Adobe Photoshop CS5 Tutorial GETTING STARTED Adobe Photoshop CS5 is a popular image editing software that provides a work environment consistent with Adobe Illustrator, Adobe InDesign, Adobe Photoshop
Maine Day in May. 54 Chapter 2: Painterly Techniques for Non-Painters
 Maine Day in May 54 Chapter 2: Painterly Techniques for Non-Painters Simplifying a Photograph to Achieve a Hand-Rendered Result Excerpted from Beyond Digital Photography: Transforming Photos into Fine
To do this, the lens itself had to be set to viewing mode so light passed through just as it does when making the
 CHAPTER 4 - EXPOSURE In the last chapter, we mentioned fast shutter speeds and moderate apertures. Shutter speed and aperture are 2 of only 3 settings that are required to make a photographic exposure.
H PHOTOGRAPHY JUDGING LEADER S GUIDE
 2014 4-H PHOTOGRAPHY JUDGING LEADER S GUIDE The photography judging contest is an opportunity for 4-H photography project members to demonstrate the skills and knowledge they have learned in the photography
BLACK CAT PHOTOGRAPHIC RULES-OF- THUMB
 Page 1 of 5 BLACK CAT PHOTOGRAPHIC RULES-OF- THUMB These 50+ photo-cyber-tips are meant to be shared and passed along. Rules-of-thumb are a kind of tool. They help identify a problem or situation. They
Introduction to Photoshop Elements
 John W. Jacobs Technology Center 450 Exton Square Parkway Exton, PA 19341 610.280.2666 ccljtc@ccls.org www.ccls.org Facebook.com/ChesterCountyLibrary Introduction to Photoshop Elements Chester County Library
surround us. We are breaking them into the components that create beautiful images.
 Pondering Practice I place my mat. I arrange my water bottle, block, and towel. Today is about this practice. Today is about the series of breaths I will take and poses I will practice. The collection
Illustrated Lecture Series;
 Presents Illustrated Lecture Series; Understanding Photography Photo Basics: Exposure Modes, DOF and using Shutter Speed Exposure; the basics We have seen that film and digital CCD sensors both react to
Term 1 Study Guide for Digital Photography
 Name: Period Term 1 Study Guide for Digital Photography History: 1. The first type of camera was a camera obscura. 2. took the world s first permanent camera image. 3. invented film and the prototype of
Shaw Academy. Lesson 2 Course Notes. Diploma in Smartphone Photography
 Shaw Academy Lesson 2 Course Notes Diploma in Smartphone Photography Angle of View Seeing the World through your Smartphone To understand how lenses differ from each other we first need to look at what's
CTE DIGITAL PHOTOGRAPHY STUDY GUIDE
 CTE DIGITAL PHOTOGRAPHY STUDY GUIDE Camera Information, Techniques and Tools When backpacking, take the lightest weight camera with you to use, which will be either a point and shoot or your phone camera
U N I T 3 ~ PA R T 2. Developed by Sonia Coile, Madison County HS ~ Jan 2016
 DIGITAL PHOTOGRAPHY U N I T 3 ~ PA R T 2 WHY DIGITAL PHOTOGRAPHY? Now that you know how to use Photoshop, we need to brush up on your photography skills. At the end of this part of the unit, you will put
Create a Beautiful Abstract Portrait in Photoshop - Psd Premium Tutorial
 Create a Beautiful Abstract Portrait in Photoshop - Psd Premium Tutorial By: Wojciech Pijecki In this tutorial we will combine several stock images to create an artistic, abstract portrait of a woman.
Your texture pattern may be slightly different, but should now resemble the sample shown here to the right.
 YOU RE BUSTED! For this project you are going to make a statue of your bust. First you will need to have a classmate take your picture, or use the built in computer camera. The statue you re going to make
Failure is a crucial part of the creative process. Authentic success arrives only after we have mastered failing better. George Bernard Shaw
 PHOTOGRAPHY 101 All photographers have their own vision, their own artistic sense of the world. Unless you re trying to satisfy a client in a work for hire situation, the pictures you make should please
Creating Stitched Panoramas
 Creating Stitched Panoramas Here are the topics that we ll cover 1. What is a stitched panorama? 2. What equipment will I need? 3. What settings & techniques do I use? 4. How do I stitch my images together
PHOTOGRAPHY Mohamed Nuzrath [MBCS]
![PHOTOGRAPHY Mohamed Nuzrath [MBCS]](/thumbs/80/82228500.jpg "PHOTOGRAPHY Mohamed Nuzrath [MBCS]") PHOTOGRAPHY Mohamed Nuzrath [MBCS] Coordinator HND IT / Senior Lecturer IT BCAS Kandy Campus Freelance Photographer Freelance Web/Software Developer PHOTOGRAPHY PHOTO - Light GRAPHY Drawing PHOTOGRAPHY
PHOTOGRAPHY Mohamed Nuzrath [MBCS] Coordinator HND IT / Senior Lecturer IT BCAS Kandy Campus Freelance Photographer Freelance Web/Software Developer PHOTOGRAPHY PHOTO - Light GRAPHY Drawing PHOTOGRAPHY
5 THINGS YOU PROBABLY DIDN T KNOW ABOUT CAMERA SHUTTER SPEED
 Photzy 5 THINGS YOU PROBABLY DIDN T KNOW ABOUT CAMERA SHUTTER SPEED Quick Guide Written by Kent DuFault 5 THINGS YOU PROBABLY DIDN T KNOW ABOUT CAMERA SHUTTER SPEED // PHOTZY.COM 1 There are a few things
Photography Basics. The Media Co-op. An introduction to taking great photographs - print edition
 Photography Basics An introduction to taking great photographs - print edition For anyone who has little or no photographic experience and wants to take photographs for journalistic, activist or documentary
Introductory Photography
 Introductory Photography Basic concepts + Tips & Tricks Ken Goldman Apple Pi General Meeting 26 June 2010 Kenneth R. Goldman 1 The Flow General Thoughts Cameras Composition Miscellaneous Tips & Tricks
Making Your Work Flow
 TE RI AL Making Your Work Flow MA J GH TE D ust a few years ago, when photographers were primarily shooting film, I rarely heard any of them mention the word workflow. That s because post-production consisted
Digital Design and Communication Teaching (DiDACT) University of Sheffield Department of Landscape. Adobe Photoshop CS5 INTRODUCTION WORKSHOPS
 University of Sheffield Department of Landscape. Adobe Photoshop CS5 INTRODUCTION WORKSHOPS") Adobe INTRODUCTION WORKSHOPS WORKSHOP 1 - what is Photoshop + what does it do? Outcomes: What is Photoshop? Opening, importing and creating images. Basic knowledge of Photoshop tools. Examples of work.
Adobe INTRODUCTION WORKSHOPS WORKSHOP 1 - what is Photoshop + what does it do? Outcomes: What is Photoshop? Opening, importing and creating images. Basic knowledge of Photoshop tools. Examples of work.
TAKING PICTURES. 1. Be sure your picture has a point of interest.
 TAKING PICTURES 1. Be sure your picture has a point of interest. Each picture should have one principal idea or point of interest. That is, the eye of someone looking at the picture should, at a glance,
SEEING THE WORLD THROUGH A. April 6, 2013 FRIENDSHIP FORCE LENS
 SEEING THE WORLD THROUGH A April 6, 2013 FRIENDSHIP FORCE LENS WHY DO WE TAKE PICTURES WHEN WE TRAVEL? To capture memories the moment To share experiences To document where we have been To share where
What is real? What is art?
 HDCC208N Fall 2018 We ll fix it in post The Digital Darkroom What is real? What is art? We have been discussing this pair of questions at various points this semester, with drawings, paintings, the camera
Adobe Photoshop CS5. Oct 12, 19, 26 Nov 2 & 9 5:00 pm 7:30 pm. Goals:
 Adobe Photoshop CS5 Wednesday Oct 12, 19, 26 Nov 2 & 9 5:00 pm 7:30 pm Instructor: Jay DiMasso SWCA --IMD Instructor s 801-3400 Cell 325-5232 Email: Jason_dimasso@yahoo.com Web: www.dimassodesign.com Blog
Kent Messamore. What is a Camera & How do I use it?
 Kent Messamore What is a Camera & How do I use it? Digital Photography JKM 8/21/2014 Enhanced Images 2 JKM 8/21/2014 Enhanced Images 3 JKM 8/21/2014 Enhanced Images 4 JKM 8/21/2014 Enhanced Images 5 JKM
* When the subject is horizontal When your subject is wider than it is tall, a horizontal image compliments the subject.
 Digital Photography: Beyond Point & Click March 2011 http://www.photography-basics.com/category/composition/ & http://asp.photo.free.fr/geoff_lawrence.htm In our modern world of automatic cameras, which
Photography Basics. Innovative Storytelling
 Photography Basics Innovative Storytelling 11 Tips for Taking Better Pictures #1: Take a LOT of pictures! Film taught us to be frugal with the photos we took because development was expensive. Digital
Take Control of Your Camera
 Take Control of Your Camera With all of the technology packed into our cameras, it is easy to hand over control & blame our equipment when our images don t meet our expectations.. In this workshop we will
Teton Technique C H A P T E R 3
 C H A P T E R 3 Teton Technique TRY IT AT HOME: TetonTechnique.psd SIT BACK AND WATCH: TetonTechnique.mov Ladies and gentlemen, girls and boys of all ages, welcome to the Grand Teton National Park. But
Exploring Analogue and Digital Images. Playful Self-Portraits
 1 Lesson Plan Exploring Analogue and Digital Images Playful Self-Portraits Art Educator: Cynthia Cousineau Target Audience: Age: 14 to 17 years old Group size: Small group of 15 students or less. Formal
The objectives of today s demo
 The objectives of today s demo Review the basics for digital photography Cameras Background Lighting Tips on improving your photography Review simple photo editing techniques to improve the pictures you
Editing your digital images:
 Editing your digital images: 1 By Garry Sankowsky zodpub@rainforestmagic.com.au All images taken with a digital camera need to be edited. You will usually get software with your camera that can do at least
MAKE YOUR OWN PINHOLE CAMERA
 KS2/3 SCIENCE RESOURCE MAKE YOUR OWN PINHOLE CAMERA INTRODUCTION Photography is everywhere magazines, gift cards, mugs, key rings, books, school pictures and we re very used to seeing photographic reproductions
Please note: In order to receive the crest, you will be required to submit the photos taken as part of the challenge to
 BC PHOTO CHALLENGE Do you want pointers on how to take good photos of your unit? Would the girls in your unit enjoy learning to take great photos? Would you like to explore your creativity through photography?
Thank you for spending your evening with me! Truly enjoyed chatting and sharing image blending.. :)
") easymail Webmail :: Texture Blending Notes 1 of 2 9/4/2016 8:38 PM Subject From To Date Texture Blending Notes Denise Silva Denise Silva 2016-09-02 8:10 am Texture
easymail Webmail :: Texture Blending Notes 1 of 2 9/4/2016 8:38 PM Subject From To Date Texture Blending Notes Denise Silva Denise Silva 2016-09-02 8:10 am Texture
Adobe PhotoShop Elements
 Adobe PhotoShop Elements North Lake College DCCCD 2006 1 When you open Adobe PhotoShop Elements, you will see this welcome screen. You can open any of the specialized areas. We will talk about 4 of them:
H PHOTOGRAPHY JUDGING LEADER S GUIDE
 2009 4-H PHOTOGRAPHY JUDGING LEADER S GUIDE The photography judging contest is an opportunity for 4-H photography project members to demonstrate the skills and knowledge they have learned in the photography
PHOTO 1 MIDTERM REVIEW!
 PHOTO 1 MIDTERM REVIEW! THESE TOPICS WILL BE COVERED 1. Shutter speed 2. Aperture 3. Depth of field 4. Point of departure 5. Light metering & grey cards 6. Bracketing 7. Equivalent exposures 8. Film speed
TAKING BETTER PHOTOS ON ANY DEVICE
 TAKING BETTER PHOTOS ON ANY DEVICE Sarah Dudik Public Information & Marketing HOW TO TAKE BETTER PHOTOGRAPHS The device you use isn t as important as how you are looking through it Any device can be used
ADJUSTMENT LAYERS TUTORIAL
 ADJUSTMENT LAYERS TUTORIAL I briefly showed layers in the original layers tutorial but there is a lot more to layers than discussed there. First let us recap the premise behind layers. Layers are like
Chapter 9-2: The Invention of Photography
 Chapter 9-2: The Invention of Photography Ancient times: Camera Obscura used to form images on walls in darkened rooms; image formation via a pinhole The Inventors of Photography The Camera Obscura: (Latin:
Important Dates In lecture Tuesday March 6th Covers lab procedures, bring 4521 NCS answer sheet
 PHOTO 40 SYLLABUS Spring 12 : The purpose of this class is to familiarize students with basic camera and black and white photographic techniques. Concepts of visual organization, design, and using light
5 TIPS TO IMPROVE YOUR WILDLIFE
 5 TIPS TO IMPROVE YOUR WILDLIFE PHOTOGRAPHY TRENTSIZEMORE INTRODUCTION A great image will immediately grab a viewer s attention and keep it as they start reading into the deeper meaning. With millions
Impact With Smartphone Photography. Smartphone Camera Handling. A Smartphone for Serious Photography?
 A Smartphone for Serious Photography? DSLR technically superior but photo quality depends on technical skill, creative vision Smartphone cameras can produce remarkable pictures always at ready After all
TAKING GREAT PICTURES. A Modest Introduction
 TAKING GREAT PICTURES A Modest Introduction HOW TO CHOOSE THE RIGHT CAMERA EQUIPMENT WE ARE NOW LIVING THROUGH THE GOLDEN AGE OF PHOTOGRAPHY Rapid innovation gives us much better cameras and photo software...
CHAPTER 7 - HISTOGRAMS
 CHAPTER 7 - HISTOGRAMS In the field, the histogram is the single most important tool you use to evaluate image exposure. With the histogram, you can be certain that your image has no important areas that