Master the art of decorative quilting! Software Manual
|
|
|
- Gertrude Webb
- 6 years ago
- Views:
Transcription


1 Master the art of decorative quilting! Software Manual

2 Table of Contents Welcome 3 Video Library 4 Introduction Overview 5 System Requirements 5 Software Installation 6 Software Registration 8 File Formats Supported 9 Saving a File 9 Navigating the Screen Backdrop 10 Design Page 11 Decorating Blocks 12 Menu Bar 15 Standard Tool Bar 16 Properties Box 19 Tool Box 20 Sequence View 21 Color & Thread Toolbar 22 Customizing the Software 24 Right Click Options 29 Artwork Quilt Blocks Tool Introduction to Blocks 30 Stitch Styles Stitch Styles Introduction 31 Applique Applique 31 Applique Properties 33 Printing Applique Templates 34 Appli-Stitch Appli-Stitch 36 Appli-Stitch Properties 37 Contour Contour 38 Contour Properties 38 Echo Quilting Echo Quilting 39 Echo Properties 39 Motif Run Motif Run 40 Motif Run Properties 40 Shape Echo Shape Echo 41 Shape Echo Properties 42 Run Run 43 Run Properties 43 Texture Texture 45 Texture Properties 45 Steil Steil 46 Steil Properties 46 Stippling Stippling 47 Stippling Properties 47 Advanced Stippling Advanced Stippling 48 Advanced Stippling Properties 59 Embellishments Introduction to Embellishments 60 Using Embellishments 61 Catalog of Embellishments 63 Text Adding Text 72 Text Properties 72 Text Formatting Tools 73 Font Library 80 Decorative Borders Catalog of Border Designs 89 Using Border Designs 106 Decorative Flourishes or Decor Catalog of Flourish Designs 107 Using Flourish Designs 109 Crazy Quilting Crazy Quilting 110 Using Crazy Quilt Stitches 110 Catalog of Crazy Quilt Stitches 111 Magic Wand 112 Artwork 116 Reference Section Fabric Images 117 Glossary 118 Hoops 126 2


3 Welcome Your thread will surely dance on your quilts when you use Floriani's My Decorative Quilter. This amazing quilting software simulates the look of hand heirloom, echo, stipple stitches and more! Here are some samples provided by Quilting ARTISTS around the world. Visit us on-line to hear all their amazing journeys to become Masters of the ART of Quilting! Pssst... You can do this too! YOU CAN Master the art of decorative quilting! You can now have the beauty and elegance of hand sewn stitches in a few simple clicks and create quilting works of art with unlimited inspiration! Below are a few of the many features this amazing software will enable you to do: Crazy Quilting: Crazy Quilting is a time honored technique that directly reflects the artistic expression of the quilter. It is an art form in and of itself. Easily apply the look of hand stitched embellishments choosing from over 50 heirloom stitches to create exquisite embroidery that will be treasured for all time. Echo Quilting: Showcase your appliqué or embroidery with this radiating quilting method. Easily manipulate the echo impression to capture your inspiration in a few simple clicks. Trapunto Quilting: This sculptured quilting technique is made effortless and unlimited, allowing you to choose or create the trapunto effects your desire. Stippling & Micro Stippling: Create the look of free motion stippling and micro-stippling without the labor. Choose from over 300 advanced stippling designs or simply create your own! Appliqué the Floriani Way: Quilting appliqué is amazingly simple and unlimited with the tools to create, stitch and embellish any design with a little touch of fabric and a few simple clicks. Create a design or simply open an existing appliqué design to embellish on the fly. Your Imagination is Your Only Limit! Choose popular scanned fabrics or simply add your own favorites. Upload your own images and simply trace around them to add to your design repertoire. Personalize IT! Add text choosing from over 50 fonts plus endless borders and embellishments to create custom quilt labels or even custom quilt blocks. My Decorative Quilter will bring out the creative artist in every quilter. Over 2200 quilt blocks can be embellished with fonts, stipple, echo, trapunto or décor stitches with accuracy, speed and creativity. 3


4 Video Library Detailed overview of features with step-by-step instructions are included on the CD provided with this manual. Adding Borders to Filled Objects Advanced Stippling Appliqué Appli-Stitch Artwork Creation Artwork to Stitches Artwork Re-Shaping Audition Stitches Backdrop - Horizon & Scale Backdrop - Merge Design Border Run Stitch Contour Crazy Quilts Overview Crazy Quilting in the Hoop Creating Artwork Echo Quilting Embellishments Magic Wand Backdrop Appliqué Motif Run Run Stitch Shape Echo Show Stitch Ends Simple Star Block Steil Stipple Stitch Styles Introduction Texture 4
5 Introduction Overview of My Decorative Quilter MDQ is the simplest, most versatile and most effective solution to designing and using embroidery embellishments for quilting applications. Regardless of the inspiration - quilt software, magazine articles, paper patterns, flea market quilt blocks, or a treasured family heirloom - My Decorative Quilter is your partner in creativity. Not only is MDQ the only comprehensive, specialized software available on the market today for quilt embellishment; it pays homage to our cherished quilting tradition. MDQ features a Crazy Quilt Stitch capability that accurately replicates the organic look of hand embroidery, incorporating a selection of at least fifty historically authentic stitches. Incorporate any embroidery design, in any embroidery stitch format, into your quilt decoration. Literally HUNDREDS of embroidery design options may be created from the tools and designs in this software alone. Choose from multiple types of quilt blocks; your scanned sewn blocks, over 2200 artwork model blocks, block images from other quilt design software, or scanned pattern images. Select texture, echo, stipple, contour and shaped echo stitches to decorate any quilt block. Choose from over 200 scalable quilt designs to embellish full blocks and open areas; including a square, circle, rectangle and triangle design for each embellishment theme. Use any of the included quilt block images to audition feathers, swirls, lines, motifs, lettering, appliqué and more. Size, align, group, combine and break apart any of your quilting creations. Turn shapes and artwork into a perfect appliqué embroidery design with a simple click. Create your own embroidered quilting designs from drawings, artwork, or freehand. Scan finished blocks, see your quilting creation on your actual block, print templates and send it to your embroidery machine. Easily create "in-the-hoop" pieced crazy patch, foundation piecing and log cabin type designs - then garnish them with the perfect embroidery! And if that wasn't enough, MDQ also includes: 50 scalable digitized fonts for quilt labels, monograms and embroidered messages. 100 built-in, resize-able, distinctive border designs in multiple colors and shapes. 50 unique, decorative flourish designs to use wherever a little extra adornment is needed. This amazing addition to the Floriani software product line also includes: Free updates and upgrades. Dongle-free security. Free access to our amazing software support team. Free access to our interactive support forum. Software/System Requirements Minimum System Requirements Windows XP Home/ P3 300Mhz Processor 300 MB hard drive 128MB RAM DVD-ROM Drive 800 x 600 display Mouse Internet Access Recommended System Requirements Windows 7 P4 300Mhz Processor 320 GB hard drive 4 GB RAM DVD-ROM Drive 1024 x 768 display Mouse Internet Access 5


6 Introduction Software Installation Instructions for My Decorative Quilter Before starting the installation, you must be logged on as the Administrator on your computer. This means that if you share the computer with someone else and have separate login id's, your id must be the one named Administrator and allowed to install software on the computer. Close all open programs. We suggest you disable your security software for the duration of the installation because anti-virus and anti-spam software can prevent installation. Please contact your security software provider to learn how to disable it. If you have a Vista operating system on your computer, you must also turn off the User Account Control before you install. It will prevent installations. To do this, Click "Start", "Control Panel". Click "Classic View" if it is not showing icons this way. Double click "User Accounts". Click the bottom entry "Turn User Account Control On or Off". Click off the check mark to turn off User Account Control and then click "OK". Restart the computer so this can take effect. Place the Floriani s Embroidery Software DVD in the DVD-ROM drive. The DVD should auto run and show the installation menu. Follow the menu and install each item. If the DVD doesn't auto run, you will see the operating system Autoplay window. Double click on "Run CD_Start.exe" to start the installation menu. Below is the menu that will appear for My Decorative Quilter after you click "Run Cd_Start.exe". At the welcome screen click on Next. 6
.")


7 Introduction Read the License Agreement. (Scroll all the way down using the scroll bar on the far right of the screen). If you agree to the license agreement, click on I accept the terms in the license agreement. Click on Next. You are now ready to install the program by selecting the "Install" button on the bottom right. Once installation is complete the window below will appear. Click the "Finish" button in the bottom right of your screen. You are ready to register your software! 7


8 Introduction Software Registration Disable any anti-virus, ad-ware, and spy-ware software on your computer. We have found that these types of programs may affect embroidery software if they are active when you are registering. Disable your Windows firewall if it is on. If you have a computer with Vista operating system, you must also turn off the User Account Control before you register the software. To do this, 1. Click Start, Control Panel 2. Click Classic View if it is not showing icons this way 3. Double click User Accounts 4. Click the bottom entry Turn User Account Control On or Off 5. Click off the checkmark to turn off User Account Control and then click OK 6. Restart the computer so this can take effect Double-click the My Decorative Quilter Icon on your Desktop to open the software program. When the welcome page appears, select "Register Your Software". Fill out the registration information completely. All fields with an asterisk are required. A. Select the program you purchased and fill in your contact information completely. B. Insert your 16-digit Serial Number. (It must be typed in using all CAPITAL letters and the dashes are required - this number is located inside your DVD case.) C. Your Reg. Number will automatically fill in. (This is NOT your serial number. It is the number that comes from your computer's registry.) D. Click "Register Now". A License Agreement will appear. Scroll down and click to accept terms. You are now registered! Close down the program and eopen. My Decorative Quilter is now fully functional. 8
9 Introduction File Formats Supported Embroidery Design Formats Supported Include: Floriani (C2S) Magellan (MGL) Baby Lock/Brother Multi Needle(PES v9) Baby Lock/Brother Multi Needle(PES v8) Baby Lock/Brother Multi Needle(PES v7) Baby Lock/Brother Multi Needle(PES v6) Baby Lock/Brother Multi Needle(PES v5) Baby Lock/Brother Multi Needle(PES v4) Baby Lock/Brother Multi Needle(PES v2) Baby Lock/Brother Multi Needle(PES v1) Baby Lock/Brother Multi Needle(PEC) Singer (XXX) Singer (EMD) Pfaff (PCS) Pfaff (PCM) Elna/Janome/Kenmore (SEW) Elna (EMD) Viking (HUS) Viking D1 (SHV) Poem/Singer (CSD) Janome/Elna (JEF) Viking/Pfaff (VP3) Melco/Bernina (EXP) Tajima (DST) Tajima (DSB) Tajima (DSZ) SWF (SST) KSM (KSM) Barudan DOS (UXY, A:U01) Barudan DOS (DAT) Toyota (10) Zsk DOS (ZSK) Happy (TAP) HPGL Plotter File (PLT) AutoCad File (DXF) QCC Files (QCC) CQP Files (CQP) HQF Files (HQF) SSD Files (SSD) TXT Files (TXT) IQP Files (IQP) Long Arm Formats: QCC (Quilters Cruise Control) CQP (CompuQuilter) HQF (HQ Pro) SSD (Side Saddle) TXT (PC Quilter) Graphic Files Supported: Raster and Vector (including.bmp,.jpg,.tif,.ai,.eps, wmf) Saving a File When saving a design for the first time it is very important to save the file using the.c2s format. This is the native format for all Floriani Embroidery Software programs, including My Decorative Quilter. The.c2s version of the file remembers all of the features, stitch types, fonts, etc. of the design. Any time the design is re-opened to edit or change, it is best to use the.c2s format. It is a good practice to save and keep any file you may want to stitch again in the.c2s format. After a file has been saved in.c2s; save it in the stitch format for the machine on which it will be stitched. Use the Save As feature to save the stitch file in the proper format for the machine and it may be saved directly to a memory stick, diskette, cd, etc. that the machine will read. It is not necessary to keep a library of the designs in the stitch format. Any stitch format may be recreated from the.c2s file in the software. 9


10 Navigating the Screen Backdrop Features Load a backdrop image The backdrop may be any raster, or bitmap, image such as.bmp,.png, or.jpg; it does not have to be a professionally created vector art file. Naturally, a cleaner and clearer image will produce a better result with the magic wand. It is possible to use image files saved (or exported) from quilt design programs, scanned from pattern sheet or a photograph of the finished product. Be careful to respect any licensing and/or copyright restrictions. Select the Backdrop Icon. Select the image to be used. Set the horizon To straighten up an image that is crooked. Click on the slide out menu bar of the Backdrop Icon and select Define Horizon. The cursor will become a + sign. Use any straight line that should be parallel to the top or bottom of the screen, and drag the cursor across while holding down the left mouse key. Enter the correct measurement for the portion selected and click OK. The image is resized based on those proportions. The image properties will still reflect the full size of the image. When the mouse button is released, the image will align to the new horizon. It is helpful to turn on the grid lines to see the image is straight. Set the Scale If the image has a border, or the image needs to be resized based on a portion of the image, the transform feature will not be accurate. Transform resizes based on the total image size. Use the Define Scale to determine the size of the image on a portion of the image. Click on the slide out menu bar of the Backdrop Icon and select Define Scale. Click to set the cursor on the left side of the portion to measure, drag to the right side. When the mouse button is released, the scale measurement window displays. Both of these options are repeatable when the Backdrop Icon is selected. Videos Available on CD Backdrop - Merge Design Backdrop - Horizon & Scale Redwork Quilt Design 10

11 Navigating the Screen Design Screen One of the features that make My Decorative Quilter so user friendly (like the other Floriani software programs), is that all of the designing is done on a single screen. There is no flipping back and forth between program modules to design and view the outcome of your creativity. Menu Bar: The Windows menu bar allows alternate access to the features of the program as well as standard Windows features and the My Floriani Today portal. Standard Bar: Contains all of the icons for stitch creation, block selection, optimization tools and quick access to other frequently used tools through their icons. Properties Box: Displays and allows editing of all of the information about the selected design element. Sequence View: Displays design sequence by color and objects within the colors. Tool Box: This panel contains the quick access icons for tools needed to select, change, and view elements of the design. Color/Thread Selection: Displays the information about colors and threads of elements in the design. It also allows for color changing, adding and removing. Design Tabs: Multiple designs may be open at any one time. The current design name is designated with an X next to the name. To switch between open designs, click on the design tab. Status Line: Displays the current status of the selected design. 11


12 Navigating the Screen Decorating Blocks - Tutorial How to Decorate a Quilt Block from the Block Library Select a Quilt Block Change block colors Sometimes it is helpful to change the colors of the block artwork to reflect the actual colors of the block or to better see it on the design page. To change the colors of the block artwork patches, select the color to be changed in the sequence view box. Then, right click on any of the colors on the color bar. Select the New icon to display a new design page. Select the Block Icon to display the quilt library. Select a category, and click on the desired block. For more information on assigning colors, see Color and Thread Toolbar. Converting Artwork to Stitches Select the block size from the drop down menu. Then click OK to display the block on the page. The block is displayed on the screen as a combination of artwork shapes, or patches. Each patch is outlined and a single color. When selecting a patch is selected, a series of diagonal lines will appear on the patch as shown below. To select multiple patches, hold down the Ctrl key while left clicking on the patch. To select all the patches of a single color, select the color in the Sequence View box. The block is now displayed on the design page. With the patches selected, click on one of the available stitch options: Texture (fill) Stipple (fill) Advanced Stipple (fill) Contour (fill) Shape Echo (fill) Run Stitch (outline) Motif Run (outline) Steil Stitch (satin outline) appliqué Appli-Stitch 12

13 Navigating the Screen Once the stitch type has been selected, a menu may appear with additional options for that stitch type. Left click to select an option from the menu and click OK. Notice that stitch type is applied to each patch individually. To have the stitch type treat the selected patches as a single item, click on the combine icon on the menu bar. The selected patches will then be converted to that stitch. The stitch properties are displayed in the Properties Box on the right. The Combine function units the patches into a single patch, or object. To create the quilting stitches around the star, select the remaining patches by holding down the Ctrl key while clicking on them, or simply left click on color 2 in the Sequence View and all of those patches are selected. Select the Combine icon to unite the patches. Adjustments may be made to the stitch properties in the properties box. With this stitch type, the Stitch Length and the Density may be adjusted. To change the space between the rows of stitching to add more space between the rows, increase the Density number. The larger the number the further apart the lines of stitching. Click Apply to display the changes. See Properties Box for more information. Select another stitch type, such as Textures. Select a stitch from the pop-up menu and click OK Increasing the density from 5mm to 15mm, creates completely changes the effect. 13
14 Navigating the Screen The background is now converted to a Texture stitch. Notice in the Properties Box that the only option on this stitch is the Pattern Length. For the Texture, Advanced Stipple and Motif stitches, the length of a stitch and the density are both determined by the Pattern length. Audition other stitch types and sizes to find your perfect combination for your block. The only limit is your imagination. The design is now complete and ready to be printed and/or saved to stitch in the format for your machine. 14


15 Navigating the Screen Menu Bar In addition to the standard Windows options on the main menu bar, this is also the location to access the "My Floriani Today" menu. The menu displays automatically when the software is launched, IF the computer has Internet access available. It may also be launched from the menu bar option. This menu is your link to RNK Distributing and their means of communicating directly with the software users. Many helpful features are found here including specials, free designs, information on events in your area, and new updates to the software. While it is not necessary to have on-line access to use the software, it is highly recommended that you check here at least once a month to see what is new and exciting in the world of Floriani and RNK distributing! 15
16 Navigating the Screen Standard Tool Bar Icon Shortcut Function Definition Ctrl + N Ctrl + O Ctrl + S Ctrl + R Shift + Delete Ctrl + C Ctrl + V New Page Open Save Print Preview Slow Redraw tool Cut Copy Paste Select to open a new design page. The name of the file will default to "Design X" where x is the next number of the new page opened in this session. Click to open an existing design. A file open dialog box will appear to navigate to the folder containing the desired file. Click this to save the current design. If it is a new design that has not been saved, the "save as" dialog box opens to allow input of the location, name and format of the design. Note: to change the name or location of a previously saved file, select File>Save As. Select this icon to access the Print Preview screen to print templates, color charts, etc. of the design. See the print feature for optional settings. Select to display a virtual sew-out of the design. By manipulating the arrow keys and slider bar, it is possible to view the stitching sequence of a design before committing it to fabric. Tip: This is a great learning tool for analyzing designs and correcting problems. Select to remove the selected (highlighted) object(s). The cut object(s) are temporarily available on the "clip board" to be pasted to another location or another design. Select to copy the selected (highlighted) object(s). The copied object(s) are temporarily available on the "clip board" to be pasted to another location or another design. Select to insert any copied or cut objects to a new location or design. Objects may be pasted multiple times as long as they are on the "clip board". Ctrl + Z, or Alt + Backsp Ctrl + Y Undo Redo Zoom Display About Select to undo a previous action. The only limit to the number of times undo may be used in sequence is when it reaches the point that the design was saved, or a blank page (if the design has not been saved). Select to restore and undo. Again, this is limited by the number of undo's since the last save of the file. This window displays the percentage of enlargement currently being displayed on the design screen. The down arrow may also be selected to automatically change the size to a predetermined percentage. Note: "1:1" is the same as "100%". Displays the current version number of the software. Flip Horizontal Select to mirror image the selected object(s) left to right. Flip Vertical Rotate Left Rotate Right Select to mirror image the selected object(s) top to bottom. Select to rotate the selected object(s) to the left exactly 45 degrees. May be selected multiple times consecutively. To rotate a precise number of degrees, see Properties Box>Transform. Select to rotate the selected object(s) to the right exactly 45 degrees. May be selected multiple times consecutively. To rotate a precise number of degrees, see Properties Box>Transform. 16
17 Navigating the Screen Icon Shortcut Function Definition 2 Run Path Input 0 Artwork Input Select this icon to input a run stitch path. May be used in conjunction with the magic wand. Select icon, and then select the type of artwork to create: pen, rectangle, ellipse, triangle diamond. Magic Wand Crazy Quilting Color Sort Optimize Sequence Optimize Entry/Exit Block Used in conjunction with backdrop images, artwork images, etc. Select stitches from the drop down menu. These stitches are laid down individually. See Using Crazy Quilt Stitches. With any or all objects selected, use to sort the sequence by color, putting like colors together. With multiple objects selected, use to sort the sequence by screen location for fewer/shorter jump stitches. With multiple objects selected, use to arrange the start and stop points for closest next point connect. Select to open the quilt block library and add to the design page. Texture Stipple Advanced Stipple Echo Quilting Convert selected object to a Texture fill. Convert selected object to a Stipple fill. Convert selected object to an Advanced Stipple fill. Convert selected object to an Echo Quilting fill. Contour Quilting Convert selected object to a Contour fill. Shape Echo Run Stitch Convert selected object to a Shape Echo fill. Convert selected object to a Run stitch. Motif Run Convert Convert selected object to a Motif Run stitch. Steil Run Convert Convert selected object to a Steil Run stitch. Appliqué Convert Appli-stitch Convert Artwork Convert Convert selected object to an Appliqué design. Convert selected object to an Appli-stitch design. Convert selected object to Artwork. Embellishment Select and add an embellishment design to the design page. T Text Select from fifty fonts to create writing on the design page. 17
18 Navigating the Screen Icon Shortcut Function Definition Shift + Left Arrow Shift + Right Arrow Border Flourish Placement Marks Align Left Align Right Select from multiple border designs to add to the design screen. Good designs for creating quilt labels. Select from multiple decorative designs to add to the design screen. Select to display the placement mark selection screen. Select any of eight placement marks to stitch at the perimeter of the design. Line up selected objects to the left. Line up selected objects to the right side. Shift + Up Arrow Shift + Down Arrow Align Top Align Bottom Align Horizontal Center Align Vertical Center Group Ungroup Combine Break Apart Line up selected objects to the top. Line up selected objects to the bottom. Line up selected objects along a center axis, horizontally. Line up selected objects along a center axis, vertically. Groups two or more object together. When selecting an object that belongs to a group it will select all objects in that group. Breaks apart grouped objects. When selecting grouped objects all the items will be broken apart into individual objects and then can be selected separately. Unites multiple paths into a single object. Unlike Group, the combined object takes on all of the properties of the first object in the sequence. Separates combined objects into the original objects. The combined object properties remain with the separated objects. 18

19 Navigating the Screen Properties Box The Properties box is where all the settings for an element/stitch type are accessed and modified. Use this panel to view and modify the stitch type, stitch length, stitch density, start/end commands, tie-in and tie-off stitches, design size, rotation and position. When a design element is selected on the screen, all of its available properties appear in the properties box. After changes are made on any tab, click with some changes but is not universal. to have the changes implemented. Note - the Enter key will work Artwork use the properties window to modify artwork. Fill use this section to adjust the different fill stitch properties of an element (stipple, contour, echo, shape, etc). Run use this section to adjust the stitch settings for any run stitch design element (run, two ply, bean, motif, etc). Column use this to adjust column settings/types for a selected satin stitch element. Commands use this to set the start/end commands of design elements, insert fabric, and change colors. When working with text, use this to create trims and color changes as well. Text - see Text Properties for a full description of available text properties. Transform use this to resize designs, rotate designs a specific number of degrees and mirror image designs. Other properties tabs not shown include Appliqué and Appli-stitch. 19
20 Navigating the Screen Tool Box Icon Shortcut Function Description F7 F9 Z P R Ctrl + B Ctrl + 3 Select Tool Shape Tool Zoom Tool Pan Tool Ruler Tool Backdrop Tool 3D View Left click to select an object(s) in the design area. Hold the Ctrl key to select multiple objects. Hold the left mouse button while and drag a box around the areas to select. Select an object with this tool to edit the outlines, angle lines and start/stop points. Left click on the icon to select the tool, then click on the design page to zoom in on a particular area. Tip: Double click on the icon to fit the contents of the design page on the screen. Select the icon, then left click and hold to relocate the display area of the screen. Select the icon, click and hold the left mouse button while dragging to measure an area on the screen. The measurement will be in the same units as the screen ruler. Select this tool to open an image from your computer into the work area. While selected, the image may be resized, scaled and a new horizon applied. Note: Only one background is allowed per design. Click on the icon to toggle back and forth between regular view and a more realistic (three dimensional) representation of the design. Ctrl + B Grid Stitch Ends Commands Hoop Backdrop Image Artwork Display Select the icon to turn the grid on the design screen on. Select the icon to display small points where every stitch will penetrate the fabric. Select the icon to display all machine commands within the design; including stop, cut, needle/color change, etc. Select this icon to display one of the existing hoops or create a custom hoop size. Click again to turn off the hoop display. Tip: Applying a hoop to a design automatically centers the design in the center of the design screen. If the icon is highlighted, click to dismiss the background image from the display area. Click again to turn on the icon and the background image. Select the highlighted icon to turn off the display of all artwork elements on the design screen (this does not include background images). Select again to display any artwork elements. 20

21 Navigating the Screen Sequence View The Sequence View is a very powerful panel. This panel is often overlooked and underutilized. It is in this panel where you get a snapshot of the entire design. You are able to see the sequence in which the design will sew out. Also, you will see a small view of each object and the color of that object. When you expand the view for a color segment you will see a list of all stitch types used to create that element in the order in which it will sew out. The Sequence View will quickly and easily allow you to turn on/ off the view of a given segment. This helps greatly when editing objects or figuring out where all the elements of a given segment are located in a design. Also, you have the ability to lock a design color segment. When you lock a segment it takes away the ability of that object to be moved or have the properties changed in any way. The Sequence View is also the area in which you change the sewing order of the design. You can click and drag a segment or design element into a different location by simply selecting it and dragging it into the desired location. Plus/Minus box click to expand/collapse elements pertaining to the color. Eye Symbol use this to turn on/off the view of a design element. Lock Symbol use this to lock/unlock the elements in the sequence. When locked you cannot change the properties of that element. Move Elements to move an element left mouse click and hold the click while dragging your mouse to the desired location. Release mouse click when in the desired position. 21


22 Navigating the Screen Color & Thread Selection Tool Bar The color and thread selection tool bar is located at the under the design display screen. When a design is opened the colors for that design are displayed along this tool bar. If a new design is created the tool bar is automatically populated with eight default colors. In the diagram above, ten colors are available. New colors are added every time a new design is opened with new colors. Color 2 is currently selected color because it has a box around it. When an object is selected, its color is highlighted. If the object has multiple colors, no color boxes are highlighted. To add more color options, left click on the "+" sign to the right of the color boxes. To reduce the number of colors to only those colors in the currently displayed design, left click on the "-" sign. To change the background color of the display screen, select the screen icon. This is helpful when working with dark or light colored designs for greater contrast. Change a thread color: Left click on the color and the thread dialog box appears: The palette of colors for that thread brand appear, and the current color is highlighted as shown. To select a different color in the same palette: click on a different color square, or enter a number, or name in the Find box 22


23 Navigating the Screen Change a thread palette, or family: To select a color from a different thread palette, click on the down arrow in the Family box. Then select the desired thread brand/family: When the new thread family is displayed, the highlighted thread displayed is the suggested match to the thread selected in the previous palette*: *Color conversion is a suggestion and may be limited by information available from manufacturers. Please visually verify for accuracy before stitching. 23
24 Navigating the Screen Customizing the Software - General Options Preface - It is not necessary to change the defaults in Tools>General Options to use the software. These parameters are designed to provide each user with the software options particular to their machine and preferences. The General Options box allows you to globally change many settings for the software. When you make a change in the General Options box it will keep these settings as default settings every time you open the software. In the General Options you can make changes to the working environment, stitch trim options, grid settings, and digitizing modes. To access the General Options box 1. Select Tools from the menu bar 2. Next, select General Options from the drop down menu. Tabs available under the General Options box: Environment - in this section you can change the units of measure, select a default fabric setting, select a default thread chart, and select to auto match thread colors when loading a design. Machine - in this section you can choose to activate trims if a stitch is longer than the specified number, split up jumps longer than the specified number, remove stitches that are shorter than a specified number, combine jumps when reading a design, and select the default frame out location. Grid - in this section you can set the parameters for the grid by selecting spacing for both Horizontal and Vertical. You can check to maintain aspect ratio so the Horizontal and Vertical settings will be equal. You can also select to have objects you move to snap to the grid for lining objects up. Finally, you can choose to display the grid as lines or dots. Digitizing - in this section, select the type of input mode to use while digitizing (simple draw, bezier, free hand). In this section you can also select the digitizing mode you want to use (standard or advanced) for both complex fill s and satin stitches. With Complex fills you can even select the default stitch angle you want to use. View - in this section, choose the color a design element will display when you select it in the software. Color Sort - set the maximum color overlap percentage for re-sequencing like colors together. 24
 of the display screen. B.")
25 Navigating the Screen Environment Tab A. Units: Select the preferred default, Metric or Imperial. This may also be changed for immediate display by right clicking the ruler bar (top and left) of the display screen. B. Default Style: The style settings are preset stitch lengths, density, pull compensation, etc; set to sew best on a specific material. Do we include this? C. Default Thread Chart: The default thread chart is used when you are creating a new design. When loading a design that doesn t have color information, there are numerous thread manufacturers to choose from: Anchor Angel King Brother Embroidery Brother Flesh Tone DMC ME DMC Embroidex Threads Floriani Floriani Cotton Floriani Metallic Floriani Premium Guterman Hemingworth Isacord Isafil J&P Coats Janome Plaette Jenny Haskins Kingstar Fujix KingStar Madeira Polyneon Madeira Rayon Marathon Polyneon Marathon Rayon Melco ARC Polyneon Pearl Yacht Poly-X40 Rheingold Polyester Robison Anton 1#122 Robison Anton 2#152 Robison Anton Polyneon Robison Anton Rayon Robison Anton SBP6 Robison Anton SSR6 Sulky Polyneon Sulky Rayon Viking Palette D. Auto match thread colors on loading: When this is selected, the software will auto-match any design to the Default thread chart when you load a design. 25
: The software will automatically add a trim command to your design whenever there is a stitch longer that than 30 mm (default).")

26 Navigating the Screen Machine Tab A. Activate trim if stitch is longer than (mm): The software will automatically add a trim command to your design whenever there is a stitch longer that than 30 mm (default). This is a user defined function, so you can change it anytime you wish. Function not available on all machines. B. Split up jumps longer than (mm): 12.0 mm. The software automatically splits the distance between jumps to normal stitches of 12 mm increments and inserts them. 12 mm is normally the maximum movement a sewing machine can move before a jump is needed. C. Remove stitches shorter than (mm): This is used to clean up designs that are stitched too close. By turning on this function, the software will automatically clean out any stitches at 0.2(mm) default from your design. D. Combine Jumps when reading: When you first load a design, the software will combine all jumps together adding jumps only if needed. E. Frame Out location: This tells the frame out function what direction to move the pantograph, (Top, Bottom, Left or Right) when a frame out command has been inserted. Function not available on all machines. F. It is helpful to insert a frame out command after the placement stitching on an appliqué to allow more accessibility to the hoop without having to remove it from the machine. On a single needle embroidery machine, a front or left location would be desirable. Grid Tab A. Horizontal Spacing: Set the horizontal spacing on the grid, (10mm default). B. Vertical Spacing: Set the vertical spacing on the grid, (10mm default). C. Maintain aspect ratio: If selected, the numbers will change proportionally when changing either the horizontal or vertical spacing on the grid. D. Snap to grid: If selected, edit point to the closest grid point when created or selected. E. Lines Style: Set the style of grid to lines (default). F. Dots Style: Set the style of grid to dots instead of lines. 26

 mode for the software.")
27 Navigating the Screen Digitizing Tab A. Outline input mode: Click the down arrow to select one of three different ways to create stitch outlines in My Decorative Quilter software: Bezier, Simple draw, and Free hand. Bezier - this is very common in vector artwork programs. Instructions 1. Left mouse click to plot your first point. 2. Left mouse click to create a straight line. 3. Left click and drag to create a curved line. 4. Right mouse click after plotting your last point in order to set the structure. Simple draw - this is the standard (default) mode for the software. Instructions: 1. Left mouse click to plot your first point. 2. Left mouse click to create a straight line. 3. Left mouse click plus Ctrl on your keyboard to create a curved line. 4. Right mouse click after plotting your last point in order to set the structure. Free hand - this is ideal for those using a tablet. Instructions: 1. Left mouse click and hold while dragging your mouse (or touch the tablet and move your cursor to create the line). 2. Release mouse click when done. 3. Right mouse click to set the structure. View Tab A. Highlight selection: This option will allow the user to turn off or on (default) a highlighted color on a selected object. The color of the highlighted object may be changed, at any time, for easier editing. B. Show property tabs as icons: If selected the tabs in the properties box will be displayed as icons instead of names. This option eliminates/reduces scrolling across the tabs when viewing object properties. 27
28 Navigating the Screen Color Sort Tab A. Use Default: The default percentage of color overlap per layer is set to 5%. This parameter is used in conjunction with the color sort icon. The color sort feature will sort the colors so that like colors are together, but will not combine colors if they overlap another color by more than the set percentage. 28
29 Navigating the Screen Right Mouse Click Options There are many additional options available when you right mouse click on a selected object. Some of these options are only available when you right mouse click. Cut use this to cut the selected element from the design. To use, select an object and then right mouse click and select Cut. This will remove the selected object from the project. Copy use this to copy the selected design element. To use, select an object and then right mouse click and select Copy. This will create a copy of the selected object that can then be pasted into the project. Paste use this to paste the cut/copied element. To use, select an object and then right mouse click and select Paste. This will paste a copy of the cut or copied element onto the design page. Insert use this to insert a copy of the selected element (places right after copied object). To use, select an object and then right mouse click and select Insert. It will insert a copy of the selected element. Delete use this to delete the selected element. To use, select an object and then right mouse click and select Delete. This will delete the selected object. Create Border - use this to create a border around a fill object. To use, select the fill stitch and then right mouse click and select Create Border. Combine - use this to combine objects into a single object. To use, select the objects and then right mouse click and select combine. Break Apart - use this to break apart a combined object into a multiple objects. To use, select the combined object and then right mouse click and select break apart. Align use this to align objects left, horizontal center, right, center, top, vertical center, and bottom. To use, select multiple objects and then right mouse click and select Align. Next, select the type of alignment you want to use from the list. Group use this to group selected elements together. To use, select multiple object and then right mouse click and select Group. This will group together all the selected objects. Ungroup use this to ungroup grouped elements. To use, select the grouped objects and then right mouse click and select Ungroup. This will ungroup the grouped objects. Transform use this to access the transform tab from the properties box. To use, select an object and then right mouse click and select Transform. This will open the Transform box in the properties box. Properties use this to access the properties box. To use, select an object and then right mouse click and select Properties. This will open the properties box window. 29

30 Artwork Quilt Blocks Tool Introduction to Blocks Block Icon My Decorative Quilter has over 2200 quilt block models loaded in the block library. They are sorted by category and name. To access the block library, click on the Block icon. Artwork patches, in different shapes, have been combined to create the quilt block models. These model blocks are decorating templates for sewn blocks whose instructions are found in quilting books, software programs and patterns. These blocks may be modified by color, size and even shapes to create a specific design. It is even possible to design a block from scratch by using the Artwork tools. To add a block to the design screen: 1. Click on the Block icon to display the library. 2. Select the category in the left hand column. If a category has multiple pages, click on the + to view the available options. 3. Use the slider bar on the right to scroll through the display block templates. 4. Select a block by left clicking on it. 5. Then adjust the size in the drop down menu at the bottom of the screen. 6. To display the block on the design screen, select OK. Videos Available on CD Simple Star Block 30
31 Stitch Styles Stitch Styles Introduction Artwork Quilt Blocks Tool This section will explain the numerous stitch styles and their attributes which can be created from artwork or other stitch objects. For a general overview, please click the video icon below. Note: this video has also been broken up into segments for each of the stitch styles and may be accessed through the video library or from the page for each style. Videos Available on CD Stitch Styles Intro Adding Borders to Filled Objects Stitch Styles: Appliqué Description: An appliqué is a sewing technique in which fabric patches are layered on a foundation fabric, then stitched with the raw edges turned under or covered with decorative stitching. From the French appliquer, to put on. This function, has three parts: 1. Cut Line or Placement Line: This is a tracing with the use of a running stitch to guide the embroidery on where to lay down the material. A Color Change or Stop command is automatically added at the end of step one. The cut line is 50% from the edge of the cover stitch. 2. Tack Down Stitch: This stitch is a running stitch that holds down the material added after step one, (keeping it from shifting and moving around). The tack down stitch will automatically be moved in from the cut line approximately 50% between the edge of the cut line and cover stitch. 3. Cover Stitch: The cover stitch will edge the fabric patches to the foundation fabric. Note: The width of the cover stitch will default to 50% (i.e 50% on the fabric patch and 50% on the foundation fabric). While this is appropriate for a satin cover stitch, it may need to be adjusted for E-Stitch, Motif, and other types of stitches. There are four types of Cover Stitches to choose from, and each one has different property options: Satin 31

32 Stitch Styles Applique E-Stitch (Blanket Stitch) Motif Crazy Quilt See also: Magic Wand, Backdrop Videos Available on CD Appliqué Video Magic Wand Backdrop Appliqué 32

 Motif Crazy Quilting Type - this is the type of stitch that")


33 Applique Stitch Styles Applique Properties Appliqué properties can vary depending on the type of cover stitch. When any options are adjusted, select Apply to have the changes take effect. Satin E-Stitch (Blanket) Motif Crazy Quilting Type - this is the type of stitch that will border the appliqué. You can use a Satin, E-Stitch, Motif, or Crazy Quilt stitch as a border. Appliqué width - this defines the width of the border. Inset % - defines how much the border lies on the fabric and how much overlaps. The higher the number the more it lies on the fabric and the lower the amount of overlap--and vice versa. Stitch length - this defines the length of the stitch used. 33

34 Stitch Styles Applique Pattern Length - this is the length of the stitches used in the Motif and Crazy Quilt borders. The smaller the value the smaller the pattern size. Appliqué density - this is the density of the stitches used in the border. Angle - you can use this to slant or angle the border stitches of the appliqué. Corner type - when using a satin stitch border this will allow you to extend the corners out or square the corners off. Activation angle - this is the angle in which it will either square the corner or extend the corner depending on what is chosen for the corner type. Placement line - when this box is checked the machine will stitch a placement stitch to be used as a guide for applying the fabric. Placement offset - this is the % of offset that will be used in the placement stitch. Usually this is kept at 0%, which is the original size of the appliqué design. This is also the same size to use for a precut fabric piece. Tack down line - when this box is checked the machine will stitch a run stitch to tack the appliqué to the fabric. Tack down offset - this is the % of offset that will be used in the tack down stitch (Default 25%). Adjust holes - if the appliqué object has a hole (or empty section inside the appliqué piece), this will reverse the appliqué stitch settings and treat the hole in the same manner as the outer edge. See image below. (Default on.) Printing Appliqué Templates Printing appliqué templates is a very simple process with My Decorative Quilter. Whether the appliqué design was created in the software or an appliqué design from another source, printed templates are just a few clicks away. For best results, print templates directly onto Floriani s Appli-Kay Wonder fusible web. Open the appliqué design on the design page. Select all of the elements that are appliqué. Right click and select Copy from the menu. Click on the New page icon to open a new file. Right click in the design area and select Paste from the menu. Now only the appliqué is on the new page. 34

35 Applique Stitch Styles With the appliqué design still selected, click on the Convert to Artwork Icon. When the appliqué converts to artwork, the placement line of the appliqué is now the outline of the artwork. The artwork may be filled or not. Note: If the appliqué design is not symmetrical (like this butterfly), mirror image the templates by selecting EITHER the Flip Vertical or Flip Horizontal icons with the artwork selected. Then, when the appliqué prints on the Appli-Kay Wonder, fused to the fabric, and trimmed; the fabric will be in the proper shape for the appliqué. Select the Print icon to display the print preview menu. Select the Settings option and check Actual Size and Artworks to print the templates in the correct size for the design and to print the artwork images. When using appliqué designs not created in Floriani software, use the sequence view and the show/hide feature to isolate the placement line of the appliqué design. The placement line should always be the true fabric shape for an appliqué. 35

36 Stitch Styles Appli-Stitch Stitch Styles: Appli-Stitch Appli-Stitch Tool: Appli-Stitch is the most exciting embroidery innovation in a decade! It removes the fear factor from appliqué, making it easy to add fantasy and fun to embroidery creations. This revolutionary process eliminates all cutting from the appliqué process. You will LOVE both the texture and dimension of this amazing new material and how easy it is to work with. Whenever you have an Appli-Stitch design selected, you will notice that your properties box will display the available settings for the process. So, you can customize until your heart is content. We do recommend that you keep the density of your satin stitch border between 0.27mm and 0.30mm and that you keep the box checked for the "Trapping line." These two things are extremely important. Click the icon below to access on-line video for additional information. Internet connection required. Videos Available on CD Appli-Stitch 36
 - density used for the satin stitch border. Inset % - is the amount of offset used for the border stitch.")

37 Appli-Stitch Stitch Styles Appli-Stitch Properties Width (mm) - width of Appli-Stitch border Stitch length (mm) - stitch length used in the placement line, tack down line, and trapping line. Density (mm) - density used for the satin stitch border. Inset % - is the amount of offset used for the border stitch. 50% is default and means that the border stitch falls 50% to the left of the input line and 50% to the right of the input line. If put a value of 25% this would create the border stitch so that 25% of width lies on one side of the input line and 75% of the width lies on the other side of the input line. Angle (-10.10) - will angle the stitch negative 10 to positive 10 percent. The default is 0 meaning there is no angle to the border stitch other than before or after a corner. Corner type - this represents the type of cornering that will take place for the border stitch. Choosing "Square" from the drop down box will square off the ends in a block style when the degree of an angle/corner is less than the input amount for the "Activation angle <" (letter G). Choosing "Extended" from the drop down box will extend the edge to a point when the degree of an angle/corner is less than the input amount for the "Activation angle <" (letter G). Activation angle - is the angle at which the software will either square off (Corner type = Square) or form a point (Corner Type = Extended) when dealing with a curve/angle. Placement line - is a run stitch outline in the size of Appli-Stitch material that will be used. Tack down line - is a run stitch line that tacks the material to the garment to help prevent it from shifting while the border stitch is sewing out. Trapping line - is a run stitch line that lies just inside the satin border stitch that is used to prevent the material from tearing out from the inside of the border stitch. Without this stitch, the inner portion of the material will tear out. (See image of "T" above to see what this stitch looks like - "j") Adjust holes - when there is a cutout or hole in the middle of the design, checking this box will ensure those inner sections sew out correctly. Placement offset % - the default value is "0" for Appli-Stitch. If you place a value other than zero in this box it will offset the placement stitch, meaning it will indent the placement line or make it extend outward from the original position. Tack down offset % - the default value is "0" for Appli-Stitch. If you place a value other than zero in this box it will offset the tack down stitch, meaning it will indent the tack down line or make it extend outward from the original position. Trapping offset (mm) - is the amount the trapping stitch is indented from the placement line. The default value is 2.0. This line needs to be a minimum of 1.0mm from the inner edge of the border stitch. Adjust holes - if the appliqué object has a hole (or empty section inside the appliqué piece), this will reverse the appliqué stitch settings and treat the hole in the same manner as the outer edge. See image below. (Default on.) 37
 until the shape is filled.")
38 Stitch Styles Contour Stitch Styles: Contour The contour fill reflects the shape that it fills. In this example, the shape is a square. The run stitch that comprises the contour fill begins around the outer perimeter, and continues to move in a set distance (the density) until the shape is filled. It works the same in the second example, but the shape it reflects is not completely filled. Therefore, the run stitch begins with the outer square, but begins reflecting the inner shape as it progresses. Videos Available on CD Contour Contour Properties Fill type: Contour. To change fill type, click the down arrow in the box and select from the options. Stitch length (mm): current pattern length displayed. To change, enter a new number. Density (mm): current density displayed. To change the density, enter a new number, or click the up/down arrow keys. The density setting is visually reflected in the box on the right. To make changes, click Apply. 38
39 Echo Quilting Stitch Styles Echo Quilting Echo Quilting is a run stitch that reflects the inner shape as it progressively moves to the outer perimeter. Unlike the Contour fill, it does not reflect the outer perimeter as well. The distance between the rows of stitches is determined by the density measurement in the Properties box. Echo Quilting is only available when two artwork shapes have been combined resulting in an inner shape and an outer boundary, or perimeter. See also Embellishment outline, Shape Echo, Contour, Artwork. Videos Available on CD Echo Quilting Echo Quilting Properties Fill type: Echo Quilting. To change fill type, click the down arrow in the box and select from the options. Stitch length (mm): current pattern length displayed. To change, enter a new number. Density (mm): current density displayed. To change the density, enter a new number, or click the up/down arrow keys. The density setting is visually reflected in the box on the right. To make changes, click Apply. 39
40 Stitch Styles Motif Run Motif Run Stitch Styles Videos Available on CD Motif Run Motif Run Properties Pattern length (mm): current pattern length displayed. To change, enter a new number. Type: Motif. To change fill type, click the down arrow in the box and select from the options. Pattern: current pattern displayed. To change the pattern, click the drop down arrow in the pattern box, or select the box with... next to it. To make changes, click Apply. 40


41 Shape Echo Stitch Styles Shape Echo Stitch Styles Shape Echo Quilting is a run stitch that reflects a selected shape as it progressively moves to the outer perimeter. The distance between the rows of stitches is determined by the density measurement in the Properties box. Both examples use the circle, 100, as their shape. To change where the center of the shape is located, click the Reshape Icon and move the center pink dot to another location. Right click to implement change. The Shape Echo works for any shape of fill. 41
42 Stitch Styles Shape Echo Shape Echo Catalog Videos Available on CD Shape Echo Quilting Shape Echo Properties Fill type: Shape Echo. To change fill type, click the down arrow in the box and select from the options. Stitch length (mm): current pattern length displayed. To change, enter a new number. Density (mm): current density displayed. To change the density, enter a new number, or click the up/down arrow keys. The density setting is visually reflected in the box on the right. To make changes, click Apply. 42

43 Run Stitch Styles Run Stitch Styles Types of Run Stitches Standard Two Ply Bean Motif Crazy Quilt Videos Available on CD Run Video Border Run Stitch Video Run Properties Standard Stitch length (mm): default 3.0mm. To change, enter a new number. Type: Standard. To change fill type, click the down arrow in the box and select from the options. Pattern: (applies only to Motif & Crazy Quilt) To make changes, click Apply. Two Ply Stitch length (mm): default 3.0mm. To change, enter a new number. Type: Two Ply. To change fill type, click the down arrow in the box and select from the options. Pattern: (applies only to Motif & Crazy Quilt) To make changes, click Apply. 43
 Bean repeats: default 3. To change, click down arrow and select number. To make changes, click Apply.")
44 Stitch Styles Run Bean Stitch length (mm): default 3.0mm. To change, enter a new number. Type: Standard. To change fill type, click the down arrow in the box and select from the options. Pattern: (applies only to Motif & Crazy Quilt) Bean repeats: default 3. To change, click down arrow and select number. To make changes, click Apply. Motif Pattern length (mm): current pattern length displayed. To change, enter a new number. Type: Motif. To change fill type, click the down arrow in the box and select from the options. Pattern: current pattern displayed. To change the pattern, click the drop down arrow in the pattern box, or select the box with... next to it. To make changes, click Apply. Crazy Quilt Pattern length (mm): current pattern length displayed. To change, enter a new number. Type: Crazy Quilting. To change fill type, click the down arrow in the box and select from the options. Pattern: current pattern displayed. To change the pattern, click the drop down arrow in the pattern box, or select the box with... next to it. To make changes, click Apply. 44
45 Texture Stitch Styles Stitch Styles: Texture Catalog Texture Video Provided on CD Texture Properties Fill type: Texture. To change fill type, click the down arrow in the box and select from the options. Pattern: current pattern displayed. To change the pattern, click the drop down arrow in the pattern box. Pattern length (mm): current pattern length displayed. To change, enter a new number. To make changes, click Apply. 45
: default.50mm. To change the density, enter a new number. Corner type: Square default.")
46 Stitch Styles Steil Steil Stitch Styles Videos Available on CD Stitch Styles: Steil Steil Properties Width (mm): default 3.0mm. Enter a new number to change. Angle ( ): default 0. To change, enter a new number. Inset %: default 50%. To change, enter a new number. Steil Density (mm): default.50mm. To change the density, enter a new number. Corner type: Square default. Click the down arrow to select extended. To make changes, click Apply. 46
 in the Properties Box. This stipple sample has a density of 3.0 and a stitch length of 2.5mm.")


47 Stippling Stitch Styles Stippling Stitch Styles Stippling Properties To change the look of a stipple fill, change the density (and stitch length, if necessary) in the Properties Box. This stipple sample has a density of 3.0 and a stitch length of 2.5mm. This sample has a density of 7.0 andstitch length of 4.0mm. Fill type: Stippling. To change fill type, click the down arrow in the box and select from the options. Stitch length (mm): current pattern length displayed. To change, enter a new number. Density (mm): current density displayed. To change the density, enter a new number, or click the up/down arrow keys. The density setting is visually reflected in the box on the right. To make changes, click Apply. Videos Available on CD Stitch Styles: Stipple 47
48 Stitch Styles Advanced Stippling Advanced Stippling Stitch Styles: Advanced Stippling Catalog 48
49 Advanced Stippling Stitch Styles 49
50 Stitch Styles Advanced Stippling 50
51 Advanced Stippling Stitch Styles 51
52 Stitch Styles Advanced Stippling 52
53 Advanced Stippling Stitch Styles 53
54 Stitch Styles Advanced Stippling 54
55 Advanced Stippling Stitch Styles 55
56 Stitch Styles Advanced Stippling 56
57 Advanced Stippling Stitch Styles 57
58 Stitch Styles Advanced Stippling 58
: current pattern length displayed. To change, enter a new number.")
59 Advanced Stippling Stitch Styles Advanced Stipple Video Provided on CD Advanced Stippling Properties Fill type: Adv. Stippling. To change fill type, click the down arrow in the box and select from the options. Pattern: current pattern displayed. To change the pattern, click the drop down arrow in the pattern box. Pattern length (mm): current pattern length displayed. To change, enter a new number. To make changes, click Apply. 59


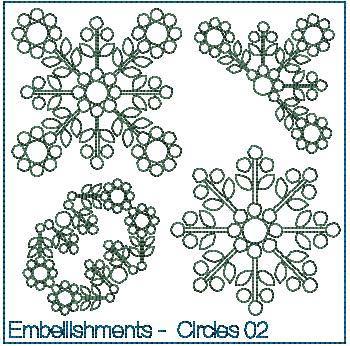
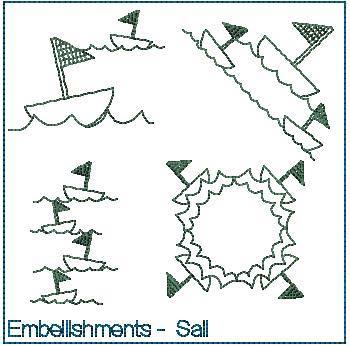
60 Embellishments Introduction to Embellishments Embellishments are collections of embroidery designs specifically created to stitch on quilts. Each design collection consists of four coordinating elements: Square Motif Round Motif Rectangle/Border Motif Triangle/Corner Motif Elements may be combined in many ways to create a coordinated quilting effect for all parts of the quilt. All of the designs are scalable to accommodate almost any size and shape of quilt section. Each embellishment design has a unique feature; an Artwork outline. The outline may be used to create echo quilting effects, and add other quilting stitches around the embellishment design; as shown in the blocks here. The artwork outline may also be ignored or deleted, and just use the embellishment design. Embellishments may be combined with the MDQ Blocks; as shown here. 60
61 Embellishments Using Embellishments Create an 8 square using the Artwork tool or the size of the block to be decorated. Click fill in the properties box. Then, click Apply. In the sequence view, hold down the Ctrl key and select both artwork elements (the green background and the blue design outline). Click on the Combine Icon. Select the Embellishment Icon. Select a design from the menu. Click OK to place the design on the page and close the menu. This function combines the two art work elements into a single element. The artwork in the center functions as a cookie cutter through the green background, the dough. With both parts (colors) of the design selected, click Transform in the properties box and resize the design to 7 height and width. Click Apply. Select the background artwork and click on the Stipple stitch icon (or whichever stitch you choose). 61

62 Embellishments The Echo Quilting option is available, click on Echo Quilting icon. The design is now complete and ready to be saved and stitched. Change the Density in the properties box to a higher number, and click apply, to move the lines of stitching further apart. Note: to use the Combine with Artwork elements, the artwork elements do not have to be filled. However, it is much easier to visualize the process when the background (at least) is filled. Videos Available on CD Embellishments With the background still selected, right click and select the Border option. A run stitch border is place on both the inside and the outside of the background. 62


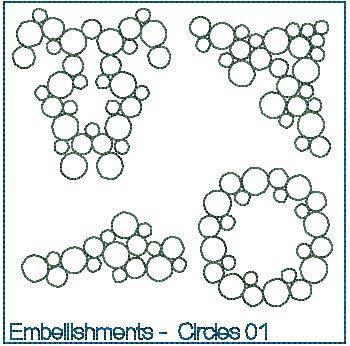
63 Embellishments Catalog of Embellishments 63


64 Embellishments 64


65 Embellishments 65


66 Embellishments 66


67 Embellishments 67


68 Embellishments 68


69 Embellishments 69


70 Embellishments 70


71 Embellishments 71
. 4. Using your keyboard, type the word(s) or letter(s) you want to add to the design. 5.")
72 Text Adding Text Step-by-Step How To: 1. Select the or the Text tool. 2. Left click on the design page, and a letter "A" will appear. 3. In the Text Properties Box, highlight the letter A (to write over it in the next step). 4. Using your keyboard, type the word(s) or letter(s) you want to add to the design. 5. Adjust text properties such as height, font style, etc. 6. Click Apply to set changes. Text Properties Text Properties To view properties of the text, the text must be selected with the selection tool or the text tool. If the text properties box should display on the screen. (If the properties box is not displayed, simply right click on the text and select properties from the menu displayed.) The tab indicating text properties will either be the letter A (as circled below) or the word Text. (See General Options>View for more information). Other text options: 72 A. Text Box: All text is input and/or displayed in this box. Text may be copied and pasted from a word document, but only the line spacing format will apply. Text does not automatically wrap when entered in the Text Box B. Font Display: The current selected font will be displayed in this window. C. Font Selection Menu: Click the down arrow to scroll through all of the fonts available. Left click on a font to select it. Once a font is selected, use the up and down arrow keys to scroll through them while displaying an image in the Font Display window. D. Apply: The Apply button must be selected for all changes made in the properties menu to be put into effect. Height (in): Input an exact height measurement for the selected text. The measurement will either be inches or mm, depending on the default selection or the ruler selection. Default =.79 (or, 20mm) For other methods of altering text size, see Text Formatting Tools. Space %: Enter a percentage of space between the characters. Default = 0. Line Space %: Enter a percentage to increase or decrease the spacing between the lines. This also applies to the depth of the steps if Stairs is selected. Default = 25 Reverse Direction: If this box is checked, the text will move to the bottom of the circle, instead of on the top. The box is not available unless the text is in a circle. Italic: Check the box to give the text a slight slant to the right. Optimize Colors: Default is checked. If a font has more than one color, the displayed text will be color sorted to minimize thread changes. Stairs: Moves each letter down the percentage entered in the Line Space % to give it a stair-step effect.


73 Text Text Formatting Tools Straight Line Text Green Box The Green Box, located at each of the four corners of the text box, allows you to adjust the height of the text up or down at each given corner. To use the Green Box adjustment tool: 1. Position your cursor over the green box. 2. Left mouse click and hold while dragging your cursor up or down. 3. Release the mouse click when you reach the desired position. 73


74 Text Orange Box The Orange Box, located in the center of each letter, allows you to move the given letter into any location in your work area. To use the Orange Box adjustment tool: 1. Position your cursor over the Orange Box in the middle of the letter you wish to move. 2. Left mouse click and hold while dragging your cursor to the desired location. 3. Release the mouse click when you reach the desired position. Yellow Diamond The Yellow Diamond, located between each letter, allows you to shift all letters located to the right of the yellow diamond to the left or right (in the example above, the text was shifted to the right of the letter "T." To use the Yellow Diamond adjustment tool: 1. Position your cursor over the Yellow Diamond located to the left of the letters you wish to shift to the right or left of their current location. 2. Left mouse click and hold while dragging your cursor to the desired location. 3. Release the mouse click when you reach the desired position. Black Diamond - Top Left The Black Diamond, located in the upper left-hand corner of the text box, allows you to proportionately make the text larger or smaller (in the example above, the text was made smaller). To use the Black Diamond (upper left-hand corner) adjustment tool: 1. Position your cursor over the Black Diamond located in the upper left-hand corner of the text box. 2. Left mouse click and hold while moving your cursor to the desired location (move up and to the right to make the text larger, move down and to the right to make the text smaller). 3. Release the mouse click when you reach the desired position. 74
. To use the Black Diamond (lower right-hand side) adjustment tool: 1.")
 or to the right (stretches the text wider). 3. Release the mouse click when you reach the desired position.")
. To use the Green Circle adjustment tool: 1.")
75 Text Black Diamond - Lower Right The Black Diamond, located in the lower right-hand corner of the text box, allows you to move the text inward or outward along the axis (notice in the example above that the text stretches outward but the height of the text does not change). To use the Black Diamond (lower right-hand side) adjustment tool: 1. Position your cursor over the Black Diamond located in the lower right-hand corner of the text box. 2. Left mouse click and hold while moving your cursor either to the left (makes text narrower) or to the right (stretches the text wider). 3. Release the mouse click when you reach the desired position. Green Circle The Green Circle, located in the upper-middle and lower-middle of the text box, allows you to move the text inward or outward in an envelope manner (notice in the examples above that the text stretches inward, outward, or both while the edges stay in the same position). To use the Green Circle adjustment tool: 1. Position your cursor over the Green Circle located in the upper-middle or lower-middle of the text box. 2. Left mouse click and hold while dragging your cursor either inward or outward. 3. Release the mouse click when you reach the desired position. Purple Circle The Purple Circle, located in the upper right-hand corner of the text box, allows you to rotate the text to the left or right. To use the Purple Circle adjustment tool: 1. Position your cursor over the Purple Circle located in the upper right-hand corner of the text box. 2. Left mouse click and hold while dragging your cursor either to the left or right. 3. Release the mouse click when you reach the desired position. 75


76 Text Circular Text Black Inside Circle 76
77 Text Black Outside Circle Blue Inside Circle 77

78 Text Red Inside Circle Yellow Inside Diamond 78
79 Text Orange Inside Box 79

80 Text Font Library Arial Arial Run Arial 4mm Audrey Arial Central Run August 80
81 Text Bauhaus Bookman Benquiat Brittany Block Brush 6mm 81
82 Text Brush Casual Brushg Comm_Scr Cap_Scr Curlyq 82
83 Text Cursive Data Curt_Scr Diana Dallas Diana_Vs 83

84 Text Easy_Scr Exotic Eleg_Scr Fan_Scr Eurob Formal Monogram 84

85 Text Freehand Jester Pro Kids Giddyup Impress Mini Lancer Script 85

86 Text Mnarci Initials Ribbon Love Mono20 Roman Princetown Rounded 86


87 Text Shadow Tall Sierra Teknoidb Swiss Universi 87

88 Text Waffle Yankee 88


89 Decorative Borders Catalog of Border Designs Border 01 Border 02 Border 03 Border 04 Border 05 Border 06 89
90 Decorative Borders Border 07 Border 08 Border 09 Border 10 Border 11 Border 12 90
91 Decorative Borders Border 13 Border 14 Border 15 Border 16 Border 17 Border 18 91

92 Decorative Borders Border 19 Border 20 Border 21 Border 22 Border 23 Border 24 92


93 Decorative Borders Border 25 Border 26 Border 27 Border 28 Border 29 Border 30 93

94 Decorative Borders Border 31 Border 32 Border 33 Border 34 Border 35 Border 36 94

95 Decorative Borders Border 37 Border 38 Border 39 Border 40 Border 41 Border 42 95


96 Decorative Borders Border 43 Border 44 Border 45 Border 46 Border 47 Border 48 96


97 Decorative Borders Border 49 Border 50 Border 51 Border 52 Border 53 Border 54 97


98 Decorative Borders Border 55 Border 56 Border 57 Border 58 Border 59 Border 60 98


99 Decorative Borders Border 61 Border 62 Border 63 Border 64 Border 65 Border 66 99


100 Decorative Borders Border 67 Border 68 Border 69 Border 70 Border 71 Border
101 Decorative Borders Border 73 Border 74 Border 75 Border 76 Border 77 Border


102 Decorative Borders Border 79 Border 80 Border 81 Border 82 Border 83 Border

103 Decorative Borders Border 85 Border 86 Border 87 Border 88 Border 89 Border


104 Decorative Borders Border 91 Border 92 Border 93 Border 94 Border 95 Border


105 Decorative Borders Border 97 Border 98 Border 99 Border

106 Decorative Borders Using Decorative Borders Decorative Borders are a collection of embroidery designs that can be used in a multitude of ways. They are perfect, when combined with text, for embroidered quilt labels! They are very scalable and can be recolored to suit any taste. Incorporating a border design is as easy as 1, 2, 3! 1. Click on the Border Icon. 2. Select a border by clicking on it in the drop down menu. Then click OK. 3. The grouped border design is displayed on the current design page and may be resized, rotated and otherwise manipulated. To change a color, first click the Ungroup Icon, and then select the individual colors. 106

107 Decorative Flourishes or Decor Catalog of Flourish Designs Flourish 01 Flourish 02 Flourish 03 Flourish 04 Flourish 05 Flourish 06 Flourish 07 Flourish 08 Flourish 09 Flourish 10 Flourish 11 Flourish 12 Flourish 13 Flourish 14 Flourish 15 Flourish 16 Flourish 17 Flourish 18 Flourish 19 Flourish 20 Flourish 21 Flourish 22 Flourish 23 Flourish 24 Flourish 25 Flourish 26 Flourish
108 Decorative Borders Flourish 28 Flourish 29 Flourish 30 Flourish 31 Flourish 32 Flourish 33 Flourish 34 Flourish 35 Flourish 36 Flourish 37 Flourish 38 Flourish 39 Flourish 40 Flourish 41 Flourish 42 Flourish 43 Flourish 44 Flourish 45 Flourish 46 Flourish 47 Flourish 48 Flourish 49 Flourish

109 Decorative Borders Using Flourish Designs Inserting Decor Elements Decorative Flourishes are a collection of embroidery designs that can be used in a multitude of ways. They are very scalable and can be recolored to suit any taste. Incorporating a border design is as easy as 1, 2, 3! 1. Click on the Flourish Icon. 2. Select a design by clicking on it in the drop down menu. Then click OK. 3. The grouped design is displayed on the current design page and may be resized, rotated and otherwise manipulated. To change a color, first click the Ungroup Icon, and then select the individual colors. 109

110 Crazy Quilting For generations quilts have told amazing stories. Fabrics, threads and stitches can weave tales of time, hardships and prosperity. My great-great Grandma s quilt is no exception. This beautiful crazy patch was completed in the year of 1907 by loving hands and a group of helpful ladies accepting a young Indian bride into their community. My grandmother was the second wife to my widower grandfather; so, she inherited a ready-made household of children, chores, love, laughter, and of course heartache. I am sure the acceptance of these friends meant the world to her, as quilts were normally pieced and embellished by a group of ladies getting to know one another. While these new friends gossiped, shared recipes, traditions and lore, a work of art unfolded beneath their wise finger tips. Creating this quilt with new found friends had to mean so very much to her. Her lovely hand work, as well as those who pitched in to create this family treasure, were the inspiration for the stitches included in Floriani s My Decorative Quilter. Our goal was to create irregular stitches in order to duplicate the feel of hand work from over a century ago. I hope you enjoy creating and embellishing your own family heirlooms while preserving the tradition of sharing them with all the generations yet to come. Sincerely, Kay Brooks Videos Available on CD Using Crazy Quilt Stitches Crazy Quilt In the Hoop 110
111 Crazy Quilting Catalog of Crazy Quilt Stitches 111
.")
, then click the outline. The Magic Wand will create a single run stitch (i.e. redwork) in the center of the outline design.")
112 Magic Wand The Magic Wand works in conjunction with a Backdrop visible on the design page. The Magic Wand sees the backdrop and can convert it to artwork or run stitches. Magic Wand with Run Stitch Icon The Run Stitch option with the Magic Wand is a great choice for magically creating run stitch designs, such as quilting motifs and redwork (regardless of the color). Load and prepare a backdrop. Click on the Run Stitch Icon and select the Magic Wand. Place the cursor on the black outline of the design, hold down the Shift key (and the magic wand will turn red), then click the outline. The Magic Wand will create a single run stitch (i.e. redwork) in the center of the outline design. The properties, such as stitch length and type, may be altered in the properties box if necessary. The design is complete. 112

113 Magic Wand Magic Wand with Artwork Icon The Artwork Option with the Magic Wand is an ideal choice for creating appliqué patterns, creating artwork to convert to background stitches, and many other options. Load and prepare a backdrop. Click on any of the artwork elements and the Magic Wand. Select the yellow color from the color palette by right clicking on it. In the properties box, check the fill option for artwork and select apply. Click on the yellow flower areas to convert each to artwork. 113

114 Magic Wand Dismiss the background image by clicking on the view Backdrop Icon, or selecting Ctrl +B. Artwork has been created for all four of the yellow flowers. Click the Backdrop Icon again to display the image. Repeat the procedure for each of the remaining colors in the backdrop image, changing colors as necessary. Dismiss the backdrop image again. Press Ctrl +A to select all of the artwork elements. 114

115 Magic Wand Click the appliqué icon to convert all of the artwork elements to appliqué. With all of the elements still selected, change the Properties options to: Type: E-Stitch Appliqué width: 2.5 Appliqué length: 2.5 Inset %: 95 Click Apply to make the changes. The appliqué design is now ready to be saved and sewn. 115
Floriani Total Quilter User s Guide
 Floriani Total Quilter User s Guide COPYRIGHT Copyright 2016 Pulse Microsystems, Inc. All rights reserved. This User s Guide and the Floriani Total Quilter software are copyrighted by the developer of
Floriani Embroidery Software Comparison Guide
 : Floriani Total Control Commercial : Floriani Total Control Professional : Floriani Embroidery Suite : My Decorative Quilter : Floriani Piece Maker : Stitch2Perfection Digitizing Tools Split Designs NEW
Floriani...The Name That Means Beautiful Embroidery! Embroidery Suite Pro. Floriani Software
 Floriani Software Embroidery Suite Pro ESP: Includes eight exciting software products that will have your customers embroidering with the masters! Walter Floriani s Theory of Measurement is now a few clicks
1 embroidery software for great designs
 6 finished projects BERNINA Embroidery Software 8 DesignerPlus 1 kitty photo digitised with Colour PhotoStitch 363 stars designed with 3D Globe Effect 3 easily created textures with Couching 1 embroidery
File Button 9 Font Creator 251. Gifts in the Hoop 413 Grid 53 Grouping 93. Installing Adding a shortcut 24 Checking for updates 23 Full version 17
 A Alignment Aligning multiple pieces 345 Alignment is similar to Applique position 340 Different color for alignment lines 345 Using Thumb tacks for Alignment 340 Why Straight Alignment lines 344 Applique
Template: Quilter Title Overview: Traditional Application
 Template: Quilter Title Overview: Traditional Application Subject Launching Topic Quilter Open Steps BERNINA Embroidery Software. Select Steps the Quilter icon in the Applications Toolbox to launch Quilter.
BERNINA Embroidery Software Version 6
 PC Software 61 PC Software 63 BERNINA Embroidery Software Version 6 Transform your most creative ideas into unique embroidery designs! New and exclusive only from BERNINA! The BERNINA Embroidery Software
Appliqué with CutWork
 Appliqué with CutWork Method 1: Creating Appliqué from a Placement Line Open BERNINA Embroidery Software. Click on File> Open. Select the Appliqué Flowers, provided with the lesson. Click on Open. Select
All-in-one application (Gallery/Edit/Digitize) New platform/new style interface Software starts up faster Automatic Update Trial Software (30 days)
 New platform/new style interface Software starts up faster Automatic Update Trial Software (30 days)") Legend: New/Impro ved feature in V5 Included feature DigitizerJr / MBX Software features comparison table Optional feature Capabilities Reference Digitizer Digitizer V5 Jr V5 Generals Basic Procedures
Legend: New/Impro ved feature in V5 Included feature DigitizerJr / MBX Software features comparison table Optional feature Capabilities Reference Digitizer Digitizer V5 Jr V5 Generals Basic Procedures
TruEmbroidery Software Program
 Page 1 Get to Know TruE Create, an Application of the TruEmbroidery Software Program By Janie Lantz TruE Create is easy yet feature-rich digitizing software with an automated Assistant, plus many manual
Premier + Create Create Express Border Applique
 Premier + Create Create Express Border Applique Page 1 Learn to use the Create Express Border Wizard to create a beautiful applique. It s so quick and easy! You can audition your applique fabric right
5D EMBROIDERY SYSTEM5D. Embroidery System
 5D EMBROIDERY SYSTEM5D Embroidery System 5D SOFTWARE MAKES YOUR EMBROIDERY ANYTHING BUT ORDINARY! The technically advanced, yet user friendly HUSQVARNA VIKING 5D Software System makes it easy to explore
StitchBuddy Help. About "StitchBuddy"
 StitchBuddy Help About "StitchBuddy" Introducing embroidery on Macs for hobbyists. Viewing embroideries View embroidery designs and use view options, copy, print and preview color changes. Modifying embroideries
Floriani Total Control-U Software Update
 Floriani Total Control-U Software Update Build 3322 Release Date: 9/19/17 Steil-Run Tool Motif Stitch Features Variable Size New Features Horizontal and Vertical Arrangement Motif Inset Placement Mixed
Personalize Your Napkins
 Dress up a table with embroidered napkins. These napkins are great for gifts, but don t forget to make some for yourself. In this project, we ll be working with text, adding a decorative outline to it,
BasePac ACE. x x x x. x x x x. x x x. x x x. x x x x. x x x. x x x x
 BasePac MfM Design administration Sorted in folders Design entry with design number, name, customer s name, no. of stitches, type and date Pictogram directory Delete, copy and move designs Design header
Welcome to Corel DESIGNER, a comprehensive vector-based package for technical graphic users and technical illustrators.
 Workspace tour Welcome to Corel DESIGNER, a comprehensive vector-based package for technical graphic users and technical illustrators. This tutorial will help you become familiar with the terminology and
PREMIER+ 2 Modify & PREMIER+ 2 Cross Stitcher
 PREMIER+ 2 Modify & PREMIER+ 2 Cross Stitcher User s Guide The software to which this User s Guide relates is subject to change without notice. All efforts have been made to ensure the accuracy of the
BuzzEdit v3. User's Manual
 BuzzEdit v3 User's Manual Copyright 2000-2012 by Buzz Tools, Inc. All U.S. and international rights reserved. BuzzEdit v3 User Manual for Windows. This manual and the software described in it, are furnished
Indigo Cocktails. Supplies. Visit bernina.com: Projects Webinars Promotions. Created by Susan Fears
 Indigo Cocktails Created by Susan Fears Use the Stitch Designer to create new stitches and edit existing ones. Sew, embroider or transfer them into the BERNINA Embroidery Software 7 to use as Pattern Runs.
Software Club 402: Create THREAD VELVET Embroidery
 Software Club 402: Create THREAD VELVET Embroidery By Janie Lantz, Embroidery Software Specialist Create THREAD VELVET embroidery with its unique velvety plush texture, using 5D Design Creator in the 5D
Embroidery Gatherings
 Planning Machine Embroidery Digitizing and Designs Floriani FTCU Digitizing Fill stitches with a hole Or Add a hole to a Filled stitch object Create a digitizing plan It may be helpful to print a photocopy
9. Click Load a Picture and navigate to \Documents\Premier+\Samples\Premier+Lessons\Create.
 P a g e 1 See how to take a basic background image and make 3 different embroideries. Make a simple Quilt Design in PREMIER+ EXTRA. Create a simple sail boat embroidery, and then make it special with PREMIER+
Use the and buttons on the right to go line by line, or move the slider bar in the middle for a quick canning.
 How To Use The IntelliQuilter Help System The user manual is at your fingertips at all times. Extensive help messages will explain what to do on each screen. If a help message does not fit fully in the
Stitch n Bloom Jacket
 Stitch n Bloom Jacket Created by Debra Rutledge This all-over floral arrangement is designed for embellishing a ready-made denim jacket, but may be easily modified to accommodate any jacket style. Supplies
BERNINA Sewing Machine Workbook 3
 my BERNINA Sewing Machine Workbook 3 Creative Options For BERNINA 880, 7 Series, 580, 570 QE, 560 (Pages 8-12: B 790, 880 only; Pages 13-15: B 880 only) 2016 BERNINA of America. Permission granted to copy
WORD ART - CHANGING LETTERING SPACING
 CHANGING LETTERING SIZE Enter single letters or words and use the icon to rescale the motif. When the Maintaining Proportions (lock) icon is outlined in white, the design will be resized proportionately.
Integrated Wilcom auto-digitizing as well as Corel based Auto-digitizing
 1 : Auto digitize Bitmaps : Integrated Wilcom auto-digitizing as well as Corel based Auto-digitizing - Free hand tools 2 : Free hand tools 3 : Vector drawing tools 4 : Virtual Decoration, + High Resolution
Embroidery Software 8 Owner s Workbook 3 Advanced Features
 Embroidery Software 8 Owner s Workbook 3 Advanced Features 1 Table of Contents Introduction:... 3 Exercises Advanced Editing Features Creating Holes... 4 Color Blending... 5 Quilting Backgrounds... 7 Layouts...
USER GUIDE DESIGN LAYOUTS
 USER GUIDE DESIGN LAYOUTS CONTENTS Design layouts... 1 Insert designs... 2 Insert design... 2 Fabrics & color palettes... 3 Insert & modify... 3 Select objects... 5 Select with Select... 5 Select with
Mastering Your. Embroidery Software V6.0. Owner s Workbook - Part 1
 Mastering Your Mastering Your Embroidery Software V6.0 Owner s Workbook - Part 1 1 Table of Contents Introduction... 3 Class 1: Getting Started... Class Overview... 4 Four Bonus programs in BERNINA Embroidery
FLORAL CLUTCH SEWING SUPPLIES
 creative 1.5 FLORAL CLUTCH Create this beautiful floral clutch decorated with embroideries from the PFAFF creative 1.5 sewing and embroidery machine. The Embroidery Intro PC Software makes it easy to combine
Happy 4th Wallhanging
 Happy 4th Wallhanging S wing Su te by: LuAnn Hartley Artistic Sewing Suite software makes it easy for you to combine applique with embroidery. Customize lettering by resizing and reshaping with the built
Addendum 27: Personalized Meander
 Addendum 27: Personalized Meander About the Author: Lynn Mintz Photo Lynn Mintz is a Florida resident. She spends summers in New Jersey. Lynn has been quilting, embroidering and digitizing for 20 years.
PART 0 - Introduction to Art and Stitch PLUS
 PART 0 - Introduction to Art and Stitch PLUS ArtandStitch.com User Guide for Art and Stitch PLUS Version 5 This Art and Stitch PLUS User Guide is written by Loes van der Heijden, Artistitch v.o.f., Oss,
USER GUIDE ADVANCED DIGITIZE
 USER GUIDE ADVANCED DIGITIZE Introduction COPYRIGHT Copyright 1998-2016. Wilcom Pty Ltd, Wilcom International Pty Ltd. All Rights reserved. All title and copyrights in and to Digitizer Embroidery Software
Monogrammed Garden Flag
 BERNINA E 16 CLICK & CREATE Monogrammed Garden Flag Written by: Judy Hahner, BERNINA Educator, Multi-Needle Embroidery Specialist Stitching large appliqué embroidery just got easier using the BERNINA E
Mastering Your. Embroidery Software V6.0. Owner s Workbook - Bonus
 Mastering Your Mastering Your Embroidery Software V6.0 Owner s Workbook - Bonus 1 Table of Contents Index... 2 Class 9... Class Overview... 3 Quilter... 4 Block Editor 7 Cross Stitch... 9 2 Class 9 - BERNINA
Generations Automatic Stand-Alone Lace By Bernie Griffith Generations Software
 We are going to create an open Italian lace. Generations software products provide advanced image processing features allowing for the creation of stand-alone lace with just a few simple techniques. A
BERNINA Embroidery Software 6 for the Garment-Maker
 BERNINA Embroidery Software 6 for the Garment-Maker BERNINA Embroidery software makes garment-making and embellishing fast and easy using basic tools in the software. Scanning You may choose to use the
creative creative 4D software
 www.hostemostel.com 4D software More unique, versatile, and personalized than ever before! You are the creator! Everyone with a passion for embroidery will love the new 4D software from Pfaff. There have
USER GUIDE EDIT OBJECTS
 USER GUIDE EDIT OBJECTS CONTENTS Edit objects... 1 Selection functions... 1 Editing functions... 2 Object properties... 3 Access properties... 3 Copy properties... 4 Adjust stitch spacing... 5 Corner stitching...
Lettering Fabric Preparation deco 340 aurora 430E & 440QEE NAME artista 630E, 635LE & 640E
 Lettering Fabric Preparation Deco 340 Hoop a piece of firm woven fabric backed with tear-away stabilizer in the Large hoop. aurora, artista, and 8 Series Hoop a piece of firm woven fabric backed with tear-away
30 Designs. Rochelle Stibb 2012 RS112* W: 4.6" RS114* W: 5.0" H: 5.0" H: 4.8" W: 5.0" H: 5.0" Free Table Runne Project Inclu RS111* W: 2.4" H: 4.
 Project Quilting Feathers and Frills Table Runner Detailed quilting gives breathtaking beauty to this whole cloth quilting inspired table runner. Only you will know how easy it was to make thanks to your
Addendum 30: Creating 3D Fringe in Art and Stitch PLUS
 Addendum 30: Creating 3D Fringe in Art and Stitch PLUS About the Author, Marilyn Strowmatt Having sewn all her life, Marilyn began quilting in the 80 s with an unfortunate effort that to this day remains
Artistic Software for the Quilter
 By Bunny Gates Looking for a pretty table runner but can t find one that matches your room? In that case, create your own! Start by choosing a floral fabric, scanning it and bringing an image of the fabric
ADDENDUM 10 - Borders and Matching Corner Designs
 ADDENDUM 10 - Borders and Matching Corner Designs About the Author, Mary Beth Krapil Mary Beth is a semi-retired pharmacist who loves quilts and quilting. An avid sewer since childhood, Mary Beth has been
USER GUIDE CUSTOMIZE DESIGNS
 USER GUIDE CUSTOMIZE DESIGNS CONTENTS Customize designs... 1 General functions... 1 Design information... 3 Summary information... 4 Design details... 5 Thread colors... 6 Stitching details... 8 Thread
Walk Input Method. DesignShop V9 Basic Digitizing Quick Reference Guide
 Walk Input Method DesignShop V9 Basic Digitizing Quick Reference Guide w w w. m e l c o u n i v e r s i t y. c o m Digitizing Tools and Basic Functions Selecting a Tool Click on the desired tool in the
Sashiko-Style Sampler
 Sashiko-Style Sampler Created by Debbi Lashbrook Sashiko, traditionally a Japanese hand embroidery technique, can be imitated using BERNINA Embroidery Software 7 and your embroidery machine. The simple,
World Class Digitizing Software
 World Class Digitizing Software DesignShop V9 offers easy lettering and digitizing tools that get the job done quickly while providing robust features that inspire the imagination. highlights turn art
Addendum 26: Continuous-line Landscapes for Creative Fills
 Addendum 26: Continuous-line Landscapes for Creative Fills About the Author: Michele Vangraan Michele Vangraan is a certified educator with 40 years of sewing experience, and 25 years of Graphic Design
Home Screen to Get You Started
 Updated User Interface The user interface has been redesigned for faster learning and more complete designing. Its friendly new look introduces large interface elements, customizable workspace, help tips,
PROJECTS PHOTOFRAME KEEPSAKE
 PROJECTS PHOTOFRAME KEEPSAKE Photoframe keepsake COPYRIGHT Copyright 1998-2015. Wilcom Pty Ltd, Wilcom International Pty Ltd. All Rights reserved. All title and copyrights in and to Digitizer Embroidery
Drawing with precision
 Drawing with precision Welcome to Corel DESIGNER, a comprehensive vector-based drawing application for creating technical graphics. Precision is essential in creating technical graphics. This tutorial
MY BERNINA EMBROIDERY MASTERY BOOK SERIES SOFTWARE BERNINA EMBROIDERY SOFTWARE 8.1. WORKBOOK 4 Application Programs
 MY BERNINA EMBROIDERY MASTERY BOOK SERIES SOFTWARE BERNINA EMBROIDERY SOFTWARE 8.1 WORKBOOK 4 Application Programs 2017 BERNINA of America. 02/012017 Table of Contents Introduction... 3 Exercises Quilter...
Video Tutorials Included on DVD
 Instruction Manual Video Tutorials Included on DVD With Instruction Manual, view the instructional movies providing supplementary information about cutwork creation. Please visit us at http://solutions.brother.com
Getting Started. with Easy Blue Print
 Getting Started with Easy Blue Print User Interface Overview Easy Blue Print is a simple drawing program that will allow you to create professional-looking 2D floor plan drawings. This guide covers the
THE DESIGNER S GALLERY PLATFORM
 THE DESIGNER S GALLERY PLATFORM USER GUIDE FOR MACINTOSH Copyright 2015 BriTon Leap, Inc. All Trademarks are the property of their respective owners. TABLE OF CONTENTS Welcome Welcome... 1 EmbroideryWorks
Have FUN Creating a Sweatshirt Jacket on Your TinLizzie18 Long Arm
 Have FUN Creating a Sweatshirt Jacket on Your TinLizzie18 Long Arm This ADVANCED project will reinforce what you have already learned:! Set Quilt Area! Free Motion! Save File! Adjust current pattern box!
5D EMBROIDERY SYSTEM5D. Embroidery System
 5D EMBROIDERY SYSTEM5D Embroidery System 5D SOFTWARE MAKES YOUR EMBROIDERY ANYTHING BUT ORDINARY! The technically advanced, yet user friendly HUSQVARNA VIKING 5D Software System makes it easy to explore
Easy to navigate through various screens for sewing, editing, and embroidery. Embroider magnificent 360 x 350 mm designs in one hooping.
 Features & Benefits Just imagine a new world of C A PA B I L I T Y and unlimited potential. ULTIMATE INTERACTIVE SCREEN Easy to navigate through various screens for sewing, editing, and embroidery. Largest
RELEASE NOTES Rev 1 May 2009
 RELEASE NOTES Rev 1 May 2009 These Release Notes contain descriptions of all features and improvements in the BERNINA Embroidery Software product range new to this release. The BERNINA User Manual contains
1.3 Feed dogs options 1.4 Thread manufacturer 2.1 Free-motion quilting 2 Quilting 2.2 Quilting in sewing mode 2.3 Quilting in embroidery mode
 Techniques book Table of contents 1.1 Owner s name 1 Settings menu 1.2 Twin needle 1.3 Feed dogs options 1.4 Thread manufacturer 2.1 Free-motion quilting 2 Quilting 2.2 Quilting in sewing mode 2.3 Quilting
Corel PHOTO-PAINT BERNINA Page 1 DL
 Corel PHOTO-PAINT 2018 BERNINA Page 1 Corel PHOTO-PAINT Corel PHOTO-PAINT is part of BERNINA Embroidery Software and gives users many tools for editing photos or bitmap artwork. Corel PHOTO- PAINT can
FRENCH LINEN KITCHEN TOWEL
 PROJECTS FRENCH LINEN KITCHEN TOWEL COPYRIGHT Copyright 2016. Wilcom Pty Ltd, Wilcom International Pty Ltd. All Rights reserved. No parts of this publication or the accompanying software may be copied
PREMIER+ 2 Create, PREMIER+ 2 Font Create & PREMIER+ 2 Sketch
 PREMIER+ 2 Create, PREMIER+ 2 Font Create & PREMIER+ 2 Sketch User s Guide Windows The software to which this User s Guide relates is subject to change without notice. All efforts have been made to ensure
PRODIM CT 3.0 MANUAL the complete solution
 PRODIM CT 3.0 MANUAL the complete solution We measure it all! General information Copyright All rights reserved. Apart from the legally laid down exceptions, no part of this publication may be reproduced,
GiS BasePac 8 Options
 GiS BasePac 8 Options BasePac classic BasePac ACE Monogramm Punch 1 Editor Druck & Statistik Schiffli Disk Monogramm Punch ACE ACE ACE Punch 2 Schiffli Editor BasePac SE Monogramm Punch SE Editor SE BasePac
12. Creating a Product Mockup in Perspective
 12. Creating a Product Mockup in Perspective Lesson overview In this lesson, you ll learn how to do the following: Understand perspective drawing. Use grid presets. Adjust the perspective grid. Draw and
Ornamental Pro 2004 Instruction Manual (Drawing Basics)
") Ornamental Pro 2004 Instruction Manual (Drawing Basics) http://www.ornametalpro.com/support/techsupport.htm Introduction Ornamental Pro has hundreds of functions that you can use to create your drawings.
Ornamental Pro 2004 Instruction Manual (Drawing Basics) http://www.ornametalpro.com/support/techsupport.htm Introduction Ornamental Pro has hundreds of functions that you can use to create your drawings.
PREMIER+ 2 Embroidery Extra & PREMIER+ 2 Card Shop
 PREMIER+ 2 Embroidery Extra & PREMIER+ 2 Card Shop User s Guide Windows The software to which this User s Guide relates is subject to change without notice. All efforts have been made to ensure the accuracy
Textured Tote By Marie Duncan
 Textured Tote By Marie Duncan Not a day will go by where you won t fill your Textured Tote and enjoy the gorgeous embroidery while traveling through your day! The featured design, 145312, is from PFAFF
V6 BERNINA Embroidery Software
 V6 BERNINA Embroidery Software BERNINA Embroidery Software. Simply the Best Exclusive! Advanced Appliqué Tool Exclusive! CorelDRAW Essentials 4 Monogramming Program Automatic Digitizing Preview Font View
USER GUIDE CUSTOMIZE DESIGNS
 USER GUIDE CUSTOMIZE DESIGNS Introduction COPYRIGHT Copyright 1998-2016. Wilcom Pty Ltd, Wilcom International Pty Ltd. All Rights reserved. All title and copyrights in and to Digitizer Embroidery Software
Editing and Digitizing in EDS III
 Editing and Digitizing in EDS III Design Editing Tablet and On-Screen Digitizing Embroidery and Chenille Stitching Scanning Compatibilities Part Number 110282-01, Revision A A Saurer Group Company 1575
Fe atures & B enefits
 Features & Benefits Simply Excellent! Automatic Jump Stitch Trim Time-saving embroideries; your Designer SE Limited Edition automatically trim jump stitch threads for you. Go To Exact Embroidery Stitch
USER GUIDE EDIT OBJECTS
 USER GUIDE EDIT OBJECTS COPYRIGHT Copyright 2016. Wilcom Pty Ltd, Wilcom International Pty Ltd. All Rights reserved. No parts of this publication or the accompanying software may be copied or distributed,
Embroidered Tile Wall Art
 Embroidered Tile Wall Art Looking for the perfect project to complete with your new Baby Lock Palette 11 Digitizing Software? Try these colorfully embroidered tiles! With decorative fills and unique designs,
Large 300 mm x 180 mm embroidery area Fast 1,050 stitches per minute embroidery speed Automatic thread cutting USB port
 The large area embroidery machine with advanced features. Large 300 mm x 180 mm embroidery area Fast 1,050 stitches per minute embroidery speed Automatic thread cutting USB port Craft inspiration Embroider
Editing and Digitizing in EDS III
 Editing and Digitizing in EDS III Design Editing Tablet and On-Screen Digitizing Embroidery and Chenille Stitching Scanning Compatibilities Part Number 110221-01, Revision A A Saurer Group Company 1575
ILLUSTRATOR BASICS FOR SCULPTURE STUDENTS. Vector Drawing for Planning, Patterns, CNC Milling, Laser Cutting, etc.
 ILLUSTRATOR BASICS FOR SCULPTURE STUDENTS Vector Drawing for Planning, Patterns, CNC Milling, Laser Cutting, etc. WELCOME TO THE ILLUSTRATOR TUTORIAL FOR SCULPTURE DUMMIES! This tutorial sets you up for
GiS BasePac 10. Level 1 to 4
 GiS BasePac 10 Level 1 to 4 ZSK Stickmaschinen GmbH Magdeburger Str. 38-40 D-47800 Krefeld Tel: +49 (0) 2151 444 0 Fax: +49 (0) 2151 444 170 atelier@zsk.de www.zsk.de Construction of the GiS BasePac 10
Photoshop CC 2018 Essential Skills
 Photoshop CC 2018 Essential Skills Adobe Photoshop Creative Cloud 2018 University Information Technology Services Learning Technology, Training, Audiovisual and Outreach Copyright 2018 KSU Division of
CutWork Many Ways: Editing a Draw File
 CutWork Many Ways: Editing a Draw File Notes: Opening the File Select the Apple.draw file. Click on Open. The CutWork apple appears on the screen and can be sent to the machine of your choice at this point
Introducing the new SINGER FUTURA QUINTET sewing & embroidery machine featuring the new Endless Embroidery Hoop!
 Introducing the new SINGER FUTURA QUINTET sewing & embroidery machine featuring the new Endless Embroidery Hoop! Have you heard the exciting news? SINGER has launched a new embroidery & sewing machine!
Bee Awesome Pillow. Created by: Susan Enderson, Educator
 Created by: Susan Enderson, Educator Skill Level: Intermediate Time: 4 hours Bee creative, bee productive or just bee awesome with this fun statement pillow. See how to combine purchased embroidery designs
Master the Basics. Top Selling Features: Sell Up Features from the SAPPHIRE 960Q sewing machine:
 Utility Foot A, Utility Foot B, Buttonhole Foot C, Blind Hem Foot D, Zipper Foot E, Non-Stick Glide Foot H, Edging Foot J, Embroidery Darning Foot R, Sensor One-Step Buttonhole Foot, Self-Adhesive Glide
QuiltWorks II Appliquéd Hoodie
 QuiltWorks II Appliquéd Hoodie As you prepare your children for another school year, why not make an appliqué hoodie with the use of QuiltWorks II from Designer s Gallery. If time is an issue, this project
ART (Bernina), BLF (Outline File), DST embroidery formats: (Tajima), EXP (Bernina. JEF (Janome), PCS BSB116 W: 2.5" H: 3.9" BSB117* ** W: 4.
, BLF (Outline File), DST embroidery formats: (Tajima), EXP (Bernina. JEF (Janome), PCS BSB116 W: 2.5 H: 3.9 BSB117* ** W: 4.") Project On the Go Purse This purse can take you from morning to evening, from casual to elegant, depending on your choice of fabrics and embellishment. You ll love the large flap it s the perfect palette
Project On the Go Purse This purse can take you from morning to evening, from casual to elegant, depending on your choice of fabrics and embellishment. You ll love the large flap it s the perfect palette
Featuring AcuFil Quilting
 Featuring AcuFil Quilting Compact Footprint and Practical Weight Remarkably Complete, yet Remarkably Compact. The Memory Craft 11000 Special Edition sews, embroiders and quilts with a precision and innovation
PosterArtist Quick Guide
 PosterArtist Quick Guide Create posters in four easy steps STEP STEP STEP STEP Use Auto Design to Create Posters Simply select a poster type and a design image to automatically create high-quality posters.
Christmas Table Mat Using Letters
 Using a couple letters and Artistic Suites Software you can create a wonderful placemat for the center of your table. Artistic Supplies Required Artistic Suites Software V6 Artistic Tear Away Stabilizer
PREMIER+ 2 Embroidery
 PREMIER+ 2 Embroidery User s Guide Mac The software to which this User s Guide relates is subject to change without notice. All efforts have been made to ensure the accuracy of the contents of this User
Falling Leaves Mini Wall Hanging
 Created by Elva Mungai Seasonal Sensational Swirls Falling Leaves Mini Wall Hanging For Cork and Dry Erase Board Create a mini quilt for each season to dress up a bulletin board for your work room or sewing
Cricut Design Space App for ipad User Manual
 Cricut Design Space App for ipad User Manual Cricut Explore design-and-cut system From inspiration to creation in just a few taps! Cricut Design Space App for ipad 1. ipad Setup A. Setting up the app B.
EmbroideryWorks Cute as a Caterpillar Bulletin Board
 EmbroideryWorks Cute as a Caterpillar Bulletin Board Create this darling appliquéd bulletin board in an afternoon using the updated version of EmbroideryWorks with built-in AccuQuilt shapes. Think outside
House Design Tutorial
 House Design Tutorial This House Design Tutorial shows you how to get started on a design project. The tutorials that follow continue with the same plan. When you are finished, you will have created a
Precision quilting at your fingertips graceframe.com
 Precision quilting at your fingertips 800-264-0644 graceframe.com Quilter s Creative ouch Precision quilting at your fingertips Quilter s Creative Touch 4 is the lastest version of QuiltMotion, the top-of-the-line
Pillow Party. Skill Level: Intermediate. Created by: Diane Kron, Software Project Manager
 Pillow Party QuiltWorks II from Designer s Gallery offers so many opportunities that it s hard to stop creating pillow after pillow. After you have completed this pillow, you will want to make several