LION RAMPANT MEDIEVAL WARGAMING RULES DANIEL MERSEY
|
|
|
- Christiana Stone
- 5 years ago
- Views:
Transcription

1

2 LION RAMPANT MEDIEVAL WARGAMING RULES DANIEL MERSEY
3 CONTENTS 1. INTRODUCTION 2. BATTLE RULES Setting up a Game Commanding Your Retinue Important Rules Conventions Understanding Unit Profiles Unit Cohesion Terrain Leaders What Happens During Each Turn Activating Your Units Moving Shooting Attacking Testing Courage Ending the Game 3. MUSTERING YOUR RETINUE Mounted Units Foot Units Missile Units 4. SCENARIOS Scenario Basics Scenario A: Bloodbath Scenario B: Defending the Indefensible Scenario C: The Fugitive Scenario D: A Gentle Stroll Scenario E: Hold on Tight Scenario F: Sausages With Mustard Scenario G: The Convoy Scenario H: The Messenger Scenario I: A Taxing Afternoon Scenario J: Meeting the Neighbours Scenario K: Hammer and Anvil Scenario L: Bloodfeud Linking Your Games Together 5. SAMPLE RETINUES The British Isles Western Europe Eastern Europe
4 The Middle East & Spain Hollywood Legends Old-School Fantasy LION RAMPANT REFERENCE SHEET LION RAMPANT ROSTER
5 1. INTRODUCTION Welcome to Lion Rampant, a set of simple miniature wargaming rules designed for fighting historical or Hollywood battles in the medieval period, from the rise of the Normans to the Hundred Years War and beyond. This period is well suited to retinue-sized games involving a few dozen models per side as it was a time of anarchy, feuds, and raiding. Although full-sized battles took place, wars were often ended by siege or diplomacy but small, ferocious actions were fought many times over throughout Europe and the Middle East. Lion Rampant also embraces bravehearts in kilts, men in green tights, do-gooders at round tables, and (so long as you whisper it quietly) 1970s-style fantasy wargaming. At this point, I hold my hands up and admit that I ve been just as influenced by movies and fiction as I have reference books. Alongside the straightforward battle rules, Lion Rampant presents a varied selection of scenarios and a Boasting system allowing players scope for choosing their own victory conditions. This means that you can concentrate on playing the scenario and enjoying yourself without getting bogged down in rules. The rules are model scale-neutral, although many gamers choose 28mm or 20mm armies; 15mm is more cost-effective but less heraldry-friendly. Lion Rampant is a medieval-themed battle game rather than a detailed and scholarly simulation of combat in a specific century; I favour abstraction and stylization to allow quick and streamlined play, rather than rules that take into account the different types of arrowhead available. That said, good tactics will prevail and the scenarios prevent players from engaging in an arms race to find out who can paint the mostest knights the fastest. Gameplay rewards using your units in the correct tactical way: knights are great at charging down enemies, but less useful for guarding convoys; spearmen are jacks of all trades and masters of none; and archers are to be feared at distance but cut down if you can get close enough. Battlefield confusion and chaos means that you might not get to use every one of your units in every turn of the game, so start thinking about your unit s priorities during the game even before you ve set the table up. Removal of models as casualties doesn t necessarily reflect sudden and violent death (although if you re that way inclined ): some warriors run away, others are wounded, and the rest are killed. Model removal essentially tracks a unit s morale and current fighting ability rather than anything more literal: whether a unit is above or below half strength is important in the game. My design goals for Lion Rampant tell you how I designed the rules and explain why they work as they do: Games about knights should be fun. The emphasis is on a playable medieval-themed game rather than an over-detailed simulation of medieval warfare. Use no unusual dice, cards, or supplements make it accessible for gamers new to the hobby. Keep the rules simple, streamlined and abstracted where appropriate: don t make players continually thumb through the rulebook. Quick play and minimal record keeping to allow multiple games in a session. Gain period feel by differing profiles for troops; avoid complex core rules. Think small-scale combat: reflect skirmish warfare not huge set-piece battles. Let scenarios drive the game and make the victory conditions interesting and feel like a narrative story. Give players extra goals in each scenario to allow different ways to win. Offer malleable army selection: no hard and fast army lists. Embrace medieval caricatures: knights should be headstrong, spearmen resolute, tribesmen fierce, and light cavalry agile. Performance is abstracted: make sure units feel right.

6 Create a medieval miniature wargame that s an excuse to push some colourfully painted models around the table. Oh the glamour Mounted Men-at-Arms swan about like they own the place (which they do). Crusader Miniatures from the author s collection. (Henry Hyde) My overall goal was to design a medieval miniatures game that is easy to learn, makes you think about how best to use your resources, and provides entertainment as you do so: I hope you find Lion Rampant achieves this. Roll sixes and enjoy!
7 2. BATTLE RULES SETTING UP A GAME To play a game of Lion Rampant you ll need to read through this section on Battle Rules first, and keep the book handy through your first few games. Most players will be familiar with the basics after a couple of games. To play, you ll need to bring together the following: This book (of course) A list of unit profiles (there s a blank one included at the end of the book) A friendly opponent (although you may make your own rules for play solo or playing with larger groups) An army of medieval miniatures for each player (the section on Mustering Your Retinue gives more detail on this, but you ll usually field around models in the standard game) A good handful of dice (12 per player should do it, but more never hurts) A tape measure (preferably showing inches) A table to play on and some model terrain (a flat surface ideally 6x4 or larger) Some markers to indicate Battered units (gaming gems or dead/wounded models are great for this) Design note: I m deliberately vague about table sizes in Lion Rampant, but for good reason! Most scenarios will play out nicely on a 6x4 table, but depending on the units in your retinue, you may be advantaged or disadvantaged by larger or smaller tables. A good game between point infantry retinues can be ground out on a table no more than 4x3, but ultimately, play on a table size that suits you (or more likely, a table size that you have available). Some scenarios benefit from a larger table, especially those requiring manoeuvre more than combat. Lion Rampant is easy to play if your models are based individually. It doesn t matter too much how you base your models, although common dimensions for 28mm models are 20x20mm squares or 25mm rounds for foot, and 25x50mm for mounted. If your collection includes multiple models on a communal base, you can still play Lion Rampant without much difficulty: just be prepared to ignore the direction the models are actually facing and think of them as a blob of troops with no flanks or rear. You ll also need to mark casualties as they occur (small dice are a discreet way of doing so). COMMANDING YOUR RETINUE Each player s army known as your retinue in Lion Rampant is built from a variety of units, each representing a class of warrior from the medieval period. The rules don t impose many restrictions when choosing units, although arming 12th-century western knights with bows will raise your opponent s eyebrows so carry out a little research about the units your retinue should contain (or flick through to the end of this book and choose a ready-made retinue that you think you ll enjoy commanding). Lion Rampant is written for retinues comprising 24 points; depending on their abilities, individual units generally cost between 1 and 6 points each, but most retinues will be built of around 6 units. Mounted units begin with 6 models each, whereas Foot units mostly begin with 12 models each (Menat-Arms and Bidowers have just 6 models). See the section on Mustering Your Retinue for more details on the units available to you. A SAMPLE 24-POINT RETINUE Before ploughing on with the battle rules, take a look at this sample retinue for an idea of how many units you ll be commanding in Lion Rampant:


8 1 Mounted 6 points 1 Mounted 4 points 2 Foot 4 points each 1 4 points 1 2 points English Men-at-Arms and Expert Foot Serjeants by Claymore Castings. (David Imrie)
9 The sample retinue arrayed for battle. (Henry Hyde) This retinue would be a good starter army to collect: it s a pretty generic Western European force from the 12th to 14th centuries. There are many other options of course, including upgrades for individual units and various other troop types to recruit. PLAYING WITH LARGER OR SMALLER RETINUES If you don t yet have enough models for a 24-point retinue, try playing with between 12 and 20 points per side; even better, if you re blessed with a huge collection of models, experiment with upping retinues to 30 or 36 points. The rules scale up and down easily enough, but adjust your table size accordingly. An alternative way to get started is to just play with what you ve got ready: this is especially useful as you collect and paint your retinue. Ignore points values and group your units into 6 or 12 models and divide them between both players. This won t offer balanced games, but is a good way of learning the rules and since when were all armies equal anyway? IMPORTANT RULES CONVENTIONS Lion Rampant is written with playability in mind; the rules try to keep things as simple as possible while maintaining the feel of medieval battle. A few general rules are worth noting here, as they apply throughout the rules: All dice are ordinary six-sided dice and are numbered 1 6. For combat results, dice are scored individually, but for orders and courage tests, roll two dice and add the total. Expect high scoring dice to favour you and low scoring dice to count against you. Each model is supposed to represent one warrior, although if you decide on a different model ratio it won t affect gameplay. All measurements are given in inches ( ), although you may wish to change this to centimetres if playing Lion Rampant with 15mm or smaller models. Round down fractions unless otherwise noted. Distances between units are measured between the closest model of each unit. The distance between these two models counts when deciding if units are within range in the rules. There is no unit facing. All models can see, move, and shoot in all directions: in Lion Rampant, units move in loose formations and can turn towards threats quickly. Use your good sense! The rules for Lion Rampant will not cover every conceivable situation that arises in miniature wargaming; when something happens that is ungoverned by the rules, or if you have a situation that sits uneasily alongside the written rules, discuss the most sensible way forward with your opponent. In-keeping with the rest of the rules, keep your solution simple. Design note: The beauty of medieval wargaming is that there s generally little uniformity, so you could collect one 24-point retinue but break this down into two 12-point retinues if your opponent doesn t yet have his or her models painted and ready to play. If playing with retinues smaller than 24 points, you may wish to remove the courage test taken when your retinue is reduced to half of its starting number of units. UNDERSTANDING UNIT PROFILES In Lion Rampant, different troop types act and react differently to one another. Each of the eleven troop types has its own unit profile, showing its own strengths and weaknesses. The following list shows what each line of the profile means:

10 Unit name: The troop type represented by this unit. Attack: The total needed on two dice to carry out this order. Move: The total needed on two dice to carry out this order. Shoot: The total needed on two dice to carry out this order. Not all units may Shoot. Courage: The total needed on two dice to keep calm and carry on. Armour: The number of hits needed to remove one model from this unit. Points: How many points it costs to include one of these units in your retinue. Attack Value: The score needing to be equalled or bettered on one die to hit an enemy when carrying out an Attack. Defence Value: The score needing to be equalled or bettered on one die to hit an enemy when being Attacked. Shoot Value: The score needing to be equalled or bettered on one die to hit an enemy with missiles. Not all units have this ability. Maximum movement: The maximum number of inches a model in this unit may move. Special rules: Any other rules applicable to this unit, which may differ from the core rules. Flick through to Mustering Your Retinue for more details of each troop type, or take a look at the sample profile shown here for an everyday, bog-standard Foot Serjeant unit. UNIT NAME Foot Serjeants POINTS 4 Attack 6+ Attack Value 5+ Move 5+ Defence Value 4+ Shoot Shoot Value Courage 4+ Maximum movement 6 Armour 3 Special rules Schiltron The Mounted Men-at-Arms are within cohesion distance but the rearmost slinger is not. (Henry Hyde) UNIT COHESION Individual models move independently but at the end of their move must conform to unit cohesion. Choose one model from the unit, and at the end of the unit s movement, all models must be within 3 of
; keep a small gap between each model and manoeuvre them around the tabletop in rough clumps")
11 that model. Some players decide to model a standard bearer or musician model to use as the cohesion model every turn, but you may instead choose a different model in different turns if you prefer. Models in a unit should not be in base-to-base contact (unless they are using the Schiltron special rule); keep a small gap between each model and manoeuvre them around the tabletop in rough clumps there s no neatly regimented lines of warriors in Lion Rampant s medieval world. Keep at least 3 between units unless they are fighting; this makes it clear which unit is which and acts as a zone of control for each unit, applying equally to friends and enemies. The only time that units may be in contact with another is during the Attack sequence, and models may never move within 3 of another unit at any other time. As no unit may move within 3 of another unit, friendly units may not move through one another. Clever use of the 3 proximity rule means that the Crossbowmen are protected from frontal attack by the Foot Serjeants, but may still shoot. Crusader and Curtey s Miniatures. (Henry Hyde) TERRAIN Try to make your tabletop battlefield look as realistic as possible, whether you re fighting battles on the Welsh Marches, on a frozen Steppe, or in the searing heat of the desert. Before beginning your game, agree with your opponent how each type of terrain is going to affect the battle, using the guidelines shown here and in later sections on the rules. There are no hard and fast rules governing how much terrain you should place; scenarios may specify exact requirements but I would usually suggest aiming for at least one piece of terrain on each quarter of your tabletop. Lion Rampant keeps terrain as simple as possible: I ve played too many games in the past where I ve been too terrified to move into a wood because of the extra pages of rules I d have to brush up on. There are five broad categories of terrain: Rough terrain: such as marshland, wide streams or rivers, deep snow, villages, very steep hills for units moving up them, and woods. This is area terrain that slows down movement within it and is harder for most units to attack in. Obstacles: such as ditches, fences, and walls. This is usually linear terrain that temporarily holds up units as they attempt to cross it. Obscuring terrain: Hills, woods, villages and other terrain that prevents units seeing what lies beyond. Cover: such as walls, fences, villages and woods. These reduce casualties to units benefitting from

12 this terrain category. Impassable: such as deep rivers, ravines and cliffs. Models can t move over these, and casualties are caused if a unit blunders into impassable terrain. A unit counts as in cover or rough terrain if the majority of models in the unit are in the terrain, or are shielded from the majority of the shooting/attacking unit. A unit that is not in rough terrain itself still counts as such when Attacking a unit that is; but when Moving, the models in a unit move individually so some (outside of the terrain feature) may move at full speed while those on a terrain feature move more slowly. Many types of terrain count fall into more than one category, for example: Hills are cover when defending an Attack and higher than your enemy and obscuring terrain from the other side and very steep hills are rough terrain when moving up them. Woods are rough terrain and obscuring terrain and cover. Walls are obstacles and cover. Buildings are obscuring terrain and cover. Agree with your opponent how you will define each piece of terrain before you begin each game; also agree how the effect of combined terrain types will be handled (for example, whether areas of scrubland should just count as rough terrain or also count as cover). Rules for applying these guidelines can be found in the relevant sections on movement, shooting, and attacking. The Bidowers on the left do not count as being in rough terrain, but the Fierce Foot on the right do. (Henry Hyde)
 SUPERB COVER You may agree with your opponent to count some cover as better than the norm; examples could include the solid walls of a castle or other sturdy buildings.")
13 Make your Leader stand out fancy headgear is a good indicator. Foundry models from the author s collection. (Henry Hyde) SUPERB COVER You may agree with your opponent to count some cover as better than the norm; examples could include the solid walls of a castle or other sturdy buildings. Superb cover increases the target unit s Armour by 2 points against Shooting rather than the usual 1 point. I strongly recommend using this classification sparingly and perhaps reducing any retinue starting the game behind such cover by a few points. LEADERS One of your models must be designated as your Leader your very own metal or plastic embodiment on the tabletop and you must identify this model to your opponent before the game begins. As this model represents you, be sure to paint it well! Your Leader is part of a unit and may not join a different unit during the game; the Leader is not an additional model, so for example, a Mounted Men-at-Arms including a Leader still comprises 6 models not 7. Here s a quick summary of what your Leader does the same or differently to other models: Leaders are part of a unit and cannot leave it. Leaders move and fight as an ordinary model. Leaders will be the last model to die in their unit, unless falling to a lucky blow or during a challenge. If a Leader should be removed as a casualty but other models remain in his unit, remove the non- Leader. Leaders give +1 to your total for all Courage tests for units within 12 of the Leader model. Leaders may issue challenges. Leader skills may affect the above! These are covered in the next section. Leader rules are only applied if the Leader is in play on the tabletop and his unit is not Battered. LEADER SKILLS Every Leader should stand out a little; in Lion Rampant, Leaders may have their own special skills to help or hinder your command of your retinue. Unlike units, which you can choose and upgrade as you

14 wish, your Leader s abilities are randomly determined. Leaders have their own special characteristics that affect gameplay or allow for some limited roleplaying opportunities (optionally, your opponent may award you 1 Glory for this at the end of a scenario). Decide which unit your Leader will be part of, then roll two dice and consult the following chart for your Leader s skill: 2 Forgettable: No discernable qualities other than a fine moustache. 3 Sly: May refuse challenges without this incurring the usual Courage test. 4 Insipid: Offers units within 12 no Courage bonus. 5 Vulnerable: Killed by lucky blows on a score of 2 or Rash: Leader s unit gains Wild Charge rule. If the unit already has this, it must automatically make Wild Charges without dicing for success or failure. Commanding: Each turn, you may reroll one failed Move, Attack, or Shoot test (no other tests) within 12 of your Leader s model. 8 Strong: During Attacks, the Leader s unit may reroll one failed hit dice. 9 Braveheart: In challenges, is only hit on a Lionheart: During Attacks, the Leader s unit may reroll up to two failed hit dice. 11 Blessed: Invulnerable to lucky blows. 12 Great Leader: Leader s unit automatically passes all Move, Attack and Shoot activations, and all Rally tests. If your Leader is Battered or not in play (whether he s not entered the table, has fed, dead, or otherwise left) his Leader Skills cannot be used. Feel free to create your own Leader skills, or adapt them to better suit the military culture or training of your retinue: treat the list above as a good stepping-off point. WHAT HAPPENS DURING EACH TURN A game consists of a number of turns, played through a cycle of phases that allow all players to activate their units. Turns are fairly fluid in Lion Rampant: you cannot be sure that all of your units will be guaranteed to act in any given turn, and most games last for an uncertain number of turns. This adds a degree of confusion that seems suitable for the blink-of-an-eye clashes presented in the game.
 A turn doesn t represent a set amount of time, but in real life, the battles fought probably last for no more than a handful of minutes: maybe a half hour at most.")
15 Prince Llywelyn, leader of a Welsh retinue (sold as King John by Trent Miniatures). (Stephen Hall) A turn doesn t represent a set amount of time, but in real life, the battles fought probably last for no more than a handful of minutes: maybe a half hour at most. Here s a brief summary of the phases that make up every turn of the game: Attacker s activation phase: Player carries out actions until an ordered activation test is failed. Defender s activation phase: As above. Additional activation phases: In multi-player games, carry out an activation phase for each additional player in the game. End of the turn: Begin the next turn of the game unless the game has ended, in which case all players total their Glory to see who wins. Some scenarios end when one side has been wiped out or has moved off the battlefield, and others end when one of the players has achieved the goals they ve been set. The battle of Patay, 1429, by Graham Turner Osprey Publishing Ltd. Taken from Campaign 94: Orléans ACTIVATING YOUR UNITS In Lion Rampant, as in real battles, some units will do what you want them to do, others may decide to charge off without orders from you (regardless of whether you wish them to or not), and others will remain stationary and of no use to you until you ve inspired them back to bravery or poked them with a sharp stick.
16 When your activation phase begins in each turn, you play through a sequence that allows you to issue challenges, rally Battered units, make Wild Charges, and give out orders to Attack, Shoot, or Move. During each of these except challenges you test to see how a unit responds by rolling dice. When Rallying units, success recovers their ability to act as a fighting force; when testing for Wild Charges, success sees your units getting medieval on their enemies; and when testing for ordered activations, success allows you to act with that unit (moving, shooting, or attacking). Regardless of the type of action occurring, you must immediately carry out and conclude it before choosing another unit to activate; so for example, if your unit is Attacking, resolve that combat (including the removal of casualties and any resulting courage tests) before moving on to another unit s action. When your activation phase begins, play through it using the following sequence every time: Issue a Challenge (if eligible). Rally Battered units. Activate Wild Charges. Order activations. A unit may be activated only once in your activation phase, so a unit that has tried to Rally may not make a Wild Charge or receive an ordered activation in this turn. A unit that has tested for a Wild Charge may not test for an ordered activation. If your Leader issues a Challenge, his unit may not attempt a Wild Charge or ordered activation during this activation phase, but will attempt to Rally if required.
17 Design note: You won t always get to activate all of your units, every turn so work out your priorities before doing anything! If there is something you wish to achieve this activation phase, try to do that at the first opportunity. Units are more likely to be activated if they re ordered to achieve something they re good at (for example, Men-at-Arms are good at charging into their enemies, Serfs less so) so try to manoeuvre your units to ensure that the unit carrying out an order is well suited to it. Some of your opponent s units might be able to take immediate action as a result of your own unit s activations; these are: Counter-charge Evade A unit may only attempt to carry out one of these actions for each Attack it is targeted by; a unit cannot Counter-charge and Evade the same Attack. ISSUE A CHALLENGE
.")
18 Your Leader may challenge an opponent s Leader to a duel if the two models are within 12 of each other at the start of your activation phase and your own Leader s unit isn t Battered. You may only make one challenge per game. If you challenge the enemy Leader, your own Leader s unit may not attempt Wild Charges or ordered activations during your activation phase (but can Rally). When you make a challenge: If it is accepted, move both models into space around half way between the two units and fight a duel immediately. If it is refused, that cowardly player s units must each immediately take a Courage test, in the same way as if the leader has been killed. Issuing a challenge overrules any other action the unit would usually need to take: for example, a unit of Mounted Men-at-Arms that would usually need to charge at an enemy could be held in place by issuing a challenge earlier in the player s activation phase. Issuing a Challenge also prevents a unit from any ordered activation. FIGHTING A DUEL Duels are fought as the best of three blows (three dice rolled simultaneously), hitting your opponent on a 5 or 6. Unit upgrades do not affect duelling dice rolls, and neither Leader s Armour has any effect on hits. If one Leader lands more hits, he will kill the enemy Leader, causing an immediate Courage test for the dead Leader s retinue; the victorious Leader immediately returns to any legal position within his unit. If an equal number of blows are landed, both Leaders return to any legal position in their unit, and the duel was a draw with no effect. Leaders duel: white inflicts no hit to blue s 2 hits white loses the duel and his life and his retinue must take a Courage test. Foundry models from the author s collection. (Henry Hyde) RALLY BATTERED UNITS Units become Battered as a result of poor morale, which may be caused by casualties and a variety of other factors; in modern military terminology, the unit has been suppressed. The later section on Battered units goes into more detail on how this affects the unit. If you have any Battered units, you must try to rally them at this point in your activation phase. A Battered unit will rally (remove its Battered marker) if it successfully passes a Courage test:
19 If the test is successful, remove the unit s Battered marker, but remember that you cannot activate it again during your activation phase. Unless the unit is Battered again before your next activation phase begins, it can be activated as normal at that time. If the test is unsuccessful, the unit retains its Battered marker, removes one model as a casualty (this model has had enough and runs away), retreats, and takes no further action during your activation phase. It will be at a disadvantage if attacked while Battered. Failed Rally tests do not end your activation phase. If more than one of your units must test for Rallying, you may choose the order in which you test; however, all Battered units must be tested: you can t choose to miss a Rally test. Finally, a unit may only test to Rally if it is Battered! See the section on Courage for how to make a Courage test and how to retreat; all of the modifiers and rules shown in the Courage section apply equally to Rallying as to any other Courage test. TEST FOR WILD CHARGES Some units have Wild Charge listed as a special rule. If any of your units with this rule have not taken a Rally test and begin this part of your activation phase within contactable distance of a visible enemy unit, you must test to activate a charge; this is the only action the unit can be given to this unit during your activation phase (except for Challenges or Rallying). Wild Charges are tested for even if the target unit is in rough terrain or behind cover. All Wild Charges must be tested before moving on to any other orders, and each unit s charge should be resolved before moving on to test for other Wild Charges: If successful, the unit immediately carries out an Attack activation against an enemy unit of your choice within range. If unsuccessful, the unit remains stationary and takes no further action. A failed Wild Charge does not end a player s activation phase. If more than one of your units must test for a Wild Charge, you may choose the order in which you test: remember that the outcome of one Wild Charge may change which other units must make the test. ORDERED ACTIVATIONS Any of your units that have not yet tested for a Challenge, Wild Charge or Rallying may be ordered into action in this part of your activation phase. You may choose whether these units move, shoot, or attack; you may also choose the order in which you order your units into action. In general, most of your units will be activated in this way. A failed ordered activation test will end your activation phase immediately. When you choose a unit to activate, you need to point out a unit and state out loud which of these actions the unit is being ordered to carry out: Move Shoot Attack Some units may also: Skirmish The rules for skirmishing are shown under the relevant troop types entries in the section Mustering Your Retinue. When you ve announced the action your unit intends to make, carry out an activation test by rolling
20 two dice (see the following section): If your test is successful, carry out this action in its entirety before selecting another unit to activate. If your test is unsuccessful, your activation phase ends. Different types of units have different values for each action; some units are better at certain actions than others. If you do not wish to order a unit to take any action, carry out any other ordered activations first and then declare that you re ending your activation phase without ordering any more units. You may wish to place a small marker or gaming gem next to units once they have tested for activation, so that you don t forget which has acted and which has not. Design note: As not every unit will necessarily move every activation phase, some players will wonder why. It could be that the unit is scared, won t lower itself to perform that task, has received a confusing order, is busy reloading or helping injured soldiers, is catching its breath, or cannot see the same dangers as you see with your god-like view over the battlefield. Behind every failed dice roll is a story waiting to be told. THE ACTIVATION TEST When you test for Wild Charges or ordered activation, roll two dice and add the total: If the total is equal to or higher than the score needed, the unit succeeds and carries out that action. When this is completed, you may choose another unit to activate. If the total is lower than the score needed, the unit fails. It remains stationary, taking no action at all, and if this was an ordered activation your activation phase ends. COUNTER-CHARGING AND EVADING The rules for these reactions are shown under the relevant troop types entries in the section Mustering Your Retinue. ENDING YOUR ACTIVATION PHASE Your activation phase will end in one of three ways: If your test to carry out an ordered activation fails. If you have tested to activate each of your units once. You have tested all Battered units and Wild Charges, and have decided not to activate any or all of your other units.
 Remember that a failed test for Battered units or units subject to Wild Charge does not end your activation phase; also remember that each of your units may only be tested")
21 Perry Miniatures mounted Men-at-Arms on the move. (Alan and Michael Perry) Remember that a failed test for Battered units or units subject to Wild Charge does not end your activation phase; also remember that each of your units may only be tested for activation once during your phase. When your activation phase ends, the next player begins his activation phase or the turn ends if everyone has now taken their go. MOVING A unit may be ordered to Move during your activation phase. A Move may not be used to contact with an enemy (only Attack activations allow that) or to move within 3 of an enemy unit. Models may not move within 3 of an enemy if not Attacking it. MOVING YOUR UNIT Movement is kept simple and as free as possible, and you may move each model up to the maximum shown below with no restrictions other than terrain and unit proximity. By the end of the movement, each model must abide by the unit cohesion rule. Maximum movement distances in open terrain are: Mounted Yeomen: 12 All other Mounted: 10 Fierce Foot, Foot Yeomen, and Bidowers: 8 All other Foot: 6 When moving, all models in a unit must aim to end their movement within unit cohesion (3 of a central model). If this unit cohesion is broken for any reason, the unit must try to correct this next time it Moves, Retreats, or Attacks (but may choose to Shoot instead). Each model moves individually in any way it wishes. Models may move sideways, backwards, or at any angle during the move. I recommend not getting too caught up in exact measurements: move a few of your models by measuring the correct distance and move the rest of the unit using these models as approximate distance markers. If you wish to play more precisely, let you opponent know before the game begins and be prepared for a slower (and slightly hypnotic) game. Design note: Plastic or wooden movement trays may be used to move your units around the battlefield more efficiently. If you choose to use them, be prepared to be generously flexible with measurements, determining cover, and so on.

22 HOT WEATHER If your battle takes place in the searing heat of the desert, you may wish to penalize all units with a base score of Armour 4 by making their Move one point higher. This represents the extra fatigue of fighting in the desert while wearing a tin can. A unit of Archers; all models in a unit may shoot, so long as one model is in range and line of sight. Curtey s Miniatures from the author s collection. (Henry Hyde) HOW TERRAIN AFFECTS MOVEMENT Rough terrain halves all movement inside it (if moving into Rough terrain with 4 of move left, the unit may only move 2 into the terrain), unless the unit is Fleet Footed. Work out how much of your unit s movement has not been used at the point it reaches the rough terrain, and halve what is left when moving into the terrain. Movement in rough terrain is applied to individual models rather than whole units: some models in a unit may suffer reduced movement because they are in rough terrain, while others move their full distance because they are not in rough terrain. Remember to maintain unit cohesion at the end of a unit s movement. Obstacles are moved up to, halted at, and then moved over with no delay during your unit s next movement. Impassable terrain cannot, of course, be crossed. SHOOTING A unit may be ordered to Shoot only if it is armed with missile weapons (bows, crossbows, javelins, or slings). There must be a target unit within sight and range for a unit to be given this order. As long as one model from each unit is within range and line of sight, Shooting takes place and casualties may occur to any models in the target unit. The sequence for Shooting is: Choose a target unit. Shoot! Shooting unit rolls to hit. Target unit removes casualties (and tests for lucky blows). Target unit tests Courage if needed.
 MISSILE RANGES Different missiles are effective up to different distances.")
23 The target unit never shoots back, even if missile armed: it s too busy finding cover and shielding itself. When measuring, use the distance between the closest models from each unit. (Henry Hyde) MISSILE RANGES Different missiles are effective up to different distances. Maximum missile ranges in Lion Rampant are: Bows and crossbows: 18 Slings, Bidowers, Mounted bows and crossbows: 12 Javelins: 6 So long as one model from your Shooting unit is within maximum range of one model of the target unit, your unit may Shoot. An important rule to remember is that up to 12 range all models in your unit roll to hit using their Shoot Value; beyond this distance, they subtract 1 from each dice rolled. Design note: Shooting ranges may look quite short, but remember that this is just the shortest distance between the two units; depending on how the units are positioned, the shooting unit s models may be shooting over an additional 12, which is quite some distance! Also, shooting in Lion Rampant mostly represents individual aimed shots rather than volleys of missiles fired at long range massed targets. CHOOSING A TARGET The following rules guide you through choosing a target for your Shooting unit: Line of sight is all around: there are no firing arcs and it does not matter which direction a model is facing. Although you may choose your own target, an enemy unit able to contact the Shooting unit during its next activation must be chosen as a target in preference to a unit unable to contact the Shooting unit during its next activation phase. If more than one target is available, you may choose which unit to target. Units cannot split shooting between target units: all shots are directed at one unit. Units in cover may be targeted, but units may not shoot at targets completely hidden behind trees/buildings or other Obscuring terrain. Models in your Shooting unit do not block line of sight, but other units can. Targets further than 12 away are harder to hit.
. 6 dice if your unit is at half its starting strength or below (fewer models than shown above).")
24 RESOLVING SHOOTING Once you ve chosen your target, add up the number of dice your Shooting unit will target them with: 12 dice if your unit is above half its starting strength (7 or 4 models depending on the troop type). 6 dice if your unit is at half its starting strength or below (fewer models than shown above). Roll that number of dice and apply the following modifier to the scores if applicable: -1 to each dice score if 12 or further from target. Any result equalling or bettering your unit s Shoot Value is a hit. If the target is in cover, the terrain improves their Armour rather than reducing the Shooting unit s ability to hit. The Crossbowmen hit on 4+ so score 8 hits. The Mounted Serjeants Armour of 3 means that they take 2 hits. (Henry Hyde) REMOVING CASUALTIES Once the shooting unit has rolled its dice, compare the final number of hits against the Armour of the target unit. For every number of hits equalling the target s Armour, remove one model from the target unit: Units with Armour 1 remove one model for every hit inflicted. Units with Armour 2 remove one model for every two hits inflicted. Units with Armour 3 remove one model for every three hits inflicted. Units with Armour 4 remove one model for every four hits inflicted. Any leftover hits are ignored. Cover increases Armour by 1. For example, 5 hits inflicted on a unit with Armour 3 will cause only one casualty; the remaining two hits bounce off shields and armour with no effect. Starting with models within the Shooting unit s missile range, the target unit s player removes a number of models equal to the casualties inflicted. If all models that were within missile range have been removed and there are still outstanding casualties, remove them from other models within the unit. When removing casualties, remember to maintain unit cohesion. If the target unit includes a Leader, the owning player must test to see if the Leader has been killed before removing any models.
, roll two dice to see if he falls to a lucky blow.")
25 A unit taking casualties must immediately make a Courage test (see the section on Courage for how to do this). CHECKING FOR LEADER LUCKY BLOWS Every time your Leader s unit loses at least one casualty during Shooting (but not during a Courage test), roll two dice to see if he falls to a lucky blow. If the score is a double 1, your Leader must be chosen as one of the casualties. Unless killed in this way, your Leader will always remain the last model in his unit; when your Leader is the last model in the unit and further casualties are taken, there s no need to test there s noone else left who can die first! A slain Leader causes Courage tests. ENDING SHOOTING Once you have determined and removed casualties from the target unit, that unit will need to take a Courage test if it suffered any casualties. When the Courage test has been resolved, your Shooting unit s activation ends and you may move on to activate another unit from your retinue. HOW TERRAIN AFFECTS SHOOTING Cover increases Armour by 1 (so a unit with Armour 2 becomes Armour 3 when in cover); Obscuring terrain blocks line of sight but units can see through woods and smoke up to 3, although the target unit still counts as in cover. English Expert Archers tell the author what they think of his dice rolling. (Front Rank Miniatures) A target unit counts as in cover if the majority of models in the unit benefit from the terrain against the majority of the Shooting unit. Area terrain should be pretty simple to judge; obstacles as cover are a little tougher as a general rule for Shooting, models benefit from obstacles if within 3 of it (and on the other side to the shooting unit, obviously!). If there is any doubt, allow the unit to count as in cover real soldiers find it easier to find a hole than model soldiers do.
 A unit entirely hidden from the Shooting unit by Obscuring terrain cannot be targeted as there is no line of sight; if some models are within line of sight, the target unit counts as")
26 The Foot Yeomen count as in cover against the crossbowmen to their front but not the Bidowers behind them. (Henry Hyde) A unit entirely hidden from the Shooting unit by Obscuring terrain cannot be targeted as there is no line of sight; if some models are within line of sight, the target unit counts as being in cover but can be shot at. BAD WEATHER To represent bad weather be it snow, a sandstorm, fog, or heavy rain you may wish to limit line of sight to 12 and increase all units Armour by 1 point versus Shooting. ATTACKING A unit may only be ordered to Attack if there is an enemy unit within movement distance of it, using this order to contact an enemy unit. When models in the unit have been moved into contact, they will immediately fight; that s what Attacks are all about! Attack move distances are the same as Move distances: the only difference is that Attacks end in contact with the enemy (and many units have different activation scores for Moving and Attacking). Some units must attempt to Attack enemies within range because they are subject to Wild Charges. The sequence for an Attack is: Choose a target unit The target unit may take an action if allowed (evade or counter-charge) Move Attacking unit into contact. Fight! The Attacking unit uses its Attack Value, and the unit being attacked uses its Defence Value. Both sides remove casualties and test for lucky blows. Units test Courage if required. If both units are still in contact, one unit will retreat.
 MOVING INTO CONTACT Models in a unit may see all around: there are no charge arcs or facings in Lion Rampant.")

27 Bundle! Everyone fights even though not all models are in contact. Foundry Men-at-Arms smash up Curtey s Yeomen. (Henry Hyde) MOVING INTO CONTACT Models in a unit may see all around: there are no charge arcs or facings in Lion Rampant. Line of sight may prevent a unit from Attacking, as it may only Attack a unit that at least one of its models can see at the start of its activation. Models in your own unit do not block line of sight, but other units can. Scottish schiltron standing firm against the English charge, by Graham Turner Osprey
28 Publishing Ltd. Taken from Campaign 102: Bannockburn If more than one enemy unit is within sight and range, the Attacking player may decide which to target (remembering that a unit may not move within 3 of another unit unless charging it). Only one unit may be contacted in an Attack move. If the target unit is directly behind an obstacle, the Attacking unit contacts it by moving up to the obstacle and halting against it. Use these guidelines when moving an Attacking unit into contact with its target unit: Move each model in the Attacking unit up to its maximum Move distance. Moving the Attacking unit into contact by the most direct path. Move as many models as possible into contact with a model in the target unit. Regardless of which models are in contact with an enemy, all models in both units will fight. ENEMY COUNTER-CHARGES AND EVADES Some units may make a counter-charge or evade move when Attacked. When you declare the target of your attack, your opponent may tell you that his unit intends to try one of these special moves. The target unit tests for activation and, if successful, carries out the reaction according to the rules shown under troop types. The Attacking unit then moves as ordered. If the target unit fails its activation, it does not move and the Attack continues. Units may only attempt to counter-charge or evade if this skill is allowed to that troop type (listed under the unit s Special rules ). RESOLVING ATTACKS Once you ve moved your Attacking unit into contact with the target unit, add up the number of dice both units will fight with: 12 dice if your unit is above half its starting strength (7 or 4 models depending on the troop type). 6 dice if your unit is at half its starting strength or below (fewer models than shown above). Roll that number of dice and apply the following rules if applicable: Units in Rough terrain fight with Attack and Defence of 5+ and Armour of 2 unless they have the Ferocious special rule. Battered units only hit on 6. Any result equalling or bettering your unit s Attack Value (if Attacking) or Defence Value (if Defending) is a hit. REMOVING CASUALTIES Once both units have rolled their dice, compare the final number of hits against the Armour for both units. For every number of hits equalling the target s Armour, remove one model from the target unit: Units with Armour 1 remove one model for every hit inflicted. Units with Armour 2 remove one model for every two hits inflicted. Units with Armour 3 remove one model for every three hits inflicted. Units with Armour 4 remove one model for every four hits inflicted. Any leftover hits are ignored. Cover increases Armour by 1. For example, 3 hits inflicted on a unit with Armour 2 will cause only one casualty; the remaining hit is deflected by armour and parried by swords with no effect. Starting with models in contact with any enemy model, both players remove a number of models

29 equal to the casualties inflicted. If all models that were in contact have been removed and there are still outstanding casualties, remove them from other models within the unit. When removing casualties, remember to maintain unit cohesion. If the target unit includes a Leader, the owning player must test to see if the Leader has been killed before removing any models. A unit taking casualties must make a Courage test as noted in the section Ending Attacks, regardless of whether it is the Attacking or target unit. See the section on Courage for how to carry out this test. The Foot Men-at-Arms Attack on 3+, so score 8 hits; the Foot Yeomen Defend on 4+, so score 2 hits (rolling 6 dice as they re under half strength). With their Armour of 2, the Yeomen take 4 casualties; the Yeomen don t score enough hits to damage the Men-at-Arms. Ouch! Foundry and Curtey s Miniatures from the author s collection. (Henry Hyde) CHECKING FOR LEADER LUCKY BLOWS Every time your Leader s unit loses at least one casualty during an attack (but not during a Courage test), roll two dice to see if he falls to a lucky blow. If the score is a double 1, your Leader must be chosen as one of the casualties. Unless killed in this way, your Leader will always remain the last model in his unit; when your Leader is the last model in the unit and further casualties are taken, there s no need to test there s noone else left who can die first! A slain Leader causes Courage tests. Design note: Rough terrain is a great leveller of fighting ability in Lion Rampant as it prevents the momentum of charges, provides hiding places for light troops, stops the better troops from strutting their stuff, and helps weaker troops to battle against their better quality enemies. I refer to this as the Robin Hood effect, where lower quality fighters can outsmart and outpace their betters with the help of bushes, unfeasibly jammed doors, and tumbled carts full of fruit in busy marketplaces. ENDING ATTACKS Once you have determined and removed casualties from both units, either unit must take a Courage test if it suffered any casualties. If both units are still in contact after any Courage tests have been taken (or if no tests were required): The unit that removed most casualties during this Attack must retreat (see the later section on Retreats for distances). If at the end of this retreat some models still remain within 3 of the enemy that the unit was fighting, continue to move those models until they are 3 away. The retreat must be directly away from the unit it fought. If both units suffered equal (or no) casualties, the Attacking unit retreats as described above. No units will remain in contact or within 3 of any other by the end of an Attack.

30 If a unit cannot fall back the required distance due to terrain or other units blocking its path, it tests for casualties as shown in the later section on Retreats. When Courage tests and any additional movement have been concluded, your Attacking unit s activation ends and you may move on to activate another unit from your retinue. HOW TERRAIN AFFECTS ATTACKING Rough terrain changes most units Attack and Defence Values to 5+ and their Armour becomes 2 regardless of their usual profile. And if one unit counts as in Rough terrain, both units involved in the combat do: it s never a case that only one of the units fighting is affected by the terrain. Units with the Ferocious special rule are not affected by rough terrain. If you re up against Mounted Men-at-Arms, try to take them on in rough terrain. And if you have Serfs, plonk them into rough terrain and see how they terrify your enemies (especially if you can lure in units that make Wild Charges)! Cover increases the Defending unit s Armour by 1 (so a unit with Armour 3 becomes Armour 4 when in cover); cover in rough terrain makes most units Armour 3. Hills count as cover if defending an Attack and uphill of the Attacking unit, but have no effect on Shooting (other than blocking line of sight). Obscuring terrain blocks line of sight for Attacks but units can see through woods and smoke up to 3. A unit counts as in cover or rough terrain if the majority of models in the unit benefit from the terrain against the majority of the Attacking unit. Area terrain should be pretty simple to judge; obstacles count as cover to a unit being attacked only if the unit counts as in cover (majority rule as above). If there is any doubt, allow a unit to count as in cover real soldiers find it easier to find a hole than model soldiers do. Foot Serjeants charge hapless Serfs. For the Serfs sake, let s hope the players agreed that ploughed soil is rough terrain in this game! (Michael Leck) TESTING COURAGE WHEN TO TEST COURAGE Courage tests must be taken by any unit immediately during play if your: Unit has taken casualties from Attacking or Shooting. Unit is attempting to rally to remove a Battered marker.

31 Unit becomes your only unit remaining on the table. Leader is killed or flees the table. Leader refuses a challenge. Retinue has had half or more of its total points value of units removed from play. The author s Courage Test during playtest feedback. Foundry model from the author s collection. (Henry Hyde) The first three situations affect only the individual unit but the final three affect all units remaining in your retinue. Make a test immediately and only when it is triggered; for example, don t continue to test each and every turn after your Leader has been killed, only at the point he is killed. As indicated above, some tests affect only one unit but others affect your entire retinue. If two or more factors from the list occur at once (such as the Leader being killed and the unit taking casualties), only take one Courage test per unit rather than a test for each applicable factor. And the loss of models from a Courage test does not trigger a further Courage test for that unit! HOW TO TEST COURAGE When a Courage test is needed for any unit, take the following actions: Roll two dice and add the total. From this total subtract 1 for each casualty the unit has suffered in the game so far (so if you ve lost 4 models, subtract four from your total). Subtract 1 from this total if your retinue has had half or more points of units removed from play. Add 1 to your total if your Leader s model is within 12 of the unit taking the test. Compare your final score to the unit s Courage score. If you have equalled or bettered the Courage score, there s no effect unless you re attempting to remove a Battered marker as a Rally activation, in which case you must now remove it. If your score is lower than your Courage score, you have failed the test. FAILING A COURAGE TEST If your unit fails a Courage test, the outcome depends on how badly they failed. The unit might just retreat from immediate danger and spend some time licking its collective wounds, or it might decide
.")
32 that enough is enough and rout from the battlefield. Resolve the outcome shown below immediately: If you ve failed a Courage test but your final score is greater than 0, your unit must retreat (see the next section). Your unit also becomes Battered after retreating. If you ve failed a Courage test and your final score is 0 or a negative number, your unit loses heart completely and flees the table in rout. Remove it immediately. A Battered unit which receives another Battered result loses a model of the owner s choice in addition to retreating. Anglo-Norman knight ambushed by Gaelic warriors, by Angus McBride Osprey Publishing Ltd. Taken from Elite 9: The Normans. RETREATING When a unit retreats, it must move directly away from the unit that caused the retreat and must not go within 3 of any other unit at any time during the retreat: A retreating unit moves half of the unit s normal movement distance, affected as usual by terrain. If at the end of this move some of your models remain within 3 of the enemy unit that caused this retreat, continue to move those models until they are 3 away. You are not penalized for individual models having too short a movement distance to complete the retreat: in this instance they re happy to run a bit faster. Being unable to move the full distance required due to impassable terrain or other units blocking the path is more dangerous, as shown below. Remember that you may not move within 3 of any unit, and

33 that even friends can block the path of your retreat in this way. A retreat must always try to move the full distance required, although a couple of unusual situations may arise: Units unable to retreat the full distance required: If a unit cannot retreat its full move (for example, if unable to pass by units without moving within 3 of them or being trapped against impassable terrain) it moves as far as possible and then rolls one die, comparing the result to its Courage. If the dice roll is lower than the unit s Courage, it must remove a number of models equal to the dice result. These models have surrendered, been killed, or managed to flee the table. This is the only situation where a unit may remain within 3 of another unit. Units retreating off the table: If any model from a unit moves off the table as the result of a retreat, remove the entire unit and count it as routed. It may not re-enter the battlefield during the game. A Battered Crossbowmen unit, indicated by the red gaming gem. Curtey s Miniatures from the author s collection. (Henry Hyde) Terrain affects the distance moved during a retreat in the same way as for any other movement. BATTERED UNITS When a unit becomes Battered, place a marker or casualty model with it to remind all players that the unit is Battered. A Battered unit: Must test to remove its Battered marker (Rally) at the beginning of the owning player s next activation phase. May not be activated other than to Rally. Only hits enemies on a 6 if it is Attacked whilst Battered. May only move as the result of a failed Courage test. The only way a Battered unit may remove its marker is by Rallying; success in any other Courage test does not remove the marker. Receiving another Battered result from a Courage test when already Battered means that the unit must lose a model and retreat. A Battered unit may not Wild Charge, counter-charge or evade an attacking enemy and nor may it Shoot. If your Leader s unit is Battered, your Leader may not issue challenges or use any Leader special rules. Battered markers are a great use for some of the excellent casualty models available from many manufacturers.
34 ENDING THE GAME In Lion Rampant, battles are rarely fought for a set number of turns, as gameplay is so fluid. Because of this, scenarios should have defined end points to prevent games grinding on with the last two units dragging themselves across the tabletop when the players would prefer to go home. Victory in a game of Lion Rampant is decided by the amount of Glory (victory points) a retinue amasses at the end of the game. See the section on Scenarios for more on Glory. If you are playing without a scenario, keep playing until a turn begins with 5 or fewer units remaining in the game. When this happens, roll a die at start of turn if the score is higher than number of units left on table, this is the final turn so it s time to grab that Glory!
35 3. MUSTERING YOUR RETINUE You need to bring a usable retinue to battle! This section shows you how to assemble your own model army for Lion Rampant, and also details how each troop type performs. Design note: I ve chosen to limit the number of each troop type available to any retinue. This is in the interests of gameplay rather than any historical precedent: firstly I hope it will encourage you to build lively and varied forces, and secondly I want to dissuade players from fielding unbalanced armies that are no fun to play against. As always, if your opponent is happy to ignore this rule field whatever units you wish. All retinues are built from the following units: Mounted Foot Missile Mounted 6 points per unit Mounted 4 points per unit Mounted 4 points per unit Foot 6 points per unit Foot 4 points per unit Fierce 4 points per unit Foot 3 points per unit 1 point per unit 4 points per unit 4 points per unit 2 points per unit Your retinue consists of 24 points of units, constructed as follows: No more than four units or 12 points of any unit type (whichever is lower), inclusive of upgrades. 1 Leader model that is an integral part of one unit and may not join other units. So, for example, a retinue may only include two Foot Men-at-Arms, three Foot Serjeants (or two if Expert), or four Bidowers. Mounted and Foot units count separately, so you could include three Foot Serjeants plus three Mounted Serjeants for example.

36 Plastic Foot Serjeants. (Fireforge Games) Units begin a game with either 6 or 12 models, as shown on their unit profile. Many troop types have optional upgrades and in some cases downgrades to tailor units to suit your historical army. The Expert upgrade affects different troop types in different ways. Mounted models cannot dismount mid-game, they re too busy fighting in this fast-moving battle: you must choose whether units are Foot or Mounted before the game begins. SPENDING YOUR LAST COUPLE OF POINTS If you ve built your perfect retinue and find yourself with 1 or 2 points left over, rather than spending them on an additional unit of Bidowers or Serfs you may instead go into battle with a reduced retinue and claim an extra 0.5 Glory at the end of the game (regardless of the outcome). You can t gain more Glory by reducing your retinue further: turning up for a fight shorthanded isn t worth bragging about that much. THE MASH UP If you are playing a one-off battle and both players are fielding similar retinues both are Western European hosts, for example you could choose to mix things up a bit: place all of the units on show and make sure your opponent knows what each of your units is. Players then take it turns to choose one unit for their own retinue (dice to see who chooses first); if there are an odd number of units, the player who chooses last takes the final two units. This mixes things up nicely, prevents super-retinues, and gives you a chance to try out some different units. FIELDING A HISTORICALLY PLAUSIBLE RETINUE
37 When collecting a retinue, there are no strict rules as to which units or upgrades you must include. In the level of warfare represented in Lion Rampant, the units usually present in national armies may not be present locally and there s always some scope for more exotic units. Do keep your retinue historically plausible though, so if you re unsure of suitable troop types, consult the sample retinues in this book and also look to the following resources for further inspiration: Wargames Research Group books: Armies of Feudal Europe, Armies of the Middle Ages (volumes 1 and 2), Armies and Enemies of the Crusades. Field of Glory army lists: Swords & Scimitars, Oath of Fealty, Storm of Arrows, Eternal Empire. Osprey Publishing series: Men-At-Arms, Campaign, and Warrior. Design note: The titles of each unit are just a nice way to add flavour. They may not be appropriate to your chosen retinue or period; feel free to rename unit types as suits your retinue, but be sure to explain them in game terms to your opponent. The units are intended as caricatures of the type of warrior fielded by medieval armies; of course not all mounted knights were impetuous and not all footmen were staid spearmen, so tweak the rules for each unit as suits your own retinue. If you ve done your research and avoid fielding any true super-units, no reasonable opponent should object to this. Don t feel restricted by the options shown here: make the units work in the way you think they historically should do. The same applies to upgrades and special rules: if you can make a good case for tweaking the rules (and your opponent agrees), go ahead and do so. MOUNTED UNITS MOUNTED MEN-AT-ARMS Mounted Men-at-Arms are big men on big horses they are usually European knights clad in state-ofthe-art armour riding protected horses, and prefer to charge first and ask questions later. This troop type also includes other well-armoured mounted nobles on armoured horses who prefer to fight hand-to-hand rather than using skirmish tactics, although apply this sparingly. Design note: Mounted Men-at-Arms armed with bows should be rare: I reserve this for Eastern heavily armoured men on heavily armoured horses who are equally willing to charge with a lance or shoot with a bow. Mounted Men-at-Arms are not the most tactically flexible unit in Lion Rampant; they have less interest in enemies outside of their charge range (hence their poor Move score), but will chase after any enemy coming too close like a greyhound after a hare. However, their good armour and ability to ride down enemies makes them the king of hand-to-hand combat alongside their dismounted brethren. Mounted Men-at-Arms are weaker if unable to charge into contact, but their good armour still makes them a formidable opponent. UNIT NAME Mounted Men-at-Arms POINTS 6 Attack 5+ Attack Value 3+ Move 7+ Defence Value 5+ Shoot Shoot Value Courage 3+ Maximum movement 10 Armour 4 Special rules Wild Charge; Counter-charge Models per unit: 6 SPECIAL RULES: Wild Charge: If the unit is within Attack range of an enemy unit, you must test to activate an Attack;

38 this is the only order the unit can be given. Wild Charge may not be used if the unit is Battered. Counter-charge: When an enemy has successfully diced to Attack this unit, but before it moves, this unit may test for a counter-charge. Test for an Attack at 7+. If it succeeds, the two units meet a proportionate movement distance between their start positions, and both count as Attacking. If it fails, it stands in place for the enemy s charge. Counter-charge may not be used if the unit is Battered. Early Crusaders by Perry Miniatures: these could be fielded as Men-at-Arms or Serjeants. (Alan and Michael Perry) UNIT UPGRADES: Mounted 2 points per unit: Wild Charge and Counter-charge are removed and replaced with Shoot 6+/Range 12 hitting on point per unit: This unit is better controlled than most hot-headed Men-at-Arms and removes Wild Charge.

39
 MOUNTED SERJEANTS Mounted Serjeants represent well-armoured, non-noble horsemen in Western European retinues, and also represent most non-knight mounted unit that charge into combat.")
40 The battle of Lewes, 1264, by Graham Turner Osprey Publishing Ltd. Taken from Warrior 48: English Medieval Knight Seljuk Turkish Mounted Serjeants. Painted by Alan Dearn. (Peter Arnott) MOUNTED SERJEANTS Mounted Serjeants represent well-armoured, non-noble horsemen in Western European retinues, and also represent most non-knight mounted unit that charge into combat. They are usually armoured and shielded but ride unprotected horses, and although they charge home with less impact than Mounted Men-at-Arms, Mounted Serjeants still expect to engage their enemies in hand-to-hand combat. As with other mounted units in Lion Rampant, being only 6 models strong, Mounted Serjeants are fragile and less effective when fighting on the defensive. Mounted Serjeants may upgrade to be missile-armed, either with bows or crossbows. Mounted Serjeants with crossbows lose some of their impact in close combat, and cannot evade in the same way as Mounted Yeomen, but represent a middle-ground of manoeuvrability and firepower (in reality, mounted crossbowmen probably dismounted to shoot, but this need not be represented in gameplay). Mounted Serjeants with bows retain their strong attacking ability but back this up with the option to shoot down enemies at a distance: don t be afraid to commit these troops into close combat, but remember their ability to shoot from distance too. UNIT NAME Mounted Serjeants POINTS 4 Attack 5+ Attack Value 4+ Move 5+ Defence Value 5+ Shoot Shoot Value Courage 4+ Maximum movement 10 Armour 3 Special rules Counter-charge Models per unit: 6 SPECIAL RULES:
41 Counter-charge: When an enemy has successfully diced to Attack this unit, but before it moves, this unit may test for a counter-charge. Test for an Attack at 7+. If it succeeds, the two units meet a proportionate movement distance between their start positions, and both count as Attacking. If it fails, it stands in place for the enemy s charge. Counter-charge may not be used if the unit is Battered. UNIT UPGRADES: Mounted 1 point per unit: Add Shoot 6+/Range 12 hitting on 5+. This upgrade represents the majority of eastern armoured horsemen who may shoot with bow but are not afraid to charge down their enemies. Mounted 0 points per unit: Counter-charge is removed and replaced with Shoot 7+/Range 12 hitting on 5+; Attack Value is reduced to 5+. This upgrade represents mounted crossbowmen who primarily shoot rather than charging into combat. MOUNTED YEOMEN Mounted Yeomen are lightly armed and armoured horsemen who rely on missile weapons and speed of movement on the battlefield. They usually use bows and shun close combat, instead whittling down their enemies with bowfire at a distance. They are often able to evade charges by their enemies shooting as they retire but need to keep plenty of space around themselves on the battlefield to evade into. They are under threat from foot missiles, who usually out-range them, and from most units that manage to contact them to fight. Some Mounted Yeomen use shorter-ranged javelins rather than bows, and are cheaper to recruit. UNIT NAME Mounted Yeomen POINTS 4 Attack 7+ Attack Value 5+ Move 5+ Defence Value 6 Shoot 6+ Shoot Value / Range 5+ / 12 Courage 5+ Maximum movement 12 Armour 3 Special rules Skirmish; Evade Models per unit: 6 SPECIAL RULES: Skirmish: As an ordered activation, successful on a 7+, the unit may choose to make a half move and Shoot either before or after this movement takes place. All models in the unit Shoot with -1 to their dice scores. Evade: When an enemy has successfully diced to Attack this unit, but before it moves, this unit may test to Evade at 7+. If it succeeds, it immediately carries out a Skirmish action targeting the Attacking unit only, may not move closer to the Attacking unit, and must avoid other units by 3 as usual; casualties inflicted in the Skirmish action cause a Courage test or Lucky Blow only at the end of the Attack. The charging unit then moves its full charge distance following the Evading unit; if it makes contact it Attacks with the Evading unit reducing its Armour to 1, and if it cannot contact it must move as close as possible. If the Evade test fails, the unit stands in place and awaits attack without shooting or moving, and its Armour drops to 1 during the Attack. Evade cannot be used if the unit is Battered.
42 UNIT UPGRADES: Javelins -1 point per unit: Most units are armed with bows but may instead be armed with javelins only, with range reduced to 6. 2 points per unit: Will Skirmish without the -1 Shooting penalty. FOOT UNITS FOOT MEN-AT-ARMS Foot Men-at-Arms are the cream of your retinue s dismounted units. They are very well armoured and armed with one- or two-handed weapons, and can confidently engage any other unit in Lion Rampant. They usually wear the latest armour, often carry shields, and may be armed with a variety of melee weapons with which they re well trained to create carnage with in both good and rough terrain. There s no Expert upgrade for Foot Men-at-Arms as they are already carrying the best equipment and their only disadvantage is their starting strength of six models. Foot Men-at-Arms may also be used to represent the personal bodyguard of non-feudal leaders, and those bands of all-round tough guys found in Hollywood history. UNIT NAME Foot Men-at-Arms POINTS 6 Attack 5+ Attack Value 3+ Move 5+ Defence Value 4+ Shoot Shoot Value Courage 3+ Maximum movement 6 Armour 4 Special rules Ferocious Models per unit: 6 SPECIAL RULES: Ferocious: This unit uses its normal Attack/Defence profile when fighting in rough terrain. UNIT UPGRADES: None: they re pretty upgraded as they are. FOOT SERJEANTS Foot Serjeants are armoured footmen usually armed with long spears, relying on their numbers and good armour to keep them alive. They fight better on the defensive as this allows them to draw together in formations to repel attacks, and their long spears give them the opportunity to form a Schiltron that s tricky to break in close combat. Foot Serjeants form a solid backbone for many retinues, being difficult to grind down and able to carry out most orders efficiently. Foot Serjeants may be upgraded to Expert, which represents two-handed chopping weapons such as bills, halberds, and axes: this improves their offensive capability. This troop type may also be used to represent less well-armoured footmen who carry large protective shields. Design note: If you re looking for pikemen in Lion Rampant, you won t find them. Units on the Lion Rampant battlefield are too small and fluid for their pikes to count differently to any other long spear, so in Lion Rampant they re just Foot Serjeants or Yeomen with spears.

43 UNIT NAME Foot Serjeants POINTS 4 Attack 6+ Attack Value 5+ Move 5+ Defence Value 4+ Shoot Shoot Value Courage 4+ Maximum movement 6 Armour 3 Special rules Schiltron Models per unit: 12 SPECIAL RULES: Schiltron: There needs to be 6 or more models in unit to form a Schiltron. On a Move order, form the unit into a two rank formation based around a central model; a Schiltron cannot form in Rough terrain or in cover, and it cannot move in this formation. Schiltrons increase their Armour by 1 point against Attacks but not Shooting (to 4 for Foot Serjeants). If an Attack ends with both units still in contact, the enemy must retreat. If the unit becomes Battered while in a Schiltron, the formation is broken. UNIT UPGRADES: The battle of Wakefield, 1460, by Graham Turner Osprey Publishing Ltd. Taken from Warrior 35: English Medieval Knight

44 2 points per unit: Attack Value becomes 4+. The unit may no longer form a Schiltron. A Schiltron of Foot Serjeants, which is indicated by base-to-base contact. Crusader Miniatures from the author s collection. (Henry Hyde) Design note: The small scale of battles represented in Lion Rampant lends itself well to units performing one specific role (for example, one unit with spears, another with bows), but you may wish to represent some units of mixed type. These are commonly Foot Yeoman in a levy or militia role, combining the spears and hand weapons with bows; use a mixture of models armed with both weapons in your units: the precise mix makes no difference to the unit s abilities. FOOT YEOMEN Foot Yeomen are generally poorly armoured spearmen fulfilling a very similar role to Foot Serjeants. They usually carry shields but lack body armour, and like Foot Serjeants they can use their long spears to form a Schiltron for protection in close combat. Although they lack the staying power of Foot Serjeants, they are manoeuvrable and therefore well suited to taking objectives and holding them against light opposition. They are under threat from missile fire, which are able to shoot them down from a distance. They may be upgraded to Expert in the same manner as Foot Serjeants, and they also have an option to upgrade to carry javelins, giving them a short range missile threat of their own. The Mixed Weapons upgrade allows you to field units of combined spear and bowmen, although they are still outshot by real Archers and Crossbowmen. UNIT NAME Foot Yeomen POINTS 3 Attack 6+ Attack Value 5+ Move 5+ Defence Value 4+ Shoot Shoot Value Courage 4+ Maximum movement 8 Armour 2 Special rules Schiltron Models per unit: 12 SPECIAL RULES: Schiltron: There needs to be 6 or more models in unit to form a Schiltron. On a Move order, form the unit into a two rank formation based around a central model; a Schiltron cannot form in Rough terrain or in cover, and it cannot move in this formation. Schiltrons increase their Armour by 1 point against

45 Attacks but not Shooting (to 3 for Foot Yeomen). If an Attack ends with both units still in contact, the enemy must retreat. If the unit becomes Battered while in a Schiltron, the formation is broken. UNIT UPGRADES: 2 points per unit: Attack Value becomes 4+. The unit may no longer form a Schiltron. 1 point per unit: Shoot 6+/Range 6 hitting on 5+. Mixed 2 points per unit: The unit carries a mixture of spears and bows, adding Shoot 6+, Range 12 hitting on 5+. Remove Schiltron and cannot be combined with Expert or javelins. A Mixed Weapons unit of Foot Yeomen, tooled up with spears and bows. Curtey s Miniatures from the author s collection. (Henry Hyde) FIERCE FOOT Fierce Foot are most commonly big hairy chaps with axes, fur coats, and a nasty outlook on life. These troops are more frequent in retinues from the fringes of medieval Europe (such as Ireland, the Scottish Isles, and the pagan Baltic states) or as mercenaries in western European retinues. Their fierce charge wreaks havoc upon most enemies; like Mounted Men-at-Arms, they are likely to chase off after enemies in close proximity whether you want them to or not unlike Mounted Men-at-Arms, they are not well armoured so should be cautious of enemies capable of shooting them up from outside of their movement distance.
 Their impressive Attack Value represents the impact of their initial charge and the short-range missile weapons hurled during their charge; but if caught on the defensive they cannot")
46 Islamic Fierce Foot by Black Tree Design. Painted by Alan Dearn. (Peter Arnott) Their impressive Attack Value represents the impact of their initial charge and the short-range missile weapons hurled during their charge; but if caught on the defensive they cannot exploit these strengths. This unit type may also be used for some units of swordsmen or axemen if this suits your retinue s character; sword-and-bucklermen and fast-moving Swiss halberdiers work well as this unit troop. UNIT NAME Fierce Foot POINTS 4 Attack 5+ Attack Value 3+ Move 6+ Defence Value 6 Shoot Shoot Value Courage 4+ Maximum movement 8 Armour 2 Special rules Models per unit: 12 Ferocious; Wild Charge; Counter-charge versus infantry; Fleet Footed SPECIAL RULES: Ferocious: This unit uses its normal Attack/Defence profile when fighting in rough terrain. Their Defence Value remains 6. Wild Charge: If the unit is within Attack range of an enemy unit, you must test to activate an Attack; this is the only order the unit can be given. Wild Charge may not be used if the unit is Battered. Counter-charge versus infantry: When an enemy has successfully diced to Attack this unit, but before it moves, this unit may test for a counter-charge. This is an Attack at 7+. If it succeeds, the two units meet a proportionate movement distance between their start positions, and both count as Attacking. If it fails, it stands in place for the enemy s charge. This rule does not apply versus mounted units. Counter-charge may not be used if the unit is Battered. Fleet Footed: This unit does not halve its movement in Rough terrain.
47 UNIT UPGRADES: None: all they need is a bare chest and a big axe. Design note: One Lion Rampant player suggested turning the Serfs Smelly rule into something a little more significant: Mounted Men-at-Arms units may ignore Serfs when determining their Wild Charge targets. If you re fielding a retinue including Serfs, discuss with your opponent whether to use this rule or not. SERFS Serfs in the nicest possible sense are cheap sword fodder and I recommend buying them only if your retinue has an odd point or two left over, if you re looking to engulf your enemy in the fug of an unwashed mass, or if you are a masochist. For retinues where serfs were historically of some tactical value, consider representing them as Foot Yeomen instead. You have been warned! Serfs are not well-suited to battle; they arrive on the battlefield armed with agricultural implements, sharpened vegetables, and harsh language but little in the way of protection. They are generally unenthusiastic but may be capable of holding ground if under little pressure from your enemies. They may also be used as speed bumps to slow down your opponent s knights! UNIT NAME Serfs POINTS 1 Attack 7+ Attack Value 6 Move 6+ Defence Value 6 Shoot Shoot Value Courage 5+ Maximum movement 6 Armour 1 Special rules Smelly Models per unit: 12 SPECIAL RULES: Smelly: No special rules for this they just are. UNIT UPGRADES: None: you can t polish a turd. MISSILE UNITS ARCHERS (AND SLINGERS) Archers represent all manner of bow-armed units that are drawn up into bodies of troops as opposed to free-roaming skirmishers (a role played in Lion Rampant by Bidowers). They are not well armoured nor particularly useful in hand-to-hand combat, but may be able to shoot their enemies down from a distance. Formed units of slingers are treated as archers: there is no difference other than the models you choose to use. Archers may be upgraded to Expert, representing both better bow technology (such as longbows and composite bows) or better training and marksmanship. Archers have a higher rate of fire than crossbowarmed units, as represented by their better Shoot score. UNIT NAME Archers POINTS 4
48 Attack 7+ Attack Value 6 Move 6+ Defence Value 5+ Shoot 6+ Shoot Value / Range 5+ / 18 Courage 4+ Maximum movement 6 Armour 2 Special rules Models per unit: 12 Design note: Defence Values for Missile units include close range shooting as their enemies close in to attack. Closing shots are represented in this way to streamline the rules whilst achieving a similar outcome. SPECIAL RULES: None UNIT UPGRADES: 2 points per unit: Shoot Value becomes 4+.

49
50 Genoese crossbowmen, by Graham Turner Osprey Publishing Ltd. Taken from Campaign 71: Crécy Design note: If your crossbowmen upgrade to pavises, you may choose to represent these with pavises mounted on their own stands, or by including a number of spear-armed pavise-holders in your unit. Regardless of the way they are represented, all models in the unit count as being crossbow-equipped. CROSSBOWMEN Crossbowmen are armed with arbalests or crossbows, shooting at their enemies from close-ranked formations. Like Archers, they are not especially suited to hand-to-hand combat but are dangerous at a distance. They differ from Archers by having a slower rate of shooting (represented by their inferior Shoot score), but are more deadly as befits a weapon famously banned by a pope. Crossbowmen may upgrade to using pavises. These are large shields that protect from missile fire; the unit is also better equipped with weapons for close combat. UNIT NAME Crossbowmen POINTS 4 Attack 7+ Attack Value 6 Move 6+ Defence Value 5+ Shoot 7+ Shoot Value / Range 4+ / 18 Courage 4+ Maximum movement 6 Armour 2 Special rules Models per unit: 12 SPECIAL RULES: None UNIT UPGRADES: 2 points per unit. If armed with Pavise, Armour becomes 4 versus Shooting from any direction, and 3 versus Attacks. BIDOWERS In Lion Rampant, Bidowers represent woodsmen, scouts, brigands, and professional skirmishers who flit around the battlefield in small units. They are missile-armed skirmishers and of limited value in a stand-up fight, but are capable of grabbing objectives and harrying the enemy with accurate shooting. Bidowers try to evade enemy charges, and are hard to target with missile weapons as they make full use of the terrain around them. Bidowers may be represented by models armed with bows, crossbows, slings, or javelins, but they fight in the same way no matter what weapons are depicted. Their missile range is shorter than bows as they are armed with hunting weapons rather than more powerful war bows; however, their range is greater than javelins thrown from horseback or from within tighter formations of Foot Yeomen.

51 Plastic Crossbowmen. (Fireforge Games) Design note: Bidowers could equally be described as bidets in Lion Rampant, but this term has another meaning these days! UNIT NAME Bidowers POINTS 2 Attack 7+ Attack Value 6 Move 5+ Defence Value 6 Shoot 7+ Shoot Value / Range 5+ / 12 Courage 5+ Maximum movement 8 Armour 1 Special rules Models per unit: 6 Hard to target; Skirmish; Evade; Fleet Footed SPECIAL RULES: Hard to target: Bidowers count as Armour 2 versus Shooting and may only be targeted within 12. Skirmish: As an ordered activation, successful on a 7+, the unit may choose to make a half move and Shoot either before or after this movement takes place. All models in the unit Shoot with -1 to their dice scores. Evade: When an enemy has successfully diced to Attack this unit, but before it moves, this unit may test to Evade at 7+. If it succeeds, it immediately carries out a Skirmish action targeting the Attacking unit only, may not move closer to the Attacking unit, and must avoid other units by 3 as usual; casualties inflicted in the Skirmish action cause a Courage test or Lucky Blow only at the end of the Attack. The charging unit then moves its full charge distance following the Evading unit; if it makes contact it Attacks, and if it cannot contact it must move as close as possible. If the Evade test fails, the unit stands in place and awaits attack without shooting or moving. Evade cannot be used if the unit is Battered.
52 Fleet Footed: This unit does not halve its movement in Rough terrain. UNIT UPGRADES: None

53 4. SCENARIOS The battles you ll fight in Lion Rampant are not kingdom-forging hackfests between massed armies of thousands of warriors. Such battles were sometimes fought only once in a lifetime, and even in the most chaotic periods perhaps only a handful of times a year. Instead, Lion Rampant reflects the week-to-week service carried out by troops sworn to a local lord. Tax collection, convoy escort, garrison work, and raiding animals are more commonplace than pitched battles: yes, it really is that exciting in the world of Lion Rampant! In keeping with the flavour of this setting, scenarios are the key to a good game. If you endlessly refought major battles you d forever choose an army of Men-at-Arms to steamroller your enemies into the dirt and they d choose the same. However, if you play through the scenarios presented in this section you ll find a role for all units somewhere. At times, the one-trick pony that is a Men-at-Arms unit might lose you the game, and at other times the speed of an unarmoured Foot unit might just earn you a victory. Escort duties keep these Perry Miniatures Foot Yeomen busy. (Alan and Michael Perry) SCENARIO BASICS CHOOSING A SCENARIO You may either choose a scenario with the agreement of your opponent, or decide randomly by rolling a die twice and consulting the following scenario generator: First Roll Second Roll Play Scenario 1 A: Bloodbath 2 B: Defending the Indefensible Even (2, 4, 6) 3 C: The Fugitive
54 Odd (1, 3, 5) 4 D: A Gentle Stroll 5 E: Hold on Tight 6 F: Sausages with Mustard 1 G: The Convoy 2 H: The Messenger 3 I: A Taxing Afternoon 4 J: Meeting the Neighbours 5 K: Hammer and Anvil 6 L: Bloodfeud For your first game, try the Bloodbath scenario: this is a pretty straightforward scenario that allows you to focus on learning the rules rather than remembering what you need to do to win: just kill all of your enemies. Once you ve decided on the scenario you re playing, organise the game as follows: Select your forces to an equal points value. Decide who is attacking and who is defending. Set up terrain and deploy retinues. Choose & announce Boasts. Begin the first turn. CHOOSING ATTACKERS AND DEFENDERS Unless you re playing a campaign or linked scenarios, you ll need to choose who attacks and who defends: in some scenarios, the attacker and defender will have very different victory conditions.

55 The French raid the English camp at Oulchy-le-Château, 1373, by Peter Dennis Osprey Publishing Ltd. Taken from Raid 20: The Great Chevauchée. Both players roll a die: the highest scorer becomes the Attacker. The retinue with the highest combined number of Mounted Yeomen and Bidower units wins ties. Unless noted differently in the scenario you re playing, the Attacker goes first in Lion Rampant. DEPLOYING YOUR RETINUE Unless noted differently in your scenario set-up, deploy as follows: Defender deploys any 1- or 2-point units in his retinue; Attacker does the same. Defender deploys any 3- or 4-point units in his retinue; Attacker does the same. Defender deploys any 5-point or higher units in his retinue; Attacker does the same. If you run out of space to legally deploy units in your deployment zone, the remaining units start off the table and must successfully make a Move activation during your activation phase, measured from the edge of the table. A unit may only enter the game in this way if there is space for the unit to deploy, and it may not make a Wild Charge, Counter-charge or Attack to enter play. Where a scenario s set-up states that a certain number of points must be deployed in specific ways, this is for standard 24-point retinues. Adjust this according to the size of retinue you are playing with. Deployment is usually explained in a scenario by points of a compass: if you must deploy in the NW and your opponent in the SE, you know that you must deploy on opposite corners of the table.

56 WINNING A GAME Each scenario has Glory (victory points) awarded for fulfilling your goals. The player with the most Glory at the end of game is the winner. Many scenarios have just the one goal, which awards 5 Glory, but some scenarios offer variable Glory and this is explained in each scenario. Unless explicitly stated in the scenario, you cannot score Glory with Battered or retreating units (so if your objective is to occupy an area or move off the board, units that do so by retreating do not count). The one exception is that Battered units can still gain Glory if being Attacked. However, Lion Rampant also encourages players to be braggards in their games Boasts are subplots that you may attempt to complete, and a cunning player might be able to win the game by fulfilling Boasts even without completing the scenario s main goals. Glory is awarded for successful Boasts even if you did not achieve the scenario s goal. It s fun to agree with your opponent before the game begins that an extra Glory will be awarded if either player manages to live up to their Leader s special ability either by roleplay or dice play. Only agree to this if you re prepared to be generous to your opponent! MAKING BOASTS Every Lion Rampant scenario awards Glory for achieving your goals. In addition each player may gain Glory from making Boasts before the game begins, declaring amazing feats and achievements that their
57 retinue must then achieve during the game. You may choose up to three Boasts per scenario, allowing you to pursue your own agenda on the tabletop and the potential to win even if you don t achieve the scenario s goal. You should agree either to announce your Boasts to your opponent before the game begins, or write them down and keep them secret until the end of game. Choose Boasts once the table is laid out and the retinues have deployed, as this makes it easier to indicate target units and so forth. More than one player may choose each Boast, so you may find you re striving to achieve the same as your opponent. The more of these Boasts completed, the more Glory you ll score at the end of the game but beware: every Boast you fail to achieve loses you 1 Glory from your final total for the game. Glory is scored for Boasts even if you lose the scenario s main objective. If you choose to announce your Boasts before the game begins, remember to do so in the style of Laurence Olivier, Brian Blessed, Errol Flynn, Nikolai Cherkasov, or erm, Kevin Costner or Lucy Lawless. CHOOSING YOUR BOASTS The list below shows a good selection of boasts to help you through your first few games, but feel free to come up with new ones that can be used by both yourself and your opponents. Boasts should always be worth between 1 and 3 Glory, scoring more points the harder they are to achieve. Remember that every boast you do not complete costs you -1 Glory at the end of the game, regardless of it being a 1, 2, or 3 Glory boast. 3-GLORY BOASTS: I shall slay your Leader : Your Leader must kill the enemy Leader in a duel or Attack. Routing the enemy leader does not count as a success. If the enemy Leader refuses your challenge and also survives the game, you succeed but score only one Glory. My retinue will stand firm : None of your units may rout or retreat off the tabletop (they may be wiped out or leave to fulfill scenario goals). My own sword shall not be drawn : Your Leader s unit may not Attack or Shoot at another unit, or itself be Attacked. My lambs will beat their lions : Your lowest points value unit must force your opponent s highest points value unit to retreat or be wiped out (you may only choose this if your lowest value unit costs 3 points or less; if two or more enemy units are tied on points value, you must indicate/write down which you are targeting at the start of the game). Cleave them in half : Rout/kill units worth 12 points in one turn. 2-GLORY BOASTS: I will destroy more units than I lose : Your retinue must rout/kill more enemy units than you lose (the actual number of models destroyed is not relevant). Half of the enemy shall falls to my sword : Your retinue must rout/kill at least half of your enemy s total number of units (the actual number of models destroyed is not relevant). My arrows are deadlier than my spears : Your retinue must rout/kill more individual models with Shooting than Attacks (put the casualties in two separate piles!). I shall smite the enemy s best warriors : Your retinue must rout/kill your opponent s highest points value unit; if two or more are tied on points value, you must indicate/write down which you are targeting at the start of the game. Strike a mighty blow : Destroy two enemy units in one turn.
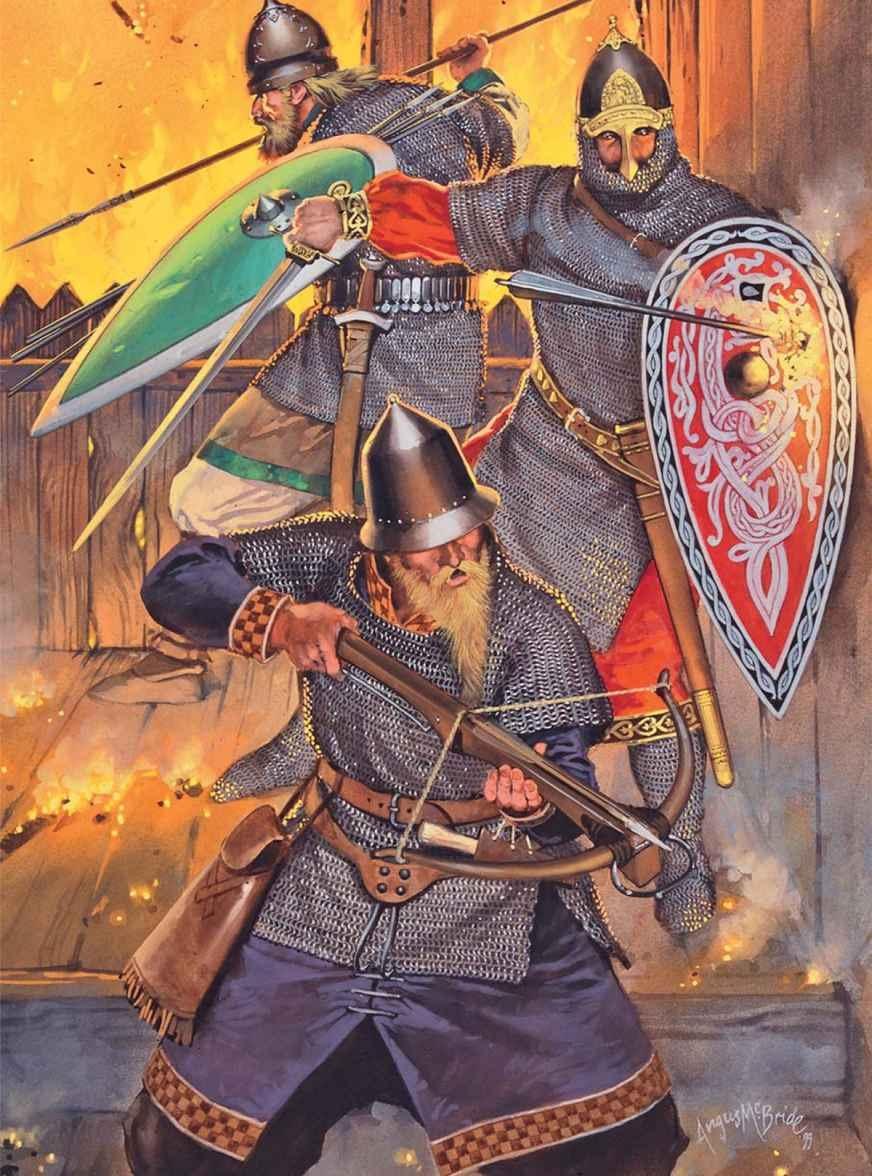
58
59 Russian troops defend their town from a Mongol attack, by Angus McBride Osprey Publishing Ltd. Taken from Men-at-Arms 333: Armies of Medieval Russia GLORY BOASTS: I shall strike the first blow : One of your units must declare the game s first Attack. I will make them run : One of your opponent s units must make the first failed Courage test of the game. I shall challenge their Leader to a duel : Your Leader must issue a challenge; if your opponent refuses the challenge it is still a successful boast. Every blade shall be drawn : Each of your units must succeed in making at least one Attack during the game (regardless of casualties inflicted). Run rings around them : At the end of one turn of the game, have one of you own units closer to the enemy s base line than any of their units. SCENARIO A: BLOODBATH Bloodbath is a straightforward fight between opposing retinues. It s also a good scenario for multiplayer games or for your first game of Lion Rampant. This scenario represents the multitude of small battles or large skirmishes fought time and again across the medieval period, many of which we have no record of. Both the Attacker and Defender must attempt to rout their enemies to achieve victory. SET-UP The Attacker deploys along the N edge and the Defender deploys along the S edge. You may wish to experiment with deployment: starting with all units off table and needing to pass a Move order to enter the table adds a touch of spice. SPECIAL RULES None. ENDING THE SCENARIO Keep playing until a turn begins with 5 or fewer units remaining in the game. When this happens, roll a die at start of turn if the score is higher than number of units left on table, this is the final turn. VICTORY CONDITIONS Both Attacker and Defender add up the point value of enemy units routed or wiped out before the game ends; damaged units still in play are not counted. The player with the higher score wins 5 Glory (+/- Boasts). Players tied for first place gain 3 Glory each (+/- Boasts). SCENARIO B: DEFENDING THE INDEFENSIBLE Garrison duty is an essential military duty, usually blending safety and boredom in equal measure. The Defender has been tasked with guarding an immovable object: possibly a shrine or church, a carroccio, a siege engine or cannon, or whatever scenery you can muster. This is your opportunity to buy that trebuchet model you ve always wanted to own but have never been able to justify buying! Part of the Defender s retinue is on static guard duty while the rest scour the local area; they must prevent any Attacker from contacting the immovable object. Undetected, the Attacker s retinue has snuck up and launches an assault with the aim of reaching the immovable object and damaging it beyond repair.
 SPECIAL RULES The immovable object should ideally be no larger than 3x3.")
60 SET-UP The Defender places the immovable object and up to 10 points of units in the central deployment area. The rest of the Defender s retinue deploys along the W edge. The Attacker deploys his entire retinue along the E edge. Foot Men-at-Arms. (Front Rank Miniatures) SPECIAL RULES The immovable object should ideally be no larger than 3x3. The Defender may treat the object as the centre point of his unit, meaning that he may deploy a unit on the object. If your object is a piece of scenery that might usually count as cover, agree with your opponent whether it does or not for this scenario (I suggest that it should not, otherwise the object becomes easier to defend). ENDING THE SCENARIO If the Attacker manages to move at least one model from a unit into contact with the immovable object, the game ends immediately with the Attacker smashing it to pieces before the defenders weeping eyes. Retreating onto the object does not count! Otherwise, play continues until the Attacker has lost at least half of his retinue s points. Heavy casualties outweigh the benefits of the raid, so at the end of this turn the game ends as the Attacker decides to retreat from the board. VICTORY CONDITIONS If the game ends because the Attacker has contacted the immovable object, he scores 3 Glory (+/- Boasts). If the game ends and the Attacker has not contacted the immovable object, the Defender scores 5 Glory (+/- Boasts). SCENARIO C: THE FUGITIVE Nobles were often held as prisoners until ransomed back to their families. Medieval accounts often make me wonder if there were ever any rooms in castles not occupied by prisoners! In this scenario, the Defender must locate and rescue a member of his lord s household who has recently escaped from the Attacker s lord. The Attacker, of course, must prevent this, bringing the fugitive back dead or alive. SET-UP The Attacker deploys along the E edge and the Defender along the W edge. The table must include six areas of rough going (approximately 6x6 ), spread evenly across the table and no closer than 18 to any table edge. Play on as large a table as you can.
61 SPECIAL RULES When any Defending unit moves into each rough terrain area for the first time in the game, roll a die. For the first piece of terrain, the fugitive is found there on the roll of a 6; for the second piece of terrain, on a 5+; third piece, on a 4+ and so on. When the fugitive is found, immediately place a token or model with the unit that found him. That unit must now attempt to move off of any board edge with the fugitive attached. The fugitive model is just a token in the game and cannot be targeted or contacted by enemy models; move the model if it s in the way of Attacks or Shooting. The fugitive is killed if the protecting unit is routed or wiped out, and also tests for Lucky Blows in the same way as a Leader. An Attacking unit can never test to find the fugitive he s been held captive too long to risk being captured by them again! ENDING THE SCENARIO Play until the unit with the fugitive has moved off the table or been wiped out or routed; or until one retinue routs from the table. VICTORY CONDITIONS If the fugitive moves off the table with the Defender (or the Attacker s retinue is routed), the Defender earns 5 Glory (+/- Boasts). If the game ends with any other result, the Attacker earns 3 Glory (+/- Boasts). SCENARIO D: A GENTLE STROLL The Defender is on a forced march with orders to stop for nothing; they are in danger of being cut off from the main army. He must move his retinue across the table taking as few casualties as possible. The Attacker must inflict as many casualties as possible. SET-UP The Defender deploys in the NW deployment zone and the Attacker splits his retinue as he wishes in the NE and SW deployment zones at least one unit must be deployed in each). SPECIAL RULES Unless prevented by Rallying or Wild Charges, at least one of the Defender s units must attempt a Move activation each turn. A failed Move order does not end the Defender s activation phase in this scenario. The Defender ignores the following Courage test trigger: Unit becomes your only unit remaining on the table. ENDING THE SCENARIO Play until only one retinue remains on the table. VICTORY CONDITIONS The Defender gains 5 Glory (+/- Boasts) if more than half of its retinue s total points leave the table from the SE deployment zone (regardless of casualties). The Attacker gains 5 Glory (+/- Boasts) if it destroys or routs at least half of the enemy s total points. Any other end to the game gains each player 2 Glory (+/- Boasts) for a draw. SCENARIO E: HOLD ON TIGHT Both the Attacker and Defender have been tasked with securing a strategically important piece of land
62 on the border of their lands (perhaps a small hill, a ford, or a vital crossroads). As luck would have it, both retinues arrive at the same time, and must fight for possession of it, holding it for five turns in total to win the game. SET-UP The Attacker deploys along the N deployment zone and the Defender along the S deployment zone. At the centre point of the table, place an easily identifiable terrain piece as the objective for both retinues to capture and hold. I recommend not using terrain that would count as cover. The objective should be small enough that no more than one unit may occupy it at any one time. SPECIAL RULES A non-battered unit counts as holding the objective when it begins the owner s activation phase as the only unit placed on that objective. ENDING THE SCENARIO Play until one side has accumulated 5 Glory or has routed the enemy retinue. VICTORY CONDITIONS A player gains 1 Glory every time one of his units occupies the objective at the start of his activation phase. If a player routs his enemy before this, this immediately brings his Glory total up to 5. Both players gain/lose Glory for Boasts. SCENARIO F: SAUSAGES WITH MUSTARD The medieval French writer Juvenal des Ursins tells us that England s Henry V observed War without fire has no value; no more than sausages without mustard. The Attacker has been tasked with locating enemy supplies and burning them to the ground; the defender must of course prevent this from happening by repelling the enemy. SET-UP On each corner of the central deployment area, the defender places an objective marker or piece of scenery such as a barn, hovel, haystack or other item that an Attacker might wish to burn. Ideally, they should all be 3x3 or a little smaller. The Defender may place up to 4 points of units in the central deployment area, and the rest of his retinue along the E edge. The Attacker places his retinue along the W edge. SPECIAL RULES To try to set fire to an objective marker, the Attacker must have at least one model from a unit in contact with it at the start of his activation phase. As an ordered activation, he may use that unit to try to set fire to the objective (instead of Moving, Attacking, or Shooting). If there are 7 or more models in the unit the fire starts on a roll of 8+; if there are 6 or fewer models in the unit the fire starts on a roll of 9+. Leaders cannot influence this roll. More than one unit may attempt to burn an objective in the same activation phase. Once a fire begins, it may not be put out, and the objective marker becomes impassable. ENDING THE SCENARIO Play until all 4 objectives are on fire or until the Attacker has lost at least half of his retinue s points. At the end of this turn, the game ends as the Attacker decides to retreat from the board.

63 VICTORY CONDITIONS The Attacker gains 2 Glory for each objective set on fire. The Defender gains 2 Glory for each objective remaining unburned at the end of the game. Both players gain/lose Glory for Boasts. SCENARIO G: THE CONVOY The Attacker needs to escort a small convoy of carts or animals from the borders of his lord s lands to the main city. En route, an enemy force lies in wait to ambush them they really want to get their hands on those sheep! The Attacker must move the convoy safely off of the opposite edge of the board. The Defender must prevent this from happening. SET-UP The Attacker deploys in the SW deployment zone and the Defender must split his forces across the SE, NW and NE deployment zones (at least 4 points of his retinue in each). Play this scenario on as large a table as you are able to. SPECIAL RULES The Attacking player must add three convoy markers to his retinue; more than one marker may be appointed to each unit. The rules for the convoy markers are as follows: An unusual convoy: sleds being escorted in the Baltic States. (Michael Leck) The convoy markers must remain with the same escorting units throughout the game. A unit escorting a convoy has a maximum movement of 6. It may not enter rough terrain or cross obstacles. Units with a convoy marker must deploy before any other units in the Attacker s retinue. Units with a convoy marker may test for and make one Move order before the game begins. Escorting units may not be given Attack orders and must ignore Wild Charges (if applicable). If the escorting unit is wiped out or routs, the convoy markers with the unit are captured and removed from the game. The convoy markers may not be captured in any other way. If the escorting unit moves into contact with the opposite table edge (the NE deployment zone), that unit moves off the table with the convoy marker. Each convoy model is simply a token: move them out of the way of other models when required, and they do not count as part of the unit for measuring distances, cover or during battle/shooting. The Attacker ignores the following Courage test trigger: Unit becomes your only unit remaining on

64 the table. ENDING THE SCENARIO Play continues until all three convoy markers have been removed from the game. VICTORY CONDITIONS The Attacker must safely exit the convoy from the NE deployment zone. Each marker removed in this way earns him 2 Glory. The Defender must prevent this by capturing the convoy markers. Each captured marker earns him 2 Glory. Both players gain/lose Glory for Boasts. SCENARIO H: THE MESSENGER The Attacker has been tasked with escorting a messenger from his lord s fortress to that of a nearby friendly city. En route, an enemy force stumbles across the escort and deploys in a pincer movement to corner them. The Attacker must move the messenger safely off of the opposite edge of the board. The Defender must prevent this from happening. This messenger ain t stoppin for no-one, right? Foundry models from the author s collection. (Henry Hyde) SET-UP The Attacker deploys in the NE deployment zone and the Defender must split his forces with no more than 6 points of his units in the SE deployment zone and the remainder in the NW. Play this scenario on as large a table as you are able, preferably with longer N and S edges than E and W edges. SPECIAL RULES The Attacking player must add an easily identifiable messenger model to one unit of his choice (other than his Leader s). The messenger s unit deploys at full strength plus the extra messenger model. The rules for the messenger are as follows: The messenger must remain with his unit throughout the game. The messenger s unit must deploy before the Attacker s other units. If that unit takes casualties, test to see if the messenger is a casualty in the same way as for Leaders. If the unit is wiped out or routs, the messenger dies at the same time as the last fighting model. If the unit moves into contact with the opposite table edge (the SW deployment zone) before the messenger is killed, he has escaped.
65 The messenger model is simply a token in the game: move it out of the way of other models when required, and it does not count as part of the unit for measuring distances or during battle/shooting. It moves at the same speed as the rest of the unit. ENDING THE SCENARIO Play continues until the messenger has been killed, his unit or his player s retinue routed or until the messenger escapes. VICTORY CONDITIONS The Attacker must safely escape the messenger off of the table from the SW deployment zone. This earns him 5 Glory (+/- Boasts). The Defender must prevent this by killing the messenger, routing his unit, or routing or wiping out the entire enemy retinue. This earns him 5 Glory (+/- Boasts). SCENARIO I: A TAXING AFTERNOON Nothing is certain but death and taxes sadly this was equally true in the 12th century as it is today. But in Lion Rampant, the former happens surprisingly often and the latter is just an excuse to roll some dice (with apologies to Daniel Defoe). The Attacker has been told to launch a raid into enemy territory in the week that local taxes are collected. Taxes have been handily grouped at collection points and he should steal as many of these as possible before the defender s armed and dangerous tax men arrive. The Defender must collect taxes from the local area but has been told that enemy raiders are close by so must rush to collect those taxes before they end up lining his enemy s coffers.
.")
66 Northern Italian cavalry, by Angus McBride Osprey Publishing Ltd. Taken from Men-at-Arms 376: Italian Medieval Armies SET-UP Randomly lay out six tax tokens evenly across the board (these could be livestock, crates, barrels, or just paper tokens). Underneath each, randomly place a tax value marker with a value written underneath it (one is worth 3 points, three are worth 2 points, and two are worth 1 point, but this is only known by the player once collected). Ideally, tax tokens should be placed in small villages but this isn t vital. Once the tokens have been placed, the Attacker deploys along the E edge and the Defender along the W edge. Play this scenario on a large table if possible, to allow for maximum manoeuvre and adequate distance between tokens. SPECIAL RULES The following rules apply in this scenario: To collect a tax token, one model from a unit must move onto it. At that time, the token joins the collecting unit and moves with it (counting as a token only, it takes no part in gameplay). Once picked up, the owning player may check the tax value of the marker (don t tell your opponent). If the owning unit leaves the table by choice (rather than retreating or routing) the player gains those points at the end of the game.

67 A unit may only carry one token and may not return to the table once it leaves. If the unit is routed or wiped out during an Attack, the unit routing it picks up the token, assuming that it does not already have one. If it does already have one, or if the unit was routed or destroyed by Shooting or a Courage test, leave the token where it was dropped and anyone else can pick it up. A unit may not choose to drop a token: it must keep it once it is picked up (so you can t drop a low value token to replace with a better one). If a unit is forced to retreat off the table while carrying a token, it does not count the points for that token. Both players ignore the following Courage test trigger: Unit becomes your only unit remaining on the table. A perfect day to collect some taxes! (Michael Leck) ENDING THE SCENARIO Play until the final token has been removed from the table, or only one retinue remains in play (at which point they collect any tokens remaining on the board). VICTORY CONDITIONS Both players earn Glory equal to the value of the tokens they have collected. Both players gain/lose Glory for Boasts. SCENARIO J: MEETING THE NEIGHBOURS Both players control a patrol sent out along an unfriendly borderland. As they head home for mead and turnips, they bump into an enemy retinue doing exactly the same thing. Both players must break through their enemy and exit as many units as possible from the opposite edge of the board. This scenario makes an interesting four player scenario, with one player deploying in each corner of the board. SET-UP The Attacker deploys in the SW deployment zone and the Defender in the NE deployment zone. SPECIAL RULES
68 Units must aim to leave the board via the deployment zone opposite its starting position (so NE for the Attacker and SW for the Defender). A unit in which at least one model is contacting or has left via its exit zone is immediately removed from play and scores points at the end of the game. ENDING THE SCENARIO Keep playing until only one player has units left on the board. VICTORY CONDITIONS Both players score Glory for the units they have exited from the opposite deployment zone. An exited unit above half strength is worth 2 Glory and a unit at half strength or below is worth 1 Glory. Both players gain/lose Glory for Boasts. Any units remaining in play at the end of the game do not count towards Glory so keep moving your models towards their exit rather than weighing into Attacks. SCENARIO K: HAMMER AND ANVIL The Attacker has been raiding in the Defender s territory, and the Defender s retinue has tracked down and cornered the raiders in a valley, forest, or other area with plenty of cover and broken terrain. The Defender has sent part of his retinue forward to provoke the Attacker into action, and other units behind the enemy to chase them forward. The Attacker must attempt to flee the battlefield, escaping back past the enemy towards its homeland and exiting the tabletop. The Defender must try to prevent this from happening. SET-UP Each quarter of the table should include at least one significant terrain feature, possibly rough terrain, hills, a stream, or a river. Play this scenario on a large table if possible, to allow for plenty of manoeuvring. The Defender deploys 6 8 points of his units in the central deployment zone and 4 6 points along the W edge and the Attacker deploys along the E edge. The remainder of the Defenders retinue begins off the E edge, and must attempt to enter each unit with a Move order from turn 2 onward. SPECIAL RULES Attacking units must aim to leave the board via the NW and SW deployment zones. A unit in which at least one model is contacting or has left via its exit zone is immediately removed from play and scores points at the end of the game. The Defender s units entering from the E edge make a Move order during the player s activation phase in turn 2 of the game. Any unit succeeding in its test enters the table anywhere the player chooses along the E edge, carrying out a normal Move order (not an Attack or Shoot) and not passing within 3 of any other unit. Units which do not enter on turn 2 test again in future turns. Both players ignore the following Courage test trigger: Unit becomes your only unit remaining on the table. Be sure to agree on the exact effect of each terrain piece before the game begins. ENDING THE SCENARIO Keep playing until only one player has units left on the board. VICTORY CONDITIONS The Attacker scores Glory for his units exited from the NW and SW deployment zones. A unit is worth 1 Glory regardless of its strength when leaving the table. The Defender gains 1 Glory for each enemy

69 unit routed or wiped out. Both players gain/lose Glory for Boasts. The battle of Courtrai, 1302, by Angus McBride Osprey Publishing Ltd. Taken from Men-at- Arms 231: French Medieval Armies SCENARIO L: BLOODFEUD Medieval history overflows with accounts of bad feeling between rival lords or neighbours: Marcher Lords, Crusading knights, Italian cities, king and parliament, Robin Hood and the Sheriff of Nottingham and Mel Gibson versus Patrick McGoohan. This scenario sees the Attacker s retinue sent out to accost and kill the thorn in his side. The Attacker must slay the enemy Leader and the Defender must make sure this does not happen. SET-UP The Attacker deploys on the N edge and the Defender on the S edge. Deployment begins with units of 5 points or higher, then 3 4 points, then 1 2 points. SPECIAL RULES None. ENDING THE SCENARIO
70 Play continues until a turn begins with 5 or fewer units remaining in the game. When this happens, roll a die at start of turn if the score is higher than number of units left on table, this is the final turn. VICTORY CONDITIONS The Attacker must kill his opponent s Leader, either with a lucky blow, a challenge, or by wiping out or routing the Leader s unit. This earns him 5 Glory (+/- Boasts). The Defender must destroy or rout his opponent s retinue and keep his own Leader alive. This earns him 3 Glory (+/- Boasts). If the game ends with neither Attacker nor Defender fulfilling their goals, both players earn Glory for Boasts alone. LINKING YOUR GAMES TOGETHER There are many great resources available to gamers who wish to play a lengthy campaign, but I ve always been more interested in the humble linked scenario (there s less paperwork for one thing). The level of warfare represented in Lion Rampant is localised, so rather than worrying about conquering vast swathes of land, grinding your hereditary enemies into the earth, or accruing enough wealth and resources to launch the largest invasion since the days of Rome, all you have to worry about as a player and Leader in Lion Rampant is the next task set for you by your local lord or ruler. Linking scenarios allows you to play through a few games where the set-up is based on what has happened in previous games, without entering into a full-blown campaign. This simplified system, designed for two players, emphasises ease of use and gameplay: Casualties are replaced from your garrison (so you don t need to worry about painting models that will never return after your first game). The effect of previous battles is minimal beyond the next game (except for gaining Glory). The overall winner is decided when either player hits a Glory target agreed by both players before the campaign begins. The target depends on how many games you d like to play: start with a 30 Glory target to get a feel for how things work over five to ten games. Both players begin by selecting standard 24-point retinues. To get started, dice to choose attacker/defender roles for your first game, and then follow through this sequence until one player is declared winner: Roll on the scenario generator to discover the task set for the next game. The player who won the previous game chooses whether to be the scenario s attacker or defender. The defender regains all dead or routed models from the previous scenario (replacements are supplied by the local lord s garrisons), so begins this game with the same army as for the previous scenario. The attacker may replace up to 6 points of his army with different units/upgrades to suit the new scenario, and also regains all dead or routed models from other units. If either player s Leader was killed in the previous scenario, roll up a new skill for the brave replacement. Award the player who killed the Leader 1 bonus Glory (in addition to any gained through boasts). Play through the new scenario. Award Glory at the end of the game; the player with highest Glory from the scenario is the winner. Add the Glory from this scenario to a running total for each player; if either player has hit the agreed Glory total, your campaign has a winner who must be treated to a medieval-style feast by his vanquished foe. If both players happen to hit the total at the same time, the player with the overall higher total is the winner. You may wish to experiment with reducing the number of models in units that were wiped out or routed in the previous game: these units could start the next scenario at half strength plus the number of

71 models shown on one die (halved for 6-model units). The last stand of the Gotland Militia, Visby, 1361, by Angus McBride Osprey Publishing Ltd. Taken from Men-at-Arms 399: Medieval Scandinavian Armies (2).
72 5. SAMPLE RETINUES This section includes sample retinues from a variety of medieval theatres of war; you may wish to collect them as written, or tweak them to better suit your style of play or your own interpretation of the way different armies fought. There are no official army lists in Lion Rampant, and Section 3 includes suggestions for further reading to research your own retinue in detail. Many of these lists are interchangeable. For example, the French retinue could easily be used to represent a German or Italian force and vice versa. Not all of the retinues shown here are typical of the same nation s larger armies of the period so this is another good justification for you to tinker! I have not distinguished between retinues in different centuries, except where fighting style dramatically changed over time (the period of change being shown in parenthesis). Not all of the included retinues were contemporaries of one another, but everyone knows that dice score best against real historical opponents so choose enemies sensibly. The unit in which your Leader is recommended to be part of is noted with an asterisk (*); in keeping with the spirit of these lists, use or ignore this as you wish. BORDER RAIDERS (ANY NATION) 1 Mounted 4 points 2 Mounted Yeomen + 6 points 2 Foot Yeomen + 8 points 3 6 points EARLY ENGLISH 2 Mounted 12 points 2 Foot 8 points 1 4 points SCOTTISH 1 Foot 6 points 3 Foot 12 points 1 Fierce 4 points 1 2 points THE BRITISH ISLES LATER ENGLISH (EDWARD III ONWARDS) 1 Foot 6 points 2 Expert 12 points 1 Expert Foot 6 points IRISH 1 Foot 6 points 3 Fierce 12 points 3 6 points
73 ISLEMEN 2 Foot 12 points 2 Fierce 8 points 1 4 points WELSH 1 Mounted 4 points 3 Foot Yeomen + 12 points 4 8 points BURGUNDIAN 1 Foot 6 points 2 Expert 12 points 1 4 points 1 2 points CONDOTTIERI 2 Mounted 12 points 1 Foot 4 points 2 8 points FEUDAL GARRISON (ANY NATION) 3 Mounted 12 points 2 8 points 1 Foot Yeomen + 4 points FREE COMPANY 1 Mounted 6 points 1 Mounted 4 points 1 Expert 6 points 1 4 points 2 4 points FRENCH 2 Mounted 12 points 1 Mounted 4 points 1 Foot 4 points 1 4 points FLEMISH 1 Mounted 4 points 3 Foot 12 points 2 8 points WESTERN EUROPE
74 GERMAN 1 Mounted 6 points 1 Mounted Serjeants + 4 points 2 Foot 8 points 1 Crossbowmen + 6 points ITALIAN 1 Mounted 6 points 1 Mounted 4 points 2 Foot 8 points 1 4 points 1 2 points NORMAN 2 Mounted 12 points 2 Foot 6 points 1 4 points 1 2 points SWISS 2 Expert Foot Serjeants 12 points 2 Fierce 8 points 1 4 points BALTIC PAGAN 1 Foot 6 points 3 Fierce 12 points 1 Mounted 4 points 1 2pts HUNGARIAN 1 Mounted 6 points 3 Mounted 12 points 1 Foot 4 points 1 2 points MONGOLIAN 1 Mounted Men-at-Arms* + 8 points 2 Mounted Serjeants + 10 points 1 Expert Mounted 6 points OTTOMAN TURKISH 2 Mounted Serjeants* + 10 points EASTERN EUROPE
75 2 Mounted 8 points 1 4 points 1 2 points EARLY RUSSIAN 2 Mounted 8 points 2 Mounted 8 points 1 Foot 4 points 1 4 points LATER RUSSIAN (POST-MONGOL) 1 Mounted Men-at-Arms* + 8 points 1 Mounted Serjeants + 5 points 2 Mounted 8 points 1 Foot 3 points SCANDINAVIAN 1 Mounted 6 points 1 Mounted 4 points 3 Foot Yeomen + 12 points 1 2 points STEPPE TRIBES 1 Mounted Men-at-Arms* + 8 points 1 Mounted 4 points 3 Mounted 12 points TEUTONIC ORDER 2 Mounted 12 points 1 Mounted Serjeants + 4 points 1 Foot 4 points 1 4 points HUSSITE 2 Expert Foot 12 points 2 Crossbowmen + 12 points BERBER 1 Mounted 4 points 1 Mounted Yeomen + 3 points 3 Foot 9 points 1 Fierce 4 points 1 4 points THE MIDDLE EAST & SPAIN
76 BYZANTINE 3 Mounted 12 points 2 Foot 8 points 2 4 points CRUSADER 2 Mounted 12 points 1 Mounted 4 points 1 Foot 4 Points 1 4 points EGYPTIAN 2 Mounted Serjeants* + 10 points 2 Mounted 8 points 2 Foot 6 points SELJUK TURKISH 2 Mounted Serjeants* + 10 points 3 Mounted 12 points 1 2 points SPANISH CHRISTIAN 1 Mounted 6 points 2 Mounted Yeomen + 6 points 2 Foot 8 points 1 4 points SPANISH MUSLIM 1 Mounted 4 points 2 Mounted Yeomen + 6 points 2 Foot 6 points 1 4 points 2 4 points

77
78 Polish knights put a Baltic village to the torch, by Gerry and Sam Embleton Osprey Publishing Ltd. Taken from Men-at-Arms 445: Medieval Polish Armies HOLLYWOOD LEGENDS These retinues are intended for tongue-in-cheek games only. Being Hollywood-themed, they may break the rules of history and unit selection in a way that only a movie director can. You may wish to represent some units with fewer models and track hits using markers; this works well for units of heroes, wizards, giants, movie stars, and other larger than life units. THE MERRY MEN The Foot Men-at-Arms with bows use the same Shooting profile as Archers. This costs 2 points as shown. 1 Foot Men-at-Arms + 8 points 3 12 points 2 2 points 1 2 points THE SHERIFF S MEN Give the Leader a negative characteristic and Alan Rickman s beard. 2 Mounted 8 points 2 Foot 8 points 2 8 points THE ROUND TABLE Each model must be given the name of one of Malory s knights. 4 Foot 24 points MORDRED S REBELS & BARBARIANS Mordred must wear black armour and the Fierce Foot need horned helmets. 2 Foot 12 points 3 Fierce 12 points OLD-SCHOOL FANTASY The final two retinues throw out some ideas for using Lion Rampant for old-school fantasy battles from the days when such games required your own imagination to kick in. Players gain an additional 2 Glory if they field a retinue comprising solely of models from the 1970s or 1980s. GOOD 1 Shining Paladins & Heroes* (Mounted 6 points 1 Resolute Dwarves of the Mountains (Expert Foot 6 points 1 Immortal Elves of the Forest (Expert 6 points 1 Proud Men of the City (Foot 3 points 1 Rough Riders of the Plains (Mounted Yeomen + 3 points EVIL
79 1 Vile Warlocks & Necromancers* (Expert Archers using 6 points 1 Brutish Orcs (Fierce 4 points 1 Cackling Goblins riding Howling Wolves (Mounted 4 points 1 Despicable Goblins (Foot 3 points 1 Ponderous Undead Horde (Serfs, but Courage 1 point 1 Colossal Trolls or Giants (Foot 6 points
80 LION RAMPANT REFERENCE SHEET ACTIVATION PHASE Issue a Challenge. Rally Battered units. Activate Wild Charges. Order activations. LEADERS Last model to die unless falling to a lucky blow or challenge. +1 to your total for all Courage tests within 12 of the Leader model. Leaders may issue challenges. RALLY TEST Successful: remove Battered marker; cannot activate during this activation phase. Unsuccessful: retain Battered marker, remove one model, retreat; take no further action during this activation phase. Disadvantaged if attacked. Failed Rally tests do not end your activation phase. MOVING Mounted Yeomen: 12 All other Mounted: 10 Fierce Foot, Foot Yeomen, and Bidowers: 8 All other Foot: 6 Rough terrain halves movement. Obstacles end movement, cross next activation. SHOOTING RANGES Bows and crossbows: 18 Slings, Bidowers, Mounted bows and crossbows: 12 Javelins: 6 ATTACKING/SHOOTING 12 dice if above half strength 6 dice if half strength or less -1 to Shooting over 12 Cover increases Armour by 1. Lucky blows: Roll a double 1 on two dice. Battered units hit on 6. Units in Rough terrain: Attack and Defence of 5+ and Armour of 2 unless Ferocious. WHEN TO TEST COURAGE Unit has taken casualties from Attacking or Shooting. Unit is attempting to rally to remove a Battered marker. Unit becomes your only unit remaining on the table. Leader is killed or flees the table.
81 Leader refuses a challenge. Retinue has had half or more points of units removed from play. COURAGE TEST -1 for each casualty the unit has suffered in the game so far. -1 if your retinue has had half or more points of units removed from play. +1 to your total if your Leader s model is within 12. FAILED COURAGE TEST Final score is greater than 0, unit must retreat a half move and becomes Battered. Final score is 0 or a negative number, unit routs. Remove it immediately. A Battered unit which receives another Battered result loses a model and retreats.
82 LION RAMPANT ROSTER RETINUE: ARMY POINTS: LEADER NAME: LEADER SKILL: UNIT NAME POINTS Attack Attack Value Move Defence Value Shoot Shoot Value / Range Courage Maximum movement Armour Special rules UNIT NAME POINTS Attack Attack Value Move Defence Value Shoot Shoot Value / Range Courage Maximum movement Armour Special rules UNIT NAME POINTS Attack Attack Value Move Defence Value Shoot Shoot Value / Range Courage Maximum movement Armour Special rules UNIT NAME POINTS Attack Attack Value Move Defence Value Shoot Shoot Value / Range Courage Maximum movement Armour Special rules UNIT NAME POINTS Attack Attack Value Move Defence Value Shoot Shoot Value / Range Courage Maximum movement Armour Special rules
83 UNIT NAME POINTS Attack Attack Value Move Defence Value Shoot Shoot Value / Range Courage Maximum movement Armour Special rules UNIT NAME POINTS Attack Attack Value Move Defence Value Shoot Shoot Value / Range Courage Maximum movement Armour Special rules
84 DISCOVER MORE AT

85

86 SIGN UP FOR THE OSPREY NEWSLETTER AND WIN! 5 OSPREY BOOKS Sign up to the Osprey e-newsletter to get all the latest news, great special offers, information about new releases and get an exclusive look inside life at Osprey. You will then be in with a chance to win some great prizes in our monthly prize draw. Every month we will be selecting one newsletter recipient who will receive any 5 Osprey books of their choice. A range of other prizes, from exclusive artwork prints to free ebooks, will also be given away throughout the year to newsletter recipients. Go to: Enter your address to register
LION RAMPANT Medieval Wargaming Rules OSPREY WARGAMES. Daniel Mersey. Osprey Publishing
 LION RAMPANT Medieval Wargaming Rules Daniel Mersey OSPREY WARGAMES LION RAMPANT MEDIEVAL WARGAMING RULES DANIEL MERSEY CONTENTS 1. INTRODUCTION 4 2. BATTLE RULES 5 Setting up a Game 5 Commanding Your
Field of Glory - Napoleonic Quick Start Rules
 Field of Glory - Napoleonic Quick Start Rules Welcome to today s training mission. This exercise is designed to familiarize you with the basics of the Field if Glory Napoleonic rules and to give you experience
Primo Victoria. A fantasy tabletop miniatures game Expanding upon Age of Sigmar Rules Compatible with Azyr Composition Points
 Primo Victoria A fantasy tabletop miniatures game Expanding upon Age of Sigmar Rules Compatible with Azyr Composition Points The Rules Creating Armies The first step that all players involved in the battle
PROFILE. Jonathan Sherer 9/10/2015 1
 Jonathan Sherer 9/10/2015 1 PROFILE Each model in the game is represented by a profile. The profile is essentially a breakdown of the model s abilities and defines how the model functions in the game.
PROFILE. Jonathan Sherer 9/30/15 1
 Jonathan Sherer 9/30/15 1 PROFILE Each model in the game is represented by a profile. The profile is essentially a breakdown of the model s abilities and defines how the model functions in the game. The
BRONZE EAGLES Version II
 BRONZE EAGLES Version II Wargaming rules for the age of the Caesars David Child-Dennis 2010 davidchild@slingshot.co.nz David Child-Dennis 2010 1 Scales 1 figure equals 20 troops 1 mounted figure equals
The Glory that was GREECE. Tanagra 457 BC
 The Glory that was GREECE Tanagra 457 BC TCSM 2009 The Glory that Was Vol. I: Greece Rulebook version 1.0 1.0 Introduction The Glory that was is a series of games depicting several different battles from
A Great Victory! Copyright. Trevor Raymond. April 2013 (Exodus 20:15 - Thou shall not steal.")
") A Great Victory! Copyright. Trevor Raymond. April 2013 (Exodus 20:15 - Thou shall not steal.") Page 1 of 27 A Great Victory is a basic set of rules designed for the table-top wargaming battles in the ancient
A Great Victory! Copyright. Trevor Raymond. April 2013 (Exodus 20:15 - Thou shall not steal.") Page 1 of 27 A Great Victory is a basic set of rules designed for the table-top wargaming battles in the ancient
Conflict Horizon Dallas Walker Conflict Horizon
 Conflict Horizon Introduction 2018 Dallas Walker Conflict Horizon Welcome Cadets. I m Sargent Osiren. I d like to make it known right now! From that moment you stepped foot of the shuttle, your butts belonged
Campaign Notes for a Grand-Strategic Game By Aaron W. Throne (This article was originally published in Lone Warrior 127)
") Campaign Notes for a Grand-Strategic Game By Aaron W. Throne (This article was originally published in Lone Warrior 127) When I moved to Arlington, Virginia last August, I found myself without my computer
Campaign Notes for a Grand-Strategic Game By Aaron W. Throne (This article was originally published in Lone Warrior 127) When I moved to Arlington, Virginia last August, I found myself without my computer
A Clash of Arguments
 A Clash of Arguments A set of rules for the lazy gamers of this world. (Or Horse and Musket?) By Craig Grady Phases each turn consists of the following five phases Initiative Move Shoot Hand to Hand Moral
CONTENTS INTRODUCTION Compass Games, LLC. Don t fire unless fired upon, but if they mean to have a war, let it begin here.
 Revised 12-4-2018 Don t fire unless fired upon, but if they mean to have a war, let it begin here. - John Parker - INTRODUCTION By design, Commands & Colors Tricorne - American Revolution is not overly
Armour Battles. Introductory World War Two Wargame Rules. Jim Bambra
 1 Armour Battles Introductory World War Two Wargame Rules Jim Bambra First published in 2015 by Wargames Design. 2015 Jim Bambra. All rights reserved. Jim Bambra has asserted his right under the Copyright,
Aperitif Game for Gentlemen, By Pierre Laporte
 Belle Epoque Aperitif Game for Gentlemen, By Pierre Laporte Belle Epoque Aperitif Game for Miniature Battles in the Victorian Era and Early 20 th Century EQUIPEMENT NEEDED Small coloured counters, ordinary
A Marvellous Victory! Copyright. Trevor Raymond. November 2015 (Exodus 20:15 - Thou shall not steal.") Version 2
 Version 2") Page 1 of 30 A Marvellous Victory! Copyright. Trevor Raymond. November 2015 (Exodus 20:15 - Thou shall not steal.") Version 2 The first abstraction: A Marvellous Victory are an abstract set of wargame
Page 1 of 30 A Marvellous Victory! Copyright. Trevor Raymond. November 2015 (Exodus 20:15 - Thou shall not steal.") Version 2 The first abstraction: A Marvellous Victory are an abstract set of wargame
1. Introduction 2. Army designation 3. Setting up 4. Sequence of play 25cm three
 Blades of Bronze Fast play rules for 15mm Ancients Contents 1. Introduction. 2. Army designation. 3. Setting up. 4. Sequence of play. 5. Orders. 6. Classification tables. 7. Conclusion 1. Introduction
WARHAMMER LEGENDARY BATTLES
 WARHAMMER LEGENDARY BATTLES Welcome Most games of Warhammer are two player games between armies with equal points values of anywhere from 500 to 3000 points. However, while games like these are great fun,
2.0 The Battlefield. 2.1 Terrain Hexes. 2.2 Terrain Types. 3.0 Command Cards (10 each) 3.1 Order Cards (7 each)
 3.1 Order Cards (7 each)") Advanced Vive l Empereur Introduction Advanced Vive l Empereur is a Histo Command Dice System Game and allows you to simulate on a grand-tactical level the battles of the Napoleonic era. The player is
Advanced Vive l Empereur Introduction Advanced Vive l Empereur is a Histo Command Dice System Game and allows you to simulate on a grand-tactical level the battles of the Napoleonic era. The player is
LATE 19 th CENTURY WARGAMES RULES Based on and developed by Bob Cordery from an original set of wargames rules written by Joseph Morschauser
 LATE 19 th CENTURY WARGAMES RULES Based on and developed by Bob Cordery from an original set of wargames rules written by Joseph Morschauser 1. PLAYING EQUIPMENT The following equipment is needed to fight
Henry Bodenstedt s Game of the Franco-Prussian War
 Graveyard St. Privat Henry Bodenstedt s Game of the Franco-Prussian War Introduction and General Comments: The following rules describe Henry Bodenstedt s version of the Battle of Gravelotte-St.Privat
LATE 19 th CENTURY WARGAMES RULES Based on and developed by Bob Cordery from an original set of wargames rules written by Joseph Morschauser
 LATE 19 th CENTURY WARGAMES RULES Based on and developed by Bob Cordery from an original set of wargames rules written by Joseph Morschauser 1. PLAYING EQUIPMENT The following equipment is needed to fight
Frontier/Modern Wargames Rules
 Equipment: Frontier/Modern Wargames Rules For use with a chessboard battlefield By Bob Cordery Based on Joseph Morschauser s original ideas The following equipment is needed to fight battles with these
WARHAMMER 40K COMBAT PATROL
 9:00AM 2:00PM ------------------ SUNDAY APRIL 22 11:30AM 4:30PM WARHAMMER 40K COMBAT PATROL Do not lose this packet! It contains all necessary missions and results sheets required for you to participate
RANDOM MISSION CONTENTS TAKING OBJECTIVES WHICH MISSION? WHEN DO YOU WIN THERE ARE NO DRAWS PICK A MISSION RANDOM MISSIONS
 i The 1 st Brigade would be hard pressed to hold another attack, the S-3 informed Bannon in a workman like manner. Intelligence indicates that the Soviet forces in front of 1 st Brigade had lost heavily
When it comes to generic 25mm Science Fiction skirmish games, there are really only two choices.
 1 of 6 When it comes to generic 25mm Science Fiction skirmish games, there are really only two choices. Stargrunt II, which is a gritty, realistic simulation of near-future combat. And ShockForce, which
Game Rules. The Great Battles of the Napoleonic Era. Giovanni Crippa. version October v.1.1. A game by: GIOGAMES
 The Great Battles of the Napoleonic Era Game Rules v.1.1 version 1.2 - October 2013 GIOGAMES A game by: Giovanni Crippa 23900 LECCO (Italy) Introduction Advanced Vive l Empereur is a game system that allows
French and Indian Wars Skirmish Rules. Tyneside Wargames club October Version 3.4
 French and Indian Wars Skirmish Rules Tyneside Wargames club October 2016 Version 3.4 Page 2 of 11 Index: Introduction:... 4 Troop Classifications:... 4 Loyalty:... 4 Weapons:... 4 Play Sequence:... 4
Damned Wobbly Gentlemen. Zuluwar 'Lite.'
 Damned Wobbly Gentlemen. Or Zuluwar 'Lite.' Version:2 12/01/09 by PDE Empress Miniatures 28mm Rules for Colonial skirmishes. The following rules are a set of simple fast play rules to get you started.
THURSDAY APRIL :00PM 10:00PM 5:00PM :00AM 3:00PM
 THURSDAY APRIL 18 ------------------ 4:00PM 10:00PM 5:00PM 10:00PM ------------------ 9:00AM 3:00PM HAIL CAESAR MATCH PLAY Do not lose this packet! It contains all necessary missions and results sheets
Titan Games and Hobbies AOS Tournament Rules
 Titan Games and Hobbies AOS Tournament Rules Army Building 6-12 Warscrolls 1-2 Hero Warscrolls 0-1 Named Character Warscrolls are allowed. 0-2 Monster Warscrolls 0-2 War Machine All Warscrolls taken for
Unofficial Bolt Action Scenario Book. Leopard, aka Dale Needham
 Unofficial Bolt Action Scenario Book Leopard, aka Dale Needham Issue 0.1, August 2013 2 Chapter 1 Introduction Warlord Game s Bolt Action system includes a number of scenarios on pages 107 120 of the main
ARMY COMMANDER - GREAT WAR INDEX
 INDEX Section Introduction and Basic Concepts Page 1 1. The Game Turn 2 1.1 Orders 2 1.2 The Turn Sequence 2 2. Movement 3 2.1 Movement and Terrain Restrictions 3 2.2 Moving M status divisions 3 2.3 Moving
UNITS Hidden Units Formed Units Fighter Commander
 COLONIAL ADVENTURE UNITS Each unit consists of 5 to 20 figures. Additionally units may contain leaders (maximum 2 per unit), musicians (maximum 1 per unit) and color bearers (maximum 1 per unit). Each
Sample file WRITTEN BY ED TEIXEIRA DIGITALLY EDITED BY CRAIG ANDREWS
 WRITTEN BY ED TEIXEIRA DIGITALLY EDITED BY CRAIG ANDREWS CHAIN REACTION 1 TABLE OF CONTENTS 3 PROLOGUE 2.0 INTRODUCTION 3.0 YOUR ROLE.0 NEEDED TO PLAY The Dice.1.1 Passing Dice.1.2 Counting Successes.1.3
WARHAMMER FANTASY REGIMENTS OF RENOWN
 WARHAMMER FANTASY REGIMENTS OF RENOWN FRIDAY MARCH 20 TH :00PM 1:00AM Do not lose this packet! It contains all necessary missions and results sheets required for you to participate in today s tournament.
The Struggle for Britannia The Year 1065 A.L
 The Struggle for Britannia The Year 1065 A.L The year 1060 was a bad year as Britannia was ravaged from the seas. They came from lands afar, savage raiders and land wasters. Proudly the tribes fought to
Down In Flames WWI 9/7/2005
 Down In Flames WWI 9/7/2005 Introduction Down In Flames - WWI depicts the fun and flavor of World War I aerial dogfighting. You get to fly the colorful and agile aircraft of WWI as you make history in
Maida 1806: Stuart vs. Reynier
 Table of contents. 1.0 Introduction... 2.0 Components... 3.0 Gameplay... 4.0 Leaders... 5.0 Infantry in Column... 6.0 Infantry in Line... 7.0 Square... 8.0 Skirmish order... 9.0 Cavalry... 10.0 Artillery...
UK Games Expo SAGA Melee 2017 Version 1.3
 UK Games Expo SAGA elee 2017 Version 1.3 Permitted Factions. Your warband may be from any officially published faction i.e. anything in SAGA Dark Age Skirmishes, Northern Fury, Raven s Shadow, Varjazi
VANGUARD. THE FANTASY SKIRMISH GAME Beta Playtest
 THE FANTASY SKIRMISH GAME Beta Playtest 2018-03-08 1 WHAT YOU WILL NEED Models Table and Terrain Mantic Games supply a range of ready-made Warbands for Vanguard so it s easy to start your collection and
Nfejfwbm!Cbuumft!!! Mfhobop! 3:ui!Nbz!2287!
 NfejfwbmCbuumft Mfhobop 3:uiNbz2287 2008 1 Battles of the Middle Ages Battle of Legnano 1176 Rulebook version 1.0 1.0 Introduction Battles of the Middle Ages is an easy to learn wargaming system that tries
Table of Contents. Pygmies FINAL page 1
 Pygmies Table of Contents Overview...2 Introduction...2 Pygmies Design Elements...2 Opposed Rolls...3 Colored Game Dice...4 Rolling Dice...4 Measuring...4 Characteristics...5 The Game Turn...7 1. Initiative...7
COMPONENT OVERVIEW Your copy of Modern Land Battles contains the following components. COUNTERS (54) ACTED COUNTERS (18) DAMAGE COUNTERS (24)
 ACTED COUNTERS (18) DAMAGE COUNTERS (24)") GAME OVERVIEW Modern Land Battles is a fast-paced card game depicting ground combat. You will command a force on a modern battlefield from the 1970 s to the modern day. The unique combat system ensures
GAME OVERVIEW Modern Land Battles is a fast-paced card game depicting ground combat. You will command a force on a modern battlefield from the 1970 s to the modern day. The unique combat system ensures
WRITTEN BY ED TEIXEIRA INTERIOR ARTWORK BY JAMES SMYTH COVER BY PAUL KIME DIGITALLY EDITED BY CRAIG ANDREWS
 ple m Sa file ple m Sa file file ple m Sa WRITTEN BY ED TEIXEIRA INTERIOR ARTWORK BY JAMES SMYTH COVER BY PAUL KIME DIGITALLY EDITED BY CRAIG ANDREWS TABLE OF CONTENTS 1.0 INTRODUCTION 1 2.0 NEEDED TO
RESERVES RESERVES CONTENTS TAKING OBJECTIVES WHICH MISSION? WHEN DO YOU WIN PICK A MISSION RANDOM MISSION RANDOM MISSIONS
 i The Flames Of War More Missions pack is an optional expansion for tournaments and players looking for quick pick-up games. It contains new versions of the missions from the rulebook that use a different
Welcome to the eve of war; a conflict that will rip galaxies apart and this is where it begins. Playing the Game
 Welcome to 2175 Events have been set in motion that is drawing the human race into their first major conflict for over a 100 years; and it could possibly be their last. Welcome to the eve of war; a conflict
Wardens of the West. New Commanders. Contents. Tyrion Lannister. On Using This Expansion
 Wardens of the West Inside this Battles of Westeros (BOW) expansion are more troops and commanders for players to add to their Lannister army. In addition to new rules and components, this expansion also
Sequence of Play This rulebook is organized according to this Sequence of Play.
 Introduction...1 Sequence of Play...2 Campaign Set-Up...2 Start of Week...10 Pre-Combat...11 Combat...14 Post-Combat...19 End of Week...20 End of Campaign...22 Optional Rules...22 Credits...22 Sample Game...23
Portable Wargame. The. Rules. For use with a battlefield marked with a grid of hexes. Late 19 th Century Version. By Bob Cordery
 The Portable Wargame Rules Late 19 th Century Version For use with a battlefield marked with a grid of hexes By Bob Cordery Based on some of Joseph Morschauser s original ideas The Portable Wargame Rules
Airborne Landings For WWII MicroArmour :The Game
 Airborne Landings For WWII MicroArmour :The Game by Leif Edmondson. The WWII rulebook presents some parachute landing rules in scenario #3 A Costly Setback and in the Modern MicroArmour rule book as well.
Budget Battle. Phil West
 Budget Battle Phil West This set of rules was inspired by some sets of cheap toy soldiers with interesting pairings such as Army men vs Cavemen, Ninja vs Robots and so forth. These reminded me of the running
Components Locked-On contains the following components:
 Introduction Welcome to the jet age skies of Down In Flames: Locked-On! Locked-On takes the Down In Flames series into the Jet Age and adds Missiles and Range to the game! This game includes aircraft from
World at War. Blood and Bridges, Death of First Panzer, Eisenbach Gap COMBINED SCENARIO: A RACE FOR VICTORY. Robert Holzer, 2010
 World at War Blood and Bridges, Death of First Panzer, Eisenbach Gap Robert Holzer, 2010 COMBINED SCENARIO: A RACE FOR VICTORY In a sudden blitz attack a detachment of the 2 nd Soviet Airborne Division
Command Phase. Setup. Action Phase. Status Phase. Turn Sequence. Winning the Game. 1. Determine Control Over Objectives
 Setup Action Phase Command Phase Status Phase Setup the map boards, map overlay pieces, markers and figures according to the Scenario. Players choose their nations. Green bases are American and grey are
SCENARIO LIST. (In no particular order) SEIZE GROUND. - As per page #91 of the Warhammer 40,000 Rulebook -
 SEIZE GROUND. - As per page #91 of the Warhammer 40,000 Rulebook -") The following is the complete list of scenarios that may be played at the 2011 Ultimate Warhammer 40K tournament. Four of these will be used by all players in the first four rounds of the tournament (pre-determined
The following is the complete list of scenarios that may be played at the 2011 Ultimate Warhammer 40K tournament. Four of these will be used by all players in the first four rounds of the tournament (pre-determined
Warhammer 40K Golden Rhino Tournament
 CREATED BY IAN PIETILA FOR USE AT THE HIGHLAND PUBLIC LIBRARY Warhammer 40K Golden Rhino Tournament JULY 28TH 1ST ANNUAL List Requirements and Structure INSIDE YOU LL FIND Army list requirements and structure.
I-95 GAMERS. Domination Missions
 I-95 GAMERS Domination Missions I-95 GAMERS Domination Missions Design notes Domination special rules Domination Frontline Domination Blind Domination Blitzkrieg Domination Early war Blitzkrieg Domination
NO DICE DARK AGES RULES get the kids involved. ANY SIZED FIGURES but if not
 NO DICE DARK AGES RULES get the kids involved ANY SIZED FIGURES but if not 28mm Foot 15mm frontage Depth 15mm,18mm,20mm depending on figure Cavalryman 25mm frontage Depth 40mm,50mm,60mm depending on figure
Napoleon s Triumph. Rules of Play (draft) Table of Contents
 Table of Contents") Rules of Play (draft) Table of Contents 1. Game Equipment... 2 2. Introduction to Play... 2 3. Playing Pieces... 2 4. The Game Board... 2 5. Scenarios... 3 6. Setting up the Game... 3 7. Sequence of Play...
Rules of Play (draft) Table of Contents 1. Game Equipment... 2 2. Introduction to Play... 2 3. Playing Pieces... 2 4. The Game Board... 2 5. Scenarios... 3 6. Setting up the Game... 3 7. Sequence of Play...
Lights in the Sky: War among the stars
 Introduction A long time ago, in a galaxy not so far away... Some of the most exciting and compelling moments from movies and books are the space battles. Whether a dogfight between a handful of star fighters
BATTLEFIELD TERRAIN STC RYZA-PATTERN RUINS
 BATTLEFIELD TERRAIN In this section you will find expanded terrain rules for the STC Ryza-pattern Ruins included in Moon Base Klaisus. You do not need to use these rules to enjoy a battle using the models,
Fantasy and Magic Casting spells Casters level Blocking Spells Continuing spells Summoned Creatures
 Fantasy and Magic For those that wish to add powerful magic casters and fantastic units, characters and armies to their Ancients D6 game, the following rules should allow them to do just that. Casting
15MM FAST PLAY FANTASY RULES. 15mm figures on 20mm diameter bases Large Figures on 40mm Diameter bases
 15MM FAST PLAY FANTASY RULES 15mm figures on 20mm diameter bases Large Figures on 40mm Diameter bases In brackets equivalent in inches ( ) DICE used D8 D10 D12 D20 D30 Terrain Board minimum 120cm x 90cm
Braccio da Montone INDEX
 Braccio da Montone INDEX 1.0 Introduction 2.0 Components 2.1 The Maps 2.2 The Counters 2.3 Game Scale 3.0 General Course of Play 4.0 Condottiero Activation Sequence 4.1 Continuum 4.2 Interruptio 4.3 Limits
Field of Glory V2 Ancients - UK Umpire Clarifications
 Field of Glory V2 Ancients - UK Umpire Clarifications This document has been compiled by several players who regularly umpire at BHGS and other events. It is intended to provide clarity, particularly for
FLASHBURN HYPER SIMPLE SCIENCE FICTION SKIRMISH WARGAMES RULES FREE! Pz8. Playtest & Ideas: Martin Nortman & The Southern Rebels
 FLASHBURN HYPER SIMPLE SCIENCE FICTION SKIRMISH WARGAMES RULES By Pz8 FREE! Playtest & Ideas: Martin Nortman & The Southern Rebels Players take the same number of miniatures (for example 10) and roll one
ARMOR DIAGRAM ARMOR DIAGRAM. Mech Data. Mech Data BATTLEMECH RECORD SHEET BATTLEMECH RECORD SHEET. Weapons Inventory.
 BATTLEMECH RECORD SHEET Left Torso Head Right Torso ARMOR DIAGRAM Type: HER-2S Hermes II Tonnage: 40 Points: Walking: 6 Running: 9 Weapons Inventory Mech Data Type Location Damage Short Med. Long 1 Autocannon
FAQ v.2.2. Q: Does a model that is currently fighting with a Great Weapon get free hacks if he's also carrying a hand weapon?
 FAQ v.2.2 Q: Several skills and abilities give a 4+ ward save vs. the effects of harmful spells. Does this include hex / nerf spells, like spells that lower characteristics values, give minuses to hit
SATURDAY APRIL :00AM 10:30PM 5:00PM 10:00PM :00PM
 SATURDAY APRIL 20 ------------------ 9:00AM 10:30PM 5:00PM 10:00PM ------------------ 9:00AM 9:00PM WARHAMMER 40K COMBAT PATROL Do not lose this packet! It contains all necessary missions and results sheets
DOMINATION PLAYER A PLAYER B
 DOMINATION The battlefield will provide a distinct tactical advantage for whoever holds it for many years to come. Victory can be achieved by forcing the enemy back and securing the key points on the battlefield,
CONTENTS CONTENTS 1 INTRODUCTION 3 ACKNOWLEDGEMENTS 3 UNIT REPRESENTATION 4 WHAT DO TROOP STANDS REPRESENT? 4 RECOMMENDED TROOP STAND SIZES 4
 CONTENTS CONTENTS CONTENTS 1 INTRODUCTION 3 ACKNOWLEDGEMENTS 3 UNIT REPRESENTATION 4 WHAT DO TROOP STANDS REPRESENT? 4 RECOMMENDED TROOP STAND SIZES 4 BEFORE BATTLE COMMENCES 5 THE PRIMARY RULE OF WARGAMING
Bible Battles Trading Card Game OFFICIAL RULES. Copyright 2009 Bible Battles Trading Card Game
 Bible Battles Trading Card Game OFFICIAL RULES 1 RULES OF PLAY The most important rule of this game is to have fun. Hopefully, you will also learn about some of the people, places and events that happened
SATURDAY APRIL :30AM 5:00PM 7:00PM :00AM
 SATURDAY APRIL 20 ------------------ 8:30AM 5:00PM 9:00AM 7:00PM ------------------ 9:00AM 5:00PM WARHAMMER ANCIENTS SINGLES TOURNAMENT Do not lose this packet! It contains all necessary missions and results
Remember the Alamo!* By George Knapp Version 6, 31 Jan 2000
 Remember the Alamo!* By George Knapp Version 6, 31 Jan 2000 *Please accept my apologies for the title. I do not mean to infringe upon any copyrighted material using the same name. These rules are for home
NapoleoN-The Game Beta Version 1.1
 «Napoleon» is a rule system to simulate big battles of the napoleonic era. The number of troops and units involved in those battles were huge. Nevertheless, these rules intend to keep things simple, allowing
On the day you also need to bring :
 In this pack you will find everything you will need to do and know, to prepare for and play in the OMG Bolt Action Tournament. Tournament Organiser: Jeff Black Players Pack/ Tournament Rules writer: Jeff
Sample file ACKNOWLEDGEMENTS
 ACKNOWLEDGEMENTS Thanks to the members of the Stamford Adventurers Society for playtesting these rules, albeit in a slightly different guise. Thanks to Mike Owen and Lon Weiss for putting the idea in our
Operation Blue Metal Event Outline. Participant Requirements. Patronage Card
 Operation Blue Metal Event Outline Operation Blue Metal is a Strategic event that allows players to create a story across connected games over the course of the event. Follow the instructions below in
IV. TROOPS FAQ SPECIALIZED UNITS 2
 IV. TROOPS FAQ STANDARD UNITS 1 7 8 8 Infantry Move 0-1 and battle, or move 2 no battle May Take Ground on successful Close Assault Armor Move 0-3 and battle May Overrun on successful Close Assault Artillery
Game Turn 11 Soviet Reinforcements: 235 Rifle Div can enter at 3326 or 3426.
 General Errata Game Turn 11 Soviet Reinforcements: 235 Rifle Div can enter at 3326 or 3426. Game Turn 11 The turn sequence begins with the Axis Movement Phase, and the Axis player elects to be aggressive.
SATURDAY APRIL :30AM 5:00PM
 SATURDAY APRIL 20 ------------------ 8:30AM 5:00PM 9:00AM 5:30PM ------------------ 9:00AM 5:00PM LORD OF THE RINGS CHAMPIONSHIPS Do not lose this packet! It contains all necessary missions and results
Montelimar: Anvil of Fate Scenario 1 -Opening Blows - The Feint
 Montelimar: Anvil of Fate Scenario 1 -Opening Blows - The Feint Introduction This is an after action report of a play test game of Monlimar: Anvil of Fate. Please note that the Vassal module and graphics
Dungeon Cards. The Catacombs by Jamie Woodhead
 Dungeon Cards The Catacombs by Jamie Woodhead A game of chance and exploration for 2-6 players, ages 12 and up where the turn of a card could bring fortune or failure! Game Overview In this game, players
How to Win Axis and Allies Style Games
 How to Win Axis and Allies Style Games October 31, 2006 Alan Richbourg Why Try? Whether you win or lose, especially in the long run, it s most rewarding for all players if they all make a reasonable effort
SERIES RULEBOOK. Game Design by Mark S. Miklos. Version: June 2017 TABLE OF CONTENTS. Great Battles of the American Revolution
 1 SERIES RULEOOK Game Design by Mark S. Miklos Version: June 2017 TALE OF CONTENTS 1. Introduction... 2 2. Components... 2 3. Game Scale and Terminology... 2 4. How To Win... 3 5. Sequence of Play Outline...
SPACE EMPIRES Scenario Book SCENARIO BOOK. GMT Games, LLC. P.O. Box 1308 Hanford, CA GMT Games, LLC
 SPACE EMPIRES Scenario Book 1 SCENARIO BOOK GMT Games, LLC P.O. Box 1308 Hanford, CA 93232 1308 www.gmtgames.com 2 SPACE EMPIRES Scenario Book TABLE OF CONTENTS Introduction to Scenarios... 2 2 Player
Powers and Abilities
 Powers and Abilities SPEED X FLURRY Give this character a close combat action. It makes two separate close combat attacks as free actions (making two separate attack rolls) against one or two adjacent
THE RULES 1 Copyright Summon Entertainment 2016
 THE RULES 1 Table of Contents Section 1 - GAME OVERVIEW... 3 Section 2 - GAME COMPONENTS... 4 THE GAME BOARD... 5 GAME COUNTERS... 6 THE DICE... 6 The Hero Dice:... 6 The Monster Dice:... 7 The Encounter
The Esoteric Order of Gamers
 The Esoteric Order of Gamers www.orderofgamers.com High quality materials for the dedicated devotee of immersive, thematic tabletop games. Game rules summaries, foamcore box plans, articles, interviews,
VICTORY IS VENGEANCE. Sunday 14th MAY
 VICTORY IS VENGEANCE Sunday 14th MAY HORUS HERESY VICTORY IS VENGEANCE WHAT IS IT ALL ABOUT? Victory Is Vengeance is the focus of an elite team of commando-style raids, head-hunter missions and precise
command efficiency table
 sequence of play 0. PRE-GAME ORGANIZATION PHASE. 1. POSTURE DETERMINATION PHASE 2D6 + Cohesion. Highest total has initiative in this phase. Mark required stands or groups in movement posture. [6.01.01]
Historicon Ancient and Medieval
 HISTORICON 2 INTRODUCTION Welcome to version 1.5 of Historicon. These rules are the product of a great deal of research over the last number of years. The intent behind them is to achieve the following
IMPERIAL ASSAULT-CORE GAME RULES REFERENCE GUIDE
 STOP! This Rules Reference Guide does not teach players how to play the game. Players should first read the Learn to Play booklet, then use this Rules Reference Guide as needed when playing the game. INTRODUCTION
Shooting Value. Morale Value
 16 th -17 th Century Japanese Army During the Sengoku Jidai warlords known as daimyo raised and led armies to dominate regions of Japan always with the ultimate goal of becoming Shogun. At the same time
001 \ FORTRESS AMERICA
 TM TM 00 \ FORTRESS AMERICA ONE NATION, UNDER SIEGE! IN THE ST CENTURY, THE UNITED STATES OF AMERICA UNVEILED A NEW SYSTEM OF SATELLITES AND POWERFUL LASERS THAT PROVIDED NOT ONLY A FLAWLESS DEFENSE AGAINST
The Belfry. Table Of Contents
 The Belfry The siege tower in the original SIEGE game always looked weird to me with its 3 tiny hexes. This belfry has been put to scale and takes full advantage of its multiple levels and included drawbridge.
WARHAMMER FANTASY IT s HOW YOU USE IT TOURNAMENT
 9:00AM 2:00PM FRIDAY APRIL 20 ------------------ 10:30AM 4:00PM ------------------ FRIDAY APRIL 20 ------------------ 4:30PM 10:00PM WARHAMMER FANTASY IT s HOW YOU USE IT TOURNAMENT Do not lose this packet!
For 2 to 6 players / Ages 10 to adult
 For 2 to 6 players / Ages 10 to adult Rules 1959,1963,1975,1980,1990,1993 Parker Brothers, Division of Tonka Corporation, Beverly, MA 01915. Printed in U.S.A TABLE OF CONTENTS Introduction & Strategy Hints...
ALAMO Thirteen Days of Glory A GAME BY FRANCK YEGHICHEYAN Translation: Roger Kaplan
 ALAMO Thirteen Days of Glory A GAME BY FRANCK YEGHICHEYAN Translation: Roger Kaplan Alamo is a solitaire game depicting the Sunday, March 6, 1836 climax of the thirteenday siege of the Alamo Mission that
Fleet Engagement. Mission Objective. Winning. Mission Special Rules. Set Up. Game Length
 Fleet Engagement Mission Objective Your forces have found the enemy and they are yours! Man battle stations, clear for action!!! Mission Special Rules None Set Up velocity up to three times their thrust