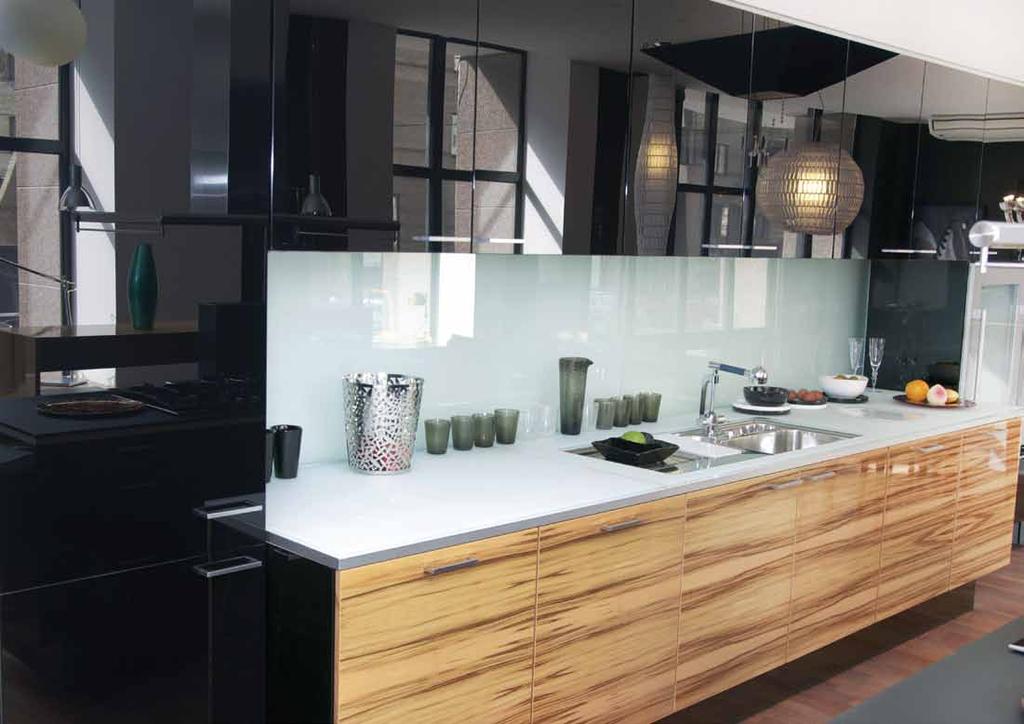
REDEFINING SPLASHBACKS
|
|
|
- Edwin Nash
- 5 years ago
- Views:
Transcription


1 AluSplash User & Installation Manual REDEFINING SPLASHBACKS 1 Winding Drive Suite 100 Philadelphia PA vitali@megasupplystore.com

2
3 Important Information 01 Product Characteristics 1. Product Composition 2. Product Applications 3. Sheet Dimensions & Tolerances 4. Colors 5. Metallic Colors 6. Solid Colors 7. Adhesives 8. Warranty 9. Care & Maintenance Fabrication & Installation Guide 1. Planning your Installation 2. Tools & Materials 3. Sheet Inspection 4. 3 Types of Installations Methods 5. Routing & Folding 6. 6 Easy Steps to a Perfect Installation
4 1 1. To achieve optimum product performance and compliance, AluSplash Splashback Panels must be installed in Important Information accordance to the installation guideline shown below in this manual. 2. It is important that a minimum set back distance indicated below between the installed AluSplash Panel and the cooktop is adhered to for the warranty to be effective. 30mm / mm / 2.36 Minimum distance between vitroceramic and induction cooktops to installed AluSplash Panel is 30mm or 1.2 Minimum distance between gas cooktops to installed AluSplash Panel is 60mm or It is important that if AluSplash Panels are used in a shower recess, shower wall or any other applications where the panel will be in subject to contact with water and/or steam, that the exposed side edges of the panel sheet must be sealed with silicon and must not be left exposed. Failure to comply may cause the panel to delaminate and the warranty will not apply if this guideline is not adhered to. 01
5 4. AluSplash panels are coated with a high durable and proprietary paint coating system, which can be cleaned easily. Damage caused to the coated surface by the use of abrasive, acidic and caustic-cleaning accessories will not be covered under the warranty. It is important the correct cleaning and maintenance guidelines outlined in this manual are followed, to not only maintain the panel s coated surface but also to keep the panel s warranty in force. 7. It is required that a 2 man lift or mechanical assistance be used when lifting and moving AluSplash Panels around. Always lift the panels in a vertical orientation to avoid buckling of the panel. Glazier s suction cups are recommend to be used to assist with lifting and moving the panels safely. Two Person Lift Required 5. AluSplash Splashback Panels comply with International Fire Standards to meet the highest fire safety regulations. The Panels are tested in accordance to: ASTM E-84 (United States) BS 476, Part 6 & 7, (British Standard) EN (European Union) AS/NZ (Australia/New Zealand) 6. It is important that Personal Protective Equipment (PPE) is always worn when handling, fabricating or installing AluSplash Splashback Panels. AluSplash Panel weighs approximately 7kg/m2 or 15.5lbs/m2 Panel Size 1250x3100mm 1500x3100mm weighs approximately 28Kg or 62lbs, 34kg or 75lbs. 8. Always transport AluSplash Panels horizontally on a solid pallet that supports the entire length of the panel. Ensure that the panels are strapped and protected with the top and bottom coversheets to prevent damage. Multiple Sheets should be transported with the decorative faces together. 9. Always inspect the panel sheet upon delivery and prior to fabricating and installing. Inspect the panel sheet for any visible damage such as dents, impact damage or deep scratches through the protective film. Panels with such defects should be rejected unless the damaged section is outside of the required usable area. Installation of damaged sheets will not be covered under the warranty. 02
6 10. AluSplash Panels can be fabricated easily with normal wood working tools. The Panels can be cut and folded easily around or into corners to give a continuous look without any joints. For simpler installation, AluSplash panels can be butt joined together or into corners. Allowance of 3mm is required for silicon sealing and thermal expansion if the butt joint installation method is being used. 11. AluSplash Splashback Panels can be cut for plumbing and electrical installations. The panels can be cut using a hole-saw or a jigsaw. A 3mm expansion gap around joins is required. AluSplash Panels are electrically conductive; a licensed electrician must perform all electrical work. A licensed plumber or gas fitter must perform all plumbing work. Always follow the above-mentioned guidelines and install the panels in accordance to the installation guidelines outlined in this manual. Failure to do so will leave the product unwarranted and could pose as a potential hazard. 12. AluSplash Splashback Panels are protected with a thick protection film to protect the coated surface from any damage. The film is marked with an arrow indicating the direction of installation. All panels must be installed in the same direction as the arrow to avoid visual color or gloss variation. The protective film should not be removed during fabrication or installation. Only remove the protection film after all works to install the panels are complete. 03
7


8 2 Product Product Characteristics Composition AluSplash is an advanced aluminium substrate, which is roller coated with a high durable, proprietary paint coating technology. The core material is produced under a feed block roll injection system, in which the front and back aluminium skins are composited with the extruded Fire Resistant core along adhesive polymer film which adheres the aluminium skins to the core material ensuring excellent bond integrity. The panel surface is flat and rigid and the panel conforms to the highest industry standards for smoke and flame propagation and fire-resistance. The coated surface of the Panel Sheets comes with a self-adhesive peel of protective film. Protective Film High Gloss, Durable Decorative Paint Coating Pretreatment Primer Top Aluminium Skin Mineral Fire Resistant Core Bottom Aluminium Skin Pretreatment Primer High Gloss, Durable Decorative Paint Coating Protective Film 05
9 Product Application Kitchen Splashbacks Kitchen Island & Bar Backs Alfresco and BBQ splashbacks Shower wall panels & Shower recess Vanity Splashback Mirror surrounds Laundry Splashbacks Feature Walls Spa Surroundings Shop fitting and Displays Commercial & Retail fit outs Sheet Dimensions & Tolerances in mm in inches Thickness (mm) Width (mm) Length (mm) /3100/ /3100/ /3100/ /3100/4100 Thickness (mm) Width (inches) Length (inches) /122/ /122/ /122/ /122/161 * Width Tolerance: +3mm * Thickness Tolerance: +/- 0.10mm *Width Tolerance: * Thickness Tolerance: +/- 0.10mm * Length Tolerance: + 4mm * Difference between diagonals: Max 3mm * Length Tolerance: *Difference between diagonals: Max 0.12 Colors AluSplash Splashback Panels are available in a wide array of earthy and vibrant colors. Visit to view full range of colors. Metallic Colors Juicy Red, Ruby Scarlet, Sandy Steps, Ash Brown, Totally Teal, Stardust Black, Space Silver, First Frost, Olive Green and Ocean Wave are high gloss metallic colors with metallic flakes. These colors are directional and hence must be installed in the same direction as shown by the arrows on the protection film. Solid Colors Luscious Lime, Orange Fizz and Arctic White are solid colors with a high gloss finish. Colors shown on the Company s brochures and website are subject to limitation of commercial printing and screen visuals and may not necessarily represent the actual color. It is highly recommended that an actual color sample be requested before purchasing. Color and gloss variations within the Company s acceptable tolerances could occur between different production batches and shall be treated as acceptable. All Panels must be installed in the same direction as shown on the panel s protective film. All visual inspection of Panels Sheets must be carried out from a two-meter distance of the Panel or Panels Sheets being placed vertically on or against a wall. 06
10 Adhesives AluSplash recommends using neutral cure silicon and 3M VHB double-sided tapes for installation of AluSplash Panels. Warranty AluSplash Panels are backed with 5 Year Limited liability warranty, when installed in accordance with the manufacturer s fabrication and installation guide, outlined below. Care and Maintenance AluSplash must be cleaned using only mild detergents, soft non-abrasive cleaning materials. Dirt, grime, cooking oils and food splashes must be cleaned off the panel surface regularly to maintain the gloss and esthetic look of the panel. Damage to the coated surface, which is not cleaned of such deposits, will not be covered under the warranty. Panel Surface must be cleaned regularly Only mild detergents and soft micro fiber cloth should be used to clean the coated surface Grime and food splashes should not be allowed to be built up on the panel surface The coated surface should not be cleaned if the surface of the panel is hot Acidic, caustic and abrasive cleaning detergents and materials should not be used to clean the panel s coated surface. Metal pot scrubbing pads or any other abrasive cleaners should not be used on the coated surface. Avoid placing metallic or sharp objects like knives and other utensils against the coated surface, as it may cause scratches on the panel s surface. The above-mentioned Care and Maintenance guidelines must be followed to maintain the panels coated surface and for the warranty to be effective for the period of the warranty. 07
 Read through all the installation steps below Measure the area where you plan to")

11 03 Fabrication & Installation Guide Planning your installation It is very important to plan your installation before commencing with cutting or fabricating the AluSplash Panel Sheet. Some handy tips to consider prior to installation Ensure that you wear appropriate Personal Protective Equipment (PPE) Read through all the installation steps below Measure the area where you plan to install the AluSplash Panel Measure twice, to double check Always use a two-man lift to carry panels around to avoid injury. Ensure everything is leveled Make sure you have all the fabrication materials and tools ready before commencing work. Decide on installation method you plan to use. After cutting and before installation, always do a dry fit to ensure everything measures up and components fit together nicely. If things get difficult, get professional help. Tools & Material required for Installation Recommended Cutting & Routing Tools : 1. Circular saw (using aluminium cutting blade) 2. Hand held Aluminium Routing Machine (Recommended Festool PF 1200) 3. Jigsaw (using aluminium cutting blade) 4. Hole saw or Drill (using HSS drill bits) Other material required for Installation 1. Measuring tape 2. Sand Paper 3. Glazier s Suction Cup x 2 4. Handy Knife 5. Masking Tape 6. Builders Angel 7. Leveling tool 8. Neutral Cure Silicon Adhesive 9. Silicon Gun 10. Metal File 11. VHB Double Side Tape 12. 3mm packers 13. Metal seam roller- for rolled over edge finish 08


 2 cm (0.8 ) 1 cm (0.")
12 Sheet Inspection It is important to inspect the panels prior to installation for damages that could have been caused during transportation or handling. Do not fabricate damaged sheets unless the damage section can be removed. Always check the protective film on the decorated surface for any drag marks or deep scratches that may have penetrated into the coated surface. If any visible damages are evident on the decorated surface of the panel upon delivery, do not use the panel and contact the distributor or retailer from whom the panel was purchased from immediately. (Level of Proficiency: Basic) 3. J-Profile Slide in method: This method is the easiest and fastest of the three suggested installation methods. It only requires a basic level of proficiency for installation. J profiles are screwed to the plaster wall or tile wall and the AluSplash Panel simply slides in. 1 cm (0.4 ) 2 cm (0.8 ) 1 cm (0.4 ) 3 Types of Installation Methods to Consider (Level of Proficiency: Intermediate to High) 1. Continuous and Grout free method: This method gives a clean, seamless, and continuous finish. To achieve this seamless finish, the Panels need to be routed using a hand routing tool so that it can be folded around internal or external corners. Refer to section of Routing & Folding below to see how to route and V Groove the panels correctly. J-Profile AluSplash Panel (Level of Proficiency: Intermediate) 2. Butt Join method: This method is easy, fast and simple to carry out by anyone with an intermediate level of proficiency. With this method, the flat panels are butt joint together at the corners and do not require any routing or folding, hence joints will be visible and does not give a seamless and continuous look. It is important to take into consideration minor thermal expansion of the panel sheets during heating and cooling, hence a 3mm gap must be maintained between the panel sheets when butt joining to allow the panels to expand and contract and for caulking and sealing. Slide AluSplash Panel inside the J-Profile groove AluSplash Panel leave 3 mm gap to fill with silicone 09
 must be retained at the base allowing enough room for easy folding.")
13 Routing & Folding AluSplash Panels can be routed using a handheld routing machine like a Festool PF1200 or similar or a flatbed CNC router to route a V shaped groove on the reverse side of the panel sheet. When routing, the groove should not be made all the way to bottom, a thin layer of core (0.8 mm) must be retained at the base allowing enough room for easy folding. This is to prevent the paint on coated surface and the aluminium from cracking or crazing during the folding process. Always use a vacuum to extract the swarf build up on the panel or clear the swarf regularly to avoid build up on the panel. For more information on appropriate routing speeds and other technical information of Festool PF1200 hand held router, please visit Form milling cutter with cylindrical shaft for hand routing Ø 8mm Ø 8mm Ø 8mm 90 o mm 0 bis 4mm 135 o mm 0 Ø 10/15 mm 0.8mm 0.8mm 1.3 mm Milling cutter for V-grooves, 90 o Milling cutter for V-grooves, 135 o Milling cutter for rectangular grooves 90 o r~3 mm 0.8mm 3mm Groove 90 o (V-shape) for foldings up to 90 o 10
14 6- Easy Steps to a Perfect Installation Step 1: Area preparation Ensure that the wall or tile surface is smooth, clean and free from any cracked plaster, grease, large holes, and paper tears. Use a Sand paper to smoothen the wall surface and patch up any holes with a plaster filling. The application surface must be flat, square, dry, clean and smooth. If covering an existing tile wall make sure that the tiles are securely attached to the wall. Step 2: Measuring Take your measurements with precision. Measure twice! Protect the AluSplash panel and place it face down on a clean surface. Report your measurements on the backside of the panel. Use masking tapes to mark out location of any Power points on the wall if any. Measure the distance from the top of the working counter top and bottom of the upper cabinets and measure the distance from wall to wall (See diagram below). If using behind a gas cooktop with an open flame, ensure a 60mm distance is respected between the panel and edge of the cook top. For use behind a vitro-ceramic or induction cook top a 30mm distance must be maintained. 90 o Measure the height between your benchtop and the bottom of your cabinets 2. Measure the full width of your panel Do not forget to measure the exact position of each power outlet 4. Repeat for each wall Step 3: Cutting and fitting Work on the reverse side of the panel. Cut and fit your panel just like a wooden board. Measure the distance from the wall to the power points and from the bottom of the worktop to the power points and clearly mark out the exact position of the power point on the panel, then use a drill or a hole saw followed by a jigsaw to cut out the hole for the power socket. 11
.")

15 Step 4: Dry test and remove the film off reverse side of the panel Apply the panel against the wall without using any bonding material to test its positioning using a glazier s suction cup to assist with handling. Once satisfied remove the protection film on the side of the panel that will face the wall (reverse side). AluSplash Panels are usually coated with two different colors on either side of the panel. It is important to know which is the right side that will face out and which side will face the wall. Do not remove the film from the decorated side which will face out at this stage. Only remove the film on the reverse side of the panel that will be stuck against the wall. Remember to leave a 3mm (0.12 ) gap if using the Butt Joint Method. 3mm 3mm 3mm 3mm 1. Butt joins to allow 3mm comer gap 2. Folded corner has no gap Gap Allowance for dry fit sheet - butt join method Step 5: Apply the Double Sided Tape & Silicone Apply the double-sided VHB tape on the wall in straight strips at an interval of 400mm (15.75 ) to each other. Next apply a neutral cure silicone adhesive with a caulking gun in a Zigzag pattern between the strips of double-sided tapes. Double sided tape Silicone applied in zig-zag pattern Step 6: Panel Installation Apply the panel against the wall, then peel away the protective film. Do not use excessive force while peeling the protective film, as it may shift the installed panel. Once the protective film is removed off the decorative side, apply masking tape around the 3mm gaps where the silicon is to be filled, to ensure a clean finish. Apply silicon into the 3mm gaps between panels and between panels and overhead cabinets and bench tops to avoid any water infiltration. It is very important to ensure the edges are sealed with silicon and edges are not left exposed to water or steam. Failure to comply may cause the panel to delaminate and void the warranty. Application pattern for silicone Removal of protective film 12
16 1 Winding Drive Suite 100 Philadelphia PA Disclaimer All information, photos, illustrations, diagrams and recommendations with regards to the fabrication and installation methods provided in this manual and or other marketing materials are for general information only and accurate at the time of printing to the best of our knowledge. The Company disclaims all liabilities whatsoever, including for injuries to persons and property, loss of Panels Sheets, loss of profits, loss of goodwill or any tangible or intangible loss, however arising. The user must determine the suitability of all the information provided in this Manual in relation to their particular purpose and specific circumstances. As the information contained in this manual may be applied under conditions beyond the Company s reasonable control, the Company cannot be held liable under any circumstances whatsoever, for failure by the user or any person acting or refraining from action as a result of this information. Errors & Omissions The Company has taken all reasonable steps to ensure that all information provided in the Company s catalogue and other marketing materials is accurate. However it may be possible that, due to human error or oversight in the production of the catalogue and other marketing materials, some of the contents in these publications may have inaccuracies or errors. The Company shall not be held liable for any direct, indirect, special, incidental, consequential or exemplary damages, including but not limited to, damages for loss of profits, goodwill, use, or other intangible loss whatsoever, arising out of the use of incorrect or incomplete information contained in the Company's publications. The Company reserves the absolute right to amend, alter, change, substitute, replace, any or all of the contents in any of its publications at any time without any prior notice whatsoever. USA, UK, Netherlands, Germany, Belgium, Scandinavia, Central & South America, Spain, Italy, Dubai, Singapore, Thailand, Philippines, Australia, New Zealand
Reynobond GRANDEZZA Interior aluminium composite panels Fabrication and installation guidelines
 GUIDELINES FOR REYNOBOND GRANDEZZA INTERIOR adpephoto Fotolia.com Laminex Reynobond GRANDEZZA Interior aluminium composite panels Fabrication and installation guidelines oliver-marc steffen Fotolia.com
Rev. 05/16 01 ACRYLIC INSTALLATION GUIDE
 Rev. 05/16 01 ACRYLIC INSTALLATION GUIDE Contents 1.0 Inspection 3 2.0 Storage 3 3.0 Handling 3 4.0 Planning & Preparation 3 5.0 Panels 4 6.0 Accessories 4 7.0 Tools & Fixings 4 8.0 Fitting Tips 5 9.0
Splashback Installation Instructions
 Splashback Installation Instructions What is Akril? Akril is an Australian made environmentally friendly, highly engineered polymer, enhanced with colour. Quite simply, it offers a new source of design
MANUFACTURE GUIDELINES
 PRE-INSTALLATION CHECKS Ensure cabinets are fitted correctly and level prior to installing the Evostone work surface. It is a condition of the Evostone 10 year limited warranty that before any fabrication
WET AREA PANELLING. Designer Walls. Fast
 WET AREA PANELLING Designer Walls. Fast AU/a5 WallART Brochure_ART BUNNINGS.qxp_Layout 1 7/6/18 10:16 am Page 3 LINEAR SERIES WET AREA PANELLING Add a touch of class to your SHEET COLOURS home or workplace
Installation Instructions
 www.marlite.com Effective Date 03/01/2018 ARTIZAN FRP, SYMMETRIX FRP, ENVUE FRP, STANDARD FRP Installation Instructions Statements expressed in this technical bulletin are recommendations for the application
Before you Begin... 3 Storage and preparation... 3 Tools & Materials You may Need... 4
 Installation Guide Installation Guide Contents INTRODUCTION... 2 Before you Begin... 3 Storage and preparation... 3 Tools & Materials You may Need... 4 Adhering your Think Solid benchtop to your cabinets
Linda Barker Collection Heritage Collection Classic Collection INSTALLATION GUIDE
 Linda Barker Collection Heritage Collection Classic Collection INSTALLATION GUIDE Ruler Pencil Masking tape Measuring tape Silicone sealant & silicone gun Power drill & screwdriver High-grab adhesive Jig
Installation Guide 1
 1 2 Contents Before you begin Storage & preparation Tools & materials you may need Getting started Sink & cooktop cut-outs Cabinet Joins for 20mm benchtops Joining & installation of 20mm benchtops Joining
Wet Area Panelling. Linear Series
 Wet Area Panelling Linear Series LINEAR SERIES WET AREA Add a touch of class to your home or workplace with the Linear Series, WallART s line of wet area panelling. With a striking range of colours and
CLASSIC RANGE PLUS RANGE PHOTO WALL. Pre-installation check-list
 CLASSIC RANGE PLUS RANGE PHOTO WALL The following is an installation guide for fitting Multipanel CLASSIC RANGE, PLUS RANGE, PHOTO WALL Jig saw or Hand saw Measuring Tape Ruler Pencil High-grab adhesive
INSTALLATION INSTRUCTIONS. GetaCore Kitchen Worktops
 INSTALLATION INSTRUCTIONS GetaCore Kitchen Worktops INSTALLATION INSTRUCTIONS GetaCore Kitchen Worktops SAWING MILLING Before being cut, the solid surface material parts to be joined should be checked
Lustrolite Installation Guide
 Lustrolite Installation Guide EDITION 2 lustrolite.com Introduction Lustrolite is the superior high gloss acrylic panel featuring a high performance hard-coated surface. Ideal for heavy-duty vertical applications,
VIEWpanel Technical Manual
 VIEWpanel Technical Manual VIEWpanel is a prefabricated panel comprising 0.21 aluminium skin (1100 alloy) both sides, apart from our lite grade, which is 0.12 aluminium skin both sides and a polyethylene
Lumicor CSI Specification Guide Open Format Section Solid Polymer Fabrication
 Lumicor CSI Specification Guide Open Format Section 06650 Solid Polymer Fabrication I. GENERAL 1.01 DESCRIPTION A. Work described in this section: 1. Wall Partitions 2. Lighting 3. Table tops 4. Bar tops
How-to-Install. Laminate Countertops and Sheet Laminate. FREE brochure Reverso en español
 FREE brochure Reverso en español How-to-Install Laminate Countertops and Easy to install instructions provided inside Multiple colors available for unique design options Durable and easy to care for Accessory
PRIME SHOWER ENCLOSURE INSTALLATION INSTRUCTIONS
 PRIME SHOWER ENCLOSURE INSTALLATION INSTRUCTIONS IMPORTANT DreamLine reserves the right to alter, modify or redesign products at any time without prior notice. For the latest up-to-date technical drawings,
Ulltraclad Aluminium Cladding. Contents. 1.0 General Information Design Information Installation Information 7. 4.
 Ulltraclad Aluminium Cladding Contents 1.0 General Information 2 2.0 Design Information 4 3.0 Installation Information 7 4.0 Maintenance 10 5.0 Health & Safety 10 1 1.0 General Information 1.1 Introduction
Masking: Each mirrored sheet is well protected by a durable paint backing and
 STORAGE Horizontal storage: If mirror sheets are stored flat, care must be taken to avoid warping, slipping and scratching. If different sizes are stored together the largest panels should at the bottom
VANITY CABINET + MIRROR VANITY SET: LV1-30 INSTALLATION INSTRUCTIONS. Version 1.1
 INSTALLATION INSTRUCTIONS Version 1.1 READ ALL INSTRUCTIONS BEFORE UNPACKING THE PRODUCT 2 PEOPLE ARE REQUIRED TO LIFT AND DURING ENTIRE INSTALLATION OF THIS PRODUCT INSTALLATION OF LESSCARE PRODUCTS BY
INFINITY-Z SHOWER DOOR / TUB DOOR INSTALLATION INSTRUCTION. MODEL #s 01-Chrome
 INFINITY-Z SHOWER DOOR / TUB DOOR INSTALLATION INSTRUCTION IMPORTANT DreamLine reserves the right to alter, modify or redesign products at any time without prior notice. For the latest up-to-date technical
Installation Instructions
 Aspex Digitally Printed Wall Art PL PREMIUM HEAVY DUTY ADHESIVE ASPEX WALL ART DOUBLE SIDED FOAM TAPE Installation of Aspex Digitally Printed Wall Art with Foam Tape and PL Premium Adhesive. Maximum size
Flexicryl Splashback Installation Guide Easy DIY Add a Pop of Colour!
 Flexicryl Splashback Installation Guide Easy DIY Add a Pop of Colour! Product Information - 4mm High Gloss Flexicryl Splashback Panels - Hard-co-extruded surface for hygienic clean sustaining daily use
QWALL 4 ACRYLIC SHOWER WALL INSTALLATION INSTRUCTIONS
 QWALL 4 ACRYLIC SHOWER WALL INSTALLATION INSTRUCTIONS IMPORTANT DreamLine TM reserves the right to alter, modify or redesign products at any time without prior notice. For the latest up-to-date technical
SINKS AND LAVATORIES. Steps to completion: These items are essential for installing all sinks:
 DUPONT CORIAN SOLID SURFACE FABRICATION/INSTALLATION FUNDAMENTALS NA/ENGLISH SINKS AND LAVATORIES INTRODUCTION This bulletin discusses installing DuPont Corian solid surface sinks and lavatories. OVERVIEW
KITCHEN INSTALLATION GUIDE
 KITCHEN INSTALLATION GUIDE The step-by-step guide to installing your new kitchen right The materials and tools you ll need This brochure is your guide to preparing and installing your new kitchen. Inside
Installation Guidelines for all Quaker products with nail fins New Construction nail fin installation with a Zip sheathing system.
 www.quakerwindows.com www.quakercommercialwindows.com PO Box 128 504 Highway 63 South Freeburg, MO 65035 800-347-0438 573-469-4151 (fax) Installation Guidelines for all Quaker products with nail fins New
IMPORTANT READ ALL INSTRUCTIONS CAREFULLY BEFORE STARTING THE INSTALLATION
 SAPPHIRE ALCOVE SHOWER INSTALLATION GUIDE IMPORTANT READ ALL INSTRUCTIONS CAREFULLY BEFORE STARTING THE INSTALLATION SHOWER WALL TOP RAIL DOOR RETAINER DOOR RETAINER DOOR ASSEMBLY DOOR SILL SHOWER TRAY
EASY APPLICATION. Furniture Linoleum
 EASY APPLICATION Furniture Linoleum can be applied easily on all common materials such as MDF, chipboard and Plywood as well as steel or composite materials. Furniture Linoleum has a special matte appearance
KITCHEN INSTALLATION GUIDE
 KITCHEN INSTALLATION GUIDE The step-by-step guide to installing your new kitchen right This brochure is your guide to preparing and installing your new kitchen. Inside you ll find tips and ideas, clear
September 10, 2009 Page 1 PRODUCT DESCRIPTION PRODUCT FEATURES
 September 10, 2009 Page 1 PRODUCT FEATURES BASIC USES/RELATED USES Interior decorative tile. Architectural tile for decorative wall surfaces, backsplashes and other applications. Custom architectural and
QWALL 5.2 (2 Back Panels)
") QWALL 5. ( Back Panels) SHOWER ACRYLIC WALL INSTALLATION INSTRUCTIONS IMPORTANT DreamLine TM reserves the right to alter, modify or redesign products at any time without prior notice. For the latest up-to-date
QWALL 5. ( Back Panels) SHOWER ACRYLIC WALL INSTALLATION INSTRUCTIONS IMPORTANT DreamLine TM reserves the right to alter, modify or redesign products at any time without prior notice. For the latest up-to-date
Installation Guide. Pionite Decorative Surfaces One Pionite Road, Auburn, Maine PIONITE ( )
") Installation Guide A Subsidiary of Panolam Surface Systems SMPBRO00-012 6/14 Pionite decorative laminates are designed for finished interior surfaces which require high impact, wear and stain resistance
Installation Guide A Subsidiary of Panolam Surface Systems SMPBRO00-012 6/14 Pionite decorative laminates are designed for finished interior surfaces which require high impact, wear and stain resistance
Backpainted Glass Technical Manual
 Backpainted Glass Technical Manual v.05.16 Table of Contents Element Designs manufactures custom backpainted glass for both commercial and residential applications. Custom backpainted glass is available
SHOWER DOORS INSTALLATION INSTRUCTIONS SHOWER DOORS: LBSDD Version 4.0
 D SHOWER DOORS INSTALLATION INSTRUCTIONS SHOWER DOORS: LBSDD7279 Version 4.0 PREPARATION FOR INSTALLATION SHOWER DOORS PREPARATION FOR INSTALLATION READ ALL INSTRUCTIONS BEFORE UNPACKING THE PRODUCT 2
VANITY SET: LV4 INSTALLATION INSTRUCTIONS VANITY CABINET + VANITY TOP + MIRROR. DRAWER BASE SINK BASE LV4-24 LV4-30 LV4-36
 SINK BASE LV4-24 LV4-30 LV4-36 DRAWER BASE LV4-DB12 VANITY CABINET + VANITY TOP + MIRROR INSTALLATION INSTRUCTIONS Version 1.0 DIMENSIONS/TECHNICAL DATA READ ALL INSTRUCTIONS BEFORE UNPACKING THE PRODUCT
multipanel Installation (panels) CONTENTS
 CONTENTS") multipanel Installation (panels) The following is an installation guide for fitting multipanel to walls, tiles, plaster, chipboard or concrete. A separate guide is available for fitting multipanel shower
multipanel Installation (panels) The following is an installation guide for fitting multipanel to walls, tiles, plaster, chipboard or concrete. A separate guide is available for fitting multipanel shower
PPC Aluminium Column Casings. Technical Information and Product Maintenance
 PPC Aluminium Column Casings Technical Information and Product Maintenance Product Description The Contour Aluminium column casing range is an aesthetically pleasing and robust solution to the problem
SPEKVA. Installation Instructions. Solid wood. August
 Installation Instructions Solid wood August 2013 www.spekva.com Table of contents Page Before installation - warranty coverage... 3 Receipt and storage... 4 Location... 4 Jointing worktops... 5 Attachment...
SECTION COUNTERTOPS ecox PART 1 GENERAL
 SECTION 11456 COUNTERTOPS ecox PART 1 GENERAL 1.1 SECTION INCLUDES A. Countertops B. Bar tops C. Vanity tops D. Table tops E. Reception counters F. Cash/back wraps G. Transaction counters H. Service counters
HOW TO INSTALL ELITE PANELED WAINSCOTING Using X-Rails with Either Raised, Flat or Beaded Panels
 HOW TO INSTALL ELITE PANELED WAINSCOTING Using X-Rails with Either Raised, Flat or Beaded Panels 1. First, remove the cover plates from all electrical outlets. All baseboards should also be removed; the
QWALL TUB TUB ACRYLIC BACK WALL INSTALLATION INSTRUCTIONS
 QWALL TUB TUB ACRYLIC BACK WALL INSTALLATION INSTRUCTIONS IMPORTANT DreamLine TM reserves the right to alter, modify or redesign products at any time without prior notice. For the latest up-to-date technical
Shower Screen and Door Kit Instructions
 Shower Screen and Door Kit Instructions Step by step guide everton.com.au IMPORTANT NOTICE IMPORTANT: The glass panels used for Highrove frameless shower screens are made from Grade A Toughened Safety
Hinge Door + Inline Panel + Return Panel
 Hinge Door + Inline Panel + Return Panel Instruction Manual DXL2HDR + DXL2HR + DXR Important Information Toughened glass is completely safe for use in our shower enclosures and bath screens; providing
Installing 3M DI-NOC Architectural Finishes on Doors
 Installation Guide Revision C, September 2017 Introduction The purpose of this installation guide is to establish a 3M-recommended procedure for installing 3M DI-NOC Architectural Finishes (the Product
solid surfaces for every room Mirostone fabrication and installation guidelines solid surface February 2018
 solid surfaces for every room fabrication and installation guidelines February 2018 solid surface fabrication and installation guidelines It is a condition of the limited warranty that the following supplementary
VITREO X SHOWER / TUB DOOR INSTALLATION INSTRUCTIONS
 VITREO X SHOWER / TUB DOOR INSTALLATION INSTRUCTIONS IMPORTANT DreamLine reserves the right to alter, modify or redesign products at any time without prior notice. For the latest up-to-date technical drawings,
CAVALIER. Shower Door Installation Instructions
 CAVALIER Shower Door Installation Instructions IMPORTANT DreamLine reserves the right to alter, modify or redesign products at any time without prior notice. For the latest up-to-date technical drawings,
Loose Lay Luxury Vinyl Plank
 Loose Lay Luxury Vinyl Plank FLEX COLLECTION Installation & maintenance * PLEASE READ CAREFULLY * Installation, maintenance & warranty guideline for loose lay luxury vinyl products. Adherence to This guideline
MAGNUM BOARD INTERIOR INSTALLATION GUIDELINES
 TECHNICAL BULLETIN No.: 090509-1405 Subject: Issue Date: September 4, 2009 Issue No.: II MAGNUM BOARD INTERIOR INSTALLATION GUIDELINES 1. CUTTING MAGNUM BOARD You can easily cut Magnum Board with carbide
CLASSIC RANGE PLUS RANGE CREATE RANGE - PHOTO WALL
 CLASSIC RANGE PLUS RANGE CREATE RANGE - PHOTO WALL The following is an installation guide for fitting Multipanel CLASSIC RANGE, PLUS RANGE, CREATE RANGE AND PHOTO WALL Jig saw or Hand saw Measuring Tape
DURACRYL WALL INDEX INTRODUCTION. TOOLS AND MATERIALS REQUIRED. FLAT SHOWER WALL SIDE CONTOUR SHOWER WALL CORNER CONTOUR SHOWER WALL FLAT BATH WALL
 DURACRYL WALL FLAT SHOWER WALL SIDE CONTOUR SHOWER WALL CORNER CONTOUR SHOWER WALL FLAT BATH WALL INSTALLATION GUIDE INDEX PAGES Introduction 1 Tools and materials 1-2 Construction requirements - timber
Processing and design Solid Textile Board
 Processing and design Solid Textile Board List of contents Introduction Kerfing Joints and assembly Increasing thickness and stiffness Edges Cutting Milling and drilling Three-dimensional pressing Surface
Repairs. Chapter 10 Repairs 10. 1
 10 Repairs Chapter 10 Repairs 10. 1 Repairs As an installer, you will probably be called upon to repair damage to a resilient floor. Here are some of the most common problems and the recommended repairs
SHOWER ENCLOSURES INSTALLATION INSTRUCTIONS SHOWER ENCLOSURES:
 D SHOWER ENCLOSURES INSTALLATION INSTRUCTIONS SHOWER ENCLOSURES: LBSDD4879-C+LBSED3679-CB LBSDD4879-B+LBSED3679-CB LBSDD6079-C+LBSED3679-CB LBSDD6079-B+LBSED3679-CB LBSDD7279-C+LBSED3679-CB LBSDD7279-B+LBSED3679-CB
FLEX 28 / 32 / 42 x 72
 FLEX 28 / 32 / 42 x 72 SHOWER DOOR INSTALLATION INSTRUCTIONS IMPORTANT DreamLine reserves the right to alter, modify or redesign products at any time without prior notice. For the latest up-to-date technical
Grenite Installation Information.
 Grenite Installation Information. v2.0 Effective: 11/2014 Thank you for your investment in Grenite products. This information is provided to help you fabricate and install Grenite products in a beautiful,
Wall Profiles 2 Pozi Screwdriver. Wall Profile Covers 4 Sealant. Large Panel and Thin Panel Assemblies Sealant Gun
 Decem Sliding Door (Corner Fitting) Instruction Manual DXT Important Information Toughened glass is completely safe for use in our shower enclosures and bath screens; providing our products are installed
Fitted Furniture Installation and Aftercare Guide
 Fitted Furniture Installation and Aftercare Guide Customer Service Contact Number 08008 778899 Important Information In the unlikely event that your product is damaged or faulty in any way, this must be
pacific build supply ltd
 Product Information ETERPAN is a medium density fibre cement sheet that is used for external cladding, plastered finish, base for stone and brick slips, rigid air barrier, weatherboards, soffits, louvres,
INSTALLATION GUIDE VERSION 11/14
 INSTALLATION GUIDE VERSION 11/14 In this guide we will demonstrate effective techniques and methods for installing EDGE stainless steel sinks seamlessly in both laminate and solid surface. These techniques
Installation Instructions
 Please read all instructions before installing products. STORAGE: Keep crates in the upright position. When unpacking, store panels flat in a clean dry place. BEFORE INSTALLATION: Check for damage that
3M Impact Protection Profile Installation System Instructions
 3M Impact Protection Profile Installation System Instructions IMPORTANT: READ INSTRUCTIONS FOR USE BEFORE OPERATING Intended Use: The 3M Impact Protection Profile Installation System is for installing
DURACRYL WALL INDEX INTRODUCTION TOOLS AND MATERIALS REQUIRED FLAT SHOWER WALL SIDE CONTOUR SHOWER WALL CORNER CONTOUR SHOWER WALL FLAT BATH WALL
 DURACRYL WALL FLAT SHOWER WALL SIDE CONTOUR SHOWER WALL CORNER CONTOUR SHOWER WALL FLAT BATH WALL INSTALLATION GUIDE INDEX PAGES Introduction 1 Tools and materials 1 Construction requirements - timber
wellington french patio doorset fitting & fixing guidelines
 wellington french patio doorset fitting & fixing guidelines CAUTION SAFETY: Large windows and glass units are heavy and may be hazardous. Great care MUST be taken to avoid injury during manual handling
LuxCore Installation Instructions
 LuxCore Installation Instructions ATTENTION: LuxCore PANELS MUST BE ACCLIMATIZED FOR 24 HOURS BEFORE INSTALLATION PLEASE READ ALL INSTRUCTIONS PRIOR TO INSTALLATION The guidelines provided herein have
QUARTZ FABRICATION MANUAL
 QUARTZ FABRICATION MANUAL Quartz Fabrication Manual Rev. 1 Page 1 of 26 TABLE OF CONTENTS Product Description. 3 Slab Inspection.. 4 Fabrication Equipment.. 6 FABRICATION TIPS Cutting The Slab. 7 General
Step-by-Step Installation Instructions for
 Step-by-Step Installation Instructions for Version 5-06/11 Before Starting: Please read and understand these instructions. Not following these instructions will invalidate your warranty (although this
Wall Panel Installation
 Wall Panel Installation Special care must be taken in handling of panels with grout lines, especially in cold weather. The indented grout lines are by necessity a little thinner than other areas of the
FLEX 48 x 72 / 60 x 72
 FLEX 48 x 72 / 60 x 72 SHOWER DOOR INSTALLATION INSTRUCTIONS IMPORTANT DreamLine reserves the right to alter, modify or redesign products at any time without prior notice. For the latest up-to-date technical
ESSENCE - H SHOWER / TUB DOOR INSTALLATION INSTRUCTIONS
 ESSENCE - H SHOWER / TUB DOOR INSTALLATION INSTRUCTIONS IMPORTANT DreamLine reserves the right to alter, modify or redesign products at any time without prior notice. For the latest up-to-date technical
Dubnium 11 Installation Instructions & Parts List
 Dubnium 11 Installation Instructions & Parts List Illustration Dubnium, H1 Handle Right Hand: Open Out Page 1 of 25 IMPORTANT This shower screen / enclosure must be installed by suitably qualified individuals.
Titan Installation Instructions
 Titan Installation Instructions Introduction: This manual was written to cover the fabrication and installation of sink bowls and tub and shower surrounds in residential and commercial applications. As
ELEGANCE SHOWER DOOR/ENCLOSURE INSTALLATION INSTRUCTIONS. Style A Style B Style C Style D
 ELEGANCE SHOWER DOOR/ENCLOSURE INSTALLATION INSTRUCTIONS IMPORTANT DreamLine reserves the right to alter, modify or redesign products at any time without prior notice. For the latest up-to-date technical
Tools required by installer: Materials required by installer:
 Installation Guidelines For Quaker Window Products Vinyl product line (Single Hung, Double Hung, Sliding Window, Fixed Window, Casement, Awning, and Hopper) Installer: Read these instructions completely
NATURA PRO Product Information Leaflet 1
 NATURA PRO Product Information Leaflet 1 1. Product composition NATURA PRO sheets consist of the following: Portland cement Mineral fillers Organic reinforcing fibers Additives Semi-transparent water-based
Robert Bosch GmbH. Wall organiser
 Wall organiser The organisational talent Wall organiser Say goodbye to messiness! The wall organiser is the ideal place to store everything that tends to lie around. 1 Introduction Wardrobes, drawers and
Argon 02 Installation Instructions & Parts List
 Argon 02 Installation Instructions & Parts List Illustration Argon, H1 Handle Right Hand: Open Out 16/06/2016 Revision 1.1 Page 1 of 10 IMPORTANT This shower screen / enclosure must be installed by suitably
INSTALLATION MANUAL STORAGE
 IMVersion 1.1 INSTALLATION MANUAL GENERAL GUIDE: The information in this IM is intended to serve as a general guide to proper installation with no warranties intended or implied. Prime Panels assumes no
Installation Instructions Palladium Square Edge Panels
 Please read all instructions before installing wall panels Important 1. Before installation: a. Acclimate Palladium Panels, Trim, adhesives and wall substrates to room temperature 24 hours before installation.
MIRAGE-X / BELLA. Shower Door Installation Instructions
 MIRAGE-X / BELLA Shower Door Installation Instructions IMPORTANT DreamLine reserves the right to alter, modify or redesign products at any time without prior notice. For the latest up-to-date technical
Hinge Door + Side Panel
 Hinge Door + Side Panel Instruction Manual KL+ KR Important Information Toughened glass is completely safe for use in our shower enclosures and bath screens; providing our products are installed according
VALENCIA RONDO DOOR WITH RETURN
 VALENCIA RONDO DOOR WITH RETURN INSTALLATION GUIDE SEALANT REQUIRED TO COMPLETE THIS INSTALLATION: ( not supplied) Sika Silaflex NG To seal the WHITE shower door and returns to the shower tray. Usage:
Installation Instructions Palladium 3D Hi Impact Wall System, Partial Height with Color Matched Caulk Joints
 Please read all instructions before installing Palladium 3D Hi Impact Wall System.. Before installation: a. Acclimate rigid sheet, Palladium 3D boards, adhesives and wall substrates to room temperature
EZYSTONE WORKSURFACES
 EZYSTONE WORKSURFACES Installation & Maintenance Instructions 1. Tools Required Worktop Edge Finishing Kit Pack 1-100mm Velcro Backing Pad Pack 2-100mm Diamond Dry Cut Velcro Discs (100 Grit Yellow) (200
Installing your new Bevella Top. L Shaped Countertop with Joints No Finished Ends (Fits Between Four Walls)
") Installing your new Bevella Top L Shaped Countertop with Joints No Finished Ends (Fits Between Four Walls) Bevella RTI Countertops are engineered and manufactured to the highest quality standards, built
Installing your new Bevella Top L Shaped Countertop with Joints No Finished Ends (Fits Between Four Walls) Bevella RTI Countertops are engineered and manufactured to the highest quality standards, built
Adhesive Application & Laminating System
 U S E R S G U I D E Adhesive Application & Laminating System The XM2500 is an economical and easy to use document finishing system. This versatile and non-electric system has been designed to laminate
Contents. pages 20-24: Installing Edge sinks into. custom laminate countertops page 8: Installing Edge sinks into postform laminate countertops
 Contents pages 2-8: Installing Edge sinks into custom laminate countertops page 8: Installing Edge sinks into postform laminate countertops pages 9-14: Installing Acrylic sinks into custom laminate countertops
ColorCore Laminate: Fabrication
 ColorCore Laminate: Fabrication Formica ColorCore is a high quality surfacing material. Most of the conventional tools, machines and methods used in the fabrication of normal laminates apply, but some
Installation Instructions
 Installation Instructions General Notes & Product Information Product profiles & details may vary by installation. Consult architectural drawings, details & specifications before installation of any Marlite
INSTALLATION SUGGESTIONS LEVEL APPLICATION LIMITED WARRANTY
 INSTALLATION SUGGESTIONS LEVEL APPLICATION LIMITED WARRANTY L.J. Smith, Inc. issues the following Limited Warranty: The product(s) furnished hereunder are warranted to be free from defects in material
Step-by-Step Installation Instructions for
 Customer helpline number: 01604 633607 8892_Step_By_Step_Corner_Door&Side_Panel_V4.indd 1 1/9/10 17:57:38 Before Starting: Please read and understand these instructions. Not following these instructions
Splashbacks & Wall Panels in High Gloss, Satin Finish, any colour & Filler EFX
 08 8381 8880 www.ispsinnovations.com.au Splashbacks & Wall Panels in High Gloss, Satin Finish, any colour & Filler EFX Bonethane, available in any colour & EFX. A Polymer based product & coating formula,
Retrofit Apron Front Farm Sink With Dual Mount Capability Installation Instructions
 For Under-Mount Installation please refer to page 14 FOR EXPERIENCED AND PROFESSIONAL INSTALLATION ONLY This installation project is designed for an advanced skill level. Disclaimer: Undermount Application
Approx. Weight in g/m²
 TECHNICAL DATA SHEET Magnetically Active glass fleece Properties / Typical application The back of glass fleece has a metallic coating. Standard, commercially available magnets therefore adhere directly
Radon 07 Installation Instructions & Parts List
 Radon 07 Installation Instructions & Parts List Illustration Radon 07, H1 Handle Right Hand: Open Out 14/06/2016 Revision 1.1 Page 1 of 21 IMPORTANT This shower screen / enclosure must be installed by
HBS-AP ASSEMBLING INSTRUCTIONS
 ALUMINIUM PIPEWORK - ALUMINIUM PIPEWORK - ALUMINIUM PIPEWORK 97 HBS-AP ASSEMBLING INSTRUCTIONS 1. INTRODUCTION 1.1. This manual is very easy to consult and we recommend reading it before starting work,
GOLDEN RULES FOR EASIFIX INSTALLATION
 GOLDEN RULES FOR EASIFIX INSTALLATION Golden rules - essential guidelines that need to be considered prior to preparation of the opening and before beginning installation of glass blocks. Glass block walls
Gluing windows with SABA Glasstack 760
 Info sheet 208 Gluing windows with SABA Glasstack 760 Version 2008-05-08 EN, replaces all prior versions Page 2 of 9 Info sheet 208 Gluing windows with SABA Glasstack 760, version 2008-05-08 EN 1. Introduction
Treefrog Technical Information Guide
 Treefrog Technical Information Guide Index Product Reference Sheet:... 2 Product Description:... 3 Size:... 3 Application:... 3 Storage & Handling:.... 3 Protective Mask:.... 4 Cleaning & Maintenance:....