Splashbacks & Wall Panels in High Gloss, Satin Finish, any colour & Filler EFX
|
|
|
- Oswin Fox
- 5 years ago
- Views:
Transcription


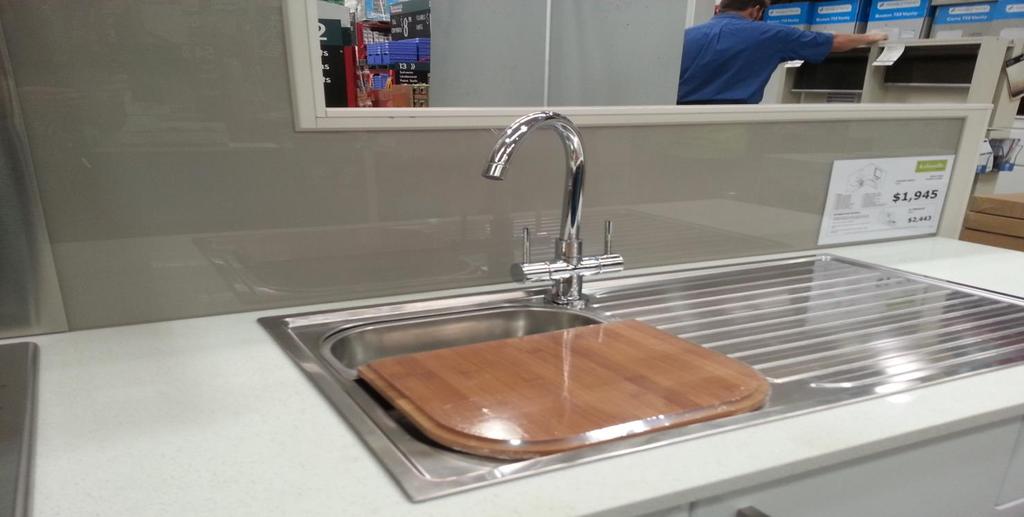
1 Splashbacks & Wall Panels in High Gloss, Satin Finish, any colour & Filler EFX Bonethane, available in any colour & EFX. A Polymer based product & coating formula, crafted & customised modelling strength, flexibility & colour spectrums that are simply endless. Bonethane Premium has a continuous service temperature of 110 C, Bonethane GN Acrylic grade has a continuous service temperature of 85 C. Light flexible, bringing style to any home or commercial environment. See our new filler EFX endless designs mixing colour combinations, used as either a mosaic filler design creating length extension, bordering or as a splashback or feature wall. Custom designed with your specific mix of colour blend, coordinating colours in high gloss or satin finish. Our Premium Metallic Satin finish range is durable & great for table tops, perfect for kitchen tables & bench spaces. Be in control, choose your colour, choose BonethanePremium or BonethaneGN Acrylic all custom made! Bonethane available in two grades Premium 120 C High Heat Polymer suitable for induction cook tops(maintain distance specifications, showers cubicles, wet areas, feature walls, hospitals, bars, does not split or crack when following cutting instructions. GN Acrylic grade 100 C great for feature walls & shower cubicles, not suitable for any cook-top. FEATURE & BENIFITS Bonethane grades are DIY & cost effective. Premium Sheets do not split or crack when cutting. Bonethane grades can be cut down with ease on site including power points & innovative angles. Bonethane grades available in any colour, metallic & Abstract EFX. Can be colour matched up to 12% variation to your selected colour choice. Bonethane is suitable for indoors, outdoors & most wet areas. Applied virtually anywhere you can imagine. Great for shower cubicles! Bonethane grades installation is easy, fast with a visual reward in a matter of hours. Bonethane GN Acrylic grade requires more attention when cutting & should not be confused with Bonethane Premium both substrates cut differently & handle heat differently. Easy to clean, warm soapy water & sponge, rinse residue. Bonethane grades air dry & shine, no polishing necessary saving you cleaning time. Harsh cleaning agents, gone! Bonethane grades can be placed over existing surfaces. Bonethane grades come with Grip Tech backing, no need to coat walls a neutral colour or sanding of the backs of sheets. Bonethane Premium is DIY friendly will not split or crack when cutting with standard fabricating equipment. Strictly follow our step by step instructions. Bonethane Premium has better heat distribution than Acrylic grades of material. Burn test on You Tube Bonethane Premium Vs Acrylic & out Candle burn test. Scratches easily buff out, see us demonstrate on Youtube Bonethane grades are a custom made to order DIY product. Order what you need in any colour, accessories also available. We can create your corporate colour & logos into our sheeting. On Bonethane Premium ISPS can double your Warranty, ask how. View Bonethane Premium VS Acrylic on You tube Ice Grey & Black Bonethane Bonethane Premium Violette Mushroom Ph: Bonethane Premium in this image Get Creative Midnight Metalic Star Bonethane Premium making you the DIY Master!


 Tile wedge Step 4 It is important to")

 measurements are final, making sure, Bonethane is face down,")


2 Step by Step Installation Guide Step 1 Step Bonethane Premium suitable for induction cook tops Step 8 Lay Bonethane flat for first 3 hours prior to Installation. Ensure wall is level flush free from holes neutral in colour forming even flat surface for Bonethane placement. Use only led pencil for marking cut outs or cuts on back of sheet, coated side. Power hole cut outs vary on the power switch. The cut out should not be greater than the covering plate. An electrician will also need to connect electricity if you have extra out lets. Switch off Electricity for your safety!!! Add clear silicone to the coated side of Bonethane ( this is the side that does not have protective film), first vertically from the top then horizontally creating a grid of squares around 10 to 15 cm width and length ways. Step 2 Before After Measure the outside perimeter of the wall. Length and height, allowing 1 to 2ml gap all around. For example if you: measure 500 height by 500 length your cut out area should be 498 x 498 (2ml) It is important that the 1 to 2ml gap is followed, allowing Bonethane to expand and contract. Also measure section for cut out. Step 3: Turn off Electricity from main switch!!! On perimeter of Bonethane allow a 1 to 2ml gap all around. The tile wedge will be placed around the perimeter of the mm gap once clear silicone is applied to back & placed upright, against wall. The tile wedge will hold Bonethane in place (more about this in STEP 8) Tile wedge Step 4 It is important to place Bonethane face down (masked side down) in preparation for cutting. The area for the preparation of cutting must be free of obstacles, on a solid flat, non slip surface, in a well ventilated, lit area. Ensure the Bonethane sheet is firmly secure in preparation for cutting. Step 6 Cut splash back once perimeter and cut out(s) measurements are final, making sure, Bonethane is face down, (that is the masked side is touching the flat level non slip surface and the coated side is facing you. Step 7 After clear silicone grid process, mount Bonethane onto wall, inserting cables through power hole cut outs, securing tile wedges around the 1 & 2ml allocated perimeter, leave tile wedges for approximately 2 hours. Clean surrounding areas free from saw dust particles. Once secure, peel off protective film from Bonethane face. Please refer to Care Do s for keeping Bonethane bright & beautiful Step 9 Finally use silicone clear non acidic to seal 2ml exposed joins & seal. Clear is always the safest choice, white is effective if you have a steady hand or you may seek the services of a professional. Follow instructions for silicone application, the product you choose should display instructions, make sure it is a water proof silicone used for kitchen and bathroom areas. When Bonethane is upright & in a secure position peel off masking. ISPS Innovations can provide a fire rated insert, custom made for behind your gas cook top. Made from Vetro Poly Star fire Toughened Glass in either metallic Silver or colour toned to blend with Bonethane Premium or Bonethane GN. Please enquire about our glass offer call ISPS also customise trim in 6mm Anodised or Colour coded to finish your joins & Filler EFX. TIPS: Incorporate tiles as a design DO NOT BUTT UP AGAINST COOK TOPS Trim & Filler EFX Combinations


, protective goggles, dust mask, saws, spirit level.")


3 Do not butt up against cook top Some of our standard Colour Range Orange Lime Mushroom Satin Blue Grape What you need Not included in Pack Jig saw fine sharp teeth to cut Premium & fine sharp plastic teeth blade for GN Acrylic grade. Drilling requires plastic drill bit attachment. The following items also required, tile wedges, silicone non acidic (Parfix All Purpose clear Silicone), protective goggles, dust mask, saws, spirit level. Call ISPS if in doubt 7 days a week. Satin Blue Ice Grey Apple A/White Bone Black BonethanePremium available in 16 standard Colours. The colours on this brochure vary from the actual colour. View display board in store for accurate colour. Call ISPS if you are unsure of colour A/White Induction Cook-top Apple Bonethane Premium Retro Dusk Bonethane Premium & Silver VetroPoly Toughened Glass


4 Grape Ice Grey Chocolate Kaboodle Green


5 Create a Colour! Flinders Green Linseed


6 Hog Bristol Full Strength Wasabinaise Bonethane Premium in Wendy s


7 Splashbacks & Wall Panels in High Gloss, Satin Finish, any colour & EFX Bonethane Premium Doors & Splashbacks SPECIAL ORDER For custom colour selection simply follow these steps: 1. Choose any colour sample either from our standard colour range, paint colour chips or another colour you may have ie (fabric), anything really. 2. Bring your colour chip into store for placing your order. You will need to supply the colour chip for colour matching. 3. Place your order at the Special Orders desk. 4. Your custom coloured Bonethane will be supplied in 10 to 15 work days. Colour Toning Existing High Gloss Bonethane Grades If you are extending, & require more Bonethane, ISPS Innovations can colour tone additional Bonethane for your project. What we require is a piece of Bonethane at least A4 to A3 size to be posted back to us, so we can process colour. We can have up to a 12% variation in colour toning gloss colours. If the gloss sample is to small we are limited in our colour process which can blow variation out to 25% & can effect pigment ratio. When colour matching satin colours we are dealing with one range of colour, when colour matching high gloss we need to factor in light contrast along with gloss depth. A small sample in gloss limits full colour range & variation up to 25% can occur. So the bigger the gloss sample the better the match. TIPS & COLOURS: 1 to 6 1) When ordering multiple colours, it is best to order of same colour batch. Ordering off different batches can result in variations. 2) A/White on white can appear grey, so choose your white carefully, this may be a special order. 3) Bonethane Grades come with Grip tech backing, no need to coat walls a neutral colour or sanding of the backs of sheets. 4) Adhesive, clear neutral cure silicone apply in grid format 10cm apart. 5) Use standard jig saw with fine sharp teeth for cutting. 6) Use plastic cutting blade for GN grade acrylic grade & plan cuts. Please call ISPS for tips & helpful information 7) Bonethane Premium is DIY friendly & will not split or crack when cutting & drilling with a jigsaw with fine sharp teeth. 8)When ordering from different colour batch through ISPS, please ensure an A3 or A4 gloss sample is provided. Please refer to our colour section on our website for more information on colour process
 B/Premium")

 Abstract EFX 5102346 Metallic 5102345 Printed Logo & colour backing TBA Designer cut out & two tone Colour")

8 All items are available cut out in two tone Note M2 rate applies to straight cut only. Additional charges apply for angles, elevated & power hole cut outs. 5mm Bonethane Grade Size Item Number TINY B/Premium 400 X 1200MM TBA MINI B/Premium 400 x2400mm TBA SML B/Premium 1200 x 760MM MED B/Premium 2440 x 600MM TBA STD (PACK INCLUSIONS) B/Premium 2440 x 760MM PACK LGE B/Premium 2440 x1220mm XL B/Premium 3000 x 760MM TBA XXL B/Premium 3000 x 900MM TBA XXXL B/Premium 3000 x 1100MM TBA CUT TO SIZE M2 RATE B/Premium OVER 1.85M2 TBA CUT TO SIZE M2 RATE B/Premium UNDER 1.85M2 TBA SMLGN GN Acrylic 2440 X 600MM TBA STD GN GN Acrylic 3000 X 600MM TBA LGEGN GN Acrylic 2440 X 1220MM TBA Shower Pack GN Acrylic 2 X 1M X2M SHEETS CUT TO SIZE M2 RATE GN GN Acrylic TBA CUT TO SIZE M2 RATE GN GN Acrylic TBA Colour Match Flat (solid colour not metallic) Abstract EFX Metallic Printed Logo & colour backing TBA Designer cut out & two tone Colour TBA Anodised Trim TRIM 2400MM 6MMSOLID TBA Colour coded Trim TRIM 2400MM 6MM SOLID TBA Cut to size 1 straight cut OPTION TBA Cut to shape OPTION TBA Power hole cut out OPTION TBA Bonethane Premium & GN Sheets come with GripTech backing. The backing is a different colour to face of the sheet, if you require similar colour backing please advise the team member & ask that they place on your purchase order. ISPS Innovations always have the right customised accessory for you to finish your project. Universal Joining Strip for vertical or Horizontal Joins & Designer Filler EFX by ISPS Innovations Filler EFX Bonethane Joiner Bonethane Sheet Joiner Filler Joining strip Vertical External corner created by joiner 6mm solid joining strip can be used as vertical or horizontal joiner, to join pieces or wrap around window or create external right angle. Filler EFX, custom designed. 65mm x 760mm. Longer lengths available. Additional charges apply. Call for more info. NEW Bonethane, Filler EFX A design based on the colour furnishings where Bonethane is applied. Allowing the design to be placed horizontal or vertical within the sheet, housed with our anodised joiners. A stone or marble filler Efx creating the finishing touch based on your colour scheme. Bonethane filler Efx fillers can also be used in conjunction with other products. Combination colours designed to your decor.

 3 straight cuts ( all the way through the sheet, angled cuts additional charge) 1 fire rated insert in Silver in either 600 x 300 or 900 x 300 ( additional charge on colour toning or")

 2 Sheets Bonethane Premium 2440 x 760 x 5mm 1 Flat colour match on any flat colour on Bonethane Premium (additional")
 12 Anodised Trim @ 760mm 2 Custom Filler EFX 65mm x 760mm Item number 5102179 Bonethane Premium 2440 x 1220 sheet is available in 16 House colours.")
9 Customised VetroPoly Toughened Glass for behind your gas burner Let ISPS assist you with your cook top needs. If you have a gas burner then VetroPoly Toughened Glass is just for you. ISPS can customise glass dimensions to reside specifically behind your cook top in metallic silver or colour toned to Bonethane sheeting. STD Bonethane Premium PACK offer & Upgrades... Through Bunnings on item number enclosed in this pack are the following items 1 Sheet Bonethane Premium 2440 x 760 x 5mm 1 Flat colour match on any flat colour (additional charge on metallic) 3 straight cuts ( all the way through the sheet, angled cuts additional charge) 1 fire rated insert in Silver in either 600 x 300 or 900 x 300 ( additional charge on colour toning or customising insert) 6 Anodised 760mm 1 Custom Filler EFX 65mm x 760mm If you purchase two of these fine line numbers ( ) to complete your project, ISPS will upgrade your insert for behind your cook-top from either a 600 x 600mm or 900 x 600mm in metallic silver. It is important to nominate size of insert as ISPS will place what ever insert is available at the time if this is not nominated. Additional charges apply to change & ship once order is received. With the Purchase of two sheets (2 x item number please see below you get) 2 Sheets Bonethane Premium 2440 x 760 x 5mm 1 Flat colour match on any flat colour on Bonethane Premium (additional charge on metallic) 6 straight cuts ( all the way through the sheet) 1 fire rated insert in Silver in either 600 x 600 or 900 x 600 ( additional charge on colour toning or customising insert to Bonethane Sheeting) 12 Anodised 760mm 2 Custom Filler EFX 65mm x 760mm Item number Bonethane Premium 2440 x 1220 sheet is available in 16 House colours. There are no inclusions, however colour matching, fire rated inserts, trim, filler EFX or cut to size & shape can be purchased at an additional charge. Bonethane Premium making you the DIY Master!
10 Splashback Blank, straight cut NAME: CONTACT PHONE: ADDRESS Purchase order number :
11 Splashback - Central Cut Out and PowerPoints NAME: CONTACT PHONE: ADDRESS Purchase order number
12 Splashback - Central Rangehood - 2 PowerPoints NAME: CONTACT PHONE: ADDRESS Purchase order number
13 Splashback - Central Rangehood - Left Hand PowerPoin NAME: CONTACT PHONE ADDRESS Purchase order number
14 Splashback - Central Rangehood - Right Hand PowerPoint NAME: CONTACT PHONE PHONE: ADDRESS
15 Splashback - Central Rangehood NAME: CONTACT PHONE PHONE: ADDRESS


16 Let ISPS Innovations assist you with all your custom interior & exterior needs. No minimum order quantity. Stay tuned, more updates to follow. SPECIALISING IN Benchtops in ColourTech Partitions in ColourTech Polyurethane Doors in Colour Tech BonethanePremium Splashbacks & Wall Panels BonethaneGN Acrylic grade Splashbacks & Wall Panels Bonethane10 Flooring, Benchtops, Wall Panels IPA Acrylic Splashbacks & Wall Panels Vetropoly Toughened StarFire Glass Alumethane composite panels KUTTM NEW YOU TUBE CLIP ON INSTALL OF BONETHANE PREMIUM LAUNCHED. ALSO SCRATCH TEST ON OUR PREMIUM SHEET. SEE US POLISH PREMIUM GRADE IN REAL TIME BEFORE YOUR EYES! BURN TEST Bonethane Premium Vs Acrylic & Candle Test, Bonethane Premium goes head to head with Acrylic substrates (Bonethane Premium Vs Acrylic) (Line up candle test, Bonethane premium is 5 th in the line up (red sample) counting from left to right) Grape Ice Grey It is regulation that when installing any products that Australian standards are followed in conjunction with the product you choose. Regulations are for your safety
Splashback Installation Instructions
 Splashback Installation Instructions What is Akril? Akril is an Australian made environmentally friendly, highly engineered polymer, enhanced with colour. Quite simply, it offers a new source of design
Rev. 05/16 01 ACRYLIC INSTALLATION GUIDE
 Rev. 05/16 01 ACRYLIC INSTALLATION GUIDE Contents 1.0 Inspection 3 2.0 Storage 3 3.0 Handling 3 4.0 Planning & Preparation 3 5.0 Panels 4 6.0 Accessories 4 7.0 Tools & Fixings 4 8.0 Fitting Tips 5 9.0
Curium 19.4H Installation Instructions & Parts List
 Curium 19.4H Installation Instructions & Parts List Illustration Curium 19.4H Right Hand Page 1 of 21 30/06/2016 Revision 1.0 IMPORTANT This shower screen / enclosure must be installed by suitably qualified
Curium 19H Installation Instructions & Parts List
 Curium 19H Installation Instructions & Parts List Illustration Curium 19H Right Hand Page 1 of 15 01/07/2016 Revision 2.1 IMPORTANT This shower screen / enclosure must be installed by suitably qualified
INFINITE RANGE - HINGE DOOR
 INFINITE RANGE - HINGE DOOR HINGE DOOR + 1 SIDE RETURN PANEL (CORNER) Please read these instructions before installing, as incorrect fitting will invalidate the guarantee-carry out each stage before moving
Flexicryl Splashback Installation Guide Easy DIY Add a Pop of Colour!
 Flexicryl Splashback Installation Guide Easy DIY Add a Pop of Colour! Product Information - 4mm High Gloss Flexicryl Splashback Panels - Hard-co-extruded surface for hygienic clean sustaining daily use
Dubnium 11 Installation Instructions & Parts List
 Dubnium 11 Installation Instructions & Parts List Illustration Dubnium, H1 Handle Right Hand: Open Out Page 1 of 25 IMPORTANT This shower screen / enclosure must be installed by suitably qualified individuals.
Step-by-Step Installation Instructions for
 Step-by-Step Installation Instructions for Version 5-06/11 Before Starting: Please read and understand these instructions. Not following these instructions will invalidate your warranty (although this
splashback product guide choose your splashback solution
 splashback product guide choose your splashback solution With your cabinets, hardware, accessories, doors, panels and benchtops installed, it s time to apply the finishing touches to your kitchen. This
WET AREA PANELLING. Designer Walls. Fast
 WET AREA PANELLING Designer Walls. Fast AU/a5 WallART Brochure_ART BUNNINGS.qxp_Layout 1 7/6/18 10:16 am Page 3 LINEAR SERIES WET AREA PANELLING Add a touch of class to your SHEET COLOURS home or workplace
CAVALIER. Shower Door Installation Instructions
 CAVALIER Shower Door Installation Instructions IMPORTANT DreamLine reserves the right to alter, modify or redesign products at any time without prior notice. For the latest up-to-date technical drawings,
INSTALLATION INSTRUCTIONS FRAMELESS CONTINUOUS HINGE SHOWER ENCLOSURE QCI5233
 INSTALLATION INSTRUCTIONS FRAMELESS CONTINUOUS HINGE SHOWER ENCLOSURE QCI5233 QCI5233 Rev 0 Page 1 Certified 06/20/2016 INSTALLATION NOTES: Unpack your unit carefully and inspect for freight damage. Lay
Argon 02 Installation Instructions & Parts List
 Argon 02 Installation Instructions & Parts List Illustration Argon, H1 Handle Right Hand: Open Out 16/06/2016 Revision 1.1 Page 1 of 10 IMPORTANT This shower screen / enclosure must be installed by suitably
Panel Riser Kit Option 1. Installation Instructions 226BEE 0117CH
 Panel Riser Kit Option 1 Installation Instructions 226BEE 0117CH Before you Start Please read these instructions fully before starting. Although these instructions are comprehensive we always recommend
Radon 07 Installation Instructions & Parts List
 Radon 07 Installation Instructions & Parts List Illustration Radon 07, H1 Handle Right Hand: Open Out 14/06/2016 Revision 1.1 Page 1 of 21 IMPORTANT This shower screen / enclosure must be installed by
A-935 RODA WALL MOUNT HINGES
 INSTALLATION INSTRUCTIONS A-935 RODA WALL MOUNT HINGES NEED INSTALLATION HELP? Call 1-800-45-BASCO (452-2726) Monday - Friday 8:00 A.M. - 4:30 P.M. Eastern Time FRAMELESS DOOR / PANEL CELESTA QCI0274 REV.
Wet Area Panelling. Linear Series
 Wet Area Panelling Linear Series LINEAR SERIES WET AREA Add a touch of class to your home or workplace with the Linear Series, WallART s line of wet area panelling. With a striking range of colours and
Frameless Inline Door With Return QCI5263
 INSTALLATION INSTRUCTIONS Frameless Inline Door With Return QCI5263 WALL MOUNT HINGES FRAMELESS DOOR / PANEL / RETURN PANEL QCI5263 REV. 0 Page 1 Certified 06/17/2016 Parts List with wall mount hinges
FRAMELESS DOOR / PANEL WITH WALL MOUNT HINGES QCI5274
 FRAMELESS DOOR / PANEL WITH WALL MOUNT HINGES QCI5274 QCI0274 QCI5274 REV. Rev. 1 0 Page Page 1 1 Date Certified: Certified 06/16/2016 10/01/10 Parts List with wall mount hinges ITEM NO. Part # DESCRIPTION
DURACRYL WALL INDEX INTRODUCTION. TOOLS AND MATERIALS REQUIRED. FLAT SHOWER WALL SIDE CONTOUR SHOWER WALL CORNER CONTOUR SHOWER WALL FLAT BATH WALL
 DURACRYL WALL FLAT SHOWER WALL SIDE CONTOUR SHOWER WALL CORNER CONTOUR SHOWER WALL FLAT BATH WALL INSTALLATION GUIDE INDEX PAGES Introduction 1 Tools and materials 1-2 Construction requirements - timber
Please read through the entire document before starting your installation process to better understand what is required.
 1 P a g e How s It Hanging? Step-by-Step Guide for Hanging your Wallpaper Walls Republic offers a richer and wider selection of designs, textures and colours than ever before found in the wallpaper world,
Glass and Stainless Solutions
 Glass and Stainless Solutions Highgrove Glass and Stainless Solutions Glass Balustrading Stainless Steel Balustrading Glass Shower Screens Mirrors Glass Splashbacks Glass Fencing Stainless Steel Fencing
Xenon 05 Installation Instructions & Parts List
 Xenon 05 Installation Instructions & Parts List Illustration Xenon 05, H1 Handle Left Hand: Open Out 26/05/2016 Revision 2.1 Page 1 of 19 IMPORTANT This shower screen / enclosure must be installed by suitably
DURACRYL WALL INDEX INTRODUCTION TOOLS AND MATERIALS REQUIRED FLAT SHOWER WALL SIDE CONTOUR SHOWER WALL CORNER CONTOUR SHOWER WALL FLAT BATH WALL
 DURACRYL WALL FLAT SHOWER WALL SIDE CONTOUR SHOWER WALL CORNER CONTOUR SHOWER WALL FLAT BATH WALL INSTALLATION GUIDE INDEX PAGES Introduction 1 Tools and materials 1 Construction requirements - timber
Thank you for your order
 Installation Guide Thank you for your order Ph: 09-9133110 Fax: 09-9133113 5 Smales Road. East Tamaki, Manukau PO Box 58031 Greenmount, Manukau 2013 AUCKLAND // WELLINGTON // CHRISTCHURCH www.bathroomdirect.co.nz
Frameless Inline Door QCI5248
 INSTALLATION INSTRUCTIONS Frameless Inline Door QCI5248 FRAMELESS PANEL / DOOR / PANEL QCI5248 REV. 0 Page 1 Certified 06/16/2016 Parts List with glass to glass hinges *Quantities may vary. **Support Bar
INSTALLATION INSTRUCTIONS FRAMELESS CONTINUOUS HINGE SHOWER ENCLOSURE QCI5232
 INSTALLATION INSTRUCTIONS FRAMELESS CONTINUOUS HINGE SHOWER ENCLOSURE QCI5232 QCI5232 Rev 0 Page 1 Certified 06/20/2016 INSTALLATION NOTES: Unpack your unit carefully and inspect for freight damage. Lay
Gallium 03 Installation Instructions & Parts List
 Gallium 03 Installation Instructions & Parts List Illustration Gallium 03, H1 Handle Left Hand: Open Out 04/05/2016 Revision 1.1 Page 1 of 19 IMPORTANT This shower screen / enclosure must be installed
WOODWORKS Walls. Installation Instructions WALL
 WALL Systems Between us, ideas become reality WOODWORKS Walls Installation Instructions 1. GENERAL 1.1. Product Description WoodWorks walls consist of 2' x 4', 2' x 8', 2' x 9' or 2' x 10' perforated and
Model 6100 Illustrated Installation Instructions Contractors Wardrobe
 Model 6100 Illustrated Installation Instructions Contractors Wardrobe DESIGNERS MANUFACTURERS 26121 Avenue Hall Valencia, CA 91355 (661) 257-17 Fax: (661) 257-4907 Toll Free: (800) CW-DOORS (800) 293-6677
Installation Instructions
 Please read all instructions before installing products. STORAGE: Keep crates in the upright position. When unpacking, store panels flat in a clean dry place. BEFORE INSTALLATION: Check for damage that
FRAMED PANEL / DOOR / PANEL CONTINUOUS HINGE SHOWER ENCLOSURE INSTALLATION INSTRUCTIONS
 FRAMED / DOOR / CONTINUOUS HINGE SHOWER ENCLOSURE INSTALLATION INSTRUCTIONS QCI5229 Rev 0 6 INSTALLATION NOTES: Unpack your unit carefully and inspect for freight damage. Lay out and identify all parts
Frameless Inline Door QCI5254
 INSTALLATION INSTRUCTIONS Frameless Inline Door QCI5254 FRAMELESS DOOR / PANEL QCI5254 REV. 0 Page 1 Cer fied 06/16/2016 Parts List with wall mount hinges *Quanes may vary QCI5254 REV. 0 Page 2 Cer fied
FIXED PANEL SLIDER QCI5241
 INSTALLATION INSTRUCTIONS FIXED PANEL SLIDER QCI5241 FRAMELESS PANEL / DOOR / PANEL FRAMELESS DOOR / PANEL QCI5241 REV. 0 Page 1 Certified 06/16/2016 Parts List *Quantities may vary QCI5241 REV. 0 Page
INFINITE RANGE - CENTRE FOLDING DOOR
 INFINITE RANGE - CENTRE FOLDING DOOR CENTRE FOLDING DOOR ONLY ( RECESS) Please read these instructions before installing, as incorrect fitting will invalidate the guarantee-carry out each stage before
Installation Instructions Palladium Wall Panels - Demountable Factory Finished Edges and Field Cut Edges
 Please read all instructions before installing Palladium Wall Panel System. 1. Before installation: a. Acclimate Palladium Panels, reveals, adhesives and wall substrates to room temperature 24 hours before
VIEWpanel Technical Manual
 VIEWpanel Technical Manual VIEWpanel is a prefabricated panel comprising 0.21 aluminium skin (1100 alloy) both sides, apart from our lite grade, which is 0.12 aluminium skin both sides and a polyethylene
Titan Installation Instructions
 Titan Installation Instructions Introduction: This manual was written to cover the fabrication and installation of sink bowls and tub and shower surrounds in residential and commercial applications. As
Wall Installations. Chapter 16 Wall Installations 16. 1
 16 Wall Installations Chapter 16 Wall Installations 16. 1 Alterna Premium Groutable Tile Create decorative backsplashes, accent walls, or other focal points with any size Alterna 16" x 16", 8" x 16", 8"
Ultra Fast Delivery SGL Toilet Cubicle Pack Fitting Instructions
 Ultra Fast Delivery SGL Toilet Cubicle Pack Fitting Instructions This instructional booklet should be read in full prior to undertaking any work. If in doubt please call Commercial Washrooms on 01202 650900,
SEMI-FRAMELESS DOOR WITH GLASS PANEL & BENCH GLASS
 INSTALLATION INSTRUCTIONS 1-800-669-9867 800-643-1514 www.alumaxshowerdoor.com SEMI-FRAMELESS DOOR WITH GLASS PANEL & BENCH GLASS 395CV-1217 Yes! Guaranteed Forever! Proudly Made in Kansas, USA 202 Anderson
Deluxe Continuous Hinge Framed Door & Inline Panel with Return Panel Shower Enclosure
 INSTALLATION INSTRUCTIONS Deluxe Continuous Hinge Framed Door & Inline Panel with Return Panel Shower Enclosure QCI0235 Page 1 of 11 Certified 08/20/10 MAINTENANCE: Two primary materials are used to manufacture
INSTALLATION INSTRUCTIONS. Deluxe Continuous Hinge Inline Door & Panel Shower Enclosure QCI5230
 INSTALLATION INSTRUCTIONS Deluxe Continuous Hinge Inline Door & Panel Shower Enclosure QCI5230 QCI5230 Rev 0 6 shower new QCI5230 Rev 0 Page 2 Certified 06/20/2016 Parts List A. Curb (w/ weep holes) (1)
Balustrading. Pool Fencing. Splashbacks. Mirrors. Showers. Privacy Screening. Custom Fabrication. Domestic or Commercial
 Balustrading Pool Fencing Splashbacks Mirrors Showers Privacy Screening Custom Fabrication Domestic or Commercial BALUSTRADING Frameless A modern glass balustrade giving a seamless designer appearance
MIRAGE-X / BELLA. Shower Door Installation Instructions
 MIRAGE-X / BELLA Shower Door Installation Instructions IMPORTANT DreamLine reserves the right to alter, modify or redesign products at any time without prior notice. For the latest up-to-date technical
Frameless Fixed Panel Slider
 INSTALLATION INSTRUCTIONS Frameless Fixed Panel Slider QCI-5279 SINGLE ROLLER WITH ANTI-JUMP DOUBLE ROLLERS QCI5279 Rev Page Certified 08/09/6 Tools: To install your New Shower Enclosure, you may need
675 Quick N Stall Neo Angle Framed Hinge Shower Enclosure
 INSTALLATION INSTRUCTIONS 675 Quick N Stall Neo Angle Framed Hinge Shower Enclosure Call Technical Dept @ 1-800-452-2726 QCI1003 Page 1 of 9 Certified 10/01/09 INSTALLATION NOTES: Unpack your unit carefully
Chapter 19. Interior Finish Work
 Chapter 19. Interior Finish Work 19.1 INSTALLING FLOOR TRIM 19.2 INSTALLING CLOSET SHELVES AND POLES 19.3 INSTALLING BATHROOM ACCESSORIES 19.4 HANGING MINI-BLINDS 19.5 INSTALLING APPLIANCES 19.6 INSTALLING
FRENCH LINEA PANEL SHOWER PANEL INSTALLATION INSTRUCTIONS
 FRENCH LINEA PANEL SHOWER PANEL INSTALLATION INSTRUCTIONS IMPORTANT DreamLine reserves the right to alter, modify or redesign products at any time without prior notice. For the latest up-to-date technical
Installation Instructions for Mincey Marble Manufacturing s 6 x 24 - Stacked - IL Panel System. Product number TS-VS/6 x 24 - Stacked - IL
 Mincey Marble Mfg., Inc. 4321 Browns Bridge Road Gainesville, GA 30504 Ph: 800.533.1806 Fx: 770.531.0935 www.minceymarble.com Installation Instructions for Mincey Marble Manufacturing s 6 x 24 - Stacked
INSTALLATION INSTRUCTIONS 960 RODA GLASS TO GLASS HINGES ANGLED FRAMELESS PANEL / DOOR / PANEL CELESTA DRESDEN TRESOR
 INSTALLATION INSTRUCTIONS 960 RODA GLASS TO GLASS HINGES NEED INSTALLATION HELP? Call 1-800-45-BASCO (452-2726) Monday - Friday 8:00 A.M. - 4:30 P.M. Eastern Time ANGLED FRAMELESS PANEL / DOOR / PANEL
Rosalina Accessories Tutorial Version March 2011 Martyn
 Rosalina Accessories Tutorial Version 1.0 - March 2011 Martyn Star Brooch Feel free to experiment with these dimensions, you should make a template you are happy with, the method still works. 1) Creating
Small 45 Roof Houses 1 or 2 Story 1 /24 th Scale Patterns
 BA GARDEN TOWNS 45 Roof Houses 10" x 10" 1 or Story Scaled and easy to read patterns and instructions for wood houses. Yard and Garden Buildings Compatible with Garden Railroads or a delight for any child's
Step-by-Step Installation Instructions for
 Step-by-Step Installation Instructions for Customer helpline number: 01604 633607 8892_Step_By_Step_900_Quad_V5.indd 1 1/9/10 18:01:22 Before Starting: Please read and understand these instructions. Not
Aluminum Clad Wood Window 1/2 Reinforced Field Mulling and Stacking Supplement
 Aluminum Clad Wood Window 1/2 Reinforced Field Mulling and Stacking Supplement 1 Aluminum Clad Wood Window 1/2 Reinforced Field Mulling and Stacking Supplement The following instructions are a supplement
Installation Guide 1
 1 2 Contents Before you begin Storage & preparation Tools & materials you may need Getting started Sink & cooktop cut-outs Cabinet Joins for 20mm benchtops Joining & installation of 20mm benchtops Joining
PL-91. Frameless Door with Panel. 202 Anderson Ave., Belvue, KS Phone: Fax:
 202 Anderson Ave., Belvue, KS 66407 Phone: 800-669-9867 Fax: 800-393-6699 www.onyxcollection.com 800-643-1514 www.alumaxshowerdoor.com PL-91 Frameless Door with Panel Full Showers Bench Seat Showers PL91-0318
Installation Site Preparation - Site Preparation
 S c u l p t u r e s Bespoke Single Door / Bespoke Frameless Hinged Door + Inline Panel Instruction Manual Truelife Consumer Guarantee Please make sure the purchaser/end user completes and returns the Guarantee
waterproof wall panelling
 waterproof wall panelling waterproof wall panelling Splashpanel PVC panels are the 100% waterproof alternative to tiling, suitable for showers, bathrooms and wetrooms. Suitable for wet and dry areas A
Product number: TS-CS/6 x 24 - TB - S
 Mincey Marble Mfg., Inc. 4321 Browns Bridge Road Gainesville, GA 30504 Ph: 800.533.1806 Fx: 770.531.0935 www.minceymarble.com Installation Instructions for Mincey Marble Manufacturing s Contemporary 6
Linda Barker Collection Heritage Collection Classic Collection INSTALLATION GUIDE
 Linda Barker Collection Heritage Collection Classic Collection INSTALLATION GUIDE Ruler Pencil Masking tape Measuring tape Silicone sealant & silicone gun Power drill & screwdriver High-grab adhesive Jig
SHOWER ENCLOSURE INSTALLATION
 T F e34 x 46 s a QUATRA LUX 32 x 46 / ele A R r r fo SHOWER ENCLOSURE INSTALLATION I NSTRUCTIONS d e D v o r p IMPORTANT DreamLine reserves the right to alter, modify or redesign products at any time without
600mm 3 drawer base cabinet
 Follow these instructions to build and attach your cabinet. Things you need to know ase cabinets come with different positions for attaching your. If you are choosing the rebated back option make sure
300C6 CONTINUOUS HINGE SEMI-FRAMELESS DOOR KIT
 300C6 CONTINUOUS HINGE SEMI-FRAMELESS DOOR KIT LIMITED WARRANTY AND REMEDY Alumax Bath Enclosures warrants to its dealers, customers, and all subsequent purchasers and users, that the products supplied
QWALL 5.2 (2 Back Panels)
") QWALL 5. ( Back Panels) SHOWER ACRYLIC WALL INSTALLATION INSTRUCTIONS IMPORTANT DreamLine TM reserves the right to alter, modify or redesign products at any time without prior notice. For the latest up-to-date
QWALL 5. ( Back Panels) SHOWER ACRYLIC WALL INSTALLATION INSTRUCTIONS IMPORTANT DreamLine TM reserves the right to alter, modify or redesign products at any time without prior notice. For the latest up-to-date
Shower Screen and Door Kit Instructions
 Shower Screen and Door Kit Instructions Step by step guide everton.com.au IMPORTANT NOTICE IMPORTANT: The glass panels used for Highrove frameless shower screens are made from Grade A Toughened Safety
EZYSTONE WORKSURFACES
 EZYSTONE WORKSURFACES Installation & Maintenance Instructions 1. Tools Required Worktop Edge Finishing Kit Pack 1-100mm Velcro Backing Pad Pack 2-100mm Diamond Dry Cut Velcro Discs (100 Grit Yellow) (200
Step-by-Step Installation Instructions for
 Customer helpline number: 01604 633607 8892_Step_By_Step_Corner_Door&Side_Panel_V4.indd 1 1/9/10 17:57:38 Before Starting: Please read and understand these instructions. Not following these instructions
INSTALLATION INSTRUCTIONS 935 RODA GLASS TO GLASS HINGES FRAMELESS DOOR / PANEL CELESTA DRESDEN GEOLUX TRESOR VONSE
 INSTALLATION INSTRUCTIONS 935 RODA GLASS TO GLASS HINGES NEED INSTALLATION HELP? Call 1-800-45-BASCO (452-2726) Monday - Friday 8:00 A.M. - 4:30 P.M. Eastern Time FRAMELESS DOOR / PANEL CELESTA DRESDEN
Easyfix. Easyglaze. Superglaze. Filmglaze
 Easyfix Easyglaze Superglaze Filmglaze Magnetglaze Magnetglaze Pro TUBEWAY (SALES) LTD are proud to offer six effective secondary double glazing systems to the general public. Each system is available
Modern Ceramic Tile 2018 CATALOG. Dimensional and Field Tile
 Modern Ceramic Tile 2018 CATALOG Dimensional and Field Tile INTRO ModCraft is a Modern ceramic studio specializing in dimensional and flat field wall tile. Made in New York s Hudson Valley, ModCraft wall
Robert Bosch GmbH. Wall organiser
 Wall organiser The organisational talent Wall organiser Say goodbye to messiness! The wall organiser is the ideal place to store everything that tends to lie around. 1 Introduction Wardrobes, drawers and
Product number TS-CS/12 x 12. Please read the following before attempting to install your new 12 x 12 Contemporary cast marble panel system
 Mincey Marble Mfg., Inc. 4321 Browns Bridge Road Gainesville, GA 30504 Ph: 800.533.1806 Fx: 770.531.0935 www.minceymarble.com Installation Instructions for Mincey Marble Manufacturing s 12 x 12 Contemporary
Wall Panel Installation
 Wall Panel Installation Special care must be taken in handling of panels with grout lines, especially in cold weather. The indented grout lines are by necessity a little thinner than other areas of the
Frameless Heavy Glass Door with Wall Mount Hinges
 INSTALLATION INSTRUCTIONS Frameless Heavy Glass Door with Wall Mount Hinges QCI-5245 QCI5245 REV. 0 Page 1 Certified 06/16/16 Frameless Door with Wall Mount Hinges ITEM NUMBER DESCRIPTION QUANTITY 1 DOOR
Mirrorcraft Project Especially for Dogs
 Mirrorcraft Project Especially for Dogs DIY Customized Pet Mirror Make a mirror photo frame to Display your Pets Photo Irene Jacobs April 2007 Mirrorcraft is a fun craft to easily create you own customized
ALLORA SWING PANEL INSTALLATION INSTRUCTIONS
 ALLORA SWING PANEL INSTALLATION INSTRUCTIONS Before Installation Please check that your Allora Swing Panel is undamaged SEQUENCE OF INSTALLATION These instructions are also available from the Athena website:
FIXED SHOWER SCREEN For Wall Mount Hinges QCI5283
 FIXED SHOWER SCREEN For Wall Mount Hinges QCI5283 QCI5283 Page 1 Date Certified: 06/16/2016 Parts List with wall mount clamp ITEM NO. DESCRIPTION QTY. 1 FIXED GLASS PANEL 1 2 WALL MOUNT CLAMP 1 3 U-CHANNEL
FLEX 48 x 72 / 60 x 72
 FLEX 48 x 72 / 60 x 72 SHOWER DOOR INSTALLATION INSTRUCTIONS IMPORTANT DreamLine reserves the right to alter, modify or redesign products at any time without prior notice. For the latest up-to-date technical
Handrail H Series. Product Installation. Instructions. Installation Instructions For. Wall Mounted and Freestanding Round Handrails
 Product Installation Installation Instructions For Instructions Handrail H Series Installation Instructions for Wall Mounted and Freestanding Round Handrails Step Nosing F Series Concrete and Timber Step
ENIGMA AIR ENCLOSURE
 ENIGMA AIR ENCLOSURE SHOWER ENCLOSURE INSTALLATION INSTRUCTION IMPORTANT DreamLine reserves the right to alter, modify or redesign products at any time without prior notice. For the latest up-to-date technical
INSTALLATION LAMTON INSTALLATION INSTRUCTIONS. Lamton Laminate Flooring with Underlay Attached Glueless Installation. Tools and Accessories
 Lamton quality laminate flooring is manufactured to exacting standards for long life and lasting beauty. Following these simple procedures for installation and it will ensure many years of pride and satisfaction.
935 RODA VINESSE NEED INSTALLATION HELP? DOUBLE ROLLERS FRAMELESS DOOR INSTALLATION INSTRUCTIONS QCI XX/XX/XXXX. Call BASCO ( )
") INSTALLATION INSTRUCTIONS 935 RODA DOUBLE ROLLERS FRAMELESS DOOR NEED INSTALLATION HELP? Call 1-800-45-BASCO (452-2726) Monday - Friday VINESSE QCI0286 1 XX/XX/XXXX 935 Roda Parts List With double rollers
INSTALLATION INSTRUCTIONS 935 RODA DOUBLE ROLLERS FRAMELESS DOOR NEED INSTALLATION HELP? Call 1-800-45-BASCO (452-2726) Monday - Friday VINESSE QCI0286 1 XX/XX/XXXX 935 Roda Parts List With double rollers
Frameless Door QCI5284
 Frameless Door QCI5284 F AB GLASS AND MIRROR www.fabglassandmirror.com Call: +1 888-474-2221 Fax: (614)-334-4919 Office Timing: 8:30-18:00 EST info@fabglassandmirror.com INSTALLATION INSTRUCTIONS Frameless
INSTALLATION GUIDE DUOFUSE SLAT WALL SYSTEM
 06/2013 ENG 1 INSTALLATION GUIDE DUOFUSE SLAT WALL SYSTEM The Duofuse wood composite slat wall system is much more durable than wooden fences, and correct installation is necessary to enjoy the fences
UNIDOOR X (STYLE L1)
") UNIDOOR X (STYLE L) SHOWER DOOR & GLASS PANEL INSTALLATION INSTRUCTIONS IMPORTANT DreamLine reserves the right to alter, modify or redesign products at any time without prior notice. For the latest up-to-date
UNIDOOR X (STYLE L) SHOWER DOOR & GLASS PANEL INSTALLATION INSTRUCTIONS IMPORTANT DreamLine reserves the right to alter, modify or redesign products at any time without prior notice. For the latest up-to-date
INFINITE RANGE - CENTRE FOLDING DOOR
 INFINITE RANGE - CENTRE FOLDING DOOR CENTRE FOLDING DOOR + 2 SIDE RETURN PANELS (PENINSULA) Please read these instructions before installing, as incorrect fitting will invalidate the guarantee-carry out
Centre-fold Door. Installation Instructions. Please note: Images shown are for illustration purposes only
 Centre-fold Door Installation Instructions Please note: Images shown are for illustration purposes only Please read these instructions in full before installing. The enclosure can be installed to give
QUARTZ FABRICATION MANUAL
 QUARTZ FABRICATION MANUAL Quartz Fabrication Manual Rev. 1 Page 1 of 26 TABLE OF CONTENTS Product Description. 3 Slab Inspection.. 4 Fabrication Equipment.. 6 FABRICATION TIPS Cutting The Slab. 7 General
UNIT No FRAMELESS PIVOT SHOWER DOOR
 INSTALLATION INSTRUCTIONS UNIT No. 3600 FRAMELESS PIVOT SHOWER DOOR NEED INSTALLATION HELP? Call 1-800-45-BASCO (452-2726) Monday - Friday 8:00 A.M. - 4:30 P.M. Eastern Time QCI0020 Rev. 3 Page 1 of 8
Installation Instructions
 Installation Instructions General Notes & Product Information Product profiles & details may vary by installation. Consult architectural drawings, details & specifications before installation of any Marlite
Installing Digital Wallcoverings
 Installing Digital Wallcoverings Hints & Tips Muraspec Digital (Hints & Tips) 1 BEFORE YOU START Make sure that your image is intact and has not been damaged in transit. For best results, use only Murabond
1 SELECT suitable material. It takes time to cut a cab. Don t waste it on rubbish.
 7 July 09 CUTTING A STANDARD CABOCHON A Standard Cabochon or CAB is an oval or round stone with one flat side and the other side having an even curved dome shape. Top of Cab It will have a narrow bevel
Storing, Handling, and Cleaning dekō Markerboards Storing Markerboards. Handling. Cleaning
 Storing, Handling, and Cleaning dekō Markerboards Storing Markerboards dekō markerboards must be stored inside, and stacked horizontally to avoid bowing. Do not store or transport dekō markerboards outdoors
Heavy Glass Frameless Shower Door With Return Panel
 202 Anderson Ave., Belvue, KS 66407 Phone: 800-669-9867 Fax: 800-393-6699 www.onyxcollection.com Heavy Glass Frameless Shower Door With Return Panel Full Showers with Return PL92-0118 R S K Parts List
UNIDOOR-X TUB DOOR TUB DOOR INSTALLATION NSTRUCTIONS. MODEL #s D58580-##
 T F UNIDOOR-X TUB DOOR se A R a e l re TUB DOOR INSTALLATION I NSTRUCTIONS r o D ved f IMPORTANT DreamLine reserves the right to alter, modify or redesign products at any time without prior notice. For
C Paint. Product Information Sheets
 T A T G O E C Paint Product Information Sheets Cottage Paint- 8oz jar Available in many pre-tinted colors -see chart. Used for painting furniture and cabinetry. Water based Clay paint that is easily distressed
Frameless Inline Door QCI5250
 INSTALLATION INSTRUCTIONS Frameless Inline Door QCI5250 FRAMELESS PANEL / DOOR / PANEL QCI0249 REV. 3 Page 1 Certified 10/12/12 Parts List with pivot hinges *Quantities may vary. QCI0249 REV. 3 Page 2
Sketchpaint. Ideal for turning any smooth surface into a whiteboard. Ready to use in 5 days
 Sketchpaint Ideal for turning any smooth surface into a whiteboard SketchPaint - A whiteboard straight out of a tin! White Gloss or Transparent Finish Simple application Tin size available: 3m² or 6m²
Almost Heaven Saunas THE AUTHENTIC SAUNA EXPERIENCE. Patterson Sauna Installation & Owner s Manual
 Almost Heaven Saunas THE AUTHENTIC SAUNA EXPERIENCE Patterson Sauna Installation & Owner s Manual Read this entire manual through to the end before proceeding with the assembly. ELECTRICAL REQUIREMENTS