Seatex Seapath 200 Installation Manual
|
|
|
- Domenic Spencer
- 5 years ago
- Views:
Transcription
1 Seatex Seapath 200 Installation Manual Issued:
2 Blank page
3 Notice All rights reserved. Reproduction of any of this manual in any form whatsoever without prior written permission from Kongsberg Seatex AS is forbidden. The contents of this manual is subject to change without notice. All efforts have been made to ensure the accuracy of the contents of this manual. However, should any errors be detected, Kongsberg Seatex AS would greatly appreciate being informed of them. The above notwithstanding, Kongsberg Seatex AS can assume no responsibility for any errors in this manual or their consequences. Copyright 2008 by Kongsberg Seatex AS. All rights reserved. Kongsberg Seatex AS Pirsenteret, N-7462 Trondheim, Norway Telephone: Facsimile: Duty phone: III
4 Blank page IV
5 Revision log Document ID Rev. Date Reason for revision Approved (sign) GM First version FOS Added to description of installing FOS coax connector on superflex cable, new output data formats and some corrections Upgraded with new MRU mounting FOS bracket and to correspond with Seapath version and MRU version Updated to correspond with the FOS MRU 3.00 software version Updated to include the new HWplatform FOS Updated to Seapath version 2.0 FOS software Updated to correspond with latest FOS version of the Processing Unit with analog output channels Corrected polarity for the RS-422 FOS DB-9 connector, updated Installation Worksheet with RS232/422 selection Updated to correspond with Seapath FOS sw. version 2.02 and SCC version Updated with the possibility to FOS disable range rate corrections and the change to LCD monitor Updated to correspond with Seapath FOS sw. version 2.03 and SCC version Updated to correspond with latest FOS PU hardware Updated 1PPS specification FOS Updated with recommendations on antenna baseline length FOS V
6 Blank page VI
7 Table of contents 1. INTRODUCTION About this manual References Definitions, abbreviations and acronyms Definitions Abbreviations and acronyms SPECIFICATIONS Physical dimensions Power Environmental specification Cable INSTALLATION General information Logistics Location of the system parts The GPS antennas The MRU The Processing Unit The Video Display Unit Procedures Mechanical installation Installation procedure Electrical installation MRU to Processing Unit cable wiring External input and output serial lines Ethernet connection PPS signal connection Analog output Installation procedure Setup of configuration parameters Lever arm vector determinations Input data Serial data output Setup procedure Calibration Calibration of the GPS antenna installation Typical calibration procedure Calibration of MRU axis VII
8 4. INSTALLATION DRAWINGS APPENDIX A - INSTALLATION WORKSHEET APPENDIX B - OUTPUT PROTOCOLS FROM SEAPATH NMEA format Binary format Binary format, Simrad EM1000/950 compatible Binary format, Simrad EM3000, EM300 and HiPap compatible Calibration format Echo sounder format RDI ADCP format Binary format Lehmkuhl gyro repeater format PPS time tag, NMEA ZDA message PPS time tag, Trimble compatible Atlas Fansweep format Echo sounder format Submetrix format Cyclic redundancy check algorithm APPENDIX C - INSTALLATION OF COAX CONNECTORS ON SUPERFLEX CABLE APPENDIX D - SEAPATH CONFIGURATION SOFTWARE, SCC Software installation How to get started Starting the program Setting the serial port parameters Establishing connection General user interface File menu Demo Exit Wizards menu View menu Help menu Tool buttons Seapath Control Centre button Mouse operation Editing parameter values Vessel settings Vessel geometry VIII
9 Vessel description GPS sensor settings GPS geometry GPS processing GPS reference stations SBAS common settings GPS antenna configuration GPS attitude processing MRU sensor settings MRU geometry MRU heave configuration Measurement points Measurement points geometry Data interface Host common Network common Input Output Parameter management Download Upload Save on file Load from file Undo Generate report Index Reader's comments IX
10 Blank page X
11 List of illustrations Figure 1 Dimensional drawing for the antenna holder Figure 2 Top view of the Antenna Bracket Figure 3 The different components for mounting of the Antenna Bracket Figure 4 Side view of the GPS antenna installation Figure 5 Recommended orientation of the MRU mounting bracket Figure 6 Wall mounting of bracket with MRU connector pointing down Figure 7 Sticker (4) shall indicate actual mounting orientation of MRU within bracket Figure 8 Junction box mounting Figure 9 Connection box mounting Figure 10 Rear panel of the Processing Unit Figure 11 The offset vectors between the different components Figure 12 GPS Antenna Configuration Figure 13 Page 1 of GPS Antenna Calibration Figure 14 Page 2 of GPS Antenna Calibration Figure 15 Page 3 of GPS Antenna Configuration Figure 16 Page 4 of GPS Antenna Configuration Figure 17 Value of roll-error as function of vessel pitch angle as parameter and 1 and 2 yaw misalignments Figure 18 Installation Complete Figure 19 SCC Start Window Figure 20 Initial Offline Dialog Figure 21 Seapath Control Centre, Main Window Figure 22 Communication Setup Figure 23 Connect Status Figure 24 Connected to Seapath Figure 25 Setup icons Figure 26 About SCC Figure 27 Tool Buttons Figure 28 Keep Folder List Open Figure 29 Close Folder List Figure 30 Vessel 3D-View, Ghost mode Figure 31 Vessel Drop Down Menu Figure 32 Vessel Geometry Figure 33 Vessel Description Figure 34 GPS Geometry Figure 35 GPS Processing Settings Figure 36 GPS Reference Stations Figure 37 SBAS Common Settings for WAAS satellites Figure 38 GPS Antenna Configuration Figure 39 Page 1 of GPS Antenna Calibration Figure 40 Page 2 of GPS Antenna Calibration Figure 41 Stop Antenna Calibration XI
12 Figure 42 Page 3 of GPS Antenna Configuration Figure 43 Edit Calibration Data Figure 44 Page 4 of GPS Antenna Configuration Figure 45 GPS Attitude Processing Figure 46 MRU Geometry Figure 47 Step 1 of MRU Axis Orientation Figure 48 Step 2 of Manual MRU Axis Orientation Figure 49 Step 3 of Manual MRU Axis Orientation Figure 50 Positive offset angles rotations Figure 51 Step 2 of Auto MRU Axis Orientation Figure 52 Step 3 of Auto MRU Axis Orientation Figure 53 MRU Heave Filter Figure 54 Measurement Points Geometry Figure 55 Common Host Settings Figure 56 Common Network Settings Figure 57 Data Interface - Input Configuration Figure 58 Serial Port Setting Figure 59 Format Setting Figure 60 RTCM Format Decoding Figure 61 Formats available for device type Gyro Figure 62 Data Interface - Output Configuration Figure 63 Network Settings Figure 64 Analog Settings Figure 65 Measurement Point Figure 66 Message Interval Settings Figure 67 Selection of NMEA output standard Figure 68 Format Settings Figure 69 Analog Format Settings Figure 70 Datawell Hippy compatible analog output signals Figure 71 Input of test voltage for the selected analog channel Figure 72 Download Parameters Figure 73 Upload Parameters Figure 74 Save on file Figure 75 Load from file Figure 76 Undo Figure 77 Generate configuration report Figure 78 Configuration report XII
13 List of drawings Drawing no. Title Revision No. of sheets ma-010 HW platform, Enclosure dimensions md-007 Seapath 200, Antenna Holder 4 1 hs-003-a MRU housing, External dimension 4 1 hs-016-b MRU-M-MB3 bracket, Hydrographic version 1 1 hs-014-a MRU junction box MRU-E-JB1, Layout and 1 1 ext. dimensions M Processing Unit Connection Box 0 1 M Cable, Processing Unit Aux-Serial, Analog Output 0 1 XIII
14 Blank page XIV
15 Introduction 1. INTRODUCTION 1.1 About this manual This manual contains the information necessary to install the Seapath 200 on a ship. For all other product information, please consult the User's Manual, reference [3]. The Seapath 200 is a precise heading, attitude and position sensor based on a sophisticated combination of DGPS carrier phase measurements and inertial sensor technology. To achieve the specified accuracy of the product, the installation has to be properly done and the installation procedures in this manual have to be followed. This manual is organised into the following chapters: Chapter 1 Introduction - A brief presentation of the Installation Manual with references and abbreviations. Chapter 2 Specifications - Describes the physical dimensions, required power, environmental and cable specifications. Chapter 3 Installation - Presents procedures to be followed for a typical ship installation with recommendations on location of the different parts, mechanical and electrical installation, and how to set up and calibrate the product. Chapter 4 Installation Drawings - Contains outline drawings showing the mechanical dimensions of the different parts of the Seapath 200. In this manual the following notations are used: CAUTION Is used to make the user aware of procedures and operational practice which, if not followed, may result in degraded performance or damage to the equipment. Note A note text has this format and is used to draw the user's attention to special features or behaviour of the equipment. 1
16 Introduction 1.2 References [1] NMEA 0183 Standard for interfacing marine electronic devices, Version 2.3 [2] RTCM recommended standards for differential Navstar GPS service, Version 2.2 [3] GM-001, User's Manual, Seapath 200, rev Definitions, abbreviations and acronyms Definitions alignment antenna bracket antenna holder attitude heading heave host system pitch roll starboard yaw Is the process of adjusting the current internal navigation frame (g, h or b-frame) in the instrument to the true external frame. Is the arrangement for mounting the GPS antennas. Is the arrangement on board the vessel for mounting the antenna bracket to. The orientation relative to the vertical axis of a vehicle. Heading is not included. If heading is included the word orientation for the vehicle is used. The direction of the main axis (bow direction) of the vehicle as opposed to course, which is the direction of motion of the vehicle. Yaw angle as defined here is the same as heading. The vertical dynamic motion of a vehicle and defined positive down. Heave position and velocity are dynamic motion variables with a certain lower cutoff frequency. In this manual defined as Navigation computers, Dynamic Positioning Systems, etc., receiving data from Seapath. A rotation about the pitch axis is positive when the bow moves up. Normally pitch means the dynamic pitch angle motion. A rotation about the roll axis is positive when starboard side of the vehicle moves down. Normally roll means the dynamic roll angle motion. When looking in the bow direction of a vehicle this is the right hand side of the vehicle. A rotation about the vertical axis is positive when turning Eastward (Clockwise) when the vehicle cruises in North direction. Normally yaw means the dynamic yaw motion. 2
17 Introduction Abbreviations and acronyms b-frame CEP CG EMI g-frame GPS Time IMU LGND MP MRU 5 NMEA P-axis PGND PPM 1PPS RFI RMS R-axis SBAS SCC UTC Y-axis Body frame. An orthogonal frame fixed to the MRU housing or to the vehicle where the MRU is fixed. Circular Error Probability. Centre of gravity. The mass centre of a vessel. This is normally the location with least linear acceleration, and hence the best location for measurements of roll and pitch. Electromagnetic interference. Geographic frame. An orthogonal frame having axes pointing North, East, and Down at the current location of the vehicle. The time in the GPS system. The GPS time is within UTC time ±180 nsec (95 per cent) plus leap seconds. Inertial Measurement Unit. A system consisting of gyros and accelerometers. Logic Ground. Measurement Point. Motion Reference Unit, model 5. This is the IMU within the Seapath measuring dynamic linear motion and attitude. National Marine Electronics Association. NMEA 0183 is a standard for interchange of information between navigation equipment. This axis is fixed in the vehicle, and points in the starboard direction horizontally when the roll angle is zero. Positive rotation about this axis is bow of the vehicle up. Power Ground. Parts per million. One Pulse Per Second. Radio Frequency Interference. Root Mean Square. This axis is fixed in the vehicle, and points in the forward direction horizontally when the pitch angle is zero. Positive rotation about this axis is starboard side of the vehicle down. Satellite Based Augmentation System Seapath Control Centre is special software used to set configuration parameters in Seapath. The software runs under Microsoft Windows version 95, 98, NT 4.0 or compatible on a PC. Universal Time Co-ordinated. This is the official time in the world and has replaced GMT (Greenwich Mean Time) as the official time. This axis is fixed in the vehicle and points in the downward direction when the vehicle is aligned horizontally. Positive rotation about this axis is turning the bow of the vehicle to starboard. 3
18 Introduction Blank page 4
19 Specifications 2. SPECIFICATIONS 2.1 Physical dimensions Processing Unit Width: mm (19-inch rack) Height: mm (3 U) Depth: mm Weight: kg Colour:... Front anodised black Connection Box, M Length: mm Width: mm Height: mm Weight: kg Colour:... Grey Video Display Unit, 17" LCD (Samsung SyncMaster 710n) Width: mm Height: mm Depth: mm Weight: kg Colour:... Black/Silver MRU 5 Height: mm Diameter: mm Weight: kg Colour:... Blue MRU Mounting Bracket, MRU-M-MB3 Length: mm Width: mm Height: mm Weight: kg Colour:... Black Material:... POM-H MRU Junction Box, MRU-E-JB1 Length: mm Width: mm Height: mm Weight: kg Colour:... Black 5
20 Specifications Antenna Bracket Length mm Height: mm Width: mm Weight for the 2.5-metre aluminium version kg Colour:... Grey RAL Power Processing Unit Voltage: to 135 and 180 to 265V AC Power consumption: W (max.) Batteries:... None, connection to UPS recommended Video Display Unit, 17" LCD (Samsung SyncMaster 710n) Voltage: to 240V AC (50/60 Hz) Power consumption: W (typical) 2.3 Environmental specification Processing Unit Enclosure material:... Aluminium Enclosure protection:... IP-30 Operating temperature range:... 0 to +55ºC Operating humidity: to 80% relative Storage temperature range: to +60ºC Storage humidity:... Less than 55% Vibration testing according to:... EN Connection Box, M Material:... Aluminium Enclosure protection:... IP-20 Video Display Unit, 17" LCD (Samsung SyncMaster 710n) Operating temperature range:... 5 to +40ºC Relative humidity: to 80% MRU 5 Enclosure material:... Anodised aluminium Enclosure protection:... IP-66 Operating temperature range: to +55ºC Operating humidity (max.): % Storage temperature range: to +70ºC Storage humidity (max.): % Max. allowed vibration operational ( Hz continuous): m/s 2 6
21 Specifications Max. allowed vibration non-operational ( Hz continuous): m/s 2 Max. shock non-operational (10 ms peak): m/s 2 MRU Junction Box, MRU-E-JB1 Material:... Aluminium Enclosure protection:... IP-65 GPS Antennas (L1) Enclosure material:... Weatherable Polymer Operating temperature range: to +70ºC Operating humidity (max.): % 2.4 Cable Cable MRU-E-CS1 Type:... Heavy Duty Screened, Habia Aquatherm RTFR 14x2x0.25 mm 2 Length:... 3 m Diameter: mm Flame retardation:... IEC Insulation:... ETFE Screen:... Cu-braid Processing Unit to MRU Junction Box Cable Type:... LAMAC 4x2x0.5 mm 2 Maximum length: m Diameter: mm Flame retardation:... IEC 332-3/A The GPS Antenna Cables (Coax) Type:... NK ½"-Superflex 50 BHF Attenuation: db/100 m (at 1.6 GHz) Maximum length (each cable): m Diameter: mm Minimum bend radius: mm Flame retardation:... CATV, UL1581, IEC 332-3, IEEE383 Coax connectors:... Huber+Suhner 11 N
22 Specifications Blank page 8
23 Installation 3. INSTALLATION 3.1 General information This chapter describes a typical ship installation of the Seapath system. The standard system is supplied with the following parts: The Processing Unit. The Processing Unit connection box with 1.5-metre cable. Video Display Unit and standard keyboard. The MRU 5 unit. The MRU mounting bracket, MRU-M-MB3. Junction box, MRU-E-JB1, with three metres MRU-E-CS1 cable. Two GPS antennas. A 2.5-metre aluminium Antenna Bracket. Setup software, power cable, a null-modem configuration cable and documentation. 9
24 Installation In addition to the above delivered parts, the following is needed: GPS antenna cables and the cable between the Processing Unit and the MRU junction box. A 19-inch rack for mounting of the Processing Unit. Gyro compass data on a serial line (recommended). DGPS corrections on one or more serial lines for improved position accuracy (recommended). Additional cables for input of Gyro compass data and DGPS corrections, and for output lines to external equipment. Devices for reference measurements of roll, pitch and heading (for calibration). An external IBM-compatible PC with MS-Windows for setup and calibration. General arrangement drawings of the ship should be acquired to simplify determination of offsets between the GPS antennas, the MRU and the ship's centre of gravity (CG). Locations for the various parts of the system must be decided, and mounting arrangement for the Antenna Bracket and sufficient lengths of cable made available. For external interfaces, electrical characteristics and data formats must be decided, and the necessary cables and connectors made available. Power supply for the Processing Unit and an external computer for setup and calibration are also needed. An external heading reference, for example a surveyed quay is required for heading calibration. For some applications, pitch and roll reference for calibration is also needed. The MRU unit is shipped in a specially designed transportation container. Keep the MRU within the container until everything is ready for installing the unit in the mounting bracket. Note After the installation, please save the transportation container. The MRU must be shipped in this container for service or repair to maintain the warranty. 3.2 Logistics Safety: General safety guidelines to be followed when working in mast and on deck. Personnel qualifications: Trained electrical workers. Minimum number of personnel: 2, especially when mounting the Antenna Bracket to the Holder. Ship location: The GPS antennas have to be mounted such that blocking of the GPS signal is avoided. The MRU 5 unit is preferably mounted low in the ship or close to the system to be compensated. The Processing Unit can be mounted on the bridge or in the instrument room. Special tools required: A PC with Microsoft Windows 95, 98, NT version 4.0 or compatible. 10
25 Installation 3.3 Location of the system parts The following sections contain hints regarding mounting of the various system parts: The GPS antennas For the GPS antennas, consider the following: The space above the antennas has to be free of obstructions of any kind. The antenna should be protected from direct illumination of radar beams and other transmitting antennas such as Inmarsat antennas. Seapath is more sensitive for blocking and reflections (multipath) of GPS signals than GPS sensors that only utilises pseudo-range data. This since Seapath also utilises carrier phase measurements for heading determination, and both GPS antennas need to see at least two common satellites at the same time. CAUTION The GPS antennas have to be mounted in a way that avoids blocking of the GPS signal. In order to reduce problems due to multipath effects the GPS antennas have to be mounted above the nearest deck at a height which is equal to the width of this deck or more. The Antenna Bracket has to be mounted in such a way that torsion movement relative to the ship's hull is kept at an absolute minimum. Note If the Antenna Bracket supplied by Seatex is not used, it is important that the antennas are rigidly mounted so that the distance between the antennas does not change due to vibrations or accidental dislocation. 11
26 Installation The antenna baseline length is recommended in range 2.5 to 4.0 meters, but 1 to 5 meters can be used. Maximum heading accuracy is achieved at 4.0 meters baseline. The maximum length for each of the antenna coaxial cables is 100 metres for the cable type normally delivered with the system (1/2" Superflex). If longer cables are needed, a low noise signal amplifier (LNA) should be fitted The MRU 5 For the MRU 5, consider the following: The unit is designed for installation in an indoor environment and for operation within its temperature range. The unit is to be mounted close to the user equipment of which it is supposed to measure the motion. This is to avoid errors in alignment with the user equipment and to eliminate errors due to ship hull torsion. If the system is not allocated to measure motion of a particular user equipment, mount the MRU as close to the ship's centre of gravity (CG) as possible. This to ensure best roll and pitch measurements. If it is not possible to mount the MRU close to CG, try to mount it along the longitudinal axis of the ship and as close to the CG as possible. Avoid mounting the MRU high up or out to the side of the ship. Be aware of: Vibrations. Direct mounting onto the main hull structure is preferable. Note The worst mounting positions are thin walls that may come in resonance with vibrations driven by machinery, propellers, pumps or motors. Avoid mounting the MRU close to hydraulic pumps and valves where there are high frequency vibrations. Temperature changes. For safe mounting of the MRU, place the unit in a location where the temperature is low and where changes in temperature are slow. A location directly on the hull far away from the heat of the machinery, heaters and air conditioning systems is preferable. Corrosion problems. Place the MRU in a location where no direct splashing seawater is present. 12
27 Installation The Processing Unit For location of the Processing Unit, consider the following: The unit is designed for indoor installation and should not be exposed to heavy vibrations, transformers or similar. The unit should be mounted in a damped 19-inch rack to be in accordance with the environmental standard IEC945/EN It is recommended that ventilation or air conditioning is provided in order to keep the ambient operating temperature around +20 C. The best location is typically in the instrument room or on the bridge mounted into a 19-inch rack with good ventilation. It is recommended that the area around the unit is kept free from dust and static electricity. The air inlet and outlet on the unit must not be blocked. The unit has an internal fan and requires free airflow from the rear and out to the sides of the unit. All connections to the unit are on the rear side and available space for cable connections and service must be provided The Video Display Unit For location of the table mounted Video Display Unit, consider the following: The unit is designed for installation in an indoor environment and for operation within the temperature range. The best location is typically on a table in the instrument room or on the bridge mounted close to the Processing Unit. It is recommended that the area around the unit is kept free from dust and static electricity. 3.4 Procedures Mechanical installation The mechanical installation consists of: Making a holder for the Antenna Bracket and having it fastened in a suitable location in a mast. Mounting the Antenna Bracket with the GPS antennas on a holder in the mast. Mounting the MRU bracket and the MRU near the user equipment for which attitude data is wanted, or near the vessel's centre of gravity. Mounting the Processing Unit in a rack in the instrument room or bridge. Mounting the VDU close to the Processing Unit. 13
28 Installation The installation procedure described below assumes that the Antenna Bracket delivered by Seatex is used and that a holder for this Antenna Bracket is prepared in accordance with the antenna holder drawing in chapter Installation procedure The mechanical installation of the various parts is performed in the following steps: 1. First the user has to make a holder for the Antenna Bracket (the holder is not part of the Seapath delivery) and have it properly fastened to the mast in the preferred orientation (horizontal or vertical). When the Antenna Bracket is mounted vertically, the drawings in Figure 2, Figure 3 and Figure 4 are not correct. Figure 1 Dimensional drawing for the antenna holder 2. Bring the Antenna Bracket, the two GPS antennas and the antenna cables as close as possible to the location of the antenna holder. While both the GPS antennas and the Antenna Bracket are down on deck, mount the GPS antennas on the Bracket with both antennas oriented in the same direction. Depending on antenna type, labelling on the antenna housing (arrow or text) or connector location is used to determine direction. Figure 2 shows the antennas oriented with connectors pointing in the same direction. The antennas are not marked, and are interchangeable but called no. 1 or 2 for reference. The normal orientation of the Antenna Bracket is along ship with antenna no. 1 aft. It can, however, be mounted in any orientation, provided it is approximately horizontal. Note Both GPS antennas have to be mounted on the Bracket oriented in the same direction, otherwise the system will have degraded heading performance. Figure 2 Top view of the Antenna Bracket The screws for mounting the GPS antennas to the Bracket must be secured with washers. 14
29 Installation 3. Connect the antenna cables to both GPS antennas. The connection between the antenna and the antenna cable should be sealed against water penetration, preferably by using waterproof self-vulcanising tape. The GPS antenna cables are then strapped inside the Antenna Bracket as shown in Figure Lift the Antenna Bracket in the preferred direction on the holder. Figure 3 The different components for mounting of the Antenna Bracket Ensure that the delivered insulation plate is used between the Antenna Bracket and the holder, and that the four bushings are placed in the mounting holes before the screws are entered. The nuts should be secured with washers or by utilising self-locking nuts. Figure 4 Side view of the GPS antenna installation 5. When the best mounting location for the MRU has been identified, place the MRU mounting bracket in the preferred orientation and make screw holes in the foundation. If the orientation of the bracket can be freely selected, mount the bracket on the longitudinal 15
30 Installation or transversal bulkheads of the ship with the opening pointing downward, as shown in Figure 5. This will ensure easy and accurate orientation of the MRU according to the longitudinal axis. Reserve sufficient space below the bracket to allow insertion of the MRU from below. Figure 5 Recommended orientation of the MRU mounting bracket 6. Mount the MRU bracket on the wall, preferably with the opening pointing down, as shown in Figure 6. Mark and drill a M6 hole for the top screw (1) and enter the screw without tightening it completely. Align the bracket vertically using its own weight or by aligning it in relation to the wall. Drill two holes for the lower screws (2) and insert and securely tighten all three screws, using washers or self-locking nuts. Figure 6 Wall mounting of bracket with MRU connector pointing down 16
31 Installation 7. Insert the MRU into the bracket. In order to achieve the orientation as shown in Figure 5, the MRU must be rotated in the bracket. Apply Loctite 242 glue or equivalent on the four MRU screws (3). Note The MRU R+ arrow must always point in the bow direction unless the default mounting orientation of the unit is modified in the MRU configuration. 8. Apply the sticker (4) onto the bracket according to the actual mounting direction of the MRU, as shown in Figure 7. In this way, the actual mounting direction is identified in case the unit is to be exchanged or removed temporarily. Figure 7 Sticker (4) shall indicate actual mounting orientation of MRU within bracket Note If the MRU is mounted correctly in the bracket, the +R arrow on the top of the MRU will point in the bow direction of the ship and the same direction as the R- axis of the sticker. If uncertain whether the MRU R-axis is pointing in the bow direction, look under the MRU and check that the +R arrow label is pointing in the bow direction. Precise MRU orientation is important to ensure that high quality and accurate measurements are available to the host system. 9. Mount the junction box on the wall in a suitable location within the length of the 3-metre MRU-E-CS1 cable, as shown in Figure 8. The screws for mounting the junction box should be secured with washers or self-locking nuts. 17
32 Installation Figure 8 Junction box mounting 10. Mount the Processing Unit within a standard 19-inch rack in a preferred location. The Processing Unit has to be fastened both in front and rear of the rack. Minimum 10 cm free space is needed behind the module for connecting cables. 11. Mount the connection box (part no. M410-32) on a suitable location within the length of its 1.5-metre cable to the 15 pin MRU port on the Processing Unit, as shown in Figure 9. The two screws for mounting the connection box should be secured with washers or selflocking nuts. Figure 9 Connection box mounting 18
33 Installation Electrical installation The electrical installation consists of: Connecting two cables between the GPS antennas and the Processing Unit. Connecting a cable between the MRU junction box and the Processing Unit by using a direct cable or with the connection box in between. Connecting cables with output data between the Processing Unit and external equipment (optional). Connecting a cable with analog output signals between the Processing Unit and external equipment (optional). Connecting the Video Display Unit and the keyboard to the Processing Unit (optional). Supplying 110/230V AC power to the Processing Unit and the Video Display Unit. Connecting a cable with gyro data to the Processing Unit (optional). Connecting cables with DGPS corrections to the Processing Unit (optional). Connecting a cable with data output on the Ethernet between the Ethernet connector at the rear of the Processing Unit and external equipment (optional). Connecting a cable with 1PPS output signal between the between the PPS connector at the rear of the Processing Unit and external equipment (optional). VGA COM 2 COM 5 COM 8 GPS 1 GPS 2 PPS MRU COM 6 COM 9 MOUSE LPT1 COM 7 COM 10 NET IALA KEYB AUX - Serial Input : VAC/47-63Hz/100VA Fuse : 2A Class1 : Must be connected to grounded outlet only USB NET Compass safe distance: Steering Magnetic Compass : 1.1 m Standard Compass : 1.9 m Figure 10 Rear panel of the Processing Unit If the antenna cables are not delivered by Seatex, make sure that the cables meet the following electrical specifications: Insertion loss (max.) Characteristic impedance DC resistance (max.) 15 db (at 1.6 GHz) 50 ohm (nominal) 0.5 ohm ground braid and centre conductor The antenna connectors on the Processing Unit and the GPS antennas are N-type female. 19
34 Installation MRU to Processing Unit cable wiring The MRU can be connected to the Processing Unit in the following three ways: A cable with the MRU connector in one end and a DB-15 male connector for the Processing Unit in the other end. A cable that is terminated in the MRU junction box in one end and with a DB-15 male connector for the Processing Unit in the other end. A cable that is terminated in the MRU junction box in one end and terminated in the Processing Unit connection box in the other end. For the first two alternatives the cable wiring is as follows: Processing Unit Signal Pair no. MRU junct. box MRU connector Pin no. Colour Pin no. Pin no. 1 screen chassis (x3 side) A 7 PGND 1 blue 2 (x1 side) B V 1 white 1 (x1 side) R 2 TX+ 2 white 3 (x1 side) C 9 TX- 2 blue 4 (x1 side) T 3 RX+ 3 white 5 (x1 side) S 10 RX- 3 blue 6 (x1 side) P 11 XIN 4 white 23 (x1 side) U 5 LGND 4 blue 24 (x1 side) a For the last alternative with termination in the MRU junction box in one end and termination in the Processing Unit connection box in the other end, the cable wiring is as follows: Processing Unit Signal Pair no. PU connection box MRU junct. box Pin no. Colour Pin no. Pin no. 1 screen 9 chassis (x3 side) 7 PGND 1 blue 2 2 (x1 side) V 1 red 1 1 (x1 side) 2 TX+ 2 yellow 3 3 (x1 side) 9 TX- 2 green 4 4 (x1 side) 3 RX+ 3 pink 5 5 (x1 side) 10 RX- 3 grey 6 6 (x1 side) 11 XIN 4 brown 7 23 (x1 side) 5 LGND 4 white 8 24 (x1 side) The MRU is supplied with 24 VDC power from the MRU port on the Processing Unit. Note The shield around each pair in the cable has to be individually isolated in the DB- 15 connector. The outer shield is connected to pin 1 (screen) in this connector, which is an open end (not connected to earth). In the MRU junction box both the shield around each pair and the outer shield are terminated in pin 1 (chassis) on the x3 side. 20
35 Installation Note It is important to insert a wire between pin 24 (LGND) and pin 27 (Shutoff) on the user side (x1) in the MRU junction box in order to establish RS-422 communication between the MRU and the Processing Unit. Otherwise it will be no communication between these two components External input and output serial lines Seapath communicates with external equipment through RS-232 and RS-422 serial lines. It is recommended to input one or more differential GPS correction signals to Seapath and optionally heading from a gyro compass or similar device. Output data are position, velocity and attitude to navigation computers, dynamic positioning systems etc., hereafter called host systems. No hardware or software handshake is used on the serial lines. The configuration of serial lines and their default settings are: Line Type Data com5 RS-232 or 422 User configurable input or output (default output data to host) (default 232) com6 RS-232 or 422 User configurable input or output (default output data to host) (default 232) com7 RS-232 or 422 User configurable input or output (default output data to host) (default 232) com8 RS-232 or 422 User configurable input or output (default output data to host) (default 232) com9 RS-232 or 422 User configurable input or output (default gyro compass input) (default 232) com10 RS-232 or 422 (default 232) User configurable input or output (default DGPS corrections input) All communication ports are set default to RS-232 communication when delivered from Seatex. In the SCC software the user can select which type of communication (RS-232 or 422) to be used on each port. See section Properties in Chapter for details on selection between RS-232 and 422 communication in the SCC software. To ensure a best possible position solution from Seapath based on the available differential GPS correction in the area of operation, up to four lines are available for differential GPS corrections. If more than one line is needed, lines used for output data or external heading in the default configuration must be used. 21
36 Installation The connectors on the Processing Unit for the serial lines are of DB-9 male type. Pin layout: RS-232 RS-422 Pin no. Signal Pin no. Signal 1 N/C 1 N/C 2 RXD 2 RX+ 3 TXD 3 TX+ 4 N/C 4 N/C 5 REF 5 REF 6 N/C 6 N/C 7 RTS 7 TX- 8 CTS 8 RX- 9 N/C 9 N/C Optional The comports available on AUX - Serial connector may be used if more serial input or output lines than those described above (Com 5 to 10) are required. The AUX-Serial port makes it possible to increase the number of communication ports. On the 25-pin DSub male connector, six comports are available. These ports are default RS-232 serial lines. The pin layout is described below. Pin no. Signal Line Description 1 GND 14 RX Com4 RS-232, not galvanically isolated 2 TX 15 GND 3 RX Com14 RS-232, not galvanically isolated 16 TX 18 GND 6 RX Com15 RS-232, not galvanically isolated 19 TX 7 GND 20 RX Com16 RS-232, not galvanically isolated 8 TX 21 GND 9 RX Com17 RS-232, not galvanically isolated 22 TX 10 GND 23 RX Com18 RS-232, not galvanically isolated 11 TX Note The AUX - Serial ports are limited in use since these ports are not galvanically isolated. They can only be used to distribute signals to/from other systems mounted in the same rack and uses the same power reference, unless addtional electronic equipment providing isolation is connected in between. 22
37 Installation In order to galvanically isolate these lines and maybe convert them to RS-422, the Kongsberg Seatex product HMS 100 Converter Box (part no. M410-30) can be used Ethernet connection The Seapath has the possibility to output data on up to eight individually configurable network ports. The output format, update rate and user measurement point are configured for each port by the SCC configuration software. For the network the IP address and mask have to be specified. The output data are sent out as an UDP (User Datagram Protocol) diagram. The datagrams (UDPs) that are output simultaneously (same time stamp) are sent out in one common data package. When a data package is received at the host computer, all data (UDPs) for that sample are received. To connect Seapath to a network hub, you must use straight-through twisted pair (TP) cable with RJ45 connectors. Cables can be shielded (screened) or unshielded. However, shielded is recommended used. The maximum length of the cable that can be used is 100 metres (328 ft). A straight-through cable is one where the pins of one connector are connected to the same pins of the other connector. In special instances, a crossover cable instead of straight-through is needed, like connecting a Seapath Processing Unit and an HMS 100 Computing Unit together. Below is the pin wiring for the different TP cables: Straight-through Crossover Signal Pin no. Pin no. Signal Signal Pin no. Pin no. Signal TX+ 1 1 TX+ TX+ 1 3 RX+ TX- 2 2 TX- TX- 2 6 RX- RX+ 3 3 RX+ RX+ 3 1 TX+ RX- 6 6 RX- RX- 6 2 TX- The pins 4, 5, 7 and 8 are not used PPS signal connection A 1 pulse-per-second (1PPS) signal synchronised with GPS time is available from the BNC connector at the rear of the Processing Unit. This 1PPS signal originates from the GPS receiver within the Processing Unit. The 1PPS signal is buffered and fed to the BNC connector. The high level is at +5V (unloaded) and +2V (at 50 Ohm load). The low level is at 0V. The 1PPS signal is active high and has a pulse width of 10 ms. The 1PPS is generated exactly once every second with its rising edge synchronised to GPS time. 23
38 Installation Synchronised with this signal it is possible to output 1PPS time tag messages from Seapath. These messages are the 1PPS NMEA ZDA (format no. 13) or the Trimble compatible message (format no. 14). For description of the format for these messages see "Appendix B - Output Protocols From Seapath" Analog output Three analog output channels are available from the AUX Serial port at the rear of the Processing Unit. The variables available for analog output are roll, pitch, heave and Datawell Hippy compatible roll and pitch signals. The selection of variable and channel properties is performed in the SCC configuration software, see chapter for details. The pin wiring for the analog output part of the AUX Serial port is as follows: AUX Serial port Pin no. Signal Description 24 AGND Common ground for all analog signals 12 +AOUT-1 Analog output signal for channel no AOUT-2 Analog output signal for channel no AOUT-3 Analog output signal for channel no. 3 Note The other pins on the AUX - Serial port must not to be connected to anything. They have to be open. Optionally, a DB-25 connector for the AUX - Serial port with the analog output signal connected can be delivered. This cable has a 3-metre cable length with the DB-25 connector in one end and is open in the other. The cable part number is M and a wiring drawing is shown in chapter 4. 24
39 Installation Installation procedure CAUTION Attach the antenna cables to the GPS antennas on the Bracket before attaching the antenna cables to the Processing Unit. If the antenna cables are attached to the Processing Unit, do not attach the antenna cables to the GPS antennas with the Processing Unit powered on. If the antenna cables are short-circuited with power on, the GPS receivers within the Processing Unit will be damaged. 1. Connect the two GPS antenna cables to the connector 1 (for GPS antenna 1) and connector 2 (for GPS antenna 2) at the rear of the Processing Unit. See chapter 7 on how to install the coax connector on the Superflex antenna cable. Note The GPS antenna cables must be as straight as possible. Do not crush or crimp the cable with tie-downs as this will affect the electrical properties of the cables. 2. Enter the cable from the MRU port at the rear of the Processing Unit or from its connection box (part no. M410-32) through one of the free nipples on the junction box. Ensure that the cable shield is in contact with the nipple for grounding before the cable is fastened to the box. Use the required number of clips to fasten the cable to the wall. Insert each of the MRU to Processing Unit cable wires into the correct terminal on the user side (x1) and all cable shields to pin 1 (chassis) on the auxiliary contact side (x3) within the box. Ensure that the shield around each pair is individually isolated in the DB- 15 connector in the other end and that only the outer shield is connected to pin 1 in this connector. Insert an isolated wire between pin 24 (LGND) and pin 27 (Shutoff) on the user side (x1) in the junction box. By connecting these two pins together the communication with the MRU will switch from RS-232 to RS-422. Note Note It is important to insert a wire between pin 24 (LGND) and pin 27 (Shutoff) on the user side (x1) in the MRU junction box in order to establish RS-422 communication between the MRU and the Processing Unit. Otherwise it will be no communication between these two components. The Junction Box housing is grounded to earth through the screws for mounting the box to the wall or floor. Please note that if the foundation on which the junction box is mounted is NOT connected to earth, one of the junction box mounting screws has to be connected to earth by connecting a wire from the screw to an object that is connected to earth. 25
40 Installation User side x pin signal description pin signal description 1 PWRIN+ power + 23 XIN to MRU 2 PWRIN- power gnd 24 LGND gnd ref.aux.+dig 3 TX+ from MRU 27 SHUTOFF of MRU 4 TX- -"- 5 RX+ to MRU 6 RX- -"- 3. Connect the cables for output data from Seapath to external equipment to the ports com5, 6, 7 or com8 for RS-232 or 422 communication (RS-232 is the default setting), analog output signals on the AUX Serial port or the Ethernet connection. If additional serial ports are required the ports com13to com16 available on the "AUX - Serial" port can be used, see chapter for instructions. 4. Connect the 110/230V AC ship's power supply to the Seapath power connector at the rear of the Processing Unit. 5. Connect the cable from the Video Display Unit and the keyboard to the corresponding connectors at the rear of the Processing Unit. 6. Connect the Video Display Unit to 110/230V AC ship's power. 7. If available, connect the cables with the DGPS corrections to port com10 and the external gyro compass signal to com9 at the rear of the Processing Unit. Optionally, additional DGPS correction signals can be connected to the free communication ports in the range 5 to 9 instead of output lines and gyro input. 8. When all cables are connected, power on the Processing Unit. The four LED indicators located behind the door on the front panel of the Processing Unit should then start to shine red. The LED1 light diode in the MRU junction box should then shine green indicating that the MRU receives power. A yellow light in LED2 indicates that digital data are sent from the MRU on TX+. 9. If the lights in the LED1 and 2 in the MRU junction box are shining, the installation is now completed and you can continue to set up the configuration parameters. 26
41 Installation Setup of configuration parameters Setup consists of: Installing the setup software SCC on an external PC. Entering lever arm vectors and mounting angles for the MRU and the GPS antennas. Entering input and output data interface. The setup parameters are entered into the Seapath Processing Unit by utilising the configuration software SCC. The SCC software is described in "Appendix D - Seapath configuration software, SCC". Always fill in the setup parameters for the specific installation in the Seapath Installation Worksheet before entering the setup software. Fill in the parameters directly in the worksheet found in the "Appendix A - Installation worksheet" in the manual. In this way, the parameters for the actual installation will be easier to find when requested later Lever arm vector determinations The following lever arm vectors have to be determined and input to the configuration software SCC: The vector from the centre of gravity to the GPS antenna no. 1. The vector from the centre of gravity to the MRU location. The vectors from the centre of gravity with up to maximum four measurement points. All these vectors have to be measured or calculated based upon drawings or previously measured points. These vectors are to be measured within an accuracy of 0.5 metres or better. Positive vector orientation for these parameters is X - positive forwards, Y - positive towards starboard, Z - positive downwards with the centre of gravity as the origin. Note If data shall be valid for centre of gravity, it is not necessary to define a zero measurement point vector since the data is default output in CG. The antenna and MRU vector have to be measured in any case. 27
42 Installation Figure 11 The offset vectors between the different components Input data The Processing Unit has up to five ports for input of data. The following data can be input to the system: DGPS corrections. These corrections are normally input through com10. The data format must conform to [2] "6 of 8" or "8 of 8" format. If additional lines are needed, use spare lines in the range com5 to com9. Make sure that the same line is not specified for two purposes. Optionally, the additional input lines on the AUX - Serial port can be used. Heading data from an external source, for example a gyro compass, as backup to improve reliability. Heading is normally input through the port com9. The data format must conform to an [1] HDT message or a supported proprietary format. If DGPS correction data from more than one reference station are available on the links, Seapath combines data from up to six reference stations to obtain the best solution. If data from more than six stations are available, the six nearest stations are used. If required, see the description in the User's Manual [3] chapter five, "Operating Instructions" on how to override the automatic selection of the six nearest stations. 28
43 Installation Serial data output Data can be output on up to eight individually configurable serial lines (com5 to com20). For a more detailed description of the different output formats available, see "Appendix B - Output Protocols From Seapath". The logical host channels for output of data are numbered from 1 to 8. Each channel is output to a serial line. The default configuration is: Channel no. Line Type Host Out #1 com5 RS-232 Host Out #2 com6 RS-232 Host Out #3 com7 RS-232 Host Out #4 com8 RS-232 Host Out #5 com13 RS-232, not isolated Host Out #6 com14 RS-232, not isolated Host Out #7 com15 RS-232, not isolated Host Out #8 com16 RS-232, not isolated The mapping between channel numbers and lines is configurable in the property setup string for each channel, but only one channel can be output to each line. If high data rates are used (less than 0.1 second between messages), the lowest channel numbers should be used for the highest data rates. The points on the vessel where the output positions and velocities shall be valid (measurement points) must be defined. If points different from centre of gravity shall be used, the offsets from centre of gravity to these points have to be specified in the Measurement Points \ Geometry window in SCC. A maximum of four points can be defined. Each point can be used for one or more channels. For NMEA messages, full conformance to the standard requires RS-422, 4800 baud, 8 data bits, no parity, one stop bit and at least 1 second between messages. For binary messages, 8 data bits must always be used. Baud rate and interval between messages must be selected in such a way that the serial line has sufficient capacity. The minimum baud rate is approximately 15 times the number of bytes transmitted per second. If the binary message, which is 52 bytes long, is transmitted with a 0.02 second (50 Hz) interval, the minimum baud rate is: = A baud rate of at least should be used in this case. 29
44 Installation Setup procedure The following procedure is used to configure the Processing Unit on-line: 1. Install the SCC software on an external PC if not already done. See "Appendix D - Seapath configuration software, SCC" on how to install the software. 2. Power up the Seapath unit if not already running. Connect a null-modem cable or the delivered interconnection cable from a free serial port on an external PC to the front panel connector on the Processing Unit. Start the SCC program and click on the Connect button in the Seapath start-up window. 3. When contact with the Seapath is established, edit the Seapath parameters according to the completed Installation Worksheet. Finally, select Parameter Management \ Download in the folder list in order to download the entered configuration parameters to the Seapath unit. For more description of each of the configuration parameter selections, see "Appendix D - Seapath configuration software, SCC" Calibration The system has to be calibrated on board the vessel after installation. A typical calibration consists of: Calibrating the direction of GPS antennas against an external reference. Type of reference must be decided according to the required accuracy. Calibrate the MRU axes measured by the MRU against an external reference. Decision on whether MRU calibration is needed and type of reference is based on the type of system the Seapath is interfaced to and the accuracy required Calibration of the GPS antenna installation For the GPS antenna installation the following calibration parameters have to be determined: Baseline Length. The baseline length between the two antennas is measured in metres. The length can be selected in the range 0.2 to 6.0 metres, but the recommended antenna baseline length range is 2.5 to 4.0 meters. Heading Offset. The direction of the GPS antennas relative to the vessel's longitudinal axis is measured in degrees. Height Difference. The height difference between the two antennas is measured in metres. It is of crucial importance to calibrate the heading offset correctly. During this calibration, several accurate reference measurements of the vessel heading must be read/logged simultaneously with the heading output from the Seapath. The data logging should continue for at least two hours under calm conditions alongside a quay. The best results are achieved if continuous logging of both the reference system and the Seapath measurements can be performed during the calibration period. If simultaneous logging of the two systems is not 30
45 Installation possible, one reading from both systems should be done at least every 30 seconds for a minimum of two full hours. The long calibration time is necessary in order to cancel out errors in the Seapath measurements caused by multipath effects, which may be particularly pronounced in the static conditions of a harbour area. Before calibration, measure the baseline length between the GPS antennas to within a tolerance of one centimetre or better. If the standard antenna bracket is used, the baseline is metres. Enter the measured baseline length into the Processing Unit by using the SCC software. The observations from each of the two different systems are then averaged and the offset between the two systems (reference minus Seapath reading) is the Seapath heading offset. If heading offset was not entered as zero in the SCC software on beforehand, the calibration value should be added to the existing offset value. The baseline length and height difference should be determined within an accuracy of 10 centimetres in height difference and 1 mm in baseline length. These values should be entered into the Seapath through the SCC software. By using the calibration wizard in the SCC software the baseline length and height difference are calculated automatically. Example: If the heading measured by the reference system is found to be 32.1 degrees and the Seapath heading after the calibration has been determined to be 15.3 degrees, the Seapath heading offset to be input in SCC is the value 16.8 ( ) Typical calibration procedure This is an example on how to perform a GPS antenna calibration. Proceed as follows: 1. Start up the SCC software and establish contact with the Processing Unit. When contact is established, enter the Configuration Folder List, select Sensor \ GPS \ Antenna Configuration. 2. Before editing parameter values belonging to a connected Seapath, it is recommended to first perform an upload from the Seapath. See chapter , "Upload". 31

46 Installation 3. In the GPS Antenna Configuration window, input the Baseline Length 2.5 metres if the standard Antenna Bracket is used, otherwise this length has to be measured manually with 1 cm accuracy and this value entered. For the Heading Offset input an approximate value or input zero if you are uncertain. For the Height Difference input an approximate value. Then click on the Calibration Wizard button to prepare the calibration. Figure 12 GPS Antenna Configuration 4. In the GPS Antenna Calibration Wizard - Page 1 step 1, check that the baseline length has been entered correctly. Figure 13 Page 1 of GPS Antenna Calibration 32
47 Installation 5. In step 2 input 120 minutes (two hours) as the calibration period and the logging interval as 10 seconds. Log the calibration data to the file "Seapath.cal" on a preferred folder on the PC. 6. Before pressing Next and start logging of Seapath GPS, it is recommended to start recording data of the vessel reference heading on another PC or by manual readings. When logging of the reference heading has started, click Next in order to proceed to page The progress of the calibration process is then shown on the screen with a graphical presentation of the measured data for the Seapath heading, the gyro compass (if connected), the antenna baseline length and the height difference. Figure 14 Page 2 of GPS Antenna Calibration 8. Click Next to proceed to page 3 for information about the calibration result. 33
48 Installation Figure 15 Page 3 of GPS Antenna Configuration 9. Inspect the logged calibration data (in the file "Seapath.cal") for any wild points by selecting the command Show Graph. Correct the wild points found or delete the whole line(s) and perform a recalculation of the calibration data. 10. When the Seapath calibration result has been found acceptable, click Next to proceed to page 4. Input the mean value for the vessel heading reference, in this example logged on a separate PC and found to be 7.83 degrees, and click on Compute in order to calculate the heading offset. 34

49 Installation Figure 16 Page 4 of GPS Antenna Configuration 11. Click Finish to accept the result and exit the antenna calibration wizard Calibration of MRU axis The MRU axes must be calibrated to the vessel axes after the mechanical installation. To achieve the specified roll and pitch accuracy, the offset angles between the MRU axes and the vessel axes have to be calculated to an accuracy better than 0.5 degrees. These offset angles are input to the Seapath configuration as mounting angles. For multibeam echo sounder applications an accuracy better than 0.1 degrees is required to ensure satisfactory performance. A typical calibration consists of calibrating the MRU axes to an external reference. Type of reference must be determined according to the required accuracy. 35
50 Installation The reference for roll and pitch calibration must be carefully selected depending on the intended application. It may be the hull, or a sensor like a multibeam echo sounder or a USBL acoustic system. Some sensors have internal calibration routines, and accurate calibration of the MRU is not required. In "Appendix D - Seapath configuration software, SCC" a procedure for automatic setup of MRU mounting angles is described. An accurate alignment of the MRU +R arrow with respect to the vessels longitudinal axis (yaw orientation) is of crucial importance. If not properly aligned, the performance of the roll and pitch measurements from MRU will be degraded. The easiest way to ensure a correct yaw orientation of the MRU is to mount the unit on the vessel's longitudinal or transversal bulkheads. Figure 17 illustrates that a misalignment of 1 degree of the MRU in yaw will result in a roll error of ±0.09 degrees if the vessel is pitching ±5 degrees. To calibrate the misalignment of the MRU axis to an accuracy of 0.5 degrees is not an easy task and requires use of an accurate external reference. 0.4 Misalignment about yaw-axis roll-error [deg] deg deg pitch-angle [deg] Figure 17 Value of roll-error as function of vessel pitch angle as parameter and 1 and 2 yaw misalignments 36
51 Installation drawings 4. INSTALLATION DRAWINGS This chapter contains the outline drawings showing the mechanical dimensions of the Processing Unit, the GPS Antenna Bracket and Holder, the MRU 5 and its mounting bracket, and the MRU junction box. 37
52 Installation drawings Projection: Xref file : Standard enclosure for mounting in 19" racks. Basic material Aluminium. Fits into slots with height 3 Units. ( 1U = 44.45mm ) Rev. Description Date, Sign. Title : Subtitle: Issued : HW PLATTFORM ENCLOSURE DIMENSIONS Date: Rev. no: Scale : KONGSBERG SEATEX 1:5 Drawing no: MA-010 Approved : Checked : Usage: Assey Design by : KL , ,1 132,5 (3U) 3,5 DETAIL A A 482 R 3,5 38
53 Installation drawings 39
54 Installation drawings 40
55 Installation drawings 41
56 Installation drawings 42
57 Installation drawings External 4 pair Cable JB 1 G2 P1 P2 P3 P4 RD BL YE GN PI GR BR WH P1 * P2 * P3 P4 * * X1:Terminal List G1 W1 B1 A1 SCR 1 P1 RD BL 14 7 P2 YE GN 2 9 P3 PI GR 3 10 P4 BR WH 11 5 Traced P.Kjellstrøm Sign Engineer Controlled P.Kjellstrøm Sign Sign Last revision date Date Drawing tool Visio Page Project name: HMS 100/Seapath200 Scale Drawing no Rev 1 of 1 0 Item Quant Description A1 1 ea D-sub connector 15 pin male B1 1 ea Diecast housing for D-sub connector G1 G2 X1 1 ea 1 ea 1 ea Cable Gland, Type: Skintop MS SC 11w.backnut Miltronic, Art.nr.: Cable Gland, Type: Skintop MS SC 16 w.backnut Miltronic, Art.nr Terminal list:type:phoenix MBK 3 Art.nr ,Marking:Art.nr :0001 W1 1 ea Signal cable: 4 pair x 0.22mm2, 1,5 m JB1 1 ea Junction Box, Type: ELFA Art.nr Codes : P1 = Pair no. 1 P2 = Pair no. 2 P3 = Pair no. 3 P4 = Pair no. 4 RD = Red BL = Blue YE = Yellow GN = Green PI = Pink GR = Grey BR = Brown WH = White * Individual screen to be isolated in this box. MRU end connected to earth. * Cable W1 Connector end: Screen(SCR) shall NOT be connected to D-sub housing.only to pin 1 Drawing title: M Processing Unit Connection Box, MRU Kongsberg Seatex AS * 43
58 Installation drawings AGND +AOUT-2 +AOUT-1 +AOUT P1 P2 W1 B1 SCR P1 P2 A Traced P.Kjellstrøm Sign Engineer Controlled P.Kjellstrøm Sign Sign Last revision date Date Drawing tool Visio Page Project name: Seapath200 Scale Drawing no Rev 1 of 1 0 Item Quant Description A1 1 ea D-sub connector 25 pin female B1 1 ea Diecast housing for D-sub connector W1 1 ea Signal cable: 2 pair x 0.22mm2, 3 m RFE-HF 2x2x0,5mm2 Codes : P1 = Pair no. 1 P2 = Pair no. 2 Drawing title: M Cable,Processing Unit Aux-Serial, Analog Output Kongsberg Seatex AS * 44
59 Appendix A Installation worksheet 5. APPENDIX A - INSTALLATION WORKSHEET Vessel Seapath serial no. Place MRU serial no. Date Installed by Signature Vessel Geometry Vessel Dimension: Length [m] Width [m] Height [m] Centre of Gravity (CG) Location: From CG to AP (Aft Point) [m] (positive forward of CG) From CG to CL (Centre Line) [m] (positive to starboard of CG) From CG to the Keel [m] (positive below CG) Vessel Description Vessel Data: Vessel Type and Name Vessel Owner Country of Origin Management: Manager Phone Number Seapath: Seapath Owner Seapath Manager GPS Antenna Geometry Antenna Lever Arm from CG to Antenna #1: X[m] (positive forward of CG) Y[m] (positive to starboard of CG) Z[m] (positive below CG) 45
60 Appendix A Installation worksheet GPS Antenna Processing Settings Height Aiding and SV Masking: Aid Mode (default = Off) Aided Height [m] (default = 0) Elevation Mask [deg] (default = 10) Range Rate Corrections (default = enabled) Use Geo Range (default = disabled) RTK Search Mode (default = Normal) GPS Reference Stations Only Stations: Force Stations: Ignore Stations: SBAS Common Settings SBAS Enable: Automatic mode (default = disabled) GEO SV's to track SBAS Decode: Decode any satellite (default = disabled) Decode following SVs Enable SBAS WASS Testmode (default = disabled) GPS Antenna Configuration Baseline length (standard 2.500) [m] Heading offset (Reference - Seapath reading) [deg] Height difference (standard 0.00) [m] GPS Antenna Attitude Processing Settings Max Pitch and Roll Angles [deg] (default = 15) Max Average Pitch and Roll Angles [deg] (default = 7) 46
61 Appendix A Installation worksheet MRU Geometry MRU Lever Arm: From CG to MRU X[m] (positive forward of CG) Y[m] (positive to starboard of CG) Z[m] (positive below CG) MRU Mounting Angles used: Roll [deg] Pitch [deg] Yaw [deg] MRU Heave Configuration Filter Mode Average period [s] Damping Measurement Points (0-4, CG not counted) Offset from CG to each measurement point Point no. Active X (positive if MP forward of CG) [m] Y (positive if MP starboard of CG) [m] Z (positive if MP below CG) [m] Name of MP Data Interface - Common Host Settings NMEA Identification (2 characters) Binary Message Token (0 255) Data Interface - Common Network Settings IP Network Address IP Network Mask NMEA Identification (2 characters) Binary Message Token (0 255) FTP Server Password 47
62 Appendix A Installation worksheet Data Interface Input Configuration Device Line (com) Electric 232/422 Baud rate Gyro Parity (standard n) Data bits (st.. 8) Stop bits (st. 1) Format DGPS Link #1 DGPS Link #2 DGPS Link #3 DGPS Link #4 OpCom (default Com1) Data Interface Digital RS-232/422 Output Configuration Device Line (com) Electric 232/422 Baud rate Parity (st. n) Data bits (st. 8) Stop bits (st.1) Host Out #1 MP# (0=CG) Int [s] Op. (0) Format Host Out #2 Host Out #3 Host Out #4 Host Out #5 Host Out #6 Host Out #7 Host Out #8 48
63 Appendix A Installation worksheet Data Interface Digital Network Output Configuration Device Port MP# (0=CG) Int [s] Option (st. 0) Network Out #1 Format Network Out #2 Network Out #3 Network Out #4 Network Out #5 Network Out #6 Network Out #7 Network Out #8 Data Interface Analog Output Configuration Device Gain [V/Physical Unit] Offset [Physical Unit] Analog Out #0 Analog Out #1 Analog Out #2 MP# (0=CG) Format 49
64 Appendix A Installation worksheet Blank page 50
65 Appendix B Output protocols from Seapath 6. APPENDIX B - OUTPUT PROTOCOLS FROM SEAPATH The available output data formats are as follows: Name Format Description no. NMEA 1 NMEA and proprietary messages Simrad EM1000/950 2 Simrad EM1000 and 950 binary format Seapath binary fmt3 3 Seapath binary format 3 Simrad EM3000/Hipap 6 Simrad EM3000, 300 and Hipap compatible Calibration 7 Calibration format for GPS antennas Echo Sounder fmt9 9 Echo sounder format RDI ADCP 10 RDI ADCP format, PRDID Seapath binary 11 fmt11 11 Seapath binary format 11 Lehmkuhl gyro repeater 12 Lehmkuhl gyro repeater format 1PPS NMEA ZDA 13 1PPS time tag, NMEA ZDA message 1PPS Trimble 14 1PPS time tag, Trimble compatible message Atlas Fansweep 16 Atlas Fansweep format Echo Sounder fmt18 18 Echo sounder format, TSS1 compatible Submetrix 19 Submetrix format 6.1 NMEA format The NMEA format is an ASCII text format using the ZDA, GGA, GLL, VTG, HDT, GST, GSA and GRS messages defined in [1] and the proprietary PSXN,20, PSXN,21, PSXN,22 and PSXN,23 messages conforming to the same specification. Format: $INZDA,time,day,month,year,,*csum term $INGGA,time,lat,{N S},long,{E W},gga-qual,nsat,hdop,height,M,,M,age,stn*csum term $INGLL,lat,{N S},long,{E W},time,gll-qual,mode*csum term $INVTG,course,T,,M,speed,N,,K,mode*csum term $INHDT,head,T*csum term $INGST,time,,semi-maj,semi-min,ell-orient,sd-lat,sd-long,sd-height*csum term $INGSA,gsa-mode,gsa-status,id,id,id,id,id,id,id,id,id,id,id,id,pdop,hdop,vdop*csum term $INGRS,time,1,res,res,res,res,res,res,res,res,res,res,res,res*csum term $PSXN,20,horiz-qual,hgt-qual,head-qual,rp-qual*csum term $PSXN,22,gyro-calib,gyro-offs*csum term $PSXN,23,roll,pitch,head,heave*csum term $PSXN,24,roll-rate,pitch-rate,yaw-rate,vertical-vel*csum term $PSXN,21,event*csum term 51
66 Appendix B Output protocols from Seapath Explanation: time UTC time on format hhmmss.ss where hh is hours (00-23), mm is minutes (00-59) and ss.ss is seconds ( ). day Day of month (01-31). month Month of year (01-12). year Year on format yyyy. lat Latitude on format ddmm.mmmmmm where dd is degrees (00-90) and mm.mmmmmm is minutes ( ). long Longitude on format dddmm.mmmmmm where ddd is degrees ( ) and mm.mmmmmm is minutes ( ). gga-qual GPS quality indicator: 0 = invalid position, 1 = GPS SPS used, 2 = DGPS used, 3 = GPS PPS used, 4 = GPS RTK used, 5 = GPS float RTK used, 6 = dead reckoning. nsat Number of satellites in use (00-99). hdop HDOP on format x.x. height Height above ellipsoid in metres on format m.mm. age Age of DGPS corrections in seconds on format s.s. stn DGPS reference station ID ( ). gll-qual Geographic position quality: A = valid, (D)GPS used (normal or reduced performance), V = dead reckoning or invalid position. mode Positioning mode: A = GPS used, D = DGPS used, E = dead reckoning, N = invalid position/velocity. course Course over ground, degrees true on format d.dd ( ). speed Speed over ground, knots on format k.k. head Heading, degrees true on format d.dd ( ). semi-maj Standard deviation of the semi-major axis of the position error ellipse in metres on format m.mm. semi-min Standard deviation of the semi-minor axis of the position error ellipse in metres on format m.mm. ell-orient Orientation of the semi-major axis of the position error ellipse in degrees (0-180). sd-lat Standard deviation of latitude error in metres on format m.mm. sd-long Standard deviation of longitude error in metres on format m.mm. sd-height Standard deviation of height error in metres on format m.mm. gsa-mode GPS position mode setting: A = height aiding enabled, M = 3D only. gsa-status GPS position mode used: 1 = no GPS position, 2 = height aided (3 satellites), 3 = 3D. id Satellite ID number, PRN (01 32). pdop PDOP on format x.x vdop VDOP on format x.x. res GPS range residual in metres on format m.m (no fraction if the value is greater than 99.9 metres). horiz-qual Horizontal position and velocity quality: 0 = normal, 1 = reduced performance, 2 = invalid data. hgt-qual Height and vertical velocity quality: 0 = normal, 1 = reduced performance, 2 = invalid data. head-qual Heading quality: 0 = normal, 1 = reduced performance, 2 = invalid data. rp-qual Roll and pitch quality: 0 = normal, 1 = reduced performance, 2 = invalid data. 52
67 Appendix B Output protocols from Seapath gyro-calib Gyro calibration value since system start-up in degrees on format d.dd. gyro-offs Short-term gyro offset in degrees on format d.dd. roll Roll in degrees on format d.dd. Positive with port side up. pitch Pitch in degrees on format d.dd. Positive with bow up. heave Heave in metres on format d.dd. Positive down. roll-rate Roll rate in degrees per second on format d.dd. Positive when port side is moving upwards. pitch-rate Pitch rate in degrees per second on format d.dd. Positive when bow is moving upwards. yaw-rate Yaw rate in degrees per second on format d.dd. Positive when bow is moving towards starboard. verticalvel downwards. Vertical velocity in metres per second on format d.dd. Positive when moving event Event code: 1 = system restart. csum Checksum (exclusive or) of all characters between, but not including, the preceding $ and *, hexadecimal (00 - FF). term CR-LF (2 bytes, values 13 and 10). The ZDA, GGA, GLL, VTG, HDT, GST, GSA, GRS, PSXN,20, PSXN,22 and PSXN,23 messages are output regularly at an adjustable rate. If gyro calibration data are not being calculated, the PSXN,22 message is not output. The PSXN,21 message is output once when an event occurs. A sub-set of the available NMEA messages can be configured individually for each serial line. 6.2 Binary format 3 The binary format consists of a fixed-length message using single-byte unsigned, 4-byte twocomplement integer and 4-byte IEEE floating point data elements. For the multi-byte elements, the most significant byte is transmitted first. Format: Element Scaling Format Bytes Value Header ASCII 1 ASCII "q" Length Unsigned 1 49 Token Unsigned Time nanoseconds Integer Latitude 2 30 = 90 degrees Integer Longitude 2 30 = 90 degrees Integer Height metres Float 4 Heave metres Float 4 North velocity metres/second Float 4 East velocity metres/second Float 4 Down velocity metres/second Float 4 53
68 Appendix B Output protocols from Seapath Element Scaling Format Bytes Value Roll radians Float 4 Pitch radians Float 4 Heading radians Float pi Status word Bit-fields 4 Checksum Unsigned Length is number of bytes between, but not including, the Length and Checksum fields. Checksum is calculated modulo 256 of all bytes between, but not including, the Length and Checksum fields. The contents of the Token field is adjustable. Latitude is positive north of the Equator. Longitude is positive east of Greenwich. Height is above the ellipsoid. Heave is positive down. Roll is positive with port side up. Pitch is positive with bow up. The status word consists of 32 single bit flags numbered from 0 to 31, where 0 is the least significant bit. A 1 value (true) means: Bit no. Interpretation 0 Reduced horizontal position and velocity performance. 1 Invalid horizontal position and velocity data. 2 Reduced heave and vertical velocity performance. 3 Invalid heave and vertical velocity data. 4 Reduced roll and pitch performance. 5 Invalid roll and pitch data. 6 Reduced heading performance. 7 Invalid heading data. The remaining bits in the status word are reserved for future expansion. 6.3 Binary format, Simrad EM1000/950 compatible The Simrad EM1000 format consists of a fixed-length message using single-byte unsigned, 2- byte unsigned and 2-byte two-complement integer data elements. For the 2-byte elements, the least significant byte is transmitted first. Format: Element Scaling Format Bytes Value Header Unsigned 1 00 Hex Header Unsigned 1 90 Hex Roll 0.01 degrees Integer to Pitch 0.01 degrees Integer to Heave 1 cm Integer to 999 Heading 0.01 degrees Unsigned 2 0 to
69 Appendix B Output protocols from Seapath Roll is positive with port side up. Pitch is positive with bow up. Heave is positive up. Invalid data are indicated by values outside the specified ranges. The definition of the attitude angles in this format is different from the Euler angles definition used elsewhere. The difference appears in the roll angle, where roll 1000 = arcsin sin( roll ) cos( pitch ) EM Euler Euler 6.4 Binary format, Simrad EM3000, EM300 and HiPap compatible The Simrad EM3000 format consists of a fixed-length message using single-byte unsigned, 2- byte unsigned and 2-byte two-complement integer data elements. For the 2-byte elements, the least significant byte is transmitted first. Format: Element Scaling Format Bytes Value Status byte Unsigned 1 Header Unsigned 1 90 Hex Roll 0.01 degrees Integer to Pitch 0.01 degrees Integer to Heave 1 cm Integer to 999 Heading 0.01 degrees Unsigned 2 0 to Roll is positive with port side up. Pitch is positive with bow up. Heave is positive up. The status byte can have the following values: Value Interpretation 90 Hex Normal. 91 Hex Reduced performance. A0 Hex Invalid data. Invalid data are also indicated by values outside the specified ranges. When the status is A0, the values which are within specified ranges can be assumed to have valid, but reduced quality. 55
70 Appendix B Output protocols from Seapath 6.5 Calibration format The calibration format is a columnar ASCII text format for use when calibrating the GPS antenna installation. Format: Element Columns Scaling Decimals Value Time 1-7 seconds Heading degrees Gyro heading degrees Baseline metres 3 Height metres 2 Term CR-LF Each record consists of numbers on ASCII format separated by spaces and terminated by carriage return and linefeed (values 10 and 13). Leading spaces are used, so the numbers are separated by two or more spaces, and spaces may occur before the first number on the record. Time is counted since last midnight UTC time. Heading is true heading from the GPS phase measurement, which is not the same as the heading output on the other formats. Gyro heading is from an external gyro, 0.00 if no gyro is connected. Baseline is the slant range between the antenna centres from the GPS phase measurement. Height is the height difference between the antennas from the GPS phase measurement. Height is positive if antenna 1 is above antenna 2. The data are intended for calibration of the antenna installation, so no data are output unless the GPS phase measurements are valid. 6.6 Echo sounder format 9 The echo sounder format is a proprietary ASCII text format with fixed-length records used when connecting Simrad EA500 and other echo sounders. Format: Element Columns Scaling Format Header 1-7 : Heave cm sdddd Warning 14 space or "?" Roll degree sdddd Pitch degree sdddd Term CR-LF Heave is positive up. Roll is positive with port side up. Pitch is positive with bow up. 56
71 Appendix B Output protocols from Seapath The zeroes in the header occupy the columns used for acceleration when this format is output from other systems. Seapath does not output acceleration. s is the sign character, space if positive and "-" if negative. dddd is a decimal number with leading zeroes where appropriate. The warning character is space if data are normal, "?" if data are invalid or of reduced quality. Columns between elements are filled with spaces. The definition of the attitude angles in this format is different from the Euler angles definition used elsewhere. The difference appears in the roll angle, where [ ] rollecho sounder = arcsin sin( rolleuler ) cos( pitcheuler ) 6.7 RDI ADCP format The RDI format is a proprietary ASCII text format used when connecting RDI ADCP equipment. Format: $PRDID,pitch,roll,head term Explanation: pitch Pitch, degrees on format sddd.dd. s is the sign character, "+" or "-". ddd.dd is a decimal number with leading zeroes where appropriate. Positive with bow up. roll Roll, degrees on format sddd.dd. s is the sign character, "+" or "-". ddd.dd is a decimal number with leading zeroes where appropriate. Positive with port side up. head Heading, degrees true on format ddd.dd, with leading zeroes where appropriate. term CR-LF (2 bytes, values 13 and 10). 6.8 Binary format 11 The binary format consists of a fixed-length message using 1-, 2- and 4-byte signed and unsigned integers. The signed integers are represented as two-complement numbers. For the multi-byte elements, the most significant byte is transmitted first. The total number of bytes is 42. Format: Element Scaling Format Bytes Value Header ASCII 1 ASCII "q" Time, seconds seconds Integer 4 Time, fraction of second 0.01 second Unsigned Latitude 2 30 = 90 degrees Integer Longitude 2 30 = 90 degrees Integer Height centimetres Integer 4 57
72 Appendix B Output protocols from Seapath Element Scaling Format Bytes Value Heave centimetres Integer 2 North velocity centimetres/second Integer 2 East velocity centimetres/second Integer 2 Down velocity centimetres/second Integer 2 Roll 2 14 = 90 degrees Integer Pitch 2 14 = 90 degrees Integer Heading 2 14 = 90 degrees Unsigned Roll rate 2 14 = 90 degrees/second Integer Pitch rate 2 14 = 90 degrees/second Integer Yaw rate 2 14 = 90 degrees/second Integer Status word Bit-fields 2 Checksum Unsigned 2 Checksum is calculated as a 16-bit Block Cyclic Redundancy Check of all bytes between, but not including the Header and Checksum fields. The CRC algorithm is described in a separate section. Time is divided in an integer seconds part and a fractional second part. The integer seconds part of time is counted from UTC time, ignoring leap seconds. Latitude is positive north of the Equator. Longitude is positive east of Greenwich. Height is above the ellipsoid. Heave is positive down. Roll is positive with port side up. Pitch is positive with bow up. The status word consists of 16 single bit flags numbered from 0 to 15, where 0 is the least significant bit. A 1 value (true) means: Bit no. Interpretation 0 Reduced horizontal position and velocity performance. 1 Invalid horizontal position and velocity data. 2 Reduced heave and vertical velocity performance. 3 Invalid heave and vertical velocity data. 4 Reduced roll and pitch performance. 5 Invalid roll and pitch data. 6 Reduced heading performance. 7 Invalid heading data. The remaining bits in the status word are reserved for future expansion. 58
73 Appendix B Output protocols from Seapath 6.9 Lehmkuhl gyro repeater format The Lehmkuhl gyro repeater format is used when outputting heading from Seapath to Lehmkuhl gyro repeaters. The message is similar to the HDT message output in the standard NMEA format from Seapath. The main differences are lower resolution and no checksum. When heading is output to devices, which are compliant to the NMEA specification [1], it is recommended to use the standard NMEA format and not the Lehmkuhl format PPS time tag, NMEA ZDA message The 1PPS time tag message is output once per second, approximately 0.5 seconds before the time pulse. The message format is ASCII text using the ZDA message defined in [1]. The message contains the UTC time when the message is output. The next time pulse appears at the first integer second after the time in the message. Format: $INZDA,time,day,month,year,,*csum term Explanation: time UTC time on format hhmmss.ss where hh is hours (00-23), mm is minutes (00-59) and ss.ss is seconds ( ). day Day of month (01-31). month Month of year (01-12). year Year on format yyyy. csum Checksum (exclusive or) of all characters between, but not including, the preceding $ and *, hexadecimal (00 - FF). term CR-LF (two bytes, values 13 and 10). This format is recommended used together with 1PPS signal output on the BNC connector at the rear of the Processing Unit. This since the message is output synchronised with the 1PPS signal and is easier/faster to decode than the standard NMEA output with a number of NMEA messages included PPS time tag, Trimble compatible The 1PPS time tag message is output once per second, approximately 0.5 seconds before the time pulse. The message format is fixed length ASCII text. The message contains the UTC time of the next time pulse. 59
74 Appendix B Output protocols from Seapath Format: Element Columns Format Header 1-3 UTC Date 5-12 yy.mo.da Time hh:mm:ss Fix type 23 digit or '?' No. of satellites 24 digit or '?' Term CR-LF yy.mo.da is year (00-99), month of year (01-12) and day of month (01-31). hh:mm:ss is hours (00-23), minutes (00-59) and seconds (00-59). Fix type is "5" for 3D fix with accurate time, "?" for no fix (time from receiver clock). No. of satellites is "1" - "8" for 1-8 satellites tracked, "9" for 9 or more satellites tracked, "?" for no fix (time from receiver clock). Columns between elements are filled with spaces Atlas Fansweep format The Atlas format is a proprietary binary format used for outputting data to Atlas Fansweep echo sounders. It consists of a fixed-length message using single-byte and 2-byte twocomplement integer data elements. For the 2-byte elements, most significant byte is transmitted first. Format: Element Scaling Format Bytes Value Start byte Integer 1 10 Hex Roll 2 14 = 90 degrees Integer 2 Pitch 2 14 = 90 degrees Integer 2 Heave millimetres Integer 2 Status byte Integer 1 Stop byte Integer 1 10 Hex Roll is positive with port side up. Pitch is positive with bow up. Heave is positive up. The definition of the attitude angles in this format is different from the Euler angles definition used elsewhere. The difference appears in the roll angle, where [ ] roll = arcsin sin( roll ) cos( pitch ) Atlas Euler Euler 60
75 Appendix B Output protocols from Seapath The status byte can have the following values: Value Interpretation 6 Normal. 7 Reduced performance or invalid data Echo sounder format 18 The echo sounder format is a proprietary ASCII text format with fixed-length records used when connecting Seabeam and other echo sounders. Format: Element Columns Scaling Format Header 1-7 : Heave cm sdddd Warning 14 "F" or "f" Roll degree sdddd Pitch degree sdddd Term CR-LF Heave is positive up. Roll is positive with port side up. Pitch is positive with bow up. The zeroes in the header occupy the columns used for acceleration when this format is output from other systems. Seapath does not output acceleration. s is the sign character, space if positive and "-" if negative. dddd is a decimal number with leading zeroes where appropriate. The warning character is "F" if data are normal, "f" if data are invalid or of reduced quality. Columns between elements are filled with spaces. The definition of the attitude angles in this format is different from the Euler angles definition used elsewhere. The difference appears in the roll angle, where [ ] rollecho sounder = arcsin sin( rolleuler ) cos( pitcheuler ) 6.14 Submetrix format The Submetrix format is a proprietary binary format used for outputting data to Submetrix equipment. It consists of a fixed-length message using single-byte and 2-byte unsigned integer data elements. For the 2-byte elements, the most significant byte is transmitted first. 61
76 Appendix B Output protocols from Seapath Format: Element Bytes Max. value Min. value Start byte 1 Status byte 1 Unused 2 Heading deg 0 deg Roll 2 π rad -π rad Pitch 2 π rad -π rad Heading deg 0 deg Roll rate 2 5 rad/s -5 rad/s Yaw rate 2 5 rad/s -5 rad/s Heave m -50 m Vertical velocity 2 10 m/s -10 m/s Unused 5 Checksum 1 The scale of the unsigned integers is such that the minimum value is output as 0 and the maximum value is output as (FFFF Hex). Roll is positive with port side up. Pitch is positive with bow up. Heave and vertical velocity are positive down. The start byte is ASCII ":". Unused elements are output as 0. The checksum byte is calculated as a sum modulo 256 of all bytes transmitted excluding the checksum byte. The status byte indicates the heave, roll/pitch and heading status using the following ASCII values: Value Heave Roll/pitch Heading "A" N N N "B" R N N "C" N R N "D' N N R "E" R R N "F" R N R "G" N R R "H" R R R "b" I NR NR "c" NR I NR "d" NR NR I "e" I I NR "f" I NR I "g" NR I I "h" I I I 62
77 Appendix B Output protocols from Seapath The codes are: N: Normal. R: Reduced accuracy. I: Invalid. NR: Normal or reduced accuracy Cyclic redundancy check algorithm The 16-bit Block Cyclic Redundancy Check algorithm used to calculate the checksum in some formats is described in C and Fortran source code below. C code: #define POLY 0x8408 unsigned short blkcrc( unsigned char *bufptr, /* message buffer */ unsigned long len /* number of bytes */ ) { unsigned char i; unsigned short data; unsigned short crc = 0xffff; if (len == 0L) { return ~crc; } do { for (i=0, data = (unsigned short) (0xff & *bufptr++); i < 8; i++, data >>= 1) { if ((crc & 0x0001) ^ (data & 0x0001)) { crc = (crc >> 1) ^ POLY; } else { crc >>= 1; } } } while (--len); crc = ~crc; data = crc; crc = (crc << 8) ((data >> 8) & 0xff); } return crc; Fortran code: SUBROUTINE blkcrc(inbuffer, len, crc) INTEGER*2 len, i, bit INTEGER*4 crc, data, poly CHARACTER inbuffer*(*) poly = 16#8408 crc = 16#FFFF data = 0 63
78 Appendix B Output protocols from Seapath IF (len.eq.0) THEN crc = 0 RETURN END IF DO i = 1, len data = ICHAR(inbuffer(i:i)) DO bit = 1, 8 data = IAND(data,16#FF) IF (IAND(crc,16#01).EQ.(IAND(data,16#01))) THEN crc = ISHL(crc,-1) ELSE crc = ISHL(crc,-1) crc = IEOR(crc, poly) END IF data = ISHL(data,-1) END DO END DO data = IEOR(crc,16#FFFF) crc = IOR(ISHL(data,8),IAND(ISHL(data,-8),16#FF)) END 64


79 Appendix C Installation of coax connectors 7. APPENDIX C - INSTALLATION OF COAX CONNECTORS ON SUPERFLEX CABLE This is the assembly instruction for the Huber+Suhner connectors , 11 N , and 21 N This connector consists of one part. 65


80 Appendix C Installation of coax connectors 66


81 Appendix C Installation of coax connectors 67

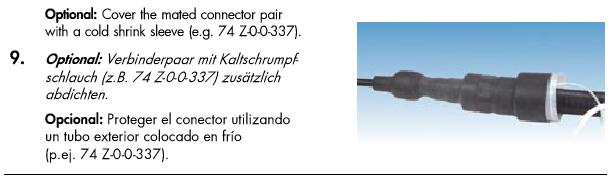
82 Appendix C Installation of coax connectors 68

83 Appendix C Installation of coax connectors 69
84 Appendix C Installation of coax connectors Blank page 70

85 Appendix D Seapath configuration software, SCC 8. APPENDIX D - SEAPATH CONFIGURATION SOFTWARE, SCC The SCC (Seapath Control Centre) program is used to set configuration parameters in Seapath. It runs under Microsoft Windows 98, NT 4.0, Me, 2000 and XP or compatible operational systems except Japanese and Chinese versions of Windows. The SCC communicates with Seapath through a serial line. 8.1 Software installation Follow the procedure below to install the SCC software on the external PC: 1. Insert SCC CD-ROM into the CD or DVD drive on the local PC. 2. From the Start menu select Settings. Then select Control Panel and Install program. Follow the instructions on the screen in order to complete the installation of the "SCCSetup.exe" program. 3. When the installation of files is finished, the window shown in Figure 18 appears. Choose to restart the computer now or later. Click Finish and the setup is complete. Remove the diskette. Figure 18 Installation Complete 71
 to the front panel connector on Seapath. A null-modem cable is delivered with Seapath. Start Microsoft Windows.")
86 Appendix D Seapath configuration software, SCC 8.2 How to get started Starting the program Power up Seapath if not already running. Connect a null-modem cable from a free serial port on the PC (com1: or com2:) to the front panel connector on Seapath. A null-modem cable is delivered with Seapath. Start Microsoft Windows. Start SCC by double-clicking on the SCC icon. The Seapath SCC start window shows the software version, and a rotating Kongsberg Seatex AS logo indicates a running application. To continue, click one of three buttons: 1. Connect. System tries to establish communication with Seapath. If connection fails, Figure 23 is shown. 2. Offline. System opens for preparation of setting parameters in local SCC computer. 3. Exit. Application is closed. Figure 19 SCC Start Window 72


87 Appendix D Seapath configuration software, SCC If option 2 (Offline) is selected, the dialogue box shown in Figure 20 appears. Tick off for Open existing Seapath parameter file or Create a Seapath demo parameter file, and choose type of Seapath. Click OK. Figure 20 Initial Offline Dialog If option Open existing Seapath parameter file is selected, the window Select file to load parameters from appears. Select the parameter file to be edited and click Open. The main window, Seapath Control Centre appears, see Figure 21. This main window also appears if the option Create a Seapath demo parameter file, is chosen. Vessel Window This part of figure presents the setting windows Configuration Folder List Figure 21 Seapath Control Centre, Main Window 73

88 Appendix D Seapath configuration software, SCC Setting the serial port parameters Click the SCC-Seapath Port Configuration button, or pull down the Options File menu and select the SCC to Seapath Communication / Port Configuration option. The dialogue box for communication setup appears (Figure 22), select connector and baud rate. The baud rate must correspond to the baud rate setting in Seapath, unless the communication goes through modems or other equipment, which change the baud rate. Default baud rate is Normally, only the connector selection has to be changed. Click OK. The settings are saved and will remain unchanged until reconfigured. Figure 22 Communication Setup Establishing connection Click the Connect to Seapath button, or pull down the File menu and select the SCC to Seapath Communication / Connect. The Connect to Seapath Status window becomes active, if communication is OK, Figure 24 is shown. If the Seapath type and version is correct, accept by clicking OK. If the connection is not in order, a "Found no Seapath at this comm. port" message will appear after a few seconds. The two buttons Retry connection and Go Offline are highlighted, choose Go Offline in order to close the connection attempt. Check that Seapath has power on, that the connection cable is plugged into the correct connectors and that the correct baud rate has been selected. When connection is checked and corrected, try to establish connection again. 74


89 Appendix D Seapath configuration software, SCC Figure 23 Connect Status Figure 24 Connected to Seapath Note Before editing parameter values belonging to a connected Seapath, it is recommended to perform an Upload from the Seapath first. See chapter , "Upload". 75
90 Appendix D Seapath configuration software, SCC 8.3 General user interface File menu In the File menu following options are available: Open Configuration. (See description in chapter , "Load from file") Save Configuration. (See chapter , "Save on file") Save Configuration. As (See chapter , "Save on file") SCC to Seapath Communication Connect (Connects SCC to Seapath) Disconnect (Disconnects SCC from Seapath) Port Configuration (See chapter 8.2.2, "Setting the serial port parameters") Demo (See chapter ) Print Configuration (Self-explanatory) Print Preview (Self-explanatory) Print Setup (Self-explanatory) Recent File (Self-explanatory) Exit (See chapter ) Demo Click on the Demo option and the system enters parameter examples into the different settings, making it possible to play with the application in offline mode Exit To close down the application, pull down the File menu and click the Exit option. The connection to Seapath is shut down and the SCC program terminates. If parameters have been edited but not sent back to Seapath, the editing will be lost. 76

91 Appendix D Seapath configuration software, SCC Wizards menu Pull down Wizards menu. Two options are available: MRU configuration. GPS Antenna Calibration. Click on the MRU configuration option or click on the tool button MRU Configuration Wizard, to activate the MRU Axis Orientation window. The configuration setting is described in chapter , "MRU geometry". Click on the GPS Antenna Calibration option or click on the tool button GPS Antenna Calibration Wizard, to activate the GPS Antenna Calibration Wizard window. The Calibration settings are described in chapter , "GPS antenna configuration" View menu Pull down the View menu. Tick off to view the wanted options: 3 Toolbar (See detailed information in chapter 8.3.5) 3 Status Bar (Bottom line). 3 SCC Mode Select Bar. (See Figure 25 Setup icons) 3 Advanced Options (For use by service personnel only, password required) Tick off to view the SCC Mode Select Bar and the Setup window below appears. Figure 25 Setup icons Click the Seapath Configuration icon to activate the Seapath configuration folder list. Click the Vessel 3D-View button to expand the "vessel" part of the configuration window to maximum size. 77
92 Appendix D Seapath configuration software, SCC Help menu Pull down the Help menu. Click on the About SCC option and the About SCC window below appears. A scroll window contains information about Company, software version and the software application. Figure 26 About SCC Tool buttons Description of tool buttons (from left to right): Figure 27 Tool Buttons Open Configuration (Self-explanatory) Save Configuration (Self-explanatory) Connect to Seapath (Establishes data communication from SCC to Seapath) Disconnect from Seapath (Disconnects data communication between SCC and Seapath) SCC-Seapath Port Configuration (See chapter 8.2.2, "Setting the serial port parameters") MRU Configuration Wizard (See chapter , "MRU geometry") GPS Antenna Calibration Wizard (See chapter , "GPS antenna configuration") Print Configuration (Not yet implemented) About (See chapter for details) 78

93 Appendix D Seapath configuration software, SCC Seapath Control Centre button The Seapath Control Centre button is located below the other tool buttons. Click on the button to see the folder list below. Figure 28 Keep Folder List Open Click the push pin in the upper right corner of the folder list to place this folder on the left side of the configuration folder. To remove the folder list and return to the original main window, click the X button in the upper right corner. Figure 29 Close Folder List Click the Vessel 3D-View button to show an expanded "vessel window". The "vessel window" will cover the whole screen like the figure below (here shown in Ghost mode). Click the Vessel 3D-View button and then click the line Seapath Configuration to return to the main window. Figure 30 Vessel 3D-View, Ghost mode 79
94 Appendix D Seapath configuration software, SCC Right click in the window to activate menu for alternative view settings. Alternative to Ghost mode is Wireframe Mouse operation The mouse operations for the 3D-View and the "vessel window" are as follows: Point and left click with the mouse pointer in the upper right "vessel window", and the mouse arrow changes into a rotation symbol. The "vessel model" can then be rotated in all directions. Press SHIFT and simultaneously point and left click with the mouse pointer in the upper right "vessel window", and the mouse arrow changes into a zoom symbol. The "vessel model" can then be zoomed both out and in. Press CTRL and simultaneously point and left click with the mouse pointer in the upper right "vessel window", and the mouse arrow changes into a move symbol. The "vessel model" can then be moved around within the window. Point and right click with the mouse pointer in the upper right "vessel window", and a drop down menu with the below options appears. The options are self-explanatory. Tick off for wanted features. Reset Viewpoint Ghost Vessel 4Wireframe Vessel Vessel Properties (NA) Light properties (NA) Show lights Show OGL Axis 4Show Vessel Axis Change FOV mode Change Background Colour Camera Properties Figure 31 Vessel Drop Down Menu 80
95 Appendix D Seapath configuration software, SCC 8.4 Editing parameter values When contact with the Seapath Processing Unit is established parameter values are loaded from Seapath into the local memory in the SCC computer where they can be inspected and modified. After editing, the parameters are sent back to Seapath. No changes are effective until the parameters are sent. In the main window, Figure 21, the different parameter groups to be edited is shown. Editing of the parameter values are done by pointing to the parameter name in the Configuration Folder List and clicking the left mouse button. The Configuration Folder List contains following parameter groups: The Vessel group contains settings for Vessel Geometry and Description. The GPS and MRU groups contain sensor parameters to be edited when installing and calibrating Seapath. The Measurement Points group contains information on up to maximum four Measurement Points. The Data Interface contains in/out parameters to be edited when defining communication with external systems. The Parameter Management group contains user features for loading and saving. Note Note For this new version of the SCC software, the sensor parameters for the MRU are to be set from this software only. Remember that the editing is done locally in SCC and has no immediate effect until the changes are downloaded to Seapath Vessel settings Vessel geometry In this folder the dimensions of the vessel and the location of the centre of gravity are entered. These inputs will influence the displayed location of the GPS antenna, the MRU and the Measurement Points in the "vessel window" and these values should therefore be as accurate as possible. Proceed as follows: In the Configuration Folder List, select Vessel \ Geometry. Set Vessel Dimension and Centre of Gravity Location. Look at the sketch of the vessel co-ordinate system in the menu in order to enter correct signs on the distance to CG. 81


96 Appendix D Seapath configuration software, SCC Figure 32 Vessel Geometry Vessel description In this folder vessel data for the specific Seapath configuration file are entered. This information is helpful to identify the correct configuration file at a later stage. Proceed as follows: In the Configuration Folder List, select Vessel \ Description. Set general vessel data and management information. Figure 33 Vessel Description 82

97 Appendix D Seapath configuration software, SCC GPS sensor settings GPS geometry The lever arm vector from the centre of gravity to GPS antenna no. 1 has to be measured or calculated based upon drawings or previously measured points, and entered into the software. The antenna cable connected to ANT.1 at the back of the Processing Unit will be GPS antenna no. 1 in the installation. This vector is to be measured within an accuracy of 0.5 metres. Proceed as follows: In the Configuration Folder List, select Sensor \ GPS \ Geometry. Set the Antenna Lever Arm for the GPS antenna which is defined to be antenna no. 1, normally the antenna closest to the aft of the vessel. Look at the sketch of the antenna geometry in the menu in order to enter correct signs on the co-ordinates. Check also that the antenna has been located on the expected spot in the "vessel window". If not, check the signs and the co-ordinates input for GPS antenna no. 1, the vessel dimension and the entered location of CG. Figure 34 GPS Geometry GPS processing For operations with weak satellite geometry the position output can be made more accurate by using height aiding and low elevation mask. For normal operations the Height Aiding mode is set to "Off", but "Filter" is also recommended used. The elevation mask is set to 10 degrees as the default value and must not be changed by other than experts. For the Seapath 200 RTK version the search mode for the RTK solution has three selections: "Safe", "Normal" and "Fast". The default RTK search mode is "Normal". In order to change the default GPS processing settings, proceed as follows: In the Configuration Folder List, select Sensor \ GPS \ Processing. Set the Seapath in Height Aiding mode by pulling down the Aid Mode menu and change the selection from "Off", which is the default setting, to "Filter". The Aided Height is for the CG and measured above the ellipsoid. This height should be set when "Filter" is selected since the filter will start with the entered height value as the initial value. 83

98 Appendix D Seapath configuration software, SCC The SV Masking value can be changed from the default value 10 by entering an Elevation Mask value between 7 and 20 degrees. This value must not be changed by other than experts from the default value 10. Click on the checkbox Enable Range Rate Corrections to use the DGPS corrections in the GPS velocity calculations. The default setting is enabled on use of range rate corrections. Disabling range rate corrections will reduce velocity and attitude noise when receiving DGPS corrections from a reference station with a noisy range rate. Click on the checkbox Use Geo Range in position solution to enable Seapath to use the ranges from the Geo stationary satellites in the SBAS system like WAAS, EGNOS or MSAS. Be aware that the Geos are less accurate than the GPS ranges. Geo ranges should not be used without differential corrections, such as SBAS. The default setting is without use of Geo ranges. For the Seapath 200 RTK version the search mode for the RTK solution be changed from the default mode "Normal" to "Safe" or "Fast" by pulling down the RTK Search Mode menu. The "Safe" mode is recommended used under difficult conditions with much multipath or ionospheric activity and for long baselines. The "Fast" mode is used when a fast RTK solution is required. However, in this mode the probability for an incorrect solution from the system increases. Figure 35 GPS Processing Settings For more information on how to select the best values for GPS Processing, see the User's Manual [3] chapter 5, "Operating Instructions". 84

99 Appendix D Seapath configuration software, SCC GPS reference stations If data from more than one reference station are available on the DGPS correction links, Seapath combines data from up to six reference stations to obtain the best solution. The default configuration is to automatically use the six nearest stations available. The Seapath can be configured to ignore a number of stations or forced to use some selected stations in addition to the automatically selected stations, or disable the automatic selection by filling in a number of stations in the Only Stations List. In order to change the reference stations used in the solution proceed as follows: In the Configuration Folder List, select Sensor \ GPS \ Reference Stations. Select the Station ID and add or remove this station from one of the three station fields by selecting the Station List to be changed. Set the Age Limit for Differential Corrections. Figure 36 GPS Reference Stations For more information whether to override the automatic selections or not, see the description in the User's Manual [3] chapter 5, "Operating Instructions" SBAS common settings The following configuration settings are available for SBAS: SBAS Enable. The preferred option is to manually select which two (or one) satellites to track. This forces Seapath to use only the satellites listed. However, automatic search for the Geo stationary satellites is available by clicking the checkbox Automatic mode to let the Seapath automatically search for the Geo stationary satellites, but this option is not recommended due to less control of the signals used. Use the Add/Clear All buttons to add or clear satellites from the list. SBAS Decode. It is recommended to force Seapath to use corrections only from the satellites listed instead of using the automatic decode mode. If more than one SBAS satellite is enabled in the GEO SV' to track above, it is recommended to choose which SBAS satellite to use for corrections. If two satellites are chosen, data from both satellites 85

100 Appendix D Seapath configuration software, SCC will be used to make the same set of SBAS corrections. Then it is very important that the satellites are from the same SBAS system and that they send exactly the same information. It is therefore recommended to set up Seapath to use corrections from only one satellite. Enable SBAS WAAS Testmode. During the test period of an SBAS system the system is not operational and the corrections are not guaranteed. Message type 0 is sent regularly as a warning and if message 0 appears it is not recommended to use information from this satellite. During normal performance the system will disregard corrections from this satellite. If SBAS WAAS Testmode is entered, this warning will be ignored and the corrections will be decoded. EGNOS and EGNOS Test Bed are not fully operational before the second half of year To be able to use corrections from these satellites you need to enable SBAS WAAS Testmode. WAAS is operational and the test mode should be disabled. Figure 37 SBAS Common Settings for WAAS satellites For more information on how to use SBAS corrections, see the description in the User's Manual [3] chapter 5, "Operating Instructions" GPS antenna configuration The heading of the GPS antenna baseline direction relative to the vessel's heading must be input to the software. At the same time, the baseline length and the antenna height difference should be determined. These values can either be calculated or input manually or determined automatically by selecting the Calibration Wizard. In order to determine the GPS Antenna configuration, proceed as follows: In the Configuration Folder List, select Sensor \ GPS \ Antenna Configuration. In the GPS Antenna Configuration window, input the baseline length 2.5 metres if the standard Antenna Bracket is used, otherwise this length has to be measured up manually and this value entered. For the heading offset and height difference input zero. Then click on the Calibration Wizard button to prepare the calibration. The Heading Offset and Height Difference is automatically updated trough the Calibration Wizard process. 86
101 Appendix D Seapath configuration software, SCC Figure 38 GPS Antenna Configuration Activate the Calibration Wizard button and page 1 of the GPS Antenna Calibration appears. Enter the baseline and calibration information asked for in step 1 and 2, and click Next in order to proceed to page 2. See chapter , "Typical calibration procedure" for a detailed example of antenna calibration. Figure 39 Page 1 of GPS Antenna Calibration 87

102 Appendix D Seapath configuration software, SCC Click Next in the GPS Antenna Calibration page 1 and the GPS Antenna Calibration page 2 appears and the calibration process starts automatically. Measurements for Seapath Heading, Gyro Compass, Antenna Baseline and Height Difference are shown in a graphical presentation in their respective diagram. The diagrams are auto scaled in order to show the total calibration period. A progress bar shows the calibration progress. Figure 40 Page 2 of GPS Antenna Calibration Click the Back or Cancel button at any time if you want to stop the calibration process, see the window in Figure 42. Accept to stop the calibration by clicking Yes or click No to continue. Click Next during the calibration process will also bring up the stop window. If accepted, the calibration process will stop and the GPS Antenna Calibration page 3 appears. 88


103 Appendix D Seapath configuration software, SCC Figure 41 Stop Antenna Calibration Click Next after the calibration process has finished and the wizard continues to page 3. Figure 42 Page 3 of GPS Antenna Configuration GPS Antenna Calibration page 3 contains information about the calibration measurements result. Here it is possible to edit or delete lines of measurements. Select a line by pointing on it. Click on the Count or Time cell, choose to edit or delete the line. Click on the Edit line button and the Edit Calibration Data dialogue box appears. This 89

104 Appendix D Seapath configuration software, SCC dialogue box also appears when clicking on one of the cells Heading, Gyro, Baseline or Height Difference. Change the wanted information; click the Set button, and the Edit Calibration Data dialogue box disappears. Figure 43 Edit Calibration Data Click Save changes in order to save the changes in the calibration file. Click Recalculate to update the calibration statistics including the changes. Only saved changes are included. Click Show Graph to see the updated graph. Click Next to proceed to page 4. In page 4 the vessel reference heading can be input. Click Compute in order to calculate the heading offset. Click Finish to accept the result and terminate the calibration. Note Note If there are too many wild points and lines that need to be edited in the logged file, a new logging period of calibration data is recommended started. Then start from Step 2 again. The new calibration data are only valid in the Seapath after download of parameters. 90

105 Appendix D Seapath configuration software, SCC Figure 44 Page 4 of GPS Antenna Configuration GPS attitude processing In the Configuration Folder List, select Sensor \ GPS \ Attitude Processing. Enter the maximum values to be used for attitude processing. Figure 45 GPS Attitude Processing 91

106 Appendix D Seapath configuration software, SCC MRU sensor settings MRU geometry The lever arm vector from the centre of gravity to the MRU location has to be measured or calculated based upon drawings or previously measured points, and entered into the software. This vector is to be measured with an accuracy of 0.5 metres. Proceed as follows to enter the MRU lever arm: In the Configuration Folder List, select Sensor \ MRU \ Geometry. Enter the settings for MRU Lever Arm. Look at the sketch of the MRU geometry on the screen in order to enter correct signs on the co-ordinates. Check also that the MRU has been located on the expected spot in the "vessel window". If not, check the signs and the co-ordinates input for the MRU, the vessel dimension and the entered location of CG. Figure 46 MRU Geometry The MRU mounting angles can either be input manually or determined by use of the MRU Mounting Wizard. To use the MRU Mounting Wizard proceed as follows: Click the MRU Mounting Wizard button to get to Step 1 of the MRU axis orientation. Choose to continue with Manual or Automatic setup of mounting angles. 92


107 Appendix D Seapath configuration software, SCC Figure 47 Step 1 of MRU Axis Orientation Manual setup: Manual setup selected in Step 1. Click Next to go to the Step 2 Manual window as shown in Figure 48. Click the Previous or Next buttons in the left part of the window to turn the MRU unit around in 90-degree steps, axis by axis. Click until the correct mounting orientation of the MRU has been found. The right part of the window is automatically updated with the actual main rotation of the MRU. Figure 48 Step 2 of Manual MRU Axis Orientation 93

108 Appendix D Seapath configuration software, SCC Click the Next button in the lower right corner in order to proceed to Step 3 - Manual. At the top of the Step 3-Manual window the found main rotation angles for the MRU are displayed. Enter the offset angles for Roll, Pitch and Yaw from the main rotation angles. A positive offset angle rotation is: Positive roll offset means starboard (right) side facing downward, or a clockwise rotation about the R-axis. Positive pitch offset means bow up, or a clockwise rotation about the P-axis. Positive yaw offset (heading, azimuth) means a turn to starboard (right), or a clockwise rotation about the Y-axis. Figure 49 Step 3 of Manual MRU Axis Orientation To get more help on the sign of the offset angles, press the Show MRU bracket misalignment help button and the window in Figure 50 will appear. 94


109 Appendix D Seapath configuration software, SCC Figure 50 Positive offset angles rotations Click Finish to finish the manual setting of the MRU axis. Note The new MRU mounting angles are only valid in the Seapath after download of parameters. Automatic Setup: Automatic setup selected in Step 1. Click Next to go to the Step 2 Auto window, as shown in Figure 51. Figure 51 Step 2 of Auto MRU Axis Orientation 95
 side facing downward.")
110 Appendix D Seapath configuration software, SCC First, input the actual roll and pitch angles of the vessel. A positive vessel angle is from the red to the green co-ordinate system or: Positive pitch angle if the bow is up. Positive roll angle if the starboard (right) side facing downward. Secondly, input the MRU mounting angle in yaw (positive clockwise). The yaw angle is found by projecting the MRU +R arrow to the horizontal plane. The yaw angle is then the angle between the longitudinal axis of the ship and the projected +R arrow in the horizontal plane. It is important that this angle is measured accurately and input correctly to avoid degradation in the performance of the roll and pitch measurements from the MRU. Note Before starting the Auto Mount process, be sure that the ship motion has stabilised and that the harbour conditions are calm. Then click Next to start the Auto Mount process. The window in Figure 52 will appear, and the MRU offset angles are computed. A time-out bar shows the progress. When finished and the found mounting angles look OK, press Finish. Note The new MRU mounting angles are only valid in the Seapath after download of parameters. Figure 52 Step 3 of Auto MRU Axis Orientation 96
111 Appendix D Seapath configuration software, SCC MRU heave configuration When using Seapath for heave measurements, it is important to tune the heave parameters (heave period and damping) to the vessel size and the motion characteristics for the actual weather conditions. The default settings in the SCC software for filter mode heave period and damping, have to be tuned for the actual vessel and weather conditions in order to achieve optimum heave performance. Therefore, before a survey and/or during operation check the heave performance of the Seapath and tune the heave parameters until the best heave performance is achieved. An alternative is to select "Automatic" and let Seapath automatically choose the best settings. The following should be considered when selecting the different heave filter modes and parameters: Filter mode: Automatic. To be selected when the vessel is operating in various sea states or when the average heave period is unknown. General purpose. Is selected when an optimal heave amplitude is to be measured and the heave phase is of no importance. This mode is typically selected when the Seapath is to be used for measuring the heave height and period on oceanographic buoys. Hydrographic survey. To be selected when the heave phase and amplitude have to be output correct in real time. This mode is typically selected when the heave output signal from the Seapath is to be used for heave compensation of echo sounders and offshore crane systems. Integrated. To be selected when RTK DGPS corrections are available. In this mode the heave and height measurements are determined by blending vertical acceleration and RTK height measurements in a Kalman filter. This combination makes it possible to measure wave slopes and the tide in real time with high precision ideal for hydrographic work. The height measurements are provided with centimetre accuracy and independent of wave frequency. The average heave period and damping parameters must be input as backup values in case the RTK DGPS corrections drop out for a longer period. Then the Seapath automatically switches over to Hydrographic survey mode. Period: An expected average heave period has to be set to the heave filter. This period can be determined by measuring the time between two wave-tops by a watch. The settling time for the heave measurements from power-on or after a turn will be about 10 times the selected period, T o. By selecting an unnecessary long heave period the settling time will be slower than it has to. For vessels performing surveys with frequent turns, the period should be set as low as possible to minimise the heave settling time after turns. Damping: The heave damping factor is usually set to 0.7. Only for special occasions should this parameter be changed. In operations with heave periods of more than 25 seconds, the damping factor should be reduced to 0.6 in order to achieve correct phase measurements. In operations with heave periods of less than 2 seconds, the damping factor should be increased to

112 Appendix D Seapath configuration software, SCC For more details on selection of heave filter mode and parameters, see the User's Manual. In order to select the heave configuration proceed as follows: In the Configuration Folder List, select Sensor \ MRU \ Heave Config. Enter the settings for Filter Mode and Filter Parameters. The pull-down Filter Mode menu has the following options; Integrated, Automatic, Hydrographic survey or General purpose. In Integrated, Hydrographic survey and General purpose mode, the filter parameter for Period can be set to a value between 1 and 25 seconds, and the Damping value between 0.2 and 1. Figure 53 MRU Heave Filter Click on the checkbox "Heave mean level is roll/pitch dependent" to make the heave measurement dependent on the roll and pitch measurements. Then the heave position in the measurement points (MP) has now longer zero mean level, instead its value depends on the vessel tilt at any time. This option is useful especially in applications where the distance between the MP and the sea level is to be determined, like in echo sounder installations with depth changes due to changes in vessel trim and list. If this mode is not selected, the heave will always have zero mean level Measurement points Measurement points geometry In Seapath up to four different measurement points for output data can be defined. The lever arm vector from the centre of gravity to each measurement point has to be measured or calculated based upon drawings or previously measured points, and entered into the software. These vectors are to be measured with an accuracy of 0.5 metres. Proceed as follows to enter the measurement point vectors: In the Configuration Folder List, select Measurement Points \ Geometry. Enter a vector and a name for each of the measurement points needed for the installation. Tick off the measurement points that should be active. Check that the measurement points have been located on the expected points in the "vessel window". If not, check the signs and the co-ordinates input for each measurement point, the vessel dimension and the entered location of CG. 98

113 Appendix D Seapath configuration software, SCC Figure 54 Measurement Points Geometry Note If data shall be valid for centre of gravity, it is not necessary to define a zero vector since the data is default output in CG Data interface Host common For identification of the output protocols from Seapath on the serial lines, the following parameters can be set: NMEA ID. A two-letter talker identifier in NMEA messages as defined in [1]. Default is IN (Integrated Navigation). Token. Numerical token in binary messages. The token number is selected in the range 0 to 255. Proceed as follows to set the common host parameters: In the Configuration Folder List, select Data Interface \ Host Common. In the NMEA Identification field, enter a two-character identification text. In the Binary message token field, enter a token number to be output in the Seapath binary formats. 99

114 Appendix D Seapath configuration software, SCC Figure 55 Common Host Settings Network common In order to output Seapath data on the Ethernet connector as an UDP (User Datagram Protocol) diagram the following parameters have to be set: The Internet protocol (IP) network address. Default is The Internet protocol (IP) network mask. Default is The NMEA ID. A two-letter talker identifier in NMEA messages as defined in [1]. Default is IN (Integrated Navigation). A token number. Numerical token in binary messages. The token number is selected in the area 0 to 255. Proceed as follows to set the common network parameters: In the Configuration Folder List, select Data Interface \ Network Common. In the IP Network Address field, enter the port ID. In the IP Network Mask field, input the mask. In the FTP Server Password, input wanted password to gain access to the FTP server. The default password is "seapath". This password is typically needed when transferring Seapath log files through the Ethernet to an external PC. Then the Seapath will ask for this password. In the NMEA Identification field, enter a two-character identification text. In the Binary message token field, enter a token number to be output in the Seapath binary formats. Note Changes in the IP Network Address or Mask will only take effect after a restart of the Seapath system. 100


115 Appendix D Seapath configuration software, SCC Figure 56 Common Network Settings Check with the network administrator on board the vessel for the correct selection of network address and mask Input In this folder list, all the input interface to the Seapath unit is selected. The following four devices can be input to the unit: The GPS antenna signals and the MRU communication. The settings for the interface with these devices are fixed in the system and cannot be changed by the user. External gyro input. Seapath can use heading data from an external source, for example a gyro compass, as backup to improve reliability. The properties and format of this signal are to be set by the user. Differential GPS corrections. DGPS corrections from up to four different data links can be input to Seapath. The properties and format for each of these links have to be set by the user. The SCC configuration port. The properties of the operational communication port (OpCom) for connecting an external PC for configuration of the Seapath unit with SCC can be set by the user. Default is com1 and normally this configuration shall not be changed. Figure 57 Data Interface - Input Configuration 101

116 Appendix D Seapath configuration software, SCC To setup the input interface proceed as follows: In the Configuration Folder List, select Data Interface \ Input. Activate the device to be interfaced by clicking on the checkbox in front of the device name. The Property of the selected Device ("Gyro", "DGPS" and "OpCom") is set by clicking in the wanted Properties cell and the Serial Port Settings dialogue box below appears. Select the wanted settings and click OK. The wanted communication (RS-232 or RS-422) is selected in the Electric field. For com2 only RS-232 communication is available. Figure 58 Serial Port Setting The Format settings can be changed for Device type "Gyro" and "DGPS". For Device type "DGPS", click in the wanted DGPS Format cell and the Select Format dialogue box below appears. Select "RTCM, RollOn, 6of8" or the "CMR" setting for the Trimble CMR format. Click OK, or if " RTCM, RollOn, 6of8" is selected, click on RTCM Properties button in order to change format on RTCM Decoding. The RTCM Format Decoding dialogue box below appears. Choose the wanted settings for Roll Bytes and Bits/Byte and click OK. The setting "MSB First (Roll ON)" and "6 of 8" are the most commonly used settings. Figure 59 Format Setting 102
 8 of 8 To set the Format for Device type \"Gyro\", click in the gyro Format cell and the dialogue box below appears. Select \"<Disabled>\", \"NMEA HDT\" or \"Robertson\" format.")
.")
117 Appendix D Seapath configuration software, SCC Figure 60 RTCM Format Decoding The options for Roll Bytes The options for Bits/Byte are: are: MSB First (Roll ON) 6 of 8 LSB First (Roll OFF) 8 of 8 To set the Format for Device type "Gyro", click in the gyro Format cell and the dialogue box below appears. Select "<Disabled>", "NMEA HDT" or "Robertson" format. Click OK and the selection is finished. The other selections are not recommended used. Figure 61 Formats available for device type Gyro Output In the Seapath the following three types of output devices are available: Serial host output ports. Network output ports (not available in Seapath 200 M). Three analog output channels (not available in Seapath 200 M). 103

118 Appendix D Seapath configuration software, SCC Figure 62 Data Interface - Output Configuration In order to set up the different output devices, proceed as follows: In the Configuration Folder List, select Data Interface \ Output. Activate the device to be interfaced by clicking on the checkbox in front of the device name. The property of the selected Device are set by clicking in the wanted Properties cell belonging to the "Host Out" device, and the box shown in Figure 58 appears. Select the wanted settings and click OK. Click in the wanted Properties cell belonging to the "Network Out" device, and the Network Settings dialogue box below appears. Select the wanted Port Number and click OK. The default port number is recommended used unless it is in conflict with other equipment connected to the network. Figure 63 Network Settings Click in the wanted Properties cell belonging to the "Analog Out" device, and the Analog Settings dialogue box below appears. Enter the wanted settings and click OK. 104


119 Appendix D Seapath configuration software, SCC Figure 64 Analog Settings Click in the wanted MP# cell and the Select Measurement Point dialogue box below appears. Select the wanted Measurement Point and click OK. Figure 65 Measurement Point Click in the wanted Interval cell belonging to the "Host Out" or "Network Out", and the Message Interval Settings dialogue box below appears. Activate the pull-down menu and choose the wanted Interval. The optional intervals are fixed values between 0.01 and 300 seconds. When finished, click OK. Figure 66 Message Interval Settings Click in the Option cell to select the NMEA messages standard and/or the characteristics of the roll and pitch angles. The following options are available: Option 0. This is the default selection and will give NMEA output messages according to version 2.3. Option 2. The selection 2 together with selection of NMEA messages will give messages as implemented in Seapath software version 2.00 or earlier. The NMEA messages will then be output in NMEA 0183 version 2.00 format. Option 4. The selection 4 together with selection of NMEA VTG message will add "Speed through water" in a VHW message. This option is used to show travelled distance on a Simrad IS15 display. 105


120 Appendix D Seapath configuration software, SCC Option 8. The selection 8 together with selection of NMEA HDT message sets up the system not to output heading data if the heading accuracy gets reduced. This option is normally not used. Option 16. The selection 16 will give pure inertial determined roll and pitch angles not integrated with GPS. These roll and pitch angles are only recommended used for vessels not cruising, such as dynamic positioned vessels that receive noisy or bad GPS data. Option 18 (option 16 + option 2). The selection 18 will give both NMEA messages implemented in Seapath software version 2.00 or earlier and pure inertial roll and pitch angles. Figure 67 Selection of NMEA output standard Click in the wanted Format cell belonging to the "Host Out" or "Network Out" device, and the Select Format dialogue box below appears. Select the wanted format and click OK. Figure 68 Format Settings The options for Format settings are: <Disabled> Simrad EM1000/950 Simrad EM3000/Hipap Echo Sounder fmt9 RDI ADCP Lehmkuhl gyro repeater 1PPS Trimble Echo Sounder fmt18 NMEA Seapath binary fmt3 Calibration Seapath binary fmt11 1PPS NMEA ZDA Atlas Fansweep Submetrix <other>=0 Click in the wanted Format cell belonging to an "Analog Out" device, and the dialogue box below appears. Select the wanted format and click OK. 106
![Appendix D Seapath configuration software, SCC The options for Analog Format settings are: Figure 69 Analog Format Settings <Disabled> Roll [rad] Pitch [rad] Heave [m] Mod.Roll [rad] sin(mod.](/docs-images/92/110422296/images/121-0.jpg "roll) [-1 to 1] sin(-pitch) [-1 to 1] Constant Heave Velocity [m/s] Roll, pure inertial [rad] Pitch, pure inertial [rad] Mod.Roll, pure inertial [rad] sin(mod.")
![roll), pure inertial [-1 to 1] sin(-pitch), pure inertial [-1 to 1] other=0 In order to output Datawell Hippy or Piro compatible analog signals, the following variables, gains and offsets must be](/docs-images/92/110422296/images/121-1.jpg "selected: Figure 70 Datawell Hippy compatible analog output signals Note Note Negative gain and the value 1 has to be used for \"Heave\" in order to make the variables positive according to the")
121 Appendix D Seapath configuration software, SCC The options for Analog Format settings are: Figure 69 Analog Format Settings <Disabled> Roll [rad] Pitch [rad] Heave [m] Mod.Roll [rad] sin(mod.roll) [-1 to 1] sin(-pitch) [-1 to 1] Constant Heave Velocity [m/s] Roll, pure inertial [rad] Pitch, pure inertial [rad] Mod.Roll, pure inertial [rad] sin(mod.roll), pure inertial [-1 to 1] sin(-pitch), pure inertial [-1 to 1] other=0 In order to output Datawell Hippy or Piro compatible analog signals, the following variables, gains and offsets must be selected: Figure 70 Datawell Hippy compatible analog output signals Note Note Negative gain and the value 1 has to be used for "Heave" in order to make the variables positive according to the Datawell co-ordinate system. The variable "sin(mod.roll)" is to be selected for roll and "sin(-pitch)" for pitch. Both variables to be selected with positive gain 10 in order to achieve analog Hippy roll and pitch output. The pure inertial variables for roll and pitch are only recommended used for vessels not cruising, such as dynamic positioned vessels that receive noisy or bad GPS data. These roll and pitch angles are determined due to pure inertial measurements and are not integrated with GPS. 107


122 Appendix D Seapath configuration software, SCC The analog format Constant can be selected to test one of the analog channels. When Constant is selected as analog format, the Test Analog Channels dialog shown in Figure 71 appears by clicking in the Properties field. Figure 71 Input of test voltage for the selected analog channel In the Description column enter a text referring to which system the output line is connected. This helps finding the correct Seapath port to connect to which system Parameter management Download The edited parameters are applied by sending them to Seapath. In the Configuration Folder List, select Parameter Management \ Download. Click the button Download Parameters to Seapath to download. The values of the edited parameters are transferred. Progress bar indicates downloading progress. Figure 72 Download Parameters 108


123 Appendix D Seapath configuration software, SCC Upload In the Configuration Folder List, select Parameter Management \ Upload. Click the button Upload Parameters from Seapath to upload parameters from Seapath to the SCC computer. Progress bar indicates uploading progress. Figure 73 Upload Parameters Save on file Edited parameters can also be stored locally on disk in the SCC computer. In the Configuration Folder List, select Parameter Management \ Save on file, and the window below appears. Figure 74 Save on file Click the Save on file button, and the "standard save window" Select file to save parameters on appears. Choose wanted location and click Save. 109
124 Appendix D Seapath configuration software, SCC Load from file Seapath parameters stored on file in the SCC computer can be loaded back into the workspace area for further editing or/and downloaded to Seapath. In the Configuration Folder List, select Parameter Management \ Load from file, and the window below appears. Figure 75 Load from file Click the Load from file button, and the "standard open window" Select file to open parameters from appears. Choose wanted location and click Open Undo If the editing of Seapath parameters for some reason fail, it is possible to overwrite the SCC workspace with the last saved parameters from Seapath at any time. In the Configuration Folder List, select Parameter Management \ Undo and the window below appears. Click Undo to get the last saved parameters. Figure 76 Undo 110

125 Appendix D Seapath configuration software, SCC Generate report A report with a list of all the configuration settings in the connected MRU or a configuration read from file is generated by clicking the Generate configuration report button as shown in Figure 77. Figure 77 Generate configuration report The MRU configuration report as shown in Figure 78 can be saved to file or printed out. Figure 78 Configuration report 111
SA-320 Installation Guide SA-320. Installation Guide. Date: Mar, 2011 Version: 2.5. All Rights Reserved
 SA-320 Installation Guide Date: Mar, 2011 Version: 2.5 All Rights Reserved Page 1 TABLE OF CONTENTS 1. Product Overview......3 1.1 Main Features...3 1.2 Applications.....3 1.3 Package Content.....3 2.
SA-320 Installation Guide SA-320. Installation Guide. Date: June, 2007 Version: 2.2. All Rights Reserved
 SA-320 Installation Guide Date: June, 2007 Version: 2.2 All Rights Reserved Page 1 TABLE OF CONTENTS 1. Product Overview......3 1.1 Main Features...3 1.2 Applications.....3 1.3 Package Content.....3 2.
Kongsberg Seatex AS Pirsenteret N-7462 Trondheim Norway POSITION 303 VELOCITY 900 HEADING 910 ATTITUDE 413 HEAVE 888
 WinFrog Device Group: Device Name/Model: Device Manufacturer: Device Data String(s) Output to WinFrog: WinFrog Data String(s) Output to Device: WinFrog Data Item(s) and their RAW record: GPS SEAPATH Kongsberg
SPEEDBOX Technical Datasheet
 SPEEDBOX Technical Datasheet Race Technology Limited, 2008 Version 1.1 1. Introduction... 3 1.1. Product Overview... 3 1.2. Applications... 3 1.3. Standard Features... 3 2. Port / Connector details...
Motion Reference Units
 Motion Reference Units MRU Datasheet Rev. 1.3 IP-67 sealed 5% / 5 cm Heave accuracy 0.03 m/sec Velocity accuracy 0.05 deg Pitch and Roll accuracy 0.005 m/sec2 Acceleration accuracy 0.0002 deg/sec Angular
GMR 420/620/1220 xhd2 Series Installation Instructions
 GMR 420/620/1220 xhd2 Series Installation Instructions To obtain the best performance and to avoid damage to your boat, install the device according to these instructions. Read all installation instructions
BW-IMU200 Serials. Low-cost Inertial Measurement Unit. Technical Manual
 Serials Low-cost Inertial Measurement Unit Technical Manual Introduction As a low-cost inertial measurement sensor, the BW-IMU200 measures the attitude parameters of the motion carrier (roll angle, pitch
Hughes 9450 Mobile Satellite Terminal. Installation Guide
 Hughes 9450 Mobile Satellite Terminal Installation Guide 3004129 Revision A September 15, 2010 Copyright 2010 Hughes Network Systems, LLC All rights reserved. This publication and its contents are proprietary
GMR FANTOM 50/120 SERIES INSTALLATION INSTRUCTIONS
 GMR FANTOM 50/120 SERIES INSTALLATION INSTRUCTIONS Important Safety Information WARNING See the Important Safety and Product Information guide in the product box for product warnings and other important
Motion Reference Units
 Motion Reference Units MRU IP-67 sealed 5% / 5 cm Heave accuracy 0.03 m/sec Velocity accuracy 0.05 deg Pitch and Roll accuracy 0.005 m/sec 2 Acceleration accuracy 0.0002 deg/sec Angular rate accuracy NMEA
Inertial Navigation System
 Apogee Marine Series ULTIMATE ACCURACY MEMS Inertial Navigation System INS MRU AHRS ITAR Free 0.005 RMS Navigation, Motion & Heave Sensing APOGEE SERIES makes high accuracy affordable for all surveying
SilverMax Datasheet. QuickSilver Controls, Inc. NEMA 23 Servomotors.
 SilverMax Datasheet NEMA 23 Servomotors QuickSilver Controls, Inc. www.quicksilvercontrols.com SilverMax Datasheet - NEMA 23 Servomotors 23 Frame Sizes: 23-3, 23-5, 23H-1, 23H-3, 23H-5 / Series: E, E3,
1.0 Introduction. Related Products and Documentation
 Quick Start t Guide ER450 Data Radio 1.0 Introduction Welcome to the Quick Start Guide for the ER450 Data Radio. This guide provides step-by-step instructions, with simple explanations to get you up-and-running.
xoem500 Hardware Integration Manual Inertial and GNSS measurement system Confidently. Accurately.
 xoem500 xf Inertial and GNSS measurement system Hardware Integration Manual Confidently. Accurately. Table of contents Introduction 5 Related documents 6 Precautions 7 Compliance testing 7 Hardware description
GPS RECEIVER GP-320B
 GPS RECEIVER GP-320B SAFETY INSTRUCTIONS CAUTION Confirm that the power supply voltage is compatible with the voltage rating of the equipment. Connection to the wrong power supply can cause fire or damage
GMR 420/620/1220/2520 XHD2 SERIES INSTALLATION INSTRUCTIONS
 GMR 420/620/1220/2520 XHD2 SERIES INSTALLATION INSTRUCTIONS Important Safety Information WARNING See the Important Safety and Product Information guide in the product box for product warnings and other
Thuraya Orion IP Satellite Terminal. Maritime Installation Guide
 Thuraya Orion IP Satellite Terminal Maritime Installation Guide 3500867-0001 Revision 2 November 27, 2013 Copyright 2013 Hughes Network Systems, LLC All rights reserved. This publication and its contents
PI-150 Broadband Power Indicator
 PI-150 Broadband Power Indicator HIGH RF VOLTAGES MAY BE PRESENT AT THE PORTS OF THIS UNIT. All operating personnel should use extreme caution in handling these voltages and be thoroughly familiar with
Features. Description. General Specifications. VS Series Inclinometer : Dual Axis, RS232 and Analogue Output
 Features Dual axis measurement from ±5 to ±60 High resolution and accuracy Low temperature drift, with optional temperature compensation to further improve temperature performance. RS232 output interface
EB-250/ EB-250L. Ultimate TRANSYSTEM INC. EB-250 Series Data Sheet
 GPS Engine Board EB-250/ EB-250L EB-250 Series Data Sheet EB-250 is an ultra miniature 13 x 15 mm 2 GPS engine board. It provides superior navigation performance under dynamic conditions in areas with
Date: January 16, 2003 Page 1 of 1
 Date: January 16, 2003 Page 1 of 1 1. System Accuracy 1.1 Attitude Accuracy With GPS Active Without GPS PITCH 0.2 deg 3σ 0.3 deg/hr drift 1σ ROLL 0.2 deg 3σ 0.3 deg/hr drift 1σ YAW 0.2 deg 3σ 0.3 deg/hr
Operation. Displayed channel. Measuring range. Status indication/ remote control Key lock Measuring mode/ time constant. Scale.
 Electronics & Software Type 5080A... Multichannel Laboratory This universal laboratory charge amplifier can be used for force and torque measurements with piezoelectric dynamometers or force plates. Piezoelectric
Copyright 2013 Hughes Network Systems, LLC
 Copyright 2013 Hughes Network Systems, LLC All rights reserved. This publication and its contents are proprietary to Hughes Network Systems, LLC. No part of this publication may be reproduced in any form
PI-10 Broadband Power Indicator
 PI-10 Broadband Power Indicator HIGH RF VOLTAGES MAY BE PRESENT AT THE PORTS OF THIS UNIT. All operating personnel should use extreme caution in handling these voltages and be thoroughly familiar with
The Signature VM package delivers vessel-mounted AD2CP capabilities based on present-day technology
 The package delivers vessel-mounted AD2CP capabilities based on present-day technology Until now, ADCP current surveys have been complex and time-consuming processes. A successful current survey depends
Hughes 9450 Mobile Satellite Terminal
 Hughes 9450 Mobile Satellite Terminal Installation Guide 3004129-0001 Revision C Copyright 2011 Hughes Network Systems, LLC All rights reserved. This publication and its contents are proprietary to Hughes
Connecting Mains Electrical Power
 Tide Level Monitoring Instrumentation The following documentation details the electrical installation for the tide level monitoring instrumentation and also a summary of the logger configurations required
[ tima-datasheet-en v11.1 ]
![[ tima-datasheet-en v11.1 ]](/thumbs/92/109134204.jpg "[ tima-datasheet-en v11.1 ]") specifically designed for protection, automation and control applications in power systems 60 ns (99%) maximum time deviation single or dual 10/100Base-T Ethernet port(s) VLAN / IEEE 802.1Q support RS232
specifically designed for protection, automation and control applications in power systems 60 ns (99%) maximum time deviation single or dual 10/100Base-T Ethernet port(s) VLAN / IEEE 802.1Q support RS232
Inertial Systems. Ekinox Series TACTICAL GRADE MEMS. Motion Sensing & Navigation IMU AHRS MRU INS VG
 Ekinox Series TACTICAL GRADE MEMS Inertial Systems IMU AHRS MRU INS VG ITAR Free 0.05 RMS Motion Sensing & Navigation AEROSPACE GROUND MARINE EKINOX SERIES R&D specialists usually compromise between high
BW-VG525 Serials. High Precision CAN bus Dynamic Inclination Sensor. Technical Manual
 Serials High Precision CAN bus Dynamic Inclination Sensor Technical Manual Introduction The Dynamic Inclination Sensor is a high precision inertial measurement device that measures the attitude parameters
ONCORE ENGINEERING NOTE M12 Oncore
 ONCORE ENGINEERING NOTE M12 Oncore 1. Product Specifications 2. Basic Description 3. Mechanical 4. Environmental 5. Electrical 6. RF Characteristics of Receiver 7. RF Requirements for Antenna 8. Performance
Hughes 9450 Mobile Satellite Terminal Series. Installation Guide
 Hughes 9450 Mobile Satellite Terminal Series Installation Guide Document No. 3004129-0001 Revision E 17 November 2017 Copyright 2013, 2017 Hughes Network Systems, LLC All rights reserved. This publication
Receiver Technology CRESCENT OEM WHITE PAPER AMY DEWIS JENNIFER COLPITTS
 CRESCENT OEM WHITE PAPER AMY DEWIS JENNIFER COLPITTS With offices in Kansas City, Hiawatha, Calgary and Scottsdale, Hemisphere GPS is a global leader in designing and manufacturing innovative, costeffective,
NEW TOUGHEST WIND SENSORS THE WORLD S 1:2
 F T 74 2 D ATA S H E E T NEW S U R FA C E M O U N T D E S I G N E D F O R I N T E G R AT I O N THE WORLD S TOUGHEST WIND SENSORS WWW.FTTECHNOLOGIES.COM 1:2 PROVEN IT LOOKS DIFFERENT BECAUSE IT IS DIFFERENT
EB-500/ EB-500L. Ultimate TRANSYSTEM INC. EB-500 Series Data Sheet
 GPS Engine Board EB-500/ EB-500L EB-500 Series Data Sheet EB-500 is an ultra miniature 13 x 15 mm2 GPS engine board. It provides superior navigation performance under dynamic conditions in areas with limited
QDV120 Operation and Pointing manual
 QDV120 Operation and Pointing manual MPAD1 Plus OP-080316-E1 page 1 Contents Item Description Page 1.0 Health and Safety for Operators and Installation Staff 3 2.0 Transit case Reflector/Mount/BUC/LNB
EB-230. Ultimate TRANSYSTEM INC. EB-230 Data Sheet
 GPS Engine Board EB-230 Data Sheet EB-230 EB-230 is an ultra miniature 12 x 12 mm 2 GPS engine board. It provides superior navigation performance under dynamic conditions in areas with limited sky view
WIRELESS INSULATOR POLLUTION MONITORING SYSTEM
 SYSTEM OVERVIEW Pollution monitoring of high voltage insulators in electrical power transmission and distribution systems, switchyards and substations is essential in order to minimise the risk of power
MHPS MHPS. Modular pressure transmitter. Technical documentation. Table of content. Characteristics - applications - technical data
 Technical documentation Table of content Page 2: Page 3: Page 4: Page 5: Page 6: Page 7: Page 8: Characteristics - applications - technical data Technical data - input quantity - output quantity Electrical
Broadband Power Amplifier
 601L Broadband Power Amplifier HIGH RF VOLTAGES MAY BE PRESENT AT THE OUTPUT OF THIS UNIT. All operating personnel should use extreme caution in handling these voltages and be thoroughly familiar with
GPS-Aided INS Datasheet Rev. 3.0
 1 GPS-Aided INS The Inertial Labs Single and Dual Antenna GPS-Aided Inertial Navigation System INS is new generation of fully-integrated, combined GPS, GLONASS, GALILEO, QZSS, BEIDOU and L-Band navigation
GPS Time and Frequency Reference Receiver
 $ GPS Time and Frequency Reference Receiver Symmetricom s 58540A GPS time and frequency reference receiver features: Eight-channel, parallel tracking GPS engine C/A Code, L1 Carrier GPS T-RAIM satellite
Installation and Quick Reference Guide. Disclaimer and warranty 2. Contents of this box 2. Brief background to AIS 3.
 AI3000 AIS Receiver ai3000vf rev 6b Installation and Quick Reference Guide Contents Page Number Disclaimer and warranty 2 Contents of this box 2 Brief background to AIS 3 Introduction 3 Installing the
EB-54X. EB-54X Datasheet
 GPS Engine Board EB-54X Datasheet EB-54X EB-54X is a complete GPS sub-system with 32 x 32 mm 2 In size. Equipped with antenna, back up battery GPS engine and onboard memory, it provides superior navigation
SA-320 Installation Guide SA-320. Installation Guide. Date: Nov., 2004 Version: 1.0. All Rights Reserved
 SA-320 Installation Guide Date: Nov., 2004 Version: 1.0 All Rights Reserved Page 1 TABLE OF CONTENTS 1. Product Overview......3 1.1 Main...3 1.2 Applications.....3 1.3 Package Content.....3 2. Installation.4
GPS-Aided INS Datasheet Rev. 2.7
 1 The Inertial Labs Single and Dual Antenna GPS-Aided Inertial Navigation System INS is new generation of fully-integrated, combined GPS, GLONASS, GALILEO, QZSS and BEIDOU navigation and highperformance
CX-A6 Amplifier Installation & User Guide V9.0
 CX-A6 Amplifier Installation & User Guide V9.0 Cloud Electronics Limited 140 Staniforth Road, Sheffield, S9 3HF England Tel + 44 (0) 114 244 7051 Fax + 44 (0) 114 242 5462 E-mail info@cloud.co.uk Web site
Picture 1 PC & USB Connection
 USB Ethernet HART Profi-bus DeviceNet EtherCAT CANopen CAN RS Zigbee Analog Switch Vibration-wire PWM SSI CDMA GPRS Wi-Fi USB Inclinometer Features - Reference with USB2.0 protocol - P2P and compatible
Double-Ridged Waveguide Horn Antennas
 Models 3112, 3106B, 3119, 3115, 3117, 3116C Double-Ridged Waveguide Horn Antennas User Manual ETS-Lindgren Inc. Although the information in this document has been carefully reviewed and is believed to
MPR kHz Reader
 MPR-5005 Page 1 Doc# 041326 MPR-5005 125kHz Reader Installation & Operation Manual - 041326 MPR-5005 Page 2 Doc# 041326 COPYRIGHT ACKNOWLEDGEMENTS The contents of this document are the property of Applied
GPS6000-PRO. GNSS Time Receiver. User Manual Version 1.1
 GPS6000-PRO GNSS Time Receiver User Manual Version 1.1 COPYRIGHT 2015-2017 World Time Solutions Limited. All Rights Reserved. All information contained within this document is the property of World Time
Chapter 4 DGPS REQUIREMENTS AND EQUIPMENT SELECTION
 Chapter 4 DGPS REQUIREMENTS AND EQUIPMENT SELECTION 4.1 INTRODUCTION As discussed in the previous chapters, accurate determination of aircraft position is a strong requirement in several flight test applications
This is by far the most ideal method, but poses some logistical problems:
 NXU to Help Migrate to New Radio System Purpose This Application Note will describe a method at which NXU Network extension Units can aid in the migration from a legacy radio system to a new, or different
IMU60 Inertial Measurement Unit
 Precision 6 DoF MEMS Inertial Measurement Unit Range: acc ±2g, gyro ±300 /s, (ODM supported) Acc Bias Instability: ±70mg, Gyro Bias Instability: 24 /h Data Update Rate: 100Hz Wide Input Power Range: 5~18VDC
Hughes 9300 Series Mobile Satellite Terminal
 Hughes 9300 Series Mobile Satellite Terminal Installation Guide 1038494-0001 Revision E Copyright 2011 Hughes Network Systems, LLC All rights reserved. This publication and its contents are proprietary
Inertial Sensors. Ellipse 2 Series MINIATURE HIGH PERFORMANCE. Navigation, Motion & Heave Sensing IMU AHRS MRU INS VG
 Ellipse 2 Series MINIATURE HIGH PERFORMANCE Inertial Sensors IMU AHRS MRU INS VG ITAR Free 0.1 RMS Navigation, Motion & Heave Sensing ELLIPSE SERIES sets up new standard for miniature and cost-effective
HandPunch Installation Guide
 HandPunch Installation Guide www.centraltimeclock.com HandPunch 3000/4000 Manual Planning an Installation Site Preparation Before you begin installation, check the site blueprints, riser diagrams, and
Inertial Sensors. Ellipse 2 Series MINIATURE HIGH PERFORMANCE. Navigation, Motion & Heave Sensing IMU AHRS MRU INS VG
 Ellipse 2 Series MINIATURE HIGH PERFORMANCE Inertial Sensors IMU AHRS MRU INS VG ITAR Free 0.1 RMS Navigation, Motion & Heave Sensing ELLIPSE SERIES sets up new standard for miniature and cost-effective
GPS-Aided INS Datasheet Rev. 2.3
 GPS-Aided INS 1 The Inertial Labs Single and Dual Antenna GPS-Aided Inertial Navigation System INS is new generation of fully-integrated, combined L1 & L2 GPS, GLONASS, GALILEO and BEIDOU navigation and
Advanced Test Equipment Rentals ATEC (2832)
") Established 1981 Advanced Test Equipment Rentals www.atecorp.com 800-404-ATEC (2832) 6500 Series Loop Antennas User Manual ETS-Lindgren Inc. reserves the right to make changes to any product described
Established 1981 Advanced Test Equipment Rentals www.atecorp.com 800-404-ATEC (2832) 6500 Series Loop Antennas User Manual ETS-Lindgren Inc. reserves the right to make changes to any product described
C-COM Satellite Systems Inc. Page 1 of 39
 Page 1 of 39 inetvu Fly-75V & Fly-98G/H/V & Fly-981 User Manual The inetvu brand and logo are registered trademarks of C-COM Satellite Systems, Inc. Copyright 2006 C-COM Satellite Systems, Inc. 1-877-iNetVu6
n Measurable displacements between n Linearity: max. ± 0.05 % n Housing diameter 12.9 mm n Service life: 10 8 movements
 Potentiometric Displacement Sensor Miniature design Model 8709 Code: Delivery: Warranty: 8709 EN ex stock 24 months Application Potentiometric displacement sensors are used for direct, precise measurement
Datasheet. Octadrive DSP-CN * Applies to Part Number: *This unit has a CobraNet interface installed
 OCTADRIVE DSP-CN Datasheet Applies to Part Number: 391030 Octadrive DSP-CN * *This unit has a CobraNet interface installed User Notice: No part of this document including the software described in it may
Seapath 320. User Manual
 Seapath 320 User Manual Seapath 320 About this document Rev Date Written by Checked by Approved by Rev. 1 2010-02-22 FOS FOS First issue of this manual Rev. 2 2010-06-25 FOS FOS Description of serial port
ScreenMaster RVG200 Paperless recorder
 ABB MEASUREMENT & ANALYTICS TECHNICAL DESCRIPTION ScreenMaster RVG200 Paperless recorder Programming the RVG200 to record GPS data in bilge water discharge monitoring applications Measurement made easy
HPC Compass NMEA Version. Installation and Operation Manual
 HPC Compass NMEA Version Installation and Operation Manual NMEA HPC COMPASS 13-1 NMEA HPC COMPASS This manual is written for the NMEA HPC Compass transducer 1.1 Edition: 1.4 May 2010 13-2 NMEA HPC COMPASS
USER GUIDE OCTANS III & POSITIONING NAVIGATION II. PART 2 : OCTANS III SURFACE USER GUIDE
 USER GUIDE OCTANS III NAVIGATION & POSITIONING II. PART 2 : OCTANS III SURFACE USER GUIDE TABLE OF CONTENTS II.1 OCTANS Technical description... II-5 II.1.1 Performances... II-6 II.1.1.1 Gyrocompass Technical
An internal gyroscope minimizes the influence of dynamic linear acceleration on slope sensor readings.
 TECHNICAL DATASHEET #TDAX06070X Triaxial Inclinometer with Gyro ±180⁰ Pitch/Roll Angle Pitch Angle Rate Acceleration SAE J1939, Analog Output or RS-232 Options 2 M12 Connectors, IP67 with Electronic Assistant
MONITOR BRACKETS CCTV SYSTEMS. BT7510S Ex GST Inc GST. BT7511S Ex GST Inc GST. BT7512S Ex GST Inc GST. BT7518S Ex GST Inc GST. BT7513S Ex GST Inc GST
 MONITOR BRACKETS BT7510S Small Flat Screen Bracket 20kg For small flat screen. Mounts screen only 20mm from wall. Security Allen Key provided Accommodates up to 20kg BT7511S Small Flat Screen Tilt Bracket
User Manual CTP4/8/16
 KMT - Kraus Messtechnik GmbH Gewerbering 9, D-83624 Otterfing, Germany, 08024-48737, Fax. 08024-5532 Home Page http://www.kmt-telemetry.com, Email: info@kmt-telemetry.com User Manual CTP4/8/16 4/8/16-channel
M-Bus Master MultiPort 250L Installation and User Guide
 Installation and User Guide Kamstrup A/S Industrivej 28, Stilling DK-8660 Skanderborg T: +45 89 93 10 00 info@kamstrup.com kamstrup.com Contents 1 Introduction 3 1.1 Design 3 2 Functionality 4 2.1 Overview
VFSC9 ELECTRONIC SPEED CONTROLLER. Mounting and operating instructions
 ELECTRONIC SPEED CONTROLLER Mounting and operating instructions Table of contents SAFETY AND PRECAUTIONS 3 PRODUCT DESCRIPTION 4 ARTICLE CODES 4 INTENDED AREA OF USE 4 TECHNICAL DATA 4 STANDARDS 5 WIRING
PULSE DISTRIBUTION AMPLIFIER OPERATING MANUAL
 SPECTRADYNAMICS, INC PD5-RM-B PULSE DISTRIBUTION AMPLIFIER OPERATING MANUAL SPECTRADYNAMICS, INC 1849 Cherry St. Unit 2. Louisville, CO 80027 Phone: (303) 665-1852 Fax: (303) 604-6088 www.spectradynamics.com
Installing the IPS 4240 and the IPS 4255
 CHAPTER 2 Installing the IPS 4240 and the IPS 4255 All IPS platforms allow ten concurrent CLI sessions. This chapter describes the IPS 4240 and the IPS 4255 and how to install them. It also describes the
B850 Boiler House Energy Monitor
 Local regulations may restrict the use of this product to below the conditions quoted. In the interests of development and improvement of the product, we reserve the right to change the specification without
SRS SEALED ROTARY SENSORS
 SRS SEALED ROTARY SENSORS Innovation In Motion INNOVATION IN MOTION Penny+Giles SRS280 sealed rotary sensors and SRS880 submersible rotary sensors have been specially developed to provide maximum performance
Underwater GPS User Manual
 Underwater GPS Document number W-DN-17002-3 Project Classification - Rev Prepared by Checked by Approved by Short description 1 2017-08-03 T. Trøite O. Skisland T. Trøite Initial 2 2017-08-04 T. Trøite
Product Documentation
 Prepared by Subject Resp. Approved by Gunnar Hermelink Geir Godheim Ketil Vanebo NERA F55 Specifications subject to changes without notice LIST OF CONTENT: 1. GENERAL... 2 2. LIST OF MATERIEL... 2 3. STANDARD
ICAM. Electronics & Software. Industrial Charge Amplifier for Applications in Manufacturing. Type 5073A...
 Electronics & Software ICAM Type 5073A... Industrial Charge Amplifier for Applications in Manufacturing The ICAM charge amplifier (Industrial Charge Amplifier Manufacturing) converts the piezoelectric
Hughes 9450 Mobile Satellite Terminal
 Hughes 9450 Mobile Satellite Terminal Installation Guide 3004129-0001 Revision C Copyright 2012 Hughes Network Systems, LLC All rights reserved. This publication and its contents are proprietary to Hughes
Attitude and Heading Reference Systems
 Attitude and Heading Reference Systems FY-AHRS-2000B Installation Instructions V1.0 Guilin FeiYu Electronic Technology Co., Ltd Addr: Rm. B305,Innovation Building, Information Industry Park,ChaoYang Road,Qi
WRM-10 TM TRANSFORMER WINDING RESISTANCE METER
 WRM-10 TM TRANSFORMER WINDING RESISTANCE METER USER S MANUAL Vanguard Instruments Company, Inc. 1520 S. Hellman Ave. Ontario, California 91761, USA TEL: (909) 923-9390 FAX: (909) 923-9391 June 2009 Revision
User Configurable POSITION 303 DATA OUTPUT 450 HEADING 910
 WinFrog Device Group: Device Name/Model: Device Manufacturer: Device Data String(s) Output to WinFrog: WinFrog Data String(s) Output to Device: WinFrog Data Item(s) and their RAW record: GPS TRACS TDMA
Cost efficient design Operates in full sunlight Low power consumption Wide field of view Small footprint Simple serial connectivity Long Range
 Cost efficient design Operates in full sunlight Low power consumption Wide field of view Small footprint Simple serial connectivity Long Range sweep v1.0 CAUTION This device contains a component which
Product Documentation
 Prepared by Subject Resp. Approved by Ketil Vanebo Geir Godheim Geir Godheim NERA F77 Specifications subject to changes without notice LIST OF CONTENT: 1. GENERAL... 2 2. LIST OF MATERIEL... 2 3. STANDARD
Cost efficient design Operates in full sunlight Low power consumption Wide field of view Small footprint Simple serial connectivity Long Range
 Cost efficient design Operates in full sunlight Low power consumption Wide field of view Small footprint Simple serial connectivity Long Range sweep v1.0 CAUTION This device contains a component which
HAWK5000 Operators Manual
 HAWK5000 Operators Manual Keison Products P.O. Box 2124, Chelmsford CM1 3UP, England Tel: +44 (0) 1245 600560 Fax: +44 (0) 1245 600030 Email: sales@keison.co.uk www.keison.co.uk KANE INTERNATIONAL LIMITED
Motion & Navigation Solution
 Navsight Land & Air Solution Motion & Navigation Solution FOR SURVEYING APPLICATIONS Motion, Navigation, and Geo-referencing NAVSIGHT LAND/AIR SOLUTION is a full high performance inertial navigation solution
Inertial Sensors. Ellipse Series MINIATURE HIGH PERFORMANCE. Navigation, Motion & Heave Sensing IMU AHRS MRU INS VG
 Ellipse Series MINIATURE HIGH PERFORMANCE Inertial Sensors IMU AHRS MRU INS VG ITAR Free 0.1 RMS Navigation, Motion & Heave Sensing ELLIPSE SERIES sets up new standard for miniature and cost-effective
NMEA Training Overview
 NMEA Training Overview NMEA offers 4 classroom installer training courses Basic Marine Electronics Installer (MEI) Basic NMEA 2000 Network Installer Basic Marine Electronics Installer (MEI) Advanced NMEA
DAA AES/EBU Digital Audio Distribution Amplifier. User Manual. I.R.T. Communications Pty Ltd
 AES/EBU Digital Audio Distribution Amplifier User Manual Revision 02 AES/EBU DIGITAL AUDIO DISTRIBUTION AMPLIFIER Revision History: Revision Date By Change Description Applicable to: 00 15/03/2005 AL Original
Contents. Instruction Leaflet IL E Effective March HMi VU Series Instruction Leaflet. Description... Page. Preface...
 Instruction Leaflet IL04801003E Effective March 2013 HMi VU Series Instruction Leaflet Contents Description... Page Preface... 1 Safety Precautions... 1 Installation... 3 Wiring... 4 asic Inspection...
JUMO Wtrans E01. Measuring probe for humidity, temperature, and CO 2 with wireless data transmission. Brief description. Universal Wtrans receiver
 Page 1/13 JUMO Wtrans E01 Measuring probe for humidity, temperature, and CO 2 with wireless data transmission Humidity from 0 to 100 % RH (incl. -40 to +80 C) or CO 2 from 0 to 2000/5000/10000 ppm or Temperature
GPS-Aided INS Datasheet Rev. 2.6
 GPS-Aided INS 1 GPS-Aided INS The Inertial Labs Single and Dual Antenna GPS-Aided Inertial Navigation System INS is new generation of fully-integrated, combined GPS, GLONASS, GALILEO and BEIDOU navigation
Thank you for buying this AIS antenna splitter.
 Thank you for buying this AIS antenna splitter. This product has been engineered to offer you the highest level of performance and durability and we hope that it will provide many years of reliable service.
Generic Bathymetry Data - Interface Control Document
 Generic Bathymetry Data - Interface Control Document For WASSP Prepared by: Keith Fletcher Electronic Navigation Ltd October 15, 2013 Version 2.2 2013 by WASSP Ltd No part of this document should be reproduced
DEC-001 Installation Instructions
 DEC-001 Installation Instructions Skill Level: The installation of this assembly requires a medium level of expertise in working with modern electronic equipment. The use of appropriate tools, correct
AIT2000 CLASS B AIS TRANSPONDER
 IMPORTANT NOTE The USB cable of the AIT2000 is designed to be used for configuring/programming the unit during installation and not for permanent connection to the boat s Navigation PC. If you intend to
Concept of Serial Communication
 Concept of Serial Communication Agenda Serial v.s. Parallel Simplex, Half Duplex, Full Duplex Communication RS-485 Advantage over RS-232 Serial v.s. Parallel Application: How to Measure the temperature
INSTRUCTION MANUAL. Simrad RI35 Mk2 Rudder Angle Indicator
 INSTRUCTION MANUAL Simrad Rudder Angle Indicator Note! Simrad AS makes every effort to ensure that the information contained within this document is correct. However, our equipment is continuously being