Cross-stitch embroidery course
|
|
|
- Marilyn Harris
- 5 years ago
- Views:
Transcription

1 Cross-stitch embroidery easier than you think Cross stitching is like over-the-counter medicine - it improves manual skills and concentration, relaxes and gives a sense of detachment from problems. Pure pleasure is derived from creating something that we proudly boast of others. For all beginners and those who have not tried yet - we recommend this amazing remedy! detailed Cross-stitch embroidery course


, under which you can find the item in the online shop www.coricamo.")
 People who like to embroider on printed canvas and lovers of counted cross-stitch embroidery have arguments that their way of creating")

2 Difficult or easy? What accessories to buy? Browsing websites or buying colourful magazines, you can see portals and newspapers dedicated to cross-stitch embroidery. Your friends have on the walls beautifully embroidered mountain landscapes reflecting in a lazily flowing river, a creeping tiger or flowers captivating by the beauty and intensity of colours? You get an idea is to embroider by yourself and decorate your home with a favourite landscape. Unfortunately, at the same time you have a thought that making such a pattern is too difficult. We want to convince such people that cross-stitch embroidery is simple and the effects of your work will surely delight your family and friends. In addition, embroidering itself gives you great pleasure and makes you proud of your own work. We hope that our course will help you to make a decision to start your adventure with embroidery and will answer most of the questions and doubts concerning this beautiful passion. You can also use embroidery accessories to help you work and keep order during and after work. (The products are given codes eg. (968-01), under which you can find the item in the online shop ) marking pen (925-01) Magic pen (924) needle threader (D6112) Printed canvas or counted embroidery? needle case (D6122) People who like to embroider on printed canvas and lovers of counted cross-stitch embroidery have arguments that their way of creating embroidery is the best. Printed canvas makes it easy for beginners, while counted cross-stitch embroidery gives us creative freedom, so everyone will find something for themselves. Counted cross-stitch embroidery Unlike embroidery on printed canvas, it is made on clean canvas (not printed) and is created on the basis of a graphic pattern printed on paper. Thanks to that, there is no problem with proper pattern reproduction or with cross shifts. In addition, the pattern is created step by step and you can see how your work is filling with mouline. This gives us incredible pleasure because the pattern is created right before our eyes. We can also see how much work remains to the end, which motivates you to continue working. 2 needle organizer (AC 6113) spatulas for cotton threads (AC GC001) cardboard mouline bobbins (AC 8895)

 stitch ripper")
 You can embroider on canvas, Aida or")

, wool or linen.")

 It is used for counted")


 3 Plastic")

3 embroidery wheel (AC 8803) What kind of canvas to choose? magnifying glass with LED lamp (AC 8820) embroidery scissors (PRYM ) stitch ripper (AC ) line counter (912 ZM) thread cutter (AC 8930) You can embroider on canvas, Aida or fabric with a simple countable weave. Canvas Woven mesh fabric with regular weave, which is used for embroidery with cotton (mouline), wool or linen. It is basic fabric used for cross-stitching. Canvas are usually stiffer and have a density of 44 crosses per 10 cm. Aida (without overprint) It is used for counted embroidery. Aida in the form of fabric is found in almost all colours - from pure white to black, but usually found in white, creamy or ivory. Aidas can be bought in metres or in sheets of various sizes and densities (904-01, , , ). Canvas or Aida with overprint The printed pattern can either be embroidered as a whole or can only be the background for counted cross-stitch. click box Jumbo organizer (AC ) 3 Plastic canvas Used to form geometric shapes. Once you have embroidered the motif simply cut it out (966). Waste canvas (removable canvas) If we want to embroider an application, for example on a blouse, we will need canvas that you apply to the place of the final embroidery. Then you fasten it with pins and embroider the pattern. At the end of you remove the canvas (938).
 in one inch.")
 = 14 (canvas mesh) crosses that is 5.")
 44")

 but we fear that it may shrink (and therefore its size may change), the material")


4 Density of weave Canvas also vary in size (density of weave) - the most popular of them are 10ct, 11ct, 14ct, 16ct and 18ct. These numbers indicate the number of canvas mesh (crosses) in one inch. Often in the descriptions appear their counterparts eg. 40, 44, 54, 64, 70. eg. if the canvas is 14 ct, then: 1 inch (2.54 cm) = 14 (canvas mesh) crosses that is 5.4 canvas mesh (cross) per 1 cm and in the description may be 54 Density of the canvas 10 ct 11 ct 14 ct 16 ct 18 ct Number of crosses at 10 cm about 40 about 44 about 54 about 64 about 70 Square 5 x 5 cm in 1:1 scale 11ct (44) 44 crosses/10 cm (962) 10ct (40) 40 crosses/10 cm (904-01) How to prepare canvas? For easy embroidering and to avoid nasty surprises at the end of the work, we should prepare the material on which we will embroider to make the work easier. If we are going to wash the pattern after finishing it (eg. it got dirty during embroidering) but we fear that it may shrink (and therefore its size may change), the material can be washed in warm water before you start embroidering, then dried and ironed. R e m e m b e r t o f o l l o w m a n u f a c t u r e r ' s recommendations for washing and ironing. 14ct (54) 54 crosses/10 cm (968-01) 16ct (64) 64 crosses/10 cm (967-01) Drawing the borders of the pattern At a distance of about 10 cm from the edge of the canvas we draw embroidery borders according to the graphic pattern. The excess of the canvas will then be needed for framing. 18ct (70) 70 crosses/10 cm 4 Numbering It is a good idea to write numbers on the edges - such as on the pattern, so that it is easier to find the right part of the pattern.


.")


5 Drawing the grid Some people mark the grid with a baste, which needs to be removed afterwards. If your have a little pattern there is no need to draw a grid - just tick the pattern with colours or start embroidering right at the starting point which is at the intersection of the lines that define the edges of the image. Only after the edges and the borders of the pattern have been drawn can the canvas be cut. It makes us sure that we will not cut the canvas too small. The grid can be drawn with a special marker or magic pen (disappears after about 20 days). If the embroidery will cover the entire canvas, then draw full grid lines every 10 canvas mesh according to the graphic pattern. Canvas protection Canvas is quite rigid material and can catch the mouline. It is good to protect the edges. Canvas can be protected against shredding in several different ways: Gently draw it with an automatic pencil, which is quite difficult to remove. Fresh traces wash out in cold water with 3 tablespoons of vinegar. By hand - fold the edges at about 1 cm and oversew it. However, this method is quite laborious. If the embroidery does not cover the entire canvas, it is worth to mark thin lines or crosses within the borders of the pattern. 5 On the sewing machine - fold the edges and sew with zig-zag stitch or trim with a ribbon. It is a fast way for those who have sewing machine.

.")
 and DMC (952) are the most popular. These companies also offer shaded, neon, pearl, linen and metallic mouline.")
 and 11 ct (44) 14 ct (54) 16 ct (64) Recommended number of threads 6 3 2 6 Thread thickness Mouline is the best for")


6 What kind of mouline to choose? Iron the edges of canvas with stripes of vlieseline interlining. Any thread can be used for embroidery. It is important that they are of adequate thickness depending on the density of the canvas and that their colours correspond to the colours of the pattern. The most appropriate thread for embroidery is mouline, because it is easy to choose its thickness to the thickness of the fabric (depending on the density of the canvas we embroider with whole or split thread of mouline). There are different companies manufacturing mouline on the market, and each manufacturer uses its own colour numbering. Ariadna (956) and DMC (952) are the most popular. These companies also offer shaded, neon, pearl, linen and metallic mouline. Line the edges with fabric glue or edge lining ribbon. Back the edges with paint tape, which can be removed easily afterwards. Density of the canvas 10 ct (40) and 11 ct (44) 14 ct (54) 16 ct (64) Recommended number of threads Thread thickness Mouline is the best for embroidery, because each of its strands consists of 6 thinner threads, so it is easy to choose the thickness of the thread to the density of the canvas weave. It is assumed that the thickness of the thread we are sewing with should not be smaller than the thickness of the canvas thread. Mouline should cover the canvas so that the canvas does not overflow between the threads and so that the pattern does not look fuzzy. On the other hand, when the thread is too thick, the pattern will look very compressed and the material may wrinkle. It is best to know for yourself what thickness we prefer and do a test: if the crosses are too tight - one or two threads must be taken out, if there are holes left between the crosses- you should add some threads. Most of the time we embroider: on Aida 44-6 threads, on Aida 54-3 threads, on Aida 64-2 threads.
 and blunt (most commonly used")
7 What kind of needle to choose? How to learn embroidering? Various types of embroidery needles are available for sale (varying in thickness, length and ending: sharp (used to embroider on materials such as high density canvas) and blunt (most commonly used in cross-stitch). Needle for embroidery For cross-stich embroidery it is best to use a special needle for this purpose. It has a specific shape - the entire length has the same thickness, its eyelet is wider than the eye of a regular needle, and the tip is not sharp but blunt. This ending allows you to place it exactly between the canvas threads and prevents the needle from entering the filament of the thread we are just sewing. The blunt tip also protects the fingers from pricking. The best needle is the one which slightly enters the holes in the canvas and, inserted underneath the canvas (under the thread load), does not fall out from it. Needle sizes Various sizes of needles are available on the market, such as 13, 16, 18, 20, 22, 24, 26, 28. The larger the number, the thinner the needle. Compliance with the rules When learning cross-stitch embroidery, you may want to learn single stitches on a piece of canvas to get the right habits. From the very beginning it is important to ensure that all the crosses are pointing one way - the basic rule is to embroider from the right top to the left bottom (the final result is better). If this rule is not followed, a very visible shading will appear on the right side of the embroidery, which destroys the final effect. SINGLE CROSS 4 2 W e s t a r t w o r k b y piercing the canvas f r o m t h e b o t t o m, holding the end of the thread with your finger we do not make a knot (the end of this thread will be caught on the left side of the canvas). We make the cross according to the numbers shown in the diagram. Most commonly used needles for cross-stitch are: 24, 26 and 28 (942 or CHI 942). VERTICAL STITCH In the stitch, each cross i s e m b r o i d e r e d separately. Starting from the top right and going to the bottom left, then we cover the cross from the top left to the bottom right. 1 Density of the canvas 11 ct 14 ct 16 ct above 18 ct Recommended needle size The single stitch can also be started from the bottom left to the top right and then cover the cross from the bottom right to the top left. You can immediately drag the needle and pierce it into the next mesh.
8 BASIC STITCH - COVERING (from right to left) BASIC STITCH - COVERING (from left to right) 1 We start the stitch from the right, embroidering to the left bottom, then we pierce the needle up vertically. This way a row o f s e m i c r o s s e s i s formed. 1 You can also embroider the basic stitch from top to bottom. We start by piercing the needle from the bottom left to the top right. 2 Then we go back doing so called covering stitch. We start from the left top to the right bottom. This way a row of crosses is formed. The covering stitch is made from the bottom to the top. By piercing the needle one mesh lower, we can start a new row of basic stitches. 2 2 It is worth learning how to embroider the covering stitch, because it allows to get beautiful, equal crosses. DIAGONAL STITCH HALF-CROSS We make half cross. Finishing the covering cross-stitch we pierce the needle to the upper left corner and then guide the needle down diagonally to the next row, to be able to make another cross. LINE STITCH - BACKSTITCH This stitch is used to make contours. To do t h i s, w e s t a r t w i t h piercing the needle in a certain place to the right side of the canvas, then push it to the next mesh of the contour, drag the needle to the left side and again pierce the needle in the next mesh to the right side of the canvas. Then we punch the needle into the previous mesh (go back) to continue the contour and drag the needle to the left side of the canvas in the next free mesh. Repeat the operation to fill the contour. The use of this type of stitch, especially on small patterns, makes it more expressive, emphasizes colours and makes the image look more elaborate and detailed. 8 For line stitch (backstitch) embroidery on canvas 11ct (44) we use 3-4 threads, 14ct (54) - 2 threads, 16ct (64) and 18ct (70) - 1 thread.

9 COMBINING COLOURS If you want to leave space between the crosses for another mouline colour, the thread should be lead on the left side of our embroidery, leaving free meshes for another colour, and then drag the needle in the place where we will continue embroidering. How to start embroidering? Embroidery hoop or embroidery hoopframe Before embroidering, it is worth stretching the embroidered place on the hoop or embroidery hoopframe, which then serves as a frame. Thanks to it the canvas does not pull up and does not wrinkle. Some people do not use the embroidery hoop at all, but it requires skill and necessity to avoid tightening the thread too much. MOVING THE BEGINNING OF THE ROW To move the beginning of the row, pierce the needle diagonally to the left (or right) and start the base stitch of the next cross. Embroidery can be started: - from the darkest colours to the brightest colorus, so the bright mouline does not get so dirty Do not leave strands of thread on the left side of the pattern. It is better to finish it and get started in the right place. ENDING THE THREAD The threads should not begin or end with a knot, because after framing it may be visible in the form of bulging. It is enough to hide the end of the thread under the first 3-4 crosses so that the left side of the embroidery remains aesthetic. On the left side of the canvas we pull the thread underneath the threads of mouline and cut. 9 - from the most often used colour in the pattern, which allows us to perform the most tedious work in the beginning when we have the greatest enthusiasm for work - from the bottom, starting from the right and moving to the left, making it easy to transfer the pattern - from the top, starting from the left and moving to the right so that the embroidered surface does not get dirty - from successively embroidering all colours in successive rows e.g. in the borders of 10 x 10 cm square (this does not require moving the embroidery hoop too frequently). This way, you need to protect the threads against tangling. In addition, you need to change the thread sometimes to a few crosses, which lengthens the working time. Some cope with it by sewing with as many needles as the colours they are using.


10 Tangling of threads While embroidering try not to drag the threads from the left to the right side of the canvas. To avoid tangling and twisting of the thread, you should embroider with short strands of thread. If the thread twists, just drop the needle freely and allow the thread to spin. Unstitching and minor mistakes If there is a large error in the pattern, it is best to unstitch the thread with a stitch ripper. However, do not worry about minor mistakes if they do not affect the final result drastically. This makes embroidery unique and original. Laundring the embroidery Reputed producers such as Ariadna and DMC guarantee that their mouline threads do not dye. If you have mouline from uncertain source, you must first check whether it does not dye - cut off a piece from each mouline, sew to a piece of canvas and wash. If the mouline does not dye and the embroidery is dirty, it can be soaked in cold water. Then wash it with hands in warm water with mild detergent or natural soap. Rinse it well, squeeze in a rolled towel and stretch. Let it dry in the unfolded state. Iron it when it is still slightly damp. Some stick to embroidery vlieseline interlining to prevent it from stretching. Canvas with prints, stiffened canvas and tapestries should not be washed. They should be cleaned dry. Protecting from dirt If the embroidery is large, you should wear a cotton glove on your left hand so that the hand does not dirty the canvas. With very large patterns, it is good to cover the embroidered areas with a piece of cloth and fasten it with pins or tack so that the embroidery does not fade or dust. How to take care of ready-made embroidery? Ironing the embroidery If the finished embroidery is not dirty, it is enough to iron it on the left side, on a soft, light colour terry towel, so that the embroidery does not flatten. The iron can not be too hot and you should not use steam from the iron it is better to spray water from the sprayer. If metallic mouline is used in the embroidery, it is best to iron it with a cotton cloth on. Plastic canvas should not be ironed. 10 Framing the embroidery After finishing work, it is recommended to frame the pattern - this provides aesthetic appearance. We do not recommend installing glass. This causes flattening of the embroidery and the loss of the threedimensional effect. However, if embroidery should necesserily be under glass, it is best to choose antireflective glass, so you can avoid reflections and admire the work from each point of view.


11 Coricamo cross-stitch catalog Z Z 8695 Z Z 4372 Z Z 8708 Z Z 8671 Z 8709 Z Z 4370 Z Z Z 4371 Z Z Z 4375


12 Z Z Z 8704 Z Z 8655 Z Z 8845 Z Z 8384 Z 8399 Z 8859 Z Z Z Z Z 10059


13 Z 8690 Z 6092 Z 8843 Z 8692 Z 8691 Z Z 4950 Z 8860 Z Z 8804 Z 8537 Z 8862 ZU Z 8851 Z ZU ZU


14 How did we make "Little Owl"?
15 It's easy, isn't it? Practice makes the master, so go to work! 15


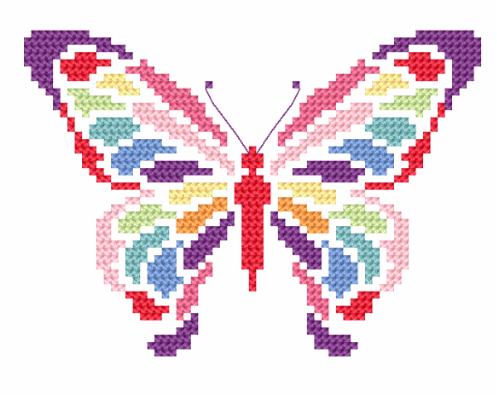
16 That might be the final result! It is worth a try! Z 8372 Z 8373 Z Z Z You are welcome to visit our website
Bead embroidery. detailed Bead embroidery course. easier than you think
 ead embroidery easier than you think detailed ead embroidery course www.coricamo.com Difficult or easy Full or combined ead embroidery has a ery long tradition for centuries they hae been used on bridal
Ribbon embroidery. detailed Ribbon embroidery course. easier than you think
 Ribbon embroidery easier than you think detailed Ribbon embroidery course www.coricamo.com Example pattern Lavender 4-5 ribbon colour (No. in the table) 4-4 ribbon width in mm instructions (No. of illustration)
AMermaid s. Basic technique. Raising the surface. Jennifer Rochester creates simply folded containers encrusted with stitch
 Jennifer Rochester creates simply folded containers encrusted with stitch PHOTO BY ALAN BENNINGTON For centuries, nomadic tribes have used folded squares of fabric to create soft containers. These folded
SWEET PEA PROJECT Level Beginner
 SWEET PEA PROJECT Level Beginner Introduction This project is aimed at the beginner. It is recommended that you get detailed instructions on the technique from either the DVD The Long & The Short Of It
FIORI 24 - Kit by STEFY.PALMA StitchCraft Home Edition
 FIORI 24 - Kit by STEFY.PALMA StitchCraft Home Edition This kit was designed and created on StitchCraft software http://www.stitchcraft.info INSTRUCTIONS FOR CROSS STITCH 1. Always begin stitching from
FIORI 23 - Kit by STEFY.PALMA StitchCraft Home Edition
 FIORI 23 - Kit by STEFY.PALMA StitchCraft Home Edition This kit was designed and created on StitchCraft software http://www.stitchcraft.info INSTRUCTIONS FOR CROSS STITCH 1. Always begin stitching from
FIORI 4 - Kit by STEFY.PALMA StitchCraft Home Edition
 FIORI 4 - Kit by STEFY.PALMA StitchCraft Home Edition This kit was designed and created on StitchCraft software http://www.stitchcraft.info INSTRUCTIONS FOR CROSS STITCH 1. Always begin stitching from
FIORI 18 - Kit by STEFY.PALMA StitchCraft Home Edition
 FIORI 18 - Kit by STEFY.PALMA StitchCraft Home Edition This kit was designed and created on StitchCraft software http://www.stitchcraft.info INSTRUCTIONS FOR CROSS STITCH 1. Always begin stitching from
FIORI 19 - Kit by STEFY.PALMA StitchCraft Home Edition
 FIORI 19 - Kit by STEFY.PALMA StitchCraft Home Edition This kit was designed and created on StitchCraft software http://www.stitchcraft.info INSTRUCTIONS FOR CROSS STITCH 1. Always begin stitching from
DOG ROSE PROJECT Level Beginner
 DOG ROSE PROJECT Level Beginner Introduction This project is aimed at the beginner. It is recommended that you get detailed instructions on the technique from either the DVD The Long & The Short Of It
Creative Stitchery Embroidery
 Prior to Presenting: Creative Stitchery Embroidery Facilitator Script and Notes Note to facilitator: Presentation: Using a laser pointer with this lesson is helpful when showing how each stitch is made.
You will need. Equipment
 1 KITE MOBILE Here s how to make a colourful kite to fly in your bedroom whatever the weather! You can use the kite tail to display favourite photos, postcards or trinkets. Just attach them with coloured
To register your machine warranty and receive Baby Lock product updates and offers, go to If you have questions with
 To register your machine warranty and receive Baby Lock product updates and offers, go to www.babylock.com/profile. If you have questions with registration, visit your Authorized Baby Lock Retailer. CONTENTS
ª 2 3 " 3 2 ' ' ' ª ª ª 1 1 " 1 1 ª ª ª ª ª ª ª ª ª ª ª ª ª ª 1 1 " 1 1 ª ª ª '
 Christmas Ornament - Joy 008 by Copyright at www.better-cross-stitch-patterns.com 0 0 0 0 0 0 DMC- DMC-909 DMC-70 DMC-8 DMC-45 DMC-04 DMC-890 DMC-78 DMC-80 DMC- DMC-04 DMC-890 DMC-78 DMC-44 KRE-00 Christmas
Pink Butterflies - Kit by Radda Pty Ltd 2005 Radda Pty Ltd
 Pink Butterflies - Kit by Radda Pty Ltd 2005 Radda Pty Ltd This kit was designed and created on StitchCraft software http://www.stitchcraft.info INSTRUCTIONS FOR CROSS STITCH 1. Always begin stitching
Lovely Lap Quilt. Read on for more details! Supplies Needed:
 Lovely Lap Quilt Floral blocks, borders, and corners make a lovely quilt. This tutorial demonstrates several quilting techniques used to make a lap quilt. I'll show you how to embroider the blocks, assemble
Organza Shadowbox Ornament
 Organza Shadowbox Ornament Illuminate your holiday decor with this unique shadowbox ornament! Two layers of sheer embroidered organza create a beautiful scene with depth and dimension. When lights shine
Cross Stitch. Created by Becky Stern
 Cross Stitch Created by Becky Stern Guide Contents Guide Contents Overview Instructions Buy Ohm Sweet Ohm Kit 2 3 4 20 Adafruit Industries http://learn.adafruit.com/cross-stitch Page 2 of 20 Overview So
Under The S ea Table Runner
 Finished Size: 12" x 48" (30.48cm x 121.92cm) Under The S ea Supp lies Needed B efore you begin 3 Wishes Fabric Under the Sea Collection 1 yd. (91.44cm) 12281-Lt. Blue 3 8 yd. (34.29cm) 12289-Lt. Blue
Sewing Vocabulary & Equipment
 Sewing Vocabulary & Equipment 1. Basting Stitch Long, temporary stitches used to hold pieces of fabric together. (Changed by twisting the stitch length knob.) Regular Stitch Length Basting Stitch Length
Sweet Dreams Gone Modern
 Sweet Dreams Gone Modern Created by Jeanne Delpit Experience the versatility of the BERNINA 830 as you create a baby quilt with a modern quilting twist! On-screen Editing, Jumbo Hoop Embroidery and template
Orchids - Kit by T Gillespie Crafted Software
 Orchids - Kit by T Gillespie Crafted Software This kit was designed and created on StitchCraft software http://www.stitchcraft.info INSTRUCTIONS FOR CROSS STITCH 1. Always begin stitching from the Centre
T U T O R I A L. Learn To Do Embroidery Cactus Flowers TRISH BURR EMBROIDERY
 T U T O R I A L Learn To Do Embroidery Cactus Flowers TRISH BURR EMBROIDERY Cactus flower Level All Size approx 9 Includes 2 projects: Project One: Cactus Flower Project Two: Pair of cactus flowers. Digital
Learn to weave. on the Knitters Loom
 Learn to weave on the Knitters Loom Welcome to the wonderful world of weaving... YOUR FIRST PROJECT A SCARF You will need: A pair of sharp scissors A measuring tape Cardboard strips 20cm (8ins) wide Two
NOTES 1. Please wash, dry & iron your fabric before beginning. 2. Use a 1/4 seam allowance throughout. 3. All seams are sewn Right Sides together.
 OTHER TOOLS & SUPPLIES - fiber stuffing or fabric scraps - paper printer - 24 contrasting embroidery floss & an embroidery hoop, for eyes - 2 yds of ribbon, for hanging (optional) - basic sewing supplies:
Bee #11 - Holiday Cocktail Coasters
 This wonderful set of linen coasters is sure to add elegance to any table setting, or holiday gettogether. Tuck a set into that special holiday hostess gift, in each tin of your holiday baking, or wrapped
Cutwork Embroidery. Project Needs & Notes:
 Cutwork Embroidery Add an impressive look to your table linens, fashion, and other home decor projects with stunning cutwork embroidery. It combines traditional embroidery with freestanding lace for a
Machine Embroidery Series Linen
 Machine Embroidery Series Linen Linen is the perfect fabric for summer clothing and it is also very popular for home linens and decorative pillows. Let s not forget accessories such as aprons, purses/totes,
Swedish Weaving. Safety pins - Use pins to mark the center point and design starting points.
 A Brief History Swedish Weaving Swedish Weaving is also known as Huck Embroidery. This needle art became popular in the late 1940's. Homemakers decorated the borders of Huck towels with embroidery floss.
Crewel Embroidery Instructions Design: Motley Mums (Version 1, 2, 3, & 4)
") Crewel Embroidery Instructions Design: Motley Mums (Version,,, & 4) What you ll need: 9" x 9" Linen (Version : Sky Blue plain weave; Version : Natural plain weave; Version : Oyster White twill, Version
Crewel Embroidery Instructions Design: Motley Mums (Version,,, & 4) What you ll need: 9" x 9" Linen (Version : Sky Blue plain weave; Version : Natural plain weave; Version : Oyster White twill, Version
Learn to weave on the. SampleIt Loom
 Learn to weave on the SampleIt Loom The Ashford SampleIt Loom assembly instructions Before Commencing - Please read the instructions completely, identify the parts and note the assembly sequence. Use the
rozenboek - Kit Dit borduurpakket wordt u gratis aangeboden door Wilma Karels Patchwork & Quilten
 rozenboek - Kit Dit borduurpakket wordt u gratis aangeboden door Wilma Karels Patchwork & Quilten www.wilmakarels.nl INSTRUCTIONS FOR CROSS STITCH 1. Always begin stitching from the centre of your design
'Sublime Stitches' Evenweave Part 12 Patterns , Final Part
 1 Blackwork Journey 'Sublime Stitches' Evenweave Part 12 Patterns 141-160, Final Part Full Sampler Design Area: 16.07 x 29.57 inches worked on 28 count evenweave 225 x 414 stitches Material: Material:
FANTASTIC DRAWSTRING PURSE Jenny Haskins
 FANTASTIC DRAWSTRING PURSE Jenny Haskins Purses are so in vogue at present but they are also really outrageously priced so here is a beautiful purse that is fun to make and looks just magic. NOTE: Pattern
Gift Jar Collection #12606 / 42 Designs
 #12606 / 42 Designs Note: Some designs in this collection may have been created using unique special stitches and/or techniques. To preserve design integrity when rescaling or rotating designs in your
Technique Instructions
 L W H 9 5 0 L L E4 W: H: :6 W W: H: 0 1 Technique Instructions Fashionable Freestanding Lace These unique lace designs stand on their own without a base layer and look like expensive lace. Simply embroider
Anniversary Tribute Quilt$
 Anniversary Tribute Quilt$ Celebrating 30 years of Martha Pullen Company www.sewbeautifulmag.com 1 materials Materials are available from www. marthapullen.com. Select Shop, then Recent Additions and scroll
Stitch- A- Long with Carol
 WWW.NEEDLEWORK- TIPS- AND- TECHNIQUES.COM Stitch- A- Long with Carol White Work Sampler Carol Leather 2011 X - C ALIBRE D ESIGNS Contents Introduction... 4 Getting started... 5 Before commencing... 5 Band
School & Crayon Totes
 LeisureArtsLibrary.com Sewing #803361 School & Crayon Totes Basic Tote Design by Nancy Burdette 2 Variations by Paula Hagerman Approx Design Size: 12" x 13 3 /4" each Click Here to sign up for the FREE
blauwkwa - Kit Dit borduurpakket wordt u gratis aangeboden door Wilma Karels Patchwork & Quilten
 blauwkwa - Kit Dit borduurpakket wordt u gratis aangeboden door Wilma Karels Patchwork & Quilten www.wilmakarels.nl INSTRUCTIONS FOR CROSS STITCH 1. Always begin stitching from the centre of your design
Freestanding Daffodil in 3D
 Freestanding Daffodil in 3D Bright yellow daffodils make springtime bloom with colorful cheer! This specially digitized design is created to hold together all on its own, like freestanding lace -- but
Lesson 2 CREATING THE SKIRT: LACE SHAPING
 1 Extension 1 Extension Lesson 2 CREATING THE SKIRT: LACE SHAPING For this lesson we will be working with the skirt pieces one skirt front and two skirt backs and your lace insertion. Are you ready to
Spooky Halloween Pillow by Pamela Cox
 by Pamela Cox Original Design for Sulky of America Project Overview Halloween is such a family-fun time. Children spend weeks deciding who they want to be this year! And they also love having their homes
Thread Painting. First Flowers
 Thread Painting First Flowers Supply List 1. Background fabric (1) 8 x10 piece of blue batik or tone-on-tone 2. Stabilizer (2) 8 x8 pieces of clear water soluble stabilizer film such as 4X by Superior
Easy-Peasy Pumpkin Mug Rug
 Easy-Peasy Pumpkin Mug Rug WoolFelt Home Décor Project - Finished size is approximately 10" x 10". Copyright 2018 Elizabeth Coughlin For personal use only, do not sell items made using these designs. Purchase
AMRIT INDO CANADIAN ACADEMY HOLIDAYS HOMEWORK ART & CRAFT VI th
 AMRIT INDO CANADIAN ACADEMY HOLIDAYS HOMEWORK ART & CRAFT 2018-19 VI th Let us Make an Apron Required matrial:- Cottpn Fabric(check print) - 1 yard is ample. Thread and sewing machine. Step 1. Cut the
3D Freestanding Lace Rose
 3D Freestanding Lace Rose Let beautiful three-dimensional roses bloom in your home decor! Read these instructions to see how to stitch and assemble the stunning floral designs. Project Needs & Notes: -
Delightful Miniature Purses! By Karin Buttigieg
 Delightful Miniature Purses! By Karin Buttigieg The idea for this came to me a few months ago when a customer ordered lots of miniature purse frames that I thought were pretty unattractive and I had sold
General Instructions for Quilted Projects
 General Instructions for Quilted Projects Projects Designed Exclusively For Licensed Martha Pullen ~ Teaching Beginning Sewing Teachers 2003 Martha Pullen Company, Inc. General Instructions for Quilted
Gifts of Gold #12643 / 35 Designs
 12643-01 Christmas Tree 5.36 X 7.89 in. 136.14 X 200.41 mm 36,799 St. 12643-02 Christmas Angel 4.63 X 6.07 in. 117.60 X 154.18 mm 34,654 St. 12643-03 Small Angel 3.64 X 3.91 in. 92.46 X 99.31 mm 18,236
Pockets; Seam Finishes
 Lessons 4, 5 Complete the sentences. 4. A zipper should be applied a facing has been applied, but a band has been applied to a garment. 5. Coil zippers are made of or. One advantage of them is the ease
Ornament Finishing Techniques
 Ornament Finishing Techniques by Anne Gale The back of the ornament should enhance, not detract from the quality of the finished ornament. There are many ways to finish ornaments depending on type, shape
Materials for Peppermint Candy Pillow
 Peppermint Candy Pillow Tutorial This adorable Peppermint Candy Pillow by BERNINA Ambassador Nancy Mahoney will give your decor a new look, whether for your bed or a decorative pillow for your couch. The
Cross & Crown Quilt. Approx Design Size: 27" square
 LeisureArtsLibrary.com Quilt #800382 ross & rown Quilt Approx Design Size: 27" square Originally published in the Spring 1994 issue of elebrations to ross Stitch and raft magazine 2008 by Leisure Arts,
design project Mother s Day Flower Scarf
 design project Mother s Day Flower Scarf Sewing Mother S Day Flower ScarF Stringing SWAROVSKI ELEMENTS Article Product Group Article No. Amount Size Color Color Code Beads 5000 120 pcs. 3 mm Crystal 001
Finished size 52 x 26. Over the River depicts the cherished childhood memories of celebrating life and families together.
 Over the River Finished size 52 x 26 Over the River depicts the cherished childhood memories of celebrating life and families together. In this Embroidery Workshop students will learn Claudia s technique
By Clarrisa Gossett, Floriani Educator
 By Clarrisa Gossett, Floriani Educator 1 Supplies Needed: Preparation of the flowers: *A pre made placemat *A few stems or a bush of silk flowers keep in mind that you will be stitching around the edges
ROMANTIC PILLOW CHEATING PATCHWORK Jenny Haskins 2001
 ROMANTIC PILLOW CHEATING PATCHWORK Jenny Haskins 2001 This little pillow is a great way to use those left over pieces of fabric you cannot bare to throw out. The secret to the beauty of this pillow is
Cutwork Pillow. Project Needs & Notes:
 Cutwork Pillow Highlight the intricacy and delicacy of cutwork designs with a lovely pillow! Accent fabric is applied behind the cutwork design adding a pop of unexpected color. Project Needs & Notes:
Threads n Scissors. Easy Flip Flops
 Easy Flip Flops Method Hoop 2 layers of water soluble stabilizer. Cut a piece of 1 mm thick 3D foam to fit the inside of the hoop. Put the foam onto the stabilizer and stitch out the design. Materials
A. Preparing the fabric (not shown):
:") INSERTING ZIPPERS - CENTER INSERTION The zipper can be snapped on to the right or to the left side of the needle so that you can sew close to the zipper. When sewing on the right side of the zipper, attach
INSERTING ZIPPERS - CENTER INSERTION The zipper can be snapped on to the right or to the left side of the needle so that you can sew close to the zipper. When sewing on the right side of the zipper, attach
Lace Trimmed Towel. Project Needs & Notes:
 Lace Trimmed Towel Give everyday bath towels a touch of elegance with soft, lacy trim! Stitch this freestanding lace edging design as many times as you like, then sew them onto the border of a plush towel.
Travel Purse by Darlene Guillory
 Travel Purse by Darlene Guillory Use this handy purse when flying, going to the beach, on a cruise, or going to your next Sewing/Quilt Expo. It's just the right size to carry your driver's license, cash,
3D Freestanding Lace Birds
 3D Freestanding Lace Birds Let one of these feathered lace friends land in your home! Multiple pieces of embroidered lace come together in the shape of a chickadee, cardinal, goldfinch, and more. Hang
Pixel Pillow Skill Level: Beginner
 Pixel Pillow Skill Level: Beginner Designed By Kati Spencer Sewn By Kati Spencer www.fromthebluechair.com This pillow is the perfect introduction to pixel piecing using very small squares. Sample use Essex
PRESSING LINING IDEAS FOR FINISHING TOUCHES. You've finished your masterpiece! Here are ideas on how to prepare it for use as a wall hanging.
 You've finished your masterpiece! Here are ideas on how to prepare it for use as a wall hanging. PRESSING Press as instructed for the craft you have done. Be careful not to flatten threads or yarns. If
 PILLOW LOOM HOW Most of the writing below the double line is in the text that appears to the right of the pictures on the web site. The text between this Paragraph and the double lines is new. Feb. 2nd
From Tassels to Textures Pillow: Designed by Louisa Meyer
 From Tassels to Textures Pillow: Designed by Louisa Meyer - 1 - Materials: Silk 50cm long x 90cm wide (20 in. x 36 in.) Velveteen 50cm long x 25cm wide (20 in. x 10 in.) Woven iron-on stabiliser G 700
Dolly s Darling Dungarees
 Dolly s Darling Dungarees All photos, text, and pattern pieces Dandelions n Dungarees 2013. All rights reserved. No part of this publication may be reproduced or transmitted in any form or by any means
Sewing and Clothing ID
 Sewing and Clothing ID 1 Acrylic Ruler -- Ruler used in crafts and clothing showing different measurement. May come in different shapes and sizes. Aida Cloth Beautiful even-weave cloth, popular for cross
Crochet Beading. Bead size
 Crochet Beading To say I enjoy working with beads is a bit of an understatement. I can't resist their sparkle and love the extra colour and texture they add to my work. I always use beads from the Debbie
Sample Collection 4 #32056 / 10 Designs
 #32056 / 10 Designs Note: Some designs in this collection may have been created using unique special stitches and/or techniques. To preserve design integrity when rescaling or rotating designs in your
Angel Pets Memorial Mug Rug PDF Pattern
 Angel Pets Memorial Mug Rug PDF Pattern Finished Size: 6 1/2 x 8 inches If you are only making one animal, be sure to print only that page. Use these with a snack, or hang on your wall. They also make
Panel Place Mats with Large Motif Fabric
 Published on Sew4Home Panel Place Mats with Large Motif Fabric Editor: Liz Johnson Monday, 08 January 2018 1:00 By emphasizing a large motif and using a contrasting fabric for the borders, this place mat
Carry Sew Table and Hoop Bag Created by Joy Harvey
 www.bernina.com.au Carry Sew Table and Hoop Bag Created by Joy Harvey Materials List What to do with all those leftover cords, ribbon, braids, pearls and sequins? Your answer, foot #12C my favourite presser
Freestanding Lace Bouquet #12454 / 6 Designs / 14 Files
 Note: Some designs in this collection may have been created using unique special stitches and/or techniques. To preserve design integrity when rescaling or rotating designs in your software, always rescale
GO! Elephants. Machine Embroidery Set for the AccuQuilt GO! Elephant Die (#55373) Design Set Information. Appliqué Shapes:
 Design Set Information. Appliqué Shapes:") GO! Elephants by Marjorie Busby Machine Embroidery Set for the AccuQuilt GO! Elephant Die (#55373) Design Set Information Appliqué Shapes: These beautiful appliqué designs are for use in quilts, clothing,
GO! Elephants by Marjorie Busby Machine Embroidery Set for the AccuQuilt GO! Elephant Die (#55373) Design Set Information Appliqué Shapes: These beautiful appliqué designs are for use in quilts, clothing,
Supply List. Tracing the design onto the clear stabilizer
 Solitary Tree Supply List 1. Background fabric (1) 9 x12 piece of landscape batik 2. Moon Scrap of yellow batik 3. Stabilizer (1) 9 x12 piece of clear water soluble stabilizer film such as 4X by Superior
Hermione Granger Style Bag
 Hermione Granger Style Bag Finished size: 6 x 6 x 6 Read all of the instructions before you begin. All Rights Reserved Page 1 Materials: 11 x 14 (28 x 35 cm) of four different purple fabrics (I used velvet,
Catch of the Day Recipe Book
 Catch of the Day Recipe Book Created by Elva Mungai Catch, create, and cook! Gather your favorite seafood recipes, fabric collections, and scrapbooking supplies. Combine them with the embroidery designs
Hardanger Sachet By Jean Hughes
 By Jean Hughes Front Back List of Materials: 22 count Hardanger fabric 2 pieces 6 inches square Perle cotton #5 Perle cotton #8 Perle cotton #12 (optional but will create a finer 4-sided edge) # 22 and
Shades Of Violet Needlework Set Complimentary Design
 Shades Of Violet Needlework Set Complimentary Design Shades Of Violet Needlework Set, Page 1. Design sizes: Pinkeep: 43 w x 42 h. Finished size: 3 1/4 square. Scissorkeep: 35 w x 52 h. Finished size: 2
Contents. Loading for Quilting... 41
 Contents Avoid Trouble from the Start........ 8 Unstabilized Edges and Tops............ 8 Off-Center Backing.................... 10 Borders with Too Much Fullness........ 12 Failure to Plan Ahead..................
Freestanding Lace Easter Baskets
 Freestanding Lace Easter Baskets Deliver Easter treats to your sweeties with these beautiful lace Easter baskets. They're a stunning way to add elegance to your Easter! Project Needs & Notes: - Water-soluble
Precious Moments A Time to Play Project Lesson: Pillow for a Princess By Tamara Evans
 Precious Moments A Time to Play Project Lesson: Pillow for a Princess By Tamara Evans Precious Moments A Time to Play Project Lesson: Pillow for a Princess By Tamara Evans Show the princess in your life
Misty Morning by Deanna Bertlesen
 Cover Project Misty Morning by Deanna Bertlesen Skill Level: Intermediate to Advanced Embroidery CANADA Mar 2005 11 12 x 12 broadcloth, light grey or blue 12 x 12 muslin backing fabric 12 x 12 piece of
Emilia. The Folding Rigid Heddle Loom. Learning to weave on your Emilia loom by Joanne Hall
 Emilia The Folding Rigid Heddle Loom Learning to weave on your Emilia loom by Joanne Hall Heddle Handle Heddle Bracket Rigid Heddle Warping peg The Emilia Loom and Accessories Warp beam Texsolv cord Folding
By Laurie Pessetto. Create your pattern. The decorative fabric will be on the edges of the circle layers.
 By Laurie Pessetto Create an elegant, soft, travel pouch to protect jewelry from damage and keep it organized even when your suitcase gets tossed into a plane or trunk! Skill Level Good sewing skills,
Finishing a Kite Ornament
 Finishing a Kite Ornament These instructions have been written to aid in finishing the kite ornament shown in Needlepoint Now, September/October 2017, Volume XIX, No..5 Materials Stitched kite ornament
Chili Pepper Quilt Patterns
 Chili Pepper Quilt Patterns Free Pattern ~ Cry Baby ~ Instructions Page 1 Chili Pepper Quilt Patterns ~ Cry Baby ~ Crib Quilt Finished Size: 39.5" x 50.5" Fabric A 1 st Bright Fabric Fabric B 2 nd Bright
Patchwork Rosette Needle Book
 Patchwork Rosette Needle Book Elizabeth Betts All full size templates can be found at www.stitchcraftcreate.co.uk/patterns Patchwork Rosette Needle Book Every respectable sewing box should have a handmade
Sew Sweet Bunny Basket
 Sew Sweet Bunny Basket Crafter level: Intermediate to Advanced Time needed: 2½ hours What you'll need Printouts of templates ¾ yd. linen fabric for basket ¾ yd. cotton print fabric for lining Pins Sharp
Locker Hooking for Beginners - 1
 Locker Hooking for Beginners Locker hooking became popular between 1920 and 1940 in Great Britain and in America where strips of fabric were used to create rugs. It s a similar process as that used in
Basic Bearmaking Instructions
 Laying out the Pattern Basic Bearmaking Instructions We recommend that you read the instructions right through before commencing. This will help you to understand the steps you need to take. Copying your
Planner / Journal Tutorial
 Planner / Journal Tutorial Sewing your own planners and journals is so much fun! You get to choose every part of the design, and your new book will delight you every time you open it. This method quickly
Note ook Doodle Pillow
 Note ook Doodle Pillow There s nothing better than a project with fun personality, customization and color! This notebook doodle pillow is the best thing next to drawing in the margins of homework, because
Kitchen. by Michele Mishler. 20 CREATIVE MACHINE EMBROIDERY cmemag.com
 Kitchen Coordinates by Michele Mishler Combine large floral embroidery designs and smaller embroidered accents to add a splash of vintage style to a coordinating apron, towels and potholder. 20 CREATIVE
MACHINE SEW HOW TO POT HOLDER. Project
 GET TO KNOW YOUR ING BY TRYING OUT THE VARIOUS STITCHES AVAILABLE, THEN TURN YOUR STITCH SAMPLER INTO A USEFUL. CUSTOMIZE YOUR PROJECT BY CHOOSING YOUR OWN FABRIC AND MATCHING OR CONTRASTING THREAD COLOURS.
CREATE A SPRING EMBROIDERY HOOP: Day 1
 CREATE A SPRING EMBROIDERY HOOP: Day 1 PHOTOGRAPHY: ANNE OLIVER, LOLLI & GRACE Sew a pretty peony in various shades of pink 62 84 02 03 04 04 HOW TO MAKE AN EMBROIDERED PEONY MATERIALS (FOR THE WHOLE PROJECT)
Festival Bracelet. 1, 2, 3... let s go! Zweigart & Sawitzki GmbH & Co. KG Fronäckerstraße Sindelfingen. - more than 3 hours -
 arben Festival Bracelet - more than 3 hours - 1, 2, 3... let s go! Zweigart & Sawitzki GmbH & Co. KG Fronäckerstraße 50 71063 Sindelfingen Preparation: Arrange your material and print out the embroidery