INSTALLATION AND MAINTENANCE MANUAL
|
|
|
- Ruth Blake
- 5 years ago
- Views:
Transcription


1 ARTIS smartstone INSTALLATION AND MAINTENANCE MANUAL making life nice and easy Please note: Installer should read these instructions before installation. Jan 09 edition
2 ARTIS smartstone CONTENTS INTRODUCTION 03 BENEFITS OF SMARTSTONE 03 AVAILABILITY 04 IMPORTANT CHECKS AND PROCEDURES BEFORE STARTING Handling, storage and packaging Product weight Design, layout and joints On site conditions and security Site preparation and checks TOOLING AND EQUIPMENT REQUIREMENTS HEALTH AND SAFETY CONSIDERATIONS 08 JOINING THE PRODUCT PREPARING THE SEAMING ADHESIVE 12 EDGE PREPARATION AND BONDING FORMING EDGES 14 FINISHING THE SURFACE HOB AND SINK CUT-OUTS APPLIANCE PLACEMENT 16 VERTICAL SURFACING 16 CARE AND MAINTENANCE 17 TERMS AND CONDITIONS 18 TOOLING AND EQUIPMENT TOOL AND ACCESSORIES SUPPLIERS 21 REPAIR PROCEDURE 22 SMARTSTONE ACCESSORIES 23
3 INTRODUCTION making life nice and easy Artis Smartstone is outstanding. This remarkable material offers an affordable solid surfacing system with extraordinary looks and inconspicuous seams. Smooth, strong and sealed, Smartstone can be sculptured to provide the most elegant, practical and hygienic surface solution. Using the modular concept that is the feature of all Artis surface ranges, Smartstone offers high luxury at a fraction of the cost associated with solid surfaces of any type. BENEFITS OF SMARTSTONE 1. Easy to clean 2. Inconspicuous Seams 3. Easy to repair 4. Chemical resistant 5. U.V. resistant 6. Non porous 7. Hygienic 8. Easy installation with no templating required year guarantee against manufacturing defects Smartstone is an homogenous mineral based solid surfacing material, with natural mineral fillers and high grade engineered resins. Uniquely, once edged, a neutral Smartstone composite is poured to the reverse and a decorative Smartstone composite is poured to the surface of an environmentally friendly core. The surface is then semi finished and packaged ready for off-the-shelf availability. An installation DVD as well as training workshop dates are available by contacting us at
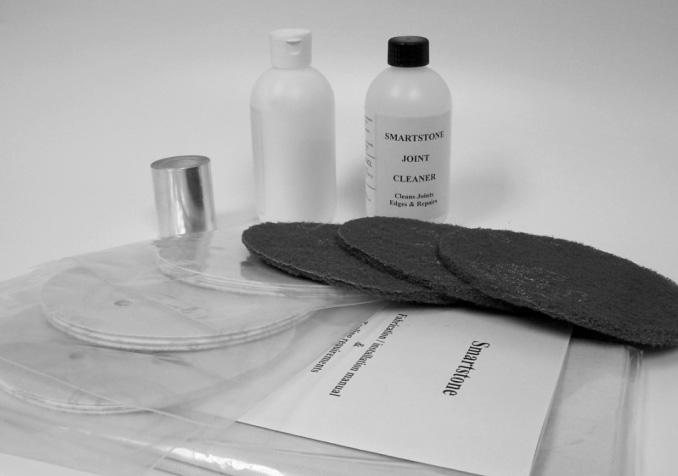
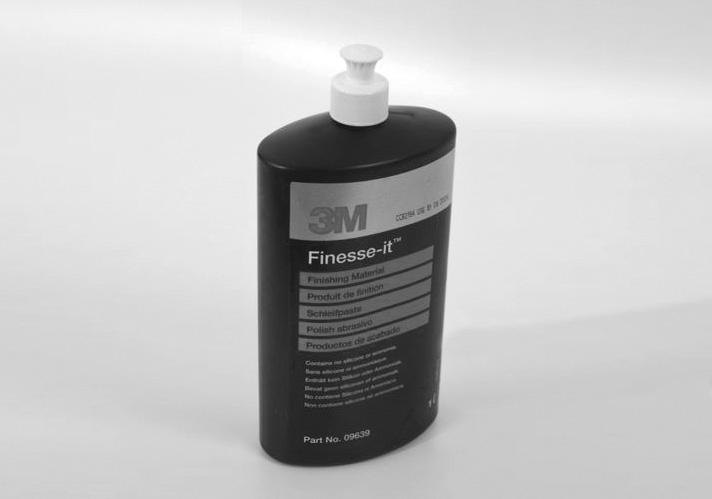
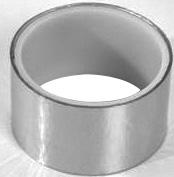
4 making life nice and easy AVAILABILITY WORKSURFACES 3000 x 650 x 40mm Finished 1 long edge and 2 short sides x 650 x 40mm Finished 1 long edge and 2 short sides x 900 x 40mm Finished all round with one square and one ellipse end (200mm radius). FACTORY FINISHED IN-LINE WORKSURFACE 1500 x 650 x 40mm Factory finished in 12mm material with sink cutout, drainer grooves and tap hole. Available in both left and right hand elements to accommodate a Franke ARX160 under mounted sink. Finished on one long edge. UNIVERSAL IN-LINE WORKSURFACE 1500 x 650 x 40mm Factory finished in 12mm material for customers own under mounted sinks. Finished on one long edge. MODULAR SPLASHBACK 1260 x 1220 x 12mm For vertical use directly behind the hob. MID PANEL SPLASHBACK 3000 x 600 x 6mm For vertical use on walls between worksurface and wall units. (Do not use 6mm splashbacks behind a hob. Always use a 12mm modular splashback to prevent bowing from heat). UPSTAND 3000 x 50 x 12mm For vertical use on back edge of a worktop. EDGING STRIP 1350 x 45 x 6mm For re-edging raw worktop ends. ADHESIVE GUN To apply the adhesive for jointing. ADHESIVE Seaming adhesive 50ml cartridge and joint spacers. INSTALLATION KIT Sanding papers, Scotch-Brite pads, finishing cream, heat reflective tape, Imanol joint/edge cleaner, bleached white cloths and installation manual. CARE AND MAINTENANCE KIT To maintain lustre and remove minor scratches by hand. REPAIR KIT To repair minor damages. JOINTING BOLTS For jointing worktops together. A CLAMPS To secure edging strip whilst the adhesive cures. FINISHING CREAM For finishing all surfaces (1 Litre bottle). APPLIANCE HEAT REFLECTIVE SHEET 650 x 650mm (approx) To protect a joint against heat and moisture. HEAT TAPE (5 Metre) Heat reflective tape for hob cut-outs. IMANOL Joint/edge cleaner (200ml). COUNTERTOP MAGIC Extra to the Care and Maintenance kit. WORKTOP COUNTER SAVER 400 x 300 x 12mm To help and protect worksurface against wear and tear. 04
5 IMPORTANT CHECKS AND PROCEDURES BEFORE STARTING 1. Handling, Storage and Packaging Artis Smartstone worksurfaces and splashbacks should be carried individually, horizontal and on edge to eliminate any possible damage. Always unpack your Artis Smartstone surfaces and check for any damage caused during transition and storage and report any problems found before proceeding further with the installation. Do not rest abrasive or gritty components on the decorative surfaces as this may cause scratching. Artis Smartstone is less prone to colour matching problems than most other Solid Surface products. However, components that are to be used together should be checked for colour match under good lighting conditions before installation. Lightly sand both surfaces using a 320 grit sanding disc and wipe over with a damp cloth, to see the true colour. Any shade defects should be reported to your supplier. The manufacturer will not accept any responsibility for refit charges due to colour variance or substandard fitting. IMPORTANT Store Artis Smartstone surfaces indoors in a well-ventilated dry area. Components must be stored in racks, horizontally with adequate support along their full length. Before fabrication or installation, all Artis Smartstone products should be brought to room temperature (minimum 16ºC 60ºF). 2. Product Weights 3000 x 650 x 40mm worksurface 55kg 4100 x 650 x 40mm worksurface 72kg 3000 x 900 x 40mm worksurface 73kg 1260 x 1220 x 12mm splashback 36kg 3000 x 600 x 6mm splashback 18kg making life nice and easy Edging or cast sheet products are more brittle in cold temperatures so extra care is required when handling. 3. Design, Layout and Joint Placement Having designed the kitchen layout and planned the location of all appliances, please remember that a key feature of Smartstone is the inconspicuous seams, so care needs to be taken in their preparation and fabrication. The maximum length of worktop is 4.1m, therefore in some cases; straight butt joints will be needed to make longer lengths. In some cases it may be possible to carry out the seaming process in your factory or workshop, before transporting completed worktops to site. If so, then care should be taken in the handling of the worktops around the seamed area. When measuring for your Smartstone worksurfaces, remember; 1. Joints must not extend across hob and sink cut-outs. 2. Offset all joints by at least 100mm from all cut-outs. 3. It is recommended to avoid joints over appliances, however if this is unavoidable always use the appliance heat reflective sheet to avoid damage to the joint. 4. Check location of corner units in relation to carousel units. Cut-outs in the top panel have to be made to allow insertion of jointing bolts. Otherwise use the block and clamp method (see page 09 fig. 3). 05
6 making life nice and easy IMPORTANT CHECKS AND PROCEDURES BEFORE STARTING 4. Site Condition and Security The installation site must be dry and secure, for example windows, glass and doors must be in place. Always ensure that the temperature is in the region of 16 26ºC; as extreme temperatures can effect the curing time of the adhesive. 5. Site Preparation and Checks Ensure that all carcass units are installed correctly to the wall and plumb and level in both directions. Check appliance spaces to ensure that wall worktop support battens are in place and that all the appliances fit correctly into the allocated spaces. Unpack worktop components and check site dimensions against drawing. Check that you have adhesive and any additional edging strips required. Determine that all cut-outs have been machined to the correct dimensions and located correctly. NOTE Should you have any queries on product installation that you feel are not clearly covered in this manual, then visit us online at to view the installation DVD video. If several installations are being carried out at the same time, the ideal procedure would be to unpack each set of worktops in turn, making sure site conditions are correct, and place worktops on carcases to precondition. Adhesive must be brought to room temperature prior to use. We recommend that before joints are bonded with the seaming adhesive, they are dry fitted to make sure that they are tight and accurate. It is recommended that you set aside working time for fitting, cleaning up etc, whilst the adhesive is curing. TOOLING AND EQUIPMENT REQUIREMENTS The only tooling needed which differs from standard laminate worktop installation is a well balanced random orbital sander with extraction, Smartstone installation kit, seaming adhesive and an application gun Well balanced random orbital sander with extraction 2. Smartstone installation kit 3. Seaming adhesive 4. Application gun 5. Router and cutters 6. Worktop Butt and Scribe jig 7. Jig saw 8. Hand drill and 16mm bit 9. Dust masks 10. Safety glasses 11. G or A Slip clamps 12. Masking tape 13. Dust sheets 14. Jointing bolts (3 per 650mm joint) 15. Jointing biscuits 16. Care and maintenance kit
7 making life nice and easy TOOLING AND EQUIPMENT REQUIREMENTS 1. Routers and Cutters A router is the most suited tool for machining Smartstone. When choosing a router always make sure it is powerful enough to do the job. For Butt and Scribe jointing and edge dressing a minimum rating of 1200 watts is required. For sink and hob cut-outs a higher rating of at least 1600 watts is required. Minimum rotational speed of cutter should be 18,000 rpm. Router cutters should be of high quality tungsten carbide, double fluted, with a 12mm shank to reduce chatter. NOTE When routering on a residential site it is advisable to fit an extraction unit onto the sander/router to reduce any dust or shavings. 2. Random Orbital Sanders To obtain the best possible versatility using one tool, we recommend that a well balanced random orbital sander with extraction is used. These orbital sanders can be either electric or air driven, but must have a minimum orbital speed of 10,000 rpm with a 3/32 orbit. See tooling list for recommended suppliers on page Recommended Grit Sizes are:- 180, 240 and 320 grit for removing adhesive bead and deep marks and to achieve the final sanded finish. Scotch-Brite 7448 (grey) pads for surface polishing with Smartstone finishing cream. 4. Circular Saws The most practical type of saw to use when cutting Smartstone is a sliding table saw. A fine chip free cut is required. To achieve this a triple fine tooth tungsten carbide tipped blade is recommended. When using table saws always place Smartstone face up on the table with approximately 25mm of saw blade above the surface and cut slowly through the panel. A hand held circular saw, guided along a straight edge clamped to the surface of the top can be used for workshop or on-site sizing. These saws only produce a rough cut; the edge and final finish should be made using a router. 5. Jig Saws A jig saw can be used for customising Smartstone worktops in the same way as standard laminate tops, i.e. for the cutting of sink and hob cut-outs as well as other cutting operations. To reduce the amount of marking on the surface from the saw/router plate, mask the area that is to be cut with masking tape. Due to the unique composite nature of Smartstone, blade life expectancy will be reduced. NOTE It is very important to make sure that a sharp blade is used, to reduce the risk of chipping and fracturing the surface. 07
8 making life nice and easy HEALTH AND SAFETY CONSIDERATIONS There are no known hazards associated with Smartstone Solid Surfacing material. Normal, good workshop operating practices should be followed as with any other panel product. When machining Smartstone components, methyl-methacrylate vapour is released, but will dissipate with adequate ventilation. When sanding and cutting Artis Smartstone components always use safety glasses and a dust mask. Good extraction on the sander and router will also remove dust and shavings. Consideration should be given to the weight of the product when off-loading and installing. Material Safety Data Sheets are available for both the worktops and adhesive, these can be obtained from your distributor or directly from the manufacturer. Butt and Scribe and Butt Joints Tools and equipment required JOINTING THE PRODUCT 1. Well balanced radom orbital sander with extraction 2. Smartstone installation kit 3. Seaming adhesive 4. Application gun 5. Router and cutters 6. Worktop Butt and Scribe jig 7. Jig saw 8. Hand drill and 16mm bit 9. Dust masks 10. Safety glasses 11. G or A slip clamps 12. Masking tape 13. Dust sheets 14. Jointing bolts (3 per 650mm joint) 15. Jointing biscuits When all the Smartstone components are customised to their final length, lay out the worktops to check the finished dimensions against the drawing/plan, with all internal corners and open-ends in situ. (If the quality of saw cut is not adequate to produce a chip-free edge, cut oversize by approximately 2mm/edge and dress to final length using a router and straight edge, or alternatively use a butt and scribe jig.) If a Butt and Scribe joint is to be used, then your standard worktop Butt and Scribe jig with the appropriate guide ring and router cutter will be adequate. Key holes must be routered to a depth of 25mm to allow even pull on the surfaces. 08

. Fig.")


9 JOINTING THE PRODUCT making life nice and easy Fig. 1 Always use biscuit inserts for joint alignment and strength. Make sure all biscuit cuts are only machined into the core material and not into the Smartstone surface material. Stepping of the joints is difficult to see whilst the surface has excess adhesive, which has to stay on the surface until set to allow for shrinkage. Cut biscuit rebates either side or above the keyholes (3 per 650mm wide joint and 4 per 900mm joint). Fig. 2 Before applying any adhesive, make one last dry fit to check alignment of the joints. The tighter the dry fit, the better chance of an inconspicuous seam. Fig. 3 If using sash clamps, apply 2 blocks to the surface either side of the joint using hot melt adhesive. This clamping method is useful where access to the underside of the worktop is limited. Fig. 4 When using worktop jointing bolts, if the keyholes have not already been prepared, you should now make these cuts with the Butt and Scribe jig and router cutter, to a recess depth of 25mm. (3 per 650mm wide joint and 4 per 900mm joint). 09


10 making life nice and easy JOINTING THE PRODUCT Fig. 5 Prepare the joint faces by cleaning the edges and surrounding areas with a clean bleached white cloth dampened with Imanol joint/edge cleaner both provided in the Smartstone Installation Kit to remove pencil, grease, dust and finger marks, which will contaminate the adhesive. Do not saturate the core with Imanol joint/edge cleaner. This should be dry before applying any adhesive. Fig. 6 You must use a Smartstone applicator gun with Smartstone adhesive. Unscrew the protective cap from the adhesive cartridge and apply the self mixing nozzle to the cartridge. Pull up the black loading arm on the top of the gun, insert the adhesive cartridge and click the loading arm back into position. Do not cut the end of the nozzle. When starting with a new nozzle always run a small bead of Smartstone adhesive out onto a cloth as this reduces the risk of the first bead of adhesive not being mixed with the hardener. Fig. 7 Apply a healthy bead of Smartstone adhesive into the biscuit cuts and along the bottom edge and middle of one side of the joint. Insert the biscuits making sure you fit a joint spacer over each biscuit. (see adhesive cartridge pack for full details). Pull the worksurfaces together leaving a gap between the joint. Apply a healthy final double bead of Smartstone adhesive to the top and front edge of the joint. Each 650mm joint should use a minimum of two thirds of an adhesive cartridge. If any Smartstone adhesive is not used, simply remove and throw away the mixing nozzle and replace the protective cap for future use. A spare nozzle is supplied with every Smartstone adhesive cartridge. 10


 Fig.")
11 JOINTING THE PRODUCT making life nice and easy Fig. 8 Pull the two boards together and insert and tighten the jointing bolts, making sure not to over tighten them. It is important that you have an unbroken bead of Smartstone adhesive along the entire joint top and bottom. Once the Smartstone adhesive has been applied, you have 5-8 minutes to bring the joints together and make any final adjustments. Fig. 9 Check that the two surfaces are level and flat either side of the joint before leaving the adhesive to cure. Do not remove the Smartstone adhesive from the joint. Using the nozzle from the adhesive cartridge, gently check that both boards are level at the front and back of the joint. This needs to be done before the adhesive starts to cure. If you have displaced any adhesive, replace it immediately. (Do not use your finger for this task.) Fig. 10 Any excess Smartstone adhesive on the front internal corner should be removed whilst still wet. Simply cut a 45º angle on the corner of a piece of card and slowly drag up the internal joint (see diagram) removing the excess Smartstone adhesive, as finishing this area can be difficult if the adhesive is left to set. Leave the joint approximately 35/45 minutes before sanding. (Curing times may vary due to different temperatures in the room). Do not sand or disturb the joint until the adhesive is hard or when it is not possible to scratch the adhesive bead with a fingernail. During the jointing process you may get some of the seaming adhesive onto the worksurface. This will not damage the surface but once dry the only way to remove the adhesive will be by sanding. To prevent this, wipe off any spills immediately with Imanol joint/edge cleaner. To help to reduce the odour of the adhesive whilst curing keep kitchen unit doors, which are directly underneath the jointed areas open. 11


12 making life nice and easy PREPARING THE SEAMING ADHESIVE Each Smartstone colour has its own seaming adhesive, which is identified on the adhesive cartridge. Each cartridge is more than enough to seam a 650mm joint. The adhesive is a two part system with the pigmented adhesive in one compartment and the hardener in the other. You must use a Smartstone applicator gun with Smartstone adhesive. Unscrew the protective cap from the adhesive cartridge and apply the self mixing nozzle to the cartridge. Pull up the black loading arm on the top of the gun, insert the cartridge and click the loading arm back into position. When starting with a new nozzle, always run a small bead of adhesive out onto a cloth, as this reduces the risk of the first bead of adhesive not being mixed with the hardener. NOTE Do not cut off the end of the nozzle. If any Smartstone adhesive is not used, simply remove and throw away the mixing nozzle and replace the protective cap for future use. A spare nozzle is supplied with every Smartstone adhesive cartridge. EDGE PREPARATION AND BONDING Tools and equipment required 1. Flush-trimming cutter (alternatively use heavy sanding disc and random orbital sander with extractor). 2. 3mm radius profiling cutter (alternatively use sanding block and sandpaper) 3. Router and cutters 4. Dust masks 5. Safety glasses 6. Imanol joint/edge cleaner and clean bleached white cloths (both provided in the Installation Kit) 7. G or A Slip clamps 8. Seaming adhesive Fig. 1 Prior to edging, make sure the Smartstone edging strip and the worksurface to be edged are the same shade. The worksurface edge and scarified side of the Smartstone edging strip must be thoroughly cleaned with Imanol joint cleaner. 12


13 EDGE PREPARATION AND BONDING making life nice and easy Fig. 2 Apply a healthy bead of Smartstone adhesive along the full length of the reversed side of the edging strip (top, middle, bottom and both ends). Fig. 3 Using A clamps, secure the Smartstone edging strip into place until the Smartstone adhesive has cured. (35-45 minutes depending on the temperature). Make sure an unbroken bead of Smartstone adhesive is visible on all four edges. Fig. 4 Using either an edging router or heavy grade sanding disc on a random orbital sander, machine then sand or just sand the excess Smartstone edging flush with the worktop surface, underside and ends. Fig. 5 Remember to profile the sharp edges of the Smartstone edging strip using a 3mm radius cutter or a sanding block and sandpaper. 13

14 making life nice and easy FORMING EDGES Smartstone edges can be formed around special shapes. To form the edge it is important that the edge is kept at room temperature (20ºC). Before applying the adhesive, address the edging strip to the shape using minimal pressure and clamp into place. If the edging does not clamp easily or for a tighter radius, pour boiling water directly from a kettle up and down the edging strip until plyable. Clamp into place using the A clamps and allow to cool for approximately fifteen minutes. Once cooled, the edging strip will maintain its shape ready for cleaning and gluing. FINISHING THE SURFACE Tools and equipment required 1. Well balanced random orbital sander with extraction 2. Sanding discs - 180, 240 and 320 grit 3. Scotch-Brite pads (grey) 4. Smartstone finishing cream 5. Dust masks 6. Safety glasses Preparing the Joint Area If using the glue and block method, (page 09 fig. 03) remove the clamping blocks by giving them a sharp side blow with a rubber mallet, do not prise off using a chisel. Remove any hot melt adhesive that may be left Sanding the Joint Area Fig. 1 Your Smartstone worksurface has been pre-finished to the standard of a 320 grit orbital finish. Carefully remove the ridge of Smartstone adhesive from the joint using a well balanced random orbital sander with extraction and a 180 grit sanding disc, taking care not to sand a depression into the worksurface or overheat the joint. When the Smartstone adhesive bead is flush with the surface, sand again over a wider area using a 240 grit sanding disc blending the joint and the rest of the worksurface together. Now sand the whole of the worksurfaces using a 320 grit sanding disc to remove any imperfections or packaging marks. Make sure to wipe down in between each sanding process with a clean damp cloth to remove any dust or debris.

15 FINISHING THE SURFACE making life nice and easy NOTE The higher the sheen and the darker the colour the more visible light scratches and scuff marks become. In these cases greater effort by the consumer will be required to maintain the surface finish. Final Finishes Fig. 2 To take your sanded, cleaned down raw material to its final stone effect, apply a moderate amount of Smartstone finishing cream to the worksurface and polish in using the Scotch-Brite pads with a well balanced random orbital sander on a low setting. Spread the finishing cream over the whole surface being careful not to leave any dry spots. Turning the sander to a higher speed setting, continue with the same Scotch-Brite pad repeating the same technique used when sanding, East-West then North-South until all the Smartstone finishing cream has been polished into the surface. Using the dry side or new Scotch-Brite pad, polish over the whole surface again to take off any final traces of Smartstone finishing cream. Finally, wipe over the Smartstone surface with a soft cotton cloth to remove any fibres left behind from the Scotch-Brite pad. If sanded and polished correctly the final finish should be a squeaky clean, blemish free eggshell finish. HOB AND SINK CUT-OUTS Tools and Equipment required 1. Router and cutters 2. Jig saw 3. Hand drill and 16mm bit 4. Straight edge guide for the router 5. Silicone sealant 6. Heat reflective tape 7. Safety glasses 8. Dust masks General When designing the worktop layout, never allow any joints to extend into cut-outs. The joint seams must be offset from all cut outs, dishwashers or other heat generating appliances by a minimum of 100mm. When machining cut-outs in the workshop, it is advisable to only partially machine out centrepieces as its total removal could subject the product to possible damage when transporting to site. 15
16 making life nice and easy HOB AND SINK CUT-OUTS The ideal method is to cut through the surface material into the core, to a depth of 35mm around the cut-out. Then take the router cutter through the final 5mm, at each corner and for about 100mm each side. The remaining 5mm of core material can be simply jig sawn on site, using a pencil line drawn between the corners on the underside. In order to avoid possible stress cracks in the corners of any cut out, all corners must be drilled using a drill bit no smaller than 8mm. Cut along the marked line with a jig saw between each of the drill holes making sure all four corners retain the drilled out curve. Radius the top edge on all sides of the cut-out to prevent stress cracks ocurring from rough jig saw edges using the radius cutter used for end-capping. Hob Cut-Outs Measure the overall dimensions of the hob and transfer these to the worksurface remembering to reduce the dimensions by approximately 10mm all round to allow the edges of the hob to sit securely onto the worksurface. (Do not mechanically fasten hobs directly into the Smartstone surface material). Prior to installing a hob, apply self adhesive aluminum heat reflective tape to all four sides of the cut-out, leaving an overhang to be folded over the surface and underside. Sink Cut-Outs As with any worksurface you must thoroughly seal the raw chipboard core with silicone to prevent moisture ingress. APPLIANCE PLACEMENT Its is recommended to plan the worksurface layout so that no joints are directly above an appliance. However, if this is unavoidable it is essential to apply the appliance heat reflective sheet to the underside of the worksurface to prevent any excess heat and moisture from effecting the joints. VERTICAL SURFACING Please note: Due to a difference in the manufacturing process, vertical and horizontal surfaces may differ slightly in shade. Check the shade of vertical and horizontal products together prior to any fabrication or installation as the manufacturer will not accept any responsibility for refit charges due to colour variance or sub standard fitting. For splashbacks and hob panels, apply the same technique used when measuring and machining hob and sink cut-outs. Make sure when cutting your splashback and hob panel you leave a clean, chip free edge. Sand and finish splashbacks and hob panels prior to vertical installation. Fix to the wall using panel adhesive. Do not bond splashbacks and upstands to the worksurface using Artis Smartstone seaming adhesive, always use silicone. Do not use 6mm splashbacks behind a gas hob - always use a 12mm modular splashback. 16
17 CARE AND MAINTENANCE making life nice and easy General Care Artis Smartstone is a member of the Solid Surface Family and like any solid surface material it requires sanding and polishing to create its final finish. The final finish should be a squeaky clean, blemish free eggshell finish which is smooth to the touch. The polish used by the installer is Smartstone finishing cream which is used in conjunction with a well balanced random orbital sander. The finishing cream on your Artis Smartstone worksurface is only surface deep and it is inevitable that day to day dulling will occur in areas that are regularly used. (Dulling is more visible on darker colours). Artis Smartstone requires a degree of simple regular maintenance. General daily care in preserving the beauty and functionality of Artis Smartstone is as simple as wiping with a warm damp cloth. Countertop Magic is a specially formulated solid surface cleaner and has been developed to deal with surface dulling and must be used once a day for the first 7 days after installation and once a week thereafter, which will preserve the lustre of your Artis Smartstone worksurface. Countertop Magic is available as part of the Smartstone Care and Maintenance Kit, and individual bottles are available from your retailer. If the Smartstone Care and Maintenance Kit has not been provided by the installer, contact your retailer who will be happy to assist. For minor scratches also refer to the Smartstone Care and Maintenance Kit provided by your Smartstone worksurface supplier. Do not leave spills on the surface for too long. (See above for general cleaning). For more stubborn stains always start by trying the gentlest methods. (Avoid using abrasive or harsh chemicals). Do not use the worksurface as a cutting board as this will scratch the surface and will blunt sharp knives. Always use a cutting board or worktop counter saver which can be obtained through your supplier. Minor cuts and scratches can be lightly sanded and re-polished. Deep scratches or impact damage can be repaired using a Smartstone Repair Kit. (Contact your supplier for advice). Never place hot pans/hot casserole dishes directly onto the worktop surface. Always use trivets or worktop counter savers to avoid marking or damaging the surface (available through your supplier). Do not allow pans to overhang the edge on gas hobs. Pans overhanging a gas hob can omit high temperatures into the Smartstone surface, drying the material causing shrinkage and cracking. Heat generating appliances or utensils should never be placed on the joints. When using a hob, make sure that hot pans do not come into direct contact with the splashback as this may discolour, crack or blister the product. 17
18 making life nice and easy TERMS AND CONDITIONS 1. Subject to the conditions set out below the Company warrants that the Product will be free from defects in material and workmanship for a period of 10 years from the date of delivery (the Warranty ), subject to the following conditions: 1.1 The company shall be under no liability in respect of any defect arising from the failure to fit the product in accordance with the Company s instructions; 1.2 The Company shall be under no liability to the extent that the same results from the buyer s failure to notify the Company of a defect as soon as reasonably practicable and in any event within 7 days of the buyer s becoming aware of such defect; 1.3 The Company shall be under no liability in respect of any defect arising from fair wear and tear, willful damage, negligence, abnormal conditions, misuse or alteration or repair of the Product without the Company s approval; 1.4 The Company shall be under no liability under the Warranty (or any other warranty, condition of guarantee) if the total price for the Product has not been paid by the due date for payment. 2. The Warranty shall extend to replacement of a Product which cannot (in the Company s sole discretion) be repaired and to the cost of repair of an existing Product or fitting a replacement for a Product. 3. The Warranty shall not extend to materials not manufactured by the Company, in respect of which the Buyer shall only be entitled to the benefit of any such warranty or guarantee as is given by the manufacturer to the Company. 4. All other warranties, conditions or other terms implied by statute or common law are excluded to the fullest extent permitted by law. 5. Any claim by the Buyer which is based on any defect in the quality of condition of the Product shall (whether or not delivery is refused by the buyer) be notified to the Company within 7 days from the date of delivery or (where the defect or failure was not apparent on reasonable inspection) as soon as reasonably practicable following discovery of the defect or failure. Except in respect of death or personal injury caused by the Company s negligence, the Company shall not be liable to the Buyer by reason of any representation (unless fraudulent), or any implied warranty, condition of other term, or any duty at common law, or under an express term, for any indirect, special or consequential loss or damage, costs, expenses or other claims for compensation whatsoever (whether caused by the negligence of the Company, its employees or agents or otherwise) which arise out of or in connection with the supply of the Product. 18
19 TOOLING AND EQUIPMENT making life nice and easy This document provides details of both products and suppliers of the materials needed to fabricate and install the Smartstone product. Other materials may be used but at this time the products listed below have been tried and tested. Tools and equipment required 1. Sanding tools 2. Sanding abrasives 3. Finishing system 4. Clamps 5. Imanol joint/edge cleaner 6. Heat reflective tape 7. Cutters Sanding Tools To finish Smartstone you will require a well balanced random orbital sander with extraction driven either by air or electric. It is recommended to use a 150mm-diameter pad. To assist in site work on residential properties it is advisable to use a sander that has extraction facilities. Tools can be supplied by most tooling companies but Mirka, Festool and SAL have approved and proven tooling. Sanding Abrasives Mirka 180 and 320 grit SAL 180, 240 and 320 grit Festool 80, 180, 240 and 320 grit NOTE 80 grit paper is only recommended as an alternative to an edge trimmer for bulk removal. Do not use this on the worktop surface. Finishing System After sanding use a grey Scotch-Brite pad reference Other pads are available for either matt or gloss finishes. Most sanding paper suppliers have their own version of Scotch-Brite pad. After using the Scotch-Brite pad add Smartstone finishing cream to the pad and finish both surface and edges. Clamps A clamps are a valuable tool when re-edging. These clamps can be purchased from your Smartstone supplier. 19
20 making life nice and easy TOOLING AND EQUIPMENT Imanol Joint/Edge Cleaner Imanol cleaner must be used to clean joints and edges before bonding. This product can be purchased from your Smartstone supplier. Heat Reflective Tape Heat reflective tape is needed within the hob cut-out as a heat deflector. This product can be purchased from your Smartstone supplier. Cutters If you chose to machine off the excess material when edging you will require a 12mm flush trimming cutter 19 x 25mm Titman BGT90LK and a 3mm radius profiling cutter Titman ROCB
21 TOOL AND ACCESSORIES SUPPLIERS making life nice and easy Festool Tools Sales Head Office (phone) Sales Head Office (fax) Technical Support North Technical Support South Sal Abrasives Sales Head Office (phone) Sales Head Office (fax) Mirka Abrasives Sales Head Office (phone) Sales Head Office (fax) M Abrasives Plc Sales Head Office (phone) Sales Head Office (fax)


22 making life nice and easy REPAIR PROCEDURE Artis Smartstone Repair Kits are made to order on request Contents: 1. Repair solution 2. Catalyst 3. Imanol joint/edge cleaner 4. Paper cups x 2 5. Wooden spatulas x 2 6. Instruction leaflet 1. Surface damage and deep scratches can be repaired using the Artis Smartstone Repair Kit. 2. Any loose chippings must be removed from the damaged area to allow the repair solution to adhere properly. Router around the damaged area to create a clean chip free edge. 3. Clean in and around the damaged area with a bleached white cloth dampened with Imanol joint/edge cleaner. 4. Make sure the area to be repaired is dry and free from dust before applying any repair solution. 5. Mix the repair solution in its original container making sure the particles are thoroughly mixed with the resin. Pour the repair solution into the paper cup up to the fill line and add 8 drops of the catalyst and mix the two together. Pour the mixed solution into the prepared area. 6. With the wooden spatula, gently tap into the solution to release any trapped air bubbles that may later cause problems when sanding. The solution should be now air free and slightly overlapping and proud of the prepared area. Leave for a minimum of five hours to cure. (If in doubt leave overnight). 7. Sand and polish the repaired area as instructed earlier in this manual or via the installation DVD Wipe over with a soft cloth to remove any particles left behind from the Scotch-Brite pad.


23 SMARTSTONE ACCESSORIES making life nice and easy Repair Kit Installation Kit Smartstone Finishing Cream (1 ltr) Gun and Adhesive Countertop Magic (extra to the aftercare kit) A Clamps Imanol Joint/Edge Cleaner Aftercare Kit Heat Reflective Tape 23

24 ARTIS smartstone making life nice and easy
All aspects of the installation of maia are also covered in a DVD that is available to view on-line at
 41405015530 41405015730 41405016130 41405015930 41405015520 41405015720 41405016120 41405015920 41405016520 41405016530 B All aspects of the installation of maia are also covered in a DVD that is available
EZYSTONE WORKSURFACES
 EZYSTONE WORKSURFACES Installation & Maintenance Instructions 1. Tools Required Worktop Edge Finishing Kit Pack 1-100mm Velcro Backing Pad Pack 2-100mm Diamond Dry Cut Velcro Discs (100 Grit Yellow) (200
solid surfaces for every room Mirostone fabrication and installation guidelines solid surface February 2018
 solid surfaces for every room fabrication and installation guidelines February 2018 solid surface fabrication and installation guidelines It is a condition of the limited warranty that the following supplementary
Contents. pages 20-24: Installing Edge sinks into. custom laminate countertops page 8: Installing Edge sinks into postform laminate countertops
 Contents pages 2-8: Installing Edge sinks into custom laminate countertops page 8: Installing Edge sinks into postform laminate countertops pages 9-14: Installing Acrylic sinks into custom laminate countertops
Rev. 05/16 01 ACRYLIC INSTALLATION GUIDE
 Rev. 05/16 01 ACRYLIC INSTALLATION GUIDE Contents 1.0 Inspection 3 2.0 Storage 3 3.0 Handling 3 4.0 Planning & Preparation 3 5.0 Panels 4 6.0 Accessories 4 7.0 Tools & Fixings 4 8.0 Fitting Tips 5 9.0
Installation Guide 1
 1 2 Contents Before you begin Storage & preparation Tools & materials you may need Getting started Sink & cooktop cut-outs Cabinet Joins for 20mm benchtops Joining & installation of 20mm benchtops Joining
INSTALLATION GUIDE VERSION 11/14
 INSTALLATION GUIDE VERSION 11/14 In this guide we will demonstrate effective techniques and methods for installing EDGE stainless steel sinks seamlessly in both laminate and solid surface. These techniques
Installation Guide. Pionite Decorative Surfaces One Pionite Road, Auburn, Maine PIONITE ( )
") Installation Guide A Subsidiary of Panolam Surface Systems SMPBRO00-012 6/14 Pionite decorative laminates are designed for finished interior surfaces which require high impact, wear and stain resistance
Installation Guide A Subsidiary of Panolam Surface Systems SMPBRO00-012 6/14 Pionite decorative laminates are designed for finished interior surfaces which require high impact, wear and stain resistance
MANUFACTURE GUIDELINES
 PRE-INSTALLATION CHECKS Ensure cabinets are fitted correctly and level prior to installing the Evostone work surface. It is a condition of the Evostone 10 year limited warranty that before any fabrication
SINKS AND LAVATORIES. Steps to completion: These items are essential for installing all sinks:
 DUPONT CORIAN SOLID SURFACE FABRICATION/INSTALLATION FUNDAMENTALS NA/ENGLISH SINKS AND LAVATORIES INTRODUCTION This bulletin discusses installing DuPont Corian solid surface sinks and lavatories. OVERVIEW
Solid Laminate Worktops Installation and Aftercare Instructions
 Solid Laminate Worktops Installation and Aftercare Instructions Introduction: Their solid composition makes solid laminate, also called compact laminate, worktops easy to install and maintain. A solid
BONDO PROCESS. Installation Guide.
 BONDO PROCESS Installation Guide www.karran.com BONDO PROCESS This Installation Guide demonstrates simple methods and proven techniques for seamlessly installing Karran undermount sinks in laminate countertops.
gold Solid surface worktops
 & Solid surface worktops Dakota Grain White Cloud Carrara Marble Choice Choose from either Pietra or Pietra Gold range 18 decors available to choose from 25mm Worktops in a choice of sizes All available
Titan Installation Instructions
 Titan Installation Instructions Introduction: This manual was written to cover the fabrication and installation of sink bowls and tub and shower surrounds in residential and commercial applications. As
Before you Begin... 3 Storage and preparation... 3 Tools & Materials You may Need... 4
 Installation Guide Installation Guide Contents INTRODUCTION... 2 Before you Begin... 3 Storage and preparation... 3 Tools & Materials You may Need... 4 Adhering your Think Solid benchtop to your cabinets
maia Installation, Care and Maintenance Manual Warranty Registration Document
 maia Installation, Care and Maintenance Manual Warranty Registration Document NB This leaflet must be left with the consumer after installation; guarantee and important maintenance information enclosed.
installation instructions
 evolve installation instructions Please inspect the product fully prior to cutting, jointing or installing, noting colour, texture and edge appearance. Any consequential fitting costs in reference to these
minerva F I T T I N G P E R F E C T I O N Installation, Care and Maintenance Manual Warranty Registration Document
 minerva R F I T T I N G P E R F E C T I O N Installation, Care and Maintenance Manual Warranty Registration Document NB THIS LEAFLET MUST BE LEFT WITH THE CONSUMER AFTER INSTALLATION; GUARANTEE AND IMPORTANT
WELDING. Section nine 9.1 CORRECT TOOLS
 Section nine 9.1 CORRECT TOOLS WELDING Polyflor strongly recommends vinyl sheet and 608mm vinyl tile floorings are welded, this includes the internal and external joints when the vinyl sheet is site cove
Installing your new Bevella Top. L Shaped Countertop with Joints No Finished Ends (Fits Between Four Walls)
") Installing your new Bevella Top L Shaped Countertop with Joints No Finished Ends (Fits Between Four Walls) Bevella RTI Countertops are engineered and manufactured to the highest quality standards, built
Installing your new Bevella Top L Shaped Countertop with Joints No Finished Ends (Fits Between Four Walls) Bevella RTI Countertops are engineered and manufactured to the highest quality standards, built
Installation Instructions
 www.marlite.com Effective Date 03/01/2018 ARTIZAN FRP, SYMMETRIX FRP, ENVUE FRP, STANDARD FRP Installation Instructions Statements expressed in this technical bulletin are recommendations for the application
Tools Required: Steps to completion:
 SEAMING Introduction This bulletin addresses seaming Corian Solid Surface. Overview High quality seams are essential to maximize the appearance and performance of Corian Solid Surface installations. Tight
Installation Instructions
 Please read all instructions before installing products. STORAGE: Keep crates in the upright position. When unpacking, store panels flat in a clean dry place. BEFORE INSTALLATION: Check for damage that
Retrofit Apron Front Farm Sink With Dual Mount Capability Installation Instructions
 For Under-Mount Installation please refer to page 14 FOR EXPERIENCED AND PROFESSIONAL INSTALLATION ONLY This installation project is designed for an advanced skill level. Disclaimer: Undermount Application
INSTALLATION INSTRUCTIONS. GetaCore Kitchen Worktops
 INSTALLATION INSTRUCTIONS GetaCore Kitchen Worktops INSTALLATION INSTRUCTIONS GetaCore Kitchen Worktops SAWING MILLING Before being cut, the solid surface material parts to be joined should be checked
Dubnium 11 Installation Instructions & Parts List
 Dubnium 11 Installation Instructions & Parts List Illustration Dubnium, H1 Handle Right Hand: Open Out Page 1 of 25 IMPORTANT This shower screen / enclosure must be installed by suitably qualified individuals.
CIRRUS AIRPLANE MAINTENANCE MANUAL MODELS SR22 AND SR22T CHAPTER 56-30: DOOR GENERAL. Door 56-30: DOOR. 1. General
 CIRRUS AIRPLANE MAINTENANCE MANUAL Door CHAPTER 56-30: DOOR GENERAL 56-30: DOOR 1. General The cabin door windows are manufactured of acrylic and adhesive bonded to the door structure. Replacement is accomplished
APOLLO MAGNA WORKTOPS INSTALLATION INSTRUCTIONS About Apollo Magna Worktops Apollo Magna Worktops
 www.sheridan-uk.com APOLLO MAGNA WORKTOPS INSTALLATION INSTRUCTIONS Apollo Magna Worktops Installing Apollo Magna Worktops is easy. If, for example, you have previously fitted a similar product then these
Installation, Care and Maintenance Manual Warranty Registration Document
 Installation, Care and Maintenance Manual Warranty Registration Document NB THIS LEAFLET MUST BE LEFT WITH THE CONSUMER AFTER INSTALLATION; GUARANTEE AND IMPORTANT MAINTENANCE INFORMATION ENCLOSED. All
Radon 07 Installation Instructions & Parts List
 Radon 07 Installation Instructions & Parts List Illustration Radon 07, H1 Handle Right Hand: Open Out 14/06/2016 Revision 1.1 Page 1 of 21 IMPORTANT This shower screen / enclosure must be installed by
Curium 19H Installation Instructions & Parts List
 Curium 19H Installation Instructions & Parts List Illustration Curium 19H Right Hand Page 1 of 15 01/07/2016 Revision 2.1 IMPORTANT This shower screen / enclosure must be installed by suitably qualified
Seamed Undermount Bowls
 CUTOUT TEMPLATES MAKING CUTOUT TEMPLATES 7.1 CUTOUT TEMPLATES The use of an accurate template is one of the most essential elements to the successful completion of a cutout in Corian. For the completion
installation instructions for solid surface wall panelling and worktops
 installation instructions for solid surface wall panelling and worktops product data Wall panel and upstand composition 5mm thick reinforced moulded acrylic. 2400 x 1200 x 5mm wall panels - weight, nominal
Curium 19.4H Installation Instructions & Parts List
 Curium 19.4H Installation Instructions & Parts List Illustration Curium 19.4H Right Hand Page 1 of 21 30/06/2016 Revision 1.0 IMPORTANT This shower screen / enclosure must be installed by suitably qualified
Fitted Furniture Installation and Aftercare Guide
 Fitted Furniture Installation and Aftercare Guide Customer Service Contact Number 08008 778899 Important Information In the unlikely event that your product is damaged or faulty in any way, this must be
QWALL 5.2 (2 Back Panels)
") QWALL 5. ( Back Panels) SHOWER ACRYLIC WALL INSTALLATION INSTRUCTIONS IMPORTANT DreamLine TM reserves the right to alter, modify or redesign products at any time without prior notice. For the latest up-to-date
QWALL 5. ( Back Panels) SHOWER ACRYLIC WALL INSTALLATION INSTRUCTIONS IMPORTANT DreamLine TM reserves the right to alter, modify or redesign products at any time without prior notice. For the latest up-to-date
WET AREA PANELLING. Designer Walls. Fast
 WET AREA PANELLING Designer Walls. Fast AU/a5 WallART Brochure_ART BUNNINGS.qxp_Layout 1 7/6/18 10:16 am Page 3 LINEAR SERIES WET AREA PANELLING Add a touch of class to your SHEET COLOURS home or workplace
Xenon 05 Installation Instructions & Parts List
 Xenon 05 Installation Instructions & Parts List Illustration Xenon 05, H1 Handle Left Hand: Open Out 26/05/2016 Revision 2.1 Page 1 of 19 IMPORTANT This shower screen / enclosure must be installed by suitably
KITCHEN INSTALLATION GUIDE
 KITCHEN INSTALLATION GUIDE The step-by-step guide to installing your new kitchen right The materials and tools you ll need This brochure is your guide to preparing and installing your new kitchen. Inside
Balustrade Systems / Installation Instructions
 A. PARTS AND SUPPLIES NEEDED FOR INSTALLATION Hardware included for each 10 section of rail: 2 3 x 1-1/2 L-brackets 4 1-3/4 x 3/16 Blue hex-head screws for anchoring the L-brackets to the newel cap, column
KITCHEN INSTALLATION GUIDE
 KITCHEN INSTALLATION GUIDE The step-by-step guide to installing your new kitchen right This brochure is your guide to preparing and installing your new kitchen. Inside you ll find tips and ideas, clear
UNIDOOR-X TUB DOOR TUB DOOR INSTALLATION NSTRUCTIONS. MODEL #s D58580-##
 T F UNIDOOR-X TUB DOOR se A R a e l re TUB DOOR INSTALLATION I NSTRUCTIONS r o D ved f IMPORTANT DreamLine reserves the right to alter, modify or redesign products at any time without prior notice. For
User Manual. CMT650 Kitchen Worktop Jig CMT Part no:
 User Manual CMT650 Kitchen Worktop Jig www.cmtuk.com Part no:200650 www.axminster.co.uk CMT650 Index of Contents... Page No. Index of Contents...02 What s in the Box.........03 What else you will need...
Extendable Large Dovetail Jig
 Extendable Large Dovetail Jig Instruction Manual Part # 3458 CAUTION: Please read, understand, and follow all manufacturers instructions, guidelines and owners manuals that come with your power tools.
ELEGANCE SHOWER DOOR/ENCLOSURE INSTALLATION INSTRUCTIONS. Style A Style B Style C Style D
 ELEGANCE SHOWER DOOR/ENCLOSURE INSTALLATION INSTRUCTIONS IMPORTANT DreamLine reserves the right to alter, modify or redesign products at any time without prior notice. For the latest up-to-date technical
Wet Area Panelling. Linear Series
 Wet Area Panelling Linear Series LINEAR SERIES WET AREA Add a touch of class to your home or workplace with the Linear Series, WallART s line of wet area panelling. With a striking range of colours and
INSTALLATION & CARE INSTRUCTIONS
 BUTCHER BLOCK COUNTERTOP INSTALLATION & CARE INSTRUCTIONS These instructions cover the installation of solid wood Butcher Block Countertops. Installing Butcher Block Countertops should only be undertaken
REPAIR. For safety purposes, it is best to fasten router to an oversized base plate made of plywood or 1 /4" (6 mm) Corian sheet.
 Corian sheet.") DUPONT CORIAN SOLID SURFACE FABRICATION/INSTALLATION FUNDAMENTALS NA/ENGLISH REPAIR INTRODUCTION This bulletin addresses the repair of damaged DuPont Corian solid surface installations. OVERVIEW Occasionally,
DUPONT CORIAN SOLID SURFACE FABRICATION/INSTALLATION FUNDAMENTALS NA/ENGLISH REPAIR INTRODUCTION This bulletin addresses the repair of damaged DuPont Corian solid surface installations. OVERVIEW Occasionally,
Step by Step Wing Bagging
 Step by Step Wing Bagging By Evan Shaw 073 589 9339 evanevshaw@gmail.com Preparing the Leading Edge 1. Cut cores. (Cutting of wing cores is covered in another article elsewhere) 2. Sand the LE to a nice
Handrail H Series. Product Installation. Instructions. Installation Instructions For. Wall Mounted and Freestanding Round Handrails
 Product Installation Installation Instructions For Instructions Handrail H Series Installation Instructions for Wall Mounted and Freestanding Round Handrails Step Nosing F Series Concrete and Timber Step
Build your own Drawer unit. D3 / D4
 Page1 Build your own Drawer unit. D3 / D4 1: Introduction. This guide will give you the plans, materials and how to information to build your own drawer unit. The dimensions given will fit a D3 or D4,
15 Dovetail Jig. Instruction Manual. Part # 3452
 15 Dovetail Jig Instruction Manual Part # 3452 CAUTION: Please read, understand, and follow all manufacturers instructions, guidelines and owners manuals that come with your power tools. Peachtree Woodworking
QWALL 4 ACRYLIC SHOWER WALL INSTALLATION INSTRUCTIONS
 QWALL 4 ACRYLIC SHOWER WALL INSTALLATION INSTRUCTIONS IMPORTANT DreamLine TM reserves the right to alter, modify or redesign products at any time without prior notice. For the latest up-to-date technical
Traditional Undermount: S Method (Undermount):
:") TOOLS REQUIRED 15.1 TOOLS REQUIRED The installation of Corian shape product must be a precise and exacting process to ensure that a good fit is always created. Using the correct tools is essential. In
TOOLS REQUIRED 15.1 TOOLS REQUIRED The installation of Corian shape product must be a precise and exacting process to ensure that a good fit is always created. Using the correct tools is essential. In
Splashback Installation Instructions
 Splashback Installation Instructions What is Akril? Akril is an Australian made environmentally friendly, highly engineered polymer, enhanced with colour. Quite simply, it offers a new source of design
Frameless Inline Door With Return QCI5263
 INSTALLATION INSTRUCTIONS Frameless Inline Door With Return QCI5263 WALL MOUNT HINGES FRAMELESS DOOR / PANEL / RETURN PANEL QCI5263 REV. 0 Page 1 Certified 06/17/2016 Parts List with wall mount hinges
PRODUCT: LOKI INSTALLATION INSTRUCTIONS. Product is covered by U.S. patents. For more information visit
 R INSTALLATION INSTRUCTIONS PRODUCT: LOKI CONFIGURATION: SINGLE DOOR MOUNT: GLASS MOUNT Product is covered by U.S. patents. For more information visit www.krownlab.com . TOOLS + MATERIALS REQUIRED TOOLS
Linda Barker Collection Heritage Collection Classic Collection INSTALLATION GUIDE
 Linda Barker Collection Heritage Collection Classic Collection INSTALLATION GUIDE Ruler Pencil Masking tape Measuring tape Silicone sealant & silicone gun Power drill & screwdriver High-grab adhesive Jig
Vanity Installation Instructions
 Vanity Installation Instructions Segments of these instructions will relate to your vanity. Please read these instructions thoroughly and ensure the appropriate instructions are used during the installation
ALLORA SWING PANEL INSTALLATION INSTRUCTIONS
 ALLORA SWING PANEL INSTALLATION INSTRUCTIONS Before Installation Please check that your Allora Swing Panel is undamaged SEQUENCE OF INSTALLATION These instructions are also available from the Athena website:
Gallium 03 Installation Instructions & Parts List
 Gallium 03 Installation Instructions & Parts List Illustration Gallium 03, H1 Handle Left Hand: Open Out 04/05/2016 Revision 1.1 Page 1 of 19 IMPORTANT This shower screen / enclosure must be installed
Install Instructions for Corvallis #4008GRC Mantel
 Install Instructions for Corvallis #4008GRC Mantel Please read this manual before installing the suite. This manual should remain with the homeowner. Updated 12/10/13 NOTE the installation requirements
How-to-Install. Laminate Countertops and Sheet Laminate. FREE brochure Reverso en español
 FREE brochure Reverso en español How-to-Install Laminate Countertops and Easy to install instructions provided inside Multiple colors available for unique design options Durable and easy to care for Accessory
QUARTZ FABRICATION MANUAL
 QUARTZ FABRICATION MANUAL Quartz Fabrication Manual Rev. 1 Page 1 of 26 TABLE OF CONTENTS Product Description. 3 Slab Inspection.. 4 Fabrication Equipment.. 6 FABRICATION TIPS Cutting The Slab. 7 General
UNIDOOR X (STYLE L1)
") UNIDOOR X (STYLE L) SHOWER DOOR & GLASS PANEL INSTALLATION INSTRUCTIONS IMPORTANT DreamLine reserves the right to alter, modify or redesign products at any time without prior notice. For the latest up-to-date
UNIDOOR X (STYLE L) SHOWER DOOR & GLASS PANEL INSTALLATION INSTRUCTIONS IMPORTANT DreamLine reserves the right to alter, modify or redesign products at any time without prior notice. For the latest up-to-date
Greenhouse Assembly Instructions
 Greenhouse Assembly Instructions Our Help Line provides support and advice to customers of Summer Garden Buildings after ordering. For advice before you buy you can phone us free 7 days a week on 0800
FRENCH LINEA PANEL SHOWER PANEL INSTALLATION INSTRUCTIONS
 FRENCH LINEA PANEL SHOWER PANEL INSTALLATION INSTRUCTIONS IMPORTANT DreamLine reserves the right to alter, modify or redesign products at any time without prior notice. For the latest up-to-date technical
PRIME SHOWER ENCLOSURE INSTALLATION INSTRUCTIONS
 PRIME SHOWER ENCLOSURE INSTALLATION INSTRUCTIONS IMPORTANT DreamLine reserves the right to alter, modify or redesign products at any time without prior notice. For the latest up-to-date technical drawings,
VANITY INSTALLATION INSTRUCTIONS
 VANITY INSTALLATION INSTRUCTIONS Congratulations and thank you for your purchase. These cabinets have been designed and assembled to a very high standard and if installed correctly will provide you with
CLASSIC RANGE PLUS RANGE PHOTO WALL. Pre-installation check-list
 CLASSIC RANGE PLUS RANGE PHOTO WALL The following is an installation guide for fitting Multipanel CLASSIC RANGE, PLUS RANGE, PHOTO WALL Jig saw or Hand saw Measuring Tape Ruler Pencil High-grab adhesive
APRON FRONT STAINLESS STEEL SINK Installation & Care Instructions
 Installation & Care Instructions FOR MODEL NUMBERS CA231132 CA231232 CA231235 CA231SB32 CA231SB35 CA231232 CA231132 RECOMMENDED TOOLS Tape Measure Safety Glasses Painter s Tape BEFORE YOU START CA231SB32
Make a cupboard as a BCATS
 National Certificate in Building, Construction, and Allied Trades Skills (BCATS) Make a cupboard as a BCATS project Unit Standard 25921 Level 2, Credit 6 Name: Contents Reference Page What you need to
340 & 350 SERIES DELUXE FRAMELESS BYPASS
 BATH ENCLOSURES An Alcoa Company Tel: 800-643-1514 Fax: 870-234-3181 www.alumaxbath.com INSTALLATION INSTRUCTIONS 340 & 350 SERIES DELUXE FRAMELESS BYPASS BATH ENCLOSURES Copyright Alumax Bath Enclosures
60 DIRECT-TO-STUD SHOWER WALL SET
 60 DIRECT-TO-STUD SHOWER WALL SET 60 X 30 MODEL # DKW6008-XX 60 X 32 MODEL # DKW6028-XX 60 X 36 MODEL # DKW6068-XX Unit consists of Model DB608-XX Backwall, and requires one of the following Side Panel
MIRAGE-X / BELLA. Shower Door Installation Instructions
 MIRAGE-X / BELLA Shower Door Installation Instructions IMPORTANT DreamLine reserves the right to alter, modify or redesign products at any time without prior notice. For the latest up-to-date technical
INSTALLATION INSTRUCTIONS FRAMELESS CONTINUOUS HINGE SHOWER ENCLOSURE QCI5233
 INSTALLATION INSTRUCTIONS FRAMELESS CONTINUOUS HINGE SHOWER ENCLOSURE QCI5233 QCI5233 Rev 0 Page 1 Certified 06/20/2016 INSTALLATION NOTES: Unpack your unit carefully and inspect for freight damage. Lay
Instructables Butcher Block Top
 Instructables Butcher Block Top Project Overview: This project requires basic woodworking skills and access to woodworking machines. Woodworking machines have sharp cutting edges and are NOT forgiving.
340 & 350 SERIES BATH ENCLOSURES
 INSTALLATION INSTRUCTIONS 340 & 350 SERIES BATH ENCLOSURES 800-643-1514 www.alumaxbath.com Copyright Alumax Bath Enclosures 2010. All rights reserved. LIMITED WARRANTY AND REMEDY ALUMAX BATH ENCLOSURES
GENERAL FITTING INSTRUCTIONS FITTED
 G07V1.1 U K GENERAL FITTING INSTRUCTIONS FITTED Important : Unpack the units carefully ensuring not to scratch them with the knife blade. Inspect every item carefully before installation as no claim for
VIEWpanel Technical Manual
 VIEWpanel Technical Manual VIEWpanel is a prefabricated panel comprising 0.21 aluminium skin (1100 alloy) both sides, apart from our lite grade, which is 0.12 aluminium skin both sides and a polyethylene
RECOMMENED TOOLS FOR MACHINING COUNTERTOPS
 Fabrication Manual RECOMMENED TOOLS FOR MACHINING COUNTERTOPS 1. Blades a) Segmented blade for porcelain. 4. Polishing Discs a) Silicon Carbide velcro discs for dry use. Grit 60, 120, 220, 400. 2. Grinding
DURACRYL WALL INDEX INTRODUCTION. TOOLS AND MATERIALS REQUIRED. FLAT SHOWER WALL SIDE CONTOUR SHOWER WALL CORNER CONTOUR SHOWER WALL FLAT BATH WALL
 DURACRYL WALL FLAT SHOWER WALL SIDE CONTOUR SHOWER WALL CORNER CONTOUR SHOWER WALL FLAT BATH WALL INSTALLATION GUIDE INDEX PAGES Introduction 1 Tools and materials 1-2 Construction requirements - timber
VITREO X SHOWER / TUB DOOR INSTALLATION INSTRUCTIONS
 VITREO X SHOWER / TUB DOOR INSTALLATION INSTRUCTIONS IMPORTANT DreamLine reserves the right to alter, modify or redesign products at any time without prior notice. For the latest up-to-date technical drawings,
Instructions for use: 650mm, 700mm & 1000mm Versions.
 Instructions for use: 650mm, 700mm & 1000mm Versions. These New Compact Multifunction jigs offer all the cuts & facilities as the larger traditional worktop jigs. The compact design make them very light
INSTALLA- INSTALLATION. A guide to install a new IKEA kitchen
 A guide to install a new IKEA kitchen INSTALLA- INSTALLATION TION GUIDE GUIDE This guide provides you with tips and step-by-step instructions on how to install your kitchen on your own. Printed on: 06/2018
Steele TV Stand Stock # BH
 LOT NUMBER: DATE PURCHASED: / / Steele TV Stand Stock # BH46-084-899-02 ADULT ASSEMBLY REQUIRED If you have any questions regarding assembly or if parts are missing, DO NOT return this item to the store
Frameless Inline Door QCI5248
 INSTALLATION INSTRUCTIONS Frameless Inline Door QCI5248 FRAMELESS PANEL / DOOR / PANEL QCI5248 REV. 0 Page 1 Certified 06/16/2016 Parts List with glass to glass hinges *Quantities may vary. **Support Bar
CAVALIER. Shower Door Installation Instructions
 CAVALIER Shower Door Installation Instructions IMPORTANT DreamLine reserves the right to alter, modify or redesign products at any time without prior notice. For the latest up-to-date technical drawings,
Flexicryl Splashback Installation Guide Easy DIY Add a Pop of Colour!
 Flexicryl Splashback Installation Guide Easy DIY Add a Pop of Colour! Product Information - 4mm High Gloss Flexicryl Splashback Panels - Hard-co-extruded surface for hygienic clean sustaining daily use
INSTALLATION AND CUSTOMER CARE INFORMATION FOR SC FREESTANDING STERILIZATION CENTERS
 INSTALLATION AND CUSTOMER CARE INFORMATION FOR SC144-200 FREESTANDING STERILIZATION CENTERS General Information: Many Artizan Design Free-standing Sterilization Centers are custom designed and built to
Repairs. Chapter 10 Repairs 10. 1
 10 Repairs Chapter 10 Repairs 10. 1 Repairs As an installer, you will probably be called upon to repair damage to a resilient floor. Here are some of the most common problems and the recommended repairs
multipanel Installation (panels) CONTENTS
 CONTENTS") multipanel Installation (panels) The following is an installation guide for fitting multipanel to walls, tiles, plaster, chipboard or concrete. A separate guide is available for fitting multipanel shower
multipanel Installation (panels) The following is an installation guide for fitting multipanel to walls, tiles, plaster, chipboard or concrete. A separate guide is available for fitting multipanel shower
Gardman Lean-to Greenhouse Assembly Instructions
 Page 1 Gardman Lean-to Greenhouse Assembly Instructions Our Help Line provides support and advice to customers of Summer Garden Buildings after ordering. For advice before you buy you can phone us free
Hinge Door + Side Panel
 Hinge Door + Side Panel Instruction Manual KL+ KR Important Information Toughened glass is completely safe for use in our shower enclosures and bath screens; providing our products are installed according
B A T H R O O M G L A S S
 mistley B A T H R O O M G L A S S vaug16 Page 2 Thank you for purchasing this Trinity shower screen. Please study these instructions carefully before assembly and installation and check all supplied parts
tile redi redi DOOR Redi Redi Swing Slide g TM TM...Opening Doors to Stunning Showers! TM TM SERIES: CONFIGURATION: MOUNTING PACKAGE:
 redi DOOR INSTALLATION INSTRUCTIONS tile redi Redi Redi Swing Slide g TM TM...Opening Doors to Stunning Showers! TM TM SERIES: CONFIGURATION: MOUNTING PACKAGE: 1100 Door-Door Framed sliding doors RDQCI5023
INFINITY-Z SHOWER DOOR / TUB DOOR INSTALLATION INSTRUCTION. MODEL #s 01-Chrome
 INFINITY-Z SHOWER DOOR / TUB DOOR INSTALLATION INSTRUCTION IMPORTANT DreamLine reserves the right to alter, modify or redesign products at any time without prior notice. For the latest up-to-date technical
Aluminum Clad Wood Window 1/2 Reinforced Field Mulling and Stacking Supplement
 Aluminum Clad Wood Window 1/2 Reinforced Field Mulling and Stacking Supplement 1 Aluminum Clad Wood Window 1/2 Reinforced Field Mulling and Stacking Supplement The following instructions are a supplement
ColorCore Laminate: Fabrication
 ColorCore Laminate: Fabrication Formica ColorCore is a high quality surfacing material. Most of the conventional tools, machines and methods used in the fabrication of normal laminates apply, but some
Install Instructions. SCR-48N Crash Rail. Please read these instructions thoroughly prior to beginning the SCR-48N Crash Rail installation!
 Please read these instructions thoroughly prior to beginning the installation! This instruction sheet is intended to provide a specific guide to follow for the installation of this. Contained within is