INSTRUCTION MANUAL. X-Wedge for LX200 and LX600 telescopes _07028_XWedge_InstructionManual.indd 1
|
|
|
- Alexina Potter
- 6 years ago
- Views:
Transcription

1 INSTRUCTION MANUAL X-Wedge for LX200 and LX600 telescopes _07028_XWedge_InstructionManual.indd 1 8/8/ :07:49 AM


 and washers (3) 6 Tangent arm (1) and connecting 8-32 hex screws (2) 8 4 1!")
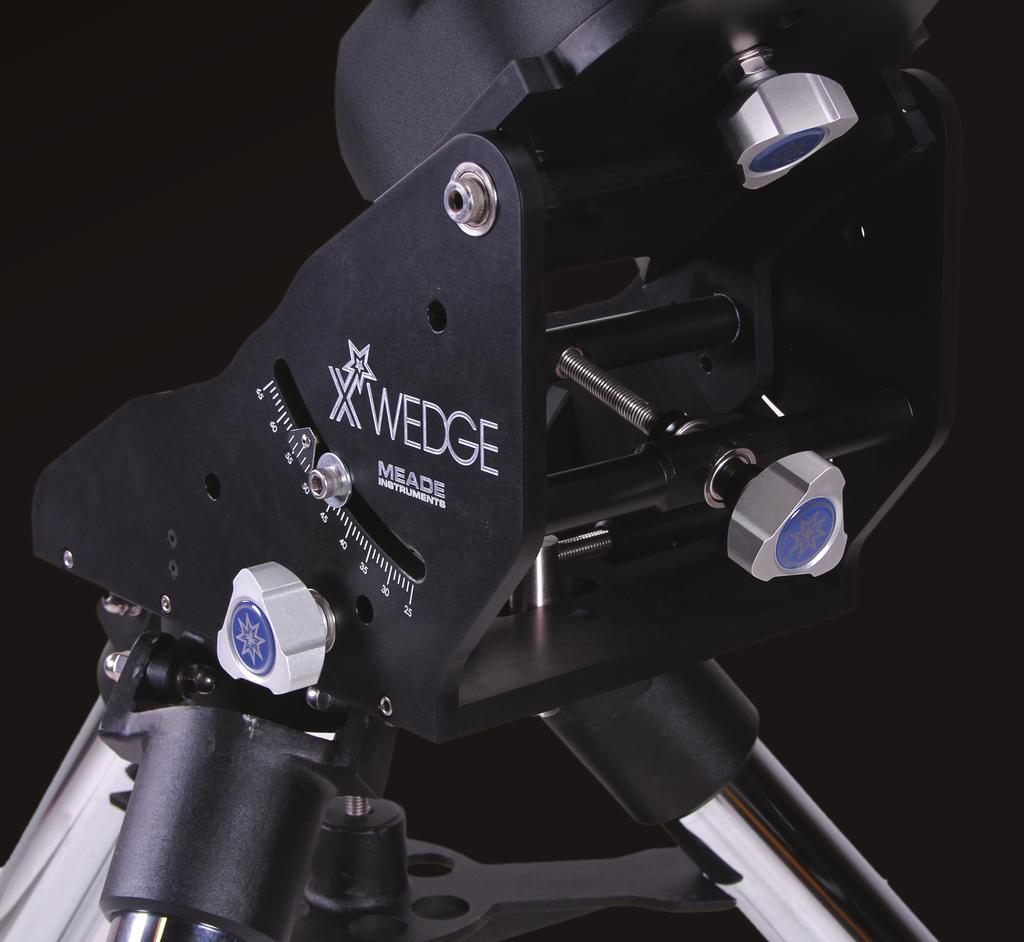
 Tilt-plate; (2) Mounting slot at top of tilt plate; (3) Latitude lock screw (one on each side); (4) Vernier pointer; (5) Latitude Scale;")
 Center bolt hole. X-Wedge Assembly The required wedge hardware is shipped within the wedge carton (Fig. A). 1.")

2 X-Wedge AutoStar Instruction #497 HANDBOX Manual X-WEDGE OPERATING MANUAL This Meade X-Wedge is designed for use with the Meade Giant Field Tripod. 2 Center mounting bolt (1) and washer (1) Warning: If the telescope is placed on the wedge without the field tripod attached to it, the wedge will be seriously overbalanced and the telescope could tip over Hex wrenches (3) 4 3/8" hex screws (3) and washers (3) 3 Threaded rod cap (1) and threaded rod sleeve insert (1) Figure A. Hardware kit for the X-Wedge /16" hex screws (3) and washers (3) 6 Tangent arm (1) and connecting 8-32 hex screws (2) 8 4 1! Figure C. Parts of the X-Wedge. (1) Tilt-plate; (2) Mounting slot at top of tilt plate; (3) Latitude lock screw (one on each side); (4) Vernier pointer; (5) Latitude Scale; (6) Azimuth Control Knob; (7) Wedge Body; (8) Plate center hole; (9) Latitude control screw (adjustment knob not shown); (10) Mounting slots; (11) Center bolt hole. X-Wedge Assembly The required wedge hardware is shipped within the wedge carton (Fig. A). 1. Locate the two 8-32 hex screws and the tangent arm (Fig. A, 6) Tripod Head 2 Threaded Rod 3 T-handle Tension Knob 4 Spreader 5 Leg Lock Knobs 6 Extension Strut 7 Tension Hub 8 Retaining clip (not visible) Figure B. Fully assembled tripod. The X-Wedge instructions are written for use with either the Meade Standard Field or Giant Field Tripod. The assembly procedure requires two people who can lift about 55 pounds each. Figure D. Attach the tangent arm with the flat surface facing up Attach the tangent arm to the tripod using the supplied 8-32 hex screws. Note: the flat surface of the tangent arm should face upwards (Fig. D).
. 4. Push the tripod threaded rod (Fig.")
.")


 pass the hex screws through the oval slots on the wedge floor and thread them into the tripod head (Fig. G). 8. The latitude lock screw (Fig.")
3 Azimuth thrust bar pin Figure E. The azimuth thrust bar pin positioned in the tangent arm. 3. Place the wedge on the tripod head, sliding the azimuth thrust bar pin into the tangent arm slot (Fig. E). 4. Push the tripod threaded rod (Fig. B, 2) up so that the rod extends through the X-Wedge plate center hole (Fig C, 8). 5. Screw the threaded rod insert onto the threaded rod until it is seated firmly on the X-Wedge base plate, fitted in plate center hole (Fig. F). Figure G. X-Wedge with threaded rod cap and 5/16" hex screws secured. 65, unthread the lock screw with the supplied hex key wrench and move the screw to the optional mounting hole. Latitude lock screw (in 25 to 57 position Latitude lock screw hole for 32 to 65 X-Wedge Instruction Manual Figure H. Latitude screw with multiple lock screw positions. Figure F. The Threaded rod insert properly positioned on the threaded rod and X-Wedge base plate. 6. Align the tripod spreader bar with the tripod legs as shown in Fig, B. Tighten the tripod t-handle tension knob to a snug fit. Screw the threaded rod cap onto the end of the threaded rod. 7. Using the three 5/16" hex screws and washers (Fig. A, 5) pass the hex screws through the oval slots on the wedge floor and thread them into the tripod head (Fig. G). 8. The latitude lock screw (Fig. H) is installed at the factory to allow the tilt plate to be adjusted for any latitude greater than 25 and less than 57. If viewing in a region with a latitude from 57 to Mounting the Telescope on the X-Wedge 1. Thread one of the provided 3/8" hex screws into the hole on the underside of the telescope drive base. The desired hole is located at the curved Figure I. Attach one of the 3/8" hex screws to the curved part of the telescope drive base. 2


4 X-Wedge AutoStar Instruction #497 HANDBOX Manual end of the telescope drive base (see Fig. I). Be sure to leave approx, 3/4" of the screw exposed to allow for clearance of the wedge tilt plate. 2. Grasp the two fork arms of the telescope firmly, with the control panel toward the floor, place the telescope onto the wedge tilt plate (Fig. A, 1) by sliding the mounting screw on the telescope base into the slot at the top tilt plate (Fig. J). 3. Insert the center mounting bolt (Fig. K) through not overtighten. The telescope is now fully mounted onto the wedge and field Figure L. Use the provided hex wrench to secure the three 3/8" hex screws into the telescope drive base. tripod. Adjustments in wedge latitude angle and/or azimuth orientation may be made with the telescope in place. Figure J. The telescope drive base placed on the X-Wedge tilt plate. the center of the underside of the tilt plate and into the underside of the drive base. Firmly tighten the bolt. Do not overtighten. Note: It is important to insert the center mounting bolt into the wedge-telescope assembly. The center mounting bolt insures the precise pointing accuracy of the X-Wedge. 4. Insert the two remaining 3/8" hex screws Setting the Observing Latitude Look up the latitude of the desired observing site (most road maps show latitude lines). Then, loosen the latitude lock screws (Fig. C, 3) and rotate the fine latitude control knob (Fig. C, 9) while reading the latitude scale (Fig. C, 5). The latitude pointer is a vernier scale (Fig. C, 4) which will allow the tilt angle to be set to within When the tilt plate is aligned with the desired latitude, tighten the latitude locking screws. Aligning on Polaris Begin aligning the telescope by locating Polaris. Finding Polaris is simple. Most people recognize the Big Dipper. The Big Dipper has two stars that point the way. Polaris is the last star in the handle of the Little Dipper (Fig. M). Once you have located Polaris in the sky, orient your telescope Figure K. Attaching the center mounting bolt. 3 through the underside of the tilt plate (Fig. L) and into the underside of the drive base. Firmly tighten all three 3/8" hex screws at this time. Do Fig. M. Locating Polaris

.")
5 so that the control panel faces north (towards Polaris). You may need to pick-up and rotate the telescope on its tripod to achieve this orientation. The telescope and X-Wedge are now pointing very near to the celestial north. Loosen the DEC lock, rotate the OTA so that it is 90 degrees to the base (pointing towards Polaris) and then relock the DEC. If you were to have performed this maneuver perfectly, you would be able to see Polaris through the finder scope (make sure that you aligned the finderscope to the OTA). If you cannot, rotate the entire telescope/tripod assembly until you can. You are now ready to perform one of the AutoStar equatorial alignment procedures. Consult your telescope s instruction manual for exact details. Aligning the Magnetic Compass With the aid of the magnetic compass, a telescope can be polar aligned in locations where the view of Polaris is obstructed or even before the skies get dark. The compass face has an angular scale from 0 to 360 degrees which will be useful in adjusting for the local angle of Magnetic Declination the difference between Magnetic North (which the compass shows) and true north (where the telescope should be pointed). Note: Magnetic Declination should not be confused with the astronomical term Declination which, when used with Right Ascension, describes the celestial coordinate system. 1. Setting Magnetic Declination: a. In order to obtain an accurate reading using the compass, you first need to determine the Magnetic Declination of the observing area by referring to the Magnetic Declination Map (Fig O). Locate this value on the compass face for future reference. Figure N. Compass level placed on the X-Wedge. of the X-Wedge as shown in Fig N. Verify the compass is still pointing toward Magnetic North and the bubble level is properly centered. If the bubble is not centered, adjust the tripod legs until centered. 2. Finding True North: The magnetic compass is now ready for use. Follow these simple steps for a quick and easy azimuth alignment. a. Slightly loosen the three 5/16" hex screws in the wedge floor to allow for rotation of the X-Wedge. b. Using the Azimuth Control Knob (Fig C, 6), manually adjust the X-wedge around the X-Wedge Instruction Manual NOTE: East Magnetic Declination means True North is to the right of the Magnetic North position and West Magnetic Declination means True North is left of the Magnetic North position. For example, Fig. O shows the correct setting for 13.5 East Declination which covers Irvine, CA. The compass scale markings range from 0 to 360 degrees azimuth so for East Magnetic Declinations subtract the East Magnetic Declination value from 360 to obtain the correct reference mark on the compass face. b. While holding the compass, rotate it so the red compass arrow points in the direction of Magnetic North. The arrow should be directly over the "N" marking on the compass face. c. Now place the compass onto the flat base Figure O. Compass bearing adjusted for Irvine, CA's magnetic declination. 4
6 X-Wedge AutoStar Instruction #497 HANDBOX Manual threaded rod (without moving the compass) until the red compass arrow points toward the observing sites Magnetic Declination found in step 1. c. Tighten the t-handle tension knob, locking the X-Wedge into place. d. Retighten the 5/16" hex screws on the wedge floor. Do not over tighten. The tripod and X-Wedge are now pointed very near celestial north and ready to run one of the alignment procedures. 5
7 X-Wedge Instruction Manual Figure P. Magnetic declination map of North America. 6
8 AutoStar X-Wedge #497 HANDBOX Manual MEADE LIMITED WARRANTY Every Meade telescope, spotting scope, and telescope accessory is warranted by Meade Instruments Corp. ( Meade ) to be free of defects in materials and workmanship for a period of ONE YEAR from the date of original purchase in the U.S.A. and Canada. Meade will repair or replace a product, or part thereof, found by Meade to be defective, provided the defective part is returned to Meade, freightprepaid, with proof of purchase. This warranty applies to the original purchaser only and is non-transferable. Meade products purchased outside North America are not included in this warranty, but are covered under separate warranties issued by Meade international distributors. RGA Number Required: Prior to the return of any product or part, a Return Goods Authorization (RGA) number must be obtained from Meade by writing, or calling (800) Each returned part or product must include a written statement detailing the nature of the claimed defect, as well as the owner s name, address, and phone number. This warranty is not valid in cases where the product has been abused or mishandled, where unauthorized repairs have been attempted or performed, or where depreciation of the product is due to normal wear-and-tear. Meade specifically disclaims special, indirect, or consequential damages or lost profit which may result from a breach of this warranty. Any implied warranties which cannot be disclaimed are hereby limited to a term of one year from the date of original retail purchase. This warranty gives you specific rights. You may have other rights which vary from state to state. Meade reserves the right to change product specifications or to discontinue products without notice. Meade Instruments Corp. 27 Hubble Irvine, CA Follow us on facebook and twitter for updates.
INSTALLATION INSTRUCTIONS
 CREATING POSITIVE CUSTOMER EXPERIENCES INSTALLATION INSTRUCTIONS Universal Low Profile Tilt Mount for 42 to 63 Flat Panels NORTH AMERICA 3130 East Miraloma Avenue Anaheim, CA 92806 USA USA and Canada Phone:
Hollywood Swing Away 2 and 4 Bike Racks Assembly and Installation Guide
 Hollywood Swing Away 2 and 4 Bike Racks Assembly and Installation Guide Tools Required: two adjustable wrenches, pliers, ¾ socket wrench recommended Note: please do assembly near your vehicle as you Can
INSTALLATION INSTRUCTIONS
 INSTALLATION INSTRUCTIONS Universal Swingout Arm Model: AM300/AM300-B NORTH AMERICA 3130 East Miraloma Avenue Anaheim, CA 92806 USA USA and Canada Phone: 1.800.368.9700 Fax: 1.800.832.4888 Other Locations
INSTALLATION INSTRUCTIONS
 INSTALLATION INSTRUCTIONS Universal Low Profile Tilt Mount Model: U.S. Toll Free: 1-866-752-6271 Outside N. America: 1-503-748-5799 E-mail: ts@planar.com FRANCE Phone: +33 5 6378 3810 E-mail: emeats@planar.com
Tilting Flat Panel Wall Mount Installation Guide
 Tilting Flat Panel Wall Mount Installation Guide Model: A580TM Easy installation Built-in level for easy positioning Safety bolts lock the TV on the mount Easy to adjust tilt angles: +5 to -15 degrees
Tilting, Swiveling & Rotating Flat Panel Wall Mount
 Tilting, Swiveling & Rotating Flat Panel Wall Mount Model: VXA980TC +5 to -5 +5 to -5 Supports most 0-80 Flat Panel TVs Maximum Weight Capacity: 32 lbs. Supports VESA Sizes up to 600x500 For technical
INSTALLATION INSTRUCTIONS
 INSTALLATION INSTRUCTIONS P4263F Universal Low Profi le Flat Mount for 42 to 63 Flat Panels NORTH AMERICA 3130 East Miraloma Avenue Anaheim, CA 92806 USA USA and Canada Phone: 1.800.368.9700 Fax: 1.800.832.4888
INSTALLATION INSTRUCTIONS
 INSTALLATION INSTRUCTIONS Universal Low Profile Flat Mount Model: U.S. Toll Free: 1-866-752-6271 Outside N. America: 1-503-748-5799 E-mail: ts@planar.com FRANCE Phone: +33 5 6378 3810 E-mail: emeats@planar.com
Graysen Manager s Chair Model # WC-666
 LOT NUMBER: DATE PURCHASED: / / Graysen Manager s Chair ADULT ASSEMBLY REQUIRED DUE TO THE PRESENCE OF SMALL PARTS, SHARP POINTS, SHARP EDGES AS RECEIVED. If you have any questions regarding assembly or
STRINGING MACHINE OWNER'S MANUAL. Copyright 1998 GAMMA Sports - All Rights Reserved
 6002 STRINGING MACHINE OWNER'S MANUAL Issue 3 - June 20, 1998 Copyright 1998 GAMMA Sports - All Rights Reserved 6002 OWNER'S MANUAL TABLE OF CONTENTS PAGE 1... WARRANTY PAGE 2... FEATURES PAGE 3... ASSEMBLY
Starizona CGEM Landing Pad
 Starizona CGEM Landing Pad The Starizona CGEM Landing Pad is designed to make setting up and polar aligning a Celestron CGEM or CGEM DX equatorial mount much simpler. The Landing Pad can remain attached
INSTALLATION INSTRUCTIONS
 INSTALLATION INSTRUCTIONS Polaris Universal Projector Mount Model: NORTH AMERICA 1321 S. State College Blvd. Fullerton, CA 92831 USA USA and Canada Phone: 1.800.368.9700 Fax: 1.800.832.4888 Other Locations
Tilting & Swiveling Plasma/LCD Flat Panel Wall Mount Installation Guide Model: A380SM
 Tilting & Swiveling Plasma/LCD Flat Panel Wall Mount Installation Guide Model: A380SM Easy installation Built-in level for easy positioning Corrective leveling adjustments after installation Forward /
OWNER S MANUAL. Safety. Please read this owner s manual before use and keep it at hand for reference. Warranty
 Please read this owner s manual before use and keep it at hand for reference. OWNER S MANUAL Safety Important safety instructions for using the INCRA Miter5000 Before using the INCRA Miter5000, read and
Models 2230 and 2240
 Models 2230 and 2240 Overview... 2 Tools Needed... 2 Hardware...3 Assembly... 4-13 Installation... 14 Drawer Removal... 15 Operation... 15 Maintenance... 15 Accessories... 16 Limited Warranty... 16 Perform
INSTALLATION INSTRUCTIONS
 INSTALLATION INSTRUCTIONS Universal Short Throw Projector Arm Model: UNI-STA/UNI-EXT NORTH AMERICA 3130 East Miraloma Avenue Anaheim, CA 92806 USA USA and Canada Phone: 1-800-368-9700 Fax: 1-800-832-4888
INSTALLATION INSTRUCTIONS
 CREATING POSITIVE CUSTOMER EXPERIENCES INSTALLATION INSTRUCTIONS PDS-PLUS Universal Projector Mount Model: NORTH AMERICA 3130 East Miraloma Avenue Anaheim, CA 92806 USA USA and Canada Phone: 1.800.368.9700
NOVA-EXT Versatile Projector Mount Model: NOVA-EXT
 INSTALLATION MANUAL NOVA-EXT Versatile Projector Mount Model: NOVA-EXT NORTH AMERICA 3130 East Miraloma Avenue Anaheim, CA 92806 USA USA and Canada Phone: 800-368-9700 Fax: 800-832-4888 Other Locations
OWNER S MANUAL FLOATING DUST COLLECTION GUARD MODEL TSG-FDC
 OWNER S MANUAL FLOATING DUST COLLECTION GUARD MODEL TSG-FDC Copyright SawStop, LLC All Rights Reserved 2nd printing, November 2017 Updates of this manual may be available at www.sawstop.com The saw shown
INSTALLATION INSTRUCTIONS
 INSTALLATION INSTRUCTIONS Universal Swingout Arm for 37 to 47 Flat Panels Model: AM80 NORTH AMERICA 3130 East Miraloma Avenue Anaheim, CA 92806 USA USA and Canada Phone: 1-800-368-9700 Fax: 1-800-832-4888
3/8-16 x 3/4 cap screw. 3/8-16 hex nut for above screws. 1/4-20 x 3/4 socket cap screw. 3/16 short arm hex key (not to scale)
") Super Slab Roller 24, 30 and 36 models Worktable Assembly Directions P.O. Box 89 Cheney, WA 99004 USA 509.235.9200/800.23.7896 Fax: 509.235.9203 www.northstarequipment.com Revised September, 2006. All
Super Slab Roller 24, 30 and 36 models Worktable Assembly Directions P.O. Box 89 Cheney, WA 99004 USA 509.235.9200/800.23.7896 Fax: 509.235.9203 www.northstarequipment.com Revised September, 2006. All
OWNER S MANUAL Table Tennis Table Patent Pending
 OWNER S MANUAL Table Tennis Table Patent Pending Be sure to write your model number and serial number here for future reference. You can find these numbers printed on the bottom of the table. MODEL # T8266
RITE-HITE RAINGUARD TM
 RITE-HITE RAINGUARD TM RG-3000 Trailer Top Seal Installation Instructions & Owner s Manual Date of Installation: This Manual Covers All Units Shipped 8/04 to Date PRINTED IN U.S.A. PUBLICATION NO. RG30-0010
Installation Instructions PP-FCMA
 Installation Instructions PP-FCMA Step 1 Carefully remove a 24 (610mm)x48 (1120mm) or two 24 (610mm)x24 (610mm) suspended ceiling tiles. Step 2 Install the four (4) each ¼ x3 eye bolts securely into the
Please Do Not Return This Product To The Store!
 MODEL NOS. T8512 TOURNAMENT SERIES 3 TABLE TENNIS TABLE OWNER'S MANUAL 1. Read this manual carefully before starting assembly. Read each step completely before beginning each step. 2. Some smaller parts
INSTALLATION INSTRUCTIONS
 INSTALLATION INSTRUCTIONS AM2 / AM2-B Articulating Swingout Arm NORTH AMERICA 3130 East Miraloma Avenue Anaheim, CA 92806 USA USA and Canada Phone: 1.800.368.9700 Fax: 1.800.832.4888 Other Locations Phone:
SawStop. Contractor Fence Assembly OWNER S MANUAL. Model CNS-SFA
 Contractor Fence Assembly OWNER S MANUAL Model CNS-SFA Warranty warrants to the original retail purchaser of the Contractor Fence Assembly accompanying this manual that the fence assembly will be free
INSTALL INSTRUCTIONS WELCOME TO THE NEWAGE PERFORMANCE CABINETRY SERIES NEWAGE STEEL WELDED CABINETRY
 NEWAGE STEEL WELDED CABINETRY WELCOME TO THE NEWAGE PERFORMANCE CABINETRY SERIES ALL CABINETS MUST BE MOUNTED TO STUDS ON A SECURE WALL, AS PER THESE INSTRUCTIONS. FAILURE TO DO SO MAY RESULT IN SERIOUS
Assembly Instructions and Parts Manual JPSF-1 Fence and JPSR Rail Set
 Assembly Instructions and Parts Manual JPSF-1 Fence and JPSR Rail Set WALTER MEIER (Manufacturing) Inc. 427 New Sanford Road LaVergne, Tennessee 37086 Part No. M-708482 Ph.: 800-274-6848 Revision C2 02/2013
INSTALLATION INSTRUCTIONS
 INSTALLATION INSTRUCTIONS Premier Mounts Tilting Wall Mount Model: TWM-085 For use with Panasonic 85 Flat Panel NORTH AMERICA 3130 East Miraloma Avenue Anaheim, CA 92806 USA USA and Canada Phone: 1.800.368.9700
INSTALLATION INSTRUCTIONS
 INSTALLATION INSTRUCTIONS CTM-MS1 Flat Panel Display Mount (26 to 37 ) NORTH AMERICA 3130 East Miraloma Avenue Anaheim, CA 92806 USA USA and Canada Phone: 800-368-9700 Fax: 800-832-4888 Other Locations
SawStop. T-GlideTM. Fence System- Professional Series II OWNER S MANUAL
 SawStop T-GlideTM Fence System- Professional Series II OWNER S MANUAL Warranty SawStop warrants to the original retail purchaser of a new T-Glide Fence System - Professional Series II from an authorized
Installation and Assembly: Articulating Swivel Arm for 37" - 60" Flat Panel Displays
 Installation and Assembly: Articulating Swivel Arm for 37" - 60" Flat Panel Displays Models: PLA60, PLA60-S, PLAV60, PLAV60-S Max UL Load Capacity: 175 lb (79 kg) 2300 White Oak Circle Aurora, Il 60502
RBP-1215B-RX DODGE RAM QUAD CAB RX3
 RBP-1215B-RX3 2002-2017 DODGE RAM 15-3500 QUAD CAB RX3 Passenger side RX-3 Side Step Drill Template Passenger side rear Modular Bracket (6) L Support Brackets Driver side rear Modular Bracket Driver side
INSTALLATION MANUAL PBC-UMS
 INSTALLATION MANUAL. PBC-UMS Premier Mounts 3130 E. Miraloma Avenue Anaheim, CA 92806 Phone: (800) 368-9700 Fax: (800) 832-4888 mounts@mounts.com www.mounts.com Rev. 01 PBL-110 Projector Mount Page 2 Installation
Installation and Assembly - Universal Articulating Swivel Double-Arm for 42" - 60" Plasma Screens
 Installation and Assembly - Universal Articulating Swivel Double-Arm for 42" - 60" Plasma Screens Models: PLAV 70-UNL, PLAV 70-UNL-S PLAV 70-UNLP, PLAV 70-UNLP-S R This product is UL Listed. It must be
 Menu Board Tilt or Fixed Mount Installation Instructions MDS1T-200, MDS1T-300, MDS1T-400 MDS2T-200, MDS2T-300, MDS2T-400 MDS3T-200, MDS3T-300, MDS3T-400 MDS4T-200, MDS4T-300, MDS4T-400 MDS5T-200, MDS5T-300,
Fletcher F-3000 / F-3100 Accessory Laser Kit
 Fletcher F-3000 / F-3100 Accessory Laser Kit Shown Assembled on F-3000 Machine Product Warranty The Fletcher-Terry Company warrants the product purchased to be free from defects in parts and workmanship
Sunset Swings By Health in Motion, LLC
 Sunset Swings By Health in Motion, LLC Model 421 Lounge Swing Assembly and Operation Manual Record Serial Number Here www.sunsetswings.com by Health In Motion, LLC. 11/6/2009 421 Owners Assembly and Operation
Owner s Manual AE PLUG AERATOR MANUFACTURING QUALITY LAWN CARE EQUIPMENT SINCE Made In CHINA REV
 MANUFACTURING QUALITY LAWN CARE EQUIPMENT SINCE 1945 Owner s Manual AE-48 48 PLUG AERATOR IMPORTANT Read and follow all Safety Precautions and Instructions Before Operating this Equipment. Made In CHINA
PAM-200 Universal Projector Mount
 INSTALLATION MANUAL PAM-200 Universal Projector Mount Sony Electronics 16540 West Bernardo Drive San Diego, CA 92127 www.sony.com IN-PAM200.R0 Table of Contents Parts List...- 3 - Installation Tools...-
INSTALLATION MANUAL PBL-UMP
 INSTALLATION MANUAL PBL-UMP Table of Contents Warning Statements... 4 Parts List... 5 Installation Tools... 5 Features... 7 Projector Preparation... 8 Bracket Installation... 10 Leveling the Mounting Bracket...
INSTALLATION MANUAL ELPMBUNI
 INSTALLATION MANUAL ELPMBUNI Warning Statements WARNING: WARNING: WARNING: WARNING: PREMIER MOUNTS DOES NOT WARRANT AGAINST DAMAGE CAUSED BY THE USE OF ANY PREMIER MOUNTS PRODUCT FOR PURPOSES OTHER THAN
P4263TP. Installation Guide. Low-Profile Tilting Portrait Mount for Flat-Panels
 Low-Profile Tilting Portrait Mount for Flat-Panels 1321 S. State College Blvd., Fullerton, CA 92831 USA Weight Limit Maximum Flat Panel Weight: 175 lbs. Warning Statements THE WALL STRUCTURE MUST BE CAPABLE
00108/00110 INSTRUCTION MANUAL
 00108/00110 INSTRUCTION MANUAL Removable and Adjustable Mudflap System IMPORTANT! Please Read this Instruction Booklet prior to assembly of your Rock Tamer Kit. IMPORTANT! Exhaust Systems Note: Any modifications
MM540 Installation Instructions IMPORTANT SAFETY INSTRUCTIONS - SAVE THESE INSTRUCTIONS
 MM50 Installation Instructions IMPORTANT SAFETY INSTRUCTIONS - SAVE THESE INSTRUCTIONS Please read this entire manual before you begin. Do not unpack any contents until you verify all requirements on PAGE.
HUSTLER 7' & 8' POOL TABLE ASSEMBLY INSTRUCTIONS
 HUSTLER 7' & 8' POOL TABLE ASSEMBLY INSTRUCTIONS Please Do Not Hesitate to Contact Our Consumer Hotline at 800-759-0977 with Any Questions That May Arise During Assembly or Use of This Product! NG2515PB/NG2520PB
Installation Instructions Hinged Roof Rack
 Installation Instructions Hinged Roof Rack Application: Jeep Wrangler Unlimited 2004 - Current Part Number: 41435-01 www.bestop.com - We re here to help! Visit our web site and click on Ask a Question
INSTALLATION INSTRUCTIONS JEEP SCRAMBLER FAST TRAC TOP PART #108-21X
 INSTALLATION INSTRUCTIONS JEEP SCRAMBLER FAST TRAC TOP PART #108-21X Thank you for purchasing Specialty s Convertible Top for your Jeep vehicle. It has been designed for great fit and long wear. Please
INCRA. Suggested Router Bit Speeds. pg Website:
 INCRA Mast R Lift II R User Manual For Rockler Tables Model #02121 61 Forest Plain Road, Oro-Medonte, Ontario, Canada L3V 0R4 Toll Free: 1-866-272-7492 Email: jessem@jessem.com Website: www.jessem.com
INSTALLATION INSTRUCTIONS HEAVY DUTY TILT WALL MOUNT Model: PPH-2000
 INSTALLATION INSTRUCTIONS HEAVY DUTY TILT WALL MOUNT Model: PPH-2000 Specifications: Accomodates Akira and Orion 84" displays without interface bracket; accomodates other large flat panel displays with
Installation and Assembly - Universal Articulating Swivel Double-Arm for 42" - 60" Plasma Screens
 Installation and Assembly - Universal Articulating Swivel Double-Arm for 42" - 60" Plasma Screens Models: PLAV 70-UNL, PLAV 70-UNL-S PLAV 70-UNLP, PLAV 70-UNLP-S R This product is UL Listed. It must be
SLW 6 Channel Letter Brake. User Guide. Operation and Mounting Instructions
 SLW 6 Channel Letter Brake User Guide Operation and Mounting Instructions Scope This document describes the operation and mounting instructions for the SLW 6" Channel Letter Brake. Please read all instructions
MODEL M1023 QUICK CHANGE COLLET ATTACHMENT INSTRUCTION MANUAL. Phone: On-Line Technical Support:
 MODEL M1023 QUICK CHANGE COLLET ATTACHMENT INSTRUCTION MANUAL Phone: 1-360-734-3482 On-Line Technical Support: tech-support@shopfox.biz #6727BL COPYRIGHT JANUARY, 2005 BY WOODSTOCK INTERNATIONAL, INC.
Installation Instructions Tailgate Rack Bracket
 Installation Instructions Tailgate Rack Application: Jeep Wrangler 1986 Current Part Number: 41411 www.bestop.com - We re here to help! Visit our web site and click on Ask a Question. Click here for more
GB-AVSTOR5 Ceiling Equipment Storage Box with Pipe Coupler
 Ceiling Equipment Storage Box with Pipe Coupler INSTALLATION INSTRUCTIONS CREATING POSITIVE CUSTOMER EXPERIENCES 9534-500-021-00 Contents Weight Limit... 2 Warning Statements... 2 Installation Tools...
Install Instructions. NewAge Steel Welded Tall Locker
 Kit Contains Full Width Adjustable Steel Shelves (4) Height-Adjustable Steel Leveling Legs (4) Aluminum Door Trim (2) 2.5 x ¼ Cabinet Mounting Lag Bolts (4) Large Zinc Plated Mounting Washers (4) 5/8 x
Assembly Instructions and Parts Manual JPSF-1 Fence and JPSR Rail Set #
 Assembly Instructions and Parts Manual JPSF-1 Fence and JPSR Rail Set #1002493 JET 427 New Sanford Road LaVergne, Tennessee 37086 Part No. M-708482 Ph.: 800-274-6848 Revision C3 02/2014 www.jettools.com
Stand Aid User Manual REF: 1914
 Stand Aid User Manual REF: 1914 The Chattanooga Group Alliance TM Stand Aid is a manual standing aid to allow patients to assist themselves in preparation for transport. Patients qualified to use the Stand
Astro-Physics Inc. 400QMD Lubrication/Maintenance Guide
 Astro-Physics Inc. 400QMD Lubrication/Maintenance Guide The following guidelines should be followed to lubricate the three main parts of the 400QMD mount. The QMD stands for Quartz Micro-Drive controller.
LC200DS1 Double Stud Articulating Wall Mount for Flat Panel Screens up to 32" with up to 200mm x 200mm VESA Mounting Patterns
 Page 1 of 6 LC200DS1 Double Stud Articulating Wall Mount for Flat Panel Screens up to 32" with up to 200mm x 200mm VESA Mounting Patterns A multi-position dual articulating arm for flat screens up to 60
Signature Choral Riser Side Rail
 Assembly/Owner s Manual Signature Choral Riser Side Rail Signature Choral 3-Step Riser with Optional Side Rail Signature Choral 4-Step Riser with Optional Side Rail CONTENTS Visit the Signature Choral
Heritage Solar Lamp Post
 Heritage Solar Lamp Post Instruction Manual 23108 Thank you very much for choosing a Nature Power product! For future reference, please complete the owner s record below: Model: Purchase Date: Save the
Installation Procedures For Corvette Basic/C-6 SNS 28
 Installation Procedures For 2005-2013 Corvette Basic/C-6 SNS 28 Warning: Please read directions completely before starting. If you have any questions please contact BMPP before beginning your installation.
Installation Instructions. Monitor Roll Stand
 Installation Instructions Monitor Roll Stand w w w. a m i c o. c o m Preface Important, Please Read Carefully Thank you for your purchase with Amico. This unit is designed for long lasting performance,
LifeGear G1 /HOME GYM ITEM NO.: 63100
 LifeGear G1 /HOME GYM ITEM NO.: 63100 OWNER S MANUAL IMPORTANT: Read all instructions carefully before using this product. Retain this owner s manual for future reference. The specifications of this product
OWNER'S MANUAL Issue 2 - December 14, 2000
 OWNER'S MANUAL AL Issue 2 - December 14, 2000 Copyright 2000 GAMMA Sports - All Rights Reserved Provided by www.gssalliance.com OWNER'S MANUAL TABLE OF CONTENTS PAGE 1... WARRANTY PAGE 2...FEATURES PAGE
Installation and Assembly: In-wall Mount for 32" to 71" Flat Panel Screens
 Installation and Assembly: In-wall Mount for 32" to 71" Flat Panel Screens Model# IM760P, IM760P-S IM760PU, IM760PU-S Screen size range 32" to 71" (81 to 180 cm) 32" to 60" (81 to 152 cm) IM760P IM760P-S
#27541 Mobile Laptop Charging Station
 1 #27541 Mobile Laptop Charging Station Assembly Instructions #27541 Mobile Laptop Charging Station Part Drawing Description Qty Part Drawing Description Qty Hardware List P-1 Left Leg Welded 1 EA A Phil
Installation Instruction
 Tools Needed for Assembly Stud finder (for wood stud wall) Pencil Mark Electric drill Wood Stud Wall Installation Step 1. Locate the Wood Studs Installation Instruction Drill bit (for wood stud wall) Masonry
MM340 Installation Instructions IMPORTANT SAFETY INSTRUCTIONS - SAVE THESE INSTRUCTIONS
 MM30 Installation Instructions IMPORTANT SAFETY INSTRUCTIONS - SAVE THESE INSTRUCTIONS Please read this entire manual before you begin. Do not unpack any contents until you verify all requirements on PAGE.
Gared Pro-S Portable Backstop
 Models: 9616 & 9618 Installation, Operation and Maintenance Instructions Please read all instructions before attempting installation or operation of these units SAVE THESE INSTRUCTIONS FOR FUTURE USE PUBLICATION
Check us out on-line! Installation Instructions
 Installation Instructions 2 OPTIONAL ACCESSORIES Order Quantum Rack Accessories Online at www.dawsbetterbuilt.com Cargo Lock Kit Secure Your Load Cargo Locks can easily be installed and adjusted left or
Electric Skein Winder
 Electric Skein Winder Assembly and Use Package Contents 1 - Triangular Body (w/ motor) 1 - Cross Arm 1 - Left Foot (w/ yarn guide) 1 - Right Foot 1 - Adjustable Finger (w/ yarn clip) 3 - Adjustable Fingers
Models 2130 and 2140
 Models 2130 and 2140 Overview... 2 Tools Needed... 2 Hardware... 2 Assembly... 3-10 Installation...11 Operation... 11 Maintenance... 12 Accessories...12 Limited Warranty... 12 Perform the following sequence
Please Do Not Return This Product To The Store!
 MODEL NO. T8176 QUICK SERVE 3000 TABLE TENNIS TABLE OWNER'S MANUAL 1. Read this manual carefully before starting assembly. Read each step completely before beginning each step. 2. Some smaller parts may
TP4463. ASSeMBly INSTruCTIONS FLAT PANEL TV MOUNTING SYSTEM OPTION 1 OPTION 2 OPTION 3
 TP63 FLAT PANEL TV MOUNTING SYSTEM OPTION 1 OPTION 2 OPTION 3 Flat Panel TV Stand Stand with TV Mounting System Stand with Wall Mount ASSeMBly INSTruCTIONS for your safety, please follow these precautions:!
Due to possible damage in shipping, the vertical stop assembly has been removed from this machine.
 Due to possible damage in shipping, the vertical stop assembly has been removed from this machine. To assemble, insert the threaded rod through the shroud opening in the top of the machine. Start the four
AST-2446 INSTALLATION INSTRUCTIONS
 AST-2446 Suspension Adapter AST-2446 INSTALLATION INSTRUCTIONS Single Stud Installation Step 1. Secure the ceiling plate to the ceiling structure (see WARNING). Step 2. Use suitable hardware (commercially
Owner s Manual LSP38 38 Lawn Sweeper
 Owner s Manual LSP38 38 Lawn Sweeper Manual Contents Safety Instructions Assembly Operation Maintenance Parts Warranty 2 4-13 2 11 14-15 16 Your Lawn Sweeper Congratulations on your purchase of a new Precision
LC200WT Security Wall Mount with Tilt for up to 32" Flat Screens
 Page 1 of 6 The LC200WT Security Wall Mount with Tilt is designed to secure up to a 32" flat panel monitor to the wall while still allowing the monitor to tilt. The VESA mounting patterns on the front
AM500-U Installation Guide
 1321 S. State College Blvd., Fullerton, CA 92831 USA Included Components Maximum Flat Panel Weight: 500 lb. / 226.79 kg. Wall Mount Bracket (Qty 2) Cross Bar 5/16 Flat Washers (Qty 6) Universal Spacers
Models 2030 and 2040
 Models 2030 and 2040 Overview... 2 Tools Needed... 2 Hardware... 2 Assembly... 3-8 Installation... 9 Operation... 9 Maintenance... 10 Accessories... 10 Limited Warranty... 10 Document # 101290 0607 Printed
Heavy Duty Ceiling Tilt Mount Installation Manual
 HD-CTM-5580 Heavy Duty Ceiling Tilt Mount Installation Manual *This Installation requires a minimum of two people. For your safety: Read the complete instruction manual before starting an installation
Stand Aid Owners Manual
 Stand Aid Owners Manual Model : STA182 Thank you for choosing the Bestcare Spryte Bestcare LLC. Stand Aid is a manual standing aid to allow patients to assist themselves in preparation for transport. Patients
Dual Arm Tilt LCD Mount
 Installation Manual model # 51324 M o u n t i n g S y s t e m s Dual Arm Tilt LCD Mount Fits Displays 13 to 32 Supports Up to 50 lbs (23 kgs) Projection from Wall from 3 to 17 Meets VESA Standards 50/75/100,
LC6X4WTM Security Wall Mount with Tilt for up to 60" Flat Screens with VESA 600mm x 400mm or less
 Page 1 of 6 The LC6X4WTM Security Wall Mount with Tilt is designed to secure a flat screen, up to a 60", to the wall while still allowing the monitor to tilt. The VESA mounting patterns on the front of
INSTALLATION INSTRUCTIONS Scout II - Fast Trac PART #
 INSTALLATION INSTRUCTIONS Scout II - Fast Trac PART #442-210 Thank you for purchasing Specialty s Convertible Top for your Scout vehicle. It has been designed for great fit and long wear. Please read and
Owner s Manual #TSGUARD
 Owner s Manual #TSGUARD PSI Table Saw Dust Collection Guard The ideal solution for table saw dust control. Version 3, 02/04 2004 PSI Woodworking Products 9900 Global Rd., Philadelphia, PA 19115 WARRANTY
400GTO Lubrication Guide
 400GTO Lubrication Guide Lubrication Guidelines for the following equatorial mounting: 400GTO Servo with GTOCP2 or CP3 Controller For other 400 models please review other postings as they become available.
PLEASE CHECK ALL BOXES FOR HARDWARE BEFORE DISCARDING WARRANTY AND USER INFORMATION CAN BE FOUND AT THE END OF THESE INSTRUCTIONS
 Thank you for purchasing the SleepSafe Safety Bed. With proper care, your bed will provide years of safe use. Carefully unpack all the contents of your bed and verify that all parts are included using
Biesemeyer fi T-Square fi Commercial Fence Systems 50 Capacity (Model ) 30 Capacity (Model ) INSTRUCTION MANUAL
 30 Capacity (Model ) INSTRUCTION MANUAL") iesemeyer fi T-Square fi Commercial Fence Systems 50 Capacity (Model 78-904) 30 Capacity (Model 78-907) INSTRUCTION MNUL D T E D 3-5-96 P RT NO. 1349984 'Delta International Machinery Corp. 1996 INTRODUCTION
iesemeyer fi T-Square fi Commercial Fence Systems 50 Capacity (Model 78-904) 30 Capacity (Model 78-907) INSTRUCTION MNUL D T E D 3-5-96 P RT NO. 1349984 'Delta International Machinery Corp. 1996 INTRODUCTION
HARDINGE Installation booklet For:
 HARDINGE Installation booklet For: L Flange Nose Dead-Length Collet Adaptation Chucks Draw Collet Read the enclosed instructions and recommendations before any installations WARRANTY & RETURN PROCEDURES
LIGHT BEAM ANTENNA MaxRange Antenna Series Assembly Instructions MaxRange Plus Digital / High Definition Television Antennas
 LIGHT BEAM ANTENNA MaxRange Antenna Series Assembly Instructions MaxRange Plus Digital / High Definition Television Antennas Assembly Instructions 1 MaxRange Plus Antenna These instructions will lead you
Heavy Duty Contemporary Hinge Kit PLEASE READ OWNER'S MANUAL COMPLETELY BEFORE INSTALLING.
 Heavy Duty Contemporary Hinge Kit Installation Instructions PLEASE READ OWNER'S MANUAL COMPLETELY BEFORE INSTALLING. For use with Wood and Vinyl Gates Supports Gates up to 150lbs. and 96" wide. 5007EPN
OPERATION MANUAL MODEL
 OPERATION MANUAL MODEL 60-511504 SUPPLIER CODE: GO-60-511504 BREEZER MESH OFFICE TASK CHAIR - GRAY/BLACK CUSTOMER SERVICE For fastest service, please visit our website at www.comfortproducts.net/support
HARVIL 3-in-1 FLIP TABLE ASSEMBLY INSTRUCTIONS
 HARVIL 3-in-1 FLIP TABLE ASSEMBLY INSTRUCTIONS CONTACT INFORMATION We work around the clock and around the globe to ensure that Harvil products maintain the highest possible quality. However, in the rare
MODEL SK61732 COMPRESSOR SERVICE KIT
 MODEL SK61732 COMPRESSOR SERVICE KIT For use on 607 and 617 Model Compressors with.32 Stroke WARNING: Unplug the compressor before beginning disassembly. CAUTION: Improper assembly or use of damaged parts
OWNER'S MANUAL JST-48 Sliding Table
 OWNER'S MANUAL JST-48 Sliding Table (shown mounted on JET 708663PK) JET EQUIPMENT & TOOLS, INC. P.O. BOX 1349 Phone:253-351-6000 A WMH Company Auburn, WA 98071-1349 Fax: 1-800-274-6840 www.jettools.com
OPERATOR'S MANUAL 46" SNOW BLADE. Model Numbers OEM IMPORTANT: READ SAFETY RULES AND INSTRUCTIONS CAREFULLY
 OPERATOR'S MANUAL 46" SNOW BLADE Model Numbers 190-833-OEM IMPORTANT: READ SAFETY RULES AND INSTRUCTIONS CAREFULLY MTD PRODUCTS INC. P.O. BOX 368022 CLEVELAND, OHIO 44136-9722 PRINTED IN U.S.A. FORM NO.