Royal Moulding & Trim
|
|
|
- Aldous Greene
- 5 years ago
- Views:
Transcription

1 All the essential details, in detail. Royal Moulding & Trim

2 TABLE OF CONTENTS 02 Interior/Exterior Moulding 03 Brick Moulds 04 Exterior Casing 05 Interior Casing 06 Conceal Casing 08 Interior/Exterior Base 09 Sill Components & Vent Systems 11 Door Frame Components 12 Exterior Hand Rail 14 Decorative Moulding 15 Crown Moulding 17 Utility Moulding 20 Planking 21 Specialty Millwork Components 24 Trimboards 25 Royal S4S 26 SurEdgeTM 27 Sheet Board 28 Installation Instructions 34 Door Frame Instructions

3 1 Pick, choose and put it together. TRIM AND MOULDING Here are the exterior moulding components you ll need to finish the look of virtually every homestyle. You ll find information and specs about everything here from door frame and sill components to decorative millwork components.

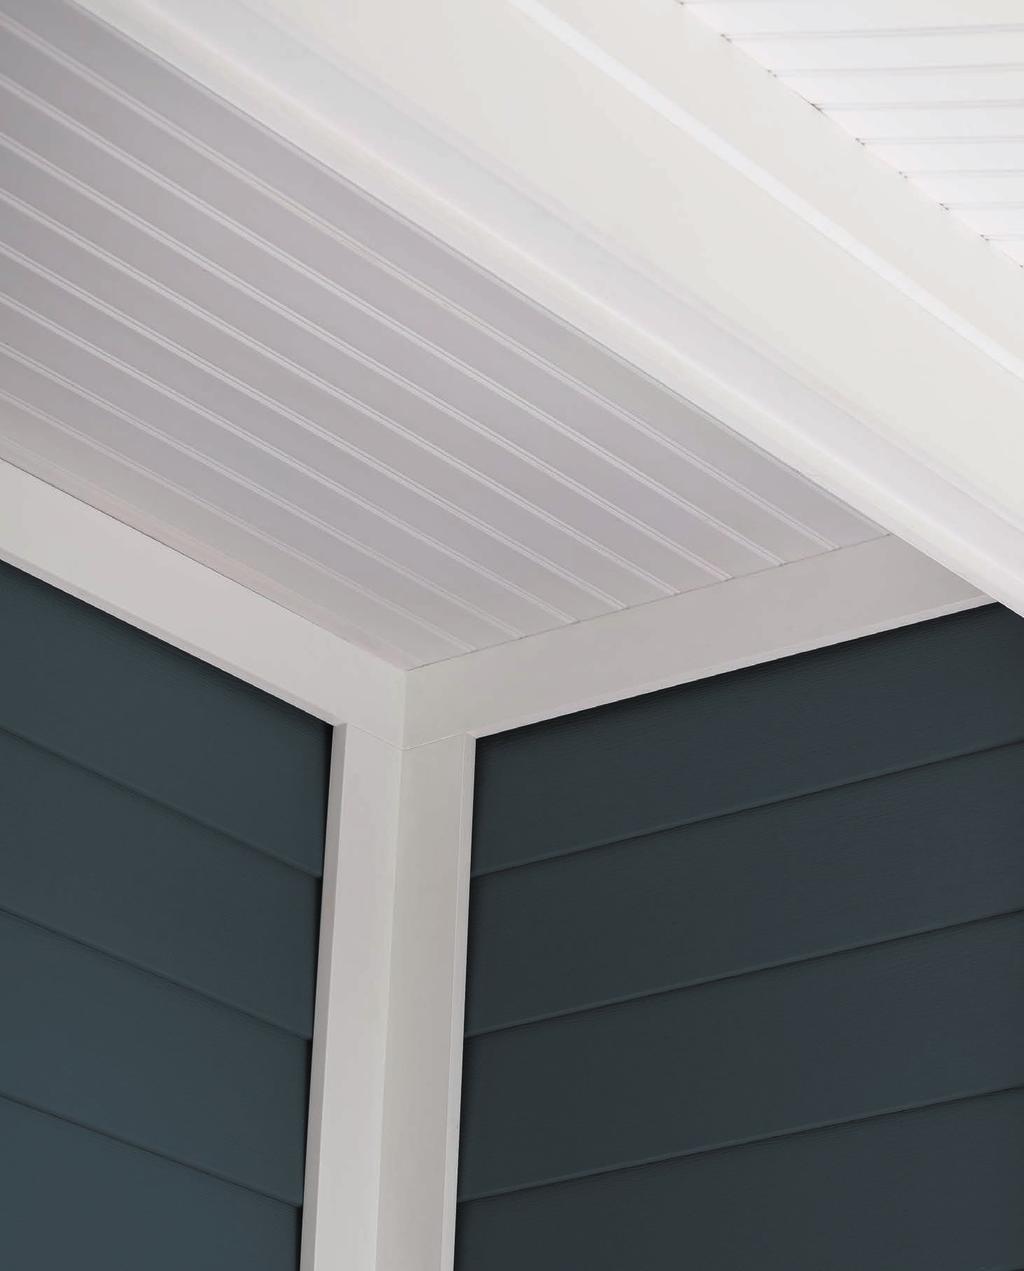
4 2 Interior / Exterior Moulding 100% Cellular PVC Limited Lifetime Warranty Low Maintenance STATEMENT-MAKING HOMES Homeowners demand their exterior moulding to be beautiful, durable and versatile. Building pros like you require that it be as simple to install as it is easy on the eyes. Done and done.


5 3 Brick Moulds 7526 Brick Mould WM Bendable Brick Mould WM /4-in x 2-in 2448 Brick Mould WM /4-in x 2-in 7252 Brick Mould LWM176 11/16-in x 1-5/8-in 7371 Nail Fin Brick Mould 1-1/4-in x 3-in 7351 J-Channel Brick Mould 1-1/4-in x 3-in 2622 Stucco Brick Mould 13/16-in x 1-5/16-in 9797 Brick Mould 1-1/8-in x 2-3/4-in


6 4 Exterior Casing 2590 Backband Casing 1-3/16-in x 4-1/2-in 7216 Williamsburg Casing 1-7/32-in x 3-1/4-in 2852 Adams Casing WM520 1-in x 3-1/2-in 9821 Window Casing 1-1/4-in x 2-3/4-in 7467 J-Channel Casing 1-1/8-in x 4-1/2-in 7651 J-Channel Casing 1-1/8-in x 6-1/2-in


7 Interior Casing Colonial Casing LWM356 9/16-in x 2-1/4-in 2428 West Coast Casing 5/8-in x 2-3/4-in 2342 Casing WM376 11/16-in x 2-1/4-in 2351 Casing WM332 11/16-in x 2-1/4-in 2365 Casing WM442 11/16-in x 2-1/4-in 2355 Colonial Casing WM356 11/16-in x 2-1/4-in 2440 Casing WM351 11/16-in x 2-1/2-in 5390 Chair Rail LWM390 11/16-in x 2-5/8-in 2343 Colonial Casing WM445 11/16-in x 3-1/4-in 2746 Casing LWM444 5/8-in x 3-1/2-in 2369 RB3 Casing WM523 1-in x 3-1/2-in
8 6

9 7 Conceal Casing 9794 Casing 1-in x 3-1/2-in 9795 Casing 1-in x 5-1/2-in 9706 Standard Trim 1-in x 3-1/2-in 7994 Standard Trim 1-in x 5-1/2-in 9707 Standard Trim 1-in x 7-1/4-in

10 8 Interior / Exterior Base 5523 Colonial Base LWM623 7/16-in x 3-1/4-in 7527 Colonial Base WM623 9/16-in x 3-1/4-in 6610 Speed Base 11/16-in x 5-1/4-in 9789 Combination Base 11/16-in x 8-7/16-in


11 9 Sill Components & Vent Systems 7806 Transom Sill 1-1/4-in x 6-9/16-in 7213 Transom Sill 1-1/4-in x 4-1/2-in 7117 Sill 1-1/4-in x 5-1/4-in 7640 Sill Nose 2-1/4-in x 2-3/4-in 7631 Sill Nose 1-3/4-in x 2-in 7435 Sill Nose 1-1/4-in x 2-13/16-in 7717 Sill Nose 1-3/16-in x 2-in 7118 Sill Nose 1-3/8-in x 1-5/16-in


12 10 Sill Components & Vent Systems 2442 Stop 5/8-in x 1-1/2-in 2345 Sill Nose 1-1/2-in x 1-5/8-in 2850 Parting Stop 7/32-in x 7/8-in 2851 Parting Stop 7/32-in x 1-1/4-in 2388 Vent Sill 1-1/4-in x 3-1/2-in 2389 Vent Blade 3/4-in x 3-1/2-in 2395 Stop 3/4-in x 2-in


13 11 Door Frame Components 7181 Door Frame 1-1/4-in x 4-9/16-in 7251 Door Frame 1-1/4-in x 5-1/4-in 7241 Door Frame 1-1/4-in x 6-9/16-in 7279 Jamb Extender 5/8-in x 2-in 7372 Jamb Extender 5/8-in x 3-in 9800 Jamb Extender 1-in x 3-1/2-in 9801 Jamb Extender 1-in x 5-1/2-in 7193 T-Astragal 1-33/64-in x 3-13/64-in 7155 T-Astragal 1-5/8-in x 3-1/4-in

14 12 Exterior Hand Rail 2535 Top Hand Rail 1-9/16-in x 3-11/32-in 2537 Bottom Rail 1-3/4-in x 3-19/32-in 2536 Baluster 1-1/4-in x 1-1/4-in 2542 Baluster 1-1/2-in x 1-1/2-in

15 13

16 14 Decorative Moulding Ready to Install Paintable with 100% Acrylic Latex Paint Superior Nailing and Gluing ESSENTIAL FINISHING TOUCHES Our decorative mouldings do more than decorate. They insulate, protect and define the look of everything from front porches and eaves to windows and doorways. Plus they require no painting, very little maintenance and come ready to install.


17 15 Crown Moulding 9824 Crown 1-in x 7-1/2-in 7661 Crown 11/16-in x 6-in 7491 Crown WM45 9/16-in x 5-1/4-in 2592 Crown WM47 11/16-in x 4-5/8-in 7541 Crown WM48 11/16-in x 4-1/4-in 2435 Crown WM49 9/16-in x 3-5/8-in 2853 Crown WM52 9/16-in x 2-3/4-in

18 16 Crown Moulding 2598 Bed Mould WM75 9/16-in x 1-9/16-in 7712 Bed Mould 1-1/2-in x 1-7/8-in 7714 Shingle/Panel Mould 2-in x 2-7/8-in 7937 Shingle/Panel Mould 1-3/8-in x 2-3/4-in 7158 Rams Crown 1-13/32-in x 2-in 7202 Rake Mould WM287 1-in x 2-in 7901 Shingle/Panel Mould WM217 11/16-in x 1-3/4-in 2599 Shingle Mould WM210 11/16-in x 1-5/8-in


19 17 Utility Moulding 9724 Utility Mould WM133 11/16-in x 1-3/4-in 2759 Decorative Trim 1/2-in x 1-in 7709 Backband 1-3/16-in x 1-3/8-in Fits 5/8-in Board 7152 Backband 1-11/32-in x 1-13/32-in Fits 3/4-in Board 7710 Backband 1-3/8-in x 1-9/16-in Fits 1-in Board 7788 Colonial Stop WM947 3/8-in x 1-1/4-in 2449 Drip Cap WM197 11/16 x 1-5/ Drip Cap WM187 11/16-in x 2-in 2755 Decorative Trim 3/4-in x 1-in 2753 Decorative Trim 1-in x 1 5/16-in 2754 Decorative Trim 15/16-in x 1-1/16-in


20 T-Mould 1-in x 5-1/2-in 9832 T-Mould 1-in x 7-1/4-in 9833 T-Mould 5/8-in x 3-1/2-in 9835 T-Mould 1-in x 3-1/2-in 2357 Utility Moulding/Stop 3/4-in x 1-1/8-in 2150 Stop 5/8-in x 1-1/2-in 2542 Square 1-1/2-in x 1-1/2-in 2536 Square 1-1/4-in x 1-1/4-in 2330 Square 5/8-in x 5/8-in 2363 Stop 3/4-in x 1-in 2018 Lattice WM265 1/4-in x 1-9/16-in 5534 Lattice 5/32-in x 1-1/8-in
21 Outside Corner WM /8-in x 1-1/8-in 6577 Outside Corner 11/16-in x 11/16-in 2021 Scotia/Cove WM93 3/4-in x 3/4-in 9785 Base Cap WM166 11/16-in x 1-1/4-in 2450 Base Cap WM164 11/16-in x 1-1/8-in 2024 Quarter Round WM108 1/2-in x 1/2-in 5111 Quarter Round WM107 5/8-in x 5/8-in 2689 Quarter Round WM105 3/4-in x 3/4-in 2803 Utility Moulding 1/4-in x 1/2-in 2258 Bead 13/32-in x 1/2-in 2046 Base Shoe WM126 5/16 x 3/4

22 20 Planking 9734 Beaded Planking 1/2-in x 5-3/4-in 2709 Flat Utility Trim 5/16-in x 5-13/16-in 2352 Beaded Planking 3/8-in x 5-15/32-in 9830 Shiplap Nickel Gap Reversible Plank 5/8-in x 5-3/8-in 9834 Shiplap Nickel Gap Reversible Plank 5/8-in x 7-1/8-in 9825 Reversible Wainscot Beaded / Nickel Gap 9/16-in x 5-1/4-in 2566 Cap Trim 1-in x 3-in Used with profile Cap Trim 3/4-in x 1-3/4-in Used with profile Cap/Base 5/8-in x 3-1/2-in Used with profile 9825


23 21 Specialty Millwork Components 7505 Louver Blades 7/16-in x 3-1/2-in 7980 Solid Stile 1-1/8-in x 2-in 7984 Rabbeted Rail 1-1/8-in x 2-in 7560 Divider Rail 3/4-in x 3-1/4-in


24 22 Specialty Millwork Components 7687 Rail 3/4-in x 4-1/2-in 7682 Rail 3/4-in x 7-in 7978 Divider Rail 3/4-in x 4-in 7561 Rail 3/4-in x 4-5/8-in 7153 Divider Rail 1-in x 3-1/4-in 7103 Rail 1-in x 4-5/8-in 7128 Rail 1-in x 6-7/8-in Way Rail 3/4-in x 5-1/2-in Way Divider Rail 3/4-in x 4-in


25 23 Specialty Millwork Components 7240 Rail 1-in x 3-3/8-in 7794 Rail 1-in x 4-in 7559 Double Beaded L-Frame 1-1/8-in x 1-3/4-in 7268 Double Headed L-Frame 1-3/8-in x 1-15/16-in 2468 Sill Plate 25/32-in x 2-1/8-in 2705 Beaded Frame 1-3/8-in x 1-in 7988 Beaded T-Post 1-3/4-in x 1-in 7163 Beaded T-Post 1-3/4-in x 1-in 7996 Decorative Frame 1-13/15-in x 2-1/4-in 7221 Decorative Trim 9/16-in x 3-in

26 24 Trimboards Moisture and Termite Proof Saves Time and Labor Does not Promote Mold or Mildew MORE OF A GOOD THING These products and profiles share the same durable, low-maintenance properties as our exterior trim and decorative moulding, and are just as easy to install.


27 25 Royal S4S Trimboard doesn t get any more smooth, durable and versatile than S4S. Its foursided finished PVC material resists dirt buildup and is backed by a lifetime warranty. Plus its true square edges make every install a clean one. Available sizes:* NOMINAL WIDTH ACTUAL DIMENSIONS PROFILE NUMBER PIECES PER UNIT ACTUAL LENGTH 5/8 THICKNESS 5 /8" x 4" 5 /8" x 3 1 /2" ' 5 /8" x 6" 5 /8" x 5 1 /2" ' 5 /8" x 8" 5 /8" x 7 1 /4" ' 5 /8" x 10" 5 /8" x 9 1 /4" ' 5 /8" x 12" 5 /8" x 11 1 /4" ' 4/4 THICKNESS 1" x 2" 3 /4" x 1 1 /2" ' 1" x 3" 3 /4" x 2 1 /2" ' 1" x 4" 3 /4" x 3 1 /2" ' 1" x 5" 3 /4" x 4 1 /2" ' 1" x 6" 3 /4" x 5 1 /2" ' 1" x 8" 3 /4" x 7 1 /4" ' 1" x 10" 3 /4" x 9 1 /4" ' 1" x 12" 3 /4" x 11 1 /4" ' 5/4 THICKNESS 5 /4" x 3" 1" x 2 1 /2" ', 20' 5 /4" x 4" 1" x 3 1 /2" ', 20' 5 /4" x 5" 1" x 4 1 /2" ', 20' 5 /4" x 6" 1" x 5 1 /2" ', 20' 5 /4" x 8" 1" x 7 1 /4" ', 20' 5 /4" x 10" 1" x 9 1 /4" ', 20' 5 /4" x 12" 1" x 11 1 /4" ', 20' *Contact your Royal Building Products sales representative for a complete list of products available in your area. 2" 3" 4" 5" 6" 8" 10" 12" 1" 3 /4" 5 /8" Royal S4S Trimboard is reversible and available in a smooth/smooth or smooth/woodgrain finish. Basic Trimboard Edges Stay Clean Edges Our durable, closed-cell technology keeps board face and edge surfaces clean.


28 26 SurEdge TM 100% cellular PVC SurEdge Trimboards have well-defined 90-degree corners that bring out the highlights of a range of architectural styles. Perfectly square edges make for a seamless install. And it comes with a protective film you can remove after installation to keep the trimboard clean. PROFILE NUMBER ACTUAL DIMENSIONS 5/8 THICKNESS TRIMBOARDS ACTUAL LENGTH / 8" x 3 1 / 2" 18' 4" / 8" x 5 1 / 2" 18' 6" / 8" x 7 1 / 4" 18' 8" / 8" x 9 1 / 4" 18' 10" / 8" x 11 1 / 4" 18' 12" / 8" x 13 1 / 4" 18' 14" / 8" x 15 1 / 4" 18' 16" 4/4 THICKNESS TRIMBOARDS / 4" x 3 1 / 2" 18' 4" / 4" x 4 1 / 2" 18' 5" / 4" x 5 1 / 2" 18' 6" / 4" x 7 1 / 4" 18' 8" / 4" x 9 1 / 4" 18' 10" / 4" x 11 1 / 4" 18' 12" / 4" x 15 1 / 4" 18' 16" 5/4 THICKNESS TRIMBOARDS " x 2 1 / 2" 18', 20' 3" " x 3 1 / 2" 18', 20' 4" " x 4 1 / 2" 18', 20' 5" " x 5 1 / 2" 18', 20' 6" " x 7 1 / 4" 18', 20' 8" " x 9 1 / 4" 18', 20' 10" " x 11 1 / 4" 18', 20' 12" " x 15 1 / 4" 18', 20' 16" NOMINAL WIDTH SurEdge Trimboard is available in two finishes. SMOOTH WOODGRAIN

29 27 Sheet Board Our sheet board s consistent high density provides a uniform appearance from piece to piece, making it easy to cut into custom widths, shapes and designs. You can mill and miter it with standard tools and have clean, precise edges. Plus it s paintable, resists moisture and mold and is backed by a lifetime warranty. Available sizes:* NOMINAL WIDTH ACTUAL DIMENSIONS PROFILE NUMBER PIECES PER UNIT ACTUAL LENGTH 3/8 THICKNESS 3 /8" x 4' 3 /8" x 48" ', 10', 12', 18', 20' 1/2 THICKNESS 1 /2" x 4' 1 /2" x 48" ', 10', 12', 18', 20' 5/8 THICKNESS 5 /8" x 4' 5 /8" x 48" ', 10', 12', 18', 20' 4/4 THICKNESS 1" x 4' 3 /4" x 48" ', 10', 12', 18', 20' 5/4 THICKNESS 5 /4" x 4' 1" x 48" ', 10', 12', 18', 20' 1 1/4 THICKNESS 1 1 /4" x 4' 1 1 /4" x 48" ', 10', 12', 18', 20' 3 /8" 1 /2" 5 /8" 4 /4" 5 /4" 1 1/4" *Contact your Royal Building Products sales representative for a complete list of products available in your area.
30 28 Installation Instructions Storage and Handling Royal trim and moulding should be stored off the ground, fully supported on a flat surface. Never place Royal trim and mouldings directly on blacktop or other surface that can develop excessive heat. Store in a well ventilated area. Handle the product with care to avoid damage. Safety Wear safety glasses for all cutting and nailing operations. Follow standard safety practices for using power tools, ladders, etc. Cut and mill in a well-ventilated area. Structural Integrity Royal trim and mouldings are not to be used as structural products in load bearing applications. PVC boards must always be supported by wood or other structural materials. Cutting Carbide edge blades give the best results. The use of improper tooling or poor board support may result in rough cut edges. Fine tooth jig saw blades may cause the fusing of boards together at the cut line. Routing Use standard wood working carbide-tipped router bits. Secure the trim to a bench or table when routing to minimize chatter. Once the routing is complete, the cut can be smoothed using grit sand paper. This will seal the cut edge and make it more resistant to dirt. Managing the expansion and contraction PVC products expand and contract through temperature changes. This movement must be taken in consideration when working with the products. The amount of movement of a board is in relation to its length. Therefore, the longer the board, the more movement is likely. Window trim is typically assembled prior to installation on the wall and are small enough not to need additional expansion joints, etc. See drawing below for guidance on longer pieces. Managing expansion on longer runs Managing expansion on longer runs Less then 12 glued both ends Glue scarf joint Cut board short for expansion Hide with adjacent board Fasteners 2 from ends max. Glue all miters DO NOT glue ship lap to allow for movement Place a fastener 2 from the seam on both sides. Glue Above 50 F Below 50 F ⅛ Coat

31 29 Fastening Use fasteners designed for wood trim. They should have thin shanks, blunt points and full round heads. Fasteners should penetrate 1½ into substrate. Fasteners should be positioned no less than ¾ or more than 2 from end of board. Fasteners must be weather resistant, such as stainless steel or hot dipped galvanized. Pneumatic guns can be used. Air pressure should be adjusted based upon gun, temperature, substrate, etc. (80-100psi typical). Trim should be fastened to a flat solid surface. In cold weather below 40º, pre-drilling may be necessary. Do not use brads or wire nails. Staples can only be used to fasten beaded planking. Recommended Screws Fasten Master Cortex Hidden Fastening System (screw and PVC plug system) Starborn Pro Plug System (screw and PVC plug system) Simpson Strong-Tie Trim-Head Stainless Steel Screw GRK Fasteners FIN/Trim Finishing Trim Head Screws (ClimatekCoated or Pheinox Stainless Steel) Kreg Blue-Kote Pocket-Hole Screws ( for assembling trim with pocket-holes). Weather resistant deck screws (for hidden fastening of crown mouldings, etc.) Recommended Nails 8d nails with annular or spiral thread shanks (hot dipped galvanized or stainless steel) 15 ga. galvanized or stainless steel trim nails (decorative trim only e.g. crown moulding) Trim Board Fastening Schedule Board Width Fasteners/width 16" O.C. Max. 4"-6 " 2 8"-10" 3 12" 4 Finishing Screw and Plug Systems When using this method for fastening trim, there is no need for additional filling of nail or screw holes. Once the plugs are set as (shown at right), the trim is ready for painting if desired. Cortex Hidden Fastening System Filling Nail Holes Dap All Purpose Painters Putty Sherwin Williams Shrink Free Spackling Two-part Epoxy Putty Painting Trim does not require painting. However, to maintain color consistency for many years it may be recommended. If painting is desired, we recommend using 100% acrylic paint with a light reflective value of 55 units or higher. If a darker color is desired (LRV 54 or lower), use only vinyl safe paints containing reflective pigments designed to reduce excessive heat gain (e.g. Sherwin Williams VinylSafe ). Caution should be used with these darker colors as they may negatively affect the performance of the trim. For best results, use a high quality paint that incorporates a primer. Warranty does not cover painted/coated finishes applied to product. Always follow paint manufacturers instructions. G: Good Bond ADHESIVE PVC WOOD MASONRY STEEL Royal PVC Adhesive G Royal Fill & Flex G Royal Whit Hot G Extreme Adhesives PVC Trim Welder G G* Quality Transparent PVC Cement G Liquid Nails Subfloor Adhesive G* Liquid Nails Heavy Duty Adhesive G* G* NPC Solar Seal 900 G* G* G* * Mechanical fasteners are always required.
32 30 Helpful tip for gluing two pieces of PVC trim Two Part Gluing Method: PVC adhesive along with Cyanoacrylate (super glue) and activator as a clamp can be used. However, these glues are not sufficient to use alone. They must be used in conjunction with PVC cement. (2P10 is an only an example of a Cyanoacrylate/ Activator system. There are others.) Using the two-part gluing system First, place a bead of PVC cement along one edge of one of the pieces to be glued. Next, place a similar bead of Cyanoacrylate glue. Spray the activator along the other piece to be glued. Do not spray the coated face of the piece. Carefully join the two pieces together making sure that they are aligned properly. Hold the pieces in place for 5-10 seconds or until the Cyanoacrylate glue adheres. This will allow for installation of the piece and give sufficient time for the PVC cement to create a permanent bond. Conceal Beaded Planking Soffit/Ceilings Cyanoacrylate Glue & Activator PVC Cement Conceal Beaded Planking cannot be used in load bearing applications. Venting must be added to soffits where applicable. Check with local building codes for requirements. Conceal Beaded Planking can span up to 16 unsupported. For spans greater than 16, a minimum of ½ substrate such as plywood or 2X nailing strips must be installed to help support the planking. The planking should then be glued as well as otherwise fastened to the substrate and framing (Figures 2-4). High Heat planking must be used in applications where there is potential for excessive heat build, such as porch ceilings that cannot be vented. In these applications, bead board must also be installed over a minimum of ½ substrate such as plywood or OSB. For porch ceilings or long runs, nailing must be moved to 12 OC. Royal beaded planking should be run perpendicular to the structure whenever possible to result in the shortest pieces of material (Figure 1). If a seam is necessary within a 12 run, a shiplap is preferred to help conceal any shrinkage. For areas longer than 12, there must be an expansion joint to allow for the expansion and contraction of the planking through temperature changes (Figure 6-7). Fastening Fasteners should penetrate 1½ into substrate. Fasteners must be weather resistant such as stainless steel or hot dipped galvanized. Pneumatic guns can be used. Air pressure should be adjusted based upon gun, temperature, substrate, etc. (80-100psi typical). In cold weather below 40º, pre-drilling may be necessary. Staples can used. 16 gauge T-nail 15 gauge trim nail Cleaning Cement PVC cyanoacrylate Super Cleaning Royal Building Products is easy and fast with most major household cleaners. There are many cleaners on the market and the glass cleaners seem to be the best candidate for keeping the finish intact. The cleaning solution should be applied and immediately wiped dry. With any cleaning material, the cleaning solution should not be left to stand on the components for an extended period of time. Royal Building Products recommends the following cleaners: Windex 409 Glass and Surface Cleaner Spic & Span Cinch Fantastik All-Purpose Fantastik Orange Action Regency (Glass and Surface) Clorox Clean-Up Glass Plus Fantastik Oxy Power Multi-Purpose Cleaner What to Avoid Harsh cleaners with glycol ethers or ethanol type solvents and/or isopropyl alcohol soften the coating if left on for several minutes and are not recommended. Examples of these harmful cleaners are Goof Off, Wal-Mart Great Value All Purpose Cleaner (glycol ether), 409 General Purpose (2-Butoxyethanol) and Greased Lightning (glycol ether), citrus cleaners, abrasive cleaners, and solvents such as acetone, paint remover and lacquer. Glue
33 31 Conceal Beaded Planking Ceiling Layout Fascia Beaded Soffit Cladding Over 16 Nailing strip 0 to 16 Fig.1 Fig. 2 OR plywood Over 16 Fig. 3 Fig. 4 Basic Rules to Assembling Window Frames Make certain that the window is properly flashed in accordance with local building code requirements. PVC trim is intended to be aesthetic and not part of the water resistant system. It is recommended that the window frame be assembled prior to the installation around the window. Joints should be glued and screwed together. Pocket screws should be used where possible. Measure the width and height of the window. Add 1/8 to both measurments. This will leave 1/16 spacing around the perimeter of the window to allow for expansion and contraction of the frame. Fasten the frame to the wall using fasteners outlined on page 29. Nailers 12 OC. ¼ expansion gap Picture Framing Glue All Joints is Advisable Preferred run direction Figure 5 Pocket Holes Washer Head Screws Nailers 12 OC. NOTE: All screws must be weather resistant ¼ expansion gap Adding Crown and Sill Nose Over 12 expansion joint Glue Returns with PVC Cement Weather Resistant Screws Figure 6 Expansion joint over 12 Conceal Beaded Planking Washer Head Screws Pocket Holes ⅝ X 4 Trimboard Rabbited for expansion joint ¼ gap Glue All Joints is Advisable ¾ ½ Figure 7 Weather Resistant Screws
34 32 Installing Backband Run a bead of PVC cement along side edge of window trim. Install backband and fasten using the fasteners outlined on page 29. Conceal Window Trim Assembly Shown are three methods for assembling Conceal trim around windows. The same basic rules outlined on page 29 apply. Make sure to leave 1/16 space on all four sides of the window for expansion and contraction of the trim. It is suggested that the trim frames be assembled prior to the installing on the wall. When mitering corners, it is recommended that cement be used. When square cutting joints, remove pieces as shown to create a continuous channel. When securing frame to the wall, fasteners must not penetrate through the siding pocket. Fasten the frame using the fasteners outlined on page 29. Install head flashing inside the pocket of the header trim. Bugle head screws Installing an Apron Begin by fastening the apron to the jamb trim. (It is typical to use a wider board for the apron to result in a similar apron reveal below the sill nose.) Run a bead of PVC cement on apron where sill will be placed. Next, install the sill nose with Washer Head Screws Pocket hole screws mitered corners Buglehead screws mitered corners Pocket hole screws square corners Bugle head screws
35 33 New Construction Window Surround New Construction Window Surround can be used in many areas for trim but is particularly useful around windows with a nailing flange (Figure 1). It is recommended that the window surround be assembled prior to its application around the window. When measuring for the surround, measure to leave a 1/16 space between the surround and the window on all sides to allow for expansion and contraction of the trim thru temperature changes. Window trim should be fastened to the wall using the fasteners outlined on page 29. Install head flashing inside the pocket of the header trim. Squared off Corner Squared off corners Remove any material necessary to allow the Channel to continue completely around the window (Figure 2). Use the integrated pocket on the back of the trim to secure the corners using weather resistant screws (Figure 2). Fig. 2 Mitered Corners Miter and assemble as shown in Figure 3 using weather resistant screws. Mitered Corners Fig. 1 Fig. 3
36 34 Door Frame Installation Instructions ABOUT THE MATERIAL The frame and material have been thoroughly tested for strength, durability and low maintenance, offering a never rot feature compared to traditional wood door frames. INSTALLATION INSTRUCTIONS Read thoroughly before beginning. This Royal Building Products exterior door frame is ready to install. You will also need one set of door and window trim to finish the interior of the opening. You may also need Royal s 100% cellular PVC exterior brick, flat or ornate trims to make the door system completely low maintenance. NOTE: It is necessary to have the door and all hardware on-hand for reference and use during installation of this frame kit. REQUIRED TOOLS Tape Measure Hand Saw Framing Square Router (recommended) Level or Chisel Set Electric Drill/Screwdriver Wood Shims 1/8 Drill Bit 8p Finish Nails Hammer 2 Galvanized Quality Exterior Grade Drywall Screws Caulk Water-Based Putty (9) 3 installation screws are provided with this kit. MORTISE FOR HINGES 1. Determine the appropriate door swing and prepare for hinges. If using an existing door with the hinges already installed, remove one hinge from the door and use it as a template to mark the jamb. Note that with hinge mortises in line, the top of the jamb is 7/8 higher than the top of the door panel. If using a new door and hinges, measure 6 from the top and bottom of the door and mark the positions for the top and bottom hinges. Mark the centerline of the door for the middle hinge. 2. Lay the jamb next to the door so that the top of the jamb is 7/8 beyond the top of the door and mark for the hinges. 3. To determine backset, place a hinge on the jamb between the marks. Make sure the barrel is out far enough so that the door can open without interfering with the trim. Mark the jamb at the edge of the hinge. Measure from the mark to the edge of the jamb. Use that measurement to mark for the remaining hinges. 4. If using a hammer and chisel, MAKE SURE THE CHISEL IS VERY SHARP. Face the bevel of the chisel point toward the mortise. Using the marks as a guide, drive the chisel into the jamb all the way around the hinge outline. 5. With the bevel facing down, chisel out the material. The depth of the mortise should be the same as the hinge leaf thickness. NOTCH FOR SILL 1. To notch the jamb for the sill (purchased separately), place the sill next to the jamb on a flat surface, making sure the interior face of the sill and jamb are in line. Using the sill as a guide, scribe or mark a line in the jamb. Remove the material below the line back to and flush with the wider part of the jamb as illustrated below. 2. You may elect to use only a threshold if the frame is being installed on a concrete slab. 3. Attach the head and sill to the sides with the 2 galvanized drywall screws. 4. Attach the hinges to the frame with the short screws supplied with the hinges. Leave one hole per hinge open for now. INSTALLATION 1. Measure the rough opening width: Frame Kit: Inside Width Between Studs: 2/8 Frame 33-3/4 > 34-1/2 3/0 Frame 37-3/4 > 38-1/2 If the opening does not fall into one of these ranges, you will need to use filler studs to bring the opening width to within range. 2. Measure the rough opening height. This is the distance from the slab or wood underlayment to the header stud. Subtract 1/2 from the opening height and cut the frame sides to this measurement. Be sure to cut from the bottom (un-notched) side of the jamb. 3. Stand the frame unit into the opening and plumb with the wall. There should be approximately 1/2 clearance all the way around the unit. Wedge shims on the bottom at each corner to center and stabilize the unit. Continue placing shims up each side of and above the unit as shown. Make sure the jambs remain square and vertical as you go. IMPORTANT: SHIMS MUST BE PLACED BEHIND THE JAMB AT EACH HINGE, LATCH AND DEADBOLT LOCATION. USE THE 3 OPEN HOLE IN EACH HINGE. IF A DEADBOLT IS BEING INSTALLED, USE TWO 3 SCREWS THROUGH THE DEADBOLT STRIKE PLATE OR THROUGH THE JAMB NEXT TO THE STRIKE PLATE. ALL SCREWS MUST PASS THROUGH THE JAMB AND SHIMS AND INTO THE STUD. 4. Pre-drill 1/8 pilot holes at each shim location. The screws that don t go through a hinge or strike plate can be hidden behind the weather stripping. 5. Use the 3 installation screws to fasten the door frame to the opening. The excess shim may be cut away with a saw or utility knife. EXTERIOR TRIM APPLICATION Exterior trim may either be included with this kit or sold separately, depending upon the dealer. 1. If the exterior brick or siding has not yet been installed, apply exterior trim so that there is a 1/2 reveal on the jamb. If exterior wall treatment has already been installed, butt the trim up to the brick or siding. Check for plumb and attach with 8p finish nails. 2. Countersink nails, putty holes and caulk seams. FINISHING If desired, this frame may be painted after installation. If painting, use a quality brand of 100% acrylic latex paint. For darker colors (colors that fall within the lightness (L) value of 56 to 0, with 100 being white and 0 being black), the use of heat-reflective paint is recommended. Allow paint to dry according to instructions on the paint container.
37 35 Frequently Asked Questions How do I clean and remove scratches? If the scratches are not too deep, you can use Windex and Mr. Clean MAGIC ERASER, (or Scotch-Brite Non-Scratch Scrub Sponge). Apply the cleaner. Use the eraser or sponge, and rub in circular and up and down motions, until scratches are buffed out. This takes some time, depending on the severity of the scratches. You can also use Turtle Wax Rubbing Compound to remove surface scratches. Clean the product after buffing the out the scratches. There are many cleaners on the market that will work for cleaning PVC: Windex 409 Glass and Surface Cleaner Spic & Span Cinch Fantastik All-Purpose Fantastik Orange Action Regency (Glass and Surface) Clorox Clean-Up Glass Plus Fantastik Oxy Power Multi-Purpose Cleaner DeckMAX M1 House Wash LA s Totally Awesome All-Purpose Cleaner Does cellular PVC trim and/or cellular PVC require painting? No. Cellular PVC trim does not require painting but, like any cellular PVC product, it will weather over time and painting will enhance these beautiful products to maintain color consistency for many years. Our cellular trim products are ready for painting and require very little preparation. Painting with a good quality, vinyl safe 100% Acrylic Latex paint will enhance these beautiful products to maintain color consistency for many years. There are several paint manufacturers that will warranty their coating products on cellular PVC trim for 20 years or more. Our Warranty does not cover painted finishes or coating applied to the Product by the original purchaser or any third party. If I do paint, what type of paint should I use? For white or light colors, we recommend a high quality 100% acrylic latex paint developed for TRIM. There are paint manufacturers that sell coatings specifically designed for PVC trim and mouldings. These paints are typically referred to as vinyl safe paints, or heat reflective coatings for vinyl. If you are going to paint the product a darker color, consult the paint manufacturer for the LRV (light reflective value). Painting our cellular PVC product with paints darker than 56 to 0 (zero being Black) on the LRV scale voids any warranty. No priming is necessary, however the finish quality is greatly enhanced if you use a premium 100% acrylic latex paint for trim with a built in primer. In addition, a primer may be required under the paint manufacturer s warranty. Always follow the paint manufacturer s instructions. In preparation for painting, we recommend product should be clean, dry and free of dirt, grease and or any other surface contaminants before painting. Adhesion can be improved, and product should be cleaned with a mild detergent or denatured alcohol and soft clean rag or bristle brush. Failure to adhere to manufacturer s recommended guidelines for application of painted surfaces may void any paint manufacturer s warranty. Can you stain PVC mouldings? Yes, but staining PVC mouldings takes a specialized base coat AWP SPQT Stainable Primer Wood Base Coat for Hard Surfaces. Follow the manufacturer s recommendations. Note that specialty applications such as this are not covered by our warranty. Can PVC be used as a structural component such as framing? PVC cannot be used as a structural product in load bearing applications. PVC boards must always be supported by wood or other structural materials.
38 36 ALPHABETIC LISTING Description Item # Page Description Item # Page Description Item # Page 2 Way Rail Way Divider Rail Adams Casing WM Backband Backband Backband Backband Casing Baluster Baluster Base Cap WM Base Cap WM Base Shoe WM Bead Beaded Frame Beaded Planking Beaded Planking Beaded T-Post Beaded T-Post Bed Mould Bed Mould WM Bendable Brick Mould WM Bottom Rail Brick Mould Brick Mould LWM Brick Mould WM Brick Mould WM Cap/Base Cap/Trim Cap/Trim Casing Casing Casing LWM Casing WM Casing WM Casing WM Casing WM Chair Rail LWM Colonial Base WM Colonial Base WM Colonial Casing WM Colonial Casing LWM Colonial Casing WM Colonial Stop WM Combination Base Crown Crown Crown WM Crown WM Crown WM Crown WM Crown WM Decorative Frame Decorative Trim Decorative Trim Decorative Trim Decorative Trim Decorative Trim Divider Rail Divider Rail Divider Rail Door Frame Door Frame Door Frame Kit Double Headed L-Frame Double Beaded L-Frame Drip Cap WM Drip Cap WM Flat Utility Trim J-Channel Brick Mould J-Channel Casing J-Channel Casing Jamb Extender Jamb Extender Jamb Extender Jamb Extender Lattice Lattice WM Louver Blades Nail Fin Brick Mould Nickel Gap Outside Corner Outside Corner WM Parting Stop Parting Stop Quarter Round WM Quarter Round WM Quarter Round WM Rabbeted Rail Rail Rail Rail Rail Rail Rail Rail Rake Mould WM Rams Crown RB3 Casing WM Reversible Plank Reversible Plank Reversible Wainscot Beaded Royal S4S...ALL...25 Scotia/Cove WM Sheet Board...ALL...27 Shingle Mould WM Shingle/Panel Mould Shingle/Panel Mould Shingle/Panel Mould WM Shiplap Nickel Gap Shiplap Nickel Gap Sill Sill Nose Sill Nose Sill Nose Sill Nose Sill Nose Sill Nose Sill Plate Solid Stile Speed Base Square Square Square Standard Trim Standard Trim Standard Trim Stop Stop Stop Stop Stucco Brick Mould SureEdge TM...ALL...26 T-Astragal T-Astragal T-Mould T-Mould T-Mould T-Mould Top Hand Rail Transom Sill Transom Sill Utility Mould WM Utility Moulding Utility Moulding/Stop Vent Blade Vent Sill West Coast Casing Williamsburg Casing Window Casing
39 37 NUMERIC LISTING Item # Page Item # Page Item # Page Item # Page , , Royal S4S...25 Sheet Board...27 SureEdge TM...26

40 1.855.ROYAL85 royalbuildingproducts.com 2018 Royal Building Products
Make every component count.
 Make every component count. Technical Bulletin Installation Instructions ABOUT THE MATERIAL The frame and material have been thoroughly tested for strength, durability and low maintenance, offering a never
Trim and Moulding. Product Spec Guide
 Trim and Moulding 2017 Product Spec Guide Table of Contents Facts are facts and details are details. Royal Building Products offers a seriously complete line of 100% cellular PVC trim, moulding and siding
Contractor Handbook 1
 Contractor Handbook 1 Table of Contents This guide outlines basic installation practices for the installation of Royal PVC trims and mouldings. These products should be installed in accordance with local
Canadian Product Spec Guide
 2017 Canadian Product Spec Guide Table of Contents Facts are facts and details are details. Royal Building Products offers a seriously complete line of 100% cellular PVC trim, moulding and siding accessories.
Exterior Moulding & Trim Special Order Items. royalbuildingproducts.com Royal Building Products
 Exterior Moulding & Trim Special Order Items royalbuildingproducts.com 20 Royal Building Products How to Place a Special Order Facts are facts and details are details. Royal Building Products offers a
Make every component count.
 Make every component count. We understand that the right components add character to every project. That s why Royal Building Products offers a seriously complete line of 100% cellular PVC sheet board,
Contractor Handbook 1
 Contractor Handbook 1 2 Table of Contents This guide outlines basic installation practices for the installation of Royal PVC trims and mouldings. These products should be installed in accordance with local
Trim and Moulding. Product Spec Guide
 Trim and Moulding 2018 Product Spec Guide Facts are facts and details are details. Royal Building Products offers a seriously complete line of 100% cellular PVC trim, moulding and siding accessories. Which
Installation Guidelines EX-Cel & NuCedar PVC Trim, Sheet & Moulding
 Installation Guidelines INTRODUCTION EX-Cel & NuCedar PVC Trim is well suited for many different applications. Especially; Any project where wood trim boards would traditionally be used. Applications with
AZEK Trim & Moulding Install Guide
 AZEK Trim and Moulding AZEK Trim & Moulding Install Guide Storage & Handling, Cutting, Drilling, Routing... 2 Fastening, Expansion & Contraction... 3 Painting, Gluing... 4-5 Spanning, Water Table... 6
Instructional videos are available online at
 Instructional videos are available online at www.intexmillwork.com Please Read Before Getting Started Important Information about the Hampton Rail System The Hampton Rail system utilizes pre-marked dimples
Give your homes a distinctive edge.
 Give your homes a distinctive edge. { trim & fascia Window & Door surrounds garage Door surrounds decorative moulding } We give every home its own signature. Today s homebuyers aren t just looking for
The look of wood. The ease of low maintenance.
 The look of wood. The ease of low maintenance. Today, people want the beauty of wood without the high cost of maintenance that goes with it. That s why they re turning to Kleer cellular PVC products. Kleer
Installation Guide. Replacing Wood For Good
 Replacing Wood For Good Installation Guide THE PLY GEM PROMISE: Ply Gem is a 70-year leader in pioneering performance home exteriors, with a superior warranty for exactly the home you want for decades
PURE. Exterior PVC Millwork Catalog. Preparation UV Protection Realistic Look Extruded by Gossen EXTERIOR PVC MILLWORK
 PURE EXTERIOR PVC MILLWORK Preparation UV Protection Realistic Look Extruded by Gossen Exterior PVC Millwork Catalog 2015 High performance millwork for a simply beautiful exterior GOSSEN : A LEGACY OF
Shapes Siding. Perfection Shingles. Chalk Line
 Snap a Chalk Line Shapes Siding Perfection Shingles Chalk Line To establish a straight reference line to guide the positioning of the starter strip and the first course of siding, snap a chalk line. starter
Installation Guide. for E-Series/Eagle Clad Hinged Inswing French Door
 Installation Guide for E-Series/Eagle Clad Hinged Inswing French Door Thank you for choosing Andersen. Instructions are for typical, new wood-framed wall construction with weather protection in place.
Sawn Baluster Sizing and Installation Guide
 Sawn Baluster Sizing and Installation Guide Welcome to the Durabrac sizing and installation guide for Sawn Balusters. This guide has been prepared to answer any questions you may have about our Sawn Balusters
HOW TO INSTALL ELITE PANELED WAINSCOTING Using X-Rails with Either Raised, Flat or Beaded Panels
 HOW TO INSTALL ELITE PANELED WAINSCOTING Using X-Rails with Either Raised, Flat or Beaded Panels 1. First, remove the cover plates from all electrical outlets. All baseboards should also be removed; the
SECTION SIMULATED WOOD TRIM
 SECTION 06455 SIMULATED WOOD TRIM Display hidden notes to specifier. (Don't know how? Click Here) Copyright 2011-2011 ARCAT, Inc. - All rights reserved PART 1 GENERAL 1.1 SECTION INCLUDES A. Simulated
Installation Guidelines
 CertainTeed Exterior Trim Installation Guidelines Installation Guidelines Restoration Millwork cellular PVC trim is an exterior decorative trim for use only in non-loadbearing applications. It must never
Balustrade Systems / Installation Instructions
 A. PARTS AND SUPPLIES NEEDED FOR INSTALLATION Hardware included for each 10 section of rail: 2 3 x 1-1/2 L-brackets 4 1-3/4 x 3/16 Blue hex-head screws for anchoring the L-brackets to the newel cap, column
Eagle clad double-hung window installation instructions
 Eagle clad double-hung window installation instructions These instructions are for typical installation in new typical wood frame wall construction. These instructions and methods are not intended for
Vinyl Windows Manufactured by VPI Quality Windows
 Vinyl Windows Manufactured by VPI Quality Windows Part Number: 531&591 Installation 531 & 591 SERIES SLIDING AND HUNG WINDOW INSTALLATION INSTRUCTIONS Installation Instructions for Typical Construction.
Installation Guide. Pionite Decorative Surfaces One Pionite Road, Auburn, Maine PIONITE ( )
") Installation Guide A Subsidiary of Panolam Surface Systems SMPBRO00-012 6/14 Pionite decorative laminates are designed for finished interior surfaces which require high impact, wear and stain resistance
Installation Guide A Subsidiary of Panolam Surface Systems SMPBRO00-012 6/14 Pionite decorative laminates are designed for finished interior surfaces which require high impact, wear and stain resistance
Integrity Polygon and Round Top Installation and Finishing Instructions
 Integrity Polygon and Round Top Installation and Finishing Instructions 08/20/2004 70852 BEFORE YOU BEGIN IMPORTANT: Read these instructions thoroughly before beginning to install your Integrity Polygon
Aluminum Clad Wood Window 1/2 Reinforced Field Mulling and Stacking Supplement
 Aluminum Clad Wood Window 1/2 Reinforced Field Mulling and Stacking Supplement 1 Aluminum Clad Wood Window 1/2 Reinforced Field Mulling and Stacking Supplement The following instructions are a supplement
Free Foam Cellular PVC for Trim, Moulding, Profiles and Fabrication
 Free Foam Cellular PVC for Trim, Moulding, Profiles and Fabrication PALIGHTTRIMBOARD.COM 1 The Palram Story Who Is Palram Industries? Palram Industries is a global company that has engineered and manufactured
Effective February, 2015
 Effective February, 2015 Table of Contents Ensuring System Performance 1 Components 2 Frequently Asked Questions 3 List of Tools 3 Before you Begin Preparation 3 Quality Tips 4 Cold Weather Tips 4 Cleaning
Wood Molding Installation Guide
 Wood Molding Installation Guide 1 P age Estimating the Quantity of Molding Required for the Job. Calculate the following: 1. Total lineal feet of Wall Base required for the job: Lineal feet 2. Total lineal
INSTALLATION INSTRUCTIONS
 CERBER FIBER CEMENT SIDING - SIERRA PREMIUM SHAKE Construction Requirements Sierra Premium Shake boards must be installed over vertical wood framing spaced no greater than 16 oc. with an APA rated 7/16
Vinyl Windows and Doors Manufactured by VPI Quality Windows
 Vinyl Windows and Doors Manufactured by VPI Quality Windows Part Number: 511_Installation ENDURANCE CASEMENT\AWNING\PW INSTALLATION INSTRUCTIONS Installation Instructions for Typical Construction These
Installation Instructions
 www.marlite.com Effective Date 03/01/2018 ARTIZAN FRP, SYMMETRIX FRP, ENVUE FRP, STANDARD FRP Installation Instructions Statements expressed in this technical bulletin are recommendations for the application
PVC Column Wraps - Semi-Assembled INSTALLATION INSTRUCTIONS
 - Semi-Assembled INSTALLATION INSTRUCTIONS Page 1 of 2 Materials Needed Safety Glasses Pencil Tape Measure Miter, Jig or Skill Saw Combination Square Hammer or Air Nailer Nail Countersink Flat Head Fasteners
Installation Guide for E-Series/Eagle Clad Mechanically Fastened Windows
 Guide for E-Series/Eagle Clad Mechanically Fastened Windows Thank you for choosing Andersen. Instructions are for typical, new wood-framed wall construction with weather protection in place. Instructions
Installation Instructions Palladium 3D Hi Impact Wall System, Partial Height with Color Matched Caulk Joints
 Please read all instructions before installing Palladium 3D Hi Impact Wall System.. Before installation: a. Acclimate rigid sheet, Palladium 3D boards, adhesives and wall substrates to room temperature
Beams INSTALLATION INSTRUCTIONS
 Beams INSTALLATION INSTRUCTIONS Page 1 of 1 You may wish to paint, stain or faux finish your decorative millwork piece prior to installation. This can speed up installation and reduce errors (spilling
Installation Guide for Andersen 400 Series Tilt-Wash Transom Windows with Stormwatch Protection (PG Upgrade) Manufactured After 2006
 Manufactured After 2006") for Andersen 400 Series Tilt-Wash Transom Windows with Stormwatch Protection (PG Upgrade) Manufactured After 2006 Thank you for choosing Andersen. Instructions are for typical, new wood-framed wall construction
for Andersen 400 Series Tilt-Wash Transom Windows with Stormwatch Protection (PG Upgrade) Manufactured After 2006 Thank you for choosing Andersen. Instructions are for typical, new wood-framed wall construction
Flashing Materials. Rough Opening Preparation
 Installation Instructions for CertainTeed New Construction Windows Handling vinyl windows CAUTION: Always store vinyl windows and doors in an upright position on a slight angle. Never lay them flat or
VERTICAL STILE ABOVE HORIZONTAL TRIM VERTICAL STILE BELOW COVE BASE ADHESIVE. 1" [25.4mm] BASE DETAIL
![VERTICAL STILE ABOVE HORIZONTAL TRIM VERTICAL STILE BELOW COVE BASE ADHESIVE. 1 [25.4mm] BASE DETAIL](/thumbs/87/96020661.jpg "VERTICAL STILE ABOVE HORIZONTAL TRIM VERTICAL STILE BELOW COVE BASE ADHESIVE. 1 [25.4mm] BASE DETAIL") Please Read All sheet will be provided in stock sizes for field cutting. All trims will be provided in 8-0 stock lengths for field cutting. CEILING TRIM 1" [25.4mm] Acrovyn Interiors vinyl acrylic wall
Please Read All sheet will be provided in stock sizes for field cutting. All trims will be provided in 8-0 stock lengths for field cutting. CEILING TRIM 1" [25.4mm] Acrovyn Interiors vinyl acrylic wall
Frameless Inline Door With Return QCI5263
 INSTALLATION INSTRUCTIONS Frameless Inline Door With Return QCI5263 WALL MOUNT HINGES FRAMELESS DOOR / PANEL / RETURN PANEL QCI5263 REV. 0 Page 1 Certified 06/17/2016 Parts List with wall mount hinges
Tools required by installer: Materials required by installer:
 Installation Guidelines For Quaker Window Products Vinyl product line (Single Hung, Double Hung, Sliding Window, Fixed Window, Casement, Awning, and Hopper) Installer: Read these instructions completely
SECTION SIMULATED WOOD TRIM. Display hidden notes to specifier by using Tools / Options / View / Hidden Text.
 SECTION 06455 SIMULATED WOOD TRIM Display hidden notes to specifier by using Tools / Options / View / Hidden Text. PART 1 GENERAL 1.1 SECTION INCLUDES A. Simulated Wood Trimboards. B. Simulated Wood One
100% Cellular Vinyl Builder Products
 100% Cellular Vinyl Builder Products Royal Mouldings making your dreams last longer Royal Mouldings is a division of Royal Group and along with Royal Window and Door Profiles, Royal Building Products,
INSTALLATION INSTRUCTIONS for Wood Bay or Bow Windows with Nailing Fin or Exterior Trim (JII032)
") for Wood Bay or Bow Windows with Nailing Fin or Exterior Trim (JII0) Thank you for selecting JELD-WEN products. Attached are JELD-WEN s recommended installation instructions for wood and clad wood bay
for Wood Bay or Bow Windows with Nailing Fin or Exterior Trim (JII0) Thank you for selecting JELD-WEN products. Attached are JELD-WEN s recommended installation instructions for wood and clad wood bay
Sun Windows General Information New Construction Hinged Door Installation Instructions
 A G H F H H A. Apply Weather Resistive Barrier B. Apply Bottom Flashing Tape C. Install Sill Pan End Caps & Pan D. Caulk Sides & Top Nailing Surface, Set Door, Fasten E. Apply Side Flashing Tape F. Apply
Installation Guide for Architectural Wood Hinged Windows
 Guide for Architectural Wood Hinged Windows Congratulations! You have just purchased one of the many fine Andersen products. Proper assembly, installation and maintenance are essential if the benefits
How To Install Windows: Nail-Fin Application
 How To Install Windows: Nail-Fin Application Required Tools & Materials: Materials: 1 3/4" galvanized roofing nails. Nails must penetrate at least 1" into framing For mulled and/or DP50 or above units:
Chapter 17 - Porch Trim
 Chapter 17 - Porch Trim Contents Chapter 17 - Porch Trim... 17-1 Timing & Prerequisites... 17-2 Trim on Porch Beams (Volunteer)... 17-4 Smart Trim on the Bottom of the Beam... 17-4 Smart Trim on the Inside
INSTALLATION MANUAL STORAGE
 IMVersion 1.1 INSTALLATION MANUAL GENERAL GUIDE: The information in this IM is intended to serve as a general guide to proper installation with no warranties intended or implied. Prime Panels assumes no
Installation Guidelines for all Quaker products with nail fins New Construction nail fin installation with a Zip sheathing system.
 www.quakerwindows.com www.quakercommercialwindows.com PO Box 128 504 Highway 63 South Freeburg, MO 65035 800-347-0438 573-469-4151 (fax) Installation Guidelines for all Quaker products with nail fins New
Frameless Inline Door QCI5254
 INSTALLATION INSTRUCTIONS Frameless Inline Door QCI5254 FRAMELESS DOOR / PANEL QCI5254 REV. 0 Page 1 Cer fied 06/16/2016 Parts List with wall mount hinges *Quanes may vary QCI5254 REV. 0 Page 2 Cer fied
A. All trim that has been damages, broken, or missing shall be repaired or replaced with material of the same size, shape, and type.
 SECTION 062000 - FINISH CARPENTRY PART 1 - GENERAL 1.1 SECTION REQUIREMENTS A. All trim that has been damages, broken, or missing shall be repaired or replaced with material of the same size, shape, and
Base Trim Moulding - WM 623. Base Trim Moulding - WM 663. Base Trim Moulding - LWM 163E. Casing - WM 376. Casing - WM 445
 Trim Moulding Wood Trim Base Trim Moulding - WM 623 TBWM623 Base Trim Moulding Primed Finger Joint Pine WM 623 9/16 x 3-1/4 16 Base Trim Moulding - WM 663 TBWM663 Base Trim Moulding Primed Finger Joint
Installation Guide for Andersen 400 Series Tilt-Wash Transom and 200 Series Narroline Transom Windows
 for Andersen 400 Series Tilt-Wash Transom and 200 Series Narroline Transom Windows Congratulations! You have just purchased one of the many fine Andersen products. Proper assembly, installation and maintenance
Steel Reinforced Joining Thank you for choosing Andersen. Please leave this guide with building owner.
 Steel Reinforced Joining (Horizontal/Vertical) for Andersen 400 Series Woodwright & Tilt-Wash Double-Hung, Picture, and Transom Windows and 400 Series Double-Hung Half Circle and Flexiframe Specialty Windows
Fold-A-Way Patio Door ASSEMBLY & INSTALLATION GUIDE
 Fold-A-Way Patio Door ASSEMBLY & INSTALLATION GUIDE This instruction guide provides the minimum recommended procedures to correctly prepare the rough opening, install a fold-a-way patio door unit and apply
675 Quick N Stall Neo Angle Framed Hinge Shower Enclosure
 INSTALLATION INSTRUCTIONS 675 Quick N Stall Neo Angle Framed Hinge Shower Enclosure Call Technical Dept @ 1-800-452-2726 QCI1003 Page 1 of 9 Certified 10/01/09 INSTALLATION NOTES: Unpack your unit carefully
How to Install Elite Bayside Beadboard
 How to Install Elite Bayside Beadboard Beadboard will give a room a warm and comfortable feeling. Its beauty lies in its simplicity. It is one of the easiest to install out of all wainscoting, regardless
Installation Instructions Double-Hung, Single-Hung, Casement, Awning, Sliding, Picture & Shapes Non-Impact & Impact Resistant Nailing Fin Windows
 Installation Instructions Double-Hung, Single-Hung, Casement, Awning, Sliding, Picture & Shapes Non-Impact & Impact Resistant Nailing Fin Windows americancraftsmanwindows.com Project Requirements: Read
Aluminum Clad Wood Window Field Mulling and Stacking Instructions
 Aluminum Clad Wood Window Field Mulling and Stacking Instructions Mulling Stacking Mulling and Stacking IMPORTANT: Please read before you begin. TABLE OF CONTENTS AND TOOL / MATERIAL REQUIREMENTS START
Installation Guide. Shingles. Classical. Shingles. Warning. Storage. Cutting Shingles. Touch-Up. Eastern White Cedar
 Installation Guide Before you begin, take the time to read this entire guide to clearly understand the requirements and steps to follow for proper installation. The Fastening Make shingle fastening simpler
Wall Installations. Chapter 16 Wall Installations 16. 1
 16 Wall Installations Chapter 16 Wall Installations 16. 1 Alterna Premium Groutable Tile Create decorative backsplashes, accent walls, or other focal points with any size Alterna 16" x 16", 8" x 16", 8"
Chapter 9. Windows and Exterior Doors
 Chapter 9. Windows and Exterior Doors 9.1 INSTALLING WINDOWS 9.2 INSTALLING EXTERIOR HOUSE DOORS 9.3 INSTALLING SHED DOOR 9.4 INSTALLING EGRESS COMPONENTS Tools needed by volunteers: Hammer Nail apron
Effective April 1, 2013
 Effective April 1, 2013 Table of Contents Ensuring System Performance 1 Components 2 Frequently Asked Questions 3 List of Tools 3 Before you Begin Preparation 3 Quality Tips 4 Cold Weather Tips 4 Cleaning
PANEL INSTALLATION GUIDE
 GUIDE The Manufacturer has provided these instructions as installation guidelines in accordance with ASTM E-330. The manufacturer, however neither installs the panels nor has any control over the installation.
Read guide from beginning to end before starting installation. Read all warnings and cautions during unit installation.
 Installation Guide for E-Series/Eagle High-Performance Mullion Windows with LVL Reinforcement and Installed Using Type B Clips Thank you for choosing Andersen. Instructions are for typical, new wood-framed
Installation Guide for Andersen 200 Series Tilt-Wash Picture, Transom and Circle Top Windows
 for Andersen 200 Series Tilt-Wash Picture, Transom and Circle Top Windows Congratulations! You have just purchased one of the many fine Andersen products. Proper assembly, installation and maintenance
Double Frameless Swing Door QCI5247
 INSTALLATION INSTRUCTIONS Double Frameless Swing Door QCI5247 WALL MOUNT HINGES QCI5247 REV. 0 Page 1 Certified 06/16/2016 Parts List with wall mount hinges *Quantities may vary **Quantities double where
Shutter Installation Instructions
 Shutter Installation Instructions ITEMS YOU WILL NEED: Tape measure Framing square Screw gun Circular saw Caulk gun PL premium adhesive Exterior grade screws 1 ¾" Safety glasses Putty knife Window and
GREEN WORLD LUMBER GENUINE MAHOGANY DECKING INSTALLATION GUIDE
 GREEN WORLD LUMBER GENUINE MAHOGANY DECKING INSTALLATION GUIDE Genuine Mahogany is among the most durable natural wood decking available. When properly installed and maintained, you should have a beautiful
With Illustrations, Drawings & Step By Step Details. Click Here To Download 12,000 Shed Plans. 1 P a g e Download 12,000 More Shed Plans
 With Illustrations, Drawings & Step By Step Details Click Here To Download 12,000 Shed Plans 1 P a g e Download 12,000 More Shed Plans Table of Contents OVERVIEW... 3 MATERIALS & CUTTING LISTS... 4 DRAWINGS,
Installation Instructions
 Please read all instructions before installing products. STORAGE: Keep crates in the upright position. When unpacking, store panels flat in a clean dry place. BEFORE INSTALLATION: Check for damage that
IMPORTANT: Please read completely before you begin.
 Standardized Installation Instructions For Windows With Exterior Casings or Nailing Fins For Wood Brickmould Units, PVC Casing Trim Units For Aluminum Clad, Fiberglass Clad, Vinyl Clad, and All-Vinyl Units
Adorn Mortarless Stone Veneer Installation Natural Concrete Products
 Adorn Mortarless Stone Veneer Installation Adorn Mortarless Stone Veneer can be used on new or existing construction. Adorn is nailed or screwed onto the wall; therefore no brick ledge is required. Adorn
Best Barns USA. Regency Deluxe. 8' x 12' Assembly Book. revised February 15, 2017
 Best Barns USA Assembly Book revised February 15, 2017 Regency Deluxe 8' x 12' Manufactured by Reynolds Building Systems, Inc. 205 Arlington Drive, Greenville, PA 16125 This manual is copyrighted. Under
INSTALLATION INSTRUCTIONS IMPERVIA SLIDING PATIO DOOR WITH FINS
 2008 Pella Corporation Part Number: 803V0101 INSTALLATION INSTRUCTIONS IMPERVIA SLIDING PATIO DOOR WITH FINS Installation Instructions for Typical Wood Frame Construction. These instructions were developed
8 x 10 Timber-frame Garden Shed
 8 x 10 Timber-frame Garden Shed Includes: Step-By-Step Instructions, Complete Details & Materials Lists Timber-framing is a traditional building method that uses a simple framework of heavy timber posts
Vinyl Windows and Doors Manufactured by Pella Corporation
 Vinyl Windows and Doors Manufactured by Pella Corporation Part Number: V981255 2009 Pella Corporation INSTALLATION INSTRUCTION - INSTRUCCIONES DE INSTALACIÓN FOR BOW WINDOWS WITHOUT HEAD AND SEAT BOARD
Installation Guidelines. Next Dimension. Single Hung / Single Hung Fixed / Double Hung / Sliding Window / Fixed Window
 Installation Guidelines Next Dimension Single Hung / Single Hung Fixed / Double Hung / Sliding Window / Fixed Window Windsor Windows & Doors Windsor Windows & Doors 900 S. 19 th St. 2210 Stafford St. Extn
Frameless Inline Door QCI5248
 INSTALLATION INSTRUCTIONS Frameless Inline Door QCI5248 FRAMELESS PANEL / DOOR / PANEL QCI5248 REV. 0 Page 1 Certified 06/16/2016 Parts List with glass to glass hinges *Quantities may vary. **Support Bar
How-to-Install. Laminate Countertops and Sheet Laminate. FREE brochure Reverso en español
 FREE brochure Reverso en español How-to-Install Laminate Countertops and Easy to install instructions provided inside Multiple colors available for unique design options Durable and easy to care for Accessory
COMPOSITE SIDING INSTALLATION GUIDE
 CENTURY HOME LIVING COMPOSITE SIDING INSTALLATION GUIDE Read all instructions prior to installing any siding product. Failure to install and finish this product in accordance with all local building codes,
Craftsman Style Columns. Ease of installation Interior or exterior use Quick Ship from inventory Made-to-Order services CAD drawings / shop drawings
 Craftsman Style Columns Craftsman Style Columns S O L U T I O N S Complete kits Low maintenance PVC Square tapered columns Square non-tapered columns Architect library on web Ease of installation Interior
You expect to find PVC. PVC Lumber PROS & CONS OF PVC PROS
 PROS & CONS OF PVC PROS Won t rot. Doesn t have to be painted (but can be). No defects; consistent. Easy to cut and machine. Readily available. CONS Not designed for structural use. Plastic appearance
Installation Guide. Tools Recommended:
 Installation Guide GenStone products are designed to provide a realistic look of stone or rock at a fraction of the installed cost. To achieve this, we have engineered the time and hassle out of installation
Best Barns USA Assembly Book
 Best Barns USA Assembly Book Revised September 12, 2017 the Easton 12'x 16' Manufactured by Reynolds Building Systems, Inc. 205 Arlington Drive - Greenville, PA 16125 This manual is copyrighted. Under
Therma-Tru Fiber-Classic and Smooth-Star Sliding Patio Door System
 PATIODOORSYSTEMS Therma-Tru Fiber-Classic and Smooth-Star Sliding Patio Door System Quad Unit Assembly & Installation Read all instructions before starting. The applicable standards for these products
INSTALLATION, STORAGE AND WALL CONSTRUCTION DETAILS
 www.capecodsiding.com INSTALLATION, STORAGE AND WALL CONSTRUCTION DETAILS IMPORTANT READ THE FOLLOWING INSTRUCTIONS CAREFULLY BEFORE INSTALLING YOUR WOOD SIDING. FAILURE TO STRICTLY FOLLOW THESE INSTALLATION,
Balustrade System Installation - Cambridge & Huntington
 A. PARTS AND SUPPLIES NEEDED FOR INSTALLATION Hardware included for each 10 section of rail: 2 3 x 1-1/2 L-brackets 4 1-3/4 x 3/16 Blue hex-head screws for anchoring the L-brackets to the newel cap, column
Wall Panel Installation
 Wall Panel Installation Special care must be taken in handling of panels with grout lines, especially in cold weather. The indented grout lines are by necessity a little thinner than other areas of the
Installation Guide. for Andersen 400 Series Tilt-Wash Picture Windows with Stormwatch Protection (High-Performance Impact Resistant Glass)
") for Andersen 400 Series Tilt-Wash Picture Windows with Stormwatch Protection (High-Performance Impact Resistant Glass) Installation Guide Congratulations! You have just purchased one of the many fine Andersen
for Andersen 400 Series Tilt-Wash Picture Windows with Stormwatch Protection (High-Performance Impact Resistant Glass) Installation Guide Congratulations! You have just purchased one of the many fine Andersen
Panel Assembly and Installation
 Assembly and Installation Assembly and Installation for Andersen 400 Series Frenchwood, 200 Series Narroline, 200 Series Perma-Shield Gliding Patio Doors and 400 Series Perma-Shield Gliding Patio Doors
Installation Manual for Thermo Panel
 Installation Manual for Thermo Panel 1 About Thermo Panel is a building wrap, insulation, air and water barrier, mold inhibitor and cold bridge eliminator all-in-one. Delivering an R-value of up to 5 on
Chapter 9. Windows and Exterior Doors
 Chapter 9. Windows and Exterior Doors 9.1 INSTALLING WINDOWS 9.2 INSTALLING EXTERIOR HOUSE DOORS 9.3 INSTALLING SHED DOOR 9.4 INSTALLING BASEMENT EGRESS COMPONENTS Tools needed by volunteers: Hammer Nail
Frameless Heavy Glass Door with Wall Mount Hinges
 INSTALLATION INSTRUCTIONS Frameless Heavy Glass Door with Wall Mount Hinges QCI-5245 QCI5245 REV. 0 Page 1 Certified 06/16/16 Frameless Door with Wall Mount Hinges ITEM NUMBER DESCRIPTION QUANTITY 1 DOOR
PRODUCT SUGGESTIONS. What to use when installing
 PRODUCT SUGGESTIONS What to use when installing NAILS & SCREWS 2 NAILS & SCREWS STAINLESS STEEL HEADCOTE SCREW Headcote stainless steel screws with white coated heads by Starborn are designed to blend
FRAMED PANEL / DOOR / PANEL CONTINUOUS HINGE SHOWER ENCLOSURE INSTALLATION INSTRUCTIONS
 FRAMED / DOOR / CONTINUOUS HINGE SHOWER ENCLOSURE INSTALLATION INSTRUCTIONS QCI5229 Rev 0 6 INSTALLATION NOTES: Unpack your unit carefully and inspect for freight damage. Lay out and identify all parts
VINYL REPLACEMENT WINDOW INSTALLATION STANDARDS
 VINYL REPLACEMENT WINDOW INSTALLATION STANDARDS BEFORE you start to remove the existing windows Place clean drop cloths in all work areas. Re-measure the opening to ensure the new window will fit. Remove
Installation Guide for E-Series/Eagle Ascent 2 or 4 Panel Gliding (Sliding) Patio Doors
 Patio Doors") Installation Guide for E-Series/Eagle Ascent 2 or 4 Panel Gliding (Sliding) Patio Doors Thank you for choosing Andersen. Instructions are for typical, new wood-framed wall construction with weather protection
Installation Guide for E-Series/Eagle Ascent 2 or 4 Panel Gliding (Sliding) Patio Doors Thank you for choosing Andersen. Instructions are for typical, new wood-framed wall construction with weather protection