LMR Master S412D. User Guide. An Integrated, Handheld Multi-function Land Mobile Radio Test Tool for Greater Flexibility and Technician Productivity
|
|
|
- Allyson Lawrence
- 5 years ago
- Views:
Transcription
1 User Guide LMR Master S412D An Integrated, Handheld Multi-function Land Mobile Radio Test Tool for Greater Flexibility and Technician Productivity Anritsu Company 490 Jarvis Drive Morgan Hill, CA USA Part Number: Revision: D Published: October 2009 Copyright 2009 Anritsu Company
2 WARRANTY The Anritsu product(s) listed on the title page is (are) warranted against defects in materials and workmanship for one year from the date of shipment. Anritsu s obligation covers repairing or replacing products which prove to be defective during the warranty period. Buyers shall prepay transportation charges for equipment returned to Anritsu for warranty repairs. Obligation is limited to the original purchaser. Anritsu is not liable for consequential damages. LIMITATION OF WARRANTY The foregoing warranty does not apply to Anritsu connectors that have failed due to normal wear. Also, the warranty does not apply to defects resulting from improper or inadequate maintenance by the Buyer, unauthorized modification or misuse, or operation outside of the environmental specifications of the product. No other warranty is expressed or implied, and the remedies provided herein are the Buyer s sole and exclusive remedies. DISCLAIMER OF WARRANTY DISCLAIMER OF WARRANTIES. TO THE MAXIMUM EXTENT PERMITTED BY APPLICABLE LAW, ANRITSU COMPANY AND ITS SUPPLIERS DISCLAIM ALL WARRANTIES, EITHER EXPRESS OR IMPLIED, INCLUDING, BUT NOT LIMITED TO, IMPLIED WARRANTIES OF MERCHANTABILITY AND FITNESS FOR A PARTICULAR PURPOSE, WITH REGARD TO THE SOFTWARE PRODUCT. THE USER ASSUMES THE ENTIRE RISK OF USING THE PROGRAM. ANY LIABILITY OF PROVIDER OR MANUFACTURER WILL BE LIMITED EXCLUSIVELY TO PRODUCT REPLACEMENT. NO LIABILITY FOR CONSEQUENTIAL DAMAGES. TO THE MAXIMUM EXTENT PERMITTED BY APPLICABLE LAW, IN NO EVENT SHALL ANRITSU COMPANY OR ITS SUPPLIERS BE LIABLE FOR ANY SPECIAL, INCIDENTAL, INDIRECT, OR CONSEQUENTIAL DAMAGES WHATSOEVER (INCLUDING, WITHOUT LIMITATION, DAMAGES FOR LOSS OF BUSINESS PROFITS, BUSINESS INTERRUPTION, LOSS OF BUSINESS INFORMATION, OR ANY OTHER PECUNIARY LOSS) ARISING OUT OF THE USE OF OR INABILITY TO USE THE SOFTWARE PRODUCTS, EVEN IF ANRITSU COMPANY HAS BEEN ADVISED OF THE POSSIBILITY OF SUCH DAMAGES. BECAUSE SOME STATES AND JURISDICTIONS DO NOT ALLOW THE EXCLUSION OR LIMITATION OF LIABILITY FOR CONSEQUENTIAL OR INCIDENTAL DAMAGES, THE ABOVE LIMITATION MAY NOT APPLY TO YOU. TRADEMARK ACKNOWLEDGMENTS Windows, Windows XP, Microsoft Paint, Microsoft Word, Microsoft Access, Microsoft Excel, Microsoft PowerPoint, and Visual Studio are all registered trademarks of Microsoft Corporation. Acrobat Reader is a registered trademark of Adobe Corporation. NXDN is a trademark of Icom Incorporated and Kenwood Corporation. LMR Master is a trademark of Anritsu Company. NOTICE Anritsu Company has prepared this manual for use by Anritsu Company personnel and customers as a guide for the proper installation, operation and maintenance of Anritsu Company equipment and computer programs. The drawings, specifications, and information contained herein are the property of Anritsu Company, and any unauthorized use or disclosure of these drawings, specifications, and information is prohibited; they shall not be reproduced, copied, or used in whole or in part as the basis for manufacture or sale of the equipment or software programs without the prior written consent of Anritsu Company. UPDATES Updates, if any, can be downloaded from the Documents area of the Anritsu web site at:
3
4 CE Conformity Marking Anritsu affixes the CE Conformity marking onto its conforming products in accordance with Council Directives of The Council Of The European Communities in order to indicate that these products conform to the EMC and LVD directive of the European Union (EU). C-tick Conformity Marking Anritsu affixes the C-tick marking onto its conforming products in accordance with the electromagnetic compliance regulations of Australia and New Zealand in order to indicate that these products conform to the EMC regulations of Australia and New Zealand. Notes On Export Management This product and its manuals may require an Export License or approval by the government of the product country of origin for re-export from your country. Before you export this product or any of its manuals, please contact Anritsu Company to confirm whether or not these items are export-controlled. When disposing of export-controlled items, the products and manuals need to be broken or shredded to such a degree that they cannot be unlawfully used for military purposes. Mercury Notification This product uses an LCD backlight lamp that contains mercury. Disposal may be regulated due to environmental considerations. Please contact your local authorities or, within the United States, the Electronics Industries Alliance ( for disposal or recycling information.
5
6

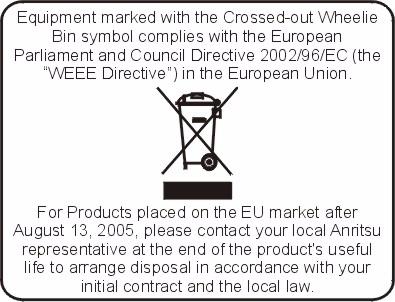
7 Safety Symbols To prevent the risk of personal injury or loss related to equipment malfunction, Anritsu Company uses the following symbols to indicate safety-related information. For your own safety, please read the information carefully before operating the equipment. Symbols Used in Manuals Danger This indicates a very dangerous procedure that could result in serious injury or death, or loss related to equipment malfunction, if not performed properly. Warning This indicates a hazardous procedure that could result in light-to-severe injury or loss related to equipment malfunction, if proper precautions are not taken. Caution This indicates a hazardous procedure that could result in loss related to equipment malfunction if proper precautions are not taken. Safety Symbols Used on Equipment and in Manuals The following safety symbols are used inside or on the equipment near operation locations to provide information about safety items and operation precautions. Ensure that you clearly understand the meanings of the symbols and take the necessary precautions before operating the equipment. Some or all of the following five symbols may or may not be used on all Anritsu equipment. In addition, there may be other labels attached to products that are not shown in the diagrams in this manual. This indicates a prohibited operation. The prohibited operation is indicated symbolically in or near the barred circle. This indicates a compulsory safety precaution. The required operation is indicated symbolically in or near the circle. This indicates a warning or caution. The contents are indicated symbolically in or near the triangle. This indicates a note. The contents are described in the box. These indicate that the marked part should be recycled. S412D User Guide PN: Rev. D Safety-1


8 For Safety Warning Always refer to the operation manual when working near locations at which the alert mark, shown on the left, is attached. If the operation, etc., is performed without heeding the advice in the operation manual, there is a risk of personal injury. In addition, the equipment performance may be reduced. Moreover, this alert mark is sometimes used with other marks and descriptions indicating other dangers. Warning When supplying power to this equipment, connect the accessory 3-pin power cord to a 3-pin grounded power outlet. If a grounded 3-pin outlet is not available, use a conversion adapter and ground the green wire, or connect the frame ground on the rear panel of the equipment to ground. If power is supplied without grounding the equipment, there is a risk of receiving a severe or fatal electric shock. Warning This equipment can not be repaired by the operator. Do not attempt to remove the equipment covers or to disassemble internal components. Only qualified service technicians with a knowledge of electrical fire and shock hazards should service this equipment. There are high-voltage parts in this equipment presenting a risk of severe injury or fatal electric shock to untrained personnel. In addition, there is a risk of damage to precision components. Warning Use two or more people to lift and move this equipment, or use an equipment cart. There is a risk of back injury if this equipment is lifted by one person. Caution Electrostatic Discharge (ESD) can damage the highly sensitive circuits in the instrument. ESD is most likely to occur as test devices are being connected to, or disconnected from, the instrument s front and rear panel ports and connectors. You can protect the instrument and test devices by wearing a static-discharge wristband. Alternatively, you can ground yourself to discharge any static charge by touching the outer chassis of the grounded instrument before touching the instrument s front and rear panel ports and connectors. Avoid touching the test port center conductors unless you are properly grounded and have eliminated the possibility of static discharge. Repair of damage that is found to be caused by electrostatic discharge is not covered under warranty. Safety-2 PN: Rev. D S412D User Guide
9 Table of Contents Chapter 1 General Information 1-1 Introduction Description Options Standard Accessories Optional Accessories Preventive Maintenance Calibration InstaCal Module Annual Verification ESD Precautions Mode References Anritsu Service Centers Chapter 2 Functions and Operations 2-1 Introduction Connector Panel Display Overview Front Panel Overview Function Hard Keys MODE FREQ/DIST AMPLITUDE MEAS/DISP Keypad Hard Keys Soft Keys Cable and Antenna Analyzer Mode FREQ/DIST AMPLITUDE MEAS/DISP MARKER LIMIT SYS S412D User Guide PN: Rev. D Conents-1
10 Table of Contents (Continued) 2-9 Spectrum Analyzer Mode FREQ/DIST AMPLITUDE MEAS/DISP MARKER LIMIT SYS Power Meter (Internal) Mode FREQ/DIST AMPLITUDE MEAS/DISP SYS Power Monitor (External Detector) (Option 5) SYS High Accuracy Power Meter Mode (Option 19) FREQ/DIST AMPLITUDE MEAS/DISP Transmission Measurement Mode (Option 21) FREQ/DIST AMPLITUDE MEAS/DISP MARKER LIMIT SYS Interference Analyzer Mode (Option 25) FREQ/DIST AMPLITUDE MEAS/DISP MARKER LIMIT SYS Channel Scanner Mode (Option 27) FREQ/DIST AMPLITUDE MEAS/DISP SYS Conents-2 PN: Rev. D S412D User Guide
11 Table of Contents (Continued) 2-16 CW Signal Generator Mode (Option 28) FREQ/DIST AMPLITUDE MEAS/DISP SYS iden Signal Analyzer Mode (Option 68) FREQ/DIST AMPLITUDE MEAS/DISP P25/LSM Tx Signal Analyzer (Option 520) FREQ/DIST AMPLITUDE MEAS/DISP P25/LSM Talk-Out Coverage Mode (Option 522) FREQ/DIST AMPLITUDE MEAS/DISP LIMIT NXDN Tx Signal Analyzer (Option 530) FREQ/DIST AMPLITUDE MEAS/DISP NXDN Talk-Out Coverage Mode (Option 532) FREQ/DIST AMPLITUDE MEAS/DISP LIMIT Symbols Self Test S412D User Guide PN: Rev. D Conents-3
12 Table of Contents (Continued) 2-24 Error Messages Self Test Error Messages Range Error Messages Spectrum Analyzer Error Messages InstaCal Error Messages Bias Tee Error Message (Option 10 only) High Accuracy Power Meter (Option 19) Error Messages General Error Messages Battery Information Charging a New Battery Charging the Battery in the LMR Master Charging the Battery in the Optional Charger Determining Remaining Battery Life Battery Life Important Battery Information Chapter 3 Getting Started 3-1 Introduction Power On Procedure Cable and Antenna Analyzer Mode Selecting the Frequency Calibration OSL Calibration Procedures InstaCal Module Calibration Procedures InstaCal Module Verification Calibration with the Test Port Extension Cable Auto Scale Amplitude Scale Set the Distance and Cable Type Spectrum Analyzer Mode Selecting Spectrum Analyzer Mode Making a Measurement Selecting the Frequency Selecting the Amplitude Selecting Bandwidth Parameters Selecting Sweep Parameters Adjusting Attenuator Settings Selecting a Signal Standard Conents-4 PN: Rev. D S412D User Guide
13 Table of Contents (Continued) 3-6 Save and Recall a Setup Saving a Setup Recalling a Setup Save and Recall a Display Saving a Display Recalling a Display Changing the Units Changing the Language Adjusting Markers Adjusting Limits Adjusting a Single Limit Defining an Upper Limit Defining a Lower Limit Adjusting Segmented Limits Enabling the Limit Beep Adjusting the LCD Brightness Printing Printing a Screen Printer Switch Settings Using the Soft Carrying Case Chapter 4 Cable & Antenna Analyzer Measurements 4-1 Introduction Line Sweep Fundamentals CW Mode Information Required for a Line Sweep Typical Line Sweep Test Procedures System Return Loss Measurement Cable Loss Measurement Distance-To-Fault (DTF) Transmission Line Test Resolution Antenna Subsystem Return Loss Test Chapter 5 Spectrum Analyzer Measurement Mode 5-1 Introduction Measurement Fundamentals Effect of Resolution Bandwidth Effect of Video Bandwidth Sweep Limitations Attenuator Functions S412D User Guide PN: Rev. D Conents-5
14 Table of Contents (Continued) 5-3 Preamplifier Preamplifier Operation Preamplifier Measurement Example Dynamic Attenuation Control Selecting the Signal Standard and Channel Field Strength Measurements Occupied Bandwidth Percent of Power Method XdB Down Method Channel Power Measurement Adjacent Channel Power Ratio AM/FM Demodulation Carrier to Interference Ratio (C/I) Chapter 6 Internal Power Meter Mode 6-1 Introduction Power Measurement Offset Calibration Recall an Offset Calibration Turn Off an Offset Calibration Changing the Display Units Displaying Relative Power Chapter 7 Power Monitor Mode (Option 5) 7-1 Introduction Power Measurement Chapter 8 High Accuracy Power Meter (Option 19) 8-1 Introduction Power Measurement Transferring Data to Master Software Tools Chapter 9 Transmission Measurement Mode (Option 21) 9-1 Introduction Measuring Active Devices Calibration Procedure Chapter 10 Bias Tee (Option 10) 10-1 Introduction Procedure Conents-6 PN: Rev. D S412D User Guide
15 Table of Contents (Continued) Chapter 11 GPS Feature (Option 31) 11-1 Introduction Activating the GPS Feature Saving with GPS Information Recalling GPS Information Chapter 12 Interference Analyzer Mode (Option 25) 12-1 Introduction Interference Analysis Spectrogram Signal Strength RSSI Signal ID Chapter 13 Channel Scanner Mode (Option 27) 13-1 Introduction Channel Scanner Chapter 14 CW Signal Generator Mode (Option 28) 14-1 Introduction Required Equipment Procedure Operation with Option 5, External Power Monitor Soft Keys Offset Chapter 15 iden Signal Analyzer (Option 68) 15-1 Introduction Set Up and Measurement Procedure Measurement Views Spectrum ACPR Demod Power vs. Time Chapter 16 P25/LSM Transmit Signal Analyzer (Option 520) 16-1 Introduction Measurement Views Constellation Histogram Control Channel Measurement S412D User Guide PN: Rev. D Conents-7
16 Table of Contents (Continued) Chapter 17 P25/LSM Talk-Out Coverage (Option 522) 17-1 Introduction Measurement Views RSSI vs. Time BER vs. Time RSSI and BER/MER vs. Time Graphs Limit Lines for RSSI and BER/MER vs. Time Graphs Chapter 18 NXDN Transmit Signal Analyzer (Option 530) 18-1 Introduction Measurement Views Constellation Histogram Control Channel Measurement Chapter 19 NXDN Talk-Out Coverage (Option 532) 19-1 Introduction Measurement Views RSSI vs. Time BER vs. Time RSSI and BER/MER vs. Time Graphs Limit Lines for RSSI and BER/MER vs. Time Graphs Appendix A Reference Data A-1 Coaxial Cable Technical Data A-1 A-2 Antenna Technical Data A-4 Appendix B Windowing B-1 Introduction B-1 B-2 Examples B-1 Appendix C Signal Standards C-1 Introduction C-1 Index Conents-8 PN: Rev. D S412D User Guide
17 Chapter 1 General Information 1-1 Introduction This chapter provides a description, optional accessories, preventive maintenance, and calibration requirements for the LMR Master model S412D. Throughout this manual, the term LMR Master will refer to the S412D. Table 1-1. S412D Mode and Frequency Model Mode Frequency Range S412D Cable and Antenna Analyzer Spectrum Analyzer Power Meter 25 MHz to 1600 MHz 100 khz to 1600 MHz 4.5 MHz to 1600 MHz 1-2 Description The LMR Master model S412D is a hand held cable and antenna analyzer, power meter, and spectrum analyzer that includes a keypad to enter data and a color liquid crystal display (LCD) to provide graphic indications of various measurements. The LMR Master is capable of up to 1.5 hours of continuous operation from a fully charged field-replaceable battery and can be operated from a 12Vdc source. Built-in energy conservation features can be used to extend battery life. The LMR Master is designed for measuring SWR, return loss, cable insertion loss, and locating faulty RF components in antenna systems. The LMR Master includes spectrum analysis capabilities with carrier-to-interference analysis. The displayed trace can be scaled or enhanced with frequency markers or limit lines. A menu option provides for an audible beep when the limit value is exceeded. The LCD brightness can be adjusted for optimum visibility in varying environments. S412D User Guide PN: Rev. D 1-1
18 1-3 Options General Information 1-3 Options The following options are available for the S412D: Table 1-2. Available Options Option Description S412D MHz Frequency Extension S412D-0005 Power Monitor (requires external detector) S412D-0010 Bias Tee S412D-0019 High Accuracy Power Meter (sensor not included) S412D-0021 Transmission Measurement S412D-0025 Interference Analyzer (requires directional antenna) S412D-0027 Channel Scanner S412D-0028 CW Signal Generator (requires CW Signal Generator Kit, 61534) S412D-0031 GPS (includes GPS antenna) S412D-0068 iden Signal Analyzer S412D-0520 P25 Tx Signal Analyzer S412D-0522 P25 Talk-Out Coverage S412D-0530 NXDN Tx Signal Analyzer S412D-0532 NXDN Talk-Out Coverage 1-2 PN: Rev. D S412D User Guide
19 General Information 1-4 Standard Accessories 1-4 Standard Accessories Table 1-3 lists items supplied with the S412D LMR Master. Table 1-3. Standard Accessories Part Number Description Soft Carrying Case Rechargeable Battery, Ni-MH R AC DC Adapter Automotive Cigarette Lighter 12 Volt DC Adapter Master Software Tools CDROM Serial Interface Cable (null modem type) R USB to RS-232 Adapter Cable User Guide One-Year Warranty S412D User Guide PN: Rev. D 1-3
20 1-5 Optional Accessories General Information 1-5 Optional Accessories Table 1-4 lists optional accessories available for the S412D LMR Master. Table 1-4. Optional Accessories (1 of 4) Part Number Description Calibration Components ICN50B InstaCal Calibration Module, 2 MHz to 6.0 GHz, N(m), 50 Ω OSLN50-1 Precision Open/Short/Load, DC to 6 GHz, 42 db, 50 Ω, N(m) OSLNF50-1 Precision Open/Short/Load, DC to 6 GHz, 42 db, 50 Ω, N(f) 22N50 Open/Short, DC to 18 GHz, N(m), 50 Ω SM/PL-1 Precision Load, DC to 6 GHz, 42 db, N(m), 50 Ω 22NF50 Open/Short, DC to 18 GHz, N(f), 50 Ω SM/PLNF-1 Precision Load, DC to 6 GHz, 42 db, N(f), 50 Ω R Precision Open, TNC(m), 18 GHz, 50 Ω R Precision Short, TNC(m), 18 GHz, 50 Ω R Precision Termination, TNC(m), 18 GHz, 50 Ω R Precision Open, TNC(f), 18 GHz, 50 Ω R Precision Short, TNC(f), 18 GHz, 50 Ω R Precision Termination, TNC(f), 18 GHz, 50 Ω R Precision Open/Short/Load, DC to 4 GHz, 7/16 DIN(m), 50 Ω R Precision Open/Short/Load, DC to 4 GHz, 7/16 DIN(f), 50 Ω Precision Adapters 34NN50A Precision Adapter, N(m) N(m), DC to 18 GHz, 50 Ω 34NFNF50 Precision Adapter, N(f) N(f), DC to 18 GHz, 50 Ω Adapters R Adapter, N(m) SMA(m), DC to 18 GHz, 50 Ω R Adapter, N(m) SMA(f), DC to 18 GHz, 50 Ω R Adapter, N(f) SMA(m), DC to 18 GHz, 50 Ω R Adapter, N(f) SMA(f), DC to 18 GHz, 50 Ω R Adapter, N(m) N(m), 90 Right Angle, DC to 11 GHz, 50 Ω Adapter, N(m) BNC(f), DC to 1.3 GHz, 50 Ω R Adapter, 7/16 DIN(f) N(m), DC to 7.5 GHz, 50 Ω R Adapter, 7/16 DIN(f) N(f), DC to 7.5 GHz, 50 Ω R Adapter, 7/16 DIN(m) N(m), DC to 7.5 GHz, 50 Ω R Adapter, 7/16 DIN(m) N(f), DC to 7.5 GHz, 50 Ω R Adapter, 7/16 DIN(m) 7/16 DIN(m), DC to 7.5 GHz, 50 Ω R Adapter, 7/16 DIN(f) 7/16 DIN(f), DC to 7.5 GHz, 50 Ω R Adapter, TNC(f) to N(f), 18 GHz, 50 Ω 1-4 PN: Rev. D S412D User Guide
21 General Information 1-5 Optional Accessories Table 1-4. Optional Accessories (2 of 4) Part Number Description R Adapter, TNC(f) to N(m), 18 GHz, 50 Ω R Adapter, TNC(m) to N(f), 18 GHz, 50 Ω R Adapter, TNC(m) to N(m), 18 GHz, 50 Ω R Adapter, TNC(m) to SMA(f), 18 GHz, 50 Ω R Adapter, TNC(m) to SMA(m), 18 GHz, 50 Ω R Adapter, TNC(f) to TNC(f), 18 GHz, 50 Ω R Adapter, TNC(m) to TNC(m), 18 GHz, 50 Ω Adapters w/ Reinforced Grip R Adapter w/ Reinforced Grip, 7/16 DIN(f)-7/16 DIN(f), DC to 6 GHz, 50 Ω Test Port Cables Cable, 0.46m, N(m)-N(m), 4 GHz, 50 Ω R Cable, 0.91m, N(m)-N(f), 4 GHz, 50 Ω R Cable, 0.91m, N(m)-N(m), 4 GHz, 50 Ω Test Port Cables, Armored 15NN50-1.5C Test Port Cable Armored, 1.5 meters, N(m)-N(m), 6 GHz, 50 Ω 15NN50-3.0C Test Port Cable Armored, 3.0 meters, N(m)-N(m), 6 GHz, 50 Ω 15NN50-5.0C Test Port Cable Armored, 5.0 meters, N(m)-N(m), 6 GHz, 50 Ω 15NNF50-1.5C Test Port Cable Armored, 1.5 meters, N(m)-N(f), 6 GHz, 50 Ω 15NNF50-3.0C Test Port Cable Armored, 3.0 meters, N(m)-N(f), 6 GHz, 50 Ω 15NNF50-5.0C Test Port Cable Armored, 5.0 meters, N(m)-N(f), 6 GHz, 50 Ω 15ND50-1.5C Test Port Cable Armored, 1.5 meters, N(m)-7/16 DIN(m), 6 GHz, 50 Ω 15NDF50-1.5C Test Port Cable Armored, 1.5 meters, N(m)-7/16 DIN(f), 6 GHz, 50 Ω Test Port Cables, Armored w/ Reinforced Grip 15RNFN R Test Port Cable Armored w/reinforced Grip 1.5 meters, N(f)-N(m), 6 GHz, 50 Ω Antennas Portable Antenna, SMA (m), MHz, 50 Ω Portable Antenna, SMA (m), MHz, 50 Ω Portable Antenna, SMA (m), MHz, 50 Ω Magnet Mount GPS Antenna with 15-foot cable Directional Antennas R Portable Yagi Antenna, N(f), 822 to 900 MHz, 10 dbd R Portable Yagi Antenna, N(f), 885 to 975 MHz, 10 dbd S412D User Guide PN: Rev. D 1-5
22 1-5 Optional Accessories General Information Table 1-4. Optional Accessories (3 of 4) Part Number Description Filters R Filter, Bandpass, 824 to 849 MHz N(m)-SMA(f), 50 Ω R Filter, Bandpass, 880 to 915 MHz, N(m)-SMA(f), 50 Ω R Filter, Bandpass, 890 to 915 MHz, N(m)-N(f), 50 Ω Attenuators 42N50-20 Attenuator, 20 db, 5W, DC to 18 GHz, N(m)-N(f) 42N50A-30 Attenuator, 30 db, 50W, DC to 18 GHz, N(m)-N(f) R Attenuator, 30 db, 150W, DC to 3 GHz, N(m)-N(f) R Attenuator, 40 db, 150W, DC to 3 GHz, N(m)-N(f) Miscellaneous Accessories Rechargeable Battery, Ni-MH Automotive Cigarette Lighter/12 Volt DC Adapter R AC/DC Adapter Battery Charger, NiMH, w/ Universal Power Supply R USB to RS-232 Adapter Cable Serial Interface Cable Magnet Mount GPS Antenna with 15-foot cable Soft Carrying Case Site Master Backpack R Transit Case 1N50C Limiter, N(m) to N(f), 50W, 10 MHz to 18 GHz CW Signal Generator Kit with variable step attenuator Master Software Tools CDROM Power Monitor Detectors N50 Detector,.001 to 3 GHz, N(m), 50 Ω N75 Detector,.001 to 3 GHz, N(m), 75 Ω 560-7N50B Detector, 10 MHz to 20 GHz, N(m), 50 Ω 560-7S50B Detector, 10 MHz to 20 GHz, WSMA(m), 50 Ω 560-7K50 Detector, 10 MHz to 40 GHz, K(m), 50 Ω 560-7VA50 Detector, 10 MHz to 50 GHz, V(m), 50 Ω Power Monitor Extender Cables m (25 ft) m (100 ft) 1-6 PN: Rev. D S412D User Guide
23 General Information 1-6 Preventive Maintenance Table 1-4. Optional Accessories (4 of 4) Part Number Description High Accy Power Meter Acc PSN50 High Accuracy Sensor, 50 MHz to 6 GHz R AC-DC Adapter Serial Interface Cable Attenuator, 20 db, 5 Watt, DC to 12.4 GHz, N(m)-N(f) R Attenuator, 30 db, 150 Watt, DC to 3 GHz, N(m)-N(f) Attenuator, 30 db, 50 Watt, DC to 8.5 GHz, N(m)-N(f) Attenuator, 40 db, 100 Watt, DC to 8.5 GHz, N(m)-N(f), Uni-directional R Attenuator, 40 db, 150 Watt, DC to 3 GHz, N(m)-N(f) GHz Offset Cal Kit consisting of one each: , 10 db Attenuator, DC to 6 GHz, 2W, , 4 GHz Cable, 18 (46 cm) Literature, Manuals User Guide Programming Manual Product Brochure Training Interference Analysis for Land Mobile Radio 1-6 Preventive Maintenance LMR Master preventive maintenance consists of cleaning the unit and inspecting and cleaning the RF connectors on the instrument and all accessories. Clean the LMR Master with a soft, lint-free cloth dampened with water or water and a mild cleaning solution. Caution To avoid damaging the display or case, do not use solvents or abrasive cleaners. Clean the RF connectors and center pins with a cotton swab dampened with denatured alcohol. Visually inspect the connectors. The fingers of the N (f) connectors and the pins of the N (m) connectors should be unbroken and uniform in appearance. If you are unsure whether the connectors are good, gauge the connectors to confirm that the dimensions are correct. Visually inspect the test port cable(s). The test port cable should be uniform in appearance, not stretched, kinked, dented, or broken. S412D User Guide PN: Rev. D 1-7
24 1-7 Calibration General Information 1-7 Calibration The LMR Master is a field portable unit operating in the rigors of the test environment. A calibration using the Open-Short-Load (OSL) or InstaCal component should be performed prior to making a measurement in the field (see Calibration on page 3-2). A built-in temperature sensor in the LMR Master advises the user when the internal temperature has exceeded a measurement accuracy window, and the user is advised to perform another calibration in order to maintain the integrity of the measurement. Note For best calibration results compensation for all measurement uncertainties ensure that the Open/Short/Load is at the end of the test port or optional extension cable; that is, at the same point that you will connect the antenna or device to be tested. For best results, use a phase stable Test Port Extension Cable (see Optional Accessories ). If you use a typical laboratory cable to extend the LMR Master test port to the device under test, cable bending subsequent to the OSL calibration will cause uncompensated phase reflections inside the cable. Thus, cables which are NOT phase stable may cause measurement errors that are more pronounced as the test frequency increases. For optimum calibration, Anritsu recommends using precision calibration components. 1-8 InstaCal Module The Anritsu InstaCal module can be used in place of discrete components to calibrate the LMR Master. The InstaCal module can be used to perform an Open, Short and Load (OSL) or a FlexCal calibration procedure. Calibration of the LMR Master with the InstaCal takes approximately 45 seconds (see Calibration on page 3-2). Unlike a discrete calibration component, the InstaCal module can not be used at the top of the tower to conduct load or insertion loss measurements. The module operates from 2 to 1600 MHz and weighs eight ounces. Anritsu recommends annual verification of the InstaCal module to verify performance with precision instrument data. The verification may be performed at a local Anritsu Service Center or at the Anritsu factory. 1-9 Annual Verification Anritsu recommends an annual calibration and performance verification of the LMR Master and the OSL calibration components and InstaCal module by local Anritsu service centers. The LMR Master itself is self-calibrating, meaning that there are no field-adjustable components. However, the OSL calibration components are crucial to the integrity of the calibration and therefore, must be verified periodically to ensure performance conformity. This is especially important if the OSL calibration components have been accidentally dropped or over-torqued. 1-8 PN: Rev. D S412D User Guide
25 General Information 1-10 ESD Precautions 1-10 ESD Precautions The LMR Master, like other high performance instruments, is susceptible to ESD damage. Very often, coaxial cables and antennas build up a static charge, which, if allowed to discharge by connecting to the LMR Master, may damage the LMR Master input circuitry. LMR Master operators should be aware of the potential for ESD damage and take all necessary precautions. Operators should exercise practices outlined within industry standards like JEDEC-625 (EIA-625), MIL-HDBK-263, and MIL-STD-1686, which pertain to ESD and ESDS devices, equipment, and practices. As these apply to the LMR Master, it is recommended to dissipate any static charges that may be present before connecting the coaxial cables or antennas to the LMR Master. This may be as simple as temporarily attaching a short or load device to the cable or antenna prior to attaching to the LMR Master. It is important to remember that the operator may also carry a static charge that can cause damage. Following the practices outlined in the above standards will insure a safe environment for both personnel and equipment Mode References The term VNA in reference to the LMR Master denotes cable and antenna analyzer modes. The term SPA in reference to the LMR Master denotes Spectrum Analyzer mode. All other modes are referenced individually Anritsu Service Centers For the location of the nearest Anritsu Customer Service center, refer to the Anritsu Internet site: S412D User Guide PN: Rev. D 1-9
26 1-10 PN: Rev. D S412D User Guide

27 Functions and Operations 2-2 Connector Panel Chapter 2 Functions and Operations 2-1 Introduction This chapter provides a brief overview of the LMR Master functions and operations, providing the user with a starting point for making basic measurements. For more detailed information, refer to the specific chapters for the measurements being made. The LMR Master is designed specifically for field environments and applications requiring mobility. As such, it is a lightweight, handheld, battery operated unit which can be easily carried to any location, and is capable of up to 1.5 hours of continuous operation from a field replaceable battery providing extended time in the field. Built-in energy conservation features allow battery life to be further extended. The LMR Master can also be powered by a 12Vdc external source. The external source can be either the Anritsu AC-DC Adapter (PN: R) or the 12Vdc Automotive Cigarette Lighter Adapter (PN: ). Both items are standard accessories. 2-2 Connector Panel The connectors and indicators located on the test panel (Figure 2-1) are listed and described below. RF DETECTOR (Option 5) RF OUT EXTERNAL POWER EXTERNAL POWER LED SERIAL INTERFACE Figure 2-1. EXTERNAL FREQ REF / EXT TRIGGER GPS ANTENNA S412D Test Connector Panel RF IN BATTERY HEADPHONE CHARGING LED JACK S412D User Guide PN: Rev. D 2-1
28 2-2 Connector Panel Functions and Operations External Power VDC (3A) 12 to 15 5A external input to power the unit or for battery charging. Warning When using the AC-DC Adapter, always use a three-wire power cable connected to a three-wire power line outlet. If power is supplied without grounding the equipment in this manner, there is a risk of receiving a severe or fatal electric shock, or damaging the equipment. Battery Charging LED Illuminates when the battery is being charged. The indicator automatically shuts off when the battery is fully charged. External Power LED Illuminates when the LMR Master is being powered by the external charging unit. Serial Interface RS-232 DB9 interface to a COM port on a personal computer (for use with the Anritsu Master Software Tools program) or to a supported printer. RF Out/Reflection 50Ω RF output, 50 Ω impedance, for reflection measurements. Maximum input is +23 dbm at ±50 Vdc. Spectrum Analyzer RF In 50Ω RF input, 50 Ω impedance, for spectrum analysis measurements. Maximum input is +43 dbm at ±50 Vdc. Ext Freq Ref/Ext Trigger Input for an external frequency reference signal or trigger in Spectrum Analyzer mode. RF Detector RF detector connector for Power Monitor measurements (Option 5). Refer to Table 1-4 on page 1-4 for available RF Detectors. Headphone Jack Provides audio output for the built-in AM/FM demodulator for testing and troubleshooting wireless communication systems. GPS Antenna GPS antenna connection. Do not connect anything other than the Anritsu GPS antenna to this port. 2-2 PN: Rev. D S412D User Guide
29 Functions and Operations 2-3 Display Overview 2-3 Display Overview Figure 2-2 illustrates some of the key information areas of the S412D display in cable and antenna analyzer modes. Figure 2-2. S412D Distance-To-Fault Display Overview Figure 2-3 illustrates some of the key information areas of the S412D display in Spectrum Analyzer mode. Figure 2-3. S412D Spectrum Analyzer Mode Display Overview S412D User Guide PN: Rev. D 2-3
30 2-4 Front Panel Overview Functions and Operations 2-4 Front Panel Overview The LMR Master menu-driven user interface is easy to use and requires little training. Hard keys on the front panel are used to initiate function-specific menus. There are four function hard keys located below the status window: Mode, Frequency/Distance, Amplitude and Measure/Display. There are seventeen keypad hard keys located to the right of the status window. Twelve of the keypad hard keys perform more than one function, depending on the current mode of operation. The dual purpose keys are labeled with one function in black, the other in blue. There are also six soft keys that change function depending upon the current mode selection. The current soft key function is indicated in the soft key menu area to the right of the status window. The location of the various keys is illustrated in Figure 2-4. SOFT KEYS MENU SOFT KEYS 1 2 ESCAPE CLEAR STATUS WINDOW START CAL 3 SAVE SETUP AUTO SCALE 4 RECALL SETUP 5 6 LIMIT MARKER 7 8 ENTER KEYPAD HARD KEYS SAVE DISPLAY 9 RECALL DISPLAY 0 RUN HOLD ON OFF PRINT SYS MODE FREQ/DIST AMPLITUDE MEAS/DISP FUNCTION HARD KEYS Figure 2-4. S412D LMR Master Front Panel Section 2-5 and Section 2-6 detail the hard key functions, soft key functions are described in Section PN: Rev. D S412D User Guide
31 Functions and Operations 2-5 Function Hard Keys 2-5 Function Hard Keys MODE Opens the Measurement Mode selection box, see Figure 2-5. Use the Up/Down arrow key to select a mode. Press the ENTER key to implement. Measurement Mode Freq - SWR Return Loss Cable Loss - One Port DTF - SWR Return Loss Optical Power Monitor (External Detector) Power Meter (Internal) High Accuracy Power Meter Spectrum Analyzer Interference Analyzer Transmission Measurement Channel Scanner iden P25 Talk-Out Coverage P25 Tx Signal Analyzer Figure 2-5. Model Selection Box Example Note Available mode selections will vary according to the installed options. FREQ/DIST Displays the Frequency or Distance to Fault soft key menus depending on the measurement mode. AMPLITUDE Displays the Amplitude soft key menu for the current operating mode. MEAS/DISP Displays the Measurement and Display soft key menus for the current operating mode. S412D User Guide PN: Rev. D 2-5
32 2-6 Keypad Hard Keys Functions and Operations 2-6 Keypad Hard Keys This section contains an alphabetical listing of the LMR Master front panel keypad controls along with a brief description of each. More detailed descriptions of the major function keys follow. The following keypad hard key functions are printed in black on the keypad keys. Table 2-1. Keypad Keys 0 9 +/ These keys are used to enter numerical data as required to setup or perform measurements. The plus/minus key is used to enter positive or negative values as required to setup or perform measurements. The decimal point is used to enter decimal values as required to setup or perform measurements. Exits the present operation or clears the status window. If a parameter is being edited, pressing this key will clear the value currently being entered and restore the last valid entry. Pressing this key again will close the parameter. During normal sweeping, pressing this key will move up one menu level. ESCAPE CLEAR Note Holding down the ESCAPE key while turning the unit on with the On/Off key will initiate a Factory Default Reset. A Factory Default Reset will restore the instrument to its default settings as the unit was shipped from the factory. Saved setups, stored traces, custom antennas, custom cables and signal standards are not affected by Factory Default Reset. Up/Down Arrows ENTER ON OFF Increments or decrements a parameter value or moves up or down a list. The specific parameter value affected typically appears in the message area of the LCD. Implements the current action or parameter selection. Turns the Anritsu LMR Master on or off. When turned on, the saved system state at the last turn-off is restored. If the ESCAPE/CLEAR key is held down while the ON/OFF key is pressed, the factory preset state will be restored. Allows selection of system and application setup parameters and the display language. SYS Note Holding down the SYS key while turning the unit on with the ON/OFF key will initiate a Full Factory Reset. A Full Factory Reset will erase all saved setups, stored traces, custom antennas, custom cables and signal standards. A Full Factory Reset is required whenever the unit has been updated with new firmware versions or upgraded with additional options. 2-6 PN: Rev. D S412D User Guide
33 Functions and Operations 2-6 Keypad Hard Keys The following keypad hard key functions are printed in blue on the keypad keys. Table 2-2. Keypad Secondary Functions This key is used to adjust the brightness of the color display. Use the Up/Down arrow key and ENTER key to adjust the display brightness. AUTO SCALE LIMIT MARKER PRINT RECALL DISPLAY RECALL SETUP RUN HOLD SAVE DISPLAY SAVE SETUP START CAL Automatically scales the status window for optimum resolution in cable and antenna analyzer mode. Displays the limit line menu for the current operating mode when in cable, antenna analyzer or spectrum analyzer mode. Displays the marker menu of the current operating mode when in cable, antenna analyzer or spectrum analyzer mode. Prints the current display to the selected printer via the RS-232 serial port. Recalls a previously saved trace from memory. When the key is pressed, a Recall Trace selection box appears on the display. Select a trace using the Up/Down arrow key and press the ENTER key to implement. Recalls a previously saved setup from a memory location. When the key is pressed, a Recall Setup selection box appears on the display. Select a setup using the Up/Down arrow key and press the ENTER key to implement. Setup 0 recalls the factory preset state for the current mode. When in the Hold mode, this key starts the LMR Master sweeping and provides a Single Sweep Mode trigger; when in the Run mode, it pauses the sweep. When in the Hold mode, the hold symbol appears on the display. Hold mode can be used to conserve battery power. Saves displayed trace to non-volatile memory. When the key is pressed, the Trace Name: box appears. Use the soft keys to enter up to 16 alphanumeric characters for that trace name and press the ENTER key to save the trace. Saves the current system setup to an internal non-volatile memory location. The number of locations available varies with the model number and installed options. There are ten available locations in cable and antenna analyzer mode, and five in SPA mode, Power Meter mode, P25 Talk-Out mode, and P25 Coverage mode. When the key is pressed, a Save Setup selection box appears on the status window. Use the Up/Down arrow key to select a setup location, use the soft keys to enter a label for the saved setup, and press the ENTER key to implement. Starts the calibration in SWR, Return Loss, Cable Loss, or DTF measurement modes (not available in Spectrum Analyzer or Power Meter modes). S412D User Guide PN: Rev. D 2-7
34 2-7 Soft Keys Functions and Operations 2-7 Soft Keys The function hard keys open a set of soft key selections. Each of the soft keys has a corresponding soft key label area on the status window (Figure 2-6). The label identifies the function of the soft key for the current Mode selection. SOFT KEYS LABEL AREA SOFT KEYS 1 2 ESCAPE CLEAR START CAL 3 AUTO SCALE 4 SAVE SETUP RECALL SETUP 5 6 LIMIT MARKER 7 8 ENTER SAVE DISPLAY 9 RECALL DISPLAY 0 RUN HOLD ON OFF PRINT SYS MODE FREQ/DIST AMPLITUDE MEAS/DISP FUNCTION HARD KEYS Figure 2-6. Soft Keys 2-8 PN: Rev. D S412D User Guide
35 Functions and Operations 2-8 Cable and Antenna Analyzer Mode 2-8 Cable and Antenna Analyzer Mode The following section explains the hard keys and soft keys available when the LMR Master is set to cable and antenna analyzer mode. MODE = Return Loss: FREQ/DIST AMPLITUDE MEAS/DISP SOFT KEYS: F1 Top Resolution F2 Bottom Single Sweep 130 Top of List Page Up Select Standard Uplink Signal Standard On/Off Trace Math Trace Overlay Fixed CW Page Down Bottom of List Show All Downlink Up+Down link Back Top of List Page Up Select Trace Top of List Page Down Back Page Up Bottom of List Page Down Delete Trace Bottom of List Delete All Traces Select/ Deselect Show Selected Figure 2-7. Return Loss Mode Soft Key Labels S412D User Guide PN: Rev. D 2-9
36 2-8 Cable and Antenna Analyzer Mode Functions and Operations MODE = DTF SWR, DTF RETURN LOSS FREQ/DIST AMPLITUDE MEAS/DISP SOFT KEYS: D1 Top Resolution D2 Bottom Single Sweep DTF Aid Trace Math Trace Overlay Fixed CW More Loss Prop Vel On/Off Select Trace Cable Window Top of List Page Up Back Page Down Bottom of List Delete Trace Delete All Traces Back Figure 2-8. Distance to Fault Mode Soft Key Labels 2-10 PN: Rev. D S412D User Guide
37 Functions and Operations 2-8 Cable and Antenna Analyzer Mode MODE = DTF OPTICAL FREQ/DIST AMPLITUDE MEAS/DISP SOFT KEYS: D1 Top Resolution D2 Bottom Single Sweep Data Points Trace Math IOR Trace Overlay Fixed CW More On/Off Select Trace Window Top of List Page Up Back Page Down Bottom of List Delete Trace Delete All Traces Back Figure 2-9. Distance to Fault Mode Optical Menu S412D User Guide PN: Rev. D 2-11
38 2-8 Cable and Antenna Analyzer Mode Functions and Operations FREQ/DIST Displays the frequency and distance menu depending on the measurement mode. Frequency Menu The frequency and distance menu for cable and antenna analyzer measurements enables setting sweep frequency end points when Freq mode is selected. Selected frequency values may be changed using the keypad or Up/Down arrow key. F1 Opens the F1 parameter for data entry. This is the start value for the frequency sweep. Press ENTER key when data entry is complete. F2 Opens the F2 parameter for data entry. This is the stop value for the frequency sweep. Press ENTER key when data entry is complete. Signal Standard Allows selection of the signal standard to be used. Select Standard Opens the signal standard menu, showing the selected signal standards. Press the Show All soft key to show the complete signal standard list. The currently selected signal standards are marked with an asterisk. Press the Show Selected soft key to show only the selected signal standards. Uplink Selects only uplink frequencies. Downlink Selects only downlink frequencies. Up+Down Link Selects uplink and downlink frequencies. Back Returns to the previous menu. Distance Menu Enables setting Distance to Fault parameters when a DTF mode is selected. Choosing DIST causes the soft keys listed below to be displayed and the corresponding values to be shown in the message area. Selected distance values may be changed using the keypad or Up/Down arrow key. D1 Opens the start distance (D1) parameter for data entry. This is the start value for the distance range (D1 default = 0). Press ENTER key when data entry is complete. D2 Opens the end distance (D2) parameter for data entry. This is the end value for the distance range. Press ENTER key when data entry is complete. DTF Aid Provides interactive help to optimize DTF set up parameters. Use the Up/Down arrow key to select a parameter to edit. Press ENTER key when data entry is complete. Data Points (Optical) Sets the number of display points to be used in Optical DTF mode, with fewer points having a faster display update, but with less resolution of the Device Under Test. IOR (Optical) Opens the Index of Refraction parameter for data entry. Use the Up/Down arrow key or numeric keypad to enter the Index of Refraction value of the optical cable under test. (Range is to ). Optical Index of Refraction is the inverse of electrical propagation velocity. More Selects the following Distance submenu options. Loss Opens the Cable Loss parameter for data entry. Enter the loss per meter (or foot) for the type of transmission line being tested. Press ENTER key when data entry is complete. (Range is 0 to 5.0 db/m, db/ft) 2-12 PN: Rev. D S412D User Guide
39 Functions and Operations 2-8 Cable and Antenna Analyzer Mode Prop Vel (relative propagation velocity) Opens the Propagation Velocity parameter for data entry. Enter the propagation velocity for the type of transmission line being tested. Press ENTER key when data entry is complete. (Range is to 1.000) Cable Opens a list of cable folders, three common coaxial (1000 MHz, 2000 MHz, and 2500 MHz) and one custom folder. Select a folder and use the Up/Down arrow key and ENTER key to make a selection. This feature provides a rapid means of setting both cable loss and propagation velocity. (Refer to Appendix A for a listing of common coaxial cables showing values for Relative Propagation Velocity and Nominal Attenuation in db/m or 1000 MHz, 2000 MHz and 2500 MHz.) Custom cables can be defined and uploaded to the LMR Master via the Master Software Tools program. Window Opens a menu of FFT windowing types for the DTF calculation. Scroll the menu using the Up/Down arrow key and make a selection with the ENTER key. Refer to Appendix B for more details on windowing. Back Returns to the Distance Menu. AMPLITUDE Choosing the AMPLITUDE key in cable and antenna analyzer measurement modes displays the following soft keys and their corresponding values in the message area or scale menu depending on the measurement mode. Top Opens the top parameter for data entry and enables setting the top scale value. Press ENTER key when data entry is complete. Bottom Opens the bottom parameter for data entry and enables setting the bottom scale value. Press ENTER key when data entry is complete. MEAS/DISP Choosing MEAS/DISP in cable and antenna analyzer freq or DTF measurement modes displays the following soft keys. Resolution Opens the status window for changing the resolution. Choose 130, 259, or 517 data points. (In DTF mode, resolution can only be adjusted through the DTF Aid table.) Single Sweep Toggles the sweep between single sweep and continuous sweep. In single sweep mode, each sweep is activated by the RUN/HOLD button. Trace Math Opens up the Trace Math functions (trace-memory or trace+memory) for comparison of the real time trace in the status window with any of the traces from memory. (Not available in DTF mode.) Trace Overlay Opens up the Trace Overlay functions menu to allow the current trace to be displayed with a trace in memory overlaid on it. Choose On or Off and Select Trace to select the trace from memory to be overlaid. Fixed CW Toggles the fixed CW function ON or OFF. When OFF, a narrow band of frequencies around the selected frequency is generated. This enhances the immunity of the LMR Master to an interfering signal. When CW is ON, only a single frequency with a very narrow bandwidth is generated by the LMR Master. The sweep speed is somewhat faster in CW ON mode. If CW is ON during normal RL or SWR S412D User Guide PN: Rev. D 2-13
40 2-8 Cable and Antenna Analyzer Mode Functions and Operations measurements, it will be more susceptible to interfering signals, so use this feature with caution. Interfering signals can make the measurement look better or worse than it actually is. MARKER Choosing MARKER in cable and antenna analyzer freq and dist mode displays the following soft keys and their corresponding values in the message area. Selected frequency marker or distance marker locations may be changed using the keypad or Up/Down arrow key. M1 Selects the M1 marker parameter and opens the M1 marker second level menu. On/Off Turns the selected marker on or off. Edit Opens the selected marker parameter for data entry. Press ENTER key when data entry is complete or ESCAPE to restore the previous value. Marker To Peak Places the selected marker at the frequency or distance with the maximum amplitude value. Marker To Valley Places the selected marker at the frequency or distance with the minimum amplitude value. Back Returns to the Main Markers Menu. M2 through M4 Selects the marker parameter and opens the marker second level menu. On/Off Turns the selected marker on or off. Edit Opens the selected marker parameter for data entry. Press ENTER key when data entry is complete or ESCAPE to restore the previous value. Delta (Mx-M1) Displays delta amplitude value as well as delta frequency or distance for the selected marker with respect to the M1 marker. Marker To Peak Places the selected marker at the frequency or distance with the maximum amplitude value. Marker To Valley Places the selected marker at the frequency or distance with the minimum amplitude value. Back Returns to the Main Markers Menu. All Off Turns all markers off. More Opens the continuation of the Marker Menus. M5 Selects the M5 marker parameter and opens the M5 second level menu. On/Off Turns the selected marker on or off. Edit Opens the selected marker parameter for data entry. Press ENTER key when data entry is complete or ESCAPE to restore the previous value. Peak Between M1 & M2 Places the selected marker at the frequency or distance with the maximum amplitude value between marker M1 and marker M2. Valley Between M1 & M2 Places the selected marker at the frequency or distance with the minimum amplitude value between marker M1 and marker M2. Back Returns to the Main Markers Menu PN: Rev. D S412D User Guide
41 Functions and Operations 2-8 Cable and Antenna Analyzer Mode LIMIT M6 Selects the M6 marker parameter and opens the M6 second level menu. On/Off Turns the selected marker on or off. Edit Opens the selected marker parameter for data entry. Press ENTER key when data entry is complete or ESCAPE to restore the previous value. Peak Between M3 & M4 Places the selected marker at the peak between marker M3 and marker M4. Valley Between M3 & M4 Places the selected marker at the valley between marker M3 and marker M4. Back Returns to the Main Markers Menu. All Off Turns all markers off Back Returns to the Main Markers Menu. Pressing LIMIT in cable and antenna analyzer frequency and distance mode activates a menu of limit related functions. Use the corresponding soft key to select the desired limit function. Then use the Up/Down arrow key to change its value, which is displayed in the message area at the bottom of the status window. Note Limit is only available in cable and antenna analyzer, interference analyzer, and spectrum analyzer modes. Choosing LIMIT in Freq or DTF measurement modes causes the soft keys below to be displayed. Single Limit Sets a single limit value in dbm. Menu choices are: On/Off Turns the single limit function on or off Edit Allows entry of the limit amplitude. Back Returns to the previous menu. Multiple Limits Sets multiple user defined limits, and can be used to create a limit mask for quick pass/fail measurements. Segment 1 through Segment 5 Opens the segment menu. On/Off Turns the segment on or off. Edit Opens the parameter for data entry. Prev Segment Edit or view the parameters of the previous segment. Next Segment Edit or view the parameters of the next segment. If the next segment is off when this button is pressed, the starting point of the next segment will be set at the ending point of the current segment. Back Returns to the previous menu. Back Returns to the previous menu. Limit Beep Turns the audible limit beep indicator on or off. S412D User Guide PN: Rev. D 2-15
42 2-8 Cable and Antenna Analyzer Mode Functions and Operations SYS In cable and antenna analyzer mode, pressing the SYS key displays the following System menu soft key selections: System Options Hour Minute Month Day Year Back Clock Printer Units Change Date Format Back GPS On/Off Location Quality Application Options Self Test Status GPS Language English CAL Mode Hold RF Off Bias Tee Back Bias Tee Voltage Bias Tee On/Off Reset Back Back Figure SYS Key Menu in Cable and Antenna Analyzer Mode System Options Displays a second level of system option functions: Clock Displays a second level of functions: Hour Enter the hour (0 23) using the Up/Down arrow key or the keypad. Press ENTER key when data entry is complete or ESCAPE to restore the previous value. Minute Enter the minute (0 59) using the Up/Down arrow key or the keypad. Press ENTER key when data entry is complete or ESCAPE to restore the previous value PN: Rev. D S412D User Guide
43 Functions and Operations 2-8 Cable and Antenna Analyzer Mode Month Enter the month (1 12) using the Up/Down arrow key or the keypad. Press ENTER key when data entry is complete or ESCAPE to restore the previous value. Day Enter the day (1 31) using the Up/Down arrow key or the keypad. Press ENTER key when data entry is complete or ESCAPE to restore the previous value. Year Enter the year ( ) using the Up/Down arrow key or the keypad. Press ENTER key when data entry is complete or ESCAPE to restore the previous value. Back Returns to the top-level SYS menu. Printer Displays a menu of supported printers. Use the Up/Down arrow key and ENTER key to make the selection. Units Select the unit of measurement (metric or English). Change Date Format Toggles the date format between MM/DD/YYYY, DD/MM/YYYY, and YYYY/MM/DD. Back Returns to the top-level SYS menu. Application Options Application options displays options specific to a particular mode. CAL Mode In cable and antenna analyzer modes, selects either OSL Cal or FlexCal. FlexCal is a broadband frequency calibration valid from 25 MHz to 1.6 GHz, see Calibration on page 3-2 for more information. Hold RF Off Turns off RF Output at Port 1 during Hold Mode when the unit is operating under external power. Default setting is to leave the RF Output on during Hold. When operating under battery power, LMR Master will always turn off the RF Output during Hold mode. Bias Tee Selects the Bias Tee. Bias Tee Voltage Set the bias tee voltage between 12 and 24 Vdc, in 1V increments, using the number keys or the Up/Down arrow keys. Bias Tee On/Off Turn the bias voltage on or off. Back Returns to the Application Options menu. Back Returns to the top-level SYS menu. Self Test Starts an instrument self test. Status Displays the current instrument status, including calibration status, temperature, and battery charge state. Press ESCAPE to return to operation. GPS Opens the GPS soft key menu. Press the GPS On/Off soft key to turn the GPS feature on or off. Press the Location soft key to view the following information: latitude, longitude, altitude and UTC timing. Press the Quality soft key to display the number of tracked satellites and the GPS quality. Press the Reset soft key to reset the GPS. Back Returns to the previous menu. Language Pressing this soft key immediately changes the language used to display messages on the LMR Master status window. Choices are English, French, German, Spanish, Chinese, and Japanese. The default language is English. S412D User Guide PN: Rev. D 2-17
44 2-9 Spectrum Analyzer Mode Functions and Operations 2-9 Spectrum Analyzer Mode The following section explains the hard keys and soft keys available when the LMR Master is set to Spectrum Analyzer mode. MODE = SPECTRUM ANALYZER: FREQ/DIST AMPLITUDE SOFT KEYS: Center Ref Level Edit Full Zero Span Up Span Start Stop Signal Standard Select Standard Edit Shift Left 1 Div Shift Left 9 Div Shift Right 1 Div Shift Right 9 Div dbm Scale Atten/ Preamp Units Ref Level Offset Auto Manual Dynamic Span Down Back Select Channel Uplink Downlink Channel Increment Back Top of List Page Up Page Down Bottom of List Back dbv dbmv dbuv Linear Back Edit Measure Offset Preamp Control Manual Back Auto Manual Dynamic Show All Back Preamp On/Off Top of List Page Up Preamp Auto Back Page Down Bottom of List Select/ Deselect Show Selected Figure Spectrum Analyzer Mode Soft Key Labels (1 of 2) 2-18 PN: Rev. D S412D User Guide
45 Functions and Operations 2-9 Spectrum Analyzer Mode On/Off MODE = SPECTRUM ANALYZER: RBW Auto SOFTKEYS: MEAS/DISP Bandwidth Select Standard Antenna Select Custom Antenna Method % dbc Center Freq Int BW RBW Manual Trace Channel Span VBW Auto VBW Manual Back Positive Peak RMS Average Negative Peak Sampling Mode Back Max Hold Detection Average (2-25) Trace Math Min Hold Back Recall Trace -> B View B / Clear B A -> B A - B -> A A + B -> A Back Measure Trigger Min Sweep Time Ref Level Label On/Off Demod Type Demod Freq Volume Demod Time Free Run Single External Video Change Trigger Position Back Narrow Band FHSS Wide Band FHSS Broadband Field Strngth OBW Channel Power ACPR More Back Signal Type Center Span Min Sweep Time Back Int. Analysis AM/FM Demod C/I Back Measure Back Set IA Freq Measure IA Freq To Center IA Freq As Marker M1 Back Zoom One Channel Measure Back Center Freq Main Channel BW Adj Channel BW Channel Spacing Measure Back Back Measure Back Back Figure Spectrum Analyzer Mode Soft Key Labels (2 of 2) S412D User Guide PN: Rev. D 2-19
46 2-9 Spectrum Analyzer Mode Functions and Operations FREQ/DIST Choosing FREQ/DIST in Spectrum Analyzer mode displays the following soft keys and their corresponding values in the message area. Center Sets the center frequency of the Spectrum Analyzer. Enter a value using the Up/Down arrow key or keypad, press ENTER to accept or ESCAPE to restore previous value. Edit allows editing of the center frequency. Enter a value using the Up/Down arrow key or keypad. Shift Left 1 Div shifts the center frequency left by one division. Shift Left 9 Div shifts the center frequency left by nine divisions. Shift Right 1 Div shifts the center frequency right by one division. Shift Right 9 Div shifts the center frequency right by nine divisions. Back returns to the previous menu level. Span Sets the user-defined frequency span. Use the Up/Down arrow key or keypad to enter a value in MHz. Also brings up Full and Zero soft keys. Edit allows editing of the frequency span. Enter a value using the number keys. Full span sets the Spectrum Analyzer to its maximum frequency span. Zero span sets the span to 0 Hz. This displays the input signal in an amplitude versus time mode, which is useful for viewing modulation. Span Up activates the span function so that the span may be increased quickly in a sequence. Span Down activates the span function so that the span may be reduced quickly in a sequence. Back returns to the previous menu level. Start Sets the Spectrum Analyzer in the START-STOP mode. Enter a start frequency value (in khz, MHz, or GHz) using the Up/Down arrow key or keypad, press ENTER to accept or ESCAPE to restore. Stop Sets the Spectrum Analyzer in the START-STOP mode. Enter a stop frequency value (in khz, MHz, or GHz) using the Up/Down arrow key or keypad, press ENTER to accept or ESCAPE to restore. Signal Standard Opens a menu of soft keys used to select the signal standard to be used. For more information on signal standards, refer to Appendix C. Select Standard Opens the signal standard menu, showing the currently selected signal standards. Use the soft keys to navigate the list. Press the Show All soft key to show the complete signal standard list. When the complete list is displayed, the currently selected signal standards are marked with an asterisk. Press the Show Selected soft key to show only the currently selected signal standards. Select Channel Sets the channel information for the available standard. Uplink Selects only uplink frequencies. Downlink Selects only downlink frequencies. Channel Increment Changes the channel increment step size when the Up/Down arrow keys are used to select the channel number. Back Returns to the previous menu PN: Rev. D S412D User Guide
47 Functions and Operations 2-9 Spectrum Analyzer Mode AMPLITUDE Choosing AMPLITUDE in Spectrum Analyzer mode displays the following soft keys and their corresponding values in the message area. Ref Level Activates the amplitude reference level function. Valid reference levels are from +20 dbm to 120 dbm. Scale Activates the scale function in a 1 db through 15 db logarithmic amplitude scale. This soft key is not active if the units are set to linear. Atten/Preamp Sets the internal input attenuator so that it is either coupled automatically to the reference level (Auto), manually adjustable (Manual), dynamically coupled to the input signal (Dynamic) and provides control for the preamplifier. Auto Sets the input attenuator so that it is coupled automatically to the reference level. Manual Sets the input attenuator manually from 0 db to 51 db. Dynamic Sets the input attenuator so that it is dynamically coupled to the input signal and turns the preamp on or off based on the overall signal conditions present throughout the entire frequency range of the instrument. The instrument will set the minimum input attenuation required to prevent saturation of the RF circuitry. Note A large signal outside of the displayed frequency range of the unit can sometimes cause the instrument to turn off the preamplifier or add attenuation, making the noise floor jump up or down suddenly as the large signal turns on or off. Preamp Control Manual Activates the preamp menu. Preamp On/Off Sets the preamplifier on or off. Preamp Auto Automatically adjusts the preamplifier according to the reference level. Back Returns to the previous menu level. Units Choose from the menu of amplitude related units. When Linear is selected, the available selections are Volts or Watts. When Log is selected, the selection of dbm sets absolute decibels relative to 1 mw as the amplitude unit. Selection of dbv, dbmv or dbμv sets absolute decibels relative to 1 volt, 1 millivolt, or 1 microvolt respectively as the amplitude unit. Ref Level Offset Sets the reference level offset. This feature allows measurement of high gain devices in combination with an attenuator. It is used to offset the reference level to view the correct output level. For example, to measure a high gain amplifier with an output of 70 dbm, an external 50 db attenuator must be inserted between the LMR Master and the device. To compensate, set the reference level offset to 50 db. S412D User Guide PN: Rev. D 2-21
48 2-9 Spectrum Analyzer Mode Functions and Operations MEAS/DISP Choosing MEAS/DISP in Spectrum Analyzer mode causes the soft keys below to be displayed. Bandwidth Activates a menu that allows the resolution and video bandwidths to be either coupled automatically to the span (Auto) or manually adjustable (Manual). RBW Auto Sets the resolution bandwidth so that it is automatically coupled to the span. RBW Manual Sets the resolution bandwidth manually, independent of the span. VBW Auto Sets the video bandwidth so that it is automatically coupled to the RBW. VBW Manual Sets the video bandwidth manually, independent of the RBW. Back Returns to the previous menu level. Trace Activates a menu of trace related functions. Use the corresponding soft key to select the desired trace function. Max Hold Displays and holds the maximum responses of the input signal. Detection Accesses a menu of detector modes including Positive Peak detection, RMS Average detection, Negative Peak detection, and Sampling Mode. Positive Peak The unit reads and displays the highest measured data point within a display point. RMS Average The unit displays the average power within a display point. Negative Peak The unit reads and displays the lowest measured data point within a display point. Sampling Mode The unit reads and displays a single measured point at each display point. Average (2-25) The display will be an average of the number of sweeps specified here. For example, if the number four is entered here, the data displayed will be an average of the four most recent sweeps. Trace Math Opens up the Trace Math functions for comparison of the real time trace in the graph with any of the traces from memory. Recall Trace > B Recalls the selected saved trace to trace B. View B / Clear B Views the recalled trace as trace B, or clears trace B from the status window. A >B Moves trace A to trace B. A B >A Moves the results of trace A minus trace B to trace A. A+B >A Moves the results of trace A plus trace B to trace A. Back Returns to the previous menu level. Min Hold Displays and holds the minimum responses of the input signal. Back Returns to the previous menu level. Measure Activates a menu of measurement related functions. Use the corresponding soft key to select the measurement function. Field Strength Accesses a menu of field strength measurement options. On/Off Turns field strength measurements on or off. Select Standard Antenna Select from the list of antenna profiles provided PN: Rev. D S412D User Guide
49 Functions and Operations 2-9 Spectrum Analyzer Mode Select Custom Antenna Select a custom antenna profile as uploaded to the LMR Master using the Master Software Tools program. Back Returns to the previous menu. OBW Activates the occupied bandwidth menu. Method Allows selection of either % of power or db Down. % Allows entry of the desired % of occupied bandwidth to be measured. dbc Allows entry of the desired power level (dbc) to be measured. Measure Enables and disables the OBW measurement. Back Returns to the previous menu level. Channel Power Activates Channel Power measurement. Channel power is measured in dbm. Channel Power density is measured in dbm/hz. The displayed units is determined by the setting of the Units soft key in the AMPLITUDE menu. Center Freq Activates the center frequency function and sets the LMR Master to the center frequency. A specific center frequency can be entered using the keypad or Up/Down arrow key. Int BW Enter the integration bandwidth frequency appropriate for the application. Integration bandwidth must be at least one tenth of the channel span. Channel Span Sets the channel span to a value appropriate for the application. Zoom One Channel Automatically sets the span to cover one channel as defined by the selected signal standard. Measure Enables and disables the channel power measurement. Back Returns to the previous menu level. ACPR Accesses a menu of Adjacent Channel Power Ratio measurement options: Center Freq Activates the center frequency function and sets the LMR Master to the center frequency. A specific center frequency can be entered using the keypad or Up/Down arrow key. Main Channel BW Sets the bandwidth of the main channel. Adjacent Channel BW Sets the bandwidth of the adjacent channel. Channel Spacing Sets the channel spacing. Measure Enables and disables the ACPR measurement. Back Returns to the previous menu. More Opens more measurement menus in spectrum analyzer mode. Int. Analysis Opens the interference analysis measurement menu. Set IA Freq. Set the interference analysis frequency from 9 khz to 1600 MHz to measure the interference. Measure Pressing the Measure soft key starts the signal identification process. This process takes approximately one minute to complete. At the end of the measurement process, a dialog box displays the results. The results are also shown in the message area at the bottom of the display. IA Freq. To Center The IA Freq to Center soft key moves the interference analysis frequency to the center of the screen. S412D User Guide PN: Rev. D 2-23
50 2-9 Spectrum Analyzer Mode Functions and Operations IA Freq as Marker M1 The IA Freq As Marker M1 soft key sets the interference analysis frequency to be the frequency of marker M1. This is the easiest way to enter the measurement frequency. Refer to MARKER on page 2-25 for information on setting the markers. Back Returns to the previous menu. AM/FM Demod Select AM, Narrow Band FM (300 ms de-emphasis), Wide Band FM (50 ms de-emphasis), USB or LSB. On/Off Turns AM/FM Demodulation on or off. Demod Type Select either AM, FM Wide Band, FM Narrow Band, SSB Lower or SSB Upper demodulation. Demod Freq Use the Up/Down arrow key or the keypad to increase or decrease the demodulation frequency. Select the GHz, MHz, khz, or Hz soft key to accept the frequency input. Volume The current volume setting is displayed at the lower right of the screen. Use the Up/Down arrow key to increase or decrease the volume, and press the ENTER key to select. Demod Time Use the Up/Down arrow key or the keypad to increase or decrease the demodulation time, and press the ENTER key to select. Back Returns to the previous menu. C/I Opens carrier to interference measurement menu. Signal Type Opens a menu to select the signal type. Selections are narrow band FHSS, wide band FHSS or a broadband signal. Center Activates the center frequency function and sets the LMR Master to the center frequency. A specific center frequency can be entered using the keypad or Up/Down arrow key. Span Sets the user-defined frequency span. Use the Up/Down arrow key or keypad to enter a value in MHz. Min Sweep Time Allows the sweep time to be slowed to improve the ability to capture instances of the interfering signal. A value from 0.05 ms to 200 seconds may be entered. The actual sweep time will be either the Min Sweep Time entered or the time necessary to achieve accurate results, whichever is greater. Measure Starts the carrier to interference measurement. Back Returns to the previous menu. Back Returns to the previous menu. Trigger Select the method used to trigger the sweep. Free Run The sweep is continuous. Single A single sweep will be performed with each press of the RUN/HOLD key. Video Sets the video trigger level if the span is set to zero. Change Trigger Position Changes the trigger sweep position from 5 msec to 2000 msec. Back Returns to the previous menu. Min Sweep Time The minimum sweep time allows a value from 0.05 ms to 200 seconds to be entered. The actual sweep time will be either the Min Sweep Time entered or the time necessary to achieve accurate results, whichever is greater. Ref Level Label Will toggle on/off numeric labels for the horizontal graticules of the graph PN: Rev. D S412D User Guide
51 Functions and Operations 2-9 Spectrum Analyzer Mode MARKER Choosing MARKER in spectrum analyzer mode displays the following soft keys and their corresponding values in the message area. Selected frequency marker or distance marker locations may be changed using the keypad or Up/Down arrow key. M1 Selects the M1 marker parameter and opens the M1 marker second level menu. On/Off Turns the selected marker on or off. Edit Opens the selected marker parameter for data entry. Press ENTER when data entry is complete or ESCAPE to restore the previous value. Marker To Channel Displays the closest channel to the marker frequency in the edit box. Entering a different channel number will cause the marker to go to that channel. Marker To Peak Places the selected marker at the frequency with the maximum amplitude value. Marker Freq To Center Makes the center frequency of the LMR Master equal to the frequency of the selected marker. Back Returns to the Main Markers Menu. M2 through M4 Selects the marker parameter and opens the marker second level menu. On/Off Turns the selected marker on or off. Edit Opens the selected marker parameter for data entry. Press ENTER when data entry is complete or ESCAPE to restore the previous value. Delta (Mx-M1) Displays delta amplitude value as well as delta frequency for the selected marker with respect to the M1 marker. Marker To Peak Places the selected marker at the frequency with the maximum amplitude value. Marker Freq To Center Makes the center frequency of the LMR Master equal to the frequency of the selected marker. Back Returns to the Main Markers Menu. All Off Turns all markers off. More Opens the continuation of the Marker Menus. M5 Selects the M5 marker parameter and opens the M5 second level menu. On/Off Turns the selected marker on or off. Edit Opens the selected marker parameter for data entry. Press ENTER when data entry is complete or ESCAPE to restore the previous value. Marker Freq To Center Makes the center frequency of the LMR Master equal to the frequency of the selected marker. Peak Between M1 & M2 Places the selected marker at the frequency with the maximum amplitude value between marker M1 and marker M2. Valley Between M1 & M2 Places the selected marker at the frequency with the minimum amplitude value between marker M1 and marker M2. Note If either marker M1 or M2 is off, the Peak and Valley functions for M5 are executed across the entire span. Back Returns to the Main Markers Menu. S412D User Guide PN: Rev. D 2-25
52 2-9 Spectrum Analyzer Mode Functions and Operations M6 Selects the M6 marker parameter and opens the M6 second level menu. On/Off Turns the selected marker on or off. Edit Opens the selected marker parameter for data entry. Press ENTER when data entry is complete or ESCAPE to restore the previous value. Marker Freq To Center Makes the center frequency of the LMR Master equal to the frequency of the selected marker. Peak Between M3 & M4 Places the selected marker at the frequency with the maximum amplitude value between marker M3 and marker M4. Valley Between M3 & M4 Places the selected marker at the frequency with the minimum amplitude value between marker M3 and marker M4. Note If either marker M3 or M4 is off, the Peak and Valley functions for M6 are executed across the entire span. Back Returns to the Main Markers Menu. Regular Marker Measures the signal level at the point of the marker in the unit type selected in the Amplitude - Units menu. When the regular marker option is selected, all markers are regular markers. Noise Marker Measures noise level normalized to a 1 Hz bandwidth. The unit of measure is dbm/hz only. When Noise Marker is selected, the detection type is automatically changed to RMS average. When the Noise Marker option is selected, all markers are noise markers. All Off Turns all markers off. Back Returns to the Main Markers Menu PN: Rev. D S412D User Guide
53 Functions and Operations 2-9 Spectrum Analyzer Mode LIMIT Choosing LIMIT in Spectrum Analyzer measurement mode causes the soft keys below to be displayed. Note Limit is available only in cable and antenna analyzer, transmission measurement, interference analyzer and spectrum analyzer modes. Single Limit Sets a single limit value in dbm. Menu choices are: On/Off Turns the limit on or off. Edit Opens the parameter for data entry. Upper / Lower Limit Activate the upper and lower limit lines by toggling this soft key. The unit beeps if the data is above or below the set limit lines and the status is displayed in the message area. Back Returns to the previous menu. Multiple Upper Limits Sets multiple user-defined upper limits, and can be used to create an upper limit mask for quick pass/fail measurements. An upper limit will result in a failure when the data falls above the limit line. Menu choices are: Segment 1 through Segment 5 Opens the segment menu. On/Off Turns the segment on or off. Edit Opens the parameter for data entry. Prev Segment Edit or view the parameters of the previous segment. Next Segment Edit or view the parameters of the next segment. If the next segment is off when this button is pressed, the starting point of the next segment will be set equal to the ending point of the current segment. Back Returns to the previous menu. Back Returns to the previous menu. Multiple Lower Limits Set multiple user defined lower limits, and can be used to create a lower limit mask for quick pass/fail measurements. A lower limit will result in a failure when the data falls below the limit line. Menu choices are: Segment 1 through Segment 5 Opens the segment menu. On/Off Turns the segment on or off. Edit Opens the parameter for data entry. Prev Segment Edit or view the parameters of the previous segment. Next Segment Edit or view the parameters of the next segment. If the next segment is off when this button is pressed, the starting point of the next segment will be set equal to the ending point of the current segment. Back Returns to the previous menu. Back Returns to the previous menu. Limit Beep Turns the audible limit beep indicator on or off. S412D User Guide PN: Rev. D 2-27
54 2-9 Spectrum Analyzer Mode Functions and Operations SYS In Spectrum Analyzer mode, pressing the SYS key displays the following System menu soft key selections: System Options Hour Minute Month Day Year Clock Printer Units Change Date Format Back GPS On/Off Location Application Options Self Test Status GPS Language English External Ref Freq Bias Tee Impedance Anritsu 12N50-75B Bias Tee On/Off Bias Tee Voltage Back Quality Back Other Adapter Offset Reset Back Back Back Figure SYS Key Menu in Spectrum Analyzer Mode System Options Displays a second level of system option functions: Clock Displays a second level of functions: Hour Enter the hour (0 23) using the Up/Down arrow key or the keypad. Press ENTER when data entry is complete or ESCAPE to restore the previous value. Minute Enter the minute (0 59) using the Up/Down arrow key or the keypad. Press ENTER when data entry is complete or ESCAPE to restore the previous value. Month Enter the month (1 12) using the Up/Down arrow key or the keypad. Press ENTER when data entry is complete or ESCAPE to restore the previous value PN: Rev. D S412D User Guide
55 Functions and Operations 2-9 Spectrum Analyzer Mode Day Enter the day (1 31) using the Up/Down arrow key or the keypad. Press ENTER when data entry is complete or ESCAPE to restore the previous value. Year Enter the year ( ) using the Up/Down arrow key or the keypad. Press ENTER when data entry is complete or ESCAPE to restore the previous value. Back Returns to the top-level SYS menu. Printer Displays a menu of supported printers. Use the Up/Down arrow key and ENTER key to make the selection. Units Select the unit of measurement (metric or English). Change Date Format Toggles the date format between MM/DD/YYYY, DD/MM/YYYY, and YYYY/MM/DD. Back Returns to the top-level SYS menu. Application Options Application options displays options applicable to particular mode. External Ref Freq Set the external reference frequency from 2 MHz to 20 MHz. Bias Tee Selects the Bias Tee. Bias Tee Voltage Set the bias tee voltage between 12 and 24 Vdc, in 1V increments, using the number keys or the Up/Down arrow keys. Bias Tee On/Off Turn the bias voltage on or off. Back Returns to the previous menu. Impedance Sets the input impedance of the instrument 50Ω Sets the input impedance of the instrument to 50Ω, which is the default setting. 75Ω Anritsu 12N50-75B Displays measurements as if the input impedance was 75Ω. The actual input impedance is still 50Ω, but the displayed information is transformed to the equivalent 75Ω value based on the offset value specified by the adapter used in the measurement. This setting is commonly used for cable TV-related measurements. Pressing this soft key will also compensate 7.5 db for the loss of the Anritsu 12N50-75B adapter. Other adapter Offset This key allows the user to enter other adapter offset values. Enter the desired loss using the keypad or Up/Down arrow key and press the ENTER key to accept. Back Returns to the previous menu. Back Returns to the top-level SYS menu. Self Test Starts an instrument self test. Status Displays the current instrument status, including calibration status, temperature, and battery charge state. Press ESCAPE to return to operation. GPS Opens the GPS soft key menu. Press the GPS On/Off soft key to turn the GPS feature on or off. Press the Location soft key to view the following information: latitude, longitude, altitude and UTC timing. Press the Quality soft key to display the number of tracked satellites and the GPS quality. S412D User Guide PN: Rev. D 2-29
56 2-9 Spectrum Analyzer Mode Functions and Operations Press the Reset soft key to reset the GPS. Back Returns to the previous menu. Language Pressing this soft key immediately changes the language used to display messages on the LMR Master status window. Choices are English, French, German, Spanish, Chinese, and Japanese. The default language is English PN: Rev. D S412D User Guide
57 Functions and Operations 2-10 Power Meter (Internal) Mode 2-10 Power Meter (Internal) Mode Selecting Power Meter (Internal) from the mode menu causes the soft keys, described below, to be displayed and the corresponding values shown in the message area. MODE = POWER METER: FREQ/DIST AMPLITUDE MEAS/DISP SOFT KEYS: Center Units RMS Acquisition Span Rel Running Averages Off Edit Offset db Low Signal Standard Full Min Zero Edit Calibrate Offset Medium High Top of List Select Standard Span Up Recall Offset CAL Page Up Page Down Bottom of List Top of List Page Up Page Down Select Channel Uplink Downlink Span Down Back Back Back Show All Bottom of List Select/ Deselect Back Show Selected Figure Power Meter Mode Soft Key Labels S412D User Guide PN: Rev. D 2-31
58 2-10 Power Meter (Internal) Mode Functions and Operations FREQ/DIST Choosing FREQ/DIST in Power Meter mode displays the following soft keys and their corresponding values in the message area. Center Activates the center frequency function and sets the power meter to the center frequency. A frequency from 4.5 MHz to MHz can be entered. Span Opens the parameter for editing and activates a menu of span related choices. Edit Allows editing of the span to enter specific frequency. Full Sets the power meter to its maximum frequency span. Min Minimum span in Power Meter mode is 3 MHz. Span Up Activates the span function so that the span may be increased quickly in a sequence. Span Down Activates the span function so that the span may be reduced quickly in a sequence. Back Returns to the previous menu level. Signal Standard Opens a menu of soft keys used to select the signal standard to be used. For more information on signal standards, refer to Appendix C. Select Standard Opens the signal standard menu, showing the currently selected signal standards. Use the soft keys to navigate the list. Press the Show All soft key to show the complete signal standard list. When the complete list is displayed, the currently selected signal standards are marked with an asterisk. Press the Show Selected soft key to show only the currently selected signal standards. Select Channel Sets the channel information for the available standard. Uplink Selects only uplink frequencies. Downlink Selects only downlink frequencies. Back Returns to the previous menu. AMPLITUDE Choosing AMPLITUDE in Power Meter mode displays the following soft keys and their corresponding values in the message area. The following soft keys are available when the AMPLITUDE key is pressed. Units Choose either Watts or dbm. Rel Selects whether relative power is on or off. When on, the message Relative: On will show in the message area. Offset db Turns offset on or off. When on, a value from 0-60 db can be entered. Edit Allows entering a power measurement offset to account for attenuation between the DUT and the LMR Master RF Input connector Calibrate Offset Starts a calibration sequence to more accurately compensate for external attenuation and feeder cables between the DUT and the LMR Master. See Offset Calibration on page 6-2 for more information. Recall Offset CAL Recalls the last Offset Calibration made on the LMR Master. See Recall an Offset Calibration on page 6-4 for more information. Zero Turns zero adjust on or off. Back Returns to the previous menu PN: Rev. D S412D User Guide
59 Functions and Operations 2-10 Power Meter (Internal) Mode MEAS/DISP The following soft key is available when the MEAS/DISP key is pressed in Power Meter mode. RMS Acquisition Activates the RMS Averaging menu. The RMS average is calculated by taking the log of the average power and the power is calculated from voltage. The number of points to average can be set to low, medium or high. Higher RMS averaging will increase the amount of time between display updates, due to the additional averaging. Off Turns off RMS averaging. Low Medium High Back Returns to the previous menu. Running Average Implements a running average of the last user-defined number of display updates. The number of updates to be averaged can be set from 1 (no averaging) to 50. S412D User Guide PN: Rev. D 2-33
60 2-10 Power Meter (Internal) Mode Functions and Operations SYS In Power Meter mode, pressing the SYS key displays the following System menu soft key selections: System Options Hour Minute Month Day Clock Printer Units Change Date Format GPS On/Off Application Options Self Test Status GPS Language English External Ref Freq Bias Tee Impedance 50 Bias Tee On/Off Bias Tee Voltage Year Back Location 75 Anritsu 12N50-75B Back Quality Back Other Adapter Offset Back Reset Back Back Figure SYS Key Menu in Power Meter Mode 2-34 PN: Rev. D S412D User Guide
61 Functions and Operations 2-10 Power Meter (Internal) Mode System Options Displays a second level of system option functions: Clock Displays a second level of functions: Hour Enter the hour (0 23) using the Up/Down arrow key or the keypad. Press ENTER when data entry is complete or ESCAPE to restore the previous value. Minute Enter the minute (0 59) using the Up/Down arrow key or the keypad. Press ENTER when data entry is complete or ESCAPE to restore the previous value. Month Enter the month (1 12) using the Up/Down arrow key or the keypad. Press ENTER when data entry is complete or ESCAPE to restore the previous value. Day Enter the day (1 31) using the Up/Down arrow key or the keypad. Press ENTER when data entry is complete or ESCAPE to restore the previous value. Year Enter the year ( ) using the Up/Down arrow key or the keypad. Press ENTER when data entry is complete or ESCAPE to restore the previous value. Back Returns to the top-level SYS menu. Printer Displays a menu of supported printers. Use the Up/Down arrow key and ENTER key to make the selection. Units Select the unit of measurement (metric or English). Change Date Format Toggles the date format between MM/DD/YYYY, DD/MM/YYYY, and YYYY/MM/DD. Back Returns to the top-level SYS menu. Application Options Application options displays options applicable to particular mode. External Ref Freq Set the external reference frequency from 2 MHz to 20 MHz. Bias Tee Selects the Bias Tee. Bias Tee Voltage Set the bias tee voltage between 12 and 24 Vdc, in 1V increments, using the number keys or the Up/Down arrow keys. Bias Tee On/Off Turn the bias voltage on or off. Back Returns to the previous menu. Impedance Sets the input impedance of the instrument 50Ω Sets the input impedance of the instrument to 50Ω, which is the default setting. 75Ω Anritsu 12N50-75B Displays measurements as if the input impedance was 75. The actual input impedance is still 50Ω, but the displayed information is transformed to the equivalent 75Ω value based on the offset value specified by the adapter used in the measurement. This setting is commonly used for cable TV-related measurements. Pressing this soft key will also compensate 7.5 db for the loss of the Anritsu 12N50-75B adapter. Other adapter Offset This key allows the user to enter other adapter offset values. Enter the desired loss using the keypad or Up/Down arrow key and press the ENTER key to accept. Back Returns to the previous menu. S412D User Guide PN: Rev. D 2-35
62 2-10 Power Meter (Internal) Mode Functions and Operations Back Returns to the top-level SYS menu. Self Test Starts an instrument self test. Status Displays the current instrument status, including calibration status, temperature, and battery charge state. Press ESCAPE to return to operation. GPS Opens the GPS soft key menu. Press the GPS On/Off soft key to turn the GPS feature on or off. Press the Location soft key to view the following information: latitude, longitude, altitude and UTC timing. Press the Quality soft key to display the number of tracked satellites and the GPS quality. Press the Reset soft key to reset the GPS. Back Returns to the previous menu. Language Pressing this soft key immediately changes the language used to display messages on the LMR Master status window. Choices are English, French, German, Spanish, Chinese, and Japanese. The default language is English PN: Rev. D S412D User Guide
63 Functions and Operations 2-11 Power Monitor (External Detector) (Option 5) 2-11 Power Monitor (External Detector) (Option 5) Selecting Power Monitor (External Detector) from the mode menu causes the soft keys, described below, to be displayed and the corresponding values shown in the message area. MODE = POWER METER: SOFT KEYS: AMPLITUDE Units Rel Offset db Zero Measure Offset Figure Power Monitor Mode (Option 5) Soft Keys Units Toggles between dbm and Watts. Rel Turns relative mode OFF, if currently ON. If relative mode is currently OFF, turns it ON and causes the power level to be measured and saved as the base level. Subsequent measurements are then displayed relative to this saved value. With units of dbm, relative mode displays dbr; with units of Watts, relative mode displays % (percent). Offset db Turns Offset OFF, if currently ON. If Offset is currently OFF, turns it ON and opens the Offset parameter for data entry (0-60). Press ENTER when data entry is complete. Offset is the attenuation (in db) inserted in the line between the DUT and the RF detector. The attenuation is added to the measured input level prior to display. Zero Turns Zero OFF, if currently ON. If Zero is currently OFF, this soft key turns it ON and initiates collection of a series of power level samples, which are averaged and saved. This saved value is then subtracted from subsequent measurements prior to display. Measure Offset Measures the exact loss of phase stable cables and attenuators attached to the unit. The Anritsu Power Meter Offset Cal Kit, PN: which includes a jumper cable and 10 db attenuator, is recommended for this offset calibration. Measure Offset is recommended when performing measurements requiring high accuracy. S412D User Guide PN: Rev. D 2-37
64 2-11 Power Monitor (External Detector) (Option 5) Functions and Operations SYS In Power Monitor mode, pressing the SYS key displays the following System menu soft key selections. System Options Clock Printer Self Test Hour Units Status Minute Month Day Change Date Format GPS Language English GPS On/Off Year Back Location Back Quality Reset Back Figure SYS Key Menu in Power Monitor (External Detector) Mode System Options Displays a second level of system option functions: Clock Displays a second level of functions: Hour Enter the hour (0 23) using the Up/Down arrow key or the keypad. Press ENTER when data entry is complete or ESCAPE to restore the previous value. Minute Enter the minute (0 59) using the Up/Down arrow key or the keypad. Press ENTER when data entry is complete or ESCAPE to restore the previous value. Month Enter the month (1 12) using the Up/Down arrow key or the keypad. Press ENTER when data entry is complete or ESCAPE to restore the previous value PN: Rev. D S412D User Guide
65 Functions and Operations 2-11 Power Monitor (External Detector) (Option 5) Day Enter the day (1 31) using the Up/Down arrow key or the keypad. Press ENTER when data entry is complete or ESCAPE to restore the previous value. Year Enter the year ( ) using the Up/Down arrow key or the keypad. Press ENTER when data entry is complete or ESCAPE to restore the previous value. Back Returns to the top-level SYS menu. Printer Displays a menu of supported printers. Use the Up/Down arrow key and ENTER key to make the selection. Units Select the unit of measurement (metric or English). Change Date Format Toggles the date format between MM/DD/YYYY, DD/MM/YYYY, and YYYY/MM/DD. Back Returns to the top-level SYS menu. Self Test Starts an instrument self test. Status Displays the current instrument status, including calibration status, temperature, and battery charge state. Press ESCAPE to return to operation. GPS Opens the GPS soft key menu. Press the GPS On/Off soft key to turn the GPS feature on or off. Press the Location soft key to view the following information: latitude, longitude, altitude and UTC timing. Press the Quality soft key to display the number of tracked satellites and the GPS quality. Press the Reset soft key to reset the GPS. Back Returns to the previous menu. Language Pressing this soft key immediately changes the language used to display messages on the LMR Master status window. Choices are English, French, German, Spanish, Chinese, and Japanese. The default language is English. S412D User Guide PN: Rev. D 2-39
66 2-12 High Accuracy Power Meter Mode (Option 19) Functions and Operations 2-12 High Accuracy Power Meter Mode (Option 19) Selecting High Accuracy Power Meter from the mode menu causes the soft keys, described below, to be displayed and the corresponding values shown in the message area. MODE = HIGH ACCURACY POWER METER FREQ/DIST AMPLITUDE MEAS/DISP SOFT KEYS: Center Rel Running Averages Offset db Max Hold Zero Limit ON/OFF Lower Limit Signal Standard Upper Limit Top of List Select Standard Limit Units Page Up Page Down Bottom of List Show All Top of List Page Up Page Down Bottom of List Select/ Deselect Select Channel Uplink Downlink Channel Increment Back Show Selected Figure High Accuracy Power Sensor Mode (Option 19) Soft Keys 2-40 PN: Rev. D S412D User Guide
67 Functions and Operations 2-12 High Accuracy Power Meter Mode (Option 19) FREQ/DIST Choosing the FREQ/DIST key displays the following soft keys and their corresponding values in the message area. Center Sets the center frequency of the Spectrum Analyzer. Enter a value using the Up/Down arrow key or keypad, press ENTER to accept or ESCAPE to restore previous value. Signal Standard Opens a menu of soft keys used to select the signal standard to be used. For more information on signal standards, refer to Appendix C. Select Standard Opens the signal standard menu, showing the currently selected signal standards. Use the soft keys to navigate the list. Press the Show All soft key to show the complete signal standard list. When the complete list is displayed, the currently selected signal standards are marked with an asterisk. Press the Show Selected soft key to show only the currently selected signal standards. Select Channel Sets the channel information for the available standard. Uplink Selects only uplink frequencies. Downlink Selects only downlink frequencies. Channel Increment Changes the channel increment step size when the Up/Down arrow keys are used to select the channel number. Back Returns to the previous menu. AMPLITUDE Choosing the AMPLITUDE key displays the following soft keys and their corresponding values in the message area or scale menu depending on the measurement mode. Rel Selects whether relative power is on or off. When on, the message Relative: On will show in the message area. Offset db Turns offset on or off. When on, a value from 0 60 db can be entered. Zero Turns zero adjust on or off. MEAS/DISP Choosing MEAS/DISP causes the soft keys below to be displayed. Running Averages Press the Running Averages soft key and use the keypad to enter the number of averages to use (up to 50) Detection Displays and holds the maximum responses of the input signal. Limit ON/OFF Press the Limit ON/OFF soft key to turn on the limits. Lower Limit Activate the lower limit line by toggling this soft key. The unit beeps if the data is below the set limit line and the status is displayed in the message area. Upper Limit Activate the upper limit line by toggling this soft key. The unit beeps if the data is above the set limit line and the status is displayed in the message area. Limit Units Press the Limit Units soft key to select the units. S412D User Guide PN: Rev. D 2-41
68 2-13 Transmission Measurement Mode (Option 21) Functions and Operations 2-13 Transmission Measurement Mode (Option 21) Selecting Transmission Measurement from the mode menu causes the soft keys, described below, to be displayed and the corresponding values shown in the message area. MODE = TRANSMISSION MEASUREMENT FREQ/SPAN AMPLITUDE MEAS/DISP SOFT KEYS: Center Ref Level Bandwidth Top of List Page Up Page Down Bottom of List Edit Shift Left 1 Div Shift Left 9 Div Shift Right 1 Div Shift Right 9 Div Back Top of List Page Up Page Down Select Standard Select Channel Uplink Downlink Span Start Stop Signal Standard Edit Full Min Span Up Span Down Back Scale Atten/ Preamp Auto Manual Dynamic Preamp Control Manual Back RBW Auto RBW Manual VBW Auto VBW Manual Back Auto Manual Dynamic Preamp On/Off Preamp Auto Trace Calibrate TM Max Hold Average (2-25) Min Hold Trace Math Back Recall Trace -> B View B / Clear B A -> B A - B -> A A + B -> A Back Show All Bottom of List Select/ Deselect Back Back Show Selected Figure Transmission Measurement Mode Soft Keys 2-42 PN: Rev. D S412D User Guide
69 Functions and Operations 2-13 Transmission Measurement Mode (Option 21) FREQ/DIST Pressing the FREQ/DIST key in Transmission Measurement mode activates a menu of frequency-related choices in the active function block. Use the corresponding soft key to select the desired function, explained below. Use the keypad or Up/Down arrow key to change or enter values shown in the edit box. Complete the entry by pressing the appropriate soft key frequency terminator. Center Sets the center frequency. A specific center frequency can be entered using the Up/Down arrow key, or the keypad and the GHz, MHz, khz, or Hz soft keys. Edit allows editing of the center frequency. Enter a value using the Up/Down arrow key or keypad. Shift Left 1 Div shifts the center frequency left by one division. Shift Left 9 Div shifts the center frequency left by nine divisions. Shift Right 1 Div shifts the center frequency right by one division. Shift Right 9 Div shifts the center frequency right by nine divisions. Back Returns to the previous menu level. Span Pressing the Span soft key activates a menu of span related choices in the active function block. Edit Allows direct entry of a specific frequency span. Use the keypad or Up/Down arrow key to select the span. Full Sets the Anritsu LMR Master to its maximum frequency span, GHz. Min Sets the span to the minimum value, 10 Hz. Span Up Activates the span function so that the span may be increased quickly in a sequence. Span Down Activates the span function so that the span may be reduced quickly in a sequence. Back Returns to the previous menu level. Start Activates the start frequency function and sets the Anritsu LMR Master in the Start/Stop mode. Use the keypad to enter the desired start frequency and complete the entry by pressing the GHz, MHz, khz, or Hz soft key to accept the start frequency input. Stop Activates the stop frequency function and sets the Anritsu LMR Master in the Start/Stop mode. Use the keypad to enter the desired stop frequency and complete the entry by pressing the GHz, MHz, khz, or Hz soft key to accept the stop frequency input. Signal Standard Opens a menu of soft keys used to select the signal standard to be used. For more information on signal standards, refer to Appendix C. Select Standard Opens the signal standard menu, showing the currently selected signal standards. Use the soft keys to navigate the list. Press the Show All soft key to show the complete signal standard list. When the complete list is displayed, the currently selected signal standards are marked with an asterisk. Press the Show Selected soft key to show only the currently selected signal standards. Select Channel Sets the channel information for the available standard. Uplink Selects only uplink frequencies. Downlink Selects only downlink frequencies. Back Returns to the previous menu. S412D User Guide PN: Rev. D 2-43
70 2-13 Transmission Measurement Mode (Option 21) Functions and Operations AMPLITUDE Pressing AMPLITUDE in Transmission Measurement mode activates a menu of amplitude-related functions. Ref Level Activates the amplitude reference level function. A specific reference level can be entered using the keypad or Up/Down arrow key. Press ENTER to accept the reference level value. Valid reference levels are +20 dbm to 120 dbm. Scale Activates the scale function in a 1 db through 15 db per division logarithmic amplitude scale. Enter the desired scale using the keypad or Up/Down arrow key. Press ENTER to accept. Atten/Preamp Activates a menu that allows control of the Anritsu LMR Master input attenuator so that it is either coupled automatically to the reference level (Auto), manually adjustable (Manual), or dynamically controlled (Dynamic). Auto Press this soft key to automatically couple the attenuation to the reference level. The automatic attenuation value is displayed to the left of the display below the Atten. Manual Sets the attenuation to manual mode. The attenuation can be adjusted from 0 to 51 db, in 1 db increments, using the keypad or Up/Down arrow key. Press ENTER to accept the selected value. The value is displayed to the left of the display below the Atten*. Note Attenuation is normally a coupled function and is automatically adjusted when the reference level changes. The reference level will not change however, when the attenuator changes. The attenuator should be adjusted so that the maximum signal amplitude at the input mixer is 30 dbm or less. For example, if the reference level is +20 dbm, the attenuation should be 50 db for an input signal of 30 dbm at the mixer ( = 30). This prevents signal compression. (This is with the preamplifier off.) Dynamic Turns on the dynamic attenuation control feature. Dynamic attenuation tracks the input signal level, automatically adjusting the attenuation and preamp to give the maximum dynamic range without compressing the input mixer. Dynamic attenuation is based on a broadband detector. This means that an out of band signal may interfere and force the need to use a bandpass filter to eliminate the out of band interference and enable accurate measurements. Preamp Control Manual Allows manual control of the preamplifier on/off state. The Preamp On/Off soft key turns the preamplifier on or off. The Preamp Auto soft key returns to automatic control of the preamplifier. Back Returns to the previous menu level PN: Rev. D S412D User Guide
71 Functions and Operations 2-13 Transmission Measurement Mode (Option 21) MEAS/DISP Pressing MEAS/DISP in Transmission Measurement mode activates a menu of bandwidthand sweep-related functions. Use the corresponding soft key to select the desired function. Bandwidth Activates a menu that allows the resolution and video bandwidths to be either coupled automatically to the span (Auto) or manually adjustable (Manual). RBW Auto Sets the resolution bandwidth so that it is automatically coupled to the span. RBW Manual Sets the resolution bandwidth manually, independent of the span. VBW Auto Sets the video bandwidth so that it is automatically coupled to the RBW. VBW Manual Sets the video bandwidth manually, independent of the RBW. Back Returns to the previous menu level. Trace Activates a menu of trace related functions. Use the corresponding soft key to select the desired trace function. Max Hold Displays and holds the maximum responses of the input signal. Average (2-25) Sets the number of the sweeps to be averaged. The number of the sweeps can be adjusted from 2 to 25 using the Up/Down arrow key, or entered directly with the keypad number keys. Select OFF, or enter 1 to turn off averaging. Press ENTER to accept the selected value. This feature uses a measurement routine that averages samples over a user-defined number of successive sweeps. The averaging is done on a point-by-point basis. Each displayed point reflects the current measurement associated with that point averaged with the measurements associated with that point from previous sweeps. This feature can be used to minimize the impact of transients on the displayed signal and noise. Min Hold Displays and holds the minimum responses of the input signal over multiple sweeps. This feature is useful for detecting small, discrete, stable signals in the presence of noise. Trace Math Pressing the Trace Math key in Transmission Measurement mode activates a menu of trace-related functions. Use the corresponding soft key to select the desired trace function. Note For this function, Trace A is always the runtime trace, and Trace B is always a saved trace. Trace A is displayed as a yellow trace, and Trace B is displayed as a magenta trace. Refer to Save and Recall a Display on page 3-16 for information on saving and recalling traces. Recall Trace B Recalls a stored trace into the Trace B buffer. View B /Clear B Overlays a stored trace over the current trace. If there is no trace in the Trace B buffer, the Recall Trace list will display. Select a trace from the menu of saved traces to recall to the Trace B buffer. Pressing the soft key again turns off the trace overlay. A B Moves the currently displayed trace into the Trace B buffer. A-B A Subtracts Trace B from Trace A and displays the result as Trace A. A+B A Adds Trace B to Trace A and displays the result as Trace A. Calibrate TM Calibrates the LMR Master for transmission measurements. S412D User Guide PN: Rev. D 2-45
72 2-13 Transmission Measurement Mode (Option 21) Functions and Operations MARKER Pressing MARKER on the data keypad in Transmission Measurement mode activates a menu for the six different markers. Use the corresponding soft key to select the desired marker. Then use the marker second level menu to turn the markers on or off, and to edit marker parameters and values. M1 Selects the M1 marker parameter and opens the M1 marker second level menu. On/Off Turns the selected marker on or off. Edit Opens the selected marker parameter for data entry. Press ENTER when data entry is complete or ESCAPE to restore the previous value. Marker To Channel Displays the closest channel to the marker frequency in the edit box. Entering a different channel number will cause the marker to go to that channel. Marker To Peak Places the selected marker at the frequency with the maximum amplitude value. Marker Freq To Center Makes the center frequency of the LMR Master equal to the frequency of the selected marker. Back Returns to the Main Markers Menu. M2 through M4 Selects the marker parameter and opens the marker second level menu. On/Off Turns the selected marker on or off. Edit Opens the selected marker parameter for data entry. Press ENTER when data entry is complete or ESCAPE to restore the previous value. Delta (Mx-M1) Displays delta amplitude value as well as delta frequency for the selected marker with respect to the M1 marker. Marker To Peak Places the selected marker at the frequency with the maximum amplitude value. Marker Freq To Center Makes the center frequency of the LMR Master equal to the frequency of the selected marker. Back Returns to the Main Markers Menu. All Off Turns off all markers. More Press to access additional marker functions: M5 Selects the M5 marker parameter and opens the M5 marker second level menu with M5 highlighted. On/Off Turns the selected marker on or off. Edit Opens the selected marker parameter for data entry. Enter the desired marker frequency using the keypad or Up/Down arrow key. Select the GHz, MHz, khz, or Hz soft key to accept the marker frequency input. Marker Freq To Center Makes the center frequency equal to the frequency of the selected marker. Peak Between M1& M2 Places the selected marker at the frequency with maximum amplitude value between marker M1 and M2. Valley Between M1 & M2 Places the selected marker at the frequency with minimum amplitude value between marker M1 and M PN: Rev. D S412D User Guide
73 Functions and Operations 2-13 Transmission Measurement Mode (Option 21) Back Returns to the previous menu level. Note If markers M1 and/or M2 are off, the Peak and Valley functions above are executed across the entire span. M6 Selects the M6 marker parameter and opens the M6 marker second level menu with M6 highlighted. On/Off Turns the selected marker on or off. Edit Opens the selected marker parameter for data entry. Enter the desired marker frequency using the keypad or Up/Down arrow key. Select the GHz, MHz, khz, or Hz soft key to accept the marker frequency input. Marker Freq To Center Makes the center frequency equal to the frequency of the selected marker. Peak Between M3 & M4 Places the selected marker at the frequency with maximum amplitude value between marker M1 and M2. Valley Between M3 & M4 Places the selected marker at the frequency with minimum amplitude value between marker M1 and M2. Back Returns to the previous menu level. Note If either marker M3 or marker M4 is off, the Peak and Valley functions above are executed across the entire span. Regular Marker Measures the signal level at the point of the marker in the unit type selected in the Amplitude -Units menu. When the regular marker option is selected, all markers are regular markers. Noise Marker Measures noise level normalized to a 1 Hz bandwidth. The unit of measure is dbm/hz only. When Noise Marker is selected, the detection type is automatically changed to RMS average. When the Noise Marker option is selected, all markers are noise markers. All Off Turns off all markers. Back Returns to the previous menu level. LIMIT Pressing LIMIT on the data keypad in Transmission Measurement mode activates a menu of limit-related functions. Use the corresponding soft key to select the desired limit function. Then use the Up/Down arrow key to change its value, which is displayed in the message area at the bottom of the display. Single Limit Sets a single limit value. Menu choices are: On/Off Turns the single limit function on or off. Edit Allows entry of the limit amplitude using the keypad or Up/Down arrow key. Press ENTER to accept the entered value. Upper / Lower Limit Selects whether the measurement will fail if the data is above the limit line or below the limit line, as indicated in the message area of the display. Back Returns to the previous menu level. S412D User Guide PN: Rev. D 2-47
74 2-13 Transmission Measurement Mode (Option 21) Functions and Operations Multiple Upper Limits Sets multiple user-defined upper limits, and can be used to create an upper limit mask for quick pass/fail measurements. An upper limit will result in a failure when the data falls above the limit line. Menu choices are: Segment 1-5 View/edit upper limit segment 1-5. On/Off Turns the segment on or off. Edit Opens the segment parameters for editing (see Adjusting Segmented Limits on page 3-18). Prev Segment Edit or view the parameters of the previous segment. Next Segment Edit or view the parameters of the next segment. If the next segment is off when this button is pressed, the starting point of the next segment will be set equal to the ending point of the current segment (if the current segment is on). Back Returns to the previous menu level Back Returns to the previous menu level Multiple Lower Limits Set multiple user-defined lower limits, and can be used to create a lower limit mask for quick pass/fail measurements. A lower limit will result in a failure when the data falls below the limit line. Menu choices are: Segment 1-5 View/edit lower limit segment 1-5. On/Off Turns the segment on or off. Edit Opens the segment parameters for editing (see Adjusting Segmented Limits on page 3-18). Prev Segment Edit or view the parameters of the previous segment. Next Segment Edit or view the parameters of the next segment. If the next segment is off when this button is pressed, the starting point of the next segment will be set equal to the ending point of the current segment (if the current segment is on). Back Returns to the previous menu level Back Returns to the previous menu level. Limit Beep Turns the audible limit beep indicator on or off. When the limit beep indicator is on, an audible beep will occur at every data point that appears above the upper limit or below the lower limit PN: Rev. D S412D User Guide
75 Functions and Operations 2-13 Transmission Measurement Mode (Option 21) SYS In Transmission Measurement mode, pressing the SYS key displays the following System menu soft key selections: System Options Hour Minute Month Day Year Clock Printer Units Change Date Format Back GPS On/Off Location Application Options Self Test Status GPS Language English External Ref Freq Bias Tee Impedance Anritsu 12N50-75B Bias Tee On/Off Bias Tee Voltage Back Quality Back Other Adapter Offset Reset Back Back Back Figure SYS Key Menu in Transmission Measurement Mode System Options Displays a second level of system option functions: Clock Displays a second level of functions: Hour Enter the hour (0 23) using the Up/Down arrow key or the keypad. Press ENTER when data entry is complete or ESCAPE to restore the previous value. Minute Enter the minute (0 59) using the Up/Down arrow key or the keypad. Press ENTER when data entry is complete or ESCAPE to restore the previous value. Month Enter the month (1 12) using the Up/Down arrow key or the keypad. Press ENTER when data entry is complete or ESCAPE to restore the previous value. S412D User Guide PN: Rev. D 2-49
76 2-13 Transmission Measurement Mode (Option 21) Functions and Operations Day Enter the day (1 31) using the Up/Down arrow key or the keypad. Press ENTER when data entry is complete or ESCAPE to restore the previous value. Year Enter the year ( ) using the Up/Down arrow key or the keypad. Press ENTER when data entry is complete or ESCAPE to restore the previous value. Back Returns to the top-level SYS menu. Printer Displays a menu of supported printers. Use the Up/Down arrow key and ENTER key to make the selection. Units Select the unit of measurement (metric or English). Change Date Format Toggles the date format between MM/DD/YYYY, DD/MM/YYYY, and YYYY/MM/DD. Back Returns to the top-level SYS menu. Application Options Application options displays options applicable to particular mode. External Ref Freq Set the external reference frequency from 2 MHz to 20 MHz. Bias Tee Selects the Bias Tee. Bias Tee Voltage Set the bias tee voltage between 12 and 24 Vdc, in 1V increments, using the number keys or the Up/Down arrow keys. Bias Tee On/Off Turn the bias voltage on or off. Back Returns to the previous menu. Impedance Sets the input impedance of the instrument 50Ω Sets the input impedance of the instrument to 50Ω, which is the default setting. 75Ω Anritsu 12N50-75B Displays measurements as if the input impedance was 75Ω. The actual input impedance is still 50Ω, but the displayed information is transformed to the equivalent 75 value based on the offset value specified by the adapter used in the measurement. This setting is commonly used for cable TV-related measurements. Pressing this soft key will also compensate 7.5 db for the loss of the Anritsu 12N50-75B adapter. Other adapter Offset This key allows the user to enter other adapter offset values. Enter the desired loss using the keypad or Up/Down arrow key and press the ENTER key to accept. Back Returns to the previous menu. Back Returns to the top-level SYS menu. Self Test Starts an instrument self test. Status Displays the current instrument status, including calibration status, temperature, and battery charge state. Press ESCAPE to return to operation. GPS Opens the GPS soft key menu. Press the GPS On/Off soft key to turn the GPS feature on or off. Press the Location soft key to view the following information: latitude, longitude, altitude and UTC timing. Press the Quality soft key to display the number of tracked satellites and the GPS quality PN: Rev. D S412D User Guide
77 Functions and Operations 2-13 Transmission Measurement Mode (Option 21) Press the Reset soft key to reset the GPS. Back Returns to the previous menu. Language Pressing this soft key immediately changes the language used to display messages on the LMR Master status window. Choices are English, French, German, Spanish, Chinese, and Japanese. The default language is English. S412D User Guide PN: Rev. D 2-51
78 2-14 Interference Analyzer Mode (Option 25) Functions and Operations 2-14 Interference Analyzer Mode (Option 25) The Interference Analyzer option provides several different ways to determine the nature and source of an interfering signal. Selecting Interference Analyzer from the mode menu causes the soft keys, described below, to be displayed and the corresponding values shown in the message area. MODE = INTERFERENCE ANALYZER: FREQ/DIST AMPLITUDE SOFT KEYS: Center (Spectrum and Spectrograph modes only) Ref Level Edit Full Zero Span Up Span Start Stop Signal Standard Select Standard Edit Shift Left 1 Div Shift Left 9 Div Shift Right 1 Div Shift Right 9 Div dbm Scale Atten/ Preamp Units Ref Level Offset Auto Manual Dynamic Span Down Back Select Channel Uplink Downlink Channel Increment Back Top of List Page Up Page Down Bottom of List Select/ Deselect Show Selected Back Top of List Page Up Page Down Bottom of List dbv dbmv dbuv Linear Back Volts Watts Edit Measure Offset Back Preamp Control Manual Back Auto Manual Dynamic Preamp On/Off Preamp Auto Show All Back Log Back Figure Interference Analyzer Mode Soft Key Labels (1 of 2) 2-52 PN: Rev. D S412D User Guide
79 Functions and Operations 2-14 Interference Analyzer Mode (Option 25) Volume Speaker Tone On/Off MODE = INTERFERENCE ANALYZER: MEAS/DISP SOFT KEYS: Spectrum Spectrogram Back Sweep Interval Time Span Auto Save Cursor Signal Strength RSSI Signal ID Setup Set IA Freq Time Interval Time Span Time Cursor Freq Cursor Back Back Bandwidth Detection Volume Back Positive Peak RMS Average Negative Peak Sampling Mode RBW Auto RBW Manual VBW Auto VBW Manual Measure IA Freq To Center IA Freq As Marker M1 Back Auto Scale Data Log Data Off/On Reset Sweep Back Back Back Figure Interference Analyzer Mode Soft Key Labels (2 of 2) To select Interference Analyzer mode, press the MODE key, use the Up/Down arrow key to highlight Interference Analysis and press ENTER. S412D User Guide PN: Rev. D 2-53
80 2-14 Interference Analyzer Mode (Option 25) Functions and Operations FREQ/DIST Center Sets the frequency at the center of the display. Frequencies can be entered in units of GHz, MHz, khz or Hz. When the center frequency is entered, the labeling below the grid shows the center frequency and the span in the most appropriate units based on the value. Span Sets the width of the measurement window in GHz, MHz, khz or Hz. The center frequency and span are displayed in the message area at the bottom of the status window. The Span menu is disabled for RSSI and Signal Strength measurements. Start Enter a start frequency value (in GHz, MHz, khz or Hz) using the Up/Down arrow key or keypad, press ENTER to accept or ESCAPE to restore. If the entered start frequency is greater than the current stop frequency, the stop frequency is automatically adjusted to be the same as the start frequency (zero span). Stop Enter a stop frequency value (in GHz, MHz, khz or Hz) using the Up/Down arrow key or keypad, press ENTER to accept or ESCAPE to restore. If the entered stop frequency is lower than the current start frequency, the start frequency is automatically adjusted to be the same as the stop frequency (zero span). Signal Standard Opens a menu of soft keys used to select the signal standard to be used. Select Standard Opens the signal standard menu, showing the currently selected signal standards. Use the soft keys to navigate the list. Press the Show All soft key to show the complete signal standard list. When the complete list is displayed, the currently selected signal standards are marked with an asterisk. Press the Show Selected soft key to show only the currently selected signal standards. Select Channel Sets the channel information for the available standard. If the particular standard has not been used before, the channel number will default to the lowest legal channel number for that standard. If that standard has been used before, the last used channel will be the default. Uplink Selects the bank of frequencies that correspond to signals sent from the client transmitter to the base station. Channel Increment n/a in Interference Analyzer mode. Downlink Selects the bank of frequencies that correspond to the signals sent from the base station to the client receivers. Back Returns to the previous menu. AMPLITUDE Choosing AMPLITUDE displays the following soft keys and their corresponding values in the message area. Ref Level Activates the amplitude reference level function which sets the amplitude at the top of the display. Valid reference levels are from +20 dbm to 120 dbm. Scale Activates the scale function which sets the db/division value from 1 db/div to 15 db/div in 1 db steps. This soft key is not active if the units are set to linear. Atten/Preamp Sets the internal input attenuator so that it is either coupled automatically to the reference level (Auto), manually adjustable (Manual) or 2-54 PN: Rev. D S412D User Guide
81 Functions and Operations 2-14 Interference Analyzer Mode (Option 25) dynamically coupled to the input signal (Dynamic) and provides control for the preamplifier. For RSSI and Signal Strength measurements, the LMR Master is set to Auto attenuation, and the Atten/Preamp menu is disabled. Auto Sets the input attenuator so that it is coupled automatically to the reference level. Manual Sets the input attenuator manually from 0 to 51 db. Choose a value that does not overload the instrument. Dynamic Sets the value of the input attenuator so that it is dynamically coupled to the input signal and turns the preamp on or off based on the overall signal conditions across the entire frequency range of the instrument. The instrument will set the lowest input attenuation consistent with the need to not saturate the front end. Note A large signal that is not displayed on-screen can sometimes cause the instrument to turn off the preamplifier or add input attenuation, causing the noise floor to jump up or down suddenly as the large signal turns on or off. Preamp Control Manual Activates the preamp menu for manual control of the preamplifier. Preamp On/Off Sets the preamplifier on or off. Preamp Auto Automatically adjusts the preamplifier according to the reference level. Back Returns to the previous menu level. Units Choose from the menu of amplitude related units. When Linear is selected, the available selections are Volts or Watts. When Log is selected, the selection of dbm sets absolute decibels relative to 1 mw as the amplitude unit. Selection of dbv, dbmv or dbμv sets absolute decibels relative to 1 volt, 1 millivolt, or 1 microvolt respectively as the amplitude unit. The Units menu is disabled for RSSI and Signal Strength measurements. Ref Level Offset Sets the reference level offset, which is a value, in db, of gain or loss external to the instrument. Negative values represent external attenuation. This feature allows measurement of high gain devices in combination with an attenuator, and is used to offset the reference level to view the correct output level. For example, to measure a high gain amplifier with an output of 70 dbm, an external 50 db attenuator must be inserted between the instrument and the device. To compensate, set the reference level offset to 50 db. MEAS/DISP Pressing MEAS/DISP activates a menu of bandwidth and sweep-related functions. Use the corresponding soft key to select the desired function. Spectrum Spectrum selects a traditional spectrum analyzer display. Spectrogram Selecting Spectrogram displays a three dimensional representation of frequency, time and power to aid in the identification of intermittent signals. The bottom portion of the display shows a traditional spectrum analyzer plot while the upper portion shows the power level in color with the most recent trace placed at the bottom of the display. A color scale on the left side of the display translates color into S412D User Guide PN: Rev. D 2-55
82 2-14 Interference Analyzer Mode (Option 25) Functions and Operations power level. The highest power level is displayed in red with the lowest power levels in dark blue and black. Sweep Interval Sweep Interval allows for the amount of time between sweeps to be set from a minimum of zero seconds up to 660 seconds (11 minutes). Enter the number using the Up/Down arrow key or use the keypad and select the appropriate soft key for minutes, seconds, milliseconds or microseconds. The current setting will be displayed in the message area. A sweep interval of 0 seconds will display as Auto and the instrument will sweep as fast as possible. Setting this value also determines the time span. Time Span Time Span sets the total time that will be taken to fill the waterfall display, from 0 to 4320 minutes (72 hours). Enter the number using the Up/Down arrow key or use the keypad and select the appropriate soft key for days, hours, minutes, seconds, milliseconds or microseconds. The current setting will be displayed in the message area. A time span of 0 seconds will display as Auto and the instrument will sweep as fast as possible. Setting this value also determines the sweep interval. Auto Save Auto Save saves the screen when the waterfall display is full. Select the RECALL DISPLAY (0) key to view and recall the saved displays ( Save and Recall a Display on page 3-16). Cursor The cursor controls enable the user to look through the waterfall display and read the power level at a selected frequency and time. The time, frequency and power level at the measurement point are shown in the message block at the bottom of the screen. Selecting the Cursor soft key turns the cursors on. Time Cursor The Time Cursor is a white horizontal line that can be positioned anywhere in the waterfall display. Select Time Cursor and use the Up/Down arrow key to move the cursor to the desired time. The time the trace was taken is shown in the bottom message block. If the cursor is moved into a portion of the display where there is no data, the date is shown as January 1, 1970 at midnight. The time cursor will stop the sweep collection. Use the cursor after a full capture is completed, or on a recalled display, in order to not miss any collection of data. Freq Cursor The Frequency Cursor is a vertical white line that can be positioned at any frequency in the span range using the Up/Down arrow key. Pressing the Up arrow key moves the cursor to a higher frequency while pressing the Down arrow key moves the cursor to a lower frequency. The frequency is shown in the bottom message block. Back Returns to the previous menu level. Back Returns to the previous menu. Signal Strength Selecting Signal Strength displays the power at a single frequency (in dbm) along with an optional audible indicator. The frequency of the audible indicator increases as the measured signal strength increases. This mode is especially useful when attempting to locate an emitter using a directional antenna. Volume Select the Volume soft key to adjust the sound level of the audible signal strength indicator using the Up/Down arrow key. The current volume setting is shown in the lower measurement block. Speaker Tone On/Off The Speaker Tone On/Off soft key toggles the audible indicator on or off. The default is On. Back Returns to the previous menu level PN: Rev. D S412D User Guide
83 Functions and Operations 2-14 Interference Analyzer Mode (Option 25) RSSI RSSI provides a way to see the scrolling display of received signal strength in zero span. Once a full screen of data has been acquired, the oldest data disappears off the left edge of the display. Time Interval Time Interval sets the time between data points. The interval can be set from 150 ms to 1 minute. Enter the number using the Up/Down arrow key or use the keypad and select the appropriate soft key for minutes, seconds, or milliseconds. Time Span Time Span sets the total duration of measurements. This value can be set from 1 minute to 7 days. A setting of zero (MANUAL) can also be entered if no limit on the time span is desired. Auto Scale Data Auto Scale Data sets the reference level and scale factor to values that spread the data vertically over as much of the screen as possible, with the reference level set in 0.1 db steps and vertical scaling set in 1 db steps from 1 db to 15 db per division. Log Data Off/On Log Data Off/On selects if data will be automatically logged. When data logging is on, information is stored after each full screen of data has been captured. Saved data is named by using the word LOG and a dash followed by the time to the nearest second in 24-hour clock format, such as LOG Select the RECALL DISPLAY key to view and recall the saved data ( Save and Recall a Display on page 3-16). Reset Sweep Restarts the sweep from zero time at the right edge of the graph display. Also resets the Min RSSI, Max RSSI, and Last RSSI numeric values displayed below the graph. Back Returns to the previous menu level. Signal ID Signal Identification is used to determine, if possible, the air interface standard of a signal. If the instrument is unable to determine the modulation format, it will display the estimated bandwidth of the signal. Set IA Freq Set IA Freq is used to enter the center frequency of the interfering signal to be identified. Enter the frequency using the Up/Down arrow key or use the keypad and select the appropriate soft key for GHz, MHz, khz, or Hz. Measure Pressing the Measure soft key starts the signal identification process. This process takes approximately one minute to complete. At the end of the measurement process, a dialog box displays the results. The results are also shown in the message area at the bottom of the display. IA Freq to Center The IA Freq to Center soft key moves the interference analysis frequency to the center of the screen. IA Freq As Marker M1 The IA Freq As Marker M1 soft key sets the interference analysis frequency to be the frequency of marker M1. This is the easiest way to enter the measurement frequency. Refer to the MARKER on page 2-25 for information on setting the markers. Back Returns to the previous menu level. Setup Sets the parameters for IA measurements. Bandwidth Activates a menu that allows the resolution and video bandwidths to be either coupled automatically to the span (Auto) or manually adjustable (Manual). RBW Auto Sets the resolution bandwidth so that it is automatically coupled to the span. S412D User Guide PN: Rev. D 2-57
84 2-14 Interference Analyzer Mode (Option 25) Functions and Operations RBW Manual Sets the resolution bandwidth manually, independent of the span, from 30 khz to 1 MHz in zero span mode, 100 Hz to 1 MHz for a span greater than zero. VBW Auto Sets the video bandwidth so that it is automatically coupled to the RBW. VBW Manual Sets the video bandwidth manually, independent of the RBW, from 3 Hz to 1 MHz. Back Returns to the previous menu level. Detection Detection brings up a group of choices that change how the instrument deals with the multiple RF measurements that are made for each display point. Positive Peak Positive Peak displays the largest signal in each display point. RMS Average RMS Average causes the instrument to calculate the RMS average of all measurements done for each display point and display that average. Negative Peak Negative Peak displays the smallest value for each display point. Sampling Mode Sampling Mode displays a single frequency point for each display point. This is the fastest mode, but may miss displaying narrow signals. Back Returns to the previous menu level. Volume Select the Volume soft key to adjust the sound level of the audible signal strength indicator using the Up/Down arrow key. The current volume setting is shown in the lower measurement block. MARKER Pressing MARKER on the data keypad activates a menu for the six different markers. Use the corresponding soft key to select the desired marker. Then use the marker second level menu to turn the markers on or off, and to edit marker parameters and values. Note Markers are only available in IA-Spectrum mode. M1 Selects the M1 marker parameter and opens the M1 marker second level menu. On/Off Turns the selected marker on or off. Edit Opens the selected marker parameter for data entry. Press ENTER when data entry is complete or ESCAPE to restore the previous value. Marker To Channel Displays the closest channel to the marker frequency in the edit box. Entering a different channel number will cause the marker to go to that channel. Marker To Peak Places the selected marker at the frequency with the maximum amplitude value. Marker Freq To Center Makes the center frequency of the LMR Master equal to the frequency of the selected marker. Back Returns to the Main Markers Menu PN: Rev. D S412D User Guide
85 Functions and Operations 2-14 Interference Analyzer Mode (Option 25) M2 through M4 Selects the marker parameter and opens the marker second level menu. On/Off Turns the selected marker on or off. Edit Opens the selected marker parameter for data entry. Press ENTER when data entry is complete or ESCAPE to restore the previous value. Delta (Mx-M1) Displays delta amplitude value as well as delta frequency for the selected marker with respect to the M1 marker. Marker To Peak Places the selected marker at the frequency with the maximum amplitude value. Marker Freq To Center Makes the center frequency of the LMR Master equal to the frequency of the selected marker. Back Returns to the Main Markers Menu. All Off Turns off all markers. More Press to access additional marker functions: M5 Selects the M5 marker parameter and opens the M5 marker second level menu with M5 highlighted. On/Off Turns the selected marker on or off. Edit Opens the selected marker parameter for data entry. Enter the desired marker frequency using the keypad or Up/Down arrow key. Select the GHz, MHz, khz, or Hz soft key to accept the marker frequency input. Marker Freq To Center Makes the center frequency equal to the frequency of the selected marker. Peak Between M1& M2 Places the selected marker at the frequency with maximum amplitude value between marker M1 and M2. Valley Between M1 & M2 Places the selected marker at the frequency with minimum amplitude value between marker M1 and M2. Back Returns to the previous menu level. Note If markers M1 and/or M2 are off, the Peak and Valley functions above are executed across the entire span. M6 Selects the M6 marker parameter and opens the M6 marker second level menu with M6 highlighted. On/Off Turns the selected marker on or off. Edit Opens the selected marker parameter for data entry. Enter the desired marker frequency using the keypad or Up/Down arrow key. Select the GHz, MHz, khz, or Hz soft key to accept the marker frequency input. Marker Freq To Center Makes the center frequency equal to the frequency of the selected marker. Peak Between M3 & M4 Places the selected marker at the frequency with maximum amplitude value between marker M1 and M2. Valley Between M3 & M4 Places the selected marker at the frequency with minimum amplitude value between marker M1 and M2. S412D User Guide PN: Rev. D 2-59
86 2-14 Interference Analyzer Mode (Option 25) Functions and Operations Back Returns to the previous menu level. Note If either marker M3 or marker M4 is off, the Peak and Valley functions above are executed across the entire span. Regular Marker Measures the signal level at the point of the marker in the unit type selected in the Amplitude - Units menu. When the regular marker option is selected, all markers are regular markers. Noise Marker Measures noise level normalized toa1hz bandwidth. The unit of measure is dbm/hz only. When Noise Marker is selected, the detection type is automatically changed to RMS average. When the Noise Marker option is selected, all markers are noise markers. All Off Turns off all markers. Back Returns to the previous menu level. LIMIT Pressing the LIMIT key activates a menu of limit related functions. Use the corresponding soft key to select the desired limit function. Then use the Up/Down arrow key to change its value, which is displayed in the message area at the bottom of the status window. Note Limit is only available in IA-Spectrum mode. Single Limit Sets a single limit value. Menu choices are: On/Off Turns the single limit function on or off. Edit Allows entry of the limit amplitude using the keypad or Up/Down arrow key. Press ENTER to accept the entered value. Upper / Lower Limit Selects whether the measurement will fail if the data is above the limit line or below the limit line, as indicated in the message area of the display. Back Returns to the previous menu level. Multiple Upper Limits Sets multiple user-defined upper limits, and can be used to create an upper limit mask for quick pass/fail measurements. An upper limit will result in a failure when the data falls above the limit line. Menu choices are: Segment 1-5 View/edit upper limit segment 1-5. On/Off Turns the segment on or off. Edit Opens the segment parameters for editing (see Adjusting Segmented Limits on page 3-18). Prev Segment Edit or view the parameters of the previous segment. Next Segment Edit or view the parameters of the next segment. If the next segment is off when this button is pressed, the starting point of the next segment will be set equal to the ending point of the current segment (if the current segment is on). Back Returns to the previous menu level Back Returns to the previous menu level 2-60 PN: Rev. D S412D User Guide
87 Functions and Operations 2-14 Interference Analyzer Mode (Option 25) Multiple Lower Limits Set multiple user-defined lower limits, and can be used to create a lower limit mask for quick pass/fail measurements. A lower limit will result in a failure when the data falls below the limit line. Menu choices are: Segment 1-5 View/edit lower limit segment 1-5. On/Off Turns the segment on or off. Edit Opens the segment parameters for editing (see Adjusting Segmented Limits on page 3-18). Prev Segment Edit or view the parameters of the previous segment. Next Segment Edit or view the parameters of the next segment. If the next segment is off when this button is pressed, the starting point of the next segment will be set equal to the ending point of the current segment (if the current segment is on). Back Returns to the previous menu level Back Returns to the previous menu level. Limit Beep Turns the audible limit beep indicator on or off. When the limit beep indicator is on, an audible beep will occur at every data point that appears above the upper limit or below the lower limit. S412D User Guide PN: Rev. D 2-61
88 2-14 Interference Analyzer Mode (Option 25) Functions and Operations SYS In Interference Analyzer mode, pressing the SYS key displays the following System menu soft key selections: System Options Hour Minute Month Day Year Clock Printer Units Change Date Format Back GPS On/Off Location Application Options Self Test Status GPS Language English External Ref Freq Bias Tee Impedance Anritsu 12N50-75B Bias Tee On/Off Bias Tee Voltage Back Quality Back Other Adapter Offset Reset Back Back Back Figure SYS Key Menu in Interference Analyzer Mode System Options Displays a second level of system option functions: Clock Displays a second level of functions: Hour Enter the hour (0 23) using the Up/Down arrow key or the keypad. Press ENTER when data entry is complete or ESCAPE to restore the previous value. Minute Enter the minute (0 59) using the Up/Down arrow key or the keypad. Press ENTER when data entry is complete or ESCAPE to restore the previous value PN: Rev. D S412D User Guide
89 Functions and Operations 2-14 Interference Analyzer Mode (Option 25) Month Enter the month (1 12) using the Up/Down arrow key or the keypad. Press ENTER when data entry is complete or ESCAPE to restore the previous value. Day Enter the day (1 31) using the Up/Down arrow key or the keypad. Press ENTER when data entry is complete or ESCAPE to restore the previous value. Year Enter the year ( ) using the Up/Down arrow key or the keypad. Press ENTER when data entry is complete or ESCAPE to restore the previous value. Back Returns to the top-level SYS menu. Printer Displays a menu of supported printers. Use the Up/Down arrow key and ENTER key to make the selection. Units Select the unit of measurement (metric or English). Change Date Format Toggles the date format between MM/DD/YYYY, DD/MM/YYYY, and YYYY/MM/DD. Back Returns to the top-level SYS menu. Application Options Application options displays options applicable to particular mode. External Ref Freq Set the external reference frequency from 2 MHz to 20 MHz. Bias Tee Selects the Bias Tee. Bias Tee Voltage Set the bias tee voltage between 12 and 24 Vdc, in 1V increments, using the number keys or the Up/Down arrow keys. Bias Tee On/Off Turn the bias voltage on or off. Back Returns to the previous menu. Impedance Sets the input impedance of the instrument 50Ω Sets the input impedance of the instrument to 50Ω, which is the default setting. 75Ω Anritsu 12N50-75B Displays measurements as if the input impedance was 75Ω. The actual input impedance is still 50Ω, but the displayed information is transformed to the equivalent 75Ω value based on the offset value specified by the adapter used in the measurement. This setting is commonly used for cable TV-related measurements. Pressing this soft key will also compensate 7.5 db for the loss of the Anritsu 12N50-75B adapter. Other adapter Offset This key allows the user to enter other adapter offset values. Enter the desired loss using the keypad or Up/Down arrow key and press the ENTER key to accept. Back Returns to the previous menu. Back Returns to the top-level SYS menu. Self Test Starts an instrument self test. Status Displays the current instrument status, including calibration status, temperature, and battery charge state. Press ESCAPE to return to operation. GPS Opens the GPS soft key menu. Press the GPS On/Off soft key to turn the GPS feature on or off. S412D User Guide PN: Rev. D 2-63
90 2-14 Interference Analyzer Mode (Option 25) Functions and Operations Press the Location soft key to view the following information: latitude, longitude, altitude and UTC timing. Press the Quality soft key to display the number of tracked satellites and the GPS quality. Press the Reset soft key to reset the GPS. Back Returns to the previous menu. Language Pressing this soft key immediately changes the language used to display messages on the LMR Master status window. Choices are English, French, German, Spanish, Chinese, and Japanese. The default language is English PN: Rev. D S412D User Guide
91 Functions and Operations 2-15 Channel Scanner Mode (Option 27) 2-15 Channel Scanner Mode (Option 27) The Channel Scanner option allows the choice of a bar graph or a text display showing the amplitude of selected channels for a given air interface standard. The interface settings can be manually entered if none of the available air interface standards meet the measurement need. MODE = CHANNEL SCANNER FREQ/DIST AMPLITUDE MEAS/DISP SOFT KEYS: Start Freq Ref Level Number of Channels Freq Step Size Scale Display Channel/ Freq Signal Standard Display Graph/ Text Top of List Page Up Page Down Bottom of List Top of List Page Up Page Down Select Standard Start Channel Uplink Downlink Channel Step Size Channel Span Show All Bottom of List Select/ Deselect Back Show Selected Figure Soft Key Menus in Channel Scanner Mode To select Channel Scanner mode, press the MODE key and use the up and down arrows to highlight Channel Scanner and press ENTER. S412D User Guide PN: Rev. D 2-65
92 2-15 Channel Scanner Mode (Option 27) Functions and Operations FREQ/DIST The operating frequency range for Channel Scanner mode can either be set manually, or the desired air interface standard can be selected from the Signal Standard list in the instrument. When the frequency range is selected from the Signal Standard list, all frequency related parameters are automatically set to the appropriate values for that particular standard. Start Freq Enter a start frequency from 9 khz to 1600 MHz using the Up/Down arrow key, or the keypad and the appropriate soft key for Hz, khz, MHz or GHz. Press ENTER to accept the input. Freq Step Size The value entered here is the channel spacing. Enter a step size from 0 to MHz using the Up/Down arrow key, or the keypad and the appropriate soft key for Hz, khz, MHz or GHz. Press ENTER to accept the input. Signal Standard Opens a menu of soft keys used to select the signal standard to be used. Select Standard Opens the signal standard menu, showing the currently selected signal standards. Use the soft keys to navigate the list. Press the Show All soft key to show the complete signal standard list. When the complete list is displayed, the currently selected signal standards are marked with an asterisk. Press the Show Selected soft key to show only the currently selected signal standards. Start Channel Sets the channel information for the available standard. If the particular standard has not been used before, the channel number will default to the lowest legal channel number for that standard. If that standard has been used before, the last used channel will be the default. Uplink Selects the bank of frequencies that correspond to signals sent from the client transmitter to the base station. Downlink Selects the bank of frequencies that correspond to the signals sent from the base station to the client receivers. Back Returns to the previous menu. Channel Step Size This integer value tells the system how many channels to skip when scanning. Enter a step size from 1 to 1023 using the Up/Down arrow key or the keypad and press ENTER to accept the input. Channel Span Channel Span sets the width of each channel. Enter a Channel Span from 0 to MHz using the Up/Down arrow key, or the keypad and the appropriate soft key for Hz, khz, MHz or GHz. Press ENTER to accept the input. AMPLITUDE Choosing AMPLITUDE displays the following soft keys and their corresponding values in the message area. Ref Level Reference Level sets the power level at the top of the display. Enter a value from to dbm, in 0.1 db steps, using the Up/Down arrow key or the keypad and press ENTER to accept the input. The currently selected reference level is shown in the message area at the bottom of the display. Scale Scale sets the number of db per division. Enter a value from 1 db per division to 15 db per division using the Up/Down arrow key or the keypad and press ENTER to accept the input. The currently selected scale is shown in the message area at the bottom of the display PN: Rev. D S412D User Guide
93 Functions and Operations 2-15 Channel Scanner Mode (Option 27) MEAS/DISP Pressing MEAS/DISP activates a menu of channel and display functions. Use the corresponding soft key to select the desired function. Number of Channels Number of Channels sets how many channels are simultaneously shown on the display. Enter a value from 1 to 20 channels using the Up/Down arrow key or the keypad and press ENTER to accept the input. Display Channel/Freq Display Channel/Frequency toggles between displaying the channel number or the channel frequency (with a maximum resolution of 100 khz). Display Graph/Text Display Graph/Text toggles between displaying a bar chart showing power levels, or a table showing channel number or frequency (depending upon the current setting of Display Channel Freq) and the power level. SYS In Channel Scanner mode, pressing the SYS key displays the following System menu soft key selections: System Options Hour Clock Printer Units Application Options Self Test Status External Ref Freq Minute Month Day Change Date Format GPS On/Off GPS Language English Impedance 50 Year Back Location 75 Anritsu 12N50-75B Back Quality Back Other Adapter Offset Reset Back Back Figure SYS Key Menu in Channel Scanner Mode S412D User Guide PN: Rev. D 2-67
94 2-15 Channel Scanner Mode (Option 27) Functions and Operations System Options Displays a second level of system option functions: Clock Displays a second level of functions: Hour Enter the hour (0 23) using the Up/Down arrow key or the keypad. Press ENTER when data entry is complete or ESCAPE to restore the previous value. Minute Enter the minute (0 59) using the Up/Down arrow key or the keypad. Press ENTER when data entry is complete or ESCAPE to restore the previous value. Month Enter the month (1 12) using the Up/Down arrow key or the keypad. Press ENTER when data entry is complete or ESCAPE to restore the previous value. Day Enter the day (1 31) using the Up/Down arrow key or the keypad. Press ENTER when data entry is complete or ESCAPE to restore the previous value. Year Enter the year ( ) using the Up/Down arrow key or the keypad. Press ENTER when data entry is complete or ESCAPE to restore the previous value. Back Returns to the top-level SYS menu. Printer Displays a menu of supported printers. Use the Up/Down arrow key and ENTER key to make the selection. Units Select the unit of measurement (metric or English). Change Date Format Toggles the date format between MM/DD/YYYY, DD/MM/YYYY, and YYYY/MM/DD. Back Returns to the top-level SYS menu. Application Options Application options displays options applicable to particular mode. External Ref Freq Set the external reference frequency from 2 MHz to 20 MHz. Impedance Sets the input impedance of the instrument 50Ω Sets the input impedance of the instrument to 50Ω, which is the default setting. 75Ω Anritsu 12N50-75B Displays measurements as if the input impedance was 75. The actual input impedance is still 50Ω, but the displayed information is transformed to the equivalent 75Ω value based on the offset value specified by the adapter used in the measurement. This setting is commonly used for cable TV-related measurements. Pressing this soft key will also compensate 7.5 db for the loss of the Anritsu 12N50-75B adapter. Other adapter Offset This key allows the user to enter other adapter offset values. Enter the desired loss using the keypad or Up/Down arrow key and press the ENTER key to accept. Back Returns to the previous menu. Back Returns to the top-level SYS menu. Self Test Starts an instrument self test. Status Displays the current instrument status, including calibration status, temperature, and battery charge state. Press ESCAPE to return to operation PN: Rev. D S412D User Guide
95 Functions and Operations 2-15 Channel Scanner Mode (Option 27) GPS Opens the GPS soft key menu. Press the GPS On/Off soft key to turn the GPS feature on or off. Press the Location soft key to view the following information: latitude, longitude, altitude and UTC timing. Press the Quality soft key to display the number of tracked satellites and the GPS quality. Press the Reset soft key to reset the GPS. Back Returns to the previous menu. Language Pressing this soft key immediately changes the language used to display messages on the LMR Master status window. Choices are English, French, German, Spanish, Chinese, and Japanese. The default language is English. S412D User Guide PN: Rev. D 2-69
96 2-16 CW Signal Generator Mode (Option 28) Functions and Operations 2-16 CW Signal Generator Mode (Option 28) To select CW Signal Generator mode, press the MODE key and use the down arrow to highlight CW Signal Generator and press ENTER. The CW Signal Generator option provides a CW signal from the instrument. The primary purpose of this signal is for sensitivity testing of receivers. To use this feature, the signal is connected directly to the receiver being measured and the output amplitude is reduced until the receiver drops the signal. The external splitter feeds the signal into the instrument s RF input. The display shows the output power and frequency. The amplitude is set using an external step attenuator. MODE = CW: FREQ/DIST AMPLITUDE MEAS/DISP SOFT KEYS: Freq Offset db Power Monitor External Display Setup Help Signal Standard Edit Top of List Select Standard Measure Offset Page Up Page Down Bottom of List Select/ Deselect Show Selected Top of List Page Up Page Down Bottom of List Select Channel Uplink Downlink Back Back Show All Figure Soft Key Menus in CW Signal Generator Mode 2-70 PN: Rev. D S412D User Guide
97 Functions and Operations 2-16 CW Signal Generator Mode (Option 28) FREQ/DIST Choosing FREQ/DIST in CW Signal Generator mode displays the following soft keys. Freq Enter a CW frequency from 25 MHz to 1600 MHz using the Up/Down arrow key, or the keypad and the appropriate soft key for Hz, khz, MHz or GHz. Press ENTER to accept the input. Display Setup Help Selecting this soft key displays a diagram of the recommended setup to use this option. Signal Standard Opens a menu of soft keys used to select the signal standard to be used. Select Standard Opens the signal standard menu, showing the currently selected signal standards. Use the soft keys to navigate the list. Press the Show All soft key to show the complete signal standard list. When the complete list is displayed, the currently selected signal standards are marked with an asterisk. Press the Show Selected soft key to show only the currently selected signal standards. Start Channel Sets the channel information for the available standard. If the particular standard has not been used before, the channel number will default to the lowest legal channel number for that standard. If that standard has been used before, the last used channel will be the default. Uplink Selects the bank of frequencies that correspond to signals sent from the client transmitter to the base station. Downlink Selects the bank of frequencies that correspond to the signals sent from the base station to the client receivers. Back Returns to the previous menu. AMPLITUDE Choosing AMPLITUDE in CW Signal Generator mode displays the following soft key. Offset db Adjusts the Power (CW) reading value by the amount entered here. Press once to enter and enable the offset value. Press again to disable the offset. Negative offset values represent attenuation added between the external splitter and the device under test, which would not be seen by the RF Input port. For instance, if the instrument displays a Power (CW) value of 73 dbm, and a 40 db pad is placed between the splitter and the DUT, the DUT would be receiving 113 dbm, while the instrument still displayed 73 dbm. Setting the Offset to 40 would cause the instrument to adjust the power reading by 40 db and display 113 dbm. S412D User Guide PN: Rev. D 2-71
98 2-16 CW Signal Generator Mode (Option 28) Functions and Operations MEAS/DISP If Option 5 (Power Monitor) is installed, it is possible to operate Option 5 and Option 28 simultaneously. This could be practical for repeater measurements or for high loss cable loss measurements. The following soft key is available by pressing the MEAS/DISP function key while in CW Signal Generator mode: Power Monitor External Displays the power from the external power monitor. SYS In CW Signal Generator mode, pressing the SYS key displays the following System menu soft key selections: System Options Hour Minute Month Day Clock Printer Units Change Date Format GPS On/Off Application Options Self Test Status GPS Language English External Ref Freq Bias Tee Impedance 50 Year Back Location 75 Anritsu 12N50-75B Back Quality Back Other Adapter Offset Reset Back Back Figure SYS Key Menu in CW Signal Generator Mode 2-72 PN: Rev. D S412D User Guide
99 Functions and Operations 2-16 CW Signal Generator Mode (Option 28) System Options Displays a second level of system option functions: Clock Displays a second level of functions: Hour Enter the hour (0 23) using the Up/Down arrow key or the keypad. Press ENTER when data entry is complete or ESCAPE to restore the previous value. Minute Enter the minute (0 59) using the Up/Down arrow key or the keypad. Press ENTER when data entry is complete or ESCAPE to restore the previous value. Month Enter the month (1 12) using the Up/Down arrow key or the keypad. Press ENTER when data entry is complete or ESCAPE to restore the previous value. Day Enter the day (1 31) using the Up/Down arrow key or the keypad. Press ENTER when data entry is complete or ESCAPE to restore the previous value. Year Enter the year ( ) using the Up/Down arrow key or the keypad. Press ENTER when data entry is complete or ESCAPE to restore the previous value. Back Returns to the top-level SYS menu. Printer Displays a menu of supported printers. Use the Up/Down arrow key and ENTER key to make the selection. Units Select the unit of measurement (metric or English). Change Date Format Toggles the date format between MM/DD/YYYY, DD/MM/YYYY, and YYYY/MM/DD. Back Returns to the top-level SYS menu. Application Options Application options displays options applicable to particular mode. External Ref Freq Set the external reference frequency from 2 MHz to 20 MHz. Bias Tee Bias Tee is disabled in CW Signal Generator mode. Impedance Sets the input impedance of the instrument 50Ω Sets the input impedance of the instrument to 50Ω, which is the default setting. 75Ω Anritsu 12N50-75B Displays measurements as if the input impedance was 75Ω. The actual input impedance is still 50Ω, but the displayed information is transformed to the equivalent 75Ω value based on the offset value specified by the adapter used in the measurement. This setting is commonly used for cable TV-related measurements. Pressing this soft key will also compensate 7.5 db for the loss of the Anritsu 12N50-75B adapter. Other adapter Offset This key allows the user to enter other adapter offset values. Enter the desired loss using the keypad or Up/Down arrow key and press the ENTER key to accept. Back Returns to the previous menu. Back Returns to the top-level SYS menu. Self Test Starts an instrument self test. S412D User Guide PN: Rev. D 2-73
100 2-16 CW Signal Generator Mode (Option 28) Functions and Operations Status Displays the current instrument status, including calibration status, temperature, and battery charge state. Press ESCAPE to return to operation. GPS Opens the GPS soft key menu. Press the GPS On/Off soft key to turn the GPS feature on or off. Press the Location soft key to view the following information: latitude, longitude, altitude and UTC timing. Press the Quality soft key to display the number of tracked satellites and the GPS quality. Press the Reset soft key to reset the GPS. Back Returns to the previous menu. Language Pressing this soft key immediately changes the language used to display messages on the LMR Master status window. Choices are English, French, German, Spanish, Chinese, and Japanese. The default language is English PN: Rev. D S412D User Guide
101 Functions and Operations 2-17 iden Signal Analyzer Mode (Option 68) 2-17 iden Signal Analyzer Mode (Option 68) The following section explains the hard keys and soft keys available when the LMR Master is set to iden Signal Analyzer Mode. FREQ/DIST AMPLITUDE MEAS/DISP Center ACPR Span Ref Level Scale Spectrum ACPR Signal Standard Demod Top of List Page Up Page Down Bottom of List Select/ Deselect Show Selected Top of List Page Up Page Down Bottom of List Select Standard Channel (Decimal) Channel (Hex) Channel Increment Back A B Ext Ref Freq Power vs. Time Normal Demod Fast Demod C Back Show All D E F Figure Soft Key Menus in IDEN Signal Analyzer Mode S412D User Guide PN: Rev. D 2-75
102 2-17 iden Signal Analyzer Mode (Option 68) Functions and Operations FREQ/DIST Choosing FREQ/DIST in iden mode displays the following soft keys. Center Sets the center frequency. Enter a value using the Up/Down arrow key or keypad, press ENTER to accept or ESCAPE to restore the previous value. ACPR Span Opens an entry window to set the frequency span in ACPR view. Use the Up/Down arrow key to select 50 khz, 100 khz, or 200 khz and press ENTER. Press ESCAPE to restore the previous value. Signal Standard Opens a menu of soft keys used to select the signal standard to be used. For more information on signal standards, refer to Appendix C. Select Standard Opens the signal standard menu. Top of List Moves the cursor to the top of the events list. Page Up Scrolls up through the events list a page at a time. Page Down Scrolls down through the events list a page at a time. Bottom of List Moves the cursor to the bottom of the events list. Show All Changes the bottom two soft keys to: Select/Deselect Selects or deselects a signal standard. The asterisk in front of it notes a selected signal standard. When the asterisk of a selected signal standard is removed, it has been deselected. Show Selected Displays only selected signal standards. Channel (Decimal) Opens an entry window to enter a channel in decimal format. Channel (Hex) Opens an entry window to enter a channel in hexadecimal format. Channel Increment Opens an entry window to set the number of valid channels the Up/Down arrow key increments when selecting a channel using either Channel (Decimal) or Channel (Hex) entries. Back Returns to the main menu External Ref Freq Syncs the external reference frequency of the LMR Master to the reference frequency of the base station. Set the external reference frequency from 2 MHz to 20 MHz. AMPLITUDE Choosing AMPLITUDE in iden mode displays the following soft keys. Ref Level Sets the vertical placement of the signal. Enter a value from +20 to 120 dbm. Use the Up/Down arrow keys to change the value in increments of 1 dbm. Use the numeric keypad to enter values that include a hundredth (.01) decimal place. Scale Sets the number of db/div on the graph. Enter a value of 1 15 db/div using the Up/Down arrow keys to change the value in increments of 1 db or use the numeric keypad to directly enter values PN: Rev. D S412D User Guide
103 Functions and Operations 2-17 iden Signal Analyzer Mode (Option 68) MEAS/DISP Choosing MEAS/DISP in iden mode displays the following soft keys. Spectrum Changes the current view to display the spectrum of the signal. ACPR Changes the current view to Adjacent Channel Power Ratio (ACPR) which displays the power of the selected channel and the relative power of adjacent channels. Demod Displays the constellation and other qualities of the signal measurement. Changes the current view to Demod to display the constellation of the signal and other qualities of the signal measurement. Normal Demod All measurements are performed and demod results are displayed. Fast Demod Only demod measurements are performed and displayed. Back Returns to the main menu Power vs. Time Changes the current view to display the power over 12 slots. S412D User Guide PN: Rev. D 2-77
104 2-18 P25/LSM Tx Signal Analyzer (Option 520) Functions and Operations 2-18 P25/LSM Tx Signal Analyzer (Option 520) The P25/LSM Signal Analyzer option displays information about the quality of a received APCO Project 25 (P25) or Linear Simulcast Modulation (LSM) signal. To select P25/LSM Tx Signal Analyzer mode, press the MODE key and use the up and down arrows to highlight P25/LSM Tx Signal Analyzer and press ENTER. MODE = P25/LSM TX SIGNAL ANALYZER FREQ/DIST AMPLITUDE MEAS/DISP SOFT KEYS: Freq External Attenuation Const External Ref Freq Histogram Pattern Select Control Hex Display Frame Averaging Serial Output Trigger ON/OFF Trigger Value Trigger Location Figure Soft Key Menus in P25 Tx Signal Analyzer Mode FREQ/DIST The operating frequency range for P25 mode is set manually. Freq Enter a frequency from 9 khz to 1600 MHz using the Up/Down arrow key, or the keypad and the appropriate soft key for Hz, khz, MHz or GHz. Press ENTER to accept the input. External Ref Freq Set the external reference frequency from 2 MHz to 20 MHz. Pattern Select Selects the Bit Error Rate pattern. Available patterns: Automatic Frequency Control (1011 Hz) Standard Transmitter Test (O.153 or V.52) Voice Control Channel 2-78 PN: Rev. D S412D User Guide
105 Functions and Operations 2-18 P25/LSM Tx Signal Analyzer (Option 520) AMPLITUDE Choosing AMPLITUDE displays the following soft key and the corresponding values in the message area. External Attenuation Enter an attenuation value from 0 to 51dB using the Up/Down arrow key, or the keypad. Press ENTER to accept the input. MEAS/DISP Pressing MEAS/DISP activates a menu of display functions. Use the corresponding soft key to select the desired function. Const Displays the demodulation information in an IQ format. Numerical information below the graph shows received channel power, frequency error, error vector magnitude, bit error rate compared to the P Hz Tone Test Pattern, symbol deviation error, and the P25 network access code (NAC) being transmitted. Histogram Displays a graphical representation of the P25 soft symbols that are being received. These are the decoded symbols after LMR Master has made a decision about where each symbol is to be decoded. The bars for each symbol represent the relative percentage that symbol was identified out of all the received symbols. Control Hex Display Sets up the LMR Master to receive and display P25 control channel information. The LMR Master will display 17 consecutive control channel messages on the screen, or can redirect all of the control channel information out of the serial port to an external computer for collection, storage, and processing. Serial Output Toggle soft key that indicates where the control channel information is directed. When this button is up, control channel information is directed to the display, updating about once per second. Note that not all control channel information received is displayed. When the button is depressed, control channel information is directed to the RS-232 serial port. All control channel information is captured and sent to the serial port. The display information will not update when the Serial Output button is pressed. Trigger ON/OFF Activates a Stop Trigger function while capturing control channel information. If the Trigger is activated, the LMR Master compares the first (opcode) octet in each command to the Trigger Value. If the opcode octet matches the trigger value, the LMR Master will stop capturing control channel commands. Trigger Value Opens a dialog to enter the Octet value in hex which will cause the LMR Master to stop collecting control channel information. Use the numeric keypad and soft keys to enter a value from 00 to FF Trigger Location Selects the display location of the control channel line that matches the trigger value. Available choices are Top (displays the trigger opcode and the next 16), Middle (shows the 8 previous and 8 following opcodes), or Bottom (shows the previous 16 opcodes). After a Stop trigger is identified and the data displayed, the trigger opcode is outlined in red. Frame Averaging Sets the number of P25 frames used to calculate the rolling average of the Bit Error Rate. The default and minimum value is 4 frames, the maximum value is 50. S412D User Guide PN: Rev. D 2-79
106 2-19 P25/LSM Talk-Out Coverage Mode (Option 522) Functions and Operations 2-19 P25/LSM Talk-Out Coverage Mode (Option 522) The P25/LSM Talk-out option allows coverage mapping with received power and BER (1011 test pattern) measurements combined with GPS location and time. This provides a method to verify the operation and coverage area of APCO Project 25 (P25) or Linear Simulcast Modulation (LSM) tower, mobile, and portable radio transmitters. MODE = P25/LSM TALK-OUT COVERAGE RSSI vs. Time BER vs. Time FREQ/DIST AMPLITUDE AMPLITUDE MEAS/DISP SOFT KEYS: Freq Ref Level Ref Percent RSSI vs. Time External Ref Freq Scale BER/MER vs. Time Pattern Select Log Data Off/On Reset Sweep Lock Keypad Figure Soft Key Menus in P25 Talk-Out coverage Mode To select P25 Talk-Out Coverage mode, press the MODE key and use the up and down arrows to highlight P25 Talk-Out Coverage and press ENTER. FREQ/DIST The operating frequency range for P25 mode is set manually. Freq Enter a frequency from 9 khz to 1600 MHz using the Up/Down arrow key, or the keypad and the appropriate soft key for Hz, khz, MHz or GHz. Press ENTER to accept the input. External Ref Freq Set the external reference frequency from 2 MHz to 20 MHz. Pattern Select Selects the Bit Error Rate pattern. Available patterns: Automatic Frequency Control (1011 Hz) Standard Transmitter Test (O.153 or V.52) Voice Control Channel None 2-80 PN: Rev. D S412D User Guide
107 Functions and Operations 2-19 P25/LSM Talk-Out Coverage Mode (Option 522) AMPLITUDE Choosing AMPLITUDE displays the following soft keys and their corresponding values in the message area. Ref Level Reference Level sets the power level at the top of the display. Enter a value from to dbm, in 0.1 db steps, using the Up/Down arrow key or the keypad and press ENTER to accept the input. The currently selected reference level is shown on the left side of the screen. Scale Scale sets the number of db per division. Enter a value from 1 db per division to 15 db per division using the Up/Down arrow key or the keypad and press ENTER to accept the input. The currently selected scale is shown on the left side of the display. Ref Percent Reference Percent sets the Bit Error Rate percentage at the top of the display. Enter a value from 1 to 100% in 1% steps using the numeric keypad, or use the Up/Down arrow key to adjust value by 10% increments. The currently selected reference percentage is shown on the left side of the screen. MEAS/DISP Pressing MEAS/DISP activates a menu of display functions. Use the corresponding soft key to select the desired function. RSSI vs. Time Displays the Received Signal Strength Indicator of the selected frequency over time. The display shows the most recent 401 measured points, covering approximately 10 minutes with the most recent data appearing at the right edge of the display. BER/MER vs. Time Displays the Bit Error Rate of the input signal compared to the currently selected pattern. When the selected pattern is Control Channel, the graph will display the Message Error Rate, as computed from the CRC fields in the control channel messages. Log Data Off/On Log Data Off/On selects if data will be automatically logged. When data logging is on, information is stored after each full screen of data has been captured. Saved data is named by using the word LOG and a dash followed by the time to the nearest second in 24-hour clock format, such as LOG Select the RECALL DISPLAY key to view and recall the saved data ( Save and Recall a Display on page 3-16). Reset Sweep Resets all of the details of the sweep, starting a fresh sweep from the right side of the display. Prior information on the display that has not been saved or automatically logged will be lost. Lock Keypad Toggle soft key that will lock the keypad to prevent accidental key presses from changing instrument settings during coverage testing. S412D User Guide PN: Rev. D 2-81
108 2-19 P25/LSM Talk-Out Coverage Mode (Option 522) Functions and Operations LIMIT Pressing LIMIT activates a menu of limit related functions. Use the corresponding soft key to select the desired limit function. Then use the Up/Down arrow key to change its value, which is displayed in the message area at the bottom of the status window. On/Off Toggles the Limit line On or Off. Edit Allows the value of the limit line to be changed by using either the Up/Down arrow key or the numeric keypad. Press Enter to accept the limit value. Upper/Lower Limit Toggles the limit line between acting as an upper limit or a lower limit. Upper limit is active when the button is up (light color button background). The limit alarm will become active if the measured signal rises above the limit value. Lower limit is active when the button is down (dark color background). The limit alarm will activate if the measured signal drops below the limit value. Limit Beep Toggles an audible beep if the measurement violates the current limit line. The beep will sound if the button is down (dark background) PN: Rev. D S412D User Guide
109 Functions and Operations 2-20 NXDN Tx Signal Analyzer (Option 530) 2-20 NXDN Tx Signal Analyzer (Option 530) The NXDN Signal Analyzer option displays information about the quality of a received NXDN signal. To select NXDN Tx Signal Analyzer mode, press the MODE key and use the up and down arrows to highlight NXDN Tx Signal Analyzer and press ENTER. MODE = NXDN TX SIGNAL ANALYZER FREQ/DIST AMPLITUDE MEAS/DISP SOFT KEYS: Freq External Attenuation Const External Ref Freq Pattern Select Mod BW Histogram Control Hex Display Frame Averaging (Control Channel pattern only) Serial Output Trigger ON/OFF Trigger Value Trigger Location Figure Soft Key Menus in NXDN Tx Signal Analyzer Mode FREQ/DIST The operating frequency range for NXDN mode is set manually. Freq Enter a frequency from 9 khz to 1600 MHz using the Up/Down arrow key, or the keypad and the appropriate soft key for Hz, khz, MHz or GHz. Press ENTER to accept the input. External Ref Freq Set the external reference frequency from 2 MHz to 20 MHz. S412D User Guide PN: Rev. D 2-83
110 2-20 NXDN Tx Signal Analyzer (Option 530) Functions and Operations Pattern Select Selects the Bit Error Rate pattern. Available patterns: Tone Test Pattern Standard Transmitter Test (O.153 or V.52) Voice Control Channel Mod BW Selects the modulation bandwidth of the NXDN signal under test. Value can be toggled between 12.5 khz and 6.25 khz. AMPLITUDE Choosing AMPLITUDE displays the following soft key and the corresponding values in the message area. External Attenuation Enter an attenuation value from 0 to 51dB using the Up/Down arrow key, or the keypad. Press ENTER to accept the input. MEAS/DISP Pressing MEAS/DISP activates a menu of display functions. Use the corresponding soft key to select the desired function. Const Displays the demodulation information in an IQ format. Numerical information below the graph shows received channel power, frequency error, error vector magnitude, bit error rate compared to the selected test pattern, symbol deviation error, and the NXDN Radio Access Number (RAN) being transmitted. Histogram Displays a graphical representation of the NXDN soft symbols that are being received. These are the decoded symbols after LMR Master has made a decision about where each symbol is to be decoded. The bars for each symbol represent the relative percentage that symbol was identified out of all the received symbols. Control Hex Display Sets up the LMR Master to receive and display NXDN control channel information. The LMR Master will display 8 consecutive control channel messages on the screen, or can redirect all of the control channel information out of the serial port to an external computer for collection, storage, and processing. Serial Output Toggle soft key that indicates where the control channel information is directed. When this button is up, control channel information is directed to the display, updating about once per second. Note that not all control channel information received is displayed. When the button is depressed, control channel information is directed to the RS-232 serial port. All control channel information is captured and sent to the serial port. The display information will not update when the Serial Output button is pressed. Trigger ON/OFF Activates a Stop Trigger function while capturing control channel information. If the Trigger is activated, the LMR Master compares the first (opcode) octet in each command to the Trigger Value. If the opcode octet matches the trigger value, the LMR Master will stop capturing control channel commands. Trigger Value Opens a dialog to enter the Octet value in hex which will cause the LMR Master to stop collecting control channel information. Use the numeric keypad and soft keys to enter a value from 00 to FF 2-84 PN: Rev. D S412D User Guide
111 Functions and Operations 2-20 NXDN Tx Signal Analyzer (Option 530) Trigger Location Selects the display location of the control channel line that matches the trigger value. Available choices are Top (displays the trigger opcode and the next 7), Middle (shows the 4 previous and 3 following opcodes), or Bottom (shows the previous 7 opcodes). After a Stop trigger is identified and the data displayed, the trigger opcode is outlined in red. Frame Averaging Sets the number of NXDN frames used to calculate the rolling average of the Bit Error Rate. The default and minimum value is 4 frames, the maximum value is 50. S412D User Guide PN: Rev. D 2-85
112 2-21 NXDN Talk-Out Coverage Mode (Option 532) Functions and Operations 2-21 NXDN Talk-Out Coverage Mode (Option 532) The NXDN Talk-out option allows coverage mapping with received power and BER measurements combined with GPS location and time. This provides a method to verify the operation and coverage area of NXDN tower, mobile, and portable radio transmitters. MODE = NXDN TALK-OUT COVERAGE RSSI vs. Time BER vs. Time FREQ/DIST AMPLITUDE AMPLITUDE MEAS/DISP SOFT KEYS: Freq Ref Level Ref Percent RSSI vs. Time External Ref Freq Scale BER/MER vs. Time Pattern Select Log Data Off/On Mod BW Reset Sweep Lock Keypad Figure Soft Key Menus in NXDN Talk-Out coverage Mode To select NXDN Talk-Out Coverage mode, press the MODE key and use the up and down arrows to highlight NXDN Talk-Out Coverage and press ENTER. FREQ/DIST The operating frequency range for NXDN mode is set manually. Freq Enter a frequency from 9 khz to 1600 MHz using the Up/Down arrow key, or the keypad and the appropriate soft key for Hz, khz, MHz or GHz. Press ENTER to accept the input. External Ref Freq Set the external reference frequency from 2 MHz to 20 MHz. Pattern Select Selects the Bit Error Rate pattern. Available patterns: Tone Test Pattern Standard Transmitter Test (O.153 or V.52) Voice Control Channel None Mod BW Selects the modulation bandwidth of the NXDN signal under test. Value can be toggled between 12.5 khz and 6.25 khz PN: Rev. D S412D User Guide
113 Functions and Operations 2-21 NXDN Talk-Out Coverage Mode (Option 532) AMPLITUDE Choosing AMPLITUDE displays the following soft keys and their corresponding values in the message area. Ref Level Reference Level sets the power level at the top of the display. Enter a value from to dbm, in 0.1 db steps, using the Up/Down arrow key or the keypad and press ENTER to accept the input. The currently selected reference level is shown on the left side of the screen. Scale Scale sets the number of db per division. Enter a value from 1 db per division to 15 db per division using the Up/Down arrow key or the keypad and press ENTER to accept the input. The currently selected scale is shown on the left side of the display. Ref Percent Reference Percent sets the Bit Error Rate percentage at the top of the display. Enter a value from 1 to 100% in 1% steps using the numeric keypad, or use the Up/Down arrow key to adjust value by 10% increments. The currently selected reference percentage is shown on the left side of the screen. MEAS/DISP Pressing MEAS/DISP activates a menu of display functions. Use the corresponding soft key to select the desired function. RSSI vs. Time Displays the Received Signal Strength Indicator of the selected frequency over time. The display shows the most recent 401 measured points, covering approximately 10 minutes with the most recent data appearing at the right edge of the display. BER/MER vs. Time Displays the Bit Error Rate of the input signal compared to the currently selected pattern. When the selected pattern is Control Channel, the graph will display the Message Error Rate, as computed from the CRC fields in the control channel messages. Log Data Off/On Log Data Off/On selects if data will be automatically logged. When data logging is on, information is stored after each full screen of data has been captured. Saved data is named by using the word LOG and a dash followed by the time to the nearest second in 24-hour clock format, such as LOG Select the RECALL DISPLAY key to view and recall the saved data ( Save and Recall a Display on page 3-16). Reset Sweep Resets all of the details of the sweep, starting a fresh sweep from the right side of the display. Prior information on the display that has not been saved or automatically logged will be lost. Lock Keypad Toggle soft key that will lock the keypad to prevent accidental key presses from changing instrument settings during coverage testing. S412D User Guide PN: Rev. D 2-87
114 2-21 NXDN Talk-Out Coverage Mode (Option 532) Functions and Operations LIMIT Pressing LIMIT activates a menu of limit related functions. Use the corresponding soft key to select the desired limit function. Then use the Up/Down arrow key to change its value, which is displayed in the message area at the bottom of the status window. On/Off Toggles the Limit line On or Off. Edit Allows the value of the limit line to be changed by using either the Up/Down arrow key or the numeric keypad. Press Enter to accept the limit value. Upper/Lower Limit Toggles the limit line between acting as an upper limit or a lower limit. Upper limit is active when the button is up (light color button background). The limit alarm will become active if the measured signal rises above the limit value. Lower limit is active when the button is down (dark color background). The limit alarm will activate if the measured signal drops below the limit value. Limit Beep Toggles an audible beep if the measurement violates the current limit line. The beep will sound if the button is down (dark background) PN: Rev. D S412D User Guide
115 Functions and Operations 2-22 Symbols 2-22 Symbols Table 2-3 provides a listing of the symbols used as condition indicators on the LCD status window. Table 2-3. LCD Icon Symbols Icon Symbol LMR Master is in Hold for power conservation. To resume sweeping, press the RUN/HOLD key. When running on battery power, after 10 minutes without a key press, the LMR Master will automatically activate the power conservation mode. GPS is on and locked to the satellites. This symbol displayed in red means GPS is on and is searching for satellites. The same symbol in green means the LMR Master has stored the GPS location information but is not currently locked to the satellites. The data will remain stored until the unit is turned off. Integrator Failure. Intermittent integrator failure may be caused by interference from another antenna. Persistent integrator failure indicates a need to return the LMR Master to the nearest Anritsu Service Center for repair. Lock fail indication. Check battery. (If the LMR Master fails to lock with a fully charged battery, call your Anritsu Service Center.) When calibration is performed, the LMR Master stores the temperature. If the temperature drifts outside the specified range, this icon will appear at the top of the status window, and the Cal Off message will be displayed. A recalibration at the current temperature is recommended. Indicates the remaining charge on the battery. The inner white rectangle grows longer as the battery charge depletes. Indicates internal data processing. Cal On Cal On! The LMR Master has been calibrated with discrete Open, Short and Load components. The LMR Master has been calibrated with the InstaCal Module. Cal Off FlexCal On FlexCal On! The LMR Master has not been calibrated. The LMR Master has been calibrated with discrete Open, Short and Load. components for the frequency supported by the unit (25 MHz to 1600 MHz). The LMR Master has been calibrated with the InstaCal Module for the frequency supported by the unit (25 MHz to 1600 MHz). S412D User Guide PN: Rev. D 2-89
116 2-23 Self Test Functions and Operations 2-23 Self Test At turn-on, the LMR Master runs through a series of quick checks to ensure the system is functioning properly. Note that the voltage and temperature are displayed in the lower left corner below the self test message. If the battery is low, or if the ambient temperature is not within the specified operational range, Self Test will fail. If Self Test fails and the battery is fully charged and the LMR Master is within the specified operating temperature range, call your Anritsu Service Center, During operation, the self test can be run by pressing the SYS key and selecting the Self Test soft key (Figure 2-33). An example of the self test results display is shown below. Selftest Temperature... 24C Memory PASSED RTC Battery V Voltage... Battery (11.1V) Battery Cal PASSED Battery Charge %(I = 743mA) VNAPLL... VNA Integrator... SPALO... PASSED PASSED PASSED Press ESCAPE to return. Figure Self Test Display Press ESCAPE to conclude the self test PN: Rev. D S412D User Guide
117 Functions and Operations 2-24 Error Messages 2-24 Error Messages Self Test Error Messages A listing of Self Test Error messages is provided in Table 2-4. Table 2-4. Self Test Error Messages Error Message Battery Low External Power Low PLL Failed Integrator Failed EEPROM R/W Failed Out Of Temp. Range RTC Battery Low LO Lock Fail Battery Cal Lost Memory Fail The time and date have not been set on this LMR Master. Description Battery voltage is less than 9.5 volts. Charge battery. If condition persists, call your Anritsu Service Center. External supply voltage is less than 10 volts. If condition persists, call your Anritsu Service Center. Phase-locked loops failed to lock. Charge battery. If condition persists with a fully charged battery, call your Anritsu Service Center. Integration circuit could not charge to a valid level. Charge battery. If condition persists with a fully charged battery, call your Anritsu Service Center. Non-volatile memory system has failed. If condition persists, call your Anritsu Service Center. Ambient temperature is not within the specified operating range. If the ambient temperature is within the specified operating range and the condition persists, call your Anritsu Service Center. The internal real-time clock battery is low. A low or drained clock battery will affect the date stamp on saved traces. If condition persists, call your Anritsu Service Center. The local oscillator in the spectrum analyzer has phase lock loop errors. If condition persists with a fully charged battery, call your Anritsu Service Center. Battery communication failed. The indicated battery charge status may be invalid. If condition persists, call your Anritsu Service Center. The EEPROM test on the LMR Master main board has failed. If condition persists, call your Anritsu Service Center. The time and date are not properly set in the LMR Master. To set after exiting here press the SYS Clock keys. Press ENTER or ESC to continue If condition persists, call your Anritsu Service Center. Note Information on contacting Anritsu Service Centers is provided at S412D User Guide PN: Rev. D 2-91
118 2-24 Error Messages Functions and Operations Range Error Messages A listing of Range Error messages is provided in Table 2-5. Table 2-5. Range Error Messages Error Message RANGE ERROR:F1 > F2 RANGE ERROR:D1 > D2 RANGE ERROR:D2 > DMax=xx.x ft (m) Description The start (F1) frequency is greater than the stop (F2) frequency. The start (D1) distance is greater than the stop (D2) distance. The stop distance (D2) exceeds the maximum unaliased range. This range is determined by the frequency span, number of points, and relative propagation velocity: ( )( dp 1) ( V f ) Maximum Unaliased Range = F2 F1 where: dp is the number of data points (130, 259, or 517) V f is the relative propagation velocity F2 is the stop frequency in Hz F1 is the start frequency in Hz Maximum Unaliased Range is in meters RANGE ERROR: TOP<=BOTTOM RANGE ERROR: TOP>=BOTTOM The SWR scale parameter top value is less than or equal to its bottom value. The RL scale parameter top value is greater than or equal to its bottom value PN: Rev. D S412D User Guide
119 Functions and Operations 2-24 Error Messages Spectrum Analyzer Error Messages A listing of Spectrum Analyzer Error Messages is provided in Table 2-6. Table 2-6. Spectrum Analyzer Error Messages Error Message OVER LOAD Decrease Input Power. OVER RANGE! Increase Attenuation. Mixer Saturation! Increase Atten. Ext Ref Not Locked. External reference unavailable. Using internal reference. Must be in Zero Span to perform this operation. Cannot Perform Operation in Zero Span Xref N MHz Min RBW for Zero Span is 30 khz. RBW has been adjusted. Over Power Condition! Remove signals connected to RF In port and re-enter Spectrum Analyzer mode. Description This error message is displayed when there is too much input power. The ADC is over range. The Mixer is saturated. This error is displayed when a signal is present at the external reference port, but is not locked to the specified frequency. This error is displayed when there is no signal detected at the External Reference port. This error is displayed when the user attempts to change the following parameters when not in zero span: CHANGE TRIGGER POSITION (MEAS/DISP/TRIGGER) VIDEO TRIGGER (MEAS/DISP/TRIGGER) This error is displayed when the user tries to do field strength, occupied bandwidth, channel power and adjacent channel power measurements when in Zero Span. The internal reference is locked to an N MHz external clock. The RBW in Zero Span mode must be at least 30 khz. If it is not, it will automatically be adjusted to 30 khz and this message will be displayed. This error message is displayed when the spectrum analyzer mode cannot be properly calibrated due to too much signal power. The power must be removed, and the mode re-entered in order to calibrate the unit. S412D User Guide PN: Rev. D 2-93
120 2-24 Error Messages Functions and Operations InstaCal Error Messages If the serial number of the connected InstaCal module does not match the serial number stored in the LMR Master, the following message is displayed: The InstaCal characterization data stored in the LMR Master is for a module different than the one currently connected. LMR Master contains data for InstaCal module S/N: xxxxx Currently connected InstaCal Module S/N: xxxxx Would you like to overwrite the previously loaded InstaCal characterization? Press the YES soft key to update the stored InstaCal characterization to use the currently connected module. Press the NO soft key to keep the stored InstaCal characterization. A listing of possible InstaCal error messages is provided in Table 2-7. Table 2-7. InstaCal Error Messages Error Message Failed to read serial number of InstaCal module Failed to successfully transfer InstaCal module data to LMR Master Failed to set baud with InstaCal module Description The LMR Master was unable to read the InstaCal module serial number. The LMR Master was unable to transfer all necessary data between the InstaCal module and the LMR Master. The LMR Master was unable to establish communication with the InstaCal module. Bias Tee Error Message (Option 10 only) The following error message will display if there is an excessive load on the RF In port while using the Bias Tee option. Table 2-8. Bias Tee Error Message Error Message Bias Tee Fault. Description Excessive Load on the Rf In port. Fix Error to continue. Possible fixes include: 1. Remove the excessive load from the RF In port 2. Turn off the Bias-Tee option 2-94 PN: Rev. D S412D User Guide
121 Functions and Operations 2-24 Error Messages High Accuracy Power Meter (Option 19) Error Messages The following error messages could be displayed on the LMR Master when using the High Accuracy Power Meter mode with Power Sensor PSN50. If any error condition persists, contact your local Anritsu Service Center. Table 2-9. Option 19 Error Messages Error Message Warning! Power Supply Error Warning! RF Power Level is too high Warning! Sensor not zeroed properly. Zero sensor again Warning! Specified temperature range (0 to 50 C) exceeded Warning! Temperature has changed. Zero sensor again Description Verify that the supply is connected properly. The specified upper measurement range is +20 dbm. Do not exceed the specification. The sensor must be zeroed with nothing connected to it. The PSN50 sensor temperature range is 0 to 50 C. The temperature changed more than the allowable limit after the sensor was zeroed. General Error Messages A listing of General Error Messages is provided below. Table General Error Messages Error Message CAL Incomplete Dist Requires F1<F2 Invalid Sweep Data Use Options menu to select a printer Flexcal is not suitable for this case, Change To OSL CAL mode Cannot zero input signal too high Level Under Description A complete open, short, and load calibration must be performed before calibration can be turned on. Valid distance to fault plots require a non-zero frequency span. The sweep data is invalid. Attempting to print a display with no printer selected. Select a printer, then retry. The cable is too long or too reflective for FlexCal to work. OSL cal must be used instead. Attempting to perform a Power Meter zero adjust function with an input of greater than 20 dbm. The level of the signal is not strong enough to make a measurement. S412D User Guide PN: Rev. D 2-95
122 2-25 Battery Information Functions and Operations 2-25 Battery Information Charging a New Battery The NiMH battery supplied with the LMR Master has already completed charge and discharge cycles at the factory and full battery performance should be realized after your first charge. Note The battery will not charge if the battery temperature is above 45 C or below 0 C. Charging the Battery in the LMR Master The battery can be charged while installed in the LMR Master. 1. Turn the LMR Master off. 2. Connect the AC-DC adapter (Anritsu PN: ) to the LMR Master charging port. 3. Connect the AC adapter to a 120 VAC or 240 VAC power source as appropriate for your application. The green external power indicator on the LMR Master will illuminate, indicating the presence of external DC power, the battery charge indicator will light, and the battery will begin fast charging. The charging indicator will remain lit as long as the battery is fast charging. Once the battery is fully charged, the fast charging indicator will turn off and a trickle charge will be started to maintain battery capacity. If the battery fails to charge, contact your nearest Anritsu service center. Note If a battery is excessively discharged, it may require several hours of trickle charging before the charger will allow a fast charge. Switching to fast charge mode is not automatic. You must either cycle the power on and off, or disconnect and reconnect the AC-DC adapter. If the battery temperature exceeds 45 C while charging, the charging will stop and the charge indicator will turn off. Charging will resume automatically when the temperature drops below 45 C. Charging the Battery in the Optional Charger Up to two batteries can be charged sequentially in the optional battery charger. 1. Remove the NiMH battery from your LMR Master and place it in the optional charger (Anritsu PN: ). 2. Connect the lead from the AC-DC adapter to the charger. 3. Connect the AC-DC adapter to a 120 VAC or 240 VAC power source as appropriate for your application. Each battery holder in the optional charger has an LED charging status indicator. The LED color changes as the battery is charged: Red indicates the battery is charging Green indicates the battery is fully charged Yellow indicates the battery is in a waiting state (see the following paragraphs) PN: Rev. D S412D User Guide
123 Functions and Operations 2-25 Battery Information A yellow light may occur because the battery became too warm during the charge cycle. The charger will allow the battery to cool off before continuing the charge. A yellow light may also indicate that the charger is alternating charge to each of the two batteries. A blinking red light indicates less than 13 VDC is being supplied to the charger stand. Check that the correct AC charger adapter is connected to the charger stand. If the battery fails to charge, contact your nearest Anritsu Service Center. Determining Remaining Battery Life When the AC-DC adapter is unplugged from the LMR Master, the battery indicator symbol will be continuously displayed at the top left corner of the LMR Master display (Figure 2-34). A totally black bar within the battery icon indicates a fully charged battery. When LOW BATT replaces the battery indicator bar at the top left corner, a couple of minutes of measurement time remains. If a flashing LOW BATT is accompanied by an audio beep at the end of each trace, the battery has approximately one minute of operating time remaining. BATTERY INDICATOR All Off More Figure LMR Master Battery Indicator Once all the power has drained from the battery, the LMR Master LCD will fade. At this point, your LMR Master will switch itself off and the battery will need to be recharged. During operation, the battery condition can be viewed by pressing the SYS key and selecting the Self Test soft key (Figure 2-33 on page 2-90). The battery condition will be displayed as a percentage of charge remaining. S412D User Guide PN: Rev. D 2-97
124 2-25 Battery Information Functions and Operations Battery Life The NiMH battery will last longer and perform better if allowed to completely discharge before recharging. For maximum battery life, it is recommended that the NiMH battery be completely discharged and recharged once every three months. It is normal for NiMH batteries to self-discharge during storage (Figure 2-35) and to degrade to 80% of original capacity after 12 months of continuous use C RETAINED CAPACITY (%) Discharge: 0.2C (E.V. 1.0V) Temperature: 25 C 20 C 40 C Figure NiMH Battery Storage Characteristics STORAGE TIME (days) The battery can be charged and discharged 300 to 500 times, but it will eventually wear out. The battery may need to be replaced when the operating time between charging is noticeably shorter than normal. Important Battery Information With a new NiMH battery, full performance is achieved after three to five complete charge and discharge cycles. Recharge the battery only in the LMR Master, or in an Anritsu approved charger. When the LMR Master or the charger is not in use, disconnect it from the power source. Do not charge batteries for longer than 24 hours, as overcharging may shorten battery life. If left unused, a fully charged battery will discharge itself over time. Storing the battery in extreme hot or cold places will reduce the capacity and lifetime of the battery. The battery will discharge faster at higher ambient temperatures (see Figure 2-35). Discharge an NiMH battery from time to time to improve battery performance and battery life. The battery can be charged and discharged hundreds of times, but it will eventually wear out. The battery may need to be replaced when the operating time between charging is noticeably shorter than normal PN: Rev. D S412D User Guide
125 Functions and Operations 2-25 Battery Information If a battery is allowed to totally discharge, the smart-memory capability of the battery may be lost, resulting in incorrect battery capacity readings or loss of communication with the battery. Do not short-circuit the battery terminals. Do not drop, mutilate or attempt to disassemble the battery. Never use a damaged or worn out charger or battery. Always use the battery for its intended purpose only. Temperature extremes will affect the ability of the battery to charge. Allow the battery to cool down or warm up as necessary before use or charging. Battery storage is recommended at less than 45 C. Batteries must be recycled or disposed of properly. Do not place batteries in the trash. Do not dispose of batteries in a fire! S412D User Guide PN: Rev. D 2-99
126 2-100 PN: Rev. D S412D User Guide
127 Chapter 3 Getting Started 3-1 Introduction This chapter provides a brief overview of the Anritsu LMR Master. The intent of this chapter is to provide the user with a starting point for making basic cable and antenna analyzer, spectrum analyzer, and power meter measurements. Procedures that are specific to Cable and Antenna Analyzer Mode on page 3-2), Spectrum Analyzer Mode on page 3-10, and common to all modes on page 3-14 are presented. 3-2 Power On Procedure The Anritsu LMR Master is capable of up to 1.5 hours of continuous operation from a fully charged, field-replaceable battery. Built-in energy conservation features allow battery life to be extended. The LMR Master can also be operated from a 12Vdc source (which will also simultaneously charge the battery). This can be achieved with either the Anritsu AC-DC Adapter (PN: R) or 12Vdc Automotive Cigarette Lighter Adapter (P/N ). Both items are included as standard accessories (see Standard Accessories on page 1-3). To power on the LMR Master: 1. Press the ON/OFF front panel key (Figure 3-1). 1 2 ESCAPE CLEAR START CAL 3 AUTO SCALE 4 SAVE SETUP RECALL SETUP 5 6 LIMIT MARKER 7 8 ENTER SAVE DISPLAY 9 RECALL DISPLAY 0 RUN HOLD ON OFF PRINT SYS MODE FREQ/DIST AMPLITUDE MEAS/DISP ON/OFF KEY Figure 3-1. LMR Master ON/OFF Key 2. The LMR Master will display the model number, the firmware revision, the internal temperature and voltage, and then perform a five second self test. At completion of the self-test, the screen displays a prompt to press ENTER key to continue. If enter is not pressed, the LMR Master will continue after a five second timeout. 3. Press ENTER key to continue. The LMR Master is now ready for operation. S412D User Guide PN: Rev. D 3-1
128 3-3 Cable and Antenna Analyzer Mode Getting Started 3-3 Cable and Antenna Analyzer Mode Selecting the Frequency For the OSL or FlexCal calibration method the frequency range for the desired measurement must be set. The LMR Master will automatically set the frequency when a particular signal standard is selected, or the frequency can be manually set using the F1 and F2 soft keys. To set the frequency to a specific signal standard for an OSL or FlexCal calibration: 1. Press the FREQ/DIST key. 2. Press the Signal Standard soft key. 3. Press the Select Standard key and use the Up/Down arrow key to highlight the desired standard, then press the ENTER key to select. To manually select the frequency range for an OSL or FlexCal calibration: 1. Press the FREQ/DIST key. 2. Press the F1 soft key. 3. Enter the desired start frequency using the key pad or the Up/Down arrow key. 4. Press ENTER key to set F1 to the desired frequency. 5. Press the F2 soft key. 6. Enter the desired stop frequency using the keypad or the Up/Down arrow key. 7. Press ENTER key to set F2 to the desired frequency. 8. Check that the start and stop frequencies displayed match the desired measurement range. Calibration For accurate results, the LMR Master must be calibrated before making any measurements. The LMR Master must be re-calibrated whenever the setup frequency changes, the temperature exceeds the calibration temperature range or when the test port extension cable is removed or replaced. The two methods of calibrating the LMR Master, FlexCal and OSL calibration, can each be accomplished with either discrete components or with the InstaCal Module, providing four calibration techniques for maximum user flexibility. FlexCal is a broadband frequency (25 MHz to 1600 MHz) calibration that remains valid if the frequency is changed. An OSL calibration is an Open, Short and Load calibration for a selected frequency range, and is no longer valid if the frequency is changed. The default calibration mode is OSL. With either calibration method, the LMR Master may be calibrated manually with Open, Short, Load (OSL) calibration components, or by using the InstaCal module. If a Test Port Extension Cable is to be used, the LMR Master must be calibrated with the Test Port Extension Cable in place. The Test Port Extension Cable is a phase stable cable and is used as an extension cable on the test port to ensure accurate and repeatable measurements. This phase stable cable can be moved and bent while making a measurement without causing errors in the measurement. 3-2 PN: Rev. D S412D User Guide
129 Getting Started 3-3 Cable and Antenna Analyzer Mode Note The test port extension cable should have the appropriate connectors for the measurement. Use of additional connector adapters after the test port extension cable can contribute to measurement errors not compensated for during calibration. During the calibration process in Return Loss mode, either with discrete calibration components or with the InstaCal module, there are typical measurement levels expected. Verifying the measurement levels displayed on the screen during calibration can save valuable time in the field. Trace Characteristics in Return Loss Mode As the discrete calibration components are connected to the LMR Master RF out port, the following measurement levels will be displayed on the screen: When an OPEN is connected, a trace will be displayed between 0-10 db. When a SHORT is connected, a trace will be displayed between 0-10 db. When a LOAD is connected, a trace will be displayed between 0-50 db. When an InstaCal module is connected to the LMR Master RF out port, the following measurement levels will be displayed on the screen: When the LMR Master is measuring an equivalent OPEN, a trace will be displayed between 0 20 db. When the LMR Master is measuring an equivalent SHORT, a trace will be displayed between 0 20 db. When the LMR Master is measuring an equivalent LOAD, a trace will be displayed between 0 50 db. The following procedures explain standard OSL, FlexCal, and InstaCal calibration methods. Refer to Figure 3-2 for a calibration setup diagram. S412D User Guide PN: Rev. D 3-3
130 3-3 Cable and Antenna Analyzer Mode Getting Started OSL Calibration Procedures In Cable and Antenna Analyzer Mode, if the Cal Off message is displayed, or the test port cable has been changed, a new calibration is required. The following procedures detail how to perform the OSL calibration. OPEN SHORT LOAD CALIBRATION RFOUT/REFLECTION TEST PORT TEST PORT CABLE (OPTIONAL) 1 2 ESCAPE CLEAR START CAL 3 AUTO SCALE 4 SAVE SETUP RECALL SETUP 5 6 LIMIT MARKER 7 8 ENTER SAVE DISPLAY 9 RECALL DISPLAY 0 RUN HOLD ON OFF PRINT SYS MODE FREQ/DIST AMPLITUDE MEAS/DISP Figure 3-2. Calibration Setup Standard OSL Calibration 1. Select OSL Cal by pressing the SYS key, followed by the Application Options soft key. The currently selected calibration method is indicated at the bottom of the status window. Use the CAL Mode soft key to select the OSL calibration method. 2. Select the appropriate frequency range, as described Selecting the Frequency on page Press the START CAL key. The message Connect OPEN or INSTACAL module to RF Out Port will appear in a message box, with the calibration type in the message box title bar. 4. Connect the calibrated Open and press the ENTER key. The messages Measuring OPEN and Connect SHORT to RF Out will appear. 5. Remove the Open, connect the calibrated Short and press the ENTER key. The messages Measuring SHORT and Connect LOAD to RF Out will appear. 6. Remove the Short, connect the calibrated Termination and press the ENTER key. The message Measuring LOAD will appear. An audible tone will sound when the calibration is complete. 7. Verify that the calibration has been properly performed by checking that the Cal ON message is now displayed in the upper left corner of the display. 3-4 PN: Rev. D S412D User Guide
131 Getting Started 3-3 Cable and Antenna Analyzer Mode FlexCal OSL Calibration 8. The currently selected calibration method can be viewed by pressing the SYS key, followed by the Status soft key. To change the calibration method, select the SYS key, followed by the Application Options soft key. Use the CAL Mode soft key to select the FlexCal calibration mode. 9. Press the START CAL key. The message Connect OPEN or INSTACAL module to RF Out Port will appear in a message box, with the calibration type in the message box title bar. 10. Connect the calibrated Open and press the ENTER key. The messages Measuring OPEN and Connect SHORT to RF Out will appear and the LMR Master is set to the maximum frequency range. 11. Remove the Open, connect the calibrated Short and press the ENTER key. The messages Measuring SHORT and Connect LOAD to RF Out will appear. 12. Remove the Short, connect the calibrated Termination and press the ENTER key. The message Measuring LOAD will appear. An audible tone will sound when the calibration is complete. 13. Verify that the calibration has been properly performed by checking that the FlexCal ON message is now displayed in the upper left corner of the LCD. S412D User Guide PN: Rev. D 3-5
132 H H z 3-3 Cable and Antenna Analyzer Mode Getting Started InstaCal Module Calibration Procedures Note The InstaCal module is not a discrete calibration component and it can not be used at the top of the tower to perform line sweep measurements. Check that the CAL Off message is displayed in the upper left corner of the status window. This indicates that the LMR Master has not been calibrated. The following procedures detail how to perform a calibration using the InstaCal module. InstaCal MODULE Model I CN50 10 M InstaCal z-4.0g 1 2 ESCAPE CLEAR START CAL 3 AUTO SCALE 4 SAVE SETUP RECALL SETUP 5 6 LIMIT MARKER 7 8 ENTER SAVE DISPLAY 9 RECALL DISPLAY 0 RUN HOLD ON OFF PRINT SYS MODE FREQ/DIST AMPLITUDE MEAS/DISP Figure 3-3. InstaCal Module Calibration Standard InstaCal Calibration 1. Select OSL Cal by pressing the SYS key, followed by the Application Options soft key. The currently selected calibration method is indicated at the bottom of the status window. Use the CAL Mode soft key to select the OSL calibration method. 2. Select the appropriate frequency range, as described in Selecting the Frequency on page Press the START CAL key. The message Connect OPEN or InstaCal to RF Out port will appear in a message box, with the calibration type in the message box title bar. 4. Connect the InstaCal module to the RF Out port (Figure 3-3). 5. Press the ENTER key. The LMR Master senses the InstaCal module and automatically calibrates the unit using the OSL procedure. The calibration should take about 45 seconds. An audible tone will sound when the calibration is complete. 6. Verify that the calibration has been properly performed by checking that the Cal On! message is displayed in the upper left corner of the status window. 3-6 PN: Rev. D S412D User Guide
133 Getting Started 3-3 Cable and Antenna Analyzer Mode FlexCal InstaCal Calibration 1. Select FlexCal by pressing the SYS key, followed by the Application Options soft key. The currently selected calibration method is indicated at the bottom of the status window. Use the CAL Mode soft key to select the FlexCal calibration method. 2. Press the START CAL key. The message Connect OPEN or InstaCal to RF Out port will appear in a message box, with the calibration type in the message box title bar. 3. Connect the InstaCal module to the RF Out port (Figure 3-3). The LMR Master is automatically set to the maximum frequency range. 4. Press the ENTER key. The LMR Master senses the InstaCal module and automatically calibrates the unit using the OSL procedure. The calibration should take about 45 seconds. An audible tone will sound when the calibration is complete. 5. Verify that the calibration has been properly performed by checking that the FlexCal On! message is displayed in the upper left corner of the status window. InstaCal Module Verification Verifying the InstaCal module before any line sweeping measurements is critical to the measured data. InstaCal module verification identifies any failures in the module due to circuitry damage or failure of the control circuitry. This test does not attempt to characterize the InstaCal module, which is performed at the factory or the service center. The performance of the InstaCal module can be verified by the Termination method or the Offset method. The termination method is the preferred method in the field, and is similar to testing a bad load against a known good load. Termination Method The Termination method compares a precision load against the InstaCal module and provides a baseline for other field measurements. A precision load provides better than 42 db directivity. 1. Set the frequency according to the device under test (cellular, PCS, GSM). 2. Press the MODE key and select Freq-Return Loss mode. 3. Connect the InstaCal module to the LMR Master RF Out port and calibrate the LMR Master using InstaCal Module Calibration Procedures on page Remove the InstaCal module from the RF Out port and connect the precision load to the RF Out port. 5. Measure the return loss of the precision load. The level should be less than 35 db across the calibrated frequency range. 6. Press the MARKER key and set the M1 marker to Marker To Peak. The M1 value should be less than 35 db return loss. 7. Press SAVE DISPLAY (page 3-16) name the trace, and press ENTER key. S412D User Guide PN: Rev. D 3-7
134 3-3 Cable and Antenna Analyzer Mode Getting Started Offset Method An alternative to the termination method is to measure the return loss of a 20 db offset. This is similar to measuring an antenna that has been specified to have a 20 db return loss across the frequency of operation. A 20 db offset provides a 20 db return loss across a very wide frequency range. Measuring the return loss with the 20 db offset will provide a relatively flat response across the operating frequency range of the LMR Master. 1. Set the frequency according to the device under test (cellular, PCS, GSM). 2. Press the MODE key and select Freq-Return Loss mode. 3. Connect the InstaCal module to the LMR Master RF Out port and calibrate the LMR Master using InstaCal Module Calibration Procedures on page Remove the InstaCal module from the RF Out port and connect the 20 db Offset to the RF Out port. 5. Measure the return loss of the 20 db Offset. The level should be 20 db, ±2 db across the calibrated frequency range. 6. Press the MARKER key and set the M1 marker to Marker To Peak. The M1 value should be approximately 20 db return loss. 7. Press SAVE DISPLAY (page 3-16) name the trace, and press ENTER key. Calibration with the Test Port Extension Cable If a Test Port Extension Cable is to be used, the LMR Master must be calibrated with the Test Port Extension Cable in place. Follow the same calibration procedures as above with the OSL components or the InstaCal module in place at the end of the test port extension cable. Auto Scale The LMR Master can automatically set the scale to the minimum and maximum values of the measurement on the y-axis of the graph. This function is particularly useful for measurements in SWR mode. To automatically set the scale, press the AUTO SCALE key. The LMR Master will automatically set the top and bottom scales to the minimum and maximum values of the measurement with some margin on the y-axis of the LCD. Amplitude Scale The following procedure sets the top and bottom scale display. 1. Press the AMPLITUDE key to call up the Scale Menu. 2. Press the Top soft key and use the keypad or Up/Down arrow key to edit the top scale value. Press ENTER key to set. 3-8 PN: Rev. D S412D User Guide
135 Getting Started 3-3 Cable and Antenna Analyzer Mode 3. Press the Bottom soft key and use the keypad or Up/Down arrow key to edit the bottom scale value. Press ENTER key to set. Note Typically the y-axis scale of the graph is 0 60 db (return loss) but for some measurements (for example, insertion loss) the scale may be changed to 0 10 db. If the scale is not changed, some measurement results may not be easily viewed on the screen. Set the Distance and Cable Type In Distance-To-Fault (DTF) mode, the length of the transmission line (distance) and cable type are selected. The cable type determines the velocity propagation and cable attenuation factor. The following procedure can be used to set the distance and select the appropriate cable type. Note Selecting the correct cable is very important for accurate measurements and for identifying faults in the transmission line. Selecting the incorrect cable, or using the correct cable out of its proper frequency characteristics type, will shift the DTF trace vertically and horizontally making it difficult to accurately locate faults. 1. Press the MODE key. 2. Select DTF Return Loss or DTF SWR mode. The LMR Master automatically sets D1 to zero. 3. Press the D2 soft key. 4. Enter the appropriate D2 value for the maximum length of the transmission line and press the ENTER key to set the D2 value. 5. Press the DTF Aid soft key. 6. Using the Up/Down arrow key, select the Cable = and press ENTER key. Use the Up/Down arrow key to select the Standard cable types stored in the standard LMR Master cable lists (which cannot be edited) or choose Custom, for additional cables. A custom cable list can be created and uploaded using the Master Software Tools application provided with the LMR Master. 7. Using the Up/Down arrow key, select the appropriate type of cable and press the ENTER key. The selected cable type, Prop Vel and Cable Loss in db/m (or db/ft) will be displayed on the DTF parameters screen. Note Use the provided Master Software Tools program cable editor to add new cable information to the LMR Master cable list. Refer to the Master Software Tools User Guide for more information. 8. Press ENTER key. S412D User Guide PN: Rev. D 3-9
136 3-4 Spectrum Analyzer Mode Getting Started 3-4 Spectrum Analyzer Mode Selecting Spectrum Analyzer Mode 1. Press the ON/OFF key. 2. Press the MODE key and use the Up/Down arrow key to select Spectrum Analyzer mode. Press ENTER key to set the mode. Making a Measurement 1. Connect the input cable to the RF In test port. 2. Locate and display the signal(s) of interest by selecting the desired frequency, span, and amplitude value. Selecting the Frequency Selecting the Start and Stop Frequencies 1. To set a specific frequency band, select the Start soft key and enter the desired start frequency using the Up/Down arrow key or the keypad and press ENTER key to accept the input. 2. Select the Stop soft key and enter the desired stop frequency using the Up/Down arrow key or the keypad and press ENTER key to accept the input. Selecting the Center Frequency and Span Note Changing the center frequency and span will change the start and stop frequencies. Conversely, changing the Start and Stop frequencies will change the center frequency and span. 1. To enter a center frequency, select the Center soft key and enter the desired center frequency using the Up/Down arrow key or the keypad and press ENTER key to accept the input. 2. Press the Span soft key to display the Span menu. 3. To set a specific span, enter the desired span using the Up/Down arrow key or the keypad and press ENTER key to accept the input. or For a full span, select the Full soft key. or For a single frequency measurement, select the Zero soft key. Note To quickly move the span value up or down, select the Span Up or Span Down soft keys. These keys facilitate a zoom-in, zoom-out in a sequence PN: Rev. D S412D User Guide
137 Getting Started 3-4 Spectrum Analyzer Mode Selecting the Signal Standard and Channel 1. Press the Signal Standard soft key and select the appropriate signal standard for the measurement. 2. Press the Select Channel soft key and select the appropriate channel for the measurement. Selecting the Amplitude 1. Press the AMPLITUDE key. 2. Press the Units soft key and select the desired units from the soft keys presented (Volts or Watts in Linear, dbm, dbv, dbmv, or dbμv in Log). Press the Back soft key to return to the Amplitude menu. 3. Press the Ref Level soft key and use the Up/Down arrow key or directly enter the desired reference level from the keypad. Press ENTER key to set the amplitude level. 4. Press the Scale soft key and use the Up/Down arrow key or directly enter the desired scale from the keypad. Press ENTER key to set the scale. Note that the Scale soft key is not active when Units is set to Linear. Note Press the Atten/Preamp soft key and select Auto coupling of the attenuator setting to the reference level to help insure that harmonics and spurs are not introduced into the measurements. Selecting Bandwidth Parameters Both resolution bandwidth (RBW) and video bandwidth (VBW) can be automatically or manually coupled. Auto coupling of the RBW links the RBW to the span. That is, the wider the span, the wider the RBW. Auto coupling is indicated on the display as RBW XXX. When the RBW is manually coupled, it can be adjusted independently of the span. Manual RBW coupling is indicated on the status window as RBW* XXX. Auto coupling of the VBW links the VBW to the RBW. That is, the wider the RBW, the wider the VBW. Auto coupling is indicated on the display as VBW=Auto. When the VBW is manually coupled, it can be adjusted independently of the RBW. Manual VBW coupling is indicated on the display as VBW* XXX. 1. Press the MEAS/DISP key and the Bandwidth soft key to display the bandwidth menu. 2. Press RBW Auto for automatic resolution bandwidth selection, or press RBW Manual and use the Up/Down arrow key to select the resolution bandwidth. Press ENTER key to set the resolution bandwidth. 3. Press VBW Auto for automatic video bandwidth selection, or press VBW Manual and use the Up/Down arrow key to select the video bandwidth. Press ENTER key to set the video bandwidth. Press the Back soft key to return to the bandwidth menu. S412D User Guide PN: Rev. D 3-11
138 3-4 Spectrum Analyzer Mode Getting Started Selecting Sweep Parameters Max Hold To toggle maximum hold on or off, press the MEAS/DISP key, the Trace soft key and the Max Hold soft key. Maximum hold displays the maximum response of the input signal over multiple sweeps. Min Hold To toggle minimum hold on or off, press the MEAS/DISP key, the Trace soft key and the Min Hold soft key. Min Hold displays the minimum response of the input signal over multiple sweeps. Detection Method Each display point represents some number of measurements combined by a detection method. The number of measurements per display point is affected by the span and the resolution bandwidth. The four available detection methods are Positive Peak, RMS Average, Negative Peak, and Sampling Mode. Positive peak display the maximum value of all the measurements associated with that display point. RMS Average detection displays the RMS average power of all the measurements associated with that display point. Negative peak displays the minimum value of all the measurements associated with that display point. Sampling mode displays one measured value for the measurements associated with the display point. To set the detection method, press the MEAS/DISP key, the Trace soft key, and press the Detection soft key and select either Positive Peak, RMS Average, Negative Peak or Sampling Mode detection. Minimum Sweep Time The minimum sweep time allows a value from.05 ms to 200 seconds to be entered. The actual sweep time will be either the Min Sweep Time entered, or the time necessary to achieve accurate results, whichever is greater. Sweep Average In order to reduce the effects of noise, it may be desirable to average the results of several sweeps and display that average rather than the results of individual sweeps. To set the number of sweeps to average, press the Average (2-25) soft key and use the Up/Down arrow key or directly enter the desired number of sweeps from the keypad. Press ENTER key to set the sweep average. Note Max Hold, Min Hold, and Average are mutually exclusive PN: Rev. D S412D User Guide
139 Getting Started 3-4 Spectrum Analyzer Mode Adjusting Attenuator Settings The spectrum analyzer attenuation can be automatically coupled, manually coupled, or dynamically adjusted. 1. Press the AMPLITUDE key. 2. Press the Atten/Preamp soft key. 3. Select the soft key corresponding to the desired coupling mode, as described below. Auto Coupling Auto coupling of the attenuation links the attenuation to the reference level. That is, the higher the reference level, the higher the attenuation. Auto coupling is indicated on the display as Atten XX db. Manual Coupling When manually coupled, the attenuation can be adjusted independently of the reference level. Manual attenuation coupling is indicated on the display as Atten* XX db. Note The attenuation should be adjusted such that the maximum signal amplitude at the input mixer is 30 dbm or less. For example, if the reference level is +20 dbm, the attenuation should be 50 db such that the input signal at the mixer is 30 dbm ( = 30). This prevents signal compression. Dynamic Attenuation Dynamic attenuation tracks the input signal level, automatically adjusting the attenuation and preamp to give the maximum dynamic range without compressing the input mixer. Dynamic attenuation is indicated on the display as Atten=Dynamic. Setting the System Impedance The RF In and RF Out ports both have 50Ω impedance. The LMR Master can compensate for a 50Ω to 75Ω adapter on the RF In port. 1. Press the SYS key. 2. Press the Impedance soft key. 3. If using the Anritsu 12N50-75B adapter, press the 75Ω Anritsu 12N50-75B soft key. 4. If using a different adapter, press the Other Adapter Offset soft key and enter the loss value using the numeric keypad or the Up/Down arrow key. Press the ENTER key to set the loss value. S412D User Guide PN: Rev. D 3-13
140 3-5 Selecting a Signal Standard Getting Started 3-5 Selecting a Signal Standard Note The following procedures apply to both Cable and Antenna Analyzer mode and Spectrum Analyzer mode. The LMR Master contains a table of common signal standards. To choose a standard for your application: 1. Press the FREQ/DIST key. 2. Press the Signal Standard soft key and the Select Standard soft key. Note When the unit is turned on for the very first time, the table will show all of the signal standards available in the instrument. To create a custom list of commonly used standards, use the soft keys or the Up/Down arrow key to highlight a standard and press the Select/Deselect soft key. The newly selected signal standard will be marked with an asterisk (*). Press the Show Selected soft key to show only those signal standards on the custom list. To view all the signal standards in the instrument, press the Show All soft key. 3. To select a signal standard, use the soft keys or the Up/Down arrow key to highlight the standard and press ENTER key. 4. Press the Select Channel soft key to choose the appropriate channel for the selected standard PN: Rev. D S412D User Guide
141 Getting Started 3-6 Save and Recall a Setup 3-6 Save and Recall a Setup Saving a Setup Saving a cable and antenna analyzer setup configuration in memory will preserve the calibration information. 1. To save the configuration in one of the available user setup locations, press SAVE SETUP. There are ten locations in cable and antenna analyzer modes, and five in Spectrum Analyzer mode. 2. Use the key pad or the Up/Down arrow key to select a location. 3. Use the soft keys to enter a label for the saved setup. 4. Press ENTER key to save the setup. Note For cable and antenna analyzer modes, an OSL calibration is saved with an OSL designation, an InstaCal OSL calibration is saved with an OSL!, a FlexCal OSL calibration is saved with an FLX, and an InstaCal FlexCal calibration is saved with an FLX!. Recalling a Setup The following procedure recalls a setup from memory. 1. Press the RECALL SETUP key. 2. Select the desired setup using the Up/Down arrow key. 3. Press ENTER key to recall the setup. Note Only setups from the current mode are displayed. S412D User Guide PN: Rev. D 3-15
142 3-7 Save and Recall a Display Getting Started 3-7 Save and Recall a Display Saving a Display The following procedure saves a display to memory. 1. Press the SAVE DISPLAY key to activate the alphanumeric menu for trace storage. 2. Use the soft keys to enter a label for the saved trace. For example, to save a display with the name TX1 RETURN LOSS press the soft key group that contains the letter T then press the T soft key. Press the soft key group that contains the letter X then press the X soft key. Press the number 1 key on the numeric keypad. Use the soft keys and keypad as necessary to enter the entire name, then press ENTER key to complete the process. Note More than one trace can be saved using the same alphanumeric name, as traces are stored chronologically, using the time/date stamp. Pressing the SAVE DISPLAY key will bring up the last saved trace name on the input line. Pressing the Delete soft key will erase the entire trace name. To erase only one character of a trace name, press the Up/Down arrow key to select the character, then press the Delete soft key. This feature can be useful when naming traces sequentially, such as: Trace 1, Trace 2, etc. Measurement traces will be saved with GPS coordinates when GPS is active. GPS data is also automatically saved in the instrument memory until the unit is turned off, so measurement traces can be saved with the saved GPS coordinates even when the GPS is inactive. Recalling a Display The following procedure recalls a previously saved display from memory. 1. Press the RECALL DISPLAY key. 2. Select the desired display using the Up/Down arrow key. 3. Press ENTER key to recall the display. Changing the Units By default, the LMR Master displays information in metric units. Use the following procedure to change the display to English units when in cable and antenna analyzer mode. 1. Press the SYS key. 2. Select the System Options soft key. 3. Press the Units soft key to change from metric to English measurement units, or vice versa. The current selection is displayed at the bottom left corner of the screen PN: Rev. D S412D User Guide
143 Getting Started 3-8 Changing the Language 3-8 Changing the Language By default, the LMR Master displays messages in English. To change the display language: 1. Press the SYS key. 2. Press the Language soft key to cycle through the available languages.choices are English, French, German, Spanish, Chinese, and Japanese. 3-9 Adjusting Markers 1. Press the MARKER key to call up the Markers menu. 2. Press the M1 soft key to select the M1 marker function. 3. Press the Edit soft key and enter an appropriate value using the keypad or Up/Down arrow key to move the marker without redrawing the trace. Pressing the ON/OFF soft key activates or deactivates the M1 marker function. 4. Press the Back soft key to return to the Markers Menu. 5. Repeat the steps for markers M2, M3, M4, M5 and M Adjusting Limits The LMR Master offers two types of limits: a single horizontal limit line and segmented limits. Adjusting a Single Limit 1. Press the LIMIT key. 2. Press the Single Limit soft key. 3. Press the Edit soft key. 4. Either enter the value using the numeric keypad or scroll the limit line using the Up/Down arrow key. 5. Press ENTER key to set the location of the limit line. Note The single limit line can be defined as either an upper limit or a lower limit in Spectrum Analyzer mode only. Defining an Upper Limit An upper limit in Spectrum Analyzer mode is one where the measurement fails if the data appears above the limit line. Press the Upper/Lower Limit soft key, if necessary, so that the status window says: Fail if data is: Above Line. Defining a Lower Limit A lower limit in Spectrum Analyzer mode is one where the measurement fails if the data appears below the limit line. S412D User Guide PN: Rev. D 3-17
144 3-10 Adjusting Limits Getting Started Press the Upper/Lower Limit soft key, if necessary, so that the status window says: Fail if data is: Below Line. Adjusting Segmented Limits Segmented limit lines are defined separately as five upper limit segments and five lower limit segments. This allows the definition of a spectral mask. A limit segment is defined by its end points. That is, starting frequency, starting amplitude, ending frequency, and ending amplitude. This procedure describes the setting of two upper limit segments. The steps can be carried over to the other upper limit segments as well as to the lower limit segments. 1. Press the LIMIT key. 2. Press the Multiple Upper Limits soft key. 3. Press the Segment 1 soft key. 4. Press the Edit soft key. The status window will successively display the value of the segment endpoints: Start Freq, Start Limit, End Freq, End Limit. 5. Edit each value using the numeric keypad or scroll the limit line using the Up/Down arrow key and press ENTER key to set. 6. Press the Next Segment soft key to move on to Segment 2. If the status of Segment 2 is OFF, pressing the Next Segment soft key will automatically set the start point of segment 2 equal to the end point of Segment Repeat these steps for the remaining segments. 8. When the final segment is defined, press the Back soft key to end the editing process. Note The LMR Master does not allow overlapping limit segments of the same type. That is, two upper limit segments cannot overlap and two lower limit segments cannot overlap. The LMR Master also does not allow vertical limit segments. A limit segment in which the start and end frequencies are the same, but the limit values are different, cannot be specified. Enabling the Limit Beep Both limit types can indicate a limit violation by enabling the Limit Beep. An audible beep will sound at each data point that violates the defined limit. 1. Press the LIMIT key (numeric keypad number 7). 2. Press the Limit Beep soft key. The status window will indicate that the status of the limit beep is On, and the soft key will remain in the down state. Press the Limit Beep soft key again to disable the limit beep PN: Rev. D S412D User Guide
145 START CAL SAVE SETUP LIMIT SAVE DISPLAY AUTO SCALE RECALL SETUP MARKER RECALL DISPLAY PRINT ESCAPE CLEAR ENTER RUN HOLD Getting Started 3-11 Adjusting the LCD Brightness 3-11 Adjusting the LCD Brightness The LCD brightness can be adjusted for optimum visibility in varying environments. 1. Press the light bulb key (numeric keypad number 1). 2. Adjust the brightness using the Up/Down arrow key. 3. Press ENTER key to save the new setting Printing Printing is accomplished by selecting an available printer and pressing the print key as described below. Refer to the particular printer operating manual for specific printer settings. Printing a Screen 1. Obtain the desired measurement display. 2. Press the SYS key and the System Options soft key. 3. Press the Printer soft key and select from the displayed menu of supported printers. 4. Press the PRINT key. 5. Connect the printer as shown in Figure 3-4. SERIAL-TO-PARALLEL INTERFACE CABLE HP DESKJET PRINTER ON OFF SYS MODE FREQ/DIST AMPLITUDE MEAS/DISP Figure 3-4. LMR Master Printer Setup Printer Switch Settings Set the switches on the serial-to-parallel interface cable to the HP Deskjet 450 ink jet printer as follows: Table 3-1. SW1 SW2 SW3 SW4 SW5 SW6 SW7 SW8 Off On Off Off Off Off On Off S412D User Guide PN: Rev. D 3-19
. Figure 3-5. Using the LMR Master Soft Carrying Case 3-20 PN: 10580-00260 Rev.")
146 3-13 Using the Soft Carrying Case Getting Started 3-13 Using the Soft Carrying Case The soft carrying case has been designed such that the strap can be adjusted to allow the case to be easily oriented horizontally; allowing the Anritsu controls to be easily accessed (Figure 3-5). Figure 3-5. Using the LMR Master Soft Carrying Case 3-20 PN: Rev. D S412D User Guide
147 Chapter 4 Cable & Antenna Analyzer Measurements 4-1 Introduction This chapter provides a description of cable and antenna analyzer measurements, including line sweeping fundamentals and line sweeping measurement procedures, available when the LMR Master is in frequency or DTF mode. 4-2 Line Sweep Fundamentals In wireless communication, the transmit and receive antennas are connected to the radio through a transmission line. This transmission line is usually a coaxial cable or waveguide. This connection system is referred to as a transmission feed line system. Figure 4-1 shows an example of a typical transmission feed line system. Figure 4-1. A Typical Transmission Feed Line System S412D User Guide PN: Rev. D 4-1
148 4-2 Line Sweep Fundamentals Cable & Antenna Analyzer Measurements The performance of a transmission feed line system may be affected by excessive signal reflection and cable loss. Signal reflection occurs when the RF signal reflects back due to an impedance mismatch or change in impedance caused by excessive kinking or bending of the transmission line. Cable loss is caused by attenuation of the signal as it passes through the transmission line and connectors. To verify the performance of the transmission feed line system and analyze these problems, three types of line sweeps are required: Return Loss Measurement Measures the reflected power of the system in decibels (db). This measurement can also be taken in the Standing Wave Ratio (SWR) mode, which is the ratio of the transmitted power to the reflected power. Cable Loss Measurement Measures the energy absorbed, or lost, by the transmission line in db/meter or db/ft. Different transmission lines have different losses, and the loss is frequency and distance specific. The higher the frequency or longer the distance, the greater the loss. Distance-To-Fault (DTF) Measurement Reveals the precise fault location of components in the transmission line system. This test helps to identify specific problems in the system, such as connector transitions, jumpers, kinks in the cable or moisture intrusion. The different measurements are defined as: Return Loss System Sweep A measurement made when the antenna is connected at the end of the transmission line. This measurement provides an analysis of how the various components of the system are interacting and provides an aggregate return loss of the entire system. Distance To Fault Load Sweep A measurement is made with the antenna disconnected and replaced with a 50Ω precision load at the end of the transmission line. This measurement allows analysis of the various components of the transmission feed line system in the DTF mode. Cable Loss Sweep A measurement made when a short is connected at the end of the transmission line. This condition allows analysis of the signal loss through the transmission line and identifies the problems in the system. High insertion loss in the feed line or jumpers can contribute to poor system performance and loss of coverage. This whole process of measurements and testing the transmission line system is called Line Sweeping. 4-2 PN: Rev. D S412D User Guide
149 Cable & Antenna Analyzer Measurements 4-3 CW Mode 4-3 CW Mode CW mode can be used to maximize sweep speeds of both frequency and DTF measurements. With CW on, sweep times can be twice as fast as with CW off. However, making measurements with CW on will reduce the instrument s immunity to interfering signals. In a controlled environment, this reduced immunity should not be a problem. In the field however, there can be stray signals from nearby or co-located transmitters that can affect frequency and DTF measurements. Turning CW on and off can verify that the LMR Master is reducing the interfering signals. If there is no appreciable difference, then it should be safe to make measurements with CW on. Use this feature with caution, as the later introduction of an interfering signal might be mistaken for a problem with the antenna or cable run. If CW is on during a normal RL or SWR measurement, the LMR Master will be more susceptible to interfering signals. Interfering signals can make the measurement look better or worse than it really is. 4-4 Information Required for a Line Sweep The following information must be determined before attempting a line sweep measurement: System Frequency Range, to set the sweep frequency Cable Type, to set the cable characteristics for DTF measurements Distance of the Cable Run, to set the distance for DTF measurements S412D User Guide PN: Rev. D 4-3
150 4-5 Typical Line Sweep Test Procedures Cable & Antenna Analyzer Measurements 4-5 Typical Line Sweep Test Procedures This section provides typical line sweep measurements used to analyze the performance of a transmission feed line system. System Return Loss Measurement System return loss measurement verifies the performance of the transmission feed line system with the antenna connected at the end of the transmission line. To measure the system return loss: Required Equipment LMR Master Model S412D Precision Open/Short, Anritsu 22N50 or Precision Open/Short/Load, Anritsu OSLN50-1 or InstaCal Module ICN50B Precision Load, Anritsu SM/PL-1 Test Port Extension Cable, Anritsu 15NNF50-1.5C Optional Adapter, DC to 7.5 GHz, 50 ohm, 7/16(F)-N(M) Device Under Test Transmission Feed Line with Antenna Procedure 1. Press the MODE key. 2. Select Freq-Return Loss using the Up/Down arrow key and press ENTER key. 3. Set the start and stop frequencies, automatically by selecting a signal standard or manually using the F1 and F2 soft keys, as described in Selecting the Frequency on page Calibrate the LMR Master as described in Calibration on page Connect the Device Under Test to the LMR Master. A trace will be displayed on the screen when the LMR Master is in the sweep mode. 6. Press SAVE DISPLAY (page 3-16) name the trace, and press ENTER key. Note The antenna must be connected at the end of the transmission feed line when conducting a System Return Loss measurement. 4-4 PN: Rev. D S412D User Guide
151 Cable & Antenna Analyzer Measurements 4-5 Typical Line Sweep Test Procedures Figure 4-2 is an example of a typical system return loss measurement trace using a FlexCal calibration: Figure 4-2. Note Typical System Return Loss Trace The system sweep trace should appear at an approximate return loss of 15 db (±3 db) in the status window. Typically, greater than a 15 db return loss is measured in the passband of the antenna system. Cable Loss Measurement The transmission feed line insertion loss test verifies the signal attenuation level of the cable system in reference to the specification. This test can be conducted with the LMR Master in Freq Cable Loss mode. Required Equipment LMR Master Model S412D Precision Open/Short, Anritsu 22N50 or Precision Open/Short/Load, Anritsu OSLN50-1 or InstaCal Module ICN50B Precision Load, Anritsu SM/PL-1 Test Port Extension Cable, Anritsu 15NNF50-1.5C Optional Adapter, DC to 7.5 GHz, 50 ohm, 7/16(F)-N(M) S412D User Guide PN: Rev. D 4-5
152 4-5 Typical Line Sweep Test Procedures Cable & Antenna Analyzer Measurements Device Under Test Transmission Feed Line with Short Procedure Cable Loss Mode 1. Press the MODE key. 2. Select Freq-Cable Loss using the Up/Down arrow key and press ENTER key. 3. Set the start and stop frequencies, automatically by selecting a signal standard or manually using the F1 and F2 soft keys, as described on page Connect the Test Port Extension cable to the RF port and calibrate the LMR Master as described on page Save the calibration set up (page 3-15). 6. Connect the Device Under Test to the LMR Master phase stable Test Port Extension cable. A trace will be displayed on the screen as long as the LMR Master is in sweep mode. 7. Cable loss is displayed in the status window. 8. Press SAVE DISPLAY (page 3-16) name the trace, and press ENTER key. Figure 4-3 is an example of a typical transmission line cable loss measurement trace using a standard calibration. Figure 4-3. Typical Transmission Line Cable Loss Trace 4-6 PN: Rev. D S412D User Guide
153 Cable & Antenna Analyzer Measurements 4-5 Typical Line Sweep Test Procedures Distance-To-Fault (DTF) Transmission Line Test The Distance-To-Fault transmission line test verifies the performance of the transmission line assembly and its components and identifies the fault locations in the transmission line system. This test determines the return loss value of each connector pair, cable component and cable to identify the problem location. This test can be performed in the DTF Return Loss or DTF SWR mode. Typically, for field applications, the DTF Return Loss mode is used. To perform this test, disconnect the antenna and connect the load at the end of the transmission line. Required Equipment LMR Master Model S412D Precision Open/Short, Anritsu 22N50 or Precision Open/Short/Load, Anritsu OSLN50-1 or InstaCal Module ICN50B Precision Load, Anritsu SM/PL-1 Test Port Extension Cable, Anritsu 15NNF50-1.5C Optional Adapter, DC to 7.5 GHz, 50 ohm, 7/16(F)-N(M) Device Under Test Transmission Feed Line with Load Procedure Return Loss Mode The following steps explain how to make a DTF measurement in return loss mode. 1. Press the MODE key. 2. Select DTF-Return Loss using the Up/Down arrow key and press ENTER key. 3. Connect the Test Port Extension cable to the RF port and calibrate the LMR Master as described on page Save the calibration set up (page 3-15). 5. Connect the Device Under Test to the LMR Master phase stable Test Port Extension cable. A trace will be displayed on the screen as long as the LMR Master is in sweep mode. 6. Press the FREQ/DIST key. 7. Set the D1 and D2 values. The LMR Master default for D1 is zero. S412D User Guide PN: Rev. D 4-7
154 4-5 Typical Line Sweep Test Procedures Cable & Antenna Analyzer Measurements 8. Press the DTF Aid soft key and select the appropriate Cable Type to set the correct propagation velocity and attenuation factor. Note Use the provided Master Software Tools program cable editor to add new cable information to the LMR Master cable list. Refer to the Master Software Tools for more information. Selecting the right propagation velocity, attenuation factor and distance is very important for accurate measurements, otherwise the faults can not be identified accurately. 9. Press SAVE DISPLAY (page 3-16) name the trace, and press ENTER key. 10. Record the connector transitions. Figure 4-4 shows an example of a typical DTF return loss measurement trace using a FlexCal calibration. Figure 4-4. Typical DTF Return Loss Trace In the above example: Marker M1 marks the first connector, the end of the LMR Master phase stable Test Port Extension cable. Marker M2 marks the first jumper cable. Marker M3 marks the end of the main feeder cable. Marker M4 is the load at the end of the entire transmission line. 4-8 PN: Rev. D S412D User Guide
155 Cable & Antenna Analyzer Measurements 4-5 Typical Line Sweep Test Procedures Procedure DTF-SWR Mode The following steps explain how to measure DTF in SWR mode. 1. Press the MODE key. 2. Select the DTF-SWR using the Up/Down arrow key and press ENTER key. 3. Follow the same procedure as DTF-Return Loss mode, above. Resolution There are three sets of data points (130, 259 and 517) available in the LMR Master. The factory default is 259 data points. By increasing the number of data points the measurement accuracy and transmission line distance to measure will increase. Step size = ( )( V p ) ΔF where, V p is the relative propagation velocity of the cable and ΔF is the stop frequency minus the start frequency (Hz). The maximum distance is: D max = step size (# of data points 1) Increasing the data points increases the sweep time and increases the accuracy of the measurement. CW mode On or Off can also affect sweep speed (see CW Mode on page 4-3). Antenna Subsystem Return Loss Test Antenna Subsystem return loss measurement verifies the performance of the transmit and receive antennas. This measurement can be used to analyze the performance of the antenna before installation. The antenna can be tested for the entire frequency band, or tested to a specific frequency range. Transmit and receive frequency measurements are conducted separately. The following steps explain how to measure the antenna loss in return loss mode. Required Equipment LMR Master Model S412D Precision Open/Short, Anritsu 22N50 or Precision Open/Short/Load, Anritsu OSLN50-1 or InstaCal Module ICN50B Precision Load, Anritsu SM/PL-1 Test Port Extension Cable, Anritsu 15NNF50-1.5C Optional Adapter, DC to 7.5 GHz, 50 ohm, 7/16(F)-N(M) Device Under Test Antenna Sub Assembly S412D User Guide PN: Rev. D 4-9
156 4-5 Typical Line Sweep Test Procedures Cable & Antenna Analyzer Measurements Procedure 1. Press the MODE key. 2. Select Freq-Return Loss using the Up/Down arrow key and press ENTER key. 3. Connect the Test Port Extension cable to the RF port and calibrate the LMR Master as described on page Press SAVE SETUP and save the calibration set up (page 3-15). 5. Connect the Device Under Test to the LMR Master phase stable Test Port Extension cable. 6. Press the MARKER key. 7. Set markers M1 and M2 to the desired frequencies. 8. Record the lowest return loss over the specified frequency range. 9. Press SAVE DISPLAY (page 3-16) name the trace, and press ENTER key. The following trace is an example of an antenna return loss measurement trace using a FlexCal calibration. Figure 4-5. Antenna Return Loss Trace Calculate the threshold value and compare the recorded Lowest Return Loss to the calculated threshold value. Maximum Return Loss = log( VSWR 1) ( VSWR + 1) Note VSWR is the antenna manufacturer s specified VSWR. Use Master Software Tools to convert VSWR to Return Loss, or Return Loss to VSWR. If the measured return loss is less than the calculated threshold value, the test fails and the antenna must be replaced PN: Rev. D S412D User Guide
157 Chapter 5 Spectrum Analyzer Measurement Mode 5-1 Introduction This chapter provides a description of Spectrum Analyzer measurements and procedures when the LMR Master S412D is in Spectrum Analyzer Mode. 5-2 Measurement Fundamentals Measurement fundamentals include the use of additional spectrum analyzer functions beyond frequency, span, amplitude and marker functions. In particular, this section focuses on resolution bandwidth, video bandwidth, sweep, and attenuator functions. Effect of Resolution Bandwidth Resolution Bandwidth is determined by the intermediate frequency (IF) filter bandwidth. The spectrum analyzer traces the shape of its IF filter as it tunes past a signal. If more than one IF filter is used in a spectrum analyzer, the narrowest one dominates and is considered the resolution bandwidth. The choice of resolution bandwidth depends on several factors. Filters take time to settle. That is, when a signal first appears at the input of the filter, it will take a while before the signal appears at the output. Additionally, the output of the filter will take some time to settle to the correct value, so that it can be measured. The narrower the filter bandwidth (resolution bandwidth) the longer the settling time. The choice of resolution bandwidth will depend on the signal being measured. If two closely-spaced signals are to be measured individually, then a narrow bandwidth is required. If a wider bandwidth is used, then the energy of both signals will be included in the measurement. Thus, the wider bandwidth does not have the ability to look at frequencies selectively but instead simultaneously measures all signals falling within the resolution bandwidth. Therefore, a broadband measurement would aggregate all signals and noise within the measurement bandwidth into a single measurement. On the other hand a narrow-band measurement will separate the frequency components, resulting in a measurement that includes separate peaks for each signal. There are advantages to each. The ultimate decision will be dependent on the type of measurement required by the user. There is always some amount of noise present in a measurement. Noise is often broadband in nature; that is, it exists at a broad range of frequencies. If the noise is included in the measurement, the measured value will be in error (too large) depending on the noise level. With a wide bandwidth, more noise is included in the measurement. With a narrow bandwidth, less noise enters the resolution bandwidth filter, and the measurement is more accurate. If the resolution bandwidth is narrower, the noise floor will drop on the display of the spectrum analyzer. This is because the IF filter of the analyzer has been made narrower in bandwidth, which lets in less noise. As the measured noise level drops, smaller signals that were previously obscured by the noise can now be measured. S412D User Guide PN: Rev. D 5-1
158 5-2 Measurement Fundamentals Spectrum Analyzer Measurement Mode Effect of Video Bandwidth Spectrum analyzers typically use another type of filtering after the detector called video filtering. This filter also affects the noise on the display but in a different manner than the resolution bandwidth. In video filtering, the average level of the noise remains the same but the variation in the noise is reduced. Hence, the effect of video filtering is a smoothing of the signal noise. The resultant effect on the analyzer s display is that the noise floor compresses into a thinner trace, while the position of the trace remains the same. Thus, changing the video bandwidth (VBW) does not improve sensitivity; however, it does improve discernibly and repeatability when making low-level measurements. As a general rule of thumb, most field spectrum analyzer measurements are made at a video bandwidth that is a factor of 10 to 100 less than the resolution bandwidth. Thus, for a resolution bandwidth of 30 khz, the typical video bandwidth setting options are either 3 khz or 300 Hz. Sweep Limitations With some spectrum analyzers, the user has control over sweep time (the elapsed time of each sweep, sometimes called scan time). An analyzer cannot be swept arbitrarily fast while maintaining its specified accuracy, but will have a sweep rate limitation depending on the resolution bandwidth, video bandwidth, and frequency range selected. The sweep rate is not usually chosen by the user but is determined by the frequency range swept divided by the sweep time. The limitation on sweep rate comes from the settling or response time of the resolution and video bandwidth filters. If an analyzer is swept too quickly, the filters do not have time to respond, and the measurement is inaccurate. Under such conditions, the analyzer display tends to have a smeared look to it, with the spectral lines being wider than normal and shifted to the right. Fortunately, the Anritsu Handheld Spectrum Analyzer has mechanisms designed into it that relieve the user from having to calculate the sweep rate. When changing the RBW and VBW, the sweep rate will change accordingly. The sweep rate will be faster for a wide RBW or VBW and slower for a narrow RBW or VBW. The sweep rate can also be changed manually, by pressing the MEAS/DISP key and selecting the Min Sweep Time soft key. Enter a sweep time from 0.05 ms to 2000 seconds. If the minimum sweep time entered by the user is less than the value calculated by the LMR Master to assure accurate results, the calculated value will prevail. Regardless of the minimum sweep time setting, the LMR Master will never sweep faster than the RBW and VBW settings will allow. 5-2 PN: Rev. D S412D User Guide
159 Spectrum Analyzer Measurement Mode 5-3 Preamplifier Attenuator Functions Attenuation adjusts the hand held spectrum analyzer input attenuator. In Auto mode, as the reference level is increased, the attenuation is increased. In Manual mode, the input attenuation can be adjusted using the keypad or the Up/Down arrow key. The attenuator range is 0 to 51 db, in 1 db steps. When Dynamic attenuation is selected, the instrument automatically sets the input attenuation and preamplifier to achieve the best possible dynamic range. Note Attenuation is normally a coupled function and is automatically adjusted when the reference level changes. The reference level does not change however, when the attenuator changes. The attenuator should be adjusted so that the maximum signal amplitude at the input mixer is 25 dbm or less. For example, if the reference level is +20 dbm, the attenuation should be 50 db for an input signal of 25 dbm at the mixer ( = 25). This prevents signal compression. The nominal gain of the preamplifier is +25 db, therefore always select attenuation values so that the input to the preamp does not exceed 50 dbm. Note It is best to begin all measurements in AUTO attenuation mode. 5-3 Preamplifier The S412D includes a built-in preamplifier which provides the S412D with an additional 20 db of sensitivity. The preamplifier is a broadband preamplifier and thus the use of discrete filters should be considered when using it. Some bandpass filters have been added to the list of optional accessories to accommodate this need (see Table 1-4). This chapter provides an overview of preamplifier operation. A measurement example is also included. 5-4 Preamplifier Operation To turn the preamplifier on or off: 1. Reset the S412D to the factory default settings for the current mode by pressing the RECALL SETUP key on the data keypad. When the key is pressed, a Recall Setup selection box appears on the display. Select setup location 0 <Default> to recall the factory preset state for the currently selected mode. 2. Press the AMPLITUDE function hard key. 3. Select the Atten/Preamp soft key, then the Preamp Control Manual soft key. Press the Preamp On/Off soft key to turn the preamplifier on or off. When the preamplifier is on, the word AMP will be displayed on the left side of the display. Note The preamplifier is a broadband amplifier. It can become saturated by a signal outside of the defined frequency span. The dynamic attenuation feature will automatically activate the preamplifier when the S412D detects that the input signal level is below a certain level. This condition could result in the preamplifier being automatically turned back on even after it has been manually turned off. When dynamic attenuation is on, Atten=Dynamic appears to the left of the display. S412D User Guide PN: Rev. D 5-3
160 5-5 Preamplifier Measurement Example Spectrum Analyzer Measurement Mode 5-5 Preamplifier Measurement Example This section provides an overview of how to detect a low-level signal with the help of the preamplifier of a S412D LMR Master. Required Equipment S412D LMR Master Test Port extension cable, Anritsu 15NNF50 1.5C A signal source (Anritsu 69xxxB Synthesized Signal Generator or equivalent) Procedure 1. Press the MODE key and use the Up/Down arrow key to select the Spectrum Analyzer mode. Press the ENTER key to select. 2. Connect the RF output of the signal source to the RF In port of the S412D. 3. Press the Center soft key. Enter the center frequency of the measurement using the Up/Down arrow key or the keypad. Select the GHz, MHz, khz, or Hz soft key to accept the center frequency input. 4. Press the Span soft key and use the Up/Down arrow key or the keypad to enter a span of 1 MHz. 5. Set the signal source output level to 120 dbm. 6. Press the AMPLITUDE key and select the Ref Level soft key to set the reference level to 80 dbm. 7. Press the Scale soft key and set the scale to 10 db/division. 8. Press the Atten/Preamp soft key and set the attenuation to Auto and press the Back soft key. 9. Press the MEAS/DISP key, the Trace soft key, and the Detection soft key and set the detection mode to Positive Peak. 10. Press the Back soft key twice, then the Bandwidth soft key. Select the RBW Manual soft key and set the RBW to 100 Hz. 11. Select the VBW Auto soft key. 12. Press the AMPLITUDE function hard key. 13. Select the Atten/Preamp soft key, then the Preamp Control Manual soft key. Press the Preamp On/Off soft key to turn the preamplifier on or off. 5-4 PN: Rev. D S412D User Guide
161 Spectrum Analyzer Measurement Mode 5-5 Preamplifier Measurement Example Figure 5-1 shows the measurement results with the preamplifier off. Figure 5-1. Preamplifier Off 14. Turn the preamplifier on. When the preamplifier is ON, the word AMP should appear in the lower left corner of the display. The displayed noise level should be lowered by approximately 20 db on the display, and the signal should appear on top of the displayed noise. The noise level will drop further if the RBW is reduced. Figure 5-2 shows the measurement results with the preamplifier on. Figure 5-2. Preamplifier On S412D User Guide PN: Rev. D 5-5
162 5-6 Dynamic Attenuation Control Spectrum Analyzer Measurement Mode 5-6 Dynamic Attenuation Control The dynamic attenuation control feature tracks the peak input signal level and automatically adjusts the attenuator to protect the S412D in situations of high RF signal levels. This feature also enhances the instrument sensitivity in situations of low-level RF signals by deactivating and activating the internal preamplifier resulting in improved measurement accuracy. When dynamic attenuation is on, the S412D is in control of the attenuation and preamp. Manual settings will be overwritten based on the input signal. To manually control these parameters, set the attenuation to Manual. The following is an example identifying interference in a PCS 900 MHz band with the aid of the preamplifier and dynamic attenuation control. Required Equipment S412D Handheld LMR Master A band Pass Filter, such as K & L Electronics 5DR or equivalent An antenna Procedure 1. If necessary, press the MODE key and use the Up/Down arrow key to select the Spectrum Analyzer mode. Press the ENTER key to select. 2. Reset the S412D to the factory default settings for the current mode by pressing the RECALL SETUP key on the data keypad. When the key is pressed, a Recall Setup selection box appears on the display. Select setup location 0 <Default> to recall the factory preset state for the currently selected mode. 3. Connect the antenna to the input of the band pass filter, and the output of the band pass filter to the RF In connector of the S412D. 4. Press the FREQ/DIST key. 5. Press the Start soft key and enter 920 MHz. 6. Press the Stop soft key and enter 960 MHz. 7. Press the AMPLITUDE key and select the Scale key. Set the scale to 10 db/division. 8. Press the Atten/Preamp soft key and set the attenuation to Dynamic. As the S412D sweeps, it continually monitors the overall input signal level and, as required, adjusts the input attenuation value and the preamplifier on/off state to achieve the best possible sensitivity. 5-6 PN: Rev. D S412D User Guide
163 Spectrum Analyzer Measurement Mode 5-7 Selecting the Signal Standard and Channel 5-7 Selecting the Signal Standard and Channel Before making measurements, the LMR Master can be set to the appropriate wireless network air interface standard and channel number. The most common standards and channel numbers are stored in the LMR Master and, when selected, the LMR Master automatically selects the correct frequency and span. The frequency and span can also be manually entered if necessary. The following procedure sets the signal standard and channel number automatically by selecting from the standards stored in the LMR Master. Note Refer to Master Software Tools for information on creating and storing custom signal standards. Procedure 1. On the LMR Master, press the MODE key. 2. Use the Up/Down arrow key to select the Spectrum Analyzer mode and press ENTER key. 3. Select the Signal Standard soft key and press the Select Standard soft key. A table of currently selected signal standards will be displayed. Note When the unit is turned on for the very first time, the table will show all of the signal standards available in the instrument. To create a custom list of commonly used standards, use the soft keys or the Up/Down arrow key to highlight a standard and press the Select/Deselect soft key. The newly selected signal standard will be marked with an asterisk (*). Press the Show Selected soft key to show only those signal standards on the custom list. To view all the signal standards in the instrument, press the Show All soft key. 4. To select a signal standard, use the soft keys or the Up/Down arrow key to highlight the standard and press ENTER key. 5. Select the Select Channel soft key and use the Up/Down arrow key or the numeric keypad to enter a valid channel number. 6. Press ENTER key to accept the value, or ESCAPE to restore the previous value. The currently selected Center Frequency, Span, Signal Standard, and Channel are displayed at the bottom of the status window. S412D User Guide PN: Rev. D 5-7
164 5-8 Field Strength Measurements Spectrum Analyzer Measurement Mode 5-8 Field Strength Measurements All antennas have loss or gain that can cause errors in measurements. The LMR Master can correct for antenna loss or gain errors using Field Strength Measurements. The antenna factors must be uploaded to the LMR Master using the Anritsu Master Software Tools provided with the unit. 1. For a custom antenna, enter the antenna factor information for the specific antenna into the Antenna Editor of Master Software Tools. 2. On the LMR Master, press the MODE key. 3. Use the Up/Down arrow key to select the Spectrum Analyzer mode and press ENTER key. 4. Select the measurement frequency by using Center and Span soft keys or Start and Stop keys or Signal Standard and Select Channel keys 5. Upload the antenna factors to the LMR Master. 6. Press the MEAS/DISP key and select the Measure soft key. 7. Select the Field Strength soft key from the measurement menu. 8. Press the Select Standard Antenna or Select Custom Antenna soft key and use the Up/Down arrow key to select the desired antenna factor file from the standard or custom antenna list. Press the ENTER key to select. The LMR Master will now automatically adjust the measurement results based on the antenna factors entered. Field Str appears to the left of the trace and indicates that the measurement is enabled. The measurement status also appears in the lower status window along with the name of the selected antenna. Figure 5-3 shows the results of a measurement. Figure 5-3. Field Strength Measurements 5-8 PN: Rev. D S412D User Guide
165 Spectrum Analyzer Measurement Mode 5-9 Occupied Bandwidth 5-9 Occupied Bandwidth A common measurement performed on radio transmitters is that of occupied bandwidth (OBW). This measurement calculates the bandwidth containing the total integrated power occupied in a given signal bandwidth. There are two different methods of calculation depending on the technique to modulate the carrier. Percent of Power Method The occupied frequency bandwidth is calculated as the bandwidth containing the specified percentage of the transmitted power. XdB Down Method The occupied frequency bandwidth is defined as the bandwidth between the upper and lower frequency points at which the signal level is XdB below the peak carrier level. Required Equipment LMR Master S412D Portable antenna for the selected signal frequency Procedure 1. Connect the antenna to the Spectrum Analyzer RF In connector. 2. On the LMR Master, press the MODE key, use the Up/Down arrow key to select the Spectrum Analyzer mode and press ENTER key. 3. Press the FREQ/DIST key, select the frequency for the measurement by using Center and Span soft keys, the Start and Stop soft keys or the Signal Standard and Select Channel soft keys. 4. Press the AMPLITUDE key and select the Ref Level soft key to set the appropriate reference level. 5. Select the Atten/Preamp soft key to set the input attenuation level to automatic, manual or dynamic. 6. Press Preamp On/Off or Preamp Auto to activate the preamplifier manually or automatically. The default preamplifier mode is auto. 7. Press the Back soft key to return to the previous menu. 8. Select the Scale soft key to set the scale. Choose a value from 1dB/div to 15 db/div and press ENTER key. 9. Press the MEAS/DISP key and select the Bandwidth soft key to set the resolution bandwidth and video bandwidth automatically or manually. Press the Back soft key to return to the previous menu. 10. Press the Measure soft key and press the OBW soft key. Select the measurement method (db Down or % of Power) by pressing the Method soft key. The currently selected method is shown in the lower left of the status window. 11. Press the dbc or % soft keys to adjust the settings as appropriate. 12. Press the Measure soft key to initiate the measurement. S412D User Guide PN: Rev. D 5-9
166 5-9 Occupied Bandwidth Spectrum Analyzer Measurement Mode Figure 5-4 shows the occupied bandwidth results using the % of power method of a CDMA signal. Figure 5-4. Occupied Bandwidth Occupied bandwidth is calculated at the end of a sweep. An hourglass is displayed as the calculations are performed. Markers M1 and M2 indicate the occupied band on the graph. The measurement results appear beneath the graph PN: Rev. D S412D User Guide
167 Spectrum Analyzer Measurement Mode 5-10 Channel Power Measurement 5-10 Channel Power Measurement Channel power measurement is one of most common measurements for a radio transmitter. This test measures the output power, or channel power, of a transmitter over the frequency range in a specific time interval. Out-of-specification power measurements indicate system faults, which can be in the power amplifiers and in filter circuits. Channel Power measurements can be used to: Validate transmitter performance Comply with FCC or local regulations Keep overall system interference at a minimum Required Equipment LMR Master S412D Portable antenna for the selected signal frequency Procedure 1. On the LMR Master, press the MODE key, use the Up/Down arrow key to select the Spectrum Analyzer mode and press ENTER key. 2. Press the Signal Standard soft key and press the Select Standard soft key. Use the Up/Down arrow key to select a signal standard, and press ENTER key to select the appropriate network standard. 3. Press the Select Channel soft key, enter a value and press ENTER key. 4. Press the AMPLITUDE key and select the Ref Level soft key to set the reference level. 5. Press the Scale soft key and set the scale to 10 db/division. 6. Press the Atten/Preamp soft key and set the attenuation to an appropriate attenuation setting using automatic, manual, or dynamic. 7. Press Preamp On/Off or Preamp Auto to activate the preamplifier manually or automatically. The default preamplifier mode is automatic. 8. Press the Back soft key to return to the previous menu. 9. Press the MEAS/DISP key, select the Bandwidth soft key and set the resolution bandwidth and the video bandwidth to Auto. 10. Press the Back soft key to return to the previous menu. 11. Press the Trace soft key and the Max Hold soft key to set max hold to ON as indicated to the left of the graph. 12. Press the Back soft key to return to the previous menu. 13. Press the Measure soft key and press the Channel Power soft key. 14. Select the Int BW soft key and enter the integration bandwidth frequency appropriate for the particular application and press ENTER key. 15. Press Center Freq and Channel Span to set the signal frequency and span if the signal standard and channel are not selected as in steps 2 and Make the measurement by pressing the Measure soft key. The detection method is automatically changed to RMS. The LMR Master will display the measurement results. S412D User Guide PN: Rev. D 5-11
168 5-10 Channel Power Measurement Spectrum Analyzer Measurement Mode Figure 5-5. Channel Power Measurement When the channel power measurement is on, a CH PWR icon appears to the left of the graph. Channel power is calculated at the end of a sweep. An hourglass is displayed as the calculations are performed. Note The channel span must be set equal to or larger than the integration bandwidth. If not, the LMR Master will set the channel span equal to the integration bandwidth. When the integration bandwidth and channel span are set to the same value, the LMR Master uses all the sampling points for integration, providing the most accurate measurements. The ratio of the integration bandwidth to channel span is kept constant. When the integration bandwidth is changed, the ratio remains the same. The ratio can be changed by changing the channel span. For example, when the integration bandwidth is doubled, the LMR Master will double the channel span. Integration Bandwidth must be at least one tenth of the channel span PN: Rev. D S412D User Guide
169 Spectrum Analyzer Measurement Mode 5-11 Adjacent Channel Power Ratio 5-11 Adjacent Channel Power Ratio Another common transmitter measurement is that of adjacent channel leakage power. This is defined as the ratio of the amount of leakage power in an adjacent channel to the total transmitted power in the main channel. This measurement can be used to replace the traditional two-tone intermodulation distortion (IMD) test for system non-linear behavior. The result of an ACPR measurement can be expressed either as a power ratio or a power density. In order to calculate the upper and lower adjacent channel values, the LMR Master requires the specification of four parameters: Main Channel Frequency Measurement Channel Bandwidth Adjacent Channel Bandwidth Channel Spacing Required Equipment LMR Master S412D Portable antenna for the selected signal frequency Procedure 1. On the LMR Master, press the MODE key, use the Up/Down arrow key to select the Spectrum Analyzer mode and press ENTER key. 2. Press the Signal Standard soft key and the Select Standard soft key to select the appropriate network standard, and press ENTER key. 3. Press the Select Channel soft key, enter a value and press ENTER key. Note For ACPR measurements, when the appropriate Channel is selected, the Main channel bandwidth, Adjacent channel bandwidth and channel spacing are automatically set. 4. Press the AMPLITUDE key and select the Ref Level soft key to set the reference level to an appropriate value. 5. Press the Atten/Preamp soft key and set the attenuation to Auto. 6. Press the MEAS/DISP key and select the Bandwidth soft key to set the resolution bandwidth and the video bandwidth to Auto. 7. Press the Back soft key to return to the previous menu. 8. Press the Trace soft key and the Max Hold soft key to set max hold to On as indicated to the left of the graph. 9. Press the Measure soft key and press the ACPR soft key. 10. Make the measurement by pressing the Measure soft key. The detection method is automatically changed to RMS Average. Solid vertical lines are drawn on the display to indicate the main channel. Dashed vertical lines define the adjacent channels. The LMR Master will display the measurement results. S412D User Guide PN: Rev. D 5-13
170 5-11 Adjacent Channel Power Ratio Spectrum Analyzer Measurement Mode Figure 5-6 shows the results of the measurement. Figure 5-6. Adjacent Channel Power Measurement Adjacent Channel Power Ratio is a continuous measurement. Once it is turned on, it will remain on until it is turned off by pressing the Measure key again. When the ACPR measurement is on, an ACPR icon appears to the left of the graph. ACPR is calculated at the end of a sweep. An hourglass is displayed as the calculations are performed PN: Rev. D S412D User Guide
171 Spectrum Analyzer Measurement Mode 5-12 AM/FM Demodulation 5-12 AM/FM Demodulation The LMR Master built-in demodulator for AM, narrowband FM, wideband FM and single sideband (selectable USB and LSB) allows a technician to hear an interfering signal for easy identification. The demodulated signal can be heard using either the built-in speaker, or through a monaural headset connected to the 1/8-inch jack on the test panel. Procedure 1. Press the MEAS/DIST key followed by the Measure and More soft keys and the AM/FM Demod soft key. 2. Press the AM/FM Demod soft key and select AM, FM Wide Band, FM Narrow Band, SSB Lower, or SSB Upper to match the modulation format of the signal. Figure 5-7. Select Demodulation Type 3. Press the Back soft key. 4. For AM or FM signals, press the Demod Freq soft key and use the keypad to enter the center frequency of the signal to be demodulated. By default, the demodulation frequency is the center of the frequency span. For SSB Upper and SSB Lower signals, press the Demod Freq soft key. By default the demodulation frequency is the center of the frequency span. If the demodulation frequency needs to be changed, press the Demod Freq soft key and enter the correct demodulation frequency. The BFO Adjust soft key allows adjustment of the beat frequency oscillator to fine tune the signal through a span of ±10000 Hz. S412D User Guide PN: Rev. D 5-15
172 5-12 AM/FM Demodulation Spectrum Analyzer Measurement Mode Figure 5-8. SSB Demodulation 5. Press the On/Off soft key to enable the measurement. AM/FM will appear to the left of the graph. Figure 5-9. AM Demodulation 6. Use the Volume soft key and the Up/Down arrow key to change the audio volume from 0% to 100%. For most headsets a volume of 40% is adequate. 7. The Demod Time soft key sets the time the LMR Master will demodulate the signal. Enter a value from 100 ms to 500 seconds PN: Rev. D S412D User Guide
173 Spectrum Analyzer Measurement Mode 5-13 Carrier to Interference Ratio (C/I) 5-13 Carrier to Interference Ratio (C/I) Carrier to Interference Ratio (C/I) Measurement is a two-step process, first measuring the carrier level and then, with the carrier turned off, measuring the remaining signals and noise in the band of interest. After the two measurements are complete, the ratio of the carrier level to the noise plus interference is displayed using three assumptions: The interferer is a narrowband frequency hopping signal source (NB FHSS) The interferer is a wideband frequency hopping signal source (WB FHSS) The interferer is a broadband signal (BB) Procedure 1. If necessary, press the MODE key and use the Up/Down arrow key to select the Spectrum Analyzer mode. Press the ENTER key to select. 2. Press the Signal Standard soft key. Select the appropriate signal standard based on the signal to be measured and press ENTER. 3. Press the Select Channel soft key, select the operating channel of the access point being measured and press ENTER. Figure Signal Standard and Channel Selected 4. Press the MEAS/DISP key followed by the Measure soft key, the More soft key and the C/I soft key. 5. Press the Signal Type soft key and select the correct carrier signal type from the three choices, Narrow Band FHSS, Wide Band FHSS, or Broadband. 6. Press the Back soft key to return to the previous menu. 7. Unless a Signal Standard and Channel have already been selected, press the Center soft key and enter the desired frequency. 8. If needed, press the Span soft key and set an appropriate span width for the signal to be measured. S412D User Guide PN: Rev. D 5-17
174 5-13 Carrier to Interference Ratio (C/I) Spectrum Analyzer Measurement Mode 9. If the signal environment includes slow frequency hopping signals, such as cordless telephones, press the Min Sweep Time soft key to set a sweep time of one second or more to give a good chance of capturing instances of the interfering signal. 10. Press the Measure soft key and follow the on-screen prompts to complete the measurement. Note Access to the transmitter is required to complete this procedure as the transmitted carrier must be turned off for the second portion of the measurement. 11. After the measurement is complete, a message box will give results for the three different signal types. Some measurement results may show as N/A, and this is to be expected. Press the ENTER key to continue. All of the information in the message box will still be available. 12. Press the appropriate soft key for the signal type being measured to view the measurement results. The results are shown at the bottom of the screen. 13. Press the Save C/I Meas soft key to save both traces. Select the alphanumeric characters for the trace name and press the ENTER key to save the traces. The LMR Master will save both the carrier and interferer traces with the same name, and automatically append a -C to the saved carrier trace, and a -I to the saved interference trace. 14. Press the C/I Done soft key to return to normal sweeping mode. 15. To recall the carrier and interferer traces, select the RECALL DISPLAY key and use the Up/Down arrow key to select either the -C or -I trace. Both traces will be displayed, with the selected trace data shown at the bottom of the display. The selected trace is displayed as a yellow trace, and the other as a magenta trace. (Adjustment of the display brightness may be required for optimal viewing.) 16. To review the specific data for the measurement, select the MEAS/DISP key followed by the Measure soft key, the More soft key and the C/I soft key. Select either the C Data, IData, or C/I Data soft keys to view the corresponding data at the bottom of the display. 17. Press the ESCAPE key to return to normal sweep mode PN: Rev. D S412D User Guide
175 Chapter 6 Internal Power Meter Mode 6-1 Introduction The LMR Master S412D can make power measurements based on the spectrum analyzer measurements, and can display the measured power in dbm or Watts. 6-2 Power Measurement Required Equipment The following equipment is required to make a power measurement with the LMR Master. LMR Master Model S412D Test Port Extension Cable, Anritsu 15NNF50 1.5C Procedure The following procedure details making a power measurement with the LMR Master. 1. Press the ON/OFF key on the LMR Master. 2. Press the MODE key. 3. Use the Up/Down arrow key to select the Power Meter mode and press ENTER key. 4. Press Span to activate a menu of span related choices: Edit Allows editing of the span to enter specific frequency. Full Sets the power meter to its maximum frequency span. Min Sets the power meter span to minimum. Span Up Activates the span function so that the span may be increased quickly in a sequence. Span Down Activates the span function so that the span may be reduced quickly in a sequence. Back Returns to the previous menu level. 5. Press the Center soft key to set the power meter to the desired center frequency. A center frequency from 4.5 MHz to MHz can be entered. or Press the Signal Standard and Select Standard soft keys and choose the appropriate signal standard for the network, and press the Select Channel soft key and choose the appropriate channel for the selected standard. 6. Press the MEAS/DISP key to activate the RMS Averaging menu. The RMS average is calculated by taking the log of the average power, and the power is calculated from voltage. The number of points to average can be set to low, medium or high. S412D User Guide PN: Rev. D 6-1
176 6-3 Offset Calibration Internal Power Meter Mode 6-3 Offset Calibration One of the main contributors to measurement error when measuring the power coming out of a base station is to assume that the combined loss of the phase stable cable and the attenuator connected to the output of the instrument is exactly the same as the specified value of the attenuator. An offset calibration can be used to measure the loss of the attenuator and cable using a scalar measurement. The instrument measures the loss of the phase stable cable and the attenuator and uses this value to subtract the loss for the selected frequency range. The original characterization is done over the entire frequency range, so there is no need to perform additional calibrations when the frequency range is changed. The calibration automatically disappears when the instrument is rebooted. It is possible to recall the last calibration and it is also possible to apply this offset cal feature to SPA mode as well. Required Equipment LMR Master S412D Test Port Extension Cable, Anritsu 15NNF50 1.5C 18" (46cm) Test Port Extension Cable, Anritsu db Attenuator, Anritsu db, 50 Watt, bi-directional, DC 18 GHz, N(m) N(f), Attenuator, Anritsu 42N50A-30 Procedure 1. Press the ON/OFF key on the LMR Master. 2. Press the MODE key. 3. Use the Up/Down arrow key to select the Power Meter mode and press ENTER key. 4. Press the START CAL (3) key. 5. Connect the 10 db Attenuator to the RF Out connector. 6-2 PN: Rev. D S412D User Guide
177 MARKER RECALL DISPLAY RUN HOLD MODE FREQ/DIST AMPLITUDE MEAS/DISP START CAL SAVE SETUP LIMIT SAVE DISPLAY ON OFF AUTO SCALE RECALL SETUP MARKER RECALL DISPLAY PRINT ESCAPE CLEAR ENTER HOLD RUN SYS Internal Power Meter Mode 6-3 Offset Calibration 6. Connect the 18" (46cm) Test Port Extension Cable to the RF In connector and the 10 db Attenuator. 18" Cable RF In 10 db Attenuator RF Out 1 2 ESCAPE CLEAR START CAL 3 AUTO SCALE 4 SAVE RECALL SETUP SETUP 5 6 LIMIT 7 8 ENTER SAVE DISPLAY 9 0 ON OFF PRINT SYS MODE FREQ/DIST AMPLITUDE MEAS/DISP Figure 6-1. Setup for Normalizing the Trace 7. Press the ENTER key. 8. Disconnect the 18" (46cm) Test Port Extension Cable from the RF In connector and connect the phase stable cable and attenuator between the RF In connector and the 18" (46cm) Test Port Extension Cable. 30 db Attenuator 42N50A-30 18" Cable Test Port Extension Cable 15NNF50-1.5C RF In 10 db Attenuator RF Out Figure 6-2. Measuring Insertion Loss of the Test Port Extension Cable and 30 db Attenuator S412D User Guide PN: Rev. D 6-3
178 6-4 Changing the Display Units Internal Power Meter Mode 9. Press the ENTER key. 10. A message will appear confirming that the Offset Calibration is done and showing the offset value to be applied. Press the ENTER key to accept the offset value, or press ESCAPE to cancel. The message Offset Cal On (# db) will show at the bottom of the display. Recall an Offset Calibration The offset calibration will be turned off when the system is rebooted. However, the last calibration is always saved and can be recalled and applied again without performing another calibration. 1. Press the Amplitude key. 2. Press the Offset db soft key. 3. Press the Recall Offset CAL soft key. Turn Off an Offset Calibration The Offset Calibration can be turned off by rebooting the LMR Master. To turn off the Offset CAL without rebooting the instrument: 1. Press the Amplitude key. 2. Press the Offset db soft key. Note The Offset Calibration can be applied to the Amplitude Offset in Spectrum Analyzer and Interference Analyzer. For Power Meter, Spectrum Analyzer, or Interference Analyzer mode, the average insertion loss value of the span will be shown. 6-4 Changing the Display Units The power reading can be displayed in dbm or Watts. 1. Press the AMPLITUDE key. 2. Press the Units soft key to toggle the display between Watts and dbm. 3. Press the FREQ/DIST key to return to the Power Meter menu. 6-4 PN: Rev. D S412D User Guide
179 Internal Power Meter Mode 6-5 Displaying Relative Power 6-5 Displaying Relative Power Relative power can be selected through the AMPLITUDE menu. 1. With the desired base power level input to the LMR Master, press the AMPLITUDE key, then the Rel soft key. The message Relative: On will show in the lower left of the status window. 2. Pressing the UNITS soft key will toggle the display between db and %. When the units are dbm, the Rel soft key toggles from db to dbm. When the units are Watts, the Rel soft key will toggle between % and nw. 3. Choose Offset or Zero depending upon the measurement (see Chapter 2 Functions and Operations ). Figure 6-3. Sample Power Meter Display S412D User Guide PN: Rev. D 6-5
180 6-6 PN: Rev. D S412D User Guide
181 Chapter 7 Power Monitor Mode (Option 5) 7-1 Introduction The LMR Master S412D with Option 5 installed can be used for making power measurements with broadband RF detectors, such as the 10 MHz to 20 GHz Anritsu 560-7N50B. See Table 1-4, Optional Accessories on page 1-4 for available RF detectors. The power monitor displays the measured power results in dbm or Watts 7-2 Power Measurement Required Equipment LMR Master S412D with Option 5 Broadband RF detector, Anritsu P/N 560-7N50B 30 db, 50 Watt, bi-directional, DC 18 GHz, N(m) N(f), Attenuator, 42N50A-30 Procedure 1. Press the ON/OFF key on the LMR Master. 2. Press the MODE key. 3. Use the Up/Down arrow key to select the Power Monitor mode and press ENTER key. Note If the detector is not installed, the LMR Master will display an error message. If the detector is installed and the error message appears, check the connections between the detector cable and the LMR Master connector. If the error message persists, contact the nearest Anritsu Service Center. Zeroing the Power Monitor 4. With no power applied to the DUT, press the Zero soft key. Wait for a few seconds while the LMR Master accumulates data samples of the quiescent power. When complete, Zero Adj: On is displayed in the message area. Zeroing subtracts the measured system noise. If the system noise is at 60 dbm and zeroing is applied, 1 nw will be subtracted from the measurement. Measuring High Input Power Levels 5. Insert an attenuator between the DUT and the RF detector to protect the LMR Master so that the input power level is less than or equal to 20 dbm. 6. Press the Offset db soft key. 7. Enter the attenuation in db using the keypad. Press the ENTER key to complete the entry. The message area will show Relative: On along with the entered value in db. S412D User Guide PN: Rev. D 7-1
182 MODE FREQ/DIST AMPLITUDE MEAS/DISP START CAL SAVE SETUP LIMIT SAVE DISPLAY ON OFF AUTO SCALE RECALL SETUP MARKER RECALL DISPLAY PRINT ESCAPE CLEAR ENTER HOLD RUN SYS 7-2 Power Measurement Power Monitor Mode (Option 5) Note If the loss is not known, Option 21, Transmission Measurement, or the Offset Calibration can be used to measure the loss of the system. Displaying Power in dbm and Watts 8. Press the Units soft key to display power in Watts. Displaying Relative Power 9. With the desired base power level input to the LMR Master, press the REL soft key. The message area will show Relative: On and the power reading will indicate 100%. If measuring a 10 dbm signal with Rel selected and the power level drops to 7 dbm, the Relative setting will show -3 db or 50%, depending on the units setting selected. 10. Press the Units soft key to display power in dbm. Since Relative is ON, the power reading will be in dbr, relative to the base power level. SYNTHESIZER RF DETECTOR RF DET PORT (Option 5) LMR MASTER Figure 7-1. S412D LMR Master Power Monitor Setup 7-2 PN: Rev. D S412D User Guide
183 Chapter 8 High Accuracy Power Meter (Option 19) 8-1 Introduction The S412D LMR Master with Option 19 and sensor PSN50 can be used to make High Accuracy Power Measurements from 50 MHz to 6 GHz. This high performance sensor provides true RMS measurements from 30 to +20 dbm providing accurate measurements for both CW and complex digitally modulated signals. The High Accuracy Power Meter (Option 19) connects to the PSN50 High Accuracy Power Sensor using an RS-232 cable (Anritsu PN: ). A 9 18 VDC (<100 ma) power supply is needed to power the sensor. The power supply (Anritsu PN: ), supplied with the LMR Master, can be used for this purpose. The display shows the power values in both dbm and Watts. The Relative Power feature displays power changes with respect to a reference value in both db and %. Figure 8-1. High Accuracy Power Measurement Display Limits can be used to determine if a measurement is within specified limits, and running averaging is available along with Max/Hold and Run/Hold. The zero feature improves accuracy between 20 and 30 dbm by removing measured system noise. Cal Factors correct both efficiency and mismatch loss. The frequency information must be entered to obtain the correct calibration factor. When necessary, attenuators should be used to ensure that the power does not exceed the specified measurement range. The Offset db feature can be used to enter the value of any cables and attenuators. It is possible to measure the loss of a cable or attenuator, up to 1.6 GHz, using Option 21 (Transmission Measurement) or the Offset Cal Kit, 65701). See Offset Calibration on page 6-2. S412D User Guide PN: Rev. D 8-1
184 MODE FREQ/DIST AMPLITUDE MEAS/DISP START CAL SAVE SETUP LIMIT SAVE DISPLAY ON OFF AUTO SCALE RECALL SETUP MARKER RECALL DISPLAY PRINT ESCAPE CLEAR ENTER HOLD RUN SYS 8-2 Power Measurement High Accuracy Power Meter (Option 19) 8-2 Power Measurement Required Equipment S412D LMR Master RS-232 Serial Cable, Anritsu P/N Power Supply, Anritsu P/N High Accuracy Power Sensor Anritsu P/N PSN50 30 db, 50 Watt, bi-directional, DC-8.5 GHz, N(m)-N(f), Attenuator, DUT PSN50 SENSOR DC SUPPLY RF OUT ATTENUATOR S412D LMR Master Figure 8-2. High Accuracy Power Meter Setup Using Anritsu Power Supply, PN: Procedure 1. Connect the RS-232 serial cable between the PSN50 High Accuracy Power Sensor and the LMR Master serial port. 2. Connect the DC power supply to the DC input of the PSN50 sensor and to an AC power source. 3. Press the ON/OFF key on the LMR Master. 4. Press the MODE key. 5. Use the Up/Down arrow key to select High Accuracy Power Meter mode and press ENTER key. 8-2 PN: Rev. D S412D User Guide
185 High Accuracy Power Meter (Option 19) 8-2 Power Measurement Zero and Cal 6. Press the FREQ/DIST key. 7. To enter the frequency manually using the number keys, select the Center soft key. To select a known signal standard, press the Signal Standard soft key and use the Up/Down arrow key to select the desired standard. The Cal Factors will be derived for the corresponding center frequency. Note The channel number is not required because the cal factor frequencies are rounded to the nearest 500 MHz. 8. With no power applied to the sensor, press the AMPLITUDE key then the Zero soft key to zero the sensor. Zeroing the sensor is recommended when making power measurements below 20 dbm. Using Attenuators 9. Press the AMPLITUDE key and select the Offset db soft key. 10. Connect the attenuator between the DUT and the sensor. 11. Enter the offset value of the attenuator, or select the Measure Offset soft key to use the Offset Cal Kit (65701) to measure the offset. See Offset Calibration on page 6-2 for additional details. Averaging/Max Hold/Run Hold 12. Press the MEAS/DISP key. 13. Press the Running Averages soft key and use the keypad to enter the number of averages to use (up to 50). 14. Press the Max Hold soft key to display the maximum value. If Averaging is selected, Max/Hold will display the maximum value of the non-averaged data. 15. Press the RUN/HOLD key to hold the display in the current condition. Setting Limits 16. Press the MEAS/DISP key. 17. Press the Limit Units soft key to select the units. 18. Press the Lower Limit soft key and enter the lower limit value in dbm or in Watts. 19. Press the Upper Limit soft key and enter the upper limit value in dbm or in Watts. 20. Press the Limit ON/OFF soft key to turn on the limits. The number display will turn green if the measurement is passing, or red if the measurement is failing. The word PASS or FAIL will also be displayed in between the logarithmic and linear display windows. S412D User Guide PN: Rev. D 8-3
186 8-2 Power Measurement High Accuracy Power Meter (Option 19) Displaying Relative Power 21. Press the AMPLITUDE key. 22. With the desired base power level input to the sensor, press the Rel soft key. The message area will show Relative On and the power reading will show 0 db and 100%. If measuring a 10 dbm signal with the Rel key selected, a drop to 7 dbm will show 3 db and 50%. Saving the Measurement 23. Press the SAVE DISPLAY key. 24. Use the soft keys to enter a Trace Name. Transferring Data to Master Software Tools The LMR Master has only one serial port, so it is not possible to communicate with both the PSN50 sensor and a PC running Master Software Tools (MST) at the same time. Therefore, only saved measurements can be viewed in MST when using the PSN50. To view saved measurements, disconnect the serial cable from the PSN50 and connect it to the serial port of the PC running MST. 8-4 PN: Rev. D S412D User Guide
187 Chapter 9 Transmission Measurement Mode (Option 21) 9-1 Introduction The Transmission Measurement option (Option 21) provides the capability to perform two-port measurements of passive devices over the 25 MHz to 1.6 GHz frequency range. Transmission Measurement can also be used to make antenna isolation measurements and repeater measurements. The signal source provided by Option 21 is unleveled, with a power output of approximately 10 dbm. 9-2 Measuring Active Devices Amplifiers can also be measured with Option 21, provided an external attenuator is installed between the RF Out port of the S412D and the input of the amplifier. The value of this attenuator depends on the required input signal level into the amplifier. Note that the output power of the signal source is not leveled, making it most suitable for gain measurements in the linear region of an amplifier. S412D User Guide PN: Rev. D 9-1
188 9-3 Calibration Transmission Measurement Mode (Option 21) 9-3 Calibration 1. Press the MODE key, select Transmission Measurement, and press ENTER key. 2. Use the Start and Stop soft keys to select the desired frequency. 3. Press the MEAS/DISP key, and then the Calibrate TM soft key to calibrate the S412D. Note The START CAL key (number 3 on the keypad) does not start calibration when the unit is in Transmission Measurement mode. 4. Following the on-screen prompt, connect a phase-stable cable between the RF Out port and the RF In port. If an attenuator is required for the measurement, connect it directly to the RF Out port and connect the cable to the attenuator output. Figure 9-1. Uncalibrated Narrowband Trace 5. Press the ENTER key. The unit will sweep once and store transmission correction information. On the next sweep, the trace should be flat at the zero db reference line and ready for measurements. The calibration information is non-volatile and will be retained through measurement mode changes and power cycles. The calibration information is also stored and recalled as part of Save Setup and Recall Setup. Please use caution to ensure that the calibration applies to the current test configuration. 9-2 PN: Rev. D S412D User Guide
189 Transmission Measurement Mode (Option 21) 9-4 Procedure 9-4 Procedure 1. Connect the duplexer between the LMR Master RF In and RF Out ports. DUPLEXER 1 2 ESCAPE CLEAR START CAL 3 AUTO SCALE 4 SAVE RECALL SETUP SETUP 5 6 LIMIT MARKER 7 8 ENTER SAVE DISPLAY 9 RECALL DISPLAY 0 RUN HOLD ON OFF PRINT SYS MODE FREQ/DIST AMPLITUDE MEAS/DISP Figure 9-2. Transmission Measurement Connections 2. Connect a load to the other end. 3. Set the start and stop frequencies to cover the frequency range of the duplexer. 4. Disconnect the duplexer and connect a cable to the LMR Master RF In and RF Out ports. 5. Calibrate the LMR Master for transmission measurements as described in Calibration on page 9-2. S412D User Guide PN: Rev. D 9-3
190 9-4 Procedure Transmission Measurement Mode (Option 21) 6. Connect the duplexer and make the measurements. Figure 9-3. Transmission Measurement 9-4 PN: Rev. D S412D User Guide
191 Chapter 10 Bias Tee (Option 10) 10-1 Introduction Option 10 provides a bias tee installed inside the S412D LMR Master. The bias arm is connected to a Vdc (variable in 1V increments) power source that can be turned on as needed to place the voltage on the center conductor of the RF In port. This voltage can be used to provide power to block down-converters in satellite receivers, and to power some tower mounted amplifiers. The bias can be turned on when the instrument is in Spectrum Analyzer mode, Transmission Measurement (Option 21) mode, or taking measurements in Cable & Antenna Analyzer mode. When bias is turned on, the bias voltage and current are displayed in the upper left corner of the display. The Vdc power supply is designed to deliver 6 Watts maximum, continuously. Note As a precaution, Bias Tee is automatically turned off whenever the measurement mode is changed, and must be manually re-enabled Procedure 1. Press the SYS key, then the Application Options soft key. 2. Select the Bias Tee soft key. 3. Select the Bias Tee Voltage soft key and use the number keys or the Up/Down arrow keys to set the bias tee voltage between 12 and 24 Vdc, in 1V increments. 4. Select the Bias Tee On/Off soft key to turn the bias voltage on. The state of the bias tee will be saved with the runtime setup. 5. Press the Bias Tee On/Off soft key again to turn the bias tee voltage off. Note If power drawn from the Bias Tee exceeds 6 Watts maximum continuous operation, the Bias Tee relay will open and a fault message will be displayed. S412D User Guide PN: Rev. D 10-1
192 10-2 PN: Rev. D S412D User Guide
193 Chapter 11 GPS Feature (Option 31) 11-1 Introduction The S412D LMR Master is available with a built-in GPS receiver feature (Option 31) that can provide latitude, longitude and altitude information and UTC timing. In addition, the frequency accuracy in some measurement modes can be enhanced by using GPS signals as a reference when the GPS receiver is properly tracking. In these modes, the LMR Master will constantly tune its frequency reference to provide the best accuracy possible. When the LMR Master is actively tuning its reference time base to GPS, the message GPS REF will appear either above or to the left of the graph. GPS-enhanced frequency accuracy is available in Spectrum Analyzer, P25 Tx Signal Analyzer, P25 Talk-Out Coverage, NXDN Tx Signal Analyzer, and NXDN Talk-Out Coverage modes. The following GPS antennas and accessories are available from Anritsu: Magnet Mount GPS Antenna with 15-foot cable 11-2 Activating the GPS Feature To activate the GPS feature: 1. Install the Anritsu GPS antenna to the GPS antenna connection on the LMR Master connector panel. Note The GPS antenna connection on the LMR Master is fitted with a reverse BNC connector to help prevent damage to the GPS circuitry. There is a DC voltage present on this connector. Do not connect anything other than the Anritsu GPS antenna to this port. 2. Press the SYS key. 3. Select the GPS soft key. 4. Press the GPS On/Off soft key to turn the GPS feature on or off. When GPS is first turned on, the GPS icon below will be displayed in red: When the GPS receiver has tracked at least three satellites, the GPS icon will change to: 5. Press the Location soft key to view the following information: latitude, longitude, altitude and UTC timing. 6. Press the Quality soft key to display the number of tracked satellites and the GPS quality. S412D User Guide PN: Rev. D 11-1
194 11-2 Activating the GPS Feature GPS Feature (Option 31) Note Press the Reset soft key to reset the GPS. Note The LMR Master retains the current GPS location information until the unit is turned off. This feature allows measurement traces to be saved with the retained GPS location information even when the GPS is inactive or the instrument is indoors. Figure GPS Location Display Figure GPS Quality Display 11-2 PN: Rev. D S412D User Guide
195 GPS Feature (Option 31) 11-3 Saving with GPS Information 11-3 Saving with GPS Information LMR Master measurement traces can be saved with the GPS coordinates of the location where the measurement was taken. The following procedure saves a display to memory. 1. Press the SAVE DISPLAY key to activate the alphanumeric menu for trace storage. 2. Use the soft keys to enter a label for the saved trace. For example, to save a display with the name TX1 GPS press the soft key group that contains the letter T then press the T soft key. Press the soft key group that contains the letter X then press the X soft key. Press the number 1 key on the numeric keypad. Use the soft keys and keypad as necessary to enter the entire name, then press ENTER key to complete the process. Note More than one trace can be saved using the same alphanumeric name, as traces are stored chronologically, using the time/date stamp. Pressing the SAVE DISPLAY key will bring up the last saved trace name on the input line. Pressing the Delete soft key will erase the entire trace name. To erase only one character of a trace name, press the Up/Down arrow key to select the character, then press the Delete soft key. This feature can be useful when naming traces sequentially, such as: Trace 1, Trace 2, etc. The measurement traces will be saved with the GPS coordinates when GPS is active. GPS data is also automatically saved in the instrument memory until the unit is turned off, so measurement traces can be saved with the saved GPS coordinates even when the GPS is inactive. The GPS icon on the display will stay green to indicate that the GPS data is saved. Figure Saved GPS Location Information S412D User Guide PN: Rev. D 11-3
196 11-4 Recalling GPS Information GPS Feature (Option 31) 11-4 Recalling GPS Information The following procedure recalls a previously saved display from memory. 1. Press the RECALL DISPLAY key. 2. Select the desired display using the Up/Down arrow key. 3. Press ENTER key to recall the display. To view the GPS information associated with the recalled display: 1. Press the SYS key. 2. Select the GPS soft key. The GPS coordinates will be displayed at the bottom of the trace. 3. Press the ESCAPE key to return to normal sweeping PN: Rev. D S412D User Guide
197 Chapter 12 Interference Analyzer Mode (Option 25) 12-1 Introduction This chapter presents Interference Analyzer (Option 25) information and procedures Interference Analysis Multiple wireless networks often operate in complicated signal environments. Three or four base station antennas may be located on the same tower, and can create interference problems. Interference is one of the most common problems affecting wireless network systems capacity and coverage. The LMR Master captures and analyzes a received signal and displays the air interface standard and estimated bandwidth of the received signal, which is critical in recognizing and analyzing the interfering signals. The Interference Analyzer option adds four measurements to the capability of the S412D: Spectrogram Signal Strength RSSI Signal ID 12-3 Spectrogram Spectrogram is a three dimensional representation of frequency, time and power useful for identifying intermittent interference. Procedure The following procedure demonstrates common Interference Analyzer Spectrogram setup options. To select Interference Analyzer mode: 1. On the LMR Master, press the MODE key, use the Up/Down arrow key to select the Interference Analyzer mode and press ENTER key. 2. Press the MEAS/DISP key followed by the Spectrogram soft key. 3. Press the FREQ/DIST key to set up the desired frequency sweep. Choose the appropriate soft keys and enter the start and stop frequency, the center frequency and the span, or select the Signal Standard soft key and select the channel and Uplink or Downlink. 4. To get the most effective spectrogram display, press the AMPLITUDE key, select the Ref Level soft key and set the reference level such that the largest signal to be displayed will be near the top of the spectrum analyzer area of the screen. The reference value required can be determined by observing the color of the highest signal and changing the reference level to place that value near the top of the spectrum analyzer area. S412D User Guide PN: Rev. D 12-1
198 12-3 Spectrogram Interference Analyzer Mode (Option 25) 5. Select the Scale soft key and set the scale value to place the lowest signal near the bottom of the screen. In general, 4 or 5 db/division will be good values. 6. Press the MEAS/DISP key followed by the Spectrogram soft key to set the spectrogram sweep parameters. There are two ways to set up spectrogram time parameters: set the time between sweeps or set the total time for a full spectrogram display. 7. To change the time between sweeps, press the Sweep Interval soft key and use the keypad to set the time from 0 seconds to 660 seconds. Entering the time interval value causes the corresponding time span value to be automatically computed. The time span can be viewed or changed by selecting the Time Span soft key and using the keypad to set the span. As expected, changing the time span will automatically change the sweep interval. If the sweep interval is > 0, then a max hold detection is in place so that no signals will be missed. 8. To set the total time span for a complete display, press the Time Span soft key and use the keypad to enter a time between 0 and 4320 minutes (72 hours.) Entering a time span value causes the corresponding sweep interval value to be automatically computed and shown when the Sweep Interval soft key is pressed. 9. Spectrogram plots may be automatically saved when the waterfall display is full by pressing the Auto Save soft key, which toggles between OFF and ON as shown at the bottom of the screen. The sweeping will stop in Auto Save mode after five waterfall spectrogram traces have been captured. All five captures of 80 traces (400 sweeps) can be downloaded with MST. If the sweep is restarted, these five captures will be overwritten by new data and the original data will be lost if not extracted from the unit with MST. 10. There are two cursors that can be used to investigate the frequency and time of any spot in the spectrogram display. Before using the cursors, press the RUN/HOLD key to suspend the acquisition of new data to avoid having the point of interest scroll off the top of the screen. Press the Cursor soft key to turn on the time cursor and frequency cursor. 11. Press the Time Cursor soft key to turn on the horizontal time cursor. Use the Up/Down arrow key to move the cursor vertically through the spectrogram. The date and time that the measurement at the cursor position was taken is displayed in the message area below the graph. 12. Press the Freq Cursor soft key to turn on the vertical frequency cursor. Use the Up/Down arrow key to move the cursor through the spectrogram. The frequency and corresponding amplitude level of the measurement at the cursor position is displayed in the message area below the graph PN: Rev. D S412D User Guide

199 Interference Analyzer Mode (Option 25) 12-3 Spectrogram 13. Press the Back soft key to turn off the cursors and return to the previous menu. Figure Spectrogram Display S412D User Guide PN: Rev. D 12-3
 along with an optional audible indicator.")
200 12-4 Signal Strength Interference Analyzer Mode (Option 25) 12-4 Signal Strength Signal Strength is useful for tracking down the source of an interfering signal. This measurement is done at a single frequency in zero span. Signal Strength displays the power at a single frequency (in dbm) along with an optional audible indicator. Connect a directional antenna and the frequency of the audible indicator increases as the measured signal strength increases. This mode is especially useful when attempting to locate an emitter using a directional antenna. Procedure The following procedure demonstrates a common Interference Analyzer Signal Strength setup. To select Interference Analyzer mode: 1. On the LMR Master, press the MODE key, use the Up/Down arrow key to select the Interference Analyzer mode and press ENTER key. 2. Press the MEAS/DISP key and select the Spectrum soft key. 3. Press the FREQ/DIST key, select the Center soft key, and use the soft keys to tune the center frequency to place the signal of interest in the center of the display. 4. Connect the appropriate directional antenna to the RF In port and press the MEAS/DISP key. 5. Press the Signal Strength soft key. 6. Press the AMPLITUDE key. 7. Press the Ref Level soft key and set the top of the measurement range to place the measured signal level near the right side of the bar chart. 8. Press the Scale soft key and set the sensitivity of the audio output frequency to amplitude changes. For most signal strength application, a value of 4 db/division works well. 9. Press the MEAS/DISP key followed by the Signal Strength soft key. 10. Press the Speaker Tone On/Off soft key to turn on the audio output. 11. If necessary, press the Volume soft key to set the speaker or headphone volume to a comfortable level. Use the Up/Down arrow keys to adjust the volume. Figure Signal Strength Display 12-4 PN: Rev. D S412D User Guide

201 Interference Analyzer Mode (Option 25) 12-5 RSSI 12-5 RSSI RSSI is useful to observe signal strength at a single frequency over time. Procedure The following procedure demonstrates a common Interference Analyzer RSSI setup. To select Interference Analyzer mode: 1. On the LMR Master, press the MODE key, use the Up/Down arrow key to select the Interference Analyzer mode and press ENTER key. 2. Press the MEAS/DISP key and select the Spectrum soft key. 3. Press the FREQ/DIST key, select the Center soft key, and use the soft keys to tune the center frequency to place the signal of interest in the center of the display. 4. Press the MEAS/DISP key and select the RSSI soft key. 5. Press the Time Interval soft key to set the time between adjacent measurement points. This time may be set from 150 ms to 1 minute. 6. Press the Time Span soft key to set the overall time span for the RSSI measurement. This time can be set from zero, to give manual control of the time span, to a maximum of seven days. After the specified time span, measurement is halted. 7. Press the AMPLITUDE key to set the reference level and scale factor to place the trace on the screen. Alternatively, the data may be scaled to place it all on screen by pressing the MEAS/DISP key, the RSSI soft key then the Auto Scale Data soft key. 8. To store the RSSI data, press the Log Data On/Off soft key to turn on data logging. The data is named Log - followed by the time at which the data was stored. Each screen full of 401 data points will be stored as a separate display, and can be saved for up to seven days. Figure RSSI Display S412D User Guide PN: Rev. D 12-5
202 12-6 Signal ID Interference Analyzer Mode (Option 25) 12-6 Signal ID Signal Identification is used to determine, if possible, the air interface standard of a signal. If the instrument is unable to determine the modulation format, it will display the estimated bandwidth of the signal. Procedure: The following procedure demonstrates a common Interference Analyzer Signal ID setup. To select Interference Analyzer mode: On the LMR Master, press the MODE key, use the Up/Down arrow key to select the Interference Analyzer mode and press ENTER key. Press the MEAS/DISP key and select the Signal ID soft key. Press the Set IA Freq soft key, enter the appropriate frequency to analyze the interfering signal, and press ENTER key. Alternatively, if marker M1 is on, press the IA Frequency as Marker M1 soft key to set the IA frequency to the current M1 frequency. Press the Measure soft key to start the measurement. A message box on the screen states that the analysis is in process, then, when the measurement is complete, displays the cell standard and estimated bandwidth of the interfering signal. Note Use IA Freq To Center to center the frequency on the display PN: Rev. D S412D User Guide
203 Chapter 13 Channel Scanner Mode (Option 27) 13-1 Introduction This chapter presents Channel Scanner (Option 27) information and procedures Channel Scanner The Channel Scanner option measures the output power of multiple transmitted signals. The output power can be displayed as a bar graph or a text display showing the amplitude of selected channels for a given air interface standard. Up to 20 channels can be measured. The operating frequency range for Channel Scanner mode can either be set manually, or the desired air interface standard can be selected from the Signal Standard list in the instrument. When the frequency range is selected from the Signal Standard list, all frequency related parameters are automatically set to the appropriate values for the selected standard. The Channel Scanner option provides the choice of a bar graph or a text display showing the amplitude of selected channels for a given air interface standard. The interface settings can be manually entered if none of the available air interface standards meet the measurement need. Procedure The following procedure demonstrates a common channel scanner setup. To select Channel Scanner mode: 1. Press the MODE key and use the up and down arrows to highlight Channel Scanner and press ENTER key. 2. Press the Signal Standard soft key, the Select Standard soft key, and use the Up/Down arrow key to highlight the CDMA US PCS standard. Press the ENTER key to select. 3. Press the Start Channel soft key, use the keypad to enter 50 and press the ENTER key. S412D User Guide PN: Rev. D 13-1
204 13-2 Channel Scanner Channel Scanner Mode (Option 27) 4. Press the MEAS/DISP key and select the Number of Channels soft key. Use the keypad to enter 20 and press the ENTER key. The channels will be displayed as bar graphs. Figure Example of Channels Displayed as Bar Graphs 5. Press the Display/Graph Text soft key and the data will be displayed in text format. Figure Example of Channels Displayed in Text Format Note The measurement can be made when the base station is either in service, out of service, or over the air PN: Rev. D S412D User Guide
205 Channel Scanner Mode (Option 27) 13-2 Channel Scanner 6. To set up the channel step size, press the FREQ/DIST key and select the Channel Step Size soft key. Use the keypad to enter 5 and press the ENTER key. Figure Example of Channels Displayed in Bar Graphs with Channel Step Size = 5 7. Press the MEAS/DISP key and select the Display/Graph Text soft key and the data will be displayed in text format. Figure Example of Channels Displayed in Text Format with Channel Step Size = 5 Note Follow the same procedure for frequency step size as used for channel step size. S412D User Guide PN: Rev. D 13-3
206 13-4 PN: Rev. D S412D User Guide


207 Chapter 14 CW Signal Generator Mode (Option 28) 14-1 Introduction This chapter presents information and procedures to make measurements using the optional CW signal generator mode (Option 28). The CW Signal Generator provides a CW signal from the RF Out port of the instrument. The CW signal is primarily used for sensitivity testing of receivers. To test receiver sensitivity, connect the signal directly to the receiver being measured, and then reduce the output amplitude until the receiver drops the signal. The external splitter feeds the signal into the RF input of the instrument. The display shows the output power and frequency. Required Equipment LMR Master S412D with Option 28 Attenuator Splitter 14-2 Procedure 1. On the LMR Master, press the MODE key, then use the Up/Down arrow key to select the CW Signal Generator mode and press ENTER. 2. Press the Freq soft key, use the Up/Down arrow key to change the desired frequency, or use the keypad to enter the desired frequency and select the MHz soft key. 3. Connect the attenuator to the RF Out port and the splitter to the RF In port.t TO RECEIVER SPLITTER ATTENUATOR Figure CW Signal Generator Mode Setup S412D User Guide PN: Rev. D 14-1

208 14-3 Soft Keys CW Signal Generator Mode (Option 28) 4. Connect the receiver cable to the output of the power splitter. 5. Adjust the power using the attenuator knobs until the receiver being tested drops the signal. Operation with Option 5, External Power Monitor If Option 5 (External Power Monitor) is installed, it is possible to operate Option 5 and Option 28 simultaneously. This could be practical for repeater measurements or for high loss cable loss measurements. Procedure 1. On the BTS Master, press the MODE key, use the Up/Down arrow key to select the CW Signal Generator mode and press ENTER. 2. Press the MEAS/DISP key. 3. Press the Power Monitor External soft key. Figure Operation with Option 5, External Power Monitor 14-3 Soft Keys The following soft keys are available in CW Signal Generator mode: Freq Enter a CW frequency from 25 MHz to 1600 MHz using the Up/Down arrow key, or the keypad and the appropriate soft key for Hz, khz, MHz or GHz. Press ENTER to accept the input. Display Setup Help Selecting this soft key displays a diagram of the recommended setup to use this option PN: Rev. D S412D User Guide
209 CW Signal Generator Mode (Option 28) 14-4 Offset 14-4 Offset The offset in CW Signal Generator Mode allows the connection of an attenuator after the divider to obtain the level after the attenuator. For instance, if the instrument reads about 73 dbm, and a 40 db pad is placed between the divider and the DUT, the instrument would still read 73 db even though the level to the DUT is 113 db. Setting the offset to 40 db will set the instrument to 113 dbm, the same as the level the DUT is seeing. S412D User Guide PN: Rev. D 14-3
210 14-4 PN: Rev. D S412D User Guide
211 Chapter 15 iden Signal Analyzer (Option 68) 15-1 Introduction The iden Signal Analyzer option provides a dedicated measurement mode to test performance of iden base stations. This option includes a RF and Demodulation measurements of iden and WiDEN signals Set Up and Measurement Procedure 1. Press the MODE key and use the Up/Down arrow key to highlight the iden mode. Press the ENTER key to select. 2. Connect the base station to the LMR Master by connecting the power amplifier of the base station to the Spectrum Analyzer/RF In 50 Ohm connector of the LMR Master using a coupler or attenuator. Caution The maximum power without damage is +43 dbm on the Spectrum Analyzer/RF In 50 Ohm connector and +23 dbm on the RF Out connector. To prevent damage, use a coupler or high power attenuator. 3. Attach the external reference frequency of the iden base station to the Ext Freq Ref/Ext Trig connector. 4. Press the External Ref Freq soft key to open the External Ref Freq entry window. Use the Up/Down arrow key or numeric keypad to set a value and press ENTER key. 5. Press the Center soft key to set the center frequency of the measurement using the Up/Down arrow key or the keypad. Select the GHz, MHz, khz, or Hz soft key to accept the Center Frequency input. or Press the Signal Standard soft key. The Signal Standards window opens and displays three signal standards. Use the Up/Down arrow key to highlight the desired signal standard and press the Select/Deselect soft key. Press the desired Channel soft key to enter a channel in either decimal format or hexadecimal format and press ENTER key. Press the Channel Increment soft key to set a channel increment and press ENTER key. Press the Back soft key to return to the main menu. 6. Press the AMPLITUDE key and use the Ref Level and Scale soft keys to set the vertical placement of the signal and set the grid spacing (db). 7. Press the MEAS/DISP key and select the desired measurement view by pressing either the Spectrum, ACPR, Demod, or Power vs. Time soft key. S412D User Guide PN: Rev. D 15-1
212 15-3 Measurement Views iden Signal Analyzer (Option 68) 15-3 Measurement Views Spectrum Displays the spectrum of the specified channel in addition to numerical values for individual subchannel powers, Channel Power, Peak to Average Ratio and Frequency Error. ACPR Adjacent Channel Power Ratio (ACPR). Displays the spectrum up to 7 channels in addition to the numerical values for relative power of adjacent channels to the main channel, Main Channel Power, Peak to Average Ratio, and Frequency Error. Press the ACPR Span soft key under the Frequency Menu to select a 50 khz, 100 khz, or 200 khz. Use the Up/Down arrow keys to scroll through to the desired value and press ENTER key. Figure ACPR Display 15-2 PN: Rev. D S412D User Guide


213 iden Signal Analyzer (Option 68) 15-3 Measurement Views Demod Demodulates the selected channel and Displays the measurements in the Constellation view. The constellation is color coded to easily identify Pilot, Sync, and Traffic. The measured parameters in this view include Channel Power, Frequency Error, Phase Noise, Demod-SQE, Channel EVM and individual subchannel EVMs. When Normal Demod is selected, all RF and Demod measurements are performed and the demod results are displayed. When Fast Demod is selected, only demodulation measurements are performed and displayed. On saving these measurements, only demod results are saved. Figure Demod Display Power vs. Time Displays the power over 12 slots. Measured parameters displayed in this view includes Channel Power, Current Active Slot Power, Frequency Error, Demod SQE, On/Off Ratio and Average Duty Cycle. Figure Power vs. Time Display S412D User Guide PN: Rev. D 15-3
214 15-4 PN: Rev. D S412D User Guide
215 Chapter 16 P25/LSM Transmit Signal Analyzer (Option 520) 16-1 Introduction The P25/LSM Transmit Signal Analyzer option provides a method to verify the operation of APCO Project 25 (P25) and Linear Simulcast Modulation (LSM) tower, mobile, and portable radio transmitters. The option includes the ability to display constellation and histogram graphs, along with numeric display of received power, frequency error, error vector magnitude, symbol deviation, Network Access Code (NAC), and bit error rate (BER) of the input signal. BER comparisons can be made to the 1011 Hz Standard Tone or the Standard Transmitter Test (O.153) pattern, regular voice traffic using a proprietary algorithm, or a Message Error Rate (MER) can be computed using the control channel messages CRC checking. The LMR Master will analyze input signal strengths from +20 dbm down to levels approaching the sensitivity of P25 radios, automatically adjusting the input sensitivity based on input levels. Procedure 1. Press the MODE key and use the Up/Down arrow key to highlight the P25/LSM Tx Signal Analyzer mode. Press the ENTER key to select. 2. Connect the transmitter to the Spectrum Analyzer/RF In 50 Ohm connector of the LMR Master using a coupler or attenuator. Caution The maximum power without damage is+43 dbm to the Spectrum Analyzer/RF In 50 Ohm connector, or +23 dbm to the RF Out connector. To prevent damage, use a coupler or attenuator when measuring high output power devices. 3. Attach the external reference of the base station to the Ext Freq Ref/Ext Trig connector on the LMR Master. 4. Press the External Ref Freq soft key to open the External Ref Freq entry window. Use the Up/Down arrow key or numeric entry keypad to set the appropriate reference frequency and press ENTER. 5. Press the Freq soft key to set the center frequency of the measurement, using the Up/Down arrow key or the numeric keypad. Select the appropriate terminator soft key to accept the center frequency. 6. Press the Pattern Select soft key to choose the pattern to measure error rates against Hz and O.153 will measure BER directly against the selected pattern. Voice uses a proprietary method to estimate BER from regular voice traffic. Control Channel will produce a Message Err Rate (MER) based on the CRC checksums contained in Control Channel messages. S412D User Guide PN: Rev. D 16-1
216 16-1 Introduction P25/LSM Transmit Signal Analyzer (Option 520) 7. Press the AMPLITUDE key, then the EXTERNAL ATTENUATION soft key to open the External Attenuation entry window. Use the Up/Down arrow key or the numeric keypad to enter the value of any attenuator or coupling factor, up to 51 db. This value will be reflected in the Rcd Pwr display. For instance if LMR Master measures 65 dbm received power, and the External Attenuation value is 30 db, LMR Master will display a value of 35 dbm ( 65 dbm + 30 db). 8. Press the MEAS/DISP key and select either Const soft key or Histogram soft key to select the measurement view. 9. If greater averaging of BER values is desired, Use the Frame Averaging soft key to increase the number of P25 frames used to calculate the rolling average of the BER. Default for LMR Master is 4 frames PN: Rev. D S412D User Guide

217 P25/LSM Transmit Signal Analyzer (Option 520) 16-2 Measurement Views 16-2 Measurement Views Constellation Constellation view displays the demodulation information in an IQ format. The chart Figure 16-1 shows the relationship between the location of a constellation data point, its deviation frequency, and the information it carries. Numerical information below the graph shows received channel power, frequency error, error vector magnitude, bit error rate compared to the P Hz Tone Test Pattern, symbol deviation error, and the P25 network access code (NAC) being transmitted. Symbol: +3 Bit Information: 01 Dev.: +1.8 khz Symbol: +1 Bit Information: 00 Dev.: +600 Hz Symbol: -3 Bit Information: 11 Dev.: -1.8 khz Symbol: -1 Bit Information: 10 Dev.: -600 Hz Figure Constellation Diagram Definition and View For input signals that are not P25 encoded, the LMR Master will still try to decode it and fit it to a symbol. This may cause some measurement results that are unexpected. For example, if a CW signal of 155 MHz was input to an LMR Master expecting a 155 MHz P25 signal, the unit will rotate the constellation until the signal lands on the nearest constellation point, either +600 Hz or 600 Hz deviation, and will report a corresponding frequency error of ±600 Hz, even though the input signal is exactly at 155 MHz. S412D User Guide PN: Rev. D 16-3

218 16-2 Measurement Views P25/LSM Transmit Signal Analyzer (Option 520) Histogram Histogram view displays a graphical representation of the soft symbols that are being received. These are the decoded symbols after LMR Master has made a decision about where each symbol is to be decoded. The bars for each symbol represent the relative percentage that symbol was identified out of all the received symbols. Each update of the graph is a separate representation of the latest data, rather than a cumulative total. The vertical scale is fixed at 0 to 100%, with each horizontal graticule representing 10% of the total symbols received. Figure P25 Histogram 16-4 PN: Rev. D S412D User Guide
219 P25/LSM Transmit Signal Analyzer (Option 520) 16-2 Measurement Views Control Channel Measurement Control Channel measurement displays a tabular view of a P25 Control Channel. The information is presented as rows of 12 hex Octets, along with the time the signal was received and the Network Access Code (NAC) of the transmitter that sent it. Typically, control channel data is collected faster than can be viewed, so the LMR Master displays 17 rows at a time, and updates about once per second. Capturing all Control Channel Data If all control channel information is needed, the LMR Master can re-direct it to the RS-232 serial data port to be received and saved on a PC. In the Control Channel menu, viewed by pressing the MEAS/DISP function key, then the Control Channel soft key, press the Serial Output soft key to begin. To stop sending data to the serial port and start displaying updates, press the Serial Output soft key again to turn the function off. Note Note that the LMR Master display does not update while sending control channel data to the serial port. Serial Data from the LMR Master has the following configuration and can be captured with Hyperterminal or any Telnet client baud, 8 data bits, No parity bits, 1 stop bit, No flow control Stop Trigger LMR Master is equipped with a Stop Trigger function in Control Channel measurement. If a certain control channel operation code (opcode) is under investigation, the LMR Master can be set up to stop capturing data when a particular opcode is encountered, and the surrounding opcodes can be analyzed. Enter the opcode to capture by pressing the Trigger Value soft key. Use the numeric keypad and soft keys to enter a value from 00 to FF. Press ENTER to accept. Next, press the Trigger Location soft key to set where the captured opcode will appear on the display. Use the arrow keys to select among: Top to view the trigger Opcode and the following 16, Bottom to view the Trigger opcode and the previous 16, or Middle to see 8 opcodes before and after the Trigger. Press the Trigger ON/OFF soft key to begin the Stop Trigger operation. When the Trigger opcode is encountered, the LMR Master will stop capturing data, the Hold icon will appear at the top of the display, and the trigger line will be outlined in red. S412D User Guide PN: Rev. D 16-5

220 16-2 Measurement Views P25/LSM Transmit Signal Analyzer (Option 520) To re-start the capture, Press RUN/HOLD. Figure P25 Control Channel Measurement 16-6 PN: Rev. D S412D User Guide
221 Chapter 17 P25/LSM Talk-Out Coverage (Option 522) 17-1 Introduction The P25/LSM Talk-Out Coverage option allows the ability to graphically view signal strength or bit error rate of a single channel as a function of time and location. LMR Master combines the received signal information with time and location information from the internal GPS module (Option 31) to store data that can then be turned into coverage maps using 3rd party software. An auto logging feature is available to allow the LMR Master to automatically store the data each time a full screen has been captured. Each trace is automatically stored to internal memory for later retrieval with Master Software Tools. A tone sounds in auto logging mode each time a trace is saved. Data includes frequency, GPS latitude and longitude, Universal Time Code from GPS, RSSI, and Bit/Message Error Rate values. Up to 8 hours of information can be stored. The LMR Master includes a Lock keypad soft key to prevent accidental contact with the function keys from changing the sweep setup, which may cause lapses during data capture. Setting up the LMR Master for Coverage Testing 1. Press the MODE key and use the Up/Down arrow key to highlight the P25/LSM Talk-Out Coverage mode. Press the ENTER key to select 2. Connect an antenna with appropriate frequency response to the Spectrum Analyzer/ RF In 50 Ohm connector on the LMR Master. The unit will automatically adjust to the received input level. Caution The maximum power without damage is +43 dbm to the Spectrum Analyzer/RF In 50 Ohm connector, or +23 dbm to the RF Out connector. To prevent damage, use a coupler or attenuator when measuring high output power devices. 3. Press the FREQ/DIST key and enter the desired carrier frequency to be monitored. 4. Press the Pattern Select soft key to choose the pattern to compare to the received signal. Voice The Voice selection is a proprietary bit error estimation method based on demodulating P25-compatible signals, rather than a bit-to-bit comparison of received data to a known pattern. When viewing noise signals, which normally have a BER of 50%, the Voice selection BER value will typically vary from 23% to 40% Control Channel Control Channel will look at CRC error checking in the Control channel messages and compute a Message Error Rate (MER). None Choosing None will not compute a BER, but allows RSSI vs. Time measurements on non-p25 signals. Measurement data logged under the None pattern will always have a BER value of 50%. 5. Press the MEAS/DISP function key to access the Measurement menu. S412D User Guide PN: Rev. D 17-1
222 17-1 Introduction P25/LSM Talk-Out Coverage (Option 522) 6. Select the RSSI vs Time or BER/MER vs Time (except for Pattern = None) to choose which trait will be displayed on the LMR Master. Both RSSI and BER/MER data is stored for every data point, regardless of which is displayed on the unit. 7. Press the Amplitude function key to make the display scale appropriate for the signal levels anticipated during the coverage test. For RSSI graphs, the Reference Level soft key opens an entry window to change the signal strength value that will be placed at the top of the graph. Valid entry values are +20 dbm to 120 dbm. The Scale soft key opens an entry window to change the scale of the RSSI graph vertical axis. Valid Scale entry values are 1 db to 15 db For BER/MER graphs, the Ref Percent soft key allows editing of the BER/MER percentage that is placed at the top of the graph. Valid entries are 1% to 100% 8. Press the MEAS/DISP key to access the Measurement menu. 9. Press the Reset Sweep soft key, if desired, to clear the graph 10. Press the Log Data On/Off soft key to store each sweep as it completes. Each time a sweep is stored, the LMR Master will sound an audible tone. Also, after the first sweep is stored, a small section of the data trace will display as green, indicating when the last trace was stored. When the green section reaches the left of the graph, the LMR will store the display. Note The LMR Master uses common internal storage space for all traces. When the LMR Master is out of storage space, it displays an error message and sounds the Error beep. Auto Logging will be automatically turned off. Traces can be transferred out of the LMR Master to an external PC using Master Software Tools. Traces can also be deleted by pressing the Recall Display (0) key, then selecting the traces to be deleted or using the Delete All soft key. 11. Press the Lock Keypad soft key to prevent accidental contact with the keypad that may interrupt data collection. Press the Lock Keypad soft key again to unlock the keypad PN: Rev. D S412D User Guide
223 P25/LSM Talk-Out Coverage (Option 522) 17-2 Measurement Views 17-2 Measurement Views RSSI vs. Time Displays the Received Signal Strength Indicator of the selected frequency over time. The display shows the most recent 401 measured points, covering approximately 5 minutes, when synchronized to a P25-compatible signal. The most recent data appears at the right edge of the display. Also displayed are the numeric values for the Received Power, Frequency Error, and Bit Error Rate for the selected pattern associated with the most recent graph data point Figure RSSI vs. Time S412D User Guide PN: Rev. D 17-3
224 17-2 Measurement Views P25/LSM Talk-Out Coverage (Option 522) BER vs. Time Displays the Bit Error Rate of the selected frequency over time, with the most recent data appearing at the right edge of the display. With the Pattern Select soft key, the LMR Master can detect bit error rates for the Standard 1011 Hz Tone or the Standard Transmitter Test (O.153/V.52) patterns. It can also use a proprietary method to estimate BER on every-day voice traffic or evaluate CRC errors in Control Channel Messages producing the Message Error Rate (MER). The LMR Master can also bypass the demodulator to make RSSI-only measurements on non-p25 signals by selecting None in the Pattern Select dialog box. Selecting None will automatically change the display from BER vs. Time to RSSI vs. Time. Each group of 256 symbols is compared to the selected pattern to generate the bit error rate values for each graphical data point. Also displayed are the numeric values for the Received Power, Frequency Error, and Bit Error Rate associated with the most recent graph data point. Figure BER vs. Time 17-4 PN: Rev. D S412D User Guide
225 P25/LSM Talk-Out Coverage (Option 522) 17-3 RSSI and BER/MER vs. Time Graphs 17-3 RSSI and BER/MER vs. Time Graphs RSSI vs. Time and BER/MER vs. Time graphs assume that GPS information is desired with each data point. For each graph point displayed, the LMR Master will check to ensure that the GPS module is synchronized with the GPS satellites before displaying the point. If the GPS module is in sync, the data point is in the standard yellow color. If the GPS module has lost synchronization with the satellites, the data point will be displayed in red. When Log Data is On, the LMR Master will save each full sweep of data to internal memory. After each save, the unit will color a portion of the data trace green to indicate when the last save occurred. The trace colorization is a display-only feature. It is not stored with, nor exported to Master Software Tools with the trace measurement data. During coverage mapping, each sweep has a maximum range of 0 32 latitude or longitude from the location of the first point in the sweep. The table below gives a general idea of how far 32 minutes is at a number of latitudes would be approximately At this latitude (N or S) Latitude Longitude 0 (equator) 36 miles 36 miles miles 35 miles 30 New Orleans 36 miles 32 miles 45 Minneapolis 36 miles 26 miles 60 Seward, AK 36 miles 18 miles miles 15 miles S412D User Guide PN: Rev. D 17-5
226 17-3 RSSI and BER/MER vs. Time Graphs P25/LSM Talk-Out Coverage (Option 522) Limit Lines for RSSI and BER/MER vs. Time Graphs Simple limit lines are available for both RSSI vs. Time and BER/MER vs. Time graphs by pressing the LIMIT (7) button. The limit, which can be configured to be either an upper limit or a lower limit, is set for the entire graph. As an added benefit to the drive test customer, an audible limit beep warning can be enabled to alert the user when the measured signal rises above the upper limit or falls below the lower limit. Figure RSSI vs Time with Limit Line Refer to LIMIT on page 2-82 for additional information about the LIMIT menu in RSSI vs. Time or BER/MER vs Time PN: Rev. D S412D User Guide
227 Chapter 18 NXDN Transmit Signal Analyzer (Option 530) 18-1 Introduction The NXDN Transmit Signal Analyzer option provides a method to verify the operation of NXDN tower, mobile, and portable radio transmitters. The option includes the ability to display constellation and histogram graphs, along with numeric display of received power, frequency error, modulation fidelity, symbol deviation, Radio Access Number (RAN), and bit error rate (BER) of the input signal. BER comparisons can be made to the Standard Tone Test pattern, the Standard Transmitter Test (O.153) pattern, regular voice traffic using a proprietary algorithm, or a Message Error Rate (MER) can be computed on the control channel using CRC checking. The LMR Master will analyze input signal strengths from +20 dbm down to levels approaching the sensitivity of NXDN radios, automatically adjusting the sensitivity based on input levels. Procedure 1. Press the MODE key and use the Up/Down arrow key to highlight the NXDN Tx Signal Analyzer mode. Press the ENTER key to select. 2. Connect the transmitter to the Spectrum Analyzer/RF In 50 Ohm connector of the LMR Master using a coupler or attenuator. Caution The maximum power without damage is+43 dbm to the Spectrum Analyzer/RF In 50 Ohm connector, or +23 dbm to the RF Out connector. To prevent damage, use a coupler or attenuator when measuring high output power devices. 3. Attach the external reference of the base station to the Ext Freq Ref/Ext Trig connector on the LMR Master. 4. Press the External Ref Freq soft key to open the External Ref Freq entry window. Use the Up/Down arrow key or numeric entry keypad to set the appropriate reference frequency and press ENTER. 5. Press the Freq soft key to set the center frequency of the measurement, using the Up/Down arrow key or the numeric keypad. Select the appropriate terminator soft key to accept the center frequency. 6. Press the Pattern Select soft key to choose the pattern to measure error rates against. Tone and O.153 will measure BER directly against the selected pattern. Voice uses a proprietary method to estimate BER from regular voice traffic. Control Channel will produce a Message Err Rate (MER) based on the CRC checksums contained in Control Channel messages. S412D User Guide PN: Rev. D 18-1
228 18-1 Introduction NXDN Transmit Signal Analyzer (Option 530) 7. Press the Mod BW soft key to select the appropriate modulation bandwidth for the current system under test. This setting is important, as the symbol rate and symbol deviation in NXDN change with the modulation bandwidth. 8. Press the AMPLITUDE key, then the EXTERNAL ATTENUATION soft key to open the External Attenuation entry window. Use the Up/Down arrow key or the numeric keypad to enter the value of any attenuator or coupling factor, up to 51 db. This value will be reflected in the Rcd Pwr display. For instance if LMR Master measures 65 dbm received power, and the External Attenuation value is 30 db, LMR Master will display a value of 35 dbm ( 65 dbm + 30 db). 9. Press the MEAS/DISP key and select the Const, Histogram, or Control Channel soft key to select the measurement view. Note The Control Channel measurement selection is only available if Control Channel is the selected pattern. 10. If greater averaging of BER values is desired, Use the Frame Averaging soft key to increase the number of NXDN frames used to calculate the rolling average of the BER. Default for LMR Master is 4 frames PN: Rev. D S412D User Guide

229 NXDN Transmit Signal Analyzer (Option 530) 18-2 Measurement Views 18-2 Measurement Views Constellation Constellation view displays the demodulation information in an IQ format. The chart Figure 18-1 shows the relationship between the location of a constellation data point, its deviation frequency, and the information it carries. Numerical information below the graph shows received channel power, frequency error, error vector magnitude, bit error rate compared to the Tone Test Pattern, symbol deviation error, and the NXDN network access code (NAC) being transmitted. NXDN definition for 6.25 khz bandwidth (4800 bps) NXDN definition for 12.5 khz bandwidth (9600 bps) Symbol: +3 Symbol: +1 Symbol: +3 Symbol: +1 Bit Information: 01 Bit Information: 00 Bit Information: 01 Bit Information: 00 Deviation: Hz Deviation: +350 Hz Deviation: Hz Deviation: +800 Hz Symbol: -3 Symbol: -1 Symbol: -3 Symbol: -1 Bit Information: 11 Bit Information: 10 Bit Information: 11 Bit Information: 10 Deviation: Hz Deviation: -350 Hz Deviation: Hz Deviation: -800 Hz Figure Constellation Diagram Definition and View For input signals that are not NXDN encoded, the LMR Master will still try to decode it and fit it to a symbol. This may cause some measurement results that are unexpected. For example, if a CW signal of 155 MHz was input to an LMR Master expecting a 155 MHz NXDN signal, the unit will rotate the constellation until the signal lands on the nearest constellation point, displaying a corresponding frequency error, even though the input signal is exactly at 155 MHz. S412D User Guide PN: Rev. D 18-3

230 18-2 Measurement Views NXDN Transmit Signal Analyzer (Option 530) Histogram Histogram view displays a graphical representation of the soft symbols that are being received. These are the decoded symbols after LMR Master has made a decision about where each symbol is to be decoded. The bars for each symbol represent the relative percentage that symbol was identified out of all the received symbols. Each update of the graph is a separate representation of the latest data, rather than a cumulative total. The vertical scale is fixed at 0 to 100%, with each horizontal graticule representing 10% of the total symbols received. Figure NXDN Histogram 18-4 PN: Rev. D S412D User Guide
231 NXDN Transmit Signal Analyzer (Option 530) 18-2 Measurement Views Control Channel Measurement Control Channel measurement displays a tabular view of the NXDN Control Channel. The information is presented as double rows of hex Octets, along with the time the signal was received and the Radio Access Number (RAN) of the transmitter that sent it. Typically, control channel data is collected faster than can be viewed, so the LMR Master displays 8 commands at a time, and updates about once per second when a control channel is being demodulated. Capturing all Control Channel Data If all control channel information is needed, the LMR Master can re-direct it to the RS-232 serial data port to be received and saved on a PC. In the Control Channel menu, viewed by pressing the MEAS/DISP function key, then the Control Channel soft key, press the Serial Output soft key to begin. To stop sending data to the serial port and start displaying updates, press the Serial Output soft key again to turn the function off. Note Note that the LMR Master display does not update while sending control channel data to the serial port. Serial Data from the LMR Master has the following configuration and can be captured with Hyperterminal or any Telnet client baud, 8 data bits, No parity bits, 1 stop bit, No flow control Stop Trigger LMR Master is equipped with a Stop Trigger function in Control Channel measurement. If a certain control channel operation code (opcode) is under investigation, the LMR Master can be set up to stop capturing data when a particular opcode is encountered, and the surrounding opcodes can be analyzed. Enter the opcode to capture by pressing the Trigger Value soft key. Use the numeric keypad and soft keys to enter a value from 00 to FF. Press ENTER to accept. Next, press the Trigger Location soft key to set where the captured opcode will appear on the display. Use the arrow keys to select among: Top to view the trigger Opcode and the following 16, Bottom to view the Trigger opcode and the previous 16, or Middle to see 8 opcodes before and after the Trigger. Press the Trigger ON/OFF soft key to begin the Stop Trigger operation. When the Trigger opcode is encountered, the LMR Master will stop capturing data, the Hold icon will appear at the top of the display, and the trigger line will be outlined in red. S412D User Guide PN: Rev. D 18-5

232 18-2 Measurement Views NXDN Transmit Signal Analyzer (Option 530) To re-start the capture, Press RUN/HOLD. Figure NXDN Control Channel Measurement 18-6 PN: Rev. D S412D User Guide
InterferenceHunter MA2700A
 User Guide InterferenceHunter MA2700A Handheld Direction Finding System User Guide Interference Hunter MA2700A Handheld Direction Finding System Includes GPS and Electronic Compass Anritsu Company 490
Site Master Spectrum Analyzer MS2711B
 Maintenance Manual Site Master Spectrum Analyzer MS2711B Handheld Spectrum Analyzer for Measuring, Monitoring, and Analyzing Signal Environments Anritsu Company 490 Jarvis Drive Morgan Hill, CA 95037-2809
Power Meter. Measurement Guide. for Anritsu RF and Microwave Handheld Instruments BTS Master Site Master Spectrum Master Cell Master
 Measurement Guide Power Meter for Anritsu RF and Microwave Handheld Instruments BTS Master Site Master Spectrum Master Cell Master Power Meter Option 29 High Accuracy Power Meter Option 19 Inline Peak
Site Master S311D. User Guide. Cable and Antenna Analyzer
 User Guide Site Master S311D Cable and Antenna Analyzer Anritsu Company PN: 10580-00185 490 Jarvis Drive Revision: D Morgan Hill, CA 95037-2809 Published: October 2012 USA Copyright 2003-2012 Anritsu Co.
Site Master Cable and Antenna Analyzer with Spectrum Analyzer
 Maintenance Manual Site Master Cable and Antenna Analyzer with Spectrum Analyzer S331E, 2 MHz to 4 GHz S332E, 2 MHz to 4 GHz, Spectrum Analyzer, 100 khz to 4 GHz S361E, 2 MHz to 6 GHz S362E, 2 MHz to 6
Site Master S810D/S820D
 Site Master S331D Site Master MS2712 Site Master S810D/S820D Cable and Antenna Analyzer 25 MHz to 20 GHz Site Master User s Guide WARRANTY The Anritsu product(s) listed on the title page is (are) warranted
User Guide. VNA Master MS2026B Vector Network Analyzer 5 khz to 6 GHz MS2028B Vector Network Analyzer 5 khz to 20 GHz
 User Guide VNA Master MS2026B Vector Network Analyzer 5 khz to 6 GHz MS2028B Vector Network Analyzer 5 khz to 20 GHz User Guide VNA Master Model MS202xB MS2026B Vector Network Analyzer 5 khz to 6 GHz
Cable and Antenna Analyzer for Anritsu s RF and Microwave Handheld Instruments
 Measurement Guide Cable and Antenna Analyzer for Anritsu s RF and Microwave Handheld Instruments Site Master Cell Master Anritsu Company 490 Jarvis Drive Morgan Hill, CA 95037-2809 USA Part Number: 10580-00241
MS2711D. Fast. Accurate, Repeatable, Portable Spectrum Analysis. Users Guide. MT8212A Cell Master MS2712. SiteMaster SpectrumMaster CellMaster
 Master S331DSite SiteMaster MS2712 MS2711D Spectrum Master SpectrumMaster MS2712 MT8212A Cell Master CellMaster MS2712 Spectrum Master MS2711D Fast. Accurate, Repeatable, Portable Spectrum Analysis SiteMaster
Spectrum Master MS2721B, MS2723B, and MS2724B A High Performance Handheld Spectrum Analyzer and Base Station Analyzer
 Spectrum Master MS2721B, MS2723B, and MS2724B A High Performance Handheld Spectrum Analyzer and Base Station Analyzer User s Guide MS2721B, MS2723B, and MS2724B Spectrum Master User Guide Anritsu Company
Spectrum Master MS2711D. Fast, Accurate, Repeatable, Portable Spectrum Analysis
 Spectrum Master MS2711D Fast, Accurate, Repeatable, Portable Spectrum Analysis 135 dbm noise floor +43 dbm maximum safe input power Full span sweep in 1.1 seconds Accurate Rugged Easy to use Powerful Spe
Spectrum Master. User s Guide MS2711D. Fast. Accurate, Repeatable, Portable Spectrum Analysis. SiteMaster SpectrumMaster CellMaster
 Site Master S331D MS2712 MS2711D Spectrum Master Cell Master SiteMaster SpectrumMaster MS2712 MT8212A CellMaster MS2712 Spectrum Master MS2711D Fast. Accurate, Repeatable, Portable Spectrum Analysis SiteMaster
JD723A/JD724B/JD726A Cable and Antenna Analyzers
 COMMUNICATIONS TEST & MEASUREMENT SOLUTIONS JD723A/JD724B/JD726A Cable and Antenna Analyzers Key Features Portable and lightweight handheld instrument. Built in wireless frequency bands as well as the
Spectrum Master MS2711D. Fast, Accurate, Repeatable, Portable Spectrum Analysis
 Spectrum Master MS2711D Fast, Accurate, Repeatable, Portable Spectrum Analysis Shown with new color screen option 135 dbm noise floor +43 dbm maximum safe input power Full span sweep in 1.1 seconds Accurate
Cell Master MT8212A. Cable, Antenna and Base Station Analyzer
 Cell Master Cable, Antenna and Base Station Analyzer MT8212A An Integrated Multi-Function Base Station Test Tool for Greater Flexibility and Technician Productivity From the Industry Leader in Handhe The
Spectrum Master MS2711D. Fast, Accurate, Repeatable, Portable Spectrum Analysis
 Spectrum Master MS2711D Fast, Accurate, Repeatable, Portable Spectrum Analysis Shown with new color screen option 135 dbm noise floor +43 dbm maximum safe input power Full span sweep in 1.1 seconds Accurate
Model 5100F. Advanced Test Equipment Rentals ATEC (2832) OWNER S MANUAL RF POWER AMPLIFIER
 OWNER S MANUAL RF POWER AMPLIFIER") Established 1981 Advanced Test Equipment Rentals www.atecorp.com 800-404-ATEC (2832) OWNER S MANUAL Model 5100F RF POWER AMPLIFIER 0.8 2.5 GHz, 25 Watts Ophir RF 5300 Beethoven Street Los Angeles, CA 90066
Established 1981 Advanced Test Equipment Rentals www.atecorp.com 800-404-ATEC (2832) OWNER S MANUAL Model 5100F RF POWER AMPLIFIER 0.8 2.5 GHz, 25 Watts Ophir RF 5300 Beethoven Street Los Angeles, CA 90066
34134A AC/DC DMM Current Probe. User s Guide. Publication number April 2009
 User s Guide Publication number 34134-90001 April 2009 For Safety information, Warranties, Regulatory information, and publishing information, see the pages at the back of this book. Copyright Agilent
Type N Coaxial Calibration Kit
 User Guide Type N Coaxial Calibration Kit DC to 18 GHz Model 8850CK30/31 8850-531 (A) 3/15 User Guide Type N Coaxial Calibration Kit DC to 18 GHz Model 8850CK30/31 2900 Inland Empire Boulevard Ontario,
HP 86290B RF PLUG-IN GHz HEWLETT PACKARD
 OPERATING AND SERVICE MANUAL. HP 86290B RF PLUG-IN 2.0-18.6 GHz HEWLETT PACKARD COPYRIGHT AND DISCLAIMER NOTICE Copyright - Agilent Technologies, Inc. Reproduced with the permission of Agilent Technologies
USER GUIDE 2.92mm Coaxial Calibration Kit
 USER GUIDE 2.92mm Coaxial Calibration Kit DC to 40 GHz Model 8770CK30/31 8770-532 (A) 03/16 USER GUIDE 2.92mm Coaxial Calibration Kit DC to 40 GHz Model: 8770CK30/31 Please note: This manual applies to
Cable and Antenna Analyzer. Site Master S331D/S332D. 25 MHz to 4000 MHz. The World s Leading Cable and Antenna System Analyzer.
 Site Master S331D/S332D Cable and Antenna Analyzer 25 MHz to 4000 MHz SiteMaster The World s Leading Cable and Antenna System Analyzer Site Master is the preferred cable and ant RS-232 Interface Transfer
TETRIS 1000 High Impedance Active Probe. Instruction Manual
 TETRIS 1000 High Impedance Active Probe Instruction Manual Copyright 2015 PMK GmbH All rights reserved. Information in this publication supersedes that in all previously published material. Specifications
GC723A / GC724B Cable and Antenna Analyzer
 www.gctm.net GC723A / GC724B Cable and Antenna Analyzer GC723A / GC724B Cable and Antenna Analyzer Introduction A large number of abnormal cell site problems are typically caused by the antenna system,
MS2711B. Handheld Spectrum Analyzer 100 khz to 3.0 GHz. Spectrum Analysis Anywhere, Anytime
 Anritsu Spectrum Master MS2711B Specs Provided by www.aaatesters.com MS2711B Handheld Spectrum Analyzer 100 khz to 3.0 GHz Spectrum Analysis Anywhere, Anytime THE LEADING PORTABLE SPECTRUM ANALYZER FOR
COMBILOG ANTENNA MODEL AC MHz. rev: 0202
 COMBILOG ANTENNA 30-2000 MHz MODEL AC-220 rev: 0202 WARRANTY All equipment manufactured by Com-Power Corporation is warranted against defects in material and workmanship for a period of two (2) years from
MS2711B. Handheld Spectrum Analyzer 100 khz to 3.0 GHz. Spectrum Analysis Anywhere, Anytime
 MS2711B Handheld Spectrum Analyzer 100 khz to 3.0 GHz Spectrum Analysis Anywhere, Anytime THE LEADING PORTABLE SPECTRUM ANALYZER FOR WIRELESS PROFESSIONALS SPECTRUM ANALYSIS ANYWHERE, ANYTIME The MS2711B
Signal Analysis Measurement Guide
 Signal Analysis Measurement Guide Agilent Technologies EMC Series Analyzers This guide documents firmware revision A.08.xx This manual provides documentation for the following instruments: E7401A (9 khz-
USER GUIDE. WR284 Waveguide TRL Calibration Kit GHz. Models: WR284C30\32 Series (Rev A) 03/16
 03/16") USER GUIDE WR284 Waveguide TRL Calibration Kit 2.60 3.95 GHz Models: WR284C30\32 Series 8770-512 (Rev A) 03/16 USER GUIDE WR284 Waveguide TRL Calibration Kit 2.60 3.95 GHz Models: WR284C30\32 Series Warranty
USER GUIDE WR284 Waveguide TRL Calibration Kit 2.60 3.95 GHz Models: WR284C30\32 Series 8770-512 (Rev A) 03/16 USER GUIDE WR284 Waveguide TRL Calibration Kit 2.60 3.95 GHz Models: WR284C30\32 Series Warranty
TETRIS User's Guide. High Impedance Active Probe DO177-1
 TETRIS 1500 High Impedance Active Probe User's Guide DO177-1 TETRIS 1500 Copyright 2010 Ltd. All rights reserved. Information in this publication supersedes that in all previously published material. Specifications
2015 RIGOL TECHNOLOGIES, INC.
 Service Guide DG000 Series Dual-channel Function/Arbitrary Waveform Generator Oct. 205 TECHNOLOGIES, INC. Guaranty and Declaration Copyright 203 TECHNOLOGIES, INC. All Rights Reserved. Trademark Information
Site Master. User s Guide S810D/S820D. Cable and Antenna Analyzer 25 MHz to 20 GHz. SiteMaster SpectrumMaster CellMaster
 Site Master Spectrum Master S331D Cell Master SiteMaster MS2712 MS2711D SpectrumMaster MS2712 MT8212A CellMaster MS2712 Site Master S810D/S820D Cable and Antenna Analyzer 25 MHz to 20 GHz SiteMaster SpectrumMaster
200Amp AC Clamp Meter + NCV Model MA250
 User's Guide 200Amp AC Clamp Meter + NCV Model MA250 Introduction Congratulations on your purchase of this Extech MA250 Clamp Meter. This meter measures AC Current, AC/DC Voltage, Resistance, Capacitance,
Radio Remote(s) (Installation Manual)
 (Installation Manual)") Radio Remote(s) (Installation Manual) 87 Progress Avenue, Tyngsboro, MA 01879, USA Phone (978) 649-4ECU Fax (978) 649-8363 http://www.qtiusa.com Trademarks, Version, Printing, and Copyright Trademarks
Radio Remote(s) (Installation Manual) 87 Progress Avenue, Tyngsboro, MA 01879, USA Phone (978) 649-4ECU Fax (978) 649-8363 http://www.qtiusa.com Trademarks, Version, Printing, and Copyright Trademarks
High Performance Handheld Spectrum Analyzer
 High Performance Handheld Spectrum Analyzer The Anritsu MS2721A is the most advanced ultra-portable spectrum analyzer on the market, featuring unparalleled performance and size at a modest price. Date
User s Guide. Digital AC/DC Clamp Meter Model 38394
 User s Guide Digital AC/DC Clamp Meter Model 38394 Introduction Congratulations on your purchase of Extech s 38394 AC/DC Clamp Meter. This clamp meter measures AC/DC Current to 600A, DC/AC Voltage, Resistance,
AN12165 QN908x RF Evaluation Test Guide
 Rev. 1 May 2018 Application note Document information Info Keywords Abstract Content GFSK, BLE, RF, Tx power, modulation characteristics, frequency offset and drift, frequency deviation, sensitivity, C/I
Signal Generators for Anritsu RF and Microwave Handheld Instruments
 Measurement Guide Signal Generators for Anritsu RF and Microwave Handheld Instruments BTS Master Spectrum Master Tracking Generator Option 20 Vector signal Generator Option 23 Anritsu Company 490 Jarvis
User Guide. Digital AC/DC Clamp Meter Model 38394
 User Guide Digital AC/DC Clamp Meter Model 38394 Introduction Congratulations on your purchase of Extech s 38394 AC/DC Clamp Meter. This clamp meter measures AC/DC Current to 600A, DC/AC Voltage, Resistance,
Current Probe Fixture Instruction Manual
 Current Probe Fixture Instruction Manual 1 TABLE OF CONTENTS INTRODUCTION 3 GENERAL INFORMATION 4 TEST METHODS 5 SAFETY 7 FIGURES 8 FORMULAS 10 MAINTENANCE 11 WARRANTY 12 2 INTRODUCTION figure 1 Mechanical
Agilent X-Series Signal Analyzer This manual provides documentation for the following X-Series Analyzer: CXA Signal Analyzer N9000A
 Agilent X-Series Signal Analyzer This manual provides documentation for the following X-Series Analyzer: CXA Signal Analyzer N9000A N9000A CXA Functional Tests Notices Agilent Technologies, Inc. 2006-2008
VT1586A Rack Mount Terminal Panel Installation and User s Manual
 VT1586A Rack Mount Terminal Panel Installation and User s Manual Manual Part Number: 82-0095-000 Rev. June 16, 2003 Printed in U.S.A. Certification VXI Technology, Inc. certifies that this product met
Cable and Antenna Analyzer
 Measurement Guide Cable and Antenna Analyzer for Anritsu s RF and Microwave Handheld Instruments BTS Master Anritsu Company 490 Jarvis Drive Morgan Hill, CA 95037-2809 USA http://www.anritsu.com Part Number:
Spectrum Master MS2711D
 User Guide Spectrum Master MS2711D 100 khz to 3 GHz Spectrum Analyzer Anritsu Company PN: 10580-00097 490 Jarvis Drive Revision: M Morgan Hill, CA 95037-2809 Published: September 2009 USA Copyright 2003-2009
Operator s Manual. PP016 Passive Probe
 Operator s Manual PP016 Passive Probe 2017 Teledyne LeCroy, Inc. All rights reserved. Unauthorized duplication of Teledyne LeCroy documentation materials is strictly prohibited. Customers are permitted
Vector Network Analyzer for Anritsu RF and Microwave Handheld Instruments
 Measurement Guide Vector Network Analyzer for Anritsu RF and Microwave Handheld Instruments Time Domain Option 2 Bias Tee Option 10 Vector Voltmeter Option 15 6 GHz VNA Frequency Extension Option 16 Balanced
World s Most Trusted Family of Handheld RF and Microwave Analyzers
 World s Most Trusted Family of Handheld RF and Microwave Analyzers Introducing applications specific solutions for the RF and Microwave field testing industry Site Master Site Master s seven models of
Site Master S331D/S332D. Cable and Antenna Analyzer 25 MHz to 4000 MHz. The World s Leading Cable and Antenna System Analyzer.
 Site Master Cable and Antenna Analyzer 25 MHz to 4000 MHz S331D/S332D SiteMaster The World s Leading Cable and Antenna System Analyzer Site Master is the Preferred Cable and Antenna Analyzer of Wireless
MODEL 3810/2 Line Impedance Stabilization Network
 EMC TEST SYSTEMS FEBRUARY 1996 REV C PN 399197 MODEL 3810/2 Line Impedance Stabilization Network OPERATION MANUAL USA P.O. Box 80589 Austin, Texas 78708-0589 2205 Kramer Lane, Austin, Texas 78758-4047
Site Master Model S251C Antenna and Cable Analyzer
 Site Master Model S251C Antenna and Cable Analyzer User's Guide Hand-Held Tester for Transmission Lines and other RF Components Color Front Cover only P/N: 00986-00045 WARRANTY The Anritsu product(s)
User s Guide. 400A AC/DC Clamp Meter. Model MA220
 User s Guide 400A AC/DC Clamp Meter Model MA220 Introduction Thank you for selecting the Extech MA200 AC/DC Clamp Meter. This meter measures AC/DC Current, AC/DC Voltage, Resistance, Capacitance, Frequency,
Using the USB Output Port to Charge a Device
 Table of Contents ----------------------------------- 2 Features ----------------------------------------------- 3 Controls and Functions ---------------------------------- 4 ER210 Power Sources -----------------------------------
MS2711B Hand-Held Spectrum Analyzer
 MS2711B Hand-Held Spectrum Analyzer Programming Manual Hand-Held Spectrum Analyzer, for Measuring, Monitoring and Analyzing Signal Environments WARRANTY The Anritsu product(s) listed on the title page
ER200 COMPACT EMERGENCY CRANK DIGITAL WEATHER ALERT RADIO OWNER S MANUAL
 ER200 COMPACT EMERGENCY CRANK DIGITAL WEATHER ALERT RADIO OWNER S MANUAL Table of Contents -------------------------------------- 2 Features ----------------------------------------------- 3 Controls and
FCN4760. Frequency Converter Module. User s Guide. 4.7 GHz to 6.0 GHz
 FCN4760 4.7 GHz to 6.0 GHz Frequency Converter Module User s Guide 490 JARVIS DRIVE MORGAN HILL, CA 95037-2809 P/N: 10580-00081 REVISION: C PRINTED: OCTOBER 2004 COPYRIGHT 2003-2004 ANRITSU CO. Table of
GT-1050A 2 GHz to 50 GHz Microwave Power Amplifier
 Established 1981 Advanced Test Equipment Rentals www.atecorp.com 800-404-ATEC (2832) Giga-tronics GT-1050A Microwave Power Amplifier GT-1050A 2 GHz to 50 GHz Microwave Power Amplifier Operation Manual
CT-2 and CT-3 Channel Taggers OPERATION MANUAL
 CT-2 and CT-3 Channel Taggers OPERATION MANUAL Trilithic Company Profile Trilithic is a privately held manufacturer founded in 1986 as an engineering and assembly company that built and designed customer-directed
Advanced Test Equipment Rentals ATEC (2832)
") Established 1981 Advanced Test Equipment Rentals www.atecorp.com 800-404-ATEC (2832) A.H. Systems Model Active Monopole Antennas Active Monopole Antenna Series Operation Manual 1 TABLE OF CONTENTS INTRODUCTION
Established 1981 Advanced Test Equipment Rentals www.atecorp.com 800-404-ATEC (2832) A.H. Systems Model Active Monopole Antennas Active Monopole Antenna Series Operation Manual 1 TABLE OF CONTENTS INTRODUCTION
Installation & Operation Manual SAGA1-K Series Industrial Radio Remote Control
 Installation & Operation Manual SAGA1-K Series Industrial Radio Remote Control Gain Electronic Co. Ltd. Table Of Contents Safety Considerations ------------------------------------------------------------2
POWER SENSORS (MA24XXA/B/D and MA2400XA) OPERATION MANUAL
 OPERATION MANUAL") POWER SENSORS (MA24XXA/B/D and MA2400XA) OPERATION MANUAL 490 JARVIS DRIVE MORGAN HILL, CA 95037-2809 P/N: 10585-00004 REVISION: R PRINTED: OCTOBER 2008 COPYRIGHT 1998-2008 ANRITSU CO. WARRANTY The ANRITSU
POWER SENSORS (MA24XXA/B/D and MA2400XA) OPERATION MANUAL 490 JARVIS DRIVE MORGAN HILL, CA 95037-2809 P/N: 10585-00004 REVISION: R PRINTED: OCTOBER 2008 COPYRIGHT 1998-2008 ANRITSU CO. WARRANTY The ANRITSU
2001A. 200KHz Function Generator Instruction Manual. 99 Washington Street Melrose, MA Phone Toll Free
 2001A 200KHz Function Generator Instruction Manual 99 Washington Street Melrose, MA 02176 Phone 781-665-1400 Toll Free 1-800-517-8431 Visit us at www.testequipmentdepot.com WARRANTY Global Specialties
SPM-50 RF Spectrum Power Meter PC Software User Manual
 SPM-50 RF Spectrum Power Meter PC Software User Manual Shineway Technologies, Inc. Notices Copyright 2014, ShinewayTech, All rights reserved. No part of this manual may be reproduced in any form or by
Suitable firmware can be found on Anritsu's web site under the instrument library listings.
 General Caution Please use a USB Memory Stick for firmware updates. Suitable firmware can be found on Anritsu's web site under the instrument library listings. If your existing firmware is older than v1.19,
GM8036 Laser Sweep Optical Spectrum Analyzer. Programming Guide
 GM8036 Laser Sweep Optical Spectrum Analyzer Programming Guide Notices This document contains UC INSTRUMENTS CORP. proprietary information that is protected by copyright. All rights are reserved. This
Model 7000 Low Noise Differential Preamplifier
 Model 7000 Low Noise Differential Preamplifier Operating Manual Service and Warranty Krohn-Hite Instruments are designed and manufactured in accordance with sound engineering practices and should give
TA MHz oscilloscope probe TA MHz oscilloscope probe
 TA375 100 MHz oscilloscope probe TA386 200 MHz oscilloscope probe User's Guide X1 X10 TA386 X1/X10 Max. 600 Vp Introduction This passive high-impedance oscilloscope probe is suitable for most oscilloscopes
Cell Master. User s Guide MT8212B. An Integrated, Handheld Multi-function Base Station Test Tool for Greater Flexibility and Technician Productivity
 Site Master Spectrum Master S331D Cell Master SiteMaster MS2712 MS2711D SpectrumMaster MS2712 MT8212A CellMaster MS2712 Cell Master MT8212B An Integrated, Handheld Multi-function Base Station Test Tool
User s Manual. Ground Resistance Clamp On Tester MODEL
 User s Manual Ground Resistance Clamp On Tester MODEL 382357 Warranty EXTECH INSTRUMENTS CORPORATION warrants the basic instrument to be free of defects in parts and workmanship for one year from date
Agilent 4396B Network/Spectrum/Impedance Analyzer PERFORMANCE TEST MANUAL SERIAL NUMBERS. This manual applies directly to instruments with serial
 Agilent 4396B Network/Spectrum/Impedance Analyzer PERFORMANCE TEST MANUAL SERIAL NUMBERS This manual applies directly to instruments with serial number prex JP1KE, or rmware revision 1.01 and below. For
WARRANTY LIMITATION OF WARRANTY TRADEMARK ACKNOWLEDGMENTS NOTICE UPDATES
 Site Master S331D MS2712 MS2711D Spectrum Master Cell Master SiteMaster SpectrumMaster MS2712 MT8212A CellMaster MS2712 Site Master S331D/S332D Cable and Antenna Analyzer Site Master is the preferred cable
Site Master S331D MS2712
 Site Master S331D MS2712 MS2711D Spectrum Master Cell Master SiteMaster SpectrumMaster MS2712 MT8212A CellMaster MS2712 Site Master S331D/S332D Cable and Antenna Analyzer Site Master is the preferred cable
Bulk Current Injection Probe Test Procedure
 Bulk Current Injection Probe Test Procedure 1 TABLE OF CONTENTS INTRODUCTION 3 GENERAL INFORMATION 4 TEST METHODS 6 SAFETY 8 FIGURES 9 FORMULAS 12 MAINTENANCE 13 WARRANTY 14 2 INTRODUCTION CURRENT PROBE
Model 9305 Fast Preamplifier Operating and Service Manual
 Model 9305 Fast Preamplifier Operating and Service Manual This manual applies to instruments marked Rev 03" on rear panel. Printed in U.S.A. ORTEC Part No.605540 1202 Manual Revision B Advanced Measurement
AMERITRON RCS-12 AUTOMATIC ANTENNA SWITCH
 AMERITRON RCS-12 AUTOMATIC ANTENNA SWITCH INSTRUCTION MANUAL PLEASE READ THIS MANUAL BEFORE OPERATING THIS EQUIPMENT! 116 Willow Road Starkville, MS 39759 USA 662-323-8211 Version 3B Printed in U.S.A.
TECHNICAL SPECIFICATION FOR RF (TEST &MEASUREMENT) DEVICE
 DEVICE") TECHNICAL SPECIFICATION FOR RF (TEST &MEASUREMENT) DEVICE Test and measuring device supports the following measurement functions: A- Cable and Antenna Analyzer, 2 MHz to 4 GHz. B- Spectrum Analyzer, 100
TECHNICAL SPECIFICATION FOR RF (TEST &MEASUREMENT) DEVICE Test and measuring device supports the following measurement functions: A- Cable and Antenna Analyzer, 2 MHz to 4 GHz. B- Spectrum Analyzer, 100
OVA-50 Optical Variable Attenuator User s Manual
 OVA-50 Optical Variable Attenuator User s Manual Shineway Technologies, Inc. All rights reserved. Safety Instructions The WARNING sign denotes a hazard. It calls attention to a procedure, practice, or
COUPLING DECOUPLING NETWORK MODEL CDN-AF4
 COUPLING DECOUPLING NETWORK MODEL CDN-AF4 II Warranty Com-Power warrants to its Customers that the products it manufactures will be free from defects in materials and workmanship for a period of 2 years.
8472B Crystal Detector. Operating and Service Manual
 8472B Crystal Detector Operating and Service Manual Part number: 08472-90022 Printed in USA Print Date: May 2001 Supersedes: April 1999 Notice The information contained in this document is subject to change
Spectrum Master MS2711D
 Site Master S331D MS2712 MS2711D Spectrum Master Cell Master SiteMaster SpectrumMaster MS2712 MT8212A CellMaster MS2712 Spectrum Master MS2711D Fast. Accurate, Repeatable, Portable Spectrum Analysis SiteMaster
IS7705. Installation & Operation Manual AUDIO INTEGRATION KIT. TranzIt LINK
 GET CONNECTED Installation & Operation Manual AUDIO INTEGRATION KIT IS7705 Note to Readers, The information contained within the following documentation is subject to change without notice. Features discussed
Model 9302 Amplifier-Discriminator Operating and Service Manual
 Model 9302 Amplifier-Discriminator Operating and Service Manual Printed in U.S.A. ORTEC Part No. 733690 1202 Manual Revision C Advanced Measurement Technology, Inc. a/k/a/ ORTEC, a subsidiary of AMETEK,
COMMUNICATIONS TEST & MEASUREMENT SOLUTIONS. JD747A RF Analyzer
 COMMUNICATIONS TEST & MEASUREMENT SOLUTIONS JD747A RF Analyzer Introduction The RF Analyzer JD747A is an ideal tool for installation and maintenance of cellular base stations. The JD747A combines the functionality
PAMS. User s Manual. Portable Attenuation Measurement System. The solution for making easy shielding effectiveness measurements.
 PAMS Portable Attenuation Measurement System User s Manual The solution for making easy shielding effectiveness measurements. 310-010042-001 TABLE OF CONTENTS Warranty Statement 1 Chapter 1 General Information
User s Guide. MultiView Series Digital MultiMeters Models: MV110 MV120 MV130
 User s Guide MultiView Series Digital MultiMeters Models: MV110 MV120 MV130 WARRANTY EXTECH INSTRUMENTS CORPORATION warrants this instrument to be free of defects in parts and workmanship for one year
JD746A/JD786A CellAdvisor RF Analyzer
 JD746A/JD786A CellAdvisor RF Analyzer JD746A JD786A Spectrum Analyzer: 100 khz to 4 GHz 9 khz to 8 GHz Cable and Antenna Analyzer: 5 MHz to 4 GHz 5 MHz to 6 GHz RF Power Meter: 10 MHz to 4 GHz 10 MHz to
Mobile Activation Case
 Mobile Activation Case Models MAC-01 and MAC-02 Description, Specifications, and Operations Manual 25500128 Rev. A1 0817 Printed in U.S.A. Copyright 2017 Federal Signal Corporation Limited Warranty This
AM-510 Commercial / Residential Multimeter. AM-510-EUR Digital Multimeter. Users Manual
 AM-510 Commercial / Residential Multimeter AM-510-EUR Digital Multimeter Users Manual AM-510 Commercial / Residential Multimeter AM-510-EUR Digital Multimeter English Users Manual Limited Warranty and
DM-46 Instruction Manual
 Auto Meter Products Inc. Test Equipment DM-46 Instruction Manual Automotive Multimeter and Inductive Amp Probe The DM-46 is the auto industry s answer to pocket portability in a 20 2650-1552-00 3/8/11
Model 863 Quad Timing Filter Amplifier Operating and Service Manual
 Model 863 Quad Timing Filter Amplifier Operating and Service Manual Printed in U.S.A. ORTEC Part No. 733960 0411 Manual Revision C Advanced Measurement Technology, Inc. a/k/a/ ORTEC, a subsidiary of AMETEK,
Oberebenestrasse Bremgarten Switzerland Tel Fax
 Oberebenestrasse 11 5620 Bremgarten Switzerland Tel. +41 56 640 06 70 Fax. +41 56 640 06 74 Single Phase - Battery Operated Automatic Transformer Turns Ratiometer Test System Model: TR-1 Model: TR-1P Instruction
COM-POWER OPERATION MANUAL ACS W
 COM-POWER OPERATION MANUAL For the ACS-250-100W 150 khz to 250 MHz 100W Power Amplifier Page 1 of 15 MANUAL_ACS-250-100W Rev. M02.15 Table of Contents Important Safety Precautions.....3 Introduction..5
AMP-13 OPERATOR S MANUAL
 AMP-13 OPERATOR S MANUAL Version 2.0 Copyright 2008 by Vatell Corporation Vatell Corporation P.O. Box 66 Christiansburg, VA 24068 Phone: (540) 961-3576 Fax: (540) 953-3010 WARNING: Read instructions carefully
41P Portable Calibrator User Manual
 Trig-Tek 41P Portable Calibrator User Manual Publication No. 980961 Rev. A Astronics Test Systems Inc. 4 Goodyear, Irvine, CA 92618 Tel: (800) 722-2528, (949) 859-8999; Fax: (949) 859-7139 atsinfo@astronics.com
ME7220A. Radar Test System (RTS) Target Simulation & Signal Analysis for Automotive Radar Exceptional Performance at an Affordable Price.
 Target Simulation & Signal Analysis for Automotive Radar Exceptional Performance at an Affordable Price.") ME7220A Test System (RTS) 76 to 77 GHz Target Simulation & Signal Analysis for Automotive Exceptional Performance at an Affordable Price The Challenge The installation of collision warning and Adaptive
ME7220A Test System (RTS) 76 to 77 GHz Target Simulation & Signal Analysis for Automotive Exceptional Performance at an Affordable Price The Challenge The installation of collision warning and Adaptive
Option 10 Complex Modulation
 User Guide Option 10 Complex Modulation Waveform Download Software for the MG3690A/B/C Series Synthesized Signal Generator Anritsu Company 490 Jarvis Drive Morgan Hill, CA 95037-2809 USA Part Number: 10370-10327
HTA125A/250A. Power Amplifiers. Installation & Use Manual
 HTA125A/250A Power Amplifiers Installation & Use Manual Specifications subject to change without notice. 2010 Bogen Communications, Inc. All rights reserved. 54-5832-04B 1011 NOTICE: Every effort was made
Field Hub Installation Guide. P/N Rev. C 05/15
 Field Hub Installation Guide P/N016-0171-380 Rev. C 05/15 E21714 Copyright 2015 Disclaimer While every effort has been made to ensure the accuracy of this document, Raven Industries assumes no responsibility
712B. Users Manual. RTD Calibrator. Test Equipment Depot Washington Street Melrose, MA TestEquipmentDepot.
 712B RTD Calibrator Test Equipment Depot - 800.517.8431-99 Washington Street Melrose, MA 02176 - TestEquipmentDepot.com Users Manual January 2014 2014 Fluke Corporation. All rights reserved. Specifications
Amplified High Speed Photodetectors
 Amplified High Speed Photodetectors User Guide 3340 Parkland Ct. Traverse City, MI 49686 USA Page 1 of 6 Thank you for purchasing your Amplified High Speed Photodetector from EOT. This user guide will
Model 113 Scintillation Preamplifier Operating and Service Manual
 Model 113 Scintillation Preamplifier Operating and Service Manual Printed in U.S.A. ORTEC Part No. 717560 1202 Manual Revision B Advanced Measurement Technology, Inc. a/k/a/ ORTEC, a subsidiary of AMETEK,