MADE EASY a step-by-step guide
|
|
|
- Rolf Heath
- 5 years ago
- Views:
Transcription

1


2 Perspective MADE EASY a step-by-step guide Coming soon! June 2015 ROBBIE LEE


3 One-Point Perspective Let s start with one of the simplest, yet most useful approaches to perspective drawing: one-point perspective. It can help you add convincing depth to virtually anything with edges, which is a lot of stuff. It can even help you create entire scenes like the room I m in right now All thanks to a single vanishing point in the middle of the picture. by the time you finish this chapter, you should be able to: identify a one-point perspective system. recognize when and when not to use onepoint perspective. draw a variety of objects with one-point perspective depth. Find the center of rectangles in perspective. Draw vertical and horizontal lines consistently. Check out IMPACT-books.com for free demonstrations and extra content. 7

 HONK! any edges that go straight across your field of vision (shown in blue) should be drawn with perfectly horizontal lines.")
. other edges are parallel to your line of sight and perpendicular to your shoulders.")

4 one-point an alternative perspective approach overview LET S begin WITH A BRIEF EXPLANATION OF HOW ONE-POINT PERSPECTIVE WORKS. say you re in the middle of the road, looking straight ahead at some boxes, and you want to draw what you see. As long as you keep looking straight out, your drawing would look something like this. notice that the vertical edges of the boxes are drawn with vertical lines. (sometimes it s not so obvious.) HONK! any edges that go straight across your field of vision (shown in blue) should be drawn with perfectly horizontal lines. parallel to shoulders = horizontal lines you could also think of these lines as being parallel to your shoulders (as long as you don t turn your head or shift your eyes). other edges are parallel to your line of sight and perpendicular to your shoulders. But in your drawing they would, as if they re all lined up to a single vanishing point (V.P.) in the middle of the picture. these lines would never intersect in reality, no matter how long they are this last behavior, where parallel lines appear to go to a vanishing point, is called convergence. and convergence to a single vanishing point in the middle of the picture, along with horizontal and vertical lines, is the essence of one-point perspective. 8 Visit IMPACT-books.com/perspective-made-easy for cool bonus materials!


 of the rectangles to the")


5 1 one-point perspective boxes the most common strategy for drawing objects in one-point perspective is to start with a simple box. let s draw a few and then turn them into everyday objects. place a vanishing point in the middle of your picture and draw some rectangles with horizontal and vertical lines. These simple rectangles will be 2 connect the vertices (corners) of the rectangles to the vanishing point. shelf book toaster bed 3 draw the back edges by redrawing the original vertical and horizontal lines. 4 add lines to the front of the objects using additional horizontal and vertical lines. Later you ll learn how to recognize how far back to go, but for now use your best guess. 5 Wrap the lines around the sides and tops, and angle them towards the vanishing point. continue to use only horizontal, vertical or vanishing point lines, even inside the objects! 6 round off the edges and add details. be aware of line thickness as you work. i use thick lines for the outside, thin lines for the inside and broken lines for soft edges. 10


6 distance between an vanishing alternative points approach and cone of vision So we know the vanishing points go on the horizon line, but where exactly? When we draw, we re not really drawing an entire field of vision We re simply drawing a tiny piece of it in the middle. This next part is kind of tricky, so if you have an extra brain, go ahead and put it in. that s why drawings normally don t include all the curvature and distortion of our peripheral vision. this smaller excerpt of the field of vision is called the picture plane. Like the viewfinder on a camera, it s a tiny slice of the 3-d world around you, We can simulate the projected onto a 2-d surface. concept of limiting our field of vision to a picture plane by using our hands AND CLOSING ONE EYE. I can easily adjust how much is captured in my picture plane by moving my hands closer in or farther out. for example, if i put my hands here, the 180 I normally see is limited to a tiny this restricted field of vision is known as a cone of vision*. Scooting my hands in a bit opens the cone of vision up to 60. with my hands pressed up against my face until it hurts, I m at *A CONE implies a CIRCLE, BUT THE PICTURE PLANE IS ALMOST ALWAYS A RECTANGLE. THAT CAN BE CONFUSING! the important thing to remember is that the picture plane is the part of your field of vision you re actually drawing, and the cone of vision is what determines how wide (and tall) your picture plane is. 40 Visit IMPACT-books.com/perspective-made-easy for cool bonus materials!


7 There s a strange, inverse relationship between the cone of vision and the distance between the vanishing points. putting the vanishing points this close inside the picture plane means i m cramming my entire 180 field of vision into the picture. it s so distorted that i actually have to use curved lines to draw it! if i scoot the vanishing points out to the very edge of the picture plane, i m restricting my field of vision to a more reasonable 90 cone of vision. this is still pretty wide, so there s still quite a bit of distortion from cramming that much of the scene into the picture plane. vanishing points at the edge of the picture equals a 90 cone of vision. putting the vanishing points outside the picture plane creates a narrower cone of vision and therefore less distortion. that s usually what we want. vanishing points here = about a 50 cone of vision Going back to the camera analogy, close-in vanishing points are the equivalent of standing close to your subject and zooming out, and spread-out vanishing points are like standing far away from your subject and zooming in. Check out IMPACT-books.com for free demonstrations and extra content. 41


 tape down strips")


8 how to place an alternative vanishing points approach off the page how far out you put your vanishing points is really up to you. it just depends on how much you want to cram into your picture and how comfortable you are with freaky distortion. For most drawings, estimating about 2 /3 of the page s width and scooting each vanishing point that far off the edge of the page works pretty well. Of course, you ll need to adapt that rule for irregular shapes. FOR REALLY TALL pictures, scoot EACH POINT out further (one page width perhaps) tape down strips of paper. this is great for classrooms. the strips can create an uneven surface, though, so remove them before you do any final line work. draw on the table. if you really need accuracy, tape your picture down first or draw a few guidelines on the table for when your paper moves. scoot them out a little less for really wide pictures. so long as they re far out enough that things don t look oddly distorted, you re okay. but don t scoot them too far out or everything will just look flat. but no matter what you decide, there s a practical problem: what do you draw them on exactly? draw small! your picture plane doesn t have to be the size of your paper. you can draw small and enlarge and trace it, use it as a study for a bigger drawing, or just crop it and let it be. Wing it. Just imagine where the vanishing points are. You know they re on the horizon line, so you just have to remember how far off the edge of the paper they are. 42 Visit IMPACT-books.com/perspective-made-easy for cool bonus materials!
9 two-point perspective boxes now that we know where, why and upon what to place our vanishing points, let s draw some boxes! one at eye level (a common sight), one below eye level (also common), and one above eye level (very rare). it can be helpful to picture the first few lines in a two-point box drawing as if you were drawing a stick figure in pain, WITH ITS ARMS AND LEGS BEING PULLED BY THE VANISHING POINTS. 1 draw a horizon line and add two vanishing points FAR OFF THE EDGE OF THE PICTURE. 3 draw two vertical lines to finish the box. 1 repeat steps 1 and 2 from above, but keep everything below the horizon line. it s okay, i m into it! 2 2 draw a vertical line that overlaps the horizon line. connect its top and bottom to the vanishing points. add two vertical lines to create a casual chevron shape. 3 yeah, do it! For the top of the box, connect the top left corner to the right vanishing point, and the top right corner to the left vanishing point. 1 for a box above the horizon line, simply reflect the previous steps over the horizon line! once again, draw that horizon line and the stick figure, but this time keep it above the horizon line. 2 draw two vertical lines to create a chevron shape. 3 connect the bottom left corner to the right vanishing point and the bottom right corner to the left vanishing point. ooooh! remember: The object s position relative to the horizon line is what determines whether you should draw its top or bottom (or neither). 43


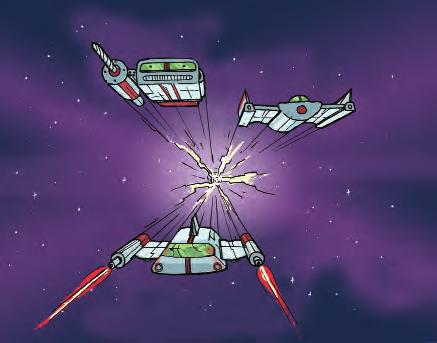
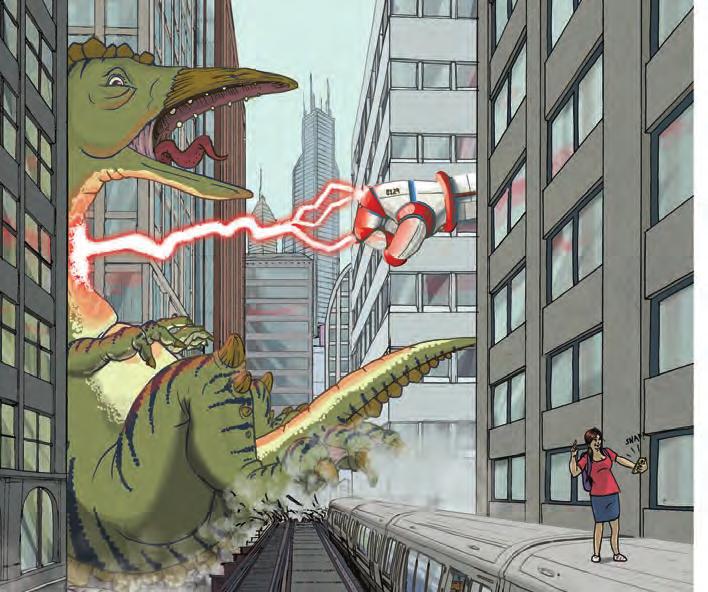
10 MECHANIKA Revised & Updated Creating the Art of Space, Aliens, Robots and Sci-Fi Coming soon in September 2015! DOUG CHIANG Executive Creative Director on the Star Wars films

11 Free-form Designing C-1 military robot One of my favorite techniques is free-form designing. I start with only a vague idea of what I want to do in this case, a large military robot. I purposely don t plan ahead, because I want the drawing to evolve and take on a life of its own, leading me in unexpected directions. Tools Surface Premium white 28-lb. (105gsm) color copier paper, 11" 17" (28cm 43cm) Markers Cool Grey 30%, 50%, 60%, 70% Other 8-inch (20cm) 45 /90 plastic triangle with inking edge 12-inch (30cm) metal ruler Air marker system Daler-Rowney Pro White opaque watercolor paint Fine-tip black pen Pointed round kolinsky sable brush, 1/16" (2mm) diameter Small and large ellipse guides, sizes Stage 1 Sketching Using the Cool Grey 30% marker, start sketching shapes, any shapes. Eventually I ended up with an armored turtle-like machine. This was a good start, but I thought the overall proportions weren t unique. Stage 2 Continued Exploration I made the body more dome-shaped, with a central eye in the front to give it direction. This was better but the overall shape was still rather bland. I kept the single eye but moved it up to the top of the body, then made the body taller and narrower. Immediately, the new silhouette was more interesting. At this stage, notice how all the marker lines from the trial-and-error explorations have created positive and negative shapes. 80

12 Stage 3 Construction Lines and Defining Details With a fine-tip pen, draw in construction lines to anchor the amorphous marker sketch and give it structure. Working from front to back, start the detailed pen work, outlining the vague marker shapes. I turned mine into hinges, joints and, finally, a leg. Stage 4 Final Detailed Lines Sometimes it s hard to see all the shapes immediately. Keep moving around the drawing; this will ensure you don t overwork any particular section. Complete the final details, but leave the two far legs unfinished. This allows the viewer s imagination to fill in what is not drawn, keeping the drawing fresh and interesting. Stage 5 Adding Tones With the Cool Grey 30%, 50%, 60% and 70% markers, start adding tones, working from front to back, large areas to small. Note that you re adding the tones from front to back instead of back to front in this case because the dark tones of the shadow areas will clean up marker bleeds and help define the leg shapes. Move fast so the markers don t dry out between applications. Stages 5 and 6 should be finished in less than twenty minutes. 81

13 Stage 6 Finished Tones Finish adding tones, but don t add tone to everything. Notice again that the two far legs are left unfinished. This, in combination with the original markers from Stages 1 and 2, keeps the drawing loose and alive. Stage 7 Adding a Background Gradation Sometimes, all the exploration can get messy, so it s necessary to unify the drawing. Do this by adding a simple background gradation using the Cool Grey 70% marker with an air marker system. 82

14 Stage 8 Adding Highlights As a final touch, add highlights with Pro White. The highlights lend extra detail and a sense of dimension to the form. You can also use Pro White to clean up edges if necessary, but use it sparingly. It is not meant to be an eraser. 83
.VP CREATING AN INVENTED ONE POINT PERSPECTIVE SPACE
 PAGE ONE Organize an invented 1 point perspective drawing in the following order: 1 Establish an eye level 2 Establish a Center Line Vision eye level vision Remember that the vanishing point () in one
Learn how to draw this World War II plane and other aircraft in this article.
 How to Draw Planes Drawing can be fun -- and it's not as hard as you may think. One of the secrets of drawing is that any object can be broken down into its smaller parts. By following these step-by-step
In addition to one-point perespective, another common perspective
 CHAPTR 5 Two-Point Perspective In addition to one-point perespective, another common perspective drawing technique is two-point perspective, illustrated in Figure 5.1. Unless otherwise stated, we will
ART 2 Summer Homework:
 ART 2 Summer Homework: Dear Art 2 Students who have taken Art 1 for high school credit in middle school. In order to ease the transition to high school and make sure you are prepared to be in an upper
NAME: PERIOD: Perspective Packet (Week One)
") NAME: PERIOD: Perspective Packet (Week One) The following are your beginning assignments for perspective. You are to complete ONE page at a time. When you finish each page show it to me to sign off and
NAME: PERIOD: Perspective Packet (Week One) The following are your beginning assignments for perspective. You are to complete ONE page at a time. When you finish each page show it to me to sign off and
ONE-POINT PERSPECTIVE
 NAME: PERIOD: PERSPECTIVE Linear Perspective Linear Perspective is a technique for representing 3-dimensional space on a 2- dimensional (paper) surface. This method was invented during the Renaissance
Perspective Notes 8 th Grade Art
 Perspective Notes 8 th Grade Art Perspective Perspective is the representation of three-dimensional objects on a flat twodimensional surface. In perspective drawing, objects are made to recede in space
12. Creating a Product Mockup in Perspective
 12. Creating a Product Mockup in Perspective Lesson overview In this lesson, you ll learn how to do the following: Understand perspective drawing. Use grid presets. Adjust the perspective grid. Draw and
You will need 9x12 blue construction paper, SOFT LEAD pencil colors, an eraser, and a metric ruler.
 Here is a nice picture for a beginner to start using color. This is a copy of the black and white barn drawing so if you wish you can do that one first. Scroll down. You will need 9x12 blue construction
Sketch technique. Introduction
 Sketch technique Introduction Although we all like to see and admire well crafted illustrations, as a professional designer you will find that these constitute a small percentage of the work you will produce.
Op Art Pinwheel Side 1 Choices
 Op Art Pinwheel Side 1 Choices 1. 1) Draw an X from corner to corner. Then draw a vertical line and horizontal line that match up in the center. 2) draw curved lines, spaced about 1/2" apart, between the
One Point Perspective Drawing/Painting
 One Point Perspective Drawing/Painting Grade: 4 Medium: Drawing and Painting Learning Objective: Students will use one point perspective to create a piece of art that has a 3D appearance. Authors: Heather
Community-based Art Curriculum Archive
 California State University, San Bernardino CSUSB ScholarWorks Curricula Community-based Art Curriculum Archive 6-2017 Beginning Drawing Jaime Hudson Catherine French Follow this and additional works at:
elements of design worksheet
 elements of design worksheet Line Line: An element of art that is used to define shape, contours, and outlines, also to suggest mass and volume. It may be a continuous mark made on a surface with a pointed
Leaving Certificate Technology
 Leaving Certificate Technology Core Module Resource: Communications and Graphics Media Communications and Graphics Media Resource Document Material and Layout Range of tasks exploring topics and learning
Line Line Characteristic of Line are: Width Length Direction Focus Feeling Types of Line: Outlines Contour Lines Gesture Lines Sketch Lines
 Line Line: An element of art that is used to define shape, contours, and outlines, also to suggest mass and volume. It may be a continuous mark made on a surface with a pointed tool or implied by the edges
Drawing: technical drawing TECHNOLOGY
 Drawing: technical drawing Introduction Humans have always used images to communicate. Cave paintings, some of which are over 40,000 years old, are the earliest example of this artistic form of communication.
TECHNICAL INFORMATION Crime Scene Template Catalog No. CST1
 SIRCHIE Products Vehicles Training Copyright 2010 by SIRCHIE All Rights Reserved. TECHNICAL INFORMATION Crime Scene Template Catalog No. CST1 INTRODUCTION When most criminal cases go to court either the
Elements of Art: Space
 Creating Depth with Size 1) In the top third of your page, draw a horizon line (line across the page for your horizon) and objects in the background that will suit your own art piece. Draw lightly in pencil.
Complete Drawing and Painting Certificate Course
 Complete Drawing and Painting Certificate Course Title: Unit Three Shading and Form Medium: Drawing in graphite pencil Level: Beginners Week: Two Course Code: Page 1 of 15 Week Two: General overview Last
Perspective Drawing Skills Packet
 Perspective Drawing Skills Packet Source: http://www.studentartguide.com/articles/one-pointperspective-drawing This article contains everything an Art student needs to know about drawing in one point perspective.
COPYRIGHTED MATERIAL. Overview
 In normal experience, our eyes are constantly in motion, roving over and around objects and through ever-changing environments. Through this constant scanning, we build up experience data, which is manipulated
What does two-point perspective look like?
 What does two-point perspective look like? corner view of a building Felix Caretto In perspective drawing, every set of parallel lines has its own vanishing point. When viewing things in two-point perspective,
Name: Period: THE ELEMENTS OF ART
 Name: Period: THE ELEMENTS OF ART Name: Period: An element of art that is used to define shape, contours, and outlines, also to suggest mass and volume. It may be a continuous mark made on a surface with
COPYRIGHTED MATERIAL OVERVIEW 1
 OVERVIEW 1 In normal experience, our eyes are constantly in motion, roving over and around objects and through ever-changing environments. Through this constant scanning, we build up experiential data,
Elements Of Art Study Guide
 Elements Of Art Study Guide General Elements of Art- tools artists use to create artwork; Line, shape, color, texture, value, space, form Composition- the arrangement of elements of art to create a balanced
The Elements and Principles of Design. The Building Blocks of Art
 The Elements and Principles of Design The Building Blocks of Art 1 Line An element of art that is used to define shape, contours, and outlines, also to suggest mass and volume. It may be a continuous mark
LESSON 11 - LINEAR PERSPECTIVE
 LESSON 11 - LINEAR PERSPECTIVE Many amateur artists feel they don't need to learn about linear perspective thinking they just want to draw faces, cars, flowers, horses, etc. But in fact, everything we
Draw Comic Book. action. Techniques for creating dynamic superhero poses and action LEE GARBETT. Press escape to return to normal view
 Draw Comic Book action Techniques for creating dynamic superhero poses and action LEE GARBETT Basic Tools From your imagination to thumbnails and roughs, through to your finished inked piece ready for
Develop an Interior perspective from a floor plan using 2 points. using orthographic projection techniques
 Develop an Interior perspective from a floor plan using 2 points using orthographic projection techniques Obtain a floor of the space to be drawn Digital or hand drawn plan Plan must be to scale Often
HOW TO MAKE A R2D2 PENCIL HOLDER
 HOW TO MAKE A R2D2 PENCIL HOLDER By Kaicie Messer 1 Introduction This set of instructions explains how to make a R2D2 pencil holder. It will not detail other characters. Any person of any age and skill
Lesson 6: Introduction to One and Two Point Perspective
 Lesson 6: Introduction to One and Two Point Perspective By Darlene Nguyen - July 18, 2017 0 329 In this lesson, I m going to introduce one and two-point linear perspective. Perspective drawing is a way
How to Make a Template
 Page 1 of 10 How to Make a Template TOOL LIST: Template Material: Templates can be made of different materials but we prefer that you use our template material. We offer rolls that are 50ft x 52in and.007
Perspective in Art. Yuchen Wu 07/20/17. Mathematics in the universe. Professor Hubert Bray. Duke University
 Perspective in Art Yuchen Wu 07/20/17 Mathematics in the universe Professor Hubert Bray Duke University Introduction: Although it is believed that science is almost everywhere in our daily lives, few people
UNIT 2 (of 5): Shape, Form & Perspective (16 hours = 1 credit)
: Shape, Form & Perspective (16 hours = 1 credit)") Art I A Elements of Art UNIT 2 (of 5): Shape, Form & Perspective (16 hours = 1 credit) Independent Study Materials Needed: Homework packet Paper Ruler Black Fine Point Marker Pencil Eraser Colored media
Art I A Elements of Art UNIT 2 (of 5): Shape, Form & Perspective (16 hours = 1 credit) Independent Study Materials Needed: Homework packet Paper Ruler Black Fine Point Marker Pencil Eraser Colored media
Table of Contents DSM II. Lenses and Mirrors (Grades 5 6) Place your order by calling us toll-free
 Place your order by calling us toll-free") DSM II Lenses and Mirrors (Grades 5 6) Table of Contents Actual page size: 8.5" x 11" Philosophy and Structure Overview 1 Overview Chart 2 Materials List 3 Schedule of Activities 4 Preparing for the Activities
DSM II Lenses and Mirrors (Grades 5 6) Table of Contents Actual page size: 8.5" x 11" Philosophy and Structure Overview 1 Overview Chart 2 Materials List 3 Schedule of Activities 4 Preparing for the Activities
Product design: Communicating your design proposals
 Product design: Communicating your design proposals In the world of business and industry design proposals can only be turned into saleable products if the designers communicate their proposals effectively.
How to Draw Comics the Marvel Way (1988)
") Homeschool l ear ni ng. com DVD Learning Guide How to Draw Comics the Marvel Way (1988) A Homeschool Learning Network Learning Guide Page 1 of 7 Format: Age Levels: Genre: Category: Rating: Length: Producer:
Homeschool l ear ni ng. com DVD Learning Guide How to Draw Comics the Marvel Way (1988) A Homeschool Learning Network Learning Guide Page 1 of 7 Format: Age Levels: Genre: Category: Rating: Length: Producer:
So once you get your 12 pieces sewn together, that s going to give you the width for your background fabric. And then I went ahead and sewed 8 half ch
 Hi, I m Jenny from the Missouri Star Quilt Company. Every time I do a trunk show, I show this wall hanging. I ve fallen in love with the Dresden, and I show a lot of different Dresden things, and this
Multi-View Drawing Review
 Multi-View Drawing Review Sacramento City College EDT 300/ENGR 306 EDT 300 / ENGR 306 - Chapter 5 1 Objectives Identify and select the various views of an object. Determine the number of views needed to
Year 7 Graphics. My Teacher is : Important Information
 Year 7 Graphics My Teacher is : Important Information > Good behaviour is an expectation > Bring correct equipment to your graphics lesson > Complete all homework set and hand in on time > Enter and leave
By: Zaiba Mustafa. Copyright
 By: Zaiba Mustafa Copyright 2009 www.digiartport.net Line: An element of art that is used to define shape, contours, and outlines, also to suggest mass and volume. It may be a continuous mark made on a
Graphic representation in technological projects
 1st ESO: Technology, Programming and Robotics Graphic representation in technological projects Author: Guillermo Gómez Revision: Pablo Rivas Martín Contents 1 Prior knowledge... 2 2 Keywords... 2 3 Mindmap
Discover how to draw a picture that looks distorted on the page, but normal in a cylindrical mirror.
 6 th 12 th grade Asking questions Planning and carrying out investigations Using mathematics and computational thinking Constructing explanations and designing solutions 45 minutes Empty soda can 8.5"
Objective: To teach that art doesn t have to look like anything familiar or real. Art can be completely abstract and made up.
 Objective: To teach that art doesn t have to look like anything familiar or real. Art can be completely abstract and made up. A) Introduction Going all the way back to the cave man, man has created many
Video 8: 2 Point Perspective
 Video 8: 2 Point Perspective Two point perspective is a drawing method using lines to create the illusion of space on a 2-Dimensional surface. Two point perspective is one of the six ways an artist can
UNIT 1 (of 5): Line (16 hours = 1 credit)
: Line (16 hours = 1 credit)") Art I A Elements of Art UNIT 1 (of 5): Line (16 hours = 1 credit) Independent Study 1. Students will be introduced to techniques meant to inspire creativity 2. Students will practice drawing skills in
Art I A Elements of Art UNIT 1 (of 5): Line (16 hours = 1 credit) Independent Study 1. Students will be introduced to techniques meant to inspire creativity 2. Students will practice drawing skills in
Elements of Art: Space AVI1O
 Elements of Art: Space AVI1O Definition Space is an Element of Art referring to the emptiness or area between, around, above, below or within objects Perceiving Depth Your eyes and brain work together
Measuring in Centimeters
 MD2-3 Measuring in Centimeters Pages 179 181 Standards: 2.MD.A.1 Goals: Students will measure pictures of objects in centimeters using centimeter cubes and then a centimeter ruler. Prior Knowledge Required:
Term 3. Explanations of assignments
 Term 3 Explanations of assignments (If you are in class, you would get more detailed explanation with powerpoints, demonstrations, examples and other methods of learning.) Categories: Assignments are in
* When the subject is horizontal When your subject is wider than it is tall, a horizontal image compliments the subject.
 Digital Photography: Beyond Point & Click March 2011 http://www.photography-basics.com/category/composition/ & http://asp.photo.free.fr/geoff_lawrence.htm In our modern world of automatic cameras, which
How to Draw with a Grid
 Level: Beginner Flesch-Kincaid Grade Level: 8.3 Flesch-Kincaid Reading Ease: 67.5-6 Pages and 12 Illustrations How to Draw with a Grid Exploring the grid method to draw accurate outline drawings This resource
Create a Portrait. of JUMPIN JACK. Sketch Puppy Proportions. Outline a puppy s face, shade his eyes and nose, and add texture to his fur with hatching
 Level: Beginner Flesch-Kincaid Grade Level: 6.79 Flesch-Kincaid Reading Ease: 70.04 Drawspace Curriculum 6.2.A11-12 Pages and 41 Illustrations Create a Portrait of JUMPIN JACK Outline a puppy s face, shade
1: Assemblage & Hierarchy
 What: 1: Assemblage & Hierarchy 2 compositional sequences o abstract, line compositions based on a 9 square grid o one symmetrical o one asymmetrical Step 1: Collage Step 2: Additional lines Step 3: Hierarchy
Drawing 101 2/4/2016. Basic Tools & Materials. Drawing Pencils. Drawing Pencils Erasers Blending Mediums Paper Other
 Basic Tools & Materials Drawing 101 Tips and Techniques Drawing Pencils Erasers Blending Mediums Paper Other Drawing Pencils H Pencils lead is firmer therefore your mark is lighter B Pencils Lead is softer
CIRCLE OR SPIRAL LETTERING
 CIRCLE OR SPIRAL LETTERING You can create a template for circle writing by using a simple drawing program (like Illustrator) on your computer (see example templates). Or you can go the old school way using
Planner / Journal Tutorial
 Planner / Journal Tutorial Sewing your own planners and journals is so much fun! You get to choose every part of the design, and your new book will delight you every time you open it. This method quickly
LEARNING TO LOOK LOOKING TO LEARN. Objectives: Observing Details Developing Vocabulary Using the 5 Senses Identifying the Elements of Art
 LEARNING TO LOOK LOOKING TO LEARN Objectives: Observing Details Developing Vocabulary Using the 5 Senses Identifying the Elements of Art Objectives: Looking for Information Comparing and Contrasting Information
Student Name: Teacher: Date: District: Rowan. Assessment: 9_12 T and I IC61 - Drafting I Test 1. Description: Unit C - Sketching - Test 2.
 Student Name: Teacher: Date: District: Rowan Assessment: 9_12 T and I IC61 - Drafting I Test 1 Description: Unit C - Sketching - Test 2 Form: 501 1. The most often used combination of views includes the:
Pixel v POTUS. 1
 Pixel v POTUS Of all the unusual and contentious artifacts in the online document published by the White House, claimed to be an image of the President Obama s birth certificate 1, perhaps the simplest
Elk Grove Unified School District Visual and Performing Arts Resources Art
 Elk Grove Unified School District Visual and Performing Arts Resources Art Grade 5: Lesson 2 Title: Linear Perspective - One Point Perspective Standards Addressed Artistic Perception Processing, Analyzing,
Transfer an Image to Drawing Paper
 Level: Beginner to Advanced Flesch-Kincaid Grade Level: 8.4 Flesch-Kincaid Reading Ease: 64.6 Drawspace Curriculum 1.2.A5 6 Pages and 4 Illustrations Transfer an Image to Drawing Paper A three-step process
WAQA Community Quilts Block of the Month. March Broken Dishes block, using Cinderella Square half square triangle construction.
 WAQA Community Quilts Block of the Month. March 2014 Broken Dishes block, using Cinderella Square half square triangle construction. Cinderella Square (makes eight half square triangle squares). 1. Cut
Photoshop 1. click Create.
 Photoshop 1 Step 1: Create a new file Open Adobe Photoshop. Create a new file: File->New On the right side, create a new file of size 600x600 pixels at a resolution of 300 pixels per inch. Name the file
Vision: How does your eye work? Student Advanced Version Vision Lab - Overview
 Vision: How does your eye work? Student Advanced Version Vision Lab - Overview In this lab, we will explore some of the capabilities and limitations of the eye. We will look Sight at is the one extent
ELEMENTS & PRINCIPLES OF FINE ART
 ELEMENTS & PRINCIPLES OF FINE ART A Handy-Dandy Floral Chart The visual components of line, shape, form, value, space, color, texture, and depth. LINE Well, you know what a line is. But it s important!
10.2 Images Formed by Lenses SUMMARY. Refraction in Lenses. Section 10.1 Questions
 10.2 SUMMARY Refraction in Lenses Converging lenses bring parallel rays together after they are refracted. Diverging lenses cause parallel rays to move apart after they are refracted. Rays are refracted
Term 3. Explanations of assignments
 Term 3 Explanations of assignments (If you are in class, you would get more detailed explanation with powerpoints, demonstrations, examples and other methods of learning.) Categories: Assignments are in
HTCiE 10.indb 4 23/10/ :26
 How to Cheat in E The photograph of a woman in Ecuador, above, shows a strong face, brightly colored clothes and a neatly incongruous hat. But that background is just confusing: how much better it is when
Trebuchet Construction Instructions
 Trebuchet Construction Instructions Follow these instructions step by step to create your trebuchet. Materials: Trebuchet Template (6 pages cardstock) Trebuchet Template (1 page paper) One unsharpened
Operation Manual My Custom Design
 Operation Manual My Custom Design Be sure to read this document before using the machine. We recommend that you keep this document nearby for future reference. Introduction Thank you for using our embroidery
Illustrated Art Lessons
 Predicting the Future Drawing Storyboards Materials: 12" x 18" manila paper pencils erasers colored markers or tempera paint and paintbrushes To divide the paper into eight rectangles, fold it in half
These lessons are very thorough. I like how each detail is explained, making art accessible to any level of artist (even me)!
!") VOLUMES 1-9 These lessons are very thorough. I like how each detail is explained, making art accessible to any level of artist (even me)! Charter School Mom of 2, California with Master Artist Able to
VOLUMES 1-9 These lessons are very thorough. I like how each detail is explained, making art accessible to any level of artist (even me)! Charter School Mom of 2, California with Master Artist Able to
28 Thin Lenses: Ray Tracing
 28 Thin Lenses: Ray Tracing A lens is a piece of transparent material whose surfaces have been shaped so that, when the lens is in another transparent material (call it medium 0), light traveling in medium
Ins and Outs of Stereograms
 The Art of Mathematics Ins and Outs of Stereograms Steve Plummer and Pat Ashforth Create simple stereogram drawings using ruler and pencil, or a computer drawing package. Easy, step by step instructions
Module 2. Lecture-1. Understanding basic principles of perception including depth and its representation.
 Module 2 Lecture-1 Understanding basic principles of perception including depth and its representation. Initially let us take the reference of Gestalt law in order to have an understanding of the basic
Environmental Design. Floor Plan. Planometric Drawing. Target Audience. Media. Materials
 Environmental Design The design of large-scale aspects of the environment by means of architecture, interior design, way-finding, landscape architecture, etc. Floor Plan A scale diagram of the arrangement
THE BROKEN SILHOUETTE Marc Taro Holmes, Author of The Urban Sketcher, and Workshop notes, 2017 USK Symposium, Chicago
 An Exercise in Direct Sketching THE BROKEN SILHOUETTE Marc Taro Holmes, Author of The Urban Sketcher, and www.citizensketcher.com Workshop notes, 2017 USK Symposium, Chicago THE IDEA IS SIMPLY: Sketch
Kit Contents. The Power House experiment kit contains the following parts:
 Version 2.0 Kit Contents 1a 1e 1d 1c 1b 18 12 15 19 16 23 11 5 8 10 20 24 14 6 21 17 7 9 2 3 4 22 13 25 The Power House experiment kit contains the following parts: Description Qty. Item No. 1 Power House
Orthographic Projection 1
 Orthographic Projection 1 What Is Orthographic Projection? Basically it is a way a representing a 3D object on a piece of paper. This means we make the object becomes 2D. The difference between Orthographic
Robo cyborg sketching
 Robo cyborg sketching Learn how to sketch a seemingly complex robot The Tutor The sketch has areas that are full of detail and areas that are fairly bland. This is a design choice to help the eye flow.
Optical Illusion Sketchbook Project Art 1201
 Optical Illusion Sketchbook Project Art 1201 Before beginning our final optical illusion project, we need to practice drawing optical illusions so we will have a better understanding of how to construct
Lesson #1 Secrets To Drawing Realistic Eyes
 Copyright DrawPeopleStepByStep.com All Rights Reserved Page 1 Copyright and Disclaimer Information: This ebook is protected by International Federal Copyright Laws and Treaties. No part of this publication
7 PAGES 15 ILLUSTRATIONS
 Drawing an Brenda Hoddinott K-02 INTERMEDIATE: PERSPECTIVE TWO You need to understand ellipses in order to correctly draw cylindrical or cone shapes objects, such as vases, ice cream cones, mugs, plates,
OBJECT STUDY. Painting Practical. Object Study. Notes
 Object Study Painting Practical 1 OBJECT STUDY Man has created several objects which we use in everyday life to satisfy our needs. Of all these, certain objects such as books, boxes, utensils are easily
ILLUSION CONFUSION! - MEASURING LINES -
 ILLUSION CONFUSION! - MEASURING LINES - WHAT TO DO: 1. Look at the line drawings below. 2. Without using a ruler, which long upright or vertical line looks the longest or do they look the same length?
Year 6 Visual Arts Unit 2017 Colour and Tone Term: Week:
 Term: 1 2 3 4 Week: 1 2 3 4 5 6 7 8 9 10 11 OUTCOMES Making: investigates subject matter in an attempt to represent likenesses of things in the world - makes artworks for different audiences, assembling
Module 5. Lecture-1. Triangle Rectangle Circle. Fig.49: Three basic shapes: the triangle, the rectangle and the circle.
 Module 5 Lecture-1 Nature drawing - to study form and structure and various shapes Basic forms: There are four basic forms you should know: the triangle, rectangle and circle. Each of these forms can be
GENERAL NOTES: Page 1 of 9
 Laminating A Zia Into A Turning Blank by W. H. Kloepping, Jan. 2009 This describes how a zia (the New Mexico state symbol) can be laminated into a turning blank. Materials needed: Square Turning Block
Dr. Reham Karam. Perspective Drawing. For Artists & Designers. By : Dr.Reham Karam
 Perspective Drawing For Artists & Designers By : Dr.Reham Karam Geometry and Art : What is perspective? Perspective, in the vision and visual perception, is : the way that objects appear to the eye based
R2-D2 SolidWorks Model
 R2-D2 SolidWorks Model Mike Haftl E-Design 100 Section 7 August 5, 2016 Haftl 1 Rendered Images Figure 1: Front view of R2-D2 model made in solid works Figure 2: Isometric Left view of R2-D2 model made
through all your theme fabrics. So I told you you needed four half yards: the dark, the two mediums, and the light. Now that you have the dark in your
 Hey everybody, it s Rob from Man Sewing. And I cannot believe I get to present this quilt to you today. That s right. This is the very first quilt I ever made. My first pattern I ever designed, originally
Note ook Doodle Pillow
 Note ook Doodle Pillow There s nothing better than a project with fun personality, customization and color! This notebook doodle pillow is the best thing next to drawing in the margins of homework, because
ARTS IMPACT ARTS-INFUSED INSTITUTE LESSON PLAN (YR2-AEMDD)
") S IMPACT S-INFUSED INSTITUTE LESSON PLAN (YR2-AEMDD) LESSON TITLE: Parallel and Perpendicular Lines: Unity and Variety Visual Art and Lesson Artist-Mentor Meredith Essex Grade Level: Fourth Grade Enduring
S IMPACT S-INFUSED INSTITUTE LESSON PLAN (YR2-AEMDD) LESSON TITLE: Parallel and Perpendicular Lines: Unity and Variety Visual Art and Lesson Artist-Mentor Meredith Essex Grade Level: Fourth Grade Enduring
Learn How to Draw. Animals. Created exclusively for Craftsy by Antonella Avogadro
 Learn How to Draw Animals Created exclusively for Craftsy by Antonella Avogadro [Special Offer] You ve unlocked savings! Enjoy more in-depth, step-by-step guidance from expert artists with Craftsy s growing
FACTFILE: GCE TECHNOLOGY & DESIGN
 FACTFILE: GCE TECHNOLOGY & DESIGN 1.8, 1.26, 1.56 DESIGN AND COMMUNICATION Design and Communication Learning outcomes Students should be able to: communicate designs using 2D methods, to include freehand
Brenda Hoddinott K-03 INTERMEDIATE: PERSPECTIVE 2
 TWO-POINT Brenda Hoddinott K-03 INTERMEDIATE: PERSPECTIVE 2 In this lesson, you use two point geometric perspective to transform a single vertical line into a three-dimensional form. The cube in this lesson
Extension material for Level 2 Design and Visual Communication Study Guide (page 33)
") Graphic media Extension material for Level 2 Design and Visual Communication Study Guide (page 33) ISBN 978-1-927194-15-7 For individual student use only. No other use permitted. ESA Publications (NZ)
Graphic media Extension material for Level 2 Design and Visual Communication Study Guide (page 33) ISBN 978-1-927194-15-7 For individual student use only. No other use permitted. ESA Publications (NZ)
Module 7. Memory drawing and quick sketching. Lecture-1
 Module 7 Lecture-1 Memory drawing and quick sketching. Sketching from memory is a discipline that produces great compositions and designs. Design, after all, is a creative process that involves recollection
Overview: These flying oddities aren t your typical paper airplane. They may be strange to look at, but they re simple to make and fun to fly.
 17 THESE THINGS FLY! Overview: These flying oddities aren t your typical paper airplane. They may be strange to look at, but they re simple to make and fun to fly. Paper Paper or foam cups Straw Elastic