N Model Ray 2
|
|
|
- Hortense Stewart
- 5 years ago
- Views:
Transcription


1 N Model Ray Page 1
2 INDEX INDEX... 2 Tool and Material Checklist... 3 Introduction... 4 Quick Guide... 5 Safety Surfacing/Fall Heights... 7 Punch List... 9 Top Down View Footing Diagram Post Installation Deck and Pipe Clamp Installation Deck Clamp Pipe Clamp Deck Clamp Plan: Pipe Clamp Plan: Deck Installation Square Deck Triangle Deck Deck Plan: Transfer Station Transfer Station Plan: Double Wall Straight Slide , 4, Double Wall Straight Slide Plan: Guard Wall W Guard Wall Plan: Steering Wheel Steering Wheel Plan: Tic Tac Toe Panel Tic Tac Toe Panel Plan: Corkscrew Climber , -4, Corkscrew Climber Plan: Label Installation Top of Surfacing Label Warning Label Manufacturer Label Trouble Shooting Safety Checklist Photo Appendix Maintenance Checklist Page 2
3 Tool and Material Checklist To dig holes, the best method is a tractor with an auger. Use a 12 auger bit. No matter what you use, there will be a considerable amount of hand digging as well Shovels, long handled spades Post hole diggers Wheelbarrows Large construction bar (generally 5 long). Spray paint, to mark ground holes Pry bar Claw hammers Large dead-blow rubber hammers Small (3lb) Sledgehammer, to use in blocking the posts 7/32, 3/6, 1/8 Allen wrenches: These are very important. Several different types are helpful (socket style, small L arm, wrench styles etc.) Vise grips, large, regular and needle-nose 3/4 and 1/2 and 9/16 sockets, both 1/2 and 3/8 drives 6 and 8 stepladders, strong ones Extension cords (also duplexes to run more than one cord) 1/2 drill and 3/8 drill 1/2 and 1/2 drill bits and 1/2 spade bits Levels: magnetic torpedo, 4 long etc. (as many as possible) Shims and blocks from scrap lumber and a saw to cut sizes on site Small, skinny, flat shims are helpful in raising posts etc. 2 by 4 and 2 by 6 and Plywood are also helpful Pencils and markers String line Bar clamp 4 Sometimes bracing material is helpful (2 x 4 x 6 studs with sturdy lag bolt/nut combinations) Files, sandpaper, wood scraps Stones Cement Surfacing One brick per post Page 3
4 Introduction BEFORE STARTING INSTALLATION OF YOUR PLAYGROUND, PLEASE READ INSTRUCTIONS THOROUGHLY. SITE REQUIREMENTS: The Playground system is designed to suit a level site. Should there be any falls or slopes on the site; care should be taken to accommodate the entry and exit points and to maintain the correct height. There should not be more than 3 of drop in grade per every 10. The site must be inspected for adverse conditions: All sites must be checked for existing utilities such as electricity, gas, water or any other underground hazards DIG-RITE is the number to call to have the services located Roots, rocks, or other natural obstacles that may pose as a trip hazard. 3. Poor drainage areas. 4. Broken glass or foreign objects around building site. MAINTENANCE: As an owner, it is most important that you are aware of your responsibility to insure safe use of your new equipment. It is necessary to install equipment correctly according to the installation instructions provided and inspect the equipment at regular intervals. During inspection, if any part is found damaged or excessively worn, equipment should immediately be put out of service while the part is replaced. Lack of maintenance will result in premature wear, reduced life expectancy, and possible failure that might result in injury. All SportsPlay Equipment play events have been engineered to meet all applicable safety guidelines, but if installed improperly, these problems may occur: Entrapment gaps (between 3 1/2 and 9 } String Entanglements Protrusions Make sure that any bolt end that protrudes more than 2 threads past the face of the nut is trimmed and deburred smoothly. Always double-check your work. Installation must adhere to the manufacturers assembly manual and all other applicable safety guidelines. PLAY AREA: The area immediately above and around the play structure must be free of any obstructions such as: Trees Other Play Equipment Buildings Overhead Power lines Make sure the play area has all the required safety surfacing and the minimum fall zones as required by the safety guidelines. These guidelines can be found at CHILDREN MUST BE SUPERVISED AT ALL TIMES. No playground is safe without adult supervision! Page 4
5 Quick Guide SITE Make sure the area of installation is relatively level, free of obstacles and underground utilities. If a slope exists, care must be taken to accommodate entry and exit areas to insure they maintain the correct heights. Call DIG-RITE to have a technician check the area for underground utilities. This service is free. MATERIAL INVENTORY Locate your Component Checklist and the 2d top down drawing included in the instructions. Use both to identify, inventory and best position the parts around the perimeter of the area. If you find damaged or parts missing, contact your SportsPlay Distributor immediately. INSTRUCTIONS Thoroughly read the instruction booklet BEFORE beginning the installation. Pay special attention to the pages describing post and deck installation. These are the bones of your playground. If they are not properly installed, the remaining events will not install correctly. KEEP THESE INSTRUCTIONS ON FILE. TOOLS Locate the Tools Checklist in the instructions. Make sure all necessary tools are available at installation time. If you are using volunteers, send a note to them that includes the tool list. You may be able to borrow most items instead of renting. SUPPLIES Set your installation date and order supplies from your local building center. You will need some flat concrete stones for blocking holes, some scrap lumber for bracing and cement. You can figure about 2 80# bags per hole. DECK LAYOUT Find the grid drawing in the instruction booklet. Decide which way to orient the structure. ALL fall zone measurements MUST be accommodated. Locate the lowest deck on the drawing. You can start laying out the structure by placing the lowest deck on the ground and then double check your measurements. Measure twice, install once! Consult the instruction booklet for post and deck installation instructions. BRACING As the decks and kick plates are installed, be sure to level the posts and place braces in the holes to keep them from shifting. Periodically, plumb and level all posts as you work your way around the playground. COMPONENT INSTALLATION Consult the instruction booklet for separate installation instructions for each component on your playground. Begin installing from the lowest deck in a clockwise rotation around the structure back around to the starting deck. Tighten panels as you go, making sure to plumb and level posts. VISUAL INSPECTION After all components are installed and tight, do a visual inspection to ensure the panels and posts are level, in the proper place, and look good with respect to one another. Once satisfied, you are ready for concrete. Page 5
6 CONCRETE Mix the concrete according to the directions. DO NOT mix directly in the hole. Fill each hole to within 2 inches of the original surface. Crown for drainage, and cure 48 hours. Check resilient surfacing depths, move or add additional surfacing if necessary. Make sure the playground area remains free of obstacles, broken glass or other sharp objects. SECURE AREA Fence off or lock area to insure that NO ONE can play on the playground until it is completely finished. You may consider contacting local law enforcement to inform them of the new installation and ask them to check the area frequently during the night. BACKFILL AND CLEANUP 48 hours after pouring cement, backfill all of the holes with dirt to the original ground level and make sure the area is free of any tools, hardware, or sharp objects. SURFACING Use the chart on page 8 to decide how much safety surfacing is required. Before spreading loose fill surfacing, be sure to install a weed barrier outside the fall zone dimension, then spread the safety surfacing. LAST THING Make one more tour around the playground and physically make sure all hardware is tight. OPEN FOR PLAY After the safety surfacing is installed and the hardware has been checked for tightness, your playground is ready for play. MAINTENANCE - Consult your instruction booklet for the maintenance checklist. Schedule and complete periodic maintenance checks of the entire playground. If any hardware is worn, or any item missing or broken, close the playground and contact your SportsPlay distributor for replacement parts. Page 6
7 Safety Surfacing/Fall Heights You must consider the type of safety surfacing you will use before beginning the installation process. There are two general types, organic/loose fill or synthetic unitary. Both materials have advantages and disadvantages and it is likely that your client s budget will dictate the material of choice. Always have all options available as product quality and longterm performance may cause your client to reevaluate their original budget. When installing a unitary safety surfacing material such as rubber mats or poured-in-place, you will need to pour a concrete slab so that the rubber material can be secured. This type of product cannot be placed on dirt. If a loose fill surface such as wood chips is selected, you will need to consider containment borders. There are many products to choose from including hard plastic and natural products such as wood. Creosoted railroad ties are NOT recommended. Loose fill materials like wood chips are easily displaced, so 12 deep is generally satisfactory. Also remember that loose fill will compress with repeated use below existing grade 2. 6 below and 6 above existing grade above existing grade The tallest deck on the unit generally defines the maximum fall height of a structure. If upper body equipment (horizontal ladder) is attached, the fall height is then the distance from the highest part of the equipment to the protective surfacing. Refer to the Top Down View to determine the maximum fall height. Since the structure will be installed at dirt grade, the height of the resilient surfacing must be determined and factored into the height of installation of decks. For example, if the resilient surfacing will be 12 deep, a 3 deck height will actually install at 4. When the structure is completed and the surfacing is installed, the deck then will be 3 above the level of the resilient surfacing. Weed mat: Some use a landscaping fabric material that allows drainage but prevents weed growth. Weed mats are installed after the structure is installed but before the resilient surfacing is installed. Borders: Building borders above ground, below grade, or on grade depends upon the area in which you live. Assuming you must use 12 of resilient surfacing, there are three basic types of installation: Page 7
8 Safety Surfacing Chart Table Critical heights (in feet) of Tested Materials Chart taken from The Handbook for Public Playground Safety written by the U.S. Consumer Product Safety Commission (CPSC) page 5 ( Material Uncompressed Depths Compressed Depths Wood Chips Double Shredded Bark Mulch Engineered 6 7 >12 6 Wood Fibers Fine Sand Course Sand Fine Gravel Medium Gravel Shredded Tires N/A N/A N/A These directions are written based upon a depth of 12 of resilient surfacing. Do not forget to calculate the compressed resilient surfacing depth needed and adjust your dirt grade height accordingly. Page 8
9 Punch List Step 1: Layout 1. Lay square deck on ground in the desired location and measure from all corners to insure there is adequate room. (Refer to Grid Drawing pg. 11) 2. Most installers usually like to orientate the playground so that the entry point of the playground is facing either the sidewalk or the direction from which the children are coming. Step 2: Holes 1. Mark the locations of all four post holes by using the center point of each deck corner and marking them with paint or a wooden stake. 2. After the holes are marked, move the deck out of the digging area and dig all four holes per the footing drawing on page Fill or dig the depth of 1 main hole to what is required; this hole will be used to get the other three holes the same depth in reference to each other. Make sure the hole is flat and tamped solid, then place a small piece of plywood or brick in the bottom. You must take this in account when determining the hole depth. 4. Now, if possible, use a transit to maintain the same hole depth on the remaining three holes, if you don t have access to a transit, then park a line on the first post about two inches above the dirt level. Then measure up from the bottom of the post to this mark and mark a line on the other three posts at the same distance. Now use a four-foot level across to each line, raising or lowering as necessary to make the lines level. Repeat this for the remaining two posts. Step 3: Deck and Post Installation 1. Measure 36 plus the amount of safety surfacing you are planning on using (example: = 48 from the existing ground level). Make a mark on the first post at this measurement and then measure from the bottom of post to this mark and make a mark on the remaining three posts at the same measurement. 2. Install a deck clamp per instruction page 16. Tighten all hardware. 3. Now make sure that you have two other helpers and the required deck clamp hardware. 4. Place all four posts into the holes and let them rest on the hole edges. Now install the deck on two of the deck clamps and install hardware down through the deck and clamp and install the locknut on the bottom. Do not tighten at this point. 5. Next place the other two posts on the deck and install the hardware. 6. It may be necessary to brace the deck and posts with lumber to make sure they stay in place and level. Level all four posts and tighten hardware. Also make sure the deck was installed level. Step 4 Component Installation 1. Begin by installing the transfer assembly to the main deck per instructions page Next install the guard wall per instructions on page 27 with steering wheel per instructions page 29. Page 9
10 3. Now install the Tic Tac Toe per instructions page 31. Level and tighten. 4. Install the double wall slide per instructions page 27. Make sure water drains out of slide bedway and the slide guard is level, then tighten. 5. Install the corkscrew climber per instructions on page 33. Step 5: Concrete 1. Once all components and posts are tight and level, you may concrete. A good rule of thumb is two 80 lb. bags of concrete per hole. Do not dry bag the concrete, always mix per instructions on concrete bag. Be sure to leave concrete about 2 from the top of the ground to allow backfill. 2. Be sure that all splattered concrete is washed off of the posts and components while it is still wet. 3. Block off installation area for at least 48 hours. Step 6: Final after 48 hours 1. Return in 2 days to backfill concrete, drill and install drive (roll) pins per instructions, and install safety surfacing. 2. Inspect all components to insure the hardware is tight and all panels are level. 3. Make sure all tools and dropped hardware are removed from play area. 4. Open the playground. Page 10
11 Top Down View Accurate scale drawings are included at the end of these instructions for your convenience. Page 11
12 Footing Diagram Page 12
13 Post Installation Footing size may vary due to local soil and weather conditions. Base of footing MUST be below the frost line. Dig holes straight down, with a flat bottom and 12 wide making sure to dig holes wide and not cone shaped. Hole depths are 22 deep (this depth changes slightly with grade). Place a brick in the bottom of the hole. Post is placed on top of the brick. If the bottom is not flat and roomy, there will be no room to adjust. It is much easier to have too much room rather than not enough. You can dig by hand using a posthole digger, but a tractor with a 12 auger will make the task much easier. Post tops should be level with one another. USE A LONG, HEAVY CONSTRUCTION BAR to adjust levels of posts, legs, etc. DO NOT try to level by pushing posts at shoulder or waist length. Carefully bump the posts at the bottom IN THE DIRECTION YOU WANT THE POST TO GO. Mark holes and dig by laying the deck on ground and using it as jig. Place (4) deck clamps, one per corner, spray paint through middle of clamp onto ground. This marks where the centers of the postholes should be. Remove the deck and clamps from the area. Dig the (4) holes 22 deep and 12 wide. Holes are straight down and flat-bottomed. Install 10 diameter plywood in hole bottoms and place a brick in the bottom of the hole. Use a marker to mark 22 from bottom of posts. Use these marks so you can run a 4 level across marks to make sure the tops of the posts are equal to each other. If line marks are on bubble, then post tops should be on bubble to each other. Install the red plastic end caps on post bottoms. Since your holes are 12 diameter and posts are centered in holes you have approx. 3 1/2 all around the post. Block the posts into center of holes when posts are on bubble. Use scrap lumber and wedges to solidify the posts in their holes as you level the posts. Re-blocking may be necessary at times in order to achieve level. You may also have to widen your holes if they are not dug on center. Top down view of post set into hole: Page 13
14 Side view of installed post Page 14
15 Deck and Pipe Clamp Installation Deck Clamp Item Part # Part Description Quantity # Clamp half FRONT Clamp half BACK /2 x 2 1/2 Button Head 1 Bolt Roll Pin 1/4 x 1 3/ /8 T-Nut Roll Pin 1/4 x 3/ /8 x 1 Button Head Bolt /2 Lock Nut /2 Washer 2 Pipe Clamp Item Part # Part Description Quantity # Clamp half BACK Clamp half FRONT /8 x 1 3/4 Button Head Bolt Socket Set Screw 3/8 x 3/ T-Nut 3/ Roll Pin 1/4 x 3/4 1 Page 15
16 Deck Clamp Plan: The deck clamps connect to the main upright posts according to the deck height(s) located on the Top Down View. INSTRUCTIONS: 1. Install the deck clamps to the center of the deck corners. If clamps are off center, then the line of posts will not be straight and the components will not connect properly. 2. Raise the deck to the proper level according to the deck height found on the Top Down View. 3. Hand tighten the button head bolt. Do not over tighten because the post may swing. 4. Decks attach to the clamps using 1/2 x 2 1/4 Button head bolts, washer on top and bottom with 1/2 lock nuts. Connect the deck bolt firmly. 5. Check the deck and all four posts to insure they are level and the deck is at the proper height. 6. Once the deck and all four posts are level and the deck is at the proper height, tighten the clamp onto the post. 7. Install Roll Pins IMPORTANT: Extra roll pins can be installed through certain high traffic clamp applications such as firepoles, roof clamps, handholds, etc. Finally smooth down any drill holes etc., with steel wool or a file. SPECIFICATIONS: Event: Clamps shall be 606ITS aluminum fastener for 5 OD posts weighing 2.21 lbs. Paint shall be electrostatically applied oven cured powdercoat. Hardware: Stainless Steel tamper resistant MAINTENANCE: Touch up any marred paint surfaces. Periodically check hardware for integrity and tightness. When the playground has been built and there are no more adjustments, drill through all of the clamps (through pre-drilled 1/4 drill holes in clamps) and the 5 O.D. posts. Use a sharp 1/4 metal drill bit to drill a straight hole. Do not egg out the holes. Then tap a 3/4 roll pin through clamp into post so that the pin is flush with the clamp. Do not allow pins to protrude. If a pin has been installed but a clamp or component has to be moved, the pin can be knocked through into post. Page 16
17 Pipe Clamp Plan: The pipe clamps connect to the main upright posts according to the height of the events found on the Top Down View. INSTRUCTIONS: There are two ways to install the clamps: 1. Pre-install the clamp to the post first, then slide the 1 3/8 O.D. pipe into the clamp. 2. Install the clamp over the 1 3/8 pipe first, and then install the clamp to the post. You will do both of these applications, depending on the circumstances. 1. Clamp is installed to post first, then 1 3/8 O.D. pipe moves into clamp. 2. Install clamp to pipe first, then to post. Fit clamp onto the pipe, and install the clamp sideways over the post. You may have to assert some pressure. MAKE SURE PIPES ARE ALL THE WAY INTO CLAMPS BEFORE INSTALLING ONTO POSTS. (2 1/4 end of pipe goes inside clamp) Use rubber hammer for clamps. You can use a marker to mark the location of clamps when preinstalling posts. If a pipe clamp is close to another clamp or a deck etc. it may be necessary to pre-tighten the set screw to clamp, then move clamp into position. For convenience of installing button head bolts, it is necessary that the bolt heads face outward. If the clamp is crooked to the pipe, and the pipe WILL NOT be able to enter the clamp. Sometimes, you can coax the clamp onto the pipe with a rubber hammer. If that will not work, take clamp off and install it sideways, placing it on the pipe first and then onto the post. Pipes enter into clamps 2 1/4 deep. Components like walls, vertical climbers, ladder ends, etc. are all 48 long, and the pipe ends have to go straight into the clamps or the connection will not work. If you force a clamp it can break! All of our components such as walls, climbers, horizontal ladders, arch walls etc. are 48 wide, and clamp to the middle of the posts. That means that these components are centered onto the posts at 48 on center. There is up to 4 of extra room in the pipe clamp cavities, 2 to the left and 2 to the right. This means that it is possible to be either too far left or right of center. Keep in mind that all COMPONENTS HAVE TO BE CENTERED, that the left and right are inserted equally into clamps! When the playground has been built and there are no more adjustments, drill through all of the clamps (through pre-drilled 1/4 drill holes in clamps) and the 5 O.D. posts. Use a sharp 1/4 metal drill bit to drill a straight hole. Do not egg out the holes. Then tap a 3/4 roll pin through clamp into post so that the pin is flush with the clamp. Do not allow pins to protrude. If a pin has been installed but a clamp or component has to be moved, the pin can be knocked through into post. Extra roll pins can be installed through certain high traffic clamp applications such as firepoles, roof clamps, handholds, Page 17
18 etc. Finally smooth down any drill holes etc., with steel wool or a file. SPECIFICATIONS: Event: Clamps shall be 606ITS aluminum fastener for 5 OD posts weighing 2.21 lbs. Paint shall be elecrtostatically applied oven cured powdercoat. Hardware: Stainless Steel tamper resistant MAINTENANCE: Touch up any marred paint surfaces. Periodically check hardware for integrity and tightness. Page 18
19 Deck Installation Square Deck Item Part # Part Description Quantity # Square Deck Deck Clamp Assembly /2 Washer /2 Lock Nut /8 x 1 Button Head Bolt 4 Triangle Deck Item Part # Part Description Quantity # Deck Clamp Assembly Triangle Deck /2 Washer /2 Lock Nut /8 x 1 Button Head Bolt 3 Page 19
20 Deck Plan: The deck(s) connect to the main upright posts according to the specifications found on the Top Down View. INSTRUCTIONS: There are two methods: The BEST method is to make a table or stand to place your deck on at the required deck height. The table will stabilize the deck so you can level it. You can make a table from sawhorses. Deck stand or table holds deck while you build around it. Blocks stabilize the posts while table stabilizes the deck. Paint: Oven cured plastisol Hardware: Stainless Steel tamper resistant MAINTENANCE: Touch up any marred paint surfaces. Periodically check hardware for integrity and tightness. The second method is to pre-install the (4) deck clamps so that there is 42 1/4 between the holes in the deck clamps. Use a level and a marker to make sure the clamps are level to each other. Place deck onto clamps and bolt. This method works but is less stable than the first method. The deck and posts will stabilize more as you add components Pre-install deck clamps and level. SPECIFICATIONS: Event: Steel Deck shall be constructed of #12 gage perforated steel, welded to 2 1/2 x 2 by 18 angle frame, 1/4 endplates, center-bracing, plastisol coated and oven cured. Page 20
21 Transfer Station Item Part # Part Description Quantity # Transfer stairs Transfer deck Transfer step Plank leg Pipe w/ hand holds Support pipe Pipe clamp Hand rail left Hand rail right Inside leg /8 aluminum pipe plug /8 x 1 1/4 button head bolt /8 x 3 button head bolt /8 x 1 1/2 button head bolt /8 x 2 1/4 button head bolt /8 rebar /8 Nylon lock nut /8 Flat washer /8 black plug flat 2 Page 21
22 Page 22
23 Transfer Station Plan: The transfer station connects to a deck side. Consult the Top Down View for proper placement of the event. INSTRUCTIONS: 1. First connect the bottom platform to the two-step assembly using (4) 3/8 X 1 3/4 button head bolts, (8) 3/8 washers, (4) 3/8 lock nuts. 2. Inside post supports (A+B), Handhold post (C), Short post (D). Center of A, B, C, D. A+B are 22 from deck posts, and C+D are 55 1/2 from the deck posts (on center). 3. Notice the center line (broken line): A+B are 14 left and right from the centerline. C+D are 12 1/2 left and right from the centerline. 4. Inside posts A+B are located outside the front of the transfer step bottom. 5. The (2) plank postholes are located by physically locating them, using the plank as a jig to locate (depending on whether plank will be on the right or left of the transfer deck.) 6. Lay out and mark (4) ground holes for posts #A, B, C, D by physically setting the transfer steps up to the deck, and use spray paint to mark the (4) holes. 7. Dig them 24 deep and 8 in diameter. 8. Loosely install these posts into their ground holes with re-bars in the bottom. 9. Connect the top of transfer step to deck (at the four hole locations on deck side) with (4) 3/8 X 1 3/4 button bolts, washer on both sides, and lock nuts under deck. 10. The bottom end of transfer step is blocked up vertically and horizontally on bubble. 11. Determine on which side the step plank will be located by viewing the Top Down drawing. 12. The handhold post will connect to the front step to the opposite side of the step plank. 13. Connect the transfer deck bottom front with (1) 3/8 by 3 button head bolt, washer both sides, and lock nut under the transfer deck. 14. Connect the short post (44 long) to the other side of front with same bolt connection through hole which is 2 from top of the short post. 15. Connect the left and right handrails to each side between the left and right deck posts to the vertical holes located on the corner of second step. 16. (2) pipe clamps, one per post, are installed on the deck side of posts at approx. 23 1/2 over the deck clamps. 17. Line up and bolt the bottom end handrails to outside of steps with (4) 3/8 by 3 button head bolts, washers and lock nuts under steps. 18. The bottom nut connection on each side will also connect to the 2 by 4 plate on the inside post. 19. Connect plate to bottom bolts and level and adjust the inside posts. 20. Locate and match up the (2) holes in the top of angle plate, (connected to the step plank) to the holes on the left and right of the transfer step bottom. Hold the plank assembly there in order to spray paint the locations for the (2) angle/pipe ground holes (legs for plank assembly). 21. Dig these two holes 24 deep and 8 wide. 22. Connect the two angle/pipe legs to the plank (so the legs of angles are on the outside of plank) with (4) 3/8 Page 23
24 by 2 button bolts, washers on both sides, and (4) lock nuts underneath. 23. Install (2) re-bars in the bottom holes of these pipes. 24. Install the assembly into the ground holes, so that the top of the 27 angle plate matches to the holes in side of the bottom of the transfer assembly, and so your ground holes are correct so that they are on bubble and in middle of their holes etc. 25. Connect with (2) 3/8 by 1 1/4 button bolts, no washer on the outside and (2) 3/8 washer and lock nuts on underside of deck. Re-check levels of all (6) posts and the bottom plank and the entire transfer step. Make sure it is all level and blocked. SPECIFICATIONS: Event: Transfer Station shall be constructed of #9 gage by 3/4 flattened, expanded metal, including offset kickplates to fully enclose gaps between decks and steps. Paint: Shall be oven-cured plastisol Hardware: Stainless Steel tamper resistant MAINTENANCE: Touch up any marred paint surfaces. Periodically check hardware for integrity and tightness. Page 24
25 Double Wall Straight Slide , 4, 5 Item Part # Part Description Quantity # Double Wall Straight Slide Double Wall Straight Slide 4 Double Wall Straight Slide Slide Guard Slide Leg Pipe Clamp Z Plate (installed on slide) /8 X 1 1/4 Button head bolt /8 Flat Washer /8 Lock Nut /4 x 3/4 Roll Pin /8 x 3/8 Socket Set Screw /8 x 1 3/4 Button head bolt /8 T-Nut /8 x 3/4 Button head bolt 7 Deck Height Post/Footing Distance Page 25
26 Double Wall Straight Slide Plan: The Double Wall Straight Slide attaches to the deck by bolting through the Z plate and the deck sidewall. See the Top Down View for placement. INSTRUCTIONS: Underneath the foot of thee slide, there are two sets of threaded inserts into which the slide legs attach. Using your slide as a template, mark the ground holes for the slide legs making sure that the holes in the Z plate are aligned with the holes in the deck and the A plate is at a 90 degree angle to the deck. Prop the foot of the slide up and mark hole locations. Dig one hole for both legs 12 wide by 20 long and 24 deep. Connect the slide legs to the threaded inserts with four 3/4 x 3/8 button head bolts. Place the bottom end of the slide with installed legs and re-bars through the hole in the bottom of the slide legs into the ground. Carefully tip the top of the slide back onto the deck. Make sure you ream the vinyl coated holes out (15 apart) with a 1/2 metal bit. Connect the Z plate to the deck with two 3/8 x 1 1/4 button head bolts, no washer on top, and 3/8 washer and lock nut on the bottom. Place a level over the bottom to be sure it is on bubble, block and level. Install the slide guard and four clamps over the deck entry on the deck side so that the top of the guard is approximately 38 above the deck. SPECIFICATIONS: Event: Double Wall Straight Slide is 3/8 wall, rotationally molded, 24 wide slide bed with 6 high side rails. Metal brackets are powdercoated. Paint shall be electrostatically applied oven cured powdercoat. Hardware: Stainless steel tamper resistant MAINTENANCE: Touch up any marred paint surfaces. Periodically check hardware for integrity and tightness. Page 26
27 Guard Wall W Item Part # Part Description Quantity # W Guard Wall /fitting Clamps /8 x 3/8 Socket Set Screw /4 x 3/4 Roll Pin /8 T-Nut /8 x 1 3/4 Button Head Bolt 8 Page 27
28 Guard Wall Plan: The 10 Rung Guard Wall attaches above the deck to the deck side of the posts with 4 post clamps. There is a mounting plate for the Steering Wheel that will be attached later. INSTRUCTIONS: Install the wall on the deck side of the posts. Install with the centered welded bracket toward the top Install with no more than 3 1/2 between the bottom of the wall and the top of the deck It is helpful to install with a couple of equal size shims under the wall to help hold the wall in position Review the clamp instructions for sideways attachment of clamps. SPECIFICATIONS: Event: the 10 Rung Guard Wall is 48 wide and acts as a barrier to prevent falls from decks. Horizontal pipes that fit into post clamps are 1 3/8 OD. Vertical pipes are 1 OD. Paint shall be electrostatically applied oven cured powdercoat. Hardware: Stainless steel tamper resistant MAINTENANCE: Touch up any marred paint surfaces. Periodically check hardware for integrity and tightness. Page 28
29 Steering Wheel Item Part # Part Description Quantity # 1 Welded wheel fitting Steering Wheel Guard Wall with welded wheel 1 W fitting /2 x 1/2 Button Head Bolt /2 Flat Washer /2 Nylon Lock Nut 1 Page 29
30 Steering Wheel Plan: The Steering Wheel attaches to the 10 Rung Guard Wall onto the welded bracket. INSTRUCTIONS: Place the 1/2 lock nut INSIDE the wheel so as not to create a protrusion. Place one washer between the bolt head and the plate Place three washers between the wheel and plate Place one washer inside the wheel under the lock nut Tighten the nut The wheel should be tight, but yet still able to turn Snap on the cover over the bolt assembly SPECIFICATIONS: Event: Steering Wheel shall be constructed of a polycarbonate 12 diameter wheel countersunk wheel hub connects to wall with non-slip double plate, center 1/2 bolt and lock nut. Hardware: Stainless steel tamper resistant MAINTENANCE: Periodically check hardware for integrity and tightness. Page 30
31 Tic Tac Toe Panel Item Part # Part Description Quantity # Tic Tac Toe Panel Post Clamp /8 x 3/8 Socket Set Screw /4 x 3/4 Roll Pin /8 T Nut /8 x 1 3/4 Button head bolt 8 Page 31
32 Tic Tac Toe Panel Plan: The Tic Tac Toe Panel attaches above or below the deck to the deck side of the posts with 4 post clamps. See 2d Top Down view for proper placement. INSTRUCTIONS: Install the wall on the deck side of the posts Install with the centered welded bracket toward the top Install with no more than 3 1/2 between the bottom of the wall and the top of the deck It is helpful to install with a couple of equal size shims under the wall to help hold the wall in position When the unit is installed on bubble, equally space the spacer bars on each side between the posts using the allen wrench SPECIFICATIONS: Event: Tic Tac Toe Panel shall be constructed of cylindrical blocks with silkscreen letters are held by 7/8 OD pipe. Event is 48 wide and attaches with four pipe clamps. Paint shall be electrostatically applied oven cured powdercoat. Hardware: Stainless steel tamper resistant MAINTENANCE: Touch up any marred paint surfaces. Periodically check hardware for integrity and tightness. Page 32
33 Corkscrew Climber , -4, -5 Item Part # Part Description Quantity # Arch Wall Corkscrew Climber Corkscrew Climber 4 Corkscrew Climber Pipe Clamp /4 x 3/4 Roll Pin /8 x 3/8 Socket Set Screw /8 T Nut /8 x 1 3/4 Button head bolt /16 x 1 1/2 Button head bolt /16 Lock Washer /16 X 1 Button head nut 1 Page 33
34 Corkscrew Climber Plan: The Corkscrew Climber attaches to the deck from an arch wall. INSTRUCTIONS: Install the arch wall on the deck side of the posts with pole attachment stub facing outward. Attach the Corkscrew Climber to the arch wall. (See detail C) Be sure to maintain the same width between the top and bottom of the arch entry opening. Make sure all gaps (between walls and posts and deck) are less than 3 1/2. Install Corkscrew Climber 19 out from the deck. SPECIFICATIONS: Event: Corkscrew Climber is constructed of Type #4 steel welded to 24 diameter by 1 5/8 O.D. coil. Angle plate connects to deck. 1 outer diameter handholds are welded to support. Paint shall be electrostatically applied oven cured powdercoat. Hardware: Stainless steel tamper resistant MAINTENANCE: Touch up any marred paint surfaces. Periodically check hardware for integrity and tightness. Page 34
35 Label Installation Apply to clean, dry, smooth surface. Carefully peel label form paper backing and apply with no wrinkles or tears. Install them where they will not be disturbed during play. Inspect labels regularly. If torn, disfigured, damaged or faded, contact your SportsPlay distributor for replacement labels. Top of Surfacing Label Install one to each upright post at the level you have determined will be your Top of Surfacing based on fall height and resilient surfacing used. Warning Label Install two labels at eye level to different upright posts at locations most likely to be used to access the play unit. Manufacturer Label Page 35
36 Trouble Shooting Problem: Incorrect sized hole or no hole where there is supposed to be one. Solution: Use a 1/4 leader drill bit to drill a hole at the desired location. Next, drill larger size hole with correct bit. Usually, when there is a hole missing, it is an oversight, but if it appears that there are several missing holes, re-check your work. Problem: Setscrew missing on clamp or setscrew hole is cross-threaded. Solution: Drill a new hole in the clamp at the correct location with a 5/16 bit, then tap with a 3/8 /16 tap. Problem: A typical 48 long portion of a pipe will not fit correctly, causing the posts to be off level. Solution: First, check to see that the pre-installed setscrews are not installed too far into the clamp making it impossible for the pipe to enter the clamp. Also, make sure that the clamp is not crooked, preventing the pipe ends to enter the clamp all the way. If this is the case, install clamp sideways onto pipe, then attach to post. The pipes enter the clamp a distance of 1 1/4 deep. If the pipe does not enter all the way, then use a rubber hammer to pound a component to the left or right to ensure the pipe ends have dead-ended into clamps. If the problem remains, contact your distributor. Problem: A clamp has already been drilled and has had a roll pin installed and you have to move it. Solution: Using a punch, simply knock the roll pin through the clamp and post then move the clamp. Problem: There is interference between a vertical portion of one component and another vertical portion of another component going into the opposite direction. (For instance, in the case of a tunnel or bubble window that has a vertical spacer bar). Solution: Loosen the spacer bar by loosening the setscrew on it, move it over to make room. Problem: Your posts are out of line. Solution: Unblock your new posts. Check to see if when the deck was installed the posts were not on the center to the corners of the deck. Loosen the hardware and re-line the posts this way. In most cases, you have to back up, loosen hardware, and physically move each post or component that is connected similarly with 48 end pipes. There is a chance that the component was installed so that it was out of center of the 48 posts, which connect it. Loosen the setscrews on these parts; move them back into line, re-block posts. You must work hard to insure that posts are in line and on bubble. Problem: You try to level a part or post and it won t budge, it swings or else bounces back. Solution: Your hardware or blocks are too tight. Loosen the assembly, level and then re-block and re-tighten. Problem: Bolt size in parts box does not match the instructions for the bolt. Solution: If we made an error in sending the wrong hardware, use a correct size from the hardware store and we ll reimburse you. Page 36
37 Safety Checklist Carefully go over each post, deck and component with bare hands very carefully to detect any areas that may be sharp. During installation and handling, there may be areas that were hammered; causing rough areas that may be sharp. Use the following list to check for problem areas: Scrapes in metal pieces. Use steel wool, files or sandpaper to smooth. Spatter or burrs at all welded locations. Look closely and smooth. Scratches on the plastic parts. Look closely and smooth with steel wool. Edges and mold lines on plastic and aluminum parts should be smoothed with steel wool or files. Slide connection joints, smooth and fill if necessary with outdoor clear caulk sealant. This applies to any small opening that might be a catch or entanglement point. Sleeve ends, sometimes rough handling will cause rough edges. Sand down rough areas if they exist. Check that screws are seated. Vinyl coated parts, check all areas to de-burr. Roll pins; make sure they are flush and to not stick out. Clamps, when aluminum is hammered, it can cause a rough area. De-burr if necessary. Bolt thread protrusions, two threads are maximum protrusion allowed. If more than two threads are visible, cut off and file smooth. T nuts, should not stick out. Loosen and retighten. Black top end caps, smooth down rough areas as necessary. If there are any nail or screw heads which are improperly installed (bent or marred) remove and replace. Angle irons, check all corners for rough areas sand if necessary. Set Screw, all setscrews should be flush with metal surfaces. Check all and tighten. Exposed concrete all concrete should be poured below grade. Backfill all of the footings with dirt. Never ASSUME that hardware was tightened. Check everything. Touch up painted areas as needed. Page 37
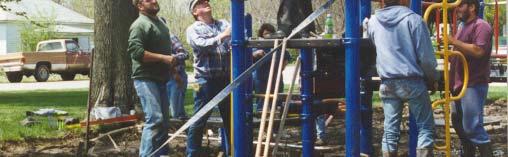
38 Photo Appendix Explosion drawings are included throughout the instructions. Photographs have been included for those who prefer them. 1. Mark post hole positions 2. Install post 3. Install deck 4. Install deck clamp 5. Install pipe clamp 6. Install panel (slide guard/arch wall/etc.) to pipe clamp 7. Leveling Suggestion 8. Leveling Suggestion Page 38


39 Page 39


40 Page 40
41 Maintenance Checklist LOCATION INSPECTOR DATE INSTRUCTIONS: All playground components are listed below. Check monthly. Train personnel (through study of CPSC Guidelines and ASTM standards) to be alert to playground hazards and report them promptly. Avoid use of hazardous equipment until repaired. Check in equipment column means satisfactory. Letter (R) means needs repair and could be hazardous. Copy this page and explain R ratings on reverse side. Equipment 36 deck Transfer Station Corkscrew Climber Straight Slide Tic Tac Toe Panel Guard Wall Steering Wheel Deck clamps Post clamps Large handhold Small handhold Resilient Surfacing Depth Broken glass, trash, foreign objects, etc. Exposed or loose concrete footings, other trip hazards Missing or broken parts Sharp or jagged edges Protrusions Entanglement, such as open S- hooks Rust, rot, cracks, splinters S- hooks, hangers, chain. Replace when 25% worn Loose or missing hardware Drainage, particularly in heavy use areas Adequate use zone Other (specify) Labels legible Page 41
Model Zack Page 1
 911-131 Model Zack 800-727-8180 www.sportsplayinc.com Page 1 INDEX INDEX... 2 Tool and Material Checklist... 3 Introduction... 4 Quick Guide... 5 Safety Surfacing/Fall Heights... 7 Punch List... 9 Top
N Model Jeremy
 911-116-N Model Jeremy 800-727-8180 www.sportsplayinc.com Page 1 INDEX INDEX... 2 Tool and Material Checklist... 3 Introduction... 4 Quick Guide... 5 Safety Surfacing/Fall Heights... 7 Punch List... 9
Model Amy Page 1
 911-117 Model Amy 800-727-8180 www.sportsplayinc.com Page 1 INDEX INDEX... 2 Tool and Material Checklist... 3 Introduction... 4 Quick Guide... 5 Safety Surfacing/Fall Heights... 7 Punch List... 9 Top Down
Spiral Slide
 IMPORTANT Page 1 PLEASE READ THESE INSTRUCTIONS BEFORE COMMENCING ASSEMBLY. All equipment must be installed in accordance with these instructions. Check your shipment against Bill of Lading and Parts list.
SportsPlay 5642 Natural Bridge Size: 6' X 12'
 8' 24' 72" Independent Spiral Slide SportsPlay 5642 Natural Bridge Size: 6' X 2' 800-727-880 Use Zone: 8' X 24' Fax: 34-389-9034 Age Group: 5-2 www.sportsplayinc.com Drawn By: Date E. Barron 00-00- CPSC:
Mallory (Value) Modular Structure Installation Booklet. Project: Miss Mallory Value Distributor: SportsPlay
 Modular Structure Installation Booklet. Project: Miss Mallory Value Distributor: SportsPlay") Mallory (Value) Modular Structure Installation Booklet Project: Miss Mallory Value Distributor: SportsPlay 33 U CLIMBER 9-9-4 TIC-TAC-TOE PANEL 90- DOUBLE WALL SLIDE 9-4 PYRAMID ROOF 9-75 44 36 TRANSFER
Mallory (Value) Modular Structure Installation Booklet Project: Miss Mallory Value Distributor: SportsPlay 33 U CLIMBER 9-9-4 TIC-TAC-TOE PANEL 90- DOUBLE WALL SLIDE 9-4 PYRAMID ROOF 9-75 44 36 TRANSFER
Miss Christel (Value) Modular Structure Installation Booklet. Project: Miss Christel Value Distributor: SportsPlay
 Modular Structure Installation Booklet. Project: Miss Christel Value Distributor: SportsPlay") Miss Christel (Value) Modular Structure Installation Booklet Project: Miss Christel Value Distributor: SportsPlay 34' Spiral Slide 9-8 Bump Wave Slide 9-85 7" Castle Panel Above 9-45 Castle Panel Below
Miss Christel (Value) Modular Structure Installation Booklet Project: Miss Christel Value Distributor: SportsPlay 34' Spiral Slide 9-8 Bump Wave Slide 9-85 7" Castle Panel Above 9-45 Castle Panel Below
H HD Adult Wheelchair Swing Frame & Hangers(perm) IMPORTANT
 IMPORTANT") Page 1 IMPORTANT PLEASE READ THESE INSTRUCTIONS BEFORE COMMENCING ASSEMBLY. All equipment must be installed in accordance with these instructions. Check your shipment against Bill of Lading and Parts list.
Page 1 IMPORTANT PLEASE READ THESE INSTRUCTIONS BEFORE COMMENCING ASSEMBLY. All equipment must be installed in accordance with these instructions. Check your shipment against Bill of Lading and Parts list.
MARCO POLO EXPLORER INSTALLATION INSTRUCTION
 INSTALLATION DETAILS! Recommended crew (Adult): 2! Installation time: 3 hours + concrete and ground prep! User age: 2-5! Use zone: 29 x 16 SURFACING: Use of safety surfacing in compliance with ASTM specification
EXPLORER. SURFACING: Use of safety surfacing in compliance with ASTM specification F1292 is required.
 INSTALLATION DETAILS! Recommended crew (Adult): 2! Installation time: 5 hours + concrete and ground prep! User age: 2-5! Use zone: 32 X 31! Weight: 1,455 lbs SURFACING: Use of safety surfacing in compliance
Football Goal Posts MODEL SERIES: FGP400 and FGP600 series
 Football Goal Posts MODEL SERIES: FGP400 and FGP600 series Installation and Maintenance Instructions Please read all instructions before attempting installation of these units SAVE THESE INSTRUCTIONS FOR
10 CTN 5 BDL 3 WF 1 SKID 1 SLIDE 20 TOT. PCS. 1067# TOT. WT. Class 70
 Page 1 of 7 * IMPORTANT * PLEASE RETAIN THIS INSTRUCTION SHEET IN YOUR FILES. IT CONTAINS IMPORTANT REPLACEMENT PARTS INFORMATION. ALL EQUIPMENT SHOULD BE INSTALLED IN ACCORDANCE WITH THESE INSTRUCTIONS.
U. M. ARMY Texas Conference. Wheel Chair Ramp Manual
 U. M. ARMY Texas Conference Wheel Chair Ramp Manual June 2014 U. M. ARMY Texas Conference Building & Repair Tips Wheelchair Ramps Complete a site survey to determine the design and layout of the ramp.
PLAY HOUSE IMPORTANT
 IMPORTANT Page 1 PLEASE READ THESE INSTRUCTIONS BEFORE COMMENCING ASSEMBLY. All equipment must be installed in accordance with these instructions. Check your shipment against Bill of Lading and Parts list.
Installation Guide. Capped Cellular PVC Fencing. Table of Contents. Storage and Handling Tools Needed Fence Layout and Locating Posts
 Capped Cellular PVC Fencing Installation Guide Table of Contents Storage and Handling Tools Needed Fence Layout and Locating Posts Installation instructions 4 x 4 Over Sleeve Post - 3.5 Rail Privacy Shadowbox
Extreme Tube Slide - 5ft.
 Extreme Tube Slide - 5ft. Part Number: 03-0014 Revison: A 6.12.2013 Please inspect and inventory all parts immediately upon accepting delivery. Use the inventory pages in the manual to make sure you have
MERRY GO ROUND ITEM NO: 8030
 MERRY GO ROUND ITEM NO: 8030 OWNER S MANUAL CAUTION: This unit is designed to be used safely by up to 4 children between the ages of 3 years to 8 years old with a maximum weight of 00 pounds (45.4 kgs)
Ranch Rail Vinyl Fence
 Ranch Rail Vinyl Fence INSTALLATION INSTRUCTIONS These instructions are to be used as general guidelines for the installation of your vinyl fence under normal installation conditions. Local conditions
Dura-Lock Roof System
 DLR-14 Dura-Lock Roof System Assembly and Installation Instructions Read the instructions before starting the job. They explain the steps required to produce a finished product that will meet factory specifications.
PRIVACY FENCE WITH SCALLOPED PICKET INSTALL INSTRUCTIONS
 PRIVACY FENCE WITH SCALLOPED PICKET INSTALL INSTRUCTIONS These instructions are to be used as general guidelines for the installation of your vinyl fence under normal installation conditions. Local conditions
10 x 10 Flat Top Two Tone Pergola
 0 x 0 Flat Top Two Tone Pergola Models: Bordeaux ASSEMBLY GUIDE OPTIONAL ACCESSORIES Arch Kit System ( Arches) Privacy Fence Panel System ( Panels & Middle Post) Bolt Down Bracket Kit ( for Pergola) Ver.0-00
Owner s Manual and Assembly Instruction
 Owner s Manual and Assembly Instruction Model #: 22-PS120 Model Name: Verona III Swing Set Manual Date: September, 2007 Important: Keep this owner s manual; do not discard in case you need to contact Pacific
10x10 Trellis Pergola
 0x0 Trellis Pergola ASSEMBLY GUIDE Ver.0-7 Table of Contents PAGE Introduction & Overview...................................................... Pergola Materials Overview..............................................................
Post & Rail Crossbuck
 Post & Rail Crossbuck 1. Getting Started 6. Crossbuck Be sure to call underground prior to digging Assemble gates (if necessary) and decide where they will be located Stake out the fence line Space and
Portable System Owners Manual Customer Service Center N53 W24700 South Corporate Circle Sussex, WI U.S.A.
 Portable System Owners Manual Customer Service Center N53 W24700 South Corporate Circle Sussex, WI 53089 U.S.A. Adult Assembly Required. This manual, accompanied by sales receipt, should be saved and kept
Flex Fence Instruction Manual
 The Safer Stronger Smarter Choice Flex Fence Instruction Manual Table of contents 2 3 4 4 5 5 6 7 8 10 10 11 11 12 13 13 15 18 18 19 20 22 Table of contents Supplies, tools and equipment Introduction Laying
U.S. Rack, Inc Falcon Drive, Madera, CA APR17 INSTALLATION AND USE INSTRUCTIONS for SIDE-MOUNT LADDER RACK
 U.S. Rack, Inc. 2850 Falcon Drive, Madera, CA 93637 15APR17 INSTALLATION AND USE INSTRUCTIONS for SIDE-MOUNT LADDER RACK WARNING: Do NOT attempt to install or use this rack without following all instructions.
7 X 10 X 6 SHELTER 7 X 16 X 6 SHELTER 12 X 10 X 6 SHELTER 12 X 16 X 6 SHELTER
 ASSEMBLY INSTRUCTIONS FOR 7 X 10 X 6 AND 7 X 16 X 6 ATV SPORT SHELTER ACTUAL FRAME SIZES: 7 X 9-1 1/2 X 6 AND 7 X 13-7 1/2 X 6 AND 12 X 10 X 6 AND 12 X 16 X 6 ATV SPORT SHELTER ACTUAL FRAME SIZES: 12 X
Installation Instructions for. Before You Begin TOOLS REQUIRED
 Composite Railing System STEP-BY-STEP Installation Instructions for Spectrum Composite Railing Virtually maintenance free 20-year warranty EverNew Spectrum Railing system is designed to work with a number
PRIVACY FENCE WITH LATTICE INSTALLATION INSTRUCTIONS
 PRIVACY FENCE WITH LATTICE INSTALLATION INSTRUCTIONS These instructions are to be used as general guidelines for the installation of your vinyl fence under normal installation conditions. Local conditions
400A 40113V, 401A 40120V, & 401AL 40120VL ALUMINUM VERTICAL 4000 LB LIFT INCLUDES SCREW LEG ASSEMBLY INSTRUCTIONS
 12/11/07 PAGE 1 OF 12 400A 40113V, 401A 40120V, & 401AL 40120VL ALUMINUM VERTICAL 4000 LB LIFT INCLUDES SCREW LEG ASSEMBLY INSTRUCTIONS Thank you for purchasing our product! *Please read these instructions
INSTALLATION INSTRUCTIONS 12' x 18' x 7' FRAME (12 x 20 x 7 ROOF COVERAGE) 2 SQUARE CARPORT
 2 SQUARE CARPORT") INSTALLATION INSTRUCTIONS 12' x 18' x 7' FRAME (12 x 20 x 7 ROOF COVERAGE) 2 SQUARE CARPORT Our unique assembly process quickly transforms the individual pieces into a finished structure that will give
INSTALLATION INSTRUCTIONS 12' x 18' x 7' FRAME (12 x 20 x 7 ROOF COVERAGE) 2 SQUARE CARPORT Our unique assembly process quickly transforms the individual pieces into a finished structure that will give
Chesapeake TM PB 8243 ASSEMBLY INSTRUCTIONS
 PB 8243 Chesapeake TM check out http://www.swing-n-slide.com/planupdates.html for updates to these instructions For more information, visit this link: http://www.swing-n-slide.com 28'-6'' 26'-6'' No. of
SHADOWBOX INSTALLATION FOR: Standard 6 H x 8 W Shadowbox Fence 5 x 5 Routed Posts Dog Ear or Straight-Edge Pickets 1.75 x 3.5 Rail
 SHADOWBOX INSTALLATION FOR: Standard 6 H x 8 W Shadowbox Fence 5 x 5 Routed Posts Dog Ear or Straight-Edge Pickets 1.75 x 3.5 Rail Storage and Handling Fence Preparation and Layout Locate and Set Posts
Swerve Rack CUSTOM RACKS AVAILABLE
 CUSTOM RACKS AVAILABLE Swerve Rack The design of the Swerve mirrors the bike frame, thus providing superior bike support while making it easy to secure both the bike frame and wheel with a standard u-lock.
ClearSpan PolyMax Windbreak Wall
 ClearSpan PolyMax Windbreak Wall Photo may show a different but similar model. 2007 ClearSpan All Rights Reserved. Reproduction is prohibited without permission. Revision date: February 2007ldg STK# DIMENSIONS
ADJUSTABLE BASKETBALL SYSTEM ASSEMBLY INSTRUCTIONS AND OWNER'S MANUAL
 IRONCLAD SPORTS, INC HIGHLIGHT HOOPS ADJUSTALE ASKETALL SYSTEM ASSEMLY INSTRUCTIONS AND OWNER'S MANUAL MODEL: HIL885!! WARNING FAILURE TO COMPLY WITH ANY OF THE WARNINGS IN THESE INSTRUCTIONS MAY RESULT
INSTALLATION INSTRUCTIONS
 Tools required for the installation. A. Core Drill 87mm Drill bit B. Tape measure C. Spirit Level D. Marking pen E. Caulking gun F. Cutting Pliers G. Cordless Drill and Philips head bit, 5mm Drill bit.
GUIDELINES INSTALLATION INSTRUCTIONS
 Important! Please Read Completely Before Beginning Installation. According to a report published by the U. S. Consumer Product Safety Commission (C.P.S.C.) 72% of all playground injuries result from accidental
Safety Guidelines and Assembly Instructions
 Play Action Air Rider TM Safety Guidelines and Assembly Instructions Maximum Weight Limit: 210 pounds We re Here To Help! Call Toll Free 1-888-752-9782 Customer Service: Monday - Friday, 8:00 A.M. to 5:00
PRIVACY INSTALLATION FOR: Standard 6 H x 8 W Privacy Fence 4 x 4 Post Sleeve & Brackets Dog Ear or Straight-Edge Pickets 1.75 x 3.
 PRIVACY INSTALLATION FOR: Standard 6 H x 8 W Privacy Fence 4 x 4 Post Sleeve & Brackets Dog Ear or Straight-Edge Pickets 1.75 x 3.5 Rail Storage and Handling Fence Preparation and Layout Locate and Set
The Festival Assembly Instructions
 The Festival Assembly Instructions Toll Free: 866.768.8465 Hours: 9-5 Monday-Friday EST www.homeplacestructures.com Package ships as shown CONTACT INFORMATION: HomePlace Structures 301 Commerce Drive New
6 1/2 x 6 1/2 Wood Grain Flat Top Pergola
 / x / Wood Grain Flat Top Pergola A S S E M B LY G U I D E Models: Lakewood OPTIONAL ACCESSORY Bolt Down Bracket Kit V.-09 Ta b l e o f Co n t e n t s The PAGE Introduction & Overview.......................................................
ATLANTIS RAIL Contact Information
 ATLANTIS RAIL Contact Information Customer Service (800) 541-6829 (508) 732-9191 Spectrum System Installation Instructions Atlantis Rail s Spectrum System is an easy to install, universal cable railing
Chapter 23. Garage Construction
 Chapter 23. Garage Construction 23.1 ESTABLISHING CHALK LINES 23.2 MEASURING AND CUTTING WALL PLATES 23.3 MARKING WINDOW & DOOR LOCATIONS ON EXTERIOR WALL PLATES 23.4 MARKING STUDS ON EXTERIOR WALL PLATES
MODERN PERGOLA INSTALLATION GUIDE. When only the best will do.
 MODERN PERGOLA INSTALLATION GUIDE When only the best will do. TOOLS LIST Drill(s) 3/8" Magnetic Driver (s) 12" Drill Extension #2 Square Drive bit for Drill or Driver Level Tape Measure Hammer Drill if
Laminate Cabinet Installation Instructions
 Laminate Cabinet Installation Instructions www.easygaragestorage.com/installation How To Use These Instructions Thank you for your purchase! Please read each step of this manual thoroughly to ensure proper
Model #SH & CH SH Pine CH Naturaline
 Model #SH304-101 & CH304-101 Assembly Manual SH304-101 Pine CH304-101 Naturaline Component Parts A 2 ea. Angled Rail - 2 x 4 x 107-1/8" B 1 ea. Center Angled Rail - 2 x 4 x 107-1/8" C 9 ea. Rock Board
southpaw enterprises, inc.
 Store these instructions in a safe place or with the enclosed maintenance checklist In-FUN-ity Climbing System Assembly Examples This example sheet is intended to supplement the instruction sheets that
Connect Transit Shelter
 Tools Required *denotes special tools required Connect Shelter, 8ft Connect Shelter, 12ft *Soft, non abrasive protective surface such as a furniture blanket *Source of compressed air (for thorough dust
Sunrise Deck Assembly Instructions for Kingston Left
 Sunrise Deck Assembly Instructions for Kingston Left It s easiest to build the deck frame first like it will be lying on its back and then after all 4 legs and horizontals are in place, tip the deck toward
CertainTeed INSTALLATION GUIDE SIMTEK FENCE PRODUCTS. Fence Installation Guide 3', 4' & 6' High
 CertainTeed INSTALLATION GUIDE SIMTEK FENCE PRODUCTS Fence Installation Guide 3', 4' & 6' High INSTALLATION GUIDE These instructions are designed to assist both professional installers and do-it-yourselfers
Oxford Stalls Installation Instructions
 Oxford Stalls Installation Instructions RAMM Horse Fencing and Stalls 13150 Airport Hwy. Swanton, OH 43558-9615 1-800-434-8456 Rev. 8/15/17 Before You Start Typical stall sizes are 10 x 10, 12 x 12 or
Roof Only Lean-to Instruction Manual
 Roof Only Lean-to Instruction Manual for 10 x 20 2 x 8 /10 6 covers Our unique assembly process quickly transforms the individual pieces into a finished structure that will give you a lifetime of service.
Post & Rail. Includes: Crossbuck, 2-Rail, 3-Rail and 4-Rail POST SUPPORT OPTIONS
 Post & Rail Includes: Crossbuck, 2-Rail, 3-Rail and 4-Rail STAGGER RAIL ENDS FOR GREATER STRENGTH ALLOW 1-1/2" GAP ON HINGE SIDE OF GATE AND 1-1/4" ON LATCH SIDE OF GATE HARDWARE DIG HOLES 30" MINIMUM
PRO-RIB FENCE PANELS INSTALLATION GUIDELINES. Virtually Maintenance Free Available in 24 Colors Custom Heights Available by the Inch
 PRO-RIB FENCE PANELS INSTALLATION GUIDELINES Virtually Maintenance Free Available in 24 Colors Custom Heights Available by the Inch www.midwestmanufacturing.com Page 2 TOOLS NEEDED Measuring Tape Drill
A Huffy Sports Company In-Ground Basketball System Owners Manual. Customer Service Center N53 W24700 South Corporate Circle Sussex, WI U.S.A.
 A Huffy Sports Company In-Ground Basketball System Owners Manual Customer Service Center N53 W2400 South Corporate Circle Sussex, WI 53089 U.S.A. Write Model Number From Box Here: WARNING! REQUIRED TOOLS
ClearSpan End Frame Kit 26' Wide x 12' High
 ClearSpan End Frame Kit 26' Wide x 12' High Diagram shows the end frame kit for an end wall without a door. (Door and end panel are purchased separately.) Rafter and struts shown in the above diagram are
12 x 12 Flat Top Attached Louvered Pergola
 x Flat Top Attached Louvered Pergola Model: Elysium ASSEMBLY GUIDE OPTIONAL ACCESSORIES: Bolt Down Bracket Kit Privacy Wall Pergola Planter ( for Pergola) VR.-0077 Table of Co n t e n t s PAGE x Flat Top
Ledger Board Lean-to Instruction Manual
 Ledger Board Lean-to Instruction Manual for 18 x 24 2 x 8 covers Our unique assembly process quickly transforms the individual pieces into a finished structure that will give you a lifetime of service.
Hoops Installation Instructions for Adjustable Basketball Goals
 WARNING! Before beginning any excavation, call your local Underground Service Locator company to make sure there are NO electrical power, natural gas, telephone, cable television, irrigation systems or
The following instructions will guide you through the installation of your new vinyl railing stair kit.
 Installation Guide Vinyl Standard Stair Railing Tools Required Protective eye glasses Tape measure Variable speed drill/screwdriver Rotary hammer or hammer drill and masonry percussion bit recommended
Ledger Board Lean-to Instruction Manual
 Ledger Board Lean-to Instruction Manual for 18 x 24 2 x 8 /12 6 covers ROOF ONLY ROOF WITH GABLES 2-SIDED FRAME ONLY 2-SIDED WITH GABLES Our unique assembly process quickly transforms the individual pieces
6a. Eight Steps to Chain-Link Fence Installation
 6a. Eight Steps to Chain-Link Fence Installation Before You Start You will need the following tools to install your chain-link fence: Post hole digger Wheelbarrow, shovel and hoe for mixing concrete Tape
ASSEMBLY INSTRUCTIONS FOR SOFTOP SHADE COVER
 ASSEMBLY INSTRUCTIONS FOR SOFTOP SHADE COVER Our unique assembly process quickly transforms individual pieces into a finished structure that will give you a lifetime of service. Great care has been taken
Installation Instructions for Vista Air Vertically Folding Walls
 Installation Instructions for Vista Air Vertically Folding Walls Use these instructions in conjunction with your shop drawings to see the specifics that are particular to the model you are installing.
10 x 10 Arch Top Pergola
 0 x 0 Arch Top Pergola I N S T A L L A T I O N G U I D E O P T I O N A L A C C E S S O R I E S Privacy Fence Panel System ( Panels & Middle Post Included) Bolt Down Bracket Kit (Set of ) Additional Shade
MM540 Installation Instructions IMPORTANT SAFETY INSTRUCTIONS - SAVE THESE INSTRUCTIONS
 MM50 Installation Instructions IMPORTANT SAFETY INSTRUCTIONS - SAVE THESE INSTRUCTIONS Please read this entire manual before you begin. Do not unpack any contents until you verify all requirements on PAGE.
INSTALLATION INSTRUCTIONS 10' WIDE FRAME FRAME SIZE: 10 X 18 X 7 (2 SQUARE TUBING) STORAGE SHELTER / CARPORT
 STORAGE SHELTER / CARPORT") INSTALLATION INSTRUCTIONS 10' WIDE FRAME FRAME SIZE: 10 X 18 X 7 (2 SQUARE TUBING) STORAGE SHELTER / CARPORT STORAGE SHELTER CARPORT Our unique assembly process quickly transforms the individual pieces
INSTALLATION INSTRUCTIONS 10' WIDE FRAME FRAME SIZE: 10 X 18 X 7 (2 SQUARE TUBING) STORAGE SHELTER / CARPORT STORAGE SHELTER CARPORT Our unique assembly process quickly transforms the individual pieces
PATRIOT DOCKS ASSEMBLY INSTRUCTIONS
 6/1/2008 PATRIOT DOCKS ASSEMBLY INSTRUCTIONS Congratulations on your new Patriot Dock purchase. This manual contains instructions to assemble basic dock configurations for use at typical shoreline application.
THE ROGUE TM FUNSLIDE TM
 THE ROGUE TM FUNSLIDE TM ASSEMBLY AND INSTALLATION INSTRUCTIONS * * C A U T I O N * * S.R. SMITH ROGUE TM FUNSLIDES TM ARE MANUFACTURED FOR INSTALLATION AND USE ON RESIDENTIAL INGROUND POOLS ONLY. ROGUE
MODEL PS10CLATL ASSEMbLy MAnuAL
 Assembly Manual By If you have problems or questions about your Creative Playthings Play Set, DO NOT CALL THE RETAILER. Contact Creative Playthings Customer Service at 1-800-833-4001 or customerservice@creativeplaythings.com
Vinyl Gazebo Instructions
 P a g e 1 Vinyl Gazebo Instructions 10 Vinyl Gazebo Shown Thank you for the purchase of your New Gazebo. Depending on the size of your Gazebo, installation can usually be completed in 1 to 2 days. These
Chapter 1. Beam and Sill Plates
 Chapter 1. Beam and Sill Plates 1.1 ESTABLISHING SQUARE SILL PLATE CHALK LINES 1.2 INSTALLING TREATED SILL PLATES 1.3 INSTALLING LAMINATE BEAM Tools needed by volunteers: Hammer Nail apron Tape measure
INSTALLATION INSTRUCTIONS
 INSTALLATION INSTRUCTIONS SOLID PHENOLIC TOILET PARTITIONS 1080 DuraLineSeries Class-A Fire Rated Includes Institutional Hardware Option.67 IMPORTANT: Storage and Handling Information on last page. Review
Installation Instructions
 For Medium (15-18.5K) + Heavy duty (22-28.5K) Air Conditioner READ BEFORE INSTALLING UNIT To avoid risk of personal injury, property damage, or product damage due to the weight of this device and sharp
Extreme Tube Slide II - 5ft. Part Number: Revison D: LA 9459
 Extreme Tube Slide II - 5ft. Part Number: 03-0020 Revison D: 6.19.2018 LA 9459 Please inspect and inventory all parts immediately upon accepting delivery. Use the inventory pages in the manual to make
Installation Instructions for. Handrail Component System
 Handrail STEP-BY-STEP Installation Instructions for Handrail Component System Rise in Inches Run in Inches 8 8.5 9 9.5 10 10.5 11 11.5 12 12.5 13 13.5 14 14.5 15 8.5 47 45 43 42 40 39 38 36 35 34 33 32
12 x 24 Flat Top Pergola
 A S S E M B LY G U I D E OPTIONAL ACCESSORIES: Bolt Down Bracket Kit Privacy Wall (6 for Pergola) Pergola Planter Ver.-75 Ta b l e o f Co n t e n t s PAGE Introduction & Overview......................................................
US RACK, Inc Falcon Drive, Madera, CA
 US RACK, Inc - 2850 Falcon Drive, Madera, CA 93637-559-661-3050 INSTALLATION AND USE INSTRUCTIONS for Long-John Extension Ladder Rack WARNING: Do NOT attempt to install or use this rack without following
Salter Industries Spiral Stair
 Salter Industries Spiral Stair The Leader in Spiral Staircases Continuous Sleeve Stair Installation Instructions TOOLS NEEDED: 1. Electric drill with hex chuck and Phillips bit 2. Drill bits 1/8", 1/4",
6 1/2 x 6 1/2 Wood Grain Flat Top Pergola
 / x / Wood Grain Flat Top Pergola A S S E M B LY G U I D E Models: Lakewood OPTIONAL ACCESSORY Bolt Down Bracket Kit V.- Ta b l e o f Co n t e n t s The PAGE Introduction & Overview.......................................................
BUMP GATE FITTING INSTRUCTIONS.
 1 BUMP GATE FITTING INSTRUCTIONS. HEAVY DUTY MODEL FOR STEEL POSTS. Hinge post Lock post Bump arms Two-way lock Thank you for purchasing a Bump Gate. This device will provide you with many years of good
GUIDELINES INSTALLATION INSTRUCTIONS
 Important! Please Read Completely Before Beginning Installation. According to a report published by the U. S. Consumer Product Safety Commission (C.P.S.C.) 72% of all playground injuries result from accidental
CONTENTS TOOL LIST U P S I D E I N N O V A T I O N S, L L C RAMP AND STEP SYSTEM ASSEMBLY INSTRUCTIONS. Revised: June 2013
 U P S I D E I N N O V A T I O N S, L L C RAMP AND STEP SYSTEM ASSEMBLY INSTRUCTIONS TOOL LIST Required Tools: - Reciprocating Saw with Metal Cutting Blade - Drill - 7/16 Drill Bit for Metal Drilling -
17MAY18 U.S. RACK, Inc Falcon Drive, Madera, CA
 17MAY18 U.S. RACK, Inc. - 2850 Falcon Drive, Madera, CA 93637-559-661-3050 INSTRUCTIONS for FIFTH WHEEL RACK Model 2010-4AD WARNING: Do NOT attempt to install or use this rack without following all instructions.
MantelMount. TM1A Installation Instructions IMPORTANT SAFETY INSTRUCTIONS - SAVE THESE INSTRUCTIONS
 MantelMount TMA Installation Instructions IMPORTANT SAFETY INSTRUCTIONS - SAVE THESE INSTRUCTIONS TM Thank you for choosing the MantelMount television wall mount. Please read this entire manual before
12 x 12 Flat Top Pergola
 x Flat Top Pergola Model: Regency, Roosevelt ASSEMBLY GUIDE OPTIONAL ACCESSORIES: Bolt Down Bracket Kit Canvas Weave Shade Kit Privacy Wall Pergola Planter ( for Pergola) (Regency Only) (Regency Only)
YUKON PATIO COVER INSTALLATION INSTRUCTIONS
 YUKON PATIO COVER INSTALLATION INSTRUCTIONS Before You Begin: Consult your local building department for any required permits You may be required to obtain a building permit for this structure. Contact
CONSTRUCTION GUIDE 21ft Wide and 24ft Wide SHEEP HOUSE
 The Outside, Inside CONSTRUCTION GUIDE 21ft Wide and 24ft Wide SHEEP HOUSE Thank you for purchasing a Premier Sheep House. Please take the time to carefully read through this Construction Guide before
Installation of Balustrade Systems
 Installation of Balustrade Systems IMPORTANT: Be sure to mark the center point of each newel post's location prior to installation to insure proper spacing. All product interfaces must use PL Premium Adhesive
Phone # La Jolla Doors. Block Frame Installation Manual Aluminum Frame with either Vinyl or Aluminum Panels
 Phone # 800-440-8785 www.lajolladoors.com La Jolla Doors Block Frame Installation Manual Aluminum Frame with either Vinyl or Aluminum Panels Thank you for choosing La Jolla Doors In this manual you will
INSTALLATION INSTRUCTIONS
 Tools required for the installation. A. Core Drill 87mm Drill bit B. Tape measure C. Spirit Level D. Marking pen E. Caulking gun F. Cutting Pliers G. Cordless Drill and Philips head bit, 5mm Drill bit.
SAFETY. Injury hazard
 SAFETY Installation Guidelines Your safety and the safety of others is very important. In order to help you make informed decisions about safety, we have provided installation instructions and other information.
US RACK, Inc Falcon Drive, Madera, CA
 US RACK, Inc. - 2850 Falcon Drive, Madera, CA 93637-559-661-3050 INSTRUCTIONS for MOTORCYCLE RACK with Cradling Wheel Chocks WARNING: Do NOT attempt to install or use this rack without following all instructions.
Hoops Installation Instructions for Standard (Non-Adjustable) Basketball Goals
 Basketball Goals") WARNING! Before beginning any excavation, call your local Underground Service Locator company to make sure there are NO electrical power, natural gas, telephone, cable television, irrigation systems or
WARNING! Before beginning any excavation, call your local Underground Service Locator company to make sure there are NO electrical power, natural gas, telephone, cable television, irrigation systems or
Horizontal Cable Systems
 ALUMINUM RAILING INSTALLATION INSTRUCTIONS v2012 orizontal Cable Systems 1) Check Contents Of Packages: Verify that all parts have arrived and that they match the packing list. 1A) Coastal applications:
BISON GOOSENECK FOOTBALL 1 PAIR OF GOAL POSTS
 Instruction Manual BISON GOOSENECK FOOTBALL 1 PAIR OF GOAL POSTS Customer Service (800) 247-7668 P A R T S L I S T Item Qty Description Item Qty Description A 2 GOOSENECK POLE I 4 UPRIGHTS B 2 BAND CLAMP
MODEL PS10CLASB ASSEMBLy MAnuAL
 Assembly Manual By If you have problems or questions about your Creative Playthings Play Set, DO NOT CALL THE RETAILER. Contact Creative Playthings Customer Service at 1-800-833-4001 or customerservice@creativeplaythings.com
10 x 10 Flat Top Pergola
 0 x 0 Flat Top Pergola A S S E M B L Y G U I D E Models: Venetian, Tuscany, Luxor, Acadia O P T I O N A L A C C E S S O R I E S Arch Kit System ( Arches) Privacy Fence Panel System ( Panels & Middle Post)