Armourvent Multi application guide
|
|
|
- Maude Skinner
- 5 years ago
- Views:
Transcription
1 application guide

2 CONTENTS Why ventilate a shingle roof 2 A balanced system: the key to proper roof ventilation 3 Calculating the net free area of vent openings 4 Installation of IKO 6 Ridge vent installation instructions 10 Hip vent installation instructions 12 Off peak vent installation instructions 14 UK application guide

3 WHY VENTILATE A SHINGLE ROOF? Unventilated shingle roofs will cause high temperatures inside. This will age the shingles much quicker and at the same time create unhealthy, moist air to live in. Ventilating the roof will lower the temperature of both the shingle roof and the space directly underneath, leaving the roof structure unaffected and preventing accumulation of moisture in the attic. A BALANCED SYSTEM: The Key to Proper Roof Ventilation The most important factor in roof ventilation is the need for a balanced system. This means for every cm² of air exhausted, it must be balanced by providing the same amount of air intake at the eaves. Ventilating your roof will equalize the temperature of the outer and inner roof. Your roof structure will then be able to withstand sudden temperature changes. Especially those, which are created by thunderstorms during the summertime. Exhaust Exhaust Ventilating the roof also prevents ice dams. Ice dams are the results of continuous freezing and thawing of snow due to escaping heat through the roof deck being backed up with frozen slush. If it occurs, water may be driven under the roof. Airflow Warm Air Rises (Thermal effect) Airflow Warm Air Rises (Thermal effect) A balanced system of ventilation, which is the key to proper roof ventilation, allows heat and water vapor to escape from the roof system. Air must be able to circulate freely between insulation and the nailable roof deck, from the eaves to ridges. Intake Air At Soffit Intake Air At Soffit extend the life of your roof increase your living comfort regulate the moisture in your house Your dryer insulation will function better lower utility bills Providing a balanced system assures that damaging heat and moisture is being vented out of the attic, protecting the roof from premature deterioration, costly repairs. If an attic has a properly balanced system, the will move from the bottom of the attic to the top, pushing out heat and moisture in a natural flow using air pressure, thermal effect and diffusion. If the system were to be unbalanced, and the Net Free Area (NFA) at the ridge is higher than at the eave, a reverse can occur causing an opposite effect to what is desired. The will come from the top of the house and push down toward the eaves. As a result, heat and moisture are not allowed to escape and additional air and moisture can be drawn into the home. Unventilated: high temperature inside. Without air gap between insulation and roof deck: condensation forms and the roof structure is damaged. Ventilated: lower temperature inside. With air gap between insulation and roof deck: air escapes via ridge vents, leaving the roof structure unaffected. Recognized by builders throughout the industry, are the standards for static ventilation, as found in the requirements for proper ventilation. These requirements call for a ratio of 1:300. This means one cm² of ventilation for every 300 cm² of insulated roof area. In addition, specifications for good attic ventilation require a balanced system 50% of the vents at the eave and 50% at the upper portion of the roof application guide - 3 -
4 CALCULATING THE NET FREE AREA OF VENT OPENINGS The air gap between the insulation and the roof deck must be 4 to 6 cm. Air should flow in from the bottom of the roof (eaves) and out through the top of the roof (ridge). The air flow between the eaves and ridge vents must be unobstructed (by insulation or roof beams) to ensure cross-flow ventilation. The total required net free area (NFA) of vent openings is a function of the insulated roof area (P) and the slope of the roof. Ventilation should be equally divided among the number of vents at eaves and ridges. Example: Roof area (P) = 120 m² Roof pitch = 35 NFA = 275 cm²/linear m of vents Total required NFA of vent openings: = 0,4000 m² = 4000 cm² Minimum linear m of vents required over total roof: = 14,54 m Linear m of vents at ridge: 14,54 2 = 7,27 => 7,50 m Linear m of vents at eaves: 14,54 2 = 7,27 => 7,50 m Note: P P P Roofs with vapour barriers need 40% less ventilation. In certain regions (mountainous areas, the coast) special building regulations may apply. SAMPLE ROOF STRUCTURES Plus Dimensions 6 m x 22,80 cm 6 m x 28,50 cm Roof pitch Required NFA of vent openings P P 600 IKO Shingles which may be used Monarch Armourglass (Victorian) Superglass (-Biber) Monarch -Diamant Diamant DiamantShield BiberShield ArmourShield Marathon Ultra (Cambridge Xpress) Roof Pitches NFA per linear m of vents 275 cm²/m 275 cm²/m application guide
5 INSTALLATION OF IKO ARMOURVENT MULTI IKO on ridge application (rafter) IKO on ridge application (double beam) Nail Must penetrate roof deck Shingle Decking Nail Must penetrate roof deck Shingle Decking Opening Opening Center Beam Truss Opening Double Beams Opening Truss IKO on ridge application (single beam) IKO off peak application (intake or outlet) Nail Must penetrate roof deck Shingle Decking Roof Sheathing Nail Must penetrate roof deck Shingles Nail Off Peak Vent can be used at upper end of roof for exhaust or lower end of roof for intake. Opening Double Beams Opening Truss cut here Vent Detail moisture barrier membrane Sealant Sealant Shingles application guide
6 IKO shed roof application IKO eave application (narrow overhang) Siding Rafter/Truss cut here Flashing Detail Sheathing moisture barrier Flashing membrane Shingle Drip Edge Fascia Board Shingle Solid Sheathing Insulation Vent Detail Truss/Rafter Siding moisture barrier membrane Roof Sheathing IKO eave application (wide overhang) Soid Sheathing Shingle Insulation Drip Edge Rafter/Truss Soid Soffit Panel application guide
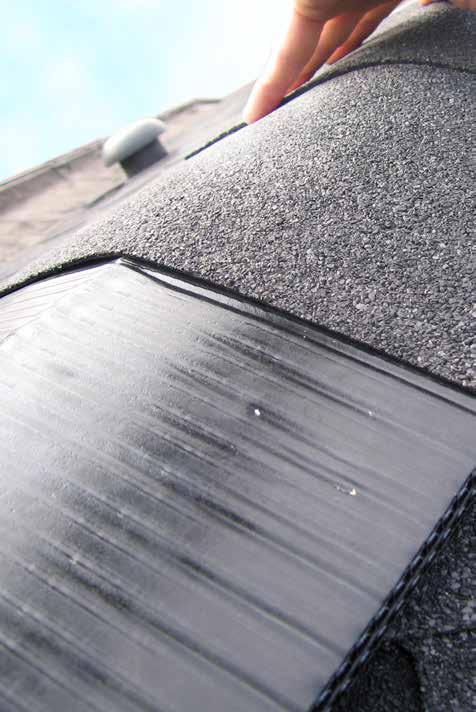
7 RIDGE VENT INSTALLATION INSTRUCTIONS The length of slot cut along the roof ridge controls the amount of ventilation. Remember, for a very attractive roofline, it is recommended that IKO Armourvents Multi are installed along the entire ridge of the roof. 3 / End cap installation 1 / Ridge slot preparation Install end caps. Pull apart a pre-cut section of the foam end cap found with the IKO. Use a utility knife, to make a cut in the moisture barrier membrane 1,5 cm on each side, back from the end of the section. Cut a 5 cm slot (2,5 cm on each side of ridge) along the ridge(s). For a roof with a centre beam, a 9 cm slot should be cut (4,5 cm on each side of the ridge). A minimum of 15 cm must be left uncut on each end of the ridge. Once the slot is cut and any overlapping shingles covering the ridge are trimmed and removed, the ridge is ready for vent installation. Use Bitumious mastic, coat both sides of the moisture barrier membrane between the foam end cap and the vent underside for a tight seal. Attach vent in the corners to the roof and nail vent and end caps in place to roof deck. Drive two nails through the vent and foam end cap to hold foam in place on the ends of the ridge only. Nails should penetrate the wood roof deck at least 1,5 cm. 2 / Vent placement on ridge 4 / Ridge shingle installation Roll out and place the IKO along the entire length of slot also covering the 15 cm minimum uncut ridge on both ends. Secure at the lead edge, inserting the end cap. Pull the vent tight and secure at about 3 m. Pull the rest of the vent tight and secure, inserting the end cap. Multiple lengths of vent can be joined by butting the sections tightly together. We require applying bitumious mastic to the shingles, before installing the vent on the ridge. This sealant should fill any voids between the bottom of the vent and the surface of the shingle. Nail ridge shingles with roofing nails in a common overlapping pattern. Nails should penetrate thewood roof deck at least 1,5 cm. The vent has been installed properly if the bottom of the vent is flat on the roof and the peak is slightly rounded. application guide
8 HIP VENT INSTALLATION INSTRUCTIONS The length of slot cut along the roof ridge controls the amount of ventilation. Remember, for a very attractive roofline, it is recommended that IKO Armourvents Multi are installed along the entire ridge of the roof. 1 / Hip slot preparation 3 / Hip and ridge vent transition 45 cm 15 cm 30 cm 45 cm To maintain structural integrity, one continuous slot is not recommended on hip applications. Start ventilation preparation by leaving 15 cm of hip uncut from where the ridge and hip meet. Cut a 9 cm width slot for ventilation (4,5 cm on each side of the hip). Hip slot should be 45 cm inlength, spaced with a 30 cm uncut area between each 45 cm opening. The slot for ventilation should not be cut any lower than 1/3 of the roof to maintain a balanced ventilation system. 2 / Vent placement on ridge Roll out and place the IKO along the entire length of slot also covering the 15 cm minimum uncut ridge on both ends. Secure at the lead edge, inserting the end cap. Pull the vent tight and secure at about 3 m. Pull the rest of the vent tight and secure, inserting the end cap. Multiple lengths of vent can be joined by butting the sections tightly together. We require applying bitumious mastic to the shingles, before installing the vent on the ridge. This sealant should fill any voids between the bottom of the vent and the surface of the shingle. Using a utility knife to trim the end of IKO. Insert the foam end cap under the IKO where it is at full width. Fasten vent for hip at point where it meets ridge. Roll out or place the vent all of the way down the hip, covering 2 pre-laid cap shingles at the bottom of the hip. Go back over hip vents and fasten at 10 cm intervals. If the is not being run the entire length of the hip, use the cap shingles to create a transition. Use sealant to fill any void left between the shingles and the remaining top layer of the vent. Be sure to apply roofing sealant to any spaces left by cap shingle used for transition. If 2 or more sections of IKO are being joined together, an end cap MUST be installed into each end of the joining sections. Repeat on all hips. 4 / Hip and ridge shingle istallation Apply the shingles to the hip and then to the ridge. Nail hip shingles with roofing nails in a common overlapping pattern. Nails should penetrate the wood roof deck at least 1,5 cm. It is important when installing this vent that you maintain the pitch of the roof. The vent has been installed properly if the bottom of the vent is flat on the roof and the peak is slightly rounded. application guide


9 OFF PEAK VENT INSTALLATION INSTRUCTIONS 1 / Vent preparation Using IKO Plus, peel 7,5 cm of the moisture barrier membrane away from one entire side of the vent. Using a utility knife, cut off 7,5 cm of the corrugated air return at one entire side of the vent. 4 / Vent installation Install IKO Plus along the slot opening with the remaining 7,5 cm corrugated air return placed approximately 2,5 cm below the ventilation slot. Nail down the roll, starting with the lead edge, middle and other end through the 7,5 cm air return. Be sure the moisture barrier membrane is pulled tight and lay a bead of bitumious mastic, 11,5 cm above the slot, below the moisture barrier membrane. Nail through the plastic cap and moisture barrier membrane into the deck. Install foam end caps. 2 / Ridge exhaust/lower intake Cut a horizontal 2 cm slot in the deck where the desired ventilation is needed. A minimum of 15 cm must be left uncut on each end of the slot. Install an underlay onto the deck and trim underlay from slot opening. Caulk edge of underlay. 5 / Bitumious mastic Lay a bead of bitumious mastic on front edge of IKO Plus. Bitumious mastic on top and behind the vent. Install an underlay on top of vent (a minimum of 40 cm). Install underlay from the vent to the ridge. Lay a bead of IKO Shingle Stick front edge of underlay. 3 / Shingle installation Install shingles, bitumious mastic the top edge of shingles and trim shingles from slot opening. application guide


10 6 / Tabs removal Using a utility knife, remove tabs from shingles. Nail this starterstrip. Nails should penetrate the wood roof deck at least a 1,5 cm. Lay a bead of Bitumious mastic on the front edge of the starterstrip. IKO is multi-functional 2 sizes available for all types of IKO shingles Can be used for a wide variety of sloped roofs Can be used for ridge, hip, soffit and off peak ventilation IKO can be applied very quickly 7 / Shingle installation Install a minimum of one course of shingles, lapped on top of starterstrip, over vent. Rolls can be cut to any desired length Easy to handle No special tools are required Easy fastening method One pass application IKO is cost efficient Less openings have to be made Very fast application IKO is a highly solid material Does not crush when nailed application guide
11 application guide


12 Notice: The information on this publication is subject to change without notice. IKO assumes no responsibility for errors that may appear on this publication. Warning: Check local building codes, safety precautions and law procedures that may apply to your particular situation. Copyright by IKO Sales Int. Belgium. All rights reserved. No part of this publication may be copied or reproduced without the express prior written permission of IKO Sales International NV. Order extra copies of this booklet direct at IKO Sales International Belgium.

13 IKO Sales International nv I.Z. Ravenshout Truibroek Ham Belgium AG-UK-2015 T +32 (0) F +32 (0) E support@iko.be
Bitumen Roofshingles ARMOURVENT MULTI APPLICATION GUIDE VENTILATION
 Bitumen Roofshingles ARMOURVENT MULTI APPLICATION GUIDE VENTILATION WHY VENTILATE A SHINGLE ROOF? Unventilated shingle roofs will cause high temperatures inside. This will age the shingles much quicker
Installation Instructions
 Installation Instructions ROLL VENT STANDARD / METRIC Page Installation Considerations 3 Roll Vent Standard General Installation 4 Roll Vent Metric General Installation 5 Steep Pitch Guidelines 6 Asphalt
Installation Instructions
 Installation Instructions RAPID RIDGE STANDARD / 7 / METRIC Page Installation Considerations 3 Rapid Ridge Standard General Installation 4 Rapid Ridge Metric General Installation 5 Rapid Ridge 7 General
Installation Instructions
 Installation Instructions SHARK VENT XLP / XTRA Page Installation Considerations 3 Shark Vent XLP & Xtra General Installation 4 Steep Pitch Guidelines 5 Asphalt Shingles Detail 6 Ridge Beam Detail 7 Hip
Installation Instructions
 Installation Instructions XTRACTOR VENT X18 / X18 XTRA / XLP Page Installation Considerations 3 X18 and X18 Xtra General Installation 4 XLP General Installation 5 Steep Pitch Guidelines 6 Asphalt Shingles
Installation Instructions
 Installation Instructions XTRACTOR VENT X18 / X18 XTRA / XLP Page X18 and X18 Xtra General Installation 2 XLP General Installation 3 Asphalt Fiberglass Shingles Detail 4 Ridge Beam Detail 5 Hip Roof Detail
SmartVent Eave Edge Installation Instructions
 SmartVent Eave Edge Installation Instructions STEP 1: Cut a slit 1 wide (or a series of 1 ¾ holes at 3 on center) into the roof decking 6 to 7 up from the drip edge. SmartVent is rated 9NFA. Ensure drip
The Expert Application Guide
 The Expert Application Guide The Expert Application Guide - 1 - www.iko.be The Expert Application Guide PAGE FOREWORD INTRODUCTION SHINGLES PRODUCT INFORMATION 1 ADVANTAGES OF SHINGLES 2 A FEW ESSENTIAL
6 STEP INSTALLATION GUIDE BY DCI
 6 STEP INSTALLATION GUIDE BY DCI STEP 1 (Ensure metal drip edge was previously installed.) Begin by cutting a slit 1 wide (or a series of 1 ¾ holes 3 on center) into the roof decking 6 to 7 up from the
RIDGEMASTER PLUS CAUTION INSTALLATION INSTRUCTIONS ALWAYS WEAR SAFETY GLASSES TOOLS NEEDED GENERAL GUIDELINES FOR RIDGEMASTER PLUS AND HIPMASTER
 INSTALLATION INSTRUCTIONS RIDGEMASTER PLUS CAUTION Before beginning installation read all general guidelines, special notes and installation steps thoroughly and be sure to check and follow all your local
HipMaster Installation Instructions
 Mid-America, Plus and HipMaster Installation Instructions New applications for metal, slate and wood shingle roofs (see page 7) CAUTION: Before beginning installation read all general guidelines, special
BARDOLINE INSTALLATION INSTRUCTIONS
 BARDOLINE INSTALLATION INSTRUCTIONS www.onduline.com CONTENTS General conditions Material requirements Terms Estimating shingle requirements Roof preparation Shingle application 9 GENERAL CONDITIONS ONDULINE
SLATE & SHINGLE INSTALLATION
 EAVE EDGE Apply a small strip of roofing paper to the bottom of eave. Eave flashing is attached to substrate with roofing nails every 9". Install underlayment over entire roof. (See Fig. 1) PAGE 1 Bend
CAMBRIDGE XPRESS Most efficient laminated shingle in the world
 Most efficient laminated shingle in the world Cambridge Xpress, express your individuality Cambridge Xpress Get the -advantage: Your benefits Most efficient laminated shingle in the world: larger shingle
StormMaster Slate General Instructions 1.) GENERAL INSTRUCTIONS 2.) ROOF DECK VENTILATION 3.) ROOF DECK
 GENERAL INSTRUCTIONS 2.) ROOF DECK VENTILATION 3.) ROOF DECK") StormMaster Slate General Instructions IMPORTANT: THE STATEMENTS EXPRESSED ON THIS PAGE ARE THE RECOMMENDATIONS FOR THE APPLICATION OF THE ROOFING PRODUCTS AS OUTLINED AND ILLUSTRATED. ANY DEVIATION FROM
StormMaster Slate General Instructions IMPORTANT: THE STATEMENTS EXPRESSED ON THIS PAGE ARE THE RECOMMENDATIONS FOR THE APPLICATION OF THE ROOFING PRODUCTS AS OUTLINED AND ILLUSTRATED. ANY DEVIATION FROM
SG-30 A P P L I C A T I O N I N S T R U C T I O N S. Directions For Application
 1 2 3 General Instructions NOTICE: THESE SHINGLES MUST BE APPLIED TO CONFORM WITH ALL APPLICABLE BUILDING CODES. THESE DIRECTIONS REPRESENT COMMON AND ACCEPTED ROOFING PRACTICES. DEVIATIONS FROM THESE
CertainTeed. Shake / Slate Installation Guide
 CertainTeed Shake / Slate Installation Guide Table of Contents System Components... 2 General Conditions, Safety and Roof Preparations... 3... 4 Eave/Drip Edge... 5 Inner Gable... 6 Outer Gable... 7 Open
DIRECTIONS FOR APPLICATION
 Instructions 1 General NOTICE: THESE SHINGLES MUST BE APPLIED TO CONFORM WITH ALL APPLICABLE BUILDING CODES. THESE DIRECTIONS REPRESENT COMMON AND ACCEPTED ROOFING PRACTICES. DEVIATIONS FROM THESE DIRECTIONS
Shingle Installation Guidelines
 Shingle Installation Guidelines General Guidelines Materials to be used Key definitions Cost of roofing Preparation of the roofing deck Materials used for roofing should conform to approved norms and regulations
A P P L I C A T I O N I N S T R U C T I O N S
 1 2 3 General Instructions NOTICE: THESE SHINGLES MUST BE APPLIED TO CONFORM WITH ALL APPLICABLE BUILDING CODES. THESE DIRECTIONS REPRESENT COMMON AND ACCEPTED ROOFING PRACTICES. DEVIATIONS FROM THESE
This document is provided for guidance only, it is not intended to cover all local code variations.
 FULL VERSION Ridge/Hip Installation Guidelines VIPER VENT A Ridge Vent for a Durable Roof VIPERVENT A Roof Exhaust Vent for all types of Roofing VIPER VENT is a patented, light weight, nylon vent developed
GlassMaster General Instructions - Ardmore, OK & Hampton, GA <br /> Atlas Roofing
 GlassMaster General Instructions - Ardmore, OK & Hampton, GA (For Metric Size Franklin, OH Instructions Click Here) IMPORTANT: THE STATEMENTS EXPRESSED ON THIS WRAPPER ARE THE RECOMMENDATIONS FOR THE APPLICATION
OWENS CORNING LAMINATE SHINGLES INSTALLATION INSTRUCTIONS
 General This Installation Instruction document for Owens Corning asphalt roofing shingles is to be read in conjunction with the Installation information printed on each packet of shingles along with the
1 Roof Substrate (Deck) OWENS CORNING BERKSHIRE SHINGLES INSTALLATION INSTRUCTIONS
 OWENS CORNING BERKSHIRE SHINGLES INSTALLATION INSTRUCTIONS") General This Installation Instruction document for Owens Corning Berkshire roofing shingles is to be read in conjunction with the Installation information printed on each packet of shingles along with
General This Installation Instruction document for Owens Corning Berkshire roofing shingles is to be read in conjunction with the Installation information printed on each packet of shingles along with
A REFERENCE GUIDE OF TYPICAL RAINSCREEN WALL AND WINDOW DETAILS
 WARRANTY PROVIDER ACCEPTED A REFERENCE GUIDE OF TYPICAL RAINSCREEN WALL AND WINDOW DETAILS Per: 2006 B.C.B.C. Part 9 DISCLAIMER THE INFORMATION CONTAINED IN THIS DOCUMENT REPRESENTS CURRENT WOOD FRAME
The City of Winnipeg SHINGLE ROOF REPLACEMENT Section Replacement of Shingle Roof - Louis Riel Library Page 1 of 5 Bid Opp. No.
 Replacement of Shingle Roof - Louis Riel Library Page 1 of 5 PART 1 GENERAL 1.1 SCOPE OF WORK.1 Total roof area approximately 1,312 m 2. The Work includes, but is not limited to:.1 Removal and disposal
DIRECTIONS FOR APPLICATION
 Instructions 1 General NOTICE: THESE SHINGLES MUST BE APPLIED TO CONFORM WITH ALL APPLICABLE BUILDING CODES. THESE DIRECTIONS REPRESENT COMMON AND ACCEPTED ROOFING PRACTICES. DEVIATIONS FROM THESE DIRECTIONS
Tuff-Rib Install Guide
 Install Guide bestbuymetalroof.com Page 2 of 27 Page 3 of 27 1. Page 4 2. a. Installation Guide b. Panel Squaring Pages 5, 6 Pages 7, 8 3. Pages 9, 10 4. a. Fascia (optional) b. Eave / 1.5x3.5 Angle c.
DIRECTIONS FOR APPLICATION
 Instructions 1 General NOTICE: THESE SHINGLES MUST BE APPLIED TO CONFORM WITH ALL APPLICABLE BUILDING CODES. THESE DIRECTIONS REPRESENT COMMON AND ACCEPTED ROOFING PRACTICES. DEVIATIONS FROM THESE DIRECTIONS
SECTION 9: ROOF STRUCTURE, ROOFING MATERIALS AND FLASHING, GUTTER, DOWNSPOUTS, AND SKYLIGHTS. Background
 Background SECTION : ROOF STRUCTURE, ROOFING MATERIALS AND FLASHING, GUTTER, DOWNSPOUTS, AND SKYLIGHTS There are two basic types of roofs, flat and pitched. These two types have numerous variations. The
Polytegola N. Bitumen Roof shingles. Application guide
 Polytegola N Bitumen Roof shingles Application guide Application manual POLYTEGOLA N CONTENT 1. Foreword - General conditions 3 2. POLYTEGOLA N designs 4 3. Roof pitches 5 4. Storage 5 5. Roof decking
ROOFING APPLICATION STANDARD (RAS) No. 115 STANDARD PROCEDURES FOR ASPHALTIC SHINGLE INSTALLATION
 No. 115 STANDARD PROCEDURES FOR ASPHALTIC SHINGLE INSTALLATION") ROOFING APPLICATION STANDARD (RAS) No. 115 STANDARD PROCEDURES FOR ASPHALTIC SHINGLE INSTALLATION 1. Scope 4. Underlayment 2. 1.1 This roofing application standard has been developed to provide a responsive
ROOFING APPLICATION STANDARD (RAS) No. 115 STANDARD PROCEDURES FOR ASPHALTIC SHINGLE INSTALLATION 1. Scope 4. Underlayment 2. 1.1 This roofing application standard has been developed to provide a responsive
The chimney must extend at least 2 above any part of the roof within 10 of it. A fireplace must have an intake combustion air duct installed to plan.
 ROOF ASSEMBLY FURNACE VENT In the utility room or where the furnace is located, there is an access panel to inspect the furnace chimney pipe for gas fired units. Remove the cover and check to see that
IRONWOOD SHAKE & FLASHING SPECIFICATIONS
 3 1-51 3-3/4 1 IRONWOOD SHAKE & FLASHING SPECIFICATIONS 6 1-13- 1-1-1/4 2-1.5 Drip Edge 2.5 Drip Edge 2-7/8 1-1-1/4 3/4 1 2-1 IRONWOOD SHAKE Overall Length 51 Length of Coverage 48 Width of Coverage 1
3-Tab Shingle Instructions DURA-SEAL 20 DURA-SEAL 25
 3-Tab Shingle Instructions DURA-SEAL 20 DURA-SEAL 25 1 Directions For Applying Malarkey 3-Tab Shingles GENERAL INSTRUCTIONS Install Malarkey 3-tab shingles according to building code and local amendments.
F-WAVE REVIA SYNTHETIC ROOFING SHINGLES
 F-WAVE REVIA SYNTHETIC ROOFING SHINGLES Installation Manual for Steep-Slope Residential Installations For support with all other Steep-Slope Installations, please call F-Wave Technical Support at 888-GO-FWAVE.
IRONSTONE SLATE & FLASHING SPECIFICATIONS IRONSTONE SLATE
 8 5/8" A) 1 5/8" 5/8" 1 10" 10 1 5 50" 9 7/8" IRONSTONE SLATE & FLASHING SPECIFICATIONS IRONSTONE SLATE 1/8" 1 B) 3/8" 2 7/8" 1 3/8" 3/8" 3/8" 3/8" 1" 1 5/8" 1 5/8" 1 2 1 8.3" 3/4" Overall Length 52 Length
installation guide Villa
 installation guide Villa Table of Contents Introduction............................. 2 Safety................................... 2 Tools.................................... 2 Codes & Requirements....................
Straight Rib Series Metal Roofing Panel Installation Guide
 D-Rib G-Rib C-Rib Straight Rib Series Metal Roofing Panel Installation Guide 7000 AIRPORT LINE R.R., BOX 7 HENSALL, ONTARIO N0M X0 EASY BUILDING PRODUCTS TEL. : 5-6-07 TOLL FREE : -888-76-777 FAX: 5-6-08
Installation Manual. Future Roof Shingle / Slate Products
 Installation Manual Future Roof Shingle / Slate Products REVISED 14/09/2010 Future Roof Shingle Installation Manual is a component of Future Roof, Inc. and as such is intended to be used with Future Roof
Laminated Shingles. Landmark Series and Landmark TL. CertainTeed Shingle Applicator s Manual
 CertainTeed Shingle Applicator s Manual Laminated Shingles 12 Landmark Series and Landmark TL YOUR OBJECTIVE: To learn the correct procedure for installing Laminated shingles. LANDMARK SERIES AND LANDMARK
Pipe penetration refer CT15. Viking CertainTeed Shingles General Roof details
 Vented ridge refer CT02 Substrate Viking SuperStrand or F11 Roofing ply Pipe penetration refer CT15 Valley details refer CT07 and CT08 refer CT17 and CT18 for requirements Drip-edge refer CT01 Barge detail
Installation Guide - Evolution Series Wood Siding
 Installation Guide - Evolution Series Wood Siding The following instructions pertain to the installation of Fraser Wood Siding Evolution Series on a typical wood frame construction allowing for nail penetration
HERITAGE LAMINATED ASPHALT SHINGLES Frederick, MD
 Application Instructions for FORMERLY 30 THESE ARE THE MANUFACTURER S APPLICATION INSTRUCTIONS FOR THE ROOFING CONDITIONS DESCRIBED. TAMKO BUILDING PRODUCTS, INC. ASSUMES NO RESPONSIBILITY FOR LEAKS OR
Installation Guide. Step 3. Valley Flashing. Step 7. Transition Flashings and Accessories. Step 6. Hip and Ridge Installation
 Step 7. Transition s and Accessories Step 3. Valley Step 6. Hip and Ridge Installation Step 2. Rake Trim Step 5. Installing the Shingles Step 1. Eave Starter Installation Step 4. Endwall s Installation
Installation. Openings: Valley: Installation on timber roofs (new buildings) 1. Fit a support (noggins) around the opening.
 1. Fit a support (noggins) around the opening.") Installation Openings: 1. Fit a support (noggins) around the opening. 2. Apply Isola Sealant to the support and then fit Pro Super. 3. Install an Isola Opening Fitting for round or square openings. (Remember
Installation Openings: 1. Fit a support (noggins) around the opening. 2. Apply Isola Sealant to the support and then fit Pro Super. 3. Install an Isola Opening Fitting for round or square openings. (Remember
STORMMASTER SHAKE GENERAL INSTRUCTIONS
 STORMMASTER SHAKE GENERAL INSTRUCTIONS IMPORTANT: THE STATEMENTS EXPRESSED ON THIS PAGE ARE THE RECOMMENDATIONS FOR THE APPLICATION OF THE ROOFING PRODUCTS AS OUTLINED AND ILLUSTRATED. ANY DEVIATION FROM
EVALUATION REPORT GAF Materials Corporation 1361 Alps Road, Building 7-3 Wayne, NJ 07470
 EVALUATION REPORT GAF Materials Corporation 1361 Alps Road, Building 7-3 Wayne, NJ 07470 EXTERIOR RESEARCH & DESIGN, LLC. 353 CHRISTIAN STREET, UNIT #13 OXFORD, CT 06478 PHONE: (203) 262-9245 FAX: (203)
Installation Guide. Guardian Slate Roof System. England, Scotland & Wales
 Installation Guide Guardian Slate Roof System England, Scotland & Wales March 2016 Product Information Construction: Manufactured from resin bonded crushed limestone Size (slate): 445 x 294mm (ridgecap):
PREMIUM LAMINATED ASPHALT SHINGLES Frederick, MD
 Application Instructions for FORMERLY 50 THESE ARE THE MANUFACTURER S APPLICATION INSTRUCTIONS FOR THE ROOFING CONDITIONS DESCRIBED. TAMKO BUILDING PRODUCTS, INC. ASSUMES NO RESPONSIBILITY FOR LEAKS OR
Best Barns USA. the Brookhaven 10' x 16' Assembly Book. revised March 23, 2016
 Best Barns USA Assembly Book revised March 23, 2016 the Brookhaven 10' x 16' Manufactured by Reynolds Building Systems, Inc. 205 Arlington Drive Greenville, PA 16125 724-646-3775 This manual is copyrighted.
TYPICAL BARGE DETAIL - CROSS SECTION
 SELECTED OWENS CORNING ASPHALT SHINGLES APPLY A BEAD OF BITUMASTIC ADHESIVE/SEALANT METAL BARGE DRIP EDGE FLASHING No15 RAG FELT ROOF UNDERLAY PLYWOOD ROOF FRAME BARGE BOARD SOFFIT LINING (IF APPLICABLE)
PREMIUM LAMINATED ASPHALT SHINGLES Dallas, TX Tuscaloosa, AL Phillipsburg, KS
 Application Instructions for FORMERLY 50 THESE ARE THE MANUFACTURER S APPLICATION INSTRUCTIONS FOR THE ROOFING CONDITIONS DESCRIBED. TAMKO BUILDING PRODUCTS, INC. ASSUMES NO RESPONSIBILITY FOR LEAKS OR
SUPER-UNDERLAY SHEET
 SUPER-UNDERLAY SHEET SBS modified bitumen underlay sheet Producer: KATEPAL OY P.O.Box 33 FI-37501 LEMPÄÄLÄ FINLAND Telephone +358 3 375 9111 Telefax +358 3 375 0974 E-mail: katepal@katepal.fi www.katepal.fi
Hatteras Shingles. CertainTeed Shingle Applicator s Manual. YOUR OBJECTIVE: To learn the correct procedures for installing Hatteras shingles
 CertainTeed Applicator s Manual Hatteras s 14 YOUR OBJECTIVE: To learn the correct procedures for installing Hatteras shingles HATTERAS SHINGLES Hatteras shingles are a premium oversize (18" x 36") roofing
Timberline and Sovereign Expanded Fastener Placement Area
 Timberline and Sovereign Expanded Fastener Placement Area Information Sheet Updated: 2004 Quality You Can Trust Since 1886... From North America s Largest Roofing Manufacturer Less Fastening Hassles! Announcing
StormMaster Shake GENERAL INSTRUCTIONS For Spanish Instructions Click Here (Para las Instrucciones Españolas Haga Clic Aquí)
") StormMaster Shake GENERAL INSTRUCTIONS For Spanish Instructions Click Here (Para las Instrucciones Españolas Haga Clic Aquí) IMPORTANT: THE STATEMENTS EXPRESSED ON THIS PAGE ARE THE RECOMMENDATIONS FOR
StormMaster Shake GENERAL INSTRUCTIONS For Spanish Instructions Click Here (Para las Instrucciones Españolas Haga Clic Aquí) IMPORTANT: THE STATEMENTS EXPRESSED ON THIS PAGE ARE THE RECOMMENDATIONS FOR
Inspire Aledora Slate Application Guidelines
 July 2014 Inspire Aledora Slate Application Guidelines Only Basic Roofing Tools Required Hand fastened or fastened with a pneumatic nail gun Utility knife or a standard circular saw Tape measure, pry bar,
BARRELL VAULT BATTENLESS
 i BARRELL VAULT BATTENLESS INSTALLATION GUIDE INSTALLATION NOTIFICATION The installation procedures demonstrated in this manual are recommended methods for the installation of the Gerard Barrel Vault battenless
Table of Contents. Roof to Head Wall w/ Side Flashing DECRA Shake XD Roof Overview Roof Penetration - Pipes & Vents...
 Table of Contents DECRA Shake XD Roof Overview.... 2 DECRA Shingle XD Roof Overview.... 3 Introduction... 4 Safety... 4 Tools.... 4 Estimating Sheet... 4 Codes & Requirements... 4 Roof Slope... 4 Underlayment...
Inspire Slate Starter Piece Hip and Ridge. 13 1/2" Height: 13 ½" Width: 12" Squares/ Pallet. Bundles/ Square
 December 2017 Classic Slate Application Guidelines Only Basic Roofing Tools Required Hand fastened or fastened with a pneumatic nail gun Utility knife or a standard circular saw Tape measure, pry bar,
ROOFING VENTILATION. Euramax Canada, Inc. Pro-Master Ridge Vent. Pro-Master Highpoint Series 5 & 7 Ridge Vents. Standard Box Vents
 ROOFING VENTILATION Pro-Master Ridge Vent Pro-Master Highpoint Series 5 & 7 Ridge Vents Standard Box Vents Euramax Canada, Inc. (800) 461-5706 www.euramaxcanada.com RIDGE VENTTM Pro-Master Ridge Vent is
Integrate the Window and WRB (1/2)
") Window and WRB Installation - Window/WRB. Cut the house wrap flush along all sides of the rough opening.. Slope the sill and flash with flashing tape. Push the tape tight into the corners, being careful
Window and WRB Installation - Window/WRB. Cut the house wrap flush along all sides of the rough opening.. Slope the sill and flash with flashing tape. Push the tape tight into the corners, being careful
The Sealed Attic System with. DuPont Tyvek AtticWrap INSTALLATION USING DRAPE METHOD
 The Sealed Attic System with TM TM DuPont Tyvek AtticWrap INSTALLATION USING DRAPE METHOD Air flow Tyvek AtticWrap drapes between rafters We recommend that the first two courses of DuPont TM Tyvek be installed
eco-shake INSTALLATION INSTRUCTION
 1 eco-shake INSTALLATION INSTRUCTION NOTE: Shuffling the eco-shakes during installation may be necessary to obtain a uniform color throughout the roof. Due to the natural wood content in the ecoshakes,
MetroCOTTAGE Shingle
 Batten-less Installation Sept. 14, 2017 INSTALLATION WARNING! These install details are provided to demonstrate a recommended installation method for Metro Roof panels and accessories. used in the United
Installation Manual SOLID CORE SIDING
 Installation Manual SOLID CORE SIDING SOLID CORE SIDING Installation Information contained in this manual can be viewed in video form at: www.youtube.com/epbc CONTENTS Important Notes...2-4 Weather Protective
Installation Guide Classic Series Wood Siding
 Installation Guide Classic Series Wood Siding Please read the following instructions prior to beginning your installation. The following installation guidelines have been produced in accordance with the
Barrel Vault Counter Batten and Batten
 Barrel Vault Counter Batten and Batten INSTALLATION GUIDE www.gerardusa.com INSTALLATION NOTIFICATION The installation procedures demonstrated in this manual are recommended methods for the installation
INSTALLATION GUIDE LEARN MORE AT DECRA.COM
 Villa Tile INSTALLATION GUIDE LEARN MORE AT DECRA.COM Table of Contents DECRA Villa Tile Roof Overview... 2 Introduction... 3 Safety... 3 Tools.... 3 Estimating Sheet... 3 Codes & Requirements... 3 Roof
Installation Manual. For Gerard Shingle Products
 Installation Manual For Gerard Shingle Products Gerard Shingle Installation Manual is a component of Gerard roofing products and as such is intended to be used with Gerard products only. All information
The better way to build TM. Installation Manual ROOF SIPs
 The better way to build TM Installation Manual ROOF SIPs August 2017 ROOF SIPs Installation Manual Table of Contents Topics General Requirements.................................... 3 Materials..............................................
IKO0716 July Roofing Shingles. Selector & Fixing Guide
 IKO0716 July 2016 Roofing Shingles Selector & Fixing Guide Durable, waterproof and beautiful Protecting what s under your roof from the elements is simplicity itself with IKO Roofing Shingles. Roofing
The Sealed Attic System. with DuPont Tyvek AtticWrap INSTALLATION MANUAL
 The Sealed Attic System TM TM with DuPont Tyvek AtticWrap INSTALLATION MANUAL TM DuPont Tyvek TM AtticWrap Revealed The sealed attic vented roof system uses DuPont TM Tyvek AtticWrap TM airtight membrane
INSTALLATION, STORAGE AND WALL CONSTRUCTION DETAILS
 www.capecodsiding.com INSTALLATION, STORAGE AND WALL CONSTRUCTION DETAILS IMPORTANT READ THE FOLLOWING INSTRUCTIONS CAREFULLY BEFORE INSTALLING YOUR WOOD SIDING. FAILURE TO STRICTLY FOLLOW THESE INSTALLATION,
Chapter 51: Sidewall Overhang(s) Only - Enclosed
 Only - Enclosed") Chapter 51: Sidewall Overhang(s) Only - Enclosed Most Common Mistakes: 1. Incorrect eave height. 2. Placing eave girt below truss tails. 3. Fascia board top edges not bevel cut to match roof slope. 4.
Chapter 51: Sidewall Overhang(s) Only - Enclosed Most Common Mistakes: 1. Incorrect eave height. 2. Placing eave girt below truss tails. 3. Fascia board top edges not bevel cut to match roof slope. 4.
Steel Shingle Installation Guide
 Page THESE ARE THE MANUFACTURER S APPLICATION INSTRUCTIONS FOR THE ROOFING CONDITIONS DESCRIBED. TAMKO BUILDING PRODUCTS, INC. ASSUMES NO RESPONSIBILITY FOR LEAKS OR OTHER ROOFING DEFECTS RESULTING FROM
Dura-Lock Roof System
 DLR-14 Dura-Lock Roof System Assembly and Installation Instructions Read the instructions before starting the job. They explain the steps required to produce a finished product that will meet factory specifications.
SuperFOIL Insulation. Solutions Guide. Pitched Roof - Under Rafter
 SuperFOIL Insulation Solutions Guide Pitched Roof - Under Rafter SF19+ Pitched Roof Under Rafter Solutions CONSTRUCTION THICKNESS R -VALUE EXTERNAL SURFACE - 0.040 TILES / SLATES 10mm - BATTEN CAVITY 25mm
Laminate Shingle Installation Instructions
 Laminate Shingle Installation Instructions WWW.MALARKEYROOFING.COM Directions for Applying Malarkey Laminate Shingles GENERAL INSTRUCTIONS Install Malarkey laminate shingles according to adopted building
Cambridge English Application Instructions
 Cambridge English Application Instructions ROOF SLOPE: Never apply asphalt shingles to roof slopes less than 2:12. For slopes 2:12 to 4:12 (LOW SLOPE), see special underlayment requirements outlined below.
HOW TO Fix Onduline Corrugated Bitumen Sheets
 HOW TO Fix Onduline Corrugated Bitumen Sheets BBA BRITISH BOARD OF AGREMENT CERTIFICATE NO. 87 / 1823 W ROOFING PLAN IT Roofing components: Ridge Roof decking Apex Verge Barge board Purlins / battens Rafters
8x8 Shed Plans and Building Guide
 Page 1 Legal 2018 Zac Spade & Christopher D. Brown. All Rights Reserved For information about special discounts available for bulk purchases, sales promotions, fundraising and educational needs, contact
Installation Guidelines
 TM TM Installation Guidelines * Guidelines also apply to installation of astroeco products More For Pre-Engineered Metal and Post-Frame Buildings icient, Safer To Use and Easier To Install Than Regular
9Upgrades to Windproof Your Roof
 9Upgrades to Windproof Your Roof Nail down the details to keep asphalt shingles where they belong By Mike Guertin Asphalt shingles are getting better all the time, but the elements can still get the best
Gerard Installation Manual Shingle Profiles
 Gerard Installation Manual Shingle Profiles Granite Ridge Shingle Guardian Shingle March 2017 This Installation Manual is designed as an instructional tool to clearly depict to the contractor, installer,
CONTENTS. Transitions Board and Batten Vertical Installation... 10,11
 INSTALLATION MANUAL CONTENTS Important Notes... 2-4 Weather Protective Barriers... 2 Storage and Transportation... 2 Tools and Equipment... 2 Fastener Choices... 3 Wall Preparation... 3,4 Flashing... 4
ONDUVILLA. The Attractive Alternative to Shingles I N S T A L L A T I O N I N S T R U C T I O N S
 ONDUVILLA The Attractive Alternative to Shingles I N S T A L L A T I O N I N S T R U C T I O N S 1 INSTALLATION INSTRUCTIONS Even though ONDUVILLA is easy to install, it is important to read through these
Granite Ridge Shingle Guardian Shingle
 Allmet Installation Manual Shingle Profiles Granite Ridge Shingle Guardian Shingle March 2017 This Installation Manual is designed as an instructional tool to clearly depict to the contractor, installer,
INSTALLATION PROCEDURE
 Vinyl Siding INSTALLATION PROCEDURE Tools Needed and Preparation MOST ESSENTIAL TOOLS The proper tools, materials and equipment can make the installation of Durabuilt Vinyl Siding much easier. Here are
Installation Guide. Shingles. Classical. Shingles. Warning. Storage. Cutting Shingles. Touch-Up. Eastern White Cedar
 Installation Guide Before you begin, take the time to read this entire guide to clearly understand the requirements and steps to follow for proper installation. The Fastening Make shingle fastening simpler
 Florida Building Code Online Page 1 of 2 BCIS Home Log In User Registration Hot Topics Submit Surcharge Stats & Facts Publications FBC Staff BCIS Site Map Links Search Product Approval USER: Public User
Chapter 16: Roof Steel
 Chapter 16: Roof Steel Most Common Mistakes: 1. Roof purlins not checked for alignment. 2. Failure to properly square roof. 3. Reversing steel laps. 4. Using not enough or too many screws. 5. Over or under
3-Tab Shingle Installation Instructions
 3-Tab Shingle Installation Instructions WWW.MALARKEYROOFING.COM Directions for Applying Malarkey 3-Tab Shingles GENERAL INSTRUCTIONS Install Malarkey 3-tab shingles according to adopted building code and
Best Barns USA Assembly Book
 Best Barns USA Assembly Book Revised September 19, 2017 the Millcreek 12'x 20' Manufactured by Reynolds Building Systems, Inc 205 Arlington Drive Greenville, PA 16125 This manual is copyrighted Under the
How To Install Asphalt Shingles. Part 1 of 3: Preparing the Roof. Tutorial
 Tutorial How To Install Asphalt Shingles Installing new shingles yourself can save considerable time and money, and you can follow the same steps they do to achieve the same professional look. Re-doing
Installation Instructions Split Shake, Staggered Shake, Shingle, Perfection Shingle, and Shapes
 Installation Instructions Split Shake, Staggered Shake, Shingle, Perfection Shingle, and Shapes General Guidelines These instructions show one type of installation and are intended for the professional
INSPECTION SERIES ROOFING
 INSPECTION SERIES ROOFING SECTION 1 UNDERSTANDING ROOFING Roofing Overview The purpose of a roof is to shelter a house from the elements. Its materials and construction are designed as a first line of
Assembly Book. 10' x 12' the Cambridge II. revised June 13, 2014
 Assembly Book revised June 13, 2014 the Cambridge II 10' x 12' Manufactured by Reynolds Building Systems, Inc. 205 Arlington Drive Greenville, PA 16125 724-646-3775 This manual is copyrighted. Under the