EB/MM Upd.2_ CLIP-IN DOOR FOR SHOWERS FT
|
|
|
- Buck Norris
- 5 years ago
- Views:
Transcription


1 EB/MM Upd.2_ CLIP-IN DOOR FOR SHOWERS FT
2 Working in partnership with Saint-Gobain Glassolutions, Adler SAS has developed Clip-In Door, a hinge that can be used to create glass doors of unrivalled transparency. A full range of Adler accessories available from stock for use in the straightforward installation of a wide variety of shower screens, on walls that are often less than perfect, uneven and out of plumb, with a swing door that closes by means of the pressure of a seal against a fixed glass panel. This seal itself has been specially developed to meet the miniaturisation and transparency requirements of Clip-In Door and also provides effective protection for the free edge of the door or the fixed panel. Single door in an alcove Door and fixed panel less than 35 cm wide in an alcove Corner cubicle with wall-hung door and a fixed return less than 35 cm wide Corner cubicle with wall-hung door and a fixed return in excess of 35 cm wide, stabilised with a square support bar Corner cubicle with wall-hung door, fixed in-line panel and fixed return screwed to the edge of the fixed in-line panel: fixed in-line panel less than 35 cm wide Corner cubicle with wall-hung door, fixed in-line panel and fixed return inserted into double-edged section: fixed in-line panel less than 35cm wide Corner cubicle with door hung on fixed return: openjoint structure. Corner cubicle with door hung on fixed return: watertight structure. Other Clip-In Door shower screen models can also be created, such as, for example: (a) a corner model with a door hung on the fixed return and a fixed in-line panel abutting the wall; (b) against a wall, with a door hung on one of the returns, a fixed in-line panel bracing the other fixed return and a support bar connecting the two return panels; (c) as with Capsi, if one of the fixed returns is very narrow (less than 350 mm wide here, as the glass is 10 mm thick), it makes it possible to construct a cubicle with a single in-line door, mounted on either the larger or the smaller return. All screens designed to be produced in non-toughened laminated 55.2 glass (see FT ) are of course suitable for use with the Clip-In Door hinge instead of the Adler VF hinge. Compared with the models described here, these offer the particular advantage of reduced glass shaping costs, significant installation tolerance and correction via the build process of tempering defects (distortion of the glass, etc.) which may adversely affect the more lightweight structures also shown here. NB: in the diagrams below, the Adler product numbers are indicative and correspond by default to products with a brushed stainless steel finish. Also available in high shine chrome plate


3 Model CI-1: Single door in an alcove With Clip-In Door, this installation offers a simple, fully watertight single door solution for any alcove, even where walls are out-of-plumb or uneven. The wall sections compensate efficiently for all imperfections of this kind. They are also the only effective solution for ensuring that a tiled wall is watertight, particularly around the tile joints. The supporting section for the hinge must be glued and then screwed into a vertical position. Ideally, the section for the free edge of the door should be fitted after the door is hung, to ensure the required clearance of 2 mm up the full height of the door


4 Model CI-2: Door and fixed panel less than 35 cm wide in an alcove With Clip-In Door, this alcove installation with a fixed glass panel and wall-mounted hinged door offers a simple, fully watertight solution. The wall sections are an efficient way to compensate for out-of-plumb and uneven wall surfaces. They are also the only effective solution for ensuring that a tiled wall is watertight, particularly around the tile joints. The supporting section for the hinge must be glued and then screwed into a vertical position. The U section for the fixed glass panel allows for adjustment by +/-8 mm, which is sufficient in the majority of cases. The front of the U section is 27 mm wide; the Clip-In Door hinge and associated flat section together measure 23 mm, providing an elegant overall balance

5 Model CI-3: Corner screen with wall-hung door and a fixed return less than 35 cm wide With Clip-In Door, where the fixed glass return panel is sufficiently narrow (less than 35 cm wide), this corner and partial alcove installation offers high transparency and simplicity and is fully watertight. On the in-line panel side, the flat section against the wall behind the hinge naturally compensates for uneven or out-of-plumb wall surfaces. It also contains the seal that keeps the hinge watertight. On the fixed return side, the U section glued and screwed to the wall allows for adjustment of the installation by +/- 8 mm. The front of the U section is 27 mm wide; the Clip-In Door hinge and associated flat section together measure 23 mm, providing an elegantly balanced installation. Assembly is entirely mechanical, and the only seal strip, in the U section on the return panel, is slimline and near-invisible and is located on the external face of the cubicle, where it cannot be affected by water, soap, etc

6 Model CI-4: Corner cubicle with wall-hung door and a fixed return in excess of 35 cm wide, stabilised with a square support bar On the fixed return side, the U section recommended for wall mounting helps to compensate for imperfections in the wall surface, providing stability for the installation and simplifying the build process. At the hinge, the flat wall section is essential for secure, easy fitting and a watertight, durable installation. The square 20 x 20 mm support bar provides stability for the inline panel and maintains the sleek, clean lines of the finish. At floor level, the threshold strips are near invisible, in keeping with the build, and allow the clip that holds the lateral screen in place to be affixed without drilling into the shower tray, with the method of assembly delivering a watertight installation


7 Model CI-5: Corner cubicle with wall-hung door, narrow fixed in-line panel and fixed return screwed to the edge of the fixed inline panel On the front of this screen, the inset profile of the fixed glass screen provides visual balance for the combination of the Clip-In Door hinge and associated flat wall section. The distinctive mounting of the inset profile on the fixed return enhances the overall impression of transparency and refinement. This method of installation allows for simple adjustments in the width of both cubicle screens by +/- 8 mm


8 Model CI-6: Corner cubicle with wall-hung door, narrow fixed in-line panel and fixed return inserted into double-edged section In this arrangement, the fixed glass panels are all inset, with no screws, making it simple to install and allowing for significant adjustments to size, for example in case of inaccurate measurements. Taken at the scale of a cubicle, all these sections remain slimline and unobtrusive, highlighting the lack of framing on the horizontal edges of the glass panels and making the cubicle look more spacious


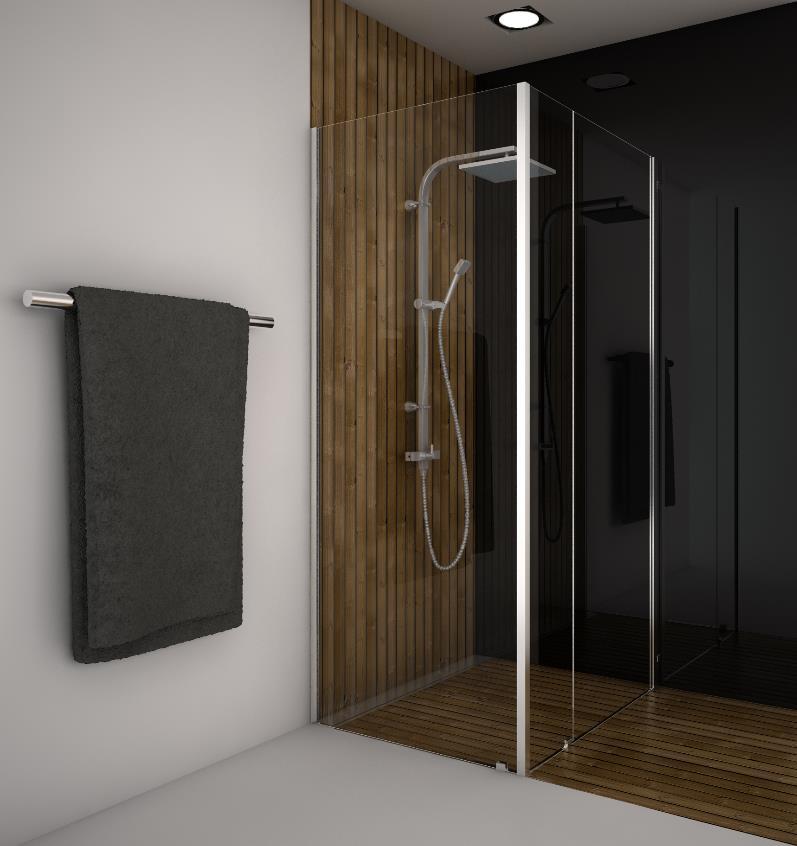
9 Model CI-7: Corner cubicle with door hung on fixed return: open joint structure This screen showcases the full refinement and technical innovation of the Clip-In Door hinge, which is screwed directly to the glass of the fixed return panel at two separate points. The shower frontage is as transparent as possible: a 5 mmthick flat section at the wall ensures that the free edge of the door fits perfectly so that the cubicle closes properly and is fully watertight at this point; the Clip-In Door hinge forms a slimline, full-height strip 16 mm wide, typically accounting for less than 2% of the width of the door. Without no supporting sections, the point of abutment with the fixed return is no longer fully watertight
10 Model CI-8: Corner cubicle with door hung on fixed return: watertight structure Hinged to the fixed glass return panel, the door can be opened both ways: to the outside, clearing any radiator, towelwarmer, item of bathroom furniture, etc. on the wall outside the cubicle, and to the inside if the depth of the cubicle allows. Simple to install, this arrangement is fully watertight: the Clip- In Door hinge is screwed to the fixed return screen through a flat section that includes the watertight seal in a second flat section running parallel to the first, but on the outside. This second flat section functions as a full-height clip and conceals the engineered grooves in the underside of the first


11 CLIP-IN DOOR hinge Components for installation: The Clip-In Door hinge has a wealth of novel features: It is attached with screws along its full height to the edge of a 10 mm-thick glass panel, into a dovetail groove patented by Saint-Gobain Glassolutions. Installation is very simple using a wall section and two metal screws. It is highly resistant and can withstand extraordinary overloads at the end of the span. It is a double-action hinge with some finger pinch protection, opening through +/- 90. With an understated, distinctive design, it discreetly enhances the front of the shower screen without affecting overall transparency and maintaining the appearance of a frameless glass structure. Flat wall section with seal The flat wall section plays a number of roles. For affixing the hinge to the wall, it can help to: compensate for out-of-plumb and uneven wall surfaces ensure that the installation is watertight, with the addition of sealant in gaps in the tile joints, etc. secure the door mounting by screwing the hinge to the section, metal to metal, with the remainder of the section being glued/screwed to the wall. Where the door is affixed with a hinge to a glass return panel, if a watertight arrangement is required, the seal can be stuck to the flat section that can be inserted between the supporting panel and the hinge. This ensures that it is fully watertight and stops the door from swinging. It is recommended that the hinge be screwed into a facing flat section which, fitted backto-back with the first, conceals the engineered grooves in the underside of each


 to each other create a corner, with a tolerance of a few degrees in the angle")


12 U section with rebate seal for wall mounting or free edge of fixed return panel The rigid U section can be used to: affix a 10 mm (or 55.2, for example) fixed screen securely to a wall, or at 90 to another glass panel; adjust the position of the glass panel by +/-8 mm; hold the section in place against the glass or the glass in place in the section using the special, highly effective rebate seal. In some cases, additional bonding using sealant, MS polymer adhesive or silicone can help secure the installation; provide a good alternative to the floor clip which would otherwise be necessary to hold the lower edge of the return glass panel in place; provide a flat, smooth supporting surface for a watertight seal on the edge of the door. L section with rebate seal for corner joint between two fixed glass panels The rigid L section can be used to: securely attach two fixed 10 mm glass panels (in non-toughened 55.2 glass, for example) to each other create a corner, with a tolerance of a few degrees in the angle of the corner; adjust the position of the glass panel by +/- 2-3 mm; hold the section in place against the glass or the glass in place in the section using the special, highly effective rebate seal. In some cases, additional bonding using sealant, MS polymer adhesive or silicone can help secure the installation; create a wide range of installations using non-toughened laminated glass, from a five-sided cubicle to a corner enclosure, which may be self-supporting. It has a simple, sleek, clean design using just metal and glass, and the unobtrusive rebate seal is mounted on the inside


, which is appropriate for monolithic toughened glass; the load is perfectly balanced along the")


13 Threshold strip The threshold strip is an important component in installing an Adler shower cubicle, delineating and effectively framing the installation. It centres vertical U and L sections and holds them in place. It ensures that the base of the shower cubicle is watertight especially with a tiled shower tray creating a smooth floor surface and evening out the dips in the tile joints. Secure bonding along the full length of the strip using the groove in the underside of the strip ensures durability. It avoids drilling into the shower tray, for simple, reliable fitting of the clip that is required for any fixed in-line glass panel. There is no requirement to drill into the shower tray. Adler standard watertight sections offer: speedy, watertight installation the rigid PVC section goes right down to the level of the base of the clip, creating a continuous seal along a very smooth supporting surface; an alternative arrangement with the threshold strip and seal 79016N (also available in other lengths), which is appropriate for monolithic toughened glass; the load is perfectly balanced along the length of the supporting edge, thus protecting the glass. Shown opposite is the standard combination of the threshold strip bonded to the shower tray, the PVC section and the seal. Shown below is the threshold strip on its own, bonded to the shower tray to run underneath a door, for example N Capsi support bar with adjusters for L or U rebate sections Clip- In Door enclosures are designed to be built using 10 mm thick toughened glass. Capsi square stainless steel 20 x 20 mm support bars are recommended to ensure optimum stability: they are unobtrusive and are affixed using screws through the screens that they support. When one end is wall-mounted, for ease of fitting and the ultimate strength of the installation, it is always preferable to screw it into the wall section that is also to be used to affix the hinges, clips, etc


14 10 x 2 mm edge section with self-adhesive seal Adler has designed a slimline adhesive aluminium section for edging 10 mm or 55.2 glass panels. This slimline section includes a groove to house a specially developed seal section which indexes an Adlock pivot or Adler VF hinged door in the closed position and ensures it is fully watertight. The section is delivered in 2.20 m lengths, with a bonded seal and pre-coated with adhesive on the back, ready for edging the glass panel. The Adler catalogue includes a number of seal materials, to ensure that the best compromise between price and seal durability is always available. Door bottom water deflector section 79043S Transparent polycarbonate section, self-adhesive along one side and one face. Acrylic adhesive. Offering full and durable transparency, this section is glued to the base of the door and forces all the water that runs down the door back into the shower tray. Under normal conditions of use, it does not come into contact with the floor or the threshold strip but is fully waterproof. Some of our component accessories: More seals from the ADLER range: 8 x 8 mm solid section in transparent PMMA, bonded using UV adhesive or transparent acrylic biocomposite: it performs the same function as the deflector above, and is recommended for hotels, etc., where these components may be subject to heavy use. Ref K Adler SAS offers a full range of self-adhesive seals with exceptional properties in terms of mechanical performance, resistance to tearing and atmospheric resistance. Find them in the ADLER catalogue which you can download from our website [catalogue in French]:


, or you could also opt for a pull ring, etc.")
15 Some ideas for handles: This type of cubicle needs a door handle. 'G-shaped' handle or simple cut-out in the door This handle is inserted into a semi-circular cut-out in the free edge of the door. Once bonded, it provides effective protection for the machined edge and substantially limits the requirement for lapping after drilling or milling. It offers an attractive, unobtrusive and practical alternative to door knobs and handles. Better still for a minimalist look, the handle cut-out can simply be lapped. G-shaped handle Glass with cut-out Door knobs 70765U 69800V & up 69967B & up Adlock round door knob, diameter 30 mm Brushed stainless steel. Polished finish on request. Handles Capsi square door knob 30 x 30 mm Bronze with high-shine chromeplated or brushed or gilt stainless steel finish. Single or double door knob. Adler round door knob, diameter 30 mm Bronze with high-shine or matte chrome-plated or gilt finish. Single or double door knob. Product families B 70518A A full range of standard and made-to-order handles in polished or brushed stainless steel, in diameters from 20 to 45 mm. Mounted horizontally, they make an ideal towel-holder. Options are also available for converting a handle on one side of the door into a handle on the outside and a door knob on the inside (see 70765U), or you could also opt for a pull ring, etc. Stainless steel handles with a clean design, featuring welded spacers and mounting points for Adlock glass for secure, straightforward fitting. Single horizontal handle square, 20 x 20 mm - Length 520 mm - Space between holes 500 mm. Stainless steel handles with a clean design, featuring welded spacers and mounting points for Adlock glass for secure, straightforward fitting. Single vertical handle 20 x 20 mm square - Drilling diameter 10 mm - Height 320 mm - Space between holes 300 mm
16 16 1 6
B A T H R O O M G L A S S
 mistley B A T H R O O M G L A S S vaug16 Page 2 Thank you for purchasing this Trinity shower screen. Please study these instructions carefully before assembly and installation and check all supplied parts
ALLORA SWING PANEL INSTALLATION INSTRUCTIONS
 ALLORA SWING PANEL INSTALLATION INSTRUCTIONS Before Installation Please check that your Allora Swing Panel is undamaged SEQUENCE OF INSTALLATION These instructions are also available from the Athena website:
Deauville Installation Guide
 vjul16 (for 17 or 24 mm Surface Wall Profiles) DO NOT ASSEMBLE WITHOUT FULLY READING THESE INSTRUCTIONS Page 2 Thank you for purchasing this Deauville shower enclosure. Please study these instructions
Installation Instructions
 Installation Instructions Alcove Enclosure Before Installation please check that your shower enclosure system is undamaged Please read these instructions carefully March 2015 TOOLS REQUIRED Electric or
Deauville Installation Guide
 vjul16 (for Recessed Wall Profiles) DO NOT ASSEMBLE WITHOUT FULLY READING THESE INSTRUCTIONS Page 2 Thank you for purchasing this Deauville shower enclosure. Please study these instructions carefully before
Portofino Installation Guide
 vjul16 (for 17 or 24 mm Surface Wall Profiles) DO NOT ASSEMBLE WITHOUT FULLY READING THESE INSTRUCTIONS Page 2 Thank you for purchasing this Portofino shower enclosure. Please study these instructions
Hinge Door + Inline Panel + Return Panel
 Hinge Door + Inline Panel + Return Panel Instruction Manual DXL2HDR + DXL2HR + DXR Important Information Toughened glass is completely safe for use in our shower enclosures and bath screens; providing
Portofino Case2 Installation Guide
 Portofino Case2 Installation Guide vjun16 (for 17 or 24 mm Surface Wall Profile) DO NOT ASSEMBLE WITHOUT FULLY READING THESE INSTRUCTIONS Page 2 Thank you for purchasing this Portofino Case 2 shower enclosure.
Glass Instalation Guide PRIVA-LITE. Updated v
 PRIVA-LITE Glass Instalation Guide Updated 25.10.2013 v 5.0 www.glassolutions.eu PRIVA-LITE? T TABLE OF CONTENTS 1. Fixed frame application 2-8 2. Butt joint application 9 3. Door application 10-11 4.
multipanel Installation (panels) CONTENTS
 CONTENTS") multipanel Installation (panels) The following is an installation guide for fitting multipanel to walls, tiles, plaster, chipboard or concrete. A separate guide is available for fitting multipanel shower
multipanel Installation (panels) The following is an installation guide for fitting multipanel to walls, tiles, plaster, chipboard or concrete. A separate guide is available for fitting multipanel shower
Beautiful balustrades DESIGNER FRAMELESS GLASS BALUSTRADES & POOL FENCES
 Beautiful balustrades DESIGNER FRAMELESS GLASS BALUSTRADES & POOL FENCES CUBOID FACE-FIXED BALUSTRADE A discreet and invisibly fixed system for attaching glass balustrades and pool fencing without disturbing
1/4 FRAMELESS DOOR WITH INLINE PANEL 1413A-1713A-1813A
 1/4 FRAMELESS DOOR WITH INLINE PANEL 1413A-1713A-1813A F AB GLASS AND MIRROR www.fabglassandmirror.com Call: +1 888-474-2221 Fax: (614)-334-4919 Office Timing: 8:30-18:00 EST info@fabglassandmirror.com
Allora ALCOVE ENCLOSURE INSTALLATION BEFORE INSTALLATION CHECK THAT YOUR ALLORA SHOWER ENCLOSURE SYSTEM IS UNDAMAGED
 Allora ALCOVE ENCLOSURE INSTALLATION BEFORE INSTALLATION CHECK THAT YOUR ALLORA SHOWER ENCLOSURE SYSTEM IS UNDAMAGED ALCOVE SHOWER Your shower can be installed to open Left hand or Right hand by rotating
Side Light Frame Pack Assembly Instructions
 Please read this complete set of assembly instructions before starting the installation and only when you understand the construction method start to follow the step by step guide. IDENTIFY THE PACK CONTENTS
Hinge Door + One Inline Panel
 inge Door + One Inline Panel Instruction Manual KLD + KL Important Information Toughened glass is completely safe for use in our shower enclosures and bath screens; providing our products are installed
Platinum Swing Panel Installation Instructions
 Platinum Swing Panel Installation Instructions The Standard Platinum Swing Panel is designed to fit baths with a perimeter lip no taller than 20mm. If installing onto baths without a perimeter lip an optional
Liniar Window. installation guide
 Liniar Window installation guide This installation guide is designed to show you the best way to fit Liniar windows, and covers all styles of window made from Liniar s lead-free 70mm PVCu profile. Not
Side Light Frame Pack Assembly Instructions
 Side Light Frame Pack Assembly Instructions Please read this complete set of assembly instructions before starting the installation and only when you understand the construction method start to follow
INSTALLATION INSTRUCTIONS
 INSTALLATION INSTRUCTIONS SHOWER Englefield has a history of making superb showers and their popularity is testament to their quality and affordability. It s the details that Englefield cares about - from
SECTION FRAMELESS GLASS SLIDING BI-FOLD SHOWER DOOR HARDWARE
 1 SECTION 10 2880 FRAMELESS GLASS SLIDING BI-FOLD SHOWER DOOR HARDWARE PART 1 - GENERAL 1.1 RELATED DOCUMENTS A. Drawings and general provisions of the Contract, including General and Supplementary Conditions
INSTALLATION INSTRUCTIONS DANUBE ACRYLIC NEO ANGLE
 INSTALLATION INSTRUCTIONS DANUBE ACRYLIC NEO ANGLE March 2013 DOOR 2 Page 1 of 5 INSTALLATION INSTRUCTIONS NEO ANGLE 6MM FRAMELESS AND 4MM FRAMED SHOWER DOOR DANUBE, DELTA, SIGNATURE, OCEANIA, CASCADE
SLIDING TUB / SHOWER ENCLOSURE WITH STATIONARY 90º PANEL
 SLIDING TUB / SHOWER ENCLOSURE WITH STATIONARY 0º PANEL This instruction sheet applies to the following units. C, C7, C7, C77, C, C7 This instruction sheet also applies to the following units. VTE / VSE
Heavy Glass Frameless Shower Door With Return Panel
 202 Anderson Ave., Belvue, KS 66407 Phone: 800-669-9867 Fax: 800-393-6699 www.onyxcollection.com Heavy Glass Frameless Shower Door With Return Panel Full Showers with Return PL92-0118 R S K Parts List
Installation Site Preparation - Site Preparation
 S c u l p t u r e s Bespoke Single Door / Bespoke Frameless Hinged Door + Inline Panel Instruction Manual Truelife Consumer Guarantee Please make sure the purchaser/end user completes and returns the Guarantee
Cardo DOOR & RETURN SHOWER ENCLOSURE INSTALLATION PLEASE READ THESE INSTRUCTIONS CAREFULLY.
 Cardo DOOR & RETURN SHOWER ENCLOSURE INSTALLATION PLEASE READ THESE INSTRUCTIONS CAREFULLY. IT IS RECOMMENDED TO USE A TRAINED SHOWER INSTALLER FOR THIS SHOWER TO OBTAIN THE BEST INSTALLATION. D Square
CLASSIC RANGE PLUS RANGE CREATE RANGE - PHOTO WALL
 CLASSIC RANGE PLUS RANGE CREATE RANGE - PHOTO WALL The following is an installation guide for fitting Multipanel CLASSIC RANGE, PLUS RANGE, CREATE RANGE AND PHOTO WALL Jig saw or Hand saw Measuring Tape
Simply Showers Hardware Supplies
 Simply Showers Hardware Supplies 1 Simply Showers... Bohle presents a simple overview to our extensive range of shower hardware, offering hinges and fittings to suit every pocket. Divided into Basic, Select
INFINITE RANGE - CENTRE FOLDING DOOR
 INFINITE RANGE - CENTRE FOLDING DOOR CENTRE FOLDING DOOR ONLY ( RECESS) Please read these instructions before installing, as incorrect fitting will invalidate the guarantee-carry out each stage before
Hinge Door + Side Panel
 Hinge Door + Side Panel Instruction Manual KL+ KR Important Information Toughened glass is completely safe for use in our shower enclosures and bath screens; providing our products are installed according
FITS MUSTEE 32 X 32 SHOWER RECEPTOR
 MUSTEE FIBERGLASS SHOWERWALL FITS MUSTEE 32 X 32 SHOWER RECEPTOR IMPORTANT: SEE BACK PAGE FOR SHOWER DOOR (ENCLOSURE) LISTING Before you assemble and install your MODEL 732 three-piece Molded Fiberglass
Linda Barker Collection Heritage Collection Classic Collection INSTALLATION GUIDE
 Linda Barker Collection Heritage Collection Classic Collection INSTALLATION GUIDE Ruler Pencil Masking tape Measuring tape Silicone sealant & silicone gun Power drill & screwdriver High-grab adhesive Jig
These instructions must be left with the user
 Torsion Hinged Door These instructions must be left with the user Installation Guide 1 G005-00 1281732-A02-A 1281732-A02-A 2 INTRODUCTION future reference. We recommend that the unit is installed by a
COMPONENTS AND BOX CONTENTS
 Hinge Hinge Door Door COMPONENTS AND BOX CONTENTS 1 1 2 3 4 5 6 7 8 9 13 10 14 11 12 No. Description Qty Part No. 1 Wall profile cover caps screw 4 8S410045 2 Upright profile cover cap 2 8SSJ035L/R 3 Wall
AMPCO PRODUCTS, INC. TECHNICAL SPECIFICATIONS SOLID PHENOLIC CORE TOILET COMPARTMENTS
 PART 1 - GENERAL 1.1 RELATED DOCUMENTS TECHNICAL SPECIFICATIONS SOLID PHENOLIC CORE TOILET COMPARTMENTS A. Drawings and General Provisions of Contract, including General and Supplementary Conditions and
MUSTEE FIBERGLASS SHOWERWALL
 MUSTEE FIBERGLASS SHOWERWALL Before you assemble and install your MODEL 736 three-piece Molded Fiberglass Shower Wall unit you will have to prepare the rough-in area, determine which side wall will have
INSTALLATION INSTRUCTIONS INSTALLATION INSTRUCTIONS
 MUSTEE FIBERGLASS SHOWERWALL INSTALLATION INSTRUCTIONS DIRECT MOUNTING TO STUDWALLS INSTALLATION INSTRUCTIONS 3636C - NEO ANGLE SHOWER RECEPTOR 3636DT - DOUBLE THRESHOLD SHOWER RECEPTOR IMPORTANT: FITS
Frameless Inline Door With Return QCI5263
 INSTALLATION INSTRUCTIONS Frameless Inline Door With Return QCI5263 WALL MOUNT HINGES FRAMELESS DOOR / PANEL / RETURN PANEL QCI5263 REV. 0 Page 1 Certified 06/17/2016 Parts List with wall mount hinges
DuraPanel. collection Wall Panels Shower Enclosures Shower Trays Simply smart. Retail Price Guide - to December 2015
 R DuraPanel collection Wall Panels Shower Enclosures Shower Trays Simply smart R Retail Price Guide - to December 2015 DuraPanel DuraPanel R The luxury alternative to traditional tiling See page 5 for
IMPORTANT INSTALLATION GUIDE VALENCIA ANGLE CORNER SHOWER READ ALL INSTRUCTIONS CAREFULLY BEFORE STARTING THE INSTALLATION
 INSTALLATION GUIDE VALENCIA ANGLE CORNER SHOWER SEALANT REQUIRED TO COMPLETE THIS INSTALLATION: (Supplied) Sika Sikasil NG (Arctic White) To seal the WHITE shower door and returns to the shower tray. Usage:
CLASSIC RANGE PLUS RANGE PHOTO WALL. Pre-installation check-list
 CLASSIC RANGE PLUS RANGE PHOTO WALL The following is an installation guide for fitting Multipanel CLASSIC RANGE, PLUS RANGE, PHOTO WALL Jig saw or Hand saw Measuring Tape Ruler Pencil High-grab adhesive
Gluing windows with SABA Glasstack 760
 Info sheet 208 Gluing windows with SABA Glasstack 760 Version 2008-05-08 EN, replaces all prior versions Page 2 of 9 Info sheet 208 Gluing windows with SABA Glasstack 760, version 2008-05-08 EN 1. Introduction
GEZE SLIDING DOOR SYSTEMS
 GEZE Perlan 140 Multi-faceted uses with individual accessories The discrete design supports every required room effect and makes the sliding door system with its accessories a guarantee for elegant and
Figure #1 - VSNEO Shower Door Assembly
 Figure #1 - VSNEO Shower Door Assembly Figure #2 - VSNEO - Top View Figure #3 - VSNEO - Side View Figure #4 - Foam Curb Plug Figure #5 - Magnet Strip Figure #6 - VSNEO - Drip Deflector Preparation VSNEO
675 Quick N Stall Neo Angle Framed Hinge Shower Enclosure
 INSTALLATION INSTRUCTIONS 675 Quick N Stall Neo Angle Framed Hinge Shower Enclosure Call Technical Dept @ 1-800-452-2726 QCI1003 Page 1 of 9 Certified 10/01/09 INSTALLATION NOTES: Unpack your unit carefully
Frameless Inline Door QCI5250
 INSTALLATION INSTRUCTIONS Frameless Inline Door QCI5250 FRAMELESS PANEL / DOOR / PANEL QCI0249 REV. 3 Page 1 Certified 10/12/12 Parts List with pivot hinges *Quantities may vary. QCI0249 REV. 3 Page 2
Installation Instructions
 Installation Instructions Bespoke Glass Design In A Box Typical Installation Guidance Installation Instructions Important Information Please read these instructions carefully before starting installation
Installation Guide. Frameless Sliding Door - Alcove. These instructions must be left with the user
 Frameless Sliding Door - Alcove These instructions must be left with the user Note! For instructions on installing a sliding door enclosure, please disregard this guide and refer to the guide packed with
VITREO X SHOWER / TUB DOOR INSTALLATION INSTRUCTIONS
 VITREO X SHOWER / TUB DOOR INSTALLATION INSTRUCTIONS IMPORTANT DreamLine reserves the right to alter, modify or redesign products at any time without prior notice. For the latest up-to-date technical drawings,
Cabonyx Installation Manual
 Cabonyx Installation Manual Content Deck-Nyx and Plan-Nyx Installation Page 1 Flooring Products Page 1 Accessories Page 1 Installation Tools Page 2 Preparing Sub-structure Page 2 Installation Page 4 Cautions
ASS 70 FD folding / sliding door. Installation Guide
 ASS 70 FD folding / sliding door Installation Guide IMPORTANT! These doors should be fitted by competent and trained installers. Please read these instructions thoroughly before beginning the installation.
UNIDOOR LUX (STYLE E)
") UNIDOOR LUX (STYLE E) SHOWER DOOR & GLASS PANEL INSTALLATION INSTRUCTIONS IMPORTANT DreamLine reserves the right to alter, modify or redesign products at any time without prior notice. For the latest up-to-date
UNIDOOR LUX (STYLE E) SHOWER DOOR & GLASS PANEL INSTALLATION INSTRUCTIONS IMPORTANT DreamLine reserves the right to alter, modify or redesign products at any time without prior notice. For the latest up-to-date
Installation Instructions
 Installation Instructions Angle orner & Round Enclosures efore Installation please check that your shower enclosure system is undamaged Please read these instructions carefully Oct 2015 TOOLS REQUIRE Electric
Table and Furniture Base Fittings Plinth Adjusting Fittings
 Adjusting screw with M8 or M thread Rigid, for glide inserts, steel thread Finish/Colour: Black, thread galvanized Version: With acceptance Ø30 mm Thread M8 650.22.381 M 650.22.382 Packing: 1 or 0 pcs.
Frameless Inline Door QCI5254
 INSTALLATION INSTRUCTIONS Frameless Inline Door QCI5254 FRAMELESS DOOR / PANEL QCI5254 REV. 0 Page 1 Cer fied 06/16/2016 Parts List with wall mount hinges *Quanes may vary QCI5254 REV. 0 Page 2 Cer fied
Installation Instructions Models: SESD180, DESD180, MESD180 1/4" Semi-Frameless Door and 3/8" In-Line Panel
 Models: SESD180, DESD180, MESD180 Scan this Barcode for Parts Bag BP.3143.NLT Thank you for purchasing this outstanding product! This booklet will help you install your units safely and successfully. IMPORTANT:
Matte Black NEW! D Series. Ask about other finishes! D D D D Fasteners Included M4 x 25
 2018 Addendum 2018 NEW! D200000 Series Matte Black D205192-94 28.5 C 8.5 D204128-80 C3 C2 C1 20 11 D205320-94 15 15 D29515-80 25 Ask about other finishes! Fasteners Included M4 x 25 3 NEW! D200000 Series
PL-91. Frameless Door with Panel. 202 Anderson Ave., Belvue, KS Phone: Fax:
 202 Anderson Ave., Belvue, KS 66407 Phone: 800-669-9867 Fax: 800-393-6699 www.onyxcollection.com 800-643-1514 www.alumaxshowerdoor.com PL-91 Frameless Door with Panel Full Showers Bench Seat Showers PL91-0318
UNIDOOR/UNIDOORLUX/UNIDOOR PLUS
 UNIDOOR/UNIDOORLUX/UNIDOOR PLUS SINGLE SHOWER DOOR INSTALLATION INSTRUCTIONS IMPORTANT DreamLine reserves the right to alter, modify or redesign products at any time without prior notice. For the latest
Hardware Fitting Accessories Door Seals
 Areas of application Protection against cold, draught and vermin Reduces light leakage, sound insulation Smoke control, fire resistance Reduces the energy consumption of air conditioning systems (see following
QCI0029 REV. 1 Page 1 of 11 Certified 07/06/05
 QCI0029 REV. 1 Page 1 of 11 Certified 07/06/05 MAINTENANCE: Two primary materials are used to manufacture your new Basco enclosure: tempered glass and anodized aluminum. To assure a long lasting finish
NEW! D Series. Matte Black D C 8.5 D L C3 C2 C1 D D Fasteners Included M4 x 25.
 2018 Addendum 2018 NEW! D200000 Series Matte Black D205192-94 28.5 C 8.5 D204128-80 C3 C2 C1 20 11 D205320-94 15 15 D29515-80 25 Fasteners Included M4 x 25 3 NEW! D200000 Series Matte Black D206192-80
EXTRUTECH PLASTICS, INC. Custom Extruder of Close Tolerance Profiles
 PVC SINGLE DOOR INSTALLATION INSTRUCTIONS Single Pre-Hung Doors are shipped assembled in most cases ready for installation. Check the sill; in some cases you may want a sill in this door or if not requested
COMPONENTS AND BOX CONTENTS
 Infold Door COMPONENTS AND BOX CONTENTS 1 1 2 3 4 5 6 7 8 9 10 13 11 12 Inside 30mm 12 Note: Remove spacers in frame. Insert seal 8SSJ074 into the top and bottom profile. On both ends, pull out 30mm and
SHOWER DOOR INSTALLATION & CARE GUIDE
 SHOWER DOOR INSTALLATION & CARE GUIDE For models: SD-AZ-0 Please Note: This is a two person job. The glass doors are extremely heavy and it is highly recommended to use professional installers. For any
Frameless Inline Door QCI5248
 INSTALLATION INSTRUCTIONS Frameless Inline Door QCI5248 FRAMELESS PANEL / DOOR / PANEL QCI5248 REV. 0 Page 1 Certified 06/16/2016 Parts List with glass to glass hinges *Quantities may vary. **Support Bar
SINGLE DOOR QUADRANTS
 INSTINCT 8 SINGLE DOOR QUADRANTS INSTINCT 8 SINGLE DOOR QUADRANTS Single door offset quadrant 8mm toughened safety glass Height 1900mm Easy clean double rollers Colour matched chrome magnetic seals* Concealed
ELEGANCE SHOWER DOOR/ENCLOSURE INSTALLATION INSTRUCTIONS. Style A Style B Style C Style D
 ELEGANCE SHOWER DOOR/ENCLOSURE INSTALLATION INSTRUCTIONS IMPORTANT DreamLine reserves the right to alter, modify or redesign products at any time without prior notice. For the latest up-to-date technical
Oxford Stalls Installation Instructions
 Oxford Stalls Installation Instructions RAMM Horse Fencing and Stalls 13150 Airport Hwy. Swanton, OH 43558-9615 1-800-434-8456 Rev. 8/15/17 Before You Start Typical stall sizes are 10 x 10, 12 x 12 or
Page 1 of Ch 6. A Lecture note on Building Technology By Kishor Thapa
 CHAPTER-6 Doors and windows 6.1 Doors: frames, shutters and their fixing details The function of a door is to give access to building and to different parts of the building and to deny the access whenever
Double Swing Door With Header QCI5114
 Double Swing Door With Header QCI5114 QCI5114 REV. 0 Page 1 of 9 Certified 06/22/2016 MAINTENANCE: Two primary materials are used to manufacture your new shower enclosure: tempered glass and anodized aluminum.
ASS 70 FD folding/sliding door installation guide
 ASS 70 FD folding/sliding door installation guide 2 Preparation IMPORTANT These doors should be fitted by competent and trained installers. Please read these instructions thoroughly before beginning the
Exploded View PAGE 2 OF 9
 Argon 02 Exploded View PAGE 2 OF 9 Supplied Parts Underframe Underframe Insert Wall to Glass Hinge Door Handle Door Bottom Seal Hinge Seal Bubble Seal PAGE 3 OF 9 Important Information This shower screen/enclosure
Installation Manual. Solid Plastic Toilet Partitions. IN CANADA & AREAS OTHER THAN U.S.A.: IN THE U.S.A.:
 Installation Manual Solid Plastic Toilet Partitions Toilet Partitions & Lockers IN THE U.S.A.: Hadrian Inc., 7420 Clover Avenue, Mentor, OH 44060 Telephone: 440-942-9118 Fax: 440-942-9618 U.S. toll free
INFINITE RANGE - CENTRE FOLDING DOOR
 INFINITE RANGE - CENTRE FOLDING DOOR CENTRE FOLDING DOOR + 2 SIDE RETURN PANELS (PENINSULA) Please read these instructions before installing, as incorrect fitting will invalidate the guarantee-carry out
IMPORTANT INSTALLATION GUIDE VALENCIA SQUARE CORNER SHOWER READ ALL INSTRUCTIONS CAREFULLY BEFORE STARTING THE
 INSTALLATION GUIDE VALENCIA SQUARE CORNER SHOWER NOTE: Acrylic wall, tray and tapware not included. Supplied handles may differ from image. SEALANT REQUIRED TO COMPLETE THIS INSTALLATION: (Not supplied)
3/16 OR 1/4 FRAMELESS SWING DOOR WITH SINGLE INLINE PANEL OR TWO INLINE PANELS
 / OR / FRAMELESS SWING DOOR WITH SINGLE INLINE OR TWO INLINE S This instruction sheet applies to the following units with a magnetic handle. C7, C7, C79 This instruction sheet also applies to the following
UNIDOOR-X TUB DOOR TUB DOOR INSTALLATION NSTRUCTIONS. MODEL #s D58580-##
 T F UNIDOOR-X TUB DOOR se A R a e l re TUB DOOR INSTALLATION I NSTRUCTIONS r o D ved f IMPORTANT DreamLine reserves the right to alter, modify or redesign products at any time without prior notice. For
Organisational Kitchen Fittings Kitchen Cabinet Accessories
 Kitchen waste bin systems Single waste bin, capacity 1 litres Carcase width: Min. 400 mm For door mounting: For left and right hand use Installation: Screw fixing to side panel Housing: Steel, plastic
Method of Build 1. Fire. Sound
 Method of Build 1 General Viso Fire & Acoustic in the solid form differs from most other systems as it can be erected using 12.5mm & 15.0mm boards within the same Aluminium framework. Also hidden fix board
Wall Profiles 2 Pozi Screwdriver. Wall Profile Covers 4 Sealant. Large Panel and Thin Panel Assemblies Sealant Gun
 Decem Sliding Door (Corner Fitting) Instruction Manual DXT Important Information Toughened glass is completely safe for use in our shower enclosures and bath screens; providing our products are installed
argenta opening doors
 invisidoor Invisible aluminium frame for interior doors Content invisidoor... 4 invisidoor AX / AX PRO... 10 invisidoor SD / SDX... 16 invisiplint... 22 general information... 27 THE INVISIDOOR CONCEPT
XL JOINERY LTD LA PORTE VISTA MODULAR 3 ASSEMBLY INSTRUCTIONS
 XL JOINERY LTD LA PORTE VISTA MODULAR 3 2090mm High x 4687mm Wide ASSEMBLY INSTRUCTIONS READ AND UNDERSTAND THESE INSTRUCTIONS FULLY PRIOR TO STARTING INSTALLATION. IT IS STRONGLY RECOMMENDED THAT A COMPETENT
tile redi redi DOOR Redi Redi Swing Slide g TM TM...Opening Doors to Stunning Showers! TM TM SERIES: CONFIGURATION: MOUNTING PACKAGE:
 redi DOOR INSTALLATION INSTRUCTIONS tile redi Redi Redi Swing Slide g TM TM...Opening Doors to Stunning Showers! TM TM SERIES: CONFIGURATION: MOUNTING PACKAGE: 1100 Door-Door Framed sliding doors RDQCI5023
UNIDOOR X (STYLE L1)
") UNIDOOR X (STYLE L) SHOWER DOOR & GLASS PANEL INSTALLATION INSTRUCTIONS IMPORTANT DreamLine reserves the right to alter, modify or redesign products at any time without prior notice. For the latest up-to-date
UNIDOOR X (STYLE L) SHOWER DOOR & GLASS PANEL INSTALLATION INSTRUCTIONS IMPORTANT DreamLine reserves the right to alter, modify or redesign products at any time without prior notice. For the latest up-to-date
Installation Instructions with 90 Degree Return Panel -- Model E-DP9. Model Semi-Frameless Door & Panel
 6//5 Model Semi-Frameless Door & Panel Installation Instructions with 90 Degree Return Panel -- Model E-DP9 IF YOU NEED REPLACEMENT PARTS OR HAVE INSTALLATION QUESTIONS, PLEASE CALL OUR CUSTOMER SERVICE
BLANCO STEELART. Masterpieces in stainless steel. Exclusive and individual worktops from our high-tech manufactory.
 Product programme 2017 192256 Stainless steel worktops, lateral, back and front panels www.blanco-steelart.com BLANCO STEELART. Masterpieces in stainless steel. Exclusive and individual worktops from our
Dubnium 11 Installation Instructions & Parts List
 Dubnium 11 Installation Instructions & Parts List Illustration Dubnium, H1 Handle Right Hand: Open Out Page 1 of 25 IMPORTANT This shower screen / enclosure must be installed by suitably qualified individuals.
Gallium 03 Installation Instructions & Parts List
 Gallium 03 Installation Instructions & Parts List Illustration Gallium 03, H1 Handle Left Hand: Open Out 04/05/2016 Revision 1.1 Page 1 of 19 IMPORTANT This shower screen / enclosure must be installed
MIRAGE-X / BELLA. Shower Door Installation Instructions
 MIRAGE-X / BELLA Shower Door Installation Instructions IMPORTANT DreamLine reserves the right to alter, modify or redesign products at any time without prior notice. For the latest up-to-date technical
Door Hinges Drill-in Hinges
 Drill-in hinge StarTec Frame part For timber lining frames For rebated doors Maintenance-free friction bearing To use in combination with receiver Max. door weight: 40 kg Knuckle: Ø15 mm Drilling bit Ø7.2
UNIDOOR (STYLES B&C)
") UNIDOOR (STYLES B&C) SHOWER DOOR & GLASS PANEL INSTALLATION INSTRUCTIONS IMPORTANT DreamLine reserves the right to alter, modify or redesign products at any time without prior notice. For the latest up-to-date
UNIDOOR (STYLES B&C) SHOWER DOOR & GLASS PANEL INSTALLATION INSTRUCTIONS IMPORTANT DreamLine reserves the right to alter, modify or redesign products at any time without prior notice. For the latest up-to-date
A POCKET GUIDE TO POCKET DOORS
 A POCKET GUIDE TO POCKET DOORS SLIDING POCKET DOOR SYSTEMS eclisse.co.uk QUICK START THE FRAMEWORK WITH TRACK AND RUNNING GEAR IN TOP JAMBS - TIMBER LINING KIT TO COVER THE EDGES OF THE DOOR DOORS SLIDE
Pivot-Door Downdraft Cabinet Plans
 Pivot-Door Downdraft Cabinet Plans Finished Cabinet Closed Open Exploded View Introduction This simple downdraft-style dust collection cabinet is a great way to keep your shop cleaner and keep your router
INSTALLATION INSTRUCTIONS
 INSTALLATION INSTRUCTIONS SHOWER STUDIO GLIDE Englefield has a history of making superb showers and their popularity is testament to their quality and affordability. It s the details that Englefield cares
340 & 350 SERIES DELUXE FRAMELESS BYPASS
 BATH ENCLOSURES An Alcoa Company Tel: 800-643-1514 Fax: 870-234-3181 www.alumaxbath.com INSTALLATION INSTRUCTIONS 340 & 350 SERIES DELUXE FRAMELESS BYPASS BATH ENCLOSURES Copyright Alumax Bath Enclosures
FIXED PANEL SLIDER QCI5241
 INSTALLATION INSTRUCTIONS FIXED PANEL SLIDER QCI5241 FRAMELESS PANEL / DOOR / PANEL FRAMELESS DOOR / PANEL QCI5241 REV. 0 Page 1 Certified 06/16/2016 Parts List *Quantities may vary QCI5241 REV. 0 Page
EUROVIEW I \ IMST. Installation Instructions. Continuous Hinge Shower Enclosure , \ Model. 1. Model Number 2. Part Number 3. Part Description 4.
 EUROVIEW FRAMELESS GLASS ENCLOSURES Model IMST Continuous Hinge Shower Enclosure 14 -- 13 -- 12 -- 4,., To assemble your shower enclosure, you will need the following: - Phillips Screwdriver -Silicone
Frameless Heavy Glass Door with Header
 INSTALLATION INSTRUCTIONS Frameless Heavy Glass Door with Header QCI5243 QCI5243 REV. 0 Page 1 Certified 06/16/16 Frameless Heavy Glass Door with Pivot Hinges ITEM NUMBER DESCRIPTION QUANTITY 1 DOOR GLASS
Series 8 Bifold door/shower wall
 INSTALLATION GUIDE Series 8 Bifold door/shower wall Bifold Door Shower wall Corner Door NOTE: When the products is being used as a Bifold in a recess or with a side panel it can be used with or without
1 p
 Installation Guide Tiled Wall Installation Acrylic Wall Installation The Cube Shower Door is suitable for both L/H and R/H installations Thank you for your order PH: 09 913 3110 FAX:09 913 3113 5 Smales