9 X 12 REMOVABLE TYPE ALUMINUM WINDOW BARS INSTALLATION INSTRUCTIONS Import Note : 9 X 12 Spacing Removable Type Installation is covered in this
|
|
|
- Clemence Norton
- 5 years ago
- Views:
Transcription
 The horizontal bars spacing are 12 The spacing between two vertical bars is 9 The Height of Vertical Bars is 2 less than")
1 Import Note : 9 X 12 Spacing Removable Type Installation is covered in this Instruction. Removable Bars Only Mount in Recess Position ( Between Window Jamb/ Frame ) The horizontal bars spacing are 12 The spacing between two vertical bars is 9 The Height of Vertical Bars is 2 less than Opening Height to allow unlocking and Lift the Bars. We custom cut and make Window bars for your Order for Opening Size of Window.
2 9 X 12 Removable Mount Lay Out Example: Procedure to calculate # of Horizontal Bars Opening height is 39".Divide opening height with 12. Because standard space between two horizontal bars is 12" for 9" X 12" type Bars. (i.e.: 39/9 =3.25) 3 is whole number so there will be 3 horizontal bars. Find the distance from the First Horizontal bar to the Bottom of Frame. Vertical bars are 2 less than the opening height for allowance of installation. So the vertical bars are at a height of 37". 3 horizontal bars will create a total of 4 spaces between top and bottom of window frame as shown above. 3 horizontal bars will create 2 spaces between the Top and Bottom Horizontal Bars. That will be a 12 standard space between two horizontal bars, therefore two spaces multiply by Twelve inches (2 X 12 = 24 ). 24 Space will occupy between 4 Horizontal Bars. (So the remaining space is 37" (vertical bars height) - 24" = 13 Inches.) Now that 13 Inches are left for 2 the remaining two notch spaces, space between the top horizontal bar and top frame of the window (1st Space) and space between the bottom bar and bottom window frame. (2nd Space) So Divide Available remaining Height by 2. (i.e. 13 /2 = 6 ½ ) There will be 6 ½ space required from the bottom frame of window to center of the first the Horizontal Bar. Subtract 5/16 of Horizontal bars thickness from this to find out top of locking bracket Find out this measurement for your opening height and mark this measurement on your window frame. Now, the distance between the top bar and top of the window frame will be 8 ½. Why? The 6 ½ space
3 from above the number and 2" we have deducted an amount for the allowance of Removable bars to Operate for Removing. Makes a total of 8 ½ Layout Example 2


4 WINDOW BARS COMMON PARTS
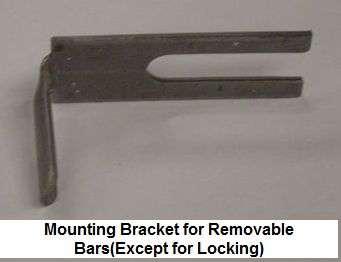


5 ADDITIONAL PARTS FOR REMOVABLE MOUNT


6 ASSEMBLY- INSTALLATION GUIDE Do a Window Bar Lay Out on paper. Take Guidance from the example shown above. Once you have lay out ready Transfer/ Mark measurement to Window Frame. Make Sure Bracket goes on to the frame needs to be 5 /16 below the horizontal bars. See lay Out Sheet example above. 12 from the top of first bracket to Top of next bracket.this is a very important step to install bars correctly. Mark on both sides same way so it is in level After figuring out First horizontal bar distance from bottom of Frame to Center of First Horizontal bar, Mount U Channel Locking Bracket to Window Frame such a way it stays 5/16 below center of first Horizontal bars on both side. Attach Both Side Locking Channel Brackets with Screws, Diagonally with Top Screws towards Glass Side only at bottom. See Picture Below After first horizontal bars Bracket, Please note that Other U channel Bracket which do not have lock, need sscrews only on Glass Side. These bracket will go 12 after first horizontal bars bracket (Top to top measuremnt) I

")


7 On, You have Installed all Brackets on Window frame, Insert Assembly Keys (Clips) underneath of Horizontal Bars near each hole. Insert locking L Bracket to both End of first Horizontal bars and than Insert to U channel Bracket.


8 Install First Horizontal Bars and Drop vertical bars into holes. Do not set assembly keys (Clips) yet. Do not tight fully at this point. Slide the rest of Horizontal bars into place, Every 12 Set Assembly Keys, Making sure to have a 2 Space at Top for Removable Bars

9 Small Version Installation Instructions


10 More Installation Pictures Important: The Lay out Example and Installation Instructions is for Guidance purpose only. Use your Opening Size to find out Space between bottom horizontal bar and bottom of window frame with help from lay out Instructions.
9 X 9 REMOVABLE TYPE ALUMINUM WINDOW BARS INSTALLATION INSTRUCTIONS Import Note : 9 X 9 Spacing Removable Type Installation is covered in this
 Import Note : 9 X 9 Spacing Removable Type Installation is covered in this Instruction. Removable Bars Only Mount in Recess Position ( Between Window Jamb/ Frame ) The spacing between horizontal bars is
9 X 12 FIXED TYPE ALUMINUM WINDOW BARS INSTALLATION INSTRUCTIONS Import Note : 9 X 12 Spacing Fixed Type Installation is covered in this Instruction.
 Import Note : 9 X 12 Spacing Fixed Type Installation is covered in this Instruction. Fixed Bars can be Mount in Recess Position ( Between Window Jamb/ Frame )or Surface Mount (Face Of Wall) This Fixed
How To Measure Your Finished Opening
 3000 Series Bifold Doors How To Measure Your Finished Opening MEASURE FROM RIGHT TO LEFT 2 PLACES (WIDTH) MEASURE FROM TOP TO BOTTOM 2 PLACES (HEIGHT) Tools Required for Assembly: Tools Needed: Phillips
Installation Instructions - Model V4JSD 1
 Installation Instructions - Model V4JSD 1 Support Assemblies: Parts list: (Note see enclosed cut sheet for quantities and dimensional information) A vertical structural member (1 ½ x 1 ½ modular frame)
ASSEMBLY OF THE KNOCKED-DOWN LADDERS: 8 to 12 STEPS STANDARD TOP AND SAFELOCK REQUIRED TOOLS
 ASSEMBLY OF THE KNOCKED-DOWN LADDERS: 8 to 12 STEPS STANDARD TOP AND SAFELOCK REQUIRED TOOLS SAFETY GLASSES 7/16" WRENCH OR SOCKET STEP LADDER OF APPROPRIATE HEIGHT (2) 9/16" WRENCHES OR SOCKETS RUBBER
C-Leg Electric Height Adjustable Tables
 C-Leg Electric eight Adjustable Tables Glides only Related tables: KCXE6030G KCXE7230G Unboxing You should have received your top plus two boxes per table. Box 1 includes: C-Leg assemblies, feet castings,
Mounting a BalanceBox 400 to a brick wall
 Unpack the BalanceBox 400 and remove the Wall frame cover and its bag of screws. Slide the cover out at the top. NOTE: the cover is NOT included with the BalanceBox 400H LOCK SCREW HOLE MOBILE STAND MOUNTING
VisioGlide 100 System W4F Four doors 2 fixed, 2 sliding
 Balcony Systems 2011 Visio Glide W4-F Curved Sliding Doors 4 doors: 2 fixed, and 2 sliding Installation guide 1. Insert silicone into the two bottom corners before closing the frame. 1 2. Connect top and
Setup. The Faraday Cage is available in two types of configurations. Cage for mounting to a full perimeter enclosure on series tables.
 Faraday CageSetup, 2017 Setup The Faraday Cage is available in two types of configurations. Cage for mounting to a full perimeter enclosure on 63-500 series tables. Cage with a base plate for use on a
Figure #1 - ATE-ASE & UTE-USE Shower Door Assembly
 Figure #1 - ATE-ASE & UTE-USE Shower Door Assembly Refer to FIG #3A or 3B For detail and orientation of towel bar and pull assemblies. Page Figure # 2 - Shower Door Assembly - Side View Figure # 3a - Shower
C D. Secondary Glazing Fixed Unit. Do not scale 1 to 1. Frame 301 Face Fix. 19.8mm. Typical Elevation. Top hung over fixed.
 Secondary Glazing Fixed Unit 19.8mm 14.0mm Frame 301 Face Fix Top hung over fixed Fixed unit Fixed unit using overlap section 310 Glazing available in 4mm 6mm and 6.4mm Laminate Glass o not scale 1 to
NEPAL Installation procedure
 PART DESCRIPTION 1.- Door handle (1pc) 2.- Long tight bar (1pc) 3.- Short tight bar (1pc) 4.- Support block-lower (2pcs) 5.- Wall jamb cap (2pcs) 6.- Tight bar support (2 pcs) 7.- Acrilic base (1pc) 8.-
How to Operate Hurricane Shutters
 How to Operate Hurricane Shutters NOTES for PORTFOLIO: I created this manual as a booklet for a family who could not operate their hurricane shutters without paying for service. To develop the manual,
A Generic Sauna Room Assembly Manual
 A Generic Sauna Room Assembly Manual Parts List Exterior 1. Ceiling Assembly 2. Wall Elements 3. Exterior Mouldings 4. Top Exterior Mouldings 5. Bottom Exterior Mouldings 6. Main Base Frame 7. ABS Bolt
Metal & Vinyl, Flush Mount and Recessed Fin Windows Recommended Installation Instructions
 PO Box 480 Ph: 417-235-7821 Monett, MO 65708 Fax: 417-737-7140 Metal & Vinyl, Flush Mount and Recessed Fin Windows Recommended Installation Instructions These installation instructions are recommendations
Mach Wall Installation Instructions
 Mach Wall Installation Instructions Planning the Job Since Mach Wall is an innovative product that accomplishes 3 tasks at the same time (frame, insulate and drywall) and it replaces traditional framing,
LEGENDS RETRACTABLE DOOR SCREENS
 LEGENDS RETRACTABLE DOOR SCREENS MAGNETIC LATCHING DESIGN SYSTEM 42 I N S T A L L A T I O N I N S T R U C T I O N S 1 MOUNTING OPTIONS Recess : Mount the Screen Cassette using Recess Mounting Clips Recess
Post & Rail. Includes: Crossbuck, 2-Rail, 3-Rail and 4-Rail POST SUPPORT OPTIONS
 Post & Rail Includes: Crossbuck, 2-Rail, 3-Rail and 4-Rail STAGGER RAIL ENDS FOR GREATER STRENGTH ALLOW 1-1/2" GAP ON HINGE SIDE OF GATE AND 1-1/4" ON LATCH SIDE OF GATE HARDWARE DIG HOLES 30" MINIMUM
INSTALLATION INSTRUCTIONS
 INSTALLATION INSTRUCTIONS Thank You, for your recent purchase with TrimLine Windows, Inc. This is a quality product and deserves a quality installation. Please follow the attached instructions for a quick
LEGENDS RETRACTABLE DOOR SCREENS
 I N S T A L L A T I O N I N S T R U C T I O N S 1 MOUNTING OPTIONS Recess : Mount the Screen Cassette using Recess Mounting Clips Recess within the door jamb area. Recess installations are the most typically
SLIDING MECHANISM TROLLEY CATCH TROLLEY ASSEMBLY FLOOR GUIDE
 Set A Set B P7001 Standard Kit FITTING INSTRUCTIONS For use with 44mm thick doors only For Single and Double doors IF INSTALLING A TOUCH LATCH, PLEASE READ THE CORRESPONDING FITTING INSTRUCTIONS FIRST
Agave Standard Series
 Mailing Address: 033 San Elijo Ave, #464 Cardiff, CA 9007 619.708.917 619.330.88 fax info@agaveiron.com www.agaveiron.com Agave Standard Series Flat Track Hardware Systems General Information and Installation
ROLL-A-GLIDE INSULATED ROLLER DOOR
 ROLL-A-GLIDE INSULATED ROLLER DOOR Installation Instructions 1. Motor 13. Brush / Wear Strips 2. Axle Assembly 14. Curtain Assembly 3. Rigid Link Collars 15. Door Laths 4. Octagonal Plug End 16. Locking
Design Considera ons & Installa on Guidance
 Design Considera ons & Installa on Guidance LiteSpace Interior Aluminum Framing provides a slim profile for glass walls and office fronts. It is designed to be cut to length on project sites for finished,
Installation Instructions Window Opening Control Device. Single-Hung & Sliding Windows with No Vent Latches
 Single-Hung & Sliding Windows with No Vent Latches These s (WOCDs) work with single-hung windows and sliding windows with one operational and one stationary sash in the confi gurations of either XO or
GRID PANEL SYSTEM Installation Instructions
 Ceiling Top Edge Trim Shim GRID PANEL SYSTEM Installation Instructions Installation is simple & fast using Ambienta Grid Horizontal Reveal Option for Horizontal Reveals & Edge Trim to be punched with slotted
Pocket Door Kit PD1 / PD2 Installation Instructions. Kit Contents.
 Pocket Door Kit PD1 / PD2 Installation Instructions Kit Contents. 1, Create Rough Opening In Stud Wall Construct rough opening ensuring all sides are square and level. Rough opening should be; Height =
For Installer. Duration Windows. Assembly Guide Durafold 1000
 For Installer Assembly Guide Durafold 1000 Contents Title Page Number Handling Manual Blinds 4 Handling Electronic Blinds 5 Drainage 63 Outer Frame Assembly (Kit Form Door Only) 7 15mm Low Threshold Assembly
Constable Oak Extension Dining Table
 Constable Oak Extension Dining Table Assembly Instructions - Please keep for future reference 176/0325 Dimensions Width - 160/ 200cm Depth - 90cm Height - 75cm Important - Please read these instructions
INS T A L L A TIO N INS T R U C TIO N S. Ceiling Mount Track System
 Ceiling Mount Track System 10.26.2016 Specifications Ceiling Post: Unassembled 2-7/8 Assembled 1-11/16 7/8 7-9/16 5-7/8 3/8 2 Tubes 1/2 2-3/8 5 Parts and Tools Tools Needed Tape Measure Pencil Drill with
User Instructions Multiline Otter Scoreboard Caddy Assembly
 List of parts: User Instructions Multiline Otter Scoreboard Caddy Assembly Single Caddy Double Caddy 1 1 Base assembly with attached wheels 2 4 1 1 2 4 4 8 10 20 12 Uprights (60 or 74 aluminum extrusion)
Clopay Models 835/837 Sliding Door System Installation Guide
 Clopay Models 835/837 Sliding Door System Installation Guide The aim of this instruction is to guide you through the process of construction and fitting of Sliding Doors. Due to the number of sizes available
Aluminum Railing Installation. Glass Railing Spindle Railings Intimacy Railings and Panels
 Aluminum Railing Installation Glass Railing Spindle Railings Intimacy Railings and Panels This information in this manual will help you to Better understand our product line. Give you guidelines for an
1) Place the reactor stand on a sturdy bench with the bottom plate facing toward the front.
 Place the reactor stand on a sturdy bench with the bottom plate facing toward the front.") Assembly Instructions for ChemRxnHub Reactor Systems 1) Place the reactor stand on a sturdy bench with the bottom plate facing toward the front. Loosen knobs on the right and left using 2 hands of the
Assembly Instructions for ChemRxnHub Reactor Systems 1) Place the reactor stand on a sturdy bench with the bottom plate facing toward the front. Loosen knobs on the right and left using 2 hands of the
Portofino Installation Guide
 vjul16 (for 17 or 24 mm Surface Wall Profiles) DO NOT ASSEMBLE WITHOUT FULLY READING THESE INSTRUCTIONS Page 2 Thank you for purchasing this Portofino shower enclosure. Please study these instructions
Deauville Installation Guide
 vjul16 (for Recessed Wall Profiles) DO NOT ASSEMBLE WITHOUT FULLY READING THESE INSTRUCTIONS Page 2 Thank you for purchasing this Deauville shower enclosure. Please study these instructions carefully before
Method of Build 1. General
 Method of Build 1 General GLAZED ELEVATIONS Viso Double Glazed in glazed form differs from many other systems as the vertical joints can have Viso dry joints or the unique HIDDEN mullion post between glazed
METAL BLINDS. Deluxe GETTING STARTED OPTIONAL HARDWARE. A few simple tools are required: STANDARD HARDWARE
 METAL BLINDS Deluxe GETTING STARTED OPTIONAL HARDWARE A few simple tools are required: Steel Tape Measure Pencil Level Hold Down Brackets with Screws Extension Bracket Power Drill and Drill Bits Flathead
patio door installation guide
 patio door installation guide Measuring & surveying p2 Mechanical jointing p5 Installation p5 Hardware adjustment p7 Sealing of outer frame p7 Cleaning p7 Walk through clearances p8 Minimum and maximum
Installation Manual. Solid Plastic Toilet Partitions. IN CANADA & AREAS OTHER THAN U.S.A.: IN THE U.S.A.:
 Installation Manual Solid Plastic Toilet Partitions Toilet Partitions & Lockers IN THE U.S.A.: Hadrian Inc., 7420 Clover Avenue, Mentor, OH 44060 Telephone: 440-942-9118 Fax: 440-942-9618 U.S. toll free
Series 1500 Aluminum Door Canopy
 Series 500 Aluminum Door Canopy with Sidewings It is our recommendation that you read instructions carefully prior to assembly and installation. Series 500 with Sidewings mounting bar (A) top trim (B)
KNOB LATCH. Specifications: Glass-To-Wall Installation CAT NO. LAT001 C.R. LAURENCE CO., INC. PROFESSIONAL QUALITY
 Specifications: Material: Solid brass Hole Size Required: 7/8" (22mm) Glass Thickness Range: 3/8" (10mm) to 1/2" (12mm) Includes: Knob, Tapered Strike for wall-to-glass installation and J-Hook for glass-to-glass
Sliding Pocket Door Systems
 Sliding Pocket Door Systems W H DH Finished Floor Level DW Install at finished floor level. DOOR PANEL DW DH frame OVERALL DIMENSIONS width W H W H To obtain a sliding pocket door with two leafs it s necessary
GSP REMOVABLE PANEL INSTALLATION GUIDE
 GSP REMOVABLE PANEL INSTALLATION GUIDE 4495 Winfred Drive NE Atlanta, GA 30307 (770) 928-0851 VISIT US ON THE WEB AT WWW.GEORGIASCREEN.COM GSP Removable Panel Installation Guide Note: The GSP Removable
Installation Manual for Metal Emperor Lockers
 P a g e 1 Table of Contents Page General Notes and Tools Required 2-3 Assemble Shelves with Coat Hooks/Coat Rods 4 Fastening Chart 5 Knock Down Locker Assembly (Banks of Three) 6-12 Appendix A: Dress End
Rotary Fixture M/V/X CLASS LASER SYSTEMS. Installation and Operation Instructions
 Rotary Fixture M/V/X CLASS LASER SYSTEMS Installation and Operation Instructions 02/01/2000 Introduction The Rotary Fixture controls in the Printer Driver are used along with the optional Rotary Fixture
western window systems westernwindowsystems.com installation instructions non-pocket 2-1/4 panels
 series 2600 multi-slide non-pocket 2-1/4 panels windowsystems.com windowsystems.com movement, which can cause warping and other problems. Frame kit components: Each door will have a head assembly, a threshold
Installation Guide for Panel Mount Product
 Installation Guide for Panel Mount Product There are 2 installation solutions for itech Panel Mount Product : I. Screw Mount Installation II. Clamp Mount Installation In general, screw mount is for those
SLIDING MECHANISM TROLLEY CATCH TROLLEY ASSEMBLY FLOOR GUIDE
 Set A Set B PFD30 SG Fire Door Kit FITTING INSTRUCTIONS For use with 44mm thick doors only For Single and Double doors SUGGESTED TOOLS DRILL G-CLAMP TAPE MEASURE (Image for reference only) HACKSAW POCKET
2 pane servery 6mm sashless double hung in aluminium frames (top pane fixed - small box) with aluminium covers vertical section A-A
 with aluminium covers vertical section A-A") VS 2P6 v - small box in aluminium frames (top pane - small box) vertical section - 68,4 12,6 head (by others) head adaptor pulley and cord arrangement glass height = (opening + 44mm) / 2 6mm lapseal 6mm
VS 2P6 v - small box in aluminium frames (top pane - small box) vertical section - 68,4 12,6 head (by others) head adaptor pulley and cord arrangement glass height = (opening + 44mm) / 2 6mm lapseal 6mm
2 pane servery 6mm sashless double hung in aluminium frames (bottom pane fixed - small box) with aluminium covers vertical section A-A
 with aluminium covers vertical section A-A") VS P6 v - small box in aluminium frames (bottom pane - small box) vertical section - 68,4 1,6 head (by others) head adaptor standard handle (clear acrylic) aluminium lift handle (optional) for aluminium
VS P6 v - small box in aluminium frames (bottom pane - small box) vertical section - 68,4 1,6 head (by others) head adaptor standard handle (clear acrylic) aluminium lift handle (optional) for aluminium
Assembly Instructions & General Overview
 Assembly Instructions & General Overview 1. General Overview & Assembly Order...Page 3 2. Assembling the Structural Components Page 4-11 3. Power, Data, Power Poles and Cable Floor Boxes.Page 12-17 4.
NUMBER OF HORIZONTALS REQUIRED FOR 2 ON CENTER SPACING.
 K WIK FRAME ASSEMBLY INSTRUCTIONS NUMBER OF HORIZONTALS REQUIRED FOR 2 ON CENTER SPACING. APPROXIMATE DOOR LEAF WEIGHT (LBS.) WITH 29 GAUGE STEEL PANEL ALL PACK AGES INCLUDE #235 STEEL GIRT 2 FT. ON CENTER
Assembly Instructions
 Selling Station Assembly Instructions View from above without top A B C D Rounded finished corners on A & D Square unfinished 3-sides on B & C Selling Station Components (2) 2' x 6' Side s Have a channel
INSTALLATION OF THE TRACK FOR THE STRAIGHT SIDE STEEL LADDER
 ASSEMBLY OF THE 7180 STRAIGHT SIDE STEEL LADDER TOOLS REQUIRED FOR ASSEMBLY SAFETY GLASSES (2) 1 / 2 WRENCHES OR SOCKETS STEP LADDER OF APPROPRIATE HEIGHT (2) 7 / 16" WRENCHES OR SOCKETS HACKSAW FLAT HEAD
On the Right Track. Installation Guide
 On the Right Track Installation Guide Table of Contents General Introduction Introduction...1 Local Building Codes...1 Tools Required...1 Additional Assistance...1 Parts Glossary Components...2 Track...5
If you discover that material is missing or defective, contact our customer service department immediately:
 General Information Open the pack list on the crate s exterior. Locate the shop drawings and installation instruction inside the box. Review contents and make sure all parts are present. For a rectangular
I n s t a l l a t i o n I n s t r u c t i o n s S E N T I N E L S E R I E S 1 50 SLIDING GLASS DOORS
 I n s t a l l a t i o n I n s t r u c t i o n s S E N T I N E L S E R I E S 1 50 SLIDING GLASS DOORS Page 2-9: Installation Instructions, Figures 1, 2, & 3 Page 10-12: Figures A-1, A-2, & A-3: Installation
Deauville Installation Guide
 vjul16 (for 17 or 24 mm Surface Wall Profiles) DO NOT ASSEMBLE WITHOUT FULLY READING THESE INSTRUCTIONS Page 2 Thank you for purchasing this Deauville shower enclosure. Please study these instructions
Frequently Asked Questions
 1. What is the difference between new construction and retrofit? The difference is in the overall jamb depth and required components: For new construction, the flash flange on the head of the unit is left
SAM. Model: STV-C65 LCD Mobile Visualized Stand Instruction Manual. Weight Capacity: 1251bs / 56.7kg Suits LCD Flat Panel Display: 42"-55" Page 20
 SAM Model: STV-C65 LCD Mobile Visualized Stand Instruction Manual Weight Capacity: 1251bs / 56.7kg Suits LCD Flat Panel Display: 42"-55" 20 Step 6 LCD Mobile Lift Stand Model: STV-C65 Cable management
ASSEMBLY INSTRUCTIONS FOR SL500A AND SL500AL
 ASSEMBLY INSTRUCTIONS FOR SL500A AND SL500AL January 2013 The SL500A is a square upright glass cabinet with a single hinged lockable door. It has five adjustable shelves plus the base. It also has an optional
ASSEMBLY INSTRUCTIONS
 ASSEMBLY INSTRUCTIONS MODEL RTA - 4985 Thanks for purchasing one of our products. Please read carefully the assembly instructions before the installation. Please save this manual for future reference.
ED1300/1300F SERIES CONCEALED VERTICAL ROD DEVICE INSTALLATION INSTRUCTIONS
 ED1300/1300F SERIES CONCEALED VERTICAL ROD DEVICE INSTALLATION INSTRUCTIONS Ver.2 1300 SERIES CONCEALED VERTICAL ROD DEVICE Top Strike Latch Screws Strike Screws Release Plunger Top Latch Plunger Screws
Playground Assembly Instructions
 Before You Begin Playground Assembly Instructions Locate the playground set on firm, level ground. Assemble the playground on or close to its permanent location Two people are recommended to assemble the
Post & Rail Crossbuck
 Post & Rail Crossbuck 1. Getting Started 6. Crossbuck Be sure to call underground prior to digging Assemble gates (if necessary) and decide where they will be located Stake out the fence line Space and
C-Series & S-Series Classic Frame with Transom (Single or Pair)
") 1. TOOLS REQUIRED Tape measure 6' magnetic level 3' magnetic level Safety Glasses Screw gun #2 Screwdriver tip #3 Screwdriver tip Philips Head screwdriver (Used to move frame on wall using oval slots on
1. TOOLS REQUIRED Tape measure 6' magnetic level 3' magnetic level Safety Glasses Screw gun #2 Screwdriver tip #3 Screwdriver tip Philips Head screwdriver (Used to move frame on wall using oval slots on
Y1160A EIA Rack Sliding Shelf Installation Note
 Y1160A EIA Rack Sliding Shelf Installation Note This installation note contains procedures for mounting L4400 Series LXI instruments in EIA rack cabinets using the Y1160A sliding shelf rack mount kit.
TOOLS REQUIRED Metal Wood Wood and Metal Screws. #16 Drill #12-24 Tap. 1/8 Drill
 DEVICES COVERED IN THIS DOCUMENT: 4700S Surface Vertical Rod Device 4700SF Fire Exit Surface Vertical Rod Device TOOLS REQUIRED Metal Wood Wood and Metal Screws Sex Bolts #7 Drill ¼ -20 Tap #16 Drill #12-24
CRL OVERHEAD TRACK BI-FOLD DOORS (OTC)
") INSTALLATION INSTRUCTIONS CRL OVERHEAD TRACK BI-FOLD DOORS (OTC) HALF PANEL OVERHEAD TRACK SYSTEM ALUMINUM Phone: (800) 421-6144 Fax: (866) 587-7501 crlaurence.com usalum.com crl-arch.com 11M0283 CONTENTS
INSTALLATION INSTRUCTIONS CRL OVERHEAD TRACK BI-FOLD DOORS (OTC) HALF PANEL OVERHEAD TRACK SYSTEM ALUMINUM Phone: (800) 421-6144 Fax: (866) 587-7501 crlaurence.com usalum.com crl-arch.com 11M0283 CONTENTS
Page 1. FIG. #1 - Shower Door Assembly SHOWER & BATH ENCLOSURES BUILT TO LAST A LIFETIME HANDLE ASSEMBLIES REMOVED FOR CLARITY.
 FIG. #1 - Shower Door Assembly 29 1 2 1 6 9 9 5 HANDLE ASSEMBLIES REMOVED FOR CLARITY. 25 25 PLEASE REFER TO FIG. #2 FOR INSTALLATION 26 12 17 18 18 17 10 3 11 7 10 8 Page 1 FIG. #2 - Top View 5 21 10
Assembly and Installation Guide
 The Easy Hang Closet Solution SM Install Your elfa In An Instant. Enjoy The Benefits For A Lifetime. Basic Tools For elfa Assembly and Installation Level Hand or Power Drill Drill Bits 1/8", 3/8", 5/16"
DeckRail A Product of DeckRite LLC 3912 East Progress North Little Rock, AR Phone: (501) Fax: (501)
 Fax: (501)") Disclaimer: Deck Rail Glass Railing Installation Guide This guide is not intended to replace a trained professional installer. The drawings and instructions contained within are for demonstration purposes
Disclaimer: Deck Rail Glass Railing Installation Guide This guide is not intended to replace a trained professional installer. The drawings and instructions contained within are for demonstration purposes
TELESCOPIC GATE MANUFACTURING AND INSTALLATION MANUAL.
 TELESCOPIC GATE MANUFACTURING AND INSTALLATION MANUAL. Telescopic gates have been manufactured for many years essentially in the same way they are largely today. In recent years hardware suppliers have
Series 1100 Aluminum Door Canopy
 Series 00 Aluminum Door Canopy with Support Arms It is our recommendation that you read instructions carefully prior to assembly and installation. Series 00 with Support Arms MOUNTING BAR (A) TOP TRIM
INSTALLATION INSTRUCTIONS Flat Panel Static Wall Mount Model: GSM-111
 INSTALLATION INSTRUCTIONS Flat Panel Static Wall Mount Model: GSM-111 The GSM-111 static wall mount fits most 23" to 30" displays. The GSM-111 is designed to adapt to VESA 200mm/ 100mm compliant displays.
Extendable Swing Shut Gate
 Extendable Swing Shut Gate WIDTH Adjustable from 72.5 to 95 cm HEIGHT Top of gate to floor 78 cm SPINDLES x 4 WALL CUPS x4 7cm EXTENSIONS x2 GATE NUTS x 4 SPANNER x Note: Each 7cm extension comprises of
9/16" (14mm) 1/2" (12mm)
 1/2 (12mm)") Deluxe Header Kit Deluxe Header Kit Cat. No. SDH660-66" (1676mm) Length Cat. No. SDH980-98" (2489mm) Length Cat. No. SDH144-144" (3657mm) Length Each Deluxe Header Kit Contains: 66" (1676mm), 98" (2489mm)
Deluxe Header Kit Deluxe Header Kit Cat. No. SDH660-66" (1676mm) Length Cat. No. SDH980-98" (2489mm) Length Cat. No. SDH144-144" (3657mm) Length Each Deluxe Header Kit Contains: 66" (1676mm), 98" (2489mm)
Waste/recycle sets. Waste/recycle sets. Premium TANDEM and TANDEMBOX solutions for waste/recycle cabinets. blum.com
 Waste/recycle sets Waste/recycle sets Premium TANDEM and TANDEMBOX solutions for waste/recycle cabinets blum.com SERVO-DRIVE BLUMOTION Waste/recycle solutions for every kitchen Blum s new TANDEM and TANDEMBOX
#916 CLASSIC 16 GUN CABINET ASSEMBLY INSTRUCTIONS
 Thank you for purchasing this quality product. A list of PARTS and INSTRUCTIONS is included to assist you. Unpack and identify all parts included on the Parts List and Hardware List. If parts are missing,
Curium 19H Installation Instructions & Parts List
 Curium 19H Installation Instructions & Parts List Illustration Curium 19H Right Hand Page 1 of 15 01/07/2016 Revision 2.1 IMPORTANT This shower screen / enclosure must be installed by suitably qualified
Ensure there is reasonable access for materials and working space, ensure the shed site is level and consider the disposal of run-off water.
 INSTALLATION GUIDE TM Flat Roof Homesheds THE POTTER BEFORE YOU START It is important to check your Local Government Authority requirements before the installation of your new Stratco Potter Flat Roof
Installing the Profile Privacy Panel. Assemble top mounting bracket. Prerequisites. Tools
 Installing the Profile Privacy Panel Complete these instructions to install the Profile Privacy Panel. Privacy panels are available in various heights to match tiers and include mounting hardware for slat
Installation Instructions for the AlphaDeck Staging System
 Installation Instructions for the AlphaDeck Staging System Step 1 - Preparation A. Before setting up your system, determine the location where the stage will be installed and locate all the parts you will
1 PREPARE HEADER AND ROUGH OPENING
 CONTENTS. HEADER & TRACK ASSEMBLY. END BRACKET PLAIN 3. FLOOR PLATE.. 8. 4. SPLIT STUD 6 5. CARRIER (987) 6. QUICK RELEASE PLATE (960) 7. DOOR GUIDE SET (9883) 3. 4. 7. 8. BUMPER KIT (988) 9. #8 X 3/4
101B, 210X, ELM, VSTB Installation Manual
 101B, 210X, ELM, VSTB Installation Manual 99-16105-I001 Copyright 2010 by ALL rights reserved. Information in this document is subject to change without notice. Companies, names and data used in examples
400A 40113V, 401A 40120V, & 401AL 40120VL ALUMINUM VERTICAL 4000 LB LIFT INCLUDES SCREW LEG ASSEMBLY INSTRUCTIONS
 12/11/07 PAGE 1 OF 12 400A 40113V, 401A 40120V, & 401AL 40120VL ALUMINUM VERTICAL 4000 LB LIFT INCLUDES SCREW LEG ASSEMBLY INSTRUCTIONS Thank you for purchasing our product! *Please read these instructions
TorqueMaster Replacement Spring
 TorqueMaster Replacement Spring Installation Instructions NOTE: Use these installation instructions in conjunction with the TorqueMaster Repair / Replacement Spring Program literature. Copyright 999 Wayne-Dalton
INTRODUCTION. EqunioxRoof.com. Pro Tip
 INSTALLATION MANUAL INTRODUCTION The Equinox Louvered Roof System is designed to be installed in an aluminum frame. All these sections are 1/8" thick extruded aluminum. All engineering for this system
ESA-200 Fixed Sidelite
 Exterior View Installation Instructions For use with ESA II Controller 1 Tools Required: Suggested Fasteners Required - (Not supplied) Screwdrivers Small Straight (FlatBlade) - for Terminal Block wiring
Deck Mount Installation with Bench
 Deck Mount Installation with Bench 1. Mark track with square. 2. Cut tracks with saw. 3. Drill ¼ hole (if needed.) 4. Countersink track. 5. Countersink all track 6. File all track ends. ends. 7. Lay out
Installation Instructions Split Shake, Staggered Shake, Shingle, Perfection Shingle, and Shapes
 Installation Instructions Split Shake, Staggered Shake, Shingle, Perfection Shingle, and Shapes General Guidelines These instructions show one type of installation and are intended for the professional
Installers guide Deadbolt 02.
 Installers guide Deadbolt 02. version 0.7.1 Specifications Model igloohome Smart Deadbolt 02 Material Zinc Alloy Current Rating (Standby) ~30uA Current Rating (Active) ~200mA Batteries 4 x AA Alkaline
1200 SERIES 2 PANEL DOOR rev.1 DETAILED INSTALLATION INTRUCTIONS
 1200 SERIES 2 PANEL DOOR 10.2013 rev.1 DETAILED INSTALLATION INTRUCTIONS GENERAL: Door elevations shown in these instructions are as viewed from the outside. X denotes the active or moving panel(s). O
LOWLINE SINGLE FOLD DOWN WALL BEDS
 ASSEMBLY INSTRUCTIONS LOWLINE SINGLE FOLD DOWN WALL BEDS Tools Required For Assembly No 2 & No 4 Phillips Head Screwdrivers No 2 Slot Head Screwdriver Hammer Electric Drill (Hammer Drill for Masonry) 6.5mm
The following instructions will guide you through the installation of your new vinyl railing stair kit.
 Installation Guide Vinyl Standard Stair Railing Tools Required Protective eye glasses Tape measure Variable speed drill/screwdriver Rotary hammer or hammer drill and masonry percussion bit recommended
Waste/recycle sets. Waste/recycle sets Premium TANDEM and TANDEMBOX solutions for waste/recycle cabinets. blum.com
 Waste/recycle sets Waste/recycle sets Premium TANDEM and TANDEMBOX solutions for waste/recycle cabinets blum.com Waste/recycle solutions for every kitchen Blum s new TANDEM and TANDEMBOX waste/recycle
3/16 FRAMELESS SERIES BY-PASS TUB AND SHOWER ENCLOSURES #3344, 3345, 3037
 / FRAMELESS SERIES BY-PASS #, 5, 07 PLEASE READ THOROUGHLY BEFORE STARTING INSTALLATION Item 5 7 8 9 0 5 7 8 Part # 09/050 0 05 A05 8 0 0 0 70 0 09 5 5 0 0 7 0 Description Tub Header Stay Clean Sill Tub
SLIDING TUB / SHOWER ENCLOSURE WITH STATIONARY 90º PANEL
 SLIDING TUB / SHOWER ENCLOSURE WITH STATIONARY 0º PANEL This instruction sheet applies to the following units. C, C7, C7, C77, C, C7 This instruction sheet also applies to the following units. VTE / VSE
TRIADE MAXI TRIADE MAXI WOOD AND GLASS SHELVING SYSTEMS
 is the concealed mounting bracket for shelves minimum 0mm thick. It has been conceived to simplify the shelf installation. It is provided with three indipendent adjustments: 1) VERTICAL Before installing