STAINED GLASS URN Paula McCoy All Rights Reserved
|
|
|
- Matilda Miles
- 5 years ago
- Views:
Transcription
1 Suggested Retail $ STAINED GLASS URN These pieces are done on Petro Mold s Urn. Color decoration is done with Colors for Earth Color Concentrates. This technique includes flooding color, piping and shading techniques. All Rights Reserved Paula McCoy, 104 Finneyoaks Lane, Weatherford, Texas * Phone: * Fax: Web Site: ceramicsbypaula@prodigy.net CBPM102 Page 1
2 Supply List Miscellaneous 2 Sponges Tissue Paper Pencil Ceramic Tile (Palette) Watercolor Marker or Sharpie Scissors 2-Water Bowls (One for Piping Bottle) Palette Knife Paper Towels Old Bath Towel Paint Well Palette Fine Mister Bottle Brushes (Natural Hair brushes are recommended) #6 W.G. Fan Glaze Paula McCoy or CFE Sumi Brushes Suggested Ware: Petro Molds Cayman Urn Mold #1813 Products Colors for Earth Concentrates: CC132 Deep Cranberry CC137 Bright Violet CC143 Sapphire Blue CC161 Green Leaf CC162 Laurel Green LE003 Aqua Splash CFE Glazes: CSP01 Gloss Medium NT Clear Color Strokes: CS607 Ivory Specialty Products: CSP31 Black Clay Dimensions Please read through all instructions first before starting the project so that you have a better understanding of the technique and this may answer some of your questions up front before you get started. Should you have any questions or comments on this technique please don t hesitate to contact me. Page 2
3 Technique Talk (Discussion of different terms and techniques that may be in this packet.) Brushes: Brushes listed in this project are what is recommended and may vary in size by manufacturer. I recommend that you use natural hair brushes which are sable. This will allow you to achieve the same color depth that I did in decoration. If using a synthetic or taklon brush you may need to apply more coats because these brushes do not hold as much color as the sable. A sable brush is like your own hair. It holds moisture when it is wet; therefore, it will hold the water or product you need it to. A synthetic (man made hair) has a coating on it that is waxy and the product will tend to slide off. It will not absorb the product. Fully Load: Working color into all the hairs of the brush, turning the brush over as you are loading it to make sure you have all hairs covered. Slip Slap/Moosh Moosh: Brush Recommended: Paula McCoy Sumi Brush. With Sumi Brush and color thinned to a wash, apply color to area in a hap-hazard manner. Moving the brush back and forth in a crosshatch direction making an X with the brush or laying the brush on it s side and patting it down mooshing it, overlapping and keeping strokes tight and close together, you create a watercolor look. You will have some areas darker than others for highs and lows. This technique can be used to graduate from one color to another as we have in the background in this design. When working with two colors you will need to fade one color into another. To do this you may need to load the brush with water and work the areas that overlap in color so that they blend and have a soft gradual fading from one color to another. Sumi Shading: Brush Recommended: Paula McCoy s Sumi or Umbra Pro Brush. Fully load Sumi Brush with water and tip into shadow color just on the very tip of the brush. Set the tip of the brush down by applying pressure which will flatten the bristles out and allow the color to bleed back into the water allowing the underneath color to still show through and add the darker color in the area that you want to be the darkest. By moving the brush from right to left (back and forth) while setting the brush down you will be able to blend the color to achieve a gradual color change. You may need to repeat this step multiple times to achieve a darker value. Wash: Start with a puddle of water on your palette and add a touch of color to it and mix, which will create a transparent watercolor look of that color. I usually will mix with the brush that I am going to use in the area I am working. After mixing, wash your brush and blot the water out on a sponge or paper towel and then pick up the wash of color and go to the area you need it. This will keep you from applying too much where you may have only wanted a small amount of the wash. Always start with a small amount of color in the water to create your wash. It is easier to add more color to make it darker but harder to take the color off if you are too dark. Flood In: Thin down color with water until it drips off the brush before you count to 3. The color should be thin enough to allow the color to drip off the brush freely. Keep the brush fully loaded at all times and allow the color to drip off the brush, you only need to guide the color in place. No brushing. Generally 1-2 coats are required for opaque coverage unless otherwise specified. With this technique you can achieve an opaque coverage quicker then brushing 3-4 coats in an area and this eliminates those brush strokes that we sometimes see when you are looking for solid coverage. You can do this technique with color concentrates or with glazes. If doing a multi-colored flooding generally one coat is required. Color Concentrates: Color Concentrates are hydrated firing pigment that is suspended in a pure non-diluting gel base. They are Non-Toxic. Fired ceramic colors are made from metals and minerals. These natural raw materials are heated, refined, and when placed in the hands of ceramic engineers are combined to produce colored powdered pigments. In our hands, these dry ground pigments are suspended with a non-degrading gel base and ball milled. This process produces a ready-to-use fired color pigment, we refer to as Color Concentrate. Color Concentrates have a firing range from Cone 06 Earthenware to Cone 6 Stoneware/Porcelain. You can use them straight from the bottle: As a translucent one-stroke on greenware or bisque. 3 or more coats can be applied for solid coverage to block in patterns on greenware or bisque. Page 3
4 Can be used for antiquing on bisque. Finger painting or hand printing on bisque. Bubble painting Use to color any of the CFE Enhancement Products. Blend with the CFE Enhancement Mediums to create a vast array of fired decorating products and only a blend away. Opaque Clay Based Underglaze Translucent Underglaze for bisque or greenware. Opaque Underglaze for Bisque Transparent Gloss Glaze Semi-opaque Gloss Glaze Matt Glaze Solids Matt Glaze Specks Colored Piping Slip (Clay Dimensions) Plus Specialty Techniques Color Strokes: Although, Color Strokes are considered an Underglaze Color, it is actually a type of glaze. It is frit based but matt in finish unless glazed over. This means that lids can not be fired in place if the color is where the rims touch. While there are special techniques, the main purpose is to add color to bisque or greenware by applying a pattern, brushstrokes, three brushed coats for opaque coverage or flooding color for pattern base coats. Cover with Transparent or Clear Glaze by brushing or dipping and fire to cone When used on greenware avoid the bottom of pieces unless you are stilting the piece. Fire to 04, some areas may gloss, when glaze is applied it will require a longer drying time for glaze in those areas. You can use them straight from the bottle: As a one-stroke coverage on bisque. 3 or more coats can be applied for solid coverage to block in patterns on bisque. Can be used for antiquing on bisque. Left unglazed can be used as a chalkboard. Finger painting or hand printing on bisque. Stamping Sponging Bubble painting Airbrushing (Dilute 50/50 with Water) With 2 oz. bottles with cap and writer tips to do outlining, lettering, line work and flooding of color. Majolica techniques over CGE502 Ultra White opaque gloss glaze. Over Neutral Clay Dimension (Piping) designs. NOTE: When shading Color Strokes you need to let them completely dry before doing your shading. They have enough Designer Glaze Medium in them that they stay slick and won t allow the shading color to absorb until it is dry. CFE-Gloss Medium NT Clear: Gloss Medium is a non-toxic clear gloss glaze. In the CFE Color System it is also used as an enhancement product. When you add any Color Concentrate to the Gloss Medium, you have created a colored gloss glaze and are in control of the color intensity. Depending on the ratio of Color Concentrate to Gloss Medium the technical application may vary. CSP01 is perfect to create the popular Made for Bisque Glazes Strokes. The blend is 1 part color to 1 part Gloss Medium for a high pigment detailed glaze with very smooth brush ability. These blends can be used for brushwork or color-blocking on 04 bisque which is then covered with CG900 clear glaze or CSP01 Gloss Medium NT Clear and fired to cone 06 with a 20 minute hold. CSP01 Gloss Medium can be used as a base for creating a colored gloss glaze. The typical blend ratio is 2 parts Gloss Glaze Medium to 1 part Color Concentrate. This creates a 3 to 4 coat gloss glaze. Fire to witness cone 06 with a 20-minute hold. Page 4
5 Gloss Glaze Medium is a glaze base. It contains frit, as well as other oxides and has been refined and ball milled for a smooth blend and brush consistency. It is clear in value. It is non-toxic. It does not flow during firing. Currently Firing Range is Cone 04 to Cone 6 When blended with any of the Color Concentrates it produces a food safe surface. Piping: Piping, also known as tube lining, can be used on greenware or bisque. There are different products out on the market that can be used to do your piping with. This project we are using Clay Dimensions by Colors for Earth. You can paint over it as soon as it dries (about 10 minutes) using the Colors for Earth Concentrates and many other ceramic colors without first firing the piping. Or you can fire (to witness cone 04 for greenware and witness cone 06 for bisque) to set the Piping, if you are more comfortable doing that, and then do your color technique. Most color will break and fall off the piping even though you are painting right over it. The piping will take on a hint of the color put over it, but it will not be as intense on the piped areas. If you are working on a project that is round like a vase and you are piping the outside of it, I would recommend that you fire set the piping because you will be rolling the piece around painting it and could break off some of the piping if not careful. Holding the piping tool of your choice at a 45 degree angle is the best. Let the tip of the tool (Gizmo/Air-pen Decorating Tool), bottle or bag keep in contact with the surface of the ware. Always pull the lines from left to right if you are right handed and from right to left, if left handed. If you go backwards with your tool you will clog up your tip with dust, product, etc. Wipe your tip frequently. Use your fingers to gently pinch-wipe the tip after almost every stroke or wipe on a damp sponge to keep the tip free of lumps which cause your stroke to be larger when you begin each stroke. If you are working too fast you may get a broken line and you may want to slow your stroke down. There may be instances that you want a broken line, but for this pattern we are looking for a solid even line. To correct a piping mistake use the chisel edge of a wipe-out tool for ease of removal of the stroke right away. If the piping is dry, a fingernail or cleaning tool, will probably do the trick. Mix and stir Clay Dimensions. No matter what method of piping you are using, practice a few strokes on a tile to get a rhythm and flow to each stroke. The piping slip should be fluid but not runny. If you are using the air-pen, this is the time to check and make any adjustments to the regulator for a clean and controlled flow of air. The regulator allows you to adjust the air flow for more accurate control with ceramic mediums and their varying viscosity. Adjust the dial on the regulator to slow down the flow of air, which in turn reduces the speed with which the liquid is dispensed through the Gizmo. Start piping from one side and work toward the other side, or top to bottom. This will keep what you have done to one end and less chance of you laying your hand down in what you have just piped, which will bump and break piping off that is completed. Turn your piece as you work. You may find it helpful to work on a turntable if it sits low enough. Otherwise, use a towel to rest the piece on as you turn it. When piping I recommend that you make the longest stroke you can and work from that point. For instance, do the right side of the leaf starting from the base to the tip, then do the center vein, then pull in the side veins, and then do the other outside of the leaf. Refer to example below. Page 5
6 When I am working on a tile design I will generally put the tiles in the frame I will be using for it, and work on them in the frame. I find this helps me keep everything together and I am not chasing tiles all over and you can get a more consistent color that overlaps from one tile to another this way. When doing your piping either on greenware or bisque I find it necessary to condition the ware well by first wiping down the surface with a damp sponge and water and then, as you are working, using a fine mist bottle and misting the surface with water to prevent too quick of drying of the piping, which could cause cracking, if lines are heavy. Be certain to mist your piece frequently. If working on greenware, do not saturate it. The misting is very important if you are in a dry climate like Arizona. The Clay Dimensions can be tinted with the Color Concentrates. Take out a small amount on a glazed tile and add 5-6 drops of color and mix with palette knife. What you see is what you get in color. Technique: 1. Preparation of ware: Clean greenware by removing all seams in usual manner and with damp sponge remove any dust. Fire to witness cone 04 bisque. If there are any rough areas or imperfections on the bisque ware, use a rubber scrubber or fine sand paper to lightly remove. Then wipe piece down with a damp sponge to remove dust and to add a slight amount of moisture to the ware for smooth color application. 2. Preparing Working Area: Using a Paint Well (white plastic palette with little cups) for mixing color. I like using this when painting because the product sits in a little cup and doesn t spread out on a tile and dry out before you know it. With the Paint Well it keeps the color moist and you don t waste as much product when you have to walk away. You can cover with plastic wrap or they make covers for these. I don t suggest using these if doing brush stroke work. I put a damp sponge in the center of the Paint Well to blot my brush on as I am working and changing colors. I put a damp sponge in the center of the Paint Well to blot my brush on as I am working and changing colors. Set up your Gizmo or piping bottle with CSP31 Black Clay Dimensions (piping) in one tube/bottle. I like to use the yellow tip when piping but you need to try it and see what works for you and change until you find the size you like. Remember to have a mug or deep bowl with a sponge in the bottom of it covered 1/2 way with water to rest your Gizmo or piping bottle in while not in use. Use this sponge to wipe off excess piping slip on tip of pen to keep lines nice and crisp. 3. Roll Glaze: Thin down some CSP01 Gloss Medium NT Clear glaze and roll the inside of the urn. Wipe off any drips with damp sponge. 4. Transfer Design: Carefully trace design on tissue paper with pencil. Transfer to piece by laying tissue paper with design on piece and, using a water color marker, trace over your pencil marks. The marker will bleed through the tissue and transfer to your piece. The marker will fire away. Clay Carbon can be used in place of tissue paper if desired. Divide vase into 4 sections with pencil. Repeat pattern 4 times around urn in each section you penciled off. Sharpie Markers can be used when transferring to greenware or on top of a matt glaze. Watercolor or washable markers should be used when working directly on bisque. Both markers will burn away in firing but the Sharpie on bisque will sometimes leave a white line where the marker was if you paint outside your transferred lines. Page 6
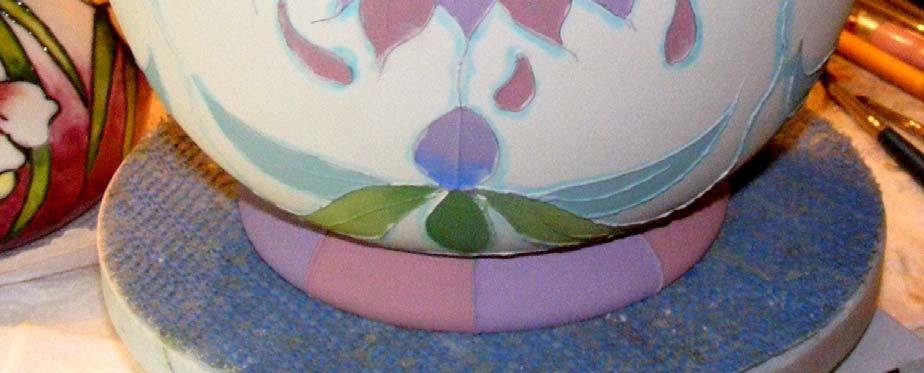
7 4. Piping: With Gizmo or bottle and CSP31 Black Clay Dimensions pipe all of the pattern following the piping guide lines. Start at one side and work your way around the piece. Continuously wipe the tip off to keep the lines even and to keep the tip from clogging. Depending on the time of year and where you live you may need to mist the area you are piping to keep it moist and slow down the drying. If it dries too fast it could lift off the piece. At the top and bottom of your 4 sections divide it in 1/2 with pencil and come out 1/2 from neck of urn and create a line that will create rectangular sections as shown on photo. You will also create a wavy line from top to bottom where your 4 section are to section piece off. All of these lines will be piped also. NOTE: Never fan dry piping!! 5. Background: Thin down some CS607 Ivory to a wash consistency and with medium sumi brush slip/slap moosh/ moosh in background around urn. 6. Leaves: The leaves are 2 different colors, aqua and light green color. With small sumi brush and thinned LE003 Aqua Splash/CSP01 Gloss Medium 50/50 color, flood in aqua colored leaves with 2 coats. The other leaves are light green color and done with CC161 Green Leaf/CSP01 Gloss Medium 50/50 thinned with water. Refer to photo for placement. Allow to dry. Sumi shade these with CC162 Laurel Green up against the stem. Flood In: Thin down color with water until it drips off the brush before you count to 3. The color should be thin enough to allow the color to drip off the brush freely. Keep the brush fully loaded at all times and allow the color to drip off the brush, you only need to guide the color in place. No brushing. Generally 1-2 coats are required for opaque coverage unless otherwise specified. With this technique you can achieve an opaque coverage quicker then brushing 3-4 coats in an area and this eliminates those brush strokes that we sometimes see when you are looking for solid coverage. You can do this technique with Color Concentrates or with glazes. If doing a multi-colored flooding generally one coat is required. 7. Stem: Thin down some CC162 Laurel Green/CSP01 Gloss Medium 50/50 mix with water. With small sumi brush and color flood in stems as indicated on pattern with one coat. 8. Calyx: The calyx are light green color and done with CC161 Green Leaf/CSP01 Gloss Medium 50/50 thinned with water and small sumi brush 2 times. Sumi shade these up against the stem with CC162 Laure Green. Refer to photo 9. Front Flower Petals & Bud (Purple): Thin down some CC137 Bright Violet/CSP01 Gloss Medium 50/50 with water. With small sumi brush flood in petals and bud at bottom of design with 2 coats of mix. Allow to dry. Sumi shade these petals with CC143 Sapphire Blue pure where the petals gather together. 10. Back Flower Petals & Comma Shaped Petals (Burgundy): Thin down some CC132 Deep Cranberry/CSP01 Gloss Medium 50/50 with water. With small sumi brush flood in back petals and comma shaped petals that are falling off the flower with 2 coats of mix. 11. Lid Background: The background of the lid is done with CC161 Green Leaf/CSP01 Gloss Medium mix thinned down and flooded on 2 times with small sumi brush. 12. Rectangular Section Border: These sections are alternated with 2 colors. Also, the top and bottom are opposite in colors. There is one set of these rectangular at the bottom of large sections and another on the foot of the piece. Refer to photo. Thin down some CC137 Bright Violet/CSP01 Gloss Medium 50/50 with water. With small sumi brush, flood in every other section on the top and bottom of border design with 2 coats of mix. Thin down some CC132 Deep Cranberry/CSP01 Gloss Medium 50/50 with water. With small sumi brush, flood in the other rectangle shapes with 2 coats of mix. 14. Glaze: This project uses an unleaded clear glaze and these types of glazes tend to bleach out or soften the pinks/ purples and some times the red colors. If you don t think you have enough of the pinks in the areas you can add an extra coat to help the color hold better. Do this prior to glazing. Page 7


8 With soft fan brush apply 2 coats of CSP01 Gloss Medium NT Clear. Be sure not to let the glaze puddle in and around the piping. Brush this out or it will get milky when fired. 15. Firing: Stilt and fire pieces to witness cone 06. Enjoy! Page 8


9 Finished Unfired Urn Page 9
10 Stained Glass Urn Section Pattern (Repeat 4 times around) By: Paula McCoy 2012 Page 10
 By: Paula McCoy")

11 Aqua Splash Leaves Stained Glass Urn Section Pattern (Repeat 4 times around) By: Paula McCoy 2012 Green Leaf Leaves Bright Violet Petals Aqua Splash Leaves Deep Cranberry Petals Green Leaf Leaves Page 11


12 Stained Glass Urn Lid Pattern By: Paula McCoy 2012 Deep Cranberry Petals Bright Violet Petals Page 12
Colors for Earth, LLC. New Product Release. Designer Lava Stone Glazes
 CFE MARCH NEWSLETTER Colors for Earth, LLC New Product Release Volume 1, Issue 2 March 23, 2010 Inside this issue: Greenware Application 2 Packaging 3 Bisque Application 3 Brush Strokes on Designer Lava
UNIT 2 UNDERGLAZE. Requirements:
 UNIT 2 Requirements: (Refer to requirements Unit 1-4 on page 2) Basic Information: Underglazes: (1) Are usually applied to greenware and fired before glaze is applied. (2) May be applied to bisque (but
Product Features Application Recommendations Usage Variations & FAQs
 1 of 5 7/27/17, 12:02 PM Print Product Features Application Recommendations Usage Variations & FAQs Stroke & Coat Palette Speckled Stroke & Coat Palette The Creative Choice Stroke & Coat (The Wonderglaze)
Color. Webinar
 Color Me Wild Featuring Concepts in Design and using a piping bottle for detailing Ware - Oh F Large Geometric Square Plate 2480 Color - Duncan Enterprises Concepts (CN) 012 Bright Straw 04 Really Red
Bold, Beautiful Butterfly s! Study in Neon Colors & Script Liners
 Bisque: Plate, platter or flat bowls fired to cone 04. Colors: EZ 12 Black and CN253 Black CN141 Lt Aqua CN142 Bt Aqua CN172 Bt Kelp CN261 Lt Grape CN293 Dk Purple CN501 Neon Yellow CN502 Neon Blue CN503
Page 1 EXHIBITORS ASSOCIATION JUDGING PROGRAM
 EXHIBITORS ASSOCIATION JUDGING PROGRAM Page 1 CLASSIFICATIONS 1. Novice: Someone over the age of 17 that has done ceramics for less than 6 months. 2. Hobbyist: Someone that has done ceramics more than
Yellow Roses in Clear Vase By Priscilla Hauser
 1 Yellow Roses in Clear Vase By Priscilla Hauser Surface: Canvas or surface of your choice FolkArt Artist Pigments: #918 Yellow Light #629 Red Light #973 Burnt Sienna #628 Pure Orange #649 Warm White #461
RUSH KITS DISCOVERY BASICS PREMIUM QUALITY SIGNATURE LINE
 RUSH KITS ht Tools VERSATILE PREMIUM QUALITY SIGNATURE LINE EBUT TAKLONPERFOMANCE DISCOVERY BASICS We offer three lines of brushes to suit your ceramics needs and skill set. If you re just beginning to
STEPS and Stages of the Clay
 STEPS and Stages of the Clay Slip - Clay that is watered down - smooth and runny. It attaches handles and decorations.. Wedging Used for eliminating lumps and air bubbles, drying the clay. Wedging makes
Taking the mystery out of working with Acrylic By S. Taylor Hedges
 Taking the mystery out of working with Acrylic By S. Taylor Hedges Sandra Taylor Studio One Cat Squared Working with Acrylic Paint Definitions: Glaze thin transparent layers of color that enable the artist
Basic Stenciling Techniques
 Metal Stencil Techniques For each technique you ll need the equipment listed in addition to your stencil and removable tape. To avoid bending your stainless steel stencils, keep them flat at all times.
Painting Raindrops on Roses
 Painting Raindrops on Roses A Watercolor Lesson by Susie Short Supplies and materials needed for this lesson: 8 x10 Arches 140# CP Watercolor Paper, Professional Grade Watercolor Tube Paint (I use Daniel
January Instructions Willem van Aelst Study 2008 David Jansen. For the Video Link, Please see Page 3
 January Instructions Willem van Aelst Study 2008 David Jansen For the Video Link, Please see Page 3 Historical Information To start the painting we first need to establish the Ground. The ground is the
CHRISTMAS VERSE BIBLE Mold Number 1833 Christmas Verse Bible
 CHRISTMAS TREE CANDLE DRIPPERS AND GIDDY TREE 1831 Christmas Tree Candle Dripper 1832 Two Christmas Tree Oil Lamps 1834 Giddy Tree 1772 Lg. Pedestal OPAQUE STAINS: Sherwood Green, Victorian Green, Dark
Duncan University Course
 The focus of Essentials 102 is Cover-Coat Opaque Underglazes and EZ Stroke Translucent Underglazes products primarily designed for greenware application. Both product families have a wide variety of uses,
Pineapple & Posies. by Cindy Mann-Vitale
 Pineapple & Posies by Cindy Mann-Vitale Pineapple & Posies By Cindy Mann-Vitale Palette: DecoArt Americana Acrylics Antique Green #13147 Antique Teal #13158 Avocado #13052 Avocado Dip #13248 Burnt Sienna
Tuesday Tips_Poinsettia PlaceMat_ Faux Finishing and Creating Borders by Debbie- Cole CDA - Posted on December 3, 10 & 17, 2013 by debbiecole
 Tuesday Tips_Poinsettia PlaceMat_ Faux Finishing and Creating Borders by Debbie- Cole CDA - Posted on December 3, 10 & 17, 2013 by debbiecole http://debbiecole.com/tuesday-tips_poinsettia-placemat_-faux-finishing-and-creating-borders-by-debbiecole-cda/
Pennsylvania Redware
 Ceramic Arts Daily Lesson Plan Pennsylvania Redware by Denise Wilz. Photos by Lisa Short Goals Research historical Pennsylvania German folk art decorative motifs and pottery forms. Learn the symbolism
Floral Welcome. by Gisele Pope
 Floral Welcome by Gisele Pope Floral Welcome By Gisele Pope Palette: DecoArt Americana Acrylics Payne s Grey 13167 Sapphire 13099 DecoArt Americana Décor Chalky Finish Paints Everlasting 15100 Surface:
Acrylic Paint. Tools, Tips and Techniques
 Acrylic Paint Tools, Tips and Techniques Acrylic Paint Basics History Developed in the late 1940s, acrylic paint has only a brief history compared to other visual arts media, such as watercolor and oil.
Floral Coaster Set. by Debby Forshey-Choma
 Floral Coaster Set by Debby Forshey-Choma Floral Coaster Set By Debby Forshey-Choma Palette: DecoArt Americana Acrylics Antique Gold #13009 Antique Rose #13156 Avocado #13052 Brandy Wine #13079 Burnt Sienna
Unique Glass Colors. Margot Clark and Dr. Saulius Jankauskas present. Unique Glass Colors Products:
 Unique Glass Colors Margot Clark and Dr. Saulius Jankauskas present This lesson is designed to introduce you into the fascinating world of fired glass. We will be Marbling with Metallics, learning to Control
Strawberries and Daisy Teapot 2004 Donna H. Richards
 Strawberries and Daisy Teapot 2004 Donna H. Richards Palette: JansenArt Traditions JA01 - Burgundy JA02 - Naphthol Red (PR170) JA03 - Naphthol Red Light (PR9) JA14 - Hansa Yellow (PY 74) JA19 - Pine Green
PREPARATION: Retexture all textured seam lines using the TL-9 texture tool. Fire to proper cone.
 EASTER BUNNIES, WHEELBARROW AND FENCE 1708 Wheelbarrow 1709 Wheel 1710 Fence Section 1714 Wheelbarrow Bunny 1715 Bunnies for Wheelbarrow 1716 Six Decorated Eggs 1717 Bunnies with Eggs 1718 Three Easter
Summer Lilacs by Donna Hodson, CDA
 Summer Lilacs by Donna Hodson, CDA Summer Lilacs By Donna Hodson, CDA Palette: DecoArt Americana Acrylics Antique Gold #13009 Cadmium Yellow #13010 Dioxazine Purple #13101 Hauser Dark Green #13133 Hauser
Exhibitor's Association Judging Program Guide Lines. May 2017
 Exhibitor's Association Judging Program Guide Lines May 2017 Exhibitors Association Judging Program Classifications 1. Novice: Someone over the age of 17 that has done ceramics for less than 1 year.. 2.
JOY, PEACE AND HOPE. by Debby Forshey-Choma
 JOY, PEACE AND HOPE by Debby Forshey-Choma EXCLUSIVE Joy, Peace And Hope by Debby Forshey-Choma PALETTE DecoArt Americana Acrylics Antique Maroon #13160 Black Green #13157 Cadmium Red #13015 Grey Sky #13111
Sharpen new pencils with an electric pencil sharpener; don t sharpen off the color names!
 From My Sketchbook 2009 Janelle Johnson CDA, TDA Cozy Nest Designs PO Box 219 Rose Hill, KS 67133-0219 janelle@janellejohnson.com * www.janellejohnson.com * (316) 776-0440 Study of Red Cardinal Flowers
The Basics & Common Problems
 1 Day 1 - Brush Techniques & Washes The Basics & Common Problems by Dawn Woleslagle Wet-on-Dry Watercolor 1. Load a brush with a color of your choice. 2. Paint directly on a dry panel of watercolor paper
Glaser Ceramics Fired-On Images Transfer Paper MS (Multi-Surface) Instructions for Glazed Clay Bisque, Factory Glazed Ware and Fusible Glass
 Instructions for Glazed Clay Bisque, Factory Glazed Ware and Fusible Glass") Glaser Ceramics Fired-On Images Transfer Paper MS (Multi-Surface) Instructions for Glazed Clay Bisque, Factory Glazed Ware and Fusible Glass STEP 1 - Acquiring Images:. Photographs, drawings, invitations
Glaser Ceramics Fired-On Images Transfer Paper MS (Multi-Surface) Instructions for Glazed Clay Bisque, Factory Glazed Ware and Fusible Glass STEP 1 - Acquiring Images:. Photographs, drawings, invitations
UGC Product Information Seminar
 Unique Glass Colors UGC Product Information Seminar Presented by Instructors and Owners of UGC Margot Clark and Dr. SJ (Saulius Jankauskas) We welcome you to the world of glass fusing using UGC Products.
April Instructions Willem van Aelst Study 2008 David Jansen
 Video Links Full Video- April Lesson Disk 4 Video Lesson in 4 parts Lesson Link Video Part 1 of 4 Lesson Link Video Part 2 of 4 Lesson Link Video Part 3 of 4 Lesson Link Video Part 4 of 4 April Instructions
Art of Ancient Times, Studio 1 5
 Art of Ancient Times, Studio 1 5 Creating a Clay Relief Sculpture and an In-the-Round Sculpture In this studio you will make a relief sculpture and an in-the-round sculpture inspired by those created by
THE LEGO MOVIE 2 CHARACTERS
 AVERAGE DURATION 2 hours CHALLENGE LEVEL THE LEGO MOVIE 2 - Awesome! Now let s paint your favorite character on your own snack plate! THE LEGO MOVIE 2 CHARACTERS MATERIALS TIPS Bisque: Smooth Salad Plate
ARLENE LINTON A LACE DOILY ART PLAY DATE 2015
 ARLENE LINTON A LACE DOILY ART PLAY DATE 2015 A Lace Doily Palette (FolkArt): Vintage White (515) Brushes: Scharff Series 3000 Kolinsky Sable Round (#4) Surface: 8-inch Scooped Plate (#WPSCO) Available
A Colorful World Illustrated Art Lessons
 A Colorful World Preparing to Paint Materials: paint egg cartons paintbrushes newspaper paper towels water jars paper Gather materials. If possible, provide a variety of brushes: small round, medium round,
Times. For additional reading, Patti s book covering contemporary uses of acrylic for F+W Publications is titled Rethinking
 14 As Education Director for the Golden Artist Colors Certified Working Artist Program, Patti Brady has developed curriculum and taught acrylic classes for artists and art educators all over the world.
8 Pages 10 Illustrations
 NEWLY HATCHED DUCKLING Jeanette Jobson After hours of struggle, a tiny Pekin duckling breaks free of the shell that s been its home for 30 days and staggers into the world. Once the down starts to dry,
Kaszazz Alcohol Ink Art Markers
 Kaszazz Alcohol Ink Art Markers Exclusive to Kaszazz, these markers contain alcohol based ink which is permanent on most surfaces. Selecting colours for your next project is easy - each marker matches
DIY Shaving Cream. Ingredients:
 DIY Shaving Cream Ingredients: 1/3 cup coconut oil (solid, not fractioned) 1/3 cup shea butter ¼ cup sweet almond oil 4-6 drop tobacco bay leaf fragrance oil Plastic bale jar Tools: Microwave-safe bowl
Collosal Creativity Lesson Plan
 Grade Level: 6-8 Introduction: Dinosaurs inhabited the earth from about 250 million years ago to 65 million years ago a time period known as the Mesozoic Age. The Mesozoic age is divided into three periods,
From My Sketchbook Study of Yellow Kansas Sunflower Prismacolor Colored Pencils & Prismacolor Lightfast Pencils
 From My Sketchbook 2009 Janelle Johnson CDA, TDA Cozy Nest Designs PO Box 219 Rose Hill, KS 67133-0219 janelle@janellejohnson.com * www.janellejohnson.com * (316) 776-0440 Study of Yellow Kansas Sunflower
THE LEGO MOVIE 2 CHARACTERS
 AVERAGE DURATION 2 hours CHALLENGE LEVEL THE LEGO MOVIE 2 - Awesome! Now let s paint your favorite character on your own snack plate! THE LEGO MOVIE 2 CHARACTERS MATERIALS TIPS Bisque: Smooth Salad Plate,
Memory Box Sweet Nest By Phyllis Tilford, CDA Copyright 2008
 Memory Box Sweet Nest By Phyllis Tilford, CDA Copyright 2008 Free exclusive design donated by the artist for Tole Friends Charity Program PALETTE BY DELTA CERAMCOAT Autumn Brown, Black Cherry, Burnt Umber,
Part 3 J. Serresseque, 2012
 Part 3 J. Serresseque, 2012 Vellum wings are among my favorite wing media. I get excited when I see a new pattern that can be translated into a potential wing design. The nice thing about Vellum is the
Lady B Summer Banner by Deb Antonick
 Lady B Summer Banner by Deb Antonick Lady B Summer Banner By Deb Antonick Palette: Decoart Americana SoSoft Acrylics Antique Gold #14400 Baby Blue Deep #14402 Baby Pink Deep #14403 Brown #14408 Burnt Sienna
Peaches & Blueberries. by Donna Hodson
 Peaches & Blueberries by Donna Hodson Peaches & Blueberries By Donna Hodson Palette: DecoArt Americana Acrylics Antique Gold #13009 Antique Maroon #13160 Burnt Umber #13064 Cadmium Red #13015 Colonial
Fancy. Flowers. Step 1: Flatten pieces of clay between your fingers to about 1/8. Hand build ceramic blooms in a bowl.
 for the classroom Fancy Flowers Hand build ceramic blooms in a bowl By Michael Harbridge Objectives Use bisque bowls as forms Create flower shapes to sit, hang, or stand Add textures to clay Step 1: Flatten
UNIT 6 HAND CONSTRUCTION WITH STONEWARE
 Refer to requirements Unit 6 on page 2 Requirements: Basic Information: Hand Construction with Stoneware: (1) Stoneware is more or less vitreous depending on the temperature to which it is fired. (2) Hobbyist
Basic Vocabulary Clay Mold Ceramics Pottery Earthenware
 Clay Introduction Basic Vocabulary Clay: Particles of decomposed rock combined with water to create a plastic malleable body which is then fired in a kiln to fuse the particles back into a stone-like state.
From My Sketchbook 2009 Janelle Johnson CDA, TDA
 From My Sketchbook 2009 Janelle Johnson CDA, TDA Cozy Nest Designs PO Box 219 Rose Hill, KS 67133-0219 janelle@janellejohnson.com * janellejohnson.com * (316) 776-0440 Study of Blue Baby Blue-Eyes 1 Prismacolor
Woodland Friends. by Cindy Mann-Vitale
 Woodland Friends by Cindy Mann-Vitale Woodland Friends By Cindy Mann-Vitale Palette: DecoArt Americana Acrylics Antique Teal #13158 Arbor Green #13209 Avocado #13052 Avocado Dip #13248 Baby Pink #13031
GREENWARE. DIVISION rd Grade
 GREENWARE Greenware Definition an unfired clay object which was cast (poured) from a mold which has been purchased. Requirements to clean, paint and/or glaze an article or articles as described below for
mermaid Social Artworking Instruction Sheet
 mermaid Social Artworking Instruction Sheet 2016 DecoArt Social Artworking mermaid time approximately 21/2-3 hours brushes: 4 3/4" Flat No. 2 Round No. 6 Bright No. 12 Bright colors: 8 Bright Red Cobalt
Atelier Mediums. NEW Atelier Mediums All Have A Double Function
 Atelier We have divided our mediums into two sections. The established old mediums are familiar to Atelier Interactive users, and most of them are traditional in behaviour and convert the paint mixed with
COLORED PENCIL WITH MIXED MEDIA with Sarah Becktel
 SUPPLY LIST COLORED PENCIL WITH MIXED MEDIA with Sarah Becktel Lesson 1: Introduction to Materials and Techniques Strathmore 500 Series Mixed Media Board or Strathmore 400 Series Mixed Media Paper Artist-grade
First Semester Exam Review If packet is 100% complete and turned in the day of the exam, you can earn 10pts extra credit on your exam grade.
 2D Art NAME: First Semester Exam Review If packet is 100% complete and turned in the day of the exam, you can earn 10pts extra credit on your exam grade. PART 1 Exam Review Unit 1 Drawing: Fill in the
UNIT 3 OVERGLAZE. Requirements: Basic Information:
 (Refer to requirements Unit 1-4 on page 2) Requirements: Overglazes: Basic Information: (1) Are usually applied over a glaze. (2) May also be applied over polished Porcelain bisque. (3) Are mostly used
Sweet Dreams by Scottie Foster
 l Sweet Dreams by Scottie Foster Sweet Dreams l by Scottie Foster Sweet Dreams l by Scottie Foster Paint Delta Ceramcoat Acrylic Paint Lichen Grey Cadet Blue White Blue Spa Straw Charcoal Leprechaun Gypsy
Winter Wolf. by Barb Halvorson
 Winter Wolf by Barb Halvorson Winter Wolf By Barb Halvorson Palette: DecoArt Americana Acrylics Burnt Sienna #13063 Cadmium Yellow #13010 Cocoa #13253 Lamp Black #13067 Slate Grey #13068 Traditional Burnt
Glaze basics, including surface options & trouble-shooting
 Glaze basics, including surface options & trouble-shooting Ceramic Firing Ranges Low-Fire, Cone 05 Mid/High-Fire, Cone 5 What are Cones? Pyrometric Cones Cone 05 or Cone 5? Do I need to use them? Cone
Pouring Enamels Technique Nine
 Unique Glass Colors Presents Pouring Enamels Technique Nine In this tutorial I want to show another side to Pouring Enamels with UGC. How about just a smidgen of control? I do adore flowers and negative
CERAMICS VOCABULARY. FIRE - To bake in a kiln. Firing is a term used for cooking the clay.
 CERAMICS VOCABULARY BAT - A slab or platform on which clay is handled; a circular device attached to the wheel-head. BISQUE - Unglazed clay, fired once at a low temperature. BISQUE FIRING - The process
Welcome Spring Banner. by Deb Antonick
 Welcome Spring Banner by Deb Antonick Welcome Spring Banner By Deb Antonick Palette: Decoart Americana SoSoft Acrylics Antique Gold #14400 Baby Blue Deep #14402 Baby Pink Deep #14403 Brown #14408 Burnt
FIRST SNOWFALL. by Debby Forshey-Choma
 FIRST SNOWFALL by Debby Forshey-Choma EXCLUSIVE First Snowfall by Debby Forshey-Choma BRUSHES Royal Brushes sm., med. Debby s Texture brush Majestic Filbert size 8 Soft-Grip White Blending mop size 1/2
The Brush Place by Julie Polderdyke
 The Brush Place by Julie Polderdyke The Brush Place By Julie Polderdyke Palette: DecoArt Americana Acrylics Black Green #13157 Black Plum #13172 Bluegrass Green #13047 Blue Harbor #13283 Blue Violet #13141
Egg Juggler. by Christy Hartman
 Egg Juggler by Christy Hartman Egg Juggler By Christy Hartman I m sure that you often feel like you are a circus clown juggling all of your responsibilities, kid s activities, deadlines, all the demands
The Art of Recording. Materials Needed. Background WATERCOLOR TECHNIQUES. Enduring understanding: Grade Level: 6-8. Alignment to Utah Core Curriculum
 The Art of Recording Alignment to Utah Core Curriculum Intended Learning Outcomes (ILO s): 1. Use science process and thinking skills. 2. Manifest scientific attitudes and interests. 3. Understand science
SLIP-CASTING. Learning the basics
 SLIP-CASTING Learning the basics To find out more, visit: http://virginiadecolombani.wordpress.com/ INDEX 02. What is slip-casting? 03. Slip-casting manifesto 04. Making a ptototype 05. Planning mould
Building the Gothic Church
 Building the Gothic Church Mold #54 does not contain all of the blocks to build this church. You will need extra regular blocks (1/2" x 1/2" x 1") and square blocks (1/2" x 1/2" x 1/2"). These blocks can
Heart at HOME by Deb Antonick
 Heart at HOME by Deb Antonick Heart at HOME By Deb Antonick Palette: DecoArt Americana SoSoft Acrylics Antique Gold #14400 Avocado #14401 Baby Blue Deep #14402 Baby Pink Deep #14403 Brown #14408 Burnt
The Mill by Barb Halvorson
 The Mill by Barb Halvorson The Mill By Barb Halvorson Palette: DecoArt Americana Acrylics Alizarin Crimson #13179 Black Forest Green #13083 Blue Violet #13141 Bright Yellow #13227 Brilliant Red #13145
Kingslan & Gibilisco Publications
 Grapes pes & Checker ered ed Cloth www.kingslan.com painting@kingslan.com Supplies Grapes pes & Checker ered ed Cloth Materials all available from www.kingslan.com Masonite panel (8 x 10 ) and frame of
Protecting Our Planet Lesson Plan
 Grade Level: 4-6 Introduction: Today is the perfect time to think about conserving, saving, recycling, and discovering new, more efficient products to help us do the things we do every day. We re not just
STEP 14 STEP 13. With a #8 to #12 shader, begin at the top of the design background and begin by applying pure black to the top 1/3 of the design.
 STEP 13 Cut the frisket along the outside pattern lines of your design. You are freeing the remaining background frisket from the pattern work area. Cut along the outer boundary line of your design; this
Clay Magic Eye Painting Pictorial
 Clay Magic Eye Painting Pictorial Clay Magic Eye Painting Instructions Eye Painting tips Brush Quality, VERY IMPORTANT!! Use good quality brushes that are in excellent condition. Poor quality brushes or
Sealer, Primer, Isolation Coat, & Varnish
 Sealer, Primer, Isolation Coat, & Varnish A seal can be applied between the substrate and gesso/primer, or between the substrate and the first layer of paint if gesso is not desired. A seal may also be
HICKORY HOMESTEAD. by Debby Forshey-Choma
 HICKORY HOMESTEAD by Debby Forshey-Choma EXCLUSIVE Hickory Homestead by Debby Forshey-Choma PALETTE DecoArt Americana Acrylics Avocado #13052 Black Green #13157 Black Plum #13172 Bleached Sand #13251 Charcoal
Painting Techniques: Ways of Painting
 Techniques: Ways of There are so many ways of painting that no book can possibly do justice to them all. However there are certin basic techniques that every painter should master. Opaque Technique: The
TOOLS & SUPPLIES (Included in ProTops Tool Kit)
") TOOLS & SUPPLIES (Included in ProTops Tool Kit) Clean Paint/Mixing Sticks Graduated Mixing Buckets Standard Mixing Cups Nylon Paint Brush Propane Torch 3M Masking Gun Masking Film & Painter s Tape Disposable
TOOLS & SUPPLIES (Included in ProTops Tool Kit) Clean Paint/Mixing Sticks Graduated Mixing Buckets Standard Mixing Cups Nylon Paint Brush Propane Torch 3M Masking Gun Masking Film & Painter s Tape Disposable
Vintage Keys. how to. Presented by Willow Wolfe LEARN. By Chris Haughey. Level: Intermediate. Gather These Supplies
 LEARN how to PAINT Presented by Willow Wolfe Vintage Keys Level: Intermediate By Chris Haughey with Step-by-Step Instructions Gather These Supplies No drawing or painting experience necessary! Basic Supplies
ArtRage App Manual. Click here for ArtRage website
 ArtRage App Manual Click here for ArtRage website Natural Painting Tools Get painting without having to learn complex digital tools. ArtRage provides painting tools that behave like real world tools so
Atelier Mediums. NEW Atelier Mediums. New! Heavy Gel (Satin)
") Atelier There are several top quality brands of artist acrylic on the world market, but Atelier Interactive is the only brand that can be used in a Fast Drying Mode and in a Wet Blending Mode. There are
Atelier There are several top quality brands of artist acrylic on the world market, but Atelier Interactive is the only brand that can be used in a Fast Drying Mode and in a Wet Blending Mode. There are
level: Step-by-Step instructions Gather These Supplies BruSheS Surface PaleTTe OTher SuPPlieS
 LEARN how to PAINT Presented by Willow Wolfe Strong Level: Beginner By Monica Martin with Step-by-Step Instructions Gather These Supplies No drawing or painting experience necessary! Brushes Princeton
Atelier Mediums. They are set out in a progression from a thick heavy bodied gel through to a very liquid medium.
 Atelier There are several top quality brands of artist acrylic on the world market, but Atelier Interactive is the only brand that can be used in a Fast Drying Mode and in a Wet Blending Mode. There are
Jasper County 4-H 2016
 ARTS & CRAFTS Jasper County 4-H 2016 In the Arts and Crafts project the 4-H'er will have a chance to express his/her talents in an array of mediums from fine arts which include drawings and paintings in
WINTER WATCH. by Debby Forshey-Choma
 WINTER WATCH by Debby Forshey-Choma EXCLUSIVE Winter Watch by Debby Forshey-Choma PALETTE DecoArt Americana Acrylics Grape Juice #13236 Graphite #13161 Lamp Black #13067 Purple Pizzazz #13543 Slate Grey
fñü Çz fãxxà cxtá Peni Powell 2010
 fñü Çz fãxxà cxtá Peni Powell 2010 This pattern packet is for your personal use and may be reduced or enlarged to fit surface of your choice. The pattern may be painted for sale and profit but not reproduced
Building the Bell Tower
 Building the Bell Tower Mold #55 does not contain all of the blocks to build this tower. You will need extra regular blocks (1/2" x 1/2" x 1") and square blocks (1/2" x 1/2" x 1/2"). These blocks can be
Raindrops on a Lily - PART 1 From a photograph - By Matthew Palmer
 Raindrops on a Lily - PART 1 From a photograph - By Matthew Palmer 1 Sketch 2 Masking Mask inside main petals as shown Background Using a number 10 brush mix Dark Green with Natural Blue and Aureolin Aureolin
Art Play Date 2014 Multimedia Poinsettia 2014 by Sandi Strecker
 Multimedia Poinsettia 2014 by Sandi Strecker PALETTE BY DECO ART Soft Sage, Wasabi Green, Soft Blue, Whispering Turquoise, Salem Blue, Spice Pink, Country Red, Deep Burgundy, Bubblegum Pink, Snow White,
Collaborative Weaving
 Autumn Anderson - Fall 2013 Student Teaching Pittsburgh Conroy Art Centers Ages: 5-21! Art Centers are created so that the students can move around the classroom and go to various stations that appeal
Surround Yourself. how to. Presented by Willow Wolfe LEARN. By Monica Martin. Level: Beginner. Gather These Supplies
 LEARN how to PAINT Presented by Willow Wolfe Surround Yourself Level: Beginner By Monica Martin with Step-by-Step Instructions Gather These Supplies Brushes and tools Princeton Artist Brush Co. Select
Winter Home. by Christy Hartman
 Winter Home by Christy Hartman Winter Home By Christy Hartman Palette: DecoArt Americana Acrylics Antique Gold #13009 Bright Yellow #13227 Desert Turquoise #13044 Electric Pink #13231 Hauser Dark Green
ORIGINS OF GLAZE. Glaze was originally discovered by the Egyptians.
 GLAZE ORIGINS OF GLAZE Glaze was originally discovered by the Egyptians. They discovered it when they accidentally combined sand and salt to create glass. When they added clay to the mixture they got glaze.
MUDGUN Drywall Finishing System
 Watch the demonstration video online at hydetools.com MUDGUN Drywall Finishing System Quick Start Guide Hyde Tools, Inc. / A Hyde Group Company / 800-872-4933 / custrelations@hydetools.com / hydetools.com
Winter View. by Debby Forshey-Choma
 Winter View by Debby Forshey-Choma Winter s View By Debby Forshey-Choma Palette: DecoArt Americana Acrylics Admiral Blue #13213 Autumn Red #13280 Black Green #13157 Camel #13191 Cool Neutral #13089 Country
Spring Houses by Betty Bower
 Spring Houses by Betty Bower Spring Houses By Betty Bowers Palette: DecoArt Americana Acrylics Antique Rose * discontinued by DecoArt Antique White #13058 Bittersweet Chocolate #13195 Black Plum #13172
Slab Vases Art Curriculum Matrix: K - 6
 Slab Vases Art Curriculum Matrix: K - 6 Project Grade K-6 Content/theme Objectives Essential Questions Demos/Skills Vocabulary Artist/Culture References Materials Slab vases with bisque stamp/roller impressions
Home for Summer. by Deb Antonick (Inspired by Terrye French)
") Home for Summer by Deb Antonick (Inspired by Terrye French) Home for Summer By Deb Antonick (Inspired by Terrye French) Palette: DecoArt Americana Acrylics Baby Pink #13031 Blue Chiffon #13193 Boysenberry
Home for Summer by Deb Antonick (Inspired by Terrye French) Home for Summer By Deb Antonick (Inspired by Terrye French) Palette: DecoArt Americana Acrylics Baby Pink #13031 Blue Chiffon #13193 Boysenberry