READY. SET. FAN FAVORITES PATTERNS
|
|
|
- Erick Maurice Lang
- 5 years ago
- Views:
Transcription


1 READY. SET. FAN FAVORITES PATTERNS USING THE ACCUQUILT GO! GO! Big and GO! Fabric Cutter Friendly 4 FREE patterns $ 15 Value GO! Talk to the Animals Baby Quilt featuring Riley Blake Designs Fabric Download FREE patterns at accuquilt.com C1804C AccuQuilt

2 GO! Talk To The Animals Baby Quilt Finished Size 41" x 41" Fabrics provided by Riley Blake Fabrics GO! Dies Used, Number of Shapes to Cut & Fabric Requirements Fabric Color Shape GO! Dies Used Number of Shapes to Cut Fabric Required NOTE: Apply fusible web to the wrong side of asterisked fabrics following manufacturer s instructions before cutting appliqué shapes. Red GO! Square-2" (1½" Finished) (55022) Cut 1 4½ x 4½ square. Lay square ¼ Yard on lengthwise grain and cut 4 2" squares Red GO! Square-2½" (2" Finished) (55059 or 55018) Cut 1 8 x 5½ rectangle. Lay rectangle on lengthwise grain and cut 6 2½" squares Red GO! Strip Cutter-2" (1½" Finished) (55025 or 55164) Cut 1 2 x WOF Sub cut 4 6½ strips *Light Pink GO! Owl (55333) Cut 1 4 3/8 x 5 rectangle. Lay rectangle on owl body and cut 1 owl body (3⅞"W x 4½"H) *Light Pink GO! Owl (55333) Cut 3 1 x 1 squares. Lay squares on owl beak and cut 3 owl beaks (½"W x ½"H) *Light Pink GO! Owl (55333) Cut 2 1 x 1 squares. Lay square on Light Pink Light Pink GO! Square-2" (1½" Finished) (55022) GO! Strip Cutter-2" (1½" Finished) (55025 or 55164) ½ circle and cut 2 ½" circles Cut 1 4½ x 4½ square. Lay square on lengthwise grain and cut 4 2" squares Cut 1 2 x WOF Sub cut 4 6½ strips *Dark Pink GO! Owl (55333) Cut 2 1½ x 2 3/8 rectangles. Lay rectangles on owl wing and cut 2 owl wings (¾" W x 1⅞" H) *Dark Pink GO! Owl (55333) Cut 1 1 x 1 square. Lay square on owl beak and cut 1 owl beak (½"W x ½"H) ¼ Yard ¼ Yard 2015 AccuQuilt PQ10509
3 Fabric Color Shape GO! Dies Used Number of Shapes to Cut Fabric Required *Dark Pink GO! Owl (55333) Cut 2 1 x 1 squares. Lay square on ½ circle and cut 2 ½" circles Dark Pink Dark Pink Dark Pink GO! Square-2" (1½" Finished) (55022) GO! Square-2½" (2" Finished) (55059 or 55018) GO! Strip Cutter-2" (1½" Finished) (55025 or 55164) Cut 1 4½ x 4½ square. Lay square on lengthwise grain and cut 4 2" squares Cut 1 5½ x 5½ square. Lay square on lengthwise grain and cut 4 2½" squares Cut 1 2 x WOF Sub cut 4 6½ strips *Bright Green GO! Owl (55333) Cut 1 4 3/8 x 5 rectangle. Lay rectangle on owl body and cut 1 owl body (3⅞"W x 4½"H) Bright Green Bright Green GO! Strip Cutter-2" (1½" Finished) (55025 or 55164) GO! Strip Cutter-3½" (3" Finished) (55032) Cut 1 2 x WOF Sub cut 4 6½ strips Cut 4 3½" x WOF Sub cut 4 36½" strips *Dark Green GO! Owl (55333) Cut 6 1½ x 2 3/8 rectangles. Lay rectangles on owl wing and cut 6 owl wings (¾" W x 1⅞" H) Dark Green Dark Green GO! Square-2" (1½" Finished) (55022) GO! Strip Cutter-2½" (2" Finished) (55014 or 55017) Cut 1 4½ x 4½ square. Lay square on lengthwise grain and cut 4 2" squares Cut 5 2½ x WOF strips for binding *Light Brown GO! Owl (55333) Cut 2 4 3/8 x 5 rectangles. Lay rectangles on owl body and cut 2 owl bodies (3⅞"W x 4½"H) *Light Brown GO! Owl (55333) Cut 4 1½ x 2 3/8 rectangles. Lay rectangles on owl wing and cut 4 owl wings (¾" W x 1⅞" H) *Light Brown GO! Owl (55333) Cut 1 1 x 1 square. Lay square on owl beak and cut 1 owl beak (½"W x ½"H) *Medium Brown *Medium Brown *Golden Brown Golden Brown GO! Owl (55333) GO! Owl (55333) GO! Owl (55333) GO! Square-2" (1½" Finished) (55022) Cut 1 4 3/8 x 5 rectangle. Lay rectangle on owl body and cut 1 owl body (3⅞"W x 4½"H) Cut 3 1 x 1 squares. Lay squares on owl beak and cut 3 owl beaks (½"W x ½"H) Cut 11 1½ x 2 3/8 rectangles. Lay rectangles on owl wing and cut 11 owl wings (¾" W x 1⅞" H) Cut 1 4½ x 4½ square. Lay square on lengthwise grain and cut 4 2" squares ¾ Yard ½ Yard Fat Eighth Fat Eighth ¼ Yard 2015 AccuQuilt PQ10509
4 Fabric Color Shape GO! Dies Used Number of Shapes to Cut Fabric Required Golden Brown GO! Square-2½" (2" Finished) (55059 or 55018) Cut 1 5½ x 8 square. Lay square on lengthwise grain and cut 6 2½" squares Cut 1 2 x WOF strip Golden Brown GO! Strip Cutter-2" (1½" Finished) (55025 or 55164) Sub cut 4 6½ strips *Dark Brown GO! Owl (55333) Cut 2 1½ x 2 3/8 rectangles. Lay rectangles on owl wing and cut 2 owl wings (¾" W x 1⅞" H) *Dark Brown GO! Owl (55333) Cut 6 1 x 1 squares. Lay squares on owl beak and cut 6 owl beaks (½"W x ½"H) *Dark Brown GO! Owl (55333) Cut 2 1 x 1 squares. Lay square on ½ circle and cut 2 ½" circles Dark Brown GO! Square-2" (1½" Finished) Cut 1 4½ x 4½ square. Lay square (55022) on lengthwise grain and cut 4 2" Dark Brown *Very Dark Brown *Very Dark Brown Very Dark Brown GO! Strip Cutter-2" (1½" Finished) (55025 or 55164) GO! Owl (55333) GO! Owl (55333) GO! Square-2" (1½" Finished) (55022 or 55073) squares Cut 1 2 x WOF strip Sub cut 4 6½ strips Cut 2 1 x 1 squares. Lay square on ½ circle and cut 2 ½" circles Cut 4 2 x 2 squares. Lay squares on 1 7/16 circle and cut 4 1 7/16" circles Cut 1 4½ x 4½ square. Lay square on lengthwise grain and cut 4 2" squares Very Dark Brown GO! Strip Cutter-2" (1½" Finished) (55025 or 55164) Cut 1 2 x WOF strip Sub cut 4 6½ strips *Light Gray GO! Owl (55333) Cut 1 4 3/8 x 5 rectangle. Lay rectangle on owl body and cut 1 owl body (3⅞"W x 4½"H) *Light Gray GO! Owl (55333) Cut 2 2 x 2 squares. Lay squares on 1 7/16 circle and cut 2 1 7/16" circles Light Gray GO! Square-2" (1½" Finished) Cut 1 4½ x 4½ square. Lay square (55022) on lengthwise grain and cut 4 2" squares Light Gray GO! Strip Cutter-2" (1½" Finished) Cut 1 2 x WOF strip (55025 or 55164) Sub cut 4 6½ strips *Dark Gray GO! Owl (55333) Cut 2 4 3/8 x 5 rectangles. Lay rectangle on owl body and cut 2 owl bodies (3⅞"W x 4½"H) *Dark Gray GO! Owl (55333) Cut 1 1½ x 2 3/8 rectangle. Lay rectangles on owl wing and cut 1 owl wing (¾" W x 1⅞" H) *Dark Gray GO! Owl (55333) Cut 2 2 x 2 squares. Lay squares on Dark Gray GO! Square-2" (1½" Finished) (55022) 1 7/16 circle and cut 2 1 7/16" circles Cut 1 4½ x 4½ square. Lay square on lengthwise grain and cut 4 2" squares ¼ Yard ¼ Yard ¼ Yard ¼ Yard 2015 AccuQuilt PQ10509
5 Fabric Color Shape GO! Dies Used Number of Shapes to Cut Fabric Required Dark Gray GO! Strip Cutter-2" (1½" Finished) (55025 or 55164) Cut 1 2 x WOF strip Sub cut 4 6½ strips *Black GO! Owl (55333) Cut 5 1½ x 2 3/8 rectangles. Lay rectangles on owl wing and cut 5 owl wings (¾" W x 1⅞" H) *Black GO! Owl (55333) Cut 15 1 x 1 squares. Lay squares on owl beak and cut 15 owl beaks (½"W x ½"H) *Black GO! Owl (55333) Cut 12 1 x 1 squares. Lay square on ½ circle and cut 12 ½" circles *White GO! Owl (55333) Cut 1 4 3/8 x 5 rectangle. Lay rectangle on owl body and cut 1 owl body (3⅞"W x 4½"H) *White GO! Owl (55333) Cut 4 1 x 1 squares. Lay square on ½ circle and cut 4 ½" circles *White GO! Owl (55333) Cut 10 2 x 2 squares. Lay squares on 1 7/16 circle and cut /16" circles White GO! Square-3½" (3" Finished) (55006) Cut 1 7½ x WOF strip. Fanfold into 2 4 widths. Sub cut 4 3½" squares White GO! Square-6½" (6" Finished) (55000) Cut 2 7 x WOF strip. Fanfold into 7 widths. Sub cut 9 6½" squares White GO! Strip Cutter-2½" (2" Finished) (55014 or 55017) Cut 6 2½ x WOF strips Sub cut 24 9½ strips Fat Eighth 1 Yard Additional Fabrics Needed: Backing 47 x 47 Batting 47 x 47 Fusible Web 1 Yard Sewing Directions: 1. Lay out, fuse and appliqué owl pieces, on each of the nine white 6½" squares, using the following block images as a reference. Block one Owl: 1 white 6½" square, 1 medium brown owl body, 2 dark brown wings, 2 white 1⅜" circles, 2 dark brown ½" circles, 1 light brown beak AccuQuilt PQ10509

.")
6 Block two Rabbit: 1 white 6½" square, 1 light brown owl body, 4 light brown wings (ears), 2 dark pink wings (ears), 1 white 1⅜" circles (tail), 1 dark pink beak (nose). Note: eyes, whiskers, and mouth are machine or hand stitched with dark brown thread. Block three Raccoon: 1 white 6½" square, 1 dark gray owl body, 3 black wings (mask and tail), 1 dark gray wing (tail stripes), 2 white ½" circles (eyes), 3-black beaks (ears and nose). Note: Cut a couple tail stripes from the dark gray wing. Eye pupils are machine or hand stitched with black thread (French knots work well). Block four Mouse: 1 white 6½" square, 1 light gray owl body, 2 light gray 1⅜" circles (ears), 2 light pink ½" circles (ears), 1 light pink beak (nose), 2 black beaks (feet). Note: eyes, whiskers, and tail are machine or hand stitched with black thread (French knots work well for eyes) AccuQuilt PQ10509
.")
, 2 white 1⅜\" circles (feet), 6 black ½\" circles (feet), 2 white ½\" circles (eyes), 6 black")
7 Block five Frog: 1 white 6½" square, 1 bright green owl body, 6 dark green wings (arms and legs), 2 white 1⅜" circles (eyes), 2 black ½" circles (eyes). Nose is machine or hand stitched with black thread (French knots work well). Block six Pig: 1 white 6½" square, 1 light pink owl body, 1 white 1⅜" circle (nose), 4 black ½" circles (eyes and nose), 4 black beaks (feet), 2 light pink beaks (tail). Block seven Koala: 1 white 6½" square, 1 dark gray owl body, 2 black wings (arms), 2 white 1⅜" circles (feet), 6 black ½" circles (feet), 2 white ½" circles (eyes), 6 black beaks (ears and nose). Eye pupils are machine or hand stitched with black thread (French knots work well) AccuQuilt PQ10509
, 2 dark pink ½\" circles (udders).")
, 3 medium brown beaks (acorn nut).")
8 Block eight Cow: 1 white 6½" square, 1 -white owl body, 2 white 1⅜" circles (eyes), 4 very dark brown 1⅜" circles (cow spots), 2 very dark brown ½" circles (eyes), 2 dark pink ½" circles (udders). Block nine Squirrel: 1 white 6½" square, 1 light brown owl body, 11 golden brown wings (ears, arms, tail), 6 dark brown beaks (nose, feet, acorn cap), 3 medium brown beaks (acorn nut). Note: eyes and mouth are machine or hand stitched with dark brown thread (French knots work well for eyes) AccuQuilt PQ10509


9 2. Using the baby quilt diagram for color placement, pin and sew a 2" x 6½" strip to both the left and right side of the appliquéd block. Press seams toward the fabric strips. 3. Repeat for remaining eight blocks. 4. Using the baby quilt diagram for color placement, pin and sew a 2" square on both the left and right side of a 2" x 6½" strip. Press seams toward the fabric strip. Make a total of 18 units. 5. Using the baby quilt diagram for color placement, pin and sew a strip/square unit to both the top and bottom of the appliquéd block. Press seams toward the fabric strips. 6. Repeat for remaining eight blocks. 7. Using the baby quilt diagram as a reference, lay out four 2½" x 9½" strips and three appliqué blocks in a row. 8. Pin and sew row. Press seams toward the added fabric strips. 9. Repeat for two additional appliqué block rows. 10. Using the baby quilt diagram for color placement, lay out four 2½" squares and three 2½" x 9½" strips in a row. 11. Pin and sew row. Press seams toward the fabric strips. 12. Repeat for remaining three rows AccuQuilt PQ10509


10 13. Using the baby quilt diagram as a reference, lay out four sashing row units and three appliqué block row units. 14. Pin and sew seven rows. Press seams toward added rows. 15. Pin and sew bright green 3½" x 36½" border strips to the left and the right side of the baby quilt unit. Press seams toward border strips. 16. Pin and sew one white 3½" square to each end of the top and bottom bright green 3½" x 36½" border strips. Press seams toward the border strip. 17. Pin and sew top and bottom border strips to baby quilt unit. Press seams toward border. Quilting & Finishing: 1. Layer batting between baby quilt top and backing. 2. Pin or baste layers together. 3. Quilt as desired. 4. Add dark green binding, mitering corners AccuQuilt PQ10509
11 How to use your GO! Qube with this Pattern Use this chart to find which GO! Qube dies are compatible with the dies listed on the pattern Quilt Shape By Number GO! Qube Item # s (listed first) or GO! Die Item # s (sold separately) 6" Finished Block 8" Finished Block 9" Finished Block 12" Finished Block GO! Square-3 1 /2" (3" Finished) or GO! Square-2" (1 1 /2" Finished) or GO! Half Square 3" Finished Square or GO! Quarter Square 3" Finished Square or GO! Half Square 1 1 /2" Finished Square or GO! Square on Point-2 5 /8" (2 1 /8" Finished) or GO! Parallelogram /4" x 2 13 /16" Sides (1 1 /2" x 2 1 /8" Finished) or GO! Rectangle- 2" x 3 1 /2" (1 1 /2" x 3" Finished) or GO! Square-4 1 /2" (4" Finished) 55776, or GO! Square-2 1 /2" (2" Finished) 55776, or GO! Half Square 4" Finished Square or GO! Quarter Square 4" Finished Square 55776, or GO! Half Square 2" Finished Square 55776, or GO! Square on Point-3 1 /4" (2 3 /4" Finished) or GO! Parallelogram /4 x 3 1 /2 Sides (2 1 /16 x 2 13 /16" Finished) or GO! Rectangle- 2 1 /2" x 4 1 /2" (2" x 4" Finished) or GO! Square-5" (4 1 /2" Finished) or GO! Square-2 3 /4" (2 1 /4" Finished) or GO! Half Square 4 1 /2" Finished Square or GO! Quarter Square 4 1 /2" Finished Square or GO! Half Square 2 1 /4" Finished Square or GO! Square on Point-3 11 /16" (3 3 /16" Finished) or GO! Parallelogram /16" x 3 7 /8" Sides (2 1 /4" x 3 3 /16" Finished) or GO! Rectangle- 2 3 /4" x 5" (2 1 /4" x 4 1 /2" Finished) or GO! Square-6 1 /2" (6" Finished) 55778* or 55000* GO! Square-3 1 /2" (3" Finished) or GO! Half Square 6" Finished Square 55778* or 55001* GO! Quarter Square 6" Finished Square 55778*, or GO! Half Square 3" Finished Square 55778, or GO! Square on Point-4 3 /4" (4 1 /4" Finished) or GO! Parallelogram /16" x 4 15 /16" Sides (3" x 4 1 /4" Finished) 55778* or GO! Rectangle- 3 1 /2" x 6 1 /2" (3" x 6" Finished) 55778* or *not compatible with GO! Baby Find GO! products at retail stores and accuquilt.com 2015 AccuQuilt Code QUBE1510PAT
 (55022) GO!")
12 GO! Sewing Machine Organizing Mat Finished Size 24" x 22" Fabrics are from the Basics Fabric Collection by Riley Blake Designs GO! Dies Used, Number of Shapes to Cut & Fabric Requirements Fabric Color Shape GO! Dies Used Number of Shapes to Cut Fabric Required Aqua Aqua Red Red GO! Square-2" (1½" Finished) (55022) GO! Half Square 1½" Finished Square (55319) GO! Square-2" (1½" Finished) (55022) GO! Half Square 1½" Finished Square (55319) Red GO! Strip Cutter-2½" (2" Finished) (55017 or 55014) White GO! Square-2" (1½" Finished) (55022) White White Gray GO! Half Square 1½" Finished Square (55319) GO! Quarter Square 3" Finished Square (55396) GO! Strip Cutter-2" (1½" Finished) (55025) Cut 1 4½ x 4½ square. Lay square on lengthwise grain and cut 4 2" squares. Cut 2 3 x 7 rectangle. Layer rectangles on lengthwise grain and cut 12 1½" finished half square triangles. Cut 2 4½ x 4½ squares. Layer squares on lengthwise grain and cut 8 2" squares. Cut 2 3 x 4½ rectangles. Layer rectangles on lengthwise grain (covering only 4 HST s) and cut 8 1½" finished half square triangles. Cut 4 2½" x WOF strips for binding Cut 1 6½ x WOF strip. Fanfold into 3 4½ widths. Sub cut 16 2" squares. Cut 2 3 x 7 rectangles. Layer rectangles on lengthwise grain and cut 12 1½" finished half square triangles. Cut 1 4¾ x 4¾ square. Layer square on lengthwise grain and cut 4 3" finished quarter square triangles. Cut 1 2 x WOF strip. Sub cut 4 6½" lengths. Fat Eighth Yardage included 1/2 yard Yardage included Yardage included 5/8 yard Yardage included Yardage included 3/4 yard Additional Fabrics Needed: Gray Fabric 24½" x 14½" (yardage included ) Gray Fabric 24½ x 6½ (yardage included ) 2015 AccuQuilt PQ10431
 as shown. 2.")


13 Backing Fabric 30½" x 28½" Batting 24½ x 6½ Batting 30½" x 28½" White Fabric 24½" x 8½" (yardage included ) Sewing Directions: 1. Lay out one white and one red 1½ finished half square triangle (HST) as shown. 2. Pin and sew together to form a 2 (1½ finished) square. Press seams open. Make eight units. 3. Lay out four red 2 squares, six white 2 squares, two aqua 2 squares, and four red and white HST units to form a Road to Oklahoma block as shown. 4. Pin and sew and sew four rows. Press seams in alternating directions for each row. 5. Pin and sew four row units together. Press seams toward added rows. Make two blocks. 6. Lay out one white 3 finished quarter square triangle (QST) and two aqua 1½ finished HSTs as shown. 7. Pin and sew together to form a flying geese unit. Press seams toward the aqua triangles. Make four flying geese units. 8. Lay out one white and one aqua 1½ finished HST as shown. 9. Pin and sew together to form a 2 (1½ finished) square. Press seams toward the aqua triangles. Make four units. 10. Arrange units as shown and sew into two rows. Press seams toward the aqua triangles. 11. Sew the two rows together to complete a pinwheel block unit. Press seam open AccuQuilt PQ10431


14 12. Lay out four white 2 squares, four aqua and white flying geese units, and the pinwheel block unit to form a Pinwheel Star block as shown. 13. Pin and sew one white 2 square to each end of one flying geese unit. Press seams toward the white 2 squares. Make two combined units. 14. Pin and sew one flying geese unit to each side of the pinwheel block unit. Press seams toward the pinwheel square unit. 15. Lay out block units. Pin and sew rows together. Press seams open. Make one block. 16. Lay out four gray 2 x 6½ strips with the three assembled blocks as shown. 17. Pin and sew the strips and blocks together, using the diagram as a guide. Press seams toward the sashing strips. 18. Layer 24½ x 6½ batting between the assembled block set and the 24½ x 6½ gray fabric, right sides facing out. Pin or baste layers together. Quilt as desired. 19. Add a red binding strip to the top of your quilted block set. Set aside. 20. Lay out the gray 24½" x 14½" fabric and the white 24½" x 8½" fabric as shown. 21. Pin and sew the two pieces together lengthwise as shown to form a 24½" x 22½" unit. 22. Layer batting between assembled unit and backing fabric. Pin or baste layers together. Quilt as desired. Keep in mind the bottom 6½" of white fabric will be located behind your pockets. 23. Place the quilted pocket block unit on top of the lower portion of the large quilted base unit, lining up the bottom and sides. Baste in place AccuQuilt PQ10431


15 24. To create pockets, stitch in the ditch down the seams of the sashing strips. 25. Add red binding around the entire perimeter, mitering corners AccuQuilt PQ10431

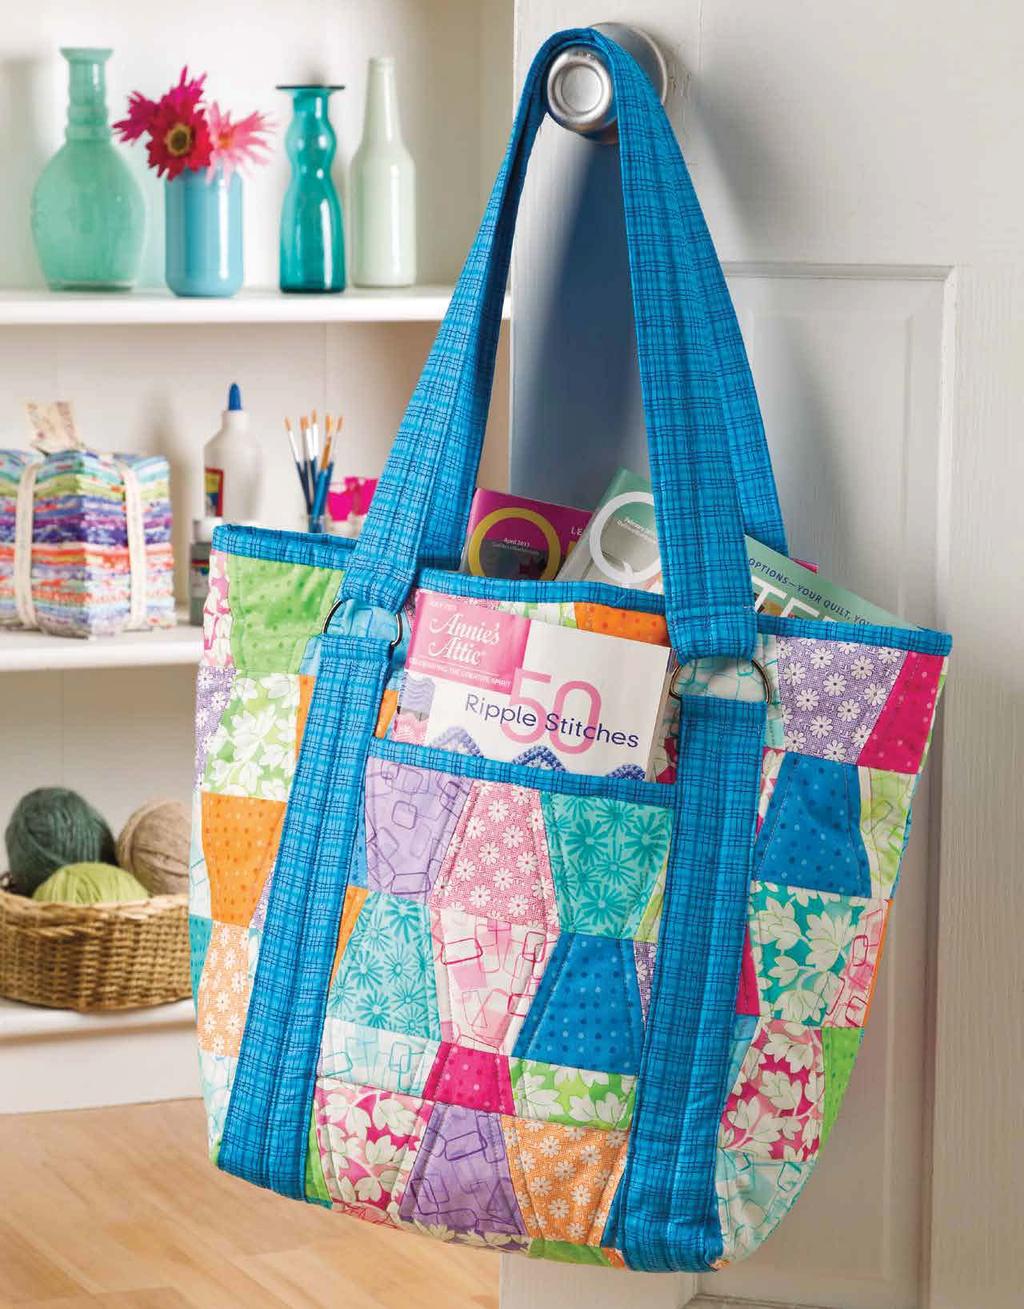
16 Use with: GO! Big GO! GO! Baby Tumbler Tote Design by Julie Weaver This roomy tote is a great project to use up scraps, and the AccuQuilt GO! Baby Fabric Cutter makes cutting those scraps a breeze! You can tailor the size of the inside pockets to fit your personal needs. Make a tote to carry everything you need for the office, your quilt class, the pool or for Baby. Project Specifications Skill Level: Confident Beginner Tote Size: 14" x 12" x 6" Materials ¼ yard floral print 5 8 yard white print 1¼ yards blue plaid 2 yards assorted bright prints (scraps or purchased) 17 8 yard fusible fleece ¾" metal snap closure Four 2" D-rings Water-soluble fabric marker Thread to match fabrics GO! Baby Fabric Cutter (55600) GO! Tumbler-3½" (3" Finished) (55015) Basic sewing supplies and tools Die-Cutting Instructions If using assorted print scraps: 1. Sort scraps by size. Scraps at least 4½" square can be used to die-cut one Tumbler block. Scraps 4½" x 11½" can be used to die-cut three tumbler shapes. Place scraps on die with fabric on the lengthwise grain as it goes through the cutter. Die cut a total of 138 Tumbler shapes. 2. Stack similar-size scraps up to six layers, right sides up, or cut smaller scraps individually. If using assorted print fabric width purchased yardage: 1. Cut six 11½" by fabric width strips and fan-fold 4½" wide. 2. Die-cut a total of 138 Tumbler blocks. Additional Cutting Instructions 1. Cut four 5" by fabric width blue plaid B/C strips; subcut four 17" C straps and two 30" B handles AccuQuilt Code PQ
17 2. Cut one 9½" by fabric width blue plaid strip; subcut two 18½" G rectangles. 3. Cut one 8½" by fabric width blue plaid strip; subcut two 9" E rectangles and one 2½" x fabric width binding strip. 4. Cut one 17½" by fabric width white print strip; subcut two 18½" D rectangles for lining. 5. Cut one 7½" by fabric width floral print strip; subcut two 18½" F rectangles. 6. From fusible fleece, cut two 17½" by fabric width strips; subcut four 18½" rectangles for tote body and lining. Cut one 7½" by fabric width strips; subcut two 7½" squares for outside pockets. Cut one 8" by fabric width strip; subcut two 18½" rectangles for inside pockets. Cut six 1¾"x fabric width strips; subcut four 15" and two 28" strips for straps and handles. Completing Outer Tote Sides 1. Arrange and sew nine A Tumbler blocks into a row. Repeat to make six rows. Sew the rows together to make a pieced tote front as shown in Figure 1. Repeat to make a pieced tote back. A 3. Measure 1" from the second vertical row of Tumbler block points on one side of the pieced tote front referring to Figure 3; trim. Repeat on opposite side to make an 18½" x 17½" pieced tote front rectangle. 4. Repeat step 3 to trim the pieced tote back, again referring to Figure Fuse front and back pieced tote rectangles to matching-size fusible fleece rectangles, following manufacturer s instructions. Quilt as desired. 6. On pieced outside pocket, measure 4½" from the center of the middle Tumbler block row referring to Figure 4 and trim each side of the pocket to make a 9" x 7½" rectangle. Repeat on second outside pocket. 1" Figure 3 Figure 1 2. Arrange and sew five A tumbler blocks into a row. Repeat to make three rows. Sew the rows together to make an outside pocket as shown in Figure 2. Repeat to make a second outside pocket. A 1" Figure 4 7. To complete one outside pocket, sew 9" edges of one E and one outside pocket right sides together. Press seam toward E. Turn right side out and match raw edges of E and outside pocket; press to make a ½" cuff at pocket top as shown in Figure /2" Figure 2 E 1 /2" 1" Figure AccuQuilt Code PQ
18
19 8. Fuse a fusible fleece 7½" square between E and pieced outside pocket, following manufacturer s instructions. Quilt as desired to complete outside pocket. 9. Repeat steps 7 and 8 to make second outside pocket. 10. Measure 4" up from the bottom of the pieced tote front and use a washable fabric marker to draw a line across the width (Figure 6). Draw a line on outside pocket lining (E) ¼" up from bottom of pocket. Completing Tote Straps & Handles 1. To make one tote strap, fold and press one short end and one long side of C ¼" to wrong side. Center and fuse a 1¾" x 15" fusible fleece strip to the wrong side of C (Figure 9). batting Figure 9 2. Fold and press the long raw edge of C over the fleece. Then, fold and press the long pressed edge of C over the raw edge. Stitch twice along center fold and edgestitch around all edges as shown in Figure 10. 4" a Figure With right sides together, center outside pocket on pieced tote front matching drawn lines on pocket and pieced tote front (Figure 7). Sew on the drawn line across pocket. Flip up pocket toward top of tote and press; pin in place as shown in Figure 8. b Figure Wrap C folded short end around straight side of D-ring about 1¼", wrong sides together, and sew across strap close to C end (Figure 11). 1 1 /4" 1 /4" Figure 11 Figure 7 4. Repeat steps 1 3 to make four C straps. 5. Referring to Figure 12, position and pin two C straps, with D-rings at top, 3¾" from each side and 2¼" down from top of pieced tote front, covering pocket raw edges. Edgestitch long edges through all thicknesses. Repeat with remaining C straps on pieced tote back. 2 1 /4" 3 3 /4" C Figure Repeat steps 10 and 11 to sew second pocket on pieced tote back. Figure AccuQuilt Code PQ
20 6. Using B strips and 1¾" x 28" fusible fleece strips to make handles, repeat steps 1 and 2, except fold both short ends of B to the wrong side. 7. Thread ends of B through D rings on pieced tote front and stitch referring to step 3 and Figure Repeat steps 6 and 7 for pieced tote back handle. Completing the Outer Tote 1. With right sides together and handles pulled up out of the way, sew pieced tote front and back side seams and bottom seams together. 2. Box tote bottom by matching side and bottom seams right sides together. Stitch 3½" from corner and trim seam to ¼" (Figure 13). Repeat on opposite corner. 3. Turn tote right side out. 3 1 /2" 1 /4" Figure 13 Completing the Lining 1. Fuse D to matching-size fusible fleece and quilt as desired. Repeat with second D. 2. Follow manufacturer s instructions and attach magnetic snap closure centered and 1" down from top edge to each lining piece. 3. To make one inside pocket, join G and F along both 18½" sides. Press seams toward F. Turn right side out and match raw edges of F and G; press to make a ½" cuff at pocket top as shown in Figure /2" Sew on the drawn lines to make pocket sections. Repeat on the other inside pocket. Note: How many pocket sections you make should be determined by the intended use of the tote. This stitching arrangement will make four pocket sections on either side of the tote. Change the section sizes as desired. F 9 1 /4" D 5" 5" Figure 15 pocket 6. With right sides together, sew the lining front to the lining back leaving the top open. Box the bottom referring to step 2 of Completing the Outer Tote. Do not turn right side out. Completing the Tote 1. Place the lining inside the outer tote, matching side seams and top edges. Making sure handles are pulled down and away from tote top, baste tote and lining together 1 8" from edge all around top edge. 2. Fold and press the 2½"-wide blue plaid binding strip wrong sides together. Sew the binding to the outer side of the tote using a 3 8" seam and matching raw edge of binding to raw edge of tote top. 3. Turn binding toward lining side and hand-stitch in place to finish. G F 7 1 /2" 18 1 /2" Figure Fuse an 8" x 18½" fusible fleece piece between G and F, and quilt as desired. Repeat to make a second inside pocket. 5. Referring to steps of Completing Outer Tote Sides, attach inside pockets to right side of front and back lining pieces (quilted D). 6. Referring to Figure 15, draw a vertical line on the inside pocket 9¼" from one side. Draw two more lines 5" on either side of the first line as shown in Figure 15. Tumbler Tote Placement Diagram 14" x 12" x 6" AccuQuilt Code PQ


 (55017 or 55014) FABRIC REQUIREMENTS Fabric 1 4 1 2 yards Fabric 2 4 1 2")
. 2.")
. 4.")
21 1 of 2 GO! Festive Hunter Star Quilt finished size 60" x 72" CUTTING DIRECTIONS Fabric 1: Cut 14 1 " x width of fabric (WOF) strips Sub cut into: 120 A Diamonds 120 B Trapezoids A 120 AR Diamonds 120 C Triangles Fabric 2: Cut 14 1 " x WOF strips Sub cut into: 120 A Diamonds 120 B Trapezoids 120 AR Diamonds 120 C Triangles Fabric 3: Cut " x WOF strips C AR B GO! DIES USED Fabric provided by Northcott Silk Inc. GO! Hunter Star-6" Finished (55166) GO! Strip Cutter-2 1 2" (2" Finished) (55017 or 55014) FABRIC REQUIREMENTS Fabric yards Fabric yards Binding 3 4 yard Batting 70" x 80" Backing 4 yards SEWING DIRECTIONS 1. Sew one, Fabric #1 A Diamond onto one, Fabric #2 B Trapezoid. Press towards Fabric #1 (Diagram 1). 2. Sew one, Fabric #1 AR Diamond onto the other end of the B Trapezoid. Press towards Fabric #1 (Diagram 2). 3. Sew one, Fabric #2 C Triangle onto the pieced Trapezoid. Press towards the Trapezoid (Diagram 3). 4. Repeat previous three steps to make a total of 120, Unit #1 Hunter Star Blocks AccuQuilt Code PQ10293i
22 2 of 2 5. Sew one, Fabric #2 A Diamond onto one, Fabric #1 B Trapezoid. Press towards Fabric #2 (Diagram 4). 6. Sew one, Fabric #2 AR Diamond onto the other end of the B Trapezoid. Press towards Fabric #2 (Diagram 5). 7. Sew one, Fabric #1 C Triangle onto the pieced trapezoid. Press towards the Triangle (Diagram 6). 8. Repeat previous three steps to make a total of 120, Unit #2 Hunter Star Blocks. 9. Sew one, Unit #1 to one, Unit #2 along the longest side (Diagram 7). Press towards the large red triangle from Diagram Lay out Hunter Star Blocks alternating between Unit #1 and Unit #2 turning as needed. Quilt top should be 10 blocks wide and 12 blocks long. 11. Sew blocks together into rows. Press seams in 0pposite directions. 12. Sew rows together and press seams in the same directions. QUILTING AND FINISHING 1. Layer quilt top with batting and backing. 2. Pin or baste layers together. 3. Model was custom machine quilted. 4. Add binding, mitering the corners AccuQuilt Code PQ10293i
GO! Talk To The Animals Baby Quilt Finished Size 41" x 41"
 GO! Talk To The Animals Baby Quilt Finished Size 41" x 41" Fabrics provided by Riley Blake Fabrics GO! Dies Used, Number of Shapes to Cut & Fabric Requirements Fabric Color Shape GO! Dies Used Number of
BABY QUILTS Using the AccuQuilt GO!
 Ready, Set, GO! BABY QUILTS Using the AccuQuilt GO! 7 FREE patterns INSIDE GO! Talk to the Animals Baby Quilt featuring Riley Blake Designs Fabric GO! Big & GO! Fabric Cutter Friendly 2017 AccuQuilt to
READY. SET. QUICK & EASY PATTERNS
 READY. SET. QUICK & EASY PATTERNS USING THE ACCUQUILT GO! GO! Big and GO! Fabric Cutter Friendly 6 FREE patterns INSIDE GO! X Marks the Spot Baby Quilt featuring Riley Blake Designs Fabrics Download FREE
MEET THE GO! CUTTERS: 90% faster than rotary cutting
 WHY YOU NEED A FABRIC CUTTER: a better way to cut TM Turn your patterns into quilts faster and more accurately with the AccuQuilt GO! fabric cutting systems. With over 200 piecing and appliqué shapes,
Ready, Set, GO! SET YOUR TABLE. Using the AccuQuilt GO! GO! Let s Talk Turkey Placemats
 Ready, Set, GO! SET YOUR TABLE Using the AccuQuilt GO! 8 FREE patterns INSIDE GO! Let s Talk Turkey Placemats GO! Big & GO! Fabric Cutter Friendly 2017 AccuQuilt to order call 888.258.7913 more patterns
How to use your GO! Qube with this Pattern
 How to use your GO! Qube with this Pattern Use this chart to find which GO! Qube dies are compatible with the dies listed on the pattern 1 2 3 4 5 6 7 8 Quilt Shape By Number 1 2 3 4 6 7 8 5 GO! Qube Item
MEET THE GO! CUTTERS: 90% faster than rotary cutting
 WHY YOU NEED A FABRIC CUTTER: a better way to cut TM Turn your patterns into quilts faster and more accurately with the AccuQuilt GO! fabric cutting systems. With over 200 piecing and appliqué shapes,
MEET THE GO! CUTTERS: 90% faster than rotary cutting
 WHY YOU NEED A FABRIC CUTTER: a better way to cut TM Turn your patterns into quilts faster and more accurately with the AccuQuilt GO! fabric cutting systems. With over 200 piecing and appliqué shapes,
Ready, Set, GO! HOLIDAY PATTERNS. Using the AccuQuilt GO! FREE. patterns INSIDE. visit accuquilt.com to order call
 Ready, Set, GO! HOLIDAY PATTERNS Using the AccuQuilt GO! 14 FREE patterns INSIDE visit us @ accuquilt.com to order call 888.258.7913 GO! Hugs and Kisses Bed Runner Finished Size 81" x 27" Fabrics are from
Sunny Sue Baby Quilt
 Sunny Sue Baby Quilt Designed & Quilted by Julie Weaver Use with: GO! Big GO! GO! Baby Make a nostalgic baby quilt that will surely please a new mother. The Sunbonnet Sue die makes cutting a breeze and
GO! Qube 8" Hugs & Kisses Baby Quilt Finished Size: 40" x 40"
 GO! Qube 8" Hugs & Kisses Baby Quilt Finished Size: 40" x 40" For use with GO! Qube Mix & Match 8" Block (55776) Fabrics are from the Cotton Couture Solids and assorted dot prints collections and are provided
GO! Qube 8" Twirling Petals Quilt Finished Size: 50" x 50"
 GO! Qube 8" Twirling Petals Quilt Finished Size: 50" x 50" Fabrics are from the Sugar Pie Collection by Lella Boutique and are provided by Moda Fabrics Dies Needed: GO! Qube Mix & Match 8" Block (55776)
GO! Qube 6" Stained Glass Quilt Finished Size: 42½" x 48½"
 GO! Qube 6" Stained Glass Quilt Finished Size: 4½" x 48½" For use with GO! Qube Mix & Match 6" Block (55775) Fabrics are from Timeless Treasure s Studio Basics Collection To make a 6" Block use GO! Qube
GO! Qube 6" Storm at Sea Throw Quilt Finished Size: 50" x 50"
 GO! Qube 6" Storm at Sea Throw Quilt Finished Size: 50" x 50" For use with GO! Qube Mix & Match 6" Block (55775) Fabrics are provided by Island Batik To make a 6" Block use GO! Qube Mix & Match 6" Block
MEET THE GO! CUTTERS: 90% faster than rotary cutting
 WHY YOU NEED A FABRIC CUTTER: a better way to cut TM Turn your patterns into quilts faster and more accurately with the AccuQuilt GO! fabric cutting systems. With over 200 piecing and appliqué shapes,
Starstruck Throw. Design by Chris Malone Quilted by Jean McDaniel
 Starstruck Throw esign by hris Malone Quilted by Jean Mcaniel Use with: GO! Big GO! GO! Baby This design allows you to color-coordinate each block for an overall controlled scrappy look. Easy piecing and
GO! Qube 12" Laura s Kitty Quilt Finished Size: 40" x 46"
 GO! Qube 12" Laura s Kitty Quilt Finished Size: 40" x 46" Fabrics are Little House on the Prairie Mansfield & Prairie Icons and provided by Andover Fabrics A charm pack of the Mansfield Collection, 3/4
GO! Qube 9" Next Door Neighbor Quilt Finished Size: 44" x 44"
 GO! Qube 9" Next Door Neighbor Quilt Finished Size: 44" x 44" Fabrics are provided by Island Batik Dies Needed: GO! Qube Mix & Match 9" Block (777) GO! Quarter Square Triangle-4½" Finished Square (Shape
GO! Qube 9" City Life Quilt Finished Quilt Size: 48 1 / 8" x 64" Finished Block Size: 15 5 / 8" x 15 5 / 8"
 GO! Qube 9" City Life Quilt Finished Quilt Size: 48 1 / 8" x 64" Finished Block Size: 15 5 / 8" x 15 5 / 8" Fabrics are from the City Life Collection and are provided by Dear Stella. Dies Needed: GO! Qube
 Fling by Laura Jones 57" x 68" Featuring fabrics from the E60-1439-GRY E60-1440-PUR E60-1441-PUR E60-1442-GRN E60-1443-TURQ E60-1444-PUR E60-1444-GRY (includes binding) collection by Materials 1 Yard 1
Holidays with Our Homies
 Holidays with Our Homies Featuring Holiday Homies by Tula Pink Celebrate the holidays with Buck the dog, Gus the buck, and Ryan the goose in this whimsical saw tooth star quilt. Collection: Technique:
Spring Rain Bed Runner
 Use with: GO! Big GO! GO! Baby Spring Rain Bed Runner Designed by Vivian Peritts for AccuQuilt As seen in Modern Quilts Unlimited Spring 2016 issue www.accuquilt.com 888.258.7913 2016 AccuQuilt Code PQ11037
GO! Qube 8" Spools and Kites Quilt Finished Size: 44½" x 44½"
 GO! Qube 8" Spools and Kites Quilt Size: 44½" x 44½" For use with GO! Qube Mix & Match 8" Block (55776) Fabrics are from Robert Kaufman s Rhoda Ruth Collection by Elizabeth Hartman To make an 8" Block
Gypsy Dreams. Quilt 2 by Denise Russell. Skill Level: Intermediate. Quilt size: 57 x 69. Free Project NOT FOR RESALE
 Gypsy Dreams Quilt 2 by Denise Russell Quilt size: 57 x 69 Blank Quilting Corporation 49 West 37th Street New York, NY 10018 Tel: 800-294-9495 Fax: 212-679-4578 www.blankquilting.net Skill Level: Intermediate
Snowballs and Stars. White Floral Cut 4 strips 2½" x WOF. Cut the strips into 56 squares 2½" x 2½".
 FINISHED QUILT SIZE 76" x 86" Finished Block Size 8" x 8" Measurements include ¼" seam allowance. Sew with right sides together unless otherwise stated. Please check our website www.rileyblakedesigns.com
GO! Cleopatra s Fan Table Runner
 GO! Cleopatra s Fan Table Runner Finished Size: 23" x 57" Dies Needed: GO! Qube Mix & Match 12" Block (55778) GO! Half Square Triangle-6" Finished Square (Shape 3) Additional Dies Needed GO! Cleopatra
GO! Qube 6" Rick Rack Flower Throw Quilt Finished Size: 46" x 46"
 GO! Qube 6" Rick Rack Flower Throw Quilt Finished Size: 46" x 46" Fabrics provided by Timeless Treasures For use with GO! Qube Mix & Match 6" Block (55775) and GO! Qube 6" Companion Set Classics (55779)
CHRISTMAS CANDY. Quilt Finished Size: 64" x 80" Block Finished Size: 8" x 8"
 CHRISTMAS CANDY Quilt design and instructions by Wendy Sheppard Specification: Advanced Beginner Quilt Finished Size: 64" x 80" Block Finished Size: 8" x 8" Cutting Instructions: From Fabric A, cut for
Finished Size: 75"x 75"
 Finished Size: 75"x 75" Finished Size: 75"x 75" Block Size: 1"x1" and 6"x6" Quilters Basics Read instructions before beginning a project. All instructions include a ¼" seam allowance. Press as you go.
QTfabrics.com QT Fabrics All rights reserved Pg 1. Designed by: Georgie Gerl. SIZE 77" X 63" for ½"binding 76½" x 62½" for ¼" binding
 SIZE 77" X 63" for ½"binding 76½" x 62½" for ¼" binding Jerry Gadamus Pg 1 Finished Size: 77"x 63" 26649X One Panel FABRIC REQUIREMENTS 26652K 3/4YARD 26653 X 1/4 YARD 26650 R 1 5/8 or 2 YARDS 1 BOLT 1
Happy Hot Dogs. 52 x 52 Quilt (8 ½ blocks)
") Happy Hot Dogs By 52 x 52 Quilt (8 ½ blocks) Cut 2 8 ½ strips white flower fabric, cut into 5 8 ½ squares Cut 1 8 ½ strip aqua flower fabric, cut into 4 8 ½ squares Cut 1 8 ½ strip white focal fabric,
Happy Hot Dogs By 52 x 52 Quilt (8 ½ blocks) Cut 2 8 ½ strips white flower fabric, cut into 5 8 ½ squares Cut 1 8 ½ strip aqua flower fabric, cut into 4 8 ½ squares Cut 1 8 ½ strip white focal fabric,
Chromaview. Quilt 2 by Denise Russell. Skill Level: Beginner. Quilt size: 72 x 66. Free Project NOT FOR RESALE
 Chromaview Quilt 2 by Denise Russell Quilt size: 72 x 66 Skill Level: Beginner Blank Quilting Corporation 49 West 37th Street New York, NY 10018 Tel: 800-294-9495 Fax: 212-679-4578 www.blankquilting.net
Leafy Tree Tops. Blue Floral Cut 7 strips 6½" x WOF for Border 4.
 FINISHED QUILT SIZE 71½" x 82½" Finished Block Size 9" x 9" Measurements include ¼" seam allowance. Sew with right sides together unless otherwise stated. Please check our website www.rileyblakedesigns.com
Ladybug. Fly Away Home quilt designed by Leigh Headington. Finished quilt: " x " Finished block: 12" square
 Ladybug Fly Away Home quilt designed by Leigh Headington Finished quilt: 64 1 2" x 76 1 2" Finished block: 12" square Fabric Requirements 3/8 yard Dot-C1820 Red 1/4 yard Fun-C3851 Black 1/4 yard Fun-C3851
DARLING. By Lindsay Wilkes of
 By Lindsay Wilkes of FINISHED QUILT SIZE 74" x 74" Finished Block Size 18" x 18" Measurements include ¼" seam allowance. Sew with right sides together unless otherwise stated. Please check our website
Old Glory One Stamp. Alternate Piano Key Border. Morning Glory Designs by Reeze L. Hanson Quilts of Valor Pattern 65 x 79
 Old Glory One Stamp Alternate Piano Key Border Morning Glory Designs by Reeze L. Hanson Quilts of Valor Pattern 65 x 79 Instructions for cutting and piecing Quilt Panel and Border 1 1. Trim the quilt panel
Sassy Runner. Design by Wendy Sheppard Skill Level: Confident Beginner Number of Blocks: 8 Block Size: 8" x 8" (finished) quiltingtreasures.
 quiltingtreasures.") Approximate Size: 24½" x 42¼" Design by Wendy Sheppard Skill Level: Confident Beginner Number of Blocks: 8 Block Size: 8" x 8" (finished) 1 Studio 8 FABRIC REQUIREMENTS 24194 W 24195 N 24196 S 24196 N
Approximate Size: 24½" x 42¼" Design by Wendy Sheppard Skill Level: Confident Beginner Number of Blocks: 8 Block Size: 8" x 8" (finished) 1 Studio 8 FABRIC REQUIREMENTS 24194 W 24195 N 24196 S 24196 N
 Flower Festival by Debbie Beckwith Graves 33" x 39" Featuring fabrics from the collection by Materials E30-BUNDLES-081 E60-1412-GRN E60-1414-ORG E60-1415-TURQ (backing) E60-1416-BLU (incl. binding) E60-1416-ORG
Figgy Pudding #131. Finished quilt size is 69-1/2 x 69-1/2. Materials Needed:
 #131 Figgy Pudding Finished quilt size is 69-1/2 x 69-1/2 Materials Needed: 10 fat quarters 2-3/4 yards background fabric 1 fat quarter for corner blocks 1 yard border fabric 2/3 yard binding fabric 4-1/2
 Summer Breeze Finished Quilt Size 65" x 65" Featuring fabrics from the Summer Bouquet collection by Page 2 of 6 Materials Additional Materials & Supplies Fabric Requirements 5773-66 (Large Floral) 5774-66
Quilt designed by Sue Harvey and Sandy Boobar of Pine Tree Country Quilts Yardages and Cutting
 Fowl Play 54" x 60" Quilt designed by Sue Harvey and Sandy Boobar of Pine Tree Country Quilts www.pinetreecountryquilts.com Yardages and Cutting Note: WOF means width of fabric from selvage edge to selvage
Bloom Lap Quilt. Design by Shannon Ownby of Fabrics N Quilts Skill Level: Confident Beginner Number of Blocks: 6 Block Size: 24" (finished)
") Approximate Quilt Size: 53" x 78½" Design by Shannon Ownby of Fabrics N Quilts Skill Level: Confident Beginner Number of Blocks: 6 Block Size: 24" (finished) 1 Amy Lee Weeks FABRIC REQUIREMENTS 23929 EH
Approximate Quilt Size: 53" x 78½" Design by Shannon Ownby of Fabrics N Quilts Skill Level: Confident Beginner Number of Blocks: 6 Block Size: 24" (finished) 1 Amy Lee Weeks FABRIC REQUIREMENTS 23929 EH
 Stepping Stones Stepping Stones featuring fabrics from the River Mist collection from A B C D E F G Fabric Requirements Red 2099M-89... ⅔ yard 2100M-89... ⅔ yard 2102M-99... ⅔ yard 2105-88... ⅔ yard 2105-99...
Coastal Chic Batiks Collection by Monique Jacobs
 FREE Quilt Pattern 52" x 65" quilt designed by Monique Jacobs Coastal Chic Batiks Collection by Monique Jacobs Coastal Chic Batik Quilt Instructions For best results, read the pattern completely first.
Growth Chart: Cut this yardage first from your bundle. For the background rectangles cut 3 pieces 9 x 12 1/2 and 2 pieces 9 x 12 1/4.
 Growing Fast, projects 4-6 in 9 months til baby Start with 1 fat quarter bundle of Little One by Robert Kaufman Fabrics which includes 10 fat quarters and 1 bib panel. You will be able to make all 3 projects
I Can Fly. makower uk Fabrics by Mark Lipinski Pickle Road Studios, LLC PRESENTS
 PRESENTS Quilt designed by Mark Lipinski Quilt size: 72" x 72" I Can Fly Fabrics by Mark Lipinski Pickle Road Studios, LLC 12/21/12 makower uk www.andoverfabrics.com Introducing Andover Fabrics new collection:
Rosy Cheeks Quilt Finished Quilt Size: 54 ½" x 70 ½"
 Designed by Jocelyn Ueng Rosy Cheeks Quilt Finished Quilt Size: 54 ½" x 70 ½" Quilt Fabric Materials White Tonal Floral* Red Large Rose Floral Red and Black Floral Black Small Floral Black Small Diamonds
Bird Watchers. Pecking Order quilt by Debby Kratovil. by Norman Wyatt
 Bird Watchers by Norman Wyatt Pecking Order quilt by Debby Kratovil Quilt size: approximately 35" x 39" Featuring fabrics from the Bird Watchers collection by Norman Wyatt and Suede by P&B Textiles Bird
Dearest Heart. Quilt Size: 36" x 36" Designed by Heidi Pridemore
 Quilt Size: 36" x 36" Designed by Heidi Pridemore #FR-064 Die cutting & traditional cutting instructions included! Fabric Requirements: Featuring the "Curious Dream" fabric line from Windham Fabrics. Yardages
 Once Upon a Time Finished Quilt Size 40" x 50" Featuring fabrics from the Once Upon a Time collection by Racoon Illustration for Fabric Requirements Once Upon a Time 7243-55...1 panel 7261-66... 3 8 yard
A Star in the Forest Table Topper 23 x 23 - A fat quarter project
 A Star in the Forest Table Topper 23 x 23 - A fat quarter project Read instructions before beginning. This project requires six fat quarters plus ¾ yard of backing fabric. Binding comes from one of the
Be sure to read the entire pattern before beginning. All seam allowances are ¼-inch. Press seams to one side. WOF = Width of Fabric
 Sophia Sophia is a blazing star quilt variation featuring fabrics inspired by Jinny s travels to Ukraine. The stars are beautifully shaded and the quilt also boasts intricate-looking but easy-to-make medallions
Mandy s Star. Designed By Linda Fitch for RJR Studio. Featuring Everything but the Kitchen Sink. Finished Sze 80-1/2 x 93-1/2
 Mandy s Star Designed By Linda Fitch for RJR Studio Finished Sze 80-1/2 x 93-1/2 Featuring Everything but the Kitchen Sink Mandy s Star Page 2 Mandy s Star Color Card Featuring the Everything but the Kitchen
Handful of Stars. by Kim Diehl. Finished Quilt Size: 621/2" x 621/2" Finished Star Block Size: 8" x 8" A Free Project Sheet from
 Handful of Stars by Kim Diehl Finished Quilt Size: 621/2" x 621/2" Finished Star Block Size: 8" x 8" A Free Project Sheet from 49 West 37th Street, New York, NY 10018 tel: 212-686-5194 fax: 212-532-3525
Accent on Amish Welcome!
 Quilt Along Accent on Amish Welcome! Designed by The Staff of McCall s Quilting Made and Machine Quilted by Sheryl Martin Skill Level Beginner Finished Quilt Size 44H x 44H Number of Blocks & Finished
Daily Grind. Designed by: Janet Wecker Frisch. Approximate napkin size: 17 X 17. Approximate quilt size: 61 X 61
 Daily Grind Designed by: Janet Wecker Frisch Approximate quilt size: 6 X 6 Approximate napkin size: 7 X 7 2673 A 2674 A backing 2676 AJ also binding 2676 E Ap r 2672 A on :o ne si ze fit s m os t Approximate
Requirements. Friendship Quilt Amanda Herring Designs 1
 Requirements Fabric Yardage Sku Fabric Name A FQ C7245-AQUA Hello Lovely - Dots, Aqua B FQ C7245-PINK Hello Lovely - Dots, Pink C 14 x 10 C7245-WHITE Hello Lovely - Dots, White D 14 x 10 C7240-AQUA Hello
Domino Effect. Quilt 1 by Denise Russell. Skill Level: Advanced Beginner. Quilt size: 61 x 71. Free Project NOT FOR RESALE
 Domino Effect Quilt 1 by Denise Russell Quilt size: 61 x 71 Skill Level: Advanced Beginner Blank Quilting Corporation 49 West 37th Street New York, NY 10018 Tel: 800-294-9495 Fax: 212-679-4578 www.blankquilting.net
Stars & Bars. Stars & Bars
 Stars & Bars Designed by Dawn Stewart Stars & Bars DMS-122 64" x 77½" Throw Skill Level: Confident Beginner A fun Patriotic quilt that s easy to sew, and easy to cut out with the AccuQuilt GO! Materials
Susannah Bee Quilt. Quilt designed by Terri Butler Finished size is approximately 43" x 60" A DIVISION OF HAMIL GROUP
 Susannah Bee Quilt Quilt designed by Terri Butler Finished size is approximately 43" x 60" A DIVISION OF HAMIL GROUP Quilt designed by Terri Butler Materials and Cutting Note: WOF is width of fabric from
125 th Anniversary Quilt. Celebrating the BERNINA 125 th Anniversary!
 125 th Anniversary Quilt Celebrating the BERNINA 125 th Anniversary! : fabrics Fabric A: 5490M-33 Paisley Gold 1-5/8 yards Fabric B: Binding 5494M-07 1/2 yard Fabric G: 5490-07 highlights only for embroidered
- 1 - Sewing Directions: 1. Trim each 8-1/2 square with the Outer Edge Template. Trim each 6-1/2 square with the Quarter Circle Template.
 Quilt Designed by Lucy A. Fazely Finished Quilt Approx. 70 x 80 - Finished Block Size: 8 x 8 Sing the Blues fabrics by Exclusively Quilters - Style #4039 Fabric Requirements: Based on 42 wide fabric 1-2/3
Blush and Bloom Plus Runner
 Blush and Bloom Plus Runner Created by Brooke Sellmann for Sew Mana Sew Blush and Bloom Plus Runner uses either fat quarters or yardage for the plus design, but yardage is recommended for the rest of the
Uses Contempo s Anything Goes collection by Ann Lauer Finished Size: 57 x 57
 2016 Benartex, LLC It s easy to create your own art quilt with Ann Lauer s exciting new Anything Goes collection. Just follow the simple instructions and you ll have a fresh new modern wallhanging, perfect
Itty Bitty Baskets. As seen in Modern Quilts Unlimited Fall 2016 Issue # Designed by Missy Shepler for AccuQuilt
 Use with: GO! Big GO! GO! Baby Itty Bitty Baskets Designed by Missy Shepler for AccuQuilt As seen in Modern Quilts Unlimited Fall 2016 Issue #17 www.accuquilt.com 888.258.7913 2017 AccuQuilt Code PQ11052
Sewing Spools Wall Quilt
 Sewing Spools Wall Quilt Display a four-block wall hanging showcasing thread spool and sewing machine designs in your sewing space. Fabrics are from the Winsome collection by Kim Diehl for Henry Glass
Crescendo Pin Wheel Quilt
 Crescendo Pin Wheel Quilt Pinwheel quilts are the perfect example of a quilt pattern inspired by a real object. Whimsical and decorative, pinwheel quilts create gorgeous motifs that any quilter will love.
My Sunflower Garden Quilt 1
 My Sunflower Garden Quilt 1 by Denise Russell Quilt size: 72 x 92 - Pillow size: 20 x 32 Skill Level: Intermediate 49 West 37th Street New York, NY 10018 Tel: 212-686-5194 - Fax: 212-532-3525 Toll Free:
Batting: 66" x 66" Coordinating thread Pink Animal Print: ½ yard
 Project Fabric Requirements Finished Quilt Size 60" x 60" Additional Supplies Needed Panel: 2024-64 1 panel Batting: 66" x 66" Stripe: 2025-64 Coordinating thread Pink Animal Print: 2026-22 ½ yard Quilting
Sand Surf and Sun. APQS Lethbridge a Ave North Lethbridge Alberta Canada
 Sand Surf and Sun APQS Lethbridge 1253 2a Ave North Lethbridge Alberta Canada 403-942-5333 www.finelyquilted.ca email: info@finelyquilted.ca 1 Fabric requirements: Background Squares 1.4 yards (1.2m) Sashing
Cutting. Construction CREAMS
 Size: "x " Size: "x " Quilter Basics Please read all instructions before beginning. Label your cut pieces All instructions use ¼" seam allowance. Press all seams toward dark fabric. CREAMS Cutting Fabric
Quilt meets Quilts of Valor size requirements.
 Monroe SIZE 60½" x 80½" Designed by Wendy Sheppard for Quilting Treasures Quilt meets Quilts of Valor size requirements. quiltingtreasures.com quiltingtreasures All rights reserved. Pg 1 FABRIC REQUIREMENTS
Chloe Collection by Maywood Studio
 70" x 82" quilt designed by Denise Russell for Maywood Studio Chloe Collection by Maywood Studio Chloe Quilt Instructions For best results, read the pattern completely first. Press in the direction of
Daisy Pocket Quilt. Sorting summertime items is easier with this simple pocket quilt. Completing the Quilt. Cutting
 Daisy Pocket Quilt Sorting summertime items is easier with this simple pocket quilt. DESIGN BY PHYLLIS DOBBS PROJECT SPECIFICTIONS Skill Level: Beginner Quilt Size: 42" x 52" MTERILS 2/3 yard multicolored
Sondalo Table Runner
 www.fabriceditions.com Sondalo Table Runner Finished Size: 14½" x 54½" Supp lies Needed 2 Fabric Palette Sondalo Fat Quarter Bundles (18" x 21") (10 different designs) 16" x 56" Low-loft batting 17" x
 Bella! Finished Quilt Size 43" x 43" Featuring fabrics from the Bella Flora collection by Project Fabric Requirements 1550-33... 5 8 Yard 1551-66... 1 8 Yard 1552-33... ½ Yard 1553-33... ½ Yard 1554-33...
Project: Reversible Quilted Pillowcase
 Project: Reversible Quilted Pillowcase Pattern 65 FABRICS are from the Anything Goes collection by Ann Lauer for Benartex (benartex.com). of Meredith Corporation. Meredith Corporation 2017. All rights
Make Templates: Trace templates onto template plastic. Cut out and label.
 Quilt Designed by Deb Mosa Finished Quilt Approx. 61-1/2 x 61-1/2 - Finished Center Size: 40 x 40 Cotillion fabrics by Exclusively Quilters - Style #3999 Fabric Requirements: Based on 44" wide fabric 1-2/3
Reflections: Jewel Tones Quilt featuring the Reflections Collection from EBI Fabric Corp.
 Reflections: Jewel Tones Quilt featuring the Reflections Collection from EBI Fabric Corp. Size: 54" x 54" Skill Level: Intermediate Design by Sasha K Studio Fabric Requirements & Cutting Instructions (A)
Handmade BY THE HENLEY STUDIO FOR MAKOWER UK. Free Pattern Download Available. Sew Special Quilt designed by: Janet Houts. Quilt Size: 70" x 94"
 Handmade BY THE HENLEY STUDO FOR MAKOWER UK Sew Special Quilt designed by: Janet Houts Quilt Size: 70" x 94" andoverfabrics.com Free Pattern Download Available 1384 Broadway New York, NY 10018 Tel. (800)
Hashtag Quilt. Washington Depot by Denyse Schmidt
 Featuring Washington Depot by Denyse Schmidt In this planned scrappy quilt, the florals and geometrics from the Washington Depot collection collide in an array of Hashtag Blocks in different print combinations.
Finished Size: 60 x70
 Finished Size: 60 x70 Finished Size: 60" x 70" Finished Block Size: 10" x 10" Cutting Label pieces as they are cut Quilters Basics Read instructions before beginning a project. All instructions include
... Had a Little Lamb
 ... Had a Little Lamb Quilt designed by Sue Harvey & Sandy Boobar of Pine Tree Country Quilts Finished size is approximately 50 x 56 A DIVISION OF HAMIL GROUP Quilt designed by Sue Harvey and Sandy Boobar
Featuring fabrics from the Carriage House collection by Pat Speth
 P R O J E C T by Pat Speth Featuring fabrics from the Carriage House collection by Pat Speth Carriage House Quilt Size 72" x 72" Block Size 14" 2007 Pat Speth Materials Light (background) fabrics - 10
Acrylic Ruler/Mat Tote Bag
 Acrylic Ruler/Mat Tote Bag Outside Pocket holds 12 1/2' and 16" square up rulers Inside pockets hold 6" x 24" ruler, 6" x 12" ruler, 6" x 6" ruler Plus the inside has pockets for other rulers, notions,
Cut squares as indicated:
 Quilt Designed by Deb Mosa Finished Quilt Approx. 68 x 80 - Finished Block Size: 12 x 12 Night Owls fabrics by Exclusively Quilters - Style #3804 Fabric Requirements: Based on 42 wide fabric 2-1/4 yards
Chalkboard Snowman
 Chalkboard Snowman Two versions Featuring fabrics from the Chalkboard Snowman collection by Jennifer Brinley from White Snowflake Border Fabric Requirements Red Snowflake Border Fabric Requirements (A)
56" x 72" quilt designed by Debbie Beaves. Aubergine Collection by Debbie Beaves. Aubergine Pattern Maywood Studio all rights reserved.
 56" x 72" quilt designed by Debbie Beaves Aubergine Collection by Debbie Beaves Page 1 Aubergine Free Quilt Pattern Instructions For best results, read the pattern completely first. Flying Geese Block
Fox Fun Mug Rug H I J. Figure 1
 one day only DESIGN BY JOANNA WILCZYNSKA Fox Fun Mug Rug Good things come in small packages. Create a cute coaster that may end up on a wall instead. ScRap- FRIENDLY PROJECT SPECIFICATIONS Skill Level:
FREE PATTERN AVAILABLE ON MICHAELMILLERFABRICS.COM
 HOLIDAY FOREST QUILT *THIS IS A DIGITAL REPRESENTATION OF THE QUILT TOP. FABRIC MAY VARY. SIZE 66 W X 82 H LEVEL CONFIDENT BEGINNER PATTERN BY WENDY SHEPPARD FREE PATTERN AVAILABLE ON MICHAELMILLERFABRICS.COM
Greek Square Table Runner
 Greek Square Table Runner Quilt Finished Size: 70-1/2" x 25-1/2" Block Finished Size: 12" Printing Options: Printer-Friendly Web Page or PDF Fabric Requirements: Dark: 1 yard Medium: 3/4 yard Light: 3/4
Sew the four units together for center of star. Make sure to turn so background fabric is in the corners.
 Mark light green square diagonally. Sew ¼ seam allowance on both sides of diagonal line. Cut on diagonal line and press to green. Trim to 3 ½ squares. Make 2 sets. Sew the four units together for center
Kinda Pawsome. windhamfabrics.com Designed by Wendy Sheppard Featuring Catnip by Whistler Studios FREE PROJECT
 11.01.18 Designed by Wendy Sheppard Featuring Catnip by Whistler Studios size: 62 x 80 FREE PROJECT this is a digital representation of the quilt top, fabric may vary. please note: before making your project,
Patriotic Stars. Blue Stripe Cut 12 strips 2½" x WOF. Cut the strips into 12 rectangles 2½" x 32½" for sashing.
 FINISHED QUILT SIZE 84" x 84" Finished Block Size 32" x 32" Measurements include ¼" seam allowance. Sew with right sides together unless otherwise stated. Please check our website www.rileyblakedesigns.com
Shenandoah Baskets - Month 12 Quilt Assembly
 Shenandoah Baskets - Month 12 Quilt Assembly It s time to finish up the elements of the quilt top and put everything together! Step 1: Framing the Blocks Before being sewn together, each of the Shenandoah
THE FLOWER FAIRIES. This is a free pattern provided by The Red Boot Quilt Company 2017 STRICTLY NOT FOR RESALE OR DISTRIBUTION
 THE FLOWER FAIRIES This is a free pattern provided by The Red Boot Quilt Company 2017 STRICTLY NOT FOR RESALE OR DISTRIBUTION The Red Boot Quilt Company The Red Boot Quilt Company THE FLOWER FAIRIES Approx.
S TA C K, SLASH & SASH. Quilting. Quilting 10+ unique projects
 Quilting S TA C K, SLASH & SASH Quilting 10+ unique projects 141355 S TA C K, S L A S H & SASH Quilting Edited by Carolyn S. Vagts 2 Introduction is all about creating uniquely beautiful quilts. Create
Diamonds and Denim. Approximately 52 x 52. Quilt designed by Donna Russell
 Diamonds and Denim Approximately 52 x 52 1 Quilt designed by Donna Russell Please read through all of the instructions before you begin your project. Fabric Requirements: A. Pattern #24400-Blu1........2
Just Kisses NAPTIME FRIENDS
 Just Kisses NAPTIME FRIENDS Designed by Darlene Zimmerman Featuring Finished quilt measures: 46 x 60 See pages 8-9 for alternate napsize quilt. - Easy Angle (EZ Quilting #8823759A) - Companion Angle (EZ
Central. Fabric. Dot to Dot Quilt. Supplies Needed. Instructions. Skill Level 2: Experience necessary. Project Instructions
 Fabric Project Instructions Central Dot to Dot Quilt Skill Level 2: Experience necessary Crafting Time: Weekend Project Supplies Needed 1 Fabric Central Dot Bundle 1 1 Fabric Central Dot Bundle 2 Fabric