AutoTurn User s Manual
|
|
|
- Jennifer Casey
- 6 years ago
- Views:
Transcription


1 AutoTurn User s Manual
2 November 2008 Putnam Engineering LLC 649 Route , Hillsborough, New Jersey Navigating This Manual For a quick look at AutoTurn features, click on the hyperlinked cover illustrations There is a detailed at the back of the book. items are hyperlinked to the appropriate location in the manual. Hyperlinks at the bottom of the page will take you back to the cover, or to the TOC If you are reading a print copy and want to take advantage of the hyperlink navigation features, download the latest PDF version from Warnings and Safety Instructions... 1 Warranty and Repair... 2 Unpacking and Installing... 3 Basic Operations... 9 Quick Start Speed Control Manual Motion Control Measurements and Distances Automatic Functions Turning and Boring Facing Cutting Threads Cutting Tapers Cutting Balls and Fillets Cutting Tapered Threads Appendix 1: Configuring Maximum Speed and Acceleration Appendix 2: Using the Menu and Options Appendix 3: Key Descriptions Appendix 4: Correcting Configuration Errors Appendix 5: Configuring the Port Adapter Appendix 6: Wiring the Breakout Board Appendix 7: Updating the Software... 77
3 Warnings and Safety Instructions All machining operations are inherently dangerous. Eye protection is required at all times. Keep hands clear of moving parts of the machinery at all times. Follow the safety instructions for your lathe, motor drive and motors. Know and follow good machine shop safety practices. The AutoTurn is capable of initiating and sustaining forceful and high speed motion of the lathe carriage and cross slide, together and separately. Become thoroughly familiar with the manual motions and the automatic motion cycles of the AutoTurn before trying to use it to cut metal. Read and understand the instructions provided Practice safely by testing motions without a cutter or workpiece in place, and with the spindle stationary. Do not attempt to cut metal until you know what to expect and are prepared for the automatic motion of the cutter and carriage. Be prepared for unexpected motion of the tool or carriage. Like any complex software system, the AutoTurn sometimes produces unexpected results. This can result in unexpected motion of the carriage and cutting tool, leading to a potentially dangerous tool jam or carriage crash. Always wear eye protection, and always keep hands clear of moving machinery. Always be prepared to stop the AutoTurn and/or the lathe spindle quickly and safely should something unexpected occur. OPERATIONAL PRECAUTIONS The AutoTurn is designed to function in a light machine shop environment. Machining oils on your hands will not affect the operation of the device. It is not sealed, however, and must be kept clear of lubricants, coolants and solvents. Take care to place it securely on a table or toolstand when it is not in use. The LCD display is sensitive to impact. It has been shock mounted, but it may be damaged by a fall to a hard floor. Keep the AutoTurn handset clear of strong magnetic fields. Do not place the unit in direct proximity to a power supply or motor drive. 1
4 Warranty and Repair The AutoTurn is warranted against defects in material or manufacture for a period of one year from date of sale. During the warranty period, for covered defects we will repair or replace the unit at our discretion. REPAIR To arrange for repair, contact the company at info@putnamengineering.com for a return authorization number. Pack the device securely to protect against breakage. Place a description of the problem in the box, and include the return authorization number, your name, return address and contact information (phone and ). Write the Return Authorization number on the outside of the box, and ship it to Putnam Engineering 649 Route Hillsborough, NJ We will contact you with a repair cost and timing estimate before proceeding with repairs. 2

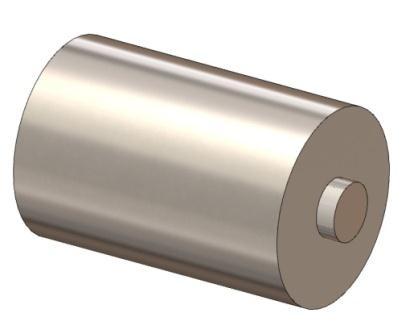
5 Unpacking and Installing You should have the following items in your shipment: 1. AutoTurn digital lathe controller 2. Parallel Port Adapter 3. One foot parallel cable 4. Power supply 5. RPM sensor 6. Magnet 7. Mini USB cable 8. User s Manual 3
6 CONFIGURING THE PORT ADAPTER Check the label on the Parallel Port Adapter and make sure it is the right adapter for your motor drive system. The name of your drive manufacturer should appear on the label (ie. Configured for Xylotex ). If there is no label, or if the Port Adapter is not fully assembled, see Appendix 5: Configuring the Port Adapter CONFIGURING THE AUTOTURN Note: do not connect the AutoTurn at this time. Now it is time to collect the data necessary to configure the AutoTurn. The AutoTurn needs to know how many steps to output in order to move the lathe one inch. It also needs to know how much backlash your lathe has in each axis. Write these measurements in the table on the next page for future reference. The AutoTurn will calculate the steps per inch (SPI) for each axis of your system by multiplying the pitch of your leadscrew (in inches), the steps per revolution of your motor drive box and the drive ratio of your gearbox or pulley system (if any). Leadscrew Pitch You may determine the pitch of the leadscrew by referencing the lathe specifications, measuring the leadscrew directly, or measuring how many manual rotations of the leadscrew are required to move the carriage or cross slide a precise distance. For example, a Sherline lathe has 20 TPI leadscrews on both axes, so in this case the pitch is inches. Write the leadscrew pitch values for your lathe in the table on the next page for future reference. Steps per Revolution Stepper motors generally have a hardware resolution of 200 steps per revolution of the motor shaft. However, most stepper motor drive systems have the ability to microstep the motors; each step is divided into 2, 4, 8 or more microsteps. If your motor drive system is configured for 8 microsteps, then the steps per revolution of your motor drive system would be 8 x 200, or 1,600 steps per revolution. The only way to know this number for sure is to dig into the documentation that came with your motor drive system, or call the manufacturer. If you are in doubt, use 200 steps per revolution. You will be able to correct the configuration later in the setup process. Drive Ratio Leadscrew drive motors are sometimes connected to the leadscrew using pulleys and timing belts. If your drive motors are connected directly to the leadscrew (no timing belts or gears) then you can ignore this section. If you do have pulleys or gears, you will need to know the pitch diameter of the drive gear (on the motor) and the driven gear (on the leadscrew). If your motor mount includes timing pulleys, you may use the groove count instead of the pitch diameter. Backlash To measure the backlash in the Z axis, mount a dial indicator on the lathe ways, with the indicator tip bearing on the saddle. Close the half nuts, and then put your hands on the saddle and push it forcefully towards the headstock. Zero the indicator, then push the saddle forcefully towards the tailstock. The indicator reading is the Z axis backlash. 4
7 X axis backlash can be measured in the same way, with the indicator bearing on the cross slide. Pull the cross slide towards you, zero the indicator, then push the cross slide away from you and read the backlash from the indicator. If you have calibrated dials on either axis, there is an easier way to measure backlash. For the X axis, carefully tighten a gib screw on the cross slide until the handwheel is somewhat hard to turn. Turn the handwheel counterclockwise until you feel resistance, and zero the dial. Then turn the handwheel clockwise until you feel resistance, and read the backlash from the dial (reset the gib screw after this procedure is complete). If you have a dial and a saddle lock on the Z axis, you can use this procedure on the Z axis as well. Note: The AutoTurn uses backlash for calculation backlash compensation moves, and for setting default retraction values in automatic functions. For safety purposes, it is best to overestimate the backlash settings by about Recording Configuration Data Record your configuration data in the table below for future reference. Lathe Configuration Leadscrew pitch Steps per Rev Drive Pulley Driven Pulley Backlash Z Axis (long axis) X Axis (short axis) CONNECTING THE AUTOTURN See the connection diagram at the beginning of this section. Connect the AutoTurn to the motor drive box by plugging the AutoTurn cable into the Parallel Port Adapter, and then plugging the Parallel Port Adapter into your motor drive box. An optional one foot long parallel cable is included in the kit and may be connected between the Parallel Port Adapter and the motor drive box to allow a more convenient placement of the Port Adapter. The connections for the power supply and spindle sensor are located on the sides of the adapter. Press the plugs in firmly. Connect the power supply to the Port Adapter only when you are ready to run the Setup Wizard. 5
8 RUNNING THE SETUP WIZARD The Setup Wizard will run automatically the first time the AutoTurn is powered up. If it does not run automatically, or you need to run it again later, you can access it directly by pressing and then selecting Setup Wizard from the menu. Use the ARROW KEYS at the bottom of the keyboard to navigate the menu, and ENTER to select a menu item or accept a parameter. When entering data like leadscrew pitch, use the number keys and the decimal point key to enter data, ENTER to accept the data, or STOP to clear the field and start over. STOP, STOP will cancel the Wizard. Multiple choice answers appear on the screen bracketed by solid arrowheads ( ). Use the LEFT and RIGHT ARROW KEYS to scroll through the available answers and then use the ENTER key to select. Now that you have all the necessary information to configure the AutoTurn, plug in the power supply and connect it to the Parallel Port Adapter. The Wizard will ask you to enter the appropriate data, and then will initiate several small moves to confirm appropriate setup, so turn on the motor drive box and make sure the motors are properly connected and the half nuts are engaged. Position the carriage so that there is plenty of room to move in any direction. When the Wizard starts, answer the questions using the data collected in the previous step. When prompted for the leadscrew pitch, remember to use the decimal point. The correct answer for a leadscrew with a pitch of fifty thousandths would be 0.050, not 50. WARNING: the AutoTurn will initiate several small moves (normally ¼ inch) to test the configuration. If there is a significant error in the configuration data, these moves may be much larger than expected. Always be prepared for unexpected motion and be ready to disengage the half nuts, turn off motor power or STOP the AutoTurn. See Appendix 4: Correcting Configuration Errors if the carriage movements are not accurate. The AutoTurn ships with conservative speed settings. You may be able to increase speed and acceleration of the system, but please be sure to read and understand Appendix 1: Configuring Maximum Speed and Acceleration before you change the system settings. 6

9 INSTALLING THE RPM SENSOR The AutoTurn system includes a sensor and magnet which together are used to sense the RPM of the lathe spindle. Input from this sensor is necessary for threading operations, and for the realtime RPM display on the AutoTurn screen. The sensor detects the passage of the magnet, which must be installed on some part of the lathe spindle. See installation instructions below. Mounting the Sensor Unless you have a conveniently located surface that you don t mind drilling into, you will probably need to make a small mounting bracket for the sensor. Usually a small piece of aluminum angle or bar will suffice. Every lathe is different, but usually a mounting screw or threaded hole can be found for securing a bracket. The ideal location and orientation of the sensor is perpendicular to the axis of the spindle, with the airgap between the sensor face and the magnet measuring about inches. The sensor fits through a diameter hole, and is secured with two nuts. You can adjust the gap by appropriately positioning the nuts. See illustrations below for a typical sensor mount on a Sieg minilathe. 7
10 Installing the Magnet The magnet included with the AutoTurn is a high flux rare earth magnet. This high-flux characteristic means that it is easily sensed by the RPM sensor (a Hall-effect sensor, for those who are interested) and it will stick tenaciously to any ferrous (iron or steel) surface. We use a couple of different magnet sizes (1/8 diameter and ¼ diameter, depending on what is readily available to us). They work equally well. Mounting considerations are the same, but if for some reason you prefer a different size than the one you received, let us know. Before you hard mount the magnet, stick it in place with its own magnetism or a piece of tape, and check the sensor adjustment. Connect the sensor, turn on the lathe and the AutoTurn and check for an RPM readout on the display. The sensor will only read one side of the magnet, and only if the gap between the sensor head and the magnet is small. If you don t see an RPM readout, the first thing to do is adjust the air gap between the magnet and the sensor to about to inches. A credit card or a piece of cardboard will make a good gage. Try again, and if there is still no RPM readout, flip the magnet over. It can be difficult to set up and adjust the sensor gap with the spindle turning at high speed. The AutoTurn has a diagnostic mode to assist with magnet and sensor setup. Press MENU, ENTER and select Magnet Check Mode. While the AutoTurn is in this mode, the screen backlight will toggle on and off in coordination with the sensor signal. You can rotate the spindle back and forth by hand to move the magnet under the sensor. Press X AXIS/Z AXIS to quit Magnet Check Mode. If there is no sensor signal, check magnet orientation, air gap and proper sensor connection. Older ferrite magnets were typically mounted to rotating shafts by either drilling a hole in the shaft and epoxying the magnet in place, or drilling and tapping a hole, and threading in an aluminum magnet holder. The very high flux of these newer magnets allows a wide variety of mounting concepts. 1) You can use the traditional methods if you wish, hard mounting the magnet on the spindle or on a gear or pulley that is part of the spindle assembly. 2) Sometimes you can just stick the magnet to the spindle and let its own magnetic field hold it in place. Be sure to carefully test this out at a variety of speeds before you decide that it is safe. Clean the spindle surface, then stick the magnet to the spindle and mark the location. Now adjust the lathe spindle speed to a low setting and turn on the lathe. Be sure to proceed with caution and wear eye protection! Turn the lathe on and off a couple of times, then check the position of the magnet. If it has not slipped or come off, proceed to higher speeds. You need an iron or steel surface for this to work stainless steel or aluminum will not work. Several AutoTurn users have been successfully operating this way for over two years. 3) On aluminum or stainless steel surfaces, the magnet may be temporarily stuck in place with duct tape or strapping tape. Once an appropriate location has been selected, you may want to hard mount the magnet. 8
11 Basic Operations Let s start this section by unplugging the AutoTurn power supply from the wall for a moment. Now plug it back in and observe the screen as the unit powers up. You will see that there is an initial display that includes the version number of the software you are running. MANUAL MODE Once the unit has powered up, the AutoTurn will be in Manual Mode. This is the basic mode of the AutoTurn. In this mode, no automatic movements are enabled, and keypad input is required in order to cause any kind of tool motion. From the Manual Mode, you may move the tool using the GO and CUT commands, and by pressing on the ARROW KEYS at the bottom of the keyboard. The key for returning to Manual Mode is the X Axis/Z Axis key in the middle of the top row of the keyboard. If you wish to exit an Automatic function, or you find yourself stuck in a configuration or options menu, press this key to return to Manual Mode. POWER MANAGEMENT The AutoTurn has no on/off switch. Instead, it has an automatic timer that will turn off the display and put the unit into a low power sleep mode if there is no keyboard activity for several minutes. While the AutoTurn is in sleep mode, the LEDs in the X Axis/Z Axis key will pulse on and off. To wake up the AutoTurn, press any key. When the unit wakes up, the screen will display the prompt Switch to Manual Mode?. Use the RIGHT ARROW KEY to select yes or no, then press ENTER. If you were in one of the Automatic modes when the unit went into sleep mode, you may choose to go back to that mode by selecting No. Otherwise, choose Yes to exit sleep mode and return to Manual Mode. 9


12 USING THE KEYBOARD The AutoTurn has a custom manufactured sealed membrane keypad designed to stand up to the rigors of the shop environment. See Appendix 3: Key Descriptions for details of each key function. Many of the keys on the AutoTurn keyboard have two functions. For instance, the 2 key is also the MENU key. When you are entering a numerical parameter such as Distance, the AutoTurn will automatically use the numerical value of the key. When you are not in a numerical data field and a dual function key is pressed, the display prompts you to clarify your intentions by listing the available options. EXAMPLE: If you are in Manual Mode and you press the 2 key, which means either the numeral 2 or MENU, the screen will display this prompt: DIGIT to set FEED ENTER to Main Menu The feed rate, or Cut speed, can be set from Manual Mode by pressing two digits in turn to select the desired percentage. Entering 22 would set the cut speed to 22%. In this example, the secondary function for the key is MENU. Pressing ENTER will select the secondary function for the key, which in this example is MENU. If you press the 5 key, this prompt will read ENTER to Taper instead. READING THE LCD DISPLAY The AutoTurn has a 128 x 64 backlit LCD graphic display. The display provides constantly updated information about the current machining process such as cut speed setting, actual speed, spindle RPM, tool location, units and mode. Several typical screen displays are presented below. The AutoTurn is in Manual mode The current feed rate setting is 16% of maximum cut speed. The tool is in motion and has an actual cut speed of 3.20 Inches per Minute The Spindle Speed is 264 RPM The position of the tool is displayed at the bottom of the screen and is currently Z,X ( ,0) 10
 The threaded section will end 1 inch to the left of")


13 This is the scrollable THREAD setup screen The units are inches An Outer Right Hand thread is being set up The pitch is 20 Threads Per Inch (TPI) The threaded section will end 1 inch to the left of the start position (Distance ) The tool retraction has been set to to ensure that the tool clears the threads during the automatic return-to-start motion. Current spindle speed and tool position appear at the bottom of the screen Multi Pass Threading is not enabled MultiStart Threadingis not enabled The tool wil advance for each cut This Threading setup is being saved as Threading Cut A and can be recalled for future use. To recall a saved cut, scroll up to the Recall line and use the ARROW KEYS to select from saved cuts. Press ENTER to recall the saved cut parameters. 11


14 Once setup is complete, the current parameters are displayed at the top of the screen. Move the tool to the appropriate start position and press ENTER to begin the cut. During the cut pass, the display changes to show critical parameters in a large, easy to read font. At the end of the cutting pass, the tool retracts and pauses. Press ENTER to return the tool to the start position. Press AUTO to enable automatic return-tostart motion. While AUTO is displayed, the tool will automatically return to the start position after each cut. AUTO can be engaged or changed at any time. 12


15 Press AUTO again to set up automatic cut repeat. Press AUTO repeatedly to cycle from No AUTO, to AUTO, to Repeat AUTO, and back to No AUTO When Repeat AUTO is engaged, the number of passes remaining is displayed at the top right hand corner of the screen. The AUTO key operates the same way in all AutoTurn functions. Press the center key in the top row to exit automatic functions and return to Manual Mode at any time 13


16 The scrollable Main MENU provides access to options, special functions, diagnostic tools and lathe configuration parameters. The Threaded Taper and Circular Approximation functions are accessed through the Main MENU Advanced Setup All lathe configuration settings are stored in the Advanced Setup area. Separate configurations can be created for different lathes in your shop, so that the AutoTurn can be readily moved from lathe to lathe. Scroll down to access all Z Axis and X Axis configuration settings. 14
17 Quick Start Once you have installed and configured the AutoTurn, you may want to work your way through the following steps to quickly familiarize yourself with basic AutoTurn operations. More detailed discussions of AutoTurn functions are found in the later sections of the manual. QUICK START SETUP Manually position the carriage in the middle of the ways, well away from the headstock and the tailstock. Remove any material mounted in the chuck, and move the tailstock well out of the way. Position the cross slide in the middle of its travel, with generous room for motion in either direction. BASIC MOVES 1. Make sure the motor power supply is on, the AutoTurn is powered up and the half nuts are engaged. 2. Press 1,0 to set the cut speed to 10% 3. Use the ARROW KEYS to experiment with manual motions at cut speed 4. Press the CUT/SLEW key at the upper right of the keyboard to temporarily change the speed to SLEW SPEED (it will revert to cut speed in three seconds) 5. Use the ARROW KEYS to experiment with manual motions at slew speed. 6. Press 3,0 to set the cut speed to 30% 7. Press CUT, 1, any ARROW KEY and then ENTER to move 1 in the selected direction at cut speed. Repeat the move in the opposite direction. 8. Press GO, 1, any ARROW KEY and then ENTER to move 1 in the selected direction at slew speed. Repeat the move in the opposite direction. GO AND END 1. Press ZERO, ENTER to zero both axis locations at the current position. 2. Press CUT/SLEW to temporarily set the speed to SLEW, and use the LEFT ARROW KEY to move the carriage an inch or so to the left. 3. Press END, ENTER to mark this location 4. Press GO to set up a high speed move, then press ABS/INC to select absolute measurement. Now enter a zero, press the RIGHT ARROW KEY to select the Z AXIS, and press ENTER. The carriage will return to the zero position you marked in the previous step. 5. Press GO, enter a distance and direction, press GO or ENTER to complete the move. Press GO twice to repeat the move. 15
18 TURN AND AUTO 1. Press TURN, ENTER. Use the RIGHT ARROW KEY to select a yes response and use the existing END position as the end point for the TURN operation. Press ENTER. Using the UP and DOWN ARROW KEYS, navigate through the onscreen menu and set up a TURN function with the following parameters: Type: Inside Distance: 1 Retraction: X Advance: 0 Z Advance: Speed: Press ENTER, ENTER, ENTER and the TURN cycle will begin with a 1 cutting pass to the left 3. When the motion stops at the end of the cutting pass, press ENTER to retract the tool and return to home. 4. Press ENTER to initiate a tool advance and another cutting pass. While the tool is in motion at cut speed (during the cut segment, not the retraction or return-to-home segments), experiment with using the UP and DOWN ARROW KEYS to control cutting speed. Press ENTER at the end of the cutting pass to retract the tool and return to the start position. 5. Press ENTER to initiate a cutting pass, and while the tool is in motion, press AUTO to activate automatic return to the start position. At the end of the cutting pass, the tool will automatically retract and return. 6. While the tool is at the start position, press the decimal point key. Press the RIGHT arrow three times to increase the tool advance (cut depth). Press ENTER, ENTER to initiate another cutting pass. 7. While the tool is in motion, press AUTO once and then 3, ENTER. The system will execute three sequential cutting passes without further input. Note the pass countdown in the upper right corner of the display. 8. Press the top center key (X AXIS/Z AXIS) to return to manual mode. Each of these actions and functions is more fully explained elsewhere in the manual. Please read all instructions before you start work. 16
19 Speed Control SETTING THE SLEW SPEED The slew speed is set in the lathe configuration menu (MENU, ENTER, Advanced Setup, Z Units/Min). It is set separately for each axis. The slew speed is the maximum speed at which the AutoTurn will execute automatic motions such as return to home, or retraction. It should be set to the maximum speed that the motors can drive the system without losing steps or locking up. It is a function of carriage or cross slide mass, slide or way friction, motor size, power supply settings and several other variables. See Appendix 1: Configuring Maximum Speed and Acceleration for a more complete discussion of how to determine and set this variable. SETTING THE MAXIMUM CUT SPEED The maximum cut speed is set as a percentage of the slew speed. It is set in the lathe configuration menu (MENU, ENTER, Advanced Setup, Z Max Cut %). It is set separately for each axis. See Speed Control: Setting the Maximum Cut Speed for a more complete discussion of how to determine and set this variable. SETTING THE CURRENT CUT SPEED Like the Maximum Cut Speed, the Current Cut Speed is set as a percentage. The Current Cut Speed is entered as a percentage of the Maximum Cut Speed. For example, if the Maximum Cut Speed is set at 50% of Slew Speed, and the Current Cut Speed is then set at 50 of Maximum Cut Speed, then the Current Cut Speed will be 25% of the Slew Speed. There are a number of ways to set or change the current cut speed setting. For Manual Operations: When the AutoTurn is in Manual Mode (Manual displays at upper LH corner of display) you can enter a two digit number to set the cut speed as a percentage of the maximum cut speed. Press 2,0,enter to set the cut speed at 20% of maximum. Press 0,5,Enter to set the cut speed to 5% of maximum cut speed. Press 0,0 to set the cut speed to 100% of maximum cut speed. For Automatic operations: When the carriage is at rest between cycles, the speed can be adjusted as in For Manual Operations above. When the AutoTurn is executing an automated cycle such as Turn or Taper, you can adjust the speed in several different ways: 1) Whenever an automatic cycle (Turn, Face, Taper) is initiated, the user is presented with a list of parameters for the cut, such as distance, retraction and tool advance. The speed of the cut can be entered at this time. 2) During the cut portion of an automatic cycle, you can press any number key to change the speed to the corresponding percentage. Press 2 to set the cut speed to 20% of maximum cut speed. Press 0 to set the cut speed to 100% of maximum cut speed. 17
20 3) During the cut portion of the cycle, you can press the UP ARROW or DOWN ARROW KEY to fine tune the speed setting in 1% increments 4) When the tool is at rest at the home position between cycles, you can press the decimal point key to open the parameters menu. All the parameters are available for editing in this menu area, including the cut speed. Scroll down to the bottom of the list and enter the cut speed you desire. 18
21 Manual Motion Control USING THE ARROW KEYS Pressing on any of the ARROW KEYS at the bottom of the keyboard will initiate motion in the direction selected. Motion will continue for as long as you hold DOWN the key. To move the tool away from the headstock, press and hold the right ARROW KEY. The AutoTurn defaults to the currently selected Cut Speed for manual motion control, so pressing on an ARROW KEY will move the tool at the Cut Speed. To change the speed to the Slew Speed, press the upper right key on the keyboard. The LED indicators on this key always indicate what speed is selected: it is a good idea to check this indicator before initiating manual motion. Once Slew Speed has been selected, it will remain selected for several seconds after any ARROW KEY is pressed. After several seconds have elapsed, the AutoTurn will default to Cut Speed again. This is a safety feature to avoid unexpected high speed moves. JOGGING All motor motions controlled by the AutoTurn start with a controlled acceleration. The duration of this acceleration is generally quite short and may not be perceptible to the user. However, the presence of this acceleration phase gives the user the ability to accomplish surprisingly small motions under manual control. If you want to manually move the tool a very short distance, press and release the appropriate ARROW KEY very quickly. A very brief motor motion will result, and it will occur at very low speed because not enough time has elapsed to complete the acceleration phase. Results will vary depending on your acceleration and maximum speed settings, but for a typical setup motions of or less are not difficult to achieve. USING GO AND CUT GO moves the tool the specified distance and direction, at the Slew Speed. CUT moves the tool the specified distance and direction at the currently set Cut Speed. For example, to GO 1 inch to the right, press GO, 1 and then use the ARROW KEYS to determine direction. Press ENTER to start the move. Both GO and CUT remember the last distance and direction set. To repeat a GO or CUT move, just press the appropriate key (GO or CUT) twice. 19
22 Measurements and Distances The AutoTurn keeps track of distances by remembering how many step pulses have been sent to the motor drives. During the configuration wizard you provide enough information for the AutoTurn to calculate an exact distance that the carriage or tool will travel for each step pulse that it outputs. The AutoTurn uses this information to calculate the current Z and X position of the tool, and it displays this calculated position at the bottom of the display screen. Remember that the AutoTurn displays the calculated position, but this may not be the actual position. See Mechanical Considerations for more information. METRIC AND IMPERIAL MODES The AutoTurn is equally comfortable with metric and imperial measurements. Changing the measurement mode will not affect anything except data entry and display: stored values will be converted as required. To set metric or imperial modes, press MENU, OPTIONS and then select the appropriate mode. USING RELATIVE AND ABSOLUTE MEASUREMENTS Distance dimensions can be entered in either relative or absolute values. A relative dimension is measured relative to the current position of the tool. An absolute dimension is measured from the last position at which the axis was zeroed. To select between absolute and relative input, press the Absolute/Relative key in the upper left hand corner of the keyboard just before you enter the value. For example, suppose you zeroed the Z axis while the tool was in contact with the end of the part, then moved the tool to the right to clear the part, then initiated a TURN command. When you are prompted to enter the cut distance, you can simply enter 1 to Turn for a distance of 1 inch from the start position, or you can press ABSOLUTE, 1 to specify a cut that extends 1 from the end of the part. If you use absolute measurements in the X Axis, remember that they are radial measurements and the diameter change will be twice as large. ZEROING AN AXIS If you wish to use absolute measurements, it is necessary to first zero the axis you will be working with. Zeroing the axis will not affect any stored values or measurements. To zero an axis readout, press ZERO, ENTER. A four way arrow will appear on the screen. Press ENTER at this point to zero both axes. Press an ARROW KEY to select only one axis (the display will change to indicate the axis selected), then press ENTER to zero it. AXES AND DIRECTIONS The AutoTurn is a two axis system; it controls movement in two directions. The axes are labled according to CNC and G-code conventions. The Z axis is oriented along the ways of the lathe (the long dimension), and the X Axis is oriented across the ways. The plus and minus directions for these axes 20
23 are also conventional. The ARROW KEYS at the bottom of the keyboard are labeled with the corresponding axis names and directions. USING END You can store a location for future use by pressing END, ENTER. The AutoTurn stores only one END location, so using this function will replace any previously stored location with the current location. The END location is used for two purposes: Use END to set a Cut Distance: You can use an END location to specify the cut distance for an automatic cycle (Turn, Thread, Part). Before you start setting up the function, while you are still in Manual Mode, use the ARROW KEYS to move the tool to the location where you want the cut to end, then press END, ENTER. The current location is stored in memory. Move the tool to your intended start position. Now select the automatic function that you want to use (for example, press TURN, ENTER). The AutoTurn will prompt you Use the END location for distance? Use the left or right ARROW KEY to select YES, and then press enter. You will see that the distance parameter has been set to the calculated distance between the current start position and the stored END location. Use END to set TAPER safety point: The Taper function requires the user to establish the maximum safe working area. Move the tool as far towards the headstock as you can safely go, then press END, ENTER to store this location. When you set up the Taper function, the AutoTurn will prompt you Use the stored END point? Use the left or right ARROW KEY to select YES, and then press ENTER and proceed with the setup. 21
24 Automatic Functions The AutoTurn has a variety of automatic functions. The more commonly used functions are available from the keypad by pressing the function key and then ENTER (i.e. THREAD, ENTER). Other functions are available in the menu; press MENU, ENTER. Note: To return to Manual Mode from any of the automatic functions, press the X AXIS/Z AXIS key in the center of the top row of keys. The following Automatic Functions are available from the keyboard: Turn Outside Inside (boring) Taper Outside Inside Preprogrammed Morse Preprogrammed Jacobs Chamfer Custom Angle Thread Inside Outside Left hand Right hand Multipass (Acme function) Multistart Face Reset Function The following functions are available from the Menu: Tapered Thread Inside Outside Left Hand Right Hand Balls and Fillets Convex only 22
25 NAVIGATING THE FUNCTION PARAMETERS When an automatic function is activated, the AutoTurn displays the setup screen for that function. To edit the setup while using the function, return to the setup screen by pressing the decimal point key while the tool is stationary at the start position between cuts. Some setup parameters are multiple choice. Notice the solid arrowheads ( ) bracketing the Type parameter. The arrowheads indicate that the left and right ARROW KEYS may be used to select among the available choices. For the thread Type parameter, the left and right ARROW KEYS will allow the user to choose Outer RH, Outer LH, Inner RH, and Inner LH thread types. Once the thread Type has been chosen, use the DOWN ARROW or ENTER key to move to the next parameter. Use the number keys to complete numerical parameters. Use the UP ARROW key to go back to the previous parameter. Outer RH Thread (in.) Recall None Type Outer RH TPI 0 Distance Retraction Advance Angle Double Pass No Multi Pass % N/A Multi Start # Advance When all parameters have been completed, the word Done will be highlighted onscreen. Pressing the ENTER key at this point will exit the setup screen and start the function, usually with a prompt to Move tool to HOME, ENTER to cut. This indicates that the user should navigate the tool to the desired start position (if it is not already there) and press the ENTER key to initiate automatic tool movement. To select a multiple choice parameter, use or To move to the next parameter, use or To move to a previous parameter, use Done Save As <None> To complete setup and exit the setup screen, use O RPM Z: X: in 23
26 COMMON PARAMETERS There are some setup parameters that are common to all automatic functions. They are defined below. Some functions also have parameters that are unique to that function, such as threads per inch for Threading, or taper angle for Tapering. These function specific parameters are discussed under the appropriate function heading later in this manual. Recall Distance Retraction Advance Feed Save As recalls a complete set of previously saved function parameters. When the function setup screen first opens, the cursor is always in the Type parameter. Access Recall by using the UP ARROW KEY to place the cursor in that line, then use RIGHT ARROW or LEFT ARROW to select from the stored parameter sets. sets the cut distance. A 1 cut distance will cause the tool to stop cutting 1 from the start position. Automatic retraction and return motions will then return the tool to the start position. Most functions default to a Z direction (towards the headstock) for this parameter. In some instances this direction can be changed using the +/- key. See also Using Relative and Absolute Measurements. establishes the distance that the tool will retract at the end of an automatic cutting pass. The purpose of this retraction is to ensure that the tool is not in contact with the workpiece during the high speed return-to-start move. In most cases, the retraction distance can be set to be a few thousandths larger than the backlash. For threading, a much larger retraction is required so that the tool tip, which ends the cut at the root of the thread, clears the thread crest during the return-to-start move. When threading, add the backlash to the maximum thread depth and set a retraction slightly larger than this figure. controls the distance that the tool will advance for each cut. In turning mode, the tool advances along the X axis. In tapering mode, the tool advances at an angle perpendicular to the taper surface. In threading, the tool advances at an angle specified by the user. controls the feed rate (cut speed) during the cutting segment of the function lets the user save any cut setup. The first saved cut will be A, the second B and so on. Each function has its own list of saved cuts, and each list starts with A. THE RESET FUNCTION The RESET function is accessed by pressing the 7 key. When used in conjunction with any of the Automatic functions, this function allows the user to reset the tool position to the original start position and resets the cut counter to 0. This allows the user to repeat the same cut on another workpiece without manually setting up the start position. 24
27 EXAMPLE: Suppose you want to turn several parts to the same distance, using four cutting passes at a depth of inches. When you set up the first part, use a collet stop or measure the projection of the workpiece from the chuck. Now complete the first part. After the last pass, the tool will be at a position away from the original start position (four passes at each). Once the last pass is complete, use the ARROW KEYS to move the tool away from the part, so you can remove the workpiece and replace it with another one set to the same projection. Then press the 7 key and the tool will reset the cut pass counter and automatically return the part to the original start position. The display will read ENTER to advance and cut. Press ENTER to begin machining another identical part. 25

 4.")


28 Turning and Boring The Turn function is used for both turning and boring. The start positions for both functions are shown below. The Turning and Boring toolpaths include the following moves: 1. Advance 2. Cut to Distance 3. Retraction (see Turning to a Shoulder) 4. Return to start point for next cut Note: The start position for the next cut is exactly at the cut diameter of the cut just completed. TURNING PARAMETERS Most of the parameters in the turning function are common to all automatic functions. These parameters are defined in the section Automatic Functions: Common Parameters and include Distance, Retraction, X Advance and Speed. 26
29 Z Advance The Z Advance parameter is used during turning and boring to enable a tool advance during each cutting cycle, in the direction of the Z Axis. Functionally, this means that the Distance parameter is increased by the amount of the Z Advance for each cutting cycle. See Cutting to a Shoulder below. SETTING UP TURNING AND BORING For either turning or boring, the setup is the same. Locate the tip of the tool at the diameter of the part, set a small distance away from the end of the workpiece. Press TURN, ENTER to bring up the parameter window, and fill in the Distance of the cut, the Advance (cut depth), and the Retraction. If you are boring, take care that the retraction distance does not cause the tool to contact the inside of the bore. Press ENTER repeatedly until the cutting cycle begins. As usual, pressing the decimal key between cuts will bring up the parameter window, and pressing AUTO will cycle through the available automatic modes (non-auto, auto return to start position, and fully automatic unattended operation). See Speed Control for ways to fine tune the cutting speed during the cut. CUTTING TO A SHOULDER For normal turning and boring operations, the Z Advance is set to zero. When it is necessary to clean up the shoulder of the cut, the Z Advance can be set to a shallow finish cut for the last few finishing passes. Setting a non-zero Z Advance has three effects: 1) In addition to the normal X Axis advance and cut, the tool advances as specified in the Z Axis direction and the shoulder is cut during the retraction move. 2) The speed of the retraction move is changed from slew speed to cut speed, so that a good finish is obtained. 3) The retraction distance is increased to bring the tool all the way out to the original start position, thus causing the entire shoulder to be cut. For normal turning and boring, the retraction distance is set to a value sufficient to clear the work during the return to the start position. This value is typically slightly larger than the backlash in the X Axis direction. This results in minimum wasted motion and the most efficient cutting cycle. Setting an Z Advance parameter will increase the time required to complete each turning cycle, so it is preferable to leave this parameter set to zero until the last few finishing passes. 27

30 Facing The Facing function operates identically to the Turning function, except that the cut segment of the cycle is oriented along the X Axis instead of the Z Axis. This is the only AutoTurn function where the tool advance is normally in the Z direction instead of the X direction. In essence, the Facing cycle is a Turning cycle rotated 90 degrees. FACING PARAMETERS Most of the parameters in the facing function are common to all automatic functions. These parameters are defined in the section Automatic Functions: Common Parameters and include Distance, Retraction and Speed. Z Advance X Advance This is the normal advance parameter for facing. The X Advance parameter is used during facing to enable a tool advance during each cutting cycle, in the direction of the X Axis. Functionally, this means that the Distance parameter is increased by the amount of the X Advance for each cutting cycle. See Cutting to a Shoulder below. SETTING UP FACING To set up a Facing function, locate the tip of the tool close to the diameter of the part, set a small distance away from the end of the workpiece. Press FACE, ENTER to bring up the parameter window, and fill in the distance of the cut, the Advance (cut depth), and the Retraction. Press ENTER repeatedly until the cutting cycle begins. As usual, pressing the decimal key between cuts will bring up the parameter window, and pressing AUTO will cycle through the available automatic 28
31 modes (non-auto, auto return to start position, and fully automatic unattended operation). See Speed Control for ways to fine tune the cutting speed during the cut. CUTTING TO A SHOULDER For normal facing, the X Advance is set to zero. When it is necessary to clean up the shoulder of the cut, which in this case would mean the surface of a stub shaft or spigot on the end of the part, the X Advance can be set to a shallow finish cut for the last few facing passes. Setting a non-zero X Advance has three effects: 1) In addition to the normal Z Axis advance and cut, the tool advances as specified in the Z Axis direction and the shoulder is cut during the retraction move. 2) The speed of the retraction move is changed from slew speed to cut speed, so that a good finish is obtained. 3) The retraction distance is increased to bring the tool all the way out to the original start position, thus causing the entire shoulder to be cut. For normal facing, the retraction distance is set to a value sufficient to clear the work during the return to the start position. This value is typically slightly larger than the backlash in the Z Axis direction. This results in minimum wasted motion and the most efficient cutting cycle. Setting an X Advance parameter while Facing will increase the time required to complete each facing cycle, so it is preferable to leave this parameter set to zero until the last few finishing passes. PARTING OFF The Facing function can be used for parting off. Set a slow feed rate (Speed) in the parameters window. Alternatively, you can use the UP ARROW KEY to advance the parting tool at a very steady rate. From Manual mode, enter a two digit percentage for the desired cut speed (start at a very conservative rate) and then press the UP ARROW KEY to advance the tool into the workpiece. Pausing occasionally will give the chips a chance to clear. Using either method, the AutoTurn controls the rate of tool movement much more accurately than any manual operation of the handwheels could ever accomplish, and thus significantly reduces or even eliminates tool snags during the cut. 29


. Left hand threads are cut from left to right.")
32 Cutting Threads The AutoTurn cuts metric or imperial threads by synchronizing the motion of the spindle and the cutter such that the tool moves exactly one pitch distance during each revolution of the workpiece. The start position and cycle diagram for an Internal Left Hand thread is shown below. The start position for an External Right Hand thread is shown below. The tool is properly positioned for threading when the tip is at the part diameter, and the tip is 3 or more thread pitches away from the start of the workpiece. The threading cycle is as follows: 1. Advance the tool 2. Cut for the specified distance at synchronous speed (updated every spindle revolution). Left hand threads are cut from left to right. Right hand threads are cut from right to left. 3. Retract 4. Return to start position for next cut Note: The start position for the next cut is at the root depth for the cut just completed. 30
33 THREADING PARAMETERS Some of the parameters in the threading function are common to all automatic functions. These parameters are defined in the section Automatic Functions: Common Paramaters. Parameters unique to threading are defined below. Type TPI Advance Angle Retraction gives the user the choice of Outer Left Hand, Outer Right Hand, Inner Right Hand and Inner Left Hand threads. lets the user set the threads per inch. determines the angle at which the tool will advance. A 0 degree angle results in a radial infeed. A 30 degree angle results in a full flank infeed. An angle between 27 and 29 degrees results in a modified flank angle infeed and often gives the best results. The Thread mode includes an automatic retraction setting which will always retract the tool to the start location in the X Axis. When Auto Retraction is selected, the tool will always clear the threads when returning to the start position, no matter the thread depth. For this to work properly, the Backlash value in Options must be set to a value at least higher than the actual backlash on the X Axis. If a Custom retraction is selected, a fixed retraction value can then be entered. 31
34 DoublePass in DoublePass threading, each cutting pass is split into two passes, thus reducing the characteristically high machining forces and spindle loads associated with cutting an Acme thread form. The first pass cuts the flank only, but not to full depth. The second pass cuts the root and completes the flank cut. The MultiPass % parameter determines how much of the flank cut is completed in the first pass. The remainder of the flank cut will be completed in the second pass. Multistart lets the user cut a multistart thread. Enter the number of thread starts desired. ORGANIZATION OF THE THREADING MENU The threading function on the AutoTurn is very versatile, and therefore there are many different optional parameters available. However, most of the time the user will want to work with the more basic parameters such as Inner or Outer, Left hand or Right hand, Distance and Tool Advance. To keep the more advanced functions out of the way during conventional threading operations, they have been placed below the Done line. When cutting conventional threads, the user will set the basic parameters and will then select Done, ENTER to exit the menu. When more advanced threading functions are desired, the user can use the Arrow keys to scroll past the Done line and access advanced setup features. Pressing STOP at any time will exit the menu, or repeatedly pressing ENTER will scroll through the available options and then exit back to the Threading start screen. 32
. Right hand threads are cut from right to left, whether they are inside threads or outside threads.")
35 START POSITION FOR THREADING The AutoTurn can cut both left hand and right hand threads without changing the spindle rotation, and without the use of special upside-down tools such as inside left hand threading tools (Tapered Threads are an exception). Right hand threads are cut from right to left, whether they are inside threads or outside threads. Left hand threads are cut from left to right, whether inside or outside threads. For any right hand thread, whether inside or outside, the start position is three to four pitch distances to the right of the surface to be threaded, with the tool tip at the part diameter (inside or outside diameter, as required). For any left hand thread, the start position is three to four pitch distances to the left of the surface to be threaded, with the tool tip at the part diameter (inside or outside diameter, as required). TERMINAL GROOVES FOR THREADING The AutoTurn will stop the tool in the same location after each cut pass. This eliminates the need for a terminal groove or runout groove for right hand threaded parts. For left hand threading, because the AutoTurn requires a start position several pitch distances to the left of the surface to be threaded, a groove is required as shown below. 33
36 EXAMPLE: RIGHT HAND THREAD, OUTSIDE, 32 TPI 1. Turn the workpiece to finished diameter, center drill and chamfer the end and set the center in place. A modified dead center works well for small diameter threads grind away most of the center on one side to allow tool clearance. 2. Set the spindle speed to a maximum of 300 RPM for 32 TPI. Adjust speed proportionally for different thread counts. Faster speeds can be attempted and may be successful, but this depends on the depth of cut, material being cut, horsepower of the spindle motor, the power of the leadscrew stepper motor, the pitch of the leadscrew and the nature of the power transmission system in the lathe (belts require slower speeds, since they may slip during threading and cause a loss of synchronization between the leadscrew and the spindle). So start slow and shallow, and try faster speeds and deeper cuts on trial pieces before risking a part. 3. Using the handwheels or the ARROW KEYS, position the tip of the threading tool precisely at the part surface. One way to do this is to start the lathe, then infeed the tool until a very slight scratch appears. 4. Zero the X Axis and then retract the threading tool away from the surface using the ARROW KEYS. It is important that you not move the tool with the handwheels once the X Axis has been zeroed. To zero the X Axis, press ZERO, ENTER, UP or DOWN ARROW KEY, ENTER. 5. Move the tool to the start position using the ARROW KEYS. First, using the ARROW KEYS, move the retracted tool to a position three to four thread pitches to the right of the end of the part. This lead in is necessary to allow the AutoTurn time to synchronize the leadscrew TO THE SPINDLE before the tool engages the workpiece. Now infeed the tool using the ARROW KEYS until the X Axis display at the bottom of the screen reads (or press GO, ABS, O, UP ARROW, ENTER). This positions the tool at the workpiece diameter (if the previous step has been properly executed). The proper start position looks like this: 3 to 4 times the pitch distance 6. Press THREAD, ENTER and then enter the desired parameters. Example: for a 32 tpi thread extending to the left of the start position, these are the parameters: Recall Type TPI 32 none Outer RH 34
37 Distance Retraction Advance Angle DoublePass DoublePass % MultiStart # 1 Advance.375 This parameter entry field defaults to relative measurement from the current tool position, and to negative direction in the Z axis for direction (towards the headstock)..070 This is the distance that the tool will retract at the end of the cut, before returning to the start position. IMPORTANT: the retract parameter must be greater than the thread depth plus any backlash in your X Axis leadscrew and nut. This is important to ensure that the tool clears the part during the return motion to the start position. 29 This prevents the tool from cutting on the trailing flank of the thread, and results in a cleaner cut. No n/a This sets the automatic tool advance to for each cutting pass. As a general rule, especially on smaller lathes (Sherline, Taig, some minilathes) first pass threading cuts deeper than should be avoided. For later passes, depths of to are required for smaller lathes or smaller stepper motors. While this may seem inconvenient, it is very easy to change the tool advance during threading, and because all the motions are automated, thread cutting passes can be accomplished very quickly. Note: it is a good practice to set the cut advance to zero for the first pass, so that all motions can be verified before cutting metal. 7. While DONE is highlighted, press ENTER to complete parameter setup. The display prompts Move lathe to home,enter to cut. Make any necessary adjustments to the start position in both the X and Z axis, turn on the spindle, and press ENTER to begin cutting the first pass 8. At the end of the first pass, the tool will pause. Press ENTER to retract the tool and return to the Start position. 9. Press ENTER to cut another pass Whenever the tool is at the Start position, a number of useful adjustments can be made: AUTO will cause the tool to automatically retract and return to the home position when the cutting pass is complete. This is normally engaged after the first cut is complete, when the user has verified that the tool motions are as expected. AUTO,AUTO will enable automatic retract and return, and will also allow you to set a number of cuts to be made at these parameters. Use with great care when threading unless you have a powerful lathe and Z drive, it is likely that you will want to frequently change (reduce) the cut depth between successive passes, and there's no way to do this if you have Auto, Auto set. Pressing the decimal point key brings up parameter setup with the cursor in the Advance parameter. The left and right ARROW KEYS can be used to change the cut depth by per 35
38 key press. Alternately, you can simply key in a new depth of cut. Use the UP and DOWN ARROW KEYS to access other parameters as necessary. Press ENTER repeatedly to cycle through the rest of the parameters, exit the setup menu and start another cut. Use the SLEW and ARROW KEYS to quickly move the tool away from the workpiece to allow you to use a caliper, micrometer or thread micrometer to check the progress of the cut (obviously you will want to get the tailstock out of the way first). When your measurements are complete, press ENTER to automatically return the tool to the start position. Replace the tailstock, and press ENTER to start another threading pass. WARNING: DON T TOUCH THE HANDWHEELS WHEN IN THREADING MODE The AutoTurn is an open loop motion control system: it has no way to know where it is, except by counting the pulses it has sent to the motor. It assumes that each pulse results in one step worth of rotation of the leadscrew. Anything that disrupts this 1 to 1 relationship will cause the AutoTurn to operate on inaccurate location information, with potentially damaging and dangerous results. For instance, if you turn the handwheel after threading has begun, your next threading pass will be out of position by whatever distance you moved the handwheel, possibly ruining the thread. If there is a tool jam, and the leadscrew stalls, the AutoTurn will not know that the leadscrew stalled, and it will assume that it continued to rotate, so it will no longer have accurate position information. Rule of thumb: after threading begins, all motions must be accomplished with the AutoTurn keys, and all motions must be properly completed. Note:To enter a more precise end point for the thread, before you enter thread mode, move the tool to the exact endpoint of the thread you want (you may use ZERO and ABSOLUTE in manual mode to establish a precise location), and press END, ENTER to mark the end of the cut. Next time you enter threading mode, you will be prompted to use the END location to set the distance. Press ENTER to accept the marked location. If you enter numerals at this point, it will default to a relative location again. Tips and Tricks for Threading For right hand threads, the tool will cut from right to left. For left hand threads, the Start position and the Distance or END Position must be set such that the tool cuts from left to right. During threading, the Z Axis drive must accelerate the tool rapidly and maintain a constant speed such that the tool moves exactly one pitch distance per revolution of the spindle. The instantaneous accelerations required to maintain this correlation can put large demands on the stepper motor and drive. Since cutting forces can cause the spindle to slow, it is advisable to keep the Advance low, especially as the thread depth (and so length of the cut) increases. For thread cutting, it is best to start with a low spindle RPM and low Advance, and increase these setting only as you gain experience with the capabilities of your lathe and stepper drives. Large diameter threads or low Threads per inch will significantly increase the demands on your system. Large diameter threads significantly increase the effect of cutting forces on spindle 36
39 RPM, and a low TPI significantly increases the strain of the stepper drive. Approach these conditions with care. Run a zero depth cutting pass as the first cut to confirm that the stepper drives can keep up with the spindle speed. As you approach your final thread depth, it is advisable to run several passes with the advance set to zero. Then move the carriage away from the workpiece with the ARROW KEYS and use a thread mike or mating part to check the thread depth. ENTER will return the tool to the start position. 37
 3. Cut at specified angle 4.")
40 Cutting Tapers The AutoTurn tapering routines can produce a wide variety of tapers and chamfers, including custom angle, Morse and Jacobs tapers. The tapering toolpath includes the following moves: 1. Retraction 2. Slew to beginning of cut (includes a backlash compensation move) 3. Cut at specified angle 4. Return to start point Note: the start point for the next cut is the same location as the original start point for the Taper function. It does not advance as the function progresses, as do the start points for Turning, Facing and Threading. TAPERING PARAMETERS Some of the parameters in the tapering function are common to all automatic functions. These parameters are defined in the section Automatic Functions: Common Parameters and include Retraction, Advance and Feed. Parameters unique to tapering are defined below. Type Taper Type Angle allows the user to choose either an inside or an outside taper allows the user to select Morse, Jacobs, Chamfer or Custom Angle tapers determines the angle between the centerline of the part and the conical surface of the taper. Available choices in this field will change depending on the selection of Taper Type. 38

41 Morse: choices are Morse 1, 2, 3, 4, 5, 6 and 7 Jacobs: choices are Jacobs 0,1,2,3,4,5,6 and 33 Chamfer: choices include any angle between 20 and 60 degrees. Angles are entered in decimal form. A safety end point is not required for chamfers. Custom Angle: any angle greater than 0 and less than 90 degrees. Angles are entered in decimal form SETTING THE SAFETY END POINT The illustration above demonstrates that the tool will move inches closer to the headstock for each cut of depth on a 5 degree taper angle. When the taper angle is small, the tool must move a large distance towards the headstock to initiate each cutting pass. This move occurs at high speed, so there is the potential for an unexpected tool crash. To prevent such a mishap, the AutoTurn tapering routine requires the user to specify the maximum safe excursion towards the headstock before starting the tapering routine. Before each cut, the AutoTurn compares the planned excursion for the next cut to the stored maximum excursion, and brings up an error message ( END too close ) if the next cut will exceed the maximum allowable excursion. 39

42 The maximum allowable excursion is specified using the END function. With the tool mounted to the toolpost and the workpiece mounted, move the carriage as far to towards the headstock as it can safely go without contact between moving parts. Press END, ENTER to mark this location. Now use the ARROW KEYS to move the tool to the start position. You may specify the END point either before start the tapering routine or after. If you have an END point stored in memory when you start the tapering routine, you will be asked to confirm that the stored end point is intended to be used as the safety end point for tapering. Select YES and press ENTER to continue. If you start the tapering routine without a safety end point in place, you will be prompted to set the end point before you can complete the tapering setup. EXAMPLE: OUTSIDE TAPER, MORSE #2 Center drill the workpiece and set the tailstock center in place. You should set up the workpiece to have about an inch of exposed workpiece to the left of where the taper will end. Using the ARROW KEYS, move the carriage as far to the left as you can safely go without having the tool or carriage interfere with the chuck or headstock. Press END, ENTER to memorize the tool position at this point. Using the ARROW KEYS, position the tool slightly to the right of the end of the part, with the tool tip located at the part diameter. Enter Tapering Mode (TAPER, ENTER) and accept the End Point set in step 2 (this is a safety feature that prevents the tool from unexpectedly encountering the chuck). Then set up the desired tapering parameters. Recall Type Taper Type None Outside Morse Angle Morse 2 Retraction should be set to a value greater than the backlash in the X axis, so that the tool always clears the part during high speed moves. 40
43 Advance Feed sets the tool advance (depth of cut) for each cutting pass. You may wish to start with a value of and verify tool motions before changing to a deeper cut. Note: the tool advance is measured perpendicular to the cut surface, not perpendicular to the centerline, so a advance will always produce a depth of cut regardless of taper angle. sets the cut speed. 10% is a conservative starting point. With the DONE field highlighted, press ENTER to exit the setup screen After you exit the setup screen, the display prompts Move lathe to home, Enter to cut. This means that you can make final adjustments to the start position in both the X and Z axis using the ARROW KEYS. Once you have the tool at the start position, press ENTER to begin cutting the first pass. Since we always set the start position to be clear of the workpiece, the first cut may not contact the workpiece, especially with a shallow tool advance. You will see and hear the steppers drive the tool along a very small triangular toolpath. Press ENTER each time it stops, and soon it will begin cutting the taper into the workpiece. At the end of each pass, the tool will pause. Press to cut another pass, and repeat until the taper dimensions are correct. If you press AUTO twice, you will be able to set a number of passes for the AutoTurn to complete without further user input. Tapering Tips and Tricks Whenever the tool is at the Start position, a number of useful adjustments can be made: AUTO, AUTO will allow you to set a number of cuts to be made automatically at these parameters. If you enter 5, the AutoTurn will complete 5 cutting passes before it stops again. Pressing the decimal point key activates the parameter setup box. LEFT and RIGHT ARROW KEYS change the cut depth by per key press. To reduce the cut depth by for the next pass, press the LEFT ARROW KEY twice. Alternately, you can simply key in a new depth of cut. Once you have the depth of cut where you want it, press ENTER repeatedly to cycle through the rest of the parameters, exit the setup menu and start another cut. You can also change the other parameters in the same way: enter the setup screen by pressing the decimal point key, then use the ARROW KEYS to scroll up and down the parameter list. Use the CUT/SLEW and ARROW KEYS to quickly move the tool away from the workpiece after a cut. This allows you to use a caliper or micrometer to check the progress of the cut (you may want to get the tailstock out of the way first). When your measurements are complete, press ENTER to automatically return the tool to the start position. Replace the tailstock, and press ENTER to start another cutting pass. The speed of the cut can be fine-tuned while you are cutting. Press the UP and DOWN ARROW KEYS during the cut to adjust the speed by 1%. Press the ARROW KEY repeatedly for larger feed rate changes, or press a digit key to change to the corresponding percentage ( 1 =10%, 2 =20%, 0 = 100%) If you press STOP during a cut, the tool will retract and then the motors will stop. Press ENTER to return to the start position, and ENTER again to start the next cut. The tool will advance 41
44 normally. Since the last cut was not completed, some portion of the cut will be at double the planned depth of cut. You can accept this, or adjust the tool advance to 0 for the cut following a STOP. When you are cutting very shallow tapers, like Morse tapers, each cut will start quite a distance to the left of the start position for the preceding cut. To prevent the carriage from traveling too far to the left and contacting the headstock or chuck, we require that a safe end position be established prior to starting a tapering routine. If you try to start a taper cut without a safety position established, you will be prompted to set one. Use the ARROW KEYS to move the tool as far left as it is safe to go, and then press END, ENTER. Then use the ARROW KEYS or a GO command to move the tool to the start position. If your next cut will cause the carriage to move past your safety position, you will see a message on the screen End too far and the cut will not initiate. You can reduce the tool advance, which will reduce the required excursion towards the headstock and may let you cut another pass or two. You can also reduce the automatic tool advance to zero, which will cause the AutoTurn to repeat the last safe cut, and then use the cross slide handwheel to advance the tool manually between cuts. Either way, proceed with caution, as you are now cutting close to the chuck. If you are cutting a short chamfer on the inside or outside of the workpiece and are confident that you will not be working in dangerous proximity to the chuck or headstock, you can skip the setting of the safety endpoint. Select the Chamfer option during setup, and you will not be prompted for the safety end point. The END function is also used to memorize positions for other reasons, such as the end of a turned section or bore. If an END position has been previously set for any reason, then when you enter TAPER mode the AutoTurn will ask you whether to used the existing end point as the safety point for this taper cut. Select YES if you are certain that it is a safe location for the current tooling and cut. Select NO and set a new End point if you have any doubts. To cut a custom taper, you will need to select Custom Angle from the available options, then enter the angle that you want to cut. The angle is entered in decimal degrees. Please note that the angle you want is the angle between the centerline of the workpiece and the surface of the cut. If you want to make a workpiece with a 60 degree included cone angle, you will enter 30 degrees. The cutting forces are properly balanced when the taper angle is less than 45 degrees. This encompasses all the self locking tapers and most chamfers. In the rare event that you need to use a taper angle greater than 45 degrees, some precautions are in order if you are not using zero backlash screws and nuts: Tighten the gib screws on the cross slide and set a carriage lock so that the carriage and cross slide are hard to move, but not so tight that the motors cannot move them (be SURE to test slew speed after tightening the gib screws, and be SURE to reset them after completing the cut). Stepper motors lose torque at high speed, so plan to cut slowly. Reduce cut depth by taking shallow cuts. Use a good lubricant. Use a sharp tool. The reason for these precautions is that in these high angle taper geometries, the cutting forces are resisted by the friction of the slides, and not by the leadscrew. If there are high cutting forces and low friction, and some backlash in the leadscrew or nut, then the tool 42
45 can move in unexpected ways. So reduce cutting forces and increase friction, and eliminate backlash as much as possible. Proceed with caution, and stop if the tool position appears to be unstable or poorly controlled at any point during the cut. 43


46 Cutting Balls and Fillets Balls and fillets are cut using the AutoTurn s Circular Approximation function. This function is an advanced compound function that combines the rectangular cycle of the Turn function with an algorithm that shortens the cut distance of each cycle, such that the end of the cut always falls precisely on the surface of the specified spherical section. Because the tool follows a rectangular tool path and does not actually follow a circular path, the result is a series of small ridges which can be readily polished off to produce a spherical approximation. The resulting surface is not a perfect sphere. However, the AutoTurn has several useful futures to improve the fidelity of the final surface and optimize the number of cuts required to produce it. See for a video of this function in action. Note: because the final surface is produced by polishing, it is not necessary to use slow speeds to produce a fine finish. In order to use this function safely it is important that the user be competent in the use of the END function, the TURN function and the AUTO function. Practice these functions until you are comfortable with them before attempting a Circular Approximation. 44
47 CIRCULAR APPROXIMATION PARAMETERS Some of the parameters in the Circular Approximation function are common to all automatic functions. These parameters are defined in the section Automatic Functions: Common Parameters and include Distance, Retraction, Advance and Feed. Parameters that are unique to balls and fillets are described below: Type Radius Variance Max Advance Tool Radius Selects between Concave and Convex surfaces. A Convex surface produces an outside fillet or ball, a Concave cut produces an inside fillet, or socket. Determines the radius of the cut surface. A 1 ball has a ½ radius. This parameter determines the allowable variance from a perfect spherical surface. A small variance will require more passes to cut, a larger variance requires fewer passes. The AutoTurn will calculate the advance of each pass, based on the Variance, the Tool. Tip Radius, and the intended surface Radius, so that the small ridge between each cut pass will be no higher than the Variance set in this parameter. For example, if you set a Variance, no surface ridge will exceed in height. Put another way, this is the maximum material that will have to be polished off to produce a uniform surface. As the AutoTurn works it s way around the spherical surface, the cut depth changes in order to keep the Variance the same. Sometimes this can result in a depth of cut that would be too deep for the tool, material or spindle horsepower. Set the Max Advance to limit the tool advance to a depth that your lathe and tools can handle for the material you are cutting. Whenever the Max Advance limits a cut, the result is a smaller variance from ideal surface, so the Variance parameter wil always be the maximum deviation from the ideal surface. The AutoTurn compensates for tool tip radius when it calculates each advance. A large tip radius will produce a smoother surface and significantly reduce the number of passes required to produce the surface. Use the largest tool that you can consistent with your spindle horsepower, material and tooling. SETTING UP CIRCULAR APPROXIMATIONS The setup for circular approximations is slightly more complicated than that for a Turn function. For ball handles and cosmetic work, the simplest way to establish the location is to mark the equator and then use the END function to establish the DISTANCE parameter. NOTE: the initial Distance parameter is the distance to the equator of the sphere (or the tangent point of the outside fillet). The first cut will not extend to this Distance, because after the tool advances for the first cut, the endpoint is recalculated and moves to the right to follow the circle. See diagram below. 45

48 The first step in the setup is to chuck up the workpiece and turn it to remove any eccentricity or out of roundness. After this is complete, use a sharp pointed tool and make a very shallow scratch right at the intended equator or tangent point. To set up the circular approximation start position and parameters, follow the procedure below. 1. Set up a right-hand turning tool, move it in until it just contacts the diameter of the workpiece, and ZERO the X Axis. The illustration above assumes a very small tool tip radius. 2. Using the ARROW KEYS, retract the tool and move it to the left until the sharp tip is just at the equator. Press END, ENTER to mark this location. 3. Move the tool to the right with the ARROW KEYS until it has reached the intended start position to the right of the end of the workpiece. 4. Use the ARROW KEYS or a GO command to move the tool to the zero point on the X Axis. 5. Press MENU, ENTER, select Circular Approximations, ENTER to bring up the setup screen. 6. Enter the required parameters and press ENTER repeatedly until the cutting cycle begins. TIPS AND TRICKS FOR CIRCULAR APPROXIMATIONS Pay careful attention to the sequence of operations in items 2 and 3 above. Approaching the end point (equator) from the left and the start point from the right in order to establish the Distance parameter ensures that Z axis backlash is compensated for in the setup, and the start and end points will be accurate. To create a fillet on a shoulder instead of a ball end, simply use a smaller Radius parameter Once the AutoTurn has completed the arc (cumulative Advance = Radius) any additional cuts will have the same Distance. 46

49 Cutting Tapered Threads The Tapered Thread function is an advanced compound function that combines the tapering function and the threading function to produce accurate threads along a preexisting tapered surface. In order to use this function safely it is important that the user be competent in the use of both the Thread function and the Taper function. Practice these functions until you are comfortable with them before attempting a tapered thread. The AutoTurn is capable of cutting threads on tapered surfaces, but the taper must be cut first. Start by cutting a taper (see Cutting Tapers) and recording the taper parameters Type, Taper Type and Angle. You will need to use identical parameters to set up Tapered Threading. TAPERED THREADING PARAMETERS Some of the parameters in the Tapered Thread function are common to all automatic functions. These parameters are defined in the section Automatic Functions: Common Parameters and include Retraction and Advance. Additional parameters required for Tapered Threading include: Type, Taper Type, Angle TPI These parameters are all defined in the Cutting Tapers section of this manual. When setting up Threaded Tapers, be sure to use the same taper parameters that you used to cut the taper. TPI stands for Threads per Inch SETUP, START POSITION AND TAPER LOCATION Setup for the Tapered Thread function is a little more complicated than for the other functions in the AutoTurn. The AutoTurn needs three locations in order to calculate start and end positions for a 47


50 toolpath that is parallel to the existing taper. These positions are established by moving the cutting tool to the appropriate locations and pressing ENTER. The AutoTurn will prompt for each position in turn. Note: Right hand threaded tapers cut from left to right, the opposite of standard threading. Because of this, for right hand threads it is necessary to reverse the spindle rotation and tooling (see illustration below). For inside right hand threads use a suitable LH Inside threading tool. To set up a right hand Threaded Taper, install a threading tool and align it to the tapered surface. Press MENU, select THREADED TAPER MODE and press ENTER to bring up the setup screen. Now select or input parameters that match those used to cut the existing taper. Also provide TPI (Threads per inch), retraction and advance. Select DONE and press ENTER to leave the setup screen. The AutoTurn will now prompt for you to locate and mark the four positions in the diagram below. For a right hand threaded taper, use the ARROW KEYS to move the carriage well to the left of the taper, then reverse direction and approach each location from the left, entering 1,2,3 and 4 in turn. Position 1 Locate start position on left, ENTER to mark Use the ARROW KEYS to move the tool to a position 3-4 pitch distances from the beginning of the taper. Press ENTER. This locates the Start Position along the Z Axis. Only the Z Axis location is recorded: the X Axis position is calculated from the Taper Angle parameter and the taper surface location recorded in the next step. Position 2 Locate point on taper, ENTER to mark Use the ARROW KEYS to move the tool to a position somewhere along the tapered surface, with the tool tip in contact with (or very close to) the tapered surface. Press ENTER. This locates the position of the tapered surface in both the Z Axis and the X Axis. Position 3 Locate end position on right, ENTER to mark Use the ARROW KEYS to move the tool to a position off the end of the taper. Press ENTER. This locates the End Position along the Z Axis. Only the Z Axis location is recorded: the X Axis Position 4 Locate X Axis Safety (currently too close) Use the ARROW KEY to retract the tool well away from the tapered surface, and press ENTER. This establishes the maximum safe X Axis excursion. It is not critical on outside tapers, but on inside tapers it prevents the AutoTurn from calculating a start position that would cause the tool to contact the back side of the 48
51 tapered bore. Only the X Axis information is recorded. Once all the necessary setup points have been entered, the AutoTurn will prompt for permission to move the tool to the start position and begin the cut. ENTER to go home ENTER to cut Press ENTER and the AutoTurn will move the tool to the calculated start position. Press ENTER and the AutoTurn will begin cutting along the taper at a feed rate synchronized with the spindle speed. The AUTO function can be used to enable automatic multiple passes and the parameter menu can be accessed by pressing the decimal point key between passes. 49
52 Appendix 1: Configuring Maximum Speed and Acceleration INTRO TO OPEN LOOP CONTROLS All stepper motor control systems use a system architecture called open loop control. This means that the control system tells the motor how many steps to take, and in what direction, and expects that the motor will follow these instructions. There is no feedback loop to tell the controller whether the motor drive did so or not. This means that the AutoTurn does not actually know how fast the carriage is moving or where it has stopped it only knows how fast it was told it to go, and where it was told it to stop. This is a characteristic of stepper motors and stepper motor controllers, not a characteristic of the AutoTurn. All stepper systems have the same basic architecture, and all are open loop. For the user, this means that extra care must be taken to ensure that the motor is always able to move at the speed and direction commanded by the controller. STEP AND DIRECTION SIGNALS The AutoTurn controls the motors by sending out a stream of step pulses and a separate direction signal. The motors take one step for each pulse. A fast pulse stream produces rapid motor motion, and a slow pulse stream produces slow motor motion. The Direction signal determines the direction of motor shaft rotation. HOW TO SET UP THE AUTOTURN CONFIGURATION All Configuration variables can be found in the Advanced Setup area of the Main Menu. Press MENU, ENTER, scroll to Advanced Setup, press ENTER and then scroll to the variable you wish to set. Z Axis variables are presented first, X Axis variables are further down. SETTING THE SLEW SPEED AND ACCELERATION The slew speed and acceleration should be set to the maximum speed at which the stepper motor is consistently able to move the carriage without missing any steps. They are set independently for each axis. Both the slew speed and the acceleration are affected by many variables, including friction of the carriage over the ways, the mass of the moving parts, the pitch of the lead screw, the size of motor used and the power capacity of the power supply and driver. These factors may change over time, for instance on a new lathe, the ways will wear in and friction will be reduced. Lubrication may wear off and increase friction. Friction may also vary depending on where the carriage is along the ways friction is usually less near the headstock, because that is where most wear occurs. 50
53 To adjust the Slew Speed, press MENU, ENTER, scroll to Advanced Setup, press ENTER, and scroll down to the Z or X Units/min parameter (this is either inches per minute or mm per minute). Enter the slew speed you want, and press ENTER when done, then STOP to exit the menu. To adjust the Acceleration, press MENU, ENTER, scroll to Advanced Setup, press ENTER, and scroll down to the Z or X Accel parameter. Enter the acceleration you want for this axis, press ENTER when done, then press STOP to exit the menu. The acceleration parameter determines how long it will take to accelerate from a full stop up to maximum slew speed. It is measured in seconds. To achieve an acceleration time of 1/2 second, enter 0.5. Values may range from 0.01 to 5 seconds. To Adjust Acceleration Start Percentage, access the Advanced Setup area as for slew speed or acceleration, scroll down to the Z or X Start %, and enter a number between 1 and 50. This parameter sets the instantaneous speed change that the system can tolerate. Stepper motors have many resonance problems at low speed. You can sometimes avoid passing through the resonant speed bands by jumping past them and instantly accelerating up to the maximum speed that your system can instantly accelerate to. This parameter is where you set the speed that your system can jump to. Speed changes above this speed will use a linear acceleration algorithm. Speed changes below this speed will occur instantly. To avoid resonance, it may be desirable to accelerate instantly to a stepper motor speed above 100 rpm. We recommend that stepper systems be designed for a maximum motor speed of 500 rpm, so to achieve a jump speed of 100 rpm you would set this parameter to 20%. If you are using a servo system or you are not encountering stalling at the very beginning of your slew moves, you can safely ignore this setting. If you are stalling as soon as a slew move begins, consider experimenting with this setting. Try values of 10, 25 and 50 to see which works better for you. Because the slew speed and acceleration are affected by many variables, they tend to be set empirically through trial and error over time. LOSING STEPS WHEN USING SLEW SPEED If the controller calls for a speed or acceleration that the motor cannot accomplish, the system will lose steps. When the stepper motor is not able to keep up with the commanded speed or acceleration, the motor stalls (stops turning) and emits a memorable high pitched noise. This sometimes occurs at the very beginning of a high speed move such as a manual GO command or a high speed retraction and return to the start position during an automatic function such as turning. In this case, it may be related to either the maximum acceleration setting or the maximum velocity setting. To reduce the slew speed for the Z Axis, press MENU, ENTER, select ADVANCED SETUP, ENTER then use the DOWN ARROW KEY to scroll down to Z Units/min and enter a lower number than the current setting. This setting has a range of 20 to 149 inches per minute, or the equivalent millimeters per minute. A typical setting for a 51
54 triple stack 23 frame size stepper motor with a suitable 40 volt supply would be 40 IPM for a system with minimal friction. The maximum acceleration setting is adjusted in the same way. It is the setting below the slew speed setting and is labeled Z Accel. Enter the acceleration you want for this axis, press ENTER when done, then press STOP to exit the menu. The acceleration parameter determines how long it will take to accelerate from a full stop up to maximum slew speed. It is measured in seconds. To achieve an acceleration time of 1/2 second, enter 0.5. Values may range from 0.01 to 5 seconds. If you find that the stepper motor is stalling in the middle of a high speed run, the maximum speed is likely to be the setting that requires adjustment. If stalling occurs at the very beginning of the run, it could be either speed or acceleration, and you will have to experiment to determine the optimum settings for your lathe. If you continue to scroll down through the Advanced Settings options, you will find the speed and acceleration settings for the X axis. LOSING STEPS WHEN THREADING If you find that your stepper motor stalls during the retraction or return part of any automatic cycle, refer to Losing Steps When Using Slew Speed. If you find that the stepper motor is stalling during the threading pass, then there are two likely causes: chip load and spindle RPM. Stalling due to excessive chip load occurs when the cutting forces are too high for the stepper system to overcome. With a small stepper motor, you may need to reduce your advance (chip depth) to one thousandth of an inch per pass, sometimes even less, for the final cutting passes in threads ¼-20 size and larger in steel. While this may seem burdensome, it turns out that the fully automatic threading cycle of the AutoTurn usually produces finished threads in a fraction of the time required for manual single point threading, and with much less opportunity for error. Just set a shallow depth of cut, make sure the part is well lubricated with an appropriate cutting oil, and set the AutoTurn for full AUTO operation. Stalling during threading may also occur when the spindle RPM is set too high. The AutoTurn must coordinate the motion of the tool with the motion of the spindle so that the tool moves one pitch distance for each spindle revolution. If you are cutting a 10 TPI thread, for instance, the pitch distance is 1/10 th of an inch, or If the lathe spindle is turning at 300 RPM, then the tool must move at 30 IPM to maintain the proper thread pitch. This is likely to be near the maximum speed of the system, and at this speed the motor will be in the low-torque part of its performance curve. This is important because each time the sensor sends a pulse to the AutoTurn, the AutoTurn recalculates the synchronous speed and instantly changes the speed of the stepper motor to match. If the spindle maintains a very constant RPM, the accelerations required at the leadscrew are small. But if the spindle RPM varies (quite common on belt driven machines, or when cutting forces are high) then the acceleration necessary to synchronize the leadscrew with the spindle may be greater than the stepper motor drive can handle. This causes the motor to stall and lock up. To correct this, reduce the spindle 52
55 RPM. This will drop the leadscrew RPM accordingly, and so put the stepper motor into a higher-torque section of the performance curve where greater accelerations can be accommodated. Remember to also reduce the Advance parameter to keep the chip load and cutting forces low. SPEED SETTING AND DISPLAY The AutoTurn has two speed settings, Slew and Cut. The Slew speed is the maximum speed of the motor drive system. For more on setting and adjusting the Slew Speed, see Setting the Slew Speed. The AutoTurn displays the feed rate of the tool during a cut in units per minute. The units (inches or millimeters) are determined by the user during the configuration process and can be changed by pressing Menu, Enter. The same units are used for entering distances and displaying speed, so if you change the display units remember to enter your distances in the same units. The AutoTurn also displays the feed rate setting. The feed rate is set as a percentage of maximum speed. 2 Feed means the current feed rate is set at 2%, 45 Feed means that the speed is set to 45%. MECHANICAL CONSIDERATIONS The AutoTurn keeps track of distances by remembering how many step pulses have been sent to the motor drives. During the configuration wizard you provide enough information for the AutoTurn to calculate an exact distance that the carriage or tool will travel for each step pulse that it outputs. The AutoTurn uses this information to calculate the current Z and X position of the tool, and it displays this calculated position at the bottom of the display screen. It is very important to remember that the AutoTurn knows only how many steps it has output, and the corresponding distance. It knows the calculated position, but not the actual position. It has no way of knowing whether the tool or carriage actually moved that distance, indeed it does not know whether the motor or the tool moved at all. If you command a motion using the AutoTurn (a GO command, for example) but fail to engage the leadscrew with the half nuts, you will get leadscrew rotation but no tool movement. However, the AutoTurn will assume that motion occurred as commanded, and will change the calculated Z or X position accordingly. Similarly, if you command a motion but do not have the motor power supply turned on, no motion will occur but the displayed location will change. If you command a motion but the carriage lock is on, friction may exceed the motor torque and you may lose steps (get partial motion) or have no motion at all. If you leave your tool loose in the tool holder, you will get carriage or slide motion as commanded, but the tool will slip in its mount and fail to properly engage the part. If you have your maximum speed or acceleration set to a value higher than your motor drives can achieve, your motors may slip or stall and incomplete motion may occur. 53
56 It is up to the user to make sure that the entire system is properly set up so that motion commanded by the AutoTurn actually occurs at the tool. If this link is broken because of improper setup, the AutoTurn will lose track of the tool location and dangerous conditions may result. Any time that you approach your lathe with the intention of using the AutoTurn, it is wise to execute a few manual moves to make sure the system is performing as expected. Press an ARROW KEY to confirm that the motor drives have power and the leadscrew is engaged. Enter a CUT command to confirm that the tool moves the intended direction and distance. It is especially important to confirm system integrity after updating the AutoTurn software or changing the selected configuration, and after any mechanical disruption of the lathe setup. Following the checklist below will clear up most lost motion problems: Check that the AutoTurn is properly connected Check that the power supply for the motor drives is on Check that the motor power cables are properly connected Make sure that there is no excessive friction in any direction. Check lubrication of ways and slides, make sure gib screws are not overtightened, make sure the carriage lock is not engaged. Check that the half nuts are engaged Make sure the tool is properly mounted Check the motor couplings and drive pulleys to be sure they are tightly fastened. Vibration can cause these fasteners to loosen over time. Consider reducing the speed or acceleration settings. Consider reducing the chip load Consider reducing the spindle RPM during threading 54
57 Appendix 2: Using the Menu and Options All of the settings that control the function and configuration of the AutoTurn are accessed through the MENU key. Press MENU, ENTER to bring up the main menu. Use the UP and DOWN ARROW KEYS to navigate through the menu. Use the RIGHT ARROW KEY or the ENTER key to select an option. Press STOP to exit the menu area. Note: to navigate back to the Menu area from any of the settings or options, it is necessary to exit the menu entirely and then select MENU, ENTER again. Press STOP or X Axis/Z Axis to exit the menus. Within the Menu area, the following selections are available: Options This item is used to access the global options area. The options available are as follows: Unit Select the default measurement mode; metric mode (units are millimeters) or imperial mode (units in inches). Increment Distance or Advance parameters may be adjusted within the setup screens by pressing the RIGHT or LEFT ARROW KEYS. This setting determines the magnitude of the increment. Speed Display - Determines how the system will display Z axis tool speed. Choices are UPM (Units per Minute) or UPR (Units per Revolution of the lathe spindle). The system will always display speed in UPM when the spindle is stationary. Units are either inches or millimeters, see above. Advance Angle The default angle along which to advance the tool when threading. Default ABS Select Yes if you want the unit to default to absolute measurements when entering distances for cuts and moves. Select No to default to incremental measurements. See Measurements and Distances for more information. Backlight Turn the display backlight on and off. Contrast Configure the display contrast Scrolling Modify how fast the screen-swipe animation moves Lathe Setup Wizard Use this option to re-configure your current lathe configuration with the wizard or to set up the AutoTurn for a new lathe. See Configuring the AutoTurn for more information. Threaded Taper Mode Selecting this item with take you into the AutoTurn's threaded taper mode. 55
58 Magnet Check Mode This is a diagnostic mode that blinks the display backlight each time the AutoTurn receives a pulse from the RPM sensor. Reset Unit This option will erase the AutoTurn's memory. After selecting it, the unit will reboot and walk you through the setup wizard. WARNING: All lathe configurations and saved cuts will be erased. Advanced Setup This area allows users to switch between different lathe configurations and fine tune their lathe configurations. Do not change values in this area unless you know what you're doing! There are 5 settings for each axis. The Z Axis settings are near the top of the list. Scroll down with the ARROW KEYS to access the X Axis settings. Lathe Select which lathe configuration is currently active. Use the Lathe Setup Wizard to create a new configuration. Unit Select the active measurement mode. In metric mode all length units are in millimeters (and must be entered this way) and in imperial mode all lengths must be entered in inches. Error- Set how the AutoTurn will respond to a motor fault in a servo system. Choices are Off (for a stepper motor system), Low (for a logic-low error signal) and High (for a logichigh error signal). When this parameter is not set to Off, a fault signal will stop all step output, cancel any automatic mode and set the AutoTurn in Manual Mode. Invert Z (or X) If your carriage is moving right when it should be moving left, toggle this option. Z (or X) Steps/Unit This value is the number of steps which the AutoTurn must output in order for the carriage to move one unit 1 (1 inch or 1 millimeter, depending on the Unit setting above. Z (or X) Units/Min The slew rate for the Z axis. In metric mode, units are millimeters per minute, and in English mode units are inches per minute. See Appendix 1: Configuring Maximum Speed and Accelleration for more information. Z (or X) Accel This selection determines the acceleration time for a speed change from 0 (stopped) to full slew speed. The units are seconds, and values from 0.01 (1/100 second) to 5 (5 seconds) are allowed. If your Z axis stepper motor is dropping steps, increase this number to allow more acceleration time. If you would like your motor to accelerate faster, increase this number, but you must make sure that your stepper motor does not drop steps. Keep in mind that while the stepper motor may be able to handle higher accelerations during a dry run, it may start dropping steps when you are actually cutting! See Appendix 1: Configuring Maximum Speed and Acceleration for more information. 56
59 Z (or X) Start % - This parameter sets the instantaneous speed change that the system can tolerate. Stepper motors have many resonance problems at low speed. You can sometimes avoid passing through the resonant speed bands by jumping past them and instantly accelerating up to the maximum speed that your system can accelerate to instantaneously. This parameter is where you set the speed that your system can jump to. Speed changes above this speed will use a linear acceleration algorithm. Speed changes below this speed will occur instantly. To avoid resonance, it may be desirable to accelerate instantly to a stepper motor speed above 100 rpm. We recommend that stepper systems be designed for a maximum motor speed of 500 rpm, so to achieve a jump speed of 100 rpm you would set this parameter to 20%. If you are using a servo system or you are not encountering stalling at the very beginning of your slew moves, you can safely ignore this setting. If you are stalling as soon as a slew move begins, consider experimenting with this setting. Try values of 10, 25 and 50 to see which works better for you. Z (or X) Max Cut % Users will want to set their slew rates very fast, however increasing the slew rate will decrease your cut feed granularity. To compensate, the AutoTurn calculates it's cut speed by first multiplying the slew rate by Max Cut % then multiplying by the selected feed percentage (1% 100%.) See Speed Control: Setting the Maximum Cut Speed for more information. Z (or X) Backlash Enter the amount of backlash in the Z axis here. Make sure to over-estimate this value, since the backlash entered here is used as a default for retraction, and is also used when the AutoTurn executes a backlash compensation move. 57
60 Appendix 3: Key Descriptions Toggles the data entry mode between: Relative measures distance relative to the current position of the tool. Absolute measures distance relative to a previously set zero point. The current selection is indicated by the embedded LED. Press this key before or during number entry or immediately after the numerals have been pressed (before the ENTER key is pressed) to toggle between Absolute and Relative distances. Returns the AutoTurn to manual mode, cancelling any automatic mode previously in operation such as threading, tapering, facing etc The embedded LED will pulse during sleep mode. Selects the speed at which the tool will move during manual moves using the ARROW KEYS. The currently selected speed is indicated by the embedded LED. a) Numerical input b) END, ENTER allows the user to set a tool location in memory. This location may be used to establish the endpoint of any cutting operation (CUT, TURN, FACE). It is also used to establish the maximum range of motion during a TAPER command. This key normally defaults to the Z Axis, but end points for facing can be set by selecting the X Axis before setting the endpoint. 58
61 a) Numerical input b) MENU, ENTER opens the menu area and gives the user access to the following functions: Options: Access this area to set options that are not lathe specific, including units (inches or millimeters), default advance angle for threading, default distance data entry mode (absolute or incremental), backlight (on or off), display contrast and menu scrolling speed. Lathe Setup Wizard: used to set up lathe specific parameters such as leadscrew pitch, gear or pulley ratio and stepper motor resolution. Threaded Taper Mode: entering this area activates a special function for cutting threads on tapered surfaces. Magnet Check Mode: activates a diagnostic tool for checking sensor function. The screen backlight flashes when the sensor activates, allowing the user to confirm sensor adjustment and magnet placement. Press ENTER to begin measuring the variation in the lathe spindle speed (make sure the lathe is on first). The AutoTurn will measure the spindle speed over a series of spindle revolutions (see below to specify) and will report the variance as a percentage of the mean. The variance is reported in the top right corner of the display. Press the DECIMAL POINT key to set parameters for the spindle speed variance function. The Pulses parameter sets the number of spindle revolutions that will be measured. Select DONE and press ENTER to return to the Magnet Check Mode main screen. Reset Unit: resets all software parameters to factory conditions Advanced Setup: lathe configuration data such as steps per inch, slew period (speed), maximum acceleration, acceleration multiplier, maximum cut speed, leadscrew backlash, and axis inversion may be set in this menu area. a) Numerical input b) RADIUS, ENTER puts the AutoTurn into Spherical mode. This mode is used for cutting convex radial sections such as balls and fillets. 59
62 a) Numerical input b) TURN, ENTER puts the AutoTurn into turning mode. This mode is used for turning a length of shaft to a diameter, and for boring operations. a) Numerical input b) TAPER, ENTER puts the AutoTurn into Taper mode. This mode is used for turning tapers on the end of the shaft. Both external and internal tapers are supported Note: when tapering, it is important to use the END function to establish the maximum limits of motion in the Z- direction (towards the headstock). Move the carriage and tool towards the headstock as far as you want to allow them to travel, avoiding the chuck or other hazard points, then use the END function to mark this location. This is a safety feature that prevents the tool from jamming into the chuck or lathe dog while cutting tapers. The TAPER function will not initiate a cutting pass until this end point has been set. a) Numerical input b) THREAD, ENTER puts the AutoTurn into threading mode. a)numerical input b) RESET, ENTER activates the function reset command. The reset command causes the tool to return to the initiation point of a function currently in use and zeroes the pass counters associated with the function. Essentially, it returns the system to the condition it was in when the last automatic function was initiated, saving all cut parameters. This allows the user to repeat the function on another part with minimal effort. For example, if you are set up to turn a cylindrical section to a shoulder and have completed one part, but you want to make another with the same settings, replace the workpiece with a properly positioned fresh blank, and press RESET, ENTER to start the turning operation over again at the same place that the last turning sequence was initiated. a) Numerical input b) FACE, ENTER initiates the FACE function. 60
63 a) Numerical input b) the SET command lets the user set the current position readout for either the X or the Z axis. For example, to set the current tool position readout for the X axis to correspond to a part diameter of 0.5 inches (radius of 0.25 inches), use the following key sequence: SET, ENTER, ENTER,.25 Used to finalize a numerical input or a command input. a) Numerical input b) ZERO, ENTER initiates the zero function and sets one or both axis locations to zero. The AutoTurn prompts for which axis you want to set to zero. Use the ARROW KEYS to select the axis, then press ENTER to complete the function and set the selected axis to zero. If you press ENTER without selecting an axis, both axes will be set to zero. Used during numerical entry to select the direction of the input data. When entering a distance or length of cut, a positive number in the Z axis will cause the carriage to move to the right, a negative number in the Z axis will cause the carriage to move to the left, a positive number in the X axis will cause the carriage to move towards the back of the lathe, a negative number in the X Axis will cause the carriage to move towards the front of the lathe. The corresponding directions of motion for each axis are printed on the ARROW KEYS at the bottom of the keyboard for reference. The GO command moves the tool at slew speed for a chosen distance and direction. To use, press GO and enter a distance, then select a direction using the ARROW KEYS. Press ENTER to start. 61
64 The CUT command moves the tool at cut speed for a chosen distance and direction. To use, press CUT and enter a distance, then select a direction using the ARROW KEYS. Press ENTER to start. AUTO initiates automatic return of the tool after the cutting pass of an automatic function (Turn, Taper, Thread, Face). Automatic functions always start in manual return mode to allow the user to verify the cut path before initiating automatic retractions and returns. At the end of the cut, the user must press ENTER to initiate the retraction and return motions. Once the motions have been verified, pressing the AUTO key once at any time during the execution of the function will put the system into semi automatic mode, causing the tool to return to the start position automatically once the cut is complete. Pressing AUTO again will put the system into full auto mode, allowing the operator to set a number of cycles for the system to complete without further user input. For example, to cause the system to automatically return to the start position when each threading pass is complete, press AUTO at any time after the first pass has started. To cause the system to complete 5 additional threading passes at the currently set advance angle and thread depth, press AUTO, AUTO, 5, ENTER From Full Auto mode, another press of the AUTO key will return the system to nonauto mode. a) Numerical input; inserts a decimal point. b) Press the DECIMAL POINT to bring up the parameter screen for all automatic functions. During a pause in an automatic function (once a cut has been completed and the tool has returned to the start position) pressing this key will allow the user to change the function parameters such as cut depth. To change the cut depth, press. and use the ARROW KEYS to increment or decrement the cut depth by one thousandth of an inch. Example: if cut depth is set to 0.006, the key sequence., RIGHT ARROW, RIGHT ARROW will increase the chip thickness by two thousandths, from to Other parameters can also be accessed and edited between cuts. Access the setup page using the. key, then use the UP and DOWN ARROW KEYS to select and edit parameters. 62
65 a) Stops motor motion during a CUT, GO, TURN, TAPER, FACE or THREAD command. b) During automatic functions (TURN, TAPER, FACE or THREAD ) the tool will automatically retract from the part when STOP is pressed. ENTER will then cause the tool to return to the start position at slew speed. Set the cut advance to zero before initiating the cut again, or the cut depth will be twice the intended depth once the tool reaches the point at which the last cut was interrupted. c) Press STOP to back out of parameter menus, the System menu and the Options menu. 63
66 Appendix 4: Correcting Configuration Errors To test the configuration of the AutoTurn, or to correct movement errors encountered during the Setup Wizard, you will need to be able to accurately measure the movement of your carriage and your cross slide. A caliper can sometimes be used, but a dial indicator will give more accurate results. To test the configuration in the Z axis, use the following procedure. 1. Move the carriage to the middle of the ways, well away from the headstock and tailstock. 2. Engage the half nuts and use the ARROW KEYS to move the carriage a small distance to the right, to take up any backlash. 3. Set up a dial indicator to measure motion to the right, and zero it. 4. Press if necessary to wake up the AutoTurn. 5. Press to set up a slow speed move. 6. Key in a distance of 0.2 and use the ARROW KEYS to select the direction to move (to the right). 7. Press to complete the move. 8. Zero the indicator and repeat the CUT If the measured movement for the second cut is 0.2, the configuration is correct. If the measured movement is incorrect, then there is an error somewhere in the configuration data. For example, suppose that you were unable to determine the correct number of steps per revolution, and used the suggested default value of 200. If your measured movement in the test above was instead of 0.250, then you need to correct the Steps per Revolution. You need to tell the AutoTurn to output twice as many steps to correct the motion from to 0.250, so rerun the Setup Wizard with a value of 400 for Steps per Revolution. 64

67 It doesn't really matter which of the configuration factors you correct the AutoTurn multiplies them all together to get the Steps per Inch required, and then stores that number. So if you prefer, you can correct that number directly instead of going through the Wizard again. Press if necessary to wake up the AutoTurn Press to go to the main menu Use the ARROW KEYS to scroll down to the Advanced Setup option and select it with the ENTER key Scroll down to the Z Steps/Unit parameter, note the value there, and enter a corrected figure. Press to back out of the main menu. To calculate the corrected figure, multiply the current Z Steps/Unit value times the commanded motion, and divide this by the measured motion; (current steps/unit) x (commanded motion) (measured motion) For example, suppose that you measured when you commanded 0.250, and the current value in the steps/unit parameter is 1,600. Your corrected value will be: (1,600) x (0.250) = 3,200 (0.125) Enter this value for Z Steps/Unit, then press ENTER to accept and STOP to back out of the menu. Note: there is no comma on the AutoTurn keyboard. Enter 3,200 as
68 Appendix 5: Configuring the Port Adapter Putnam Engineering supplies the AutoTurn Port Adapter in several different configurations. 1) If you provided the pin assignments for your motor drive system at the time of purchase, your Port Adapter will arrive already configured for your motor drive system, with a label on the port adapter indicating the name of the drive system for which it is configured. 2) If you are uncertain about your plans for the motor drive system at the time you purchase the AutoTurn, we will provide the Port Adapter unconfigured. Once you know where you want the output signals, you can easily configure the Port Adapter yourself in a few minutes. To configure the Port Adapter, first obtain the pin assignments for your motor drive system and write them in the table on the next page for future reference. Then carefully peel off the yellow plastic film that covers the 8-up switches on both sides of the board. Now place your Port Adapter board so that it looks like the SIDE A-Direction illustration on the next page (just like the picture, with the Side A lettering upside down). Take note of the Z Direction pin assignment for your motor drive (a number between 1 and 8). Looking at Side A of the port adapter board, locate the switch with the corresponding number and slide it to the UP position. Now take note of the X Direction pin assignment for your motor drive. Still looking at SIDE A of the Port Adapter board, locate the switch with the corresponding number and slide it to the DOWN position. Flip the board over and position it so that it looks like the SIDE B-Step illustration (the Side B lettering is right side up in this case). Take note of the Z Step pin assignment for your motor drive (a number between 1 and 8). Looking at Side B of the port adapter board, Locate the switch with the corresponding number and slide it to the UP position. Now take note of the X Step pin assignment for your motor drive. Still looking at SIDE B of the Port Adapter board, locate the switch with the corresponding number and slide it to the DOWN position. When you are sure the configuration is correct, place the Port Adapter board in one of the case halves and snap the other case half into place. It is quite difficult to open the case once it has been snapped together, so it is a good idea to be very sure about the switch settings before putting the case on. 66

69 Drive System Name and Model Signal Name X Step X Direction Z Step Z Direction Pin Assignment NOTE: DO NOT PLUG A PC INTO THE PORT ADAPTER!! The Port Adapter provides 12 VDC power to the AutoTurn through pin 20. Since most PC parallel ports are set up with a ground on this pin, if you plug a PC in to the Port Adapter, you will short the power supply to ground through the PC. It will overheat and fail, creating a risk of fire. Contact info@putnamengineering.com for more information 67
70 Appendix 6: Wiring the Breakout Board Instructions for wiring the standard AutoTurn breakout board will be found on the following pages. Specific instructions for using the breakout board with Gecko Drivers are located at the end of this Appendix. The following pages include diagrammatic guides for wiring high voltage DC power and 110 volt AC power. These are not complete circuit diagrams; no attempt has been made to address component and case grounding, and there are several alternate wiring options provided. It is the responsibility of the reader to implement these guides in a safe and functional manner. NOTE: DO NOT PLUG A PC IN TO THIS BREAK OUT BOARD!! The breakout board provides 12 VDC power to the AutoTurn through pin 20. Since most PC parallel ports are set up with a ground on this pin, if you plug a PC in to the breakout board, you will short the power supply to ground through the PC. It will overheat and fail, causing a fire risk. Contact info@putnamengineering.com for more information 68

71 69

72 70

73 71

74 72
75 NOTE: DO NOT PLUG A PC IN TO THIS BREAK OUT BOARD!! The breakout board provides 12 VDC power to the AutoTurn through pin 20. Since most PC parallel ports are set up with a ground on this pin, if you plug a PC in to the breakout board, you will short the power supply to ground through the PC. It will overheat and fail, causing a fire risk. Contact info@putnamengineering.com for more information 73

76 74

77 75
SHERLINE Lathe Digital Readout
 SHERLINE Lathe Digital Readout P/N 8200 (Inch), P/N 8260 (Metric) The Digital Readout in the modern machine shop Digital readouts are popular on full size machine tools because they make the life of a
1640DCL Digital Control Lathe
 1640DCL Digital Control Lathe MACHINE SPECIFICATIONS Multiple Function CNC Lathe 1. Manual Hand wheel Operation 2. CNC G-Code Operation 16.1 swing over bed, 8.6 swing over cross-slide 2.05 diameter hole
Lathe. A Lathe. Photo by Curt Newton
 Lathe Photo by Curt Newton A Lathe Labeled Photograph Description Choosing a Cutting Tool Installing a Cutting Tool Positioning the Tool Feed, Speed, and Depth of Cut Turning Facing Parting Drilling Boring
Lathes. CADD SPHERE Place for innovation Introduction
 Lathes Introduction Lathe is one of the most versatile and widely used machine tools all over the world. It is commonly known as the mother of all other machine tool. The main function of a lathe is to
SHERLINE Mill Digital Readout
 SHERLINE Mill Digital Readout P/N 8100 (Inch) Digital Readouts in the modern machine shop Digital readouts are popular on full-size shop mills because they make the life of a machinist much simpler. They
Installing CNC Stepper Motor Mounts On A Sherline Lathe
 Installing CNC Stepper Motor Mounts On A Sherline Lathe P/N 6720 (6725 Metric) 4000/4100/4500/4600 Lathes P/N 6730 (6735 Metric) 4400/4410 Lathe USING THE TEMPLATE BLOCKS TO LOCATE NEW MOUNTING HOLES FOR
SHERLINE Drill Chucks
 SHERLINE Drill Chucks P/N 1010/1015 (5/32"), P/N 1072 (1/4") and P/N 1069 (3/8") Chuck and Drill Sizes The size of the chuck indicates the largest size drill shank it will hold. Larger chucks will hold
Adjusting Backlash on Sherline handwheels
 WEAR YOUR SAFETY GLASSES FORESIGHT IS BETTER THAN NO SIGHT READ INSTRUCTIONS BEFORE OPERATING Adjusting Backlash on Sherline handwheels What Is Backlash? Backlash is the amount the handwheel can turn before
INDEX A FAGOR. 1. MC Training Manual. 2. Additional Simple Cycles. 3. USB Interface. 4. Installation. 5. Electrical Drawings
 KNEE MILL PACKAGE INDEX 1. MC Training Manual 2. Additional Simple Cycles 3. USB Interface 4. Installation 5. Electrical Drawings 1 800 4A FAGOR * This information package also includes 8055 CNC Training
Precision and high repeat accuracy for individual parts and small series manufacture. Made in Germany.
 PROXXON - PD 400/CNC 1 Precision and high repeat accuracy for individual parts and small series manufacture. Made in Germany. Z-axis and X-axis with recirculating ball spindles and two powerful step motors.
Machining. Module 6: Lathe Setup and Operations. (Part 2) Curriculum Development Unit PREPARED BY. August 2013
 Curriculum Development Unit PREPARED BY. August 2013") Machining Module 6: Lathe Setup and Operations (Part 2) PREPARED BY Curriculum Development Unit August 2013 Applied Technology High Schools, 2013 Module 6: Lathe Setup and Operations (Part 2) Module Objectives
Machining Module 6: Lathe Setup and Operations (Part 2) PREPARED BY Curriculum Development Unit August 2013 Applied Technology High Schools, 2013 Module 6: Lathe Setup and Operations (Part 2) Module Objectives
CNC Chucker Lathe P/N 6600, 6610, and 6620
 WEAR YOUR SAFETY GLASSES FORESIGHT IS BETTER THAN NO SIGHT READ INSTRUCTIONS BEFORE OPERATING PRODUCT DESCRIPTION 6600 CNC Chucker w/3c headstock, ball screws, high-torque stepper motors & PC w/4-axis
VUE READOUTS REFERENCE MANUAL
 VUE READOUTS REFERENCE MANUAL VUE Key Layout 1 Display Aera 2 Soft keys 3 Page Indicator light 4 UP/DOWN arrow keys are also used to adjust the screen contrast 5 Axis Keys 6 Numeric Keypad 7 ENTER key
Precision made in Germany. As per DIN The heart of a system, versatile and expandable.
 1 Precision made in Germany. As per DIN 8606. The heart of a system, versatile and expandable. Main switch with auto-start protection and emergency off. Precision lathe chuck as per DIN 6386 (Ø 100mm).
Introduction to Machining: Lathe Operation
 Introduction to Machining: Lathe Operation Lathe Operation Lathe The purpose of a lathe is to rotate a part against a tool whose position it controls. It is useful for fabricating parts and/or features
Turning and Lathe Basics
 Training Objectives After watching the video and reviewing this printed material, the viewer will gain knowledge and understanding of lathe principles and be able to identify the basic tools and techniques
SHERLINE/WETTROTH 2-or 3-AXIS Lathe Digital Readout P/N 8200 (Metric P/N 8260)
") WEAR YOUR SAFETY GLASSES FORESIGHT IS BETTER THAN NO SIGHT READ INSTRUCTIONS BEFORE OPERATING An optional third handwheel and encoder unit can be used on the vertical milling column to turn your lathe
WEAR YOUR SAFETY GLASSES FORESIGHT IS BETTER THAN NO SIGHT READ INSTRUCTIONS BEFORE OPERATING An optional third handwheel and encoder unit can be used on the vertical milling column to turn your lathe
Typical Parts Made with These Processes
 Turning Typical Parts Made with These Processes Machine Components Engine Blocks and Heads Parts with Complex Shapes Parts with Close Tolerances Externally and Internally Threaded Parts Products and Parts
Mach4 CNC Controller Lathe Programming Guide Version 1.0
 Mach4 CNC Controller Lathe Programming Guide Version 1.0 1 Copyright 2014 Newfangled Solutions, Artsoft USA, All Rights Reserved The following are registered trademarks of Microsoft Corporation: Microsoft,
WARNING! Read and understand the entire instruction manual before attempting set-up or operation of this machine!
 ! WARNING! Read and understand the entire instruction manual before attempting set-up or operation of this machine! 1. This machine is designed and intended for use by properly trained and experienced
TU-1503V - Opti-Turn Bench Lathe - Mini 150 x 300mm Turning Capacity Electronic Variable Speeds Ex GST Inc GST $ $908.50
 TU-1503V - Opti-Turn Bench Lathe - Mini 150 x 300mm Turning Capacity Electronic Variable Speeds Ex GST Inc GST $790.00 $908.50 ORDER CODE: L685 MODEL: TU-1503V Swing Over Bed (mm): 150 Distance Between
TM-1960G - Centre Lathe 480 x 1500mm Turning Capacity - 80mm Spindle Bore Includes Digital Readout
 TM-1960G - Centre Lathe 480 x 1500mm Turning Capacity - 80mm Spindle Bore Includes Digital Readout Ex GST Inc GST $23,900.00 $27,485.00 ORDER CODE: MODEL: Swing Over Bed (mm): Distance Between Centres
16" X 60" EVS TOOLROOM LATHES
 16" X 60" EVS TOOLROOM LATHES MODEL SB1014-220V MODEL SB1015-440V SPECIFICATIONS Hundreds of Thousands of Lathes Sold With a Tradition of Quality Since 1906! March, 2010 by South Bend Lathe Co. For Machines
VARIABLE SPEED WOOD LATHE. Model DB900 INSTRUCTION MANUAL
 VARIABLE SPEED WOOD LATHE Model DB900 INSTRUCTION MANUAL 1007 TABLE OF CONTENTS SECTION...PAGE Technical data.. 1 General safety rules....1-3 Specific safety rules for wood lathe.....3 Electrical information.4
Computer Numeric Control
 Computer Numeric Control TA202A 2017-18(2 nd ) Semester Prof. J. Ramkumar Department of Mechanical Engineering IIT Kanpur Computer Numeric Control A system in which actions are controlled by the direct
AL Centre Lathe 300 x 900mm Turning Capacity Includes Cabinet Stand
 AL-336 - Centre Lathe 300 x 900mm Turning Capacity Includes Cabinet Stand Ex GST Inc GST $4,150.00 $4,565.00 ORDER CODE: MODEL: L682 AL-336 Swing Over Bed (mm): 300 Distance Between Centres (mm): 900 Spindle
BD-405 MINI LATHE BD-712 METAL LATHE. Distance between centers Hole through spindle. Cross slide travel
 BD-405 MINI LATHE Cast iron with ground, hardened slideways Belt driven, with variable speed self-centring 3 jaw scroll chuck Chuck guard with a safety interlock Supplied with 3 jaw chuck, wrench set and
Motor Power (kw / hp): Voltage / Amperage (V / amp): Shipping Dimensions (L x W x H) (cm): Nett Weight (kg): Features
: Voltage / Amperage (V / amp): Shipping Dimensions (L x W x H) (cm): Nett Weight (kg): Features") AL-356V - Centre Lathe 356 x 1000mm Turning Capacity - 51mm Spindle Bore Includes Digital Readout, Quick Change Toolpost & Electronic Variable Speed With Digital Readout Ex GST Inc GST $7,150.00 $7,865.00
AL-356V - Centre Lathe 356 x 1000mm Turning Capacity - 51mm Spindle Bore Includes Digital Readout, Quick Change Toolpost & Electronic Variable Speed With Digital Readout Ex GST Inc GST $7,150.00 $7,865.00
Mill Specifications. FEATURE 5000(5100) 5400(5410) 2000 (2010) Max clearance, table to spindle
 5400(5410) 2000 (2010) Max clearance, table to spindle") Mill Specifications FEATURE 5000(5100) 5400(5410) 2000 (2010) Max clearance, table to spindle 8.00" (203 mm) 8.00" (203 mm) 9.00" (229 mm) Throat (without headstock spacer block) Throat (with headstock
Mill Specifications FEATURE 5000(5100) 5400(5410) 2000 (2010) Max clearance, table to spindle 8.00" (203 mm) 8.00" (203 mm) 9.00" (229 mm) Throat (without headstock spacer block) Throat (with headstock
C SERIES LATHES AFFORDABLE. DURABLE. VERSATILE. A line of precision, high performance geared head and variable speed lathes. TURNING PRODUCT CATALOG
 TURNING PRODUCT CATALOG www.clausing-industrial.com 800.323.0972 C SERIES LATHES AFFORDABLE. DURABLE. VERSATILE. A line of precision, high performance geared head and variable speed lathes. HIGH SPEED
200S READOUTS REFERENCE MANUAL
 200S READOUTS REFERENCE MANUAL 200S Key Layout 1 Display Area 2 Soft keys 3 Power Indicator light 4 Arrow Keys: Use the UP/DOWN keys to adjust the screen contrast. 5 Axis Keys 6 Numeric Keypad 7 ENTER
TURBO DRIVE INSTALLATION MODEL 1582T KNEE FEED Lagun Mill
 TURBO DRIVE INSTALLATION MODEL 1582T KNEE FEED Lagun Mill NOTE This Turbo Drive Knee Feed is configured for mounting the feed on the front of the knee with the keypad facing left. The lead screw pitch
HAFCO METALMASTER AL-335F. Centre Lathe. 300 x 910mm Turning Capacity. Product Brochure
 Product Brochure L681 HAFCO METALMASTER AL-335F Centre Lathe 300 x 910mm Turning Capacity Page 1 of 6 Front View Left View Headstock Spindle Speed Levers Control Panel Switches Feed and Thread Gearbox
HAFCO METALMASTER AL-335. Centre Lathe. 300 x 910mm Turning Capacity. Product Brochure
 Product Brochure L183 HAFCO METALMASTER AL-335 Centre Lathe 300 x 910mm Turning Capacity Page 1 of 5 Specifications & Prices are subject to change without notification - 2018-10-08 L183.pdf Headstock Speed
INSPECTION AND CORRECTION OF BELLHOUSING TO CRANKSHAFT ALIGNMENT
 INSPECTION AND CORRECTION OF BELLHOUSING TO CRANKSHAFT ALIGNMENT BACKGROUND Proper alignment of the transmission input shaft to the crankshaft centerline is required in order to achieve the best results
3" LATHE THREAD CUTTING ATTACHMENT
 3" LATHE THREAD CUTTING ATTACHMENT P/N 3 AN INTRODUCTION TO THREAD CUTTING IN THE REAL WORLD After designing and putting the enclosed screw cutting attachment into production, we sat down and started reading
SHERLINE PRODUCTS. Mill Digital Readout P/N 8100 (Metric P/N 8160) SHERLINE/WETTROTH
 SHERLINE/WETTROTH") SHERLINE PRODUCTS INCORPORATED 1974 SHERLINE/WETTROTH Mill Digital Readout P/N 8100 (Metric P/N 8160) The Digital Readout in the modern machine shop Digital readouts are popular on full size mills because
SHERLINE PRODUCTS INCORPORATED 1974 SHERLINE/WETTROTH Mill Digital Readout P/N 8100 (Metric P/N 8160) The Digital Readout in the modern machine shop Digital readouts are popular on full size mills because
Product Brochure For L682D. Description. Features. Auckland: (09)
") AL-336D DELUXE - Centre Lathe 300 x 900mm Turning Capacity Includes Digital Readout, Quick Change Toolpost, Leadscrew Covers, Foot Brake & Cabinet Stand Ex GST Inc GST $5,200.00 $5,980.00 ORDER CODE: MODEL:
AL-336D DELUXE - Centre Lathe 300 x 900mm Turning Capacity Includes Digital Readout, Quick Change Toolpost, Leadscrew Covers, Foot Brake & Cabinet Stand Ex GST Inc GST $5,200.00 $5,980.00 ORDER CODE: MODEL:
Grizzly Drill Press SOP
 Grizzly Drill Press SOP Drill Press is wired to run on 0V. Drill Press has a built in light with a ON/OFF switch. Never hold a workpiece by hand while drilling. Clamp it down or hold it in a vice. Never
1. The Lathe. 1.1 Introduction. 1.2 Main parts of a lathe
 1. The Lathe 1.1 Introduction Lathe is considered as one of the oldest machine tools and is widely used in industries. It is called as mother of machine tools. It is said that the first screw cutting lathe
Motion Manipulation Techniques
 Motion Manipulation Techniques You ve already been exposed to some advanced techniques with basic motion types (lesson six) and you seen several special motion types (lesson seven) In this lesson, we ll
HAFCO METALMASTER AL-336. Centre Lathe. 300 x 900mm Turning Capacity. Product Brochure
 Product Brochure L682 HAFCO METALMASTER AL-336 Centre Lathe 300 x 900mm Turning Capacity Page 1 of 5 Specifications & Prices are subject to change without notification - 2018-10-08 L682.pdf Headstock Metric
Screws. Introduction. 1. Nuts, bolts and screws used to clamp things together. Screws are used for two purposes:
 Screws Introduction Screws are used for two purposes: 1. To clamp things together. 2. To control motion. 1. Nuts, bolts and screws used to clamp things together. Nuts, bolts and screws that are used for
Installing CNC Stepper Motor Mounts On A Sherline Mill
 Installing CNC Stepper Motor Mounts On A Sherline Mill P/N 6700 (6710 Metric) 5000/5100/5400/5410 Mills P/N 6705 (6715 Metric) 2000/2010 Mills USING THE TEMPLATE BLOCKS TO LOCATE NEW MOUNTING HOLES FOR
TurncrafterPlus. Variable Speed Mini Wood Lathe. User s Manual #TCLPLUS PRODUCT NO.
 TurncrafterPlus Variable Speed Mini Wood Lathe PRODUCT NO. #TCLPLUS User s Manual SPECIFICATIONS OF TURNCRAFTER PLUS MINI LATHE Model number:..............................................#tclplus Motor:......................................0V
AL-960B - Centre Lathe 305 x 925mm Turning Capacity Includes Cabinet Stand
 AL-960B - Centre Lathe 305 x 925mm Turning Capacity Includes Cabinet Stand Ex GST Inc GST $4,690.00 $5,159.00 ORDER CODE: MODEL: Swing Over Bed (mm): Distance Between Centres (mm): Spindle Bore (mm): Swing
V-Turn 410/ PRECISION LATHE
 PRECISION LATHE Page 2. Highlights Page 3. Machine construction and feed system Page 3. Main spindle drive Page 4. Toolpost Page 4. Tailstock and auxiliary systems Page 5. 3 Axis Digital Read Out - X.pos
SHERLINE/WETTROTH Mill Digital Readout P/N 8100 (Metric P/N 8160)
") WEAR YOUR SAFETY GLASSES FORESIGHT IS BETTER THAN NO SIGHT READ INSTRUCTIONS BEFORE OPERATING SHERLINE/WETTROTH Mill Digital Readout P/N 8100 (Metric P/N 8160) The Digital Readout in the Modern Machine
WEAR YOUR SAFETY GLASSES FORESIGHT IS BETTER THAN NO SIGHT READ INSTRUCTIONS BEFORE OPERATING SHERLINE/WETTROTH Mill Digital Readout P/N 8100 (Metric P/N 8160) The Digital Readout in the Modern Machine
QLD Schools / TAFE - AL-356 Centre Lathe with Digital Readout - Includes Tooling Package 356 x 1000mm
 QLD Schools / TAFE - AL-356 Centre Lathe with Digital Readout - Includes Tooling Package 356 x 1000mm Please Call ORDER CODE: K8710D NSW Contract No.: ~ QLD Contract No.: MODEL: Digital Readout: ~ Schools/TAFE
AL-960B - Centre Lathe 305 x 925mm Turning Capacity Includes Digital Readout & Cabinet Stand
 AL-960B - Centre Lathe 305 x 925mm Turning Capacity Includes Digital Readout & Cabinet Stand Ex GST Inc GST $5,690.00 $6,259.00 ORDER CODE: MODEL: Swing Over Bed (mm): Distance Between Centres (mm): Spindle
Safety And Operation Instructions RSR50 VMC Right Angle Self-Reversing Tapping Units
 Safety And Operation Instructions To Avoid Serious Injury And Ensure Best Results For Your Tapping Operation, Please! Read Carefully All operator and safety instructions provided for this tapping attachment
Firmware Version d & higher Installation & Operation
 DIGI LCD Readout Firmware Version d 2.100 & higher Installation & Operation Warranty Accurate Technology, Inc., warrants this product against defective parts and workmanship for 1 year commencing from
THE FUTURE RIGHT NOW PRECISION lathes, drilling- and milling machines
 THE FUTURE RIGHT NOW PRECISION lathes, drilling- and milling machines turning milling drilling WABECO lathes > D2000 D2400 D3000 precise lead screw lathe in-house design and production the classics - tried
DRO 100 REFERENCE MANUAL
 DRO 100 REFERENCE MANUAL Warranty ACU-RITE Products and accessories are warranted against defects in material and workmanship for a period of three years from the date of purchase. ACU-RITE will, at its
Lathe is a machine, which removes the metal from a piece of work to the required shape & size HENRY MAUDSLAY
 TURNING MACHINES LATHE Introduction Lathe is a machine, which removes the metal from a piece of work to the required shape & size HENRY MAUDSLAY - 1797 Types of Lathe Engine Lathe The most common form
TU-3008G - Opti-Turn Bench Lathe 300 x 700mm Turning Capacity Geared Head-Stock & Enclosed Gearbox
 TU-3008G - Opti-Turn Bench Lathe 300 x 700mm Turning Capacity Geared Head-Stock & Enclosed Gearbox Ex GST Inc GST $3,460.00 $3,979.00 ORDER CODE: MODEL: Swing Over Bed (mm): Distance Between Centres (mm):
Performance. CNC Turning & Milling Machine. Conversational CAM 3.11 Instruction Manual
 Performance CNC Turning & Milling Machine Conversational CAM 3.11 Instruction Manual Legacy Woodworking Machinery 435 W. 1000 N. Springville, UT 84663 Performance Axis CNC Machine 2 Content Warranty and
OPERATOR S MANUAL BENCH LATHE MODEL: BT1337G BOLTON TOOLS 1136 SAMUELSON ST. CITY OF INDUSTRY, CA 91748
 OPERATOR S MANUAL BENCH LATHE MODEL: BT1337G BOLTON TOOLS 1136 SAMUELSON ST. CITY OF INDUSTRY, CA 91748 Many thanks for purchasing our BT1337G - Bench Lathe. Before operating, make sure you study the manual
Installing a 3 Indexer: Desktop Tools
 888-680-4466 ShopBotTools.com Installing a 3 Indexer: Desktop Tools built after October, 2012 Copyright 2016 ShopBot Tools, Inc. page 1 Copyright 2016 ShopBot Tools, Inc. page 2 Table of Contents Overview...5
GH-1340B(C6232B2) GH-1440B(C6236B2) GEARED HEAD PRECISION LATHE
 GH-1440B(C6236B2) GEARED HEAD PRECISION LATHE") GH-1340B(C6232B2) GH-1440B(C6236B2) GEARED HEAD PRECISION LATHE OPERATOR S MANUAL WARNING! 1. Read and understand the entire instruction manual before operating machine. 2. Always wear approved safety
GH-1340B(C6232B2) GH-1440B(C6236B2) GEARED HEAD PRECISION LATHE OPERATOR S MANUAL WARNING! 1. Read and understand the entire instruction manual before operating machine. 2. Always wear approved safety
TU-2004V - Opti-Turn Bench Lathe 200 x 300mm Turning Capacity Electronic Variable Speeds
 TU-2004V - Opti-Turn Bench Lathe 200 x 300mm Turning Capacity Electronic Variable Speeds Ex GST Inc GST $1,150.00 $1,265.00 ORDER CODE: MODEL: Swing Over Bed (mm): Distance Between Centres (mm): Spindle
Wixey ELECTRONIC DIGITAL READOUT
 Wixey ELECTRONIC DIGITAL READOUT Model WR500 INSTRUCTIONS Step 1- Mounting the readout assembly to your planer 1 Tighten any of the side cover mounting screws (1) and if necessary use a small amount of
Table of Contents. Preface 9 Prerequisites 9. Key Concept 1: Know Your Machine From A Programmer s Viewpoint 13. Table of Contents
 Preface 9 Prerequisites 9 Basic machining practice experience 9 Controls covered 10 Limitations 10 Programming method 10 The need for hands -on practice 10 Instruction method 11 Scope 11 Key Concepts approach
OWNER S MANUAL. Safety. Please read this owner s manual before use and keep it at hand for reference. Warranty
 Please read this owner s manual before use and keep it at hand for reference. OWNER S MANUAL Safety Important safety instructions for using the INCRA Miter5000 Before using the INCRA Miter5000, read and
THREAD CUTTING & FORMING
 THREAD CUTTING & FORMING Threading, Thread Cutting and Thread Rolling: Machining Threads on External Diameters (shafts) Tapping: Machining Threads on Internal Diameters (holes) Size: Watch to 10 shafts
Cross Peen Hammer. Introduction. Lesson Objectives. Assumptions
 Introduction In this activity plan students will develop various machining and metalworking skills by building a two-piece steel hammer. This project will introduce basic operations for initial familiarization
Lathe Authorization:( Authorization will take 2.5 hours- 3 hours depending on the person) 1 1/2 hours of demo /2 hours of hands on.
 1 1/2 hours of demo /2 hours of hands on.") DISCLAIMER: I am giving this instruction for free. It is not a comprehensive treatment of the subject matters being discussed. Although I do my best to be as accurate and complete as possible, I may leave
DISCLAIMER: I am giving this instruction for free. It is not a comprehensive treatment of the subject matters being discussed. Although I do my best to be as accurate and complete as possible, I may leave
HAFCO METALMASTER AL-960B. Centre Lathe. 305 x 925mm Turning Capacity. Product Brochure
 Product Brochure L237D HAFCO METALMASTER AL-960B Centre Lathe 305 x 925mm Turning Capacity Page 1 of 5 Specifications & Prices are subject to change without notification - 2018-09-19 L237D.pdf 2 Axis DRO
Build a Drill Press Vise
 Youth Explore Trades Skills Introduction This activity plan will develop the student s machining and metalworking skills as they fabricate a multi-piece steel vise. The project will encompass basic lathe
PROGRAMMING January 2005
 PROGRAMMING January 2005 CANNED CYCLES FOR DRILLING TAPPING AND BORING A canned cycle is used to simplify programming of a part. Canned cycles are defined for the most common Z-axis repetitive operation
Figure 1: NC Lathe menu
 Click To See: How to Use Online Documents SURFCAM Online Documents 685)&$0Ã5HIHUHQFHÃ0DQXDO 5 /$7+( 5.1 INTRODUCTION The lathe mode is used to perform operations on 2D geometry, turned on two axis lathes.
HAFCO METALMASTER AL-960B. Centre Lathe. 305 x 925mm Turning Capacity. Product Brochure
 Product Brochure L237 HAFCO METALMASTER AL-960B Centre Lathe 305 x 925mm Turning Capacity Page 1 of 5 Specifications & Prices are subject to change without notification - 2018-09-19 L237.pdf Head Stock
HOME WORKSHOP HANDBOOK Rugged BENCH GRINDER. By JOEL B. LONG
 6 HOME WORKSHOP HANDBOOK Rugged BENCH GRINDER W By JOEL B. LONG ITH this bench grinder you can keep your cutting tools sharp and do general offhand grinding, and can, with the aid of various attachments,
Turret covers. Rear turret cover
 TURRET Refer to the Maintenance Manual -M-314A for more information. Introduction The turret is mounted on top of the cross slide. The turret top plate is raised (unclamped) and lowered (clamped) by pneumatic
CL-38A - Centre Lathe 410 x 1000mm Turning Capacity - 52mm Spindle Bore Includes Digital Readout & Quick Change Toolpost
 CL-38A - Centre Lathe 410 x 1000mm Turning Capacity - 52mm Spindle Bore Includes Digital Readout & Quick Change Toolpost Ex GST Inc GST $9,490.00 $10,439.00 ORDER CODE: MODEL: Swing Over Bed (mm): Distance
SHARP STA, STB, STC, STF SERIES CNC big bore flat bed lathe
 SHARP STA, STB, STC, STF SERIES PRECISION MACHINE TOOLS Sharp Industries, Inc. 3501 Challenger Street Torrance, CA 90503 Tel 310-370-5990 Fax 310-542-6162 Email: info@sharp-industries.com Parts: parts@sharp-industries.com
INDIAN INSTITUTE OF TECHNOLOGY KHARAGPUR NPTEL ONLINE CERTIFICATION COURSE. On Industrial Automation and Control
 INDIAN INSTITUTE OF TECHNOLOGY KHARAGPUR NPTEL ONLINE CERTIFICATION COURSE On Industrial Automation and Control By Prof. S. Mukhopadhyay Department of Electrical Engineering IIT Kharagpur Topic Lecture
Ahsanullah University of Science and Technology (AUST) Department of Mechanical and Production Engineering
 Department of Mechanical and Production Engineering") Ahsanullah University of Science and Technology (AUST) Department of Mechanical and Production Engineering LABORATORY MANUAL For the students of Department of Mechanical and Production Engineering 1 st
Ahsanullah University of Science and Technology (AUST) Department of Mechanical and Production Engineering LABORATORY MANUAL For the students of Department of Mechanical and Production Engineering 1 st
South Bend Lathe Co. P.O. Box 2027, Bellingham, WA U.S.A. PHONE: (360)
") South Bend Lathe Co P.O. Box 2027, Bellingham, WA 98227 U.S.A. PHONE: (360) 734-1540 EMAIL: sales@southbendlathe.com www.southbendlathe.com ***For Immediate Release ~ January, 2015*** Introducing the New
South Bend Lathe Co P.O. Box 2027, Bellingham, WA 98227 U.S.A. PHONE: (360) 734-1540 EMAIL: sales@southbendlathe.com www.southbendlathe.com ***For Immediate Release ~ January, 2015*** Introducing the New
Table of Contents. Table of Contents. Preface 11 Prerequisites... 12
 Table of Contents Preface 11 Prerequisites... 12 Basic machining practice experience... 12 Controls covered... 12 Limitations... 13 The need for hands -on practice... 13 Instruction method... 13 Scope...
E M P O W E R I N G S H O P P E R F O R M A N C E JETTOOLS.COM
 E M P O W E R I N G S H O P P E R F O R M A N C E JETTOOLS.COM This new JET GH1640-ZK lathe takes the best features of our ZX series manual lathes but scaled down with a 2 Spindle Bore which makes it perfect
1250 Automatic Traverse
 Adams-Maxwell Winding Systems Operating Manual 1250 Automatic Traverse Adams-Maxwell Winding Systems Page 2 Adams-Maxwell 4740 Calle Carga Camarillo, CA 93012 Phone: (323) 936-8028 Fax: (888) 936-8042
1260 Automatic Traverse
 Adams-Maxwell Winding Systems Operating Manual 1260 Automatic Traverse Page 2 Adams-Maxwell 4740 Calle Carga Camarillo, CA 93012 Phone: (323) 936-8028 Fax: (888) 936-8042 Web: www.adamsmaxwell.com Email:
Trade of Toolmaking Module 2: Turning Unit 1: Machine Controls and Operations Phase 2
 Trade of Toolmaking Module 2: Turning Unit 1: Machine Controls and Operations Phase 2 Published by SOLAS 2014 Unit 1 1 Table of Contents Document Release History... 3 Unit Objective... 4 Introduction...
VARIABLE SPEED WOOD LATHE
 MODEL MC1100B VARIABLE SPEED WOOD LATHE INSTRUCTION MANUAL Please read and fully understand the instructions in this manual before operation. Keep this manual safe for future reference. Version: 2015.02.02
CNC Cooltool - Milling Machine
 CNC Cooltool - Milling Machine Module 1: Introduction to CNC Machining 1 Prepared By: Tareq Al Sawafta Module Objectives: 1. Define machining. 2. Know the milling machine parts 3. Understand safety rules
TU-3008G-16M - Opti-Turn Lathe & Mill Drill Combination Package Deal 300 x 700mm Included BF-16AV Mill Head
 TU-3008G-16M - Opti-Turn Lathe & Mill Drill Combination Package Deal 300 x 700mm Included BF-16AV Mill Head Package Deal Ex GST Inc GST $3,980.00 $4,577.00 Package Contents - SAVE $402.50 (Inc) 1 x L691
OPERATOR'S MANUAL ROUTER MOUNTING KIT
 OPERATOR'S MANUAL MOUNTING KIT 4950301 (FOR USE WITH BT3000 AND BT3100 TABLE SAWS) Your new router mounting kit has been engineered and manufactured to Ryobi's high standard for dependability, ease of
MACHINE TOOLS LAB LABORATORY MANUAL
 Vanjari Seethaiah Memorial Engineering College Patancheru, Medak MACHINE TOOLS LAB LABORATORY MANUAL Department of Mechanical Engineering PREFACE Industrial Revolution has given man a lot many luxuries,
TURBO DRIVE INSTALLATION MODEL 1580T KNEE FEED Lagun Mill (OEM)
") TURBO DRIVE INSTALLATION MODEL 1580T KNEE FEED Lagun Mill (OEM) NOTE This Turbo Drive Knee Feed is configured for mounting the feed on the front of the knee with the keypad facing left. The lead screw
TURBO DRIVE INSTALLATION MODEL 1580T KNEE FEED Lagun Mill (OEM) NOTE This Turbo Drive Knee Feed is configured for mounting the feed on the front of the knee with the keypad facing left. The lead screw
UNIVERSAL RETROFIT KIT
 UNIVERSAL RETROFIT KIT Midwest Office 444 Lake Cook Road, Suite 22 Deerfield, IL 60015 Phone (847) 940-9305 Fax (847) 940-9315 www.flashcutcnc.com 1998-2012 FlashCut CNC, Inc. Table of Contents THANK YOU...
AL-320G - Bench Lathe, Stand & Tooling Package Deal 320 x 600mm Turning Capacity
 AL-320G - Bench Lathe, Stand & Tooling Package Deal 320 x 600mm Turning Capacity Ex GST Inc GST $3,200.00 $3,680.00 ORDER CODE: MODEL: Swing Over Bed (mm): Distance Between Centres (mm): Spindle Bore (mm):
Standard. CNC Turning & Milling Machine Rev 1.0. OM5 Control Software Instruction Manual
 Standard CNC Turning & Milling Machine Rev 1.0 OM5 Control Software Instruction Manual Legacy Woodworking Machinery 435 W. 1000 N. Springville, UT 84663 Standard CNC Machine 2 Content Warranty and Repair
Duality Lathe. CNC & Manually Operated Lathe. Product Datasheet.
 CNC & Manually Operated Lathe www.tormach.com OVERVIEW The is a revolutionary concept in machine tools. Used in combination with a PCNC 1100 mill, this integrated machine accessory can be operated in three
Lathe Accessories. Work-holding, -supporting, and driving devices
 46-1 Lathe Accessories Divided into two categories Work-holding, -supporting, and driving devices Lathe centers, chucks, faceplates Mandrels, steady and follower rests Lathe dogs, drive plates Cutting-tool-holding
SAMPLE. MEM07006C Perform lathe operations. Learner guide. MEM05 Metal and Engineering Training Package. Version 1
 MEM05 Metal and Engineering Training Package MEM07006C Perform lathe operations Learner guide Version 1 Training and Education Support Industry Skills Unit Meadowbank Product code: 5514 Acknowledgments
527F CNC Control. User Manual Calmotion LLC, All rights reserved
 527F CNC Control User Manual 2006-2016 Calmotion LLC, All rights reserved Calmotion LLC 21720 Marilla St. Chatsworth, CA 91311 Phone: (818) 357-5826 www.calmotion.com NC Word Summary NC Word Summary A
Summer Junior Fellowship Experience at LUMS. Maliha Manzoor 13 June 15 July, 2011 LUMS Summer Internship
 Summer Junior Fellowship Experience at LUMS Maliha Manzoor 13 June 15 July, 2011 LUMS Summer Internship Internship Schedule June 13-17: 2D and 3D drawings in AutoCAD June 20-24: 2D and 3D drawings in AutoCAD
Precision & Heavy Duty Machining
 High Speed Precision Lathes Large capacity, Powerful, Universal & Precision ATRUMP 18, 21 and 25" Series Lathes have just the right amount of engineering to afford simplicity of operation, coupled with
By C.W. Woodson From the pages of Model Craftsman magazine June, 1937
 By C.W. Woodson From the pages of Model Craftsman magazine June, 1937 As shown in Fig. 1, the tool post grinder for which plans are given here can be used to finish up delicate work to more accurate dimensions