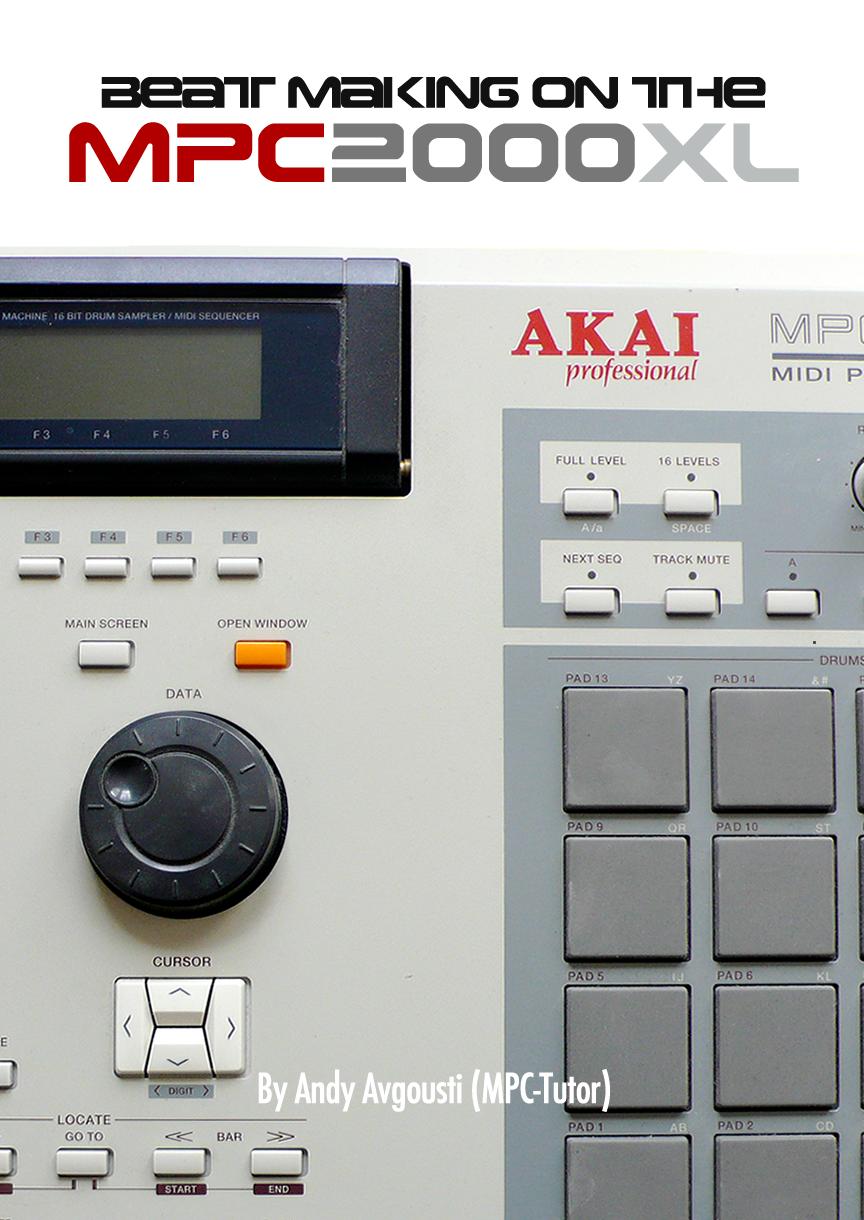
Beatmaking on the MPC2000XL (Preview) By Andy Avgousti (MPC-Tutor)
|
|
|
- Sherilyn Quinn
- 5 years ago
- Views:
Transcription
1
2 Beatmaking on the MPC2000XL (Preview) By Andy Avgousti (MPC-Tutor) Third Edition Published by MPC-Samples.com 2009 Copyright Andy Avgousti 2003 Andy Avgousti has asserted his right under the Copyright, Designs and Patents Act 1988 to be identified as the Author of this work. Notice of Rights All rights reserved. No part of this book may be reproduced, resold, stored in a retrieved system or transmitted in any form or by any means, without prior written permission of the Publisher. Notice of Liability The author and publisher have made every effort to ensure the accuracy of the information herein. However, the information contained in this book is sold without warranty, either express or implied. Neither the authors nor Publishers, nor its dealers or distributors will be held liable for any damages to be caused either directly or indirectly by the instructions contained in this book, or by the software or hardware products described herein. The Author and Publisher are not affiliated in any way to Akai Professional LP. MPC-Samples.com is a trading name of Beat Box Digital LTD, a company registered in England & Wales, Company No
3 Beat Making on the MPC2000XL Thank you for downloading this free tutorial from Beat Making on the MPC2000XL, published by MPC-Samples.com. This free preview includes all associated files required to recreate the tutorials. The tutorial files themselves can be downloaded from the following URL: We hope you find this information useful in evaluating this book if you have any more questions about the book, please do not hesitate to contact us. For more information:
4 Contents Preface i How to use this book Section A - Fundamental Skills Audio Connections Understanding MIDI Storage Options Formatting Loading Files Saving to Disk Memory Naming Sounds Sampling Sounds Understanding Mono & Stereo Editing Samples Part Editing Samples Part Looping Samples Programs The Internal Mixer Recording Sequences Editing Sequences Part Editing Sequences Part 2 89 Section B Manipulating Drums & Break Beats Chopping Samples Part Chopping Samples Part Sample Manipulation - Filtering & Tuning Layering Drum Sounds Sample Manipulation Re-sampling & Distortion Rebuilding Decay Tails on Snares 115 Section C Building Drum Kits & Breaks Building Drum Kits - Pure Kits Emulating Timbre Changes Building Performance & GM Kits Creating Realistic Drum Performances Basics of Laying Down a Drum Beat Part Laying Down a Drum Beat Part Section D Advanced Techniques Understanding the EB EB16 Reverb Parameters Levels & Auto Chromatic Assign Fitting an Instrument Loop to a Beat Multisampling Part Multisampling Part Looping Instrument Samples Sequencing Tricks Part Sequencing Tricks Part 2 181
5 Section E Building Songs Understanding Song Mode Song Arrangement Ideas Recording Your Beats Part Recording Your Beats Part Recording Your Beats Part Compression Part Compression Part Section F MPC2000XL Studio Environments Looping Multisamples in Audio Editors Using Recycle with your MPC2000XL Part Using Recycle with your MPC2000XL Part Zip Drive Installation 231 Appendix MPC2000XL FAQ Archive 235 G1 Compatibility FAQs 236 G2 Connections FAQs 239 G3 Optional Extras 242 G4 Programs FAQs 245 G5 Sampling FAQs 248 G6 Sequencing FAQs 251 G7 Storage FAQs 253 G8 Zip FAQ 255
6 019 Chopping Samples Learn how to chop and zone drum loops - by doing this you can re-arrange loops, change the groove and remove individual hits to make your own kits. Looping a drum beat is fun, but using that same 2 bar loop within your whole track can be pretty boring. By chopping up a break beat loop, we can create something unique, something that can change throughout the track. We can also get rid of vinyl pops and crackle by selecting only certain elements of a beat - and finally we can create some interesting special effects. Methods for Chopping Breaks Why do we want to chop a break? Well, normally it's because we wish to use the drum sounds within the break and generally keep the same atmosphere and production associated with the break, but we need the break to either 'fit' into an existing sequence or we would like to change the groove or note order of the break. We may also wish to perform special tricks to the break or we may simply wish to extract a particular drum sound from the break to use in one of our own beats. Perhaps your break contains some nasty pops and scratches that you would like to remove, or maybe you just want to make a boring old 2 bar loop a little more interesting. There are lots of other reasons for chopping up breaks - for a start, it's a lot of fun and it can be a challenge to transform something quite familiar into something that sounds completely different. So how do we go about chopping a break? Looking back at 012 Editing samples Part 2, we came across the 'Section New Sound' function in the Sample Edit screen - this provides us with one method of chopping a break - this function allows us to select a section of a break and turn just this section into a completely new sample. So in theory, you could keep selecting different sections within your break and creating new samples from it. That's okay and we shall use this later to do some small chops, but our MPC has a quicker way of chopping an entire break into manageable chunks - the Zone function. Zone Function Overview The MPC zone function takes any sample (it doesn't have to be a drum loop) and automatically creates separate sections or 'zones' within that sample, each one of these zones will eventually be a completely new sample in its own right. Each zone is completely editable using the same trimming techniques discussed in previous tutorials. After creating your set of zones, they are automatically assigned to a new program (in running order) so you can immediately start creating a new groove out of them. The easiest way to see how the zone function works is to work through an example. Load up the drum beat 'SIMPLE.SND' from the tutorial files and assign it to any pad. This beat has been trimmed and looped already for you using the techniques covered in previous tutorials. If you go to PARAMS in the TRIM screen you'll see that the loop is 4 beats long (1 bar) and is 63.9 BPM. Keep your finger on a pad and listen to the beat looping. It's a nice beat (you may recognise it), but it wont sound that good looped in its current state because that roll at the end will become very annoying after a while...
7 In the Zone Press the ZONE button (F3). This is the Zone screen, where we can slice our loop up quickly into smaller parts. Looking at this screen shot, you can see that the name of the sample is shown in the usual place at the top left corner. To the right you will see the PLAY X parameter. Initially, this will be set to ALL. This means that when you press 'PLAY X' (F6) you will hear all of the sample. Highlight this field and jog wheel once to the right so it says 'ZONE'. This means that when we press PLAY X (F6), it will play only the zone we have selected within our sample. Navigate so that 'Zone: 1' is selected. Now jog wheel to the right and you'll see the number increase - at the same time, the highlighted 'zone' within the sample also changes. What you are doing here is simply running through all the existing zones that our MPC has set by default. You'll see that there are 16. Go through each zone and press PLAY X to hear what each zone initially sounds like. How does an MPC decide where to place the zones? If you've ever used the computer software 'Propellerheads Recycle', you'll know that Recycle analyses the peaks of the drum beat waveform and automatically slices your beat into perfect zones. The MPC on the other hand does not do this - in fact it is blissfully unaware of the exact position of your drum hits. The MPC simply takes the length of the sample and divides it into equally spaced zones. So if a sample was 1000 samples long and we sliced it into 10 zones, each zone would be 100 samples wide. This means that 90% of the time, we need to make some manual adjustments to the width of the zones as some drum hits will be cut off slightly. With the 'Zone:' field still highlighted, press OPEN. Here you can change the number of zones available. Using the jog wheel or the number pad, change the number of zones to 4 and press DO IT. Now if you spin the jog wheel on the zone parameter, it will show all the zones available as being 4. As you can see, each zone is a lot larger now, as the beat has been evenly sliced into 4 rather than 16 zones. As this loop is 4 beats (or one bar) long (as shown in PARAMS) we can safely assume that each of these slices can represent one beat. With Zone 1 selected, press F6 (PLAY X). This is what our first slice will sound like. Listen to the other 3, and you'll notice that Zone 3 is slightly cut off at the start. Looking at Zone 2, we can see that the start of the third beat is actually contained within zone 2. Why is this? Well most drum beats are played by real drummers. Real drummers don't play to a quantise template, they sometimes hit a snare slightly behind or ahead of the beat, giving the music some swing and feeling - and even the tightest drummers simply make the odd 'mistake'. When cutting up drum breaks recorded by real drummers it is quite common to find

8 that certain hits don't 'line up' exactly on the beat. So, the MPC divides your loop into equal parts based on the number of zones you select. This is why some hits will get cut off and this is why you need to adjust your zones. Adjusting Zones This is pretty simple. It's the same method as you would use in trimming, except this time you need to adjust the start and end points for all your zones instead of just one. Simply select a zone, then navigate to its start point, hit OPEN and trim to the start of the hit using your jog wheel - you'll only need to make a minor adjustment in most cases. Then go to the end point of the same zone, hit open and repeat the procedure. Lets adjust the zones in our sample now. Go to Zone 1, and select the end point and hit OPEN window (we don't need to trim the start point for this zone as it is the beginning of the sample and we've already trimmed that when looping). The end point is currently at 41345, and as you can see, this is slightly cutting off the start of the next zone. Move the jog wheel until you are at the start of the hit, (around 41166) and return to the MAIN screen. Now zone 1 is perfectly edited and in the process, you've also made sure the start of zone 2 is perfectly trimmed. Select Zone 2, select its end point, and repeat the adjustment for this zone, making sure that the end zone of zone 2 does not fall on the drum hit that is supposed to be at the start of zone 3 (around 81710). Go through all 4 zones to make sure everything is as perfect as possible. Slicing To finally slice your zones, hit EDIT. You'll get this following screen Here you need to set your End Margin. Adding an end margin is supposed to help stop gaps forming in your sequenced beats due to the abrupt way that your slices get chopped. The end margin is actually 'borrowed' from the zone in front of that zone. Setting an end margin of '30' will actually take 30 sample points from zone 2 and add it to the end of zone 1. It will also take 30 sample points from zone 3 and add it to the end of zone 2 and so on. Only your last zone does not get anything added as there is no zone in front of it to 'borrow' anything from. Unfortunately, this is not the ideal solution to the problem of cutting off the end of slices too abruptly - it leaves a small click at the end of each sample which can be noticeable in certain situations. We'll look at ways of overcoming this problem later. Set your End Margin to 35 as this is a good compromise, and keep 'Create New Program' set to YES. This tells your MPC to create a new program out of your slices. Press DO IT, and the MPC slices your beat, creating a new program with your 4 slices on PADS A1 - A4. To see your new program you'll have to manually go into PROGRAM (shift 6) and select the DRUM number that is currently highlighted along the bottom row.
9 If you like, load up the 'simplea.pgm' file from the tutorial files. This is my version of the chopped up beat (you can use your version if you wish). Play the pads A1 to A4 to hear your cuts/slices. You'll notice that the pad A1 chop has a small tick after it, don't worry about that for the moment, we'll deal with that later. First, let's recreate our original beat within our sequencer. Go to a blank sequence and set the BPM to 63.9, set the timing to 1/8 and make sure that track 1 is assigned to the DRUM that your chopped beat is stored in. Now, remember that we chopped our break into 4 slices and our break was exactly 4 beats long - that means each slice is one beat. So let's place each one of these slices exactly on a beat. In your 'Now:' field (top right of your main sequence page), you have 3 sets of numbers, , which we saw in previous tutorials represents the Bar (001), beat (01) and tick (00) position. So beat 1 is represented by Beat 2 is represented by Beat 3 is and beat 4 is So to place our zones 'on the beat' simply go into step edit and add our slices at these 4 points. Make sure you are at the start of your sequence and press STEP (F1). Enter your first slice here (pad A1). Now navigate to The easiest way to do this is to use the STEP cursors above the REC button - as your timing is set to 1/8, this involves press the right STEP key 4 times. Enter your second slice here (pad A2). Enter pad 3 at and pad 4 at Alternatively, you can load the sequence BEAT1.MID from the tutorial files. Whichever sequence you use, press play - doesn't sound quite right, does it? Some of the beats seem to come in a little too late... Why it sounds weird Remember that we had to adjust our zone positions earlier. We did this because our hits didn't fall exactly on the beat. To recreate our original beat, we cannot simply place all chops exactly on the beat, we would need to place some slightly before in this case, as the original drummer was playing slightly ahead of the beat - remember, drummers do not obey strict quantise points - this is what gives real drum performances their feel. Load up BEAT2.MID. This time, I've placed the chops 2, 3 and 4 slightly behind the beat by setting the 'timing' field to 'OFF' and using step edit to place the notes in their new position. It sounds a lot better. Arranging the chops this way has kept the original feel of the beat - but let's look at a few ways of changing the original feel, and making a whole new beat in part 2 of this tutorial.
10 020 Chopping Samples Part 2 Take chopping a step further by changing the feel of a loop, and creating choppy break effects in the zone screen. Changing the Feel A common trick in dance music is to make the hits fall exactly on the beat - DJ's love music like this as they can beat match tunes together a lot more easily. Well, we tried placing all our chops exactly on the beat with BEAT1.MID, and it did not sound quite right. But let's go back to that same sequence, and this time we'll make the chops fit exactly on the beat - by doing this we will remove the 'ahead of the beat' feel, making the beat a bit more rigid, but perfect for beat matching. A good place to start is trying to adjust the tempo of your sequence. Go back to BEAT1.MID which was the sequence we originally created where all the chops were 'on beat'. First off, if we listen carefully (try headphones) we can hear small gaps between each chop, suggesting that if we increase the tempo, things might sound a bit better. Try it at 64.5BPM (don't increase the tempo too much, it will sound strange). There's still a bit of a gap between the second and third chops, and it also sounds like the looping point comes in too quickly. To reduce the gap between the second and third chops, we can try stretching the length of our second chop pad A2 - SIMPLE2.SND). By stretching it out, we will increase its length and thus remove the gap between it and the third zone. So how do we stretch out the length of a sample? Well there are two ways this can be done. Tuning Remember from 014 Programs, we discussed the 'Tune' parameter on each pad. By decreasing this number we basically slow down the sample on this pad. Well, slowing down a sample results in a longer sample - so what if we tune down the sample on PAD A2? Well, let's try it. Go to Program (shift 6) and select pad A2. Press PARAMS (F2) and in the top right corner highlight 'Tune: 0'. Change this to -5 and press play on your sequencer. The sample is definitely slower, but at the same time, you can definitely hear there has been a change in pitch of this sample - it sounds lower compared to the other samples - mainly on the hi hat sound. This is always a problem with tuning samples like this. The solution is to tune all your samples down by the same amount - the problem this time is that this will tune down samples that were okay in the first place! There is a much better way to lengthen our samples, and it's called Time stretching. We'll look at tuning samples down in later tutorials as it does have some other interesting uses. Time Stretching Time stretching lets us lengthen or shorten a sample without changing its pitch. This was a new feature for MPCs which until then, had to make do with the tuning method. Time stretching has its limitations, especially when trying to increase sample length - samples can start to sound metallic, but generally, this feature is a really useful addition to the MPC arsenal.
 and jog wheel all the way to the right - to TIME STRETCH. The 'New Name' field is the name that the MPC will give your new time stretched sample.")
11 First, set your Tuning in pad A2 back to 0. From here, press Trim (shift f5) to bring up our SIMPLE2 sound in the sample edit screen. Press EDIT (F5) and jog wheel all the way to the right - to TIME STRETCH. The 'New Name' field is the name that the MPC will give your new time stretched sample. Whenever your MPC time stretches a sample, it creates a completely new sample (the time stretched version) and it leaves the original sample untouched. Leave this field as it is (our new sample will be called 'SIMPLE5'). The next field, 'Ratio' is the amount of stretch we wish to apply to our sample. Any number greater than 100% will result in a sample that is longer than the original. Any number less than 100% will give us a shorter sample. Normally, we find that time stretching more than 110% gives a metallic sound - it's always best to time stretch as little as possible to achieve your goal. Initially try a ratio of about % for a subtle stretch (use either your job wheel or number pad to change this). The third field is our 'Preset' field. Change this field to match the type of sound you are time stretching. When it comes to drum sounds, you have several choices - you could choose any of the RHYTHM presets and any of the PERCUSSION presets. For general drum loop processing I tend to use the PERCUSSION time stretch preset, although it doesn't hurt to try alternatives as each preset will act slightly differently and you may get a better result with another. You'll notice that each preset has 3 versions - A, B and C. A is the lowest quality, C is the highest (although it takes longer to process). For a short sample like this, the processing time is not an issue so set it for best quality, C. The final parameter is 'Adjust'. This allows you to tweak the time stretch preset a little. If after processing, things don't sound quite right, you should try changing this value slightly - increasing its value is supposed to help high frequency sounds, while dropping this value results in improved bass stretching. For the moment, leave this at 0. Press DO IT. Once the sound has been processed, you'll be taken back to the trim screen and your new sample will be displayed - have a listen to the result. When I did this, I found the sample had gained a metallic sound so I decided to scrap this sample and deleted it (highlight the name in the top left, OPEN, DELETE, DO IT). I repeated the entire process again but this time set the adjust to -36 and I found the resulting sample sounded a lot better. This can be really hit and miss so have a little patience. Of course, not only does our sound have to sound right, it also needs to fit into our sequence properly. So, we now have a slightly longer version of SIMPLE2.wav called SIMPLE5.WAV. Hopefully, this will help fill the gap between chops 2 and 3. Go to PAD A2 and

12 replace SIMPLE2 with SIMPLE5, and press play. That sounds a lot better. Of course in practice, you may need to try a few different time stretch percentages until you find one that fixes the problem, it's all about trial and error - and patience. If you are dealing with a longer sample that will take your MPC a long time to process, I suggest you choose the 'A' version of the time stretch preset until you find the length you require (remember 'A' presets are low quality but processed a lot faster), then make a 'C' version for final inclusion. Fixing the end chop We still have the problem of the end chop. If you listen carefully, it sounds like the loop point comes in just too fast - this is because our end sample is too long. If we shrink our last chop, hopefully this will solve this problem (stretching this chop will only make things sound worse). Select SIMPLE4 in your program and press SHIFT and 5 (TRIM). This will take you to the editing page. Press EDIT and select TIME STRETCH. This time I first selected 98.50%, a decrease in length of 1.5%. But when I replaced the original SIMPLE4 with this new sample (SIMPLE6), it wasn't short enough. So I erased this and tried again, this time using 97.57%. The result was a lot better. To hear it, load up SIMPLEB.pgm and play it through sequence BEAT3.MID. (this is simply BEAT1 at 64.5bpm). So, now we have 2 ways to chop a beat. The first was to keep the original feel, the second has created a slightly new feel (including an increase in speed). This second way, with our drum hits falling exactly on the beat leads to much easier beat manipulation and leads us to the next example. Chopping it further From now on, we shall be using the 4 chops in our SIMPLEB.PGM program, so I suggest removing the unwanted chops from memory (i.e. remove SIMPLE2 and SIMPLE4). Now create a new program and call it SIMPLEC. We are now going to take each chop, and start to chop it down into smaller chunks. We'll start with SIMPLE1. In the TRIM screen, select SIMPLE1. Press a pad to hear it - it's got a click on the end - we'll remove this click later. Let's now cut this slice into two. We could use the zone function for this, but this time, we'll use SECTION NEW SOUND. Using the slider and shift, move your end point roughly to the start of the second kick in this sample. Now, with the end point highlighted, press OPEN and fine edit the end point so that the start of the next kick falls just to the right of the edit line (around 20986). Press EDIT and jog wheel to SECTION NEW SOUND. Call the sample SIMPLE7, and press DO IT. Assign this sound to pad A1 in your program - pad A1 now has
13 a single hit which is made up of an open hat and a kick drum laid on top of each other. Return to SIMPLE7. Now move your start point to the start of the second sound (a quiet kick + hat laid on top of each other), and repeat the process of creating a SECTION NEW SOUND. This time, set your end point before that horrible click on the end so it get removes when we create our new sound - I set the start point to and the end point to This time name the sample SIMPLE8 and assign to PAD A2. We now have a double hit on pad A2 consisting firstly of a kick with a hat laid on top of it, followed by another kick shortly after it. Now repeat this process for SIMPLE 5 (remember to remove the click on the end). Split this sample in half, which should leave you with a snare (with a hat laid on top) and a double hit of a hat followed by a kick. Assign these to pads A3 and A4. Do the same for SIMPLE 3. For SIMPLE6, slice the beat into two parts, the first part being the kick/open hat and the second part being the snare roll with the kick at the end. Once you've chopped all your new slices make sure you've assigned them all to your SIMPLEC program and save it to disk - I've included my own version of this - it's in the tutorial files, and is also called SIMPLEC.pgm. In its current state, you could start experimenting and making new beats with these chops, so feel free to do so. But wouldn't it be good if we could spilt all our chops into the smallest pieces possible? Well, there's nothing stopping us (except patience!). Using the exact same techniques we used in the previous example, take each one of your new slices and chop it down to the individual hits. Assign each of these hits to a new program and call it SIMPLED. You may like to load up my version from the tutorial files (also called SIMPLED.pgm). Each pad contains a single hit; apart from pad A13 which contains a little roll I thought would sound good intact. The first thing you may notice is that I've renamed all the samples. I'll talk about this naming convention in later tutorials when I introduce pure and impure kit templates, but for the moment, you can probably work out that 'KH1' refers to a 'kick with a hat laid over it' while K1 simple refers to a 'pure kick' sound. Load the sequence BEAT4.mid to hear a sequence I created using this program. It sounds very different to the original loop - a different tempo and a completely different groove. Straight away you can see the advantage of chopping your break into individual hits - you are no longer limited by the original performance, but get to keep the sound and production in your new beat. You can change the tempo of your beat quite easily just by adjusting the sequence tempo in the main screen using the jog wheel. One downside to this method is that you can't really slow your beat down any slower than the tempo of the original loop, as you'll start to hear the gaps between the chops. But you can certainly speed it up no problem, as I did in BEAT4 (63.9 to 86.5BPM). Just remember that if you use the roll sample on pad A12, you must time stretch this to make it shorter otherwise it will not fit properly.
 sounds a bit duff - it has a bit of bass reverberation running through it and it also sounds quite clicky.")
14 Using only your best samples If you look at BEAT4, you'll see that I only used one hi hat sample even though there was two that we salvaged. This was because the second hi hat sample (CH2 on pada7) sounds a bit duff - it has a bit of bass reverberation running through it and it also sounds quite clicky. But that's the beauty of this method - you can pick and choose the best samples and ignore the bad ones. Of course, it's nice to have several variations of the same sample to make our beat a little more interesting, but we'll look at drum programming in more detail within the Drum Manipulation section of the book where we will also look at ways in which we can change these drum sounds, beef them up, recreate timbre changes and build our own drum kits. Choppy, Stuttering Loops If you like DJ Shadow, here's an effect that you may hear on some of his tracks. A stuttering effect is very easy to make with an XL, but can sound pretty effective. It uses the fact that within the zone screen, you can take any slice and perform an edit to that particular slice only (while leaving the rest of the sample intact). Load up 'STUTTER.snd' from the tutorial files. Press TRIM (shift and 5) and then press F3 to go to the ZONE screen. We want to slice our sample as many times as possible, so we'll leave it set to the default number of zones, 16. Go to the top right of the screen and highlight 'PLAY X' and use your jog wheel to change this to 'PLAY X: ZONE' - this means whenever we press 'PLAY X' (F6), it will play our selected zone. The first thing to do is to make sure all our zones are set correctly. We've covered this already in this tutorial, so I'll assume you are comfortable doing that now. Once all the zones are set, you'll have 16 little chops to play with. What we're going to do is select alternate chops and mute them. This can be done using the 'SILENCE' function available in the EDIT screen. First highlight ZONE 2 and press EDIT (F5). This will, by default bring up the SLICE SOUND page, but we do not want this screen - jog wheel three notches to the left so that you are in the SILENCE SECTION screen To silence this slice only, simply press DO IT. This will return you to your ZONE screen and you'll see that ZONE 2 appears to be blank. Press F6 (PLAY X) and you'll here nothing. Now continue to do this for every other slice - i.e. 4, 6, 8, 10, 12, 14, 16. Once you've muted all these zones, just hit your pad and the break will play from start to end, stuttering away quite happily. To hear my version, load up 'STUT2.snd' from the tutorials folder.
15 Using the Edit function on Zones The above example has shown us that you do not have to wait to edit your zones until you've actually performed a SLICE SOUND edit. You can perform any of the options in the EDIT screen on any slice and it will instantly change your sample within the zone screen (but only for that particular zone). So, why not reverse a single zone? As above, all you need to do is highlight a single zone (try zone 5, which is a snare), press EDIT (F5) and jog wheel to the REVERSE SECTION screen. After pressing DO IT you'll have a reverse sample for zone 5. Equally, you can perform a timestretch on individual zones, or you can even use the DELETE SECTION screen to physically remove a zone from your sample. Be careful with this though - by removing a slice, you'll change not only the BPM of your beat, but you'll also change the time signature (i.e. there will no longer be 4 beats to a bar as you just removed one of the beats!) Obviously the main problem with this method is it's a little bit 'final' (no 'undo') and you can't move samples around (i.e. after performing the reverse edit, you'll hear that the reverse sample needs a little nudging for it to keep in time with the beat). This is why I prefer to slice the samples into a program and then I have a lot more control over each individual sound and it's placement in the beat. That s the end of this free preview of the Beat Making on the MPC2000XL you can purchase the full book at MPC- Samples.com:
 What s in this free demo? In this free excerpt from Beat Making on the MPC500 we ve included the chapter Chopping Breakbeats where you ll learn how to slice up a break to create your own drum kits and
Please note that this tutorial contains references to other chapters in the book!
 Beat Making On The MPC500 Example Tutorial - Chopping Breaks Thank you for downloading the free sample chapter of Beat Making on the MPC500 by MPC-Tutor. This excerpt is taken from the Manipulating Drums
Go back to the stopped deck. Put your finger on it, holding it still, and press start. The deck should be running underneath the stopped record.
 LEARN TO MIX RECORDS Place two identical records/cd's on your decks, and set the pitch to 0. On most decks, a green light will come on to let you know it's at 0 and it'll probably click into place. By
1 Best Practices Course Week 12 Part 2 copyright 2012 by Eric Bobrow. BEST PRACTICES COURSE WEEK 12 PART 2 Program Planning Areas and Lists of Spaces
 BEST PRACTICES COURSE WEEK 12 PART 2 Program Planning Areas and Lists of Spaces Hello, this is Eric Bobrow. And in this lesson, we'll take a look at how you can create a site survey drawing in ArchiCAD
Getting Started. Pro Tools LE & Mbox 2 Micro. Version 8.0
 Getting Started Pro Tools LE & Mbox 2 Micro Version 8.0 Welcome to Pro Tools LE Read this guide if you are new to Pro Tools or are just starting out making your own music. Inside, you ll find quick examples
The Fantom-X Experience
 ÂØÒňΠWorkshop The Fantom-X Experience 2005 Roland Corporation U.S. All rights reserved. No part of this publication may be reproduced in any form without the written permission of Roland Corporation
Power User Guide MO6 / MO8: Recording Performances to the Sequencer
 Power User Guide MO6 / MO8: Recording Performances to the Sequencer The Performance mode offers you the ability to combine up to 4 Voices mapped to the keyboard at one time. Significantly you can play
BEST PRACTICES COURSE WEEK 21 Creating and Customizing Library Parts PART 7 - Custom Doors and Windows
 BEST PRACTICES COURSE WEEK 21 Creating and Customizing Library Parts PART 7 - Custom Doors and Windows Hello, this is Eric Bobrow. In this lesson, we'll take a look at how you can create your own custom
Drum Beat Construction by Eddie Bazil 1
 Drum Beat Construction by Eddie Bazil 1 Drum Beat Construction: Demo Chapter This is an excerpt taken from Eddie Bazilʼs book, ʻDrum Beat Constructionʼ. To download the complete book with all audio examples,
Getting Started Pro Tools M-Powered. Version 8.0
 Getting Started Pro Tools M-Powered Version 8.0 Welcome to Pro Tools M-Powered Read this guide if you are new to Pro Tools or are just starting out making your own music. Inside, you ll find quick examples
Hello and welcome to the CPA Australia podcast. Your weekly source of business, leadership, and public practice accounting information.
 Intro: Hello and welcome to the CPA Australia podcast. Your weekly source of business, leadership, and public practice accounting information. In this podcast I wanted to focus on Excel s functions. Now
The Slide Master and Sections for Organization: Inserting, Deleting, and Moving Around Slides and Sections
 The Slide Master and Sections for Organization: Inserting, Deleting, and Moving Around Slides and Sections Welcome to the next lesson in the third module of this PowerPoint course. This time around, we
Project Two - Building a complete song
 Project Two - Building a complete song Objective - Our first project involved building an eight bar piece of music and arranging it for three backing instruments. In this second project we will consider
Record your debut album using Garageband Brandon Arnold, Instructor
 Record your debut album using Garageband Brandon Arnold, Instructor brandon.arnold@nebo.edu Garageband is free software that comes with every new Mac computer. It is surprisingly robust and can be used
BEST PRACTICES COURSE WEEK 14 PART 2 Advanced Mouse Constraints and the Control Box
 BEST PRACTICES COURSE WEEK 14 PART 2 Advanced Mouse Constraints and the Control Box Copyright 2012 by Eric Bobrow, all rights reserved For more information about the Best Practices Course, visit http://www.acbestpractices.com
Practicing with Ableton: Click Tracks and Reference Tracks
 Practicing with Ableton: Click Tracks and Reference Tracks Why practice our instruments with Ableton? Using Ableton in our practice can help us become better musicians. It offers Click tracks that change
PLEASE NOTE: EVERY ACTIVITY IN THIS SECTION MUST BE SAVED AS A WAV AND UPLOADED TO YOUR BOX.COM FOLDER FOR GRADING.
 PLEASE NOTE: EVERY ACTIVITY IN THIS SECTION MUST BE SAVED AS A WAV AND UPLOADED TO YOUR BOX.COM FOLDER FOR GRADING. Multitrack Recording There will often be times when you will want to record more than
QUICKSTART COURSE - MODULE 1 PART 2
 QUICKSTART COURSE - MODULE 1 PART 2 copyright 2011 by Eric Bobrow, all rights reserved For more information about the QuickStart Course, visit http://www.acbestpractices.com/quickstart Hello, this is Eric
How big is your room and what are the walls made out of?
 Objective: By the end of this lab you will be able to hide, display and call up any reverb and to deduce how to load presets and manipulate the various components within a reverb. To be able do duplicate
Add Rays Of Sunlight To A Photo With Photoshop
 Add Rays Of Sunlight To A Photo With Photoshop Written by Steve Patterson. In this photo effects tutorial, we'll learn how to easily add rays of sunlight to an image, a great way to make an already beautiful
Getting Started. Pro Tools LE & Mbox 2 Pro. Version 8.0
 Getting Started Pro Tools LE & Mbox 2 Pro Version 8.0 Welcome to Pro Tools LE Read this guide if you are new to Pro Tools or are just starting out making your own music. Inside, you ll find quick examples
MIXING I HAVE A NAME
 MIXING I HAVE A NAME by Chris Harris http://headfirst.www.idnet.com/about_music.htm chris@headfirstonly.com This document explains how I mixed @sapient and @leslie's song for FAWM 2016, I Have A Name.
Disclaimer COPYRIGHT NOTICE
 Disclaimer The content of this book is for information only. MPC Samples shall not be liable for any direct, indirect, incidental, special or consequential damages that result from the use of the information
Recording guidebook This provides information and handy tips on recording vocals and live instruments at home.
 Welcome to The Hit Kit s QuickStart instructions! Read on and you ll be set up and making your first steps in the world of music making in no time at all! Remember, you can find complete instructions to
first, is this possible? if so, could someone give me insight into how best to organize this?
 using the octatrack for live backing tracks Posted by tngregory - 2011/02/15 07:31 i am a singer/songwriter. i write songs like movie scores with lyrics and i usually make my tracks in logic or live. i
- for CreamWare SCOPE -
 bx_digital MANUAL - for CreamWare SCOPE - 2006 by BRAINWORX GmbH Brainworx Music & Media GmbH Hitdorfer Str. 10 40764 Langenfeld info@brainworx-music.de 1 INDEX 1. What is the bx_digital? 3 2. What is
CONTENTS JamUp User Manual
 JamUp User Manual CONTENTS JamUp User Manual Introduction 3 Quick Start 3 Headphone Practice Recording Live Tips General Setups 4 Amp and Effect 5 Overview Signal Path Control Panel Signal Path Order Select
Learn Crochet: Part 1
 Mom s Crochet Patterns written by Sandy Marie Learn Crochet: Part 1 Includes: Beginner s Basics, Crochet Chain, Single Crochet and More. Plus the Single Crochet Potholder Pattern. Learn Crochet: Part 1
Freezer Paper Piecing with Tara Faughnan
 Freezer Paper Piecing with Tara Faughnan Chapter 1 - Freezer Paper Piecing Overview (modern music) - Hi everyone, I'm Tara Faughnan, I'm a quilter, a teacher, and a textile designer by trade. We're gonna
The Art of SoundFont: A Step-by-Step Guide Page 1 of 2
 The Art of SoundFont: A Step-by-Step Guide Page 1 of 2 Jess Skov-Nielsen was the Grand-Prize winner of the 1997 Creative Open MIDI Contest. Are you one of the many desktop musicians who rely only on those
How To Turn Off Manual Tempo Mode In Pro Tools
 How To Turn Off Manual Tempo Mode In Pro Tools 1 Turn the volume down on your audio interface when counting off before recording or playback starts In Manual Tempo mode, Pro Tools ignores tempo. based
Supplementing MIDI with Digital Audio
 Supplementing MIDI with Digital Audio Richard Repp Assistant Professor of Music Georgia Southern University Last month I showed how to use subsequences to put together a popular-style song. http://ti-me.org/members/november2003/repp1.html
Easily Smooth And Soften Skin In A Photo With Photoshop
 Easily Smooth And Soften Skin In A Photo With Photoshop Written by Steve Patterson OPEN THE START FILE BY RIGHT CLICKING THE.JPG FILE AND CHOOSING OPEN WITH ADOBE PHOTOSHOP. SAVE AS: X_lastname_firstname_Smooth_Soft
Organic Transitions. user manual. loops de la Crème
 Organic Transitions user manual loops de la Crème september 2015 1 Thank you for purchasing ORGANIC TRANSITIONS! This sample library is based on recordings of percussion instruments (shakers, tambourines,
Lesson 2: Choosing Colors and Painting Chapter 1, Video 1: "Lesson 2 Introduction"
 Chapter 1, Video 1: "Lesson 2 Introduction" Welcome to Lesson 2. Now that you've had a chance to play with Photoshop a little bit and explore its interface, and the interface is becoming a bit more familiar
QUICKSTART COURSE - MODULE 7 PART 3
 QUICKSTART COURSE - MODULE 7 PART 3 copyright 2011 by Eric Bobrow, all rights reserved For more information about the QuickStart Course, visit http://www.acbestpractices.com/quickstart Hello, this is Eric
Week 1: Day 1 - Progressive Pattern 1
 Week 1: Day 1 - Progressive Pattern 1 Step 1 in understanding the off-beat is to look at the strumming pattern I'm providing. It may not seem like much at first, but as you practice this pattern and increase
Making Music with Tabla Loops
 Making Music with Tabla Loops Executive Summary What are Tabla Loops Tabla Introduction How Tabla Loops can be used to make a good music Steps to making good music I. Getting the good rhythm II. Loading
MITOCW watch?v=fp7usgx_cvm
 MITOCW watch?v=fp7usgx_cvm Let's get started. So today, we're going to look at one of my favorite puzzles. I'll say right at the beginning, that the coding associated with the puzzle is fairly straightforward.
Getting Started Guide
 Getting Started Guide Overview Circuit Thank you for buying Novation Circuit, our standalone groovebox designed to inspire. Two Novation polysynths, a four-part drum machine and an intuitive sequencer:
copyright Karen Hinrichs, 2011 all rights reserved Adding Stops and Stitches Page 1 of 5 Adding Stops and Stitches to make Applique from Ordinary
 all rights reserved Adding Stops and Stitches Page 1 of 5 5D Embroidery Extra Adding Stops and Stitches to make Applique from Ordinary Karen Hinrichs Lee in Tampa asked: Is there a way to take a design
Sew a Yoga Mat Bag with Ashley Nickels
 Sew a Yoga Mat Bag with Ashley Nickels Chapter 1 - Introduction Overview Hi, I'm Ashley Nickels. I'm a sewer and a quilter. And one of my favorite things to do is design bags. And I designed this yoga
Click on the numbered steps below to learn how to record and save audio using Audacity.
 Recording and Saving Audio with Audacity Items: 6 Steps (Including Introduction) Introduction: Before You Start Make sure you've downloaded and installed Audacity on your computer before starting on your
USAGE AND SAFETY PRECAUTIONS
 OPERATION MANUAL USAGE AND SAFETY PRECAUTIONS USAGE AND SAFETY PRECAUTIONS In this manual, symbols are used to highlight warnings and cautions for you to read so that accidents can be prevented. The meanings
GarageBand 3 Tutorial
 You don t have to be a musician to make music with GarageBand. GarageBand includes short pieces of pre-recorded music called loops. Loops contain musical patterns that can be combined and repeated seamlessly.
Music Production. Summer Music Technology - Day 1. July 8, 2013
 Music Production Summer Music Technology - Day 1 July 8, 2013 1 Introduction In this activity we will cover the basics of music production using the popular digital audio workstation (DAW) GarageBand for
As can be seen in the example pictures below showing over exposure (too much light) to under exposure (too little light):
 to under exposure (too little light):") Hopefully after we are done with this you will resist any temptations you may have to use the automatic settings provided by your camera. Once you understand exposure, especially f-stops and shutter speeds,
Hopefully after we are done with this you will resist any temptations you may have to use the automatic settings provided by your camera. Once you understand exposure, especially f-stops and shutter speeds,
How To Record On Cubase The A to Z Guide
 musicproductiontips.net http://musicproductiontips.net/how-to-record-on-cubase/ How To Record On Cubase The A to Z Guide By Paschalis Recording on Cubase is easier than you think, so in this tutorial I
MUSC 1331 Lab 3 (Northwest) Using Software Instruments Creating Markers Creating an Audio CD of Multiple Sources
 Using Software Instruments Creating Markers Creating an Audio CD of Multiple Sources") MUSC 1331 Lab 3 (Northwest) Using Software Instruments Creating Markers Creating an Audio CD of Multiple Sources Objectives: 1. Learn to use Markers to identify sections of a sequence/song/recording. 2.
MUSC 1331 Lab 3 (Northwest) Using Software Instruments Creating Markers Creating an Audio CD of Multiple Sources Objectives: 1. Learn to use Markers to identify sections of a sequence/song/recording. 2.
ArchiCAD Tutorial: How to Trace 2D Drawings to Quickly Create a 3D Model
 ArchiCAD Tutorial: How to Trace 2D Drawings to Quickly Create a 3D Model Hello, this is Eric Bobrow of Bobrow Consulting Group, creator of the ArchiCAD MasterTemplate with another ArchiCAD video tip. In
Tutori-O: Spacer How to Make a Mini Miter Box. /mini-miter-box-tutorial. DIY Dork Tutori-O: How to Make a Mini Miter Box
 1 DIY Dork Tutori-O: Spacer How to Make a Mini Miter Box www. /mini-miter-box-tutorial 2 Published by: Kevin Torrence kevin@diydork.com Copyright 2011 - Kevin Torrence. All rights are reserved. No part
Harry Plummer KC BA Digital Arts. Virtual Space. Assignment 1: Concept Proposal 23/03/16. Word count: of 7
 Harry Plummer KC39150 BA Digital Arts Virtual Space Assignment 1: Concept Proposal 23/03/16 Word count: 1449 1 of 7 REVRB Virtual Sampler Concept Proposal Main Concept: The concept for my Virtual Space
User Guide ios. MWM - edjing, 54/56 avenue du Général Leclerc Boulogne-Billancourt - FRANCE
 User Guide MWM - edjing, 54/56 avenue du Général Leclerc 92100 Boulogne-Billancourt - FRANCE Table of contents First Steps 3 Accessing your music library 4 Loading a track 8 Creating your sets 10 Managing
Enjoy The Journey. Don t Waste Your Time Practicing Page 1
 Enjoy The Journey What do you dream about being able to do on the drums? Is it playing a mind blowing drum solo? Is it making people bob their heads to your drumming? Whatever it is, you can make it happen
Photoshop Techniques Digital Enhancement
 Photoshop Techniques Digital Enhancement A tremendous range of enhancement techniques are available to anyone shooting astrophotographs if they have access to a computer and can digitize their images.
Copyright 2015, Rob Swanson Training Systems, All Rights Reserved.
 DISCLAIMER This publication is indented to provide accurate and authoritative information with regard to the subject matter covered. The Handwritten Postcard System is not legal advice and nothing herein
ÂØÒňΠGuitar synthesizer July 10, 1995
 GR-1 ÂØÒňΠGuitar synthesizer July 10, 1995 Supplemental Notes MIDI Sequencing with the GR-1 This is an application guide for use with the GR-1 and an external MIDI sequencer. This guide will cover MIDI
Wavelore American Zither Version 2.0 About the Instrument
 Wavelore American Zither Version 2.0 About the Instrument The Wavelore American Zither was sampled across a range of three-and-a-half octaves (A#2-E6, sampled every third semitone) and is programmed with
Overview. The Game Idea
 Page 1 of 19 Overview Even though GameMaker:Studio is easy to use, getting the hang of it can be a bit difficult at first, especially if you have had no prior experience of programming. This tutorial is
Zero-G IMPACT DESIGNER USER MANUAL"
 Zero-G IMPACT DESIGNER USER MANUAL" CONTENTS:" Overview General Principle Of The Impact Designer The MIDI Keys Saving Your Settings GUI: PRE HIT, HIT, BOOM and DECAY Random Button Bottom Row Of Knobs Master
Recording your Voice Tutorials 3 - Basic Uses of Audacity Wayne B. Dickerson
 Recording your Voice Tutorials 3 - Basic Uses of Audacity Wayne B. Dickerson In this tutorial, you are going to learn how to use Audacity to perform some basic functions, namely, to record, edit, save
Formulas: Index, Match, and Indirect
 Formulas: Index, Match, and Indirect Hello and welcome to our next lesson in this module on formulas, lookup functions, and calculations, and this time around we're going to be extending what we talked
In this free ebook you will find the following
 Hey. Welcome to Learn Guitar Tunes newsletter, firstly thank you for downloading my ebooks and choosing me as your teacher, I am totally honoured. As a subscriber to my newsletter you will receive informative
VOCAL FX PROJECT LESSON 9 TUTORIAL ACTIVITY
 LESSON 9 TUTORIAL REQUIRED MATERIALS: VOCAL FX PROJECT STUDENT S GUIDE NAME: PERIOD: TEACHER: CLASS: CLASS TIME: Audio Files (Pre-recorded or Recorded in the classroom) Computer with Mixcraft Mixcraft
Please Read! Quick Start Guide
 Please Read! Quick Start Guide Sound Quality The BeatBuddy Mini sounds best when played through a full-range neutral sound system. Many guitar and bass amps are either not full-range (they muffle the higher
Hohner Harmonica Tuner V5.0 Copyright Dirk's Projects, User Manual. Page 1
 User Manual www.hohner.de Page 1 1. Preface The Hohner Harmonica Tuner was developed by Dirk's Projects in collaboration with Hohner Musical Instruments and is designed to enable harmonica owners to tune
AUDIO INSTRUCTIONS CAPTURE STUDIO ONE PRO TOOLS
 AUDIO INSTRUCTIONS CAPTURE STUDIO ONE PRO TOOLS Updated 4/1/2016 SETTING UP THE LIVE ROOM Set the room up for recording. Arrange the studio rug in the live room and position microphone stands or direct
ipads in Music Education Session 1
 Online 2012 ipads in Music Education Session 1 Katie Wardrobe Midnight Music 2 Part A: GarageBand As A Performance Tool 5 Why play virtual instruments? 5 Why play ipad instruments when you can play the
Re-Amping with Firebox and Little Labs Redeye 3D
 Re-Amping with Firebox and Little Labs Redeye 3D Equipment This is the equipment I used to set up and test this Presonus FireBox Little Labs Redeye 3D Phantom one XLR->XLR cable One 1/4 TRS->XLR (male)
Fingerpicking Patterns
 Fingerpicking Patterns 3 Comments It`s clear you guys who visit this site regularly really love to fingerpick. That`s been shown by the popularity of my `Fingerpicking Classics Series`. I`m just glad you
Open SimPe. It may take a bit to load, heck...it may take quite a while to load, but be patient, it will load.
 Recoloring Single Frame Wall Hangings First and foremost, you will most certainly need SimPE for this tutorial, it can be found here: http:sims.ambertation.de/. You will need to follow the instructions
A Fingerstyle/Chordal Examination of The Sound of Silence by Simon & Garfunkel
 A Fingerstyle/Chordal Examination of The Sound of Silence by Simon & Garfunkel When you take a look at the material below, you won't notice (at first) anything more than just some notes. This makes sense
The Open University xto5w_59duu
 The Open University xto5w_59duu [MUSIC PLAYING] Hello, and welcome back. OK. In this session we're talking about student consultation. You're all students, and we want to hear what you think. So we have
2809 CAD TRAINING: Part 1 Sketching and Making 3D Parts. Contents
 Contents Getting Started... 2 Lesson 1:... 3 Lesson 2:... 13 Lesson 3:... 19 Lesson 4:... 23 Lesson 5:... 25 Final Project:... 28 Getting Started Get Autodesk Inventor Go to http://students.autodesk.com/
The notes are C, G, and E.
 A and E Style Chords: The C's When I first offered this course, the demo was about the C Major chord using both the E and A style format. I am duplicating that lesson here. At the bottom I will show you
CONSOLE 1 POWER-USER TIPS
 CONSOLE 1 POWER-USER TIPS 1 2 Contents 4 1. Grouping tracks 2. Saving presets6 8 3. Deeper DAW Integration 10 4. Using UAD Plug-ins 5. History Function (Undo/Redo) 12 14 16 6. Solo Safe 7. Sidechaining
Owner s Manual. Page 1 of 23
 Page 1 of 23 Installation Instructions Table of Contents 1. Getting Started! Installation via Connect! Activation with Native Instruments Service Center 2. Pulse Engines Page! Pulse Engine Layers! Pulse
Audio Engineering Basics Lab 4 Inserts, Sends & Busses
 Objective: By the end of this lab you will be able to hide display Inserts & Sends, put an effect onto that track, route a track to an AUX track, put an effect onto that AUX track and control the blend
Intro to Pro Tools. Version 8.0.4
 Intro to Pro Tools Version 8.0.4 Welcome to Pro Tools LE Read this guide if you are new to Pro Tools or are just starting out making your own music. Inside, you ll find quick examples of how to record,
GUITAR SYSTEM THE. Beginner
 Beginner GUITAR SYSTEM THE Beginner The Guitar System - Beginner - Table Of Contents Table Of Contents DVD #6 - Minor Chords And Walk-Downs Open Minor Chords...................................................................
Voice Banking with Audacity An illustrated guide by Jim Hashman (diagnosed with sporadic ALS, May 2013)
") Voice Banking with Audacity An illustrated guide by Jim Hashman (diagnosed with sporadic ALS, May 2013) Section One: Install and Setup Audacity Install Audacity... 2 Setup Audacity... 3 Getting Familiar
Voice Banking with Audacity An illustrated guide by Jim Hashman (diagnosed with sporadic ALS, May 2013) Section One: Install and Setup Audacity Install Audacity... 2 Setup Audacity... 3 Getting Familiar
opensap Be Visual! Sketching Basics for IT Business Unit 0
 opensap Be Visual! Sketching Basics for IT Business Unit 0 00:00:13 Hi, and welcome to Week 1. My name is Johanna Wittig and I'm a user experience designer at SAP. 00:00:20 I've been driving several formats
Environmental Stochasticity: Roc Flu Macro
 POPULATION MODELS Environmental Stochasticity: Roc Flu Macro Terri Donovan recorded: January, 2010 All right - let's take a look at how you would use a spreadsheet to go ahead and do many, many, many simulations
CONTENTS PREFACE. Chapter 1 Monitoring... 1 CHAPTER 2 THE MICROPHONE Welcome To The Audio Recording Basic Training...xi
 iii CONTENTS PREFACE Welcome To The Audio Recording Basic Training...xi Chapter 1 Monitoring... 1 The Listening Environment... 1 Determining The Listening Position... 2 Standing Waves... 2 Acoustic Quick
SHA532 Transcripts. Transcript: Forecasting Accuracy. Transcript: Meet The Booking Curve
 SHA532 Transcripts Transcript: Forecasting Accuracy Forecasting is probably the most important thing that goes into a revenue management system in particular, an accurate forecast. Just think what happens
THE 10 MAJOR MIXING MISTAKES
 T H E U L T I M A T E M I X I N G F O R M U L A P R E S E N T S THE 10 MAJOR MIXING MISTAKES The 10 Most Common Mixing Mistakes And What To Do About Them 2 0 1 4 P R O S O U N D F O R M U L A. C O M T
We aren't going to play any 4/4 time signatures because you already know this style. Let's try some others.
 Time Signatures Video Reference: Chapter 2 - "Time Signatures" We aren't going to play any 4/4 time signatures because you already know this style. Let's try some others. These may not be the most 'fun'
Intro to Pro Tools. Pro Tools LE and Eleven Rack. Version 8.0.1
 Intro to Pro Tools Pro Tools LE and Eleven Rack Version 8.0.1 Welcome to Pro Tools LE and Eleven Rack Read this guide if you are new to Pro Tools or are just starting out making your own music. Inside,
How To Add Falling Snow
 How To Add Falling Snow How To Add Snow With Photoshop Step 1: Add A New Blank Layer To begin, let's add a new blank layer above our photo. If we look in our Layers palette, we can see that our photo is
Contents. Articulations 10 Sustain Samples 11 Effects 12 Previews 15
 Contents MPC Orchestral Pro Edition: Introduction 3 Install: MPC Software Expansion Browser 4 Install: MPC Live & MPC X 4 MPC Expansion: What s Inside? 9 Articulations 10 Sustain Samples 11 Effects 12
Sales Manual. Table of Contents. 1. What s new? Explaining the Fantom-G in 10 seconds What can it do? Showing the features of the Fantom-G 2
 Sales Manual Table of Contents Page 1. What s new? Explaining the Fantom-G in 10 seconds 2 2. What can it do? Showing the features of the Fantom-G 2 3. Comparison with the Fantom-X 21 4. Comparison with
M-16DX 16-Channel Digital Mixer
 M-16DX 16-Channel Digital Mixer Workshop Using the M-16DX with a DAW 2007 Roland Corporation U.S. All rights reserved. No part of this publication may be reproduced in any form without the written permission
SAVING, LOADING AND REUSING LAYER STYLES
 SAVING, LOADING AND REUSING LAYER STYLES In this Photoshop tutorial, we re going to learn how to save, load and reuse layer styles! Layer styles are a great way to create fun and interesting photo effects
QUICK START. How to Read This Manual. Thank you, and congratulations on your choice of the Roland
 QUICK START Thank you, and congratulations on your choice of the Roland (FA-76). Before using this unit, carefully read the sections entitled: IMPORTANT SAFETY INSTRUCTIONS (Owner s Manual p. 2), USING
Music Technology. Advanced Unit 4: Analysing and Producing. Thursday 31 May 2012 Afternoon Time: 2 hours (plus 10 minutes setting up time)
") Write your name here Surname Other names Edexcel GCE Centre Number Music Technology Advanced Unit 4: Analysing and Producing Candidate Number Thursday 31 May 2012 Afternoon Time: 2 hours (plus 10 minutes
Write your name here Surname Other names Edexcel GCE Centre Number Music Technology Advanced Unit 4: Analysing and Producing Candidate Number Thursday 31 May 2012 Afternoon Time: 2 hours (plus 10 minutes
GM Arts Firmware v4.0. for BJ Devices MIDI Foot Controllers USER GUIDE
 GM Arts Firmware v4.0 for BJ Devices MIDI Foot Controllers USER GUIDE 2nd Release for version 4.03 Table of Contents Introduction... 4 GM Arts Firmware... 4 MIDI Messages... 4 What's Included... 4 Features...
WK-7500 WK-6500 CTK-7000 CTK-6000 BS A
 WK-7500 WK-6500 CTK-7000 CTK-6000 Windows and Windows Vista are registered trademarks of Microsoft Corporation in the United States and other countries. Mac OS is a registered trademark of Apple Inc. in
The Layer Blend Modes drop-down box in the top left corner of the Layers palette.
 Photoshop s Five Essential Blend Modes For Photo Editing When it comes to learning Photoshop, believe it or not, there's really only a handful of things you absolutely, positively need to know. Sure, Photoshop
GlassSpection User Guide
 i GlassSpection User Guide GlassSpection User Guide v1.1a January2011 ii Support: Support for GlassSpection is available from Pyramid Imaging. Send any questions or test images you want us to evaluate
INSANITY SAMPLES. Presents
 INSANITY SAMPLES Presents A 3 oscillator super synth modelled on a mixture of analogue beasts. Designed to tap into both the classic analogue sound, whilst stepping out into the modern age with a multitude