Technology module TM Pulse 2x24V (6ES7138 6DB00 0BB1) SIMATIC ET 200SP (6ES7138 6DB00 0BB1) Preface. Documentation guide.
|
|
|
- Sydney Page
- 6 years ago
- Views:
Transcription
1

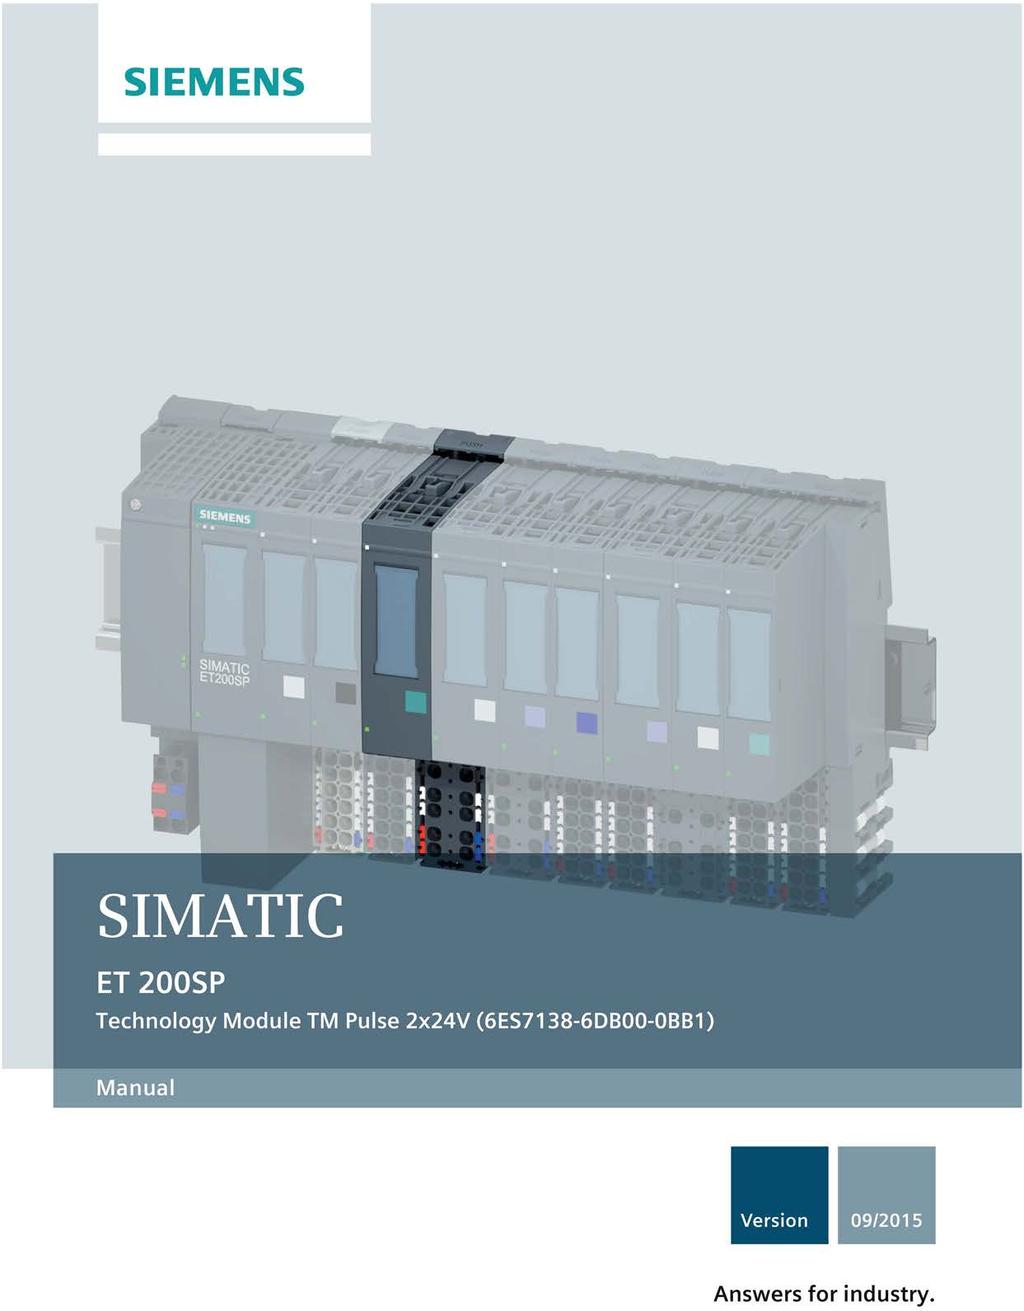
2 Technology module TM Pulse 2x24V (6ES7138 6DB00 0BB1) SIMATIC ET 200SP Technology module TM Pulse 2x24V (6ES7138 6DB00 0BB1) Manual Preface Documentation guide 1 Product overview 2 Modes and Functions 3 Connecting 4 Configuring 5 Program control and feedback interface 6 Interrupts/diagnostic messages 7 Technical specifications 8 A Parameter data record B Open Source Software 09/2015 A5E AA
3 Legal information Warning notice system This manual contains notices you have to observe in order to ensure your personal safety, as well as to prevent damage to property. The notices referring to your personal safety are highlighted in the manual by a safety alert symbol, notices referring only to property damage have no safety alert symbol. These notices shown below are graded according to the degree of danger. DANGER indicates that death or severe personal injury will result if proper precautions are not taken. WARNING indicates that death or severe personal injury may result if proper precautions are not taken. CAUTION indicates that minor personal injury can result if proper precautions are not taken. NOTICE indicates that property damage can result if proper precautions are not taken. If more than one degree of danger is present, the warning notice representing the highest degree of danger will be used. A notice warning of injury to persons with a safety alert symbol may also include a warning relating to property damage. Qualified Personnel The product/system described in this documentation may be operated only by personnel qualified for the specific task in accordance with the relevant documentation, in particular its warning notices and safety instructions. Qualified personnel are those who, based on their training and experience, are capable of identifying risks and avoiding potential hazards when working with these products/systems. Proper use of Siemens products Note the following: Trademarks WARNING Siemens products may only be used for the applications described in the catalog and in the relevant technical documentation. If products and components from other manufacturers are used, these must be recommended or approved by Siemens. Proper transport, storage, installation, assembly, commissioning, operation and maintenance are required to ensure that the products operate safely and without any problems. The permissible ambient conditions must be complied with. The information in the relevant documentation must be observed. All names identified by are registered trademarks of Siemens AG. The remaining trademarks in this publication may be trademarks whose use by third parties for their own purposes could violate the rights of the owner. Disclaimer of Liability We have reviewed the contents of this publication to ensure consistency with the hardware and software described. Since variance cannot be precluded entirely, we cannot guarantee full consistency. However, the information in this publication is reviewed regularly and any necessary corrections are included in subsequent editions. Siemens AG Division Digital Factory Postfach NÜRNBERG GERMANY A5E AA P 08/2015 Subject to change Copyright Siemens AG All rights reserved
4 Preface Purpose of the documentation This manual includes module-specific information on wiring, diagnostics and the technical specifications of the technology module. General information regarding the design and commissioning of the ET 200SP is available in the ET 200SP system manual. Conventions Please observe notes marked as follows: Note A note contains important information on the product described in the documentation, on the handling of the product, and on the section of the documentation to which particular attention should be paid. Security information Siemens provides products and solutions with industrial security functions that support the secure operation of plants, solutions, machines, equipment and/or networks. They are important components in a holistic industrial security concept. With this in mind, Siemens products and solutions undergo continuous development. Siemens recommends strongly that you regularly check for product updates. For the secure operation of Siemens products and solutions, it is necessary to take suitable preventive action (e.g. cell protection concept) and integrate each component into a holistic, state-of-the-art industrial security concept. Third-party products that may be in use should also be considered. You can find more information about industrial security on the Internet ( To stay informed about product updates as they occur, sign up for a product-specific newsletter. You can find more information on the Internet ( 4 Manual, 09/2015, A5E AA
5 Preface Open source software Open source software is used in the firmware of the product described. Open source software is provided free of charge. We are liable for the product described, including the open source software contained in it, pursuant to the conditions applicable to the product. Siemens accepts no liability for the use of the open source software over and above the intended program sequence, or for any faults caused by modifications to the software. For legal reasons, we are obliged to publish the original text of the license conditions and copyright notices. Please read the information relating to this in the "Open Source Software (Page 142)" appendix. Manual, 09/2015, A5E AA 5
6 Table of contents Preface Documentation guide Product overview Properties Modes and Functions Overview Pulse output (single pulse) mode Pulse width modulation (PWM) mode Pulse train mode On/Off-delay mode Frequency output mode DC motor mode Function: High-speed output Function: Sequence counter Function: Current measurement Function: Current control Function: Dither PWM output Function: Isochronous mode Function: Direct control of DQ digital outputs Connecting Pin assignment, sensor, load, and power wiring Configuring Configuration software Configuration overview Required I/O address space TIA portal Device configuration TIA Portal Device configuration General information Potential group Channel configuration: (4 A) single or (2 A) dual channel operation Manual, 09/2015, A5E AA
7 Table of contents Channel parameters Operating mode Reaction to CPU STOP Diagnostics Parameter (Channel parameters) I/O addresses Program control and feedback interface TM Pulse 2x24V control interface SLOT parameter handling (control interface) TM Pulse 2x24V feedback interface Interrupts/diagnostic messages Status and error displays Parameter validation errors Error detection and diagnostics Technical specifications Programming reference A Parameter data record B Open Source Software Index Manual, 09/2015, A5E AA 7
8 Documentation guide 1 Introduction This modular documentation of a SIMATIC product covers automation system topics. The complete documentation for the ET 200SP system consists of the respective system manuals, function manuals, and device manuals. The STEP 7 information system (TIA Portal online Help) also helps you configure and program your automation system. Overview of the documentation for TM Pulse 2x24V technology module The following table lists further documentation that you will need when using the TM Pulse 2x24V technology module. Table 1-1 Documentation for TM Pulse 2x24V technology module Topic Documentation Most important contents System description System manual Application planning ET 200SP Distributed I/O System Installation ( / ?c= &t=1&s=BaseUnit Connecting &lc=en-us) Commissioning Device manuals Interface Module ( ucts?dtp=manual&pnid=14034&lc=en-us) Connecting Interrupts, diagnostics, error, and system messages Technical specifications Dimension drawing Device manual for the ET 200SP BaseUnit 6ES B20-0BB1 compatible with the TM Pulse 2x24V module. ET 200SP BaseUnits ( / ?c= &t=1&s=ET 200SP BaseUnit&lc=en-US) Technical specifications 8 Manual, 09/2015, A5E AA
9 Documentation guide Topic Documentation Most important contents Configuring interference-free controllers SIMATIC S7-1500, ET 200MP, ET 200SP, ET 200AL Designing interference-free controllers ( / ?t=1&s=Designing interference free controllers function manual&lc=en-us) Function Manual Isochronous mode SIMATIC PROFINET with STEP 7 ( / ?c= &t=1&s=PROFIN ET with STEP 7 V13 SP1&lc=en-US) Function manual Basics Electromagnetic compatibility Lightning protection Benefits Use Parameter settings SIMATIC manuals All current manuals for the SIMATIC products are available for download free of charge from the Internet ( Manual, 09/2015, A5E AA 9

10 Product overview Properties Article number 6ES7138-6DB00-0BB1 View of the module Figure 2-1 View of the TM Pulse 2x24V module 10 Manual, 09/2015, A5E AA
11 Product overview 2.1 Properties Properties The TM Pulse 2x24V technology module has the following properties: 2 pulse output channels with up to 2 A output current per channel One-channel operation: The two channels are merged together into one logical channel and are connected in parallel to generate pulse signals with up to 4 A output current. Two-channel operation: The two channels can work independently of each other. Programmable pulse timing. Pulse timing Minimum Maximum High-speed disabled High-speed enabled High-speed disabled Pulse duration 10 μs μs 1 85,000,000 μs (85 s) Period duration 100 μs 10 μs On-delay Off-delay 0 μs Frequency 0.02 Hz 10 khz 100 khz High-speed enabled 1 A smaller value is possible but not guaranteed for Pulse train, PWM, On/Off-delay, and DC motor modes Parallel mode High-speed disabled Maximum pulse output current High-speed enabled Disabled 2 A (two channels) 100 ma (two channels) Enabled 4 A (one channel) Not allowed You can configure DI0.0 (Channel 0) and DI1.0 (Channel 1) digital inputs as hardware enable inputs that start the output pulse sequence, or as inputs directly usable by your program and independent of the pulse generation. In DC motor mode, you can stop the motor by using the digital inputs for external stop control. If you configure one channel 4 A operation, the two output channels are connected in parallel. Only Channel 0 is parameterized to control the parallel connection and only DI0.0 is available as a digital input/hardware enable. Each channel's digital output provides two load connections: All modes except DC motor mode use a single unipolar output connection (DQn.A). In DC motor, connect a load between the bipolar output connections (DQn.A and DQn.B). For example, a channel output can drive a DC motor in both directions by reversing the voltage polarity. Note that not all functions are available in DC motor mode; for example, current measurement and current control are not allowed. Digital outputs have integrated protection diodes to prevent voltage overstress due to inductive kickback. No external protection diodes are required for inductive loads. Manual, 09/2015, A5E AA 11
12 Product overview 2.1 Properties Operating modes Pulse output: output a single pulse with variable pulse duration and On-delay. Pulse width modulation (PWM): Output a frequency with a defined period duration and variable ratio of pulse width to period duration (duty cycle). PWM can vary current in the driven loads. You can use PWM mode to control temperature in a heating resistor or the force from a coil in a proportional valve. Pulse train: output a train of pulses with an assigned pulse quantity, period duration, ratio of pulse width to period duration (duty cycle), and On-delay. On/Off-delay: the pulse output follows the signal at the DIn.0 digital input after an assigned On-delay and Off-delay. Frequency output: output pulses at a variable frequency with a fixed pulse width to pulse period duty cycle of 50%. DC motor: drive a motor in both directions with a bipolar PWM output. You can assign a digital input as an "External stop" signal, for the motor. Functions Sequence counter: count completed output sequences and provide a feedback signal. The sequence counter can count short output sequences that are too fast for your program to monitor. For example, the counter is useful when the output sequence is faster than your program's cycle time and the output sequence is triggered by the DI digital input. The sequence counter is limited to 4 bits (count range 0 to 15). The sequence counter is available only for: Pulse output and Pulse train modes. Without hardware enable, the counter is set to 1 after completion of the output sequence. With hardware enable, the counter is incremented after every completed output sequence. On/Off-delay mode. The counter is incremented with each positive and negative edge at the DQn.A digital output. Current measurement: for Pulse train and PWM modes. Current control: PID loop control for proportional current control in PWM mode. Dithering: superimpose a dither signal on the PWM output to prevent valve sticking and improve proportional valve control. Direct control of the digital output by your control program. 12 Manual, 09/2015, A5E AA
13 Product overview 2.1 Properties Programmable output response to CPU/master STOP condition. Error detection and diagnostics: Missing or under voltage L+ supply voltage Short-circuit/overload of a digital output Short-circuit/under voltage of a sensor power supply Over temperature error Parameterization fault Module/firmware error Configuration TM Pulse 2x24V configuration software options: TIA Portal V13 + SP1 with HSP 0131 (Hardware Support Package from the Internet) STEP 7 version V5.5 + SP4 with HSP 0240 GSD file links: PROFIBUS GSD files ( PROFINET GSD files ( Firmware update Firmware updates can be downloaded to the memory of the TM Pulse 2x24V module by means of the STEP 7 TIA Portal software or the HW Config software. Accessories The following accessories can be used with the module and are not included in the product package: Labeling strip Color identification labels Reference identification labels A BaseUnit of the B1 type is required to operate the technology module. For an overview of the BaseUnits to be used with the technology module, refer to the product information on the documentation for the ET 200SP Distributed I/O System ( For detailed information on the installation procedure, refer to the system manual for the ET 200SP Distributed I/O System ( Manual, 09/2015, A5E AA 13
14 Modes and Functions Overview Modes and functions The TM Pulse 2x24V has two channels. You can assign a different mode for each channel. Configuration of the operating mode is made using the TIA Portal or HW Config. You can select one of six operating modes: Pulse output (single pulse) PWM Pulse train On/Off-delay Frequency output DC motor (PWM: forward and reverse rotation) In addition to the operating mode, the TM Pulse 2x24V has the following functions: If enabled, the high-speed output option lets you generate a 1.5 μs minimum pulse duration at a current of 100 ma and a non-high-speed mode (high-speed mode disabled) with a minimum pulse duration of 10 μs and a maximum current of 2 A (two channels) or 4 A (one channel). The Sequence counter counts completed output sequences and provides a feedback signal. Current measurement for PWM and Pulse train modes Current control for the output current in PWM mode Dithering: superimpose a dithering signal on the PWM output to improve proportional valve control. You can directly control digital outputs with your control program, with separate control for each channel. Parallel connection of both channels creates one logical channel that can drive a 4 A output current. You can configure the response to CPU/master STOP. The outputs are put in the state that you assign for the control program STOP condition. 14 Manual, 09/2015, A5E AA
15 Modes and Functions 3.1 Overview The TM Pulse 2x24V provides module diagnostics and channel error detection. Figure 3-1 Dual channel operation Figure 3-2 Single channel operation Manual, 09/2015, A5E AA 15
16 Modes and Functions 3.1 Overview Interfaces to the control program and the process under control The TM Pulse 2x24V has the following I/O BaseUnit pin connections to the process under control: Channel 0: DI0.0 (digital input 0) DQ0.A and DQ0.B (digital output 0) Two connections are provided for each channel output (DQ0.A and DQ0.B). Load wiring depends on a channel's mode assignment. Channel 1: DI1.0 (digital input 1) DQ1.A and DQ1.B (digital output 1) You can find a table of configuration parameters in the "Parameter assignment and structure of the parameter data records (Page 138)" section. You can modify and monitor the modes and functions with your control program using control and feedback signals. These parameters are listed in the "Control and feedback interface (Page 110)" section. You will find the following in the "Modes and functions" section: Operation descriptions The relevant parameters The relevant control and feedback signals The "Description of operations" for modes and functions applies to both channels. The terms DIn.0, DQn.A, and DQn.B are used in descriptions that are true for both channels. 16 Manual, 09/2015, A5E AA
17 Modes and Functions 3.2 Pulse output (single pulse) mode 3.2 Pulse output (single pulse) mode Definition After the assigned On-delay time expires, the TM Pulse 2x24V outputs a pulse at the DQn.A digital output (output sequence) for the pulse duration that you set. Pulse diagram Figure 3-3 Pulse output mode output sequence using optional HW enable signal to start the output sequence The timing diagram above has the "Function DI" parameter set to "HW enable". The other option is to set "Function DI" to "Input". If the "Function DI" parameter is set to "Input", then the On-delay phase starts at the rising edge of SW_ENABLE. Manual, 09/2015, A5E AA 17
18 Modes and Functions 3.2 Pulse output (single pulse) mode Starting the output sequence Your control program must issue the enable for the output sequence, using the software enable (SW_ENABLE 0 1). The STS_SW_ENABLE feedback bit indicates that a software enable is pending in the TM Pulse 2x24V. You can also set the DIn.0 digital input of a TM Pulse 2x24V channel to be a hardware enable (HW enable) with the "Function DI" parameter. The input delay (noise filter) of the hardware enable can be set using the "Input delay" parameter. If you want to use the hardware enable, it has to be combined with the software enable. When the software enable has been enabled, the output sequence starts at the first positive edge of the hardware enable. Further positive edges of the hardware enable during the current output sequence are ignored. When the HW enable goes high (positive edge) and remains high for the input delay time, the On-delay is started and the STS_ENABLE is set. After the On-delay expires, the pulse is output with the assigned pulse duration. The output sequence finishes with the end of the pulse and STS_ENABLE is cleared. If you reduce the pulse duration to a time that has already expired, then the ERR_PULSE signal indicates a pulse output error and the output sequence stops. To resume the pulse output, you must restart the output sequence after an ERR_PULSE error occurs. The next time the output sequence starts, TM Pulse 2x24V clears the ERR_PULSE feedback bit. Note TM_CTRL_DQ technology module output control signal If TM_CTRL_DQ = 1, then the TM Pulse 2x24V module has control and produces pulse sequences at the DQn.A outputs. If TM_CTRL_DQ = 0, then the CPU has control and your program can set DQn.A/DQn.B outputs directly with the SET_DQA/SET_DQB control bits. 18 Manual, 09/2015, A5E AA
19 Modes and Functions 3.2 Pulse output (single pulse) mode Canceling the output sequence Disabling the software enable (SW_ENABLE = 1 0) cancels the current output sequence and the last period duration is not completed. STS_ENABLE and the DQn.A digital output are immediately reset to 0. You must restart the output sequence to begin new pulse output. Truth Table Software enable SW_ENABLE Function DI parameter Hardware enable (DIn.0 digital input) 1 HW_ENABLE 0 1 and remains 1 during the input delay. DQn.A digital output (when TM_CTRL_DQ = 1) 0, if On-delay > 0 1, if On-delay = 0 STS_ENABLE 0 1 Start Output Sequence Only active for the first positive edge, additional positive edges are ignored and no start occurs. 0 1 Input Not used 0, if On-delay > Start 1, if On-delay = 0 0 HW_ENABLE or Any status 0 0 Terminate Input 1 HW_ENABLE or Input Any status 0, if On-delay is not expired or if the pulse duration is expired. 1, if On-delay is expired and pulse duration is not expired. 0 1 HW_ENABLE Setting and changing the pulse duration Your control program can set the pulse duration directly with the control interface field OUTPUT_VALUE as a DWord number value in microseconds: High-speed output enabled, from 2 μs to 85,000,000 μs High-speed output disabled, from 10 μs to 85,000,000 μs If you change the pulse duration when an output sequence is running, the pulse time already elapsed is subtracted from the new pulse duration and the pulse output continues. Reducing the pulse duration If you have reduced the pulse duration to a time that is less than the pulse time already elapsed, then the output sequence is terminated. STS_ENABLE and the DQn.A digital output are cleared, and the ERR_PULSE status bit is set. At the next output sequence, the ERR_PULSE status bit is cleared. Manual, 09/2015, A5E AA 19
20 Modes and Functions 3.2 Pulse output (single pulse) mode Setting and changing the On-delay Permanent update The On-delay can be controlled permanently using the control interface. The MODE_SLOT bit has to be 1 (permanent-update); LD_SLOT must have the value 2 (for On-delay). Set the On-delay as a value between 0 μs and 85,000,000 μs in the control interface field SLOT. Single Update Set the On-delay as a value between 0 μs and 85,000,000 μs in the configuration parameters. Alternatively, you can do a single update using the control interface. MODE_SLOT has to be 0 (single-update); LD_SLOT has to have the value 2 (for On-delay). Set the On-delay as a value between 0 μs and 85,000,000 μs in the control interface field SLOT. If you change the On-delay value during the output sequence, then the new On-delay is activated on the next output sequence. For more details about the use of the SLOT value, see SLOT parameter handling (Page 113) Using the Sequence counter The Sequence counter counts completed pulse output sequences and provides the count value variable SEQ_CNT in the feedback interface. The sequence counter can count short output sequences that are too fast to be monitored by your program. See Sequence counter (Page 75) for details. Isochronous mode General information is available in Function: Isochronous mode (Page 86). Isochronous mode does not have any influence on the functionality of Pulse output operating mode. If you want to synchronize the output sequence with To, then set the Function DI parameter to "Input" and the Pulse output sequence starts at To. 20 Manual, 09/2015, A5E AA
21 Modes and Functions 3.2 Pulse output (single pulse) mode Pulse output parameters Pulse output parameter Meaning Value Range Default Mode 0 = Set the Pulse output operating mode. 0 = Pulse output 1 1 = Pulse width modulation 2 = Pulse train 3 = On/Off-delay 4 = Frequency output 5 = DC Motor High-speed output 1 The output supports higher frequencies at smaller 0 = Disabled Disabled loads when enabled. 1 = Enabled Function DI You can use the DIn.0 digital input as an input or 0 = Input Input as a hardware enable. The signal at DIn.0 is interpreted by the TM Pulse 2x24V, after noise filtering by the input delay, as the start of the output sequence. 1 = HW enable Input delay DIn.0: a digital input must be stable over the 0 = Off (4 μs) 0.1 ms delay time (signal noise suppression). 1 = 0.05 ms 2 = 0.1 ms 3 = 0.4 ms 4 = 0.8 ms 5 = 1.6 ms 6 = 3.2 ms 7 = 12.8 ms 8 = 20 ms On-delay The time from the start of the output sequence to the output of the pulse. You can change the On-delay in your control program using the SLOT parameter. 0 μs to 85,000,000 μs 0 μs 1 Only if the module is configured as "2 channels (2 A)" Manual, 09/2015, A5E AA 21
22 Modes and Functions 3.2 Pulse output (single pulse) mode Control and feedback signals for Pulse output mode Control interface: Offset to the start address Parameter Meaning Channel 0 Channel 1 1 Bytes 0 to 3 Bytes 12 to 15 OUTPUT_VALUE (DWord) Bytes 4 to 7 Bytes 16 to 19 SLOT (DWord) Pulse duration: the time that the DQn.A digital output remains set after the On-delay time expires. If you violate the lower or upper limit of the range, then ERR_OUT_VAL is returned in the feedback interface and the last valid value is used. High-speed output disabled: High-speed output enabled: 10 μs to 85,000,000 μs 2 μs to 85,000,000 μs The On-delay can be changed before the start of the output sequence. See MODE_SLOT. 0 μs to 85,000,000 μs Byte 8 Byte 20 LD_SLOT Interpretation of the value SLOT: all other values not listed below are invalid and produce the error ERR_LD (in single-update mode) or ERR_SLOT_VAL (in permanent-update mode). Bit 3 Bit 2 Bit 1 Bit Idle state; nothing is done with the value On-delay in μs Byte 8: Bit 4 Byte 20: Bit 4 MODE_SLOT Bit 4 Mode for use of the field SLOT. 0 Single-update mode 1 Permanent-update mode Byte 9: Bit 0 Byte 21: Bit 0 SW_ENABLE Bit 0 Software enable: Start/enable and terminate/disable the output sequence. 0 Output disabled/terminated 0 1 Starts output sequence on positive edge when "Function DI" = "Input" 1 Enable output sequence, when start is dependent on HW enable with "Function DI" = "HW enable" Byte 9: Bit 1 Byte 21: Bit 1 TM_CTRL_DQ Bit 1 Set DQn.A output source: Select either CPU program or module's output sequence. 0 DQn.A and DQn.B are controlled by the CPU (your program logic) using the SET_DQA and SET_DQB control bits. 1 DQn.A is controlled by the module's pulse output sequence. DQn.B is always 0. Byte 9: Bit 3 Byte 21: Bit 3 SET_DQA Bit 3 Controls the value of the digital output DQn.A, if TM_CTRL_DQ is cleared. 0 0 on DQn.A 1 1 on DQn.A Byte 9: Bit 4 Byte 21: Bit 4 SET_DQB Bit 4 Controls the value of the digital output DQn.B, if TM_CTRL_DQ and SET_DQA are cleared. 0 0 on DQn.B 1 1 on DQn.B Byte 10: Bit 0 Byte 22: Bit 0 RES_ERROR Bit 0 Reset pending errors (ERR_LD, ERR_DQA, ERR_DQB, and ERR_24V). 0 Reset of errors is not active 1 Reset of errors is active 1 Only if the module is configured as "2 channels (2 A)" and not "1 channel (4 A)". Note: All bytes and bits not described in the table above are reserved and should be Manual, 09/2015, A5E AA
23 Modes and Functions 3.2 Pulse output (single pulse) mode Feedback interface: Offset to the start address Parameter Meaning Channel 0 Channel 1 1 Byte 0: Bit 0 Byte 8: Bit 0 ERR_PWR Bit 0 Indicates under voltage on the Power supply. Note that the bit is not set if the voltage is not present. 0 PWR is not under voltage 1 PWR is detected, but under voltage Byte 0: Bit 1 Byte 8: Bit 1 ERR_24V Bit 1 Indicates a short-circuit or overload on the output 24 V DC. You must set the RES_ERROR (control interface) to reset this error. 0 No short-circuit on 24 V DC 1 Short-circuit on 24 V DC Byte 0: Bit 2 Byte 8: Bit 2 ERR_LD Bit 2 Indicates an error while loading a value using the field SLOT (only in "single-update" SLOT mode). 0 No load error pending. Byte 0: Bit 3 Byte 8: Bit 3 ERR_PULSE Bit 3 Indicates a pulse output error. 1 Load error pending: you must set the RES_ERROR (control interface) to reset this error and be able to use the SLOT again. 0 No pulse output error 1 Pulse output error Byte 0: Bit 4 Byte 8: Bit 4 ERR_DQA Bit 4 Indicates a short-circuit on the output DQn.B. You must set RES_ERROR (control interface) to reset this error. 0 No short-circuit on DQn.A 1 Short-circuit on DQn.A Byte 0: Bit 5 Byte 8: Bit 5 ERR_DQB Bit 5 Indicates a short-circuit on the output DQn.B or an attempt to set both DQs manually using SET_DQA, SET_DQB, and TM_CTRL_DQ. You must set RES_ERROR (control interface) to reset this error. 0 No short-circuit on DQn.B 1 Short-circuit on DQn.B, or attempt to set both DQn.A and DQn.B Byte 0: Bit 6 Byte 8: Bit 6 ERR_OUT_VAL Bit 6 Indicates that an invalid value is detected in OUTPUT_VALUE. 0 OUTPUT_VALUE is valid. 1 OUTPUT_VALUE is not valid. This bit is reset automatically when a valid value is read by the module. Byte 0: Bit 7 Byte 8: Bit 7 ERR_SLOT_VAL Bit 7 Indicates that an invalid value is detected in SLOT (only in "permanent-update" SLOT mode). 0 SLOT value is valid. 0 1 SLOT value is not valid. This bit is reset automatically when a valid value is read by the module. Byte 1: Bit 2 Byte 9: Bit 2 STS_LD_SLOT Bit 2 Toggle acknowledge bit for each action of the SLOT in "single-update" SLOT mode. Each toggle of this bit means a successful LD_SLOT action. Byte 1: Bit 4 Byte 9: Bit 4 STS_READY Bit 4 Indicates the module is ready and parameterized. 0 Module is not parameterized 1 Module is parameterized Byte 1: Bit 5 Byte 9: Bit 5 STS_SW_ENABLE Bit 5 Indicates the status of SW_ENABLE (control interface). 0 SW_ENABLE cleared 1 SW_ENABLE set Byte 2: Bit 0 Byte 8: Bit 0 STS_ENABLE Bit 0 Indicates an output sequence is running. 0 Output sequence not running 1 Output sequence running Manual, 09/2015, A5E AA 23
24 Modes and Functions 3.2 Pulse output (single pulse) mode Feedback interface: Offset to the start address Parameter Meaning Channel 0 Channel 1 1 Byte 2: Bit 1 Byte 10: Bit 1 STS_DQA Bit 1 Indicates the signal level at the DQn.A digital output. 0 0 on DQn.A digital output 1 1 on DQn.A digital output Byte 2: Bit 2 Byte 10: Bit 2 STS_DQB Bit 2 Indicates the signal level at the DQn.B digital output. 0 0 on DQn.B digital output 1 1 on DQn.B digital output Byte 2: Bit 3 Byte 10: Bit 3 STS_DI Bit 3 Indicates the signal level at the DIn.0 digital input. 0 0 on DIn.0 digital input 1 1 on DIn.0 digital input Byte 3: Bit 0 to 3 Byte 11: Bit 0 to 3 SEQ_CNT Sequence counter is incremented after completion of an output sequence With SW_ENABLE: 0 to 1 With HW enable: 0 to 15 Word 3 Word 7 Reserved Read as 0 1 Only if the module is configured as "2 channels (2 A)" and not "1 channel (4 A)". Note: All bytes and bits not described in the table above are reserved and are read as 0. Input and output signals for Pulse output mode Input and output signals Meaning Value range Channel 0 BaseUnit pin number Input signal HW enable Output signal Pulse at the DQn.A digital output You can select the HW enable with the "Function DI" parameter and select the input delay with the "Input delay" parameter. The signal at DIn.0 is interpreted by the TM Pulse 2x24V, after noise filtering by the input delay, as the start of the output sequence. A pulse is output at the DQn.A digital output for the set pulse duration. 0 = HW enable cleared 1 = HW enable issued 0 1 = Start of the output sequence after the input delay, dependent on the software enable (SW_ENABLE) 0 = no pulse 1 = pulse See also Pin assignment and load/sensor wiring (Page 91) Channel 1 BaseUnit pin number 24 Manual, 09/2015, A5E AA
25 Modes and Functions 3.3 Pulse width modulation (PWM) mode 3.3 Pulse width modulation (PWM) mode Definition You control the pulse width duty cycle with the control interface field OUTPUT_VALUE. The TM Pulse 2x24V generates continuous pulses based on this value. The OUTPUT_VALUE control interface field determines the duty cycle (pulse duration/period duration) for PWM. The period duration can be adjusted. After expiration of the assigned On-delay, the DQn.A output pulses begin (output sequence). In PWM mode, you can enable current control using the internal PID loop function to control the output load current. When the current control option is enabled, the TM Pulse 2x24V control of the duty cycle and the OUTPUT_VALUE control interface field is used to assign the target current as the ratio of target current/reference current. Pulse diagram Figure 3-4 PWM output sequence The timing diagram above has the "Function DI" parameter set to "HW_ENABLE". The other option is to set "Function DI" to "Input". If the "Function DI" parameter is set to "Input", then the On-delay phase starts at the rising edge of SW_ENABLE. Manual, 09/2015, A5E AA 25
26 Modes and Functions 3.3 Pulse width modulation (PWM) mode Starting the output sequence Your control program must issue the enable for the output sequence, using the software enable (SW_ENABLE 0 1). The STS_SW_ENABLE feedback bit indicates the software enable pending at the TM Pulse 2x24V. You can also assign the DIn.0 digital input of the TM Pulse 2x24V as a HW enable with the "Function DI" parameter. The input delay (noise filter) of the hardware enable can be set using the parameter "Input Delay". If you want to use the hardware enable, it has to be combined with the software enable. When the software enable has been enabled, the output sequence starts at the first positive edge of the hardware enable. Further positive edges of the hardware enable during the current output sequence are ignored by the TM Pulse 2x24V. The hardware enable option is not supported for isochronous mode. When the enable is issued (positive edge) and remains high for the input delay time, the On-delay is started and the STS_ENABLE set. The PWM pulse train is output on expiration of the On-delay. The output sequence runs continuously as long as SW_ENABLE is set. Note Technology Module TM_CTRL output control signal If TM_CTRL_DQ = 1, then the TM Pulse 2x24V module has control and produces pulse sequences at the DQn.A outputs. If TM_CTRL_DQ = 0, then the CPU has control and your program can set DQn.A/DQn.B outputs directly with the SET_DQA/SET_DQB control bits. Canceling the output sequence Disabling the software enable (SW_ENABLE = 1 0) cancels the current output sequence and the last period duration is not completed. STS_ENABLE and the DQn.A digital output are immediately reset to 0. You must restart the output sequence to begin new pulse output. Truth table Software enable SW_ENABLE Function DI parameter Hardware enable (DIn.0 digital input) 1 HW_ENABLE 0 1 and remains 1 during the input delay. Only active for the first positive edge, additional positive edges are ignored and no start occurs. Digital output DQn.A (when TM_CTRL_DQ = 1) 0, if On-delay > 0 1, if On-delay = 0 STS_ENABLE 0 1 Start Output sequence 0 1 Input Not used 0, if On-delay > Start 1, if On-delay = 0 0 HW_ENABLE or Input Any state 0 0 Terminate 26 Manual, 09/2015, A5E AA
27 Modes and Functions 3.3 Pulse width modulation (PWM) mode Software enable SW_ENABLE Function DI parameter 1 HW_ENABLE or Input Hardware enable (DIn.0 digital input) Any state Digital output DQn.A STS_ENABLE (when TM_CTRL_DQ = 1) 0, if On-delay is not expired or you are in the interpulse time 1, if On-delay is expired and during the pulse duration 0 1 HW_ENABLE Output sequence - Minimum pulse duration and minimum interpulse duration The minimum pulse duration and minimum interpulse duration are superimposed on the proportional output characteristic. You assign the minimum pulse duration and minimum interpulse duration using the "Minimum pulse duration" parameter; they always have the same value. A pulse duration calculated by the TM Pulse 2x24V that is shorter than the minimum pulse duration is suppressed. A pulse duration calculated by the TM Pulse 2x24V that is longer than the period duration minus the minimum interpulse duration is set to the period duration value (duty cycle 1,000 ). Note PWM current control and minimum pulse duration If current control is activated by the current control bit in the parametrization record, then the parametrized minimum pulse duration and minimum interpulse period are ignored. Figure 3-5 Modulation of the Pulse duration Manual, 09/2015, A5E AA 27
28 Modes and Functions 3.3 Pulse width modulation (PWM) mode Note If Dithering is activated without current control, then the minimum pulse duration and minimum inter-pulse period are used by the module. In this case, the superimposed Dithering is reduced so the effective pulse duration fits in the allowed range. Setting and changing the pulse duty cycle OUTPUT_VALUE assigns the duty cycle for the current period duration. You select the range of the OUTPUT_VALUE control interface field with the "Output format" parameter. "Per 100 (%)" output format: Value range between 0 and 100 Pulse duration = (OUTPUT_VALUE/100) x period duration. "Per 1,000 ( )" output format: Value range between 0 and 1,000 Pulse duration = (OUTPUT_VALUE/1,000) x period duration. "Per 10,000" output format: Value range between 0 and 10,000 Pulse duration = (OUTPUT_VALUE/10,000) x period duration. "S7 analog output" output format: Value range between 0 and 27,648 Pulse duration = (OUTPUT_VALUE/27,648) x period duration. You assign OUTPUT_VALUE directly with your control program. A new OUTPUT_VALUE is applied at the next rising edge of the output. When the current control option is enabled, the TM Pulse 2x24V module takes control of the duty cycle and the OUTPUT_VALUE control interface field is used to assign the target current as a ratio of target current/reference current. See the Current control (Page 78) function for details. Setting and changing the period duration Permanent update The period duration is controlled permanently using the control interface. The MODE_SLOT bit has to be set ("1" means permanent update); LD_SLOT has to have the value 1 ("1" means Period duration). Set the period value in the field SLOT. The unit is always microseconds. High-speed output enabled: between 10 μs and 85,000,000 μs in the field SLOT. High- speed output disabled: between 100 μs and 85,000,000 μs in the field SLOT. Single Update Set the period duration in the configuration parameters. Alternatively, perform a single update using the control interface. MODE_SLOT has to be cleared ("0" means singleupdate); LD_SLOT has to have the value 1 ('1' means Period duration). Set the period duration value in the field SLOT. The unit is always microseconds. High-speed output enabled: between 10 μs and 85,000,000 μs in the parameters. High-speed output disabled: between 100 μs and 85,000,000 μs in the parameters. The new period duration is applied with the next rising edge of the output. 28 Manual, 09/2015, A5E AA
29 Modes and Functions 3.3 Pulse width modulation (PWM) mode For more details about SLOT parameter handling, see "Slot parameter handling (control interface) (Page 113)". Isochronous mode General information is available in the "Function: Isochronous mode (Page 86)" topic. In isochronous mode, the output sequence is synchronized with the moment TO. The period duration is coordinated to the application cycle (the synchronous cycle, a multiple of the PROFINET cycle). It is possible that your assigned period duration cannot be implemented exactly. The configured value of the period duration is adjusted by the TM Pulse 2x24V to the application cycle based on a calculation algorithm. The calculation is performed to minimize the difference between the assigned and calculated period duration. In the most unfavorable case, the deviation amounts to half the application cycle. The table below shows examples. Application cycle TCAC 1 Assigned period duration TSetpoint TCAC \ TActual Calculated actual period duration TActual 1 10 ms (10000 μs) 5000 μs 2: μs 10 ms (10000 μs) 2000 μs 5: μs 10 ms (10000 μs) 3000 μs 3: μs Next possible value is used as actual value 10 ms (10000 μs) 1800 μs 6: μs Next possible value is used as actual value 10 ms (10000 μs) 6000 μs 2: μs Next possible value is used as actual value 10 ms (10000 μs) μs 1: μs Next possible value is used as actual value 10 ms (10000 μs) μs 1: μs Next possible value is used as actual value 10 ms (10000 μs) μs 1: μs Next possible value is used as actual value 1 The calculated actual period duration and the application cycle time always have an integer ratio (1:1, 1:2, 1:3,..., 2:1, 3:1,... ) rounded down to the next possible value. The timing between the digital output and the application cycle is shown below. The DQ duty cycle (On/Off) ratio is shown in the examples at 50%. Example 1: The period duration μs is equal to the application cycle time 10 ms (10000 μs). Manual, 09/2015, A5E AA 29
30 Modes and Functions 3.3 Pulse width modulation (PWM) mode Example 2: The period duration 3333 μs is less than the application cycle time 10 ms (10000 μs). Example 3: The period duration μs is greater than the application cycle time 10 ms (10000 μs) Note Isochronous PWM operation On-delay is not used by the module (always considered as zero) and the parameter "Function DI" is always "Input". Only the software-enable SW_ENABLE 0 1 is used to start the output sequence. 30 Manual, 09/2015, A5E AA
31 Modes and Functions 3.3 Pulse width modulation (PWM) mode Setting the minimum pulse duration and minimum inter-pulse duration You assign the minimum pulse duration and the minimum inter-pulse duration as a DWord number value between 0 and 85,000,000 μs using the "Minimum pulse duration" channel parameter configuration. The unit is always microseconds. This value can only be changed using the configuration parameter record. Setting and changing the On-delay Permanent update The On-delay can be controlled permanently using the control interface. The MODE_SLOT bit has to be set (permanent update); LD_SLOT must have the value 2 (for On-delay). Set the On-delay as a value between 0 μs and 85,000,000 μs in the field SLOT. The unit is always microseconds. Single update Set the On-delay as a value between 0 μs and 85,000,000 μs in the configuration parameters. The unit is always microseconds. Alternatively, perform a single update using the control interface. MODE_SLOT has to be cleared (single-update); LD_SLOT must have the value 2 (for On-delay). Set the On-delay as a value between 0 μs and 85,000,000 μs in the field SLOT. If you change the On-delay value during the output sequence, then the new On-delay is activated at the next output sequence. For more details about the use of the SLOT parameter see SLOT parameter handling (Page 113). Current measurement Current measurement is available in PWM mode. Your control program can use current measurement for control and diagnostic purposes. For more information, refer to Function: Current measurement (Page 76). Current control Current measurement is available in PWM mode. Your control program can use current measurement for control and diagnostic purposes. For more information, refer to Function: Current control (Page 78). Manual, 09/2015, A5E AA 31
32 Modes and Functions 3.3 Pulse width modulation (PWM) mode Parameters of PWM operating mode Parameter Meaning Value range Default Operating mode 1 = Set the PWM operating mode. 0 = Pulse output 1 1 = Pulse width modulation 2 = Pulse train 3 = On/Off-delay 4 = Frequency output 5 = DC Motor High-speed output 1 The output supports higher frequencies. 0 = disabled Disabled 1 = enabled Function DI You can use the DIn.0 digital input as an input 0 = Input Input or as a hardware enable. The signal at DIn.0 is interpreted by the TM Pulse 2x24V, after noise filtering by the input delay, as the start of the output sequence. 1 = HW enable Output format Defines the format of the ratio value (duty 0 = S7 analog format Per 100 (%) cycle). 1 = Per 100 (%) 2 = per 1,000 3 = Per 10,000 Input delay DIn.0 digital input must be stable over the 0 = Off (4 μs) 0.1 ms delay time (signal noise suppression). 1 = 0.05 ms 2 = 0.1 ms 3 = 0.4 ms 4 = 0.8 ms 5 = 1.6 ms 6 = 3.2 ms 7 = 12.8 ms 8 = 20 ms Minimum pulse duration Minimum pulse duration and minimum interpulse duration. 0 μs and 85,000,000 μs 0 μs Period Period duration of the output pulse cycle in μs. High-speed output disabled 2,000,000 μs You can change the period duration in your control program with the control interface 100 μs to 85,000,000 μs SLOT field. High-speed output enabled 10 μs to 85,000,000 μs On-delay The time from the start of the output sequence to the output of the pulses. You can change the On-delay in your control program with the control interface SLOT field. 0 μs and 85,000,000 μs 0 μs 1 Only if the module is configured as "2 channels (2 A)" and not "1 channel (4 A)". 32 Manual, 09/2015, A5E AA
33 Modes and Functions 3.3 Pulse width modulation (PWM) mode Control and feedback signals for PWM mode Control interface Offset to the start address Parameter Meaning Channel 0 Channel 1 1 Bytes 0 to 3 Bytes 4 to 7 Bytes 12 to 15 Bytes 16 to 19 OUTPUT_VALUE (DWord) SLOT (DWord) The OUTPUT_VALUE determines the duty cycle (pulse duration/period duration ratio) within a period (pulse width modulation). The period duration can be adjusted. The new output value is applied at the next rising edge of the output. When the current control option is enabled, the TM Pulse 2x24V module takes control of the duty cycle and the OUTPUT_VALUE control interface field is used to assign the target current as a ratio of target current/reference current. See the Current control function for details. UDInt data type: Only 2 least significant bytes are used For channel 0: bytes 2 and 3 For channel 1: bytes 14 and 15 Output format "Per 100": value range is 0 to 100 "Per 1000": value range is 0 to 1,000 "Per 10000": value range is 0 to 10,000 "S7 analog output": value range is 0 to 27,648 Your program can change the parameters shown in the byte 8 LD_SLOT table below, before the start of the output sequence using the SLOT and MODE_SLOT parameters. 0 μs to 85,000,000 μs Byte 8 Byte 20 LD_SLOT Interpretation of the value SLOT: all other values not listed below are invalid and produce the error ERR_LD (in single-update mode) or ERR_SLOT_VAL (in permanent-update mode). Bit 3 Bit 2 Bit 1 Bit 0 Parameter Idle state; nothing is done with the value Period in μs On-delay in μs Dither ramp in ms Dither amplitude in per mill Dither period in μs Byte 8: Bit 4 Byte 20: Bit 4 MODE_SLOT Bit 4 Mode for use of the field SLOT. 0 Single-update mode 1 Permanent-update mode Byte 9: Bit 0 Byte 21: Bit 0 SW_ENABLE Bit 0 Software enable: start and terminate the output sequence. 0 Output canceled 0 Starts output sequence on positive edge when "Function DI" = "Input". 1 1 Enable output sequence, when start is dependent on HW enable with "Function DI" = "HW enable". Byte 9: Bit 1 Byte 21: Bit 1 TM_CTRL_DQ Bit 1 Set DQn.A output source: Selects either CPU program or module's output sequence. 0 DQn.A and DQn.B are controlled by the CPU (in your program) using the SET_DQA and SET_DQB control bits. 1 DQn.A is controlled by the module's pulse output sequence. DQn.B is always 0 for TM_CTRL_DQ = 1. Byte 9: Bit 3 Byte 21: Bit 3 SET_DQA Bit 3 Controls the value of the digital output DQn.A, if TM_CTRL_DQ = on DQn.A 1 1 on DQn.A Manual, 09/2015, A5E AA 33
34 Modes and Functions 3.3 Pulse width modulation (PWM) mode Control interface Offset to the start address Parameter Meaning Channel 0 Channel 1 1 Byte 9: Bit 4 Byte 21: Bit 4 SET_DQB Bit 4 Controls the value of the digital output DQn.B, if TM_CTRL_DQ = 0 and if SET_DQA is cleared. 0 0 on DQn.B 1 1 on DQn.B Byte 10: Bit 0 Byte 22: Bit 0 RES_ERROR Bit 0 Reset pending errors (ERR_LD, ERR_DQA, ERR_DQB, and ERR_24V). 0 Reset of errors is not active 1 Reset of errors is active 1 Only if the module is configured as "2 channels (2 A)" and not "1 channel (4 A)" Note: All bytes and bits not described in the table above are reserved and should be 0. Feedback interface: Offset to the start address Parameter Meaning Channel 0 Channel 1 1 Byte 0: Bit 0 Byte 8: Bit 0 ERR_PWR Bit 0 Indicates under voltage on the Power supply. Note that the bit is not set if the voltage is not present. 0 PWR is not under voltage 1 PWR is detected, but under voltage Byte 0: Bit 1 Byte 8: Bit 1 ERR_24V Bit 1 Indicates a short-circuit or overload on the output 24 V DC. You must set the RES_ERROR (control interface), to reset this error. 0 No short-circuit on 24 V DC 1 Short-circuit on 24 V DC Byte 0: Bit 2 Byte 8: Bit 2 ERR_LD Bit 2 Indicates an error while loading a value using the field SLOT (only in "single-update" SLOT-mode). 0 No load error pending 1 Load error pending: you must set the RES_ERROR (control interface) to reset this error and be able to use SLOT again. Byte 0: Bit 4 Byte 8: Bit 4 ERR_DQA Bit 4 Indicates a short-circuit on the output DQn.A. You must set RES_ERROR (control interface) to reset this error. 0 No short-circuit on DQn.A 1 Short-circuit on DQn.A Byte 0: Bit 5 Byte 8: Bit 5 ERR_DQB Bit 5 Indicates a short-circuit on the output DQn.B or an attempt to set both DQn.A and DQn.B manually using SET_DQA, SET_DB, and TM_CTRL_DQ. You must set RES_ERROR (control interface) to reset this error. 0 No short-circuit on DQn.B 1 Short-circuit on DQn.B, or attempt to set both DQn.A and DQn.B Byte 0: Bit 7 Byte 8: Bit 7 ERR_SLOT_VAL Bit 7 Indicates that an invalid value is detected in SLOT (only in "permanent-update" SLOT-mode). 0 SLOT value is valid 0 1 SLOT value is not valid Byte 1: Bit 2 Byte 9: Bit 2 STS_LD_SLOT Bit 2 Toggle acknowledge bit for each action of SLOT in "single-update" SLOT-mode. Each toggle of this bit means a successful LD_SLOT action. Byte 1: Bit 4 Byte 9: Bit 4 STS_READY Bit 4 Indicates the module is ready and parameterized. 0 Module is not parameterized 1 Module is parameterized 34 Manual, 09/2015, A5E AA
35 Modes and Functions 3.3 Pulse width modulation (PWM) mode Feedback interface: Offset to the start address Parameter Meaning Channel 0 Channel 1 1 Byte 1: Bit 5 Byte 9: Bit 5 STS_SW_ENABLE Bit 5 Indicates the status of SW_ENABLE (control interface). 0 SW_ENABLE cleared 1 SW_ENABLE set Byte 2: Bit 0 Byte 8: Bit 0 STS_ENABLE Bit 0 Indicates an output sequence is running. 0 Output sequence not running 1 Output sequence running Byte 2: Bit 1 Byte 10: Bit 1 STS_DQA Bit 1 Indicates the signal level at the DQn.A digital output. 0 0 on DQn.A digital output 1 1 on DQn.A digital output Byte 2: Bit 2 Byte 10: Bit 2 STS_DQB Bit 2 Indicates the signal level at the DQn.B digital output. 0 0 on DQn.B digital output 1 1 on DQn.B digital output Byte 2: Bit 3 Byte 10: Bit 3 STS_DI Bit 3 Indicates the signal level at the DIn.0 digital input. Byte 3: Bit 0 to 3 Byte 11: Bit 0 to 3 SEQ_CNT Word 2 Word 6 MEASURED_CURRE NT Word 3 Word 7 Reserved Read as on DIn.0 digital input 1 1 on DIn.0 digital input Sequence counter = 0. The sequence counter is not used in pulse width modulation mode. S7 Analog format positive value 0 to 32,767: 2 Ampere channel output: Full scale value 27,648; means 2,000 ma 4 Ampere channel output: Full scale value 27,648; means 4,000 ma 32,767 means no valid current measurement available; for example, during the very first PWM period. 1 Only if the module is configured as "2 channels (2 A)" and not "1 channel (4 A)" Note: All bytes and bits not described in the table above are reserved and are read as 0. Input and output signals for PWM operating mode Input and output signal Meaning Value range Channel 0 BaseUnit pin number Input signal HW enable Note: HW enable not supported for PWM in isochronous mod Output signal Pulse at the DQn.A digital output You can select the HW enable with the "Function DI" parameter and select the input delay with the "Input delay" parameter. The signal at the DIn.0 digital input is interpreted by the TM Pulse 2x24V, after noise filtering by the input delay, as the start of the output sequence. A pulse is output at the DQn.A digital output for the set duty cycle and period duration. 0 = HW enable cleared 1 = HW enable issued 0 1 = Start of the output sequence after the input delay; dependent on the software enable (SW_ENABLE) 0 = no pulse 1 = pulse See also Pin assignment and load/sensor wiring (Page 91) Channel 1 BaseUnit pin number Manual, 09/2015, A5E AA 35
36 Modes and Functions 3.4 Pulse train mode 3.4 Pulse train mode Definition On expiration of the assigned On-delay, the TM Pulse 2x24V outputs the number of pulses you assigned as a pulse train (output sequence). The period duration and pulse duration can be adjusted. Pulse diagram Figure 3-6 Output sequence of the pulse train The timing diagram above has the "Function DI" parameter set to "HW enable". The other option is to set "Function DI" to "Input". If the "Function DI" parameter is set to "Input", then the On-delay phase starts at the rising edge of SW_ENABLE. 36 Manual, 09/2015, A5E AA
37 Modes and Functions 3.4 Pulse train mode Starting the output sequence Your control program must issue the enable for the output sequence, using the software enable (SW_ENABLE 0 1). The STS_SW_ENABLE feedback bit indicates the software enable pending at the TM Pulse 2x24V. You can also set the DIn.0 digital input of the TM Pulse 2x24V as a HW enable with the "Function DI" parameter. The input delay of the hardware enable can be set using the parameter "Input Delay". If you want to use the hardware enable, it has to be combined with the software enable. When SW_ENABLE has been enabled, the output sequence starts at the first positive edge of the hardware enable. Further positive edges of the hardware enable during the current output sequence are ignored by the TM Pulse 2x24V. When the software enable has been issued, a positive edge of the hardware enable (detected after the input delay) starts the next output sequence. When the enable is issued (positive edge) and remains high for the input delay (noise filter) time, the On-delay is started and STS_ENABLE is set. On expiration of the On-delay, the pulse train is output with the assigned pulse duration. The output sequence finishes with the end of the pulse and STS_ENABLE is cleared. If you change the number of pulses during the output sequence to a value that has already been reached in the sequence, then the bit ERR_PULSE indicates a pulse output error The next time the output sequence starts, the TM Pulse 2x24V clears the ERR_PULSE feedback bit. Note TM_CTRL_DQ technology module output control signal If TM_CTRL_DQ = 1, then the TM Pulse 2x24V module has control and produces pulse sequences at the DQn.A output. If TM_CTRL_DQ = 0, then the CPU has control and your program can set DQn.A/DQn.B outputs directly with the SET_DQA/SET_DQB control bits. Canceling the output sequence Disabling the software enable (SW_ENABLE = 1 0) during the On-delay or pulse train cancels the current output sequence and the last period duration is not completed. STS_ENABLE and the DQn.A digital output are immediately reset to 0. You must restart the output sequence to begin a new pulse output. Manual, 09/2015, A5E AA 37
38 Modes and Functions 3.4 Pulse train mode Truth table Software enable SW_ENABLE Function DI parameter Hardware enable (DIn.0 digital input) 1 HW_ENABLE 0 1 and remains 1 during the input delay. Only active for the first positive edge, additional positive edges are ignored and no start occurs. Digital output DQn.1 (when TM_CTRL_DQ = 1) 0, if On-delay > 0 1, if On-delay = 0 STS_ENABLE 0 1 Start 0 1 Input Not used 0, if On-delay > Start 1, if On-delay = 0 0 HW_ENABLE or Input Any status 0 0 Cancel 1 HW_ENABLE or Input Any status 0, if On-delay is not expired or you are in the interpulse time or the output sequence is over 1, if On-delay is expired and during the pulse duration 0 1 HW_ENABLE Output sequence - Setting and changing the number of pulses Your control program can set the pulse count directly with the control interface parameter OUTPUT_VALUE. Set the number of pulses directly as a DWord number value between 1 to 4,294,967,295 (2 32-1). If you change the number of pulses, the new value takes effect immediately whether the On-delay is expired or not. If the new number of pulses has not yet been reached in the current output sequence, then the new number of pulses will be used in the current output sequence. If the number of pulses is reduced to a number that is less than the current number of pulses already output, then the output sequence is terminated, STS_ENABLE and the DQn.A digital output are cleared, ERR_PULSE is set. At the next start of an output sequence, ERR_PULSE is cleared. If the number of pulses is zero the output sequence is terminated, STS_ENABLE and the DQn.A digital output are cleared, and ERR_PULSE is set. At the next start of an output sequence, ERR_PULSE is cleared. 38 Manual, 09/2015, A5E AA
39 Modes and Functions 3.4 Pulse train mode Setting and changing the period duration Permanent update The period duration can be controlled permanently using the control interface. The MODE_SLOT bit has to be set ('1' means permanent update); LD_SLOT has to have the value 1 (for Period duration). Set the period duration as a DWord number value of microseconds in the parameter field SLOT. High-speed output enabled (see parameters): between 10 μs and 85,000,000 μs. High-speed output disabled (see parameters): between 100 μs and 85,000,000 μs. Single update Set the period duration in the configuration parameters. Alternatively, you can do a single update using the control interface. MODE_SLOT has to be 0 (single-update); LD_SLOT has to have the value 1 (for Period duration). Set the period duration as a DWord number value of microseconds in the parameter field SLOT. High-speed output enabled (see parameters): between 10 μs and 85,000,000 μs. High-speed output disabled (see parameters): between 100 μs and 85,000,000 μs. Setting and changing the On-delay Permanent update The On-delay can be controlled permanently using the control interface. MODE_SLOT bit has to be set ('1' means permanent update); LD_SLOT must be the value 2 (for On-delay). Set the On-delay as a value between 0 μs and 85,000,000 μs in the parameter field SLOT. Single update Set the On-delay as a value between 0 μs and 85,000,000 μs in the configuration parameters. Alternatively, perform a single update using the control interface. MODE_SLOT has to be cleared ("0" means single update); LD_SLOT must be the value 2 (for On-delay). Set the On-delay as a value between 0 μs and 85,000,000 μs in the field SLOT. If you change the On-delay value during the output sequence, then the new On-delay is activated at the next output sequence. For more details about the use of the SLOT parameter, see the SLOT parameter handling (Page 113). Manual, 09/2015, A5E AA 39
40 Modes and Functions 3.4 Pulse train mode Setting and changing the duty cycle The range of the duty cycle parameter is selected using the "Output format" parameter. The TM Pulse 2x24V uses this assigned duty cycle value to calculate the pulse duration. If the number value you assign exceeds the upper limit, then a duty cycle of 100% of the period duration is used and this action does not cause an error. Output format "Per 100 (%)": Value range 0 to 100 Pulse duration = (duty cycle/100) x period duration. Output format "Per 1000": Value range 0 to 1,000 Pulse duration = (duty cycle/1,000) x period duration. Output format "Per 10000": Value range 0 to 10,000 Pulse duration = (duty cycle/10,000) x period duration. Output format "S7 analog output": Value range 0 to 27,648 Pulse duration = (duty cycle/27,648) x period duration. Update the duty cycle Permanent update The duty cycle can be controlled permanently using the control interface. MODE_SLOT bit has to be set ("1" means permanent update); LD_SLOT must be the value 4 (for duty cycle). Set the duty cycle as a value in the control interface field SLOT. The unit depends on the assigned output format. Single update Set the duty cycle in the configuration parameters. Alternatively, perform a single update using the control interface. MODE_SLOT has to be cleared ("0" means single update); LD_SLOT must be the value 4 (for duty cycle). Set the duty cycle as a value in the control interface field SLOT. The unit depends on the assigned output format. If you change the duty cycle value during the output sequence, then the new duty cycle is activated at the next output sequence. For more details about the use of the SLOT parameter, see SLOT parameter handling (Page 113). Isochronous mode General information is available in Function: Isochronous mode (Page 86). Isochronous mode does not have any influence on the functionality of Pulse train operating mode. If you want to synchronize the output sequence with To, then set the Function DI parameter to "Input" and the Pulse train output sequence starts at To. 40 Manual, 09/2015, A5E AA
41 Modes and Functions 3.4 Pulse train mode Current measurement Current measurement is available in Pulse train mode. Your control program can use current measurement for control and diagnostic purposes. For more information, refer to Function: Current measurement (Page 76). Parameters for Pulse train operating mode Parameter Meaning Value range Default Operating mode 2 = Set the "Pulse train" operating mode. 0 = Pulse output 1 = Pulse width modulation 1 2 = Pulse train 3 = On/Off-delay 4 = Frequency output 5 = DC motor High-speed output 1 The output supports higher frequencies (see pulse duration range). 0 = disabled 1 = enabled Disabled Function DI You can use the DIn.0 digital input as an input or as a hardware enable. The signal at DIn.0 is interpreted by the TM Pulse 2x24V, after noise filtering by the input delay, as the start of the output sequence. Input HW enable Input Output format Defines the format of the duty cycle ratio value. 0 = S7 analog format 1 = Per 100 (%) Per 100 (%) 2 = Per 1,000 3 = Per 10,000 Input delay DIn.0 digital input must be stable over the delay time (signal noise suppression). 0 = Off (4 μs) 1 = 0.05 ms 2 = 0.1 ms 0.1 ms 3 = 0.4 ms 4 = 0.8 ms 5 = 1.6 ms 6 = 3.2 ms 7 = 12.8 ms 8 = 20 ms Period Period duration of the output sequence: You can change the period duration in your control program using the control interface field SLOT. High-speed output disabled 100 μs to 85,000,000 μs High-speed output enabled 2,000,000 μs 10 μs to 85,000,000 μs Manual, 09/2015, A5E AA 41
42 Modes and Functions 3.4 Pulse train mode Parameter Meaning Value range Default On-delay Duty-cycle The time from the start of the output sequence to the output of the pulse train. You can change the On-delay in your control program using the SLOT parameter. The pulse duration results from the duty cycle and the period duration. The format of the duty cycle is determined by the parameter "Output format". You can change the duty-cycle in your control program using the control interface field SLOT. 0 μs to 85,000,000 μs 0 μs Output format: minimum to maximum Per 100: 0 to 100 Per 1000: 0 to 1,000 Per 10000: 0 to 10,000 S7 analog output: 0 to 27,648 50% 1 Only if the module is configured as "2 channels (2 A)" and not "1 channel (4 A)". 42 Manual, 09/2015, A5E AA
43 Modes and Functions 3.4 Pulse train mode Control and feedback signals for Pulse train operating mode Control interface Offset to the start address Parameter Meaning Channel 0 Channel 1 1 Bytes 0 to 3 Bytes 4 to 7 Bytes 12 to 15 OUTPUT_VALUE (DWord) Bytes 16 to 19 SLOT (DWord) Assign the number of pulses to the OUTPUT_VALUE as a DWord number value 0 to 4,294,967,295 (2 32-1). The On-delay, period duration, and duty cycle can be changed before the start of the output sequence. See SLOT parameter handling (Page 113). 0 μs to 85,000,000 μs Byte 8 Byte 20 LD_SLOT Interpretation of the value SLOT: All other values not listed below are invalid and produce the error ERR_LD (in single-update mode) or ERR_SLOT_VAL (in permanent-update mode). Bit 3 Bit 2 Bit 1 Bit Idle-state; nothing is done with the value Period duration in microseconds On-delay in microseconds Duty cycle in the format defined by the parameter "Output format" Byte 8: Bit 4 Byte 20: Bit 4 MODE_SLOT Bit 4 Mode for use of the field SLOT. 0 Single-update mode 1 Permanent-update mode Byte 9: Bit 0 Byte 21: Bit 0 SW_ENABLE Bit 0 Software enable: Start/enable and terminate/disable the output sequence when "Function DI" = "Input". 0 Output disabled/terminated 0 Starts output sequence on positive edge when "Function DI" = "Input" 1 1 Enable output sequence, when start is dependent on HW enable with "Function DI" = "HW enable" Byte 9: Bit 1 Byte 21: Bit 1 TM_CTRL_DQ Bit 1 Set DQn.A output source: Selects either CPU program or module's output sequence. 0 DQn.A and DQn.B are controlled by the CPU (in your program) using the SET_DQA and SET_DQB control bits 1 DQn.A is controlled by the module's pulse output sequence. DQn.B is always 0 Byte 9: Bit 3 Byte 21: Bit 3 SET_DQA Bit 3 Controls the value of the digital output DQn.A, if TM_CTRL_DQ is cleared. 0 0 on DQn.A 1 1 on DQn.A Byte 9: Bit 4 Byte 21: Bit 4 SET_DQB Bit 4 Controls the value of the digital output DQn.B, if TM_CTRL_DQ is cleared and if SET_DQA is cleared. 0 0 on DQn.B 1 1 on DQn.B Byte 10: Bit 0 Byte 22: Bit 0 RES_ERROR Bit 0 Reset pending errors (ERR_LD, ERR_DQA, ERR_DQB, and ERR_24V). 0 Reset of errors is not active 1 Reset of errors is active 1 Only if the module is configured as "2 channels (2 A)" and not "1 channel (4 A)" Note: All bytes and bits not described in the table above are reserved and should be 0. Manual, 09/2015, A5E AA 43
44 Modes and Functions 3.4 Pulse train mode Feedback interface: Offset to the start address Parameter Meaning Channel 0 Channel 1 1 Byte 0: Bit 0 Byte 8: Bit 0 ERR_PWR Bit 0 Indicates under voltage on the Power supply. Note that the bit is not set if the voltage is not present. 0 PWR is not under voltage 1 PWR is detected, but under voltage Byte 0: Bit 1 Byte 8: Bit 1 ERR_24V Bit 1 Indicates a short-circuit or overload on the output 24 V DC. You must set the RES_ERROR (control interface) to reset this error. 0 No short-circuit on 24 V DC 1 Short-circuit on 24 V DC Byte 0: Bit 2 Byte 8: Bit 2 ERR_LD Bit 2 Indicates an error while loading a value using the field SLOT (only in "single-update" SLOT-mode). 0 No load error pending Byte 0: Bit 3 Byte 8: Bit 3 ERR_PULSE Bit 3 Indicates a pulse output error. 1 Load error pending: you must set the RES_ERROR (control interface) to reset this error and be able to use the SLOT again. 0 No pulse output error 1 Pulse output error Byte 0: Bit 4 Byte 8: Bit 4 ERR_DQA Bit 4 Indicates a short-circuit on the output DQn.A. You must set RES_ERROR (control interface) to reset this error. 0 No short-circuit on DQn.A 1 Short-circuit on DQn.A Byte 0: Bit 5 Byte 8: Bit 5 ERR_DQB Bit 5 Indicates a short-circuit on the output DQn.B or an attempt to set both DQs manually using SET_DQA, SET_DQB, and TM_CTRL_DQ. You must set RES_ERROR (control interface) to reset this error. 0 No short-circuit on DQn.B 1 Short-circuit on DQn.B, or attempt to set both DQn.A and DQn.B Byte 0: Bit 7 Byte 8: Bit 7 ERR_SLOT_VAL Bit 7 Indicates that an invalid value is detected in SLOT (only in "permanent-update" SLOT-mode). 0 SLOT value is valid 1 SLOT value is not valid Byte 1: Bit 2 Byte 9: Bit 2 STS_LD_SLOT Bit 2 Toggle acknowledge bit for each action of the SLOT in "single-update" SLOT-mode. Each toggle of this bit means a successful LD_SLOT action. Byte 1: Bit 4 Byte 9: Bit 4 STS_READY Bit 4 Indicates the module is ready and parameterized. 0 Module is not parameterized 1 Module is parameterized Byte 1: Bit 5 Byte 9: Bit 5 STS_SW_ENABLE Bit 5 Indicates the status of SW_ENABLE (control interface). 0 SW_ENABLE cleared 1 SW_ENABLE set Byte 2: Bit 0 Byte 8: Bit 0 STS_ENABLE Bit 0 Indicates an output sequence is running. 0 Output sequence not running 1 Output sequence running Byte 2: Bit 1 Byte 10: Bit 1 STS_DQA Bit 1 Indicates the signal level at the DQn.A digital output. 0 0 at the DQn.A digital output 1 1 at the DQn.A digital output 44 Manual, 09/2015, A5E AA
45 Modes and Functions 3.4 Pulse train mode Feedback interface: Offset to the start address Parameter Meaning Channel 0 Channel 1 1 Byte 2: Bit 2 Byte 10: Bit 2 STS_DQB Bit 2 Indicates the signal level at the DQn.B digital output. 0 0 at the DQn.B digital output 1 1 at the DQn.B digital output Byte 2: Bit 3 Byte 10: Bit 3 STS_DI Bit 3 Indicates the signal level at the DIn.0 digital input. Byte 3: Bit 0 to 3 Byte 11: Bit 0 to 3 SEQ_CNT Word 2 Word 6 MEASURED_CURRE NT Word 3 Word 7 Reserved Read as 0 0 Signal 0 at the DIn.0 digital input 1 Signal 1 at the DIn.0 digital input Sequence counter: is incremented after completion of an output sequence. With SW_ENABLE: 0 to 1 With HW enable: 0 to 15 S7 Analog format positive value 0 to 32,767: 2 Ampere output: Full scale value 27,648, means 2,000 ma 4 Ampere output: Full scale value 27,648, means 4,000 ma 32,767 means no valid current measurement available; for example, during the very first period 1 Only if the module is configured as "2 channels (2 A)" and not "1 channel (4 A)" Note: All bytes and bits not described in the table above are reserved and are read as 0. Input and output signals for Pulse train operating mode Input and output signal Meaning Value range Channel 0 BaseUnit pin number Input signal HW enable Output Signal Pulse train at the DQn.A digital output You can select the HW enable with the "Function DI" parameter and select the input delay with the "Input delay" parameter. The signal of the DIn.0 digital input is interpreted by the TM Pulse 2x24V, after filtering by the input delay, as the start of the output sequence. Pulses are output at the DQn.A digital output for the set pulse duration. 0 = HW enable cleared 1 = HW enable issued 0 1 = Start of the output sequence; dependent on the software enable (SW_ENABLE) 0 = no pulse 1 = pulse See also Pin assignment and load/sensor wiring (Page 91) Channel 1 BaseUnit pin number Manual, 09/2015, A5E AA 45
46 Modes and Functions 3.5 On/Off-delay mode 3.5 On/Off-delay mode Definition The signal pending at the TM Pulse 2x24V DIn.0 digital input is output with an assigned On/Off-delay at the DQn.A digital output. Pulse diagram SW_ENABLE is set, while DIn.0 digital input = 0: Figure 3-7 Output sequence On/Off-delay (at the start DIn.0 digital input = 0) 46 Manual, 09/2015, A5E AA
47 Modes and Functions 3.5 On/Off-delay mode SW_ENABLE is set, while DIn.0 digital input = 1: If SW_ENABLE is set while DIn.0 digital input = 1, the first edge of a digital input (falling edge) is ignored. Figure 3-8 Output sequence On/Off-delay (at the start DIn.0 digital input = 1) Manual, 09/2015, A5E AA 47
48 Modes and Functions 3.5 On/Off-delay mode Starting the output sequence Your control program must issue the enable for the output sequence, using the software enable (SW_ENABLE 0 1). The STS_SW_ENABLE feedback bit indicates the software enable pending at the TM Pulse 2x24V. When the DIn.0 digital input goes high (positive edge) and remains high for the input delay time, the On-delay is started. After the On-delay expires, the DQn.A digital output is set. When the DIn.0 digital input goes low for the input delay time, the Off-delay is started. After the Off-delay expires, the DQn.A digital output is cleared. If the TM Pulse 2x24V recognizes a pulse duration or inter-pulse duration at the DIn.0 digital input shorter than the input delay time, then the input is ignored and the DQn.A digital output is unchanged. If the TM Pulse 2x24V recognizes a pulse duration or inter-pulse duration at the DIn.0 digital input longer than the input delay time, but too short to produce the parameterized pulse duration or inter-pulse duration, then the ERR_PULSE bit is set and the DQn.A digital output is unchanged. At the next edge of the DIn.0 digital input, the TM Pulse 2x24V clears the ERR_PULSE feedback bit Note TM_CTRL_DQ technology module output control signal If TM_CTRL_DQ = 1, then the TM Pulse 2x24V module has control and produces pulse sequences at the DQn.A output. If TM_CTRL_DQ = 0, then the CPU has control and your program can set DQn.A/DQn.B outputs directly with the SET_DQA/SET_DQB control bits. Canceling the output sequence Disabling the software enable (SW_ENABLE = 1 0) during the On-delay or pulse cancels the current output sequence and the last period duration is not completed. STS_ENABLE and the DQn.A digital output are immediately reset to 0. You must restart the output sequence to begin new pulse output. 48 Manual, 09/2015, A5E AA
49 Modes and Functions 3.5 On/Off-delay mode Truth Table Software enable SW_ENABLE DIn.0 digital input and remains 1 during the input delay DQn.A digital output (when TM_CTRL_DQ = 1) 0, if On-delay > 0 1, if On-delay = , if Off-delay > 0 0, if Off-delay = 0 STS_ENABLE 1 Start 1 Start 0 Any status 0 0 Cancel 1 Any status 0, if On-delay is not expired or if Off-delay is 1 - expired 1, if On-delay is expired and Off-delay is not expired Output sequence Minimum pulse duration/minimum interpulse duration of the DQn.A digital output The minimum pulse duration/minimum interpulse duration of the DQn.A digital output is 1.5 µs (high-speed active) and 10 µs (high-speed inactive). Note that lower values are possible but not guaranteed because this is hardware dependent. Make sure you take this into consideration when you set the On/Off-delay and the pulse duration/interpulse duration of the DIn.0 digital input. Otherwise, the response at the DQn.A digital output is not guaranteed. The pulse duration of the DIn.0 digital input is too short Case 1: The DIn.0 pulse duration < input delay time: The DIn.0 pulse is filtered out and ignored (no error occurs). Case 2: The TM Pulse 2x24V detects a DIn.0 pulse duration that is too short if: DIn.0 pulse duration + Off-delay time On-delay (error is set) Case 3: The TM Pulse 2x24V detects a DIn.0 pulse duration that is too short if: DIn.0 pulse duration + Off-delay time + minimum DQ pulse duration < On-delay time (error is set). Manual, 09/2015, A5E AA 49
50 Modes and Functions 3.5 On/Off-delay mode Response of the TM Pulse 2x24V to a pulse duration that is too short: ERR_PULSE is set. The current On-delay is cleared. The Off-delay is not started. The signal level at the DQn.A digital output remains at 0. ERR_PULSE is cleared at the next positive edge on the DIn.0 digital input. Figure 3-9 DIn.0 pulse duration too short The interpulse duration of the DIn.0 digital input is too short The TM Pulse 2x24V detects an interpulse duration that is too short on the positive edge on the DIn.0 digital input if: Interpulse duration + On-delay Off-delay. Case 1: Interpulse duration < input delay time: The DIn.0 input interpulse is filtered out and ignored (no error occurs). Case 2: Interpulse duration + On-delay time Off-delay time (error is set). Case 3: Interpulse duration + On-delay time < Off-delay time + minimum inter-pulse duration (error is set). Response of the TM Pulse 2x24V to an interpulse duration that is too short: ERR_PULSE is set. The current Off-delay is cleared. The On-delay is not started. The signal level at the DQn.A digital output remains at Manual, 09/2015, A5E AA
51 Modes and Functions 3.5 On/Off-delay mode ERR_PULSE is cleared with the next negative edge on the DIn.0 digital input. Figure 3-10 DIn.0 inter-pulse duration too short Retriggering the current On-delay The TM Pulse 2x24V starts a new On-delay on the positive edge on the DIn.0 digital input if: On-delay > pulse duration + inter-pulse duration This clears the current Off-delay. The DQn.A digital output is only set if signal level 1 is present on the DIn.0 digital input longer than the On-delay. This enables you to filter rapid pulses. Figure 3-11 DIn.0 retriggering the current On-delay Manual, 09/2015, A5E AA 51
52 Modes and Functions 3.5 On/Off-delay mode Retriggering the current Off-delay The TM Pulse 2x24V starts a new Off-delay on the negative edge on the DIn.0 digital input if: Off-delay > pulse duration + inter-pulse duration The DQn.A digital output is only cleared if signal level 0 is present on the Dn.0I digital input longer than the Off-delay. Figure 3-12 Retriggering the current Off-delay Setting and changing the OUTPUT_VALUE (On-delay) You set the On-delay OUTPUT_VALUE directly using your control program to assign a value. The unit is always microseconds. Possible range: between 0 μs and 85,000,000 μs. If an invalid value is assigned by your program, the module will send back error ERR_OUT_VAL in the feedback interface and continue using the last valid value. The new On-delay value is activated with the next positive edge on the DIn.0 digital input. Setting and changing the Off-delay Permanent update The Off-delay can be controlled permanently using the control interface. MODE_SLOT bit has to be set (permanent update); LD_SLOT must be the value 3 (for Off-delay). Set the Off-delay as a value between 0 μs and 85,000,000 μs in the field SLOT. The unit is always microseconds. Single update Set the Off-delay as a value between 0 μs and 85,000,000 μs in the configuration parameters. Alternatively, perform a single update using the control interface. MODE_SLOT has to be cleared (single-update); LD_SLOT must be the value 3 (for Off-delay). Set the Off-delay as a value between 0 μs and 85,000,000 μs in the field SLOT. If you change the Off-delay value during the output sequence, the new Off-delay is activated at the next negative edge on the DIn.0 digital input. For more details about the use of the SLOT parameter, see SLOT parameter handling (Page 113). 52 Manual, 09/2015, A5E AA
53 Modes and Functions 3.5 On/Off-delay mode Isochronous mode General information is available in Function: Isochronous mode (Page 86). Isochronous mode does not have any influence on the functionality of On/Off-delay operating mode. Parameters for On/Off-delay operating mode Parameter Meaning Value Range Default Mode High Speed Output 1 Function DI Input Delay Off-delay 3 = Set the "On/Off-delay" operating mode. The output supports higher frequencies. You can only use the DIn.0 digital input as an input. DI digital input must be stable over the delay time (signal noise suppression). The time from the falling edge of the DIn.0 digital input to the falling edge of the DQn.A. You can change the Off-delay in your control program using the SLOT parameter. 0 = Pulse output 1 1 = Pulse width modulation 2 = Pulse train 3 = On/Off-delay 4 = Frequency output 5 = DC-Motor 0 = disabled Disabled 1 = enabled 0 = Input Input 1 = reserved (do not use) 0 = Off (4 μs) 0.1 ms 1 = 0.05 ms 2 = 0.1 ms 3 = 0.4 ms 4 = 0.8 ms 5 = 1.6 ms 6 = 3.2 ms 7 = 12.8 ms 8 = 20 ms 0 μs to 85,000,000 μs 0 μs 1 Only if the module is configured as "2 channels (2 A)" and not "1 channel (4 A)". Manual, 09/2015, A5E AA 53
54 Modes and Functions 3.5 On/Off-delay mode Control and feedback signals for On/Off-delay operating mode Control interface Offset to the start address Parameter Meaning Channel 0 Channel 1 1 Bytes 0 to 3 Bytes 12 to 15 OUTPUT_VALUE (DWord) Bytes 4 to 7 Bytes 16 to 19 SLOT (DWord) On-delay 0 μs to 85,000,000 μs The Off-delay can be changed anytime, but only takes effect on the next falling edge of the DIn.0 digital input. 0 μs to 85,000,000 μs Byte 8 Byte 20 LD_SLOT Interpretation of the value SLOT: All other values not listed below are invalid and produce the error ERR_LD (in single-update mode) or ERR_SLOT_VAL (in permanent-update mode). Bit 3 Bit 2 Bit 1 Bit Idle-state; nothing is done with the value Off-delay in microseconds Byte 8: Bit 4 Byte 20: Bit 4 MODE_SLOT Bit 4 Mode for use of the field SLOT. 0 Single-update mode 1 Permanent-update mode Byte 9: Bit 0 Byte 21: Bit 0 SW_ENABLE Bit 0 Software enable: Start and terminate the output sequence. 0 Output canceled 0 1 Starts output sequence on positive edge Byte 9: Bit 1 Byte 21: Bit 1 TM_CTRL_DQ Bit 1 Set DQn.A output source: Selects either CPU program or module's output sequence. 0 DQn.A and DQn.B are controlled by the CPU (in your program) using the SET_DQA and SET_DQB control bits. 1 DQn.A is controlled by the module's pulse output sequence. DQn.B is always 0 for TM_CTRL = 1. Byte 9: Bit 3 Byte 21: Bit 3 SET_DQA Bit 3 Controls the value of the digital output DQn.A, if TM_CTRL_DQ is cleared. 0 0 on DQn.A 1 1 on DQn.A Byte 9: Bit 4 Byte 21: Bit 4 SET_DQB Bit 4 Controls the value of the digital output DQn.B, if TM_CTRL_DQ is cleared and if SET_DQA is cleared. 0 0 on DQn.B 1 1 on DQn.B Byte 10: Bit 0 Byte 22: Bit 0 RES_ERROR Bit 0 Reset pending errors (ERR_LD, ERR_DQA, ERR_DQB, and ERR_24V). 0 Reset of errors is not active 1 Reset of errors is active 1 Only if the module is configured as "2 channels (2 A)" and not "1 channel (4 A)" Note: All bytes and bits not described in the table above are reserved and should be Manual, 09/2015, A5E AA
55 Modes and Functions 3.5 On/Off-delay mode Feedback interface: Offset to the start address Parameter Meaning Channel 0 Channel 1 1 Byte 0: Bit 0 Byte 8: Bit 0 ERR_PWR Bit 0 Indicates under voltage on the Power supply. Note that the bit is not set if the voltage is not present. 0 PWR is not under voltage. 1 PWR is detected, but under voltage. Byte 0: Bit 1 Byte 8: Bit 1 ERR_24V Bit 1 Indicates a short-circuit or overload on the output 24 V DC. You must set the RES_ERROR (control interface), to reset this error and be able to use the SLOT again. 0 No short-circuit on 24 V DC 1 Short-circuit on 24 V DC Byte 0: Bit 2 Byte 8: Bit 2 ERR_LD Bit 2 Indicates an error while loading a value using the field SLOT (only in "single-update" SLOT-mode). 0 No load error pending. 1 Load error pending: you must set the RES_ERROR (control interface) to reset this error and be able to use the SLOT again. Byte 0: Bit 3 Byte 8: Bit 3 ERR_PULSE Bit 3 Indicates a pulse output error. 0 No pulse output error 1 Pulse output error Byte 0: Bit 4 Byte 8: Bit 4 ERR_DQA Bit 4 Indicates a short-circuit on the output DQn.A. You must set RES_ERROR (control interface) to reset this error. 0 No short-circuit on DQn.A 1 Short-circuit on DQn.A Byte 0: Bit 5 Byte 8: Bit 5 ERR_DQB Bit 5 Indicates a short-circuit on the output DQn.B or an attempt to set both DQn.A and DQn.B manually using SET_DQA, SET_DB, and TM_CTRL_DQ. You must set RES_ERROR (control interface) to reset this error. 0 No short-circuit on DQn.B 1 Short-circuit on DQn.B or attempt to set both DQn.A and DQn.B Byte 0: Bit 6 Byte 8: Bit 6 ERR_OUT_VAL Bit 6 Indicates that an invalid value is detected in OUTPUT_VALUE. 0 OUTPUT_VALUE is valid 1 OUTPUT_VALUE is not valid Byte 0: Bit 7 Byte 8: Bit 7 ERR_SLOT_VAL Bit 7 Indicates that an invalid value is detected in SLOT (only in "permanent-update" SLOT-mode). 0 SLOT value is valid 0 SLOT value is not valid 1 Byte 1: Bit 2 Byte 9: Bit 2 STS_LD_SLOT Bit 2 Toggle acknowledge bit for each action of the SLOT in "single-update" SLOT-mode. Each toggle of this bit means a successful LD_SLOT action. Byte 1: Bit 4 Byte 9: Bit 4 STS_READY Bit 4 Indicates the module is ready and parameterized. 0 Module is not parameterized 1 Module is parameterized Byte 1: Bit 5 Byte 9: Bit 5 STS_SW_ENABLE Bit 5 Indicates the status of SW_ENABLE (control interface). 0 SW_ENABLE cleared 1 SW_ENABLE set Manual, 09/2015, A5E AA 55
56 Modes and Functions 3.5 On/Off-delay mode Feedback interface: Offset to the start address Parameter Meaning Channel 0 Channel 1 1 Byte 2: Bit 0 Byte 8: Bit 0 STS_ENABLE Bit 0 Indicates an output sequence is running. 0 Pulse output is not running 1 Pulse output is running Byte 2: Bit 1 Byte 10: Bit 1 STS_DQA Bit 1 Indicates the signal level at the DQn.A digital output. 0 0 at the DQn.A digital output 1 1 at the DQn.A digital output Byte 2: Bit 2 Byte 10: Bit 2 STS_DQB Bit 2 Indicates the signal level at the DQn.B digital output. 0 0 at the DQn.B digital output 1 1 at the DQn.B digital output Byte 2: Bit 3 Byte 10: Bit 3 STS_DI Bit 3 Indicates the signal level at the DIn.0 digital input. Byte 3: Bit 0 to 3 Byte 11: Bit 0 to 3 SEQ_CNT Word 3 Word 7 Reserved Read as at the DIn.0 digital input 1 1 at the DIn.0 digital input Counts rising and falling edges of DQn.A output 1 Only if the module is configured as "2 channels (2 A)" and not "1 channel (4 A)" Note: All bytes and bits not described in the table above are reserved and are read as 0. Input and output signals for On/Off-delay operating mode Input and Output Signals Meaning Value Range Channel 0 BaseUnit pin number Input signal DIn.0 Digital input Output signal Pulse at the DQn.A digital output The signal of the DIn.0 digital input is output with an On/Off-delay on DQn.A digital output. The signal of the DIn.0 digital input is output with an On/Off-delay on the DQn.A digital output. 0 = no pulse 1 = pulse 0 = no signal 1 = signal See also Pin assignment and load/sensor wiring (Page 91) Channel 1 BaseUnit pin number 56 Manual, 09/2015, A5E AA
57 Modes and Functions 3.6 Frequency output mode 3.6 Frequency output mode Definition This mode allows you to assign a frequency value at high frequencies more precisely than PWM period and Period duration. A square wave signal with an assigned frequency and a constant duty cycle of 50% is produced at the digital output of the TM Pulse 2x24V. The output sequence is started after expiration of the configured On-delay on the DQn.A digital output. Pulse diagram Figure 3-13 Frequency output - output sequence The timing diagram above has the "Function DI" parameter set to "HW enable". The other option is to set "Function DI" to "Input". If the "Function DI" parameter is set to "Input", then the On-delay phase starts at the rising edge of SW_ENABLE. Manual, 09/2015, A5E AA 57
58 Modes and Functions 3.6 Frequency output mode Starting the output sequence Your control program must issue the enable for the output sequence, using the software enable (SW_ENABLE 0 1). The STS_SW_ENABLE feedback bit indicates the software enable pending at the TM Pulse 2x24V. You can also set the DIn.0 digital input of the TM Pulse 2x24V as a HW enable with the "Function DI" parameter. If you want to use the hardware enable, it has to be combined with the software enable. When SW_ENABLE has been enabled, the output sequence starts at the first positive edge of the hardware enable. Further positive edges of the hardware enable during the current output sequence are ignored by the TM Pulse 2x24V. When the enable is issued (positive edge) and remains high for the time of the input delay (noise filter), the On-delay is started and the STS_ENABLE set. The frequency sequence is output on expiration of the On-delay. The output sequence runs continuously as long as SW_ENABLE is set. Note TM_CTRL_DQ technology module output control signal If TM_CTRL_DQ = 1, then the TM Pulse 2x24V module has control and produces pulse sequences at the DQn.A output. If TM_CTRL_DQ = 0, then the CPU has control and your program can set DQn.A/DQn.B outputs directly with the SET_DQA/SET_DQB control bits. Canceling the output sequence Disabling the software enable (SW_ENABLE = 1 0) during the On-delay or frequency output cancels the current output sequence and the last period duration is not completed. STS_ENABLE and the DQn.A digital output are immediately reset to 0. You must restart the output sequence to begin new pulse output. 58 Manual, 09/2015, A5E AA
59 Modes and Functions 3.6 Frequency output mode Truth table Software enable SW_ENABLE Function DI parameter Hardware enable (DIn.0 digital input) 1 HW_ENABLE 0 1 and remains 1 during the input delay. Only active for the first positive edge, additional positive edges are ignored and no start occurs. DQn.A digital output (when TM_CTRL_DQ = 1) 0, if On-delay > 0 1, if On-delay = 0 STS_ENABLE 0 1 Start 0 1 Input Not used 0, if On-delay > Start 1, if On-delay = 0 0 HW_ENABLE or Input Any status 0 0 Cancel 1 HW_ENABLE or Input Any status 0, if On-delay is not expired or you are in the interpulse time 1, if On-delay is expired and during the pulse duration 0 1 HW_ENABLE Output sequence - Setting and changing the output value (Frequency) You set the OUTPUT_VALUE directly using your control program in the control interface. The value is in real format and the unit is always "Hz". The possible range is dependent on the parameter "High Speed Output" as follows: High Speed Output disabled Frequency (OUTPUT_VALUE): 0.02 Hz to 10,000 Hz High Speed Output enabled Frequency (OUTPUT_VALUE): 0.02 Hz to 100,000 Hz The new frequency value is applied at the next rising edge of the output. Output frequency accuracy The configured output frequency is output with an accuracy of +/- 100 ppm at the DQn.A digital output. Manual, 09/2015, A5E AA 59
60 Modes and Functions 3.6 Frequency output mode Setting and changing the On-delay Permanent update The On-delay can be controlled permanently using the control interface. MODE_SLOT bit has to be set (permanent-update); LD_SLOT must be the value 2 (for On-delay). Set the On-delay as a value between 0 μs and 85,000,000 μs in the field SLOT. The unit is always microseconds. Single update Set the On-delay as a value between 0 μs and 85,000,000 μs in the configuration parameters, the unit is always microseconds. Alternatively, perform a single update using the control interface. MODE_SLOT has to be cleared (single-update); LD_SLOT must be the value 2 (for On-Delay). Set the On-delay as a value between 0 μs and 85,000,000 μs in the field SLOT. If you change the On-delay value during the output sequence, the new On-delay is activated at the next output sequence. For more details about the use of the SLOT parameter, see Slot parameter handling (Page 113). Isochronous mode General information is available in the "Function: Isochronous mode (Page 86)" topic. Isochronous mode does not have any influence on the functionality of Frequency output operating mode. If you want to synchronize the output sequence with To, then set the Function DI parameter to "Input" and the frequency output sequence starts at To. 60 Manual, 09/2015, A5E AA
61 Modes and Functions 3.6 Frequency output mode Parameters of Frequency output operating mode Parameter Meaning Value range Default Mode High Speed Output 1 Function DI Input delay On-delay 4 = Set the Frequency output operating mode. The output supports higher frequencies. You can use the DIn.0 digital input as an input or as a hardware enable. DIn.0 digital input must be stable over the delay time (signal noise suppression). The time from the start of the output sequence to the output of the pulses. You can change the On-delay in your control program using SLOT parameter. 0 = Pulse output 1 1 = Pulse width modulation 2 = Pulse train 3 = On/Off-delay 4 = Frequency output 5 = DC Motor 0 = disabled Disabled 1 = enabled 0 = Input Input 1 = HW enable 0 = Off (4 μs) 0.1 ms 1 = 0.05 ms 2 = 0.1 ms 3 = 0.4 ms 4 = 0.8 ms 5 = 1.6 ms 6 = 3.2 ms 7 = 12.8 ms 8 = 20 ms 0 μs to 85,000,000 μs 0 μs 1 Only if the module is configured as "2 channels (2 A)" and not "1 channel (4 A)". Control and feedback signals for Frequency output operating mode Control interface Offset to the start address Parameter Meaning Channel 0 Channel 1 1 Bytes 0 to 3 Bytes 12 to 15 OUTPUT_VALUE (Real) DQn.A digital output frequency as a real number. The unit is always Hz. If you violate the lower or upper limit of the range, the TM Pulse 2x24V will work with the last valid value and the error ERR_OUT_VAL is activated. High-speed output disabled High-speed output enabled 0.02 Hz to 10,000 Hz 0.02 Hz to 100,000 Hz Bytes 4 to 7 Bytes 16 to 19 SLOT (DWord) The On-delay can be changed before the start of the output sequence. See MODE_SLOT. 0 μs to 85,000,000 μs Byte 8 Byte 20 LD_SLOT Interpretation of the value SLOT: All other values not listed below are invalid and produce the error ERR_LD (in single-update mode) or ERR_SLOT_VAL (in permanent-update mode). Bit 3 Bit 2 Bit 1 Bit Idle-state; nothing is done with the value On-delay in microseconds Manual, 09/2015, A5E AA 61
62 Modes and Functions 3.6 Frequency output mode Control interface Offset to the start address Parameter Meaning Channel 0 Channel 1 1 Byte 8: Bit 4 Byte 20: Bit 4 MODE_SLOT Bit 4 Mode for use of the field SLOT. 0 Single-update mode 1 Permanent-update mode Byte 9: Bit 0 Byte 21: Bit 0 SW_ENABLE Bit 0 Software enable: Start/enable and terminate/disable the output sequence. 0 Output disabled/terminated 0 1 Starts output sequence on positive edge when "Function DI" = "Input" 1 Enable output sequence, when start is dependent on HW enable with "Function DI" = "HW enable" Byte 9: Bit 1 Byte 21: Bit 1 TM_CTRL_DQ Bit 1 Set DQn.A output source: Selects either CPU program or module's output sequence. 0 DQn.A and DQn.B are controlled by the CPU (in your program) using the SET_DQA and SET_DQB control bits. 1 DQn.A is controlled by the module's pulse output sequence. DQn.B is always 0. Byte 9: Bit 3 Byte 21: Bit 3 SET_DQA Bit 3 Controls the value of the digital output DQn.A, if TM_CTRL_DQ is cleared. 0 0 on DQn.A 1 1 on DQn.A Byte 9: Bit 4 Byte 21: Bit 4 SET_DQB Bit 4 Controls the value of the digital output DQn.B, if TM_CTRL_DQ is cleared and if SET_DQA is cleared. 0 0 on DQn.B 1 1 on DQn.B Byte 10: Bit 0 Byte 22: Bit 0 RES_ERROR Bit 0 Reset pending errors (ERR_LD, ERR_DQA, ERR_DQB, and ERR_24V). 0 Reset of errors is not active 1 Reset of errors is active 1 Only if the module is configured as "2 channels (2 A)" and not "1 channel (4 A)" Note: All bytes and bits not described in the table above are reserved and should be Manual, 09/2015, A5E AA
63 Modes and Functions 3.6 Frequency output mode Feedback interface: Offset to the start address Parameter Meaning Channel 0 Channel 1 1 Byte 0: Bit 0 Byte 8: Bit 0 ERR_PWR Bit 0 Indicates under voltage on the Power supply. Note that the bit is not set if the voltage is not present. 0 PWR is not under voltage 1 PWR is detected, but under voltage Byte 0: Bit 1 Byte 8: Bit 1 ERR_24V Bit 1 Indicates a short-circuit or overload on the output 24 V DC. You must set the RES_ERROR (control interface), to reset this error. 0 No short-circuit on 24 V DC 1 Short-circuit on 24 V DC Byte 0: Bit 2 Byte 8: Bit 2 ERR_LD Bit 2 Indicates an error while loading a value using the field SLOT (only in "single-update" SLOT-mode). 0 No load error pending 1 Load error pending; you must set the RES_ERROR (control interface) to reset this error and be able to SLOT again. Byte 0: Bit 4 Byte 8: Bit 4 ERR_DQA Bit 4 Indicates a short-circuit on the output DQn.A. You must set RES_ERROR (control interface) to reset this error. 0 No short-circuit on DQn.A 1 Short-circuit on DQn.A Byte 0: Bit 5 Byte 8: Bit 5 ERR_DQB Bit 5 Indicates a short-circuit on the output DQn.B or an attempt to set both DQn.A and DQn.B manually using SET_DQA,SET_DB, and TM_CTRL_DQ. You must set RES_ERROR (control interface) to reset this error. 0 No short-circuit on DQn.B 1 Short-circuit on DQn.B or attempt to set both DQn.A and DQn.B Byte 0: Bit 6 Byte 8: Bit 6 ERR_OUT_VAL Bit 6 Indicates that an invalid value is detected in OUTPUT_VALUE. 0 OUTPUT_VALUE is valid 1 OUTPUT_VALUE is not valid Byte 0: Bit 7 Byte 8: Bit 7 ERR_SLOT_VAL Bit 7 Indicates that an invalid value is detected in SLOT (only in "permanent-update" SLOT-mode). 0 SLOT value is valid 0 1 SLOT value is not valid Byte 1: Bit 2 Byte 9: Bit 2 STS_LD_SLOT Bit 2 Toggle acknowledge bit for each action of the SLOT in "single-update" SLOT-mode. Each toggle of this bit means a successful LD_SLOT action. Byte 1: Bit 4 Byte 9: Bit 4 STS_READY Bit 4 Indicates the module is ready and parameterized. 0 Module is not parameterized 1 Module is parameterized Byte 1: Bit 5 Byte 9: Bit 5 STS_SW_ENABLE Bit 5 Indicates the status of SW_ENABLE (control interface). 0 SW_ENABLE cleared 1 SW_ENABLE set Byte 2: Bit 0 Byte 8: Bit 0 STS_ENABLE Bit 0 Indicates an output sequence is running 0 Pulse output is not running 1 Pulse output is running Byte 2: Bit 1 Byte 10: Bit 1 STS_DQA Bit 1 Indicates the signal level at the DQn.A digital output. 0 0 at the DQn.A digital output 1 1 at the DQn.A digital output Manual, 09/2015, A5E AA 63
64 Modes and Functions 3.6 Frequency output mode Feedback interface: Offset to the start address Parameter Meaning Channel 0 Channel 1 1 Byte 2: Bit 2 Byte 10: Bit 2 STS_DQB Bit 2 Indicates the signal level at the DQn.B digital output. 0 0 on DQn.B digital output 1 1 on DQn.B digital output Byte 2: Bit 3 Byte 10: Bit 3 STS_DI Bit 3 Indicates the signal level at the DIn.0 digital input. Byte 3: Bit 0 to 3 Byte 11: Bit 0 to 3 SEQ_CNT Word 3 Word 7 Reserved Read as on DIn.0 digital input 1 1 on DIn.0 digital input 1 Only if the module is configured as "2 channels (2 A)" and not "1 channel (4 A)" Sequence counter = 0. The sequence counter is not used in frequency output mode. Note: All bytes and bits not described in the table above are reserved and are read as 0. Input and output signals for Frequency output operating mode Input and Output Signals Meaning Value Range Channel 0 BaseUnit pin number Input signal HW enable Output signal Pulse at the DQn.A digital output You can select the HW enable with the "Function DI" parameter and select the input delay with the "Input delay" parameter. The signal of the DIn.0 digital input is interpreted by the TM Pulse 2x24V, after noise filtering by the input delay, as the start of the output sequence. A pulse is output at the DQn.A digital output for the assigned frequency. 0 = HW enable cleared 1 = HW enable issued 0 1 = Start of the output sequence after the input delay; dependent on the software enable (SW_ENABLE) 0 = no pulse 1 = pulse See also Pin assignment and load/sensor wiring (Page 91) Channel 1 BaseUnit pin number 64 Manual, 09/2015, A5E AA
65 Modes and Functions 3.7 DC motor mode 3.7 DC motor mode Definition Each channel has an A and a B output for connection to your DC motor load. The bipolar output switch and pulse width modulation lets your assign rotation direction and output voltage duty cycle. You can use the two channels for 2 A per channel maximum or use a parallel connection that provides a single channel 4 A maximum. Two channel motor load connection: Channel 0: motor connected between DQ0.A and DQ0.B Channel 1: motor connected between DQ1.A and DQ1.B Single channel motor load connection 4 A Channel 0: motor connected between DQ0.A and DQ0.B. DQ0.A and DQ1.A are connected together; DQ0.B and DQ1.B are connected together. For more details concerning the connection, see the Connecting chapter (Page 91)of this manual. Motor rotate Rotation direction Forward during high phase of the PWM signal: DQn.A is 1 and DQn.B is 0. Backward during high phase of the PWM signal: DQn.A is 0 and DQn.B is 1. Forward/Backward during low phase of the PWM signal: DQn.A is 0 and DQn.B is 0. Motor stop The motor can be stopped using an external signal connected to the DIn.0 digital input or using the signal SW_ENABLE in the control interface. Configure the "Function DI" accordingly. Function DI setting: "HW enable" starts the motor on the rising edge of DI and stops the motor on the falling edge of DI. "External stop" starts the motor on the rising edge on SW_ENABLE and stops the motor on the rising edge on DI, or the falling edge of SW_ENABLE. "Input" starts the motor on the rising edge of SW_ENABLE and stops the motor on the falling edge of SW_ENABLE (DI has no effect on the control of the motor). You control the output pulse width duty cycle with the control interface field OUTPUT_VALUE. The TM Pulse 2x24V generates continuous pulses based on this value. The OUTPUT_VALUE determines the duty cycle (pulse duration/period duration) within a period for pulse width modulation. The period duration can be adjusted. After expiration of the assigned On-delay, the DQn.A and DQn.B output pulses begin (output sequence). High-speed mode, current measurement, and current control are not available in DC motor mode. Manual, 09/2015, A5E AA 65
66 Modes and Functions 3.7 DC motor mode Starting the output sequence Your control program must issue the enable for the output sequence, using the software enable (SW_ENABLE 0 1). The STS_SW_ENABLE feedback bit indicates the software enable pending at the TM Pulse 2x24V. You can also assign the DIn.0 digital input of the TM Pulse 2x24V as a HW enable with the "Function DI" parameter. The input delay (noise filter) of the hardware enable can be set using the parameter "Input Delay". If you want to use the hardware enable, it has to be combined with the software enable. When SW_ENABLE has been enabled, the output sequence starts at the first positive edge of the hardware enable. Further positive edges of the hardware enable during the current output sequence are ignored by the TM Pulse 2x24V. The hardware enable option is not supported for isochronous mode. When the enable is issued (positive edge) and remains high for the input delay time, the On-delay is started and the STS_ENABLE set. The PWM pulse train is output on expiration of the On-delay. The output sequence runs continuously as long as SW_ENABLE is set. Canceling the output sequence Using the SW_ENABLE signal: Disabling the software enable (SW_ENABLE = 1 0) cancels the current output sequence and the last period duration is not completed. STS_ENABLE and the DQn.A and DQn.B digital outputs are immediately set to 1 (motor stop). You must restart the output sequence to begin new pulse output. Using the digital input DIn.0: If "Function DI" is parameterized as "HW_ENABLE": a falling edge on DIn.0 will stop the output sequence with the same behavior as using the SW_ENABLE. If "Function DI" is parameterized as "External stop": a rising edge on DIn.0 will stop the sequence with the same behavior as using the SW_ENABLE. 66 Manual, 09/2015, A5E AA
67 Modes and Functions 3.7 DC motor mode Truth table Software enable SW_ENABLE Function DI parameter Hardware enable (DIn.0 digital input) 1 HW_ENABLE 0 1 and remains 1 during the input delay. Only active for the first positive edge, additional positive edges are ignored and no start occurs. 0 1 Input or External stop 0 HW_ENABLE or Input or External stop Digital output DQn.A and DQn.B If On-delay > 0: DQn.A: 0 DQn.B: 0 If On-delay = 0: Forward: DQn.A: 1 DQn.B: 0 Any state If On-delay > 0 DQn.A: 0 DQn.B: 0 If On-delay = 0 Any state Forward: DQn.A: 1 DQn.B: 0 DQn.A: Tri-state DQn.B: Tri-state Backward: DQn.A: 0 DQn.B: 1 Backward: DQn.A: 0 DQn.B: 1 1 Input Any state If On-delay is not expired or during interpulse time: DQn.A: 0 DQn.B: 0 If On-delay is expired and during the pulse duration: Forward: DQn.A: 1 DQn.B: 0 1 HW_ENABLE 0 DQn.A: Tri-state DQn.B: Tri-state 1 External stop 0 1 DQn.A: Tri-state DQn.B: Tri-state 0 1 HW_ENABLE 0 DQn.A: Tri-state DQn.B: Tri-state Backward: DQn.A: 0 DQn.B: 1 STS_ENABLE Output sequence 0 1 Start 0 1 Start 0 Cancel Stop 1 0 Stop 0 - Manual, 09/2015, A5E AA 67
68 Modes and Functions 3.7 DC motor mode Setting and changing the pulse duty cycle and rotation direction OUTPUT_VALUE assigns the duty cycle and the direction for the current period duration. OUTPUT_VALUE is given as an S7 analog value, the sign gives the direction of the motor rotation ("+" means forward, "-" means backwards). The possible range is to Only the two least significant bytes of OUTPUT_VALUE are used, the two other bytes are ignored. A value of the two least significant bytes higher than will be interpreted as a value of (100% forward). A value of the two least significant bytes below will be interpreted as a value of (100% backward). Before changing the rotation direction, it is recommended that the OUTPUT_VALUE is first set to 0 long enough, to first stop the motor. Note that the TM Pulse 2x24V module does not override our duty cycle assignment in order to protect the motor. If a ramp-up or ramp-down is required by the motor, this ramp has to be implemented in the automation program and transmitted to the module by controlling the value of the field OUTPUT_VALUE accordingly. "S7 analog output" output format: Value range between -27,648 and +27,648. The sign determines the motor rotation direction. Pulse duration = (OUTPUT_VALUE/27,648) x period duration. You assign OUTPUT_VALUE directly with your control program. A new OUTPUT_VALUE is applied at the next rising edge of the output. Setting and changing the period duration Permanent update The period duration is controlled permanently using the control interface. The MODE_SLOT bit has to be set ("1" means permanent update); LD_SLOT has to have the value 1 ("1" means Period duration). Set the period duration value in the field SLOT between 100 μs and 85,000,000 μs. Single update Set the period duration in the configuration parameters. Alternatively, perform a single update using the control interface. MODE_SLOT has to be cleared ("0" means single-update); LD_SLOT has to have the value 1 ('1' means Period duration). Set the period duration value in the field SLOT between 100 μs and 85,000,000 μs. The new period duration is applied with the next rising edge of the output. For more details about SLOT parameter handling, see "Slot parameter handling (control interface)". 68 Manual, 09/2015, A5E AA
69 Modes and Functions 3.7 DC motor mode Isochronous mode General information is available in the "Function: Isochronous mode" topic. In isochronous mode, the output sequence is synchronized with the moment TO. The period duration is coordinated to the application cycle (the synchronous cycle, a multiple of the PROFINET cycle). The behavior in the DC-motor mode is the same than the behavior in the operating mode PWM. Please refer to the corresponding chapter in this manual. Only the differences are listed below: During the "pulse duration phase" (high phase), the status of the outputs is as follows: In forward direction: DQn.A is 1 and DQn.B is 0 In backward direction: DQn.A is 0 and DQn.B is 1 During the "interpulse duration phase" (low phase), the status of the outputs is as follows: DQn.A is 0 and DQn.B is 0 The parameter "Function DI" can be parameterized as "External stop" in isochronous mode to use the rising edges on the DIn.0 to stop the motor. Note that if "Function DI" is parameterized as "HW_ENABLE" in isochronous mode which is not supported, it will be interpreted as "External stop" by the TM Pulse 2x24V module. Setting and changing the On-delay Permanent update The On-delay can be controlled permanently using the control interface. The MODE_SLOT bit has to be set (permanent update); LD_SLOT must have the value 2 (for On-delay). Set the On-delay as a value between 0 μs and 85,000,000 μs in the field SLOT. The unit is always microseconds. Single update Set the On-delay as a value between 0 μs and 85,000,000 μs in the configuration parameters. The unit is always microseconds. Alternatively, perform a single update using the control interface. MODE_SLOT has to be cleared (single-update); LD_SLOT must have the value 2 (for On-delay). Set the On-delay as a value between 0 μs and 85,000,000 μs in the field SLOT. If you change the On-delay value during the output sequence, then the new On-delay is activated at the next output sequence. For more details about the use of the SLOT parameter see SLOT parameter handling. Manual, 09/2015, A5E AA 69
70 Modes and Functions 3.7 DC motor mode Parameters for DC motor operating mode Parameter Meaning Value range Default Operating mode 5 = Set the DC motor operating mode. 0 = Pulse output 1 1 = Pulse width modulation 2 = Pulse train 3 = On/Off-delay 4 = Frequency output 5 = DC Motor Function DI You can use the DIn.0 digital input as an 0 = Input Input input, for HW_ENABLE, or External stop 1 = HW enable signal. The signal at DIn.0 is interpreted by the TM Pulse 2x24V, after noise filtering by 2 = External stop the input delay. If HW_ENABLE is used in non-isochronous mode, a rising edge on DIn.0 starts the output sequence (If SW_ENABLE is set) and a falling edge on DIn.0 stops the output sequence. If HW_ENABLE is used in isochronous mode, it will be interpreted by the module as External stop. If External Stop is used, the output sequence starts with the rising edge of SW_ENABLE and stops with the rising edge of DIn.0. Output format Defines the format of the ratio value (duty 0 = S7 analog format S7 analog format cycle). Input delay DIn.0 digital input must be stable over the 0 = Off (4 μs) 0.1 ms delay time (signal noise suppression). 1 = 0.05 ms 2 = 0.1 ms 3 = 0.4 ms 4 = 0.8 ms 5 = 1.6 ms 6 = 3.2 ms 7 = 12.8 ms 8 = 20 ms Period Period duration of the output pulse cycle in μs. You can change the period duration in your control program with the control interface SLOT field. 100 μs to 85,000,000 μs 1000 μs On-delay The time from the start of the output sequence to the output of the pulses. You can change the On-delay in your control program with the control interface SLOT field. 0 μs to 85,000,000 us 0 μs 70 Manual, 09/2015, A5E AA
71 Modes and Functions 3.7 DC motor mode Control and feedback signals for DC motor mode Control interface Offset to the start address Parameter Meaning Channel 0 Channel 1 1 Bytes 0 to 3 Bytes 4 to 7 Bytes 12 to 15 Bytes 16 to 19 OUTPUT_VALUE (DWord) SLOT (DWord) The OUTPUT_VALUE determines the duty cycle (pulse duration/period duration ratio) within a period (PWM). The period duration can be adjusted. The new output value is applied at the next rising edge of the output. The OUTPUT_VALUE sign indicates direction of rotation (positive for forward) and (negative for backward). S7 analog output format: value range is -27,648 to +27,648 DInt data type: Only 2 least significant bytes are used For channel 0: bytes 2 and 3 For channel 1: bytes 14 and 15 Your program can change the On-delay and Period duration before the start of the output sequence using the SLOT and MODE_SLOT parameters. 0 μs to 85,000,000 μs Byte 8 Byte 20 LD_SLOT Interpretation of the value SLOT: All other values not listed below are invalid and produce the error ERR_LD (in single-update mode) or ERR_SLOT_VAL (in permanent-update mode). Bit 3 Bit 2 Bit 1 Bit Idle-state; nothing is done with the value Period in μs On-delay in μs Byte 8: Bit 4 Byte 20: Bit 4 MODE_SLOT Bit 4 Mode for use of the field SLOT. 0 Single-update mode 1 Permanent-update mode Byte 9: Bit 0 Byte 21: Bit 0 SW_ENABLE Bit 0 Software enable: Start and terminate the output sequence. 0 Output canceled 0 1 Starts output sequence on positive edge when "Function DI" = "Input" or "Function DI" = "External stop". 1 Enable output sequence, when start is dependent on HW enable with "Function DI" = "HW enable" Byte 9: Bit 1 Byte 21: Bit 1 TM_CTRL_DQ Bit 1 The outputs are always controlled by the module in DC-motor mode. This bit is ignored. X Don't care: No effect on the outputs. Byte 9: Bit 3 Byte 21: Bit 3 SET_DQA Bit 3 Controls the value of the digital output DQn.A, if TM_CTRL_DQ = 0. X Don't care: No effect on the outputs. Byte 9: Bit 4 Byte 21: Bit 4 SET_DQB Bit 4 Controls the value of the digital output DQn.B, if TM_CTRL_DQ = 0. X Don't care: No effect on the outputs. Byte 10: Bit 0 Byte 22: Bit 0 RES_ERROR Bit 0 Reset pending errors (ERR_LD, ERR_DQA, ERR_DQB, and ERR_24V). 0 Reset of errors is not active 1 Reset of errors is active 1 Only if the module is configured as "2 channels (2 A)" and not "1 channel (4 A)" Note: All bytes and bits not described in the table above are reserved and should be 0. Manual, 09/2015, A5E AA 71
72 Modes and Functions 3.7 DC motor mode Feedback interface: Offset to the start address Parameter Meaning Channel 0 Channel 1 1 Byte 0: Bit 0 Byte 8: Bit 0 ERR_PWR Bit 0 Indicates under voltage on the Power supply. Note that the bit is not set if the voltage is not present. 0 PWR is not under voltage 1 PWR is detected, but under voltage Byte 0: Bit 1 Byte 8: Bit 1 ERR_24V Bit 1 Indicates a short-circuit or overload on the output 24 V DC. You must set the RES_ERROR (control interface), to reset this error. 0 No short-circuit on 24 V DC 1 Short-circuit on 24 V DC Byte 0: Bit 2 Byte 8: Bit 2 ERR_LD Bit 2 Indicates an error while loading a value using the field SLOT (only in "single-update" SLOT-mode). 0 No load error pending 1 Load error pending: you must set the RES_ERROR (control interface) to reset this error and be able to use SLOT again. Byte 0: Bit 4 Byte 8: Bit 4 ERR_DQA Bit 4 Indicates a short-circuit on the output DQn.A. You must set RES_ERROR (control interface) to reset this error. 0 No short-circuit on DQn.A 1 Short-circuit on DQn.A Byte 0: Bit 5 Byte 8: Bit 5 ERR_DQB Bit 5 Indicates a short-circuit on the output DQn.B. You must set RES_ERROR (control interface) to reset this error. 0 No short-circuit on DQn.B 1 Short-circuit on DQn.B Byte 0: Bit 7 Byte 8: Bit 7 ERR_SLOT_VAL Bit 7 Indicates that an invalid value is detected in SLOT (only in "permanent-update" SLOT-mode). 0 SLOT value is valid 0 1 SLOT value is not valid Byte 1: Bit 2 Byte 9: Bit 2 STS_LD_SLOT Bit 2 Toggle acknowledge bit for each action of SLOT in "single-update" SLOT-mode. Each toggle of this bit means a successful LD_SLOT action. Byte 1: Bit 4 Byte 9: Bit 4 STS_READY Bit 4 Indicates the module is ready and parameterized. 0 Module is not parameterized 1 Module is parameterized Byte 1: Bit 5 Byte 9: Bit 5 STS_SW_ENABLE Bit 5 Indicates the status of SW_ENABLE (control interface). 0 SW_ENABLE cleared 1 SW_ENABLE set Byte 2: Bit 0 Byte 8: Bit 0 STS_ENABLE Bit 0 Indicates an output sequence is running. 0 Output sequence not running 1 Output sequence running Byte 2: Bit 1 Byte 10: Bit 1 STS_DQA Bit 1 Indicates the signal level at the DQn.A digital output. 0 0 on DQn.A digital output 1 1 on DQn.A digital output Byte 2: Bit 2 Byte 10: Bit 2 STS_DQB Bit 2 Indicates the signal level at the DQn.B digital output. 0 0 on DQn.B digital output 1 1 on DQn.B digital output 72 Manual, 09/2015, A5E AA
73 Modes and Functions 3.7 DC motor mode Feedback interface: Offset to the start address Parameter Meaning Channel 0 Channel 1 1 Byte 2: Bit 3 Byte 10: Bit 3 STS_DI Bit 3 Indicates the signal level at the DIn.0 digital input. Byte 3: Bit 0 to 3 Byte 11: Bit 0 to 3 SEQ_CNT Word 3 Word 7 Reserved Read as on DIn.0 digital input 1 1 on DIn.0 digital input 1 Only if the module is configured as "2 channels (2 A)" and not "1 channel (4 A)" Sequence counter = 0. The sequence counter is not used in PWM mode. Note: All bytes and bits not described in the table above are reserved and are read as 0. Input and output signals for DC motor operating mode Input and output signal Meaning Value range Channel 0 BaseUnit pin number Input signal HW enable /External stop Note: HW enable not supported for PWM in isochronous mode Output signal Pulse at the DQn.A and DQn.B digital outputs You can select the interpretation of the digital input signal on the output sequence with the "Function DI" parameter and select the input delay with the "Input delay" parameter. The signal at the DIn.0 digital input is interpreted by the TM Pulse 2x24V, after noise filtering by the input delay, as the start of the output sequence. A pulse is output at the DQn.A and DQn.B digital outputs for the assigned duty cycle and period duration. Function DI = "HW_ENABLE": 0 = HW enable cleared 1 = HW enable issued 0 1 = Start of the output sequence after the input delay, dependent on the software enable (SW_ENABLE) 1 0 = Stop of the output sequence after the input delay, dependent on the software enable (SW_ENABLE). Function DI = External stop: 0 1 = Stop of the output sequence after the input delay; dependent on the software enable (SW_ENABLE) No pulse or interpulse period: DQn.A is 0 V and DQn.B is 0 V Pulse duration in forward direction: DQn.A is 24 V and DQn.B is 0 V Pulse duration in backward direction: DQn.A is 0 V and DQn.B is 24 V See also Pin assignment and load/sensor wiring (DQ0.A) 11 (DQ0.B) Channel 1 BaseUnit pin number 10 (DQ1.A) 12 (DQ1.B) Manual, 09/2015, A5E AA 73
74 Modes and Functions 3.8 Function: High-speed output 3.8 Function: High-speed output High-speed mode improves the signal timing of the DQ digital outputs. The switching edges have less delay, variation, jitter, and smaller rise/fall times. High-speed mode is designed to produce more precise timing for pulse signals, but provides less maximum load current. High-speed output is only available in dual channel operation; it is not available in single channel operation. You can use the STEP 7 (TIA Portal) or STEP 7 hardware configuration to select "Highspeed output (0.1 A)" option for each channel separately. Also, you can change the parameter assignment at runtime with your program using data record 128 (Page 138). STEP 7 (TIA Portal) and STEP 7 assist you during parameter assignment, by disabling keyboard input for invalid parameters and range checking your value assignments. Depending on previous parameter selections, other options will be disabled. For example, if you select the single channel operation (the parallel connection of the two output channels), then the parameter options for Channel 1 and high-speed output are disabled. High-speed output option is available for these operation modes: Pulse output PWM Pulse train On/Off-delay Frequency output High-speed output is not available in DC motor mode. High-speed output option Pulse timing Minimum Maximum High-speed disabled High-speed enabled High-speed disabled Pulse duration 10 μs 1.5 μs 85,000,000 μs Period duration 100 μs 10 μs On-delay 0 μs Off-delay Frequency 0.02 Hz 10 khz 100 khz High-speed enabled High-speed output load current Parallel mode Maximum pulse output load current (single channel operation) High-speed disabled High-speed enabled Disabled 2 A (Two channels) 100 ma (Two channels) Enabled 4 A (One channel) Not allowed 74 Manual, 09/2015, A5E AA
75 Modes and Functions 3.9 Function: Sequence counter 3.9 Function: Sequence counter The TM Pulse 2x24V has a sequence counter for each channel that counts completed output sequences. Successfully completed and unsuccessfully completed output sequences are counted. You can monitor the completion of an output sequence with the sequence counter SEQ_CNT variable in the feedback interface (Page 115). The counter has a width of 4 bits. After a count overflow, the counter jumps back to 0. Function of the sequence counter The sequence counter has the following function in the individual operating modes: Pulse output and pulse train Function DI configuration is set to "Input": the counter is set to 1 after completion of the output sequence (range 0 to 1). Function DI configuration is set to "HW enable": the counter is incremented after every completed output sequence (range 0 to 15). On/Off-delay The counter is incremented, with each edge (positive and negative) at the DQ output (range 0 to 15). PWM, frequency output, and DC motor The counter does not have any function. When the software enable (SW_ENABLE = 0) occurs, the counter is reset to 0. Application options The sequence counter can be used for: Detecting (counting) very short pulse sequences Counting of output sequences controlled with the hardware enable Manual, 09/2015, A5E AA 75
76 Modes and Functions 3.10 Function: Current measurement 3.10 Function: Current measurement Principle of operation Your program logic can use load current measurements with a control loop for proportional control of the energy transferred to an inductive or resistive load. The current measurements are provided in the feedback interface (Page 115) MEASURED_CURRENT value in SIMATIC S7 analog value format. Current measurement is possible: For PWM and Pulse train operating modes and if the high-speed output option is inactive When there is no pulse output (at STS_ENABLE = 0), 7FFFH is supplied as the measured value. The measured value is valid at (STS_ENABLE = 1) after the first period duration. The returned current measurement value is a mean value of measured values sampled over the duration of at least one period. If Dithering is active, then the mean value is sampled over the duration of the entire Dither period. Current measurement is not possible and returns a MEASURED_CURRENT value of 0: For all other operating modes or if the high-speed output option is active. Note In order for the current measurement to work correctly, do not connect a freewheeling diode (snubber/suppressor diode) to the output load. Measuring range and measured value Channel configuration is 2 channels (2 A) (the parallel channel connection is deactivated). A measured mean current of 2 A corresponds to the SIMATIC S7 analog value of 27,648 (6C00H). Measurements of current are possible up to a SIMATIC S7 analog value of 32,511 (7EFFH) which corresponds to a current of 2.37 A. Currents exceeding 2 A may only occur briefly. Channel configuration is 1 channel (4 A) (the parallel channel connection is activated). A measured mean current of 4 A corresponds to the SIMATIC S7 analog value of 27,648. Measurements of current are possible up to a SIMATIC S7 analog value of 32,511 which corresponds to a current of 4.74 A. Currents exceeding 4 A may only occur briefly. 76 Manual, 09/2015, A5E AA
77 Modes and Functions 3.10 Function: Current measurement Output current limit diagnostic message If diagnostics are enabled and the module is in PWM or PTO mode, then an over current diagnostic error will be reported when the module senses the current to be higher 2.37 A (4.74 A in single channel mode). Current measurement accuracy Current measurement accuracy is ±2% of the full scale 27,648 measuring range ±40 ma in dual channel mode ±80 ma in single channel mode The current measurement accuracy degrades above 3 khz pulse frequency to -2% +5% accuracy, when driving resistive loads at a frequency of 10 khz. Note 2% current measurement accuracy is only possible, if the period duration is not changed during the measurement process. Manual, 09/2015, A5E AA 77
 In PWM mode, the TM Pulse 2x24V module can use a proportional-integral-derivative (PID) algorithm to control output current.")
78 Modes and Functions 3.11 Function: Current control 3.11 Function: Current control Current control (PWM mode only) In PWM mode, the TM Pulse 2x24V module can use a proportional-integral-derivative (PID) algorithm to control output current. The target value of the current (set point) is determined by your program and the module controls the duty cycle of the PWM output to follow the set point, with a response that is based on the assigned PID parameters. The set point and the measured value of the load current are compared by the PID controller. If the resulting difference (error) is outside a symmetrical dead band, a reaction is calculated by adding the selected proportional, integral and/or derivative parts. The manipulated value is limited by the defined high/low limits and finally the output pulse duration time (duty cycle) is modified, depending on the PWM period duration. Assign the reference current value to the current measured in the channel's DQn.A output load when the output is continuously in the high (On) state. Figure 3-14 Current control PID function For more information about this PID control method, refer to the CONT_C instruction topic in TIA Portal online help. 78 Manual, 09/2015, A5E AA
79 Modes and Functions 3.11 Function: Current control Setting up current control In order to use the current control feature, the module must be parametrized correctly and the set point (target value of the current) must to be controlled by the user program. In addition, your program can also read the limit-reached flags. PID parameters The PID parameters can be set in TIA Portal device configuration or by your program writing parametrization record (record 128) in the module. See the parametrization record description (Page 138) for details. Current Control: "1" activates the PID controller. Limitations: Current control can only be activated if the selected mode of operation is PWM and the high-speed output is disabled. All the following parameters have no effect, if current control is disabled. P_Sel, I_Sel, D_Sel: defines the PID control calculation. The proportional, integral, and derivative parts can be enabled ("1") or disabled ("0") in the device configuration. Reference value current (ma): The reference value is used to define the maximum set point and the high and low limits of the controlled current. Typically, the maximum current can be measured in PWM mode with current control disabled and a duty cycle set to 100%. The value measured can be set as a reference for the current control. The maximum value is 4000 ma for single channel operation (parallel channel connection enabled) and 2000 ma per channel for dual channel operation (parallel connection disabled). Dead band width (μa): A dead band is applied to the output current deviation from the set point current. The "Dead band width" is half of the size of the dead band. The dead band is symmetrical: For example, if the dead band width = 1500 μa, then the dead band is from μa to μa. High limit (S7 analog value): The manipulated value is always restricted to a high limit and low limit. The "High limit" parameter assigns the high limit in S7 analog format, relative to the reference value current. A value higher or equal than means 100% of the reference value current. The High limit value must be higher than the Low limit. High limit example: The reference current is set to 1000 ma which should be the load current measured with 100% duty cycle. If the high limit is 20000, this means the maximum current the controller will drive is 20000/27648 * 1000 ma = ma that is equivalent to a duty cycle of 72.34%. If the controller calculates a control value higher than 72.34%, it will drive 72.34% and never go higher than that value. Manual, 09/2015, A5E AA 79
80 Modes and Functions 3.11 Function: Current control Low limit (S7 analog value): The manipulated value is always restricted to a high limit and low limit. The "Low limit" parameter assigns the low limit in S7 analog format, relative to the reference value of the current. A value higher or equal to is not allowed. The Low limit value must be lower than the High limit. Low limit example: The reference current is set to 1000 ma which should be the load current measured with 100% duty cycle. If the low limit is 100, this means the minimum current the controller will drive is 100/27648 * 1000 ma = 3.6 ma that is equivalent to a duty cycle of 0.36%. If the controller calculates a control value below 0.36%, it will drive 0.36% and never go lower than that value. Gain: The proportional gain parameter assigns the amplification factor for the P part of the PID algorithm. TI (s): The integration time parameter determines the time interval of the integral action. If TI is smaller than the controller cycle time, TI will be set internally to the controller cycle time. TD (s): The derivative time parameter determines the time interval of the derivative action. If TD is smaller than the controller cycle time, TI will be set internally to the controller cycle time. TM_LAG (s): Time lag of the derivative action. The algorithm of the D-action contains a delay of TM_LAG. If TM_LAG is smaller than half the controller cycle time, TI will be set internally to half the controller cycle time. Set point control Your program controls the target value of the output current by setting the control interface field OUTPUT_VALUE. The output format is selected in the parametrization record (see parameter "output format"). For example, if the output format "per 100" is selected, writing the value 60 in OUTPUT_VALUE means the target current value is 60% of the reference current value (see parameter "reference value current"). Limit reached flags The limit reached flags are available in the feedback interface. QLMN_HLM: "1" means the manipulated value is at the high limit. QLMN_LLM: "1" means the manipulated value is at the low limit. For more information about the PID control parameters, refer to the CONT_C instruction topic in TIA portal online help. 80 Manual, 09/2015, A5E AA
81 Modes and Functions 3.11 Function: Current control Controller cycle time The internal controller cycle time depends on the configured automation system and on the PWM period. The controller cannot control the current faster than the parametrized PWM period, as the measured current is averaged over an entire PWM period. If Dithering is active simultaneously with current control, the PID controller uses the Dither period duration as the internal controller cycle time. Resetting the PID current controller The internal data of the current controller are reset in the following cases: SW_ENABLE (see control interface) is low. A new parametrization record is sent to the module. See also TM Pulse 2x24V feedback interface (Page 115) Manual, 09/2015, A5E AA 81
82 Modes and Functions 3.12 Function: Dither PWM output 3.12 Function: Dither PWM output Dither overview The Dither function creates a vibration in a proportional valve when the desired valve position is controlled with current supplied from the PWM output. The vibration is induced by superimposing the dither current fluctuation around the target current, in a PWM output load (valve coil). The dither vibration improves the accuracy and linearity of proportional control valves. You can enable and configure the Dither function to minimize valve control problems caused by static friction, stiction, and hysteresis. Dither parameters The dither parameters can be set in the TIA Portal device configuration or in the parameterization record (record 128) sent by the program to the module. See the Parameterization record (Page 138) description for details. Some dither parameters can be changed during operation by using the slot mechanism in the control interface for calibration purposes. It is recommended to restart the PWM output sequence after such a parameter change. Dither: "1" enables the dither feature. In addition to enabling "Dither" in the module's PWM configuration, you must set the DITHER bit in the Control interface (Page 110) to start the Dither signal. Dither amplitude ( ): Assign the amplitude ratio of the superimposed dither signal in a per mill ratio. The allowed range is 0 to 500 duty cycle. If a higher value is assigned, then 500 is used by the module. For example: if the dither amplitude is set to 100 and the duty cycle in PWM mode is set to 50%, then the effective duty cycle of the signal will vary periodically between 40% and 60%. The dither amplitude is adapted (reduced) dynamically by the module if the calculated effective duty cycle is higher than 100% or lower than 0%, so that the dither signal remains symmetrical. For example, if the dither amplitude is set to 100 and the duty cycle in PWM mode is set to 95%, the effective duty cycle of the signal will vary periodically between 90% and 100%. The dither amplitude is always corrected to remain symmetrical. The dither amplitude will return to the assigned value, as soon as the output signal allows enough duty cycle margin for the superimposed Dither duty cycle variation to be symmetrical. 82 Manual, 09/2015, A5E AA
83 Modes and Functions 3.12 Function: Dither PWM output Dither period (μs): Assign the period duration in microseconds for the superimposed dither signal. The allowed range is from (4 x PWM period) to 100,000 μs. Also, the Dither period must be greater than 2 ms. If a value less than 2 ms or less than (4 x PWM period) is parametrized, then an error occurs (see parameter validation (Page 120) for ERR_SLOT_VAL and ERR_LD). If a Dither period higher than 100 ms is assigned, the module will use the value 100 ms. The Dither period used by the module can only be an even multiple of the PWM period. The module will use the nearest possible value to the assigned Dither period. Dither ramps: The dither ramp parameter is one double-word made of two different words. The low word is the dither ramp-up time and the high word is the dither ramp-down time. Dither ramp-up time (ms): Assign the time in milliseconds for the duty cycle to rise from 0% to 100%. The allowed range is 0 ms to 30,000 ms. If a higher value is assigned, then 30,000 ms is used by the module. The effective ramp-up time is dependent on the dither amplitude and the nominal value of the duty cycle. For example: if your nominal value of the duty cycle is 50% and the dither amplitude is 100, the effective duty cycle will vary between 40% and 60%, the ramp-up time from 50% to 60% will be 100 x Dither ramp-up time. Dither ramp-down time (ms): Assign the time in milliseconds for the duty cycle to fall from 100% to 0%. The allowed range is 0 ms to 30,000 ms. If a higher value is assigned, then 30,000 ms is used by the module. The effective ramp-down time is dependent on the Dither amplitude and the nominal value of the duty cycle. For example: if your nominal value of the duty cycle is 50% and the dither amplitude is 100, the effective duty cycle will vary between 40% and 60%, the ramp-down time from 50% to 40% will be 100 x Dither ramp-down time. Note Changing parameters during Dither output If the PWM period is changed during operation using the slot mechanism, so that the dither period is less than (4 x PWM period), then dither current is deactivated and feedback bit STS_DITHER = 0, until a valid combination of Dither and PWM periods is assigned. If you change parameter values using the SLOT mechanism during dither output, then you should restart the output sequence. Note PWM with dithering in isochronous mode For best results, set the dither period duration to an integral even-numbered multiple of the application cycle. Example: If the application cycle is 1ms, then the minimal optimal dither period is 2ms. The next optimal values are 4ms, 6ms,... Manual, 09/2015, A5E AA 83


 Example 2: Dither with no ramp (Dither")
84 Modes and Functions 3.12 Function: Dither PWM output Dither starting and stopping The ramp-up of the dither current starts as soon as the bit DITHER is set in the control interface and the current Dither period has ended and a new Dither period starts. The feedback interface provides an acknowledge bit STS_DITHER in the feedback interface that goes high when the ramp-up phase is started (by setting the DITHER bit when the output sequence is running) and goes low when the ramp-down phase is over or the output sequence is stopped. The ramp-down starts when the bit DITHER is cleared in the control interface and the current Dither period has ended and a new Dither period starts. Example 1: No dither (Dither bit = 0) Example 2: Dither with no ramp (Dither period = 6 x PWM period) Example 3: Dither with ramp-up 84 Manual, 09/2015, A5E AA

85 Modes and Functions 3.12 Function: Dither PWM output Example 4: Dither with ramp-down Manual, 09/2015, A5E AA 85
86 Modes and Functions 3.13 Function: Isochronous mode 3.13 Function: Isochronous mode Note For basic information on isochronous mode, refer to the SIMATIC PROFINET with STEP 7 ( ET in STEP 7&lc=en-US) manual. Requirements You will require the following for the TM Pulse 2x24V in isochronous mode: A CPU that supports isochronous mode An IM (interface module) that supports isochronous mode Engineering software, such as TIA portal or STEP 7, to parameterize isochronous mode Response of the TM Pulse 2x24V Depending on the system parameter assignment, the TM Pulse 2x24V works in either non-isochronous or isochronous mode. In isochronous mode The output sequences are started at the moment TO, when only the software enable is used. Data communication between the PROFINET controller and TM Pulse 2x24V is isochronous to the cycle. All 12 bytes of a channel's control interface are consistent (24 bytes for both channels). All 8 bytes of a channel's feedback interface are consistent (16 bytes for both channels). In the PWM operating mode, the period duration is synchronized to the application cycle time (PROFINET). See the PWM chapter (Page 25) for details. 86 Manual, 09/2015, A5E AA
87 Modes and Functions 3.14 Function: Direct control of DQ digital outputs 3.14 Function: Direct control of DQ digital outputs Definition You can directly set the TM Pulse 2x24V DQ digital outputs with your control program. Select the DQ direct control function, by clearing the Technology Module output control bit (TM_CTRL_DQ = 0), in the control interface. Direct control of a digital output can support you when commissioning an automation control system. If you select direct control of the DQ during a pulse output sequence, the sequence will continue to run in the background, so that when the module gets control again (by setting TM_CTRL_DQ = 1), the output sequence continues. You assign the state of a digital output DQn.A and DQn.B with the SET_DQA and SET_DQB control bits. You cannot use the Direct control function to set both DQn.A and DQn.B outputs high on the same channel. If an attempt to do so occurs, then error ERR_DQB is set in the feedback interface and only the DQn.A output is set high. When you set TM_CTRL_DQ = 1, you deselect the direct control of digital output function. If the output sequence is still running (STS_ENABLE still active), then the TM Pulse 2x24V module regains control of a channel's DQn.A and DQn.B outputs. Note TM_CTRL_DQ technology module output control signal If TM_CTRL_DQ = 1, then the TM Pulse 2x24V module has control and produces pulse sequences at the DQn.A and DQn.B outputs. DQn.B is always 0 except in DC motor mode. If TM_CTRL_DQ = 0, then the CPU has control and your program can set DQ outputs directly with the SET_DQA/SET_DQB control bits. In DC motor mode, it is not possible to control the DQn.A and DQn.B outputs manually; TM_CTRL_DQ, SET_DQA, and SET_DQB have no effect. Manual, 09/2015, A5E AA 87

88 Modes and Functions 3.14 Function: Direct control of DQ digital outputs Pulse diagram Figure 3-15 Direct control of DQ timing during Pulse output mode Figure 3-16 TM_CTRL_DQ output switch 88 Manual, 09/2015, A5E AA
89 Modes and Functions 3.14 Function: Direct control of DQ digital outputs Control and feedback signals Control interface Offset to the start address Parameter Meaning Channel 0 Channel 1 Byte 9: Bit 0 Byte 21: Bit 0 SW_ENABLE Bit 0 Software enable: Start and terminate the output sequence. 0 Output canceled Starts output sequence on positive edge; may be dependent on the hardware enable. Byte 9: Bit 1 Byte 21: Bit 1 TM_CTRL_DQ Bit 1 Set DQ output source: Selects either PLC program or module's output sequence. 0 DQn.A and DQn.B are controlled by the PLC program using SET_DQA and SET_DQB. 1 DQn.A is controlled by the module's pulse output sequence. Byte 9: Bit 3 Byte 21: Bit 3 SET_DQA Bit 3 Controls the value of the digital output DQn.A, if TM_CTRL_DQ is cleared. 0 0V on DQn.A 1 24V on DQn.A Byte 9: Bit 4 Byte 21: Bit 4 SET_DQB Bit 4 Controls the value of the digital output DQn.B, if TM_CTRL_DQ is cleared and if SET_DQA is cleared. 0 0V on DQn.B 1 24V on DQn.B Feedback interface: Offset to the start address Parameter Meaning Channel 0 Channel 1 Byte 0: Bit 4 Byte 8: Bit 4 ERR_DQA Bit 4 Indicates a short-circuit on the output DQn.A. You must set RES_ERROR (control interface) to reset this error. 0 No short- circuit on DQn.A 1 Short-circuit on DQn.A Byte 0: Bit 5 Byte 8: Bit 5 ERR_DQB Bit 5 Indicates a short-circuit on the output DQn.B or an attempt to set both DQn.A and DQn.B manually using SET_DQA,SET_DB, and TM_CTRL_DQ. You must set RES_ERROR (control interface) to reset this error. 0 No short-circuit on DQn.B 1 Short-circuit on DQn.B or attempt to set both DQn.A and DQn.B Byte 2: Bit 1 Byte 10: Bit 1 STS_DQA Bit 1 Indicates the signal level at the DQn.A digital output. 0 Signal 0 at the DQn.A digital output 1 Signal 1 at the DQn.A digital output Byte 2: Bit 2 Byte 10: Bit 2 STS_DQB Bit 2 Indicates the signal level at the DQn.B digital output. 0 Signal 0 at the DQn.B digital output 1 Signal 1 at the DQn.B digital output Manual, 09/2015, A5E AA 89
90 Modes and Functions 3.14 Function: Direct control of DQ digital outputs States of DQ bits TM_CTRL_DQ SET_DQA SET_DQB Reaction at DQn.A Reaction at DQn.B (ERR_DQB is set) Don't care Don't care State controlled by pulse processing State controlled by pulse processing Note Setting both DQn.A and DQn.B to the 1 state not allowed You cannot set both DQn.A and DQn.B to 1 at the same time. If SET_DQA and SET_DQB are set high and TM_CTRL_DQ is low, only output DQn.A will go high and an error bit ERR_DQB is set in the feedback interface. This error must be acknowledged in the control interface by using the RES_ERROR bit. 90 Manual, 09/2015, A5E AA
91 Connecting Pin assignment, sensor, load, and power wiring The TM Pulse 2x24V must use the B1 type BaseUnit. Digital inputs, digital outputs, 24 V DC sensor power outputs and an external 24 V DC power source are connected to the BaseUnit of the technology module. BaseUnit The BaseUnit is not included in the TM Pulse 2x24V product package and must be ordered separately. For an overview of the BaseUnits to be used with the technology module, refer to the product information on the documentation for the ET 200SP Distributed I/O System ( You can find information about selecting a suitable BaseUnit in the ET 200SP Distributed I/O System ( system manual and ET 200SP BaseUnits ( device manual. Manual, 09/2015, A5E AA 91

92 Connecting 4.1 Pin assignment, sensor, load, and power wiring Pin assignment of the BaseUnit The table below shows the pin assignment, using the BaseUnit BU20-P12+A0+4B (6ES7193-6BP20-0BB1). For this BaseUnit, the TM Pulse module's L+ pins are always isolated from adjacent modules. The L+ voltage from adjacent modules are connected together through a bypass in the BaseUnit. Table 4-1 Pin assignment of the BaseUnit BU20-P12+A0+4B Designation Pin name View Pin name Designation 24 V DC supply output for sensor power Channel 0 digital input Channel 0 ground for digital inputs Channel 0 ground for digital outputs Channel 0 digital output A Channel 0 digital output B External 24VDC supply input for digital output and sensor power External 24VDC supply input for digital output and sensor power. Pins 13 and 15 are connected internally. 24VDC VDC 24VDC supply output for sensor power DI DI1.0 Channel 1 digital input M 5 6 M Channel 1 ground for digital inputs M 7 8 M Channel1 ground for digital outputs DQ0.A 9 10 DQ1.A Channel 1 digital output A DQ0.B DQ1.B Channel 1 digital output B L M Ground for supply voltage L M Ground for supply voltage Pins 14 and 16 are connected internally. 24 V DC sensor power output To power digital input sensors, the technology module supplies 24 V DC with reference to M. The 24 V DC supply is monitored for short-circuits and overload conditions. 92 Manual, 09/2015, A5E AA
93 Connecting 4.1 Pin assignment, sensor, load, and power wiring L+ external power supply Connect an external 24 V DC power to the L+ and M connections to supply power for the TM Pulse 2x24V module, output loads, and sensors. An internal protection circuit protects the technology module against damage due to reversed polarity of the supply voltage. Unexpected conditions can occur at the digital outputs when L+ is connected to the supply voltage and M is disconnected from the supply voltage return, due to a wire break. The technology module monitors the connection of the supply voltage. WARNING Supply voltage M connections Connect both the M potential pins to the power supply return with separate wires. If one wire breaks, then the other wire maintains the electrical connection from M to the power supply return If the electrical connection between the M potential and the power supply return is broken, then unexpected conditions can occur and the digital outputs may go high even though your program is not setting a high state. Note L+ and M isolation on TM Pulse 2x24V module using BaseUnit type B1 The L+ and M connections on the type B1 BaseUnit are electrically isolated, from adjacent BaseUnits plugged in on the left-side or right-side. The L+ and M power bus passes through the type B1 BaseUnit (with no connections) and extends the power bus to connect left-side and right-side BaseUnits. DI0.0 and DI1.0 digital inputs The digital inputs are not electrically isolated from each other or from the digital outputs. The digital inputs are electrically isolated from the ET 200SP system bus. When you connect input signals, depending on the configured input delay and the potential effect of interference, ground the shield on both ends of a cable that connects sensor to BaseUnit pin. Note Electromagnetic interference shielding for inputs Input connections on the type B1 BaseUnit used by the TM Pulse 2x24V module do not have shield ground connections. You must connect cable shields to electrical ground at the DIN rail or the system cabinet. Manual, 09/2015, A5E AA 93
94 Connecting 4.1 Pin assignment, sensor, load, and power wiring Input noise filter for digital inputs You can configure an input delay for each digital input to suppress interference. Signals must have a steady state during the configured input delay before a signal is accepted as a valid input state. You can assign the following values for the input delay: Off (means input delay of 4 μs and requires a minimum pulse width of 3 μs) 0.05 ms 0.1 ms (default) 0.4 ms 0.8 ms 1.6 ms 3.2 ms 12.8 ms 20 ms The input delay that you assign affects the detection time of input signals. The detected state change is always offset in time by the assigned input delay time. Note For input delay settings of "Off" or "0.05 ms" and longer wire lengths, use shielded cables at digital input connections. Shielding improves input response accuracy. 94 Manual, 09/2015, A5E AA
 The digital outputs are not electrically isolated from each other or from the digital inputs. The digital outputs are electrically isolated from the ET 200SP system bus.")
95 Connecting 4.1 Pin assignment, sensor, load, and power wiring Digital outputs of channel 0 (DQ0.A, DQ0.B) and channel 1 (DQ1.A, DQ1.B) The digital outputs are not electrically isolated from each other or from the digital inputs. The digital outputs are electrically isolated from the ET 200SP system bus. The digital outputs are protected from overload and short-circuit. DQ0.B and DQ1.B are only used in DC motor mode or directly controlled by a SET_DQB bit in the control interface. Digital outputs have integrated protection diodes to prevent voltage overstress due to inductive kickback. No external protection diodes are required for inductive loads. Figure 4-1 Dual channel wiring Manual, 09/2015, A5E AA 95

96 Connecting 4.1 Pin assignment, sensor, load, and power wiring Figure 4-2 Single channel with parallel connection wiring WARNING Supply voltage M connections Connect both the M potential pins to the power supply return with separate wires. If one wire breaks, then the other wire maintains the electrical connection from M to the power supply return If the electrical connection between the M potential and the power supply return is broken, then unexpected conditions can occur at the digital outputs. Note Load wiring resistance In single channel mode with parallel connected wiring, the wires from DQ0.A and DQ1.A must have equal resistance (length and size) for proper current sharing between the two outputs. Also, the wiring for DQ0.B and DQ1.B must have equal resistance when using DC motor mode. Maximum current is limited and current measurement errors occur if the wiring does not have equal resistance. 96 Manual, 09/2015, A5E AA
97 Connecting 4.1 Pin assignment, sensor, load, and power wiring Note Excessive temperature from unsuitable loads A high-speed output generates edges that are very steep. This creates very powerful charge reversals for the connected load, which can overheat the load at very high switching frequencies. The connected load must therefore be approved for high input frequencies. See Function: High-speed output (Page 74) topic for details. Note The digital output switch-off response / switch-off edge depends on the load. Thus, it is possible that very short pulses cannot be output correctly. Note Relays and contactors can be connected direct without external circuitry. Manual, 09/2015, A5E AA 97
98 Configuring Configuration software Introduction The TM Pulse 2x24V module is configured and assigned parameters with the configuration software. The module's pulse output sequences are controlled and monitored by your program. System environment The technology module can be used in the following system environments: Table 5-1 Applications of the technology module with PROFINET I/O Applications Components required Configuration software In your program Decentralized operation in an S system S automation STEP 7 (TIA Portal): system ET 200SP decentralized I/O system TM Pulse 2x24v Device configuration and parameter settings with hardware configuration (HWCN) Direct access to the control and feedback interface (Page 110) of the TM Pulse 2x24V in the I/O data Centralized or decentralized operation in an ET 200SP system Decentralized operation in an S7-300/400 system Decentralized operation in a PROFINET controller or PROFIBUS master ET 200SP automation system TM Pulse 2x24v S7-300/400 automation system ET 200SP decentralized I/O system TM Pulse 2x24V PROFINET controller ET 200SP decentralized I/O system TM Pulse 2x24V STEP 7 (TIA Portal): Device configuration and parameter settings with hardware configuration (HWCN) STEP 7 (TIA Portal): Device configuration and parameter settings with hardware configuration (HWCN) STEP 7: Device configuration and parameter settings with HSP Engineering system with GSD file Direct access to the control and feedback interface of the TM Pulse 2x24V in the I/O data Direct access to the control and feedback interface of the TM Pulse 2x24V in the I/O data Direct access to the control and feedback interface of the TM Pulse 2x24V in the I/O data Manual, 09/2015, A5E AA 98
99 Configuring 5.2 Configuration overview 5.2 Configuration overview You can use the STEP 7 (TIA Portal) or STEP 7 hardware configuration to set these parameters. Also, you can change the parameter assignment at runtime with your program using data record 128. STEP 7 (TIA Portal) and STEP 7 assist you during parameter assignment by disabling keyboard input for invalid parameters and range checking your value assignments. Depending on previous parameter selections, other options will be disabled. For example, if you select the one channel operation (the parallel connection of the two output channels), then the parameter options for channel two and high-speed output are disabled. When you make a runtime parameter assignment that uses the WRREC (Write Record) instruction to modify data record 128, you must ensure that you do not attempt to write an invalid record data. WRREC execution with invalid data fails and returns error code. For example, if you are using one channel operation and include parameter data for two channels, then the record length is too long and WRREC execution fails. In addition, you must follow the parameter validation rules (Page 120). If you use STEP 7 (TIA Portal), you can find the module in the Hardware catalog under "Technology Modules". If you use STEP 7, you can find the module following installation of the corresponding HSP file in the Hardware catalog. STEP 7 has two entries for Technology Module - Pulse output, with one entry for "TM Pulse 2x24V 2x2A" and one entry for "TM Pulse 2x24V 1x4A. The following table shows how a channel's "Parameter" group is affected by mode selection. Table 5-2 Channel parameters and mode selection: means the parameter is available for configuration Channel "Parameter" group Pulse output mode PWM mode Pulse train mode On/Off delay mode Frequency output mode 1 High-speed output (.1 A) DC motor mode HW enable option on DIn.0 input 3 3 Input delay Output format Minimum pulse duration 4 Period duration On delay 3 3 Off delay Duty cycle 2 Current control Activate P (Proportional) Activate I (Integral) Activate D (Derivative) Reference value current Dead band width High limit S7 analog Low limit S7 analog Gain Integration time Derivative action time Manual, 09/2015, A5E AA 99
100 Configuring 5.3 Required I/O address space Channel "Parameter" group Pulse output mode PWM mode Pulse train mode On/Off delay mode Frequency output mode DC motor mode Time lag Dithering Dither ramp up time Dither ramp down time Dither amplitude Dither period 1 High speed output is not available for the one channel (4 A) configuration that uses a parallel connection of the two (2 A) channels. 2 In PWM mode, you can enable either High-speed or Current control, but not both options at once. 3 Parameter is disabled in isochronous mode. 4 Parameter is disabled when current control is active 5.3 Required I/O address space Address space of the technology module Table 5-3 TM Pulse 2x24V I/O address space usage Function Bytes per channel Total I/O bytes Single channel (4 A) Total I/O bytes Dual channel (2 A) Program control of module operation 12 output bytes (Q addresses) 12 output bytes 24 output bytes Feedback module status to control program 8 input bytes (I addresses) 8 input bytes 16 input bytes Additional information A description on how to use the control and feedback interface of TM Pulse 2x24V can be found in the chapter Program control and feedback interface (Page 110). 100 Manual, 09/2015, A5E AA

101 Configuring 5.4 TIA portal Device configuration 5.4 TIA portal Device configuration TIA Portal Device configuration Drag the TM Pulse 2x24V module from the hardware catalog and drop it in a rack image. The example rack below uses the TM Pulse 2x24V module in a decentralized I/O system where it is possible to enable and configure isochronous mode. When you click on the TM Pulse 2x24V image in a rack, a blue line highlights the module and you can set parameters that appear on the Properties tab. Manual, 09/2015, A5E AA 101
102 Configuring 5.4 TIA portal Device configuration General information Enter the general project and identification & maintenance information Potential group The Potential group parameters are disabled for the type B1 BaseUnit used by the TM Pulse 2x24V. The TM Pulse 2x24V module is isolated from the other BaseUnit potential groups on the right and on the left of the TM Pulse 2x24V module. Therefore, the TM Pulse 2x24V requires an external supply Channel configuration: (4 A) single or (2 A) dual channel operation Select the channel configuration: Two separate channels with 2 ampere maximum output current per channel. The high-speed option (100mA maximum current) is allowed. One logical channel where the two output channels connected in parallel to provide 4 ampere maximum output current. The high-speed option is not allowed. 1 channel (4 A) operation If the "1 channel (4 A)" option is selected, then the TM Pulse 2x24V operates as a singlechannel module. All parameter assignments and operations using the control interface must use Channel 0 addresses. Feedback signals are only provided for Channel 0. The control and feedback interface is reduced to only one channel. Channel 1 cannot be configured or operated. The current measurement adds the measured values of both channels together. This results in a measuring range up to 4 A. The measured value of the current is supplied as a SIMATIC S7 analog value in the feedback interface. A current of 4 A corresponds to the SIMATIC S7 analog value of 27,648. See also Pin assignment and load/sensor wiring (Page 91) 102 Manual, 09/2015, A5E AA
103 Configuring 5.4 TIA portal Device configuration Channel parameters Operating mode Select an operating mode. Pulse output (single pulse) Pulse width modulation PWM Pulse train On/Off-delay Frequency output DC motor Reaction to CPU STOP You can configure the reaction of the TM Pulse 2x24V to the failure of a higher-level controller differently for each channel. Table 5-4 Reaction to CPU/Master STOP options for all modes except DC motor Response to CPU/master STOP Channel-specific response and status of the TM Pulse 2x24V DQ substitute a value Output of the channel-specific, substitute value that you assigned. STS_ENABLE goes to the 0 state. Terminate the current output sequence. Continue working mode The current output sequence is continued. Reaction to CPU/Master STOP options for DC motor mode For DC motor mode, there are no configuration options for the reaction to CPU STOP. The outputs always behave as follows. Both DQs (DQn.A and Dn.B) go to tri-state (high impedance state) when the CPU goes to STOP. Manual, 09/2015, A5E AA 103
104 Configuring 5.4 TIA portal Device configuration Substitute values If you select the "DQ substitute a value" option as a reaction to CPU STOP, then you must configure the substitute value (0 or 1) for the DQn.A and DQn.B outputs. Each channel has two outputs (A and B). A resistive or inductive load is wired to a channel's A output, so you must assign a substitute value to the DQn.A output. A reversible direction DC motor load is wired to a channel's A and B outputs, so you must assign substitute values to the DQn.A and DQn.B outputs. You cannot set both substitute values of one channel to the high state (DQn.A and DQn.B). If you do so, an error code is returned to the parameterization attempt. See the Parameter validation errors (Page 120) topic for details. Startup To start a new output sequence after CPU/master STOP with STS_SW_ENABLE set, first reset SW_ENABLE. Keep SW_ENABLE reset until STS_SW_ENABLE is also reset. If the "Continue working mode" option is used, then during a change from CPU-/Master- STOP to RUN (startup), the CPU/Master cannot clear the outputs. Possible solution: In the part of your program that is executed during startup, set the "Software enable" (SW_ENABLE = 1) control bit. Modified parameter assignment The status assumed by the TM Pulse 2x24V at CPU/master STOP remains even in the case of parameter assignment or configuration of the ET 200SP station. This occurs, for example, at POWER ON of the CPU/master, or the IM 155-6, or at the resumption of DP transfer. In "Continue working mode", however, and after loading changed parameters or configuration of the ET 200SP station to the CPU/master, the TM Pulse 2x24V terminates the process. As a result, the TM Pulse 2x24V does the following: Resets the DQ digital output. Resets STS_ENABLE Terminates the current output sequence. 104 Manual, 09/2015, A5E AA
105 Configuring 5.4 TIA portal Device configuration Diagnostics Module monitoring is always active. A detected error only triggers a diagnostic alarm if the diagnostics type is enabled in the Diagnostics check boxes. TM Pulse 2x24V diagnostics Diagnostic type TM Pulse 2x24V module error Default option Group diagnostics Supply voltage error Disabled Short-circuit on 24 V DC sensor supply Diagnostics DQA Short-circuit of DQn.A digital output Disabled Diagnostics DQB Short-circuit of DQn.B digital output Disabled When a TM Pulse 2x24V error event triggers a diagnostic alarm, the following happens: The DIAG light flashes red when a diagnostics alarm is pending. Once you have remedied the error, the DIAG light goes out. The diagnostics are displayed as plain text in the STEP 7 (TIA Portal) online and diagnostics view. Options for the reaction of a CPU running your control program CPU goes to STOP and interrupts processing of your program. The diagnostic interrupt OB (for example, OB 82) is called. The event that triggered the interrupt is written in the start information of the diagnostic interrupt OB. CPU remains in RUN even if no diagnostic interrupt OB is present in the CPU. The technology module continues working unchanged if this is possible, while the error exists. Detailed information on the error event is available through execution of the RALRM (read alarm information) program instruction. Note Error message details The Diagnostics information provided through OB 82 and RALRM does not indicate which channel has an error. The alternative error information provided by the feedback interface ERR_xxx bits does indicate which channel has an error. See also Error detection and diagnostics (Page 122) Manual, 09/2015, A5E AA 105
106 Configuring 5.4 TIA portal Device configuration Parameter (Channel parameters) The different operating modes restrict the configuration to a subset of these parameters and options. Channel parameters High-speed output Enabled High-speed (0.1 A) option single channel output limit is 0.1 A. 1 channel (4 A) parallel channel connection is not possible. PWM mode current control is not possible. Disabled Single channel output limit is 2 A Function DI (digital input) Input: DIn.0 functions as a digital input HW enable: DIn.0 functions as a Hardware enable for the pulse output sequence. The HW enable option is available for these modes. Pulse output PWM ( not available for isochronous mode) Pulse train Frequency output DC motor (not available for isochronous mode) External stop (DC motor only) See also Function: High-speed output (Page 74) Input delay A digital input state change must remain stable over the input delay time, before the state change is accepted and processed. The input delay time provides noise filtering for the input wiring. Off (4 μs) 0.05 ms 0.1 ms (default value) 0.4 ms 1.6 ms 3.2 ms 12.8 ms 20 ms 106 Manual, 09/2015, A5E AA
107 Configuring 5.4 TIA portal Device configuration Output format Set the format and value range for ratio variables like duty cycle. Output format options Value range S7 analog output 0 to 27, to (in DC motor mode) Per to 100 Per to 1000 Per to Minimum pulse duration Assign the minimum pulse duration that you allow in μs. Period duration Assign the period duration in μs. Actual period duration This read-only field is displayed only when isochronous mode is enabled. The period duration value that is displayed is the actual isochronous compatible period duration that is calculated from the value you entered in the Period duration parameter. On-delay Assign the On-delay in μs Pulse timing Minimum Maximum High-speed disabled High-speed enabled High-speed disabled Pulse duration 10 μs 1.5 μs 85,000,000 μs Period duration 100 μs 10 μs On-delay 0 μs 0 μs High-speed enabled Dither parameters Dither ramp-up time: 0 ms to 30,000 ms. Dither ramp-down time: 0 ms to 30,000 ms. Dither amplitude: 0 to 500 Dither period: From (4 x PWM period) to 100,000 μs. Also, the Dither period must be greater than 2 ms. Current control Enabled Disabled Manual, 09/2015, A5E AA 107
108 Configuring 5.4 TIA portal Device configuration Current control parameters If current control is enabled, then the following parameters are available for modification. Activate P: Enable/disable the proportional part in the PID algorithm Activate I: Enable/disable the integral part in the PID algorithm Activate D: Enable/disable the derivative part in the PID algorithm Reference value current: The reference value is used to define the maximum set point and the high and low limits of the controlled current. Typically, the maximum current can be measured in PWM mode with current control disabled and a duty cycle set to 100%. The value measured can be set as a reference for the current control. The maximum value is 4000mA for single channel operation (parallel channel connection enabled) and 2000mA per channel for dual channel operation (parallel connection disabled). Deadband width: A dead band is applied to the output current deviation from the set point current. The "Deadband width" determines the size of the dead band. The dead band is symmetrical: Actual dead band value range = -Deadband width to +Deadband width. High limit S7 analog: The manipulated value is always restricted to a high limit and low limit. The "High limit" parameter assigns the high limit in S7 analog format, relative to the reference value current. A value higher or equal than means 100% of the reference value current. The High limit value must be higher than the Low limit. Low limit S7 analog: The manipulated value is always restricted to a high limit and low limit. The "Low limit" parameter assigns the low limit in S7 analog format, relative to the reference value of the current. A value higher or equal than is not allowed. The Low limit value must be lower than the High limit. Gain: The proportional gain parameter assigns the amplification factor for the P part of the PID algorithm. Integration time: The proportional gain parameter assigns the amplification factor for the P part of the PID algorithm. Derivative action time: The derivative time parameter determines the time interval of the derivative action. If TD is smaller than the controller cycle time, TI will be set internally to the controller cycle time. Time lag: Time lag of the derivative action. The algorithm of the D-action contains a delay of TM_LAG. If TM_LAG is smaller than half the controller cycle time, TI will be set internally to half the controller cycle time. 108 Manual, 09/2015, A5E AA
109 Configuring 5.4 TIA portal Device configuration I/O addresses You can assign the base addresses for the control interface (12 output Q byte addresses/channel) and the feedback interface (8 input I byte addresses/channel). Your program logic uses the values stored in these addresses to control the TM Pulse 2x24V output and read feedback signals from the module. I/O addresses Output addresses Start address: Assign a starting address to 12 bytes (Q addresses) for a channel's control interface. End address: The control interface end address is a calculated read-only field. Input addresses Start address: Assign a starting address to 8 bytes (I addresses) for a channel's feedback interface. End address: The feedback interface end address is a calculated read-only field. Isochronous mode The Isochronous mode checkbox is only displayed if your system hardware supports isochronous mode. Organization block Accept the default OB assignment or select a different OB. If isochronous mode is enabled and the Organization block (OB 61) "Synchronous cycle" is assigned, then TM Pulse 2x24V PWM operation in a decentralized I/O system becomes coordinated with bus master PROFINET cycles. In isochronous mode, the PWM output sequence is synchronized with the moment To. The period duration is coordinated to the application cycle (the synchronous cycle, a multiple of the PROFINET cycle). Process image Accept the default assignment or assign a different Process image partition. Manual, 09/2015, A5E AA 109
110 Program control and feedback interface TM Pulse 2x24V control interface Your program uses this interface to control the behavior of the technology module. Control interface The following table shows control interface assignment for one channel: Bit Byte OUTPUT_VALUE SLOT 08 Reserved1) MODE_SLOT LD_SLOT 09 Reserved1) DITHER SET_DQB SET_DQA Reserved1) TM_CTRL_DQ SW_ENABLE 10 Reserved1) RES_ERROR 11 Reserved1) 1) Must be set to 0 Control interface parameters Two use cases are possible while using TM Pulse 2x24V module. Case 1: Only the main parameter OUTPUT_VALUE is controlled every program scan cycle by your program logic. All the other parameters required for the output sequence are fixed. Case 2: The main parameter OUTPUT_VALUE and another parameter SLOT are controlled every program scan cycle by your program logic. All other parameters required for the output sequence are fixed. Other parameters required for the output sequence are defined prior to the start of an output sequence using one of two possible methods. TIA portal device configuration, STEP 7 hardware configuration, or WRREC execution modifies the parameterization data record. Use the Control interface in single-update mode and before switching to the permanentupdate mode (case 2 only) with the assigned LD_SLOT value selecting the control parameter. Manual, 09/2015, A5E AA 110
111 Program control and feedback interface 6.1 TM Pulse 2x24V control interface OUTPUT_VALUE The interpretation of the value in OUTPUT_VALUE depends on the mode setting. The OUTPUT_VALUE is always updated. If an invalid value is detected (outside the allowed range), then the error flag ERR_OUT_VAL is set until a valid value is detected. During the error condition, the invalid value is ignored and the module continues with the last valid OUTPUT_VALUE. Note that PWM ratio values are not checked. If a ratio value is higher than the format allows, then a ratio of 100% is used by the module. When the PWM current control option is activated, the TM Pulse 2x24V module takes control of the duty cycle and the OUTPUT_VALUE control interface field is used to assign the target current as a ratio of target current/reference current. Mode OUTPUT_VALUE meaning Data type Pulse output Pulse duration UDInt High-speed disabled: 10 μs to 85,000,000 μs High-speed enabled: 2 μs to 85,000,000 μs PWM Current control disabled: Duty cycle Current control enabled: Ratio current UDInt: Only 2 least significant bytes are used For channel 0: bytes 2 and 3 For channel 1: bytes 14 and 15 Pulse train Number of pulses UDInt On/Off delay On-delay in microseconds UDInt Frequency output Frequency in Hz Real DC motor Duty cycle DInt: Only 2 least significant bytes are used For channel 0: bytes 2 and 3 For channel 1: bytes 14 and 15 SLOT, MODE_SLOT, and LD_SLOT The TM Pulse 2x24V module has a SLOT field in the control interface for each channel that allows several parameters to be single-updated, or one parameter to be permanently controlled (in addition to OUTPUT_VALUE). The interaction of SLOT, MODE_SLOT, and LD_SLOT is described in the SLOT parameter handling (Page 113) topic. SW_ENABLE If 0 1, then activate the output sequence. For some output modes, you can configure HW_ENABLE (hardware enable) to combine with SW_ENABLE (software enable) and trigger an output sequence with a hardware signal. TM_CTRL_DQ If 1, then outputs are controlled by the module and produce the pulse sequences. If 0, then the outputs are controlled directly by your program through SET_DQA and SET_DQB assignments Note: This bit has no effect in DC motor mode Manual, 09/2015, A5E AA 111
112 Program control and feedback interface 6.1 TM Pulse 2x24V control interface SET_DQA If 1, then set the output A to 1, when TM_CTRL_DQ is inactive. If 0, then set the output A to 0, when TM_CTRL_DQ is inactive. Note: This bit has no effect in DC motor mode. SET_DQB If 1, then set output B to 1, when TM_CTRL_DQ is inactive and SET_DQA is 0. If 0, then set the output B to 0, when TM_CTRL_DQ is inactive. Note: This bit has no effect in DC motor mode DITHER Activates the start (rising edge on DITHER) of the dithering function and begins dithering ramp-up, if a ramp-up is configured. Activates the end (falling edge on DITHER) of the superimposed dithering and begins dithering ramp-down, if a ramp-down is configured. RES_ERROR Resets the error flags ERR_LD, ERR_DQA, ERR_DQB, and ERR_24V in the feedback interface. See also Parameter data record (Page 138) 112 Manual, 09/2015, A5E AA
113 Program control and feedback interface 6.2 SLOT parameter handling (control interface) 6.2 SLOT parameter handling (control interface) SLOT and MODE_SLOT SLOT has the following modes. Single-update mode (MODE_SLOT = 0) Use this mode if some parameters have to be changed sometimes, prior to starting the output sequence. Using the SLOT parameter is an alternative to sending a new parameterization record to the module. A pulse operation change made with the SLOT parameter does not reset the module. A pulse operation change made by sending a new parameterization record does reset the module. The value in SLOT is used each time the value in LD_SLOT changes. An acknowledge bit is toggled in the feedback interface STS_LD_SLOT. The interpretation of the SLOT is defined by the value of LD_SLOT (see the following table). If the LD_SLOT value is invalid, a parameter error is triggered ERR_LD, and the user has to reset the error using the RES_ERROR control bit to reactivate SLOT. The changes done in this mode can be read back from the module in the parameterization record. The changes done in this mode are not permanently stored in the CPU. A restart of the CPU resets the parameters to the values specified in the hardware configuration. Permanent-update mode (MODE_SLOT = 1) Use this mode, if in addition to the main controlled parameter, another parameter has to be controlled continuously by the program. The value in SLOT is transferred each module cycle. No acknowledge bit is available. The interpretation of SLOT is defined by the value of LD_SLOT (see the following table). If the value in SLOT is not valid, then the error ERR_SLOT_VAL occurs. The error is automatically reset once a valid value is loaded. Note that the ratio values are not checked, if the value is higher than the format allows, a ratio of 100% will be used by the module. Using this mode, the value is not updated in the parameterization record. If LD_SLOT is changed in this mode, the last valid value controlled previously is retained. The permanent update mode can be stopped by setting LD_SLOT to 0 and MODE_SLOT to 0. By stopping permanent update mode, changes made to parameters during permanent update mode are retained. Manual, 09/2015, A5E AA 113
114 Program control and feedback interface 6.2 SLOT parameter handling (control interface) Interpretation of SLOT parameter value The value written to the SLOT parameter is interpreted as shown in the following table, depending on the LD_SLOT value and operating mode. LD_SLOT SLOT value meaning Valid modes for SLOT value use SLOT Data type 0 No action / idle state All modes 1 Period duration PWM UDInt Pulse train DC motor 2 On-delay Pulse output UDInt PWM Pulse train Frequency output DC motor 3 Off-delay On/Off-delay UDInt 4 Duty cycle (On-ratio) Pulse train UDInt: Only 2 least significant bytes are used. For channel 0: bytes 6 and 7 For channel 1: bytes 18 and 19 5 Dither ramp (includes PWM UDInt ramp-up time and ramp-down time) 6 Dither amplitude PWM UDInt 7 Dither period PWM UDInt 114 Manual, 09/2015, A5E AA
115 Program control and feedback interface 6.3 TM Pulse 2x24V feedback interface 6.3 TM Pulse 2x24V feedback interface Your program receives current values and status information from the technology module by means of the feedback interface. Feedback interface The following table shows the assignment of the feedback interface for one channel Bit Byte 00 ERR_SLOT_ VAL ERR_OUT_ VAL ERR_DQB ERR_DQA ERR_PULSE ERR_LD ERR_24V ERR_PWR 01 Reserved STS_SW_ ENABLE STS_READY Reserved STS_LD_SLO T Reserved 02 Reserved STS_DITHER STS_DI STS_DQB STS_DQA STS_ENABLE 03 Reserved SEQ_CNT MEASURED_CURRENT 06 Reserved QLMN_HLM QLMN_LLM 07 Reserved Feedback parameters Table 6-1 Status feedback Feedback parameter Meaning Value range STS_READY Module is parameterized correctly, running, and delivering valid data. 0: Not ready 1: Ready STS_SW_ENABLE Current state of the software enable 0: SW_ENABLE is not active 1: Recognized SW_ENABLE STS_LD_SLOT Toggle acknowledge bit for each action of the SLOT in single-update SLOT-mode. Each toggle of this bit indicates a successful LD_SLOT action. STS_ENABLE Output sequence is active. 0: No output sequence running 1: Output sequence running STS_DQA State of digital output DQn.A 0: DQn.A is not active 1: DQn.A is active STS_DQB State of digital output DQn.B 0: DQn.B is not active 1: DQn.B is active STS_DI DIn.0: State of digital input 0: DIn.0 is not active 1: DIn.0 is active STS_DITHER Dithering state 0: Dithering inactive 1: Dithering active with ramp-up phase started and ramp-down not complete. SEQ_CNT Counts completed output sequences 0 to 15 Manual, 09/2015, A5E AA 115
116 Program control and feedback interface 6.3 TM Pulse 2x24V feedback interface Feedback parameter Meaning Value range MEASURED_CURRENT S7 analog value 0 to 32,767 QLMN_LLM QLMN_HLM The low limit of the manipulated value has been reached. The high limit of the manipulated value has been reached. 27,648 means 4 A for "1 channel (4 A)" 27,648 means 2 A for "2 channels (2 A)" 0: Low limit not reached 1: Low limit reached 0: High limit not reached 1: High limit reached Table 6-2 Error feedback Feedback parameter Meaning Value range ERR_PWR 24 V DC present, but is not in the correct range. 0: No error 1: Error ERR_24V Short-circuit/overload, in the 24 V DC sensor supply output. 0: No error 1: Error ERR_LD Error while loading a parameter value using singleupdate mode. 0: No error 1: Error ERR_PULSE Pulse duration reduced to smaller than the minimum allowed value during operation. 0: No error 1: Error ERR_DQA Short-circuit/overload on the digital output DQn.A detected 0: No error 1: Error ERR_DQB Short-circuit/overload on the digital output DQn.B or attempt to manually set both DQn.A and DQn.B high. 0: No error 1: Error ERR_OUT_VAL The value in OUTPUT_VALUE is not valid. 0: No error 1: Error ERR_SLOT_VAL The value in SLOT is not valid where MODE_SLOT = 1 (permanent update) 0: No error 1: Error 116 Manual, 09/2015, A5E AA

117 Interrupts/diagnostic messages Status and error displays TM Pulse 2x24V front view Manual, 09/2015, A5E AA 117
SIMATIC ET 200SP. Digital input module DI 8xNAMUR (6ES7131-6TF00-0CA0) Manual. Answers for industry.
 Manual. Answers for industry.") SIMATIC ET 200SP Digital input module DI 8xNAMUR (6ES7131-6TF00-0CA0) Manual Edition 02/2014 Answers for industry. DI 8xNAMUR HF digital input module (6ES7131-6TF00-0CA0) SIMATIC ET 200SP DI 8xNAMUR HF
SIMATIC ET 200SP Digital input module DI 8xNAMUR (6ES7131-6TF00-0CA0) Manual Edition 02/2014 Answers for industry. DI 8xNAMUR HF digital input module (6ES7131-6TF00-0CA0) SIMATIC ET 200SP DI 8xNAMUR HF
Digital electronic module 4DO DC24V/2A HF (6ES7132-4BD30-0AB0) SIMATIC
 SIMATIC") Digital electronic module 4DO DC24V/2A HF (6ES7132-4BD30-0AB0) SIMATIC Properties 1 Parameters 2 Diagnostics 3 ET 200S distributed I/O Digital electronic module 4DO DC24V/2A HF (6ES7132-4BD30-0AB0) Manual
Digital electronic module 4DO DC24V/2A HF (6ES7132-4BD30-0AB0) SIMATIC Properties 1 Parameters 2 Diagnostics 3 ET 200S distributed I/O Digital electronic module 4DO DC24V/2A HF (6ES7132-4BD30-0AB0) Manual
Analog input module AI 8xU BA (6ES7134-6FF00-0AA1) SIMATIC. ET 200SP Analog input module AI 8xU BA (6ES7134-6FF00-0AA1) Preface. Documentation guide 1
 SIMATIC. ET 200SP Analog input module AI 8xU BA (6ES7134-6FF00-0AA1) Preface. Documentation guide 1") Analog input module AI 8xU BA (6ES7134-6FF00-0AA1) SIMATIC ET 200SP Analog input module AI 8xU BA (6ES7134-6FF00-0AA1) Manual Preface Documentation guide 1 Product overview 2 Wiring up 3 Parameters/address
Analog input module AI 8xU BA (6ES7134-6FF00-0AA1) SIMATIC ET 200SP Analog input module AI 8xU BA (6ES7134-6FF00-0AA1) Manual Preface Documentation guide 1 Product overview 2 Wiring up 3 Parameters/address
Analog input module AI 2xI 2/4-wire ST (6ES7134-6GB00-0BA1) SIMATIC. ET 200SP Analog input module AI 2xI 2/4-wire ST (6ES7134-6GB00-0BA1) Preface
 SIMATIC. ET 200SP Analog input module AI 2xI 2/4-wire ST (6ES7134-6GB00-0BA1) Preface") Analog input module AI 2xI 2/4-wire ST Preface (6ES7134-6GB00-0BA1) Documentation guide 1 SIMATIC ET 200SP Analog input module AI 2xI 2/4-wire ST (6ES7134-6GB00-0BA1) Manual Product overview 2 Wiring 3
Analog input module AI 2xI 2/4-wire ST Preface (6ES7134-6GB00-0BA1) Documentation guide 1 SIMATIC ET 200SP Analog input module AI 2xI 2/4-wire ST (6ES7134-6GB00-0BA1) Manual Product overview 2 Wiring 3
SIMATIC. S7-1500/ET 200MP Technology Module TM PTO 4 (6ES7553-1AA00-0AB0) Preface. Documentation guide. Product overview.
 Preface. Documentation guide. Product overview.") Preface Documentation guide 1 SIMATIC S7-1500/ET 200MP Technology Module TM PTO 4 (6ES7553-1AA00-0AB0) Manual Product overview 2 Connecting 3 Configuring/address space 4 Interrupts/diagnostic alarms 5
Preface Documentation guide 1 SIMATIC S7-1500/ET 200MP Technology Module TM PTO 4 (6ES7553-1AA00-0AB0) Manual Product overview 2 Connecting 3 Configuring/address space 4 Interrupts/diagnostic alarms 5
Analog input module. AI 2xU/I 2-/4-wire HF (6ES7134-6HB00-0CA1) SIMATIC. ET 200SP Analog input module AI 2xU/I 2-/4-wire HF (6ES7134-6HB00-0CA1)
 SIMATIC. ET 200SP Analog input module AI 2xU/I 2-/4-wire HF (6ES7134-6HB00-0CA1)") Analog input module AI 2xU/I 2-/4-wire HF (6ES7134-6HB00-0CA1) SIMATIC ET 200SP Analog input module AI 2xU/I 2-/4-wire HF (6ES7134-6HB00-0CA1) Manual Preface Guide to documentation 1 Product overview 2
Analog input module AI 2xU/I 2-/4-wire HF (6ES7134-6HB00-0CA1) SIMATIC ET 200SP Analog input module AI 2xU/I 2-/4-wire HF (6ES7134-6HB00-0CA1) Manual Preface Guide to documentation 1 Product overview 2
SIMATIC Ident RFID systems ANT 3 Compact Operating Instructions
 SIMATIC Ident RFID systems Compact Operating Instructions Legal information Warning notice system This manual contains notices you have to observe in order to ensure your personal safety, as well as to
SIMATIC. ET 200S distributed I/O 2AI U HF analog electronic module (6ES7134-4LB02-0AB0) Preface. Properties 1. Parameters 2.
 Preface. Properties 1. Parameters 2.") SIMATIC ET 200S distributed I/O SIMATIC ET 200S distributed I/O 2AI U HF analog electronic module (6ES7134-4LB02-0AB0) Manual Preface Properties 1 Parameters 2 Diagnostics 3 Analog value representation
SIMATIC ET 200S distributed I/O SIMATIC ET 200S distributed I/O 2AI U HF analog electronic module (6ES7134-4LB02-0AB0) Manual Preface Properties 1 Parameters 2 Diagnostics 3 Analog value representation
Positioning SIMATIC. ET 200S Positioning. Preface 1 1STEP 5V. 1PosUniversal. Operating Instructions 06/2010 A5E
 Preface 1 1STEP 5V 2 SIMATIC 1PosUniversal 3 ET 200S Operating Instructions 06/2010 A5E00124872-05 Legal information Legal information Warning notice system This manual contains notices you have to observe
SIMATIC. ET 200S distributed I/O 2AI I 4WIRE HS analog electronic module (6ES7134-4GB62-0AB0) Preface. Properties 1. Parameters 2.
 Preface. Properties 1. Parameters 2.") SIMATIC ET 200S distributed I/O SIMATIC ET 200S distributed I/O 2AI I 4WIRE HS analog electronic module (6ES7134-4GB62-0AB0) Manual Preface Properties 1 Parameters 2 Diagnostics 3 Analog value representation
SIMATIC ET 200S distributed I/O SIMATIC ET 200S distributed I/O 2AI I 4WIRE HS analog electronic module (6ES7134-4GB62-0AB0) Manual Preface Properties 1 Parameters 2 Diagnostics 3 Analog value representation
SINAMICS drives SINAMICS DCM. DC converters from 6 kw to 2500 kw for variable-speed direct-current drives
 SINAMICS DCM DC converters from 6 kw to 2500 kw for variable-speed direct-current drives Application: Continuous operation in the case of a pulse encoder error Edition 01-12/2010 SINAMICS drives SINAMICS
SIMATIC Vision Sensor SIMATIC VS130-2 and VS 130-2vcr
 s SIMATIC Vision Sensor SIMATIC VS130-2 and VS 130-2vcr Getting Started Release 09/2005 First Steps in Commissioning Safety Guidelines This manual contains notices you have to observe in order to ensure
SIMATIC. ET 200S distributed I/O 2AI U HS analog electronic module (6ES7134-4FB52-0AB0) Preface. Properties 1. Parameters 2.
 Preface. Properties 1. Parameters 2.") SIMATIC ET 200S distributed I/O SIMATIC ET 200S distributed I/O 2AI U HS analog electronic module (6ES7134-4FB52-0AB0) Manual Preface Properties 1 Parameters 2 Diagnostics 3 Analog value representation
SIMATIC ET 200S distributed I/O SIMATIC ET 200S distributed I/O 2AI U HS analog electronic module (6ES7134-4FB52-0AB0) Manual Preface Properties 1 Parameters 2 Diagnostics 3 Analog value representation
SIMATIC. ET 200SP Analog Input Module AI 4xI 2-/4-wire ST (6ES7134-6GD01-0BA1) Preface. Documentation guide. Product overview.
 Preface. Documentation guide. Product overview.") Preface Documentation guide 1 SIMATIC ET 200SP Analog Input Module AI 4xI 2-/4-wire ST (6ES7134-6GD01-0BA1) Manual Product overview 2 Wiring up 3 Parameters/address space 4 Interrupts/diagnostics alarms
Preface Documentation guide 1 SIMATIC ET 200SP Analog Input Module AI 4xI 2-/4-wire ST (6ES7134-6GD01-0BA1) Manual Product overview 2 Wiring up 3 Parameters/address space 4 Interrupts/diagnostics alarms
SINAMICS drives. SINAMICS DCM as a DC voltage source. Application. Answers for industry. Edition 01/2014
 SINAMICS drives SINAMICS DCM as a DC voltage source Application Edition 01/2014 Answers for industry. Compact User Manual Legal information Warning notice system This manual contains notices you have to
SINVERT. Technical requirements for medium-voltage transformers for use with SINVERT central inverters. Application manual 04/2012
 Technical requirements for medium-voltage transformers for use with SINVERT central inverters Application manual 04/2012 SINVERT Answers for the environment. Technical requirements for medium- Technical
SIMATIC. ET 200SP Analog Input Module AI 4xU/I 2-wire ST (6ES7134-6HD01-0BA1) Preface. Documentation guide. Product overview.
 Preface. Documentation guide. Product overview.") Preface Documentation guide 1 SIMATIC ET 200SP Analog Input Module AI 4xU/I 2-wire ST (6ES7134-6HD01-0BA1) Manual Product overview 2 Wiring up 3 Parameters/address space 4 Interrupts/diagnostics alarms
Preface Documentation guide 1 SIMATIC ET 200SP Analog Input Module AI 4xU/I 2-wire ST (6ES7134-6HD01-0BA1) Manual Product overview 2 Wiring up 3 Parameters/address space 4 Interrupts/diagnostics alarms
Analog Input Module. AI 4xU/I/RTD/TC ST (6ES7531-7QD00-0AB0) SIMATIC. S7-1500/ET 200MP Analog Input Module AI 4xU/I/RTD/TC ST (6ES7531-7QD00-0AB0)
 SIMATIC. S7-1500/ET 200MP Analog Input Module AI 4xU/I/RTD/TC ST (6ES7531-7QD00-0AB0)") Analog Input Module AI 4xU/I/RTD/TC ST (6ES7531-7QD00-0AB0) SIMATIC S7-1500/ET 200MP Analog Input Module AI 4xU/I/RTD/TC ST (6ES7531-7QD00-0AB0) Manual Preface Guide to documentation 1 Product overview
Analog Input Module AI 4xU/I/RTD/TC ST (6ES7531-7QD00-0AB0) SIMATIC S7-1500/ET 200MP Analog Input Module AI 4xU/I/RTD/TC ST (6ES7531-7QD00-0AB0) Manual Preface Guide to documentation 1 Product overview
https://support.industry.siemens.com/cs/ww/en/view/
 Application of the TM Pulse on a Hydraulic Valve using the Example of a Pressure Control System SIMATIC S7-1500 / ET 200SP TM Pulse 2x24V / TIA Portal V13 SP1 https://support.industry.siemens.com/cs/ww/en/view/109741742
SINAMICS DCM. DC converter Application - 12-pulse parallel connection with decoupled interphase transformer. Introduction 1
 Introduction 1 Description of the application 2 SINAMICS DCM DC converter Application - 12-pulse parallel connection with decoupled interphase transformer Application Manual Commissioning 3 Dimensioning
SIMATIC. S7-1500/ET 200MP Analog Input/Output Module AI 4xU/I/RTD/TC/ AQ 2xU/I ST (6ES7534-7QE00-0AB0) Preface. Guide to documentation
 Preface. Guide to documentation") Preface Guide to documentation 1 SIMATIC S7-1500/ET 200MP Analog Input/Output Module AI 4xU/I/RTD/TC/ AQ 2xU/I ST (6ES7534-7QE00-0AB0) Manual Product overview 2 Wiring 3 Parameters/address space 4 Interrupts/diagnostics
Preface Guide to documentation 1 SIMATIC S7-1500/ET 200MP Analog Input/Output Module AI 4xU/I/RTD/TC/ AQ 2xU/I ST (6ES7534-7QE00-0AB0) Manual Product overview 2 Wiring 3 Parameters/address space 4 Interrupts/diagnostics
SIMATIC ET 200SP. Motor Starter (3RK1308-0**00-0CP0) Manual. siemens.com. Edition 04/2016
 Manual. siemens.com. Edition 04/2016") SIMATIC ET 200SP Motor Starter (3RK1308-0**00-0CP0) Manual Edition 04/2016 siemens.com Preface Documentation guide 1 Industrial Controls SIMATIC ET 200SP Motor starter (3RK1308 0**00 0CP0) Manual Product
SIMATIC ET 200SP Motor Starter (3RK1308-0**00-0CP0) Manual Edition 04/2016 siemens.com Preface Documentation guide 1 Industrial Controls SIMATIC ET 200SP Motor starter (3RK1308 0**00 0CP0) Manual Product
SIMATIC. ET 200SP Analog input module AI 2xU/I 2-/4-wire HS (6ES7134-6HB00-0DA1) Preface. Documentation Guide. Product overview.
 Preface. Documentation Guide. Product overview.") Preface Documentation Guide 1 SIMATIC ET 200SP Analog input module AI 2xU/I 2-/4-wire HS (6ES7134-6HB00-0DA1) Manual Product overview 2 Connecting 3 Parameters/address space 4 Interrupts/diagnostics interrupts
Preface Documentation Guide 1 SIMATIC ET 200SP Analog input module AI 2xU/I 2-/4-wire HS (6ES7134-6HB00-0DA1) Manual Product overview 2 Connecting 3 Parameters/address space 4 Interrupts/diagnostics interrupts
PHOENIX CONTACT - 03/2007
 Inline Function Terminal for Pulse Width Modulation and Frequency Modulation N AUTOMATIONWORX Data Sheet 6920_en_01 1 Description PHOENIX CONTACT - 03/2007 $ ' ) The terminal is designed for use within
SIMATIC Ident. RFID systems SIMATIC RF615A. Characteristics 1. Ordering data. Installing and mounting. Connecting the antenna 4
 Characteristics 1 Ordering data 2 SIMATIC Ident RFID systems Operating Instructions Installing and mounting 3 Connecting the antenna 4 Antenna parameter assignment 5 Antenna patterns 6 Maximum read/write
Manual SIMATIC ET 200SP. Analog input module AI Energy Meter 400VAC ST (6ES7134-6PA01-0BD0) Edition. 10/2017 support.industry.siemens.
 Edition. 10/2017 support.industry.siemens.") Manual SIMATIC ET 200SP Analog input module AI Energy Meter 400VAC ST (6ES7134-6PA01-0BD0) Edition 10/2017 support.industry.siemens.com Preface Documentation guide 1 SIMATIC ET 200SP Analog input module
Manual SIMATIC ET 200SP Analog input module AI Energy Meter 400VAC ST (6ES7134-6PA01-0BD0) Edition 10/2017 support.industry.siemens.com Preface Documentation guide 1 SIMATIC ET 200SP Analog input module
13 A. Temperature regulator FM SIMATIC. S7-300 Temperature regulator FM Preface. Product Overview
 SIMATIC S7-300 Operating Instructions Preface Product Overview 1 Structure of the FM 355-2 2 Installing and removing the FM 355-2 3 Wiring the FM 355-2 4 Installing the configuration package 5 How does
SIMATIC ET 200SP. Motor Starter (3RK1308-0**00-0CP0) Manual. siemens.com. Edition 12/2016
 Manual. siemens.com. Edition 12/2016") SIMATIC ET 200SP Motor Starter (3RK1308-0**00-0CP0) Manual Edition 12/2016 siemens.com Preface Product-specific safety instructions 1 Industrial Controls SIMATIC ET 200SP Motor starter (3RK1308-0**00-0CP0)
SIMATIC ET 200SP Motor Starter (3RK1308-0**00-0CP0) Manual Edition 12/2016 siemens.com Preface Product-specific safety instructions 1 Industrial Controls SIMATIC ET 200SP Motor starter (3RK1308-0**00-0CP0)
Application examples for High-Speed Counters (HSC)
") Application Example 11/2016 Application examples for High-Speed Counters (HSC) TIA Portal, S7-1200 V4.2 https://support.industry.siemens.com/cs/ww/en/view/109742346 Warranty and Liability Warranty and
Application Example 11/2016 Application examples for High-Speed Counters (HSC) TIA Portal, S7-1200 V4.2 https://support.industry.siemens.com/cs/ww/en/view/109742346 Warranty and Liability Warranty and
SIMATIC. S7-1500/ET 200MP Analog input module AI 8xU/I/RTD/TC ST (6ES7531-7KF00-0AB0) Preface. Documentation guide. Product overview.
 Preface. Documentation guide. Product overview.") Preface Documentation guide 1 SIMATIC S7-1500/ET 200MP Analog input module AI 8xU/I/RTD/TC ST (6ES7531-7KF00-0AB0) Manual Product overview 2 Wiring 3 Parameters/address space 4 Interrupts/diagnostics alarms
Preface Documentation guide 1 SIMATIC S7-1500/ET 200MP Analog input module AI 8xU/I/RTD/TC ST (6ES7531-7KF00-0AB0) Manual Product overview 2 Wiring 3 Parameters/address space 4 Interrupts/diagnostics alarms
SIMATIC. S7-1500/ET 200MP Analog input module AI 8xU/I/RTD/TC ST (6ES7531-7KF00-0AB0) Preface. Documentation guide. Product overview.
 Preface. Documentation guide. Product overview.") Siemens Spares Preface Documentation guide 1 SIMATIC S7-1500/ET 200MP Analog input module AI 8xU/I/RTD/TC ST (6ES7531-7KF00-0AB0) Manual Product overview 2 Wiring 3 Parameters/address space 4 Interrupts/diagnostics
Siemens Spares Preface Documentation guide 1 SIMATIC S7-1500/ET 200MP Analog input module AI 8xU/I/RTD/TC ST (6ES7531-7KF00-0AB0) Manual Product overview 2 Wiring 3 Parameters/address space 4 Interrupts/diagnostics
SIMATIC. S7-1500/ET 200MP Analog Input Module AI 4xU/I/RTD/TC ST (6ES7531-7QD00-0AB0) Preface. Guide to documentation. Product overview.
 Preface. Guide to documentation. Product overview.") Preface Guide to documentation 1 SIMATIC S7-1500/ET 200MP Analog Input Module AI 4xU/I/RTD/TC ST (6ES7531-7QD00-0AB0) Manual Product overview 2 Wiring 3 Parameters/address space 4 Interrupts/diagnostics
Preface Guide to documentation 1 SIMATIC S7-1500/ET 200MP Analog Input Module AI 4xU/I/RTD/TC ST (6ES7531-7QD00-0AB0) Manual Product overview 2 Wiring 3 Parameters/address space 4 Interrupts/diagnostics
CPU 1512C-1 PN (6ES7512-1CK00-0AB0) SIMATIC S CPU 1512C-1 PN (6ES7512-1CK00-0AB0) Preface. Documentation guide.
 SIMATIC S CPU 1512C-1 PN (6ES7512-1CK00-0AB0) Preface. Documentation guide.") CPU 1512C-1 PN (6ES7512-1CK00-0AB0) SIMATIC S7-1500 CPU 1512C-1 PN (6ES7512-1CK00-0AB0) Manual Preface Documentation guide 1 Product overview 2 Technology functions 3 Wiring 4 Parameters/address space
CPU 1512C-1 PN (6ES7512-1CK00-0AB0) SIMATIC S7-1500 CPU 1512C-1 PN (6ES7512-1CK00-0AB0) Manual Preface Documentation guide 1 Product overview 2 Technology functions 3 Wiring 4 Parameters/address space
SIMATIC RTLS. Localization systems SIMATIC RTLS PCB OEM AX (6GT2700-8DF00-0AX0) Device manual 10/2018 C79000-G8976-C518-01
 Device manual 10/2018 C79000-G8976-C518-01") SIMATIC RTLS Localization systems (6GT2700-8DF00-0AX0) Device manual 10/2018 C79000-G8976-C518-01 Legal information Warning notice system This manual contains notices you have to observe in order to ensure
SIMATIC RTLS Localization systems (6GT2700-8DF00-0AX0) Device manual 10/2018 C79000-G8976-C518-01 Legal information Warning notice system This manual contains notices you have to observe in order to ensure
 Input Delay, Pulse Stretching and Oversampling SIMATIC S7-1200, S7-1500, ET 200 https://support.industry.siemens.com/cs/ww/en/view/109736504 Siemens Industry Online Support This entry originates from Siemens
OUTPUT 5/24 VDC PWM/PT 2 CHANNEL. 1 Description. GFK-2761 May 2012
 May 2012 OUTPUT 5/24 VDC PWM/PT 2 CHANNEL 1 Description The terminal is designed for use within an VersaPoint station. It can be used in four different operating modes: PWM (pulse width modulation) Frequency
SIMATIC Ident. RFID systems SIMATIC RF200 IO-Link V1.1. Introduction 1. Description. System overview. Planning an RF200 IO-Link system 4
 Introduction 1 Description 2 SIMATIC Ident RFID systems Operating Instructions System overview 3 Planning an RF200 IO-Link system 4 Commissioning and parameter assignment 5 Readers 6 Service and maintenance
Analog electronic module SIMATIC. ET 200S distributed I/O Analog electronic module 2AI TC ST (6ES7134-4JB01-0AB0) Preface. Properties.
 Preface. Properties.") Analog electronic module 2AI TC ST (6ES7134-4JB01-0AB0) SIMATIC ET 200S distributed I/O Analog electronic module 2AI TC ST (6ES7134-4JB01-0AB0) Manual Preface Properties 1 Parameters 2 Diagnostics 3 Analog
Analog electronic module 2AI TC ST (6ES7134-4JB01-0AB0) SIMATIC ET 200S distributed I/O Analog electronic module 2AI TC ST (6ES7134-4JB01-0AB0) Manual Preface Properties 1 Parameters 2 Diagnostics 3 Analog
SIMATIC. ET 200B Distributed I/O Station. Preface, Contents. System Overview. Technical Description. Mechanical and Electrical Installation
 SIMATIC ET 200B Distributed I/O Station Manual Preface, Contents System Overview Technical Description 2 Mechanical and Electrical Installation 3 Address Assignment Parameterization with COM ET 4 200 Startup
PROFINET USER S GUIDE ACSI Servo
 PROFINET USER S GUIDE ACSI Servo 3600-4196_06 Tolomatic reserves the right to change the design or operation of the equipment described herein and any associated motion products without notice. Information
SIMATIC. ET 200S distributed I/O Analog electronic module 4AI TC ST (6ES7134-4JD00-0AB0) Preface. Properties 1. Parameters 2.
 Preface. Properties 1. Parameters 2.") Preface ET 200S distributed I/O SIMATIC ET 200S distributed I/O Analog electronic module 4AI TC ST (6ES7134-4JD00-0AB0) Manual Properties 1 Parameters 2 Diagnostics 3 Analog value representation 4 Connecting
Preface ET 200S distributed I/O SIMATIC ET 200S distributed I/O Analog electronic module 4AI TC ST (6ES7134-4JD00-0AB0) Manual Properties 1 Parameters 2 Diagnostics 3 Analog value representation 4 Connecting
Product type designation. General information. Hardware product version 01. Firmware version V2.6. Engineering with. update.
 6ES7313-6CF03-0AB0 SIMATIC S7-300, CPU 313C-2DP COMPACT CPU WITH MPI, 16 DI/16 DO, 3 FAST COUNTERS (30 KHZ), INTEGRATED DP INTERFACE, INTEGRATED 24V DC POWER SUPPLY, 64 KBYTE WORKING MEMORY, FRONT CONNECTOR
Product Information. Release 3 4 SIMATIC ET 200S. 4DI UC V High Feature Digital Electronic Module
 Product Information SIMATIC ET 200S DI UC2.. V High Feature Digital Electronic Module X 2 Release New Digital Input Module Available The DI UC2.. V High Feature Digital Electronic Module has been added
PACSystems* RX3i IC695MDL765
 March 2011 PACSystems* RX3i IC695MDL765 Digital Output Module with Diagnostics 16-Channel The 24/125 volt DC 2A Smart Digital Output module, IC695MDL765, provides 16 discrete outputs in two isolated groups
Instruction manual. art Installation manual
 Instruction manual art. 01521 Installation manual Contents GENERAL FEATURES AND FUNCTIONALITY from page 4 ETS PARAMETERS AND COMMUNICATION OBJECTS from page 6 COMMUNICATION OBJECTS GENERAL FEATURES AND
SIMATIC Ident RFID systems SIMATIC RF310R special version Scanmode Compact Operating Instructions
 SIMATIC Ident RFID systems Compact Operating Instructions Legal information Warning notice system This manual contains notices you have to observe in order to ensure your personal safety, as well as to
General information. CiR - Configuration in RUN
 Data sheet SIMATIC S7-1500, ANALOG INPUT MODULE AI 8 X U/I HS, 16 BITS OF RESOLUTION, ACCURACY 0.3 %; 8 CHANNELS IN GROUPS OF 8; COMMON MODE VOLTAGE APPR. 10V; DIAGNOSIS, PROCESSALARMS; 8 CHANNELS IN 0.0625
Programming restrictions when operating SM 331; AI 8 x RTD with PROFIBUS masters which only support DPV0.
 6.9 Analog input module SM 331; AI 8 x RTD; (6ES7331-7PF01-0AB0) Cycle time extension due to wire-break monitoring The wire-break monitoring software function of the module is available in all operating
This data sheet is only valid in association with the IL SYS INST UM E user manual.
 Inline counter terminal, version for extreme conditions, 1 counter input, 1 control input, 1 output, 24 V DC, 500 ma Data sheet 106148_en_03 PHOENIX CONTACT 2015-11-04 1 Description The terminal is designed
Isometrics COMOS. Process Isometrics. Trademarks 1. Introduction 2. Project structure 3. Isometric report 4. Engineering with COMOS Isometrics
 Trademarks 1 Introduction 2 COMOS Process Operating Manual Project structure 3 Isometric report 4 Engineering with COMOS 5 Creating an isometric drawing from existing 3D data 6 IDF import 7 Administration
6.6 Analog input module SM 331; AI 8 x 13 Bit; (6ES7331-1KF02-0AB0)
") Order number 6ES7331-1KF02-0AB0 Properties 8 inputs in 8 channel groups Programmable resolution at each channel group (12 bits + sign) Programmable measurement type per channel group: Voltage Current Resistance
Order number 6ES7331-1KF02-0AB0 Properties 8 inputs in 8 channel groups Programmable resolution at each channel group (12 bits + sign) Programmable measurement type per channel group: Voltage Current Resistance
External brake resistor AX2090-BW5x
 Documentation External brake resistor AX2090-BW5x Accessories for Beckhoff servo drive AX5000 Version: Date: 1.3 2018-03-14 Table of content Table of content 1 Foreword... 5 1.1 Notes on the documentation...
Function Manual Basic Positioner SINAMICS. SINAMICS G120 Function Manual Basic Positioner. Introduction. Basic positioner. Appendix.
 Introduction 1 Basic positioner 2 SINAMICS A Appendix SINAMICS G120 Function Manual Edition 06/2013, firmware V4.6 06/2013, FW V4.6 A5E31759509B AB Legal information Warning notice system This manual contains
FM COUNTER MODULE
 FM 450-1 COUNTER MODULE Function The module off-loads the CPU by: Direct connection of one incremental encoder per channel Direct connection for gate signals (light barrier, etc.) using integrated digital
8V General information. 2 Order data 8V
 8V05.00-8V05.00- General information Modular mechanical design using plug-in modules Integrated line filter Integrated braking resistor All connections are made using plug-in connectors Integrated electronic
SINAMICS. OALINK Open Application Link. Communication between two Control Units via DRIVE-CLiQ. Function Manual. Answers for industry.
 s SINAMICS OALINK Open Application Link Communication between two Control Units via DRIVE-CLiQ Function Manual Edition 07/2014 Answers for industry. s Preface Fundamental safety instructions 1 SINAMICS
Data sheet VIPA CPU 314SC DPM (314-6CG23)
") Data sheet VIPA CPU 314SC DPM (314-6CG23) Technical data Order no. Type 314-6CG23 VIPA CPU 314SC DPM General information Note - Features Powered by SPEED7 Work memory [KB]: 512...2.048 Onboard 24x DI /
Data sheet VIPA CPU 314SC DPM (314-6CG23) Technical data Order no. Type 314-6CG23 VIPA CPU 314SC DPM General information Note - Features Powered by SPEED7 Work memory [KB]: 512...2.048 Onboard 24x DI /
FM HIGH-SPEED BOOLEAN PROCESSOR
 FM 352-5 HIGH-SPEED BOOLEAN PROCESSOR Function Instruction set: Bit instructions: NO operators, NC operators, negation, output, connector, RS flipflop, SR memory, recording of positive/negative signal
General information. Supply voltage
 Data sheet SIMATIC S7-300, CPU 314C-2 DP COMPACT CPU WITH MPI, 24 DI/16 DO, 4AI, 2AO, 1 PT100, 4 FAST COUNTERS (60 KHZ), INTEGRATED DP INTERFACE, INTEGRATED 24V DC POWER SUPPLY, 192 KBYTE WORKING MEMORY,
SIMATIC. EM 148-FC Frequency Converter A B. Preface, Contents. Product Overview. Wiring. Manual
 SIMATIC EM 148-FC Frequency Converter Manual The following supplement is part of this documentation: No. Product Information Drawing number Edition 1 Product information A5E00476687-03 07/2007 Preface,
Ametek, Inc. Rotron Technical Products Division. 100 East Erie St., Suite 200 Kent, Ohio User's Guide. Number Revision F
 Ametek, Inc. Rotron Technical Products Division 100 East Erie St., Suite 200 Kent, Ohio 44240 User's 120 Volt, 800 Watt and 240 Volt, 1200 Watt Brushless Motor Drive Electronics 5.7" (145 mm) and 7.2"
Product type designation. General information. Supply voltage
 Data sheet SIMATIC S7-300, CPU 313C, COMPACT CPU WITH MPI, 24 DI/16 DO, 4AI, 2AO 1 PT100, 3 FAST COUNTERS (30 KHZ), INTEGRATED 24V DC POWER SUPPLY, 128 KBYTE WORKING MEMORY, FRONT CONNECTOR (2 X 40PIN)
Using the Z8 Encore! XP Timer
 Application Note Using the Z8 Encore! XP Timer AN013104-1207 Abstract Zilog s Z8 Encore! XP microcontroller consists of four 16-bit reloadable timers that can be used for timing, event counting or for
EP-5111, EP-5112, EP-5212, EP-5261, EP-5311, EP-5422, EP-5442
 October 2017 RSTI-EP Slice I/O Specialty Modules EP-5111, EP-5112, EP-5212, EP-5261, EP-5311, EP-5422, EP-5442 Module Status LED Channel Status LED GE provides several RSTi-EP specialty modules, which
TECHNICAL DATASHEET #TDAX022420
 TECHNICAL DATASHEET TDAX022420 Four Inputs, Two Outputs Universal Valve Controller 2 Universal Signal Inputs, Magnetic Pick Up Sensor, or Encoder Inputs 2-3A High Side, Low Side or Half-bridge Outputs
SIMATIC. ET 200SP HA Analog input module AI 16xTC/ 8xRTD 2-/3-/4-wire HA (6DL1134-6JH00-0PH1) Security information 1. Product overview 2.
 Security information 1. Product overview 2.") Security information 1 Product overview 2 SIMATIC ET 200SP HA Analog input module AI 16xTC/ 8xRTD 2-/3-/4-wire HA (6DL1134-6JH00-0PH1) Manual Wiring 3 Parameters 4 Displays and interrupts 5 Technical specifications
Security information 1 Product overview 2 SIMATIC ET 200SP HA Analog input module AI 16xTC/ 8xRTD 2-/3-/4-wire HA (6DL1134-6JH00-0PH1) Manual Wiring 3 Parameters 4 Displays and interrupts 5 Technical specifications
PULSE INPUT MODULE PI232/PI272 USER S MANUAL
 UM-TS02 -E021 PROGRAMMABLE CONTROLLER PROSEC T2-series PULSE INPUT MODULE PI232/PI272 USER S MANUAL TOSHIBA CORPORATION Important Information Misuse of this equipment can result in property damage or human
General specifications and features
 General specifications and features General specifications and features Table 1 General AC/DC/Relay DC/DC/Relay DC/DC/DC Order number 6ES7 212-1BE31-0XB0 6ES7 212-1HE31-0XB0 6ES7 212-1AE31-0XB0 Dimensions
Drive System Application
 Drive System Application Energy-saving mode with MICROMASTER 440 and SINAMICS Application description for MICROMASTER 440 and SINAMICS Warranty, liability and support Note The Application Examples are
Data sheet CPU 313SC (313-5BF13)
") Data sheet CPU 313SC (313-5BF13) Technical data Order no. Type 313-5BF13 CPU 313SC General information Note - Features SPEED-Bus - SPEED7 technology 24 x DI, 16 x DO, 4 x AI, 2 x AO, 1 x AI Pt100 128 kb
Data sheet CPU 313SC (313-5BF13) Technical data Order no. Type 313-5BF13 CPU 313SC General information Note - Features SPEED-Bus - SPEED7 technology 24 x DI, 16 x DO, 4 x AI, 2 x AO, 1 x AI Pt100 128 kb
FM COUNTER MODULE
 FM 350-2 COUNTER MODULE Function The module takes the load off the CPU by: direct connection of 24 V incremental encoders, direction encoders, initiators and NAMUR sensors. direct connection for gate signals
The DO8332 module is equipped with eight outputs for 1-wire connections. The rated output current is 2 A.
 1.1 DO8332 1.1.1 General information The DO8332 module is equipped with eight outputs for 1-wire connections. The rated output current is 2 A. The output supply is fed directly to the module. An additional
Application Note. Brushless DC Motor Control AN-1114
 Application Note AN-1114 Abstract In this application note a GreenPAK configuration applicable for a single-phase BLDC motor is introduced. This application note comes complete with design files which
TRANSLATION OF THE GERMAN ORIGINAL MANUAL
 phytron ProfiBus Interface for the OMC/TMC Controller TRANSLATION OF THE GERMAN ORIGINAL MANUAL 1/213 Manual MA 1289-A1 EN ProfiBus Interface OMC/TMC 213 All rights with: Phytron GmbH Industriestraße 12
Manual. Application Inverter MOVIDRIVE modular/system with CiA402 Device Profile Parameter Description * _0718*
 Drive Technology \ Drive Automation \ System Integration \ Services *25835130_0718* Manual Application Inverter MOVIDRIVE modular/system with CiA402 Device Profile Parameter Description Edition 07/2018
AN4269. Diagnostic and protection features in extreme switch family. Document information
 Rev. 2.0 25 January 2017 Application note Document information Information Keywords Abstract Content The purpose of this document is to provide an overview of the diagnostic features offered in MC12XS3
JBus/Modbus Communication Card
 JBus/Modbus Communication Card Installation and Operation 05/2018 www.schneider-electric.com Legal Information The Schneider Electric brand and any registered trademarks of Schneider Electric Industries
TLE5014 Programmer. About this document. Application Note
 Application Note About this document Scope and purpose This document describes the Evaluation Kit for the TLE5014 GMR based angle sensor. The purpose of this manual is to describe the software installation
Technical manual. Microstep driver SMC11. NANOTEC ELECTRONIC GmbH & Co. KG Gewerbestraße 11 D Landsham near Munich, Germany
 Technical manual Microstep driver NANOTEC ELECTRONIC GmbH & Co. KG Gewerbestraße 11 D-85652 Landsham near Munich, Germany Tel. +49 (0)89-900 686-0 Fax +49 (0)89-900 686-50 info@nanotec.de Editorial Editorial
FM COUNTER MODULE
 FM 350-1 COUNTER MODULE Function The FM 350-1 off-loads the CPU by: Direct connection of incremental encoders Direct connection for gate signals (light barrier etc.) using integrated digital inputs. A
Easy Connect connection between SINUMERIK and a robot
 Application description 10/2015 connection between SINUMERIK and a robot SINUMERIK 828D, SW 4.5 SP3 https://support.industry.siemens.com/cs/ww/en/view/109478437 Warranty and liability Warranty and liability
General information. CiR - Configuration in RUN
 Data sheet SIMATIC S7-1500, ANALOG INPUT MODULE AI 8 X U/I/RTD/TC, 16 BITS OF RESOLUTION, ACCURACY 0.3 %; 8 CHANNELS IN GROUPS OF 8; 4 CHANNNELS FOR RTD MEASURING, COMMON MODE VOLTAGE APPR. 10 V; DIAGNOSIS,
Course Introduction. Content 20 pages 3 questions. Learning Time 30 minutes
 Purpose The intent of this course is to provide you with information about the main features of the S08 Timer/PWM (TPM) interface module and how to configure and use it in common applications. Objectives
Use of the application program. Contents. instabus EIB Application program description. September S2 Room temperature controller
 Use of the application program Product family: Product type: Manufacturer: Heating, Air conditioning, Ventilation Thermostat Siemens Name: Room temperature controller IKE 250 DELTA millennium Order no.:
HB-25 Motor Controller (#29144)
") Web Site: www.parallax.com Forums: forums.parallax.com Sales: sales@parallax.com Technical: support@parallax.com Office: (916) 624-8333 Fax: (916) 624-8003 Sales: (888) 512-1024 Tech Support: (888) 997-8267
Web Site: www.parallax.com Forums: forums.parallax.com Sales: sales@parallax.com Technical: support@parallax.com Office: (916) 624-8333 Fax: (916) 624-8003 Sales: (888) 512-1024 Tech Support: (888) 997-8267
Copyright 2014 YASKAWA ELECTRIC CORPORATION All rights reserved. No part of this publication may be reproduced, stored in a retrieval system, or
 Copyright 2014 YASKAWA ELECTRIC CORPORATION All rights reserved. No part of this publication may be reproduced, stored in a retrieval system, or transmitted, in any form, or by any means, mechanical, electronic,
MRS ELECTRONIC DATASHEET CAN I/O AND PLC DESCRIPTION TECHNICAL DATA REGULATORY APPROVALS AND TESTING SOFTWARE/PROGRAMMING
 DESCRIPTION The versatile CAN I/O PLC with 14 inputs and outputs impresses with its compact design and its operating voltage range of 9 to 30 volts. It provides 8 I/Os that can be configured as inputs
Data sheet CPU 013C (013-CCF0R00)
") Data sheet CPU 013C (013-CCF0R00) Technical data Order no. 013-CCF0R00 Type CPU 013C Module ID - General information Note - Features SPEED7 technology 16 x DI, 12 x DO, 2 x AI, from which are 4 input channels
Data sheet CPU 013C (013-CCF0R00) Technical data Order no. 013-CCF0R00 Type CPU 013C Module ID - General information Note - Features SPEED7 technology 16 x DI, 12 x DO, 2 x AI, from which are 4 input channels
6.9 Jump frequency - Avoiding frequency resonance
 E581595.9 Jump frequency - Avoiding frequency resonance : Jump frequency : Jumping width Function Resonance due to the natural frequency of the mechanical system can be avoided by jumping the resonant
QuickBuilder PID Reference
 QuickBuilder PID Reference Doc. No. 951-530031-006 2010 Control Technology Corp. 25 South Street Hopkinton, MA 01748 Phone: 508.435.9595 Fax: 508.435.2373 Thursday, March 18, 2010 2 QuickBuilder PID Reference
SIPLUS. Condition Monitoring System SM 1281 Condition Monitoring. Preface 1. Documentation guide. Safety instructions
 Preface 1 Documentation guide 2 SIPLUS Condition Monitoring System Operating Instructions Safety instructions 3 Fundamentals of vibration monitoring and diagnostics 4 System overview 5 Functions 6 Application
Cover sheet. Handling the Demo Case. SINAMICS G120 with CU250S-2 Vector. FAQ October Service & Support. Answers for industry.
 Cover sheet Handling the Demo Case SINAMICS G120 with CU250S-2 Vector FAQ October 2013 Service & Support Answers for industry. Question This article originates from the Siemens Industry Online Support.
Power Meter. Measurement Guide. for Anritsu RF and Microwave Handheld Instruments BTS Master Site Master Spectrum Master Cell Master
 Measurement Guide Power Meter for Anritsu RF and Microwave Handheld Instruments BTS Master Site Master Spectrum Master Cell Master Power Meter Option 29 High Accuracy Power Meter Option 19 Inline Peak
INDEX. i 1. B Braking Resistor Dimensions: A 24 Braking Resistors: A 20 Braking Units: A 20. DURAPULSE AC Drive User Manual
 INDEX A AC Drive Cover: 1 6 Dimensions: 2 4 External Parts and Labels: 1 6 Heat Sink Fins: 1 6 Input Mode Switch (Sink/Source): 1 6 Introduction to DuraPulse GS3 AC drive: 1 3 Keypad: 1 6 Model Number
Valve Control Unit ValDi
 Product Outline Valve Control Unit ValDi General Description Our valve control unit is a driver unit for solenoid valves for test purposes which comes with an especially developed software to control,
8V General information. 2 Order data 8V
 8V80.00-8V80.00- General information Modular mechanical design using plug-in modules Integrated line filter Integrated or optional external braking resistor All connections are made using plug-in connectors
Dynamo Brushless DC Motor and GreenDriveTM Manual
 Dynamo Brushless DC Motor and GreenDriveTM Manual This manual was developed as a guide for use by FIRST Robotics Teams using Controller Part Number 840205-000 in conjunction with the Nidec Dynamo BLDC
TECHNICAL DATASHEET #TDAX Universal Input, Single Output Valve Controller CAN (SAE J1939)
") Features: TECHNICAL DATASHEET #TDAX021610 Universal Input, Single Output Valve Controller CAN (SAE J1939) 1 universal signal input (voltage, current, resistive, PWM, frequency or digital) 1 output: proportional
Features: TECHNICAL DATASHEET #TDAX021610 Universal Input, Single Output Valve Controller CAN (SAE J1939) 1 universal signal input (voltage, current, resistive, PWM, frequency or digital) 1 output: proportional
Ordering Part Numbers: SAE J1939 version Controller: AX022400
 TECHNICAL DATASHEET #TDAX022400 2 Universal Inputs, Dual Valve Controller 2 Universal Inputs 2-3A Outputs CAN (SAE J1939) Programmable with Electronic Assistant P/N: AX022400 Features: 2 universal signal
Programmable with Electronic Assistant Simulink
 TECHNICAL DATASHEET #TDAX022410 2 Universal Inputs, Dual Valve Controller 2 Universal Signal Inputs 2-3A Outputs Drive Hydraulic Valves CAN (SAE J1939) Programmable with Electronic Assistant Simulink P/N: