About Copyright. About this Manual. Copyright of this Manual and Software
|
|
|
- Lenard Ward
- 6 years ago
- Views:
Transcription


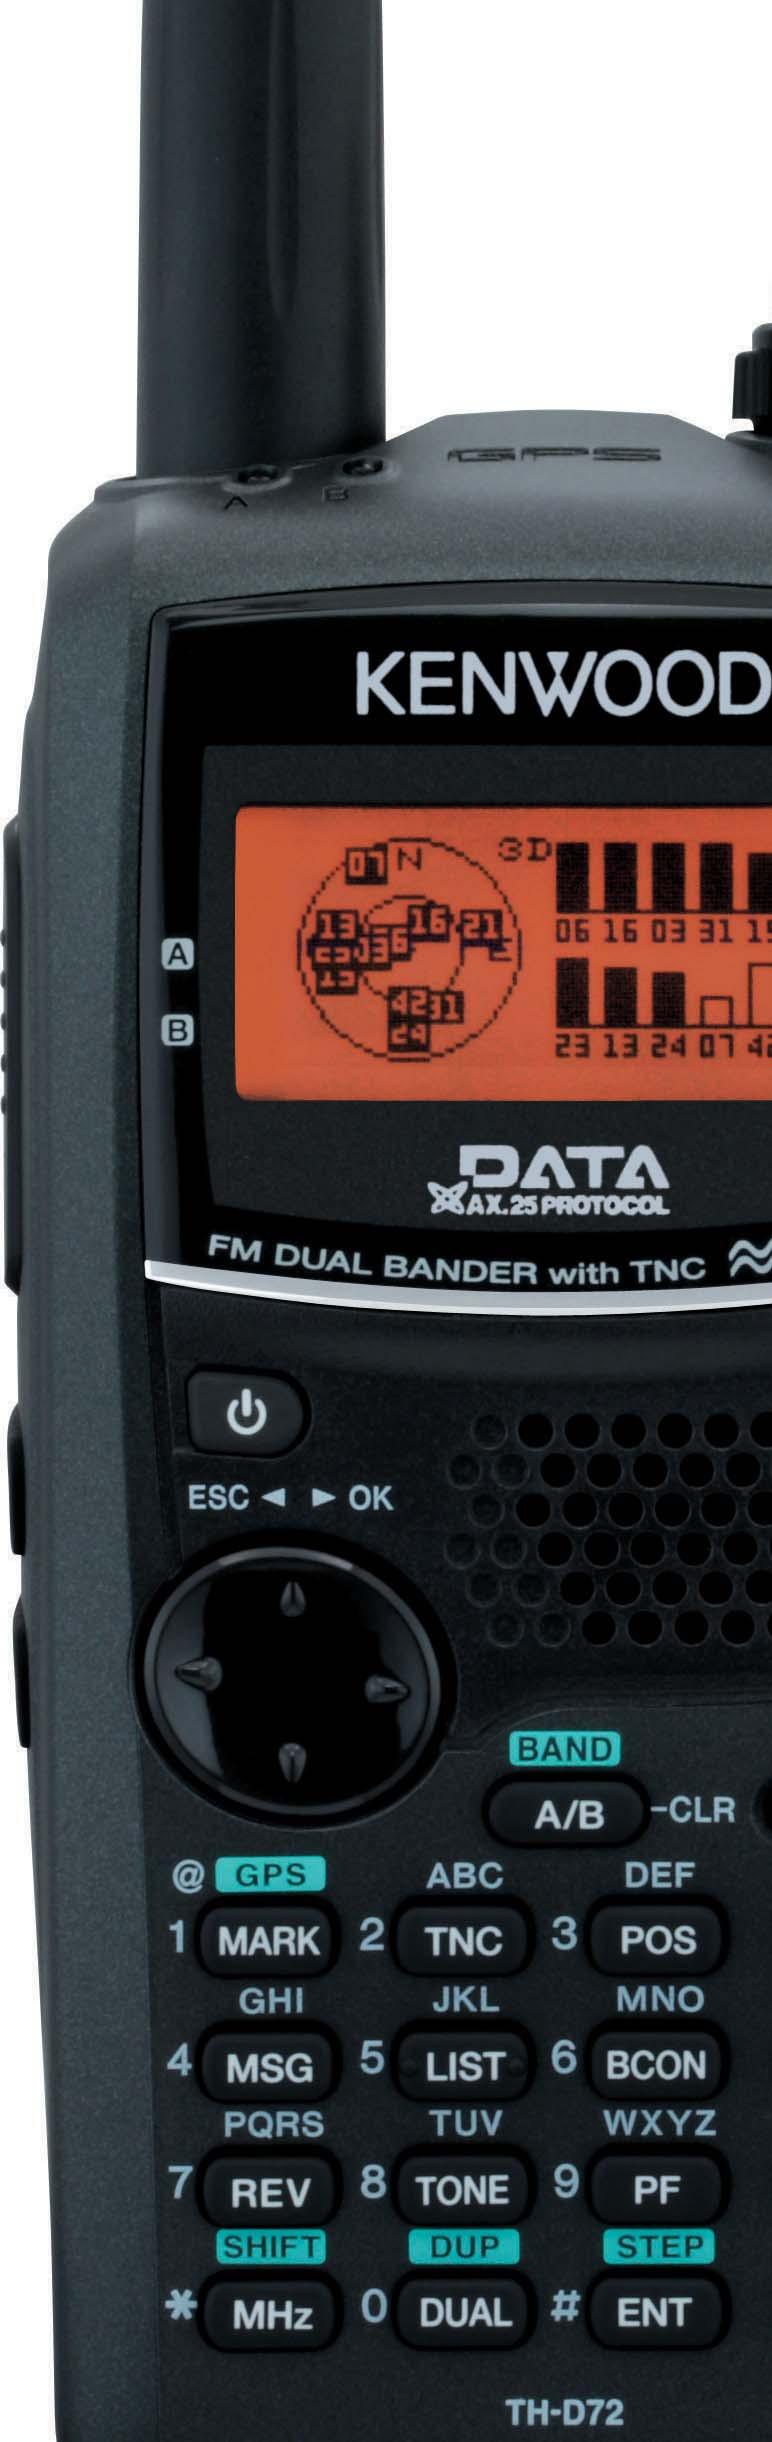
1 TH-D72A/E
2 About Copyright Copyright of this Manual and Software All copyrights and other intellectual property rights for this in-depth manual and relevant technical documents as well as the software described in this in-depth manual and relevant technical documents, and help texts and manuals attached to the software are owned by Kenwood Corporation. A right to use the software described in this in-depth manual and relevant technical documents, and help texts and manuals attached to the software is granted to a licensee by Kenwood Corporation; however, the title to and ownership for the software shall be owned by Kenwood Corporation. Refer to this in-depth manual and relevant technical documents, and help texts and manuals attached to the software for details. Kenwood Corporation does not warrant that quality and performance of the software described in this in-depth manual and relevant technical documents, and help texts and manuals attached to the software conform to the applicability of any use, and Kenwood Corporation shall be free from liability for any defects, damage or loss, or from any warranty for anything other than what is expressly described in this in-depth manual and relevant technical documents, and help texts and manuals attached to the software. Any distribution, resale, lease, waiver, assignment or disclosure on a website of all in-depth manual and relevant technical documents, and help texts and manuals attached to the software written and made by Kenwood Corporation. About this Manual This document was created for the product using the following design specifications. TH-D72A/E, an external GPS unit and Weather Station available marketplaces. TH-D72A/E with firmware version 1.02 or later. Cover 2 TH-D72A/E
3 About Registered Trademark Windows and Windows logo are registered trademarks of Microsoft Corporation in the United States and other countries. Windows Vista and.net Framework are trademarks or registered trademarks of Microsoft Corporation in the United States and other countries. Kenwood Corporation is a licensee of and entitled to use the APRS trademark and protocols from APRS Engineering, LLC. APRS (Automatic Packet Reporting System) is a registered trademark of WB4APR (Bob Bruninga). TravelPlus for Repeaters is a registered trademark of American Radio Relay League, Inc. SmartBeaconing is a trademark of HamHUD Nichetronix, LLC. EchoLink is a registered trademark of Synergenics, LLC. Dayton Hamvention is a registered trademark of DARA Incorporation. All other product names referenced herein are trademarks or registered trademarks of their respective manufacturers. and are omitted in this manual. TH-D72A/E Cover 3
4
5 CONTENTS 1 DEVELOPMENT CONCEPT GPS Unit Evolving Development Other New Functions HOW YOU ENJOY APRS WITH TH-D72A/E (WRITTEN BY BOB BRUNINGA, WB4APR) PREPARATIONS FOR OPERATING APRS What Do I Need to Configure? Configuration Built-in Clock Activating Your Mobile GPS Position Setting Manually in the Menu My Callsign Beacon Type Data Band Packet Speed Position Using Internal GPS Using GPS Receivers Manually Entering Your Position Position Comment Status Text APRS Icon Method of Beacon Transmission Packet Path Sound Battery Saver APRS Operating Frequency Placing a Transceiver in APRS mode Transmitting a Beacon GPS What is GPS? Position Determination Principle Datum (Geodetic Survey System) GPS and APRS Position Format GPS Receivers Garmin GPS18xPC AvMap G Other GPS Receivers Settings for Geodetic Survey System Internal GPS GPS Satellite Information Display Automatic Adjustment of the Built-in Clock North Up and Heading Up NMEA Sentence Output Internal GPS Unit Save Battery Operating Time during the Concurrent Use of the Internal GPS Unit GPS Only Mode Log Function Mark Waypoint Target Point SBAS APRS SOFTWARE FOR YOUR PC UI-View Introduction of UI-View Connecting a PC How to Configure UI-View Available Software associated with APRS OPERATIONAL EXAMPLES OF APRS Let s Go Mobile Overview Automatic Reply Function Entering Characters Decay Algorithm Function Proportional Pathing Function Simultaneously using Decay Algorithm and Proportional Pathing SmartBeaconing (Written by Steve Bragg, KA9MVA) Variable Rate Beaconing (Transmission Interval Changes with Speed) Corner Pegging (Transmission after Heading Change) Operation Example QSY Function Transmitting QSY Information Receiving QSY Information QSY Functions and EchoLink Message Function Automatic Reply Function TX Beep (Beacon) TH-D72A/E I
6 CONTENTS APRS Lock Base Station (Weather Station) Using Meteorological Equipment Davis Instruments Corp. Inc Peet Bros. Company APRS NETWORKS APRS Servers IGate Let s Send Sending with TH-D72A/E Digipeaters (Digital Repeaters) UIDIGI UIFLOOD UITRACE Configuration Examples (USA) Proper Configuration (written by Bob Bruninga, WB4APR) Packet Path New-N Paradigm RELAY Paradigm STATE/ SECTION/ REGION Changing the Font Sizes Setting your Callsign Exporting.hmk Files Configuring RSS Changing the Power-on Bitmap Image Configuring the Character String for the Power-on Password HOW TO UPDATE FIRMWARE Firmware Verifying Necessary Equipment How to Verify Firmware Version Checking with the Transceiver Checking with MCP-4A How to Get Latest Firmware/Software How to Update MISCELLANEOUS TOPICS AvMap (Don Arnold, W6GPS) MCP-4A MEMORY CONTROL PROGRAM (FOR USE WITH TH-D72A/E) APPENDIX Downloading and Installing MCP-4A Main Functions of MCP-4A Useful Functions of MCP-4A Functions Only Configurable by MCP-4A Reading a File Reading a File Created with MCP-4A Importing Other MCP Files into MCP-4A Reading GPS Log Data Reading GPS Log Data from TH-D72A/E Managing the Read GPS Log Data Converting to KML or GPX File Format Introduction to Main Functions Simple Operation Graphical Display of SmartBeaconing II TH-D72A/E
7 PROLOGUE Amateurs Building the New Global Communications Network Hams have enjoyed using FM transceivers for years for SSTV, ATV, packet, satellite, EME, GPS and other communications modes. A fundamental reason for this has been that FM transceivers are easy to use. Recently, personal computers and the Internet have combined to offer global communications opportunities. Yet, with their long history of communicating using various methods, nobody is better prepared than hams to embrace and take advantage of these new communications techniques to create an even more interesting new global network. No longer are users of FM transceivers bound by line-of-sight distances and local same-city coverage. The Internet now shrinks the vast distances to other operators who were once out of reach by using only an FM transceiver. Every ham now meets, experiments and interacts worldwide via voice and data communications using low-power FM transceivers. These networks built by individual hams connecting through gateways into the Internet are allowing others to share the experience that this infrastructure offers. Furthermore, the networks are growing in size day-by-day. Hams are using basic FM transceivers to communicate on a direct one-on-one basis with operators across the globe. Besides hobby applications, such a communications network also has tremendous capability to deliver a powerful tool to serve the general public in times of emergencies. Kenwood s Approaches for development of APRS The TH-D72A/E, the successor of TH-D7A/E, incorporates APRS (Automatic Packet Reporting System) functions. Kenwood has a long history in developing APRS: we have combined radio and GPS technology and developed APRS products over the years. At our first meeting with the father of APRS, Mr. Bob Bruninga, 15 years ago, our history of APRS development products began. In 1996, the TM-V7A/E became popular for use with APRS because the transceiver has been capable of the data communications using a separate band which is apart from voice communications. But the Internet, personal computers, GPS and electronic mapping technologies were all in their infancies compared to now and along with the change of the environment over the years, our transceivers have always been on the way to be evolved. TH-D7A/E and TM-D700A/E, marketed as APRS transceivers, had a great deal to do with APRS s expansion all over the world. In addition to APRS, with TM-D710A/E launched in 2007, it is possible to use EchoLink over VoIP and this means you can plot stations from the other side of the planet on a map while sending mail and communicating with them by voice. Kenwood continues to be committed to exploring the possibilities of APRS to add more useful features. TH-D72A/E CONTENTS I
8 New Technology Expands Amateur Radio Versatility Use of HF transceiver to call CQ and contact to hams around the world via ionosphere will never lose its appeal. But there is elegance in being able to communicate with only an FM transceiver and by adopting the latest technology. The global network consisting of thousands or even millions of stations will only get more interesting as it evolves with new ideas as a result of those like you becoming involved. Isn t it exciting just to think about? Everywhere even in such other country, there are hams all over waiting to be contacted! Once you begin sending a radio signal, you can communicate with a myriad of other radio amateurs via the network. Besides, this global network evolves further as each of us adds our ideas. In APRS, information on local events and weather conditions are distributed and even amateur satellites orbiting around the earth also transmit positional data. Also, in APRS, not only can you know where your acquaintance is currently located on the earth, but you can even send them an APRS message from your radio or PC. You can send directly to them or take advantage of EchoLink node numbers to make direct voice contact. Combining the different technologies adds to and enhances your communications versatility and makes you a part of the communicating world. Kenwood TH-D72A/E Transceivers Development Team II CONTENTS TH-D72A/E
9 1 DEVELOPMENT CONCEPT Following is the designing and development concept for TH-D72A/E. A genuine tool for communications via voice and data that is based on the TH-D7A/E. An out-of-the-box transceiver with an internal GPS unit (turn-key solution) Equipped with a USB interface Emphasis on ease of operation (with multifunction keys; keys may not be minimized.) Full-size dot matrix LCD display that enhances visibility for the user User-updateable firmware Large-capacity lithium ion battery Compatibility with APRS inherited from the TM-D710A/E In order to understand customer requirements, we did surveys at various ham shows, such as the Dayton Hamvention, ARRL and TAPR Digital Communications Conference (DCC), JARL Ham Fair (Japan), Ham Radio in Friedrichshafen (Germany), etc. The many ideas gathered coalesced into the above development concept as the Product Planning staff and Development staff virtually merged during the conception phase to come up with the present development program. 1.1 GPS Unit When we developed TH-D7A/E series in 1997, it was difficult to incorporate an internal GPS unit in a handheld transceiver. This was because, at that time, the GPS antenna and receive module were too large. The advancement of technology has enabled the miniaturization of these components and today they are mounted in a wide array of a mobile device such as a cellular phone, a GPS logger and a digital camera, and is almost taken for granted. If an external GPS unit was required for a successor to TH-D7A/E, i.e. a handheld transceiver, it would have been very cumbersome for a user to carry around more than one device as well as multiple batteries and cables connecting them. Therefore, we started the development of the TH-D72A/E with the concept of an out-of-the-box product that delivers higher user convenience and with the basic premise of incorporating an internal GPS unit. The internal GPS unit consists of a GPS receive module and a GPS antenna. After repeated discussions, to ensure enough GPS receive sensitivity and reliability, we have finally adopted a GPS unit that integrates a receive module using a SiRFstar III chipset, which is highly accepted in the market, and a microstrip patch antenna. Also, we have separated the transceiver circuit and the GPS unit with an aluminum die cast frame to prevent mutual interference. During the development, we have conducted endless sessions of testing and experiment to compare the performance of the product in actual operational applications such as ease of transportation and of mobile operation with competing products or GPS receivers on the market. Consequently, the new transceiver ensures good positioning performance and satisfactory operation. Although TH-D72A/E comes with an internal GPS unit, your GPS receiver can be connected as before. TH-D72A/E CONTENTS 1
10 1 DEVELOPMENT CONCEPT 1.2 Evolving Development Next, we turned our sights to applied functions of GPS. Incorporating an internal GPS unit to support the collected positional information in APRS applications is our minimum standard, and it is also very important to provide customers with applied functions to enhance the convenience of the product. Following are some examples of applied functions available with the internal GPS unit. GPS Logger Function: It features the GPS logger function to log the tracking data. The maximum of 5,000 points seem rather modest compared with a full-fledged GPS logger, but the GPS logger function on the TH-D72A/E allows setting of the interval of records in the log according to the usage environment and therefore is very useful. A user can choose from (1) the programmed interval duration, (2) the programmed travel distance and (3) the timing of transmitting an APRS beacon. The recorded movement trajectory data (log) can be exported to a PC with the MCP-4A, dedicated memory control program for TH-D72A/E, installed and be saved in several file formats including KML that is compatible with Google Earth. GPS Only mode: A new mode is now added that disables all the features of the transceiver and allows only the GPS logger to function. If you intend to only record the movement trajectory, using the mode results in a substantial reduction in battery power consumption. Mark Waypoint and Target Point functions: While you are on a trip, a maximum of 100 points that you want to store can be stored. The recorded points can be used as a destination (a Target Point) for navigating while verifying the distance and azimuth until the destination. Time adjustment function: The current time data received from a GPS satellite can be used to manually or automatically set the clock built in the transceiver. Display of GPS satellite information: This is a familiar function of a typical GPS receiver. The location and signal strength of each satellite can be viewed on the LCD screen. 2 CONTENTS TH-D72A/E
11 1 DEVELOPMENT CONCEPT 1.3 Other New Functions In addition to the functions related to the internal GPS unit, the transceiver has more new features. Following are some major functions worth to be presented. USB interface: RS-232C has been the most common interface to connect a transceiver and a PC; however, in recent years only few PCs are equipped with an RS-232C connector. TH-D72A/E is equipped with a Mini-B USB connector. The USB connector allows you to directly connect to a computer by using the supplied USB cable. Connecting weather stations: The weather stations from Peet Bros. Company, Incorporated and Davis Instruments Corporation can be connected. The acquired weather information can be displayed on the screen or transmitted in APRS format. Digipeaters (Digital Repeaters): Packet signals can be relayed. The transceiver can serve as a temporary relay station when you are on a trip or on other occasions. TH-D72 is the first handheld transceiver that has this function. APRS LOCK: This is a function to lock the settings of the data band during the operation of APRS to prevent the transceiver configuration from being changed accidentally. For example, locking the frequency of the data band, locking the [PTT] switch, and locking the TNC so that it could not be disabled without realizing it, are all possible as a user prefers. Cross tone: Any combination with Tone, CTCSS or DCS can be used. For example, you can use DCS for transmission and CTCSS for reception. Automatic cursor advancement: While entering characters of a menu name or an APRS message with the numerical keypad, upon elapse of a specified period of time after one character is entered, the cursor automatically moves to the next digit. For example, assume you need to enter AB (both A and B must be entered with the same [2] key). Upon lapse of a programmed duration of time (e.g. 1 second) after you enter A, the cursor moves to the next digit automatically, and you don t have to advance it manually so as to simplify and enhance the key operation. Adjusting wait times: Lengths of wait times that were fixed on the previous models now can be adjusted by a user. For example, you can set the illumination timer, the delay time until resuming Time-Operated Scan or Carrier-Operated Scan after a pause and the duration of an interrupted display upon receipt of APRS data. Weather channel scan (USA/Canada only) A total of 10 weather channels can be scanned. It is possible to search for adjacent weather channels with the strongest signal. Also, the scan can automatically be done with a programmed interval and it is most effective during the operation by a mobile or portable station. In addition to the above, the TH-D72A/E has more applied functions, and we hope your actual use of the transceiver presents excellence! TH-D72A/E CONTENTS 3

12 2 HOW YOU ENJOY APRS WITH TH-D72A/E (WRITTEN BY BOB BRUNINGA, WB4APR) APRS Overview The TH-D72A/E APRS Handy Transceiver brings so many new capabilities and enhancements to the portable and mobile operator, that it is hard to fully grasp the power that this brings to APRS. Besides the built-in GPS, and significant enhancement of the capabilities and depth and breadth of APRS, the new radio continues the evolution of the fundamental principles of APRS as a common information resource channel for facilitating human-to-human communication on Amateur Radio. To see how this fits in, it is first necessary to understand the history of APRS and packet radio. Packet Radio History The roots of the Automatic Packet Reporting System (APRS) go back to the late 1970s as the AMRAD (Amateur Radio Research and Development) Group was excitedly beginning to experiment with AX.25 packet radio. This was before the Internet and as we spent our free time in our shacks, we were in fact all socially networked by the AMRAD voice repeater. All evening and weekends, someone was working on something or developing something new and sharing the excitement with the others. We hung onto our handy transceivers everywhere we went like kids these days hang onto their ipads and smartphones to keep up with the excitement. Figure 2-1 The History of APRS from VIC-20 to TH-D72A/E Since only RTTY was legal in the USA, we developed a RTTY chat channel to augment our repeater communications. We wanted a digital channel that worked just like a voice repeater. That is, anyone who had info transmitted it, and everyone monitoring captured it. Advancing from RTTY, AMRAD developed the AX.25 spec and as soon as it was legal, we were on the air as a chat group using realtime Unconnected (UI) packet messaging. For this technical group, the only AMRAD operational event was communications support for the annual Old Dominion 100 mile endurance run. In the mid 1980s, the first vestige of APRS used Vic-20s and packet radio to share information on the hundreds of runners and horses across the hundreds or so square miles over the 24-hour event. There was no such thing as GPS. The system consisted of simply a packet channel where each checkpoint beaconed information and objects about arrivals and then transferred object responsibility as it was taken over by the next checkpoint. At any instant, everyone could see on their screens, a list of the objects reported at each station and their status. New information was beaconed at a high rate for immediate delivery but decayed rapidly to reduce channel loading so that fresh information had priority with minimum collisions. 4 CONTENTS TH-D72A/E
13 2 HOW YOU ENJOY APRS WITH TH-D72A/E (WRITTEN BY BOB BRUNINGA, WB4APR) Packet Network Growth Beginning in 1983, we added VHF, HF and a phone line to the Vic-20 as well as a BBS message store and forward capability and began expanding to the Commodore 64. It was linked with other systems on and had the first dual-port HF link onto the MHz HF packet frequency we still use today for APRS. It was an exciting time, but packet radio was being used more and more for connected point-to-point traffic and then to BBS systems and the real-time connectivity between operators was being lost. By that time, live beacons to announce real-time activity and to conduct group chats by UI messaging was not only disappearing but were actually being outlawed on the shared BBS channels. Even UI digipeating was being disabled in all packet nodes to make sure that no one beaconed or chatted on the BBS network and dozens of restricted/exclusive use packet frequencies. But we still wanted that live operator-to-operator UI packet chat capability and we still needed a tactical real-time local communications and information distribution channel for rapidly exchanging digital data of immediate value to local operators and operations. In 1992, we abandoned the Commodore 64 and switched to the new IBM AT personal computer running at 4 MHz and changed the name from the Connectionless Emergency Traffic System (CETS) to Automatic Packet Reporting System (APRS) since it matched my call so nicely. APRS in 1990s I formally presented APRS at the TAPR/ARRL Digital Conference in APRS really took off as the cost of GPS got below $500 each and I manually digitized the entire U.S.A. and some other countries using coordinates measured from paper maps. It was during these times that the P was temporarily called Position to highlight this new capability. Unfortunately, this was a mistake. Over the next decade as GPS became readily available, too many hams only saw the position maps of APRS and not the broad communication applications for human-to-human tactical ham radio information exchange in real time. Too many operators bought transmit-only GPS trackers and further ignored the real-time human communications element. Many follow-on software clients focused on maps with little attention to the underlying network protocol and human-to-human connectivity. TH-D72A/E CONTENTS 5

14 2 HOW YOU ENJOY APRS WITH TH-D72A/E (WRITTEN BY BOB BRUNINGA, WB4APR) APRS-IS In 1997, K4HG and the Mac/WinAPRS Sproul brothers tied APRS to the Internet and the APRS-IS system as shown above was born. While this was a huge success that enabled instantaneous global APRS texting connectivity beyond our wildest dreams, it also further enhanced the map view experience of casual APRS viewers. Looking at an APRS map was colorful but it did not obviously convey the human contact and connectivity inherent in the system. Also, it was impossible to communicate with all of the one-way trackers equipment and the value of two-way amateur radio communications was further being lost in favor of simple two-dimensional icons on maps. Further these simple icons omitted the other 8 dimensions of color attributes that gave additional at-a-glance real time information to viewers. See APRS Handheld and Mobile Radios To counteract this trend, we stopped using Position and went back to the original Packet nomenclature for APRS. Then in 1998, Kenwood gave a landmark boost to APRS in the field and to this digital communications capability by introducing the fully integrated TH-D7A/E. Thus TH-D7A/E put APRS in the palm of the hand of ham radio operators worldwide. Not only did it take GPS inputs, but it fully implemented the APRS messaging, bulletins and texting capabilities. Over the next 11 years, this predecessor to the TH-D72A/E was the most popular Kenwood HT ever as APRS brought new life to packet radio. In parallel, Kenwood also introduced the fully integrated TM-D700A/E mobile APRS radio in These APRS front-panel-display radios now brought the full APRS local situational awareness to the mobile operator as shown below. With these displays, the APRS information content delivery system was in place without any need for mobile PC s or laptops. Further, the attached GPS provided the map display and the radio display provided all the other information content. 6 CONTENTS TH-D72A/E

15 2 HOW YOU ENJOY APRS WITH TH-D72A/E (WRITTEN BY BOB BRUNINGA, WB4APR) Texting But still most non APRS ham radio operators just did not find any advantages beyond the maps. My frustration with the growing lack of live human content in APRS continued to fester to the breaking point at a 2006 ARRL Special Meeting at Dayton on the lack of youth in ham radio. The gathered fathers of ARRL lamented: Ham radio was missing the youth. They were too busy texting on their cell phones and ham radio had nothing similar to offer. I was incensed. Ham radio had had wireless hand-held texting and for nearly a decade in the form of the handheld Kenwood APRS TH-D7A/E and yet even the amateur radio leadership was not aware and had never tried it. This was frustrating. The reason was because while the hams were shunning real-time APRS digital text communications, the kids of the world were just getting going with texting and then Twitter on every conceivable handheld device. Yet the entrenched amateur radio old timers could not see any value to APRS texting and ing on a keypad. As mentioned in the above illustration, there are more than 26 different text systems available. I counted over 26 different texting systems in ham radio as suggested in the image above. Fortunately, today just about every smartphone and handheld has an application for APRS message compatibility. Our goal in APRS is to seamlessly integrate these disjointed systems so that a message-to-callsign from any device gets delivered to the callsign owner on any device that is currently turned on. Many of these systems are already connected by APRS and the APRS-Internet system (APRS-IS). Refer to: TH-D72A/E CONTENTS 7

16 2 HOW YOU ENJOY APRS WITH TH-D72A/E (WRITTEN BY BOB BRUNINGA, WB4APR) Facebook on APRS Purely as an aside, you can think back to the Kenwood VC-H1 handheld SSTV device as an attempt (before its time) to add the visual aspect of social networking to ham radio and APRS. This was a fantastic idea. And it was fully integrated into all Kenwood APRS radios at the time, adding real-time video to APRS digital and texting connectivity. You could think of the combination as real-time Facebook on APRS. Unfortunately it was ahead of its time and the VC-H1 handheld is no longer in production, but thousands of hams have them and still use them. These SSTV handhelds along with readily available free SSTV software make a great visual adjunct to APRS. This was in the early 2000 time frame before anyone had camera phones. Think of the potential. Snap an image, and send it into APRS where it was picked up by a web site that cataloged it by position, originator and a text description for viewing by anyone. This can be a tremendous asset for ham radio public service. There are a few such active links from APRS and SSTV to the web called the Automatic Picture Relay Network, or APRN. Refer to: APRS Voice Alert Three things dramatically brought back human connectivity to APRS. The first factor was Voice Alert. The second was the addition of a Frequency field in all APRS position packets. And the third was the emergence of VOIP Internet/ham radio linked voice. Voice alert is like a 3 rd simultaneous radio channel on the Kenwood APRS transceivers. It acts like an intercom channel for all APRS operators to be able to quickly raise another nearby APRS voice alert station by a simple direct voice call. It required no new hardware or software. It simply consists of setting CTCSS 100 Hz on the APRS data channel and keeping the speaker volume up. This way, all packet noise was completely muted, but the operator could still be called at any time with a CTCSS 100 Hz voice call. A secondary benefit to this technique was a free proximity detector. If any other Voice Alert station got within simplex range (maybe 5 miles or less) his periodic packets would give an audible alert. These new features of APRS Voice Alert as indicated in the APRS Mobile Information Exchange drawing above finally made it easy to keep the eyes on the road, but never miss the opportunity for human contact with a fellow APRS operator on the open road. Voice Alert is now on the Function Menu in the TH-D72A/E. Frequency Data Field At the nearly same time (2004), the Frequency field was added to the position packet specification. This standardized the inclusion of a voice operating frequency in the APRS system. APRS was never intended as an end-in-itself, but as a tool to be applied to all aspects of ham radio and human contact. Knowing other station s voice contact frequency in many cases is even more important for establishing communications than knowing position. Now every ham could announce his monitoring frequency in his APRS packet and could call others on their indicated frequency. Kenwood was the first to leverage the value of this capability by releasing the TM-D710A/E in This radio (as well as the new TH-D72A/E) not only automatically includes your voice band frequency in every position packet but can also then tune to someone else s frequency by simply selecting Tune as shown below. 8 CONTENTS TH-D72A/E


17 2 HOW YOU ENJOY APRS WITH TH-D72A/E (WRITTEN BY BOB BRUNINGA, WB4APR) These views show the screens for a station with frequency included in his position packet. This is the 11th station in the list and it is beaconing its operating frequency as well as a short note telling everyone he is also listening on Voice Alert in simplex range. The MENU button on this display will bring up a number of additional actions. One is the TUNE function shown in the middle display above. When TUNE is selected, then the radio automatically tunes to the second band frequency as shown in the 3 rd display. Voice Repeaters and Club Info Besides alerting others to the voice monitoring frequency of other APRS operators, the addition of the Frequency field to APRS opened up a whole new application of local information for the mobile operator. Now everywhere the APRS operator travels, he can be alerted to the recommended travelers voice repeater in any area he was passing through. This is accomplished by not only having every digipeater beacon its position and availability, but also by beaconing this local frequency object. These frequency objects show up in the station list of all mobile operators in range as shown below in the TM-D710A/E and TH-D72A/E front panels: On the TM-D710A/E station list as above, not only are the two stations of AB9FX nearby, but also his current VOICE operating frequency is visible. Also, we can see that this radio is in OPERATING range of three voice repeaters that are also identifying themselves as objects on APRS as the locally recommended voice operating channels. The TH-D72A/E on the right has two ham calls, two tactical calls and one repeater object. It is easy to find these nearby frequencies in the huge station list by first doing a SORT. This brings all the numeric objects (in this case, frequencies) to the top of the list. But there is more! The standard for these frequency objects also includes Tone, Shift, and bandwidth for instant tuning. In addition, they include the weekly on-air voice net times as well as the monthly club meeting dates as shown below: TH-D72A/E CONTENTS 9
 repeater with a Tone of 107.2 Hz.")

18 2 HOW YOU ENJOY APRS WITH TH-D72A/E (WRITTEN BY BOB BRUNINGA, WB4APR) Although the information appears a bit cryptic, the fact that all voice repeater objects use this same standard format makes it easy for the operator to understand the meaning. In this case, the local recommended voice repeater in this area is the (Maryland) repeater with a Tone of Hz. The range is 25 miles and the weekly net time is Tuesday evenings at 8 p.m. The final 8 characters (for backwards compatibility to TM-D700A/E) announce that the club meetings are on the 3 rd Thursday of every month. Again, a press of the MENU button and then selecting TUNE will instantly take the radio to this channel. For full details on this function, refer to the following website: 10 CONTENTS TH-D72A/E

19 2 HOW YOU ENJOY APRS WITH TH-D72A/E (WRITTEN BY BOB BRUNINGA, WB4APR) Hamfests Another very typical object that everyone loves to see is the HAMFEST object. This bright red APRS symbol stands out smartly on any APRS display including the AvMap GPS display as shown above. At first glance, this object tells you the most important information: Where it is, and when. The HFEST-DDn standardized object name includes the DATE in the DD digits. Only the day is shown (here it is on the 26th), but this allows for 2 weeks notice to everyone in the area and anyone driving through. The final character n is chosen to make the symbol unique in the global APRS system. This makes for easy sorting of these objects. Simply go to and see a list of all active hamfests the world over!. The talk-in frequency is also listed for instant QSY with the TH-D72A/E TUNE function. I was on a cross-country trip one day on a weekend and just happened to see one of these objects and was able to detour and spend an hour or two at this favorite ham radio pastime. To see how to beacon your local hamfest, refer to the following website: Voice over Internet Protocol (VoIP) Recognizing the huge potential for linking local ham radio over Internet, an added goal of APRS since 2001 has been to facilitate the use of IRLP, EchoLink, and other VoIP systems. Just like the Frequency Objects, all ham radio VoIP systems are encouraged to announce their presence on APRS. Within 10 minutes the node number, frequency, tone and other info are available to all APRS operators on their radios as shown above. Again, a simple press of the TUNE function will QSY the radio for instant operation. The long-term goal of this VoIP and Frequency capability has been to enable APRS to be used for setting up end-to-end global voice contacts. Simply entering a callsign in a contact-request message will cause the APRS Internet system to handshake with the VoIP systems to set up the call and send the necessary QSY messages and frequency information for the radio to instantly tune and complete the call. Think of it as a cellular system for ham radio where you dial by callsign instead of phone number. Both TM-D710A/E and TH-D72A/E were designed to be evolved with this capability! TH-D72A/E CONTENTS 11


20 2 HOW YOU ENJOY APRS WITH TH-D72A/E (WRITTEN BY BOB BRUNINGA, WB4APR) Digipeater Path Information Another new information feature of TH-D72A/E is the digipeater path display shown here. This display shows the First and Last digipeaters used. Most APRS areas encourage the use of only 2 hops or less. This means, in most cases, the full path is visible. In this image the WB3V-6 packet was First heard by the N3KTX-1 digipeater and then it was delivered to my radio by the Last hop on the KV3B-2 digipeater. This path knowledge is very valuable to the operator in understanding his local area network. This display is just one of the 9 pages of additional information available on each station heard by TH-D72A/E and captured in the station list. APRS Radio Map Capabilities All of the Kenwood APRS radios can display all stations in the Station list on any attached GPS map display if the GPS supports standard NMEA waypoints. These stations are shown with the GPS's native generic waypoint symbol except for those that are compatible with the special Kenwood interface such as the AvMap G5/G6 which has the full APRS symbol set (shown below) and the Garmin nuvi 350 which requires the corresponding conversion cable supplied by Argent Data System and has about 50 different symbols. The nuvi 350 needs a GTRANS Kenwood to Garmin translator cable available from The AvMap is designed for 100% compatibility with the nearly 200 APRS symbols. The data cable manufactured by Argent translates the special Kenwood data format into the 50 or so Garmin symbol set where possible. (Image of AvMap by Don Arnold, W6GPS and nuvi 350 by Mike Wren, N2QDK) Other APRS Information Resources The information available to the mobile operator is unlimited. APRS is not an end in itself, but the information is not available if no one is transmitting it. The potential is still wide open for additional content. This is not spam, but real immediate information of value to the mobile or traveler. There are many examples of data sources that have been implemented in some local areas. Traffic speeds at select choke points: refer to: MF Mobile Satellites in view: refer to: UI-InfoKiosk local info database: refer to 12 CONTENTS TH-D72A/E
21 2 HOW YOU ENJOY APRS WITH TH-D72A/E (WRITTEN BY BOB BRUNINGA, WB4APR) Contribution by Kenwood to APRS Kenwood has developed its series of radios, TH-D7A/E, TM-D700A/E, TM-D710A/E, and now the new TH-D72A/E to best support the original objectives of APRS. The display of APRS information on the front panel of these radios gives the mobile operator instantaneous access to all local information being provided on the APRS channel about all surrounding ham radio activities. There are many APRS clients and programs that have been written that sometimes have concentrated too much on the display of maps and vehicle positions while leaving out much of the original fundamentals of APRS and the efficiency of the APRS network The Kenwood radios avoid such an over-simplistic approach to APRS by implementing a rich and diverse function set. The function set includes almost all of the original functions of APRS that are meant to reinforce the concept of distributing local information. The Kenwood radios are not just Vehicle Tracking Systems, but are designed to be real-time information distribution systems for mobile operators with these features: Position Entry TH-D72A/E with its built in GPS solves the hassle of external connections and setup and always accurately knows your position. For times indoors the radio has 5 position memories for prestored frequently-used positions. Map Displays on attached GPS Although the radio has a built-in GPS, it still has the special waypoint output for putting all other APRS positions info on an attached external GPS. When connected to the AvMap G5 series and later, these position objects will show as any of the nearly 200 special APRS symbols. APRS Network Fundamentals Kenwood fully implemented the more subtle aspects of the APRS fundamentals that assure optimum network efficiency and channel sharing among all users. New TH-D72A/E supports the decay algorithm, proportional pathing and SmartBeaconing. These techniques provide good refresh rates for new and local information while minimizing the network impact of old and distant data. Objects The Kenwood transceivers fully appreciate the value of APRS objects and display them prominently. The object location is shown just like other stations either on the attached map display or on the front panel with distance and range. TH-D72A/E also includes filters for easy sorting of these objects in the list. These objects are what give APRS the local information value to local users. Two-Way Messaging Unlike passive one-way tracking devices, the Kenwood radios provide the mobile user with full two-way messaging and display. This real-time human-to-human communications is what makes APRS so valuable in support of special events and emergencies. TH-D72A/E CONTENTS 13
22 2 HOW YOU ENJOY APRS WITH TH-D72A/E (WRITTEN BY BOB BRUNINGA, WB4APR) Field Data Entry In addition to making excellent field data display devices, the TH-D72A/E menus have also been designed for easy data, position and message entry. Often overlooked is the ability to use TH-D7A/E, TM-D700A/E, and TM-D710A/E as excellent field data entry and clipboard entry devices at many field events. Refer to: Individual Information Access The Kenwood individual radio displays enhance the distribution of ham radio information to a large number of users by giving them individual front panel and keypad access to all of the online APRS data. A common mistake of fixed operations with computers is the use of large display screens for large groups to see but which fails to recognize the individual needs of a given viewer. The individuality of APRS radios with individual displays spreads this data access throughout the users in the field. Overlay Characters on all Symbols The Kenwood TH-D72A/E has been expanded to show the overlay character of all symbols, not just the original subset of special symbols. This provides hundreds of new symbol combinations for better APRS application to new uses. Digipeating New TH-D72A/E is the first APRS HT to have a digipeater function. Each radio now has front panel access control to the digipeater function so that it can be turned on and off as needed to match the local situation. In addition, each TH-D72A/E can be used as a TEMPn-N digipeater in support of emergency operations when a user is having difficulty accessing the existing WIDEn-N network. Refer to: Voice Operating Frequencies The most important new feature of the new TH-D72A/E is the recognition of the value of the voice operator frequency as a fundamental communications parameter. Not only does the radio automatically include its own voice band frequency in every position packet, it also has special displays and features that make this information readily available. For example, the station list can be sorted to bring Frequency Objects to the top of the list in frequency order. Further, the radio can tune to these frequencies for quick QSO with a single press of the TUNE menu. EchoLink, IRLP or Winlink Frequencies New TH-D72A/E frequency TUNE function not only makes rapid QSY to another station operator easy, it also facilitates quick tuning to nearby EchoLink, IRLP or Winlink frequencies with the push of a single button. Future use of this capability is anticipated to automatically and seamlessly integrate callsign to callsign calling from RF via local, national and global ham radio VoIP systems. Note: If all you think of when you hear the word APRS is maps and stagnant icons, then you are not using the full potential of APRS. If all of the local information that can be of immediate value to the APRS HT or mobile operator is not showing up in your local area, then get active and get involved in supplying this content. APRS is a communication tool, not just an automated map. Use it. But in most cases, that means entering data, not just watching it. Kenwood has provided the APRS handheld and mobile information display capability, it is up to us to provide content! 14 CONTENTS TH-D72A/E
23 3 PREPARATIONS FOR OPERATING APRS 3.1 What Do I Need to Configure? Following need to be configured before start operating TH-D72A/E with APRS. Step 1: APRS data will be stamped with date and time. Therefore, the built-in clock must be set. Since the time acquired via the GPS receiver is UTC, Time Zone must be configured. Step 2: The station configured for My Callsign will be used as the originating station when APRS data is sent. You cannot send any APRS data from your station with the default value of NOCALL unchanged. Step 3: Select APRS (default) for data format for sending. Step 4: Set either of the bands on which the internal TNC handles APRS data communications. Step 5: Adjust the packet speed to suit the APRS network. Step 6: Your station s position is added to APRS data; therefore, you must configure your latitude and longitude. You can get your own position also from GPS. Step 7: Built-in Clock Select the template message (Position Comment) that is to be included in the position packet to describe the current situation of your station. Step 8: My Callsign Beacon Type You can store up to five comments containing any desired text using a maximum of 42 alphanumeric characters. Step 9: Data Band Packet Speed Configure your station icon. Step 10: Position Position Comment Select a method to transmit the beacon. Step 11: Status Text APRS Icon Select the packet path type. Step 12: Method of Beacon Transmission Packet Path Sound Set to enable or disable the beep sound to be emitted when an APRS packet is received or transmitted. TH-D72A/E CONTENTS 15
24 3 PREPARATIONS FOR OPERATING APRS Step 13: Set the receiver shut-off period for the battery saver. Step 14: The operating frequency will depend on what region of the world you are operating. You can begin operation using the frequency configured for the data band as follows: North America: MHz Europe: MHz Australia: MHz New Zealand: MHz Argentina: MHz Brazil: MHz Japan: MHz (9600 bps), MHz (1200 bps) Step 15: Battery Saver Press the [TNC] key to place the transceiver in APRS mode so as to operate APRS. Step 16: Frequency Setting to APRS mode Transmitting beacons Select the [BCON] key to transmit the beacon using the method selected in the above-mentioned Step CONTENTS TH-D72A/E
25 3 PREPARATIONS FOR OPERATING APRS 3.2 Configuration Follow the explanations below to configure each item listed in the previous section Built-in Clock Activating Your Mobile GPS Position To enter the time in your local zone, select Menu 196 (Auxiliary-Time Zone). Example: Set to -05:00 for Atlanta. Figure 3-1 Menu 196 (Auxiliary Time Zone) Press the [F] + [MARK] keys to enable the internal GPS unit. Once the internal GPS unit starts positioning (igps pictogram blinks), the built-in clock is automatically configured with the time data from the internal GPS unit. Figure 3-2 Display of Time and Date Setting Manually in the Menu To enter the value for the data, select Menu 194 (Auxiliary Date). K-type (USA and Canada): Set month, date, year in this order. E-type (Europe): Set date, month, year in this order. Example: To configure the date to be May 20, 2011 (K-type), refer to Figure 3-3. Figure 3-3 Menu 194 (Auxiliary Date) TH-D72A/E CONTENTS 17
26 3 PREPARATIONS FOR OPERATING APRS Select Menu 195 (Auxiliary-Time) and enter the value for the time. Example: To configure the time to be12:00, refer to Figure 3-4. Figure 3-4 Menu 195 (Auxiliary Time) My Callsign To enter your own callsign, select Menu 300 (APRS Basic Set My Callsign). Example: Enter a callsign such as W6DJY-7 to be registered. Refer to Figure 3-5. Figure 3-5 Menu 300 (Basic Set My Callsign) Beacon Type To determine a beacon type, select Menu 301 (APRS - Basic Set - Beacon Type). Generally, beacons are transmitted in APRS format, so selecting APRS enables a transceiver to transmit beacons in APRS format. Figure 3-6 Menu 301 (Basic Set Beacon Type) 18 CONTENTS TH-D72A/E
27 3 PREPARATIONS FOR OPERATING APRS Data Band To configure the data band, select Menu 310 (APRS - Int.TNC - Data Band). Figure 3-7 Menu 310 (Int.TNC Data Band) Packet Speed To configure the data speed, select Menu 311 (APRS - Int. TNC - Data Speed). Figure 3-8 Menu 311 (Int.TNC Data Speed) Position Using Internal GPS Press the [F] + [MARK] keys to enable the internal GPS unit. Once the internal GPS unit starts positioning (igps pictogram blinks), the position data from the unit become available. Figure 3-9 APRS Operating Frequency Using GPS Receivers To use with an external GPS receiver, disable the internal GPS unit. To configure for a GPS terminal, select Menu 331 (APRS - COM Port). Baud Rate: 4800 bps (select the same baud rate as that is configured for a GPS receiver.) Input: GPS (enable the GPS receiver) Output: OFF (if no WAYPOINT, DGPS are used.) TH-D72A/E CONTENTS 19
28 3 PREPARATIONS FOR OPERATING APRS Figure 3-10 Menu 311 (COM Port Input) Manually Entering Your Position To use the position configured in the menu, disable the internal GPS unit. To configure for a GPS terminal, select Menu 331 (APRS - COM Port). Input: Off Figure 3-11 Menu 311 (COM Port Input) To configure the position of your own station, select Menu 360 (APRS My Position). Name: any name (Enter a name familiar with you. For instance, Home name, etc.) Latitude: Enter a latitude value. Longitude: Enter a longitude value. Example: Configure a latitude of ' N and a longitude of ' W. Refer to Figure Figure 3-12 Menu 360 (My Position) Position Comment To enter a position comment, select Menu 380 (APRS - Comment - Position Comment). Figure 3-13 Menu 380 (Comment Position Comment) 20 CONTENTS TH-D72A/E
29 3 PREPARATIONS FOR OPERATING APRS Status Text To enter a status text, select Menu 390 (APRS - StatusText). Select the text number. Pressing the [MHz] key displays [ ] as a mark representing the status text is in use. Figure 3-14 Menu 390 (StatusText Number) Configure the frequency how frequently the status text is sent for transmitting the position packets. Configure the status text. Figure 3-15 Menu 390 (StatusText TX Rate) Figure 3-16 Menu 390 (StatusText Text) APRS Icon To determine an icon for your own station, select Menu 3C0 (APRS - Icon). Figure 3-17 Menu 3C0 (Icon) Method of Beacon Transmission Select Menu 3D0 (TX Beacon Method) to configure the method to transmit the beacon. Manual is the default value. To transmit beacons automatically, set to Auto or SmartBeaconing in the menu. Figure 3-18 TX Beacon Method Menu TH-D72A/E CONTENTS 21
30 3 PREPARATIONS FOR OPERATING APRS Packet Path To configure the packetpath, select Menu 3H0 (APRS - PacketPath). Configure the packet path type. Set WIDE1-1. Figure 3-19 Menu 3H0 (PacketPath Type) Figure 3-20 Menu 3H1 (PacketPath WIDE1-1) Set the number of packet hops. Figure 3-21 Menu 3H2 (PacketPath Total) Sound To configure the sound level, select Menu 3T0 (APRS Sound). Figure 3-22 Menu 3T0 (Sound RX Beep) Battery Saver To enable or disable the battery saver, select Menu 110 (Radio - Battery - Batt.Saver). Figure 3-23 Menu 110 (Battery Batt.Saver) 22 CONTENTS TH-D72A/E
31 3 PREPARATIONS FOR OPERATING APRS APRS Operating Frequency Example: MHz, the APRS operation frequency is configured for operation frequency for the data band. Figure 3-24 Frequency Placing a Transceiver in APRS mode Press the [TNC] key to place a transceiver in APRS mode. After the message Opening TNC appears for three seconds, APRS appears and the APRS data communication capability becomes active. (Data communications take place on the data band.) Transmitting a Beacon Press the [BCON] key to transmit a beacon. The beacon is transmitted according to the method selected in Menu 3D0 (TX Beacon Method). TH-D72A/E CONTENTS 23

32 4 GPS 4.1 What is GPS? GPS, standing for Global Positioning System, is becoming common nowadays and following is a brief introduction. The American Defense Department developed GPS originally for military operations. The system is available for use by the general public. For example, anybody can use GPS in association with modern vehicle navigation systems. Position precision for public use is 15 m or 50 feet. Moreover, precision can be improved when used for vehicle navigation and aboard ships through use of map matching technology and differential GPS techniques. A total of 24 or more GPS satellites are at a high-level altitude of approximately 20,000 km or 12,500 miles on six circular tracks with orbital radii of approximately 26,000 km or 16,200 miles. Therefore, there are four or more satellites located in each orbital track. GPS typically operates at the frequency of MHz with the bandwidth of MHz. Because multiple GPS satellites transmit signals at the same frequency, spread-spectrum (SS) modulation is used. Due care must be taken when installing amateur radio equipment and antennas for use on the 430 MHz or 1200 MHz bands to prevent from interfering with GPS signals. Figure 4-1 GPS IIR Satellite in Orbit Position Determination Principle The GPS receiver receives the radio signals transmitted from the GPS satellites and measures the time duration between when the signal leaves the satellite and when the signal arrives at the GPS receiver. The receiver measures the time duration between when the signal leaves the satellite and when the signal arrives at the GPS receiver. Knowing this time allows calculation of the distance that the signal traveled from that particular satellite. By receiving multiple signals from different satellites and doing this distance calculation multiple times, the intersection of the spherical surfaces that represent the respective radius distances to the various satellites will determine a single point. The precision of the determination of the intersecting point relies on the satellites and the data collected. 24 CONTENTS TH-D72A/E
33 4 GPS Datum (Geodetic Survey System) The latitude and longitude information required by the GPS receiver does not allow for accurate representation of the unevenness of the Earth s surface. For use with GPS, the current standard that defines the precise shape of the Earth is called WGS-84. By using this standard in conjunction with mapping standards for each country, accurate position plotting on a map can be done GPS and APRS Position Format Although position can be described in many different formats, such as degrees, degrees and minutes, and degrees, minutes and seconds, the GPS system and APRS have standardized on the degrees and decimal minutes format. Just like it is important to use proper international phonetics when spelling on the air, it is important in APRS as in any communications system to have a default standard for position. All operators should be trained to use the DDD MM.mm format by default in voice communications just like in the data formats. Using these standards on the air will prevent communications errors, confusion, repeats, and conversions. APRS Standard: Geographic Coordinates Latitude Longitude Format DD MM.mm (degrees and minutes) DDD MM.mm (degrees and minutes) N Example W TH-D72A/E CONTENTS 25
34 4 GPS 4.2 GPS Receivers Weather Station External GPS receiver COM terminal Line filter Figure 4-2 Connection Example of GPS Receiver Garmin GPS18xPC The GPS18xPC is a GPS module receiver. And it interfaces via a 9-pin D-Sub RS-232C serial port. Refer to the wiring example using commonly-available DB-9 connector (male), and a cable with 3-conductor plug (Kenwood service part: E ). Power is sourced from the 12VDC supplied from a vehicle cigarette lighter socket. Because there is no screen, you cannot use the Waypoint function. RXD TXD GND White (to DATA IN on GPS/ WS) Red (to DATA OUT on GPS/ WS) Shield (to GND on GPS/ WS) (solder side) DB-9 connector (Male) Attach the line filter to the cable. (Kenwood service part: L ) Figure 4-3 Cable Connection Example (Garmin GPS18xPC) AvMap G5 The AvMap G5 comes with a Kenwood-ready cable and exclusive APRS interface built right into the panel. You can watch APRS activity on the AvMap G5 screen without having a PC. It also can be configured to navigate to your favorite APRS station Other GPS Receivers The GPS receiver used must be based on NMEA 0183 format ( The following RS-232C signal levels are allowed for using the TH-D72A/E: Low level: - 15 V to 0.5 V High level: +3.0 V to +15 V You cannot use a GPS receiver with a USB connector. 26 CONTENTS TH-D72A/E

35 4 GPS Settings for Geodetic Survey System For APRS, always configure the WGS-84 Geodetic Survey System for your GPS receiver. 4.3 Internal GPS The GPS unit is mounted on the upper surface of the body. The GPS unit incorporates SiRFstar III chipset that is highly accepted in the market. Figure 4-4 Internal GPS Unit GPS Satellite Information Display During the GPS positioning, you can check the current status on the GPS satellite information display. The GPS satellite information display provides real-time data of the sky view, satellites signal strength and status of the positioning. The display also helps you to get better reception by changing the direction of the GPS antenna or making any other adjustments. 1 Sky View The positions of the satellites indicated by the satellite numbers are plotted on the satellite location chart. The satellite location chart shows the azimuth and elevation of the satellites. The outer circle expresses the 360 of the azimuth. The sign of N at the top indicates North, the right corresponds to East, the bottom to South and the left to West accordingly. The elevation is represented by the proximity to the center; the outer circle shows 0 (horizontal position) and the center indicates 90 (zenith). Observing the satellites positions, you can see they move little by little over time. 2 Signal strength of the satellite The signal strength is indicated by the bars appearing on the top of each satellite number. The bar is based on a 15-point scale. The solid bar indicates the satellite is used for GPS positioning and only the frame of the bar means the signal of the satellite is received but not used for positioning. 3 Status of positioning 2D indicates the unit receives signals from three GPS satellites to perform two-dimensional positioning with latitude and longitude. 3D means the unit receives signals from more than four GPS satellites to perform threedimensional positioning with latitude, longitude and altitude. TH-D72A/E CONTENTS 27
36 4 GPS Figure 4-5 GPS Satellite Information Display To display the position information display, $GPGSV or $GPGSA should be selected in Menu 211 (GPS Setup Sentence) Automatic Adjustment of the Built-in Clock While the internal GPS unit is active, the transceiver s built-in clock is automatically configured with the time and date from the internal GPS unit. While the internal GPS unit is inactive, set the clock manually. Timing of automatic adjustments: First positioning after the power is turned ON Once in 24 hours The moment the built-in clock reads 00:00, if the internal GPS unit is positioning, the time data from the GPS unit is set to the radio s built-in clock. Figure 4-6 Time and Date Display North Up and Heading Up North Up keeps North at the top of the display. This is convenient when checking your destination or the location (direction) of another station on a printed map. In contrast, Heading Up keeps your traveling direction at the top. So, when traveling to a destination or another station by car or any other mode of traveling, the display conveniently allows one to definitely know which way to go at a crossing in real-time. (Thus it can be used as a portable navigation device.) Pressing the [F] key in the Time, Altitude, Travel direction, speed display, Target point distance, Travel direction display, or Station List menu display switches between North Up and Heading Up. 28 CONTENTS TH-D72A/E
37 Time, Altitude, Travel direction, speed display 4 GPS Figure 4-7 North Up Target point distance, Travel direction display Figure 4-8 Heading Up Figure 4-9 North Up Station List menu (4 th page) Figure 4-10 Heading Up Figure 4-11 North Up Figure 4-12 Heading Up TH-D72A/E CONTENTS 29

38 4 GPS NMEA Sentence Output This function enables exporting the NMEA 0183 raw data from the internal GPS unit via the PC (USB) connector. Searching the web reveals many applications that utilize the raw data. Some convert the raw data into Google Earth format and others display the satellite information or save the trajectory. Or, you can view the raw data using HyperTerminal or some other terminal software. Figure 4-13 Displaying the Raw Data TH-D72A/E can generate the following seven types of NMEA data. $GPGGA, $GPGLL, $GPGSA, $GPGSV, $GPRMC, $GPVTG, $GPZDA Use Menu 211(GPS - Setup - Sentence) to select the type of NMEA sentence that is output from the internal GPS unit to a PC. Figure 4-14 Menu 211 (Sentence) Press the [MHz] key to toggle between adding and deleting the sentence. The mark appears to the left of the added sentence. $GPGGA and $GPRMC cannot be deleted, as they are necessary for BEACON transmission and satellite information displays. To display the position information display, $GPGSV or $GPGSA should be selected. 30 CONTENTS TH-D72A/E
39 4 GPS Internal GPS Unit Save If the reception is inferior (such as while you are in a building), the GPS unit continues searching for a satellite resulting the battery longevity. To prevent unnecessary battery consumption, this function will turn the GPS power source Off for the programmed duration of time if position data is not determined during the maximum capture time (5 minutes). Set the timer through Menu 201. Possible choices are Off, 1 min, 2 min, 4 min, 8 min and Auto. Maximum Catching Time GPS ON (Catching + Tracking) G P S O F F Maximum Catching Time GPS ON (Catching + Tracking) G P S O F F Maximum Catching Time GPS ON (Catching + Tracking) G P S O F F Maximum Catching Time GPS ON (Catching + Tracking) approx. 5 min. approx. 1 min. approx. 5 min. approx. 1 min. approx. 5 min. approx. 1 min. approx. 5 min. Figure 4-15 GPS Unit Behavior if 1 min is Selected G P S O F F Maximum Catching Time GPS ON (Catching + Tracking) G P S O F F Maximum Catching Time GPS ON (Catching + Tracking) GPS OFF Maximum Catching Time GPS ON (Catching + Tracking) GPS OFF Maximum Catching Time GPS ON (Catching + Tracking) GPS OFF Figure 4-16 GPS Unit Behavior if Auto is Selected Maximum Catching Time GPS ON (Catching + Tracking) approx. 5 min. approx. 1 min. approx. 5 min. approx. 2 min. approx. 5 min. approx. 4 min. approx. 5 min. approx. 8 min. approx. 5 min Battery Operating Time during the Concurrent Use of the Internal GPS Unit Assumed uses of the TH-D72A/E include transmitting beacons on band A in APRS mode and transmitting voice on band B in dual band mode with the internal GPS unit on. Following is the table that provides the estimated battery operating time. (Transmission 6 seconds/ reception 6 seconds/ standby 48 seconds) Table 4-1 Battery Operating Time Battery Type Operating Time Normal Mode (Output Power: High) GPS Only Mode Internal GPS: Inactive Internal GPS: Active Internal GPS: Active PB-45L lithium ion battery Approximately 6 hours Approximately 5 hours Approximately 35 hours TH-D72A/E CONTENTS 31
40 4 GPS GPS Only Mode The GPS unit has two operation modes: Normal and GPS Only modes. In the Normal mode, you can use the functions of the transceiver and of the internal GPS unit at the same time. In the GPS Only mode, you cannot use it as a normal transceiver. Operating in the GPS Only mode will enable a longer battery working time. If you wish to use the TH-D72A/E as a GPS logger, we recommend setting to the GPS Only mode. Battery Type Table 4-2 Battery Life Operating Time Normal Mode (Output Power: High) GPS Only Mode Internal GPS: Inactive Internal GPS: Active Internal GPS: Active PB-45L lithium ion battery Approximately 6 hours Approximately 5 hours Approximately 35 hours You can use Menu 200 (GPS Int. GPS Operating Mode) to set to the GPS Only mode. When the operating mode is set, the transceiver restarts in the set mode. In the GPS Only mode, the internal GPS unit is always ON. Also, following is a display that appears instead of the frequency display. Figure 4-17 GPS Only Display Log Function The internal GPS unit on the TH-D72A/E can retain up to 5,000 points of log data. Saved information includes latitude, longitude, altitude, traveling direction, speed, time and date. The GPS logger function of the TH-D72A/E helps a lot on travel, cycling, mountain climbing or other outdoor activities. To start the log, press the [TNC] key in the function mode or select function menu number F-2. While the log function is active in Normal mode, Log Start appears for 5 seconds, followed by the illuminated ilog pictogram. (ilog pictogram blinks during the GPS positioning.) If the log is active while the internal GPS unit is inactive, the GPS unit also becomes active automatically. Figure 4-18 Log Start Display Figure 4-19 While the log is active 32 CONTENTS TH-D72A/E
![4 GPS Pressing the [TNC] key again in the function mode or selecting the function menu number F-2 stops logging. While the log function is inactive, Log Stop appears for 5 seconds.](/docs-images/72/68082528/images/41-1.jpg "Even if the log is inactive, the internal GPS unit continues to be active.")
41 4 GPS Pressing the [TNC] key again in the function mode or selecting the function menu number F-2 stops logging. While the log function is inactive, Log Stop appears for 5 seconds. Even if the log is inactive, the internal GPS unit continues to be active. In GPS Only mode, while the log is active, appears as the Track Log icon, and while the log is inactive, appears as the Track Log icon. Figure 4-20 GPS Only Mode The available log record methods are Time, Distance, and Beacon. Select the record method that suits the means of traveling you choose, the traveling distance and the environment of the location. For example, if there are many turns, a correct logging may not be possible with Distance and you should set to Time instead. Conversely, when you are forced to stay at the same place for a long time because of a traffic jam or for some other reason, Distance will be more efficient. Use Menu 230 (GPS - Log Setup - Record Method) to set the log record method. Time records the log with the time spacing specified in Interval. The possible value of Interval is between 2 and 1800 seconds. Figure 4-21 If 10 seconds are configured for Interval Distance records the log entry after a transceiver leaves exceeding the preconfigured distance from the point where the log was recorded last. The value of Distance can be configured in the range from 0.01 to The unit of Distance can be selected from km, mile and nm in Units 1 (Menu No. 3V0) in the APRS menu. Figure 4-22 If 0.01 miles are configured for Distance Configuring Beacon enables recording the log immediately after a beacon is transmitted each time. Using SmartBeaconing in conjunction enables more efficient logging at a turn in the road. Figure 4-23 Normal Logging Method TH-D72A/E CONTENTS 33

![The Log Memory screen is the 4 th page from the Latitude Longitude screen to be accessed by repeatedly pressing the [OK] key.](/docs-images/72/68082528/images/42-1.jpg "Figure 4-26 Log Memory Screen You can set whether or not the log is overwritten when the log memory becomes full.")

42 4 GPS Figure 4-24 During the Use combined with SmartBeaconing To delete the log data, select Menu 220 (GPS - Track Log - Clear All Data). Select Yes to delete the log data. Figure 4-25 Log Data Deletion Screen Memory usage for logging can be viewed in the Log Memory screen. The Log Memory screen is the 4 th page from the Latitude Longitude screen to be accessed by repeatedly pressing the [OK] key. Figure 4-26 Log Memory Screen You can set whether or not the log is overwritten when the log memory becomes full. Selecting ON in Menu 221 (GPS Track Log Wrap When Full) will allow old data to be overwritten with new data. Selecting OFF will display Log Full!! when the memory becomes full and new data will no longer be stored. Figure 4-27 Wrap Setting Screen "Wrap When Full" is turned on "Wrap When Full" is turned off "Log Full!!" Screen 34 CONTENTS TH-D72A/E
43 4 GPS Mark Waypoint You can register the current location as a Mark Waypoint on the TH-D72A/E. A Mark Waypoint includes data of latitude, longitude, altitude, time, name and icon, and up to 100 points can be registered. To register a Mark Waypoint, press and hold the [MARK] key. If there is no GPS data positioned by GPS, you cannot register a Mark Waypoint. After the registration of a Mark Waypoint, the registration screen appears for approximately 10 seconds. Press the [OK] key in the registration screen to edit the name and icon data. You can also edit name and icon information afterward. Figure 4-28 Registration Screen The registered Mark Waypoint can be viewed in the Mark Waypoint list. Press the [MARK] key to display the Mark Waypoint list. [OK] [OK] [OK] [ESC] [ESC] [ESC] Press the [CLR (A/B)] key to delete the Mark Waypoint in the Mark Waypoint list. Pressing the [MENU] key opens the Mark Waypoint menu screen where you can edit the name and icon, and copy the displayed Mark Waypoint to the Target Point Target Point Registering a Target Point allows you to know the distance and direction from your current location to the Target Point. The direction display can be switched between North Up and Heading Up. Up to 5 Target Points can be registered. The registration of a Target Point can be made in two ways: entering latitude and longitude manually in the menu and copying an existing Mark Waypoint. To make a registration in a menu, select Menu 240 (GPS - Target Pt.). Selecting the Target Point number and pressing the [MHz] key displays mark next to the number. Then, enter a Target Point name, latitude and longitude. Figure 4-29 Target Point Menu The information with a Mark Waypoint can be registered as a Target Point. For example, registering a rest area on the highway as a Mark Waypoint will be useful to know, on the return trip, within how much time or distance you can reach the rest area. To copy a Mark Waypoint to a Target Point, go to the menu in the Mark Waypoint list. TH-D72A/E CONTENTS 35
44 4 GPS The distance from the current location to the Target Point can be confirmed in the Target Point screen. Target Point display is the third page from the Latitude Longitude display reached by repeatedly pressing the [OK] key. However, if no GPS data is positioned by GPS, Finding GPS satellites screen appears, and, therefore, you cannot switch to the Target Point screen. Pressing the [F] key in the Target Point screen toggles between North Up and Heading Up. [F] North Up Screen Heading Up Screen SBAS SBAS (Satellite-Based Augmentation System) is a collective term given to the technologies to correct GPS errors using geostationary satellites. SBAS is referred to as WAAS (Wide Area Augmentation System) for the USA, as EGNOS (European Geostationary Navigation Overlay Service) for Europe and as MSAS (MTSAT Satellite-based Augmentation System) for Japan. To configure SBAS, go to Menu 212 (GPS - Setup - SBAS). Note, however, that you cannot configure the SBAS function to be enabled if anything other than OFF is configured for Battery Save in Menu 201 (GPS - Int. GPS - Batt.Saver). Figure 4-30 SBAS Menu Note: While SBAS is active, ensure that the sky is not obstructed in the direction of the SBAS satellite during the positioning. Upon receipt of a signal from WAAS, the satellite number 35, 47, 48, 51, or 34 appears in the GPS satellite information screen. Upon receipt of a signal from EGNOS, the satellite number 33, 37, 44, or 39 appears in the GPS satellite information screen. Upon receipt of a signal from MTSAT, the satellite number 42 or 50 appears in the GPS satellite information screen. The signal from satellites that are located in a geostationary orbit is weaker and more difficult to capture than the signals of other GPS satellites, and therefore, positioning takes longer length of time. Information regarding whether or not the data received from an SBAS satellite is used for computation in the GPS unit is not displayed. Turning on the SBAS function does not guarantee that the margin of positioning error becomes smaller. 36 CONTENTS TH-D72A/E

45 5 APRS SOFTWARE FOR YOUR PC 5.1 UI-View Introduction of UI-View32 UI-View32 is APRS client software designed to allow a PC to display APRS stations on a map and to use various APRS functions such as Internet gateway access. It allows you to display on a map on your PC the APRS stations received by a TH-D72A/E and, in addition, connect to an Internet gateway. In doing so, APRS allows access to a much larger set of stations. To start, you will require a UI-View32 registration number (Registration No.) and a certification number for the APRS server (Validation No.). Refer to the following link to download the latest version of UI-View32 software, to register and to obtain detailed setting and usage information. Note: The above URL link is subject to change. If the link is broken, search for UI-View32 using any Internet search engine to quickly locate the appropriate home page. Figure 5-1 APRS Stations Display TH-D72A/E CONTENTS 37
 connector on the rear of the TH-D72A/E operation panel to the USB connector on your personal computer.")
46 5 APRS SOFTWARE FOR YOUR PC Connecting a PC Use the USB cable that comes with the TH-D72A/E to connect the PC (USB) connector on the rear of the TH-D72A/E operation panel to the USB connector on your personal computer. Figure How to Configure UI-View32 For use of UI-View32 with the TH-D72A/E for APRS communications, the TH-D72A/E needs to be placed in KISS mode. KISS (Keep It Simple, Stupid) mode is a special mode to allow a PC to control the TNC protocols. 1. Press the [TNC] key to place the TH-D72A/E in packet mode. Ensure that PACKET12 appears and the transceiver is placed in packet mode. 2. Open the Comms Setup window from the Setup pulldown menu in the UI-View In the Comms Setup window, configure for UI-View32 the communication conditions of the PC terminals in the TH-D72A/E as follows: Baud Rate: 9600, Data Bits: 8, Stop Bits: 1, Parity: None Com port: the same port number of a PC as that is assigned to the virtual COM port of the TH-D72A/E Figure 5-3 Comms Setup Window 4. From the Host mode dropdown list, select KISS and click the Setup button next to it. 5. The KISS Setup window opens. Selecting TNC2 in Easy Setup and then clicking the OK button closes the KISS Setup window. 38 CONTENTS TH-D72A/E

47 5 APRS SOFTWARE FOR YOUR PC Figure 5-4 KISS Setup Window 6. Click the OK button in the Comms Setup window to close the Comms Setup window. UI-View32 sends a command to TH-D72A/E s built-in TNC that is changed to the KISS mode. During the process, STA and CON on the TH-D72A/E s display blink simultaneously 6 times. Starting from this point, APRS communications starts followed by the configuration for UI-View32. The configurations associated with APRS for TH-D72A/E (in Menu 300 to 3Y0) has no influence to this operation. For details of other configurations for UI-Vew32, refer to the descriptions in the help file and other reference materials. Note: Even if you select TH-D7 or TM-D700 for TNC type in the Comms Setup window of UI-Vew32, you cannot expect proper operation due to incompatibility of PC commands. Ensure that the transceiver is placed in KISS mode as described above. The built-in TNC has 2 kb memory to store data for KISS mode for TX and RX. We do not recommend you select D700 for Easy Setup in the KISS Setup window of UI-View23 due to the incompatibility of PC commands. As explained above, select TNC2 for TH-D72A/E. When changing the PACKET transfer rate of the built-in TNC from 1200 bps (default) to 9600 bps, modify the Into KISS section of Comms Setup window as follows: (Add the HB 9600 command.) 1: ^M 2: HB : KISS ON 4: RESTART TH-D72A/E CONTENTS 39
48 5 APRS SOFTWARE FOR YOUR PC 5.2 Available Software associated with APRS The APRS program currently runs on a number of platforms. These programs are constantly being updated and can be downloaded from the Internet. Most programs are shareware and the latest versions are available at the TAPR (Tucson Amateur Packet Radio) FTP site: ftp://ftp.tapr.org/ aprssig. APRSdos (ftp://ftp.tapr.org/aprssig/dosstuff/aprsdos) Written by Bob Bruninga, WB4APR, the Father of APRS. Runs on MS-DOS. MacAPRS (ftp://ftp.tapr.org/aprssig/macstuff/macaprs) Written by Mark Sproul, KB2ICI and Keith Sproul, WU2Z. APRSdos (ftp://ftp.tapr.org/aprssig/dosstuff/aprsdos) Runs on Macintosh computers using Operating System 7 or higher. WinAPRS (ftp://ftp.tapr.org/aprssig/winstuff/winaprs) Written by Mark Sproul, KB2ICI and Keith Sproul, WU2Z. Runs on Windows 95 or higher, or on Windows Win32s. javaprs (ftp://ftp.tapr.org/aprssig/javastuff) Written by Steve Dimse, K4HG Runs on JAVA. APRSplus (ftp://ftp.tapr.org/aprssig/winstuff/aprsplus) Written by Brent Hildebrand, KH2Z Runs on Windows 95 or higher, or on Windows Win32s. UI-View (ftp://ftp.tapr.org/aprssig/winstuff/ui-view) Written by Roger Barker, G4IDE SK AGWTracker ( Written by George Rossopulos, SV2AGW Note: The above URL links are available as on the date written at the end and subject to change. 40 CONTENTS TH-D72A/E
49 6 OPERATIONAL EXAMPLES OF APRS While monitoring APRS stations from around the world that may appear on your map, you can easily send messages to them. An interest is now growing in APRS QSOs where one station may call CQ looking for responses in the conventional style of a ham contact. Due to the number of characters being restricted, it can be customary to send short sentences using abbreviated words similar to operating CW. Searching for weather information can reveal that even adjacent nearby areas can have dramatically differing weather patterns. Or, operating outdoors and timing transmissions to coincide with overhead satellite passes can result in successful satellite communications using only a handheld transceiver. The opportunities for many activities exist even without installing a fixed station at home. Below are two APRS operational examples. In USA and Canada, the national APRS frequency is MHz. 6.1 Let s Go Mobile Overview Incorporating an internal GPS unit, TH-D72A/E permits APRS operations on its own. Needless to say, it is also suitable for outdoor mobile operations. When traveling outdoors with the handheld transceiver in hand, you can search for nearby stations with position beacons to exchange text messages and establish voice contact. To enjoy APRS operation in unfavorable locations, such as in a building or restaurant, some people set up the mobile station as a digipeater. Furthermore, APRS beacons that include latitude, longitude, speed, direction and altitude information are most suitable for hot-air balloon rides and hang gliding, while the support team usually tracks the whereabouts of the balloon or glider from the ground. In these cases, since it is necessary to transmit beacons with shorter intervals than usual, operation is on a different frequency from normal APRS operations. Some applications such as Google Map APRS ( have a function to store the movement trajectory of specified stations and can be utilized to review the flight of the day or to analyze the trajectory in conjunction with the meteorological data provided by the nearby weather station. Also, the following are some other features that increase convenience of text messaging while moving Automatic Reply Function This is a function to return a predefined message such as Pse QRX. Will return later at 12:35 automatically when an APRS message is received. Auto Reply is only for passing along special information to anticipated message senders when the operator may temporarily not be able to respond. It should not be left on for routine operation in most cases because it adds unnecessary network load. The sending station will always get an ACK (an acknowledgment message), and this is sufficient to know that the message was delivered in most cases. TH-D72A/E CONTENTS 41
50 6 OPERATIONAL EXAMPLES OF APRS Entering Characters Characters can be entered using the encoder or 10-key numeric keypad as you would when texting from a cell phone Decay Algorithm Function If the position beacon for a mobile station is configured to be transmitted at a fixed time interval, it would be inefficient use of air-time to continue transmitting at this fixed interval when traffic is slowmoving. The beacon transmission interval gradually increases by using a decay algorithm, thus cleverly reducing air-time used by the station. Traffic Jam! Transmits the position beacon Initial interval: 1 minute 2 minutes 4 minutes 8 minutes 16 minutes 32 minutes 32 minutes Figure 6-1 Decay Algorithm Decay Algorithm steps the transmission interval of the beacon down from 1 (if the automatic transmission interval is set to 1 minute) to 2 to 4 to 8 to 16 to 32 minutes when the mobile station is not moving. On the TH-D72A/E, when the interval for automatic transmission is greater than that of Decay Algorithm, the automatic transmission interval is used. The speed at which Decay Algorithm decides that the car is parked can be set using the Stopped dropdown list in the Basic tab of the APRS window of the MCP-4A programming software. If the mobile station s speed is less than this setting, then Decay Algorithm will start. The speed setting can be changed only in the MCP-4A program Proportional Pathing Function This function automatically changes the transmit packet path (relay route) as the automatic transmission interval elapses while traveling. The function substantially reduces load on the entire network by maintaining the packet update frequency at the automatic transmission interval for nearby stations that do not require relaying, while thinning the number of relay hops for distant stations that do not require frequent updates. Transmits every 1 minute Transmits every 1 minute Transmits every 1 minute Transmits every 1 minute Transmits every 1 minute Transmits every 1 minute Transmits every 1 minute DIRECT (No hop) WIDE1-1 (1 hop) DIRECT (No hop) WIDE1-1,WIDE2-1 (2 hops) DIRECT (No hop) WIDE1-1 (1 hop) DIRECT (No hop) WIDE1-1,WIDE2-2 (3 hops) Figure 6-2 Example of path switchover operation of Proportional Pathing (when the packet path is set to WIDE1-1, WIDE2-2) The speed at which Proportional Pathing decides that the car is moving can be set using the Moving dropdown list in the Basic tab of the APRS window of the MCP-4A programming software. If the mobile station s speed exceeds this setting, then Proportional Pathing will start. The speed setting can be changed only in the MCP-4A program. 42 CONTENTS TH-D72A/E
51 6 OPERATIONAL EXAMPLES OF APRS Simultaneously using Decay Algorithm and Proportional Pathing Refer to the diagram below to understand what occurs when both Decay Algorithm and Proportional Pathing are used at the same time. Velocity (Knots) Status Decay Decay Proportional Proportional Proportional Proportional Decay Now Proportional Pathing Returns to Decay Algorithm Figure 6-3 Switching between Decay Algorithm and Proportional Pathing (when Stopped = 1 (knot); Moving = 3 (knots)) As the example above shows, when the mobile s speed exceeds 3 knots, Decay Algorithm stops and Proportional Pathing begins. Similarly, when the mobile s speed drops below 1 knot, then Proportional Pathing stops and Decay Algorithm begins. Note: The Stopped value cannot be configured higher than the Moving value. Also, the Moving value cannot be configured lower than the Stopped value SmartBeaconing (Written by Steve Bragg, KA9MVA) SmartBeaconing was developed by Mr. Steve Bragg, KA9MVA, and Mr. Tony Arnerich, KD7TA, in SmartBeaconing uses the speed information that is received from the GPS receiver and traveling direction to efficiently transmit the beacon. There are two factors that come into play when determining how SmartBeaconing functions: distance traveled since last beacon transmission, addressed by using Variable Rate Beaconing to change the transmission interval with speed, and heading change since last beacon transmission, referred to as Corner Pegging Variable Rate Beaconing (Transmission Interval Changes with Speed) When your mobile station is moving at a speed less than LOW SPEED as set in the menu, the position beacon repeatedly transmits at the interval of SLOW RATE as set in the menu. When your mobile station is moving faster than HIGH SPEED as set in the menu, the position beacon repeatedly transmits at the interval of FAST RATE as set in the menu. And if your mobile is traveling at any speed between LOW SPEED and FAST SPEED, then the beacon transmits at an interval that varies linearly according to the speed traveled. The transmission interval extends longer as the speed becomes slower, and the interval becomes shorter as the speed gets faster. Table 6-1 Relationship between Speed and Beacon Transmission Interval Over HIGH SPEED Speed FAST RATE Transmission Interval Under HIGH SPEED (Only when HIGH SPEED LOW SPEED) Over LOW SPEED FAST RATE x HIGH SPEED / current speed = transmission interval time (Only when HIGH SPEED LOW SPEED) Under LOW SPEED SLOW RATE TH-D72A/E CONTENTS 43
52 6 OPERATIONAL EXAMPLES OF APRS Menu Item Table 6-2 Configuration Example Configured Value LOW SPEED 5 HIGH SPEED 70 SLOW RATE FAST RATE 30 minutes 120 seconds Table 6-3 Variable Rate Beaconing Example: (with LOW SPEED = 5, HIGH SPEED = 70, SLOW RATE = 30 min, FAST RATE = 120 sec) Speed TX interval Time (FAST RATE = HIGH SPEED Speed) seconds (2 minutes) seconds (2 minutes) seconds (2 minutes and 20 seconds) seconds (2 minutes and 48 seconds) seconds (3 minutes and 30 seconds) seconds (4 minutes and 40 seconds) seconds (7 minutes) seconds (14 minutes) seconds (28 minutes) seconds (30 minutes) (min.) 35 Speed vs TX Interval Time 30 TX Interval Time Speed Figure 6-4 Speed vs TX Interval Time Note: The unit of Speed can be configured by using Menu 3V Corner Pegging (Transmission after Heading Change) When the mobile station s speed is above LOW SPEED, Corner Pegging begins operating. A Corner Pegging position beacon will be transmitted when the heading difference (the compass heading of the present direction of travel subtracted from the compass heading transmitted in the previous position beacon) exceeds the threshold value. The heading difference is the compass heading of the present direction of travel (in degrees) subtracted from the compass heading transmitted in the previous position beacon. (Technical note: only the absolute value of the heading difference, normalized to the first and second quadrants, is used.) The threshold value called TURN THRESHOLD combines a fixed angle threshold, called TURN ANGLE, with a constant called TURN SLOPE, times ten, divided by the present speed. You can use the formula below to calculate TURN THRESHOLD. 44 CONTENTS TH-D72A/E
53 6 OPERATIONAL EXAMPLES OF APRS By changing the value of TURN SLOPE, you can adjust how Corner Pegging responds as the mobile station executes curves. When the value of TURN SLOPE is increased, a large heading angle change is necessary to cause a position beacon transmission, especially at low speeds. When the value of TURN SLOPE is reduced, the effect of speed on Corner Pegging is reduced, as the constant TURN ANGLE becomes the controlling term in the equation. A value for TURN SLOPE of 110 (in units of 10 degrees per mph) has been experimentally determined to be a good value for vehicles on typical roads. Corner Pegging Formula: TURN THRESHOLD = TURN ANGLE + 10 x TURN SLOPE / SPEED The above formula is based on the reality of how a mobile station executes turns: when traveling at slow speed, it can turn acute angles, but when traveling at high speeds, it turns only shallow angles. In other words, TURN THRESHOLD varies inversely with speed: at a low speed, the threshold becomes large, while at a high speed the threshold becomes small. To prevent the Corner Pegging beacon from transmitting too often and causing QRM, there is a timer value called TURN TIME. The Corner Pegging position beacon is not transmitted until TURN TIME seconds have elapsed since the previous beacon transmission, regardless of which method (Corner Pegging or Variable Rate Beaconing) caused the previous beacon. Table 6-4 Conditions for Corner Pegging Operation Over HIGH SPEED Speed Under HIGH SPEED Over LOW SPEED (Only when HIGH SPEED LOW SPEED) Under LOW SPEED Corner Pegging Yes Yes No Speed Table 6-5 Configuration Example Table 6-6 Corner Pegging Operation Example: (with TURN ANGLE = 28, TURN SLOPE = 26) TURN SLOPE Menu Item Note: When TURN THRESHOLD exceeds 120, the value will be corrected to 120. Configured Value LOW SPEED 5 TURN ANGLE 28 TURN SLOPE TURN TIME TURN SLOPE/ Speed (Cut off after the decimal point) (1) 26 (x10 /speed) 30 seconds TURN ANGLE (2) TURN THRESHOLD (3) = (1) + (2) (x10) (x10) (x10) (x10) (x10) (x10) (x10) (x10) (x10) (x10) TH-D72A/E CONTENTS 45
54 6 OPERATIONAL EXAMPLES OF APRS (degrees) 140 Speed vs Turn Threshold Turn Threshold Speed Figure 6-5 Speed vs Turn Threshold Operation Example Here are the TH-D72A/E default configurations for position beacon transmissions using the SmartBeaconing configuration as shown below. Table 6-7 SmartBeaconing Configuration Values Menu Item Configured Value LOW SPEED 5 HIGH SPEED 70 SLOW RATE FAST RATE 30 minutes 120 seconds TURN ANGLE 28 TURN SLOPE TURN TIME 26 (x10 /speed) 30 seconds Note: If SmartBeaconing does not result in appropriate beacon transmissions, then you must re-configure individual parameters so as to more closely match driving conditions. 46 CONTENTS TH-D72A/E
55 6 OPERATIONAL EXAMPLES OF APRS QSY Function The QSY function uses AFRS (Automatic Frequency Reporting System) to report a frequency on which voice communications can be established. A station using the QSY function embeds the frequency information of your voice band in a position beacon transmission. A receiving station of the information can easily tune to the frequency. In addition to contacts between TH-D72A/Es, when transmitting object information of a repeater or an EchoLink node station using an APRS software program, if embedding QSY information in the status text, the receiving station can conveniently set TH-D72A/E or TM-D710A/E to be ready for accessing the repeater or the node station with a single action Transmitting QSY Information A properly configured functioning TH-D72A/E QSY station can automatically embed the voice frequency as well as Tone, Narrow/Wide, Shift (+/-), Offset frequency from the non-data band to the beginning of status text. To embed the voice frequency, configure QSY in Status to ON in Menu 3A0 and the frequency will be automatically added to the beginning of status text and then sent. The format of the transmitted frequency is FFF.FFF MHz. So, for example, if at the time of a beacon transmission, the non-data band has a frequency of MHz selected, then the frequency of MHz gets embedded to the beginning of the status text. Then, to embed Tone and Narrow/Wide information, configure Tone/Narrow to ON in Menu 3A1, and Wide/Narrow, Tone/CTCSS/SCS and the code of Tone/CTCSS/DCS will be added after the frequency information in the status text with a single blank space used as a delimiter. Furthermore, to embed the Shift (+/-) and Offset frequency, configure the Shift/Offset to ON in Menu 3A2, and the Shift (+/-) and Offset frequency will be added after the Tone and Wide/Narrow information in the status text with a single blank space used as a delimiter. QSY Information Format: (Insert one space after the frequency before entering Wide/Narrow, Tone/CTCSS/DCS and Shift/Offset.) T079 : Upper case T indicates Wide. Tone frequency of 79.7 Hz (Encoding) t079 : Lower case t indicates Narrow. Tone frequency of 79.7 Hz (Encoding) toff : Lower case t indicates Narrow. Tone = OFF (Without any tone encoding or decoding.) C079 : Upper case C indicates Wide. CTCSS frequency of 79.7 Hz (Encoding/ Decoding) c079 : Lower case c indicates Narrow. CTCSS frequency of 79.7 Hz (Encoding/ Decoding) D023 : Upper case D indicates Wide. DCS code of 023. (Encoding/ Decoding) d023 : Lower case d indicates Narrow. DCS code of 023. (Encoding/ Decoding) + : Plus Shift (A default offset frequency is applied.) - : Minus Shift (A default offset frequency is applied.) +500 : Plus Shift, 5 MHz Offset -060 : Minus Shift, 600 khz Offset. The value of the Offset shall be a 3-digit number. (x 10 khz/ 50 khz step) Note: For detailed information on the QSY Function format, refer to the following link: ( The TH-D72A/E transceiver complies with the standard which was proposed by Bob Bruninga, WB4APR. TH-D72A/E CONTENTS 47
56 6 OPERATIONAL EXAMPLES OF APRS Configuration Example (Insert one space after the frequency before entering Wide/ Narrow, Tone/CTCSS/ DCS and Shift/ Offset.) MHz : Voice frequency configured for MHz, Wide-band FM, Tone frequency = None, Simplex MHz T071 : Voice frequency configured for MHz, Wide-band FM, Tone frequency of 71.9 Hz, Simplex MHz 0071 : Voice frequency configured for MHz, Narrow-band FM, Tone frequency of 71.9 Hz, Simplex MHz C100 : Voice frequency configured for MHz, Wide-band FM, CTCSS frequency of 100 Hz, Simplex MHz c100 : Voice frequency configured for MHz, Narrow-band FM, CTCSS frequency of 100 Hz, Simplex MHz D023 : Voice frequency configured for MHz, Wide-band FM, DCS code of 023, Simplex MHz d023 : Voice frequency configured for MHz, Narrow-band FM, DCS code of 023, Simplex MHz toff : Voice frequency configured for MHz, Narrow-band FM, Tone frequency = None, Simplex MHz : Voice frequency configured for MHz, Wide, Tone frequency = None, Minus Shift, 600 khz Offset (TH-D72A s Auto Repeater Offset may work) MHz Toff + : Voice frequency configured for MHz, Wide, Tone frequency = None, Plus Shift, Offset = default on UHF band (5 MHz) MHz T : Voice frequency configured for MHz, Wide-band FM, Tone frequency of Hz, Minus Shift, 600 khz offset MHz toff + : Voice frequency configured for MHz, Narrow-band FM, Tone frequency = None, Plus Shift, Offset = default on UHF band (5 MHz) MHz t MHz : Voice frequency configured for MHz, Narrow, Tone = Hz, +Shift, Offset = 5 MHz (Default offset on UHF band), 4 MHz is not allowed and it results in a syntax error for TM-D710A so that the default offset 5 MHz (K-type) is applied instead. Figure 6-6 QSY Information Transmission Configuration Menu 48 CONTENTS TH-D72A/E
57 6 OPERATIONAL EXAMPLES OF APRS Receiving QSY Information The TH-D72A/E receives QSY information not only from another TH-D72A/E, but also location information from other software as well as QSY information and repeater frequency object information embedded in status text. You can confirm the QSY information that is received as embedded data by checking the voice frequency at the beginning of the status text on the Station List screen. Press the [OK] key to display the List Detail screen, press the [MENU] key, then select Tune, and the transceiver will change quickly to the non-data band frequency. Also, on the Station List screen, F will appear on the right side of the screen if QSY information is embedded. This enables confirmation of the QSY information also on the Station List, and just pressing the [MENU] key and then selecting Tune easily changes the frequency to the non-data band. Also, if, in addition to voice frequency, Wide/ Narrow, Tone/ CTCSS/ DCS, Shit (+/-), Offset frequency are also set in the status text, selecting <Tune> will not only change to the voice frequency, but switch between Wide/ Narrow and set Tone/ CTCSS/ DCS. Figure 6-7 QSY Station List Screen QSY Functions and EchoLink EchoLink system operators can configure their nodes to generate APRS objects that contain their QSY Frequency information. These beacons can either be transmitted locally on the APRS channel, or generated directly to the APRS-IS for dissemination back to RF via the local IGate station. It is important for nearby traveling mobiles to see these QSY Frequency objects on their maps and the front panel of their TH-D72A/E or TM-D710A/E while traveling in new areas Message Function The Message function closely resembles other amateur radio modes since it consists of exchanging messages with hams. You can send a message by entering a callsign of the message recipient. You ll receive an acknowledgment (ACK) message back when the targeted station receives the message. You can also enjoy group messaging by using a group name instead of a callsign. A group name can be configured via Menu 3S0. In addition, there is a bulletin function. Using bulletins, you can report on upcoming events or other information to a large collection of users over a broad region Automatic Reply Function The Automatic Reply Message function replies to messages that you receive while you are driving and you can pre-configure a message response such as Pse QRX. Will return at 12:35. When using TH-D7A/E or TM-D700A/E, a response message was returned to all message senders. But, beginning with TH-D72A/E or TM-D710A/E, an individual can be selected to receive a reply. TH-D72A/E CONTENTS 49
58 6 OPERATIONAL EXAMPLES OF APRS You can configure callsigns to which you want to reply. When the wildcard is used, the transceiver will respond to all message senders. But if you set W6DJY, the transceiver will reply only to W6DJY. Configuring W6* will trigger a reply only to senders with W6 as their callsign prefix. Figure 6-8 Automatic Reply Message Configuration Screen TX Beep (Beacon) Select Menu 3T1 (Sound - TX Beep (Beacon)) and select ON to sound a beep every time the TH-D72A/E transmits a beacon. We recommend enabling this function to monitor the status of beacon transmissions when SmartBeaconing is used. If OFF is selected, the transceiver does not beep even if a beacon is transmitted APRS Lock This function prevents accidentally changing the data band frequency or accidentally transmitting on the data band by pressing the [PTT] switch in APRS communication. Select type of APRS Lock in Menu 302 (APRS-Basic Set-APRS Lock). Off It changes the data band frequency so that you can transmit on the data band by pressing the [PTT] switch. On The frequency of the data band cannot be changed. You also cannot use Scan with [VFO], [MR], [ENT], [MHz] and [ENC]. On & PTT You cannot change the frequency of the data band nor transmit on the data band by pressing the [PTT] switch. On & TNC You cannot change the frequency of the data band and, while in APRS mode, pressing the [TNC] key will not exit APRS mode. On & PTT & TNC You cannot change the frequency of the data band nor transmit on the data band by pressing the [PTT] switch. While in APRS mode, pressing the [TNC] key will not exit APRS mode. Figure 6-9 Menu 302 (Basic Set APRS Lock) 50 CONTENTS TH-D72A/E
59 6.2 Base Station (Weather Station) 6 OPERATIONAL EXAMPLES OF APRS Weather observation equipment intended for use at home is becoming more common in the United States. Using this equipment, you can observe and measure wind direction, wind velocity, air temperature, humidity, rainfall, atmospheric pressure, etc. This information can be useful to others when the data is gathered and transmitted in real time via APRS beacon transmissions. These kinds of weather stations are installed in many parts of the world. Some stations transmit NWS (National Weather Service) information. The weather information from NWS is dispatched and converted for beacon use. Local important information, such as locations of nearby tornadoes as they are forming which have not been registered with central weather bureaus, can be transmitted by APRS beacon. The weather stations from Peet Bros. Company and Davis Instruments Corp. Inc. can be connected in place of a GPS receiver via the GPS connector. The weather observation equipment transfers the meteorological information with serial data and this data is transmitted via beacon transmissions using the APRS weather format. Or you can monitor the meteorological data locally on the screen of the TH-D72A/E. The information on rainfall, air temperature, wind direction, wind velocity, atmospheric pressure and humidity can be displayed Using Meteorological Equipment Select Menu 331 (APRS COM Port) and configure the GPS terminal settings. Baud Rate: 9600 bps (same as weather equipment being used) Input: Weather (Davis) or Weather (Peet Bros.) Output: OFF Figure 6-10 Menu 602 (GPS) Equipment that has been verified with our transceiver includes the following models Davis Instruments Corp. Inc. The weather station, Vantage Pro2 ( can be used with TH-D72A/E. WeatherLink for Vantage Pro2, Windows, Serial Port (Davis Part #.06510SER) or WeatherLink for APRS with Streaming Data Logger (Davis Part #.06540) is required for TH-D72A/E. Install the adapter that comes with the above accessories to work with TH-D72A/E. To communicate with Vantage Pro2, configure the communication baud rate of Vantage Pro2 for 9600 bps using the panel keys and then configure the TH-D72A/E communication baud rate (Menu 330) to 9600 bps as well. Note: 4800 bps (06540/ 06510SER) or 2400 bps (06510SER) may work with TH-D72A/E but we recommend using 9600 bps for stable operation. TH-D72A/E CONTENTS 51
60 6 OPERATIONAL EXAMPLES OF APRS Peet Bros. Company The weather station, ULTIMETER 2100 ( can also be used with TH-D72A/E. To communicate with Vantage Pro2, configure the TH-D72A/E communication baud rate (Menu 330) to 2400 bps as well. Note: Because the GPS receiver and the weather observation equipment use the same connector, combined use is not possible. You will begin to acquire meteorological data from the weather observation equipment 5 to 10 minutes after powering up the transceiver. Meteorological data that is received from other stations is displayed in the Station List details on the fifth page. As shown below, the information is easy to understand. 5 th page 6 th page Figure 6-11 Display of Meteorological Data 52 CONTENTS TH-D72A/E
61 7 APRS NETWORKS 7.1 APRS Servers In the beginning, APRS networks consisted only of general packet transmissions through digital repeaters. To expand network coverage much further, HF gateway stations that were interfaced with the VHF stations were added. This arrangement evolved still further when it became common for personal computers to be connected with the Internet. Internet gateways provided another way to expand APRS coverage. APRServe, developed by Mr. Steve Dimse, K4HG, allows information that is gathered from the Internet to be transferred to client computers. The worldwide APRS network was completed. The service is called APRS-IS (APRS-Internet Service). At present, there are several basic servers that are called Core servers, under which a number of local servers, called Tier 2 servers, work and are located worldwide in each participating country. Later, Pete Loveall, AE5PL developed javaprssrvr to establish a Tier-2 distribution system to better handle regional APRS-IS feeds. The Internet part of the APRS system is called APRS-IS (APRS- Internet Service). 7.2 IGate There are basically two ways to use APRS-IS effectively when operating APRS: a client personal computer connected directly to Core/ Tier 2 servers, and using amateur radio with IGate (Internet gateway). For client use, a callsign is required, but amateur radio equipment is not necessary. You simply install APRS software such as UI-View32 and AGWTracker on a personal computer, configure the necessary station information and connect to an APRS server via the Internet. With this arrangement, you can enjoy the basic features of APRS such as transmitting your own station position, exchanging messages and dispatch or receipt of weather information. Using TH-D72A/E, you can transmit your own packet signals via amateur radio and use APRS-IS to access IGate. IGate acts as a two-way interface between the Internet and amateur radio packet signals. The IGate function is obtained through various releases of APRS software and IGate is commonly available as a result of many volunteer amateur radio operators. IGate connects directly to Core servers and Tier 2 servers and information received by amateur radio packet transmissions is transferred to the servers, and server information can be passed via packet radio transmissions back to amateur radio operators. Setting up an additional IGate station in an area that already has an existing IGate station will result in providing the same information to the server and put an excessive load on the Internet, and therefore is undesirable. Traffic from IGate to amateur radio stations increases air traffic; therefore, you must be familiar with operational configurations. Various filtering functions exist so you should be knowledgeable about your local existing IGate station. In the case of packet messaging, bidirectional data transfers are used. While operating TH-D72A/E from a fixed station, specifying a particular digipeater and the callsign as the packet path to a nearby IGate station will guarantee packets will always be relayed by the same path and can avoid unnecessary relays and therefore raise efficiency. In the case of a mobile station, since the packet path changes from time to time, use the default packet path or follow local rules of each area where you may operate. TH-D72A/E CONTENTS 53
62 7 APRS NETWORKS Tier 2 Server Tier 2 Server I-Gate Client Tier 2 Server Core Server I-Gate Core Server Core Server I-Gate Client Tier 2 Server Client Tier 2 Server Client I-Gate I-Gate Client Client Client Figure 7-1 APRS Network Conceptual Drawing 54 CONTENTS TH-D72A/E
63 7 APRS NETWORKS 7.3 Let s Send With TH-D72A/E it is possible to transmit by using the Message function Sending with TH-D72A/E First, press the [MSG] key to show the Message List on the screen. Next, press [MENU] to show the Message List Menu on the screen. And press NEW to create a message on the screen. Enter in the TO: field using [ENC] on the panel or the 10-key numeric keypad. Figure 7-2 Entry Screen Next, enter the address to which you wish to send . Leave one space blank after the address and begin entering the message text. Refer to an example below. Figure 7-3 Entering Message Enter the text using the encoder, cross key or the 16-key numeric keypad on the panel. When the message is completely entered, it will be transmitted in an APRS message and an is transmitted via the IGate and the APRS server connected to the Internet. TH-D72A/E CONTENTS 55
64 7 APRS NETWORKS APRS software TM-D710A/E Internet From IGate to Server has been received! Digipeater software transmission Server to Internet APRS Server Figure 7-4 Transmission Flow for Note: You cannot send from a personal computer to a mobile station. Just like other APRS packets, the content of the you sent can be monitored by other stations 2-byte codes cannot be sent. In case the Server is down, is not delivered. 56 CONTENTS TH-D72A/E
65 7 APRS NETWORKS 7.4 Digipeaters (Digital Repeaters) The greatest feature of APRS is the network that is spreading around the world. The heart of the network is made up of many digital repeaters commonly referred to as digipeaters. Of course, digipeaters are well-known among those who have used packet radio for years. Digipeaters receive data over-the-air via radio signal and repeat or relay it onward. For a voice repeater, two different frequencies are used simultaneously to accomplish this repeater function. However, a digipeater first receives and stores data, and then transmits when the channel clears. In the earlier times of packet radio and digipeaters, it was required to specify the callsign of each digipeater station. But it was difficult to know which digipeater station to use. If moving in a vehicle, you had to constantly consider changing digipeaters. Now, APRS uses a common generic callsign for all digipeaters referred to as WIDEn-N, where N is the number of hops desired through the network (typically 2 or less). The WIDE terminology lets you know the digipeater is in a good location for repeating signals. A mobile station anywhere only has to specify WIDE1-1 without needing to know a specific callsign of a digipeater in order to digipeat their beacon transmission. APRS evolved over many years beginning in 1992, and there were many inefficient older network concepts that were still being used in some areas. You still may see references to these obsolete techniques (RELAY, WIDE, TRACE, and TRACEn-N). By 2004, it was decided it was time to abandon those many older inefficient paths and concentrate on only the fully traceable WIDEn-N algorithm. The APRS network was universally upgraded to just the one simple and traceable WIDEn-N concept. This operating standard was called the New-N Paradigm. Since its adoption, most areas have seen many improvements in local area APRS reliability. In most areas, the number of hops should be no more than 2 hops. This was because additional hops just add too much network load and too much interference from stations far away. The following sections explain configuration of the TH-D72A/E for use with digipeaters UIDIGI With UIDIGI activated (On), when a digipeater receives a UI frame with a character string for alias (such as RELAY, WIDE1-1, etc.) that matches the alias character string in the digipeater, the digipeater repeats the packet substituting the callsign from the digipeater s My Callsign configuration and adding a completed flag ( ). UIDIGI should normally be off. It is not good for mobiles to be digipeating all packets on the channel because it causes much interference. But sometimes, in special cases, when a mobile is being used on top of a hill or in a special weak area to provide temporary emergency digipeating, then UIDIGI can be enabled with the WIDE1-1 alias so that this mobile can serve as the first hop out of an area. In this case, the mobile station operates as the first hop of the first relay station for this area. WIDE1-1 digipeating only operates on the first hop, so there is not much damage to the network or to other traffic. WB4APR-7 > APK103, WIDE1-1, WIDE2-1: Test WB4APR-7 > APK103, W6DJY-1*, WIDE2-1: Test My callsign: W6DJY-1 UIdigi: ON Aliases: WIDE1-1 Figure 7-5 Using UIDIGI TH-D72A/E CONTENTS 57
66 7 APRS NETWORKS UIFLOOD With UIFLOOD activated (On), when a digipeater receives a UI frame with a character string for alias in the form XXXXn-N where XXXX matches the alias character string in the digipeater, the digipeater subtracts 1 from N and processes the packet reporting only the revised character string so as not to make the frame length too long. The UIFLOOD technique does not provide traceable paths, so its use is not recommended generally. UIFLOOD is used for supporting the SSn-N or SSSn-N state or regional paths. Also the example should be changed to start with SS3-3 instead of WIDE3-3. UIFLOOD should very rarely be used by mobiles. WB4APR-7 > APK103, MD3-3: Test WB4APR-7 > APK103, W4DJY-1*, MD3-2: Test WB4APR-7 > APK103, W5DJY-1*, MD3-1: Test My Callsign: W4DJY-1 UIflood: On Alias: MD Substitution: ID My Callsign: W5DJY-1 UIflood: On Alias: MD Substitution: ID Figure 7-6 Using UIFLOOD The UIFLOOD method of digipeating is only a function of a full sized properly configured permanent digipeater. If a normal mobile station is activated with UIFLOOD, it can cause much unnecessary interference to the network. The only time to ever activate a mobile station with UIFLOOD is in very special cases, when a mobile station is being used on top of a hill to provide temporary emergency digipeating to replace a broken or missing wide area digipeater UITRACE UITRACE functions similar to UIFLOOD with the difference that UITRACE reports the full relay path of digipeaters that were used to relay the message. UITRACE is the most powerful and traceable digipeating function in APRS. It is the basis of the New-N paradigm discussed in 7.4 Digipeaters. Therefore, with UITRACE activated (On), upon receipt of a UI frame by a digipeater with a character string for alias in the form XXXXn-N where XXXX matches the alias character string in the digipeater, the digipeater subtracts 1 from N and processes the packet reporting each of the previous digipeaters. This causes the digipeater itself to produce a frame length that becomes longer as the message is relayed. Using UITRACE allows you to confirm the exact routing of any message. Like UIDIGI and UIFLOOD, UITRACE should normally never be enabled by a mobile except in very unusual circumstances. WB4APR-7 > APK103, WIDE2-2: Test WB4APR-7 > APK103, W4DJY-1*, WIDE2-1: Test WB4APR-7 > APK103, W4DJY-1, W5DJY-1,WIDE2*: Test My Callsign: W4DJY-1 UItrace: On Alias: WIDE Figure 7-7 Using UITRACE My Callsign: W5DJY-1 UItrace: On Alias: WIDE 58 CONTENTS TH-D72A/E
67 7 APRS NETWORKS Although UITRACE using the normal APRS network path of WIDEn-N can be a problem if mobiles activate their digipeater at the wrong time, it is also so powerful, that it is a shame not to be able to use it easily if required. For this reason, all APRS mobiles are encouraged to activate the UITRACE permanently, BUT using the alias of TEMP instead of WIDE. This always makes possible use of the mobile as a TEMPn-N digipeater while avoiding the problem of adding interference to the normal use of WIDEn-N Not working WB4APR-7 > APK103, TEMP1*, WIDE2-2: Test W4DJY-1 WB4APR-7 > APK103, TEMP1, W4DJY-1*, WIDE2-1: Test W5DJY-1 WB4APR-7 > APK103, TEMP1, W4DJY-1, W5DJY-1, WIDE2*: Test WB4APR-7 > APK103, TEMP1-1, WIDE2-2: Test All mobiles can act as TEMPn-N digis all the time if needed for emergency Figure 7-8 Using UITRACE Configuration Examples (USA) Following are two configuration examples of a fill-in digipeater (fill-in type digipeater) and a WIDE digipeater (Wide-type digipeater). Example 1: This example shows configuration for a typical TH-D72A/E fill-in type digipeater for general use in routine operation. Digipeat Digipeat(MyCall): On UIdigipeat UIdigi: On Aliases: WIDE1-1 UIflood UIflood: On Alias: SS or SSS (where SS or SSS is the abbreviation of state or ARRL section) Substitution: ID UItrace UItrace: Off Alias:TEMP TH-D72A/E CONTENTS 59
68 7 APRS NETWORKS Example 2: This is a general recommendation for permanent digipeaters installed at a high location. Digipeat Digipeat(MyCall): On UIdigipeat UIdigi: On Aliases: SAR (other local paths can be defined here) Note: SAR stands for Search and Rescue. UIflood UIflood: On Alias: SS or SSS Substitution: ID UItrace UItrace: On Alias: WIDE Proper Configuration (written by Bob Bruninga, WB4APR) New-N Paradigm In 2004, the recommendations for APRS path configuration were drastically simplified. And this was called the New-N Paradigm. This plan eliminated all use of the simple paths of RELAY, WIDE and TRACE. We recommend you to avoid any references to these paths and ignore them. Instead, the New-N Paradigm introduced three major routing paths, WIDEn-N, SSn-N and TEMPn-N. There n-n is set to the number of hops (usually 2-2 or less). WIDEn-N National Standard: The WIDEn-N path was designated the National Standard so that it would work everywhere and should be used for routine operations. Limiting the hops to 2 hops or less assures that the packets cover the local area and region (and will get to an IGate somewhere). And at the same time the packets do not go any farther or add unwanted interference in other areas. This drastically improved the efficiency and reliability of the APRS national network. The only disadvantage of the WIDEn-N standard was that digipeaters could only be built with specialized modern APRS TNC hardware and could not take advantage of thousands of old TNC for small local networks. To solve this problem, the WIDE1-1 first-hop concept was developed. WIDE1-1 Fill-in Digipeaters: Old TNC hardware of WIDE1-1 fill-in digipeaters only allowed a single digipeater ALIAS. In the early days of APRS we used the generic alias of RELAY so that any TNC or home station could be used as a local digipeater. But this produced too many dupes and was abandoned in In its place, we substituted the path of WIDE1-1. The beauty of this ALIAS Is that it can act both as a simple generic ALIAS but at the same time, be recognized by all of the modern WIDEn-N digipeaters as well. These modern TNCs with the WIDEn-N mechanism all avoid making any duplicates. This allows local areas to put up small area, local coverage WIDE1-1 digipeaters using any old TNC as a first hop for mobiles driving nearby. The mobile can hit these fill-in digis in weak signal areas but at 60 CONTENTS TH-D72A/E
69 7 APRS NETWORKS the same time also hit the WIDEn-N network when they are in good coverage areas. For this reason, the usual 2 hop recommendation for mobiles is not WIDE2-2. This is because those packets would not be recognized by these fill-in digis. Instead, we encourage all mobiles to use the 2-hop path of WIDE1-1, WIDE2-1. WIDE1-1, WIDE2-1 Mobile Path: WIDE1-1, WIDE2-1 Mobile Path: To assure that mobiles can get 2 hops no matter where they are and no matter what digi hears them first, we recommend the WIDE1-1, WIDE2-1 path. Notice how the second entry is already decremented to 2-1 so that the result of this combination is still the national 2 hop recommendation. The reason we do not suggest a 2 hop pair of WIDE1-1,WIDE1-1 is because it causes unnecessary dupes in those fill-in areas which are incapable of recognizing dupes. Also, we strongly discourage any fixed station from using WIDE1-1 as the first hop. Because it is not necessary and causes the same problems with multiple dupes. The SSn-N path: The SSn-N path (which can also be SSSn-N or SSSSn-N) is a special path for a given communications geographical area. Typically SS is the standard abbreviation for States in the USA, but many large states are divided into two or more ARRL communication sections. So, a 3 or 4 letter SSSn-N designation is also appropriate. These paths are used by these special communications organizations for state or section-wide nets or for drills or for emergencies. Depending on N, these packets can hit every digipeater in the state or section, but will not go into other areas no matter how big N is. A typical value is SS3-3 or more. For example, using WIDE3-3 from the middle of Maryland would not only hit all digipeaters in Maryland but also dozens of digipeaters in the 5 surrounding states. This would be very bad practice. But using MD3-3 would hit every digi in Maryland and nowhere else. In fact, MD5-5 would be no worse than MD3-3. In either case, all digis in the state would be hit and any left over hops will not go anywhere. This is because no digi will repeat the same packet twice. TEMPn-N Backup/Emergency Path: We also needed a special come-as-you-are emergency backup path system for when there is no existing infrastructure and when we needed to implement a system in a hurry in the field. The two standardized paths, WIDEn-N and SSn-N provide good APRS operation everywhere for most applications. Except, if the power to the digipeaters is lost, and then there is no backup system. To meet this need, we defined the special path of TEMPn-N to be used when either WIDEn-N or SSn- N does not work. To implement this ubiquitous backup system, we took advantage of the fact that every existing Kenwood Mobile APRS radio can be a digipeater. But it would be a huge problem if all these mobiles drove around routinely with their digipeaters enabled as WIDEn-N or SSn-N. Human fallibility suggests that once turned on (by the hundreds), many would forget to turn them back off, and we would destroy the national channel with unwanted interference. We solved that problem by defining this special TEMPn-N path. This path can be enabled in ALL mobiles ALL the time, because no one uses it for routine operations. Thus, it is available to everyone at any time if there is a mobile Kenwood nearby and there is no danger of any QRM to existing operations. Unfortunately, the original TM-D700A/E did not come factory set to enable automatic TEMPn-N operation. As a result, not many TM-D700A/E operators have remembered to do this themselves. But in the TM-D710A/E, Kenwood has enabled TEMPn-N digipeating from the factory, thus assuring that this backup system is readily available everywhere there is a TM-D700A/E. The new TH-D72A/E also comes pre-loaded to support TEMPn-N digipeating but it defaults to OFF so that these handhelds do not automatically start digipeating when someone uses the TEMPn-N system. But they can be enabled at any time with a simple menu item so that a TH-D72A/E handheld in a high location can act as a digipeater by anyone that needs it. TH-D72A/E CONTENTS 61
70 7 APRS NETWORKS Since all of these transceivers can be used as backup emergency digipeaters anytime, anywhere, someone that is unable to hit any digipeaters from their current location with either WIDEn-N or SSn- N can always try TEMP1-1,WIDE2-2 to get out. Or, if all the digipeaters in an area are off-the-air, he can actually try TEMP2-2 to get two mobile hops (or more) to a temporary destination. To further benefit this alternate backup digipeating technique, some special battery-powered backup digipeaters at high locations can also support this path in addition to WIDEn-N and SSn-N paths as a full time backup to the existing system. 7.5 Packet Path It is necessary to confront the issue of frequency congestion due to the spread of APRS systems in order to efficiently transfer packet data (paradigm). TH-D72A/E supports the configurations of New-N Paradigm, RELAY Paradigm and STATE/SECTION/REGION. Overall, this provides an efficient mechanism for transferring packets New-N Paradigm Appropriate configuration is required in order to digipeat a packet path (relay route). New-N Paradigm using WIDEn-N assigns an alias and a relay stage number for digipeaters. This system is spreading worldwide. For example, when you desire two hops, then you can configure TOTAL HOPS: 2 and once configured, you can verify that the packet path is configured to WIDE2-2. In the past years, when a regional digipeater was wanted, RELAY was used but this is replaced by WIDE1-1. You can use WIDE-1-1 simply by configuring On via menu selection Again, you can verify on the configuration screen that WIDE1-1, WIDE2-1 was used for the relay route RELAY Paradigm This is one of the digipeat types used in Europe. The old backwards compatible RELAY technique was included for some areas that have still not updated to the universal New-N Paradigm using traceable WIDEn-N. It allows the first hop to be via the RELAY path and then uses TRACEn-N for subsequent hops. The USA is using the New-N Paradigm. But, Europe has not yet fully coalesced into RELAY PARADIGM as of this writing. 62 CONTENTS TH-D72A/E
71 7 APRS NETWORKS STATE/ SECTION/ REGION In contrast to WIDEn-N which generates packets equally in all directions, you can use STATE/ SECTION/REGION to restrict packets to only be relayed within the specified boundary. Abbreviations, such as two letter AZ for Arizona or three or four letter abbreviations such as NCA for Northern California, are used to specify the boundary. Using these limited regions, it is possible for stations to set up special nets under special circumstances to communicate over large distances without adding interference to other areas not involved. For example, using WIDE5-5 from the middle of Maryland would generate hundreds of packets of interference in 13 surrounding states! This is why nothing larger than WIDE2-2 (two hops) is recommended. However, using MD5-5 from anywhere within the state of Maryland will get from any corner to every other corner of Maryland. (13 digipeaters total and with no duplications) Thus a special Maryland APRS net in support of disaster training can be held without bothering surrounding states. TH-D72A/E CONTENTS 63

72 8 MCP-4A MEMORY CONTROL PROGRAM (FOR USE WITH TH-D72A/E) MCP-4A is a software designed for use with your personal computer to edit and manage memory channel and menu data for TH-D72A/E. For convenience of users, Kenwood distributes the software via our corporate web site as a free service for users. In addition to the conventional functions, the new version has a new function to manage GPS log data. The read GPS log data can be converted into versatile KML or GPX format. The GPS log data recorded on the TH-D72A/E can be read to a PC and displayed on map software. Create, manage and edit memory channel, menu data and GPS log data for TH-D72A/E in the enhanced MCP-4A program to maximize your enjoyment of these transceivers. Figure 8-1 MCP-4A Memory Channel Window 64 CONTENTS TH-D72A/E
73 8 MCP-4A MEMORY CONTROL PROGRAM (FOR USE WITH TH-D72A/E) 8.1 Downloading and Installing MCP-4A 1. Check that the specifications for your computer meet the following that are necessary to use MCP-4A. Table 8-1 MCP-4A Computer Specifications Table Computer Required Specification Windows XP (Service Pack 3 or later) (32-bit)) Operating System Windows Vista (Service Pack 1 or later) (32-bit/ 64-bit) Windows 7 (32-bit/ 64-bit) Run-time Environment CPU Microsoft.NET Framework 2.0 (Service Pack 1 or later) must be installed. CPU clock frequency recommended by OS or faster Memory More than OS recommended capacity Hard Disk 30 MB or more free space. Display XGA resolution or higher (1024 x 768) Communication Port USB 1.0/2.0 port. Note: If using Windows XP, it is necessary to install the Microsoft.NET Framework 2.0 (Service Pack 1 or later) on the PC. Windows Vista and Windows 7 do not require NET Framework since this newer version of Windows already contains the necessary environment software. To determine if Microsoft.NET Framework 2.0 (Service Pack 1 or later) is installed on your computer with Windows XP, click Control Panel > Add or Remove Programs and check in the list of installed software. If the list includes.net Framework 2.0 (Service Pack 1 or later), another installation is not necessary..net Framework Run-time can be downloaded from the Microsoft web site. A virtual COM port driver needs to be installed onto the PC to use the MCP-4A with a USB cable. Do not connect the transceiver to a PC using a USB cable before installing the virtual COM port driver. Virtual COM Port Driver: 2. Download the newest version of MCP-4A from the Kenwood web site URL shown below: MCP-4A download location: (URL is subject to change). 3. Extract the downloaded file into a designated folder. In the designated folder, a folder will be created. Execute the setup.exe in the folder, and follow the instructions that appear on the display to install MCP-4A. Note: Windows Vista and Windows 7 require that you click the Allow (A) button when the User Account Control window displays a message asking permission to install the software. Installing MCP-4A alone without first installing Microsoft.NET Framework 2.0 (Service Pack 1 or later) will result in MCP-4A not being able to start. Microsoft.NET Framework 2.0 (Service Pack 1 or later) must be installed first. Windows Vista and Windows 7 do not require Microsoft.NET Framework 2.0 (Service Pack 1 or later) since this newer version of Windows already contains the necessary environment software. TH-D72A/E CONTENTS 65
 that will be used to communicate via your computer with the target station. You cannot select grayed out ports.")

74 8 MCP-4A MEMORY CONTROL PROGRAM (FOR USE WITH TH-D72A/E) 4. Click Start > Program > KENWOOD > MCP-4A to start MCP-4A. Figure 8-2 MCP-4A Splash Window 5. Select the communication port. Specify in the COM Port frame the communication port (COM Port) that will be used to communicate via your computer with the target station. You cannot select grayed out ports. If all ports are grayed out, this indicates your computer has no COM ports installed and you will not be able to use the MCP-4A software even if you click the OK button. Figure 8-3 MCP-4A COM Port Setting Window 6. Read the information of TH-D72A/E. Read the desired information of TH-D72A/E that you wish to edit. Click the OK button. Next, select Read Data from the Transceiver from the Program pulldown menu and read the information from the target transceiver. Note: The basic method of using MCP-4A is to read the existing transceiver data into MCP-4A, edit the configuration, and then write the new configuration back to the transceiver. 66 CONTENTS TH-D72A/E

75 8 MCP-4A MEMORY CONTROL PROGRAM (FOR USE WITH TH-D72A/E) Figure 8-4 MCP-4A Read Transceiver Advisory Message Figure 8-5 MCP-4A Program Menu: Read Data from the Transceiver TH-D72A/E CONTENTS 67
76 8 MCP-4A MEMORY CONTROL PROGRAM (FOR USE WITH TH-D72A/E) 8.2 Main Functions of MCP-4A MCP-4A has many functions. This section lists the useful functions of MCP-4A including added functions Useful Functions of MCP-4A Simple operation. Graphical display of SmartBeaconing. Importing other MCP files. Setting the font sizes. Exporting.html Files. Configuring RSS. Reading GPS log data Functions Only Configurable by MCP-4A Changing the power-on bitmap image Configuring the character string for the power-on password. Changing the speed at which the switchover is made between Decay Algorithm and Proportional Pathing. (For details, refer to sections of Decay Algorithm and of Proportional Pathing in the chapter of APRS IN ACTION.) 68 CONTENTS TH-D72A/E
77 8.3 Reading a File This section describes how to read a file. 8 MCP-4A MEMORY CONTROL PROGRAM (FOR USE WITH TH-D72A/E) Reading a File Created with MCP-4A To read a file, select Open from the File pulldown menu, select TH-D72 MCP-4A File (*.mc4) in the Files of type dropdown list, and open the desired file created in TH-D72A/E Importing Other MCP Files into MCP-4A With MCP-4A, it is possible to read a file that was created using other MCP series software. To read a file created by other MCP software, select Open from the File pulldown menu, select the correct file type in the Files of type dropdown list, and open the desired file. In the Open window, select the correct file type in the Files of type dropdown list, and open the desired file. The files in the table below can be imported into MCP-4A. The referenced software can be downloaded from the following web site: Table 8-2 MCP-4A Importable File Formats Table Software Name and Extension MCP-2A MCP-2000 (*.2k0) MCP-D7G (*.d7g) MCP-1A (*.mcp) MCP-F6/F7 (*.fx) MCP-D700 (*.700) MCP-D7 (*.d7) Transceiver Model TM-V71A/ TM-V71E/ TM-D710A/ TM-D710E/ RC-D710A/ RC-D710E TS-2000/ TS-2000X/ TS-B2000 TH-D7A (G)/ TH-D7A (G2.0)/ TH-D7E (G2.0) TH-K2AT/ TH-K2E/ TH-K2ET/ TH-K4AT/ TH-K4E/ TM-271A/ TM-271E TH-F6A/ TH-F7A/ TH-F7E TM-D700A/ TM-D700E TH-D7A/ TH-D7E Remarks TH-D72A/E CONTENTS 69
78 8 MCP-4A MEMORY CONTROL PROGRAM (FOR USE WITH TH-D72A/E) Only files created for K-type models (USA and Canada) can be imported into MCP-4A. The referenced software can be downloaded from the following Kenwood U.S.A. Corporation web site: Table 8-3 MCP-4A Importable File Formats Table (K-type only) Software Name and Extension MCP-G707 (*.707) MCP-V7 (*.v7) MCP-G71 (*.71) Transceiver Model TM-G707A TM-V7A TH-G71A Remarks Dedicated only for USA and Canada. Unable to use other than K-type (USA and Canada) of TM-G707 due to command specification differences. DTSS is ignored. Dedicated only for USA and Canada. Unable to use other than K-type (USA and Canada) of TM-V7 due to command specification differences. DTSS is ignored. Dedicated only for USA and Canada. Unable to use other than K-type (USA and Canada) of TH-G71 due to command specification differences. Note: Memory channels that are outside of the receive frequency range of TH-D72A/E cannot be read. With MCP-4A, it is not possible to exchange data between above-mentioned transceivers except TH-D72A/E. MCP-4A cannot read DTMF memory and other menu settings, Although you may be able to import an MCP file type that is not included in the above tables, some data in the file may not be read into the MCP-4A program. 8.4 Reading GPS Log Data MCP-4A can read GPS log data recorded on the TH-D72A/E. The read GPS log data can be viewed with a map software program. This section describes how to read GPS log data Reading GPS Log Data from TH-D72A/E Select Read GPS Logger Data from the Transceiver from the Program pulldown menu. Data from a GPS Logger and Waypoints can be read. Select the checkbox of the desired data. Pressing the Read button will start reading the data. The data is saved as a NMEA file. When the reading is complete, a screen appears to prompt you to select whether or not you want the GPS log data in the transceiver to be deleted. The read data cannot be written onto the transceiver again. 70 CONTENTS TH-D72A/E


79 8 MCP-4A MEMORY CONTROL PROGRAM (FOR USE WITH TH-D72A/E) Figure 8-6 GPS Data Reading Screen Managing the Read GPS Log Data When the reading is complete, the PGS log data is saved in NMEA file format in the MCP-4A folder. The GPS Logger window shows the saved NMEA files. The file name is the time and date when the data is read. Two types of NMEA file are created: a file that contains all the log data read from the transceiver and a file that is divided into blocks. Stop the log to divide the data into blocks, while recording the log on the transceiver. For example, if you wish to divide the log data into data for outward and return trips, stopping the logging once will divide the data into two blocks. The GPS Logger window allows conversion of NMEA files to KML or GPX files, or deletion of the data. The GPS Logger window can be opened also from GPS Logger in the Tools pulldown menu. Figure 8-7 GPS Logger Window TH-D72A/E CONTENTS 71

 or GPS Exchange Format File (*.")
80 8 MCP-4A MEMORY CONTROL PROGRAM (FOR USE WITH TH-D72A/E) Converting to KML or GPX File Format To display the read GPS log data in a map program, convert the date to KML or GPX file format. In the GPS Logger window, select the desired log data and press the Save button. Track and Rate of Preservation appear. Changing the value of Rate of Preservation allows a user to thin the GPS log data. If track points are too closely spaced on the map, thinning the GPS log data can reduce the complexity. Press the OK button in the Save Track dialog box and the Save screen will appear. In the file type selection, select Keyhole Markup Language File (*.kml) or GPS Exchange Format File (*.gpx) to save the data in KML or GPX format. KML and GPX format data can be viewed in map programs that are compatible with these file types. Figure 8-8 Save Track Dialog Box Figure 8-9 Save Screen of GPS data 72 CONTENTS TH-D72A/E


81 8 MCP-4A MEMORY CONTROL PROGRAM (FOR USE WITH TH-D72A/E) 8.5 Introduction to Main Functions The following sections provide detailed descriptions of the features referred to in 8.2 Main Functions of MCP-4A Simple Operation The configuration screens and writing and reading screens of the configuration data for MCP-4A can be displayed easily in the Simple Operation window. The Simple Operation window appears when MCP-4A starts or alternatively can be displayed by selecting Simple Operation in the View pulldown menu. Figure 8-10 Simple Operation Window Graphical Display of SmartBeaconing The parameters set for SmartBeaconing can be viewed in the Rate Curve and the Turn Angle vs Speed graphs. Changing the parameter values reflects the values in the Rate Curve and the Turn Angle vs Speed graphs. The graphs provide visual representations of the SmartBeaconing operation to help a user easily configure SmartBeaconing. Figure 8-11 Graphs of SmartBeaconing TH-D72A/E CONTENTS 73
82 8 MCP-4A MEMORY CONTROL PROGRAM (FOR USE WITH TH-D72A/E) Changing the Font Sizes The font sizes used in the various windows can be selected from three choices. In the Font of the View pulldown menu, the font size can be selected from Normal, Large or Extra Large. Note: Use an Operating System function to change the size of characters on the Menu bar. If you select a font other than Normal, some of the displayed items may not fit within a window Setting your Callsign Your callsign can be set to be displayed on the MCP-4A Configure your callsign in the Callsign Setting window in the Setup pulldown menu. The character string is shown in the Splash window when the software starts, in the About MCP-4A dialog box and in the Title bar. In addition, when the Callsign is configured, the character string configured will be played back using Morse code when the software starts. Note: Depending on your particular computer used, it may not be possible to play back Morse code Exporting.hmk Files Almost all the configuration data of memory channels and menus created on MCP-4A can be exported in HTML format (that can be viewed in a typical Internet browser). Select Export from the File pulldown menu and enter a file name to save in the Save window Configuring RSS In MCP-4A, RSS update information can be displayed on the tool bar. RSS is a file format designed to provide update information of news sites or blogs. Configuring RSS enables receipt of update information automatically. To configure an RSS, select MCP Setting from the Setup pulldown menu to display the RSS tab. Click the Add button and enter the target URL and Name. Click the OK button to newly add the RSS to the RSS list. Selecting the checkbox enables the setting and the update information of the registered RSS is received and displayed on the tool bar. The time interval to obtain the update information from the registered RSS s web site and the time to display the updated information on the RSS bar can be configured. Figure 8-12 RSS Tool Bar 74 CONTENTS TH-D72A/E
83 8 MCP-4A MEMORY CONTROL PROGRAM (FOR USE WITH TH-D72A/E) Changing the Power-on Bitmap Image MCP-4A allows selection of a bitmap image which appears on the transceiver display when the transceiver s power is turned on. Different images can be configured for GPS Only mode and for Normal mode. From the Edit pulldown menu select Menu > Radio. Click on the Custom Start-up Screen checkbox in Power-on or GPS Logger. Clicking the Bitmap File button activates a dialog box to open a file. Select a bitmap file to be used. Writing the configuration data to the transceiver will change the power on bitmap image. The image used for the power-on bitmap must be a monochrome bitmap file with 120 pixels width and 48 pixels height Configuring the Character String for the Power-on Password Do the following procedure to enter the password for the Power-on Password function. From the Edit pulldown menu select Menu > Radio. In the Radio window, enter in the Password edit box a string of up to 6 characters consisting of alphanumerics 0 to 9 and A to D. Note: When the entry of the password is complete, click on the Power-on Password checkbox in this window to enable the Power-on Password function. TH-D72A/E CONTENTS 75
84 9 HOW TO UPDATE FIRMWARE 9.1 Firmware This section describes how to update the firmware of the TH-D72A/E transceiver itself and of the TNC. 9.2 Verifying Necessary Equipment In order to update the equipment, each of the following is required: Equipment to be updated (TH-D72A/E) Computer Communication cable (USB Cable that comes with TH-D72A/E) Firmware update program Kenwood provides the firmware update program for use on Windows operating systems. The specifications for your computer in order to use this software are as shown in Table 9-1. Table 9-1 Firmware Update Computer Specifications Table Computer Operating System CPU Memory Hard Disk Communication Port Required Specification Windows XP (Service Pack 3 or later), Windows Vista (Service Pack 1 or later) (32-bit/ 64-bit), or Windows 7 (32-bit/ 64-bit) CPU or compatible CPU that is equivalent or superior to the CPU recommended for the Operating System More than OS recommended capacity 30 MB or more free space USB 2.0 interface Note: Upon connecting the transceiver to a PC using a USB cable, ensure that the connection has securely been in place. The firmware updating program may not behave properly if connecting through a USB hub. Download and install the virtual COM port driver to make a USB connection possible for command communications via a USB connector. Virtual COM Port Driver: This firmware updating program cannot read and write user data such as menu items and memory channel frequencies. If you do not wish to lose user data, save the data using the MCP-4A Memory Control Program prior to updating the firmware and writing the data back after updating the firmware. 76 CONTENTS TH-D72A/E

85 9 HOW TO UPDATE FIRMWARE 9.3 How to Verify Firmware Version You can view the firmware version by the procedure below. Use one of the following two ways of verifying Checking with the Transceiver 1. Press 2 [TNC] on TH-D72A/E to display APRSxx. 2. Turn the power OFF. 3. Hold #[ENT] down and turn the power ON. 4. Verify the following is displayed. Number on the first row of the display: Indicates the firmware version of the transceiver. Number on the second row of the display: Indicates the firmware version of the Built-in TNC. Figure 9-1 Verifying Firmware Versions Checking with MCP-4A 1. Press 2 [TNC] on TH-D72A/E to display APRSxx. 2. Turn the power OFF. Connect the communication cable to the transceiver itself. 3. Turn the power of the transceiver ON. 4. Start MCP-4A and select Transceiver Information from the Model pulldown menu. Figure 9-2 Verifying Firmware Versions TH-D72A/E CONTENTS 77
86 9 HOW TO UPDATE FIRMWARE 9.4 How to Get Latest Firmware/Software Download the latest version of update software from the Kenwood web site URL shown below: (URL is subject to change.) How to Update Carefully read the update instructions provided when you download the software. Begin the procedure only after you understand the provided instructions. Table 9-2 Firmware Update Summary Table Item to Update Downloads Bundle files Transceiver TH-D72_Main_VxxxE.zip TH-D72_Main_Vxxx_e.exe TH-D72_Main_e.chm TNC TH-D72_TNC_VxxxE.zip TH-D72_Tnc_Vxxx_e.exe TH-D72_Tnc_e.chm Note: XXX is a 3-digit numeric version number. During the routine update, there are automatic resets executed several times. Therefore, ensure you back up all configuration data and channel data prior to beginning the firmware update To restore the backup data, ensure using MCP-4A prior to writing data back to the transceiver all data is correct. The software update for TNC is not available on the web site: The current firmware version of TNC is 1.00 as of May 15 th, and has not been upgraded from the original firmware version. 78 CONTENTS TH-D72A/E
87 10 MISCELLANEOUS TOPICS 10.1 AvMap (Don Arnold, W6GPS) I find that using the Kenwood TH-D72A/E with built-in GPS is very convenient for travel And also APRS operations are simple without the use of an external GPS device. But at times it is important for me to have a visual display of APRS activity around me without the use of a computer. TH-D72A/E uses the NMEA 0183 standard at 4800 and 9600 baud rates to communicate with the GPS unit. The transceiver has three formats for interfacing to GPS units: NMEA, Magellan and the Kenwood format. A GPS system with a serial interface will connect to the TH-D72A/E but if your GPS supports bi-directional communication, it is possible to have APRS callsigns and icons appear on the GPS screen. Of all the name brand GPS units, the AvMap G6 smoothly interfaces with the Kenwood TH-D72A/E TNC better than any other with less adaptation and more features specific to APRS and the TH-D72A/E. The AvMap G6 takes advantage of the Kenwood APRS sentence and provides a Kenwood interface cable for truly Plug and Play operations. Note: The baud rates refer to serial communication between transceiver and GPS and not to the AX.25 Packet communication between transceivers. AvMap G6 has many of the normal Personal Navigator data fields that you would find in most world brand GPS units, but AvMap developers have integrated the Kenwood sentence format to provide you a Tactical Mode. No other standalone GPS system has this exclusive Kenwood/AvMap feature. If you are involved in a search and rescue scenario, you can assign one of your APRS assets (callsigns) the target designation for Tactical Mode. This designated callsign on each position report is processed by AvMap for easy viewing and tracking. If you are using the TH-D72A/E with the AvMap, in Tactical mode, you will get an additional five data fields that can be displayed on your AvMap: Target ID - Callsign Target Lat Long Target SOG - Speed over Ground Target COG - Course over Ground Target Altitude Mean -sea-level You can choose three of these five data fields to display on the AvMap screen. So, when your target callsign is moving, you can get real time information and a visual display on the AvMap G6. The AvMap operating system now uses full APRS icon representation. The decoded APRS packet from the Kenwood TM-D710A/E (in Kenwood WAYPOINT format) is processed by the AvMap G6 operating system. When a mark is made on the screen, it now can be one of over 200 standardized APRS icons along with the callsign. Setup of the Kenwood transceiver with AvMap is very simple. Using the defaults of the Kenwood transceiver, only a few menu configurations are needed to set up the TH-D72A/E. TH-D72A/E CONTENTS 79

88 10 MISCELLANEOUS TOPICS Basic Setup Instructions for Kenwood TH-D72A/E Radio has been fully reset. Menu 110 Battery Saver OFF 111 APO OFF 194 Date set 195 Time set 196 UTC offset 201 Battery Saver GPS OFF 300 Enter Call sign Push A/B Band Key Set A Band to F-1 Internal GPS off 330 COM port speed Input GPS 332 Output Waypoint 340 Format Kenwood 341 Length 9-Char Connect 3-pole connection to COM Port TH-D72A/E. Connect 4-pole connection to AvMap TNC port. Verify that the AvMap is in 9600 on the Interface page. Figure 10-1 AvMap G6 and TH-D72A/E 80 CONTENTS TH-D72A/E
A user is prohibited from assigning, renting, leasing or reselling the document.
 1 Copyrights for this Manual JVCKENWOOD Corporation shall own all copyrights and intellectual properties for the product and the manuals, help texts and relevant documents attached to the product or the
CONTENTS. Operation File name (TH-D72_) CONTENTS 1 OPERATING THROUGH REPEATERS... REPEATER. 01_REPEATER_E.pdf MEMORY CHANNELS...
 CONTENTS 1 OPERATING THROUGH REPEATERS... REPEATER. 01_REPEATER_E.pdf MEMORY CHANNELS...") CONTENTS Operation File name (TH-D72_) OPERATING THROUGH REPEATERS... REPEATER REPEATER ACCESS... 1 Selecting an Offset Direction... 1 Selecting an Offset Frequency... 1 Activating the Tone Function...
CONTENTS Operation File name (TH-D72_) OPERATING THROUGH REPEATERS... REPEATER REPEATER ACCESS... 1 Selecting an Offset Direction... 1 Selecting an Offset Frequency... 1 Activating the Tone Function...
MC-80 TERMINAL INTERFACES
 DATA COMMUNICATOR 144/440MHz FM Dual Bander One of the greatest pleasures of exploration is being able to communicate each new discovery. And Kenwood s Data Communicator allows you to do just that. This
GPS (GLOBAL POSITIONING SYSTEM)
") GPS (GLOBAL POSITIONING SYSTEM) What is GPS? GPS, standing for Global Positioning System, is becoming common nowadays. Following is a brief introduction. The American Defense Department developed GPS originally
GPS (GLOBAL POSITIONING SYSTEM) What is GPS? GPS, standing for Global Positioning System, is becoming common nowadays. Following is a brief introduction. The American Defense Department developed GPS originally
A Shadow Ad-Hoc TEMPn-N network Bob Bruninga, WB4APR
 A Shadow Ad-Hoc TEMPn-N network Bob Bruninga, WB4APR http://aprs.org/rovers.html APRS is ideal for ad-hoc coordination communications among portable VHF and UHF stations and roving vehicles such as the
INSTRUCTION MANUAL. Version: /440 MHz FM DUAL BANDER TM-D710GA. 144/430 MHz FM DUAL BANDER TM-D710GE
 INSTRUCTION MANUAL 144/440 MHz FM DUAL BANDER TM-D710GA 144/430 MHz FM DUAL BANDER TM-D710GE Version: 1.01 CONTENTS OPERATING THROUGH REPEATERS...REPEATER- REPEATER ACCESS... 1 Selecting an Offset Direction...
INSTRUCTION MANUAL. Version: /440 MHz FM DUAL BANDER TM-D710GA. 144/430 MHz FM DUAL BANDER TM-D710GE
 INSTRUCTION MANUAL 144/440 MHz FM DUAL BANDER TM-D710GA 144/430 MHz FM DUAL BANDER TM-D710GE Version: 1.00 CONTENTS OPERATING THROUGH REPEATERS...REPEATER- REPEATER ACCESS... 1 Selecting an Offset Direction...
Frequency and Other New Initiatives in APRS since 2004
 Frequency and Other New Initiatives in APRS since 2004 Bob Bruninga, WB4APR TAPR/ARRL/AMSAT/USNA Annapolis, Maryland Abstract: Too many hams seem to have completely misunderstood APRS and think of APRS
APRS. NAVITRA Data Communication (NAVITRA Beacon) APRS- WIDE-type RELAY-type (Fill-in type)
 APRS- WIDE-type RELAY-type (Fill-in type)") APRS APRS Data Communication (APRS Beacon) u This function uses the APRS format for data communications including your station position, messages, etc., when connected to a GPS receiver. u Even with the
APRS APRS Data Communication (APRS Beacon) u This function uses the APRS format for data communications including your station position, messages, etc., when connected to a GPS receiver. u Even with the
Automatic Packet Reporting System
 Automatic Packet Reporting System (APRS*) Rick Fletcher, W7YP FVARC October 16, 2018 *APRS is a registered trademark of Bob Bruninga, WB4APR What is APRS? APRS stands for Automatic Packet Reporting System,
Communicating to Anyone, to Anywhere, at Anytime
 APRS Communicating to Anyone, to Anywhere, at Anytime Vero Beach Amateur Radio Club Digital University November 10, 2018 Prepared by: Jerry/K4WOF, John/KK4SHF, Jim/KM4UFN Why APRS? Email and Text Anyone
Technical information: Compact PIC 16F84A/628A APRS Tracker for Portable Rigs
 Fox Delta Amateur Radio Projects & Kits FD FoxTrak Technical information: Compact PIC 16F84A/628A APRS Tracker for Portable Rigs INTRODUCTION TO APRS: WHAT'S APRS? In its simplest form, APRS allows the
APRS APRS. This degipeater can send the packet over a wide area. Fill-in type
 APRS Data Communication (APRS Beacon) APRS u This function uses the APRS format for data communications including your station position, messages, etc.. u When data is received from another station, the
APRS is a registered trademark Bob Bruninga, WB4APR
 Matt Welch KB1LCS DEC District 10 Lake County, OH What s on the Agenda? APRS Definitions & History Ham Radio Applications Typical Equipment Setup Mapping/Tracking Programs Weather Reporting Public Service
Operating Station Equipment
 Amateur Radio License Class Operating Station Equipment Presented by Steve Gallafent October 3, 2007 Operating Station Equipment Modulation Modulation is the process of adding information to a radio signal
INSTRUCTION MANUAL CONTROL PANEL RC-D710. Version: 2.10
 INSTRUCTION MANUAL CONTROL PANEL RC-D710 Version: 2.10 CONTENTS File name (TM-D710_) Operation OPERATING THROUGH REPEATERS...REPEATER- 01_REPEATER_E.pdf OPERATING THROUGH REPEATERS...1 REPEATER ACCESS...1
APRS an Overview. John Galvin N5TIM. * APRS is a registered trademark of WB4APR
 APRS an Overview John Galvin N5TIM * APRS is a registered trademark of WB4APR 1 What is APRS? APRS stands for Automatic Packet Reporting System (although it is frequently also called Automatic Position
A real-time tactical communications and display. A one-to to-many protocol updating everyone in real. March 23, 2009 John Galvin - N5TIM 2
 Or putting it all together John Galvin N5TIM * APRS is a registered trademark of WB4APR A real-time tactical communications and display system for emergencies and public service use A one-to to-many protocol
TRBOnet Mobile. User Guide. for Android. Version 2.0. Internet. US Office Neocom Software Jog Road, Suite 202 Delray Beach, FL 33446, USA
 TRBOnet Mobile for Android User Guide Version 2.0 World HQ Neocom Software 8th Line 29, Vasilyevsky Island St. Petersburg, 199004, Russia US Office Neocom Software 15200 Jog Road, Suite 202 Delray Beach,
i2820h (USA) ie2820(europe)
 ie2820(europe)") January 2007 DUAL BAND TRANSCEIVERS i2820h (USA) ie2820(europe) The above photo shows the IC-2820H. The IC-E2820 differs slightly from this photo. Icom proudly announces the debut of the new dual band
January 2007 DUAL BAND TRANSCEIVERS i2820h (USA) ie2820(europe) The above photo shows the IC-2820H. The IC-E2820 differs slightly from this photo. Icom proudly announces the debut of the new dual band
PLXTRACKER (v1.02) Instruction manual Configuration software manual
 Instruction manual Configuration software manual") PLXTRACKER (v1.02) MIC-E/BASE-91/PLAIN TEXT POSITION REPORTING INTERNAL 512KB POSITION MEMORY SIMPLE ALIAS-BASED APRS PACKET DIGIPEATER MULTIPATH APRS DECODING ALGORITHM WEATHER STATION SUPPORT EXTERNAL
PLXTRACKER (v1.02) MIC-E/BASE-91/PLAIN TEXT POSITION REPORTING INTERNAL 512KB POSITION MEMORY SIMPLE ALIAS-BASED APRS PACKET DIGIPEATER MULTIPATH APRS DECODING ALGORITHM WEATHER STATION SUPPORT EXTERNAL
UH45 Series. UHF CB Transceiver. For more exciting new products please visit our website: Australia:
 UH45 Series UHF CB Transceiver For more exciting new products please visit our website: Australia: www.uniden.com.au Controls & Indicators Included in your Package UH45 Series Radio Operating Guide Belt
Spotsylvania County VOPEX 2008 Emergency Drill
 Spotsylvania County VOPEX 2008 Emergency Drill ARES/RACES Support July 2008 Thomas A. Lauzon ARES Emergency Coordinator/RACES Radio Officer 27 May 2008 Spotsylvania VOPEX 2008 Emergency Drill Introduction
The Ham s Guide to Repeaters and Radio Etiquette
 The Ham s Guide to Repeaters and Radio Etiquette A repeater is a device which will receive a signal on one frequency and simultaneously transmit it on another frequency. FM Voice Very common. ATV Amateur
Technician Class Course. Session 1
 Technician Class Course Session 1 WHAT IS AMATEUR RADIO? What is Amateur Radio? Amateur (or Ham) Radio is a personal radio service authorized by the Federal Communications Commission (FCC). To encourage
TRBOnet Mobile. User Guide. for ios. Version 1.8. Internet. US Office Neocom Software Jog Road, Suite 202 Delray Beach, FL 33446, USA
 TRBOnet Mobile for ios User Guide Version 1.8 World HQ Neocom Software 8th Line 29, Vasilyevsky Island St. Petersburg, 199004, Russia US Office Neocom Software 15200 Jog Road, Suite 202 Delray Beach, FL
G6GVI s guide to getting started with your Tracker
 G6GVI s guide to getting started with your Tracker Different models There are two US-based companies currently producing APRS Trackers: Byonics in Las Vegas make the TinyTrak range; Argent Data Systems
Digital Amateur Radio Bridging the Gap
 Digital Amateur Radio Bridging the Gap Andy Russell, G0VRM North Humber Raynet Prologue... In the last month s article we described the current status of emergency communications in the United Kingdom,
Microwave Engineering Project Use Cases
 Microwave Engineering Project Use Cases Version 1 By KB5MU, W5NYV 18 March 2008 Version 2 By KB5MU, W5NYV 27 July 2008 Comments to W5NYV@yahoo.com Voice and Text Applications Under Study 2m repeater operation
MICRO-TRAK 8000 MANUAL VER 1.2
 MICRO-TRAK 8000 MANUAL VER 1.2 The Micro-Trak 8000 Version 1.0 is a miniature APRS (Automatic Position Reporting System) transmitter operating on the North American APRS frequency standard of 144.390 MHz.
VisorTrac A Tracking System for Mining
 VisorTrac A Tracking System for Mining Marco North America, Inc. SYSTEM APPLICATION The VISORTRAC system was developed to allow tracking of mining personnel as well as mining vehicles. The VISORTRAC system
SUBELEMENT T4. Amateur radio practices and station set up. 2 Exam Questions - 2 Groups
 SUBELEMENT T4 Amateur radio practices and station set up 2 Exam Questions - 2 Groups 1 T4A Station setup: connecting microphones; reducing unwanted emissions; power source; connecting a computer; RF grounding;
HF Digital Mode Primer
 HF Digital Mode Primer By Val Campbell K7HCP INTRODUCTION Getting started using the Amateur Radio Digital Modes of communications can be confusing and frustrating at times but it doesn t have to be that
Australian Amateur Band Plans
 Wireless Institute of Australia Australian Amateur Band Plans Updated September 2006 Introduction Spectrum Management International spectrum management is the responsibility of the International Telecommunications
Setting up a Wires-X node station and why you would want to
 Setting up a Wires-X node station and why you would want to Quick review of Yaesu System Fusion K2AS presentation What equipment/software/setup needed to operate WiresX (Hint: any Fusion radio) What equipment/software/setups
Will only send Status Text until GPS Lock! Format of Status Text: Status Text Altitude Volts Temp X AVRT5 (version)
") AP510 / AVRT5 Documentation Based upon firmware and configuration version(s) 20151031 (development build) Author: Mark Cheavens KC5EVE Version: 20151031 1.1 Quick Start: Power Button Uses: Firmware Update
AP510 / AVRT5 Documentation Based upon firmware and configuration version(s) 20151031 (development build) Author: Mark Cheavens KC5EVE Version: 20151031 1.1 Quick Start: Power Button Uses: Firmware Update
Long Distance Packet Mail via Satellite by
 Long Distance Packet Mail via Satellite by Mark Sproul, KB2ICI 82 Keith Sproul, WU2Z INTRODUCTION The packet radio mail system is a great Electronic Mail system for amateurs. Within a local VHF area, it
Repeaters and Linking
 Presented by Rob Ewert VE1KS \ Introduction / My Background Repeaters What are they? Why do we need them? How do they work? How are they controlled What kinds are there? Where are they? What do I need
Class Overview. Antenna Fundamentals Repeaters Duplex and Simplex Nets and Frequencies Cool Radio Functions Review
 Class Overview Antenna Fundamentals Repeaters Duplex and Simplex Nets and Frequencies Cool Radio Functions Review Antennas Antennas An antenna is a device used for converting electrical currents into electromagnetic
WIRES-X Portable Digital Node Function. Instruction Manual
 Wide-Coverage Internet Repeater Enhancement System WIRES-X Portable Digital Node Function Instruction Manual Please read this Instruction Manual carefully for appropriate procedure. Preparation Procedure
CARA Flea Market. System Fusion Digital Communication Solutions
 CARA Flea Market System Fusion Digital Communication Solutions Chris Wilson N0CSW National Sales Manager Yaesu North America New Products DR 1X Repeater Introduction Introduction to System Fusion Comparison
Getting Into Ham Radio
 There are 2 million amateur radio operators world wide of which 735 thousand are in the United States The Cuyahoga Falls Amateur Radio Club would like to welcome you to amateur (Ham) radio. 2 World wide
New Tech - Operating Beric K6BEZ
 New Tech - Operating Beric K6BEZ Sponsored by Start with Repeater Operation What is a Repeater? Station usually in a high location Repeats what it hears so others can hear Why start there? Greatly increases
TX4400 UHF CB RADIO INSTRUCTION MANUAL TX4400 INSTRUCTION MANUAL PAGE 1
 TX4400 UHF CB RADIO INSTRUCTION MANUAL TX4400 INSTRUCTION MANUAL PAGE 1 TABLE OF CONTENTS GENERAL................................... 3 FEATURES.................................. 3 BASIC OPERATION...4 Front
Communications Academy 2018
 Communications Academy 2018 Presenters: Joel Ware IV KD7QKK Bill Thomassen N6NBN Presentation Author: Scott Currie NS7C ns7c@arrl.net Session Overview Owner s Manual Review Basic Radio Controls Setting
Yavapai Amateur Radio Club 4 September 2008
 Yavapai Amateur Radio Club http://www.w7yrc.org/ 4 September 2008 Having Fun with the Amateur Satellites by Patrick Stoddard http://www.wd9ewk.net/ Amateur satellite history, in brief OSCAR I launched
APRS.org. APRS Frostfest Maps Mobiles - Users. Human to human info exchange! APRStt!!! Appalachian Trail Golden Packet Event.
 APRS.org APRS Frostfest 2015 Maps Mobiles - Users Human to human info exchange! APRStt!!! Appalachian Trail Golden Packet Event May 2014 1 Who is WB4APR? 1980 1970 1990 2012 2010 2007 2013 Future? 2009
D-Star Update. Presentation to Hornsea Amateur Radio Society by Andy Russell, G0VRM. 30 th Jan 2013
 D-Star Update Presentation to Hornsea Amateur Radio Society by Andy Russell, G0VRM 30 th Jan 2013 D-Star Update What is D-Star D-Star Repeaters Call Sign Routing Linking to Reflectors Programming Software
Class outline for Get On The Air
 Class outline for Get On The Air Note 1: Notify the repeater s trustee that you wish to use the repeater for the week 3+ 4 class exercise. Note 2: The class instruction will use the YAESU FT-60 as the
APX 6000 Portable Radio
 Montgomery County Emergency Services 800 MHz Rebanding Training Portable Radio Before You Begin View the main training video first, it covers: General Radio Review Overview of Montgomery County s Radio
User Guide: PTT Application - Android. User Guide. PTT Application. Android. Release 8.3
 User Guide PTT Application Android Release 8.3 March 2018 1 1. Introduction and Key Features... 6 2. Application Installation & Getting Started... 7 Prerequisites... 7 Download... 8 First-time Activation...
Advanced APRS System SBARA Holiday Raffle 2009
 Advanced APRS System SBARA Holiday Raffle 2009 SBARA 2009 Umesh Ghodke (K6VUG) & Al Rendon (WT6K) APRS Basics Automatic Position Reporting System Broadcast your location & information Display information
Muscle Shoals Amateur Radio Club. Extra License Class Training Session 2
 Muscle Shoals Amateur Radio Club Extra License Class Training Session 2 Review Test Pool Question Review Questions? Syllabus Week 1 9/4/18: Commission s Rules (6 question areas) Week 2 9/11/18: Operating
Emergency Alert Text Messages via Radio
 Emergency Alert Text Messages via Radio Steve Johnston Wisconsin Public Radio Madison, Wisconsin Abstract This paper describes Wisconsin Public Radio s project to transmit Emergency Alert System text information
Trunking Information Control Console
 Trunking Information Control Console One Touch Communication and Control In a TICC we can: Initiate a call in one touch Send a status in one touch Call a group of users in one touch See what type of call
Radio 101 Reference Version 3 Feb https://w7jcr.wordpress.com/ Page 1
 Radio 101 Reference Version 3 Feb 2017 https://w7jcr.wordpress.com/ Page 1 Topics 1. Emergency Communications 2. Radio Modes a. Simplex b. Repeaters 3. Programmed Frequency List Highlights 4. Radio Propagation
TurboVUi Solo. User Guide. For Version 6 Software Document # S Please check the accompanying CD for a newer version of this document
 TurboVUi Solo For Version 6 Software Document # S2-61432-604 Please check the accompanying CD for a newer version of this document Remote Virtual User Interface For MOTOTRBO Professional Digital 2-Way
APRS Turns 35. What s Next?
 APRS Turns 35. What s Next? Ray Rischpater, KF6GPE kf6gpe@arrl.net kf6gpe.org BayCon, 9 February 2019 The Automated Packet Reporting System... Was developed by Bob Bruniga, WB4APR beginning in 1984 Is
Montgomery County Emergency Services 800 MHz Rebanding Training. MTS 2000 Type II & III. Portable Radio
 Montgomery County Emergency Services 800 MHz Rebanding Training Portable Radio Before You Begin View the main training video first, it covers: General Radio Review Overview of Montgomery County s Radio
Networks of any size and topology. System infrastructure monitoring and control. Bridging for different radio networks
 INTEGRATED SOLUTION FOR MOTOTRBO TM Networks of any size and topology System infrastructure monitoring and control Bridging for different radio networks Integrated Solution for MOTOTRBO TM Networks of
SECTION III OPERATION
 SECTION III OPERATION 3.1 INTRODUCTION This section contains information concerning the operation procedures for the BK Radio GPH Flex Mode Series handheld VHF radios. Information on installation and programming
Microwave Engineering Project (MEP) Update The Problem is Pointing
 Update The Problem is Pointing") Microwave Engineering Project (MEP) Update The Problem is Pointing Most microwave stations use dish antennas. Dish antennas at the frequencies of operation of interest to MEP, which range from 3.4GHz to
Microwave Engineering Project (MEP) Update The Problem is Pointing Most microwave stations use dish antennas. Dish antennas at the frequencies of operation of interest to MEP, which range from 3.4GHz to
VHF Transceiver AR6201
 VHF Transceiver AR6201 Operating Instructions Issue 2 / October 2010 Article No. 0618.764-071 Becker Flugfunkwerk GmbH Baden-Airpark B 108 77836 Rheinmünster Germany Telefon / Telephone +49 (0) 7229 /
Icom IC-9100 HF/VHF/UHF transceiver
 263 Walsall Road, Great Wyrley, Walsall, WS6 6DL Established 1997. Open Monday - Friday 9am - 5pm and Saturday 9.30am - 4pm Tel: 01922 414 796 Fax: 01922 417829 Skype: radioworld_uk Icom IC-9100 HF/VHF/UHF
BRB900 GPS Telemetry System August 2013 Version 0.06
 BRB900 GPS Telemetry System August 2013 Version 0.06 As of January 2013, a new model of the BRB900 has been introduced. The key differences are listed below. 1. U-blox GPS Chipset: The Trimble Lassen IQ
Explorer 725 / 705. VHF Marine Radio Quickstart Guide.
 Explorer 725 / 705 VHF Marine Radio Quickstart Guide www.northstarnav.com This Quickstart Guide is to be used with the Northstar Explorer 721 VHF Radio Installation and Operation Manual. The Explorer 721
OPERATING GUIDE OPERATING GUIDE FOR IC-F5060/F6060 SERIES BIIS 1200/MDC 1200 SYSTEM/ LTR /IDAS NXDN OPERATION
 OPERATING GUIDE OPERATING GUIDE FOR IC-F060/F6060 SERIES BIIS 100/MDC 100 SYSTEM/ LTR /IDAS NXDN OPERATION IMPORTANT Thank you for purchasing this Icom transceiver. The BIIS 100/MDC 100 system/ltr /IDAS
SRM9000-Application Note
 SRM9000-Application Note A9k-705 SRM9000 Simple Dispatcher User Guide This application note describes how to set up a simple dispatcher system to send and receive data messages between a PC and SRM9000
SAPLING WIRELESS SYSTEM
 SAPLING WIRELESS SYSTEM Sapling Wireless System DESCRIPTION A Wireless Clock System starts with a master clock with a transmitter. The master clock s transmitter transmits the time data to the secondary
CAT-260 Repeater Controller Computer Automation Technology, Inc
 CAT-260 Repeater Controller Computer Automation Technology, Inc 7378 W. Atlantic Blvd. #239 Margate, Florida 33063 Phone: (954) 978-6171 Fax: (561) 465-5891 Internet: http://www.catauto.com Table of Contents
SYSTEM FUSION & WIRES-X. AN OVERVIEW Parker Radio Association 2/22/2018
 SYSTEM FUSION & WIRES-X AN OVERVIEW Parker Radio Association 2/22/2018 MY APOLOGIES IN ADVANCE Some parts of the presentation will sound like a Yaesu commercial. That is because the best information available
Communicating with Other Hams
 Amateur Radio License Class Communicating with Other Hams Presented by Steve Gallafent October 10, 2007 Communicating with Other Hams Operating Rules Your primary station/operator license is issued by
User Guide. PTT Radio Application. Android. Release 8.3
 User Guide PTT Radio Application Android Release 8.3 March 2018 1 Table of Contents 1. Introduction and Key Features... 5 2. Application Installation & Getting Started... 6 Prerequisites... 6 Download...
PROFESSIONAL DIGITAL TWO-WAY RADIO SYSTEM MOTOTRBO DP 3600/DP 3601 DISPLAY PORTABLE QUICK REFERENCE GUIDE
 PROFESSIONAL DIGITAL TWO-WAY RADIO SYSTEM MOTOTRBO DP 3600/DP 3601 DISPLAY PTABLE QUICK REFERENCE GUIDE m DP 3600/3601 Portables Quick Reference Guide Important Safety Information Product Safety and RF
SATELLITE RADIO/TELEPHONE
 A Unique and Powerful Communications System NETWORK INNOVATIONS SATELLITE RADIO/TELEPHONE (FORMERLY SKYTERRA, MSV, LIGHT SQUARED ) Secure Communications 1. The network employs the IMBE (Improved Multi-Band
USING THE ZELLO VOICE TRAFFIC AND OPERATIONS NETS
 USING THE ZELLO VOICE TRAFFIC AND OPERATIONS NETS A training course for REACT Teams and members This is the third course of a three course sequence the use of REACT s training and operations nets in major
Problem. How we solve the problem.
 Humanitarian agencies need to trust their personnel are safe and secure at all times. A long range digital radio solution provides reliable voice and data communications for workers in the field, ensuring
INSTRUCTION MANUAL IP REMOTE CONTROL SOFTWARE RS-BA1
 INSTRUCTION MANUAL IP REMOTE CONTROL SOFTWARE RS-BA FOREWORD Thank you for purchasing the RS-BA. The RS-BA is designed to remotely control an Icom radio through a network. This instruction manual contains
WCS-D5100 Programming Software for the Icom ID-5100 Data
 WCS-D5100 Programming Software for the Icom ID-5100 Data Memory Types (left to right) Memories Limit Memories DR Memories Call Channels GPS Memories Receive Frequency Transmit Frequency Offset Frequency
Field Software Notice
 To: Subject: Field Software Notice Users of 5100 ES, 51SL ES and Ascend ES Portable Radios Software Release Platform: 5100 ES Portable Protocol: All Version Release #: 6.14.5 (part number 039-5757-222)
FT-991. (WIRES-X Edition)
") HF/VHF/UHF All Mode Transceiver FT-991 Instruction Manual (WIRES-X Edition) Thank you for purchasing this Yaeau product. This instruction manual explains operations and settings associated with the WIRES-X
HF/VHF/UHF All Mode Transceiver FT-991 Instruction Manual (WIRES-X Edition) Thank you for purchasing this Yaeau product. This instruction manual explains operations and settings associated with the WIRES-X
SUPPORT OF NETWORK FORMATS BY TRIMBLE GPSNET NETWORK RTK SOLUTION
 SUPPORT OF NETWORK FORMATS BY TRIMBLE GPSNET NETWORK RTK SOLUTION TRIMBLE TERRASAT GMBH, HARINGSTRASSE 19, 85635 HOEHENKIRCHEN, GERMANY STATUS The Trimble GPSNet network RTK solution was first introduced
Push-to-talk ios User Guide (v8.0)
") Push-to-talk ios User Guide (v8.0) PTT 8.0 ios - Table of Contents 1 Activating PTT on your ios device... 4 How to activate PTT on your Android Smartphone... 4 How to Logout and Login to the PTT Service...
Push-to-talk ios User Guide (v8.0) PTT 8.0 ios - Table of Contents 1 Activating PTT on your ios device... 4 How to activate PTT on your Android Smartphone... 4 How to Logout and Login to the PTT Service...
Technician License Course Chapter 5. Lesson Plan Module 11 Transmitters, Receivers and Transceivers
 Technician License Course Chapter 5 Lesson Plan Module 11 Transmitters, Receivers and Transceivers Generalized Transceiver Categories Mobile Single Band Dual Band All Band Multimode Handheld (HT) VHF/UHF
DragonLink Advanced Transmitter
 DragonLink Advanced Transmitter A quick introduction - to a new a world of possibilities October 29, 2015 Written by Dennis Frie Contents 1 Disclaimer and notes for early release 3 2 Introduction 4 3 The
Radio-IP Hotspot Transceiver
 Abstract ~ Chris Culpepper, Jerome Glick, Syed Ali Kazi, Damodar Adhikari ~ The is a small self-contained device that allows an amateur radio operator to conveniently connect to distant repeater nodes
Bloodhound RMS Product Overview
 Page 2 of 10 What is Guard Monitoring? The concept of personnel monitoring in the security industry is not new. Being able to accurately account for the movement and activity of personnel is not only important
Configuration Program for OZ4HZ Version 2 Tracker (rev ).
.") Configuration Program for OZ4HZ Version 2 Tracker (rev. 2008-12-08). The tracker is configured with a Windows program witch can be downloaded from the website. www.aargang64.dk/aprs Use a standard null-modem
Configuration Program for OZ4HZ Version 2 Tracker (rev. 2008-12-08). The tracker is configured with a Windows program witch can be downloaded from the website. www.aargang64.dk/aprs Use a standard null-modem
Newcomers and Elmers Net: Scanning with Amateur Radios Robert AK3Q
 Newcomers and Elmers Net: Scanning with Amateur Radios Robert AK3Q 3-9-14 If you are like me there is not much that doesn t fascinate you about radio, and my limited hobby time is spent between a number
How Radio Works by Marshall Brain
 How Radio Works by Marshall Brain "Radio waves" transmit music, conversations, pictures and data invisibly through the air, often over millions of miles -- it happens every day in thousands of different
OPERATING GUIDE OPERATING GUIDE FOR IC-F5060/F6060 SERIES BIIS 1200/MDC 1200 SYSTEM/ LTR /IDAS OPERATION
 OPERATING GUIDE OPERATING GUIDE FOR IC-F060/F6060 SERIES BIIS 100/MDC 100 SYSTEM/ LTR /IDAS OPERATION IMPORTANT Thank you for purchasing this Icom transceiver. The BIIS 100/MDC 100 system/ltr /IDAS (Icom
DJ-MD5 PC Software Guidance
 DJ-MD5 PC Software Guidance Ver, 1.00 2018/08/16 1 Appendix I Public... 4 1. Channel... 4 1 Frequency, call type, power... 4 2 Digital Channel Setting... 5 3 Analog Channel Setting... 6 2. Zone... 7 3.
Elmer Session Hand Out for 3/3/11 de W6WTI. Some Common Controls Found On Amateur Radio Transceivers. (From ARRL web site tutorial)
") Elmer Session Hand Out for 3/3/11 de W6WTI Some Common Controls Found On Amateur Radio Transceivers. (From ARRL web site tutorial) The placement of the controls may vary from manufacturer to manufacturer
Elmer Session Hand Out for 3/3/11 de W6WTI Some Common Controls Found On Amateur Radio Transceivers. (From ARRL web site tutorial) The placement of the controls may vary from manufacturer to manufacturer
Future Concepts for Galileo SAR & Ground Segment. Executive summary
 Future Concepts for Galileo SAR & Ground Segment TABLE OF CONTENT GALILEO CONTRIBUTION TO THE COSPAS/SARSAT MEOSAR SYSTEM... 3 OBJECTIVES OF THE STUDY... 3 ADDED VALUE OF SAR PROCESSING ON-BOARD G2G SATELLITES...
ASTRO 25 MISSION CRITICAL DATA YOUR LIFELINE FOR SUCCESSFUL MISSIONS
 ASTRO 25 MISSION CRITICAL DATA YOUR LIFELINE FOR SUCCESSFUL MISSIONS ALWAYS AVAILABLE Your mission critical operations depend on reliable voice PTT communications all the time, everywhere you operate.
Australian Amateur Band Plans
 Wireless Institute of Australia Australian Amateur Band Plans Updated January 2011 Introduction Spectrum Management International spectrum management is the responsibility of the International Telecommunications
DRG-Series. Digital Radio Gateway. Tait P25 CCDI Tier-2 (TM9400 Series Mobile Radio) Digital Radio Supplement
 Digital Radio Supplement") DRG-Series Digital Radio Gateway Tait P25 CCDI Tier-2 (TM9400 Series Mobile Radio) Digital Radio Supplement DRG-Series Digital Radio Gateway Tait P25 CCDI Tier-2 (TM9400 Series Mobile Radio) Digital Radio
DRG-Series Digital Radio Gateway Tait P25 CCDI Tier-2 (TM9400 Series Mobile Radio) Digital Radio Supplement DRG-Series Digital Radio Gateway Tait P25 CCDI Tier-2 (TM9400 Series Mobile Radio) Digital Radio
WIRES-X Portable Digital Node Function. Instruction Manual
 Wide-Coverage Internet Repeater Enhancement System WIRES-X Portable Digital Node Function Instruction Manual Please read this Instruction Manual carefully for appropriate procedure. Preparation Procedure
Mobililinkd TNC2 User Guide
 Mobililinkd Thank you for purchasing your new Mobilinkd TNC2 Battery-powered Bluetooth TNC. This TNC is designed to suit all aspects of the Amateur Radio community. It is ready to plug in and go with easy
Enhanced Push-to-Talk Application for iphone
 AT&T Business Mobility Enhanced Push-to-Talk Application for iphone Standard Version Release 8.3 Table of Contents Introduction and Key Features 2 Application Installation & Getting Started 2 Navigating