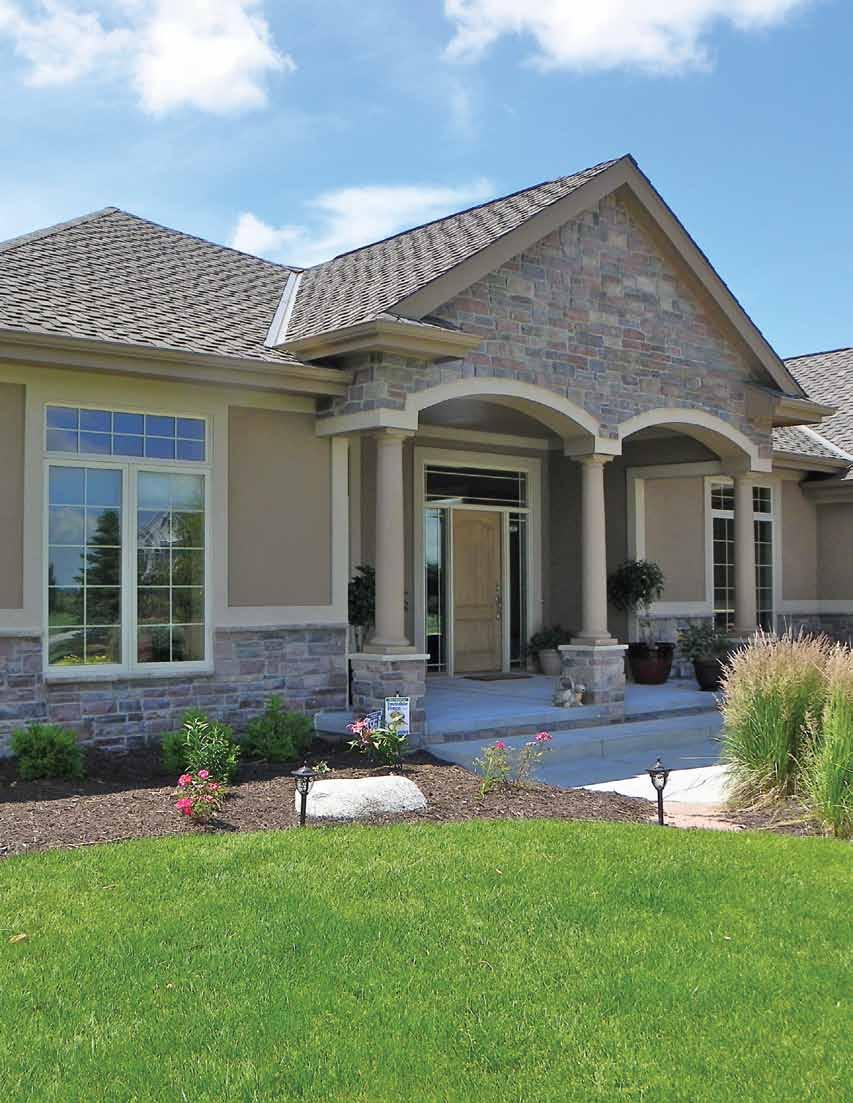
CarraraFinishes built on LP SmartSide
|
|
|
- Sherman Sutton
- 5 years ago
- Views:
Transcription

1 CarraraFinishes built on LP SmartSide

2 2


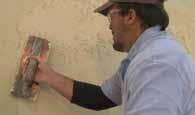
3 System Overview 3 CarraraFinishes built on LP SmartSide make it easy to achieve the authentic look of stucco and help ensure longlasting performance in even severe weather environments. CarraraFinishes are applied directly over LP SmartSide Precision Series smooth panels in a process similar to finishing drywall. Its easy-to-install, noncementitious formula flexes with temperature changes. Combined with the LP SmartSide substrate, it provides impact resistance. CarraraFinishes also resist water intrusion, which in turn helps make the entire wall assembly more durable. Easy Installation The CarraraFinishes system is installed in a six-step process that can be organized into four general tasks: 1. Seal all joints and seams in the substrate 2. Seal and finish all corner joints 3. Seal the surface of the substrate 4. Apply the texture finish FRAMING MOISTURE-PROTECTION BARRIER LP SMARTSIDE PRECISION SERIES PANEL AcraCream JOINT SEALANT 2" FOUNDATION TAPE AcraCream JOINT SEALANT 4" FINISH TAPE AcraCream JOINT SEALANT ColorTex - Primer CARRARA TEXTURE FINISH COAT OPTIONAL TRIM BAND OPTIONAL WEEP SCREED FOUNDATION NAIL PLATE Exclusive Dual-Tape-Core SM Technology PATENTED


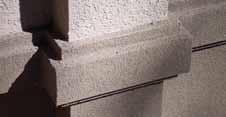
4 4 The Materials You ll Need LP SmartSide Panels to help resist moisture. Like all LP SmartSide products, Precision Series smooth panels are made with LP s state-of-the-art SmartGuard manufacturing process. A premium engineered wood product, the panels are treated with a proprietary, zinc borate-based SmartGuard process to resist moisture, fungal decay and termite damage. Precision Series smooth panels offer structural durability that can withstand the elements of nature. AcraCream to absorb structural movement and repel moisture. The key component of Carrara s patented Dual-Tape-Core technology, AcraCream is applied in three layers using two different types of tape Foundation Tape and Finish Tape. Carrara Foundation Tape, a 2" wide PVC fiber composite tape with holes to embed the tape within the AcraCream. Unlike drywall tape, Foundation Tape has high tensile and tear strength. Carrara Finish Tape for providing a smooth and secure transition between panels. A 4" wide high-tensile polyester mesh fabric, it s used to reinforce joints and to prevent edge-creep and cracking. Carrara Fill-N-Build, a high-fill, easy spread, exterior sandable ceramic spackle for creating a smooth, level surface wherever corner beads are used. Ideal for arches and columns but not joints and seams.

5 5 Carrara ColorTex Primer, a unique roller-applied scratch coat system that helps protect the walls, joints and corners from water intrusion even in freeze-thaw climates. An ideal primer for smooth surfaces like LP SmartSide Precision Series panels, ColorTex can be tinted to match the color of your texture finish. CarraraFinishes, available in a variety of textures and colors that can be sprayed, troweled or applied with a free-style knife technique. You can expect greater coverage than with competing products on average, 120 to 150 square feet per five-gallon pail. 4" to 5" and 6" to 8" mud knives to help smooth tapes and creams. A square trowel for texture application. A plastic trowel for finish application. Warranties: Confidence Backed by Reputation CarraraFinishes : 5-year limited warranty Will not chip, peel or flake for the full warranty period For complete limited warranty, visit carrarafinishes.com carrarafinishes warranty issued by Global Coatings, Inc. LP SmartSide Panel: 5/50-year limited warranty 5-year, 100% labor and replacement 50-year pro-rated limited warranty on the substrate for complete limited warranty, visit lpcorp.com


6 6 Panel Installation Panel Applications CarraraFinishes built on LP SmartSide are used in both residential and commercial applications. APA-approved for use as structural sheathing, you can install the Precision Series smooth panels in the following ways: Direct to metal STEEL STUD WATER BARRIER PRECISION SERIES Over exterior gypsum panel STEEL STUD STRUCTURAL SHEATHING WATER BARRIER PRECISION SERIES Direct to wood WOOD STUD WATER BARRIER PRECISION SERIES Over exterior sheathing WOOD STUD STRUCTURAL SHEATHING WATER BARRIER PRECISION SERIES Be sure to check your local building code to see if sheathing is required under Precision Series panels. Panels need to be installed over a code-approved water-resistive barrier such as housewrap. *Refer to panel instruction guidelines in the Appendix at the back of the manual. Panel Siding Types Precision Series smooth panels come in two thicknesses: 38 Series panels are used only in double-wall applications over a structural sheathing such as OSB. 76 Series panels are APA-rated for use in single-wall assemblies without structural sheathing or diagonal wall bracing.

7 7 Storage and Handling Handle LP SmartSide panels and trim the same way you would solid-sawn wood: Store off the ground on a flat surface so the pieces are well-supported you can use pallets laid end to end or doubled 2x4s spaced 24" apart. Keep the stack covered with a waterproof tarp when you re not using them. After the products are delivered, let them sit for 48 hours to adjust to atmospheric conditions on the jobsite. Do not install when the structure has recently been exposed to excessive moisture. If the wall is rainsoaked, let it dry before you start. Correct any irregularities such as crooked studs. The panels will lie flat only if the wall behind them is flat. Ground Clearance Install all panels so the bottom edge is at least 6" above the ground. When installing on a wall above a patio, sidewalk or other finished surface, leave at least a 1" gap from the bottom of the panel to the surface. The bottom of the panel should extend below the sill plate but should never come into direct contact with the masonry foundation.


8 8 Panel Installation LP SmartSide Trim You can use LP SmartSide trim boards to build out details that will be textured with CarraraFinishes. Trim can also be useful in transitions between dissimilar substrates. LP SmartSide trim comes in a full range of sizes for use around windows and doors, as horizontal accent trim and for other applications. All horizontal trim bands should be sloped on the top surface to promote water drainage. Form the sloped edge using a high-quality, shrink-resistant, permanently flexible, paintable, elastomeric sealant. Then, tape the sloped edge noting that you may need to use two pieces of finish tape to overlay the edge. Seal the joint where the bottom edge of the trim meets the wall using the same sealant. Treat horizontal joints with z-flashing before you apply SmartSide trim over the joint.
9 9 Proper Nailing Use hot dipped galvanized box nails with a minimum 1/4" round or clipped head. The nails need to penetrate 1-1/2" into wood studs or the combined sheathing and studs. Use 6d nails when you nail the panels directly to wood studs or 8d nails if you re renailing over 7/16" OSB sheathing. Nail 6" o.c. along all four edges and 12" o.c. in the field. Refer to local building codes for additional fastening requirements. Refer to APA design & construction guidelines for shear wall construction. Use horizontal blocking (2x4 with long face to wall) between the studs at any horizontal joints. Countersink nails just slightly and fill with AcraCream. Place another nail next to any overdriven nails and fill both holes with AcraCream. Carefully remove nails that miss any studs or blocking, fill with AcraCream, and re-nail. Avoid surface damage when removing any fasteners. Proper nailing Correcting overdriven nails Problem Solution Nailing specs, elevation view Nail 6" o.c. on all edges Nail 12" o.c. in the field Install 2x4 horizontal blocking at joints, 3-1/2" face out Countersunk less than 1/8" Fill with AcraCream Countersunk 1/8" or more Fill with AcraCream and re-nail Cutaway side view, horizontal joint Stud Housewrap 3/16" gap between panels Z-flashing Horizontal 2x4 blocking (Blocking must be fastened to both vertical studs) Precision Series smooth panel Refer to pages for horizontal joints without bands Cutaway side view, horizontal joint Stud Housewrap AcraCream and Joint Tape 3/16" gap between panels Horizontal 2x4 blocking (Blocking must be fastened to both vertical studs) Precision Series smooth panel Horizontal control joints (cutaway view) Sheathing Housewrap (blue) Precision Series panel Control joint (red)
10 10 Panel Installation Installing Panels Rip the first and last panels so the edges are inset 3/16" from the corner Leave a 3/16" gap around all doors and windows When you turn the corner, extend the first panel past the stud so it s flush with the face of the panel on the adjacent wall for a solid, squared-off base for a corner bead On double-wall assemblies, the housewrap goes over the sheathing and under the Precision Series smooth panels. Vertical joints between panels need to be offset so LP SmartSide panel joints are not stacked directly over sheathing joints. Layout (foundation 6" or more above grade) Wall with housewrap applied Chalk-lines 12" o.c. Minimum 6" from bottom of wall to ground Double-wall details (plan view) 3/16" gap between Precision Series panels Studs Single-wall detail, (plan view) First panel inset 3/16" 3/16" gap between panels Last panel inset 3/16" Housewrap over sheathing, under Precision Series panels Precision Series panel joint offset from sheathing joint Offset the corners of the sheathing and the Precision Series panels 3/16" gap
 behind the panels.")


 Outside corners: Align the panels with the corner Precision Series panel Housewrap over sheathing")
11 11 Butt Joints And Dormers On dormers or other assemblies where the bottom of the siding meets a roof surface, use corrosion-resistant flashing (aluminum or galvanized) behind the panels. Extend the flashing at least 4" up the wall and leave 1" clearance from the bottom of the panel to the roof Use care to coat the bottom edges of all panels Nail 2x4 blocking between the studs with the 3.5" face to the wall as a nailing base for the flashing Corner Details CarraraFinishes built on LP SmartSide are a tape-and-float system similar to drywall. At both inside and outside corners, install the panels leaving a 3/16" gap for expansion at the edges. Use exterior-grade drywall corner bead (metal or plastic) to protect outside corners Seal outside corners with AcraCream and Finish Tape followed by Fill-N-Build spackle Seal inside corners with AcraCream plus Finish Tape folded to an L-shape similar to finishing drywall 1" gap Siding over roof surfaces (elevation view) Precision Series smooth panel Housewrap 2x4 angled blocking with 3-1/2" face to wall Flashing extends 4" up the wall behind the siding Corner treatments (plan view) Outside corners: Align the panels with the corner Precision Series panel Housewrap over sheathing Sheathing Exterior Grade Drywall corner bead 3/16" gap Vertical joints (plan view) 1-1/2" minimum nail penetration 3/16" gap Nail 3/8" from panel edge Inside corners Leave a 3/16" gap at the ends of the panels Precision Series panel Sheathing

12 12 Panel Installation Trimming Windows Install windows, doors, moisture barriers and flashing systems according to the manufacturers instructions. When the trim will be finished with CarraraFinishes texture, butt joints are recommended. Run the head trim beyond the window on both sides so it covers the ends of the side pieces Run the side pieces so they extend past the bottom of the window to cover the ends of the bottom trim Refer to the LP SmartSide complete installation instructions for proper trim installation Flashing the Top of the Window with Z-flashing Leave a 3/16" gap between the panel and the window frame Seal over the header trim with a 50-year elastomeric, non-hardening, shrink-resistant, paintable sealant with a fungal inhibitor and tool it to a 45-degree angle. DO NOT USE SILICONE SEALANT Apply a tack coat of AcraCream that covers the bottom of the panel and extends partway down the face of the trim Next, bed a piece of finish tape in the AcraCream and apply a second coat of AcraCream and float it out Trimming windows, elevation view Head trim covers the ends of the side pieces Window flashing Precision Series panel Side trim covers the ends of the bottom trim *Refer to appendix for additional detailed panel installation specifications.


13 Panel Installation 13 Roof Flashing n Install kick-out flashing to direct the water into the gutter n Install step flashing with minimum 4-inch upper leg n Properly integrate flashing with the secondary waterresistive barrier. Use housewrap, flashing tape, z-flashing, or other items as needed to maintain the counterflashing principle. n DO NOT extend the siding or trim into the kick-out flashing or gutter n Maintain a clearance between the end of the gutter and the adjoining wall to allow for proper maintenance of the siding n Paint ALL exposed cut edges CarraraFinishes Built on LP SmartSide Siding Minimum 1" clearance between trim and roofing Clean rain gutter Do not run trim or siding inside of the kick out flashing Tape and Float The CarraraFinishes Dual-Tape-Core TM System The CarraraFinishes Dual-Tape-Core system is designed to flex with the movement of the structure, to provide a longlasting, flexible seal at the joints between LP SmartSide Precision Series smooth panels. Working with the Dual- Tape-Core system is similar to finishing drywall joints except that you ll use two types of tape on most joints, as shown in the illustration " to 6" wide, 1/4" thick tack coat of AcraCream 2. Foundation Tape embedded in the AcraCream 3. Second pass of AcraCream to cover Foundation Tape 4. Finish Tape embedded in AcraCream, centered over the Foundation Tape 5. Float AcraCream over the Finish Tape 8" to 12" to both the right and left of the center Exclusive Dual-Tape-Core Technology


14 14 Working With AcraCream AcraCream is water-based and dries by evaporation. AcraCream typically dries to the touch in 2 to 4 hours and fully cures in 24 hours. Clean tools, equipment and any spillover with water before it cures. 1 AcraCream And Foundation Tape Application With CarraraFinishes, you ll seal and finish the joints in a single session, while the AcraCream is wet. Since AcraCream is an elastomeric sealant, you can t sand it. You ll need to feather the edges smooth with your taping knife before it cures. Use AcraCream to seal nail heads and any gouges in the Precision Series smooth panels. Before you start, make sure the wall surface is clean and free of loose dirt, paint or other material Apply a tack coat of AcraCream at least 1/4" thick to all joints and seams with normal drywall tools 2. Center the Foundation Tape in the AcraCream over the joint 3. Pull your knife down the tape and press firmly to encapsulate the tape and push the AcraCream out from behind the tape, making sure it lies flat, adheres fully and removes any air bubbles trapped under the surface 4. As soon as you complete that step, apply a second coat of AcraCream to totally cover the Foundation Tape 5. Where vertical and horizontal joints meet, butt the two tapes together but DO NOT OVERLAP THEM 6. If you do, you ll create a bump that will telegraph through to the finished surface

. Apply two thin passes, 8 wide to the right and 8\" wide to the left of the center of the tape.")


15 15 1? AcraCream Handling Tips: do not apply AcraCream when the sustained air temperature is below 50 Fahrenheit (5 Celsius) start your project in the morning on the west wall of the building and move to the north wall, then the east wall and finish on the south wall with the sun following you throughout the day. do not apply AcraCream when it may rain or reach freezing temperatures before it cures Never thin AcraCream when you re working with it Apply AcraCream in multiple coats and in layers approximately 20 mil thick (roughly the thickness of your fingernail). Apply two thin passes, 8 wide to the right and 8" wide to the left of the center of the tape. 2 AcraCream And Finish Tape Application 3 As soon as the Foundation Tape is covered, move on to the next step. CarraraFinishes Finish Tape is 4" wide so you can center it over the 2" Foundation Tape and cover both edges. That locks down" the edges of the Foundation Tape to prevent edge creep and cracking. 4 Finishing inside corners Sheathing Precision Series panel Housewrap (blue) AcraCream tack coat Folded Finish Tape 3/16" gap 1. Center the Finish Tape in the AcraCream, centered over the Foundation tape, and pull your knife down the joint. Press firmly to make sure the Finish Tape is flat and fully adhered 2. Apply another coat of AcraCream over the Finish Tape 3. Float the AcraCream out 8" to 12" from the center of the tape on both sides, to minimize a center bump 4. Let the AcraCream cure fully (typically 24 hours depending on weather conditions) before moving to the next step Inside Corners Seal inside corners with AcraCream and finish tape. First, lay a heavy tack coat of AcraCream in the corner. Next, fold a strip of 4" Finish Tape down the center and press it into the AcraCream followed by a second coat of AcraCream floated out 8" to 12" from each side of the corner.


.")
16 16 Outside Corners and Arches You ll finish outside corners with AcraCream and Finish Tape but no Foundation Tape, plus Carrara s exclusive Fill-N-Build, an exteriorgrade, sandable mastic that can be feathered to a zero edge. First, nail exterior-grade metal or plastic drywall corner bead over the corner 1. Nail exterior-grade metal or plastic drywall corner bead over the corner and apply an 8" to 12" wide tack coat of AcraCream. Fasten the corner bead with corrosion-resistant nails or staples. 2. Set Finish Tape in the wet AcraCream and pull your knife down, pressing firmly to make sure the Finish Tape is flat and fully adhered, and has no bubbles. Float out 8" to 12" left and right of the corner. Repeat on the other side of the corner bead. 3. Smooth the edges of the AcraCream and let it dry completely, a minimum of 24 hours, and apply Fill-N-Build (See next step) Applying Fill-N-Build Fill-N-Build is an exterior-grade mastic designed to fill imperfections and create a smooth surface. It can be sanded and feathered to a zero edge that won t wash off. NOTE: Fill-N-Build is intended for use on corners and archers only, not in the field of a panel.


17 17 Apply Fill-N-Build With Normal Drywall Tools 1. Float Fill-N-Build out 12" or more with normal drywall tools to create a smooth, level surface. 2. Use Fill-N-Build to create smooth, durable surfaces around arches. 3. Fill-N-Build dries to a hard, sandable finish and may develop cracks when it cures, especially if applied too thick. Fix cracks by simply skimming a thin coat of AcraCream over the area. Horizontal control joints (cutaway view) Sheathing Housewrap (blue) Control Joints Tape And Floating Control Joints 1. Run a light bead of AcraCream into the 3/16"seam before installing the control joint. This provides a secondary moisture barrier should the contractor fail to seal fins properly. 2. Nail the control joint in the 3/16"seam, then apply a 1/4" thick tack coat of AcraCream over the joint. 3. Run your knife along the joint, pressing firmly to encapsulate it in AcraCream and remove any bubbles. Foundation tape is not necessary. 4. Next, embed Finish Tape along the nailing fins on each side of the control joint, then float a second coat of AcraCream 8" to 12" both above and below the center of the joint. Precision Series panel Control joint (red) 1 Horizontal control joints (elevation view) Precision Series panel Horizontal Blocking 2 Control joint Finish Tape (only) AcraCream 3


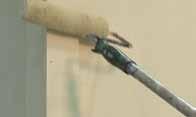
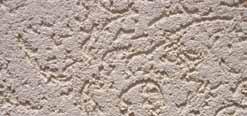
18 18 Primer And Texture Finishes ColorTex Primer ColorTex is a high-performance coating designed to enhance bonding to smooth surfaces and provide a fine, non-skid primer surface that enhances trowelapplied finishes. Ideally, ColorTex is applied with a roller, but it may also be sprayed on with an airless sprayer. The primer coat must be tinted to match the finish coat. ColorTex Handling And Preparation Tips: Make sure the Precision Series panel substrate is clean and dry, and free of any loose dirt. Don t apply ColorTex primer if the relative humidity is over 95% or if you expect rain or freezing temperatures within four hours of application. Do not apply ColorTex when the sustained air temperature is below 50 Fahrenheit (10 Celsius). Don t apply ColorTex in the late afternoon if you expect heavy moisture condensation during the night. Applying Primer Achieve a uniform coating of 3 to 5 mils thick on the entire surface of the Precision Series panel, making sure the surface is completely coated and free of pinholes, voids or blisters. If rolling the primer, use a standard paint roller with a short or medium nap. When spraying primer, use multi-directional spray passes to ensure even coverage: first left and right, then up and down. Back roll the primer for even coverage (avoid drips and runs from excess primer). Finish Texture Basics Finish texture can be troweled, applied with a free-style knife technique or sprayed. CarraraFinishes come in four textures: Fine, Medium, Worm Texture, and Sonora Sand. Use the Fine Texture when you re spraying the finish Use the Sonora Sand Texture for a skip trowel look Note: Tint colors are mixed on the jobsite. The finish coverage will naturally vary depending on the texture you choose. Expect, on average, 120 to 150 square feet from a five-gallon pail.


19 19 Fine Texture Medium Texture Worm Texture Sonara Sand Texture Sonora Sand Texture Skip Troweled Applying The Finish Texture Applying CarraraFinishes with a trowel is virtually identical to applying cementitious stucco. Apply the texture evenly with an average thickness of 1/8". If you re applying a worm texture with a deep profile, it is normal for some of the primed wall to become exposed. When you apply texture, always keep a wet edge and start at one corner and work until you reach the end of that wall without stopping. If spraying texture, apply two coats, one right after the other, spraying opposite directions with each pass. MicroSeal Dirt Repellent On some projects, you may want to seal the finish texture after application, to repel dirt and dust. MicroSeal is an acrylic copolymer formulated as a clear glaze that can be applied with an airless sprayer or a roller using the following method: Allow the CarraraFinishes finish to dry thoroughly before applying MicroSeal. MicroSeal will appear milky when you apply it but dries to a clear, semi-gloss glaze. MicroSeal dries, on average, in 24 hours depending on temperature and relative humidity. The recommended coverage is 200 to 300 square feet per gallon.
20 20 APPENDIX Applicationinstructions General At the time of manufacture, LP's Precision Series primed panel siding meets or exceeds the performance standards set forth in ICC-ES acceptance criteria ACC321 and has achieved code recognition under the ICC-ES Report ESR-1301, and HUD recognition under HUD-MR For copies of ESR-1301, call LP Customer Support at or go on-line at org/reports/pdf_files/icc-es/esr-1301.pdf. Minimum 6 in. clearance must be maintained between siding and finish grade. Siding applied adjacent to porches, patios, walks, etc. must have a clearance of at least 1 in. above any surface. Minimum 1" clearance at intersection with roof line Apply siding in a manner that prevents moisture intrusion and water buildup. All exposed wood substrate must be finished in a manner that prevents moisture intrusion and water buildup. In non-traditional ICF and SIP assemblies, the ICF or SIP manufacturer must prescribe the fastening specifications. Note: LP does not recommend LP SmartSide for use in these non-traditional assemblies. If used, LP will not warrant for Buckling and Shrinkage. However, balance of warranty does remain intact. When using wet blown cellulose insulation, adequate drying time must be allowed prior to enclosing the wall cavity DO NOT USE STAPLES Storage Store off the ground well supported, on a flat surface, under a roof or separate waterproof covering Keep siding clean and dry. Inspect prior to application. Allow siding to adjust to atmospheric conditions before application. Stud Spacing Precision Series 38 Series and 76 Series panel siding must be installed on 16 in. OC framing only. When installing on 24 in. OC framing, Precision Series 190 Series panel siding is required. Vapor Retarder/Weather Barrier A properly installed breathable water-resistive barrier is required behind the siding. Consult your local building code for details. LP will assume no responsibility for water penetration. Gaps & Sealants Seal all gaps with AcraCream Joint Sealant or a high-quality, nonhardening, paintable sealant with a minimum stated service life of 30 years. Follow the sealant manufacturer s instructions for application. Flashing, Windows, Doors & Openings All openings must be properly sealed or flashed in a manner that prevents moisture intrusion or buildup. Properly install kick-out flashing to divert roof drainage away from the siding. Several examples that accomplish this are shown on the following pages. Trim precision series 38 series, 76 series, smooth primed panel siding under CararraFinishes System Trim should be thick enough so the siding does not extend beyond the face of the trim. Trim and fascia must be applied in a manner that will not allow moisture intrusion or water buildup. LP SmartSide siding is not designed and/or manufactured to be used as trim or fascia. LP SmartSide trim and fascia are available in a variety of dimensions. Finishing Instructions Refer to the LP SmartSide CarraraFinishes Installation Guide and the Carrara Master Guide Specification. DO NOT USE WITH STANDARD PAINT FINISHES. THIS SIDING IS SPECIFICALLY ENGINEERED FOR ELASTOMERIC ACRYLIC STUCCO FINISHES. Moisture Moisture control and moisture vapor control are critical elements of proper housing design. Check your local building codes for application procedures for handling moisture and moisture vapor in your area. As with all wood products, do not apply engineered wood siding to a structure having excessive moisture conditions such as drying concrete or plaster. If such conditions exist, the building should be well ventilated to allow it to dry prior to the application of the siding. Siding must not be applied to green or crooked structural framing members. Do not apply siding over rain-soaked or buckled sheathing materials. Gutters are recommended for control of roof water run off.

21 Nailing Instructions Use minimum 7d, corrosion resistant according to ASTM 641, box style nails for 38 Series and 76 Series panels when fastening to wood framing. Do not use electroplated fasteners. Penetrate studs or combined studs and wood sheathing a combined minimum of 1 1/2 in. 6 in. max. perimeter nail spacing Application instructions (cont.) Do not let panel contact masonry Masonry Nail a min 3 /8 in. from edge 12 in. max. field nail spacing 6 in. max. perimeter nail spacing Nail corner first 6 in. min. ground clearance CONDITION Flush Countersunk more than 1/8 in. CORRECTION OK Seal with AcraCream and renail LP SmartSide Panel Siding Joint Details Panels may be attached to code-approved steel wall framing with minimum no. 8 corrosion-resistant self-drilling, tapping screws with a bugle-head that has a minimum head diameter of inch. (consult your local code for additional fastening and structural requirements) Minimum fastening (nail or screw) schedule is 6 inches along all edges and 12 inches along intermediate framing in the field of the panel. 76 series LP SmartSide smooth precision panel siding is a wood structural panel sheathing suitable for use in braced wall lines. (Refer to chapter 23 of the IBC or chapter 6 of the IRC and our code report ESR-1301) 38 series LP SmartSide smooth precision panel siding must be installed over code-approved wood structural panel sheathing. Shear values for panels applied directly to studs shall be no greater than noted in Table 1 of the ICC-ES report ESR Not warranted for application on SIP and ICF assemblies. Panels must be installed vertically. All edges must be supported with blocking or framing. Finish all wall joints according to the CarraraFinishes application instructions. HORIZONTAL beltline joints For multi-story buildings, make provisions at horizontal joints for settling shrinkage of framing. CAUTION 38 Series and 76 Series panels must be installed on 16 in. OC framing only. Backside of panel must not come in contact with masonry foundation. Do not force siding into place. Maintain the illustrated 3/16 in. space at the joint to allow for expansion while the panel equilibrates with the local environment. Do not over drive nails. Staples must not be used.
 LP SmartSide Panel Siding Joint Details Siding Must Not Contact Masonry Bottom plate")


22 Application instructions (cont.) LP SmartSide Panel Siding Joint Details Siding Must Not Contact Masonry Bottom plate Extend siding below sill plate Min. 1/8 in. or flashing between siding and masonry. Stud OR Floor system Flashing or moisture barrier Masonry foundation Sill plate 1 in. Roof & Chimney Clearance Trim 4 in. min. flashing secured to solid backing 1 in. min. clearance from roofing Min. 3/16 in. space at joint Paint bottom edges Gap, Flash Doors & Windows Install windows and doors according to the window and door manufacturer's instructions

23 Vapor Barrier Breathable Weather Resistant Barrier 3/16" 3/8" The Louisiana-Pacific Corporation ( LP ) LP SmartSide Siding (the Products ) limited warranty (the Warranty ) applies only to structures on which the Products have been applied, finished and maintained in accordance with the published application, finishing and maintenance instructions in effect at the time of application. The failure to follow such application, finishing or maintenance instructions will void the Warranty as to the portion of the Products affected by the variance (the Affected Products ). LP assumes no liability for any loss or damage sustained by the Affected Products and is expressly released by the purchaser or owner from any such loss or liability. Any modification of the Warranty s application, finishing or maintenance requirements is void and unenforceable unless approved in writing prior to application by the Siding General Manager or his designee and a member of the LP Legal Department. For a copy of the warranty or for installation and technical support, visit the LP SmartSide product support Web site at: or for additional support call Warranty remedies are not available if requirements are not followed. Cal. Prop 65 Warning: Use of this product may result in exposure to wood dust, known to the State of California to cause cancer Louisiana-Pacific Corporation. All rights reserved. LP and SmartSide are registered trademarks of Louisiana-Pacific Corporation. Printed in U.S.A. SmartGuard is a trademark of Louisiana-Pacific Corporation and S-T-N Holdings, Inc. NOTE: Louisiana-Pacific Corporation periodically updates and revises its product information. To verify that this version is current, call LPZB0552

24 LPCorp.com 2012 Louisiana-Pacific Corporation. Todos los derechos reservados, Build With Us. LP y SmartSide son marcas comerciales de Louisiana-Pacific Corporation Global Coatings, Inc. Todos los derechos reservados. Patente N. US B2. "CarraraFinishes" y "Dual-Tape-Core" son marcas comerciales de Global Coatings, Inc. LPZB0552
application instructions
 application instructions architectural collection cedar shake 76 series lap siding General At the time of manufacture, siding meets or exceeds the performance standards set forth in Composite Panel Association
LP SmartSide Soffit ON SITE STORAGE PREPARATION. Application Instructions Vented and Non-Vented Smooth Finish or Cedar Texture. General Information
 Application Instructions Vented and Non-Vented Smooth Finish or Cedar Texture A B A - Open / Closed (Page 5) B - Vented (Page 6) ON SITE STORAGE Store off the ground well supported, on a flat well-drained
PRIMED STRAND REVERSIBLE SHAKE
 PRIMED STRAND REVERSIBLE SHAKE PRIOR TO INSTALLATION Inspect product for any issues before installing (breakage, surface defects, foreign objects). Do not install questionable product. Report any problems
Application Instructions
 Application Instructions Architectural Collection, Precision Series & Foundations Soffit GENERAL These soffits can enhance the appearance of almost any roof overhang. The advantages of GOODStyle soffit
Installation Instructions for Standard Lap and Self-Aligning Lap Siding
 Installation Instructions for Standard Lap and Self-Aligning Lap Siding 7/16 in. Standard Laps Include: All Old Mill Widths, Cedar Shake Lap and Smooth Lap 1/2 in. Self-Aligning Include: 8 in. and 12 in.
Installation Instructions for Old Mill Shingle and Designer Shake Lap Siding
 Installation Instructions for Old Mill Shingle and Designer Shake Lap Siding Includes: Cove, Craftsmen Staggered, Diamond, Fish Scale, Octagon, Round and Old Mill Shingle Lap Important: Read and understand
Installation Instructions for Panel Siding and Soffit
 Installation Instructions for Panel Siding and Soffit 7/16 in. Panels Include: Sturdy Panel, Square Edge, 3/4 in. Channel and Reverse Board and Batten (RB&B) 1/2 in. Panels Include: Adobe Shiplap and 808
Installation Instructions for TruWood Reversible Trim
 Installation Instructions for TruWood Reversible Trim Important: Read and understand all pages of the installation instructions before starting the trim application. For TruWood care and maintenance information,
ForceField Air & Water Barrier System. installation instructions
 ForceField Air & Water Barrier System installation instructions Protection and Performance inside and out The ForceField air and water barrier system consists of engineered wood sheathing panels laminated
COMPOSITE SIDING INSTALLATION GUIDE
 CENTURY HOME LIVING COMPOSITE SIDING INSTALLATION GUIDE Read all instructions prior to installing any siding product. Failure to install and finish this product in accordance with all local building codes,
The Beauty Of Wood. Made Better. Product Specifications LPZB0590
 The Beauty Of Wood. Made Better. Product Specifications LPZB0590 LP SmartSide Trim Specifications Reversible Two Premium Looks The natural look of cedar on one side and smooth on the other Interior or
CFDTT-01. Control Joint Study (General)
") Trim Method Classic Method Notes: Control joints are required and should be located by the designer at the following locations on the construction documents: 144 sf (13.4 sm) is the maximum overall area
Trim Method Classic Method Notes: Control joints are required and should be located by the designer at the following locations on the construction documents: 144 sf (13.4 sm) is the maximum overall area
TYPAR WEATHER PROTECTION SYSTEM TABLE OF CONTENTS. SPECIAL INSTALLATION CONSIDERATIONS Stucco** Brick** Stone Veneer** Wood Siding**
 TYPAR WEATHER PROTECTION SYSTEM INSTALLATION GUIDE TABLE OF CONTENTS Table of Contents...01 Special Installation Considerations...01 Code Requirements...02 Approvals and Reports...02 Recommended Materials...02
INSTALLATION INSTRUCTIONS for Wood Bay or Bow Windows with Nailing Fin or Exterior Trim (JII032)
") for Wood Bay or Bow Windows with Nailing Fin or Exterior Trim (JII0) Thank you for selecting JELD-WEN products. Attached are JELD-WEN s recommended installation instructions for wood and clad wood bay
for Wood Bay or Bow Windows with Nailing Fin or Exterior Trim (JII0) Thank you for selecting JELD-WEN products. Attached are JELD-WEN s recommended installation instructions for wood and clad wood bay
INSTALLATION INSTRUCTIONS
 CERBER FIBER CEMENT SIDING - SIERRA PREMIUM SHAKE Construction Requirements Sierra Premium Shake boards must be installed over vertical wood framing spaced no greater than 16 oc. with an APA rated 7/16
Technical Note No. 026
 Technical Note No. 026 Strand Substrate Installed Vertically for Board & or Board-on-Board Applications This Technical Note is an addendum to the Strand Substrate Application Instructions and Trim and
Shapes Siding. Perfection Shingles. Chalk Line
 Snap a Chalk Line Shapes Siding Perfection Shingles Chalk Line To establish a straight reference line to guide the positioning of the starter strip and the first course of siding, snap a chalk line. starter
INSTALLATION, STORAGE AND WALL CONSTRUCTION DETAILS
 www.capecodsiding.com INSTALLATION, STORAGE AND WALL CONSTRUCTION DETAILS IMPORTANT READ THE FOLLOWING INSTRUCTIONS CAREFULLY BEFORE INSTALLING YOUR WOOD SIDING. FAILURE TO STRICTLY FOLLOW THESE INSTALLATION,
Technical Note No. 028
 Technical Note No. 028 38 Series Strand Substrate for Board & Batten Applications This Technical Note provides guidance for the application of 38 Series Strand Substrate for Board & Batten Applications.
KuraStone TM Installation Guide
 Installation Guide Read these installation guidelines completely and thoroughly before beginning installation. Construction Requirements KuraStone pieces can be installed on braced wood or steel stud (18
Installation Guidelines For Quaker Window Products Aluminum flange fin sub sill & receptor system using a T mulled twin window unit.
 Installation Guidelines For Quaker Window Products Aluminum flange fin sub sill & receptor system using a T mulled twin window unit. Installer: Read these instructions completely before starting any installation.
INSTALLATION INSTRUCTIONS for Vinyl Projecting Windows with Integral Nailing Fin (JII023)
") Thank you for selecting JELD-WEN products. Attached are JELD-WEN s recommended installation instructions for vinyl bay, bow and garden windows which incorporate an integral nailing fin. While the use of
Thank you for selecting JELD-WEN products. Attached are JELD-WEN s recommended installation instructions for vinyl bay, bow and garden windows which incorporate an integral nailing fin. While the use of
INSTALLATION INSTRUCTIONS for Wood/Clad Wood Windows without Exterior Trim or Nailing Fin (JII025) ImpOrTaNT INFOrmaTION & GlOssary.
 ImpOrTaNT INFOrmaTION & GlOssary.") for Wood/Clad Wood Windows without Exterior Trim or Nailing Fin (JII025) Thank you for selecting JELD -WEN products. Attached are JELD-WEN s recommended installation instructions for metal clad wood windows
for Wood/Clad Wood Windows without Exterior Trim or Nailing Fin (JII025) Thank you for selecting JELD -WEN products. Attached are JELD-WEN s recommended installation instructions for metal clad wood windows
INSTALLATION INSTRUCTIONS for Wood Bay or Bow Windows with Nailing Fin or Exterior Trim (JII032) IMPORTANT INFORMATION AND GLOSSARY ROUGH OPENINGS
 IMPORTANT INFORMATION AND GLOSSARY ROUGH OPENINGS") for Wood Bay or Bow Windows with Nailing Fin or Exterior Trim (JII0) Thank you for selecting JELD-WEN products. Attached are JELD-WEN s recommended installation instructions for wood and clad wood bay
for Wood Bay or Bow Windows with Nailing Fin or Exterior Trim (JII0) Thank you for selecting JELD-WEN products. Attached are JELD-WEN s recommended installation instructions for wood and clad wood bay
Tools required by installer: Materials required by installer:
 Installation Guidelines For Quaker Window Products Vinyl product line (Single Hung, Double Hung, Sliding Window, Fixed Window, Casement, Awning, and Hopper) Installer: Read these instructions completely
STACKING MULTI-SLIDE DOOR SYSTEM INSTALLATION INSTRUCTIONS
 STACKING MULTI-SLIDE DOOR SYSTEM INSTALLATION INSTRUCTIONS 1290363 Revision 1 12/16 Page 1 Weather Shield Mfg., Inc. NOTICE CAUTION! Failure to install and maintain our product according to these instructions
Flashing Materials. Rough Opening Preparation
 Installation Instructions for CertainTeed New Construction Windows Handling vinyl windows CAUTION: Always store vinyl windows and doors in an upright position on a slight angle. Never lay them flat or
INSTALLATION INSTRUCTIONS for Vinyl Windows with Integral Nailing Fin (JII001)
") Thank you for selecting JELD-WEN products. Attached are JELD-WEN s recommended installation instructions for Vinyl windows with an integral nailing fin. While the use of these installation instructions
Thank you for selecting JELD-WEN products. Attached are JELD-WEN s recommended installation instructions for Vinyl windows with an integral nailing fin. While the use of these installation instructions
Installation Guidelines For ALUMINUM M-SERIES 3 PANEL SLIDING DOOR
 www.quakerwindows.comv www.quakercommercialwindows.com PO Box 128 504 Highway 63 South Freeburg, MO 65035 800-347-0438 573-469-4151 (fax) Installation Guidelines For ALUMINUM M-SERIES 3 PANEL SLIDING DOOR
(773) INSTALLATION INSTRUCTIONS for Vinyl Windows with Integral Nailing Fin (JII001) IMPORTANT INFORMATION & GL OSSARY ROUGH OPENINGS
 INSTALLATION INSTRUCTIONS for Vinyl Windows with Integral Nailing Fin (JII001) IMPORTANT INFORMATION & GL OSSARY ROUGH OPENINGS") Thank you for selecting C l i m a t e G u a r d products. Attached are our recommended installation instructions for Vinyl windows with an integral (2400-02) will not affect application of the ClimateGuard
Thank you for selecting C l i m a t e G u a r d products. Attached are our recommended installation instructions for Vinyl windows with an integral (2400-02) will not affect application of the ClimateGuard
Best Materials LLC distributes backer rod, caulking and sealants for all types of EIFS joints and penetration sealing applications.
 Best Materials LLC distributes backer rod, caulking and sealants for all types of EIFS joints and penetration sealing applications. EXTERIOR INSULATION & FINISH SYSTEM CONSTRUCTION Data Published Courtesy
Installation Guide. for E-Series/Eagle Clad Hinged Inswing French Door
 Installation Guide for E-Series/Eagle Clad Hinged Inswing French Door Thank you for choosing Andersen. Instructions are for typical, new wood-framed wall construction with weather protection in place.
Series Sloped glazed Curtain wall. Installation Instructions
 Series 5600 Sloped glazed Curtain wall Installation Instructions Part NO. Y308 February 2013 SECTION TABLE OF CONTENTS PAGE I. General Notes & Guidelines. 3-4 II. Gutter and Mullion Assembly.. 5 III. End
How To Install Windows: Nail-Fin Application
 How To Install Windows: Nail-Fin Application Required Tools & Materials: Materials: 1 3/4" galvanized roofing nails. Nails must penetrate at least 1" into framing For mulled and/or DP50 or above units:
Eagle clad double-hung window installation instructions
 Eagle clad double-hung window installation instructions These instructions are for typical installation in new typical wood frame wall construction. These instructions and methods are not intended for
Installation Guide - Evolution Series Wood Siding
 Installation Guide - Evolution Series Wood Siding The following instructions pertain to the installation of Fraser Wood Siding Evolution Series on a typical wood frame construction allowing for nail penetration
PANELTEK ENGINEERED SIDING/PANELLING INSTRUCTIONS
 PANELTEK ENGINEERED SIDING/PANELLING INSTRUCTIONS This product can be used for interior and exterior installations. Much of this guide refers to exterior installation, however, many of the construction
3M Air and Vapour Barrier 3015 Technical guide
 3M Air and Vapour Barrier 3015 Technical guide Product overview Typical physical properties For installation ease and flexibility, 3M Air and Vapour Barrier 3015 High performance 3M acrylic adhesive grabs
INSTALLATION INSTRUCTIONS for Wood/Clad Wood Windows with Exterior Trim or Nail Fin (JII024)
") Thank you for selecting JELD-WEN products. Attached are JELD-WEN s recommended installation instructions for metal clad wood windows with nailing fin or primed wood windows with exterior trim. While the
Thank you for selecting JELD-WEN products. Attached are JELD-WEN s recommended installation instructions for metal clad wood windows with nailing fin or primed wood windows with exterior trim. While the
Installation Manual for Thermo Panel
 Installation Manual for Thermo Panel 1 About Thermo Panel is a building wrap, insulation, air and water barrier, mold inhibitor and cold bridge eliminator all-in-one. Delivering an R-value of up to 5 on
Sun Windows General Information New Construction Hinged Door Installation Instructions
 A G H F H H A. Apply Weather Resistive Barrier B. Apply Bottom Flashing Tape C. Install Sill Pan End Caps & Pan D. Caulk Sides & Top Nailing Surface, Set Door, Fasten E. Apply Side Flashing Tape F. Apply
Read guide from beginning to end before starting installation. Read all warnings and cautions during unit installation.
 Installation Guide for E-Series/Eagle High-Performance Mullion Windows with LVL Reinforcement and Installed Using Type B Clips Thank you for choosing Andersen. Instructions are for typical, new wood-framed
INSTALLATION INSTRUCTIONS for Vinyl Windows with Integral Nailing Fin (JII001) IMPORTANT INFORMATION & GLOSSARY ROUGH OPENINGS
 IMPORTANT INFORMATION & GLOSSARY ROUGH OPENINGS") Thank you for selecting JELD-WEN products. Attached are JELD-WEN s recommended installation instructions for Vinyl windows with an integral nailing fin. While the use of these installation instructions
Thank you for selecting JELD-WEN products. Attached are JELD-WEN s recommended installation instructions for Vinyl windows with an integral nailing fin. While the use of these installation instructions
Window Frame Installation Instructions For Nail-on and Block Frames
 General The key to any window or door installation is preparation. This extends from storage of the product to the final installation and to all points in between. Careful planning and attention to detail
INSTALLATION MANUAL. ZIP System Roof & Wall Sheathing FASTER. TIGHTER. ENERGY EFFICIENT.
 FASTER. TIGHTER. ENERGY EFFICIENT. FROM THE CREATORS OF ZIP System Roof & Wall Sheathing INSTALLATION MANUAL Sales Office: 10925 David Taylor Dr., Suite 300 Phone: 800-933-9220 zipsystem.com Charlotte,
Building Wrap and Flashing
 Insulati o n First Revision November 2017 Building Wrap and Flashing INSTALLATION GUIDE FOR RESIDENTIAL & LIGHT COMMERCIAL APPLICATIONS 1. General Information 2. Usage & Limitations 5. Handling & Storage
Installation Manual for M4-Exterior Sheathing
 Installation Manual for M4-Exterior Sheathing 1 Application Area - Testing M4 complying with: 2015 and 2012 International Building Code (IBC) and 2015 and 2012 International Residential Code (IRC). The
SECTION LAP SIDING. A. Fiber cement lap siding, panels, single, trim, fascia, moulding and accessories.
 SECTION 07460 LAP SIDING PART 1 GENERAL 1.1 SECTION INCLUDES A. Fiber cement lap siding, panels, single, trim, fascia, moulding and accessories. B. Factory-finished fiber cement lap siding, panels, single,
Building Wrap and Flashing
 Insulati o n Fifth Revision January 2019 Building Wrap and Flashing INSTALLATION GUIDE FOR RESIDENTIAL & LIGHT COMMERCIAL APPLICATIONS 1. General Information 2. Usage & Limitations MAX, HPW, VW, RainDrop
Features & Benefits: For Use with OSI QUAD Window & Door System. Recommended For:
 Description: OSI Butyl Flash is a rubberized butyl backed, self-adhering 15-mil membrane. The foil backed exterior allows the flashing to be exposed to UV rays for at least 12 years. It is efficient, easy
INSTALLATION INSTRUCTIONS for Vinyl Projecting Windows with Integral Nailing Fin (JII023) IMPORTANT INFORMATION AND GLOSSARY ROUGH OPENINGS
 IMPORTANT INFORMATION AND GLOSSARY ROUGH OPENINGS") Thank you for selecting JELD-WEN products. Attached are JELD-WEN s recommended installation instructions for vinyl bay, bow and garden windows which incorporate an integral nailing fin. Read these instructions
Thank you for selecting JELD-WEN products. Attached are JELD-WEN s recommended installation instructions for vinyl bay, bow and garden windows which incorporate an integral nailing fin. Read these instructions
Installation Instructions
 www.marlite.com Effective Date 03/01/2018 ARTIZAN FRP, SYMMETRIX FRP, ENVUE FRP, STANDARD FRP Installation Instructions Statements expressed in this technical bulletin are recommendations for the application
Installation Guidelines. Next Dimension. Single Hung / Single Hung Fixed / Double Hung / Sliding Window / Fixed Window
 Installation Guidelines Next Dimension Single Hung / Single Hung Fixed / Double Hung / Sliding Window / Fixed Window Windsor Windows & Doors Windsor Windows & Doors 900 S. 19 th St. 2210 Stafford St. Extn
Sun Windows General Information New Construction Sliding Door Installation Instructions H F
 A G B D C H F H E H A. Apply Weather Resistive Barrier B. Apply Bottom Flashing Tape C. Install Sill Pan End Caps & Pan D. Caulk Sides & Top Nailing Surface, Set Door, Fasten E. Apply Side Flashing Tape
INSTALLATION GUIDE SAVANNAH SMOOTH & SIERRA PREMIUM SHAKE
 INSTALLATION GUIDE SAVANNAH SMOOTH & 1 NICHIHA INSTALLATION GUIDE FOR SAVANNAH SMOOTH & GENERAL INSTRUCTIONS FOR SAVANNAH SMOOTH & CONSTRUCTION REQUIREMENTS Savannah Smooth and Sierra Premium Shake boards
Fold-A-Way Patio Door ASSEMBLY & INSTALLATION GUIDE
 Fold-A-Way Patio Door ASSEMBLY & INSTALLATION GUIDE This instruction guide provides the minimum recommended procedures to correctly prepare the rough opening, install a fold-a-way patio door unit and apply
All Window Installation Instruction
 1 All Window Installation Instruction Hurd Window Installation Instructions for Nail Fin & Wood Brick Mould Units Nail Fin Windows See Pages 2-11 Wood Brick Mould Windows See Pages 2-6, 8 & 12BM - 14BM
Installation Guide Classic Series Wood Siding
 Installation Guide Classic Series Wood Siding Please read the following instructions prior to beginning your installation. The following installation guidelines have been produced in accordance with the
Installation Guide for E-Series/Eagle Clad Mechanically Fastened Windows
 Guide for E-Series/Eagle Clad Mechanically Fastened Windows Thank you for choosing Andersen. Instructions are for typical, new wood-framed wall construction with weather protection in place. Instructions
MAXISHINGLE LAP SIDING INSTALLATION GUIDE
 MAXISHINGLE LAP SIDING INSTALLATION GUIDE Read all instructions prior to installing any siding product. Failure to install and finish this product in accordance with all local building codes, regulations
SERIES 4070-T GENERAL ASSEMBLY AND INSTALLATION INSTRUCTIONS
 Table of Contents I. Care and Maintenance... 2 II. Tools / Materials, Sealant Requirements, & Anchor Instructions... 2 III. Structure Verification & Sub-Sillpan Installation... 3 1. Opening Verification...3
MULTISHAKE LAP SIDING INSTALLATION GUIDE STORAGE AND HANDLING: PACKAGING:
 MULTISHAKE LAP SIDING INSTALLATION GUIDE Read all instructions prior to installing any siding product. Failure to install and finish this product in accordance with all local building codes, regulations
INSTALLATION INSTRUCTIONS IMPERVIA SLIDING PATIO DOOR WITH FINS
 2008 Pella Corporation Part Number: 803V0101 INSTALLATION INSTRUCTIONS IMPERVIA SLIDING PATIO DOOR WITH FINS Installation Instructions for Typical Wood Frame Construction. These instructions were developed
Installation Guidelines for all Quaker products with nail fins New Construction nail fin installation with a Zip sheathing system.
 www.quakerwindows.com www.quakercommercialwindows.com PO Box 128 504 Highway 63 South Freeburg, MO 65035 800-347-0438 573-469-4151 (fax) Installation Guidelines for all Quaker products with nail fins New
LuxCore Installation Instructions
 LuxCore Installation Instructions ATTENTION: LuxCore PANELS MUST BE ACCLIMATIZED FOR 24 HOURS BEFORE INSTALLATION PLEASE READ ALL INSTRUCTIONS PRIOR TO INSTALLATION The guidelines provided herein have
Inspire Aledora Slate Application Guidelines
 July 2014 Inspire Aledora Slate Application Guidelines Only Basic Roofing Tools Required Hand fastened or fastened with a pneumatic nail gun Utility knife or a standard circular saw Tape measure, pry bar,
Storefront Installation Guide
 Storefront General Notes: 1. Check Contract Documents and Shop Drawings. Understand and clarify any Field Verify Notes and approvals of drawings and products to be familiar with the project. Installation
Butyl Flash. Installation Instructions. Prep & General Conditions
 Prep & General Conditions All surfaces must be clean, dust free, smooth and dry. Do not apply over sealants or uncured caulks containing plasticizers or solvents. This includes most silicones and polyurethane
WindowSeal. Installation Instructions. Prep & General Conditions
 Prep & General Conditions All surfaces must be clean, dust free, smooth and dry. Do not apply over sealants or uncured caulks containing solvents or plasticizers. This includes most silicones and polyurethane
SECTION SHEET METAL FLASHING AND TRIM
 SECTION 07620 PART 1 - GENERAL 1.1 SUMMARY A. Section Includes: 1. Formed roof drainage sheet metal fabrications. 2. Formed low-slope roof sheet metal fabrications. 1.2 SUBMITTALS A. Shop Drawings: Show
MAGNUM BOARD INTERIOR INSTALLATION GUIDELINES
 TECHNICAL BULLETIN No.: 090509-1405 Subject: Issue Date: September 4, 2009 Issue No.: II MAGNUM BOARD INTERIOR INSTALLATION GUIDELINES 1. CUTTING MAGNUM BOARD You can easily cut Magnum Board with carbide
WEB BASED CORE APPLICATION SPECIFIC INSTALLATION INFORMATION AND METHODS
 CORE WEB BASED CORE APPLICATION SPECIFIC INSTALLATION INFORMATION AND METHODS Removing Old Windows Part I - Frame In Although all possible measures have been taken to insure the accuracy of the material
NEW HOME WARRANTY A REFERENCE GUIDE FOR TYPICAL WALL AND WINDOW DETAILS (RAINSCREEN SYSTEM) SHOWN AS FIBRE CEMENT CLADDING
 SHOWN AS FIBRE CEMENT CLADDING") NEW HOME WARRANTY A REFERENCE GUIDE FOR TYPICAL WALL AND WINDOW DETAILS (RAINSCREEN SYSTEM) SHOWN AS Reference Guide 0.1 GENERAL 0.1 Reference Guide 0.2 Index 0.3 Disclaimer & Limitations 0.4 General Notes
NEW HOME WARRANTY A REFERENCE GUIDE FOR TYPICAL WALL AND WINDOW DETAILS (RAINSCREEN SYSTEM) SHOWN AS Reference Guide 0.1 GENERAL 0.1 Reference Guide 0.2 Index 0.3 Disclaimer & Limitations 0.4 General Notes
SHEET METAL FLASHING AND TRIM Christ on the Mountain
 SECTION 076200 - SHEET METAL FLASHING AND TRIM PART 1 - GENERAL 1.1 SUMMARY A. Section Includes: 1. Compatibly with the bumping of flashings and trim as identified in the Membrane Roofing Section 075000.
Integrity Polygon and Round Top Installation and Finishing Instructions
 Integrity Polygon and Round Top Installation and Finishing Instructions 08/20/2004 70852 BEFORE YOU BEGIN IMPORTANT: Read these instructions thoroughly before beginning to install your Integrity Polygon
VINYL WINDOWS (new construction or replacement) page 2. VINYL PATIO DOORS pages WOOD CLAD WINDOWS (new construction).page 5 WOOD CLAD WINDOWS
 page 2. VINYL PATIO DOORS pages WOOD CLAD WINDOWS (new construction).page 5 WOOD CLAD WINDOWS") RECOMMENDED INSTALLATION INSTRUCTIONS Please choose the appropriate instructions for the product(s) you are using. Read the instructions thoroughly before beginning the installation process. All instructions
RECOMMENDED INSTALLATION INSTRUCTIONS Please choose the appropriate instructions for the product(s) you are using. Read the instructions thoroughly before beginning the installation process. All instructions
Aluminum Clad Wood Window 1/2 Reinforced Field Mulling and Stacking Supplement
 Aluminum Clad Wood Window 1/2 Reinforced Field Mulling and Stacking Supplement 1 Aluminum Clad Wood Window 1/2 Reinforced Field Mulling and Stacking Supplement The following instructions are a supplement
ROOFING APPLICATION STANDARD (RAS) No. 115 STANDARD PROCEDURES FOR ASPHALTIC SHINGLE INSTALLATION
 No. 115 STANDARD PROCEDURES FOR ASPHALTIC SHINGLE INSTALLATION") ROOFING APPLICATION STANDARD (RAS) No. 115 STANDARD PROCEDURES FOR ASPHALTIC SHINGLE INSTALLATION 1. Scope 4. Underlayment 2. 1.1 This roofing application standard has been developed to provide a responsive
ROOFING APPLICATION STANDARD (RAS) No. 115 STANDARD PROCEDURES FOR ASPHALTIC SHINGLE INSTALLATION 1. Scope 4. Underlayment 2. 1.1 This roofing application standard has been developed to provide a responsive
VERTICAL STILE ABOVE HORIZONTAL TRIM VERTICAL STILE BELOW COVE BASE ADHESIVE. 1" [25.4mm] BASE DETAIL
![VERTICAL STILE ABOVE HORIZONTAL TRIM VERTICAL STILE BELOW COVE BASE ADHESIVE. 1 [25.4mm] BASE DETAIL](/thumbs/87/96020661.jpg "VERTICAL STILE ABOVE HORIZONTAL TRIM VERTICAL STILE BELOW COVE BASE ADHESIVE. 1 [25.4mm] BASE DETAIL") Please Read All sheet will be provided in stock sizes for field cutting. All trims will be provided in 8-0 stock lengths for field cutting. CEILING TRIM 1" [25.4mm] Acrovyn Interiors vinyl acrylic wall
Please Read All sheet will be provided in stock sizes for field cutting. All trims will be provided in 8-0 stock lengths for field cutting. CEILING TRIM 1" [25.4mm] Acrovyn Interiors vinyl acrylic wall
UNIT 5: EXTERIOR DOORS AND WINDOWS
 KEY CONCEPTS 1. Identify tools needed for exterior door and window installation 2. Last step to weather proofing the home 3. Steps to installing exterior doors and windows 4. Maintenance and safety of
Tamko. tw window & door flash Flashing Membrane PRODUCT DATA *
 tw window & door flash PRODUCT DATA DESCRIPTION Tamko TW WINDOW & DOOR FLASH is a flexible self-adhering rubberized asphalt flashing membrane with a white polymer surface film and a removable treated release
Providing 3 Layers of Protection
 Providing 3 Layers of Protection Barrier 1: Barrier 2: Barrier 3: Integrate the Opening Seal the Exterior Seal the Interior Standard Integral Flange After Housewrap Standard Window Integral Flange After
ZIP System Roof Sheathing INSTALLATION MANUAL A REVOLUTION IN ROOFING
 A REVOLUTION IN ROOFING FROM THE CREATORS OF ZIP System Roof Sheathing INSTALLATION MANUAL Sales Office: 10925 David Taylor Dr., Suite 300 Phone: 800-933-9220 zipsystem.com Charlotte, NC 28262 Fax: 704-547-9228
TECHNICAL GUIDE BEONSTONE PANELIZED STONE SIDING
 TECHNICAL GUIDE BEONSTONE PANELIZED STONE SIDING TABLE OF CONTENTS This installation guide provides detailed step-by-step instructions for do-it-yourself projects. We invite you to read it carefully and
TAMKO. TW MOISTURE WRAP Above Grade Moisture / Air Barrier Membrane PRODUCT DATA
 PRODUCT DATA DESCRIPTION TAMKO is a flexible 40 mil self-adhering rubberized asphalt sheet membrane with a clear polymer film on the surface film and a removable treated release film on the adhesive side.
DuPont Flashing Systems Installation Guidelines. Integral Flanged Door Before water-resistive. Version 2
 DuPont Flashing Systems Installation Guidelines Helping you get the job done right Integral Flanged Door Before water-resistive barrier (wrb) is installed Version 2 Table of Contents Applicable Products...2
RIDGEMASTER PLUS CAUTION INSTALLATION INSTRUCTIONS ALWAYS WEAR SAFETY GLASSES TOOLS NEEDED GENERAL GUIDELINES FOR RIDGEMASTER PLUS AND HIPMASTER
 INSTALLATION INSTRUCTIONS RIDGEMASTER PLUS CAUTION Before beginning installation read all general guidelines, special notes and installation steps thoroughly and be sure to check and follow all your local
INSTALLATION INSTRUCTIONS for Wood/Clad Wood Windows without Exterior Trim or Nail Fin (JII025) IMPORTANT INFORMATION AND GLOSSARY ROUGH OPENINGS
 IMPORTANT INFORMATION AND GLOSSARY ROUGH OPENINGS") for Wood/Clad Wood Windows without Exterior Trim or Nail Fin (JII025) Thank you for selecting JELD-WEN products. Attached are JELD-WEN s recommended installation instructions for metal clad wood windows
for Wood/Clad Wood Windows without Exterior Trim or Nail Fin (JII025) Thank you for selecting JELD-WEN products. Attached are JELD-WEN s recommended installation instructions for metal clad wood windows
Ash Brook Golf Course Scotch Plains, New Jersey
 SECTION 062013 - EXTERIOR FINISH CARPENTRY PART 1 - GENERAL 1.1 RELATED DOCUMENTS A. Drawings and general provisions of the Contract, including General and Supplementary Conditions and Division 01 Specification
Inspire Slate Starter Piece Hip and Ridge. 13 1/2" Height: 13 ½" Width: 12" Squares/ Pallet. Bundles/ Square
 December 2017 Classic Slate Application Guidelines Only Basic Roofing Tools Required Hand fastened or fastened with a pneumatic nail gun Utility knife or a standard circular saw Tape measure, pry bar,
4. Metal roof jacks at penetrations and attachments
 - - - - - - - - - - - - - - - - - - - - - - - - - - - - - - - - - - - - - - - - - - - - - - - - - - - - - - - - - - - - - - - - - - - - - - SECTION 07 61 00 METAL SHINGLE ROOFING - - - - - - - - - - -
DOOR INSTALLATION GUIDE WOOD FRAMING New Construction
 DOOR INSTALLATION GUIDE WOOD FRAMING New Construction IMPORTANT NOTICES AND INFORMATION Read these instructions in their entirety prior to installing doors. Any local building code requirements supersede
RECOMMENDED INSTALLATION PROCEDURE LEVEL 3
 45 45 6 6 Step 1. Modify Weather Resistive Barrier 1.A Cut the weather resistive barrier flush to the recessed opening (per diagram). Remove the cut away weather resistive barrier, exposing recessed opening
Quick Reference Guide For MoistureFree Certified Inspectors and Contractors
 Quick Reference Guide For MoistureFree Certified Inspectors and Contractors Topic Page No. Critical Elements Of The Kickout 2 Bad Kickout Examples 3 Raintek Kickout By Demand Products 4 Inspecting and
Finishing Finishing Instructions Painting Tips Aluminum Astragal Painting Doorlite Frame Finishing
 Finishing... 2.3 Painting Tips... 2.6 Aluminum Astragal Painting... 2.9 Doorlite Frame Finishing... 2.10 SITE 2 2017 2.1 2.2 2017 SITE 2 SITE 2 2017 2.3 2.4 2017 SITE 2 SITE 2 2017 2.5 Painting Tips Therma-Tru
MUDGUN Drywall Finishing System
 Watch the demonstration video online at hydetools.com MUDGUN Drywall Finishing System Quick Start Guide Hyde Tools, Inc. / A Hyde Group Company / 800-872-4933 / custrelations@hydetools.com / hydetools.com
Product Information & Installation Instructions
 Product Information & Installation Instructions TUFF-STRAND TM OSB Sheathing OSB Structural Panels from MARTCO Installation Instructions: Site-Built and Modular Construction Important Notice to Buyers
PROJECT INSTRUCTIONS Roofing
 PROJECT INSTRUCTIONS Roofing This handout outlines some basic regulations contained within the 2015 Minnesota State Building Code, as well as other good building practices. However, this handout is not
Dear Contractor, I am glad that you are interested in our window rebate program.
 Dear Contractor, I am glad that you are interested in our window rebate program. I have included three documents with this letter. One is our form to indicate your intention to participate in the program.