Table of Contents RULEBOOK. SCENARIO BOOK General Principles...14 Variants...16 Scenario List...18
|
|
|
- Angelica Anthony
- 5 years ago
- Views:
Transcription


, use the Rulebook.")


.")

.")


1 RULEBOOK This book has two parts, the Rulebook and the Scenario Book. The Rulebook provides the complete rules for playing the Mage Knight Board Game. We strongly recommend that players start by reading the Game Walkthrough, where the rules are explained in a more natural order, with many pictures and examples. Once you have read the Game Walkthrough and played your first scenario, and are familiar with the game components and concept, this Rulebook provides the complete rules for the game, except the rules relating to certain scenarios (those you can find in the Scenario Book) and rules for particular map sites (those you can find on the Site Description cards). This is a complex game, and even after you play your first couple of games, you may still need to check the rules from time to time. For a smoother experience, we recommend this approach: When playing, have the Site Description cards for all sites nearby. Each Site Description card provides all the rules for the given map site. It may use terms that are further explained in the Rulebook. When playing, have the last page of this book within reach. It provides a useful summary of game phases and a table of combat abilities. For scenario related rules (setup, special rules, end game conditions, scoring), consult the description of the given scenario in the Scenario Book. It may also refer to some more common scenario rules (like the dummy player or scoring); these are at the start of the Scenario Book. If you want to check some generic rule (not related to a particular map site or scenario), use the Rulebook. It is organized in systematic way, and once you understand its structure, you will be able to navigate through it more easily. When searching for a particular rule or situation, consult the Table of Contents on this page to find which phase of the game the rule belongs. If it does not relate to a particular phase of the game, it will be probably in the Basic Game Concepts section. The same applies if you are searching for more details of a site related rule (for example, to see how a mage tower affects movement, search in the Movement section). The Rulebook refers to sites by text written like this. Note that sites may share some rules according to their type (fortified sites, adventure sites and rampaging enemies). Do not try to look up rules in the Game Walkthrough. You should be able to find all the rules in this book or on a Site Description card. If you have found the rule here but you are not sure how to interpret it, you may try to find its more detailed explanation in the Game Walkthrough. Table of Contents RULEBOOK Game Flow...1 Game Setup for the Full Game...3 One Round of the Game (Day or Night)...4 Basic Game Concepts...4 A Player s Turn...6 Movement...7 Interacting with Locals...8 Combat with Enemies...8 End of the Turn...11 Wounds and Healing...11 Player versus Player Combat...12 Cooperative City Assault...13 SCENARIO BOOK General Principles...14 Variants...16 Scenario List...18 SUMMARY Summary...23 Icon Reference...24 Turn Sequence Overview...24 Game Flow ~ ~ When a player takes their Hero, they put that Hero s Round 3. Setup the Game Follow the directions in the Game Setup 1. Choose a scenario Pick a scenario from the Scenario Book to play. You may also use any variant rules as long as all players agree to them. 2. Player Order/Hero Selection Determine an order for players to make their Hero selection. In that order, each player chooses one of the available Heroes and takes all of the associated Hero components. Order token on the table. Round Order tokens should be placed sequentially in a column, such that the Round Order token for the player that picked first is at the top of the column, while the token for the player that picked last is at the bottom. 1 section on the next page to set up the game area. Check the scenario description for any exceptions or special rules that may modify the game setup. 4. Play the Game Play out the Rounds of the game until you fulfill the end-game conditions outlined in the scenario, or until you reach the Round limit. 5. Outcome of the Game When the game is over, follow the scoring rules outlined in the scenario.

 Mana die Bank Map Mana crystals Tiles revealed at start Map shape when starting tile B is used.")
2 Advanced Action deck Spell deck Wound pile Artifact deck Enemy and Ruin token piles City cards and City figures Spaces for Common Skill o ff e r Spaces for Advanced Action offer Fame track Reputation track Spaces for Spell offer Tile deck Elite Unit deck Regular Unit deck Fame and Reputation board Round Order Move costs Source Day/Night board Unused Night Tactics Site Description and Scoring cards Spaces for Unit offer Space to display Advanced Action cards later (for Monasteries) Mana die Bank Map Mana crystals Tiles revealed at start Map shape when starting tile B is used. Displayed Day Tactics 2
 Unit Tile deck.")
 and ruin (hexagonal) tokens by the reverse side, and stack them in seven face down piles.")


. Discard pile.")

, pick them randomly.")


3 Game Setup for the Full Game ~ ~ Fame and Reputation board. Players put one of their Shield Unit offer. Reveal as many cards from the Regular (silver) Unit Tile deck. The Scenario description says how many tiles of tokens on the 0 space of the Fame track and one on the central 0 space of the Reputation track. Enemy and Ruin token piles. Sort the enemy (round) and ruin (hexagonal) tokens by the reverse side, and stack them in seven face down piles. Next to each pile, there is a space for discarded tokens. If you run out of tokens, reshuffle the discarded ones and create a new face down pile. Artifact deck. Shuffle the Artifacts and put them in a face down deck. Artifacts are never displayed in an offer. Wound pile. All Wound cards are the same. Stack them in a face up pile. Spells deck and Spell offer. Shuffle the Spell cards and put them in a face down deck. Reveal the first three as the offer. Advanced Action deck and Advanced Action offer. Prepare in the same way as for Spells. Common Skill offer. An empty area where Skill tokens not chosen during Level up will be put. Regular Unit deck and Elite Unit deck. Shuffle the Unit cards with silver and gold backs separately to create two face down decks. deck as there are actual players plus 2. Later, there may also be some Advanced Action cards in the Unit offer (one for each monastery on the map). Round Order tokens. Each player puts their Round Order token here, with the player who picked their Hero first being at the top. Day/Night board. At the start of the game, put it day side up. At the start of a new round, it gets flipped, so Day and Night alternate. The left part of this board depicts the Move costs of various terrains. The right part is the Source. Roll as many mana dice as there are actual players plus 2, and place them there. At least half of the dice have to show basic colors (red, blue, white or green). If not, keep rerolling all the black and gold dice together until this is true. Displayed Day Tactics. Display the Day Tactic cards in an easily accessible place. Unused Tactics. Put the Night Tactic cards here now. You do not need to shuffle them. PLAYER AREA Hero card. This card represents your character. In its lower part is the Inventory, in which you store crystals gained during the game. Pile of Level tokens. Stack the five octagonal Level tokens in a face up pile, sorted by numbers, so the one marked 1-2 is at the top, while 9-10 is at the bottom. The current token shows your Armor of 2 and Hand limit of 5 for levels 1-2. Put the sixth blank Level token shield side up in your Unit area as a Command token. Unit Area. Here you place your recruited Units. Each Unit needs its own Command token. You currently have one Command token, so you can only have one Unit. When advancing to an odd-numbered level, you get another Command token, so your maximum number of Units increases. Deed Deck. Each player shuffles the 16 Basic Action cards of their Hero (check the symbol in upper right corner) to create their Deed deck. Player s hand. At the start of the game, draw 5 cards from your Deed deck (according to your Hand limit depicted on your topmost Level token). Discard pile. Here you discard played cards at the end of your turn (and sometimes also some cards during your turn). Figure. For now, place your figure here. It will move to the map during your first turn. Shield tokens. Use one on the Fame track and another on the Reputation track. The rest are used to mark your successes on the map. The supply should be endless (if you run out of them, use a substitute). Hero card each type you should use to form this deck. For Countryside tiles (green back), pick them randomly. For Core tiles (brown back), separate them into city and non-city tiles (according to whether they have a City icon in the middle). Then randomly choose the appropriate number of non-city and city tiles. To form the deck, shuffle the chosen brown tiles together, then put the shuffled green tiles on top of them. Map. According to the scenario description, put the starting tile either A side or B side up. Reveal two (if using starting tile A) or three (if using B) tiles from the Tile deck and place them as depicted. Orient the tiles in the same direction as the starting tile. For all revealed sites, check the Site Description card to see what happens when they are revealed. Site Description cards and Scoring card. These should be nearby, so players can easily take and read them. City cards and City figures. These can be out of reach, as you will not need them until later in the game. Bank. Put the mana crystals in an accessible space. Place any unused mana dice there, as sometimes you may need to roll a die during the game. Pile of Skill tokens. Each player has 11 Skill tokens in their color. If you are playing a cooperative game then remove the competitive interactive skill. If you are playing a competitive game then remove the cooperative interactive skill. Randomize the 10 remaining skills and put them in a face down pile. Gained Skills. An area where Skill tokens gained during Level up will be put. Skill Description card. All Skill tokens belonging to your Hero are described here. Play Area. Each player should have some reasonable space in front of them, where they can play cards during their turn. Gained Skills Pile of Level tokens Play Area Shield tokens Inventory Deed deck Command token Hero figure Unit area Discard pile (face up) Pile of Skill tokens Skill Description card Player s hand 3
: a.")

 Units only. If at least one Core tile has been revealed, alternate dealing Elite (gold) and Regular Units. (Elite, Regular, Elite, etc.")


 discard any Banner Artifact assigned to their Units at this moment. Readies all Units in their Unit area, including Wounded ones (Wounded Units are not healed).")


4 One Round of the Game (Day or Night) ~ ~ c. Rearrange the Round Order tokens according to the Tactic e. Refresh the Spell offer Follow the same steps as for 1. Rounds are either Day or Night. Players take their turns within a Round. 2. Prepare the Round (skip this step for the first Round of the game, as it was completed during setup): a. Flip the Day/Night Board If it was Day, flip the board to Night; if Night, flip to Day. b. Reset the Source Reroll all mana dice in the Source, following the conditions outlined in the Game Setup section. c. Create a new Unit offer. Take all Unit cards currently in the offer and put them on the bottom of their corresponding decks. If there are some Advanced Action cards in the Unit offer, put them to the bottom of the Advanced Action deck. Deal new Unit cards into the Unit offer equal to the number of actual players plus 2. If no Core tile has been revealed, deal Regular (silver back) Units only. If at least one Core tile has been revealed, alternate dealing Elite (gold) and Regular Units. (Elite, Regular, Elite, etc.) If there are any monasteries on the map, add one Advanced Action card to the Unit offer for each monastery that has not been burned. d. Refresh the Advanced Action offer Remove the lowest position Advanced Action card in the offer and put it on the bottom of the Advanced Action deck. Move each other Advanced Action down one position in the offer, then draw a new card from the Advanced Action deck and add it to the offer in the top position. DEED CARDS refreshing the Advanced Action offer. f. Collect Tactic cards Collect all Tactic cards from the previous Round, then display the appropriate set of Tactic cards in the game area, face up. g. Each player: Flips all Banner Artifacts and Skill tokens in their play area face up. They may (does not have to) discard any Banner Artifact assigned to their Units at this moment. Readies all Units in their Unit area, including Wounded ones (Wounded Units are not healed). Shuffles all their Deed cards to create a new Deed deck. Draws cards up to their Hand limit. This may be increased if they are on or next to a keep or city see the description of these sites. If next to both, use only the higher effect. This may also be increased by an effect that increases Hand limit next time you draw cards if that effect occurred on the player s final turn of the previous Round. 3. Players choose Tactic cards for this Round. a. Each player chooses one Tactic card displayed in the game area. The player with the lowest Fame picks first, followed by the player with the second lowest Fame, etc. In case of a tie, the player whose Round Order token is in a lower position picks first. Note: This means that in the first Round, the player who picked their Hero last chooses their Tactic card first. b. Follow any instructions on Tactic cards which say when you take this Tactic. number of each player, such that the lowest Tactic number is on top (first) and the highest Tactic number is on the bottom (last). d. Remove any unclaimed Tactics and set them aside. 4. Players play their turns: a. Players take their turns in the order stated by the Round Order tokens (from top to bottom). After the last player, the first player plays again. b. If a player s Deed deck is empty at the start of their turn, that player may announce the End of the Round instead of playing their turn. If they do, each other player takes one last turn and then the Round ends. c. At the end of each player s turn check the Scenario End description to see whether the conditions have been met. This will often involve all players having one last turn before the game then ends. d. If a player has announced the End of the Round and the Scenario End conditions have also been met then players get their final turn according to whichever occurred first. e. Players may not play any effects after their last turn in a round, not even those usable in another player s turn. f. On a player s last turn of a Round, any effects that increase that player s Hand limit the next time they draw cards transfer to the start of the next Round. 5. Check the Scenario description to see whether the game is over. a. If the scenario conditions have been met or if the Round limit is reached, the game is over and you should follow the Scenario description to determine the outcome of the game. b. If not, continue the game by playing the next Round. Concepts ~ ~ Basicb. A SpellGame can be powered by one mana of the depicted color 5. At the end of the turn, all played Deed cards go to your discard 1. All cards with this card back are Deed cards. These consist of Action cards (Basic and Advanced), Spells, Artifacts and Wounds. At the start of the game, players have only Basic Action cards in their Deed deck. 2. Each turn, players will play Deed cards from their hand. To play a card, put it in your Play area and perform the stated effect. 3. Different Deed cards can be played in different ways: a. An Action card (Basic or Advanced) can be played to provide its basic effect, or it can be powered by one mana of the depicted color to provide its strong effect. The color of an Action card is determined by the color required for its strong effect. to provide its basic effect. At Night it can be powered by one mana of the depicted color and one black mana to provide its strong effect. The color of a Spell card is determined by the color required for its basic effect. c. An Artifact can be played to provide its basic effect, or it can be thrown away (removed from the game) for its strong effect. d. Wound cards cannot be played in any way. e. Any non-wound card can be played sideways into the Play area to provide either Move 1, Influence 1, Attack 1, or Block 1. They can t be played to provide Ranged Attack, Siege Attack, or any kind of elemental (Fire, Ice or Cold Fire) Attack or Block. 4. Cards that provide similar effects (even those of different types) can be played together to provide a cumulative effect. Stack the played cards together and total their effects. 4 pile. Unplayed cards remain in your hand, unless you decide to discard one or more of them. 6. Some card effects order you to pay extra mana of some color, or to discard (put to your discard pile) or throw away (remove from the game) another card. These effects cannot be played if you are unable to do this. a. Wound cards can be never discarded or thrown away this way, unless the effect explicitly allows so. Thus any card refers to any card in your hand, except Wound cards.


5 USING UNITS 1. Units are separated into two decks, Regular (silver card back) and Elite (gold card back). The card back does not impact game play once Units are in the game. 2. At the start of the game, players control no Units. Units gained (recruited) during the game are displayed in front of the player in the Unit area at all times (they will never be in a player s hand, Deed deck or discard pile). 3. Each Unit in your Unit area has an assigned Command token. You cannot have more Units than Command tokens in your Unit area. a. Units with Command tokens above them are considered to be Ready. b. Units with Command tokens on them are considered to be Spent. c. Units with a Wound card across them are considered to be Wounded. 4. Newly recruited Units are always Ready and not Wounded. a. If you want to gain a new Unit but all of your Command tokens are occupied, you must disband one of your Units. Remove a disbanded Unit from the game. The newly recruited Unit is Ready and not Wounded, regardless of the state of disbanded Unit. 5. A Unit that is Ready and not Wounded may be activated for one of its abilities. a. To activate a Unit, put its Command token on it the Unit is no longer Ready, it is spent until the end of the Round. b. Then choose one of the abilities displayed on the Unit card and apply its effect. You may combine it with the effects of other Deed cards, Skills and Units. To choose an ability with a mana symbol in front of it, you have to pay mana of the corresponding color first. 6. Whenever an effect allows you to Ready a Unit, you may move the Command token above that Unit. The Unit is now Ready and can be activated again. 7. An effect can only alter an ability of a Unit if that Unit has that ability. So for instance, to increase a Units Block it must already have a Block value. 8. Banner Artifacts can be assigned to a Unit at any time during your turn. Put the Banner card partially under the Unit card you are assigning it to. As long as the Banner is attached to the Unit, the Unit can benefit from its basic effect, but the strong effect is inaccessible. a. If the Unit is destroyed or disbanded, or if you assign another Banner to the same Unit, the Banner goes to your discard pile. b. At the end of the Round, you may decide either to keep the Banner with the unit, or you can shuffle it back into your Deed deck. 9. At the end of your turn, do not discard or Ready a Spent Unit. Units are automatically Readied at the end of each Round. USING SKILLS 1. Skills are represented by Skill tokens. Each character has their own set of Skill tokens. 2. At the start of the game, players have no Skill tokens available to them. Each time a Hero reaches an even-numbered Fame level, they gain one Skill token. a. Players put the Skill tokens they gain during the game face up in front of them. b. Players may gain Skill tokens of their own character, but also Skill tokens of other characters in the game. If they do, they can use them the same way as their own once a Skill is in the game, it does not matter to which character set it belongs. 3. The use and effect of each Skill is depicted by icons on its token. They are described in detail on the Skill Description card of the corresponding character. 4. Skills are of three basic types: a. Skill tokens with this symbol can be used only once a Round, on your turn (except the Motivation skill, which can also be used during other player s turns). If you use such a Skill, flip the token face down until the start of the next Round. b. Skill tokens with this symbol can be used once a Round, but their effect persists until the start of your next turn. These Skills will affect other players during their turns while they are active. When using this type of Skill, announce it loudly and put the token in the center of the table. At the start of your next turn (or when the Round ends, if that comes first), take it back and flip it face down. It will be flipped up at the start of the next Round. c. Skill tokens without any special symbols can be used once each turn. COMPOSITE EFFECTS USING MANA 1. If an effect tells you to gain a mana token, take a mana token of the corresponding color and put it in your Play area. 2. If an effect tells you to gain a crystal, take a mana token of the corresponding color and put it in your Inventory. If you already have three crystals of that color, gain a mana token of that color to your Play area instead. 3. If an effect tells you to gain a new Deed card (Advanced Action, Spell, or Artifact) during or after your turn, the new card is placed on top of your Deed deck unless stated otherwise. a. Whenever you gain a card from the Spell offer or Advanced Action offer, replenish the offer immediately by shifting the remaining cards down and adding a new card to the top slot of the offer. b. If you take a card from the Unit offer (either a Unit or an Advanced Action that you learned in a monastery), do not replenish the offer. It will be replenished at the start of the next Round. 4. Any Artifacts and any rewards won during combat are gained at the end of your turn. See the End of Turn section. 1. There are four basic colors of mana in the game (red, blue, white and green). The mana can be in two forms: a. Pure mana. This is represented by a mana die or by a mana token in a player s play area. When gained, it has to be used before the end of the player s turn, or it disappears. b. Crystals. These are represented by a mana token in the player s Inventory (on their Hero card). Up to three tokens of each basic color can be stored there. A crystal can be turned into pure mana at any moment of a player s turn. Pure mana cannot be turned into crystals unless an effect says so. 2. There are two special colors (gold and black) that can be in pure form only (there are no gold and black crystals). a. During Day Rounds, gold mana can be used as mana of any basic color (for all purposes, it is considered exactly the same as using mana of the desired color). Black mana can never be used during the Day. b. During Night Rounds, black mana can be used to power some effects. Gold mana can never be used at Night. 3. The Source represents pure mana present in the world. Each turn, a player may take one mana die from the Source and use it as mana of the color shown on the die. a. Reroll any dice taken from the Source this way at the end of the player s turn, and return them to the Source. b. Players take the dice at the moment when they want to use the mana. Players are not allowed to take a die and then not use the mana it provides. c. During Day Rounds any mana die in the Source showing black mana is immediately depleted. During Night Rounds any mana die in the Source showing gold mana is immediately depleted. Depleted mana die cannot generally be used. They should be placed in the top right of the Source to make this clear. 1. Some cards (Concentration, Magic Talent, etc.) allow you to play the effect of another card or token as part of their effect (some even multiple times Maximal Effect). a. This is all evaluated as playing a single effect. So for instance, you could not use Maximal Effect with Determination and use the Block against different enemy attacks. b. You have to respect all the limitations of the played effects. For the purposes of resistances, each effect maintains its color, even if the mana is not actually paid. c. Special case: The Time Bending spell has to be set aside after it is played. If you use another card (Magic Talent) to play Time Bending, that card is set aside instead. GAIN EFFECTS DISCARDING AND THROWING AWAY 1. If an effect tells you to discard a card, put the discarded card into your discard pile. You may never discard a Wound card, unless the effect explicitly allows it. 2. If an effect tells you to throw away a card then: a. If it is a Wound, put it back in the Wound pile. b. Otherwise, remove it from the game (return it to the box). REVERTING EFFECTS 1. Deed cards, Units, Skill tokens and some Tactic cards provide a variety of effects that may be used on a given turn. a. Many effects are described with shortcuts like Move X (gain X Move points) or Heal X (gain X Healing points). These terms are explained in the rules. b. Other effects might allow you to modify the rules for the turn, or to gain something you wouldn t normally be able to gain. For these types of effects, follow the text on the card. If the effect modifies some values or rules, the change begins immediately and lasts until the end of the current turn (unless stated otherwise). 2. If you do not understand an effect or the interaction of two or more effects in combination, check the game website for FAQs Unless you agree otherwise (not recommended), players may take back any actions and decisions they make during their turn. It is faster to playout your turn and change your mind than to attempt to plan everything in your head. 2. You cannot revert to a moment prior to any new information being revealed (a map tile, enemy token, or card), a die rolled or another player reacting specifically to the player s actions (usually in Player vs. Player combat). a. Once this happens, all decisions, moves, played cards, used Skills and Unit abilities, spent mana etc. have to remain exactly as they were.


6 A Player s Turn ~ ~ 1. Some Tactic cards, Skill tokens, and the village Description card 3. If your Deed deck is empty at the start of your turn, and if the 6. Playing a Regular turn has two voluntary parts: movement, offer you options that are labeled as before your turn or on another player s turn. a. For game purposes both of these are the same. You can play them while others are playing, or just before your turn. Note: You can use effects playable on another player s turn before your first turn, even if you are the first player to play this Round. You may also use them between any two of your turns, even if they immediately follow each other. b. You can also play these effects in reaction to another player announcing they will play an effect (and evaluate them before that effect). You cannot do this in the middle of an effect evaluation. c. You cannot play them in the following situations: during your End of Turn sequence. before Tactic selection is finished at the start of the Round. after your last turn during the Round. d. You are not allowed to play other effects outside of your turn. e. These effects usually allow you to draw cards from your Deed deck. The following conditions (whether the draw deck is empty, whether you have cards in your hand) are checked after these actions are completed. 2. If your round order token is flipped then flip it back and miss your turn. a. In a cooperative game your round order token may be flipped because you took part in a cooperative city assault since your last turn. b. In a fully competitive game your round order token may be flipped because you were a defender in a player versus player combat that you fully attended since your last turn. c. Whether your round order token was flipped or not, any of your cooperative or interactive skill tokens that are still in effect will now expire. d. If you have to flip your round order token back then you cannot declare the End of the Round this turn. End of the Round has not been announced yet, you may forfeit your turn and announce the End of the Round. If you do, each other player takes one more turn, and then the Round is over. a. You may only announce End of the Round if your Deed deck is empty at the start of your turn. b. You must announce End of the Round if your Deed deck is empty and you have no cards in your hand at the start of your turn. c. If you have cards in your hand, but your Deed deck is empty, it is up to you whether to announce End of the Round, or whether to play your turn. d. If you have no cards in your hand and Deed deck, but the End of the Round has already been announced by another player, you must forfeit your turn. 4. If you forfeit your turn, your turn ends immediately; you cannot even use the benefits of a map space you occupy (mines or magical glade). 5. If you do not forfeit your turn, you have two options: playing a Regular turn or Resting. a. In both cases, you have to play or discard at least one card during or at the end of your turn (except if your hand is empty but there are still cards in your Deed deck at the beginning of your turn). b. You may play any number of special effects anytime after your turn starts and before you announce its end, including before you decide whether you are taking a Regular turn or Resting. The same applies for healing effects, except these cannot be played during combat. c. You may also play any number of move and influence effects at any time during your turn just as you can with special effects. Most of the time however there is no reason to play these effects outside of their normal phases. Unless explicitly stated otherwise, you cannot move your figure or explore new tiles in phases other than the Movement phase of your turn. Any effect that allows for this is ignored when played outside the Movement phase. and a single action, in that order. a. First, you may (but do not have to) move. You may reveal new map tiles during movement. See the Movement section later. b. Your movement may result in a mandatory action: If you ended your movement on a space occupied by another player, you must initiate Player vs. Player combat. If you entered (i.e. assaulted) a fortified site (keep, mage tower, city), you must fight all garrisoned enemies. If your movement ended because you were attacked by rampaging enemies, you must fight these enemies. c. If there are no mandatory actions, you may choose to perform one (and only one) of the following voluntary actions: At inhabited sites (village, monastery, keep, mage tower, city) you may interact with the locals. See the Interaction with Locals section later. At adventure sites (ruins, dungeon, tomb, monster den, spawning grounds) you may decide to explore them. This will usually lead to combat. If there are rampaging enemies (orc marauders, draconum) in one or more adjacent spaces, you can decide to challenge one or more of them in combat. If in a monastery, you may decide to burn it. This leads to combat. If none of the above actions are available, or if you do not want to take any of these actions, you can do nothing. d. You may do only one action each turn (mandatory or voluntary). If you want to move and/or reveal new tiles, you must do it before taking an action. You cannot move or reveal map tiles after an action. e. Unspent Move points and Influence points from previous phases of your turn are lost at the moment you start your action phase. 7. If Resting, you cannot move, initiate combat or interact with locals. a. Depending on the contents of your hand, you must either take a Standard Rest (if you have at least one card other than a Wound in your hand) or a Slow Recovery (if you have only Wound cards in your hand). Note: Playing all of your non-wound cards earlier in the turn will effect which type of Rest you take. Standard Rest: You must discard one non-wound card and any number of Wound cards. Note: this is not the same as Healing, as the Wound cards go to your discard pile. Slow Recovery: You must reveal your hand to show you have only Wound cards. Then, discard one Wound card to your discard pile. 8. Once you have done everything you wanted to do on your turn (Regular turn or Resting), announce that your turn is over. a. First, return any mana dice to the Source. Reroll any dice you used before returning them. This is listed as the first thing you must do, as other players need this information to be able to plan their turns. b. Inform the next player (as per the Round Order tokens) that they may now start their turn. This speeds up the play of the game. However, if the next player insists, they may wait until you completely finish your turn before they start theirs. c. Finalize your turn while the other player begins theirs. See the End of the Turn section. You cannot play effects during your end of turn sequence. 6

7 Movement ~ ~ e. Depending on the back color of the Map Tile being placed, 1. You may move during a Regular turn (not Resting). During movement, you can reveal new map tiles. All movement must be completed before taking any action (combat or interacting with locals). 2. When moving, you may play any amount of movement effects. Most of these effects generate Move points. a. You may play any number of movement cards from your hand (and power them with any available mana), use movement Skills, or activate Units with movement abilities. b. The Move X effect means you get X Move points. c. Any card (except for a Wound) can be played sideways to a movement column as Move 1. d. Players can also play any number of special and healing effects during movement. 3. Total the Move points provided by all your cards and effects. You may then move your figure, space by space, spending Move points according to the type of terrain you are moving into (as indicated by the Day/Night board). You may only move to accessible adjacent spaces. a. The spaces marked by X on the Day/Night board are inaccessible. Note: The cost to move into the Desert and Forest terrain differs according to whether it is Day or Night. Note: The cost to move into a city is always 2, regardless of the terrain shown on its space. 4. Limitations: a. Entering a space with an unconquered fortified site (keep, mage tower, or city), or with a keep owned by another player immediately ends your movement, and is considered to be an assault on that site. b. You are not allowed to enter a space occupied by a rampaging enemy (orc marauder or draconum) until they are defeated. c. If you provoke a rampaging enemy (i.e. move directly from a space adjacent to their token to another space adjacent to the same token), you are attacked by that enemy and your movement immediately ends. d. Entering a space with an adventure site (ruins, monster den, spawning grounds, dungeons or tombs) does not necessarily end your movement; you may ignore it and treat it as an empty space, even if there are enemy tokens. 5. During movement, you can reveal new map tiles: a. You can only reveal new tiles if you occupy a space adjacent to a position where a new tile can be added. Tiles must be placed in fixed positions defined by the symbols in their corners. No tile can be added behind the coastline (see the Game Setup section, and the definition of the map shape in the scenario description). b. To reveal a tile, a player has to spend 2 Move points. c. The new tile comes from the top of the Map Tile deck. If the player occupies a space bordering two available positions for a new tile, they must announce which of them they are exploring before revealing the tile. d. Tiles are always oriented in a defined direction (so the number in one of their corners is oriented the same way as the starting tile). Players do not decide how to orient tiles when placing them. additional limitations apply: Countryside tiles (green tile back) can only be placed such that they will be adjacent to at least two other tiles, or adjacent to a tile that borders at least two other tiles. Core tiles (brown tile back) can only be placed such that they will be adjacent to at least two other tiles. If there are no tiles left in the Map Tile deck when a player attempts to explore, they may use a random Countryside tile removed from the game during Setup. If all Countryside tiles have been placed, they can use removed non-city Core tiles instead. Tiles explored this way can only be placed such that they are adjacent to at least three other tiles (to fill up holes). If there are no tiles in the box, no more tiles can be explored. f. For sites on a newly revealed tile, check the When revealed section of the associated Site Description cards and follow the text. Especially: If a monastery is revealed, draw one Advanced Action card and add it to the Unit offer (not the Advanced Action card offer). g. If a tile with a city in its center is revealed: Take the corresponding City card and place it close to the map. Consult the Scenario description to see of which level this city has to be. Take the corresponding City figure and rotate its base so the level of the city is shown in the window. Put the figure on the city space. The base shows circles of different colors. For each circle, draw an enemy token of the corresponding color and place it face down on the City card. 6. During movement, you may move as many spaces and explore as many tiles as you can pay Move points for. a. You are allowed to alternate between exploring new tiles and moving. b. You are allowed to play additional effects to add Move points to your total at any time during movement. You are allowed to play additional cards after a new tile is revealed. Move points from newly played effects are added to any Move points that might be left from your previously played effects. It is not possible to power previously played cards with mana for the strong effect this has to be done when the card is played, or not at all. 7. Some effects modify the rules of movement. These apply to all movement done after the effect is played, until the end of turn. a. Some effects reduce the Move cost of certain terrains. If a player plays more than one of this type of effect, they can apply them in any order. If the Move cost of a terrain is reduced to 0, the player may enter spaces of this terrain without paying any Move points. The Move cost of a terrain cannot be reduced below 0. b. Some cards allow a player to enter inaccessible terrain at certain cost. Beware - players should end their turn in a safe space (see below), otherwise, Forced Withdrawal rules apply (see End of the Turn section, pg. 11). c. Some effects directly allow you to move one or more spaces. For this, you do not pay any cost other than what 7 the effect states, and you may also move over inaccessible spaces (including those occupied by rampaging enemies or fortified sites), unless stated otherwise. Some of these effects order you to end this move on a safe space (see below). d. A space is considered to be a safe space if: It is accessible under normal conditions (i.e. if no special effects apply). It is not an unconquered fortified site, or a keep owned by an opponent. It does not contain another hero, except for sites that allow more heroes (portal, conquered city). 8. Other players: a. You are allowed to pass through spaces occupied by another player s figure freely, unless it is a keep owned by that player. It is also allowed to enter a space with another player, to reveal a new map tile or tiles, and then to continue movement. b. If you enter space a with another player and you do not want or cannot continue your movement this turn, it is automatically considered to be an attack on that player. See Player vs. Player combat section later. Especially, entering a keep owned by another player while that player is there immediately ends your movement and thus is automatically considered to be an attack on that player. c. An attack on another player is considered to be your action for this turn. It is never allowed to do any other action on a space occupied by another player. d. On some spaces, there are multiple figures allowed. Combat never occurs on those spaces: If you end your turn on a portal space, remove your figure from the map and place it in front of you. Place it back to the portal space at the start of your next turn. If you enter a conquered city, place your figure off the map on the corresponding City card. Place the figure back on the map once it moves away from the city. e. In certain situations, Player vs. Player combat is not allowed. If you end your movement on the same space as another player in these situations, you cannot do any action on your turn. Forced Withdrawal rules apply to you at the end of your turn (see the End of the Turn section). These situations are: The other player s Round Order token is currently facedown. End of Round has been called, and each player has their last turn this Round. The scenario conditions were met, and each player has their last turn in the game. You play a cooperative scenario, or you agreed Player vs. Player is not allowed in your game. You play a team scenario, and that other player is your teammate.
8 Interacting with Locals ~ ~ e. Each city has its own interaction option depicted on the 1. You can interact with locals at several different places on 4. Once a player has calculated their Influence total, they can the map (villages, monasteries, keeps you own, and mage towers and cities conquered by any player). Interaction is your action for that turn. 2. When interacting, you may play any amount of influence effects to generate Influence points. a. Check the position of your Shield token on the Reputation track. You gain influence (positive or negative) equal to the modifier shown immediately once you start the Interaction. Any later changes to Reputation during the turn have no effect on the bonus or penalty you gained. If your token is on the X space of the Reputation track, you cannot interact at all! b. You can play influence cards from your hand (and power them with any available mana), use influence Skills, or activate Units with influence abilities. c. The Influence X effect means you get X Influence points. d. Any card (except for a Wound) can be played sideways to an influence column as Influence 1. e. Players can also play any number of special and healing effects during interaction. 3. Total the Influence points provided by all your cards and effects. a. If interacting in a conquered city, you add 1 to your Influence total for each Shield token you have on the City card. Note: If these bonuses are high enough, you may interact without playing any Influence effects. spend their Influence points on whatever the site offers. See the Site Description card, or the corresponding City card for options. a. A Player can recruit a Unit from the Unit offer, as long as one of the Unit types (icons in the upper left of the Unit card) matches the site (icon in the upper right corner of the Description card). The Influence cost is stated in the upper left corner of the Unit card. For recruiting, see the Basic Concepts Using Units section. You can use a newly recruited Unit immediately (but you cannot use an Influence effect of that Unit to pay its own cost). b. Healing points can be bought at villages for 3 Influence points and at monasteries for 2 Influence points (see the Description card of these sites). See the Wounds and Healing section. c. As described on the monastery Site Description card, a player can learn a new Advanced Action there for 6 Influence points. The Advanced Action card must be from the Unit offer (not from the Advanced Action offer) and is put on top of their Deed deck. The offer is not replenished until the start of the next Round. d. A player can learn new Spells from the Spell offer at a mage tower. To gain a Spell, the player must pay 7 Influence points as well as one mana of the same color as the Spell they wish to acquire. A newly gained Spell is put on top of the player s Deed deck and the Spell offer is replenished. lower half of the City card: In the Red city, you can buy Artifacts for 12 Influence points each. The Artifact is drawn at the end of the turn, as if you won them in combat (see End of Turn Combat Rewards). In the Blue city, you can buy Spells + as if you are in a mage tower. In the White city, you can recruit + Units of all types. Also, you can pay 2 Influence points to add one Elite (gold) Unit card to the Unit offer. In the Green city, you may pay 6 /? Influence points to gain a card from the Advanced Action offer (replenish the offer after) or a random card from the top of the Advanced Action deck. Put the gained card on top of your Deed deck. 5. You may buy any number of things of the same or different types during an interaction, as long as you have the Influence points to pay for them. a. You apply the bonus or penalty (for Reputation and for Shield tokens in a city) only once per turn, no matter how many things you buy. Combat with Enemies ~ ~ c. Assign Damage phase Any unblocked enemies deal a. It can happen that a single move provokes two rampaging 1. There are several ways to initiate combat with an enemy: a. Entering a space with an unconquered fortified site (keep, mage tower, or city). This is considered to be an assault, and you must fight the defenders of that site. They are always fortified (see later). Every time you make an assault, you lose 1 Reputation, regardless of the outcome of the combat. Also, entering a space with a keep belonging to another player counts as an assault and you lose 1 Reputation. If the other player is present in the keep, you start Player vs. Player combat. If not, a random gray enemy token is drawn as garrison of the keep (worth half Fame). b. If you are at an adventure site containing enemies (dungeon or tomb, unconquered monster den or spawning grounds, or ruins with enemies), you may announce that you are entering the site as your action. This initiates combat with all enemies in the site. c. If you are standing at a monastery, you may announce that you are attempting to burn it. If you do, you get Reputation -3, then draw a random violet enemy token as the defender. d. If you are standing adjacent to a rampaging enemy token (orc marauder or draconum), you can challenge it to combat. If there are rampaging enemies on multiple adjacent spaces, you can choose to challenge one or more of them to combat. e. If you make a move from a space adjacent to a rampaging enemy token to another space directly adjacent to the same token, this provokes that rampaging enemy to attack you. 2. Only one combat is allowed each turn. However, in certain situations, enemies from multiple spaces may be fought in that combat: enemies. You have to fight them both. b. An assault is a move, and it can happen that it provokes one or more rampaging enemies. You have to fight both the defenders and these rampaging enemies at once. The rampaging enemies are not fortified, though, and you can conquer the site even if you do not defeat them. c. If your move started a combat and there are one or more rampaging enemies adjacent to the space you moved into, you may challenge them to join the fight. This means: You may provoke a rampaging enemy by your move, then challenge one or more rampaging enemies adjacent to the space you moved into, and then fight them all. When assaulting a fortified site, you may also challenge any rampaging enemies adjacent to that site. They join the defenders in combat, but are not fortified and you do not need to defeat them in order to conquer the site. d. You cannot challenge extra enemies when entering an adventure site. e. You can never fight enemy tokens and another player at the same time. On your turn, you may do only one action, and both combat with enemies and Player vs. Player combat are separate actions. 3. Combat starts by drawing and/or revealing all enemies you have to fight. Then, the combat has four phases: a. Ranged and Siege Attack phase Ranged and/or Siege Attacks can be used first to attempt to eliminate some enemies before they get to attack you. b. Block phase Enemies not eliminated by Ranged / Siege make their attack. Players can use Block effects to attempt to block these attacks. 8 damage. Damage points must be assigned to your Hero and/or your Units. d. Attack phase Attack enemies using any other attacks remaining in your hand (including Ranged and Siege Attacks you have not used during the first phase) to attempt to eliminate enemies. 4. During each phase a player can play corresponding cards, use Skills, and activate Units. Track the effects played in each phase in separate columns. 5. Unless a restrictive effect is otherwise stated, you may play additional combat effects (that affect your Units, enemies, or combat rules) during any of these phases. Unless stated otherwise, that effect persists until the end of the turn. a. When using a red card, or a Unit ability that costs red mana to activate, any effect, other than Attack or Block effects, have no effect when targeting enemies with Fire resistance. b. When using a blue card, or a Unit ability that costs blue mana to activate, any effect, other than Attack or Block effects, have no effect when targeting enemies with Ice resistance. c. Effects that target something other than an enemy (such as the Ignore Site Fortifications effect of the Demolish spell) are not prevented by any enemy resistances. 6. Players can play any number of special effects during any combat phase. However, no healing effects may be played during combat.
9 RANGED AND SIEGE ATTACK PHASE 1. During this phase, you may perform one or more attacks, or pass and do nothing. 2. To perform an attack, choose one or more enemy tokens as the target of the attack. 3. Play any number of Ranged Attacks and Siege Attacks of any elements Fire, Ice, Cold Fire, or physical (physical Attacks have no elemental attribute). a. You may play cards that provide Ranged or Siege Attacks from your hand (and power them with any available mana), use Ranged or Siege Attack Skills, or activate any Units with Ranged or Siege Attack abilities. Stack these effects together in a column to help keep track of your total. If some of the chosen enemies are fortified (either because they are defending a fortified site, or because they have the fortified ability on their token), only Siege Attacks can be played. You can play Ranged Attacks only if none of the targeted enemies are fortified. Enemies that are fortified twice (because they have the fortified ability and they are defending a fortified site) cannot be targeted at all in this phase, even by Siege Attacks. b. Cards cannot be played sideways to contribute to Ranged or Siege Attacks. 4. Now total the Attack value of all the played effects: a. If at least one targeted enemy has one or more Resistance icons, then all attacks of a type that match a resistance icon are inefficient their strength is halved. (Total all inefficient attacks, divide the result by two, round down.) Cold Fire Attacks are halved only when there is at least one targeted enemy with both Ice and Fire Resistance. 5. To make a successful attack, the total Attack value has to equal or exceed the total Armor values of all targeted enemies. If it does, the targeted enemies are defeated. a. Defeated enemy tokens are immediately discarded to the discard pile next to their corresponding enemy pile; they do not participate in the rest of the combat. b. The attacking player scores Fame equal to the number on the bottom of each defeated enemy token. Move your Shield token on the Fame track by that many spaces. If it crosses the end of a line, you do not Level up immediately. Level ups are done at the end of the turn. 6. An Attack of lower total value than the total Armor of the enemies has no effect and any damage dealt does not carry over to subsequent phases or turns. a. If you realize your Attacks are not enough to defeat the chosen enemies, you may want to either play more Attacks, or choose a different enemy to target, or take back the cards you played and cancel your attack. 7. You can declare none, one or more attacks during this phase. With each attack, you can defeat one or multiple enemies. Group the cards and effects you play for each attack in separate columns. a. If some of the enemies are fortified and some are not, you may want to deal with the unfortified ones with a separate attack (so you can use your Ranged Attacks). b. If some enemies have certain resistances and some not, you may want to deal with them with separate attacks, as the presence of a resistant enemy halves the value of all Attacks of the type it is resistant to. 8. You may not save Attack points for later use. You must immediately assign them to an enemy or group of enemies as the points are generated or they are wasted. BLOCK PHASE ASSIGN DAMAGE PHASE 1. After performing any Ranged and Siege Attacks, the Block phase begins. In this phase, all enemies that have not been eliminated get to attack, but players have the chance to actively counter the attack of one or more enemies by using blocks. A Blocked enemy deals no damage in the Assign Damage phase. 1. Any enemies that are still alive and unblocked deal damage from their attacks during this phase. a. If there are none, skip this phase. b. Otherwise, process all unblocked enemies one by one in whatever order you choose. 2. For each enemy with the Summon icon, draw a brown enemy token and add it to the enemy group now. a. For both the Block Phase and the Damage Assigning Phase, the summoned monster replaces the summoning enemy. No effect can target the summoning enemy during these phases. b. Once the Attack Phase begins the summoning enemy is considered to be back in play and effects can target them. 3. Choose a single attacking enemy to block. 4. Play any number of Blocks of any elemental type Fire, Ice, Cold Fire, or physical. a. Play cards that provide Block from your hand (you can power them with any available mana), use Block Skills, or activate any Units with Block abilities. Stack these effects together in a column to help keep track of your total. b. Any card (except for a Wound) can be played sideways to the Block column as Block 1. Sideways cards are always physical Block, never a block of an elemental type. 5. Determine the total Block value of all played effects. a. Against elemental attacks, only certain Blocks are fully efficient: Any type of Block is efficient against a physical attack. Only Ice or Cold Fire Blocks are efficient against Fire Attacks. Only Fire or Cold Fire Blocks are efficient against Ice Attacks. Only Cold Fire Blocks are efficient against Cold Fire Attacks. b. Other blocks are inefficient. Inefficient Blocks are reduced by half. When totaling the final Block value, total the values of all inefficient Blocks, divide by two (round down) and then add the full values of all efficient Blocks. 6. The Block is successful if the total value equals or exceeds the attack value of the chosen enemy. a. If the enemy has the Swift ability, its Attack value is doubled for the purpose of blocking. 7. A successfully blocked enemy token is set aside. Its attack was stopped and it will do no damage during the next phase of combat. However, it is not eliminated yet. You will have a chance to eliminate it in the Melee Attack phase. a. If a summoned monster is successfully blocked, discard it to the corresponding discard pile (but gain no Fame). 8. If your Block total is lower than the Attack value of the enemy you are attempting to block, it has no effect. You cannot lower the Attack value by playing Blocks you either block it fully, or it goes through at the full strength. a. Sometimes a blocking card will have effects other than adding to your Block total. Unless stated otherwise, these effects apply whether or not the block was successful. 9. You may block any number of attacking enemies during this phase. Any enemies you wish to block are resolved individually; you cannot block multiple enemies at once. 10. You must immediately assign Block points to an enemy attack as the points are generated or they are wasted. You may not save Block points for later use Each enemy deals damage equal to its Attack value. a. If the enemy has the Brutal ability, it deals twice as much damage as its Attack value. 3. You must assign all damage. You can assign damage to one or more of your Unwounded Units. The rest is assigned to your Hero. 4. You can assign damage to a Unit as long as it is not Wounded. Unwounded Spent Units can have damage assigned to them. a. Whenever a Unit is assigned damage, put a Wound card on that unit. A Unit becomes Wounded regardless of how much damage was actually assigned. Then, reduce the damage total by the Unit s Armor value. Assigning just one point of damage can Wound a Unit with a high Armor value. Armor value simply determines how much damage remains after the Unit is Wounded, if any. b. Exception: If the Unit is resistant to the elements of the attack (Physical resistance vs. regular physical Attack, Fire Resistance vs. Fire Attack, Ice Resistance vs. Ice Attack, both Ice and Fire Resistances vs. Cold Fire Attack): First, reduce amount of the damage by the Unit s Armor (without Wounding the Unit). If this absorbs all the damage, nothing happens. If there is any remaining damage, continue assigning damage as usual by Wounding the Unit and reducing the damage total by its Armor value again. Units resistant to the given type of attack can absorb twice as much damage as they have Armor, and are Wounded only if the damage was greater than their Armor. If a Unit is assigned damage but does not get Wounded because of a resistance, it cannot be assigned damage again during the same combat. 5. If you cannot or do not want to assign damage to a Unit, or if there is still damage left over after assigning damage to your Units, you must assign all remaining damage to your Hero. This is done repeatedly until all damage has been assigned: a. To assign damage to your Hero, put a Wound card in your hand and reduce the damage total by your Hero s Armor value (the left number on your Hero s Level token). As with Units, even if the assigned damage is lower than your Armor value, your Hero must still take a Wound. b. Repeat the above process until all Damage has been assigned. Effectively, you will take one Wound for every X points of damage (where X is your Armor), rounded up. c. Knock out: If the number of Wound cards added to your hand during a combat equals or exceeds your unmodified Hand limit (the right number on your Hero s Level token), you are knocked out immediately discard all nonwound cards from your hand. Wounds received from other sources (for example: The effects of some cards played during combat) also count towards knock out. While knocked out, your Units may continue to fight, you can use any of your Skills, and you continue taking Wounds if you have to assign further damage to your Hero.

.")
.")


10 6. Special enemy abilities related to damage dealing: a. If an enemy has the Poison ability: If a Unit is assigned damage by a Poisonous enemy and would be given a Wound, it is given two Wound cards instead. It must be Healed twice to remove both Wounds. A Hero assigned damage from a Poisonous enemy must put one Wound card into their discard pile for each Wound card added to their hand. b. If an enemy has the Paralyze ability: If a Unit is assigned damage by a Paralyzing enemy and would be given a Wound, it is immediately destroyed (remove it from the game). A Hero assigned damage by a Paralyzing enemy must immediately discard any non-wound cards from their hand. c. If an enemy has the Summon ability, you assign the damage of the summoned enemy (taking into account any special abilities it might have). After the attack, discard the summoned enemy token to its corresponding discard pile. 7. The phase ends when you have assigned the damage from all unblocked enemies. ATTACK PHASE 1. The Attack phase works the same way as the Ranged and Siege Attack phase, except: a. You can combine any Attacks: Ranged, Siege or regular. In this phase, there is no difference between regular, Ranged and Siege Attacks. Fortifications no longer apply, you can target any enemy with any attack or combination of attacks. b. Any non-wound card may be played sideways to an attack column as a physical Attack 1. c. You may use effects that are labeled as usable in the Attack phase only. 2. As in the Ranged and Siege Attack phase, you may eliminate multiple enemies in one attack, or declare multiple individual attacks. The rules for enemy resistances are the same. COMBAT OUTCOMES 1. Combat ends after the Attack phase. You might defeat none, one, or more enemies during the combat. a. If you were assaulting a city, put one of your Shield tokens on the City card for each enemy you defeated. Put the Shields in a row, so you can determine in which order they were put there later. 2. If you defeated all enemies at the site, depending on the site: a. If you defeated one or more rampaging enemies, remove their tokens from the board: the icon on the space has no meaning now, treat it as an empty space. You do not mark the space with a Shield token, but you do gain Reputation (+1 for each orc marauders, +2 for each draconum). Note: Orcs and Draconum enemies encountered elsewhere are not generally worth reputation when defeated. b. If you defeated all enemies on an adventure site, mark the space with a Shield token. At the end of your turn, you can claim the reward indicated on the Site Description card. Do not pick your reward before the end of your turn; you can take your time choosing a reward while other players are playing. If it is a ruins the reward may contain an Artifact, a Spell, an Advanced Action, a set of four crystals, or a Unit. c. If you defeated all the defenders of a fortified site, you end your turn on the conquered space. Note: If some rampaging enemies were involved in the assault, whether you defeated them or not does not affect whether you conquered the fortified site. If the site is a keep or mage tower, mark it with a Shield token. If it is a mage tower, you will get to choose a Spell at the end of your turn as a reward. If it was a city, see City Assaults later in these rules. d. If you defeated the defenders of a monastery, mark the monastery with a Shield token. The monastery is now burned and is treated like an empty space for the remainder of the game. At the end of your turn, claim an Artifact as your reward If you did not defeat all the enemies at the site: a. If you fail to defeat a rampaging enemy, it stays in its space. b. If you failed to defeat enemies drawn in a dungeon, tomb, or monastery, discard them. The next time a Hero attempts to fight here, new enemies of the appropriate type will be drawn. c. If you failed to defeat the enemy in a monster den, or one or both monsters in a spawning grounds or ruins, return any remaining monsters face up on the space. Next time a Hero attempts to fight here, they will fight the same enemies. Note: You may decide to return them face down, so that they are not confused with rampaging enemies, but anyone can take a look at any token that was revealed earlier in the game. d. If you failed to defeat all the defenders of a fortified site, you have to withdraw back to the space you were attacking from. This withdrawal does not count as Forced Withdrawal. However, if the space you withdrew to is not a safe space, then Forced Withdrawal rules apply for that space (see the End of the Turn section). CITY ASSAULTS 1. City assaults work the same way as assaulting any other fortified site, but in addition to the fortification, each city gives a bonus to the defending Units. See the upper part of the corresponding City card: a. In the White city, all defenders get +1 Armor. b. c. d. In the Blue city, all defenders get +2 Attack if they have Ice Attack or Fire Attack, and +1 Attack if they have Cold Fire Attack. In the Red city, all defenders that have physical Attack gain the Brutal ability. In the Green city, all defenders that have physical Attack gain the Poison ability. 2. If a city is conquered, its new leader must be determined. a. The player with the most Shield tokens on the City card (or the one with the first Shield amongst the tied in case of tie) becomes the City leader. b. The leader takes the City card, including all the Shield tokens, in front of them. Note when any player enters the city, they put their figure on the City card in front of that player, to emphasize the fact they are visiting their city.
11 End of the Turn ~ ~ In both cases, put the newly gained Skill in front of you b. Artifacts draw that many plus one from the Artifacts 1. You can complete your turn while the next player starts theirs. The first thing you should do is reroll and return any mana dice you used to the Source. 2. Forced Withdrawal: You must end your turn on a safe space (see paragraph 7d in Movement section, pg. 7). a. If you are not on a safe space, you must backtrack your move until you arrive at a safe space. b. For each space you move while backtracking, add a Wound to your hand. 3. Clear up your play Area: a. Return all mana crystals, used or unused, from your play area to the bank. b. Put all cards played this turn into your discard pile (except those that were thrown away remove them from the game, or, in the case of Wounds, put them back on top of the Wound pile). 4. Use the benefits of your space: a. If you end your turn on a magical glade, you may throw away one Wound card from your hand or discard pile. Units cannot be Healed this way. b. If you end your turn on a crystal mine, you gain a crystal of the mine s color to your Inventory (unless you have 3 crystals of that color already in which case you get nothing). 5. Rewards from combat: If you won any rewards from a combat, take them now. Pick your rewards in whatever order you choose. If you won: a. Crystals add them to your Inventory (unless you already have 3 of that color then nothing happens). If you gained any random crystals, roll a die for each reward to determine which color you receive. If black is rolled, you gain 1 Fame instead. If gold is rolled, you may choose the color. deck. Place one of them on the bottom of the Artifacts deck, and put the rest on top of your Deed deck in any order. c. Spells or Advanced Actions choose them from the corresponding offer and put them on top of your Deed deck, then replenish the offer by moving cards down and adding a new card to the topmost position. You cannot gain Advanced Action cards that are in the Unit offer this way. d. Units take any Unit from the Unit offer, regardless of its type or cost. If you do not have an open Command token for the Unit to occupy, you must disband one of your Units or forfeit the reward. Exception: If you also get a Level up this turn that gives you a new Command token, you may postpone taking a new Unit until you process your Level up, so you do not have to disband a Unit. 6. Level up: If your Shield token crossed one or more lines on the Fame track this turn, you gain a level for each line crossed: a. When advancing to a level marked with this icon: Remove your top Level token, revealing your new Armor value and Hand limit. Flip the removed token over so it is shield side up and place it in your Unit area. It is now a Command token: your Command limit is increased by one. b. When advancing to a level marked with these icons, you get one new Skill token and one Advanced Action card from the offer. Flip the top two Skill tokens from your Skill deck. You have two options now: Take one of these two tokens and put the other in the Common Skills area. In addition, take any one Advanced Action card from the Advanced Action offer. Take a token of another player from the Common Skills area (if there are any), then put both of your revealed Skills in the Common Skills area. In addition, take the Advanced Action card from the lowest position on the Advanced Action offer. (face up), put the newly gained Action card on top of your Deed deck, then refresh the Advanced Action offer (by moving cards down and adding a new card to the topmost position). 7. Drawing new cards: a. Before drawing, you may discard any number of nonwound cards from your hand, if you wish. b. Draw cards from your Deed deck, up to your Hand limit (the number on the right side of your Hero s Level tile). If you are on or next to a keep you own (marked with your Shield token), your Hand limit is increased by the number of keeps you own anywhere on the map. If you are on or next to a conquered city you have at least one Shield token in, your Hand limit is increased by 1 (by 2 if you are the leader of that city). If both a keep and a city bonus are possible, use the higher bonus only. Your Hand limit can also be increased by the Day Tactic card Planning (see that card). c. If you have more cards in your hand than your current Hand limit, you do not have to discard down to your Hand limit (but you draw no new cards). d. If you run out of cards in your Deed deck while drawing, stop drawing. Do not reshuffle your discard pile unless you have the Night Tactic card Long Night (see that card). Note: The Long Night Tactic can be used even during card drawing: once your Deed deck is empty, follow its instructions and then continue drawing. Wounds and Healing ~ ~ To heal a Wounded Unit, you have to pay Healing 1. When a Hero gets wounded, the player takes one or more 2. Wounded Units have Wound cards placed across the face of Wound cards from the Wound pile and puts them into their hand. a. Wound cards can never be discarded, unless an effect explicitly states otherwise. Wound cards cannot be played sideways (as Move 1, Influence 1, Attack 1 or Block 1), and cannot be discarded at the end of your turn. b. When you choose to Rest for the turn, or when an effect allows you to discard Wound cards, they go onto your discard pile. Thus during the next Round, you may draw them into your hand. c. When the Round ends, any Wounds in your hand get shuffled back into your Deed deck with all your other Deed cards. the Unit card. a. Wounded Units cannot be activated or assigned damage in combat. b. A Wounded Unit retains its state of readiness (Ready or Spent). A Wounded Unit that is Spent still becomes Ready at the start of a new Round (but can t be activated until Healed). 3. Players can Heal during their turn, even when Resting. a. You can play effects that provide Healing points (Heal X). b. You may also buy one or more Healing points at a village or monastery (see the Interacting with Locals section). c. Add up all Healing points played or bought; they can be used for these healing effects: Use one Healing point to throw away a Wound card from hand (return the Wound card to the Wounds pile). 11 points equal to the level of the Unit (the number in its upper right corner). If you do, remove the Wound card from the Unit and return it to the Wounds pile. If the Unit has two Wound cards (because it was exposed to a Poison attack), it needs to be healed twice to be healed completely. Effects that heal a Unit will heal one Wound on that Unit. d. Players can heal any time during their turn, except during combat. Damage from a combat can be healed on the same turn, once the combat is over. Any unspent Healing points disappear when entering combat. Note: the magical glade site does not provide healing. Its effect may not be used on Units and cannot be combined with other healing effects.

.")

 during this combat. 3.")
12 Player versus Player Combat ~ ~ They may use their Skills for effects valid in the current 1. A player can invoke Player vs. Player combat as their action for the turn, if they meet the following conditions: a. They entered a space containing another player and does not want to or cannot continue moving. b. The space is a not a portal or a city space (fights between players are not allowed on these spaces). c. The End of the Round has not been announced yet, and the end game condition has not been triggered. d. The other player s Round Order token has not been flipped face-down (either from another Player vs. Player combat or from a cooperative assault). Note: It is not allowed to enter a space occupied by another player by a move that provokes a rampaging enemy to attack. 2. If Player vs. Player combat occurs, the attacking player is referred to as the aggressor, and the defending player is referred to as the defender. The defender gets a chance to defend by either fully or partially playing their turn during the aggressor s turn. The defender cannot move or perform an action (interaction or initiating another combat) during this combat. 3. When attacked, the defender can use any effects normally usable before their turn or in turns of other players (such as plundering a village). They may not declare End of the Round. Then, they have two options. a. Fully Attend the Combat. A player may choose to take their next turn in advance. If they do: They flip their Round Order token down. As long as it is face-down, they cannot be attacked again. When it would be the defender s next turn, the token is flipped back up but they skip the turn completely (they cannot even announce End of the Round). They may benefit from start of turn effects such as the mana token provided by a magical glade. They may use a mana die from the Source. situation. After combat, they may play special and healing cards and effects, if they wish. Then, they follow all the usual end of turn steps (see the End of the Turn section). They may not Move, reveal a map tile, or perform any other action. Note: A player may not fully attend a combat if they have no non-wound cards in hand. b. Partially Attend the Combat. A player may choose to not skip their next turn. In that case: They do not flip down their Round Order token and are subject to attack from other players. They will play their next turn as normal. They cannot use a mana die from the Source (unless some effect states otherwise). They cannot use their Skill tokens (except those useable in turns of other players). When the combat is over, their part of the turn immediately ends. They cannot heal or play other special effects after combat. They do not follow the normal end of turn procedure. Especially, they do not draw new cards. Any unused mana crystals remain until the end of their regular turn. Note: The defender can still block an opponent s attacks and perform their own attacks. The difference is in the means they can use to do so, and what happens after combat. 4. Player vs. Player combat has two phases: Ranged and Siege Attacks, and Melee Attacks. Combat ends when one of the players is forced to retreat, or when neither player wants to attack any more. If that is the case, the aggressor must retreat. 12 RANGED AND SIEGE ATTACKS 1. In this phase, players take turns playing Ranged and Siege Attacks, starting with the defender. The player performing an attack is referred to as the attacker and the other player is the blocker, regardless of who is the aggressor or defender. 2. When it is a player s turn to perform an Attack, they can choose to perform an attack or pass. 3. To perform an attack, the attacker plays any amount of Ranged or Siege Attacks (and special effects), as if it were a regular combat. a. If the blocker is also the defender and the combat is taking place at a fortified site (a keep or mage tower), the attacker/ aggressor can only use Siege Attacks. b. Cards played sideways cannot contribute to this attack. 4. Then, the blocker can play any amount of Blocks (and special effects), as if it were regular combat. a. The rules for efficient and inefficient Blocking outlined in regular combat apply normally. If the Attack consists of Attack effects of multiple elements, the Block effect is efficient if it is efficient against at least one element represented in the Attacks. b. Unlike regular combat, it is not necessary to block the entire attack, attacks can be partially blocked thus it is useful to block portions of the attack. c. The total value of the attack is reduced by 1 for each 2 points of total value of the blocks played. This is because the Ranged and Siege Attacks work similar to the Swift ability of an enemy. If the blocker uses an effect that says blocked enemy loses Swiftness, then the block works fully: the attack is reduced by 1 for each point of block. Example: If the attacker uses Fire Ranged Attack 4, and you play Ice Block 4, the attack is reduced to 2. If you play Block 7, the attack is reduced to 3 (total value of your inefficient block is 3, which reduces the attack by 1 only). d. If the attack is not reduced to zero, the remainder is turned into damage that must be assigned to the blocker (either their Hero or their Units). 5. Unlike assigning damage in regular combat, the attacker chooses how to assign the damage. Contrary to a regular combat, the attacker has to have as much damage as is the Armor of the chosen target to wound it (while in combat with enemies, 1 damage is enough to wound a Unit or Hero). a. The attacker may wound any of the blocker s Unwounded Units by assigning damage equal to that Units Armor. If the Unit is resistant to any element used in the attack, its Armor is doubled, so the attacker has to assign twice as much damage to wound the Unit. b. The attacker may wound the blocker s Hero by assigning damage equal to that Hero s Armor. This can be done multiple times, and the blocker takes a Wound card in their hand each time. The blocker can get knocked out if they get too many Wounds see Combat with enemies. c. The attacker may leave some attack points unassigned. They have to leave them unassigned if there is no target with Armor equal to or lower than remaining damage. 6. After resolving the attack, the other player gets their chance to be the attacker, and the Ranged and Siege Attack phase continues with both players alternating the roles of attacker and blocker. If both players pass on attacking in succession, the phase ends.


13 MELEE ATTACKS 1. The Melee Attack phase works similarly to the Ranged and Siege Attack phase, with a few differences: a. The aggressor gets to start as the attacker instead of the defender. b. Any combination of Attack effects can be played, including Ranged and Siege. Fortifications are ignored in this phase. c. It is possible to play any card sideways as physical Attack 1. Note that adding to an attack this way will make it count as a physical Attack if it wasn t already (making any Block efficient against it and doubling Armor of Units with Physical resistance). d. The blocks work fully, i.e. the attack is reduced by 1 for each point of total block played. 2. Damage can be used to Wound Units and/or the enemy Hero, as in the Ranged and Siege Attack phase. In addition, there are two other ways to spend damage: a. The attacker can spend 5 damage to steal one Artifact from the blocker and put it in their discard pile: Artifacts can be stolen if they are in the blocker s discard pile, Play area, or assigned to a Wounded Unit (including Units wounded during this attack). Artifacts that are in the blocker s hand, Deed deck or assigned to a unwounded Unit cannot be stolen. b. Damage can be converted to Move points, and spent to force the blocker to retreat. To do so: The attacker has to choose an accessible safe space adjacent to where they are fighting (i.e. would not result in that player being forced to assault a fortification or incur combat against another player). The attacker must spend damage equal to the unmodified Move cost of that space. The blocker is moved to that space and the combat ends. This move never provokes rampaging enemies to attack. 3. Players alternate roles as attacker and blocker until either one player is forced to retreat or until both players pass on attacking in succession. COMBAT OUTCOME 1. If a player is forced to retreat, combat is over and the other player is considered to be victorious and may gain some Fame. a. If the victorious player is of a lower level than the one forced to retreat, they gain 1 Fame plus 2 Fame for each level they are lower. b. If they are of the same level but lower Fame, they gain 1 Fame. c. If they are of the same or higher Fame, they gain nothing. 2. If combat ended because neither player wanted to attack any more, the combat is a draw and no one gets any Fame. a. The aggressor must withdraw to the space they were attacking from. This withdrawal does not count as Forced Withdrawal. However, if the space they withdrew to is not a safe space then Forced Withdrawal rules apply for that space (see the End of the Turn section). SPECIAL COMBAT EFFECTS 1. In regular combat, you may play various effects other than Attacks and Blocks. Most of these can also be used when fighting another player. 2. Effects that target enemies can target opponent s Unwounded Units. You may never target the enemy Hero with them. a. If the effect is from a red card, or if it is a Unit ability activated by red mana, it has no effect against Units with Fire Resistance. b. If the effect is from a blue card, or if it is a Unit ability activated by blue mana, it has no effect against Units with Ice Resistance. c. If the effect says to destroy an enemy, the Unit is Wounded instead. d. The Armor value of a Unit can never be reduced below 1. e. The special effects of blocks that affect the blocked enemy may target any Unit contributing to the attack, if there are any. If the effect is triggered only by a successful block, it works only if the blocker reduces the attack to zero. f. The strength or cost of some effects may depend on the number of enemies. In Player vs. Player combat, this is the number of opponent s Ready Unwounded Units and Units contributing to the current attack or block, plus 1 for the enemy Hero. 3. Effects that modify values or rules (such as ignoring fortifications) last for the entire combat. 4. Effects that prevent an enemy from attacking may be played when you are blocking. Choose a Unit contributing to the attack and deduct its contribution from the attack total. The Unit remains Spent. You cannot cancel enemy special effects or Blocks this way. 5. Effects that allow you to skip the Blocking and Damage dealing phases of combat can be used to cancel any one attack (Siege/ Ranged or Melee). No damage is dealt for this attack (but the cards remain played, Units Spent etc.). The combat continues, however. Cooperative City Assault ~ ~ c. If all invited players agree, the cooperative assault can 1. In cooperative scenarios (and also in competitive scenarios, if players agree), players can cooperate to conquer a city. 2. A player can initiate a cooperative city assault on their turn if: a. The End of the Round has not been announced yet, and the scenario conditions have not yet been fulfilled. b. They have not taken an action yet (and if the players agree on a cooperative assault, it is considered to be their action for this turn). c. Their figure is on a space adjacent to the city, and there is no other player on that space. Note: they can also initiate the attack if they are able to reach the city using the Underground Attack Spell. d. There are one or more suitable Heroes present. A Hero is suitable if all of the following are true: They are on a space adjacent to the city. They have not had their Round Order token flipped face down (either from another cooperative assault or from Player vs. Player combat). They have at least one non-wound card in hand. 3. The player announces they would like to form a cooperative assault: a. They invite one or more suitable Heroes. They may decide to exclude a Hero even if they are suitable. b. They propose how to distribute the quantity of enemies in the city, i.e. how many enemies each player will face. Each player has to be assigned at least one enemy. begin. If not, nothing happens. The player can try to make another proposal, or continue their turn as if no proposal had been made. 4. If the players agree to the proposal, all invited players flip their Round Order token face down, to mark that they give up their next turn. 5. Then, shuffle and randomly distribute (without even looking at the reverse side) enemy tokens amongst the players, respecting the agreed numbers. (Imagine: You can agree how long a section of the city walls you will attack, but cannot predict which units will defend that part). 6. Participants take turns assaulting the city according to the Round order, starting with the player that initiated the cooperative attack: a. Each player performs all phases of their combat before the next player. b. Each player may use one die from the Source (but they do not return it until the assault is over) as well as all effects they could use before, at the start of, or during their turns. c. Each player has to start by moving directly to the city. No other movement or actions are allowed. If this move provokes some rampaging enemies, they are added to that player s portion of enemies. Players may voluntarily challenge any other rampaging enemy adjacent to the assaulted city and add them to their enemies. 13 d. Resolve the assault as usual (including Reputation loss and assigning Shields on the City card for defeated enemies). Each player faces only the enemies assigned to them and ignores the others. Effects affecting all enemies affect only those assigned to the player. 7. The city is conquered when all defenders were defeated (whether or not rampaging enemies that joined the combat were defeated). a. If it is not conquered, all players have to withdraw to the space where they attacked from. 8. Then, participants take turns ending their turns as usual, in the Round order (see the End of the Turn section). a. Players can play any healing and special effects before the end of their turns, just as after a regular assault.


.")


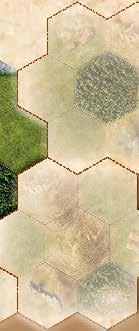

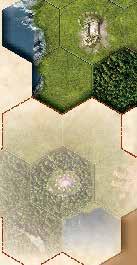
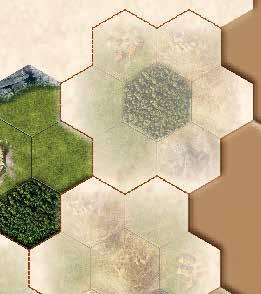
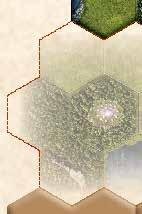


14 SCENARIO BOOK This scenario book has three parts. First, there are some general principles that apply to all scenarios, or to a subcategory of scenarios (like cooperative scenarios). In the second part, there are optional variant rules you can use for your game. The third part contains descriptions of the scenarios. I. GENERAL PRINCIPLES MAP SHAPE In each scenario description, there is a recommended map shape for the various number of players allowed in that scenario. Note: Any map tiles revealed during setup are taken from the Tile deck being used in the scenario. Wedge Map A This shape uses starting tile A. It is similar to the one in the starting scenario, with one extra rule: Core (brown) tiles cannot be added to the coastline. (i.e. to the leftmost and rightmost lane of tiles). The map starts tight, but then opens relatively quickly, and soon it can be wide. The extra rule prevents the Cities being too far from one another. This map is most suitable for 2 or 3 players. Because of its narrow start, it is not recommended if the players are of different levels of experience: With 3 players, an inexperienced player may get blocked at the start. With 4 players, this risk gets even higher and harder to avoid. Fully Open Map A fully open map uses starting tile B, and you deal three tiles adjacent to it at the start. The coastline opens out in a much wider angle here. However, it does not open forever the map can have a maximum of 5 parallel columns of tiles. Imagine the coastline in each direction breaks after you add two tiles to the starting tile. See the picture to the right. A fully open map is suitable for a comfortable 4 player game. For less players, it is a bit too vast, and there may not be enough interaction in later phases of the game. Open Map Limited to 4 or 3 Columns This is the same shape, except the map is limited to 4 or 3 columns only. (With 4 columns, it opens more to the right than to the left). See the pictures. The 4 column map is suitable either for a 3 player game, if you do not want the start to be too crowded, or for a 4 player game, if you want more interaction between the players. Similarly, the 3 column map is suitable for a 2-3 player game, if you want the interaction to be tight during the entire game. Note: If you play with 3 or 4 players here, someone could rush forward and the ones that stay behind may not have enough interesting places to explore and conquer. 14


15 COOPERATIVE AND SOLO SCENARIOS In the Mage Knight Board Game, players themselves determine the pace of the game. If someone is rushing, playing most of their cards each turn, the others have to adjust their tempo, or end up with half of their decks unused at the end of a Round. If the players cooperate, it would be advantageous to agree to play carefully, trying to get the maximum effect from every card then the tempo adjusting aspect of the game would disappear, and the game would take forever. To avoid this, whenever you play a cooperative or solo mission, there is one automated Dummy player. Dummy Player At the start of the game: After players choose their Heroes, randomly choose one of the Heroes that is not in the game as a Dummy player Hero. You only need their Hero card, their Round Order token, and their starting deck of 16 Basic Action cards. Take a look at their Hero card. At the bottom, there are three colored dots (for example Goldyx has green, green and blue). Give three crystals of these colors (one for each dot) to the Dummy player s Inventory. Note: this applies for the Dummy player only. Other characters start with no crystals. Shuffle that Hero s Deed deck, and the Dummy player is ready. Note: Do not count the dummy player for the purpose of determining how many mana dice and Units to use in a scenario. When picking Tactics: See the Scenario description for how the Dummy player chooses their Tactic card at the start of each Round. TEAM RULES Some four player scenarios are played by two teams. Separate the players into teams randomly or by agreement before Hero selection. The interactive Skills (the ones written in a different color on the Skill Description card) ignore your fellow player. However, the interactive Spells (the ones that affect other players) do not ignore your fellow player. Magic does not recognize friend from foe. Allied players cannot trade crystals, Artifacts, Units etc. Mage Knights are very individual, it is a wonder they cooperate at all. Rules for cooperative city assault are recommended, but you can also cooperate in other ways: You may agree who goes which way, who needs which Tactic, who would like to take which cards from the offers, who needs a particular color in the They do not benefit from the Tactic, it just determines when they play in Round Order: Arrange the Round Order tokens by the Tactic numbers, as usual. When it is the Dummy player s turn: If their Deed deck is empty, they announce the End of the Round. Other players have one more turn, and the Round is over. If their Deed deck is not empty, flip over three cards from their Deed deck and put them in their discard pile. Check the color of the last flipped card (topmost card of the discard pile): If the Dummy player has no crystals of that color in their Inventory, their turn is over. If they have any crystals of that color, flip as many additional cards as they have crystals of that color. Then, their turn is over (the color of the additionally flipped card(s) does not matter). Note: If there are not enough cards in their Deed deck, flip as many as you can. On their next turn, the Dummy player announces End of the Round. When preparing a new Round: When removing the lowest card from the Advanced Action offer, add this card to the Dummy player s deck instead. Then shuffle the Dummy player s deck. When removing the lowest card from the Spell offer, put it to the bottom of the Spells deck, as usual. In addition, add one crystal of the same color as that Spell card to the Dummy player s Inventory. Contrary to real players, they can have more than 3 crystals of the same color. Source etc. However, allied players should not say which cards they have in their hand, nor help each other out on details when playing their turn (how to play cards, use Units, pay mana etc.). Each player is individually responsible for how they play. Allied players cannot share the same space at the end of the turn (except for cities and the portal). If this would happen, Forced Withdrawal rules apply for the player who entered the space later. Allied players may not engage in Player vs. Player combat with each other. A player may enter an empty keep owned by their ally, and they can recruit Units there. When in or adjacent to an allied keep, their Hand limit is increased, but only for the keeps they own themselves. Note 1: The Dummy player does not play too aggressively, so you have enough time to play efficiently. Sometimes, though, the random flips may mean that they go through their deck much faster. Watch the Dummy player s deck to adjust your tempo! Note 2: You have a slight control over the Dummy player s deck and crystals. It may be advantageous not to let them get crystals and cards of the same color. Note 3: The deck used for the Dummy player is the main reason why all cooperative scenarios are up to three players only. If you really wish to play a four player cooperative scenario, simply create another deck from one of the remaining Heroes. Skills in a Solo Game In a Solo game, you also use a set of Skills belonging to the Dummy player s Hero. Either remove the Competitive Interactive Skill (with the symbol) of the Dummy player Hero before the game or, if drawn during the game, discard and replace it with another token from the stack. Whichever you decide to do, randomize the tokens being used and place them in a face down pile. Every time your Hero has gained a Skill token, also reveal one Skill of the Dummy player, and put it into the Common Skill offer it is available to you the next time you may gain a Skill token. If you choose such a Skill from the Common Skill offer, you have to take the lowest Advanced Action card, as with usual Level Up rules. When scoring, each team has one common score. The base score is the Fame of the player that has the lower Fame. Ignore the Fame of the player with higher Fame. For Achievements, and any similar scoring, score only the higher score of both players in this area. Ignore the score of the player that scored least. For the Greatest Beating, score only the player with the largest penalty. Assign titles as usual (compare only the larger values of both teams). Note: It is therefore advantageous if each player in the team concentrates on different things, as long as no one falls behind with Fame, and no one is too Wounded. STANDARD ACHIEVEMENTS SCORING The Greatest Knowledge The Greatest Leader The Greatest Adventurer Each player scores 2 Fame for each Spell, and 1 Fame for each Advanced Action in their deck. The player who scores the most Fame this way gets 3 extra Fame for achieving the Greatest Knowledge. If two or more players are tied, each gets 1 Fame (except if the tie is between players who scored no Fame in this category). Each player scores Fame equal to the total level of all their Units. Wounded Units are counted only as half, rounded down (thus a Wounded level 1 Unit is worth no Fame). The player who scored the most Fame this way gets 3 extra Fame for being the Greatest Leader (1 if tied). Each player scores 2 Fame for each Shield token they have on an adventure site. The player who scored the most Fame this way gets 3 extra Fame for being the Greatest Adventurer (1 if tied) The Greatest Loot The Greatest Conqueror The Greatest Beating Each player scores 2 Fame for each Artifact in their deck or on their Units, and 1 Fame for every two crystals in their Inventory. Again, the player who scored the most Fame this way gets 3 extra Fame for achieving the Greatest Loot (1 if tied). Each player scores 2 Fame for each Shield token they have on a keep, mage tower or monastery. The player who scored the most Fame this way gets 3 extra Fame for being the Greatest Conqueror (1 if tied). Each player loses 2 Fame for each Wound card in their deck (not on their Units). The player who lost the most Fame this way loses an additional 3 Fame for receiving the Greatest Beating (-1 if tied, except if the tie is between players that have no Wounds) v


 picking a Hero.")


, and then flip it by any axis (choose the axis before seeing the tile content).")

16 II. VARIANT RULES Variants are here to add even more variety to the game, and to adjust it to your tastes. We recommend you follow these rules when picking variants: You should play your first few games with the standard rules only, to better understand the game. Only use a variant rule if all players agree. You should agree and clearly announce what scenario you are playing and which variant rules apply BEFORE the start of the game, i.e. even before Hero selection. Do not pick too many variant rules at once, as you might easily forget which rules apply and which do not. If you realize that you like a variant rule so much you are always using it, you may agree to consider it to be a standard rule, and these points do not apply for it any more. Even if your group has a set of variant rules you usually use, you should abandon them temporarily when introducing new players to the game. Play The First Reconnaissance scenario without any variant rules. The new players will have lots to digest even with the standard rules. Any player who has not picked a Hero yet may disagree and offer to sacrifice 1 or more Fame points to get that Hero instead. The player who originally picked the Hero must either match the offer, or give up on this Hero. If more players are interested, the next offer must be greater. It goes in rounds, like an auction, except that the players earlier in the selection order may just match the offer, they do not have to increase. Once no one wants to increase, the player who offered most (or was earlier in selection order from the ones that offered most) takes the Hero and loses the Fame. Others lose nothing and continue following the same rules, with the next player (or the same player, if they did not win the auction) picking a Hero. Mark the Fame lost by a player by putting their Shield token on the last row of the Fame track (for example, they put their Shield on the space 118, and treats it as -2). The Heroes are still on level 1, though, and nothing happens if they cross the end of the last line; they just continue on the first line of the track. The Tactic cards for the first round are picked in reverse order to the Hero selection order (regardless of the Fame), to make up for the disadvantage of the player who was last in the auctions. However, after many games under your belt, you may notice that limited amount of tiles cause some patterns to repeat in the game from time to time. If you want, you may use this rule: When revealing a new tile (at the start of the game, or during it), it is rotated randomly. Add it to the map face down (so no one can see how it is oriented), and then flip it by any axis (choose the axis before seeing the tile content). Note: The symbols in the corners still have to connect, although now, circles can connect to stars, creating irregular shapes. That s the game story, and it makes the cities different not just by their garrison and bonuses. If you want more variability, though, you can do it a different way: Whenever a city tile is revealed, draw a random City card, and put the city of that color on the central space of the tile, regardless of the space color. Note: You may also use random cities in scenarios where a fixed city is defined (for example: Green city in the Druid Nights scenario), as it is usually because of the city surroundings, not the city color itself. In these cases, use the tile the scenario describes, but when it is revealed, put a random city onto it. AUCTIONING THE HEROES Maybe one Hero seems better or stronger to you, or perhaps they fit your gaming style better. And for some scenarios or other variant rules, certain Heroes may indeed be a bit stronger than others. According to the standard rules, the player who chooses their character first then has a disadvantage in the first turn, as they are the last to pick a Tactic card. If you feel this disadvantage is not enough, you may use these rules: Randomly determine the player order for the Hero selection, as per the standard rules. When a player picks a Hero, they ask the others whether they agree. If all agree, they just take that Hero and the selection is over for them. MAP VARIABILITY Map Shape and Number of Tiles The map shapes and number of tiles for the scenarios are just recommended settings. If you discover that you like some map shapes better, if you want more or less interaction at the start of the game or during it, or if you want more or less tiles to explore, or even cities to conquer, feel free to choose different map shapes and number of tiles. Random Tiles Orientation The orientation of tiles is normally fixed, the player revealing them having no choice in how to orient them. That s right, Heroes are just discovering an unknown kingdom, not, say, building a medieval city in the south of France. Random Cities The cities have a fixed position. The White city is always by a lake next to a keep, the Red city is in desert surrounded by dragons, etc. DAYTIME VARIABILITY Each scenario goes Day, Night, Day, Night... You may change this if you wish, just for variety. Night Arrival You may start with a Night round. Note this is more difficult: not only it is harder to use mana and travel through forests, but you also do not see who defends keeps and towers, and what dangers lurk in the ruins. If using this, we recommend you roll the mana dice until there is no gold and no black at the start. Darkness is Coming No Interactive Skills Friendly Mana You may remove Skills that affect other players those with this icon (also note the skill description has a darker background color on the Skill Description card). You may agree that during the Day, a player cannot use a gold die as mana of certain color if there is an unused die of that color in the Source. i.e. if there is a red die, you cannot use a gold die to power a red card, you have to use the red one. Also, you cannot reroll or reset a gold die during the Day, as long as there is another non-gold die in the Source. You start with a Day round. At the end of the Round, roll two mana dice. If any of them is black, night falls and it is Night until the end of the game. If not, continue with another Day round, and roll again at its end. FRIENDLY GAME If your group is not too competitive, or if both new players and experienced ones are playing together, you may use one or more of these rules. No Interactive Spells You may remove Spell cards that hinder other players: Mana Meltdown, Mana Claim, Mind Read, and Energy Flow ( ). No Player versus Player Combat You may forbid players attacking each other. If a player ends their movement on a space with another player s figure (except for cities or the portal), the Forced Withdrawal rule applies for them. 16
17 RAMPAGE! This is a kind of side quest. You may add it to any scenario to spice it up. This kingdom is under heavy raids. Terrorized people are very suspicious and do not trust anyone. Your characters start with -2 Reputation (i.e. They have -1 penalty to interaction). At the end of each Day, roll a mana die for each space where a rampaging enemy was defeated. If a warm, living color was rolled (red, green or gold), draw a new enemy to that space. If it was gold, also add one brown enemy to the usual green or red token. When fighting this enemy, you have to fight both. The space is considered to contain a rampaging enemy as long as there is at least one of these tokens. You get Reputation +1 for each enemy token defeated. At the end of each Night, do the same, except this time cold colors (white, blue or black) count, and you add one extra brown enemy when black is rolled. More Rampage! If it is blue, the enemy has +1 to Armor in the Attack phase. In all the above cases, the enemy is worth 1 more Fame for being defeated. If the color is black (or even green or gold, if you made a mistake), the enemy has no bonus, but there is also no extra Fame for it. The player who set the color reveals it at the start of the phase it has an effect. So, at the start of the Siege and Ranged Attack phase, they either reveal the white die, or say It is not white. Then at the start of the Block phase they either reveal the red die or say It is not red. At the start of Attack phase, if not already revealed, they just reveal the die, no matter what the color is. Note: This variant is recommended especially for two player games. When using it, it pays to watch the other player s gaming style. Sometimes, you can prevent the opponent from shooting the enemy by setting it to white, sometimes you can cause serious problems by increasing a nasty special attack, and sometimes you can even cause the enemy to survive because of the +1 Armor it gets (especially when resistant). On the other hand, sometimes the player would just use a big enough Attack or Block anyway and increasing it by 1 would not change the outcome. Thus, you would just give them more Fame. One point for each Advanced Action card. One point for every two crystals. As many points as its level for each Unit (Wounded Units count as half, rounded down). To this score, add 3 points for every level you are above the player who is of lowest level, and announce the result. Then, starting from the player who had the lowest result (if tied, the one with the lower Fame, if still tied, the one who played later in the last round), each player may (but does not have to) take one of the displayed Advanced Action cards and add it to their deck. At the same time, they also has to throw away one of their Action cards. The new card has to either be of the same color or share at least one type (icon in the upper left corner) as the card thrown away. Then, the card or cards no one picked are put to the bottom of the Advanced Action deck. Players should shuffle their decks well before the next Round. Note: You might like this variant if you prefer a slower pace of game. It allows you to take a break once or twice during the game (depending on the number of rounds), to examine and review your deck, and to think what it needs to work better. Also, if you agree, players may take a look at the decks of other players now; during the game itself, there may be not enough time for it. Drafting at the Start For an even more extreme version of this variant: Your characters start with -4 Reputation (i.e. They have -2 penalty to interaction). At the end of each Day or Night, you roll a die for each defeated rampaging enemy as above. However the rampaging enemy token is added always, and if a warm (during Day) or cold (during Night) color is rolled, you also add the brown one. INTERACTIVE COMBAT In this variant, another player not only oversees your combat, but they can also make some small decisions. The combat is less predictable, and in some cases, it may become a true duel of wits. This variant rule applies whenever a player starts a fight with a single enemy (no matter whether it is a rampaging one, or a monster in dungeon, or the only defender left in the city after previous assaults etc.). When this happens, the player who played before that player takes a spare mana die and secretly selects a color on it. They hide it with their hand, so the fighting player does not see the color. If it is white, the enemy has +1 to Armor in the Siege and Ranged Attack phase. If it is red, the enemy has +1 to its Attack. MORE DECKBUILDING If you feel you would like to have more chance to tune your deck during the game, you may use one of the following variants. We do not recommend them for your first few games. Also, when using these rules, your Hero s strength rises faster, so you might want to adjust the game difficulty by increasing the city levels. Note: If using one of these variants, and especially with 4 players, or when cards that allow you to gain more Advanced Action cards enter the game early, there is a chance you might run out of Advanced Action cards. In that case, the monastery offer is affected first (do not deal cards there if there are none left). If there are not enough cards to replenish the Advanced Action offer, just use as many as you can. If there are none, the player who has to take a card gets nothing. Action Upgrades This variant not only lets you tune your deck during the game, it also gives a slight advantage to those that are behind. At the end of each Night except the final one (i.e. twice during the standard 6-Round scenarios), reveal as many Advanced Action cards as the number of players plus 1. Then, players should examine their decks, and score their strength. Use the first three lines of the Achievements Scoring: Two points for each Artifact or Spell. 17 This variant encourages long term planning. You plan some upgrades for your Hero ahead of time, and can adjust your decisions during the game to suit your plan. After the characters are distributed (but before the map is set, the dice rolled and the offers revealed), deal four cards from the Advanced Action deck randomly to each player. Each player chooses one of these cards and sets it aside, passing the remaining ones clockwise to the next player. Continue until each player has three cards set aside. Shuffle the ones no one picked back into the Advanced Action deck. Players keep the cards secretly in a safe place (ideally away from the playing table, so they do not get shuffled into their decks accidentally). At the end of each Day round, when players are shuffling their decks, each player chooses one of these cards and shuffles it into their deck. Note: You may use these rules even when the scenario has fewer than six rounds. Players just do not use all the cards they picked.


 on the space covered by the city figure is ignored.")

 Draw garrison tokens for both cities, and add them together as the Megapolis garrison (it does not matter which was drawn for which city).")


, or leave it by entering a space adjacent to the part they")


 Type: Slightly competitive Length: Three rounds (2 days and 1 night) Purpose:")


18 CITY LEVELS The city levels for a given scenario are shown in the scenario descriptions. Once you are experienced, you may increase the city levels, especially when using rules for a cooperative city assault. Soon, you will see that even a city of level 11 can be conquered by a single player, if they have really strong cards and an army suitable for a city assault. Megapolis If you find out that even the highest level of cities is not enough of a challenge for you, or if you just want to spice things up, you may turn one of the cities into a Megapolis. Note: This can only be done in scenarios with three or less cities. Once you have agreed on the levels of regular cities, also agree on the level of a Megapolis: it can be any number from 2 to 24. It does not have to be higher than 11. The Megapolis should be always the last city revealed in the game. When a Megapolis is revealed, place its figure and take its City card as usual. Then randomly choose one of the City cards not used yet, and put it to the right of the first City card. Also, take the city figure of that color, and put it on the tile, one space right from the first city. The terrain (and, in the case of the Green city, also the symbol) on the space covered by the city figure is ignored. Set the level of each city as half of the Megapolis level. If the number is odd, round up for the city on the left, and round down for the city on the right. (So, the level of the Megapolis is the sum of the both city levels.) Draw garrison tokens for both cities, and add them together as the Megapolis garrison (it does not matter which was drawn for which city). Treat this pair of cities as one big city: You reveal the entire garrison of the Megapolis from any space adjacent to any of its spaces. You can assault the Megapolis from any space adjacent to any of its spaces. You face the entire garrison of the Megapolis. They are all fortified, and benefit from combat bonuses of both cities simultaneously. In case of a cooperative city assault, players adjacent to any space of the Megapolis can be invited. Randomize and randomly deal all enemies, no matter who stands next to which part of the city. The Megapolis is conquered once all defenders are eliminated. Determine a City leader as normal. If conquered, treat the Megapolis as one big city that has two spaces. A player puts their figure onto the corresponding card to mark which part they are in. They may move from one part to another during movement (for the standard city Move cost of 2), or leave it by entering a space adjacent to the part they are currently in. Also, to challenge a rampaging enemy when in a city, the player has to be on the space adjacent to that enemy. No matter in which part of the city their Hero is, the player may use purchase options of both cities during interaction. During scoring, a Megapolis counts as only one city. Note: Scoring does not take city level into account. If you decide to play a scenario with two Megapolis, add a random city to the first revealed city tile. The other two cities will go to the second city tile, even if it happens to be the color you added to the first Megapolis. III. SCENARIO LIST FIRST RECONNAISSANCE Players: 2 to 4 (plus a solo variant) Type: Slightly competitive Length: Three rounds (2 days and 1 night) Purpose: Training scenario. Strongly recommended whenever any player plays the game for the first time, as it provides a natural way to learn the game rules and get familiar with them. On your first mission, you will be sent to an unknown part of the Atlantean kingdom, your task is to locate its Capital. That s all. All the Fame, any knowledge and treasures you manage to get during your mission are yours to keep. For a detailed description of this scenario, see the Game Walkthrough. Here is just a summary: Map (for 2, 3, or 4 players) Map Shape: Wedge with no limitations Countryside tiles: 8, 9, or 11, sorted by numbers Core city tiles: 1 Core non-city tiles: 2 Cities: Cities cannot be conquered nor entered in this scenario. Special Rules A player scores 1 Fame whenever they reveal a new tile, no matter which type. No Player vs. Player combat is allowed (unless you agree otherwise). For the first game, there should be at least one Unit in the offer with the village icon on the left side of the card. If not, shuffle the cards and deal them until this is true. Elite Units are not used in this scenario. You should not reveal Spells and Advanced Action cards until they are needed for the first time. Scenario End When a player reveals a city, all players (including themselves) have one last turn. If the Round ends during this, the game ends immediately. 18 Scoring Apply standard Achievements scoring. Whoever has the most Fame, wins. If tied, the players share the victory. Solo Variant If you want to try your first mission solo, play with 8 countryside tiles (as in a 2-player game), but adjust the game length to four rounds (2 days and 2 nights). Use a Dummy player (see page 15), and special rules for Tactic selection from the Solo Conquest mission (page 19). When scoring, award no titles. However, if you just want to become familiar with the mechanics, you may also ignore the Dummy player in your first game, and enjoy the experience with one hero and no pressure.
19 FULL CONQUEST Players: 2 to 4 Type: Competitive Length: Six rounds (3 days and 3 nights) Purpose: Standard game scenario, in which you use all the game features. Can be long, especially with 4 players or when players are not experienced yet. Your task is to find and conquer all cities in three days and three nights. Each of you will be on your own, and as usual, you want to get as much Fame, knowledge, and loot as possible. Luckily for you, conquering cities is a great way to get Fame. Map (for 2, 3, or 4 players) Map Shape: Wedge (2 or 3 players), or Fully Open (4 players) Countryside tiles: 8, 9, or 11 Core city tiles: 2, 3, or 4 (the same number as there are players) Core non-city tiles: 1, 2, or 3 (one less than players) Cities: Each revealed city is level 4. Scenario End When all cities are conquered, all players (including the one who conquered the last city) have one last turn. If the Round ends during this, the game ends immediately. Scoring Apply standard Achievements scoring. In addition, also score for conquered Cities, as described on the other side of the Scoring card. A player scores 7 Fame for each city they are the leader of. A player scores 4 Fame for each city they are not the leader of but has at least one of their shield tokens on the City card. Whoever scores the most Fame for this gets an additional +5 Fame as the Greatest City Conqueror (+2 Fame if tied). If you conquered all the cities, your mission was successful. Whether you did or not, whoever has most Fame wins the game. Variants If experienced, you can increase the level of the cities. But beware even with the suggested settings, this is a long scenario. Team Game If playing with four, you may decide to play this as a team game (see the General Principles section). In this case, you may either keep four cities in the game, or you may decide to encourage cooperative city assaults by using only two city tiles, and set the level of cities to 10 or higher. Or, you can use two Megapolis instead (see the Variants section). BLITZ CONQUEST Players: 2 to 4 Type: Competitive Length: Four rounds (2 days and 2 nights) Purpose: Shorter scenario that shares most of the mechanics with the standard game, but is faster. Again, your task is to conquer all cities. You have only two days and two nights this time, so you were imbued with extra power. And again, whoever scores most Fame is the winner. Special Rules Map (for 2, 3, or 4 players) When all cities are conquered, all players (including the one who conquered the last city) have one last turn. If the Round ends during this, the game ends immediately. Map Shape: Wedge (2 or 3 players), or Open limted to 4 columns (4 players) Countryside tiles: 6, 7, or 9 Core city tiles: 2, 3, or 4 (equal to the number of players) Core non-city tiles: 1, 2, or 3 (one less than players) Cities: Each revealed city is of level 3. You start with 1 Fame. Whenever you cross a line on the Fame track, you get 1 extra Fame. You start with +2 Reputation (i.e. you have a bonus of +1 for interaction right from the start). There is one more die in the Source and one more Unit in the offer than usual. Scoring You score Achievements and conquered Cities (on both sides of Scoring card), as with the standard Conquest scenario. Variants You can adjust the level of the cities according to your preferences. Scenario End SOLO CONQUEST Players: 1 Type: Solo Length: Six rounds (3 days and 3 nights) Purpose: Solitaire game. Also suitable for a player who wants to understand the game before explaining it to others. Yes, that s true you are alone now. But the Council still needs these cities to be conquered. Good luck! Special Rules Map When all cities are conquered, you have one last turn (the Dummy player does not). Map Shape: Wedge Countryside tiles: 7 Core city tiles: 2 Core non-city tiles: 2 Cities: the first revealed city is of level 5, the second revealed city is of level 8. Dummy Player: There is one standard Dummy player (see the General Principles section). Cards and Skills: Remove the four competitive Spells (109112) from the Spell deck, and the one interactive Skill, marked with this icon, from the player s Skill deck. When taking Tactics, you always choose first. The Dummy player then takes one random card from those remaining. At the end of each Day or Night, remove both used Tactic cards from the game. That means, each Tactic card is picked exactly once during the game. Scenario End Scoring If you succeed in defeating all cities, you are victorious. If not, you have failed. In both cases you may count your score, to see how good you were. Take your Fame as the base. Then apply standard Achievements scoring, except no titles are awarded. Then score for your goal and for the time to reach it. See the other side of the Scoring card: Score 10 points for each city you conquered. Score an additional 15 points, if you conquered all cities. If you finished the game one or more Rounds before the limit, score 30 points for each such Round. Score 1 point for each card in the Dummy player s Deed deck (that was not yet flipped this Round). If the End of the Round was not announced yet in your last Round, score an additional 5 points. 19 Variants You may adjust the city levels to set up the right challenge for you. You may also use a Megapolis. Other Solo Missions This is a standard solo mission. If you wish though, you may play any other mission as solo, just use similar setup modifications and Special rules as this mission.
20 FULL COOPERATION Players: 2 or 3 Type: Cooperative Length: Six rounds (3 days and 3 nights) Purpose: Standard cooperative scenario the ultimate challenge for those who want to beat the game together. Your task is to conquer all cities. You have to work as a team, and you will also be rewarded as a team, according to your weakest link and best achievements. Special Rules Map (for 2 or 3 players) Scenario End Map Shape: Fully open Countryside tiles: 8, or 10 Core city tiles: 3, or 4 (one more than players) Core non-city tiles: 2, or 3 (equal to number of players) Cities: The cities are of level 5, except for the final one revealed, which is of level 8 (2 players), or 11 (3 players) Dummy Player: There is one standard Dummy player (see the General Principles section). Cards and Skills: Remove the four competitive Spells from the Spell deck ( ), and and the one interactive Skill, marked with this icon, from the player s Skill deck. When taking Tactics, the Dummy player takes a random Tactic first, then the players choose theirs. At the end of the Day or Night, agree and remove one of the Tactics used by the players (not the Dummy player) from the game. This does not matter on the last day and the last night. Team Rules apply, except you are all one team. (see the General principles section). When all cities are conquered, all players except the Dummy player have one last turn. Scoring If you succeed in defeating all cities, you are all victorious. If not, you have all failed. In both cases you may count your score, to see how good you were. You have one score as a team. As a base score, take the lowest Fame of all players. Then apply standard Achievements scoring, except: In each category, you score only the player with highest score (or most negative points in case of Greatest Beating). No titles are awarded. Then score for your goal and for the time to reach it. See the other side of the Scoring card: Score 10 points for each city you conquered. Score an additional 10 points if every player is a leader of at least one conquered city. Score an additional 15 points if you conquered all cities. If you finished the game one or more Rounds before the Round limit, score 30 points for each such Round. Score 1 point for each card in the Dummy player s Deed deck (that was not yet flipped this Round). If the End of the Round was not announced yet in your last Round, score an additional 5 points. Variants You may adjust the city levels to set up the right challenge for you. In a 2 player game, the last city may also be a Megapolis see the Variants section. You may also agree on a scoring variant: for Achievements, only the lowest score counts. This encourages balanced development of all Heroes instead of specialization. (For the Greatest Beating Achievement, the biggest penalty is scored again.) BLITZ COOPERATION Players: 2 or 3 Type: Cooperative Length: Four rounds (2 days and 2 nights) Purpose: Shorter, cooperative scenario, that shares most of the mechanics with the standard one, but is easier and faster. Again, your task is to conquer all cities. You have only two days and two nights this time, so you were imbued with special powers. All the rules and setup conditions for Full Cooperation apply, with these modifications: Map (for 2 or 3 players) Additional Special Rules Special Rules Scenario End Countryside tiles: 7 or 8 Core city tiles: 2 or 3 (equal to number of players) Core non-city tiles: 1 or 2 (one less than players) Cities: In order in which they are revealed, the cities are of level 5 and 8 (2 players), or 5, 8, and 11 (3 players). You start with 1 Fame. Whenever you cross a line on the Fame track, you get 1 extra Fame. You start with +2 Reputation (i.e. you have a bonus of +1 for interaction right from the start). There is one more die in the Source and one more Unit in the offer than usual. MINES LIBERATION Players: 2 to 4 Type: Competitive Length: Four rounds (2 days and 2 nights) Purpose: A shorter scenario similar to the standard one, but with different goals. Fight in the tunnels! Mines in this friendly kingdom are occupied by enemies! Without a supply of crystals, Mages cannot serve the land. Go there and regain them. Map (for 2, 3, or 4 players) Map Shape: Wedge (2 or 3 players), or Open limited to 4 columns (4 players) Countryside tiles: 8, 9, or 11 (remove only tiles with no mines on them). Core city tiles: 1 (always the red city) Core non-city tiles: 1, 2, or 3 (the one without a mine is always amongst the removed ones). Cities: The city is friendly. Each player puts one Shield token on it, but no-one is its leader. When a mine is revealed, put one green (if on a Countryside tile) or red (if on a Core tile) enemy token on it, face up. Also, add one brown enemy token, face down. These are enemies controlling the mine (one is hidden in the deeps). Arrange them in a way that the reverse of the brown one is visible, too, to distinguish them from rampaging enemies. To liberate a mine, you may enter it from its space (as an Action). Fight both enemies. Night rules apply as in a Dungeon (but you can use your Units). If you do not defeat both, the remaining token(s) stay on the space. They can be attacked again later. Whoever defeats the last enemy liberates the mine. They mark it and gain +1 Reputation (+2, if on a Core tile). Until liberated, mines produce no crystals. Once liberated, they produce as usual (the production starts immediately, so the conqueror gets one crystal on the turn they liberated the mine). At the start of Day or Night, each player gains one crystal from every mine they already conquered, no matter how far away it is on the map. Just a gift from the grateful miners. Note: If there are not enough brown tokens, use some substitute for the brown monsters that are on the map but not revealed yet. Draw a new brown monster when it is about to be revealed. 20 When all map tiles are revealed and all mines are liberated, all players (including the one who conquered the last mine) have one last turn. If the Round ends during this, the game ends immediately. Scoring If you liberated all mines, the mission was successful. In any case, apply standard Achievements scoring. In addition: A player scores 4 Fame for each of their mines in Countryside and 7 Fame for each mine on Core tiles. Whoever scores the most Fame for this gets an additional +5 Fame as the Greatest Liberator.

 Core non-city tiles: 1, 2, or 3 (one less than the player number). Cities: The city is friendly.")

.")

, or at the end of the second Night.")
 or two (with 3 or 4 players) Shield tokens can be placed on each glade.")
21 DRUID NIGHTS Players: 2 to 4 Type: Slightly competitive, or competitive Length: Four rounds (2 days and 2 nights) Purpose: A shorter scenario similar to the standard one, but with different goals. How big a challenge dare you encounter? Have you noticed the mysterious obelisks with engraved symbols on the magical glades around this kingdom? Go and investigate! Map (for 2, 3, or 4 players) Map Shape: Wedge (2 or 3 players), or Open limited to 4 columns (4 players) Countryside tiles: 8, 9, or 11 (remove only tiles with no magical glades on them). Core city tiles: 1 (always the green city) Core non-city tiles: 1, 2, or 3 (one less than the player number). Cities: The city is friendly. Each player puts one Shield token on it, but no-one is its leader. Special Rules When ending your movement on a magical glade, you may activate it mark the glade with your Shield token. There may be multiple tokens on each glade, but only one from each player. Once during the first Night, in any of your turns, you may perform an incantation. You may not be at an inhabited space and it counts as your Action for that turn. It summons one monster for each glade you have your Shield token on draw that many brown enemies and fight them. The ones you defeat bring you twice as many Fame. The ones you do not defeat disappear after the combat (but the Wounds they did do not). Regardless how many of them you defeated, at the end of your turn you get one random crystal for each monster you summoned (roll a die for each, like in a monster den). At the end of the first Night, remove all Shield tokens from the glades. Players have to mark them again, if they want to use them for an incantation the second night. During the second Night, you may do the same, except this time you summon red enemies. The Fame for defeated ones is doubled again, and this time you get two random crystals for each enemy. Scenario End When all players have performed the incantation during the second Night (in that case, each player has one more turn), or at the end of the second Night. Scoring Do the standard Achievements scoring. Whoever has the most Fame, wins the game. Variants You may play a more competitive variant: only one (with 2 players) or two (with 3 or 4 players) Shield tokens can be placed on each glade. If a glade is already at its limit, choose and replace one from another player. With fewer players, you may also play an Epic, 3 days and 3 nights version. Use all Countryside and Core non-city tiles. Remove the Shields after the second Night, too. During the third Night, you summon one brown and one red enemy for each magical glade you have marked, and get three crystals for each pair summoned. DUNGEON LORDS Players: 2 to 4 Type: Competitive Length: Five rounds (3 days and 2 nights) Purpose: A shorter scenario similar to the standard one, but with different goals. Let s go underground. We thought we already controlled this land. We were wrong! There is a vast system of underground tunnels under the kingdom. We do not know who dug these tunnels and why, but we do not care. Go, and seize control of them! Map (for 2, 3, or 4 players) Map Shape: Wedge (2 or 3 players), or Open limited to 4 columns (4 players) Countryside tiles: 8, 9, or 11 (remove only tiles with no dungeons on them). Core city tiles: 1 (always the Blue city) Core non-city tiles: 1, 2, or 3 (always include the desert tile with monastery and tomb). Cities: The city is friendly. Each player puts one Shield token on it, but no-one is its leader. Special Rules Whenever a tile with a village is revealed, the player who revealed it chooses any accessible non-swamp space adjacent to that village (it can even be on a neighboring tile) that has no site on it. From now on, there is a secret dungeon entrance on this space. Put a face down brown enemy token on the space to mark it. A secret dungeon entrance works like any other dungeon (see its description card). If you conquer it, mark the space and claim your reward. If you fail, discard the monster token and put another random brown enemy on that tile. The same applies for monasteries except you put a red enemy token to an adjacent empty space to mark there is a secret tomb. The secret tomb works the same way as regular tombs. Conquered dungeons and tombs (both regular and secret ones) cannot be entered again to fight for more Fame in this scenario. All conquered tombs and dungeons (including the secret ones) are connected. When on a conquered dungeon or tomb space during movement, you may move to any other conquered dungeon or tomb space. These two spaces do not have to be of the same type (you may travel from a regular dungeon to a hidden tomb etc.) To do so, you have to pay 2 Move points plus 1 Move point for each space you traveled. When measuring the distance, you have to go through revealed spaces, and you have to avoid lakes and swamps. If it is not possible, you cannot travel there. 21 Scenario End When all map tiles are revealed and all dungeons and tombs are conquered, all players (including the one who conquered last tomb or dungeon) have one last turn. If the Round ends during this, the game ends immediately. Scoring If you conquered all the dungeon and tombs, the mission was successful. In any case, apply standard Achievements scoring, except: When scoring Adventures, also count the secret dungeons and tombs. All dungeons and tombs give 4 points instead of 2. Instead of the Greatest Adventurer title, Greatest Dungeon Crawler title is awarded, and it is worth +5 points (+2 if shared).

22 CONQUER AND HOLD Players: 2, or 4 (two teams) Type: Very competitive Length: Four rounds (4 players), six rounds (2 players) Purpose: A very competitive scenario full of opportunities for Heroes to fight each other. Victory points for controlled sites instead of Fame! You are sent to this problematic province by the Council of the Void... well... to be exact... by the... um... righteous members of the Council of the Void... to seize control over it. Just beware, there is another faction of treacherous Council members that wants to control the region. Do not allow them! Map (for 2, 3, or 4 players) Map Shape: Predefined. See the picture. Use the B side of the starting tile, three revealed Countryside tiles, and predefined positions where another 2 Countryside and 4 Core tiles can be revealed (you may put them there, face down, when setting up the game). Countryside tiles: 5 (all the ones with forts and mage towers). Core city tiles: 1 (always the White city) Core non-city tiles: 3 (all the ones with forts and mage towers). City: The city was friendly, but it closed its gates. You are not allowed to enter it. Units: Remove level IV Units (the ones that can be recruited in a city only) from the Elite Units deck. Special Rules Deal Regular (silver) Units only during the first half of the game. Deal both Regular and Elite Units during the second half (from Round 3 in a four player game, or from Round 4 in a three player game). The Units that can be recruited in monasteries can also be recruited in mage towers. The Units that can be recruited in villages may also be recruited in keeps. There is no reputation loss for assaulting keeps and towers in this scenario. The mage towers work differently than normal; in this scenario they work similar to keeps. When you conquer a mage tower, you get no Spell. You can still buy Spells there later. When you conquer a mage tower, it becomes yours, like a keep. Other players can assault it, like a keep: they fight a randomly drawn fortified violet enemy, for half of the Fame, rounded up. If you start your turn in or next to your mage tower, you get one gold mana (during Day) or black mana (during Night) for every mage tower you control on the map. When close to both your keep and mage tower, you benefit from both! During the second Day and Night, you draw two random gray (for keeps) or violet (for mage tower) enemy tokens when attacking a keep or tower owned by another player. The total fame for defeating them is added together and then halved (round up). During the third Day and Night (in a 2 player game), the same applies, except you draw three instead. Team Rules If playing with four, Team Rules apply (see the Variants section). Especially note this rule (from the Variants section): A player may enter a keep owned by their ally, and they can recruit Units there. When in, or close to an allied keep, their Hand limit is also increased, but only for the keeps they own themselves, if any. The same applies to mage towers and extra mana. The Winner The scenario is played until end of the Round limit, or until one side admits the other side has won. Each owned keep counts as 3 Victory points. Each owned mage tower counts as 2 Victory points. The player or team who has the most points wins the game. If tied (i.e. if some sites were left unconquered, as there are 25 points available in the game), no one is the winner. Variants For a more strategic game, you may reveal the map tiles from the very start (if you will not miss the thrill of exploring). You can also play this scenario with 3 players, but it can suffer from the if two fight each other, the third one benefits syndrome. If you want to anyway, we recommend to play four rounds only, as in a 4 player game. ONE TO RETURN Players: 2 to 4 Type: Very competitive Length: Four rounds (2 days and 2 nights) Purpose: A competitive scenario suitable for those who prefer last man standing types of games over the end game scoring. This is an ultimate test of your power. You are sent to an unknown part of the kingdom and the portal closes after you go through it. After two days and two nights, the portal opens again for a short while. Only the hero who is at the portal at that moment can return home. Map (for 2, 3, or 4 players) Map Shape: Wedge (or any other you agree) Countryside tiles: 7, 8, 10 Core city tiles: 1, 2, or 3 (one less than players) Core non-city tiles: 1, 2, or 3 (one less than players) Cities: Each revealed city is of level 3. Special Rules The portal closes at the end of the Day 1 (whoever is on the portal at that time would be eliminated from the game). From now on, the portal works as an empty plain space only one player can be there, and combat can be initiated there (including Forced Withdrawal rules). The Winner The scenario ends as soon as the second Night is over. Whoever stands on the portal space at that moment wins the game. If noone stands there, there is no winner. There is no scoring, and Fame does not matter. Note: After End of the Night is announced, initiating Player vs. Player combat is not allowed. Thus, if the portal is occupied at the moment when end of the second Night is announced, the player occupying it wins. Team Variant If playing with four, you may play this scenario in teams. All the Team Rules apply (see the General Principles section). At the start of the game, each team chooses randomly (or by decision, if you prefer) a Shield token of one of its members. This player is the chosen one the one that has to return. Their teammate has to help, especially by blocking the other team. The opposing team should not know which player has been chosen. Store both Shield tokens (one from each team) secretly in a safe place. At the end of the second Night, reveal these Shield tokens. If one of them belongs to a player that currently stands on the portal, their team has won the game. If no player stands on the portal, or if a player whose Shield token was not chosen stands there, no one has won the game. Variants You may play an Epic version that lasts 3 Days and 3 Nights. Add one tile of each type to the game, and increase the level of cities to 4. MAGE KNIGHT ULTIMATE EDITION Rulebook editing: Gaming Rules! - Paul Grogan & Phil Pettifer Playtesting: Playtesters: Filip, David, Hanka, Miloš, Aneken, Vítek, Kreten, Fanda, A GAME BY VLAADA CHVÁTIL Michal, Flygon, Paul, Falco, Glee, Rumun, Monča, Ese, Yuyka, Jéňa, Bianco, Jirka Original Game Design: Vlaada Chvátil Development Team: Vlaada Chvátil, David Korejtko, Filip Murmak, Phil Pettifer, Paul Grogan Illustrations: J. Lonnee, Milan Vavroň, Octographics.net Graphic Design: Chris Raimo, Filip Murmak, Scott Hartman Bauma, and many others from Czech Republic, US and UK. Special thanks to: Filip Murmak for enthusiasm and valuable help from the very first WizKids/NECA, LLC moment they learned the game to the moment it went to print. David Korejtko for 603 Sweetland Ave. many hours of playtesting and balancing. Paul Grogan, Philip Pettifer, and friends Hillside, NJ USA for endless days (and nights) of rules proofreading and language corrections. Bryan Kinsella and Wilson Price from WizKids for their help and valuable advice. WizKids and Czech Games Edition for their support with extensive playtesting WizKids/NECA, LLC. WizKids and related marks and logos are trademarks of WizKids. All rights reserved. 22
: Flip Day/Night board and refresh the Source.")


.")
. Resting: no movement, no action.")
: discard one Wound card.")
 the mana dice used. Next player may play now.")

 Hand limit.")

. Gain Fame for each defeated enemy (but do not Level up yet) and discard its token.")


 and discard its token.")


23 GAME Choose scenario and variants. Players choose Heroes. Setup the game. Play the Rounds, until Round limit or end conditions. Determine the game outcome. ONE ROUND Prepare the Round (not on the first Round): Flip Day/Night board and refresh the Source. Create a new Unit offer. Refresh Advanced Action and Spell offers. Players Ready their Units and flip back Skill tokens. Players reshuffle their decks and draw new cards. Players choose Tactics Lowest Fame (the later in Round Order, if tied), goes first. Rearrange the Round Order tokens. Players play turns in order, until someone announces the End of the Round. Other players then have one last turn. ONE TURN If your Deed deck is empty, you may forfeit your turn to announce the End of the Round. If your hand is also empty, you have to do this. Regular turn: Optional movement (and/or map revealing), then optional (sometimes mandatory) action: Combat with enemies (assault to a fortified site, provoking or challenging rampaging enemies, entering an adventure site). Interaction with locals (recruiting, healing and buying cards for Influence). Player vs. Player combat (if on the same space as anopponent). Resting: no movement, no action. Standard rest: discard one non-wound and any number of Wound cards. Slow recovery (if you have Wound cards only): discard one Wound card. Any turn: Play any special and healing (if not in combat) effects. Use up to one die from the Source. End of the turn: Return (and reroll) the mana dice used. Next player may play now. Do Forced Withdrawal, if you are not on a safe place. Discard played cards, return all mana except crystals. Claim your combat rewards, and process Level ups, if any. Discard any number of cards from your hand (at least one if no cards were played this turn.). Draw cards up to your (modified) Hand limit. SUMMARY COMBAT WITH ENEMIES Ranged and Siege Attack phase Perform none, one or more attacks. You may defeat one or more enemies with each. Play Ranged and Siege Attacks of total value equal to or higher than the chosen enemies Armor to defeat them (Siege attacks only if some of these enemies are fortified). Gain Fame for each defeated enemy (but do not Level up yet) and discard its token. Block phase Perform none, one or more blocks. You may block one enemy with each block. Play Block of total value equal to or higher than the chosen enemy attack to block it. Assign Damage phase For each enemy that was not defeated or blocked, assign damage equal to its Attack value (in any order). First, you may assign damage to Unwounded units. Give it a Wound and reduce the damage by an amount equal to the Unit s Armor. Then, assign the rest to your Hero. For each Wound you take to your hand, reduce the damage by Hero s Armor. Attack phase Perform none, one or more attacks. You may defeat one or more enemies with each. Play any Attacks (including Ranged and Siege ones, or a card played sideways) of total value equal to or higher than the chosen enemies Armor to defeat them. Gain Fame for each defeated enemy (but do not Level up yet) and discard its token. PLAYER VERSUS PLAYER COMBAT Defender declares their intention: If they attend the attack fully, they may do all as in their turn, including end of turn processing, they are protected until their next turn, but they lose their next turn. If not, they may not use mana or Skills, and their reaction ends immediately after the end of combat. Ranged and Siege Attacks phase Players take turns, starting with the defender, playing Ranged and Siege Attacks, until both forfeit their chance. The player attacking plays any amount of Ranged and Siege Attacks (Siege only if the defender is fortified). The other player may play Blocks to reduce the attack. It is reduced by 1 for every 2 points of Block. The remaining attack is assigned as damage by the attacker to the opponent s Units and Hero. Damage equal to Armor has to be assigned to wound a Hero or an Unwounded Unit. Melee Attacks phase Players take turns playing Attacks, starting with the aggressor, until someone is forced to retreat or until both forfeit their chance. The player attacking plays any amount of Attacks (including Ranged and Siege ones, or a card played sideways). The other player may play Blocks to reduce the attack. It is reduced by 1 for every 1 point of Block. The remaining Attack is assigned as damage (see above), and/or converted to Move points to force the player to withdraw to a neighboring safe space, and/or used to steal used Artifacts or Banners assigned to a Wounded Unit (5 damage per Artifact). If the opponent is forced to retreat, then gain 1 Fame if they have more Fame than you, plus 2 for each level they are higher than you. 23
. Ice Attack Only Fire and Cold Fire Blocks are efficient when blocking this (others are halved).")


 are inefficient (halved). Fire Resistance All Fire Attacks are inefficient (halved).")


.")


. If any damage remains, continue as normal (wound the Unit and reduce the damage by its Armor again).")


24 ENEMY TOKEN ABILITIES Offensive Defensive Fire Attack Only Ice and Cold Fire Blocks are efficient when blocking this (others are halved). Ice Attack Only Fire and Cold Fire Blocks are efficient when blocking this (others are halved). Cold Fire Attack Only Cold Fire Blocks are efficient when blocking this (others are halved). Summon Attack At the start of the Block phase, draw a random Brown token for this enemy. It replaces the enemy in the Block and Assign Damage phases, then it is discarded. Unit Resistances Fortified Only Siege Attacks can be used against this enemy in the Ranged and Siege Attacks phase (no attacks at all if it also defends a fortified site). Physical Resistance All physical Attacks (incl. cards played sideways) are inefficient (halved). Fire Resistance All Fire Attacks are inefficient (halved). The enemy ignores any non-attack effects of red cards or Unit abilities powered by red mana. Swift To block this enemy, you need twice as much Block as its Attack value. Ice Resistance All Ice Attacks are inefficient (halved). The enemy ignores any non-attack effects of blue cards or Unit abilities powered by blue mana. Brutal If unblocked, it deals twice as much damage as its Attack value. Both Fire and Ice Resistance Also all Cold Fire Attacks are inefficient (halved). Poison If a Unit gets Wounded because of an attack from an enemy with Poison, it is given two Wound cards instead of one. For each Wound a Hero takes into their hand from a Poisonous attack, they also puts one Wound into their discard pile. Elusive An elusive enemy has an increased Armor value. The lower value is used only in the Attack phase, and only if all of the enemy attacks are successfully Blocked. Any Armor modifications apply to both values. Paralyze If a Unit gets Wounded because of an attack from an enemy with Paralyze, it is immediately destroyed (removed from the game). If a Hero takes one or more Wounds into their hand from a Paralyzing attack, they must immediately discard any non-wound cards from their hand. Unfortified All site fortifications are ignored for such an enemy. Arcane Immunity The enemy is not affected by any non-attack/block effects. Effects that directly affect enemy attacks still apply. Assassination Damage from this attack cannot be assigned to Units; if unblocked, it has to be all assigned to the hero. Defend Enemies with the Defend ability will defend themselves or other enemies when you attack them. Cumbersome In the Block phase, you may spend Move points; for each Move point spent, the attack is reduced by 1 for the rest of the turn. An attack reduced to 0 is considered successfully blocked. Vampiric An enemy with the Vampiric ability has its Armor value increased by 1, for the rest of the combat, for each unit its attacks wound and for each wound its attacks cause to be added to a player s hand. Combat with enemies: If the Unit is assigned damage from an attack it is resistant to, the damage is reduced by its Armor first (without taking Wounds). If any damage remains, continue as normal (wound the Unit and reduce the damage by its Armor again). Player vs. Player: If the Unit is resistant to at least one element included in the opponent s attack, the opponent has to spend twice as much damage to wound that Unit. Physical Resistance Makes the Unit less vulnerable to physical Attacks of enemies and physical Attacks of an opponent. Fire Resistance Makes the Unit less vulnerable to Fire Attacks of enemies and Fire Attacks of an opponent. It also ignores non-attack effects of opponent s red cards or Unit abilities powered by red mana. Ice Resistance Makes the Unit less vulnerable to Ice Attacks of enemies and Ice Attacks of an opponent. It also ignores non-attack effects of opponent s blue cards or Unit abilities powered by blue mana. Both Fire and Ice Resistance Also counts as resistance to Cold Fire Attacks of enemies and Cold Fire Attacks of an opponent. Multiple Attacks Each attack has to be handled (blocked or get their damage assigned) separately. Effects that prevent an enemy from attacking prevent all their attacks. An enemy is considered "successfully blocked" if all its attacks are blocked. TURN SEQUENCE OVERVIEW You MAY Announce End of the Round Before your turn or In another player s turn effects Your previous turn Skill tokens expire YES Is your Deed deck empty? Is your Round Order token face down? YES YOUR TURN Action Movement Special and healing effects OR One Rest action Flip your Round Order token 24 Special and healing effects End of Turn sequence Before your turn or In another player s turn effects
FULL RULEBOOK GAME FLOW TABLE OF CONTENTS. Playing Scenarios... 17
 T FULL RULEBOOK his book includes the complete rules for the game, followed by the Scenario section on page 17. This rulebook is not intended as a method for learning the game, and especially not as a
When placed on Towers, Player Marker L-Hexes show ownership of that Tower and indicate the Level of that Tower. At Level 1, orient the L-Hex
 Tower Defense Players: 1-4. Playtime: 60-90 Minutes (approximately 10 minutes per Wave). Recommended Age: 10+ Genre: Turn-based strategy. Resource management. Tile-based. Campaign scenarios. Sandbox mode.
Goal of the Game. For 2-4 Players
 RULEBOOK 1 For 2-4 Players As Jarl of a Viking clan, your followers have certain expectations: prosperity, security and glory. In return they follow you on raids of keep and villages and territories. They
GLOSSARY USING THIS REFERENCE THE GOLDEN RULES ACTION CARDS ACTIVATING SYSTEMS
 TM TM USING THIS REFERENCE This document is intended as a reference for all rules queries. It is recommended that players begin playing Star Wars: Rebellion by reading the Learn to Play booklet in its
Introduction. Contents
 Introduction Side Quest Pocket Adventures is a dungeon crawling card game for 1-4 players. The brave Heroes (you guys) will delve into the dark depths of a random dungeon filled to the brim with grisly
Another boardgame player aid by
 Another boardgame player aid by Download a huge range of popular boardgame rules summaries, reference sheets and player aids at www.headlesshollow.com Universal Head Design That Works www.universalhead.com
CONTENTS. 1. Number of Players. 2. General. 3. Ending the Game. FF-TCG Comprehensive Rules ver.1.0 Last Update: 22/11/2017
 FF-TCG Comprehensive Rules ver.1.0 Last Update: 22/11/2017 CONTENTS 1. Number of Players 1.1. This document covers comprehensive rules for the FINAL FANTASY Trading Card Game. The game is played by two
Lightseekers Trading Card Game Rules
 Lightseekers Trading Card Game Rules 1: Objective of the Game 3 1.1: Winning the Game 3 1.1.1: One on One 3 1.1.2: Multiplayer 3 2: Game Concepts 3 2.1: Equipment Needed 3 2.1.1: Constructed Deck Format
IMPERIAL ASSAULT-CORE GAME RULES REFERENCE GUIDE
 STOP! This Rules Reference Guide does not teach players how to play the game. Players should first read the Learn to Play booklet, then use this Rules Reference Guide as needed when playing the game. INTRODUCTION
Notes about the Kickstarter Print and Play: Components List (Core Game)
") Introduction Terminator : The Board Game is an asymmetrical strategy game played across two boards: one in 1984 and one in 2029. One player takes control of all of Skynet s forces: Hunter-Killer machines,
Introduction Terminator : The Board Game is an asymmetrical strategy game played across two boards: one in 1984 and one in 2029. One player takes control of all of Skynet s forces: Hunter-Killer machines,
Comprehensive Rules Document v1.1
 Comprehensive Rules Document v1.1 Contents 1. Game Concepts 100. General 101. The Golden Rule 102. Players 103. Starting the Game 104. Ending The Game 105. Kairu 106. Cards 107. Characters 108. Abilities
Mythic Battles: Pantheon. Beta Rules. v2.8
 Mythic Battles: Pantheon Beta Rules v2.8 Notes: Anything with green highlighting is layout notes, and is NOT FOR PRINT. Anything with yellow highlighting is not yet finished. 1 Appearance There are many
Playing By Order of the Queen:
 Playing By Order of the Queen: Overview: In By Order of the Queen, you and your fellow players are leaders of the most prestigious guilds of the Kingdom of Tessandor. You must work together to fulfill
Lightseekers Trading Card Game Rules
 Lightseekers Trading Card Game Rules Effective 7th of August, 2018. 1: Objective of the Game 4 1.1: Winning the Game 4 1.1.1: One on One 4 1.1.2: Multiplayer 4 2: Game Concepts 4 2.1: Equipment Needed
Mythic Battles: Pantheon. Beta Rules. v2.5
 Mythic Battles: Pantheon Beta Rules v2.5 Notes: Anything with green highlighting is layout notes, and is NOT FOR PRINT. Anything with yellow highlighting is not yet finished. 1 Game Terms & General Rules
RU L E S REFERENCE USING THIS RULES REFERENCE
 TM TM RU L E S REFERENCE USING THIS RULES REFERENCE This document is a reference for all Star Wars: Armada rules queries. Unlike the Learn to Play booklet, the Rules Reference booklet does not teach players
Component List. Game Overview. How to Use This Rulebook. This Rulebook. 1 Quick-Start Rules Booklet. 3 Painted Plastic Ships.
 Game Overview Welcome to X-Wing, an exciting, fast-paced dogfighting game set in the Star Wars universe. In X-Wing, two players take control of X-wings, TIE fighters, and other ships from the Star Wars
The Stygian Society Rules v2.2
 The Stygian Society Rules v2.2 By Kevin Wilson Edits by Kevin Brusky (7/28/18) Introduction The Stygian Society. You do not know them, but for hundreds of years, they have quietly worked to protect you
Privateer Press Designed by Will Schoonover. Revised Rulebook by Justin Alexander
 Privateer Press Designed by Will Schoonover Revised Rulebook by Justin Alexander http://www.thealexandrian.net CHARACTERS Each player will take on the role of a specific character. CHARACTER SHEET: Your
Underleague Game Rules
 Underleague Game Rules Players: 2-5 Game Time: Approx. 45 minutes (+15 minutes per extra player above 2) Helgarten, a once quiet port town, has become the industrial hub of a vast empire. Ramshackle towers
Robot Factory Rulebook
 Robot Factory Rulebook Sam Hopkins The Vrinski Accord gave each of the mining cartels their own chunk of the great beyond... so why is Titus 316 reporting unidentified robotic activity? No time for questions
COMPONENT OVERVIEW Your copy of Modern Land Battles contains the following components. COUNTERS (54) ACTED COUNTERS (18) DAMAGE COUNTERS (24)
 ACTED COUNTERS (18) DAMAGE COUNTERS (24)") GAME OVERVIEW Modern Land Battles is a fast-paced card game depicting ground combat. You will command a force on a modern battlefield from the 1970 s to the modern day. The unique combat system ensures
GAME OVERVIEW Modern Land Battles is a fast-paced card game depicting ground combat. You will command a force on a modern battlefield from the 1970 s to the modern day. The unique combat system ensures
P a g e Realms v1.2 Copyright 2010 Ignazio Corrao
 P a g e 1 P a g e 2 Siegfried, Snow White, D Artagnan, Red Riding Hood, and the other 12 Realms heroes are being reunited for one last great adventure. The Dark Lords have joined forces to completely conquer
Mythic Battles: Pantheon. Beta Rules. v2.4
 Mythic Battles: Pantheon Beta Rules v2.4 Notes: Anything with green highlighting is layout notes, and is NOT FOR PRINT. Anything with yellow highlighting is not yet finished. 1 Game Terms & General Rules
MOBA Inspired & Card Driven 2 players game Minutes
 MOBA Inspired & Card Driven 2 players game. 30-50 Minutes This rulebook is a work in progress and is constantly improved. You can download the latest version and see playthrough videos at: www.playskytear.com/playtest
MONUMENTAL RULES. COMPONENTS Cards AIM OF THE GAME SETUP Funforge. Matthew Dunstan. 1 4 players l min l Ages 14+ Tokens
 Matthew Dunstan MONUMENTAL 1 4 players l 90-120 min l Ages 14+ RULES In Monumental, each player leads a unique civilization. How will you shape your destiny, and how will history remember you? Dare you
1.1 Introduction WBC-The Board Game is a game for 3-5 players, who will share the fun of the
 1.1 Introduction WBC-The Board Game is a game for 3-5 players, who will share the fun of the week-long World Boardgaming Championships, contesting convention events in a quest for Laurels and competing
Card Racer. By Brad Bachelor and Mike Nicholson
 2-4 Players 30-50 Minutes Ages 10+ Card Racer By Brad Bachelor and Mike Nicholson It s 2066, and you race the barren desert of Indianapolis. The crowd s attention span isn t what it used to be, however.
Introduction. Game Overview. Object of the Game. Component List
 Introduction They crept down the stone stairs as silently as possible, not daring to announce their presence to whatever foul minions lurked in the shadows. The faint glow from Leoric s enchanted stone
BASE RULEBOOK - v1.14
 BASE RULEBOOK - v1.14 A Game by James Van Niekerk TABLE OF CONTENTS GAME COMPONENTS 1 Spell & Treasure Decks 1 Map Tiles 1 Creature Cards 2 Minion Decks 2 GAME OVERVIEW 3 Character Sheets 3 Ally Objectives
Dragon Canyon. Solo / 2-player Variant with AI Revision
 Dragon Canyon Solo / 2-player Variant with AI Revision 1.10.4 Setup For solo: Set up as if for a 2-player game. For 2-players: Set up as if for a 3-player game. For the AI: Give the AI a deck of Force
Welcome to Runebound. Components
 Welcome to Runebound The world of RUNEBOUND is a magical, dangerous world of powerful wizards, noble knights, vicious monsters, and powermad tyrants. It is a world of great quests and mighty deeds. Above
Force of Will Comprehensive Rules ver. 6.4 Last Update: June 5 th, 2017 Effective: June 16 th, 2017
 Force of Will Comprehensive Rules ver. 6.4 Last Update: June 5 th, 2017 Effective: June 16 th, 2017 100. Overview... 3 101. General... 3 102. Number of players... 3 103. How to win... 3 104. Golden rules
Table of Contents. TABLE OF CONTENTS 1-2 INTRODUCTION 3 The Tomb of Annihilation 3. GAME OVERVIEW 3 Exception Based Game 3
 Table of Contents TABLE OF CONTENTS 1-2 INTRODUCTION 3 The Tomb of Annihilation 3 GAME OVERVIEW 3 Exception Based Game 3 WINNING AND LOSING 3 TAKING TURNS 3-5 Initiative 3 Tiles and Squares 4 Player Turn
Of Dungeons Deep! Table of Contents. (1) Components (2) Setup (3) Goal. (4) Game Play (5) The Dungeon (6) Ending & Scoring
 Components (2) Setup (3) Goal. (4) Game Play (5) The Dungeon (6) Ending & Scoring") Of Dungeons Deep! Table of Contents (1) Components (2) Setup (3) Goal (4) Game Play (5) The Dungeon (6) Ending & Scoring (1) Components 32 Hero Cards 16 Henchmen Cards 28 Dungeon Cards 7 Six Sided Dice
Of Dungeons Deep! Table of Contents (1) Components (2) Setup (3) Goal (4) Game Play (5) The Dungeon (6) Ending & Scoring (1) Components 32 Hero Cards 16 Henchmen Cards 28 Dungeon Cards 7 Six Sided Dice
DUNGEON THE ADVENTURE OF THE RINGS
 DUNGEON THE ADVENTURE OF THE RINGS CONTENTS 1 Game board, 1 Sticker Pad, 8 Character Standees, 6 Plastic Towers, 110 Cards (6 rings, 6 special weapons, 6 dragons, 48 treasures, 50 monsters) 2 Dice. OBJECTIVE
SUPPLIES. 10 Supply cards TURN SEQUENCE. Event Resolution Eating Declare Action Trade. Mutant Players FOLLOWERS ENCOUNTERS.
 STARTING ITEM MUTATION SCARS MUTANT ACTION PLACE EVENT DECK HERE and DRAWN NORMAL EVENTS ON TOP PLACE DRAWN SEASONAL EVENTS HERE SKILL EQUIPMENT MUTANT SCARS MUTANT ACTIONS SKILLS EQUIPMENT WEAPONS OTHER
Game components. Common components: 1 dice tower. 24 progress tokens. 40 commodity tokens 8 of each type
 Follow the lead of the famous navigator and discoverer Amerigo Vespucci. New lands are waiting to be discovered and to provide a new homeland rich with valuable resources ffor its settlers. Good planning
GAME COMPONENTS. Your ORIGINZ box contains:
 GAME COMPONENTS This 20-page Rule Book 12 dividers Your ORIGINZ box contains: 264 cards (252 white-bordered and 12 black-bordered) divided into 12 pre-constructed, ready-to-play, Origin decks. Each Origin
Another boardgame player aid by
 Another boardgame player aid by Download a huge range of popular boardgame rules summaries, reference sheets and player aids at www.headlesshollow.com Universal Head Design That Works www.universalhead.com
Reference Guide. Using This Reference Guide STOP! The Golden Rules
 Reference Guide Using This Reference Guide This document is intended as a reference for all rules queries not answered in the main rulebook. Unlike the rulebook, this reference guide does not teach players
CONTENTS. A WWII tactical and operational strongpoint defense game. PAGE 1 Introduction. PAGE 2 Setup minutes ages: players
 CONTENTS A WWII tactical and operational strongpoint defense game PAGE 1 Introduction PAGE 2 Setup PAGE 3 Counters and Cards PAGE 4 Playing the Game PAGE 5 Soviet Card Phase PAGE 9 Wehrmacht Card Phase
1 4 Players Playtime: minutes. Introduction: Object of the Game: Contents:
 1 4 Players Playtime: 45 80 minutes Introduction: This isn t the end of the world. That already happened. This is what s left. Us, Gravehold, and The Nameless creatures seeking to snatch what little we
When attacking, increase your combat. value by 2 unless you are attacking the. Joint War. orange player. 16 Player Diplomacy Cards (4 per player)
") GAME OVERVEW Each of us is carving a stone, erecting a column, or cutting a piece of stained glass in the construction of something much bigger than ourselves. Adrienne Clarkson Dial Assembly Sid Meier
GAME OVERVEW Each of us is carving a stone, erecting a column, or cutting a piece of stained glass in the construction of something much bigger than ourselves. Adrienne Clarkson Dial Assembly Sid Meier
Equipment for the basic dice game
 This game offers 2 variations for play! The Basic Dice Game and the Alcazaba- Variation. The basic dice game is a game in its own right from the Alhambra family and contains everything needed for play.
CONTENTS TABLE OF BOX CONTENT SECTION SECTION SECTION SECTION SECTION SECTION SECTION
 BOX CONTENT 300 CARDS *20 Starter Cards [Grey Border] 4 Evasive Maneuvers 4 Tricorder 4 Phasers 4 Diagnostic Check 4 Starfleet Academy *54 Basic Characters [Yellow Border] 24 Ensign 16 Lieutenant 14 Commander
4.4.11a Tweaked rule to bring it in line with c (overassigning damage is legal, breakthrough damage is not mandatory)
") EPIC COMPLETE RULES Revised August 29th 2016 White Wizard Games LLC REVISIONS Various typo fixes 4.4.11a Tweaked rule to bring it in line with 4.4.11c (overassigning damage is legal, breakthrough damage
EPIC COMPLETE RULES Revised August 29th 2016 White Wizard Games LLC REVISIONS Various typo fixes 4.4.11a Tweaked rule to bring it in line with 4.4.11c (overassigning damage is legal, breakthrough damage
A.1.2 If a player's opponent is unable to cycle their deck (see E.2.2), that player wins the game.
, that player wins the game.") UFS Living Game Rules Last Updated: January 25th, 2019 This document describes the complete rules for playing a game of the Universal Fighting System (UFS). It is not intended for players wishing to learn
UFS Living Game Rules Last Updated: January 25th, 2019 This document describes the complete rules for playing a game of the Universal Fighting System (UFS). It is not intended for players wishing to learn
2-4 players 13 years + 60 minutes
 2-4 players years + minutes Game setup Game board Components The game board is placed in the middle of the table, easily accessible to all players The 5/ points tokens are placed near the end of the scoring
Shaun Austin Jim Hartman
 RULEBOOK Shaun Austin Jim Hartman V 1.3.1 Copyright 2005 Shaun Austin & Jim Hartman Lost Treasures Introduction Lost Treasures is a simple two player game where each player must hire a party of adventurers
Location cards. soldier attacks. HostiLe turn. additional information
 introduction Game Overview...2 Victory...2 Component Overview...2 Set-Up...6 BuiLding Your mission and team Mission Card...7 Objective Card...8 Soldiers Player Soldier Cards...9 Non-Player Soldier Cards...10
FOR THE CROWN Sample Play
 FOR THE CROWN Sample Play v1.0 1 Turn 1 Yellow player FOR THE CROWN Sample Play To begin the game, Yellow player Draws 2 Peons and 3 Guards into his Hand. Order Phase: For his first Order Phase, he cannot
Range Example. Cards Most Wanted The special rule for the Most Wanted objective card should read:
 Range Example FAQ Version 1.2 / Updated 9.30.2015 This document contains frequently asked questions, rule clarifications, and errata for Star Wars: Armada. All changes and additions made to this document
Anthony Rubbo. Game components. 1 Camp. 30 clocks. 4 dice Each die has the following symbols: 3x food, 2x map and 1x pick & shovel 16 treasure maps
 Game components Anthony Rubbo 1 Camp Connect the two tiles together. 3 excavations 1x jungle, 1x desert, 1x sea 30 clocks 4 dice Each die has the following symbols: 3x food, 2x map and 1x pick & shovel
Mage Tower Rulebook Ver 0.1
 Mage Tower Rulebook Ver 0.1 This is a very early version of the rulebook, and is one of the last things being worked on while the Kickstarter is happening. All the text to play the game is here, but the
In the event that rules differ in the app from those described here, follow the app rules.
 In the event that rules differ in the app from those described here, follow the app rules. Setup In the app, select the number of players and the quest. Place the starting map tiles as displayed in the
PROFILE. Jonathan Sherer 9/30/15 1
 Jonathan Sherer 9/30/15 1 PROFILE Each model in the game is represented by a profile. The profile is essentially a breakdown of the model s abilities and defines how the model functions in the game. The
Empires at War. 2. Win conditions Your main objective is destroy all unit cards of the opposing player. You can recognize unit
 Empires at War 1. About game Empires at War is a competitive card game set during I World War. Players create unique decks and take control over armies of conflicted nations. To win, you have to break
STOP! How to Use this booklet
 Advanced Concepts STOP! If this is your first game, set the advanced concepts aside and read the rulebook included in the game box. Do not read the advanced concepts until you are comfortable playing the
Primo Victoria. A fantasy tabletop miniatures game Expanding upon Age of Sigmar Rules Compatible with Azyr Composition Points
 Primo Victoria A fantasy tabletop miniatures game Expanding upon Age of Sigmar Rules Compatible with Azyr Composition Points The Rules Creating Armies The first step that all players involved in the battle
The starting player takes the first turn, then players take turns in a clockwise order until a game-ending event.
 It is the year 2123. Earth has become inhospitable to life and humanity has spread throughout the universe in a quest to find a new home. Each surviving human colony will form exploration teams to different
Forge War. Game Overview. Components
 Forge War Game Overview The wild country lands are growing dangerous. The king has called upon all able-bodied men to fight back the ever-deepening darkness, and you, as a skilled blacksmith, are tasked
Contents. Dragon Rampage
 Contents Object of the Game 2 Setting up the Game 2 Game Length 3 Playing the Game 3 I. Heroes Action Phase 3 II. Dungeon Phase 4 III. Rest Phase 6 Ending the Game 6 I. Hero is Slain 6 II. Heroes Escape
Using this Rules Reference
 Rules Reference Using this Rules Reference This document is the comprehensive source for the complete rules of the Runewars Miniatures Game. Unlike the Learn to Play booklet, the Rules Reference is not
Contents. Goal. Jump Point
 Game Rules W elcome to the height of technology and comfort, the Space Station Atlantis! All the comfort of a five star hotel, mixed with the adventure of space travel. The station is filled with staff,
3rd Edition. Game Overview...2 Component Overview...2 Set-Up...6 Sequence of Play...8 Victory...9 Details of How to Play...9 Assigning Hostiles...
 3rd Edition Game Overview...2 Component Overview...2 Set-Up...6 Sequence of Play...8 Victory...9 Details of How to Play...9 Assigning Hostiles...23 Hostile Turn...23 Campaigns...26 Optional Rules...28
The Modules. Module A - The Contracts. Symbols - What do they mean?
 The Modules Each time you play First Class, you will use exactly 2 modules. All of the modules can be combined with each other. For your first game, use modules A and B. This will help you learn the core
game design - shem phillips illustration - mihajlo dimitrievski graphic design & layouts - shem phillips copyright 2015 garphill games
 game design - shem phillips illustration - mihajlo dimitrievski graphic design & layouts - shem phillips copyright 2015 garphill games www.garphill.com 2 introduction Raiders of the North Sea is set in
CYTOSIS: A CELL BIOLOGY GAME A worker placement game inside a human cell for 2-5 players
 RULEBOOK CYTOSIS: A CELL BIOLOGY GAME A worker placement game inside a human cell for 2-5 players GAME SUMMARY Cytosis is a worker placement game that takes place inside a human cell. Players start out
Contents. Introduction
 Rules of Play Introduction 2 Game Components 3 Game Overview 4 Game Setup 5 The Golden Rule 8 The Hero Area 9 Dungeon Room Features 9 Player Turn 9 Action Phase 9 Boosting Actions 10 Skill Symbols 10 Contents
Solitaire Rules Deck construction Setup Terrain Enemy Forces Friendly Troops
 Solitaire Rules Deck construction In the solitaire game, you take on the role of the commander of one side and battle against the enemy s forces. Construct a deck, both for yourself and the opposing side,
Range Example. CARDS Most Wanted The special rule for the Most Wanted objective card should read:
 Range Example FAQ Version 1.1.1 / Updated 7.24.2015 This document contains frequently asked questions, rule clarifications, and errata for Star Wars: Armada. All changes and additions made to this document
Sentinel tactics: skirmishes
 These are suggestions for alternate skirmish modes, proposed by members of the GtG online forum. the original post can be found here https://greaterthangames.com/forum/topic/alternate-skirmishes-super-poweredfriendlies-5763
Tarot Combat. Table of Contents. James W. Gray Introduction
 Tarot Combat James W. Gray 2013 Table of Contents 1. Introduction...1 2. Basic Rules...2 Starting a game...2 Win condition...2 Game zones...3 3. Taking turns...3 Turn order...3 Attacking...3 4. Card types...4
Details of Play Each player counts out a number of his/her armies for initial deployment, according to the number of players in the game.
 RISK Risk is a fascinating game of strategy in which a player can conquer the world. Once you are familiar with the rules, it is not a difficult game to play, but there are a number of unusual features
Game Manual. prototype
 Game Manual prototype prototype Can you survive in this hostile land ravaged by monsters and unending strife? Are you ready to fight and become Lord of Hellas? In Lords of Hellas you will lead a hero to
Components. Matching Travel Markers. Brother Gherinn
 Welcome to Dragonfire Dungeon! Vast wealth awaits the adventurer who is strong enough to face the creatures that dwell within and clever enough to avoid the many pitfalls that await. But one must be quick,
Contents. Overview. The Battlefields expansion for the Lord of the Rings board game offers the following new features:
 You have reached the final challenge of the epic adventure. While you lead your hobbits through the perilous scenarios in the game towards Mount Doom you must also give direction to the other members of
Dungeon Cards. The Catacombs by Jamie Woodhead
 Dungeon Cards The Catacombs by Jamie Woodhead A game of chance and exploration for 2-6 players, ages 12 and up where the turn of a card could bring fortune or failure! Game Overview In this game, players
Looting MiniSkull Castle
 Looting MiniSkull Castle In Looting MiniSkull Castle, 2-4 Heroes are back at MiniSkull Castle, but instead of stealing treasures from the caverns beneath the castle, this time they are searching for loot
The Esoteric Order of Gamers
 The Esoteric Order of Gamers www.orderofgamers.com High quality materials for the dedicated devotee of immersive, thematic tabletop games. Game rules summaries, foamcore box plans, articles, interviews,
Dragon Phoenix Games
 Dragon Phoenix Games Game: Near and Far Developer: Ryan Laukat Publisher: Red Raven Games Year: 2017 Variant Developer: Harvey and Carlie Cornell Status: Released Version: 1.2 Date: 8/7/2017 Overview:
1 Setup. 100 Before playing each game, resolve the following steps in order Choose Scenario Prepare Board and Encounters
 Rules Reference Using this Document This document is the definitive source for all Arkham Horror Third Edition rules. This document is not intended to teach new players how to play the game. Players who
Loot Roll. Rules and Instructions
 Loot Roll Rules and Instructions Overview Loot Roll provides the dungeon exploration experience from many modern mmorpg s, just without the teamwork. You and your friends will battle dangerous monsters,
RULEBOOK ADVANCED VERSION + COOPERATIVE VERSION + SKELETON CHIEFS
 RULEBOOK B Do not read this before having played! David Flies Alexander Brick, Aoulad, Oliver Mootoo ADVANCED VERSION + COOPERATIVE VERSION + SKELETON CHIEFS Now that you have played several games of the
BEGIN YOUR ADVENTURE HERE!
 ALLEN MORRIS & 07 WIZARDS 9/6 TM QUICK-START RULES BEGIN YOUR ADVENTURE HERE! NEW TO DECK-BUILDING GAMES? A deck-building game starts each player with a small deck of cards. Then, during the game, players
ASSAULT OBJECTIVES DEPLOYMENT HEXADOME SCORING ZONE END-GAME CONDITIONS. SCENARIOS v 1.3
 SCENARIOS v 1.3 ASSAULT Being the only player with one or more Characters inside the Scoring Zone at the end of the Round (3 Victory Points). of the Round than the opponent (2 Victory Points, but only
Force of Will Comprehensive Rules ver. 8.1 Last Update: January 11th, 2018 Effective: January 18th, 2019
 Force of Will Comprehensive Rules ver. 8.1 Last Update: January 11th, 2018 Effective: January 18th, 2019 100. Overview... 3 101. General... 3 102. Number of players... 3 103. How to win... 3 104. Golden
Introduction. Components
 Introduction Heroes of Tenefyr is a cooperative deck-building game where players need to work together to improve the strength of their adventuring party to withstand the incoming threat of evil. Components
Sequence of Play This rulebook is organized according to this Sequence of Play.
 Introduction...1 Sequence of Play...2 Campaign Set-Up...2 Start of Week...10 Pre-Combat...11 Combat...14 Post-Combat...19 End of Week...20 End of Campaign...22 Optional Rules...22 Credits...22 Sample Game...23
G a m e C o m p o n e n t s a n d S e t u p
 G a m e C o m p o n e n t s a n d S e t u p C o m p o n e n t s Initial game setup is the same for any number of players. 48 Action Tiles (16 of each of 3 symbols, in 4 different colors) The 48 action
GOAL OF THE GAME CONTENT
 The wilderness of Canada is in your hands. Shape their map to explore, build and acquire assets; Plan the best actions to achieve your goals and then win the game! 2 to 4 players, ages 10+, 4 minutes GOAL
Castles of Burgundy Rules Summary. Game board: Player board: TERMS
 Castles of Burgundy Rules Summary TERMS Game board: Player board: Hex tiles: Silverling (Money) SETUP Silverling x 20, Worker x 30 as general supply (No. unlimited) Sort Hex tiles according to the color
You ran from that place in the dark of night. And wandered over a cruel desert...
 Rule Book Your last village was ransacked by barbarians. You barely had time to pick up the baby and your favorite fishing pole before they started the burning and pillaging. You ran from that place in
THE STORY GAME PLAY OVERVIEW
 THE STORY You and your friends all make a living selling goods amongst a chain of tropical islands. Sounds great, right? Well, there s a problem: none of you are successful enough to buy your own seaplane,
Dungeon Crawler Card Game
 Dungeon Crawler Card Game Design by: Nadun J Players will choose a class at the start of the game. Hearts = Healer Spades = Warrior Diamond = Wizard Clubs = Trickster Once the classes have been chosen,
Runikend 1st edition Schneider Lab Ltd E. Hampden Ave Unit C-113 Denver CO,
 OFFICIAL RULEBOOK TABLE OF CONTENTS INTRO... 1 OBJECTIVE... 1 WARNING!... 1 SETUP... 2 GAME LAYOUT... 3 CARD LAYOUT... 4 TURN... 5 BUY... 6 TRADE... 6 BUILD... 7 COMBAT... 8 SELL (Advanced Rule)... 10
Star Trek Fleet Captains FAQ version
 If you are missing your command posts, look under the ship insert (not the entire insert, just the insert the Ships are in) Where can I get replacements for damaged, missing or broken cards/ships: http://
The Arena v1.0 An Unofficial expansion for Talisman by Games Workshop Copyright Alchimera Games 2012
 The Arena v1.0 An Unofficial expansion for Talisman by Games Workshop Copyright Alchimera Games 2012 Created May 1st, 2012 Final Version - May 1st, 2012 The Arena is an Alternative Ending where the Emperor
Command Phase. Setup. Action Phase. Status Phase. Turn Sequence. Winning the Game. 1. Determine Control Over Objectives
 Setup Action Phase Command Phase Status Phase Setup the map boards, map overlay pieces, markers and figures according to the Scenario. Players choose their nations. Green bases are American and grey are