INDEX. 1. Hanwha Interior Film BODAQ. 2. Product Feature. 3. Comparisons among Surface materials. 4. Property and Inspection record
|
|
|
- Sabrina Magdalene McGee
- 5 years ago
- Views:
Transcription


1 BODAQ Interior Film
2 INDEX 1. Hanwha Interior Film BODAQ 2. Product Feature 3. Comparisons among Surface materials 4. Property and Inspection record 5. About HANWHA L&C 6. Certificate of Producer Etc 7. [Appendix#1] Application Image 8. [Appendix#2] User Manual How to use it
3 HANWHA Interior Film BODAQ BODAQ Interior Film? :Interior sheet is high-quality surface material for architectural interior place. Easily and quickly installable due to the gluing agent on the backside of sheet. Diverse pattern & texture, and colorful design will meet customers needs to decorate interior as their preference and purpose.

4 Product Feature Product Characteristics 다양한 Diverse 패턴의 patterns, 무늬와color, 칼라 and, 표면textures 질감으로making 아름다운beautiful 생활공간을 interior 연출place 특수 Easily 점착처리로 and precisely 시공성installable 탁월하고 by 작업의 special 정밀성이 gluing 높음 agent 고품격의 Quaint beauty 자연미로of 자연질감이 wooden grain 탁월하며 texture,, 다양한 making 패턴에any 따라use 소비자의 of purpose 기호에& preference 맞는연출가능 뛰어난 Making 인테리어 splendid 효과로 effect 다양한 on interior 분위기와space 용도에 by 적용 simple 가능usage Product Compounding 제품특징 Transparency film Printing layer Base S/T Adhesive layer Convenience : On flat & curved plane Econmic : Easy & quick install Release film Primer Flame Retardant : nonflammable Occupant material (MDF, metal material, etc) Durability & Antifouling
5 Comparisons among Surface materials Surface Materials Appropriateness Installation Cost Wood board For simple and small structure surface A lot of laborers, time, and tools required Labor costs (High claim rate) Artificial Marble Mere Design expression Hard to install Unable to Partially repair (Extra costs) Paint For uneven wall Hazardous to human body Often repair & maintenance expenses Wall paper To decorate residential wall Somewhat simple & easy (extra gluing work) High repair expenses Interior Film (BODAQ) For every surface of interior space Simple & easy (adhesive itself) Low constructural & repair expenses
6 Technical Specification Sheet Property and Inspection record The tales above are explaining about ordinary property of product, it is not allowed to have effect of legal proof. The tables above can change without notice due to improvement of its quality or request of customers.


7 Inspection Records Inspections (by HANWHA L&C Bukang plant)


8 Certificate of Producer Inspection Records


9 Inspection Records Certificate of Management System


10 Inspection Records ISO Certificate & Q/C Declaration of conformity
11 #1. Keeping & usage manual detailed Basic Manual Item Keeping Description Avoid humidity and direct rays of the sun to keep it ventilating in cool place. (Temp. : under 30 ) Use up quickly after tearing the package Keeping cut sheet Roll the sheet with release paper loosely and taping on it to stand still. It can hurt the roll as laying it on the floor Keeping rest Put collumn into the roll of sheet & release film and put END-CAPS on the both ends. Keep them into the product box. Carriage Carry it in the product box as possible not to ruin it As a small amount, carry it as a roll. As carrying it, be careful not to make BODAQ wrinkled or bended. Caution; Deciding spec. Background color can affect to perceive products color Deciding the direction to attach a sheet depends on the pattern s flow shown in the sample book. Be cautious to keep out of frequent touches
12 Usage Manual : #1. Viscosity #2. Keeping & usage manual detailed Description Viscosity of flame retardant product gets loosen up to 30% around a year after its production. Otherwise, non-retardant products is possible to maintain its viscosity for over 2 years. Adhesive can disappear due to remnant of moist on adherent A. As attaching on MD(F) having moist, B. constructing at dawn in spring/autumn, absolutely remove all of humidity on the wall. Increase the room temperature around or more. C. Even after the construction, if moisture pass through the adherent and interior films, adhesive would get weaken and films get peeled off. Therefore please care about the follow-up maintaining. If it is kept outside for a while, after tearing the package in winter times, the adhesive get weaken. For the reason, it might freeze to crack during winter construction Recommended to install it in a room temperature(15-25 ). If opponent materials has sleek surface like metal board/glass, adhesive would maximize its function. In this case, spray or put detergent on the surface and rub it with spatula from the center of films. On the surface, any substance of gas or wax might cause adhesive weaken.
13 #2. Keeping & usage manual detailed Usage manual : #2 Overlapping / #3 Keeping Description PVC interior film can have shrinkage within 0.05%. Accordingly installing in construction, it should be overlapped to attach in 3 5 mm After construction, be careful not getting a blade on, it could show bigger opening as time goes. AR/JS series, and special products, which are thick type, are recommendable to process a heat treatment during work of settling (folding edge). Give a minimum force when doing a settling work (folding edge) or working on curve, to prevent the result of crumpling or detachment due to a shrinkage. Using product box in carriage to prevent wrinkle or dent Keep out of humidity and rays of direct sun, and do not use it for outside construction. Extended exposure to ultraviolet radiation can cause discoloration. Keep out of extended touch on product surface. Recommend to store the product at room temperature(15 ~25 ) to make the best function.


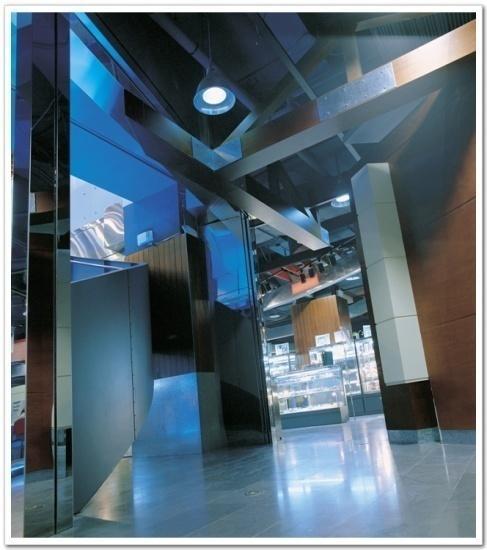


14 Commercial building Application Images


15 Residential building Application Images

16 Residential building Application Images


17 Commercial building Application Images

18 Residential building Application Images


19 Residential building Application Images

20 Commercial building Application Images


21 Residential building Application Images
22 Commercial building Application Images


23 Residential building Application Images

24 User Manual 1. Materials for Application -Tool : a heater, ventilator, dust mask, goggle - putty, primer, corner- tape, primer, paint thinner, toluene, send-paper, corner tape, corner bead, squeeze, cloth & chamois leather, roller, steel ruler, cutter, dryer, etc 2. Applying interior films 1. Folding release paper : Lay a board like rubber sheet on the floor and work on it. Measure the part you want to adhere, and cut out BODAQ 5cm longer. 2. Folding release paper : Peel off 10cm as much of BODAQ s release paper, then fold it back completely

 (Don t fold the release paper, instead use its elasticity.) 6.")
25 User Manual 2. Applying interior films 3. Adhere 1 : On the spot, place the BODAQ and press the part which release paper was peeled off. Meanwhile, put the film exactly on the place and prevent the center sag. 4. Press 1 : Put spatula From the center of film where release paper is folded, press it moving spatula toward right and left 5. Adhere 2 : Adhere the BODAQ up to down, peeling release paper 20-30cm off gradually, making round. (3,4) (Don t fold the release paper, instead use its elasticity.) 6. Press 2 : After adhering, press it firmly making spatula round from center to both side. Lean the squeeze about 45 and push it to draw air in the adherend. (Don t move back and forth prevent entry of air)

26 User Manual 2. Applying interior films 7. Check over : Check all over the the occurrence of air. 8. Removing air bubble : Press the air bubble with spatula as possible as you can, and let air out making blade.


27 3. Adjusting User Manual 1. Adjusting joint : Select between overlapping and adding piece of BODAQ 2. Overlapping : Overlap the part of BODAQ on the joint. In this way, the joint doesn t open easily 3. Masking, brushing the primer : On the first sheet of BODAQ, adhere it leaving place to overlap and adhere the masking tape on it. Paste primer on the part to overlap. Cut off with cutter


28 4. Adjusting joint & Overlapping User Manual 1. Adhering first sheet : Adhere the first sheet of BODAQ and leave the release paper as 5cm long. 2. Adhering second sheet : Overlap the second sheet of BODAQ on the first one as 5cm much as. 3. Cut & join : Cut vertically on the middle of 2 overlapping films


29 4. Adjusting joint & Overlapping User Manual 4. Removing unnecessary part : Peel off the cut-part and remnant piece orderly. 5. Removing release paper : Peel off second release paper - be cautious not to overlap : Press equally on the both side of sheets, not to overlap 6. Adhering : Adhere the connecting part with squeeze neatly


30 5. Adjusting edge User Manual 1. Edge projecting out - In order to finish application neatly, the edge is critical part. - On the edge, use a corner bead & corner tape to make straight line - Fix the edge part putting primer on it. 2. Adjusting adherent : Adjust the adherent to be in optimal state. 3. Adjusting edge : Attach corner bead & corner tape on the edge. 4. Using Putty : Remove the gap between corner bead & wall pasting the putty on the corner bead. Paste it widely and uniformly 5. Brushing the primer : To improve its adhesive, brush the primer on both side of edge as 3cm much.

31 5. Adjusting corner User Manual 6. Final adhering : Press the film from the long-size end and it should be cut 5cm longer than its needs. Stretch and Press it strongly not to make any air bubble on the corner side. 7. Adhering corner part : When it s too cold to bend films, adhere the corner part using dryer. (If it s not dried uniformly, it can cause film to transform.) 8. Pressing whole sheets : Lastly, press the whole sheets. Especially around the corner, make sure it s adhered completely.

 : Cut BODAQ film 1cm more from the corner.")

32 6. Adjusting in-curved corner User Manual 1. In-curved corner - Adhering to in-curved corner is especially hard to make it neatly. - Select between the way you press upward along the edge and the way you cut along the edge. - The way of cutting the edge is explained below. 2. Adjusting adherend : Adjust the adherend to be in optimal state. To increase viscosity of adherend, paste primer 3cm as much on the both end. 3. Adhering(1 film) : Cut BODAQ film 1cm more from the corner. Bend the release paper after peeling off it about 10cm long. 4. Temporary adhering : Adhere the sheet and be cautious to prevent air bubble and sag. 5. Pressing : Peel off a release paper and press it into the corner using a squeeze. (Move the squeeze like round) 6. Pressing into the corner : Put into the squeeze close to the corner.

 : Next, adhere the sheet on the other side.")
33 User Manual 6. Adjusting in-curved corner 7. Treating the rest : Cut out the rest of film against the metal spatula on the corner. (Leave the film hidden by, thickness of metal spatula as long as, 1-2mm) 8. Adhering (2 side) : Next, adhere the sheet on the other side. Likewise, leave the spare part as long as 1cm and press it in same way. 9. Finishing : Peel off the rest of sheet slowly downward.


34 7. Adhering to curved part User Manual 1. Cutting release paper : Cut vertically some release papers as 50cm wide width and then fold it about 10cm long. 2. Adhering temporarily : Firstly adhere the middle part of film and make its direction to put.


35 7. Adhering to curved part User Manual 3. Adhering middle part :From the middle of film, adhere it peeling off the middle of release paper. Press and rub it from center to each side, like drawing a circle on the middle of sheet. 4. Adhering both sides : Peel off the both sides of release papers, and adhere the same way as adhering middle part. Press and rub it from center to each side.
1Use the metal file to smooth
 Yamato: Step-by-step 85 Parts of the bridge and the hull a b c d e f a Part of the bridge b Part of the bridge c Part of the bridge d Radar x 2 e Part of the bridge x 2 f Wire Recommended tools and materials
LG BENIF characteristics
 LG BENIF characteristics Over 500 Patterns Interior Applications Class A Fire Rated (UL-723) as well as being rated for Fire Door Applications Repairable Stain & Solvent Resistant Minimal Down Time Flexible
APPLICATION OF JAC FILMS
 1. Important points For reliable results, JAC films are best applied to smooth, dry and clean surfaces (metal, glass, paintwork, plastic etc.). It is essential to ensure that the surface is free from dirt
Roll Out Vinyl Installation Guide
 Sub-floor Requirements The contractor performing the installation of the performance vinyl flooring must ensure the proper quality of the sub-floor. The sub-floor must be clean, smooth, permanently dry,
MANUAL 3. Wrapping with Graficast Automotive & Deco Films HIGH LE VEL. GrafiWrap. Grafityp wrapping films
 MANUAL 3 GrafiWrap Grafityp wrapping films Wrapping with Graficast Automotive & Deco Films 2017 1 WHAT IS GRAFIWRAP? GrafiWrap is a trade name that was registered by Grafityp Selfadhesive Products, which
5If the protruding part is. 6Place 1 as is shown in the. 7Place what was assembled
 Yamato: Step-by-step 49 The base of the bridge and strakes a c b d a Base of the bridge b Base of the bridge c Base of the bridge d Strakes x 10 THE BASE OF THE BRIDGE 1Smooth 1 to 3, first using the metal
Installation Guide. Aspect Stone Peel & Stick Tile. proper surface preparation is essential for a successful project. Installations Methods
 Aspect Stone Peel & Stick Tile Installation Guide E proper surface preparation is essential for a successful project Failure to follow recommended surface preparation instructions may void the warranty.
LED Thin Frame Fixed Frame Screen User Guide
 LED Thin Frame Fixed Frame Screen User Guide INTRODUCTION INTRODUCTION WARNING - Sharp Edges This product may contain sharp edges, please handle with care. Protective gloves are recommended. WARNING -
EASY APPLICATION. Furniture Linoleum
 EASY APPLICATION Furniture Linoleum can be applied easily on all common materials such as MDF, chipboard and Plywood as well as steel or composite materials. Furniture Linoleum has a special matte appearance
GrafiWrap Vehicle Wrapping
 GrafiWrap Vehicle Wrapping What is GrafiWrap? GrafiWrap is the registered trade name for a combination of materials used in the wrapping of a vehicle. The GrafiWrap system is a sandwich made up of a cast
REINFORCING THE CORNERS OF FLAT FRAMES
 REINFORCING THE CORNERS OF FLAT FRAMES There are a number of different methods that may be used to join flat frame sides together. As most Woodworkers know, end grain glue joints are not nearly as strong
A-LF-Sea. Application Manual for M&R. (Full blasting)
") Application Manual for M&R (Full blasting) April 2015 1 Contents 1.Standard scheme 1)Standard scheme for flat & vertical bottom 2)Colour scheme for system 2.High pressure fresh water washing (HPFWW) 1)Timing
Application Manual for M&R (Full blasting) April 2015 1 Contents 1.Standard scheme 1)Standard scheme for flat & vertical bottom 2)Colour scheme for system 2.High pressure fresh water washing (HPFWW) 1)Timing
Cardboard Model Buildings
 Cardboard Model Buildings Get more model kits from http://www.modelbuildings.org PRINTING & ASSEMBLY TIPS: These OO designs can easily be resized by reducing the print percentage as follows: OO scale is
DULUX UNIVERSAL UNDERCOAT
 TECHNICAL DATA SHEET Version 1 2015 JUNE THIS ISSUE SUPERSEDES ALL PREVIOUS PUBLICATIONS PRODUCT DESCRIPTION Intermediate coating for use under decorative topcoats, for interior and exterior use PRODUCT
Elara NanoEdge Fixed Frame Screen User Guide
 Elara NanoEdge Fixed Frame Screen User Guide INTRODUCTION INTRODUCTION WARNING This product may contain sharp edges, please handle with care. Protective gloves are recommended. A minimum of two people
Sketchpaint. Ideal for turning any smooth surface into a whiteboard. Ready to use in 5 days
 Sketchpaint Ideal for turning any smooth surface into a whiteboard SketchPaint - A whiteboard straight out of a tin! White Gloss or Transparent Finish Simple application Tin size available: 3m² or 6m²
POWER VLIES STRETCH 160
 Product Information Manufacturer: Architects Paper A brand of A.S. Création Tapeten AG Südstr. 47 51645 Gummersbach www.architects-paper.com Product Name POWER VLIES STRETCH 160 Quick Start Guide - The
Wallgard 1,3 product
 INSTALLATION INSTRUCTIONS Wallgard 1,3 product October 2015 GENERAL Application can be done to smooth, dry, clean, sound walls of concrete, plaster, hardboard, plywood and fibreboard. Board material must
ASX / OUTLANDER SPORT MZ538307EX SIDE MOULDING INSTALLATION AND HANDLING INSTRUCTIONS
 ASX / OUTLANDER SPORT MZ538307EX SIDE MOULDING INSTALLATION AND HANDLING INSTRUCTIONS Side moulding Thank you for purchasing the Mitsubishi Genuine Accessory. To install and use the product correctly with
Elastic-powered Bus : Assembly Instructions
 Elastic-powered Bus : Assembly Instructions Assembly Instructions 1. Carefully cut out the parts. 2. Fold along the dotted lines, making mountain or valley folds as indicated. 3. Attach the glue spots
Please read through the entire document before starting your installation process to better understand what is required.
 1 P a g e How s It Hanging? Step-by-Step Guide for Hanging your Wallpaper Walls Republic offers a richer and wider selection of designs, textures and colours than ever before found in the wallpaper world,
DASH KIT INSTALLATION
 ÿÿÿÿÿ ÿÿÿÿÿÿÿÿÿÿÿÿ ÿÿÿ ÿÿÿÿÿ ÿÿ ÿÿÿ ÿÿÿÿÿÿÿÿÿÿÿÿÿÿ ÿÿÿÿÿÿÿÿÿÿ ÿÿÿÿ ÿÿÿÿ ÿÿ ÿÿÿÿÿ ÿÿÿÿÿÿÿÿ PROUDLY MADE IN THE USA DASH KIT INSTALLATION These instructions are aimed at the do-it-yourself installer. Read
WELDING. Section nine 9.1 CORRECT TOOLS
 Section nine 9.1 CORRECT TOOLS WELDING Polyflor strongly recommends vinyl sheet and 608mm vinyl tile floorings are welded, this includes the internal and external joints when the vinyl sheet is site cove
Instructions for Installing Vinyl Stair Treads with Musson 3 Wide Double-Face Tape
 Instructions for Installing Vinyl Stair Treads with Musson 3 Wide Double-Face Tape (For No. 300 & No. 334 treads see special note in the Installation of Vinyl Stair Tread section below) Where To Install
Installation Instructions
 Aspex Digitally Printed Wall Art PL PREMIUM HEAVY DUTY ADHESIVE ASPEX WALL ART DOUBLE SIDED FOAM TAPE Installation of Aspex Digitally Printed Wall Art with Foam Tape and PL Premium Adhesive. Maximum size
Repairs. Chapter 10 Repairs 10. 1
 10 Repairs Chapter 10 Repairs 10. 1 Repairs As an installer, you will probably be called upon to repair damage to a resilient floor. Here are some of the most common problems and the recommended repairs
Installing 3M DI-NOC Architectural Finishes on Doors
 Installation Guide Revision C, September 2017 Introduction The purpose of this installation guide is to establish a 3M-recommended procedure for installing 3M DI-NOC Architectural Finishes (the Product
1Take the keel (3) and
 and") 1 The hull and the bridge 1Take the keel (3) and apply PVA wood glue in the second slot from the left: a toothpick may make it easier. Take care: the left end is the one that has a projection. THE HULL
1 The hull and the bridge 1Take the keel (3) and apply PVA wood glue in the second slot from the left: a toothpick may make it easier. Take care: the left end is the one that has a projection. THE HULL
UNIT 11: PAINTING, STAINING, AND FINISHING
 KEY CONCEPTS 1. Equipment needed 2. Primary kinds of Paint: Interior/Exterior 3. Primary kinds of Stain: Interior/Exterior 4. Proper application techniques: Paint/Stain/Finish 5. Equipment care and clean
Loose Lay Luxury Vinyl Plank
 Loose Lay Luxury Vinyl Plank FLEX COLLECTION Installation & maintenance * PLEASE READ CAREFULLY * Installation, maintenance & warranty guideline for loose lay luxury vinyl products. Adherence to This guideline
Application guidance for Printed Vinyl decals
 Paint Masks - Dry Rub Decals - Waterslides - Printed media Telephone: Website: email: +44(0)7872 181119 (mobile) http://www.flightlinegraphics.com sales@flightlinegraphics.com Application guidance for
Clay Modeling Film. Features of Clay Modeling Film. Use Clay Modeling Film
 Clay Modeling Film The series of Clay Modeling Film, originally developed by TOOLS INTERNATIONAL Corp, is mainly used for interior/exterior shape confirmation, checking highlights and qualification studies
INSTALLATION GUIDE Twinback
 INSTALLATION GUIDE Twinback Fundamentals Subfloor preparation 1. Always check before fitting the carpet supplied does correspond to the requested specifications (colour, width...) 2. Provide for a detailed
1983 Jaguar XJS Interior Wood Trim Repair and Refinishing
 The following describes and shows one method of wood trim repair/restoration/refinishing for wood trim on Jaguar cars, specifically this 1983 Jaguar XJS, although the wood trim should be the same in all
C Paint. Product Information Sheets
 T A T G O E C Paint Product Information Sheets Cottage Paint- 8oz jar Available in many pre-tinted colors -see chart. Used for painting furniture and cabinetry. Water based Clay paint that is easily distressed
Installation Guide. Pionite Decorative Surfaces One Pionite Road, Auburn, Maine PIONITE ( )
") Installation Guide A Subsidiary of Panolam Surface Systems SMPBRO00-012 6/14 Pionite decorative laminates are designed for finished interior surfaces which require high impact, wear and stain resistance
Installation Guide A Subsidiary of Panolam Surface Systems SMPBRO00-012 6/14 Pionite decorative laminates are designed for finished interior surfaces which require high impact, wear and stain resistance
Vinyl Installation Guide and Tips
 Vinyl Installation Guide and Tips Tools Needed: Squeegee; Grease Pencil (white or blue only!); 2" & 1/4" Masking Tape Prepare your surface and vinyl as outlined on back cover prior to employing this technique
WORK METHODS FOR THE RENOVAID WOOD RENOVATION SYSTEM
 WORK METHODS FOR THE RENOVAID WOOD RENOVATION SYSTEM Durable maintenance of exteri joinery of all sts with the RENOVAID system can be subdivided into the following parts: V.(Vokomen) = Prevention of Wood
Working with Wood & Tools. Marking and Measuring. Tools you will need:
 Marking and Measuring English Measure If you want to make pieces of a certain size, you will have to measure and mark them before you do any cutting. Examine a rule and find an inch mark. The mark (")
Insulating Aluminium Windows
 Insulating Aluminium Windows The Problem Aluminium windows are great for low maintenance, but they re absolutely terrible for letting heat in and out, with the frames being very thermally conductive as
Magnetpaint & Sketchpaint
 Magnetpaint & Sketchpaint Turn any smooth surface into a magnetically receptive whiteboard MagnetPaint is an exciting product that allows you to paint your own magnetic surface on any flat area. SketchPaint
#70 grit sand Putty knives, sized as needed #1 fine gray sand Corner tools Milestone acrylic liquid
 Countertops Supplies Tools White and/or gray Milestone cement 12 inch steel trowel #70 grit sand Putty knives, sized as needed #1 fine gray sand Corner tools Milestone acrylic liquid Hock Universal tints
Installation Guidelines for all Quaker products with nail fins New Construction nail fin installation with a Zip sheathing system.
 www.quakerwindows.com www.quakercommercialwindows.com PO Box 128 504 Highway 63 South Freeburg, MO 65035 800-347-0438 573-469-4151 (fax) Installation Guidelines for all Quaker products with nail fins New
CONREMA cold vulcanizing materials for repairing textile conveyor belts. Conveyor Belt Group
 CONREMA cold vulcanizing materials for repairing textile conveyor belts Conveyor Belt Group ContiTech Conveyor Belt Group Contents 3 Introduction 4 General Instructions 6 CONREMA Repair Materials 7 Repairing
3Insert the second rod no. 4
 Yamato: Step-by-step 37 The stern block and searchlight control towers a b c d e f Recommended tools and materials Wood glue Sandpaper (no. 800 grain) Metal file Putty Craft knife For metal: Super Glue
installation manual m y w a l l a r t. c o m
 installation manual Step 1 Step 2 Acclimate panels for 48 hours in the environment and temperature they will be installed in. Step 3 Install over relatively smooth flat surfaces, all major holes or major
Manual 2: Graficast print films for high level wrapping. MANUAL 2. Graficast Print Films FOR HIGH LE VEL WR APPING
 Manual 2: Graficast print films for high level wrapping. MANUAL 2 Graficast Print Films FOR HIGH LE VEL WR APPING 2017 1 WHAT IS GRAFIWRAP? GrafiWrap is the registered trade name for a combination of materials
MICRO1L / MICRO2 / MICRO6 / MICRO140UV / MICROM0
 Application Guide MICROperforated Films APPLICATION AND REMOVAL Microperforated Films MICRO1L / MICRO2 / MICRO6 / MICRO140UV / MICROM0 REQUIRED ACCESSORIES QA squeegee (refer to our catalogue) QRigid for
My Dreamhouse Add - A - Room
 Instructions for Kit #AG185 Real Good Toys 10/15 My Dreamhouse Add - A - Room This kit will add an additional level to your 'My Dreamhouse' dollhouse. The ideal time to include this Add A Room in your
Swift assembly guide
 Swift assembly guide Download the assembly guide at www.scihighmodels.com/swift.pdf Sample kit shown with aluminium bells (available with the Deluxe kit) Shown here without main tanks Version 10/12/2010
SUPER BLUE INSTRUCTIONS FOR INSTALLING
 Featuring STRIPENET REV. 09/01 PAGE 1 Super Blue, Super Blue 2 and StripeNet are registered trademarks of PRI. All other company and product names mentioned in this document are trademarks of their respective
Application Notes! RIGID MATERIALS. Rigid material standards. Printing on Rigid Materials with the Gerber Solara ion & Gerber CAT UV
 Printing on Rigid Materials with the Gerber Solara ion & Gerber CAT UV This document instructs on the proper use of rigid materials when printing on the flat bed of the Gerber Solara ion & Gerber CAT UV.
Processing Guidelines ORAFOL Films for Aircraft Applications
 Page 1 of 11 Description This document describes the application and removal procedures for ORAFOL films for aircraft applications, in particular ORAJET 3967AC and ORACAL 970AC ORAFOL offers a wide range
Installing GEKKOTEX Self Adhesive Wallcovering
 Preparations Installing GEKKOTEX Self Adhesive Wallcovering Before applying GEKKOTEX, the underlying surface has to be smooth, solid and dry and should have a uniform, white colour. Remove old wallpaper,
IMPORTANT NOTES ABOUT YOUR FLOORING PLEASE READ BEFORE INSTALLING INSTALLATION & MAINTENANCE FOR ENGINNERED HERRINGBONE
 IMPORTANT NOTES ABOUT YOUR FLOORING PLEASE READ BEFORE INSTALLING INSTALLATION & MAINTENANCE FOR ENGINNERED HERRINGBONE ACCLIMATIZATION AND STORAGE Your new flooring has to be acclimatized before installation,
Installation Instructions
 Please read all instructions before installing products. STORAGE: Keep crates in the upright position. When unpacking, store panels flat in a clean dry place. BEFORE INSTALLATION: Check for damage that
Mold Release, Break-In, Maintenance and Storage. Linda Bergstrom
 Mold Release, Break-In, Maintenance and Storage Linda Bergstrom Mold Release Requirements Form a barrier between the mold and molded part Provide a lubricating film which allows the molded part to be easily
Installation recommendations nora stair solutions
 Installation recommendations nora stair solutions Suitable subfloors are stairs made of wood, stone, screed (primed), metal as well as other hard and solid subfloors. The subfloor must fulfil the requirements
Linda Barker Collection Heritage Collection Classic Collection INSTALLATION GUIDE
 Linda Barker Collection Heritage Collection Classic Collection INSTALLATION GUIDE Ruler Pencil Masking tape Measuring tape Silicone sealant & silicone gun Power drill & screwdriver High-grab adhesive Jig
Easyfix. Easyglaze. Superglaze. Filmglaze
 Easyfix Easyglaze Superglaze Filmglaze Magnetglaze Magnetglaze Pro TUBEWAY (SALES) LTD are proud to offer six effective secondary double glazing systems to the general public. Each system is available
ARMA-CHEK SILVER APPLICATION MANUAL. T. +49 (0)
") ARMA-CHEK SILVER APPLICATION MANUAL T. +49 (0) 251 7603-0 info@armacell.com www.armacell.eu 02 Arma-Chek Silver Application Manual General application instructions Working with Arma-Chek Silver The installer
ARMA-CHEK SILVER APPLICATION MANUAL T. +49 (0) 251 7603-0 info@armacell.com www.armacell.eu 02 Arma-Chek Silver Application Manual General application instructions Working with Arma-Chek Silver The installer
Providing 3 Layers of Protection
 Providing 3 Layers of Protection Barrier 1: Barrier 2: Barrier 3: Integrate the Opening Seal the Exterior Seal the Interior Standard Integral Flange After Housewrap Standard Window Integral Flange After
Technical Data Sheet. Magnetic glass fabric. Properties / Usage. Technical Parameters / Roll Style. Substrate preparation
 Technical Data Sheet Magnetic glass fabric Properties / Usage The back of glass fabric has a metallic coating. Standard, commercially available magnets therefore adhere directly to the wall covering. is
Approx. Weight in g/m²
 TECHNICAL DATA SHEET Magnetically Active glass fleece Properties / Typical application The back of glass fleece has a metallic coating. Standard, commercially available magnets therefore adhere directly
Aerospace Speciality Products
 Specifications:! Length: 18.75"/47.6 cm! Diameter: 0.98"/24.9 mm! Weight: 1.5 oz/44 gm! Streamer Recovery! Recommended Engines:!! A8-3; B4-4; B6-4; C6-5! Skill Level: Beginner This is a model rocket kit
September 10, 2009 Page 1 PRODUCT DESCRIPTION PRODUCT FEATURES
 September 10, 2009 Page 1 PRODUCT FEATURES BASIC USES/RELATED USES Interior decorative tile. Architectural tile for decorative wall surfaces, backsplashes and other applications. Custom architectural and
Sky-in-a-Box Instructions
 Strand 1 Activity 7 The Shifting Stars Sky-in-a-Box Instructions Large or Small? The Sky-in-a-Box designs are provided ready to print on A4 or US Letter size paper. Used at this size they will require
PostIts, and Aleene s are trademarks of their manufacturers and have no affiliation with Real Good Toys
 Instructions for Real Good Toys My Dreamhouse Congratulations on your choice of a Real Good Toys product. Your kit has been precision made with meticulous care by our craftspeople using carefully selected
Installation Instructions
 www.marlite.com Effective Date 03/01/2018 ARTIZAN FRP, SYMMETRIX FRP, ENVUE FRP, STANDARD FRP Installation Instructions Statements expressed in this technical bulletin are recommendations for the application
A complete collection of information about installing a Dana Decals vinyl decal.
 INSTRUCTIONS COMPLETE COLLECTION CONTENTS: 1 2 3 4 5 6 7 8 Diagram of a Decal Detailed Transferring Tips Small Decal Installation A complete collection of information about installing a Dana Decals vinyl
GTS Music diy-guitar.com
 GTS Music diy-guitar.com IB Jem Style Kit GTS Music 313 Strachan St. Port Hope, Ontario L1A 0C2 Canada sales@diyguitarkits.net Please read these instructions carefully before beginning in order to have
INSTALLATION INSTRUCTIONS Scout II - Fast Trac PART #
 INSTALLATION INSTRUCTIONS Scout II - Fast Trac PART #442-210 Thank you for purchasing Specialty s Convertible Top for your Scout vehicle. It has been designed for great fit and long wear. Please read and
Nanton Grain Mill Assembly
 ( 1 ) Nanton Grain Mill Assembly Locate package for assembling storage building. These are cut from 1/8 masonite. Inspect and lightly sand edges where it will be bonded. Use white glue or CA glue to bond.
APPLICATION NOTE - SR001. Cold Weather Application
 APPLICATION NOTE - SR001 Cold Weather Application Silent Running is best applied with the ambient, material and substrate temperature in the range of 65-85 degrees F. Lower temperatures will result in
VERTICAL STILE ABOVE HORIZONTAL TRIM VERTICAL STILE BELOW COVE BASE ADHESIVE. 1" [25.4mm] BASE DETAIL
![VERTICAL STILE ABOVE HORIZONTAL TRIM VERTICAL STILE BELOW COVE BASE ADHESIVE. 1 [25.4mm] BASE DETAIL](/thumbs/87/96020661.jpg "VERTICAL STILE ABOVE HORIZONTAL TRIM VERTICAL STILE BELOW COVE BASE ADHESIVE. 1 [25.4mm] BASE DETAIL") Please Read All sheet will be provided in stock sizes for field cutting. All trims will be provided in 8-0 stock lengths for field cutting. CEILING TRIM 1" [25.4mm] Acrovyn Interiors vinyl acrylic wall
Please Read All sheet will be provided in stock sizes for field cutting. All trims will be provided in 8-0 stock lengths for field cutting. CEILING TRIM 1" [25.4mm] Acrovyn Interiors vinyl acrylic wall
Installation Instructions Palladium 3D Hi Impact Wall System, Partial Height with Color Matched Caulk Joints
 Please read all instructions before installing Palladium 3D Hi Impact Wall System.. Before installation: a. Acclimate rigid sheet, Palladium 3D boards, adhesives and wall substrates to room temperature
Robert Bosch GmbH. Minimalist washstand
 Minimalist washstand Neat and tidy Minimalist washstand Minimalist design in the bathroom is in fashion. And rightly so, as this washstand proves: because less is more! 1 Introduction Here s an idea to
Knowledge about display stand wood materials. Fuyuan wood factory learning summary reporter:willian
 Knowledge about display stand wood materials Fuyuan wood factory learning summary reporter:willian Ⅰ wood 1.Particleboard 2. MDF 3. Plywood 4. Solid wood board Ⅱ mechanical equipment 1. Automatic cutting
3M Scotchgard Surface Protection Film 2200
 Effective July 2016 Commercial Solutions Division 3M Scotchgard Surface Protection Film 2200 Product Bulletin / Instruction Bulletin Product Description 3M Scotchgard Surface Protection Film 2200 is a
Chapter 5. Installation procedures. Installation procedures 24. Topics. Notes. 5.5 Flash coving General recommendations 25
 Installation procedures 24 Chapter 5 Installation procedures Topics 5.1 General recommendations 25 5.2 Preparation 25 5.3 Seaming 25 5.5 Flash coving 26 5.6 Forming corners 26 5.7 Seam grooving 28 5.4
INSTALLATION INSTRUCTIONS FRAMELESS CONTINUOUS HINGE SHOWER ENCLOSURE QCI5233
 INSTALLATION INSTRUCTIONS FRAMELESS CONTINUOUS HINGE SHOWER ENCLOSURE QCI5233 QCI5233 Rev 0 Page 1 Certified 06/20/2016 INSTALLATION NOTES: Unpack your unit carefully and inspect for freight damage. Lay
Install your floor between 18 and 30 C.
 GOLDEN RULES 8-0 C Install your floor between 8 and 0 C. Quick-Step Livyn must be acclimatized in the room of installation between 8-0 C for a period of at least 8 hours before installation. This floor
Installing Digital Wallcoverings
 Installing Digital Wallcoverings Hints & Tips Muraspec Digital (Hints & Tips) 1 BEFORE YOU START Make sure that your image is intact and has not been damaged in transit. For best results, use only Murabond
the newclay process AN ILLUSTRATED LEAFLET
 the newclay process AN ILLUSTRATED LEAFLET small models For chunky little models such as those shown here there will be no need to treat Newclay with the hardener. The clay alone will be quite strong enough.
INSTALLATION INSTRUCTIONS Super Scout PART #
 INSTALLATION INSTRUCTIONS Super Scout 71-80 PART #443-010 Thank you for purchasing Specialty s Convertible Top for your Scout vehicle. It has been designed for great fit and long wear. Please read and
Sawn Baluster Sizing and Installation Guide
 Sawn Baluster Sizing and Installation Guide Welcome to the Durabrac sizing and installation guide for Sawn Balusters. This guide has been prepared to answer any questions you may have about our Sawn Balusters
INSTALLATION INSTRUCTIONS of Chevron and Herringbone Engineered Hardwood Flooring
 INSTALLATION INSTRUCTIONS of Chevron and Herringbone Engineered Hardwood Flooring www.tomson-floors.com TABLE OF CONTENTS 3 USING THE PRODUCT 3 YOUR RESPONSIBILITIES 4 PRE-INSTALLATION INSPECTION 5 BASIC
Creativ 5c02. Date: Stone interpretation techniques Seite 1 von 7
 Creativ 5c02 Antique marble technique Antikmarmortechnik with Latex Plastic ELF 904 for expressive, divided surfaces in contiguous coloring with marble character The figure shows a variant of the creative
INSTALLING YOUR UNICLIC FLOOR - Small planks / 3 sizes
 INSTALLING YOUR UNICLIC FLOOR - Small planks / 3 sizes 1) General The panels must be rotated on both short and long edges to fit into one another. This can be performed by inserting either the tongue into
Practical Information ORALITE Reflective Films of Class RA3B, Grade C for Road Safety
 Page 1 of 6 1. Processing instructions for ORALITE reflective films of reflection class RA3B, grade C These processing instructions apply to the following ORALITE reflective films of reflection class RA3B,
INSTALLATION INSTRUCTIONS CJ-5 M38A PART # With Doors
 INSTALLATION INSTRUCTIONS CJ-5 M38A1 1955-1975 PART #109-011 With Doors Thank you for purchasing Specialty s Convertible Top for your Jeep vehicle. It has been designed for great fit and long wear. Please
Generations Test Drive Multi Media Project
 Generations Test Drive Multi Media Project A Creative and Inspirational project that incorporates different decoration techniques including a print transfer, embroidery applique, monogramming, and rhinestones.
Max Launch Abort System Prod. No *Kevlar is a registered trademark of Dupont
 Flying Model Parts List Max Launch Abort System Prod. No. 3014 A 11820 - Body Tube 3.5 Diam x 5.5" Long B 11824 - Orange Capsule Base Shoulder Ring C 16032 - Laser-cut Ring motor mount rear D 16033 - Laser-cut
TYPAR WEATHER PROTECTION SYSTEM TABLE OF CONTENTS. SPECIAL INSTALLATION CONSIDERATIONS Stucco** Brick** Stone Veneer** Wood Siding**
 TYPAR WEATHER PROTECTION SYSTEM INSTALLATION GUIDE TABLE OF CONTENTS Table of Contents...01 Special Installation Considerations...01 Code Requirements...02 Approvals and Reports...02 Recommended Materials...02
HOWICK CAMERA CLUB HOWICK TUTOR GROUP MOUNTING PRINTS FOR COMPETITION AND DISPLAY.
 HOWICK CAMERA CLUB 1 HOWICK TUTOR GROUP MOUNTING PRINTS FOR COMPETITION AND DISPLAY. The printing of your Picture (photograph) is not the last process that must be done! In order to take part in Competitions
U.S. General Services Administration Historic Preservation Technical Procedures
 1 of 6 8/20/2010 8:22 AM U.S. General Services Administration Historic Preservation Technical Procedures 06400-02 SUPPLEMENTAL GUIDELINES FOR REMOVING PAINT FROM INTERIOR AND EXTERIOR WOOD SURFACES This
Digital Magnetics Support document
 Digital Magnetics Support document Digital Magnetics Change your graphics quickly. 01 / 02 Introduction DM 03 / 04 Support Ferro & Magnetic Base About DM 05 / 06 Support Flexible Ferrous films Digital
Sun Windows General Information New Construction Hinged Door Installation Instructions
 A G H F H H A. Apply Weather Resistive Barrier B. Apply Bottom Flashing Tape C. Install Sill Pan End Caps & Pan D. Caulk Sides & Top Nailing Surface, Set Door, Fasten E. Apply Side Flashing Tape F. Apply
MANUFACTURING TECHNOLOGY
 MANUFACTURING TECHNOLOGY UNIT II SHEET METAL FORMING PROCESSES Sheet metal Process in detail Cutting (Shearing) Operations Manufacturing Technology In this operation, the work piece is stressed beyond
#P571 - Victorian Queen Fretwork Clock inspired by 18th century Victorian elegance. 17 H x 21 W. Requires a 3 1/2 clock insert.
 - Victorian Queen Fretwork Clock inspired by 8th century Victorian elegance. 7 H x 2 W. Requires a 3 /2 clock insert. Cut on dashed line for Back Cut on solid line for Frame only. Stock: /8 - /4, cut each