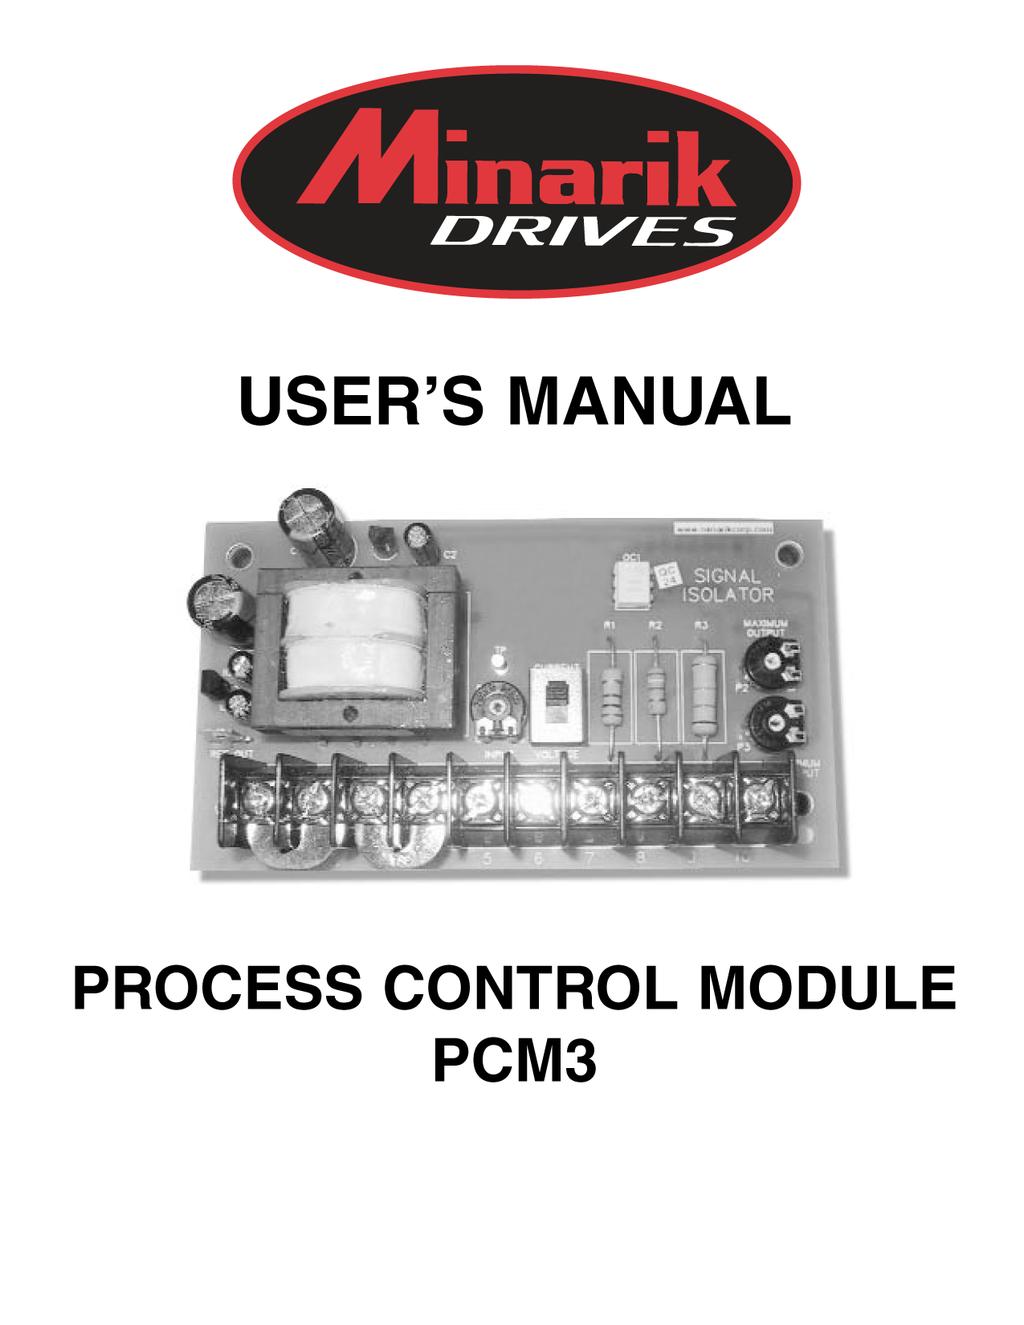
Copyright 2014 by Minarik Drives
|
|
|
- Logan Price
- 6 years ago
- Views:
Transcription
1
2 Copyright 2014 by Minarik Drives All rights reserved. No part of this document may be reproduced or transmitted in any form without written permission from Minarik Drives. The information and technical data in this document are subject to change without notice. Minarik Drives makes no warranty of any kind with respect to this material, including, but not limited to, the implied warranties of its merchantability and fitness for a given purpose. Minarik Drives assumes no responsibility for any errors that may appear in this document and makes not commitment to update or to keep current the information in this document. Printed in the United States of America.
3 i Safety Warnings SHOCK HAZARD AVOID HEAT KEE DR OID ATION This symbol denotes an important safety tip or warning. PLEASE READ THESE INSTRUCTIONS CAREFULLY before performing any of the procedures contained in this manual. DO NOT INSTALL, REMOVE, OR REWIRE THIS EQUIPMENT WITH POWER APPLIED. Have a qualified electrical maintenance technician install, adjust, and service this equipment. Follow the National Electrical Code (NEC) and all other applicable electrical and safety codes, including the provisions of the Occupational Safety and Health Act (OSHA) when installing equipment. Reduce the chance of an electrical fire, shock, or explosion by proper grounding, over current protection, thermal protection, and enclosure. Follow sound maintenance procedures. Although this process control module isolates a voltage or current signal, its internal circuit potentials are at 115 VAC or 230 VAC above earth ground. Avoid direct contact with the printed circuit board or with circuit elements to prevent the risk of serious injury or fatality. Use a non-metallic screwdriver for adjusting the calibration trimpots.
4 ii Contents Safety Warnings Specifications Dimensions Introduction Installation Mounting Wiring Shielding guidelines Screw terminal block AC line connections Voltage follower connection Current follower connection Leader signal generator connections Output Voltage Connections Armature Voltage Follower Multiple Follower Motors Voltage/Current Selector Slide Switch Calibration Voltage Signal Follower Calibration Manual Leader Control Current Signal Follower ma DC current signal input range: ma DC current signal input range: ma DC current signal input range: i
5 iii Troubleshooting Unconditional Warranty 28 inside back cover
6 iv Illustrations Figure 1. Process Control Module Dimensions Figure 2. Screw Terminal Block Figure VAC Power Connection Figure VAC Power Connection Figure 5. Connection Following an External Voltage Signal Figure 6. Connection Following an External Current Signal Figure 7. Connection Unidirectional Manual Leader Signal Source..13 Figure 8. Connection Output Voltage Figure 9. Armature Voltage Follower Connections Figure 10. Multiple Follower Motors Connection Figure 11. Voltage/Current Selectro Slide Switch Figure 12. Calibration Trimpot Layout Figure 13. Shunt Resistor Installation
7 1 Specifications Power Requirements Line input 115VAC/230 VAC, 50/60 Hz, single phase Input Signal Ranges (input circuit is isolated) Voltage signal, narrow range Voltage signal, mid range Voltage signal, wide range Current signal 0 to +25 VDC 0 to +120 VDC 0 to +550 VDC 1 5 madc, 4 20 madc, madc Input Impedance Voltage signal Current signal, 1 5 madc Current signal, 4 20 madc Current signal, madc >25K ohms 1K ohms 235 ohms 100 ohms Output Impedance Voltage range, max Linearity 800 ohms 0 to +10 VDC 0.1% Operating Temperature Range 0 50 C
8 2 Dimensions [123] [107] IC1 C1 T1 C2 OC1 SIGNAL ISOLATOR C3 R1 R2 R3 MAXIMUM IC2 C4 TP CURRENT [69] C5 P1 P [55] REF OUT TB1 P3 MINIMUM [33] MOUNTING HOLE (4 EA) [4] DIAMETER [6] ALL DIMENSIONS IN INCHES [MILLIMETERS] Figure 1. Process Control Module Dimensions
9 3 Minarik model PCM3 signal isolators produce a floating DC voltage signal proportional to a variable DC current or voltage signal input. It also can generate the floating DC voltage signal output controlled by an external potentiometer. The output signal fed to a speed controller allows a motor to be driven automatically at a speed proportional to the signal, i.e., to follow the signal. The maximum PCM3 output voltage is 10 VDC. The PCM3 DC voltage output must be trimmed to not exceed the reference voltage, i.e., the normal voltage drop across the speed adjust potentiometer of the motor speed controller. For Minarik MM20000 series controls, the reference voltage is approximately 3.5 VDC. Putting higher DC voltage into the control speed adjust circuit will not produce correspondingly higher motor speeds. Such an error can seriously degrade the linearity between the process signal level and motor speed. This manual contains specifications, installation procedures, connections, and calibration procedures for the process control module, model PCM3. Refer to your variable speed drive user s manual for additional installation, operation, and troubleshooting procedures.
10 4 Installation Mounting Warning Do not install, rewire, or remove this control with input power applied. Doing so may cause fire or serious injury. Make sure you read and understand the Safety Warnings on page i before attempting installation. PCM3 components are sensitive to electrostatic fields. Avoid contact with the circuit board directly. Protect the PCM3 from dirt, moisture, and accidental contact. Provide sufficient room for access to the terminal block. Mount the PCM3 away from other heat sources. Operate within the specified ambient operating temperature range. The operating temperature range for the PCM3 is 0 C through 50 C. Prevent loose connections by avoiding excessive vibration of the process control module board. Mount the PCM3 in either a horizontal or vertical plane. The PCM3 is mounted using 4 ea inch [6mm] standoffs. See Figure 1, page 2 for the physical locations of these standoffs. Use #8 panhead screws to fasten the standoffs to the mounting surface.
11 Installation 5 Wiring Warning Do not install, rewire, or remove this control with input power applied. Failure to heed this warning may result in fire, explosion, or serious injury. This drive is isolated from earth ground. Circuit potentials are at 115 or 230 VAC above ground. To prevent the risk of injury or fatalisty, avoid direct contact with the printed circuit board or with circuit elements. Do not disconnect any of the motor leads from the drive unless power is removed or the drive is disabled. Opening any one motor lead may destroy the drive. This product does not have internal solid state motor overload protection. It does not contain speed-sensitive overload protection, thermal memory retention or provisions to receive and act upon signals from devices for over temperature protection. If motor overload protection is needed in the end-use product, it needs to be provided by additional equipment in accordance with NEC standards. Use AWG wire for speed adjust potentiometer wiring. Use AWG wire for AC line (L1, L2) and motor (A1 and A2) wiring.
12 6 Installation Shielding guidelines Warning Under no circumstances should power and logic leads be bundled together. Induced voltage can cause unpredictable behavior in any electronic device, including motor controls. As a general rule, Minarik recommends shielding of all conductors. If it is not practical to shield power conductors, Minarik recommends shielding all logic-level leads. If shielding is not practical, the user should twist all logic leads with themselves to minimize induced noise. It may be necessary to earth ground the shielded cable. If noise is produced by devices other than the PCM module, ground the shield at the module end. If noise is generated by a device on the PCM module, ground the shield at the end away from the PCM module. Do not ground both ends of the shield. If the module continues to pick up noise after grounding the shield, it may be necessary to add AC line filtering devices, or to mount the PCM module in a less noisy environment. Logic wires from other input devices, such as motion controllers and PLL velocity controllers, must be separated from power lines in the same manner as the logic I/O on this drive.
13 Installation 7 Screw terminal block Connections to Minarik s PCM3 are made to a screw terminal block. Using a screwdriver, turn the terminal block screw counterclockwise to open the wire clamp. Insert stripped wire into the wire clamp. Turn the terminal block screw clockwise to clamp the wire. See Figure 2. Figure 2. Screw Terminal Block
14 8 Installation AC line connections Connect AC power leads to terminals 1 and 4. When operating on 115VAC, leave the jumper bars installed between terminals 1 and 2 and between 3 and 4 (see Figure 3). This is the PCM3 s default (factory) setting. When operating on 230VAC, remove both jumper bars and place one jumper bar between terminals 2 and 3 (see Figure 4, page 9). IC1 C1 T1 C2 OC1 SIGNAL ISOLATOR C3 R1 R2 R3 MAXIMUM IC2 C4 TP CURRENT C5 P1 P2 P3 TB1 MINIMUM AC POWER 115 VAC INPUT 1 4 JUMPER BARS INSTALLED BETWEEN TERMINALS 1 & 2 AND TERMINALS 3 & 4 Figure VAC Power Connection
15 Installation 9 IC1 C1 T1 C2 OC1 SIGNAL ISOLATOR C3 R1 R2 R3 MAXIMUM IC2 C4 TP CURRENT C5 P1 P2 P3 TB1 MINIMUM AC POWER 230 VAC INPUT 1 4 JUMPER BAR INSTALLED BETWEEN TERMINALS 2 & 3 Figure VAC Power Connection
16 10 Installation Voltage follower connection (1) Set the Current/Voltage Switch to Voltage. (2) Connect the incoming voltage signal leads as shown in Figure 5 below. (3) Connect the negative lead to Terminal 5. (4) If the voltage signal is less than 20VDC, connect the positive lead to Terminal 6. If the voltage signal is less than 120VDC, connect the positive lead to Terminal 7. If the voltage signal is greater than 120VDC, connect the positive lead to Terminal 8. R1 R2 R3 MAXIMUM TP CURRENT P1 P2 INPUT VOLTAGE P3 MINIMUM VDC VOLTAGE SIGNAL REF (+) CURRENT/ VOLTAGE SWITCH VDC VOLTAGE SIGNAL REF (+) VDC VOLTAGE SIGNAL COM (-) REF (+) Figure 5. Connection Following an External Voltage Signal
17 11 Current follower connection (1) Set the Current/Voltage Switch to Current. (2) Connect the incoming current signal leads as shown in Figure 6 below. (3) Connect the negative lead to Terminal 5. (4) Connect the positive lead to Terminal 6. R1 R2 R3 MAXIMUM TP CURRENT P1 P2 INPUT VOLTAGE P3 MINIMUM COM (-) REF (+) CURRENT FOLLOWER INPUT CURRENT/ VOLTAGE SWITCH Figure 6. Connection Following an External Current Signal
18 12 Installation Leader signal generator connections The PCM3 can be used as a leader controller in one of two ways. It can provide a floating DC leader voltage input to other PCM3 modules interfacing with standard variable speed drives.it can also drive several variable speed drives directly, provided that their circuit design permits wiring of their speed circuits in common. Unidirectional applications require a positive PCM3 output. Connect a 10K ohm potentiometer (not provided with the PCM3) as the leader control pot using the +10 VDC REF OUT supply on the PCM3. Refer to Figure 7 (page 13). To connect an external leader control potentiometer, attach the CW side of the potentiometer to the REF OUT terminal. The potentiometer wiper is connected to terminal 6. The CCW terminal is connected to terminal 5.
19 Installation 13 IC1 C1 T1 C2 OC1 SIGNAL ISOLATOR C3 R1 R2 R3 MAXIMUM IC2 C4 TP CURRENT C5 P1 P2 REF OUT TB1 INPUT VOLTAGE P3 MINIMUM CW 10K OHM SPEED ADJUST POTENTIOMETER Figure 7. Connection Unidirectional Manual Leader Signal Source
20 14 Installation Output Voltage Connections Warning Always check the instruction manual supplied with the variable speed drive that will be interfaced with the PCM3 module. The scheme shown for wiring to an external voltage source, as well as the specifications on that input, must be well understood before proceeding. Most Minarik controls have positive reference voltage across the speed adjust pot with respect to the CCW side. The pot wiper position determines the fraction of this control reference voltage that will be applied to the speed adjustment circuit. In these controls, the application of a positive voltage at the wiper with reference to the CCW connection will cause the motor to run. Output connections are made to terminals 9 and 10 of terminal board TB501. Connect the negative lead to terminal 9. Connect the positive lead to terminal 10. Refer to Figure 8 (page 15). Some controls have a negative reference voltage across the speed adjust pot. Reverse the polarity of the connection to such controls.
21 Installation 15 TP R1 R2 R3 MAXIMUM P1 CURRENT P2 P3 MINIMUM COM (-) REF (+) 0-10 VDC Figure 8. Connection Output Voltage
22 16 Installation Armature Voltage Follower The PCM3 may be used as an interface to control one motor speed in proportion to that of an independent DC motor. The input signal would be taken from the voltage across the armature of the 'leader' motor, since speed is proportional to this voltage. To follow the armature voltage signal, wire the positive side of the armature voltage to Terminal 7 (if VDC range) or to Terminal 8 (if VDC range). Wire the negative side of the armature voltage to Terminal 5 as shown in Figure 9 (page 17). Connect Terminals 9 and 10 to the speed control circuit in the follower controller, according to the instructions provided with the speed controller. With most Minarik controls, connect Terminal 9 of the PCM3 to the terminal for the CCW end of the control speed pot and Terminal 10 of the PCM3 to the wiper terminal. The pot wiper should be left disconnected from the control so that only the PCM3 output will control the motor speed. Remember that the connections of Terminals 9 and 10 must be reversed if the Minarik control has a negative reference voltage.
23 Installation 17 IC1 C1 T1 C2 OC1 SIGNAL ISOLATOR C3 R1 R2 R3 MAXIMUM IC2 C4 TP CURRENT C5 P1 P2 REF OUT TB1 INPUT VOLTAGE P3 MINIMUM MOTOR A2 A1 S1 S2 S3 CW MM20000 SERIES DRIVE (LEADER) 10K OHM SPEED ADJUST POTENTIOMETER MOTOR S3 S2 S1 A1 A2 MM20000 SERIES DRIVE (FOLLOWER) Figure 9. Armature Voltage Follower Connections
24 18 Installation Multiple Follower Motors If more than one 'follower' motor speed controller is to follow the output from a single 'leader' PCM3, setting the ratio between two or more of the motor speeds can be accomplished with ratioing pots (Figure 10, page 19). Wire Terminal 10 of the PCM3 to the CW end of the pot. Disconnect that side of the speed pot from its terminal on the follower control. Wire the pot wiper to the speed adjust wiper terminal. Wire the CCW side of the pot and the output from PCM3 Terminal 9 to the speed adjust CCW terminal on the control.
25 Installation 19 IC1 C1 T1 C2 OC1 SIGNAL ISOLATOR C3 R1 R2 R3 MAXIMUM IC2 C4 TP CURRENT C5 P1 P2 REF OUT TB1 INPUT VOLTAGE P3 MINIMUM K OHM MASTER SPEED ADJUST POTENTIOMETER INH2 CW S3 MM20000 SERIES FOLLOWER #1 S2 S1 A1 CW 10K OHM SPEED ADJUST POTENTIOMETER A2 MOTOR #1 INH2 S3 MM20000 SERIES FOLLOWER #2 S2 S1 A1 CW 10K OHM SPEED ADJUST POTENTIOMETER A2 MOTOR #2 Figure 10. Multiple Follower Motors Connection
26 20 Installation Voltage/Current Selector Slide Switch See Figure 11 for the Voltage/Current Selector Slide Switch. Set the swtich to VOLTAGE for voltage input mode, otherwise, set it to CURRENT for current input mode. VOLTAGE/CURRENT SELECTOR SLIDE SWITCH IC1 C1 T1 C2 OC1 SIGNAL ISOLATOR C3 R1 R2 R3 MAXIMUM IC2 C4 TP CURRENT C5 P1 P2 P3 TB1 MINIMUM Figure 11. Voltage/Current Selectro Slide Switch
27 21 Calibration Warning Dangerous voltages exist on the drive when it is powered and up to 30 seconds after power is removed and the motor stops. BE ALERT. High voltages can cause serious or fatal injury. For your safety, use personal protective equipment (PPE) when operating this drive. All adjustments increase with CW rotation, and decrease with CCW rotation. Use a non-metallic screwdriver for calibration. Each trimpot is identified on the printed circuit board. Refer to Figure 12 for trimpot layout. INPUT IC1 C1 T1 C2 K RI OC1 SIGNAL ISOLATOR C3 IC2 C4 C5 P1 TP CURRENT R1 R2 R3 P2 MAXIMUM MAXIMUM P3 MINIMUM TB1 MINIMUM Figure 12. Calibration Trimpot Layout
28 22 Calibration Voltage Signal Follower Calibration Set the VOLTAGE/CURRENT selector switch to VOLTAGE. Confirm that the positive DC voltage input lead is connected to the appropriate terminal. (1) Apply the maximum DC voltage input signal. (2) Adjust the INPUT trimpot until the voltage measured between the Test Point (post on board, marked TP) and Terminal 5 is approximately one-half of the Reference Voltage of the speed control. (3) Adjust MAXIMUM trimpot to achieve the desired maximum output voltage across Terminals 9 and 10, which normally is equal to or less than the control Reference Voltage, depending upon whether the motor is to run at its rated speed or at a slower speed with maximum DC input voltage to the PCM3. (4) Apply the minimum DC voltage input signal. (5) Adjust MINIMUM trimpot to achieve the desired minimum output voltage across Terminals 9 and 10 or, alternatively, to achieve the desired minimum speed of the motor.
29 Calibration 23 Manual Leader Control Set the VOLTAGE/CURRENT selector switch to VOLTAGE. Confirm that a 10K ohm leader speed adjust potentiometer has been properly wired between REF OUT (CW) and Terminal 5 (CCW), with its wiper wired to Terminal 6. (1) Set the leader speed adjust potentiometer to maximum (full CW). (2) Adjust INPUT trimpot until voltage measured between the Test Point (post on board, marked TP) and Terminal 5 is approximately one-half of the reference voltage of the speed control. (3) Adjust MAXIMUM trimpot to achieve the desired maximum output voltage across Terminals 9 and 10. This voltage is equal to or less than the control reference voltage, depending upon the desired motor speed. (4) Rotate the leader potentiometer wiper fully CCW. (5) Adjust MINIMUM trimpot to achieve the desired minimum output voltage across Terminals 9 and 10 or, alternatively, to achieve the desired minimum speed of the motor.
30 24 Calibration Current Signal Follower Set the VOLTAGE/CURRENT selector slide switch to CURRENT. 1-5 ma DC current signal input range: (1) Apply a 5 madc signal across Terminals 5 and 6. (2) Adjust INPUT trimpot until voltage measured between the Test Point (post on board, marked TP) and Terminal 5 is approximately one-half of the Reference Voltage of the speed control. (3) Adjust MAXIMUM trimpot to achieve the desired maximum output voltage across Terminals 9 and 10, which normally is equal to or less than the control Reference Voltage, depending upon whether the motor is to run at its rated speed or at a slower speed with maximum DC input current to the PCM3. (4) Apply a 1 madc signal across Terminals 5 and 6. (5) Adjust MINIMUM trimpot to achieve the desired minimum output voltage across Terminals 9 and 10 or, alternatively, to achieve the desired minimum speed of the motor. (6) Repeat Steps 1 through 5 once.
31 Calibration ma DC current signal input range: (1) Apply a 20 madc signal across Terminals 5 and 6. (2) Adjust MAXIMUM trimpot to achieve the desired maximum output voltage across Terminals 9 and 10, which normally is equal to or less than the control Reference Voltage, depending upon whether the motor is to run at its rated speed or at a slower speed with maximum DC input current to the PCM3. (3) Apply a 4 madc signal across Terminals 5 and 6. (4) Adjust MINIMUM trimpot to achieve the desired minimum output voltage across Terminals 9 and 10 or, alternatively, to achieve the desired minimum speed of the motor. (5) Repeat Steps 1 through 4 once.
32 26 Calibration ma DC current signal input range: Shunt a 1K ohm, 3W resistor across Terminals 5 and 6 as shown in Figure 13 (page 27). (1) Apply a 50 madc signal across Terminals 5 and 6. (2) Adjust MAXIMUM trimpot to achieve the desired maximum output voltage across Terminals 9 and 10, which normally is equal to or less than the control Reference Voltage, depending upon whether the motor is to run at its rated speed or at a slower speed with maximum DC input current to the PCM3. (3) Apply a 10 ma DC signal across Terminals 5 and 6. (4) Adjust MINIMUM trim pot to achieve the desired minimum output voltage across Terminals 9 and 10 or, alternatively, to achieve the desired minimum speed of the motor. (5) Repeat Steps 1 through 4 once.
33 Calibration 27 IC1 C1 T1 C2 OC1 SIGNAL ISOLATOR C3 R1 R2 R3 MAXIMUM IC2 C4 TP CURRENT C5 P1 P2 P3 TB1 MINIMUM SHUNT RESISTOR Figure 13. Shunt Resistor Installation
34 28 Troubleshooting Warning Dangerous voltages exist on the PCM3 when it is powered. When possible, disconnect PCM3 and drive while troubleshooting. High voltages can cause serious or fatal injury. Before troubleshooting Perform the following steps before starting any procedure in this section: Disconnect AC line voltage from the PCM3 and variable speed drive. Check the PCM3 and drive closely for damaged components. Check that no conductive or other foreign material has become lodged on the printed circuit board. Verify that every connection is correct and in good condition. Verify that there are no short circuits or grounded connections. Check that the input voltage jumpers are installed properly for the input voltage being used (see page 8). Check that the drive s rated armature and field outputs are consistent with the motor ratings. For additional assistance, contact your local Minarik distributor, or the factory direct: MINARIK ( ) or Fax:
35 Troubleshooting 29 Problem End user s drive does not respond to encoder signal Possible Causes 1. No output voltage from PCM3 (TB1). 2. Loose connections between PCM3 and motor drive. 3. PCM3 is not receiving AC line voltage. 4. Input signal is not connected. 5. INPUT pot is not calibrated. Suggested Solutions 1. Recalibrate the PCM3. If there is still no output send PCM3 to Minarik for repair. 2. Check connections between TB1 and the input of motor drive. 3. Apply AC line voltage to terminals 1and Check that the PCM3 is receiving voltage (or current) input signal. 5. Calibrate INPUT pot (page 24). 6. Motor drive not calibrated properly. 6. Re-calibrate motor drive according to manufacturer s instructions.
36 30 Troubleshooting Problem End user s motor drive does not reach full speed Possible Causes 1. Voltage out (TB1) is not changing as input changes 2. Loose connections between PCM3 and motor drive. Suggested Solutions 1. Check that the voltage out (TB1) is changing as input changes. Recalibrate the PCM3. IF voltage is still not changing send the drive to Minarik repair. 2. Check connections between TB1 and the input of motor drive. End user s motor does not respond properly (runs too slow, or too fast) to PCM3 1. Motor drive not calibrated properly. 1. Re-calibrate motor drive according to manufacturer s instructions.
37
38
39 Unconditional Warranty A. Warranty - Minarik Drives warrants that its products will be free from defects in workmanship and material for one (1) year or 6,000 hours, whichever comes first, from date of shipment thereof. Within this warranty period, Minarik Drives will repair or replace such products that are: (1) returned to Minarik Drives, De La Tour Drive, South Beloit, IL USA; and, (2) determined by Minarik Drives to be defective. This warranty shall not apply to any product that has been subject to misuse, negligence, or accident; or misapplied; or repaired by unauthorized persons; or improperly installed. Minarik Drives is not responsible for removal, installation, or any other incidental expenses incurred in shipping the product to and from the repair point. B. Disclaimer - The provisions of Paragraph A are Minarik Drives s sole obligation and exclude all other warranties of merchantability for use, express or implied. Minarik Drives further disclaims any responsibility whatsoever to the customer or any other person for injury to the person or damage or loss of property of value caused by any product that has been subject to misuse, negligence, or accident, or misapplied or modified by unauthorized persons or improperly installed. C. Limitations of Liability - In the event of any claim for breech of any of Minarik Drives s obligations, whether express of implied, and particularly of any other claim or breech of warranty contained in Paragraph A, or any other warranties, express or implied, or claim of liability that might, despite Paragraph B, be decided against Minarik Drives by lawful authority, Minarik Drives shall under no circumstances be liable for any consequential damages, losses, or expense arising in connection with the use of, or inability to use, Minarik Drives s product for any purpose whatsoever. An adjustment made under warranty does not void the warranty, nor does it imply an extension of the original one (1) year or 6,000 hour warranty period. Products serviced and/or part replaced on a no-charge basis during the warranty period carry the unexpired portion of the original warranty only. If for any reason any of the foregoing provisions shall be ineffective, Minarik Drives s liability for damages arising out of its manufacture or sale of equipment, or use thereof, whether such liability is based on warranty, contract, negligence, strict liability in tort, or otherwise, shall not in any event exceed the full purchase price of such equipment. Any action against Minarik Drives based upon any liability or obligation arising hereunder or under any law applicable to the sale of equipment or the use thereof, must be commenced within one year after the cause of such action arises.
40 14300 De La Tour Drive South Beloit, IL, Phone: (800) MINARIK or (800) Fax: (800) or (815) Document Number , Revision 6 Printed in the U.S.A 5/14
USER S MANUAL PROCESS CONTROL MODULE PCM3
 USER S MANUAL PROCESS CONTROL MODULE PCM3 Copyright 2002 by Minarik Corporation All rights reserved. No part of this manual may be reproduced or transmitted in any form without written permission from
An American Control Electronics Brand PCM4 SERIES USER MANUAL PCM4.
 An American Control Electronics Brand PCM4 SERIES PCM4 USER MANUAL www.minarikdrives.com Dear Valued Consumer: Congratulations on your purchase of the PCM4 Series isolation card. This User Manual was created
BC145 SIGNAL ISOLATOR BOARD
 BC145 SIGNAL ISOLATOR BOARD 4/17 Installation & Operating Manual MN1373 Any trademarks used in this manual are the property of their respective owners. Important: Be sure to check www.baldor.com to download
INSTALLATION AND OPERATING INSTRUCTIONS MODEL SIVF. KB Part No Signal Isolator for KBVF Controls. See Page 1 Pending
 INSTALLATION AND OPERATING INSTRUCTIONS MODEL SIVF KB Part No. 9474 Signal Isolator for KBVF Controls See Page 1 Pending See Safety Warning on Page 1 The information contained in this manual is intended
Series 500. Owner s Manual. Analog Transmitters by Data Industrial. Data Industrial. Data Industrial 2/95 PN 72806
 Series 500 Analog Transmitters by Data Industrial Data Industrial Owner s Manual Data Industrial 2/95 PN 72806 Table of Contents Introduction... 1 4-20 ma Loop Supply Requirements... 2 Installation...
Rev /13 SSRMAN-1B SERIES USERS MANUAL SSR INTELLIGENT BURST FIRING CONTROL COPYRIGHT 2013 NUWAVE TECHNOLOGIES, INC.
 Rev.2.2 12/13 MAN-1B SERIES USERS MANUAL INTELLIGENT BURST FIRING CONTROL COPYRIGHT 2013 MAN-1B Users Manual Page 2 TABLE OF CONTENTS 1. Ordering Codes... 2 2. Description... 2 2.1 Features... 3 3. Installation
Signal Isolation Module. Instruction Manual SIM
 Signal Isolation Module Instruction Manual SIM200-000 Table of Contents 1. General Description... 3 2. Specifications... 3 2.1 Electrical... 3 2.2 Physical... 4 3. Installation... 4 3.1 Wiring Guidelines...
Independent Technology Service Inc Independence Ave. Chatsworth, California Toll Free:
 Independent Technology Service Inc. 9182 Independence Ave. Chatsworth, California 91311 www.itscnc.com Toll Free: 1.800.342.3475 NEW Brush Amplifiers For Fadal Machines AMP-0006N-ITS AMP-0021N-ITS NEW
7I25 H-BRIDGE MANUAL
 7I25 H-BRIDGE MANUAL VERSION 1.0 Copyright 2002 by MESA ELECTRONICS Richmond, CA. Printed in the United States of America. All rights reserved. This document and the data disclosed herein is not to be
Glass Electrode Meter
 Glass Electrode Meter INSTRUCTION MANUAL FOR Glass Electrode R/C Meter MODEL 2700 Serial # Date PO Box 850 Carlsborg, WA 98324 U.S.A. 360-683-8300 800-426-1306 FAX: 360-683-3525 http://www.a-msystems.com
Precision Frequency To Voltage Converter Card
 Precision Frequency To Voltage Converter Card Instruction Manual Model C11451-000 Driven by Excellence D.C. DRIVES, A.C. INVERTERS, SOLID STATE STARTERS, SYSTEM INTERFACE CIRCUITS AND ENGINEERED SYSTEMS
34134A AC/DC DMM Current Probe. User s Guide. Publication number April 2009
 User s Guide Publication number 34134-90001 April 2009 For Safety information, Warranties, Regulatory information, and publishing information, see the pages at the back of this book. Copyright Agilent
Angular Rate Sensor. Owner's Manual
 Angular Rate Sensor Owner's Manual Part Number: ARS-C132-1A WATSON INDUSTRIES, INC. 3041 MELBY ROAD EAU CLAIRE, WI 54703 Phone: (715) 839-0628 FAX: (715) 839-8248 email: support@watson-gyro.com 1 Table
INSTRUCTION MANUAL LKG 601 Electrical Safety Analyzer
 INSTRUCTION MANUAL LKG 601 Electrical Safety Analyzer 110 Toledo Street Farmingdale, NY 11735 USA http://www.netech.org 510-USER-Manual Rev3 10/29/2007 Dear User, We appreciate your purchase of the LKG
PHASE ROTATION METER. Operating and Instruction Manual. a n d A C C E S S O R I E S
 PHASE ROTATION METER a n d A C C E S S O R I E S Operating and Instruction Manual HD ELECTRIC COMPANY 1 4 7 5 L A K E S I D E D R I V E WA U K E G A N, I L L I N O I S 6 0 0 8 5 U. S. A. PHONE 847.473.4980
TRANSDUCER IN-LINE AMPLIFIER
 TRANSDUCER IN-LINE Voltage Model AMPLIFIER 2080 Arlingate, Columbus, Ohio 43228, (614) 850-5000 Sensotec, Inc. 2080 Arlingate Lane Columbus, Ohio 43228 Copyright 1995 by Sensotec, Inc. all rights reserved
Master Reference Unit
 Master Reference Unit Instruction Manual Model D10096-000 Driven by Excellence D.C. DRIVES, A.C. INVERTERS, SOLID STATE STARTERS, SYSTEM INTERFACE CIRCUITS AND ENGINEERED SYSTEMS Driven by Excellence D.C.
Ordering Information. Stepping Relay Unit G9B. Model Number Legend
 Stepping Relay Unit CSM DS_E_4_1 Ideal for Controlling Pumps and Production Lines with Six or Twelve Stepping Circuits Built-in relays switch 2 A at 250 VAC or 30 VDC. Initialization of stepping with reset
Mini Receiver. Off Peak System Control. Operation & Installation Guide for Power Line Carrier WARRANTY. (Applicable to Software Version
 MR9 WARRANTY Steffes Corporation ( Steffes ) warrants that the Steffes Power Line Carrier Mini Receiver is free from defects in materials and workmanship under normal use and service. Steffes obligation
MODEL UBP-10 UNIVERSAL IN-LINE TRANSDUCER AMPLIFIER BI-POLAR SUPPLY, 0-10 VOLT OUTPUT
 MODEL UBP-10 UNIVERSAL IN-LINE TRANSDUCER AMPLIFIER BI-POLAR SUPPLY, 0-10 VOLT OUTPUT 2080 Arlingate Lane, Columbus, Ohio 43228 (614) 850-5000 Sensotec, Inc. 2080 Arlingate Lane Columbus, Ohio 43228 Copyright
40 Amp Digital Bidirectional PWM Motor Controller with Regenerative Braking BIDIR-340-DR
 40 Amp Digital Bidirectional PWM Motor Controller with Regenerative Braking BIDIR-340-DR The BIDIR-340-DR is a fully solid-state motor controller that allows you to control the speed and direction of a
Instruction Sheet SNE SERIES. Cable Chase
 Instruction Sheet SNE SERIES Cable Chase THANK YOU Thank you for purchasing the SNE Series Cable Chase. Please read these instructions thoroughly before installing this product. PRODUCT FEATURES The 45
DA6002D-DA10004D. INSTALLATION / OWNER'S MANUAL Mobile Power Amplifiers
 DA6002D-DA10004D INSTALLATION / OWNER'S MANUAL Mobile Power Amplifiers Preparation Please read entire manual before installation. Due to the technical nature of amplifiers, it is highly recommended that
XPR522 XPR540. XPR SERIES INSTALLATION / OWNER'S MANUAL Mobile Power Amplifiers
 XPR522 XPR540 XPR SERIES INSTALLATION / OWNER'S MANUAL Mobile Power Amplifiers Preparation Please read entire manual before installation. Due to the technical nature of amplifiers, it is highly recommended
MDC VAC Input Brushless Controller. User s Guide. 910 East Orangefair Lane, Anaheim, CA
 MDC200-048051 110VAC Input Brushless Controller User s Guide A N A H E I M A U T O M A T I O N 910 East Orangefair Lane, Anaheim, CA 92801 e-mail: info@anaheimautomation.com (714) 992-6990 fax: (714) 992-0471
10 Amp Digital PWM Motor Speed Controller CV-2110-HD and CV-2110-HDS
 10 Amp Digital PWM Motor Speed Controller CV-2110-HD and CV-2110-HDS The Analog / Digital PWM controller allows you to control the speed of a motor, brightness of a lamp or other device using an analog
COMMERCIAL TRANSMITTER INSTRUCTIONS
 READ THIS MANUAL CAREFULLY BEFORE BEGINNING COMMERCIAL INSTRUCTIONS MODELS: 831, 8833 OCS: 1-DOOR 733, 8833C OCS: 3-DOOR 639: 9-DOOR 535: 27-DOOR PRODUCT FEATURES Allstar Commercial Transmitters are designed
ELECTRONIC SHEAR PIN MODEL ESP 1 & 2 INSTRUCTION MANUAL
 ELECTRONIC SHEAR PIN MODEL ESP 1 & 2 INSTRUCTION MANUAL ESP Product Warranty Zener Electric warrant the Electronic Shear Pin against defective workmanship and materials for a period of 24 months from the
Pushbutton Bollard. Wireless Control for BlinkerSign, RRFB or BlinkerBeacon User Guide. Blinker Division Solar LED Solutions
 Blinker Division Solar LED Solutions The Route To Safety, One Solution At A Time Pushbutton Bollard Wireless Control for BlinkerSign, RRFB or BlinkerBeacon User Guide TAPCO Traffic & Parking Control Company,
High Performance Microphone Splitter. Artcessories. User's Manual
 High Performance Microphone Splitter Artcessories User's Manual IMPORTANT SAFETY INSTRUCTION READ FIRST This symbol, whenever it appears, alerts you to the presence of uninsulated dangerous voltage inside
MODEL KBWD-15 Pulse Width Modulated (PWM)
") MODEL KBWD-15 Pulse Width Modulated (PWM) DC MOTOR SPEED CONTROL WHISPER DRIVE INSTALLATION AND OPERATING INSTRUCTIONS See Safety Warning on Page 1 and Application Note Warning on Page 2 The information
MODEL KBWD-15 Pulse Width Modulated (PWM) DC MOTOR SPEED CONTROL WHISPER DRIVE INSTALLATION AND OPERATING INSTRUCTIONS See Safety Warning on Page 1 and Application Note Warning on Page 2 The information
BLD75-1. Bilevel Step Motor Driver. User s Guide. #L010125
 BLD75-1 Bilevel Step Motor Driver User s Guide A N A H E I M A U T O M A T I O N #L010125 1 Features Unipolar Operation 10 Amps per Phase Operating Current (Kick Current) 7 Amps per Phase Standstill Current
DA560D COMPACT SERIES. INSTALLATION / OWNER'S MANUAL Mobile Power Amplifiers
 DA560D COMPACT SERIES INSTALLATION / OWNER'S MANUAL Mobile Power Amplifiers Preparation Please read entire manual before installation. Due to the technical nature of amplifiers, it is highly recommended
User Guide. AC/DC Mini Clamp Meter. Model Introduction. Large 3 3/4 digit LCD display with 40 segment bargraph
 User Guide AC/DC Mini Clamp Meter Model 380941 Large 3 3/4 digit LCD display with 40 segment bargraph Continuity and Frequency Measurements One touch DCA zero adjust MIN/MAX and Data Hold functions 0.9
AD-8100 & AD-8200 Servo Amplifiers
 Instruction Manual IM-0607 AD-8100 & AD-8200 Servo Amplifiers Table of Contents General Information... 2 Basic Models... 3 Specifications... 3 Installation Wiring... 3 Setup & Calibration... 4-6 Troubleshooting
Classic Series Public Address Amplifiers C10 & C20 Models
 Classic Series Public Address Amplifiers C10 & C20 Models Installation and Use Manual 2009 Bogen Communications, Inc. All rights reserved. Specifications subject to change without notice. 54-5978-01B 0901
Series 3000 Model R-107A
 Series 3000 Model R-107A DUAL TONE SENDER INSTRUCTION MANUAL Monroe Electronics 100 Housel Ave Lyndonville NY 14098 800-821-6001 585-765-2254 fax 585-765-9330 monroe-electronics.com Printed in USA Copyright
VT1586A Rack Mount Terminal Panel Installation and User s Manual
 VT1586A Rack Mount Terminal Panel Installation and User s Manual Manual Part Number: 82-0095-000 Rev. June 16, 2003 Printed in U.S.A. Certification VXI Technology, Inc. certifies that this product met
TRANSDUCER IN-LINE AMPLIFIER
 TRANSDUCER IN-LINE Bi-Polar Model AMPLIFIER 2080 Arlingate Lane, Columbus, Ohio 43228 (614) 850-5000 Sensotec, Inc. 2080 Arlingate Lane Columbus, Ohio 43228 Copyright 1995 by Sensotec, Inc. all rights
DA604D DA954D DA501D DA801D COMPACT SERIES. INSTALLATION / OWNER'S MANUAL Mobile Power Amplifiers
 DA604D DA954D DA501D DA801D COMPACT SERIES INSTALLATION / OWNER'S MANUAL Mobile Power Amplifiers Preparation Please read entire manual before installation. Due to the technical nature of amplifiers, it
Rev.8.8 SSRMAN-1P SERIES USERS MANUAL SSR INTELLIGENT PHASE ANGLE CONTROL MODULE COPYRIGHT 2015 NUWAVE TECHNOLOGIES, INC.
 Rev.8.8 MAN-1P SERIES USERS MANUAL INTELLIGENT PHASE ANGLE CONTROL MODULE COPYRIGHT 2015 MAN-1P Users Manual Page 2 TABLE OF CONTENTS 1. Ordering Codes... 2 2. Description... 3 2.1 Features... 3 3. Installation
15 Amp Digital High Frequency PWM Motor Speed Controller SPD-315-D and SPD-315-DS
 15 Amp Digital High Frequency PWM Motor Speed Controller SPD-315-D and SPD-315-DS The SPD-315-D(S) PWM controller allows you to control the speed of a motor, brightness of a lamp or other load using a
Directed Energy, Inc Oakridge Dr., Suite 100, Fort Collins, CO
 PCO-7121 Laser Diode Driver Module Operation Manual Directed Energy, Inc. 1609 Oakridge Dr., Suite 100, Fort Collins, CO 80525 sales@ixyscolorado.com www.ixyscolorado.com Contents Contents... 3 Safety...
Installation and Operation Manual MSI. Multi-Sensor Interface Hub. Interface Module for all Sensors Network and Wireless CAUTION
 Installation and Operation Manual MSI Multi-Sensor Interface Hub Interface Module for all Sensors Network and Wireless CAUTION This equipment complies with the limits for a Class B digital device, pursuant
A1000 ALPHA and A1200 ALPHA Meter Installation Instructions. General. Installation. For A1000 ALPHA Type R, A1000 ALPHA Type C, and A1200 ALPHA Meters
 January 003 IL4-401B A1000 ALPHA and A100 ALPHA Meter Installation Instructions For A1000 ALPHA Type R, A1000 ALPHA Type C, and A100 ALPHA Meters General This leaflet contains general installation instructions
Log Periodic Antenna
 Page 1 of 10 Log Periodic Antenna ALFM 80120 88 MHz to 108 MHz (Extendible to 80 to 120 MHz) Page 2 of 10 Table of Contents 1.0 Introduction... 3 2.0 Product Specifications... 4 3.0 Important Safety Precautions...
AIU-2 Installation Manual
 AIU-2 Installation Manual RESEARCH CONCEPTS INC. 9501 Dice Lane Lenexa, Kansas 66215 USA VOICE: (913) 422-0210 FAX: (913) 422-0211 www.researchconcepts.com support@researchconcepts.com Contents subject
MODEL 3810/2 Line Impedance Stabilization Network
 EMC TEST SYSTEMS FEBRUARY 1996 REV C PN 399197 MODEL 3810/2 Line Impedance Stabilization Network OPERATION MANUAL USA P.O. Box 80589 Austin, Texas 78708-0589 2205 Kramer Lane, Austin, Texas 78758-4047
CCE Image may differ from the actual product By Martin Labbé, eng., Jasmin Goupil & Louis Perreault
 CCE-32 1.09 Image may differ from the actual product By Martin Labbé, eng., Jasmin Goupil & Louis Perreault Index 1. General description... 5 2. Applications... 5 3. Installation... 5 4. Connections...
PEAKTRONICS AMC-103 ADDITIONAL FEATURES. AC Motor Controller, 2A AMC-103 AMC-103A AMC-103B
 PEAKTRONICS The Peaktronics AC Motor Controller is a compact module that is intended for controlling small AC actuator motors of up to 2A. The is very well suited for applications where space constraints
Document Version 1.2
 Document Version 1.2 INTRODUCTION The X-LOAD LB-2 Reactive Load Box is a high-quality passive load box from Fractal Audio Systems. It offers a range of great features including front-panel output level
INSTALLATION AND MAINTENANCE MANUAL FOR GROUND MONITOR GM-250 COPYRIGHT 1983 AMERICAN MINE RESEARCH, INC.
 INSTALLATION AND MAINTENANCE MANUAL FOR GROUND MONITOR GM-250 COPYRIGHT 1983 AMERICAN MINE RESEARCH, INC. MANUAL PART NUMBER 180-0036 ORIGINAL: 1-17-83 REVISION: B (8-26-86) NOT TO BE CHANGED WITHOUT MSHA
XPA2100 XPA4100 XPA6100. XPA SERIES INSTALLATION/OWNER S MANUAL Mobile Power Amplifiers
 XPA2100 XPA4100 XPA6100 XPA SERIES INSTALLATION/OWNER S MANUAL Mobile Power Amplifiers XPA SERIES INSTALLATION Preparation Please read entire manual before installation. Due to the technical nature of
Multiplier and Divider Card
 Multiplier and Divider Card Instruction Manual Model D11005-000 Driven by Excellence D.C. DRIVES, A.C. INVERTERS, SOLID STATE STARTERS, SYSTEM INTERFACE CIRCUITS AND ENGINEERED SYSTEMS Table of Contents
Model 1791 VHF Radio User's Manual
 Model 79 VHF Radio User's Manual ALL WEATHER INC 65 NATIONAL DRIVE SACRAMENTO, CA 95834 WWW.ALWEATHERINC.COM 79 VHF RADIO USER'S MANUAL CONTENTS INTRODUCTION... Description... Transmitter Module... Power
MDC V, 2A Brushless Controller. User s Guide E. Landon Drive Anaheim, CA
 MDC010-024031 24V, 2A Brushless Controller User s Guide A N A H E I M A U T O M A T I O N 4985 E. Landon Drive Anaheim, CA 92807 e-mail: info@anaheimautomation.com (714) 992-6990 fax: (714) 992-0471 website:
XIA3145 INSTALLATION/OWNER S MANUAL 2/1-Channel Mobile Power Amplifier
 XIA3145 INSTALLATION/OWNER S MANUAL 2/1-Channel Mobile Power Amplifier XIA3145 INSTALLATION Preparation Please read entire manual before installation. Due to the technical nature of amplifiers, it is highly
PCO-7114 Laser Diode Driver Module Operation Manual
 PCO-7114 Laser Diode Driver Module Operation Manual Directed Energy, Inc. 1609 Oakridge Dr., Suite 100, Fort Collins, CO 80525, (970) 493-1901 sales@ixyscolorado.com www.ixyscolorado.com Manual Document
MBC Bipolar Microstep Driver. User s Guide. 910 East Orangefair Lane, Anaheim, CA
 MBC032561 Bipolar Microstep Driver User s Guide A N A H E I M A U T O M A T I O N 910 East Orangefair Lane, Anaheim, CA 92801 e-mail: info@anaheimautomation.com (714) 992-6990 fax: (714) 992-0471 website:
Digital Lighting Systems, Inc.
 PD408-AN0-277 ANALOG 0-0 V 0-0V analog control 4 Channel x 2250 W Dimmer & Switch Packs 220/240/277 Volts operation PD408-AN0-277 4 circuit Analog -0V 4 x 8 A. Dimmer pack Serial Number Digital Lighting
Instruction Sheet REB SERIES. Rotating Sliding Base REB18
 Instruction Sheet REB SERIES Rotating Sliding Base REB14 REB18 THANK YOU Thank you for purchasing the REB Series Rotating Sliding Base. Please read these instructions thoroughly before installing this
Ordering Information. Ratchet Relay G4Q. Plug-in Models. Model Number Legend
 Ratchet Relay CSM OEE_DS_E_1_1 Unique Ratchet Mechanism Assures Positive Alternate Transfer/Switching Operation Each contact in the double-pole contact mechanism performs alternate make-brake operation
PRC-LA Installation Guide
 1321 S. State College Blvd., Fullerton, CA 92831 USA Weight Limit Maximum Flat Panel Weight: Warning Statements 50 lbs. THE WALL STRUCTURE MUST BE CAPABLE OF SUPPORTING AT LEAST FOUR TIMES THE WEIGHT OF
SDI SPECTRADYNAMICS, INC. LOW NOISE FREQUENCY REFERENCE OPERATING MANUAL
 SPECTRADYNAMICS, INC. LOW NOISE FREQUENCY REFERENCE LNFR-100E OPERATING MANUAL SPECTRADYNAMICS, INC 1849 Cherry St. Unit 2. Louisville, CO 80027 Phone: (303) 665-1852 Fax: (303) 604-6088 www.spectradynamics.com
M2/M2A AC-DC Power Supply Operator s Manual
 M2/M2A AC-DC Operator s Manual Part Number: 71-0247RK Revision: A Released: 5/18/15 www.rkiinstruments.com Product Warranty RKI Instruments, Inc. warranties gas alarm equipment sold by us to be free from
HTA125A/250A. Power Amplifiers. Installation & Use Manual
 HTA125A/250A Power Amplifiers Installation & Use Manual Specifications subject to change without notice. 2010 Bogen Communications, Inc. All rights reserved. 54-5832-04B 1011 NOTICE: Every effort was made
TAG5000 WIRELESS PHASER. Instruction Manual HD ELECTRIC COMPANY 1475 LAKESIDE DRIVE WAUKEGAN, ILLINOIS U.S.A.
 TAG5000 WIRELESS PHASER Instruction Manual TM HD ELECTRIC COMPANY 1475 LAKESIDE DRIVE WAUKEGAN, ILLINOIS 60085 U.S.A. PHONE 847.473.4980 FAX 847.473.4981 website: www.hdelectriccompany.com DESCRIPTION
Fab King OWNER S MANUAL FOR RYE-Corp Model: RWC-02/ Fab King
 Fab King OWNER S MANUAL FOR RYE-Corp Model: RWC-02/ Fab King RYE-Corp. 601 Tate Coley Rd Lenoir City, TN 37771 PHONE: (865) 988-3822 www.rye-corp.com 1 MANUFACTURERS WARRANTY ONE YEAR LIMITED PARTS & LABOR
Model 7000 Low Noise Differential Preamplifier
 Model 7000 Low Noise Differential Preamplifier Operating Manual Service and Warranty Krohn-Hite Instruments are designed and manufactured in accordance with sound engineering practices and should give
AMC-100 AMC-101 AMC-100 AMC-100B AMC-100D AMC-101 AMC-101B AMC-101D AMC-100A AMC-100C AMC-100E AMC-101A AMC-101C AMC-101E. AC Motor Controllers
 The Indelac / AC Motor Controllers are used for proportional positioning of split phase AC actuator motors. An external command signal of 0-0V, -V, or -0mA can be used to compare to a feedback signal from
SRVODRV REV7 INSTALLATION NOTES
 SRVODRV-8020 -REV7 INSTALLATION NOTES Thank you for purchasing the SRVODRV -8020 drive. The SRVODRV -8020 DC servo drive is warranted to be free of manufacturing defects for 1 year from the date of purchase.
INSTRUCTION LEAFLET IL17537B F FRAME IQ ENERGY SENTINEL TM INSTALLATION INSTRUCTIONS FOR F FRAME IQ ENERGY SENTINEL TM
 F FRAME IQ ENERGY SENTINEL TM INSTALLATION INSTRUCTIONS FOR F FRAME IQ ENERGY SENTINEL TM INSTRUCTION LEAFLET IL17537B IL17537B For more information visit: www.cutler-hammer.eaton.com Effective 10/02 IL
SCMI Cross Cut Kit Installation Instructions
 SCMI Cross Cut Kit Installation Instructions Please note this installation kit is designed for installation on SCMI Sliding Table Saws (models SI12,SI16, SI16N, Hydro 3200, 300 Nova), Cross-Cut fences.
Model 416A Gate and Delay Generator Operating and Service Manual
 Model 416A Gate and Delay Generator Operating and Service Manual Printed in U.S.A. ORTEC Part No. 733160 1202 Manual Revision E Advanced Measurement Technology, Inc. a/k/a/ ORTEC, a subsidiary of AMETEK,
INSTRUCTIONS PS2500 POWER SUPPLY
 INSTRUCTIONS PS2500 POWER SUPPLY The Hoefer PS 2500 Power Supply will furnished power to Constant Voltage or Constant Power modes of operation. It will accurately supply 0-2500 volts, 0-300 ma or 0-375
Current Probes. User Manual
 Current Probes User Manual ETS-Lindgren Inc. reserves the right to make changes to any product described herein in order to improve function, design, or for any other reason. Nothing contained herein shall
Radio Remote Controls Manual K Series
 Radio Remote Controls Manual K Series PN 52764 2010.12.20 Rev. 2 K Series radio control manual 1 Conductix Incorporated The technical data and images which appear in this manual are for informational purposes
Broadband Step-Up Transformer. User Manual
 Broadband Step-Up Transformer User Manual 990-1930 09/2004 Introduction Introduction About this unit The APC Step-Up Transformer provides 220 V power from 60 VAC Broadband cable systems. Safety Electrical
SI-125 Power Amplifier Manual 6205 Kestrel Road; Mississauga, Ontario; Canada; L5T 2A1 November 2016, Rev 0.5
 SI-125 Power Amplifier Manual 6205 Kestrel Road; Mississauga, Ontario; Canada; L5T 2A1 November 2016, Rev 0.5 Phone: (905) 564-0801 Fax: (905) 564-0806 www.telecor.com E:\T2-108\T2-M108-ABC\T2-M108-B.doc/AD
SERIES 70. R SERVO PRO Version 3.0 OPERATION AND MAINTENANCE MANUAL. The High Performance Company
 SERIES 70 R SERVO PRO Version 3.0 OPERATION AND MAINTENANCE MANUAL The High Performance Company Contents 1.0 Safety Instructions - Definition of Terms 2 1.1 Hazard-free Use 2 1.2 Qualified Personnel 2
INSTRUCTION MANUAL UTL260
 INSTRUCTION MANUAL UTL260 1-800-547-5740 Fax: (503) 643-6322 www.ueitest.com email: info@ueitest.com Introduction The UTL260 has all the features and measurement functions that appliance technicians need.
User Guide. Digital AC/DC Clamp Meter Model 38394
 User Guide Digital AC/DC Clamp Meter Model 38394 Introduction Congratulations on your purchase of Extech s 38394 AC/DC Clamp Meter. This clamp meter measures AC/DC Current to 600A, DC/AC Voltage, Resistance,
TABLE OF CONTENTS WARRANTY
 DM4000 CONTROL SERIES CONTROLS Instruction Manual Field Programmable Digital Tachometer for Rate and Time P.O. Box 10 5000 W. 106th Street Zionsville, Indiana 46077 Phone (317) 873-5211 Fax (317) 873-1105
INSTRUCTION MANUAL LKG
 INSTRUCTION MANUAL LKG 610 Electrical Safety Analyzer With 10 ECG Connectors 110 Toledo Street Farmingdale, NY 11735 USA Homepage: www.netech.org Dear User, We appreciate your purchase of the LKG 610 Electrical
User s Guide. Digital AC/DC Clamp Meter Model 38394
 User s Guide Digital AC/DC Clamp Meter Model 38394 Introduction Congratulations on your purchase of Extech s 38394 AC/DC Clamp Meter. This clamp meter measures AC/DC Current to 600A, DC/AC Voltage, Resistance,
INSTRUCTION MANUAL INF Fax: (503)
") INSTRUCTION MANUAL INF151 1-800-547-5740 Fax: (503) 643-6322 www.ueiautomotive.com email: info@ueitest.com Introduction Congratulations on your purchase of the INF151 infrared thermometer. Like all UEi
INSTRUCTION MANUAL INF151 1-800-547-5740 Fax: (503) 643-6322 www.ueiautomotive.com email: info@ueitest.com Introduction Congratulations on your purchase of the INF151 infrared thermometer. Like all UEi
DYNAMIC ENGINEERING 435 Park Dr., Ben Lomond, Calif Fax Est.
 DYNAMIC ENGINEERING 435 Park Dr., Ben Lomond, Calif. 95005 831-336-8891 Fax 831-336-3840 http://www.dyneng.com sales@dyneng.com Est. 1988 User Manual PIM-Parallel-IO PMC IO Module for PMC Parallel IO PIM
Model 113 Scintillation Preamplifier Operating and Service Manual
 Model 113 Scintillation Preamplifier Operating and Service Manual Printed in U.S.A. ORTEC Part No. 717560 1202 Manual Revision B Advanced Measurement Technology, Inc. a/k/a/ ORTEC, a subsidiary of AMETEK,
PDB4. Four Channel Passive Direct Box USER'S GUIDE
 PDB4 Four Channel Passive Direct Box USER'S GUIDE IMPORTANT SAFETY INSTRUCTIONS - READ FIRST This symbol, wherever it appears, alerts you to important operating and maintenance instructions in the accompanying
99 Washington Street Melrose, MA Fax TestEquipmentDepot.com # # AAC Clamp Meter. Instruction Manual
 99 Washington Street Melrose, MA 02176 Fax 781-665-0780 TestEquipmentDepot.com #61-732 #61-736 400 AAC Clamp Meter Instruction Manual AC HOLD APO DC KMΩ mva WARNING Read First: Safety Information Understand
201AP Charge Amplifier User Manual
 Trig-Tek 201AP Charge Amplifier User Manual Publication No. 980996 Rev. A Astronics Test Systems Inc. 4 Goodyear, Irvine, CA 92618 Tel: (800) 722-2528, (949) 859-8999; Fax: (949) 859-7139 atsinfo@astronics.com
Model 9302 Amplifier-Discriminator Operating and Service Manual
 Model 9302 Amplifier-Discriminator Operating and Service Manual Printed in U.S.A. ORTEC Part No. 733690 1202 Manual Revision C Advanced Measurement Technology, Inc. a/k/a/ ORTEC, a subsidiary of AMETEK,
INSTRUCTION MANUAL MODEL 2455T SUBCARRIER MODULATOR
 INSTRUCTION MANUAL MODEL 2455T SUBCARRIER MODULATOR Data, drawings, and other material contained herein are proprietary to Cross Technologies, Inc., and may not be reproduced or duplicated in any form
Manual Carton Closing Staplers
 Operator s Manual Manual Carton Closing Staplers SHB00-A Item No. 6400 -/8" Crown Carton Closing Stapler 5/8" and /4" (5mm and 8mm) Ask for Genuine INTERCHANGE A58 and A4 Staples SHB50-C Item No. 640 -/4"
2001A. 200KHz Function Generator Instruction Manual. 99 Washington Street Melrose, MA Phone Toll Free
 2001A 200KHz Function Generator Instruction Manual 99 Washington Street Melrose, MA 02176 Phone 781-665-1400 Toll Free 1-800-517-8431 Visit us at www.testequipmentdepot.com WARRANTY Global Specialties
SSR VL-12P-xC-NCS
 HELLROARING TECHNOLOGIES, INC. P.O. BOX 1521 POLSON, MT 59860 406 883-3801 HTTP://WWW.HELLROARING.COM SUPPORT@HELLROARING.COM SSR-40150-200VL-12P-xC-NCS The SSR-40150-200VL-12P-xC-NCS is designed for Low
Your Global Flow Control Partner. Series 70 SERVO PRO Version 3.0 Operation and Maintenance Manual
 Your Global Flow Control Partner Series 70 SERVO PRO Version 3.0 Table of Contents 1.0 Safety Instructions - Definition of Terms...........................2 1.1 Hazard-free Use.......................................2
815-BR SERVO AMPLIFIER FOR BRUSH SERVOMOTORS
 815-BR SERVO AMPLIFIER FOR BRUSH SERVOMOTORS USER GUIDE September 2004 Important Notice This document is subject to the following conditions and restrictions: This document contains proprietary information
Broadband Current Probe Series Operation Manual
 Broadband Current Probe Series Operation Manual 1 TABLE OF CONTENTS INTRODUCTION 3 GENERAL INFORMATION 4 OPERATING INSTRUCTIONS 5 FORMULAS 6 MAINTENANCE 7 WARRANTY 8 2 INTRODUCTION CURRENT PROBE SPECIFICATIONS
DYNAMIC ENGINEERING 435 Park Dr., Ben Lomond, Calif Fax Est.
 DYNAMIC ENGINEERING 435 Park Dr., Ben Lomond, Calif. 95005 831-336-8891 Fax 831-336-3840 http://www.dyneng.com sales@dyneng.com Est. 1988 User Manual PIM-Universal-IO PMC IO Module PIM w/ SCSI II Bezel