1 Prepare your camera. 2 Start taking pictures 3 Check your pictures. 1 Install the software. 2 Connect your camera. 3 Load your images onto
|
|
|
- Magdalen Day
- 6 years ago
- Views:
Transcription
1
2 Digital Camera Operating Steps and Reference Guides Your camera includes two manuals: the EOS D30 Camera User s Guide and the Software Starter Guide. EOS D30 Camera User s Guide (This Document) Prepare your camera for use 2 Start taking pictures 3 Check your pictures Software Starter Guide Help Install the software from the Canon Digital Camera Solution Disk 2 Connect your camera to a computer 3 Load your images onto the computer 4 Process the images with the software 2
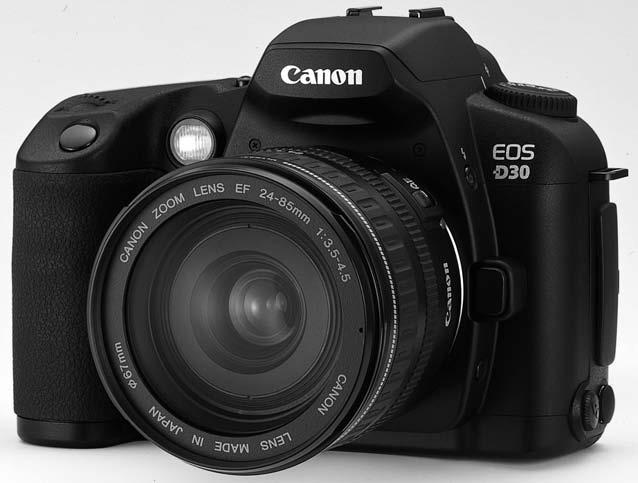
3 Thank you for purchasing this Canon product The Canon EOS D30 is a high-quality, high-precision, digital single-lens reflex camera with a CMOS sensor that has a total pixel count of 3.25 million pixels. This camera provides a full range of imaging options and functions ideal for every photographic use, from easy, fully automatic shots for first-time users to applications for experienced photographers. A CompactFlash card* (CF card Type, 2) is used as the recording media. Before you use your EOS D30, be sure to read this user s guide with your camera on hand. This will help you become more familiar with your camera, and learn how to operate it properly. * We strongly recommend that you use a Canon CF card. Introduction Test Shots and Warranty of Photographic Images Before taking important pictures, we would strongly recommend that you first shoot several trial images to make sure you are operating the camera correctly. Please note that the manufacturer is not liable for any consequential damages arising from any malfunction of the EOS D30 camera or recording media (CF card) that results in the failure of an image to be recorded or transferred to a computer. Warning Against Copyright Infringement Please note that your Canon EOS D30 camera is intended for personal use and should never be used in a way that infringes upon or contravenes international or domestic copyright laws and regulations. Please be advised that photographing performances, exhibitions, or commercial properties may contravene copyright or other legal rights, even if the photograph was taken for personal use. Canon and EOS are trademarks of Canon, Inc. Adobe and Photoshop are trademarks of Adobe Systems Incorporated. CompactFlash is a trademark of SanDisk Corporation. IBM PC/AT series computers are trademarks or registered trademarks of International Business Machines Corporation (IBM) in the U.S.A. Macintosh is a trademark of Apple Computers (U.S.A.), registered in the U.S.A. and other countries. Other corporate and product names used in this document are registered trademarks or trademarks of their respective corporations. 3
4 Check Your Accessories Before using your camera, make sure you have all the accessories shown on this and the following page. If any are missing, contact the store where you purchased your camera. q EOS D30 Camera w Strap (with eyepiece cover) e Battery Pack BP-5 r Compact Power Adapter CA-PS400 t DC Coupler DR-400 y CompactFlash Card FC-6M 4
5 Camera User s Guide Check Your Accessories u Interface Cable IFC-200 PCU i Video Cable VC-00 Introduction o Canon Digital Camera Solution Disk, Adobe Photoshop LE Disk!0EOS D30 Camera User s Guide (this document) English Edition INSTRUCTIONS! Software Starter Guide!2 Warranty 5
6 Contents Introduction Digital Camera Operating Steps and Reference Guides...2 Check Your Accessories...4 Precautions for Handling...2 Quick Guide...4 Nomenclature...6 Conventions Used in This Manual...22 Before You Begin...23 Replacing the Backup Battery...24 Charging the Battery Pack...25 Inserting and Removing the Battery Pack...27 Inserting the Battery Pack...27 Removing the Battery Pack...28 Using a Household Power Supply...29 Mounting and Detaching a Lens...30 Mounting a Lens...30 Detaching a Lens...30 Inserting a CF Card...3 Removing a CF Card...3 File Numbering System...32 Basic Operation...33 Main Switch...33 Shutter Button...33 Using the Electronic Dials...34 About the LCD Monitor...35 Menu Functions and Settings...36 Setting the Date and Time...38 Dioptric Adjustment in the Viewfinder...40 Holding the Camera Simple Picture Taking...4 Fully Automatic Picture Taking...42 Automatic Built-in Flash...43 AF-Assist Light...43 Check the Image Immediately...44 Check the Image in PLAY Mode...44 Checking the Image After it is Taken..45 Time Images Are Displayed for Checking...46 Erasing a Recorded Image (Single Image Erase)...47 Portrait Mode...48 Landscape Mode...49 Close-Up Mode...50 Sports Mode...5 Night Scene Mode Advanced Operations...53 Quality Selection...54 About ISO Speed...55 Selecting Parameters...56 Parameters...57 AF Mode Selection...58 One-Shot AF for Still Subjects...59 AI Servo AF for Moving Subjects...60 AI Focus AF...60 Focusing Point Selection...6 Focusing On an Off-Center Subject...62 Problem Subjects for Autofocusing...63 Manual Focus...63 INFO. Checking Camera Settings...64 Selecting a Metering Mode...65 Metering Modes...66 Selecting a Drive Mode...67 Setting the White Balance...68 White Balance Settings...69 Custom White Balance Setting...70 Program AE...72 Shutter Speed-Priority AE...74 Aperture-Priority AE...76 Checking the Depth of Field...77 Manual Exposure...78 Automatic Depth-of-Field AE...80 Setting Exposure Compensation...8 Autoexposure Bracketing...82 AE Lock...84 Self-timer Operation...85 Using the Eyepiece Cover...86 Bulb Exposures...87 Mirror Lockup Flash Photography...89 Using the Built-in Flash...90 Using the Built-in Flash in the Easy Shooting Zone...90 Using the Built-in Flash in the Creative Zone...90 Built-in Flash Range...9 Flash Sync Shutter Speed and Aperture Settings...9 Red-eye Reduction
7 Contents FE Lock...94 Flash Exposure Compensation...95 Flash Photography with the EOS-Dedicated 550EX Speedlite...96 Full Auto Flash...97 Taking Flash Pictures in Each Shooting Mode...97 High-Speed Sync (FP Flash)...98 FEB (Flash Exposure Bracketing)...98 FE Lock...99 Flash Exposure Compensation...99 Modeling Flash...99 Wireless Multi-Light/E-TTL Autoflash Photography...99 Using Non-Canon Flash Units Playing and Erasing Recorded Images...0 Viewing Recorded Images...02 Viewing a Single Image...02 Viewing the Index...02 Viewing Enlarged Images...03 JUMP Jumping to Another Image...03 INFO. Turning the Information Display On and Off...04 Automated Playback of Recorded Images (Auto playback)...05 Rotating an Image...06 Protecting an Image...07 Erasing Images (All Image Erase)...08 Formatting the CF Card...09 Print Order...0 Selecting Images for Printing... Print Type...3 Specifying Date Printing...4 Specifying File Number Printing...5 Connecting to a TV...6 Cleaning the CMOS Imaging Element..7 AF Modes and Drive Modes...34 Exposure Warnings...35 AE Lock Effects for Combinations of Focusing Point Selection and Metering Method...35 Program Line...36 Shutter Speed and Aperture Value Readouts...37 Troubleshooting...38 Major Accessories (Sold Separately)...40 Major Specifications...42 Message List...45 System Map...46 Index Menu Function Settings...9 List of Menu Functions...20 Custom Function Settings Reference...30 Basic Terminology for Digital Cameras and Digital Photography...30 Function Availability Table
8 EOS D30 This device complies with Part 5 of the FCC Rules. Operation is subject to the following two conditions: () This device may not cause harmful interference, and (2) this device must accept any interference received, including interference that may cause undesired operation. Note:This equipment has been tested and found to comply with the limits for class B digital devices, pursuant to Part 5 of the FCC Rules. These limits are designed to provide reasonable protection against harmful interference in a residential installation. This equipment generates, uses and can radiate radio frequency energy and, if not installed and used in accordance with the instructions, may cause harmful interference to radio communications. However, there is no guarantee that interference will not occur in a particular installation. If this equipment does cause harmful interference to radio or television reception, which can be determined by turning the equipment off and on, the user is encouraged to try to correct the interference by one or more of the following measures: Reorient or relocate the receiving antenna. Increase the separation between the equipment and receiver. Connect the equipment into an outlet on a circuit different from that to which the receiver is connected. Consult the dealer or an experienced radio/tv technician for help. Use of shielded cable is required to comply with class B limits in Subpart B of Part 5 of FCC Rules. Do not make any changes or modifications to the equipment unless otherwise specified in the manual. If such changes or modifications should be made, you could be required to stop operation of the equipment. Canon U.S.A. Inc. One Canon Plaza, Lake Success, NY 042, U.S.A. Tel No. (56) This digital apparatus does not exceed the Class B limits for radio noise emissions from digital apparatus as set out in the interference-causing equipment standard entitled Digital Apparatus, ICES-003 of the Industry Canada. Cet appareil numérique respecte les limites de bruits radioélectriques applicables aux appareils numériques de Classe B prescrites dans la norme sur le matériel brouilleur: Appareils Numériques, NMB-003 édictée par l Industrie Canada. The Mark is a directive conformity mark of the European Community (EC). This mark indicates that the product complies with Australia s EMC regulations. Bij dit produkt zijn batterijen geleverd. Wanneer deze leeg zijn, moet u ze niet weggoolen maar inleveren als KCA 8
9 SAFETY PRECAUTIONS Before using the camera, please ensure that you have read and understood the safety precautions described below. Always ensure that the camera is operated correctly. The safety precautions noted on the following pages are intended to instruct you in the safe and correct operation of the camera and its accessories to prevent injuries or damage to yourself, other persons and equipment. In the next few pages, the term equipment refers primarily to the camera and its power supply accessories. WARNINGS Do not aim the camera directly into the sun or at other intense light sources that could injure your eyesight. Do not trigger the flash in close proximity to human or animal eyes. Exposure to the intense light produced by the flash may injure eyesight. In particular, remain at least one meter (39 inches) away from infants when using the flash. Store this equipment out of the reach of children and infants. Accidental damage to the camera or batteries by a child could result in serious injury. In addition, placement of the wrist strap around a child s neck could result in asphyxiation. Be particularly careful to keep the button batteries (CR2025 lithium) used in the camera out of the reach of children. Seek medical assistance immediately if a child swallows a battery. Do not attempt to disassemble or alter any part of the equipment that is not expressly described in this guide. Disassembly or alteration may result in high-voltage electrical shock. Internal inspections, alterations and repairs should be conducted by qualified service personnel authorized by your camera distributor or a Canon Customer Support Help Desk. To avoid the risk of high-voltage electrical shock, do not touch the flash portion of the camera if it has been damaged. Similarly, never touch internal portions of the equipment that become exposed as a result of damage. There is a risk of high-voltage electrical shock. Please take the first opportunity to consult your camera distributor or a Canon Customer Support Help Desk. Stop operating the equipment immediately if it should emit smoke or noxious fumes. Failure to do so may result in fire or electrical shock. Set the camera s main switch to the Off position and remove the camera battery or unplug the power cord from the electrical outlet immediately. Confirm that smoke or fume emissions cease. Please consult your camera distributor or the closest Canon Customer Support Help Desk. Stop operating the equipment if it is dropped or the casing is damaged. Failure to do so may result in fire or electrical shock. Set the camera s main switch to the Off position and remove the camera battery or unplug the power cord from the electrical outlet immediately. Please consult your camera distributor of the closest Canon Customer Support Help Desk. Prevent the equipment from contact with, or immersion in, water and other liquids. Do not allow liquids to enter the interior. The camera has not been waterproofed. If the exterior comes into contact with liquids or salt air, wipe it dry with a soft, absorbent cloth. In the event that water or other foreign substances enter the interior, immediately set the camera s main switch to the Off position and remove the camera battery or unplug the power cord from the electrical outlet immediately. Continued use of the equipment may result in fire or electrical shock. Please consult your camera distributor or the closest Canon Customer Support Help Desk. Introduction 9
10 Do not use substances containing alcohol, benzene, thinners or other flammable substances to clean or maintain the equipment. The use of these substances may lead to fire. Do not cut, damage, alter or place heavy items on the power adapter cord. Any of these actions may cause an electrical short circuit, which may lead to fire or electrical shock. Replace a broken or damaged power adapter cord. Do not handle the power cord if your hands are wet. Handling it with wet hands may lead to electrical shock. When unplugging the cord, ensure that you hold the rigid portion of the plug. Pulling the flexible portion of the cord may damage or expose the wire and insulation, creating the potential for fires or electrical shocks. Use of power sources not expressly recommended for this equipment may lead to overheating, distortion of the equipment, fire, electrical shock or other hazards. Use only the recommended power accessories. Power down the computer and unplug the power cord before attempting to connect the interface cable, to avoid the risk of electrical shock. Do not place the batteries near a heat source or expose them to direct flame or heat. Neither should you immerse them in water. Such exposure may damage the batteries and lead to the leakage of corrosive liquids, fire, electrical shock, explosion or serious injury. Do not attempt to disassemble, alter, or apply heat to the batteries. There is serious risk of injury due to an explosion. Immediately flush with water any area of the body, including the eyes and mouth, or clothing, that comes into contact with the inner contents of a battery. If the eyes or mouth contact these substances, immediately flush with water and seek medical assistance. Avoid dropping or subjecting the batteries to severe impacts that could damage the casings. This could lead to leakage and injury. Do not short-circuit the battery terminals with metallic objects, such as key holders. This could lead to overheating, burns and other injuries. Use the supplied battery case to transport or store the battery pack. Before you discard a battery, cover the terminals with tape or other insulators to prevent direct contact with other objects. Contact with the metallic components of other materials in waste containers may lead to fire or explosions. Discard batteries in specialized waste facilities if available in your area. Use of batteries not expressly recommended for this equipment may cause explosions or leaks, resulting in fire, injury and damage to the surroundings. Use only recommended batteries and accessories. Use only the recommended compact power adapter to charge the Battery Pack BP-5 rechargeable batteries. Use of chargers not expressly recommended may result in overheating, distortion, fire or electrical shock. Disconnect the compact power adapter from both the camera and electrical outlet after recharging and when the camera is not in use to avoid fires and other hazards. The camera terminal of the compact power cord is designed for exclusive use with the EOS D30. Do not use it with other products or batteries. There is a risk of fire and other hazards. 0
11 CAUTIONS Avoid using, placing or storing the equipment in places subject to strong sunlight or high temperatures, such as the dashboard or trunk (boot) of a car. Exposure to intense sunlight and heat may cause the batteries to leak, overheat or explode, resulting in fire, burns or other injuries. High temperatures may also cause deformation of the casing. Ensure that there is good ventilation when using the compact power adapter to charge the battery pack or power the camera. Do not store the equipment in humid or dusty areas. Storage in these areas could lead to fire, electrical shock or other damage. Be careful not to bang the camera or subject it to strong impacts or shocks that could lead to injury or damage the equipment when wearing or holding it by the wrist strap. Be careful not to cover the flash with your fingers when shooting. In addition, do not touch the surface of the flash after taking several pictures in rapid succession. Either action could result in burns. Preventing Malfunctions Avoid Strong Magnetic Fields Never place the camera in close proximity to electric motors or other equipment generating strong electromagnetic fields. Exposure to strong magnetic fields may cause malfunctions or corrupt image data. Avoid Condensation Related Problems Moving the equipment rapidly between hot and cold temperatures may cause condensation (water droplets) to form on its external and internal surfaces. You can avoid this by placing the equipment in an airtight, resealable plastic bag and letting it adjust to temperature changes slowly before removing it from the bag. If Condensation Forms Inside the Camera Stop using the camera immediately if you detect condensation. Continued use may damage the equipment. Remove the CF card and battery or power cord (if connected) from the camera and wait until the moisture evaporates completely before resuming use. Extended Storage When not using the camera for extended periods of time, remove the battery (except the CR2025 lithium button battery) and store the equipment in a safe place. Storing the camera for extended periods with a battery installed will run down the battery and may damage the camera. Important Safety Functions and Preventive Measures When the CF Card Access Lamp is blinking, do not remove the CF card from the camera. Since the card is reading and writing data when the lamp is blinking, removal of the CF card at this time will damage the card. Do not use any cable other than that supplied with the camera. Use the supplied interface cable to connect the camera to a computer. Use of any other cable may lead to a malfunction. Introduction
12 Precautions for Handling The Camera () This camera is a precision instrument. Do not drop it or expose it to physical shock. (2) The camera is not waterproof and should not be used in wet conditions or underwater. If the camera gets wet, take it to your nearest Canon dealer as soon as possible. If small amounts of water splash onto the camera, wipe it with a clean dry cloth. If the camera is exposed to salty air, wipe it thoroughly with a slightly damp cloth. (3) Never leave the camera close to devices that generate strong magnetic fields, such as magnets or electric motors. Do not operate or leave the camera in areas where strong electromagnetic signals are generated, such as near electronic transmission towers. Exposing the camera to strong electromagnetic signals can cause it to malfunction and destroy recorded image data. (4) Do not leave the camera in hot locations, such as in a car sitting in direct sunlight. High temperatures can damage the camera. (5) The camera contains precision circuits. Never attempt to disassemble the camera or service it yourself. (6) Use a commercially available blower brush to remove any dust that accumulates on the camera lens, viewfinder, mirror, or focusing screen. Do not use cleaners that contain organic solvents to wipe off the camera body or lens. If the camera is very soiled, consult your nearest Canon dealer. (7) Do not touch the camera s electrical contacts with your hands. Doing so could corrode the contacts and interfere with the camera s normal operation. (8) If you take the camera quickly from a cold location into a warm one, condensation can form on the outside and inside of the camera. To prevent this, place the camera in an airtight, resealable plastic bag until it warms up to the ambient temperature. (9) Do not use the camera if condensation forms on it, or you could damage it. If this occurs, remove the CF card and battery from the camera, and wait until the condensation has evaporated before using the camera. (0) If the camera will not be used for an extended period, remove its battery and store the camera in a cool, dry, well-ventilated location. While the camera is in storage, operate its shutter periodically to make sure that it is working. () Avoid storing the camera in locations where potentially corrosive chemicals are used, such as in a laboratory. (2) If the camera has been in storage for an extended period, check its components before using it. If you have not used the camera for some time or are planning to take shots you will not want to lose (overseas vacation, etc.), have the camera checked by your Canon dealer beforehand, or check for yourself that the camera components are working properly. LCD Panel and LCD Monitor () LCD displays are manufactured using high-precision technology. Even so, very small black, red, or green dots can occasionally appear on a display. This is within the normal 99.98% range for valid picture elements (pixels), and does not indicate a fault. Such aberrations on the display also do not affect recorded images. (2) Do not press hard on an LCD display or subject it to impacts, as this can cause display flaws and damage. (3) If an LCD display becomes soiled, clean it with a commercially available blower brush, or wipe it with a soft cloth, taking care not to scratch the screen. If an LCD display becomes extremely soiled, consult your nearest Canon dealer. 2
13 Precautions for Handling (4) By their nature, LCD displays react more slowly at low temperatures, and may appear dark at high temperatures. The display will return to normal at room temperature. Lithium Backup Battery () Store lithium batteries out of reach of small children. The chemicals in these batteries are very dangerous if the battery is accidentally swallowed. If this happens, seek medical attention at once. (2) Do not use metal instruments such as pliers to hold the battery, or you could cause a short circuit. (3) Do not disassemble or heat the battery, or you could rupture it. Introduction CF Card () The CF card is a precision device. Do not drop CF cards or expose them to vibrations. Doing so could lose the images recorded on them. (2) Do not store or use CF cards near objects that generate magnetic fields, such as TVs, speakers, or magnets, or in locations affected by static electricity. Doing so could lose the images recorded on the CF card. (3) Do not place CF cards in direct sunlight or close to heating appliances. Doing so can distort the cards and make them unusable. (4) Do not spill liquids onto CF cards. (5) Always store your CF cards in a case or cabinet to protect the data stored on them. (6) Use only CF cards specified by Canon. Otherwise, you may be unable to record or play back images. (7) Do not bend CF cards, or subject them to strong impacts. (8) Do not store CF cards in hot, dusty, or humid locations, or in locations exposed to static electricity or magnetic fields. Lens Electrical Contacts After removing a lens from the EOS D30, set the lens with its mounting side facing up, and attach the dust cap to prevent damage to the electrical contacts and lens surface. Electrical Contacts 3
14 Quick Guide See the page indicated ( ) for more information. Charge the battery pack Connect the power cord to the adapter, then attach the battery. When the charge lamp stops blinking and stays lit, the battery is completely charged. A full battery charge takes approximately 90 minutes. ( 25) 2Insert the battery pack. Open the battery chamber cover and slide the battery pack into position until it locks into place. Press the cover closed until it clicks shut. ( 27) 5Mount the lens. Align the red dots on the lens and camera and turn the lens in the direction shown by the arrow in the diagram until it clicks into place. ( 30) 6Set the focus mode switch on the lens to AF. ( 30) 9Focus on the subject. Look through the viewfinder and place the AF frame over the subject. Then press the shutter button down halfway to focus. ( 33) In low-light conditions or backlit daylight conditions, the built-in flash fires automatically. ( 90) 4 0Take the shot. Press the shutter button down fully. ( 33)
15 Quick Guide 3Open the CF card slot cover. Slide the cover in the direction shown by the arrow, then open it. ( 3) 4Insert the CF card. Insert the CF card, then close the cover. ( 3) Introduction 7Set the Main Switch to ON. ( 33) 8Set the Mode Dial to (Full Auto). ( 42) Check the image. The image is displayed for approximately 2 seconds after the shot. ( 44) To check other images you have taken, see Check the Image Immediately ( 44) and Viewing Recorded Images ( 02). To erase images you have taken, see Erasing a Recorded Image (Single Image Erase) ( 47). 5
16 Nomenclature DRIVE Drive mode button ( 67) Metering mode button/ Flash exposure compensation button ( 65, 95) LCD panel ( 8) Main dial ( 34) Shutter button ( 33) AF AF mode/wb button ( 58, 70) WB Lens mount index ( 30) Built-in flash ( 90) Hot shoe ( 96) Flash button ( 90) Mode dial ( 20) Strap eyelet ( 23) Grip (Battery chamber) DC coupler cord channel ( 29) Red-eye reduction lamp( 93) AF-assist light emitter ( 43) Self-timer operating display ( 85) Reflex mirror ( 88, 7) Expansion electronics cover ( 6) Lens release button ( 30) Remote control terminal PC terminal ( 00) Depth-of-field preview button ( 77, 99) Locking pins Lens mount Electrical contacts ( 3) Inside the expansion electronics cover DIGITAL terminal (refer to Software Starter Guide) VIDEO OUT terminal ( 6) See the page indicated ( ) for more information. 6
17 Nomenclature Eyecup ( 86) Viewfinder ( 9) Main switch ( 33) MENU Menu button ( 36) INFO. Info button ( 64, 04) JUMP Jump button ( 03) Diopter adjustment knob ( 40) Quick control dial switch ( 35) AE lock button/fe lock button ( 84, 94) Focusing point selector ( 6) Access lamp ( 3) Strap eyelet ( 23) Introduction Index/ Enlarge button ( 02, 03) Playback button ( 44, 02) LCD monitor ( 36) Erase button ( 47, 08) Tripod socket Backup battery chamber cover ( 24) Set button ( 36) Quick control dial ( 35) CF card slot cover ( 3) Battery chamber cover release lever ( 27) Battery chamber cover ( 27) Inside CF Card Slot Cover CF card slot (accepts card type or 2) ( 3) CF card eject button ( 3) 7
18 Nomenclature LCD Panel Shutter speed ( -, ) Data processing ( ) Backup battery warning ( ) Cleaning warning ( ) Parameters ( ~ ) ISO Speed ( ~ ) CF full warning ( ) CF error warning ( ) Focusing point ( ) Error code ( - ) Cleaning ( ) Quality Large/Fine Large/Normal Small/Fine Small/Normal RAW White balance mode Auto Daylight Cloudy Tungsten Fluorescent Flash Custom Aperture value ( - ) Drive mode One-shot Continuous Self-timer Possible images that can still be taken ( - ) Self-timer countdown ( - ) Bulb exposure time ( - ) ISO speed ( ) AF mode ONE SHOT AF AI FOCUS AF AI SERVO AF Exposure step scale Custom function icon Beep icon Exposure level Exposure compensation amount AEB level Flash adjustment correction level Red-eye reduction lamp indicator CF card write access Battery check icon Red-eye reduction icon Flash exposure compensation icon AEB Metering mode Evaluative metering Partial metering Center-weighted averaging metering Manual focus icon The above diagram shows the LCD panel with all icons and indicators displayed. In actual use, the items displayed differ according to the camera settings. 8
19 Nomenclature Viewfinder Information New laser matte screen Focusing points Partial metering circle Introduction AE lock/fe lock indicator In-focus indicator Flash-ready indicator FE lock underexposure warning High-speed sync indicator (FP flash) Exposure level Exposure compensation amount AEB level Red-eye reduction lamp indicator CF full warning ( ) CF error warning ( ) Focusing point indicator Shutter speed ( -, ) Data processing ( ) Aperture value ( - ) The above diagram shows the LCD panel with all icons and indicators displayed. In actual use, the items displayed differ according to the camera settings. 9
20 Nomenclature Mode Dial The Mode Dial is divided into two functional zones. Creative zone Full Auto Image Easy zone shooting zone q Easy shooting zone All you do is press the shutter button. :Full Auto ( 42) Lets you take fully automatic pictures the camera makes all the settings. Image zone Lets you take fully automatic pictures in specific situations. : Portrait ( 48) : Landscape ( 49) : Close-up ( 50) : Sports ( 5) : Night Scene ( 52) w Creative zone Lets you make a variety of settings. : Program AE ( 72) : Shutter speed-priority AE ( 74) : Aperture-priority AE ( 76) : Manual exposure ( 78) : Auto depth-of-field priority AE ( 80) See the page indicated ( ) for more information. 20
21 Nomenclature Compact Power Adapter CA-PS400 Power cord ( 25, 29) Battery pack connectors ( 25) Attach battery packs for charging. Introduction Power cord socket ( 25, 29) Plug in power cord here. Charge lamp ( 25) Back DC coupler socket ( 29) Plug in cord for DC coupler here. DC coupler plug ( 29) Plug into DC coupler socket of compact power adapter. DC Coupler DR-400 DC coupler cord ( 29) 2
22 Conventions Used in This Manual All descriptions in this manual assume that the Main Switch is already set to ON. Set it to ON before proceeding with any operation. In this manual, the icon indicates the Main Dial. In this manual the icon indicates the Quick Control Dial. In this manual the icon indicates the SET button, used to set menu functions and custom functions. In this manual, the [C.Fn] symbol indicates a brief explanation of the respective custom function. For details, refer to Custom Function Settings ( 24). The camera control icons and markings in this booklet correspond to the icons and markings on the camera. See "Nomenclature" on page 6. Reference page numbers are shown in parentheses ( ). The procedures in this user s guide use a Canon EF 24-85mm F USM lens for reference. The descriptions also assume that the menu functions and custom functions are set to the default settings. The icons ( 4 ), ( 6 ), and ( 6 ) indicate that the function operates on a timer, and remains in effect after the button is released. The icons represent 4, 6, or 6 seconds respectively. In general, the illustrations used for explaining procedures are taken with a single-lens reflex camera using 35 mm film. This user s guide uses the following symbols as described: : Indicates precautions about potential problems with photographing. : Indicates additional information you may find helpful. : Indicates useful pointers for better camera operation or better photographs. 22
23 Before You Begin This chapter describes preparations and settings you need to make before you begin shooting, as well as how the shutter button operates. Eyepiece cover Attaching the Strap Pass the end of the strap through the strap eyelet from beneath, then back in and out of the strap clasp as shown. Pull the strap to make sure it does not slip out of the clasp. The eyepiece cover is attached to the strap. ( 86)
24 Replacing the Backup Battery When the backup battery s power level runs low, the message appears on the camera s LCD panel. If this happens, you will need to purchase a replacement CR2025 battery and replace the backup battery in your camera as follows. If you replace the backup battery while the camera is connected to a battery pack with power remaining or to a DC coupler, the date, time, and other menu functions will retain their settings. Set the Main Switch to OFF. 2 Open the backup battery chamber cover by turning it 45 degrees counterclockwise, as shown by the arrow in the diagram. (+) ( ) Be careful not to rotate the cover more than 45 degrees. 3 Remove the old backup battery. Turn the camera so the backup battery chamber faces down, and press the edge of the battery to remove it. 4Insert a fresh backup battery. Make sure the battery s positive (+) side faces up. 5 Close the cover by turning it clockwise, as shown by the arrow in the diagram. If the date and time now displayed in the LCD panel are incorrect, you will need to set them. ( 38) The backup battery must be a CR2025 button-type lithium battery. 24
25 Charging the Battery Pack Connect the power cord. Connect the power cord to the compact power adapter. Insert the plug into a power outlet. Battery charge 0 50% 50 75% Over 75% 00% mark Charge lamp Blinks once per second Blinks twice per second Blinks three times per second Stays on 2 Remove the cover. Store the cover in a place where it will not be lost. If you remove the battery from the camera, be sure to reattach the cover to protect against shorting. 3 Place the battery in the adapter. Align the end of the battery with the mark on the adapter, press down on the battery, and slide it into place. To remove the battery, use the reverse of the above. Batteries can be charged in either the left or right side of the adapter. 4Charge the battery pack. As soon as you place the battery pack in the compact power adapter, the charge lamp starts blinking and charging begins. When charging is complete, the lamp stops blinking and stays on. It can take up to 90 minutes to fully charge a battery pack. You can check whether a battery is charged by seeing whether the charge lamp blinks or stays on. When charging is complete, the charge lamp stops blinking and stays on. You can continue charging the battery for approximately an hour to reach full charge capacity. When charging is complete, remove the battery and unplug the power cord from the outlet. Before You Begin 25
26 Charging the Battery Pack When the DC coupler is connected to the compact power adapter, the adapter cannot be used to charge battery packs. Do not charge any battery packs other than model BP-5. When the battery pack is in the camera, it discharges slightly over time even when the camera is not used. This reduces the battery pack s operating time. When not using the camera, remove the battery pack and store it with its protective cover attached. Always be sure to charge the battery pack before using it again. To protect battery packs and prevent loss of capacity, do not charge them continuously for more than 24 hours. If operating time is sharply reduced even after charging normally, the battery pack may have exceeded its useful life. Replace it with a new battery pack. The adapter can hold and charge two battery packs. Charging starts with the first battery pack attached. After that battery pack is charged, the charge lamp goes on and the adapter starts charging the second battery pack. After charging of both battery packs is completed (both charge lamps are on), leave both battery packs in the charger for two more hours (one hour per battery pack) to reach a full charge. Charging time depends on the ambient temperature, and the level to which the battery pack is already charged. When battery power is low, the icon on the LCD panel blinks. Remove the battery pack from the camera and charge it. The battery pack can operate in temperatures from 0 C to 40 C (32 F to 04 F), however for full operating performance, use between 0 C (50 F) and 30 C (86 F) is recommended. In cold locations such as ski areas, battery performance is temporarily decreased and operating time may be reduced. 26
27 Inserting and Removing the Battery Pack Inserting the Battery Pack Load a fully charged BP-5 battery pack into the camera. Open the battery chamber cover. Slide the lever in the direction shown by the arrow in the diagram, and open the cover as shown. 2 Load the battery into the camera. Make sure the battery pack is facing the right way, and insert it into the battery chamber. Insert the battery pack until it locks into place. Before You Begin 3 Close the cover. Press the cover closed until it clicks shut. Battery Charge Remaining Icons The level of charge remaining is shown in three stages when the Main Switch is set to ON. ( 33) : Charge is sufficient. : Charge is low. : Battery pack must be charged. If the level of charge remaining runs out when you are using the menu screen or playing back an image, a no battery warning appears on the LCD monitor. When this occurs, remove the battery and charge it. 27
28 Inserting and Removing the Battery Pack Number of Available Shots Temperature Normal (20 C/68 F) Low (0 C/32 F) Shooting conditions No flash use 50% flash use Approx. 680 Approx. 540 Approx. 480 Approx. 400 The above figures were obtained under Canon test conditions (fully charged battery, EF 50mm F.4 USM lens, Review function [On], Review Time [2 sec.], Quality [Large ]). Playback on the LCD monitor is available for approximately 40 minutes at normal temperature (continuous auto playback). The number of available shots may be less than indicated in some cases, due to differences in operating conditions. The number of available shots is reduced by frequent use of the LCD monitor. Holding the shutter button halfway down for long periods to use the AF function without taking a shot can reduce the number of available shots. In low temperature conditions (0 C/32 F), the number of available shots may be less than indicated. For the number of available shots when using the Battery Grip BG-ED3, see the BG-ED3 User s Manual. Removing the Battery Pack Open the battery cover. Slide the lever in the direction shown by the arrow in the diagram, and open the cover as shown. 2 Remove the battery pack. Slide the battery lock lever in the direction shown by the arrow, and remove the battery. 3 Close the battery cover. Press the cover closed until it clicks shut. 28
29 Inserting and Removing the Battery Pack Using a Household Power Supply You can operate the EOS D30 from a household power outlet by using the DC coupler. This enables you to use the camera as long as you like without a battery. Connect the DC coupler. Plug the DC coupler into the compact power adapter. 2 Place the cord in the groove. Carefully insert the cord into the groove. Before You Begin 3 Insert the DC coupler into the camera. Open the cover ( 27) and lower the covering on the cord channel. Insert the DC coupler and fit the cord into the cord channel. Check that the cord is placed tightly in the cord channel, and slide the DC coupler into the chamber until it locks into place. Close the cover so that it clicks into place. 4Connect the power cord. Connect the power cord to the compact power adapter. Plug the cord into a power outlet. When you are finished, remove the plug from the power outlet. Do not use any DC coupler other than the one provided with your EOS D30 camera. Do not use the DC coupler provided with your EOS D30 with any other camera. 29
30 Mounting and Detaching a Lens Mounting a Lens Lens mount index Remove the caps. Remove the rear lens cap and the body cap by turning them as shown by the arrows in the diagram. 2 Attach the lens. Align the red dots on the lens and camera and turn the lens as shown by the arrow in the diagram until it clicks in place. 3 Set the focus mode switch on the lens to AF. If the focus mode switch is set to MF (or M on older lenses), the autofocus will not operate and will be displayed on the LCD panel. 4Remove the front lens cap. Detaching a Lens Press and hold the lens release button, and turn the lens as shown by the arrow in the diagram. Turn the lens until the index mark is at the top, then remove it. 30 Because the EOS D30 has a smaller sensor area than that of a 35mm-format camera, the angle of view of all EF lenses is changed. The effective focal length of all lenses is increased by a factor of.6, eg a 50mm lens has approximately the same angle of view as an 80mm lens. AF stands for autofocus. MF or M stands for manual focus. Be careful not to lose the lens caps or body cap. EOS D30 image field ( mm / in) 35 mm image field (36 24 mm / in)
31 Inserting a CF Card The EOS D30 stores pictures on a CompactFlash (CF) card. The camera can use either Type or Type 2 CF cards. Open the cover. Slide the cover in the direction shown by the arrow, and open it as shown in the diagram. mark Eject button Label side 2 Insert 3 Close the CF card. With the CF card label side (the side with the printed mark) facing toward the rear of the camera, slide the card in the direction of the mark, into the slot. The Eject button pops out. the cover. Close the cover and slide it in the direction shown by the arrow until it clicks shut. Before You Begin Removing a CF Card 2 Open the cover. Set the Main Switch to OFF. Check that the message is not shown on the LCD panel. Make sure the access lamp is off ( 7), and open the cover. Remove the CF card. Press the Eject button. The CF card is ejected. Close the cover. Never do any of the following while the access lamp is blinking (the and messages are shown on the LCD panel and in the viewfinder), or you risk destroying image data or even damaging the camera itself. Never shake the camera or subject it to impact. Never open the CF card slot cover. Never remove the CF card. Never open the battery cover. Never remove the battery. You cannot use the menu screen or play back recorded images while image data is being written onto the CF card. If the Processing message ( 37) appears when you press the MENU or the button, check that the access lamp ( 7) is off before you press the button again. If you insert a CF card that is unformatted or contains corrupt data, the LCD panel will display the message. If this happens, refer to Formatting a CF Card ( 09) for instructions. 3
32 File Numbering System The pictures you take are automatically assigned file numbers from 000 to 9900 and stored in folders of 00 images each. Each folder on the CF card is numbered from 00 to 998. Automatic file numbering can be either by continuous numbering or auto reset numbering (the default setting is continuous numbering): () Continuous: Numbering is continuous between cards, so that the first file number assigned on a new CF card is one more than the last file number assigned on the previous CF card. (2) Auto reset: Each time you insert a new CF card, the file number resets to its default value (00-000). If the card already contains files, the next available number is assigned. From 3 images are recorded on the CF card Continuous numbering When you change the CF card and take a picture Auto reset numbering the menu, select [File numbering]. Press the MENU button. Turn the dial to select [File Numbering], then press the button. 2 Select the setting you want. Turn the dial to select [Continuous] or [Auto reset], then press the button. The selection is entered, and the display returns to the menu. Press the MENU button to clear the screen and exit the menu. File numbers are used the same way as frame numbers in a film camera. For details about file numbers, see Basic Terminology for Digital Cameras and Digital Photography ( 3). Because pictures taken using continuous shooting must be stored in the same folder, there may in some cases be more than 0 images in a folder. Because continuous numbering avoids duplication of image file numbers, this setting is convenient for processing images on computers. 32
33 Basic Operation Main Switch The camera operates only after the Main Switch is set to ON. ON : Set to this position when the camera is in use. OFF : The camera does not operate. Set to this position when not using the camera. To save battery power, the camera automatically turns off if you do not operate it for approximately one minute (Auto power off function). To use the camera again, press the shutter button down halfway, or set the Main Switch to OFF and then set it to ON again. You can use the Menu functions to set the Auto power off function to, 2, 4, 8, 5, or 30 minutes, or Off. ( 2) If you set the Main Switch to OFF immediately you take a picture, the access lamp may blink for a few seconds so that the image is recorded onto the CF card. The access lamp will go off when the image has been recorded onto the CF card and the camera will turn off automatically. Before You Begin Shutter Button The shutter button has two stages. You can press it down halfway or fully. The two levels of shutter button operation are as follows: () Half press ( 4 ) Pressing the shutter button down halfway activates autofocusing (AF) and focuses the camera, and also activates the automatic exposure mechanism and sets the shutter speed and aperture value. The exposure (the combination of shutter speed and aperture value) appears on the LCD panel and in the viewfinder. (2) Full press This releases the shutter and takes the picture. This camera has been designed so that taking pictures is given priority over other operations. Unless the internal memory is full, you will always be able to take pictures immediately by pressing the shutter button down. Regardless of the camera status (playback in progress, menu selection in progress, image recording in progress, etc.), you can return to shooting mode immediately by pressing the shutter button down halfway. 33
34 Basic Operation Using the Electronic Dials Basic Operations with the Dial The dial is used to make settings only when taking pictures. It can be used in two ways. () Press a button and turn the dial. When you press a button, its function remains active while a timer ( 6 ) runs. During this time you can turn the dial and view the settings on the LCD panel. When the timer runs out or you press the shutter button down halfway, the camera is ready to take a picture. w Turn the dial q After a button is pressed Use the dial this way to set the AF mode, focusing point, metering mode or drive mode. (2) Just turn the dial. Turn the dial while watching the LCD panel. Use the dial this way to set the shutter speed and aperture value. 34
35 Basic Operation Basic Operations with the dial. You can only use the dial when the Quick Control Dial switch is set to ON. Use the dial to select and set shooting mode operations and menu functions from the LCD monitor. When using the dial to carry out basic operations, you can use it in two ways. () Press a button and turn the dial. When you press a button, its function remains active while a timer ( 6 ) runs. During this time you can turn the dial and view settings on the LCD panel. The timer function and return to shooting mode are the same as for the dial. Use the dial this way to select and set the white balance, drive mode and flash exposure compensation. Before You Begin (2) Just turn the dial. When you are taking pictures, turn the dial while watching the viewfinder display or LCD panel. When you are making selections and settings from the LCD monitor, turn the dial while watching the LCD monitor. When you are taking pictures, use the dial to set the exposure compensation and manual aperture value. When using the LCD monitor, use the dial to review and select the recorded image and select menu functions. About the LCD Monitor You can use the LCD monitor on the back of the camera to review and select images, as well as select and set menu functions. You cannot use the LCD monitor as a viewfinder while taking pictures. You can use the dial when you are using the LCD monitor, regardless of whether the Quick Control Dial Switch is set to OFF. 35


36 Basic Operation Menu Functions and Settings The Canon EOS D30 uses menu functions to set functions such as the quality, the date and time, and Custom Function settings. To use the menu functions, look at the LCD monitor and use the MENU button, dial and button as shown below. MENU button LCD monitor dial button. Display the menu. Press the MENU button to display the menu. Press the button again to clear the screen. 2. Select the menu item. Turn the dial to select the desired item. move the frame up move the frame down 3. Display the options for the item and make your selection. Press the button to display the options list, then turn the dial to select the desired option. 4. Make the setting. Press the button. 5. Exit the menu. Press the MENU button to exit the menu. When the menu is displayed, you can take pictures immediately by pressing the shutter button down. You can finish making a setting by pressing the shutter button down halfway. You can cycle through menu items and options lists. You can select the display language from three other languages besides English. ( 22) If you press the JUMP button while the menu screen is displayed, you can move to the top item in the recording, playback and setup sub-menus in that order, each time you press this button. 36
37 Basic Operation Menu Selections and Default Settings On the Menu screen, items and settings are shown in different colors according to the functions they control. Selected items are enclosed in a frame. Menu item Recording (Red) Playback (Blue) Setup (Yellow) Setting indicated by color Menu item Quality * 2 Red-eye on/off * 3 AEB * 2 ISO speed Beep Custom WB * 2 Parameters * * 2 Protect Rotate Print order Auto playback Auto power off Review Review time LCD Brightness Date/Time File numbering Language Video system Format C.Fn * 2 Large Small On Color Red Blue Yellow Options list Setting type Recording Playback Setup Available settings Large Small RAW Off Off 400 On Set custom white balance Standard Set Set 2 Set 3 Protect recorded image Rotate recorded image Order print of recorded image Automatic playback of recorded image 2 min. 5 min. min. 8 min. Off Off 2 sec. 8 sec. Normal mm/dd/yy Continuous English Français NTSC On 4 sec. Hold Bright dd/mm/yy Auto reset Deutsch Japanese PAL Format CF card Custom Function settings Description Menu items related to taking pictures. Menu items related to playing back recorded images. Menu items related to basic camera functions. 4 min. 30 min. On (Info) yy/mm/dd : Default setting Ref. page Before You Begin *: Does not appear in the menu if it is not set or registered. *2: Does not appear in the menu when the Easy Shooting zone ( 20) is selected. *3: Does not appear in the menu in and modes. 37
![Setting the Date and Time Set the date and time as shown. The date and time are recorded with the image data for each photographed image. From the Menu, select [Date/Time]. Press the MENU button.](/docs-images/74/70673714/images/38-1.jpg "Turn the dial to select [Date/Time]. 2 Press the button. The Date/Time setting screen appears. 3 Set the date and time. Turn the dial to adjust the date and time values, then press the button.")
38 Setting the Date and Time Set the date and time as shown. The date and time are recorded with the image data for each photographed image. From the Menu, select [Date/Time]. Press the MENU button. Turn the dial to select [Date/Time]. 2 Press the button. The Date/Time setting screen appears. 3 Set the date and time. Turn the dial to adjust the date and time values, then press the button. After entering the setting, go to the next item. 4 Select the order for the display. Use the dial to select the order, then press the button. Turn the dial to cycle through the selections in the order shown. yy/mm/dd mm/dd/yy dd/mm/yy 38
39 Setting the Date and Time 5 Press the button. The date and time are set, and the display returns to the menu. Press the MENU button to clear the screen and exit the menu. Before You Begin Each photographed image is recorded with the date and time it was taken. If the date and time are not set, they cannot be recorded correctly. Make sure you set the date and time correctly. The date and time are stored using the backup battery. 39
40 Dioptric Adjustment in the Viewfinder Use the dioptric adjustment in the viewfinder to best suit your vision. This adjustment can enable eyeglass wearers to see through the viewfinder clearly, even without their eyeglasses. The camera s adjustable dioptric range is 3 to + dpt. Turn the Dioptric Adjustment Knob Turn the knob right or left until the focusing point or the center spot metering circle appears sharply defined in the viewfinder. The diagram shows the knob set at the standard diopter ( dpt). If the viewfinder image still does not look sharp after adjusting the diopter adjustment knob, try one of the E-series dioptric adjustment lenses (sold separately). ( 40) Holding the Camera To get sharp pictures, hold the camera as still as possible. Landscape position Portrait position Grasp the camera grip firmly with your right hand, and hold your right elbow lightly against your body. Hold the lens at the bottom with your left hand. Hold the camera to your face and look through the viewfinder. To maintain a stable stance, place one foot slightly in front of the other. 40
41 Simple Picture Taking 2 Easy Shooting zone This chapter describes how to use the Mode Dial s Easy Shooting zone,,,,, for simple picture taking. In this zone, anyone can take pictures easily by simply pressing the shutter button. In addition, to help prevent mistakes caused by operating the camera improperly, the dial, and the,,, and buttons do not operate so there is no need to worry about accidental errors. Shutter button

42 Fully Automatic Picture Taking You can easily and confidently take pictures of any subject, with no need to do anything but press the shutter button. The Canon EOS D30 can capture subjects at any of three focusing points, so that anybody can take great pictures easily. Focusing point Set 2 Place 3 Set the Mode Dial to. The AF mode is automatically set to AI Focus ( 60), the metering mode is set to and the drive mode to (Single shot). The Quality setting is automatically set to Large/Fine ( ). one of the focusing points on the subject. The camera determines the subject position and uses the most appropriate focusing point. To focus on a subject that is not at any of the three focusing points, see Focusing On an Off-Center Subject ( 62). the focus. Press the shutter button down halfway to set the focus. The camera beeps when the shot is in focus, and the in-focus indicator lights in the viewfinder at the focusing point the camera is using. 4Check the display. 5 Take The camera determines the shutter speed and aperture value automatically, and displays them in the viewfinder and on the LCD panel. the picture. Compose the shot and press the shutter button down fully. The image is shown for approximately 2 seconds on the LCD monitor. 42
43 Fully Automatic Picture Taking If the CF card becomes full, the CF Full message appears on the LCD panel and in the viewfinder, and the camera will not take any more pictures. Replace the CF card with another CF card that has capacity available. When the in-focus indicator is blinking, the camera will not take pictures. ( 63, 39) The focus and exposure are locked when AF focusing is complete. The camera automatically focuses on the focusing point that is on the subject closest to the camera. You can set the beep that indicates the subject is in focus or the beep that indicates the self-timer is operating to On or Off. ( 37, 20) 2 Automatic Built-in Flash In the Easy Shooting zone (other than and ), the flash pops up automatically and fires in low-light conditions or backlit daylight conditions. Press the flash back down when you are finished using it. If anything blocks the flash so that it cannot pop up automatically, the error code ( 37) appears on the LCD panel. When this occurs, set the Main Switch to OFF and then set it to ON again. For precautions and information about using the built-in flash, see Flash Photography ( 90). Simple Picture Taking To take pictures in an area where flash photography is prohibited or using indoor lighting, the (Program) ( 72) mode setting is recommended. When taking flash pictures of people at night or in dark interiors, we recommend using Red-eye reduction ( 93). AF-Assist Light In dark locations, pressing the shutter button down halfway causes the AF-assist light emitter to light. The AF-assist light helps the AF function focus the shot. The effective range of the AF-assist light in focusing is approximately 3.8 m/2.5 ft. When using an EX-series Speedlite for the EOS camera (sold separately), the AFassist light built into the camera or the flash operates, depending on shooting conditions. You can set AF-assist light to On or Off. (C.Fn-5 24) 43
44 Check the Image Immediately You can view the images you take immediately, on the LCD monitor on the back of the camera. Take the picture. After the picture is taken, the image as it was shot appears on the LCD monitor. The image is shown for approximately 2 seconds. You can turn the Review function on or off, as well as display the image information display. ( 45) You can change the length of time the image is displayed. ( 46) You can change the brightness of the LCD monitor. ( 22) While a picture is being displayed, you can press the button to delete that image. ( 47) This will erase the image shown on the LCD monitor before it is written to the CF card. Check the Image in PLAY Mode View the image. Press the button. The most recently recorded image appears. Press the button again to remove the image from the LCD monitor and exit PLAY mode. 2 Change the displayed image. Turn the dial counterclockwise to move back through the images you have taken, from newest to oldest. Turn the dial clockwise to move through the images from oldest to newest. You cannot use the menu screen or play back recorded images while image data is being written onto the CF card. If the Processing message ( 37) appears when you press the MENU or the button, check that the access lamp ( 7) is off before you press the button again. You can also view the images you have taken in index form ( 02) or enlarged form ( 03). 44
]( 04) to display the image with its recording information.")
![Select [Off] if you do not want to display the image. The default setting is [On]. From the Menu, select [Review]. Press the MENU button.](/docs-images/74/70673714/images/45-1.jpg "Turn the press the dial to select [Review], then button. 2 2 Select 3 Take the Review setting. Turn the dial to select the desired option, then press the button.")

45 Check the Image Immediately Checking the Image After it is Taken You can set the camera to display each image on the LCD monitor as soon as it is taken. You can do this two ways: Select [On] to display the image by itself, or select [On (Info)]( 04) to display the image with its recording information. Select [Off] if you do not want to display the image. The default setting is [On]. From the Menu, select [Review]. Press the MENU button. Turn the press the dial to select [Review], then button. 2 2 Select 3 Take the Review setting. Turn the dial to select the desired option, then press the button. The setting is entered, and the display returns to the menu. Press the MENU button to clear the screen and exit the menu. the picture. After the picture is taken, the image as it was shot appears on the LCD monitor. The time that image is displayed depends on the review time setting. ( 46) The display differs depending on whether you selected [On] or [On (Info)]. Simple Picture Taking [On] selected [On (Info)] selected ( 04) Histogram ( 04) Image information ( 04) Date/time ( 38) You can change the review time setting. ( 46) 45
![Check the Image Immediately Time Images Are Displayed for Checking You can control how long images are displayed by setting the review time to [2 sec.], [4 sec.], [8 sec.](/docs-images/74/70673714/images/46-0.jpg "], or [Hold] which keeps the image on the monitor screen. The default setting is [2 sec.]. From the Menu, select [Review time]. Press the MENU button.")
![Turn the dial to select [Review time], then press the button. 2 Set the review time. Turn the dial to select the review time you want, then press the button.](/docs-images/74/70673714/images/46-1.jpg "The setting is entered, and the display returns to the menu. Press the MENU button to clear the screen and exit the menu.")
46 Check the Image Immediately Time Images Are Displayed for Checking You can control how long images are displayed by setting the review time to [2 sec.], [4 sec.], [8 sec.], or [Hold] which keeps the image on the monitor screen. The default setting is [2 sec.]. From the Menu, select [Review time]. Press the MENU button. Turn the dial to select [Review time], then press the button. 2 Set the review time. Turn the dial to select the review time you want, then press the button. The setting is entered, and the display returns to the menu. Press the MENU button to clear the screen and exit the menu. When this function is set to [Hold], the image is displayed until you press the shutter button down halfway. Note however that the camera power will turn off automatically when the Auto power off time setting is reached ( 33, 2). The [Review time] setting is valid when the [Review] feature is set to [On] or [On (Info)]. 46
47 Erasing a Recorded Image (Single Image Erase) Set the camera to Play mode. Press the button to enter Play mode. The most recent image appears. 2 Select the image you want to erase. Turn the dial to select the image you want to erase. 3 Open the Erase menu. Press the button. The Erase menu appears at the bottom of the LCD monitor. 2 Simple Picture Taking 4Erase the image. Turn the dial to select [Erase], then press the button. The access lamp blinks and the image is erased. You cannot recover an image once you have erased it. Make sure you no longer want an image before erasing it. You can protect images ( 07) to prevent them from being erased accidentally. To erase all images recorded on the CF card, see Erasing Images (All Image Erase) ( 08). 47
 The AF mode is automatically set to ONE SHOT, the drive mode to, and the metering mode to. The Quality setting is automatically set to Large/Fine (260 440).")
48 Portrait Mode This mode blurs the background to make the subject stand out. Set the Mode Dial to. The way you take pictures is the same as in (Full Auto) mode. ( 42) The AF mode is automatically set to ONE SHOT, the drive mode to, and the metering mode to. The Quality setting is automatically set to Large/Fine ( ). Head-and-shoulder shots give the best background blur effect. Also, the farther the subject is from the background, the more blurred the background will appear. Use a telephoto lens to blur the background even more. If you use a zoom lens, its longest focal length is the most effective (for example, a 24-85mm lens set to 85 mm). 48
 The AF mode is automatically set to ONE SHOT, the drive mode to (Single shot), and the metering mode to. The Quality setting is automatically set to Large/Fine (260 440).")
49 Landscape Mode This mode is for sweeping scenery, sunsets, etc. Set the Mode Dial to. The way you take pictures is the same as in (Full Auto) mode. ( 42) The AF mode is automatically set to ONE SHOT, the drive mode to (Single shot), and the metering mode to. The Quality setting is automatically set to Large/Fine ( ). 2 Simple Picture Taking If the shutter speed indicator blinks, the shutter speed may be too slow to keep the picture from being blurred by camera shake. We recommend you use a tripod when taking landscape pictures. (The shutter speed indicator still blinks if you use a tripod, but camera shake will not be a problem.) The built-in flash does not fire in Landscape mode, even if it is raised. A wide-angle lens provides the greatest depth from foreground to background, as well as a wider image. If you use a zoom lens, its shortest focal length is the most effective (for example, a 24-85mm lens set to 24 mm). 49
 The AF mode is automatically set to (ONE SHOT), the drive mode to (Single shot), and the metering mode to. The Quality setting is automatically set to Large/Fine (260 440).")
50 Close-Up Mode This mode is for taking close-up shots of flowers, insects, or other small subjects. Set the Mode Dial to. The way you take pictures is the same as in (Full Auto) mode. ( 42) The AF mode is automatically set to (ONE SHOT), the drive mode to (Single shot), and the metering mode to. The Quality setting is automatically set to Large/Fine ( ). Close-up mode is most effective when the subject is at the minimum focusing distance of the lens. If you use a zoom lens, use its longest focal length to get a higher magnification. For better close-ups, we recommend using an EOS-dedicated macro lens and the Macro Ring Lite MR-4EX. 50
 The AF mode is automatically set to (AI Servo), the drive mode to, and the metering mode to. The Quality setting is automatically set to Large/Fine (260 440).")
51 Sports Mode This mode is used for sports photography and capturing fast-moving subjects. Set the Mode Dial to. The way you take pictures is the same as in (Full Auto) mode. ( 42) The AF mode is automatically set to (AI Servo), the drive mode to, and the metering mode to. The Quality setting is automatically set to Large/Fine ( ). 2 Simple Picture Taking If the shutter speed indicator blinks, the shutter speed may be too slow to keep the picture from being blurred by camera shake. Be careful to hold the camera steady and press the shutter button smoothly, or use a tripod. (The shutter speed indicator still blinks if you use a tripod, but camera shake will not be a problem.) The built-in flash does not fire in Sports mode, even if it is raised. For best results in Sports mode, use a film speed setting of ISO 400 or faster. ( 55, 20) For sports photography we recommend using a telephoto lens of mm. 5

52 Night Scene Mode This mode is for taking pictures of people at sunset or at night. It uses flash to illuminate the subject and a slow shutter speed to expose the background, resulting in a natural-looking exposure. Set the Mode Dial to. The way you take pictures is the same as in (Full Auto) mode. ( 42) The AF mode is automatically set to ONE SHOT, the drive mode to (Single shot), and the metering mode to. The Quality setting is automatically set to Large/Fine ( ). To prevent camera shake, always use a tripod. When the shutter speed has been automatically set to -2 seconds, it will take one second from when the shutter button is pressed down fully until the picture is taken. Continue pressing the shutter button until the picture is taken. If you are taking images of scenery only (and not people), use Landscape mode. Tell your subjects not to move for a few seconds after the flash fires. You can also use Night Scene mode with an EX-series Speedlite. In daylight, Night Scene mode operates the same as (Full Auto) mode. For best results in Night Scene mode, use a film speed setting of ISO 400 or faster. ( 55, 20) 52
53 Advanced Operations 3 Creative zone The Creative zone features shooting modes that let you select the shutter speed or aperture value and change the exposure yourself, providing you with more flexibility to set up the camera for a variety of shooting styles. This chapter describes how to make effective use of each of these functions. The icon represents the Main Dial, and the icon represents the Quick Control Dial. Press the shutter button down halfway and release, and a timer will show the exposure setting for approximately 4 seconds on the LCD panel and viewfinder. The AE lock, exposure compensation, AEB, bulb, and depth-offield check functions operate only in Creative zone modes. The Menu function Quality, AEB, Custom WB, Parameters, and C.Fn settings are used only in the Creative zone.
54 Quality Selection Use the Menu function to choose from five Quality settings: Quality Large/Fine Large/Normal Small/Fine Small/Normal RAW Icon Recording size Recording method JPEG RAW Compression ratio Low High Low High Size of one image.3 Mbyte 0.7 Mbyte 0.7 Mbyte 0.4 Mbyte 3.4 Mbyte Recording capacity Approx. 2 shots Approx. 22 shots Approx. 22 shots Approx. 40 shots Approx. 3 shots Based on Canon testing standards (ISO 00 setting). Recording capacity is the number of shots that can be stored on the CF card/fc-6m provided with the EOS D30 camera. The number of images that can be recorded depends on the subject and modes used. From the menu, select [Quality]. Press the MENU button. Turn the dial to select [Quality], then press the button. 2 Set the quality. Turn the dial to select the Quality you want, then press the button. The selected Quality setting is entered, and the screen returns to the menu. Press the MENU button to clear the screen and exit the menu. You cannot adjust the Quality setting while in the Easy Shooting zone ( 20). Opening images on a computer that have been recorded in RAW format require the dedicated computer driver provided with the camera. For details, refer to the Software Starter Guide. You can set the Quality by pressing the button and turning the or dial as you look at the LCD panel. (C.Fn-2-28) 54
 The higher the number, the greater the sensitivity.")

55 About ISO Speed ISO speed is an index number representing the photosensitivity of silver-halide film. Digital cameras do not use film, but their photosensitivity is commonly described in terms of ISO equivalent speed settings. ( 32) The higher the number, the greater the sensitivity. Higher speeds are better for taking pictures of moving subjects or in dim light, but the pictures will also contain more noise and so will be less sharp. Conversely, lower speeds are less suited to moving subjects or dim conditions, but produce sharper, more detailed images. The Canon EOS D30 provides ISO-equivalent speed settings from ISO 00 to ISO 600, in one-step increments. Select [ISO Speed]. Press the MENU button. Turn the dial to select [ISO Speed], then press the button. 3 2 Set the ISO speed. Turn the dial to select the desired ISO speed, then press the button. The selected ISO speed is entered, and the screen returns to the Menu. Press the MENU button to clear the screen and exit the Menu. Advanced Operations You can set the ISO speed by pressing the button and turning the or dial as you look at the LCD panel. (C.Fn ) 55
56 Selecting Parameters In addition to the standard parameters automatically applied by the camera for processing images recorded, you can register up to three sets of your own parameters. Parameter settings are made using a computer and the software supplied with your EOS D30 camera, and stored in the camera by connecting the computer and camera with the proper interface cable provided with the camera. For instructions on setting parameters with the software supplied with the EOS D30, as well as registering parameters in the camera and on connecting your camera to a computer, see the Software Starter Guide. Note that if no custom parameters are set or stored using this function, this item will not appear on the menu. From the menu, select [Parameters]. Press the MENU button. Turn the dial to select [Parameters], then press the button. The LCD monitor displays the available parameters. 2 Set the parameters you want. Turn the dial to select the parameters, then press the button. The selected parameters are entered, and the screen returns to the menu. Press the MENU button to clear the screen and exit the menu. You can set the parameters by pressing the button and turning the or dial as you look at the LCD panel. However if no parameters have been registered, the message is displayed on the LCD panel and you cannot set the parameters. (C.Fn ) 56

57 Selecting Parameters Parameters The camera can store up to three sets of parameters, each a combination of settings for Contrast, Sharpness, and Color Saturation. For details, see the Software Starter Guide. Up to 3 sets of parameters can be stored. Set the contrast in three levels. Set the sharpness in three levels. 3 Parameter Contrast Sharpness Color Saturation Setting Adjusts the contrast Adjusts the sharpness Adjusts the color saturation Level Low Normal High Low Normal High Low Normal High Set the color saturation in three levels. Effect Takes pictures with lower contrast. Takes pictures with normal contrast. Takes pictures with higher contrast. Takes pictures with lower sharpness. Takes pictures with normal sharpness. Takes pictures with higher sharpness. Takes pictures with muted colors. Takes pictures with normal color saturation. Takes pictures with intense colors. Advanced Operations 57
58 AF Mode Selection The AF mode setting controls how the autofocus functions operate. The camera has two AF modes: One-shot AF for still subjects, and AI Servo AF for moving subjects. AF mode selection is available in all Creative zone settings except for. Set the lens focus mode switch to AF. 2 Set the Mode Dial to a Creative zone setting other than. 3 Press the AF button. ( 6 ) WB 4Select the AF mode. Turn the dial to make the selection. Press the shutter button down halfway to return to ready-to-shoot status. In addition to the above two AF modes, the EOS D30 provides AI Focus AF, which automatically switches between One-shot and AI Servo AF modes according to the state of the subject. AI Focus AF is automatically selected when operating in (Full Auto) mode. Turn the dial to select the white balance ( 68). 58
59 AF Mode Selection One-Shot AF for Still Subjects 3 In-focus indicator Focusing point indicator Press the shutter button down halfway to activate AF operation and focus once. When the camera has focused, the focusing point indicator and the in-focus indicator in the viewfinder light at the same time. When using evaluative metering, the exposure setting is determined when focus is achieved. The exposure setting and focus remain locked as long as the shutter button is pressed down halfway. You can then recompose the shot while retaining the exposure setting and focus ( 62). Advanced Operations If the camera cannot focus, the in-focus indicator ( ) in the viewfinder blinks. If this happens, you will not be able to take a picture even if you press the shutter button down fully. Instead, reframe the shot and focus again. See also, Manual Focus ( 63). 59
60 AF Mode Selection AI Servo AF for Moving Subjects Press and hold the shutter button down halfway, and the camera focuses continuously. This mode is suited for moving subjects when the focusing distance keeps changing. With its predictive AF function, the camera can also track a subject that is steadily approaching or retreating from the camera. The exposure settings are determined immediately before the picture is taken. If the in-focus indicator in the viewfinder blinks, the camera has not focused. You can set the camera so that during AI Servo AF operation, you can press the button and the focus will momentarily lock as long as the button is held down. (C. Fn ) About Predictive AF When a subject is approaching or retreating from the camera at a constant rate, the focusing function can track the subject and predict the focusing distance immediately before the picture is taken so that the shot will be in focus at the moment of exposure. When the focusing point is selected automatically, the camera uses one of three focusing points to focus on the subject. Tracking and predictive focusing is carried out using the selected focusing point. When the focusing point is selected manually ( 6), the selected focusing point tracks the subject. AI Focus AF AI Focus AF is set automatically in (Full Auto) mode. At the time of the shot, the camera automatically selects One-shot AF and AI Servo AF according to the state of the subject. If the subject is focused in One-shot AF and the subject then begins to move continuously, the camera detects the movement, automatically switches to AI Servo AF, and focuses continuously as it tracks the subject. 60
61 Focusing Point Selection The focusing point is the frame in which the subject is focused. The focusing point can be selected automatically or manually. In the Easy Shooting zone and in mode, the selection is automatic, but in,,, and modes you can switch between automatic and manual focusing point selection. Automatic selection AF: Manual selection AF: The camera selects the focusing point automatically according to conditions. You can select any of the three focusing points manually. This is best when you want to be sure to focus on a particular subject, or to use the speed of the AF focusing function to help you compose a particular shot quickly. Press the button. ( 6 ) 3 2 Select the focusing point. Look at the LCD panel or the viewfinder display as you turn the or dial. Automatic selection Manual selection Advanced Operations Press the shutter button down halfway to return to ready-to-shoot mode. 6
 2 Focus on the subject.")
, starting from step 2.")
62 Focusing On an Off-Center Subject To focus on a subject not covered by one of the three focusing points, follow the procedure below. This technique is called Focus Lock. Focus lock is valid when the AF mode is set to One-shot AF. Select a focusing point. ( 6) 2 Focus on the subject. Place the focusing point over the subject and press the shutter button down halfway. 3 Hold the shutter button down halfway and recompose the picture. 4Take the picture. You can also use the Focus lock function in the Easy Shooting zone (except for mode), starting from step 2. For best results, use the combination of One-shot AF with AE lock applied on the focusing point where focus is achieved, and evaluative metering. 62
63 Problem Subjects for Autofocusing The EOS D30 has a precision AF system that can focus on most subjects. However, it may not be able to focus on subjects (in-focus indicator blinks) in particular conditions such as the following: Difficult-to-Focus Subjects Very low-contrast subjects, such as a blue sky or single-color wall Subjects in very dark locations Extremely backlit or reflective subjects, such as a shiny new car Overlapping nearby and distant objects, such as cage bars and the animal inside the cage In such cases, use one of the following procedures: () Focus on an object that is at the same distance as the desired subject, apply Focus Lock, then recompose the picture. (2) Set the lens focus mode switch to MF (or M on older lenses), and focus manually. Manual Focus Set the lens focus mode switch to MF (or M on older lenses). The icon appears on the LCD panel. 3 Advanced Operations 2 Focus on the subject. Turn the manual focusing ring on the lens until the subject appears sharp in the viewfinder. If you press and hold the shutter button down halfway as you focus manually, you will see the focusing point where the subject is focused, and the in-focus indicator will light. 63
 Review ( 45), Review time ( 46) Parameters ( 56) (not displayed unless parameters have")
64 INFO. Checking Camera Settings When the camera is ready to shoot, press the INFO. button to view the current camera settings on the LCD monitor. Camera Setting Information The following information is shown on the LCD monitor: Auto power off time ( 33, 2) Review ( 45), Review time ( 46) Parameters ( 56) (not displayed unless parameters have been stored) C.Fn (custom function) number(s) ( 24) Flash exposure compensation ( 95) AEB ( 82) Possible images that can still be taken CF card capacity remaining ( 8, 54) ISO speed ( 55) Display the camera settings. Press the INFO. button. The current camera settings appear on the LCD monitor. Press the INFO. button again to clear the LCD monitor. Parameters are shown only if settings have been entered. For viewing image information during playback, see Turning the Information Display On and Off ( 04). 64
65 Selecting a Metering Mode Press the button. ( 6 ) 2 Select a metering mode. Look at the LCD panel as you turn the dial. :Evaluative :Partial 3 :Center-weighted averaging Press the shutter button down halfway to return to ready-to-shoot mode. Advanced Operations Turn the flash ( 95). dial to set the flash exposure compensation for the built-in/optional 65
66 Metering Modes The EOS D30 uses three methods for metering: evaluative, partial, and center-weighted averaging. The Easy Shooting zone uses evaluative metering. In the Creative zone, any of the three modes can be selected. : Evaluative Metering This is an all-around metering mode suited even for backlit subjects. The viewfinder field is divided into 35 metering zones to which the three focusing points are linked for evaluative metering. The camera determines the main subject s size, position, brightness, background, front and back lighting, etc., so that it can select the proper exposure for the subject at all times. When using manual focusing, evaluative metering is based on the center focusing point. : Partial Metering This is particularly effective when the background is much brighter than the subject due to backlighting, etc. This method uses a center area of approximately 9.5% of the screen. The area covered by partial metering is shown on the left. : Center-weighted Averaging Metering This method meters the average exposure of the entire viewfinder screen, and gives extra weight to the center. 66
67 Selecting a Drive Mode You can set the EOS D30 s drive mode to single-image shooting, continuous shooting or selftimer operation. Single-image shooting : Press the shutter button to take one image. Continuous shooting : You can use the continuous shooting mode by pressing and holding the shutter button. The maximum number of images that can be taken for each quality setting is shown in the table below. Self-timer operation: You can set the self-timer to take a picture after 0 seconds. ( 85) Size/Quality Large/Fine Large/Normal Small/Fine Small/Normal RAW Maximum number of images (Approx. images/sec.) ONE SHOT AI SERVO 3 Maximum number of images (Approx. images) ONE SHOT AI SERVO Based on Canon testing standards (shutter speed of /250 second or faster, at ISO 00). The number of frames that can be recorded depends on the subject and modes used. Press the DRIVE button. ( 6 ) Advanced Operations 2 Select the drive mode. Look at the LCD panel as you turn the or dial. :Single-frame shooting :Continuous shooting :Self-Timer Operation Press the shutter button down halfway to return to ready-to-shoot mode. 67
68 Selecting a Drive Mode Images taken with continuous shooting are first stored in the camera s internal memory, then on the CF card. When the internal memory is full, the message appears on the LCD panel and in the viewfinder, and no more images can be taken. Once this happens, images are written onto the CF card until there is enough memory available for another image. The message then disappears, and the camera can take the next shot. If you press the shutter button down halfway before all of the images have been saved on the CF card (the access lamp is flashing), the saving process is canceled momentarily. The number of continuous frames at that moment depends on the capacity available on the CF card. When the message is displayed on the LCD panel and in the viewfinder, make sure that the access lamp has stopped blinking before you change the CF card. Setting the White Balance The EOS D30 has seven white balance settings, Auto, Daylight, Cloudy, Tungsten, Fluorescent, Flash, and Custom. In the Easy Shooting zone the Auto setting is selected automatically, while in the Creative zone you can select any of the seven white balance settings. Press the AF button. ( 6 ) WB 2 Select the white balance setting. Set the Quick Control Dial switch to ON. Turn the dial. Press the shutter button down halfway to return to ready-to-shoot mode. Auto Daylight Cloudy Tungsten Fluorescent Flash Custom Turn the dial to select the AF mode ( 58). 68
69 White Balance Settings In light from any source, the proportion of the primary colors (red, green, blue) in the light varies according to the color temperature. Higher color temperatures contain a greater proportion of blue, and lower color temperatures contain a greater proportion of red. Moving from low to high, the progression is red orange yellow white blue-white. For example, a given subject will appear reddish if taken under tungsten (incandescent) lighting, or greenish if taken under fluorescent lighting. The human eye automatically adapts to changes in light so that white subjects appear white even under different lighting conditions. Cameras that use film have to adjust for these differences by using color-correcting filters or switching to different film types. Digital cameras rely on software to correct the color temperature by determining white as the basis for the colors in the subject, then correcting the other colors to achieve a natural color range. mode automatically selects the white balance according to the light source where you are shooting. If this does not produce pictures with satisfactory coloring, you can select a mode other than. Icon Conditions Color temperature K (Kelvin) 3 Camera selects the setting automatically. approx For bright outdoor daylight. approx For cloudy conditions at twilight or evening. approx For indoor incandescent lighting. approx For indoor white fluorescent lighting. approx Advanced Operations For flash pictures. approx balance for that To photograph a white subject to use as a base color, then load that white balance approx data to set the ideal white 69

70 Custom White Balance Setting Custom white balance lets you set the white balance yourself by photographing a white subject to use as the basis for the camera s white balance, and then selecting that picture for use as white balance data. Partial metering zone Photograph 2 From a white subject. Take a picture of a white subject, just as you would take a normal picture. Frame the shot so that the white subject fills the entire partial metering zone in the viewfinder. This picture can be taken using any mode ( 20). the menu, select [Custom WB]. Press the MENU button. Turn the dial to select [Custom WB], then press the button. 3 Select the image. Turn the dial to select the picture you took in step, then press the button. When the setting is entered, the screen returns to the menu. Press the MENU button to clear the screen and exit the menu. 4Press the AF button. ( 6 ) WB 70
71 Custom White Balance Setting 5 Select the white balance. Turn the dial to select [ ]. The custom white balance is entered. 3 Advanced Operations For best results, use subjects such as plain white paper for white balance basis. White balance data is loaded from the partial metering zone ( 9). You can store white subjects photographed under various conditions on the CF card, then select these images as needed for the [Custom WB] function as an easy way of setting the ideal white balance for any lighting conditions. The default setting for is the same as the default setting for. 7

72 Program AE Like (Full Auto) mode, this is a general-purpose picture-taking mode. The camera automatically sets the shutter speed and aperture value to suit the scene s brightness. This is called Program AE. * stands for Program *AE stands for Auto Exposure Set the Mode Dial to. 2 Focus on the subject. Press the shutter button down halfway. When the camera has focused, the focusing point indicator and the in-focus indicator in the viewfinder light at the same time. 3 Check the display. The shutter speed and aperture value are determined automatically, and displayed in the viewfinder and on the LCD panel. If the shutter speed and aperture values are not blinking, the exposure is correct. If either is blinking, see Exposure Warnings ( 34). 4Take the picture. Compose the picture, then press the shutter button down fully. 72
73 Program AE Differences Between Program AE Mode Mode and Full Auto (Program AE) and (Full Auto) mode are alike in that both automatically determine the shutter speed and aperture values. The following functions can be used in mode but not in mode. Manual focusing point selection Built-in flash firing manually/firing prohibited Metering mode selection Flash exposure compensation Drive mode selection Special features with EX-series Speedlites Program shift - High-speed sync (FP Flash) with AE lock with button selected EX-series Speedlites Exposure compensation - FE lock Autoexposure bracketing (AEB) - Fill flash control Custom functions - FEB - 2nd-curtain sync - Modeling flash - E-TTL wireless autoflash Shifting the Program In Program AE mode, you can freely change the shutter speed and aperture value combination (program) set by the camera while maintaining the same exposure value. This is called shifting the program. To do this, press the shutter button down halfway, then turn the dial until the shutter speed or aperture value you want is displayed. Once you take a picture with the shifted program, the shifted program is canceled automatically and the original program is restored. If you are using a flash, you cannot shift the program. 3 Advanced Operations 73

74 Shutter Speed-Priority AE In this mode, you set the shutter speed, and the camera automatically sets the aperture value to suit the brightness of the subject. This is called Shutter Speed-Priority AE. A fast shutter speed can freeze the motion of a fast-moving subject, and a slow shutter speed can blur the subject to give the impression of motion. * stands for time value. Fast shutter speed Slow shutter speed Set the Mode Dial to. 2 Set the shutter speed. Turn the dial. 3 Focus 4 Check on the subject. Press the shutter button down halfway. The aperture value is determined automatically. the display, then take the picture. If the aperture value is not blinking, the exposure is correct. Compose the picture, then press the shutter button down fully. 74
75 Shutter Speed Priority AE At shutter speeds slower than one second, the release time lag (between the time the shutter button is pressed completely and the start of the exposure) is approximately second. The release time will be a little longer when the drive mode is continuous shooting, even if the shutter speed is faster than one second. In this case, hold the shutter button down until the pictures have been taken. If the smallest aperture value (the maximum open aperture) for the lens you are using blinks, the scene is too dark. Turn the dial to a slower shutter speed until the aperture value stops blinking. If the largest aperture value (the minimum aperture) for the lens you are using blinks, the scene is too bright. Turn the dial to a faster shutter speed until the aperture value stops blinking. Shutter Speed Display You can set the shutter speed in half-stop increments as shown below. The shutter speeds from 4000 to 4 indicate the denominator of the fractional shutter speed, so that for example 25 is /25 second. For slow speeds, 0 7 is 0.7 seconds, and 5 is 5 seconds The ideal shutter speed for capturing a clear image from a TV screen is /5 second. We recommend using a tripod. 3 Advanced Operations You can also set the camera so that you can set the shutter speed in /3-stop increments. (C.Fn-4 24) 75
, you can blur the background to make the subject stand out as in a portrait.")
76 Aperture-Priority AE In this mode, you set the aperture value, and the camera automatically sets the shutter speed to suit the brightness of the scene. This is called Aperture-Priority AE. By setting a smaller aperture value (larger aperture), you can blur the background to make the subject stand out as in a portrait. Or, by setting a larger aperture value (smaller aperture), you can increase the depth of field to make both the foreground and background look sharp. * stands for aperture value. Small aperture value Large aperture value Set the Mode Dial to. 2 Select the aperture value. Turn the dial. 3 Focus on the subject. Press the shutter button down halfway. The shutter speed is determined automatically. 4 Check the display, then take the picture. If the shutter speed is not blinking, the exposure is correct. Compose the picture, then press the shutter button down fully. 76
77 Aperture-Priority AE If the 30 shutter speed blinks, the scene is too dark. Turn the dial to reduce the aperture value (larger aperture). If the 4000 shutter speed blinks, the scene is too bright. Turn the dial to increase the aperture value (smaller aperture). Aperture Value Display You can set the aperture in half stops as shown below. The higher the aperture value, the smaller the aperture opening. The range of aperture settings displayed depends on the lens mounted on the camera If no lens is mounted on the camera, the aperture setting is displayed as 00. You can also set the camera so that you can set the aperture value in /3-stop increments. (C.Fn-4 24) You can fix the shutter speed at /200 second for shooting with a flash. (C.Fn-6-26) Checking the Depth of Field 3 Advanced Operations You can press the Depth-of-Field Preview button to close the aperture to the current aperture setting, and then verify the range of focus in the viewfinder. This feature can be used in the Creative zone. In mode, this feature operates when the shutter button is pressed down halfway. The exposure is locked (AE lock) while the Depth-of-Field Preview button is pressed. 77

78 Manual Exposure In this mode you set the shutter speed and aperture value yourself. The camera makes no settings automatically. You can determine the correct combination of shutter speed and aperture value by checking the exposure level displayed in the camera. * stands for manual. Set the Mode Dial to. 2 Set the shutter speed. Turn the dial. 3 Set the aperture value. Set the Quick Control Dial switch to ON, then turn the dial. 4Focus on the subject. Press the shutter button down halfway. ( 4 ) The exposure level indicator appears in the viewfinder and on the LCD panel. The exposure level icon lets you see how far you are from the standard exposure level. 78
79 Manual Exposure 5 Determine the exposure. Set the shutter speed or aperture value manually. Standard exposure Underexposure Overexposure : This is the standard reference point for a correct exposure. : Decrease the shutter speed or reduce the aperture value. : Increase the shutter speed or increase the aperture value. If the exposure level indicator is flashing at the 2 + or 2 position, the exposure is over- or under-exposed by more than two stops. 6Take the picture. Compose the picture, then press the shutter button down fully. 3 Advanced Operations You can set the camera so that you can set the shutter speed or aperture value in /3-stop increments. (C.Fn-4 24) 79

80 Automatic Depth-of-Field AE When taking pictures of large groups or landscapes, the EOS D30 can automatically achieve a sharp focus over a wide depth of field. All the subjects covered by the focusing points, from those close to the camera to those far away from the camera, can be taken clearly. In mode, the shutter speed and aperture value cannot be changed freely. If the camera selects a slow shutter speed, the use of a tripod is recommended. Automatic depth-of-field AE cannot be used if the lens focus mode switch is set to MF (or M on older lenses). Set the switch to AF. * stands for Auto-Depth of field. Set the Mode Dial to. 2 Focus the picture. Place a focusing point over the subject and press the shutter button down halfway. ( 4 ) The active focusing points are displayed. The range between the nearest subject covered by a focusing point and the farthest subject covered by another focusing point will be in sharp focus. You can check the depth of field beforehand while the exposure is displayed. ( 77) In this example, the focus will be sharp from the distant subject covered by the left focusing point to the nearby subject covered by the right focusing point. 3 Check the display, then take the picture. If the aperture value is not blinking, the exposure is correct. Press the shutter button down fully. If the aperture value is blinking, the exposure level is correct but the desired depth of field cannot be achieved. Either use a wide-angle lens or move farther from the subject. If you use a flash, the result will be the same as using flash. (Program AE) mode with 80
81 Setting Exposure Compensation Exposure compensation is used to alter the camera s standard exposure setting to make the picture brighter (overexposure) or darker (underexposure). Exposure compensation can be set up to ±2 stops, in /2-stop increments. Set the Quick Control Dial switch to ON. 2 Focus on the subject, then check the exposure level. Press the shutter button down halfway and check the display. ( 4 ) 3 Select the exposure. Turn the dial. Turn the dial while pressing the shutter button down halfway, or within ( 4 ) seconds of pressing the shutter button down halfway. Positions on the [+] side indicate Underexposure Overexposure 3 Advanced Operations overexposure, and positions on the [-] side indicate underexposure. Once set, the exposure compensation remains in memory after the Main Switch is set to OFF. To cancel exposure compensation, return the compensation setting to the standard exposure position. To prevent the dial from turning inadvertently and changing the exposure compensation, enter the setting and then set the Quick Control Dial switch to OFF. In M (Manual) mode, because you determine the exposure (the combination of shutter speed and aperture) yourself, the exposure compensation function does not operate. You can set the camera so that you can set the exposure compensation amount in /3-stop increments. (C.Fn-4 24) 8
. The three bracketed shots are exposed in the selected drive mode ( 67) in the following order: correct exposure, underexposure, and overexposure.")
![Correct exposure (0) Underexposure (-.0) Overexposure (+.0) From the menu, select [AEB]. Press the MENU button. Turn the dial to select [AEB], then press the button.](/docs-images/74/70673714/images/82-1.jpg "Canceling AEB 82 :Correct exposure :Underexposure :Overexposure 2 Set the AEB level. Turn the dial to set the AEB level you want, then press the button.")

82 Autoexposure Bracketing When using autoexposure bracketing, the camera automatically changes the exposure level within the set range (up to ±2 stops in /2-stop increments) for three successive frames. This is called AEB (Auto Exposure Bracketing). The three bracketed shots are exposed in the selected drive mode ( 67) in the following order: correct exposure, underexposure, and overexposure. Correct exposure (0) Underexposure (-.0) Overexposure (+.0) From the menu, select [AEB]. Press the MENU button. Turn the dial to select [AEB], then press the button. Canceling AEB 82 :Correct exposure :Underexposure :Overexposure 2 Set the AEB level. Turn the dial to set the AEB level you want, then press the button. The AEB setting is entered, and the display returns to the Menu. Press the MENU button to clear the screen and exit the menu. 3 Take the picture. When using continuous shooting, press and hold the shutter button down fully to take all three bracketed shots continuously, and then stop automatically. When using AEB with the self-timer, the camera takes the three bracketed shots in succession after the 0-second timer delay. Follow steps and 2 to set the AEB level to. AEB will be automatically canceled when the Main Switch is set to [OFF], the lens is changed, the flash completes charging, the Auto power off time is reached, or the MENU button or the button is pressed.
83 Autoexposure Bracketing Neither flash nor bulb exposures can be used in AEB mode. If you set mirror lockup with C.Fn-3- and then use AEB, single-frame shooting takes effect even if the drive mode is set to continuous shooting. To indicate that AEB is in progress, the AEB icon on the LCD panel and the indicator in the viewfinder blink until all three bracketed shots have been taken. During continuous shooting, no viewfinder information is displayed. In manual exposure mode, AEB is applied by changing the shutter speed. You can use AEB in combination with exposure compensation. In this case, if exposure compensation causes the exposure to fall outside the indicated exposure level, the display looks as follows. In all cases the exposures are taken according to the settings. In,, and modes : AEB set to ± stop. 3 In mode : With exposure compensation of stop : With exposure compensation of.5 stops : With exposure compensation of 2 stops : Center exposure 2 stops from correct exposure : Center exposure more than 2 stops from correct exposure Advanced Operations You can change the AEB settings in /3-stop increments. (C.Fn-4 24) In this case, the AEB indicator on the LCD panel looks like this. AEB settings in /3-stop increments : -/3 :+/3 AEB settings in 2/3-stop increments : -2/3 :+2/3 You can change the sequence to underexposure, correct exposure, or overexposure. (C.Fn-7 26) 83

 Each time you press the button, the current exposure setting is locked.")
84 AE Lock AE lock enables you to lock the exposure at a place other than the point of focus. After locking the exposure, you can recompose the shot while maintaining the exposure level. This feature is useful for backlit and spotlighted subjects. The effects of the AE lock depend on the focusing point and metering method selected. ( 35) Focus on the point on which you want to lock the exposure reading. The exposure value is displayed in the viewfinder. 2 Press the button. The icon lights in the viewfinder to indicate that the exposure setting is locked. ( 4 ) Each time you press the button, the current exposure setting is locked. 3 Compose the shot and take the picture. You can apply AE lock by pressing the shutter button (instead of the down halfway, and focus with the button. (C.Fn-2-24) button) 84
85 Self-timer Operation The self-timer is convenient for group photographs. You can use it in any Easy Shooting mode or Creative mode. We recommend using a tripod when you use the self-timer. Select the self-timer. Press the DRIVE button ( 6 ), and turn the dial to select. 2 Focus 3 Take on the subject. Make sure the in-focus indicator and the exposure setting are displayed. the picture. Press the shutter button down fully. The beep sounds as the red-eye reduction lamp operates, and the picture is taken after 0 seconds. First 8 seconds: Slow beeps and the lamp blinks slowly. Last 2 seconds: Faster beeps and the lamp stays on. While the self-timer is operating, the LCD panel shows the number of seconds remaining until the picture is taken. To cancel the self-timer, press the DRIVE button. 3 Advanced Operations Do not stand in front of the camera when you press the shutter button to start the self-timer. Doing so prevents the camera from focusing on the subject. You can set the beep that indicates the subject is in focus and the beep that indicates the self-timer is operating to On or Off. ( 20) When using the self-timer to photograph only yourself, lock the focus ( 62) on an object at about the same distance as where you will be. You can use the Remote Switch RS-80N3 (sold separately) or Timer Remote Controller TC-80N3 (sold separately) to take a picture when you are away from the camera. 85
86 Self-timer Operation Using the Eyepiece Cover If you take a picture using the self-timer or remote switch (sold separately) without looking through the viewfinder, stray light can enter the eyepiece and affect the exposure. To prevent this, attach the eyepiece cover to the viewfinder eyepiece before taking the picture. Remove the eyecup. Grasp both sides of the eyecup and lift it up and away from the camera. 2 Slip the eyepiece cover over the eyepiece. The eyepiece cover is attached to the camera strap. 86
87 Bulb Exposures In a bulb exposure, the shutter remains open as long as you hold the shutter button down, and closes when you release it. Bulb exposures are useful for the long exposures required for night scenes, fireworks, etc. Set the Mode Dial to. 2 Set the shutter speed to [ ]. Look at the LCD panel and turn the dial to select [ ]. The next setting after [ ] is [ ]. 3 3 Set the aperture value. Turn the dial. 4Take the picture. Press and hold the shutter button down fully. During the bulb exposure, the elapsed exposure time is displayed on the LCD panel ( to 999 seconds). Exposure continues as long as you hold down the shutter button. Advanced Operations The elapsed exposure time displayed on the LCD panel is only counted up to 999 seconds. For accurate exposure time, check the information display for the exposed image. ( 04) Long exposures exceeding second result in increased noise introduced into the image, and reduce the quality of the image. The Remote Switch RS-80N3 (sold separately), or Timer Remote Controller TC-80N3 (sold separately) can be used to eliminate the need to hold down the shutter button. In long exposures, some degree of noise can enter the exposed image. You can use the Long exposure noise reduction function to reduce the noise. (C.Fn- 24) 87
88 Mirror Lockup Mirror lock is enabled with C.Fn-3- ( 24). This function raises the mirror and exposes the picture, in separate operations. It is useful for close-up shots or when using a super telephoto lens, where the mirror shock could affect the picture. When using mirror lockup, we recommend you use the Remote Switch RS-80N3 (sold separately). Press 2 Press the shutter button down fully. The mirror is raised. The mirror automatically returns to the down position approximately 30 seconds after it is raised. Be sure to take the picture within 30 seconds. the shutter button down fully again. The picture is taken, and the mirror goes back down. To take the picture again, repeat the procedure from step. During mirror lockup, do not point the camera at the sun. The sun s heat can scorch and damage the shutter curtains. If you use mirror lockup with the self-timer for a bulb exposure, there will be a shutter release sound when you release the shutter button during self-timer operation. This is not the sound of the shutter release. During mirror lockup, the drive mode ( 67) is single-frame shooting regardless of the current setting. If you use mirror lockup with the self-timer, pressing the shutter button down fully the first time raises and locks the mirror, then releases the shutter 2 seconds later. 88
89 Flash Photography 4 The EOS D30 can take easy, natural-looking flash pictures with correct subject illumination using E-TTL autoflash (preflash evaluative metering in memory) and either the camera s built-in flash or any EOS-dedicated EXseries Speedlite. The procedure is as easy as a normal AE shot. This chapter describes how to take flash pictures with the built-in flash, with the EOS-dedicated 550EX Speedlite, or other types of external flash.
90 Using the Built-in Flash The built-in flash lets you take the following kinds of flash pictures with the ease of a normal AE shot. E-TTL autoflash E-TTL autoflash (preflash evaluative metering in memory) supplies the correct level of flash for the subject in the focusing point selected by AF. FE (Flash Exposure) lock ( 94) FE (flash exposure) lock sets the correct flash exposure for a selected part of the subject. The FE lock functions as an AE lock with flash. Flash exposure compensation ( 95) This function corrects the flash level in much the same way as the Exposure compensation function. The level of compensation can be up to ±2 stops in /2-stop increments. Using the Built-in Flash in the Easy Shooting Zone In the Easy Shooting zone (except in and modes), the built-in flash pops up and fires automatically in low-light or backlit conditions. Using the Built-in Flash in the Creative Zone In the Creative zone, you can take flash pictures by simply pressing the < up the built-in flash at any time, regardless of lighting conditions. > button to pop : Select mode for full autoflash. The shutter speed and aperture value are determined automatically, just as in (Full Auto) mode. : Select mode to manually set a shutter speed slower than /200 second. The camera then automatically sets the flash aperture value to provide the proper exposure for your shutter speed. : Select mode to manually set the aperture value. In low-light conditions against a background such as a night sky, you can use automatic slow-sync settings to properly expose the main subject and the background. The main subject is captured by the flash, and the background is captured by time exposure using a slow shutter speed. Because automatic slow-sync photography uses a slow shutter speed, always use a tripod. : Select mode to set the shutter speed and the aperture value manually. The main subject is exposed properly by the flash. The background exposure varies according to the shutter speed and aperture settings. : The effect is the same as using flash in mode. 90
91 Using the Built-in Flash Built-in Flash Range (using EF24-85mm F USM lens) ISO Speed Wide-angle: 24 mm Telephoto: 85 mm 00 Approx m ( ft) Approx m ( ft) 200 Approx m ( ft) Approx m ( ft) 400 Approx m ( ft) Approx m ( ft) 800 Approx m ( ft) Approx m ( ft) 600 Approx m ( ft) Approx m ( ft) Flash Sync Shutter Speed and Aperture Settings Mode Sync shutter speed Automatically set from /200 to /60 second. Manually set to speeds slower than /200 second. Automatically set (/200 to 30 sec.) for the metered brightness, according to the aperture value. Manually set to speeds slower than /200 second. Aperture Value Automatically set by the E-TTL program. Automatically set for the metered brightness, according to the shutter speed setting. Manually set as desired. 4 Flash Photography 9
92 Using the Built-in Flash When using an EX-series Speedlite ( 96), press the built-in flash back into the camera before mounting the external flash. When using the built-in flash, keep at least m/3.3 ft away from the subject. Otherwise the lens barrel may partially obstruct the flash and cause part of the photo to look dark. When using the built-in flash, detach any hood from the lens to keep it from obstructing flash coverage. Using the built-in flash with any of the following lenses can partially obstruct the flash coverage. Instead, use an EOS-dedicated external flash. Large-aperture lenses, including the EF7-35mm F2.8L USM, EF28-70mm F2.8L USM. Super-telephoto lenses, including the EF300mm F2.8L IS USM and EF600mm F4L IS USM. The built-in flash can cover the picture area for lenses with focal lengths as short as 8 mm. If you use a lens shorter than 8 mm, the photo will be dark around the edges. The E in E-TTL stands for Evaluative. To retract the built-in flash, press it back down into the camera. You cannot use the built-in flash to set high-speed sync (FP flash). In or mode, if you set the shutter speed faster than /200 second, the camera will automatically reset it to /200 unless the EX-series Speedlite has been set for high-speed sync. AF flash exposure is always based on the aperture value at the time the shot is taken, and controlled by E-TTL automatic flash compensation linked to the active focusing point and weighted for the main subject. The built-in flash and external flash cannot be used at the same time. For subjects that are difficult to focus, the AF-assist light ( 43) automatically projects a beam of light at the subject. You can set the Shutter curtain sync to 2nd-curtain sync. (C.Fn-8-26) 92
93 Using the Built-in Flash Red-eye Reduction When you use flash in low-light conditions, it can reflect off your subject s pupils and make their eyes look red in the photograph. This effect is called red-eye, and is caused by the light of the flash reflecting off the retina of the eye. The Red-eye reduction function uses the camera s redeye reduction lamp, which gently shines into the subject s eyes to constrict the pupils and thereby reduces the likelihood that red-eye will occur. You can use red-eye reduction in any picture-taking mode except and modes. From the menu, select [Red-eye on/off]. Press the MENU button. Turn the dial to select [Red-eye on/off], then press the button. 2 Set the Red-eye reduction function. Turn the dial to select [On], then press the button. The red-eye reduction function is turned On, and the display returns to the Menu. Press the MENU button to clear the screen and exit the menu. 4 Flash Photography When you press the shutter button down halfway, the redeye reduction lamp indicator appears in the viewfinder. Red-eye reduction is effective only when the subject is looking at the red-eye reduction lamp. Be sure to tell your subjects to look at the lamp. To increase the effectiveness of red-eye reduction, press the shutter button down fully approximately.5 seconds after the red-eye reduction lamp indicator goes off. You can take a picture anytime by pressing the shutter button down fully, even if the red-eye reduction lamp is on. Red-eye reduction also operates when you use an EOSdedicated Speedlite. The effectiveness of red-eye reduction varies from subject to subject. Red-eye reduction lamp indicator Red-eye reduction is more effective in bright interior locations, with the camera close to the subject. 93

94 Using the Built-in Flash FE Lock FE (flash exposure) Lock obtains and locks the correct flash exposure reading for any part of a subject. FE Lock is a function in the Creative zone. Make sure the icon in the viewfinder is on. In the Creative zone, press the to pop up the built-in flash. button q w 2 Focus on the subject. Focus on the subject you want to lock the flash exposure on. 3 Place the center focusing point over the subject, and press the button. ( 6 ) The icon lights in the viewfinder. The Speedlite fires a preflash and records the required flash output for this subject in memory. In the viewfinder, the display appears as shown in for 0.5 seconds, then changes to 2. Each time you press the button the preflash fires, and the FE lock is applied at the required exposure level. 4Take the picture. Compose the shot and take the picture. In this picture, the FE lock was applied over the subject s face, then the shot was recomposed and taken as shown. The subject was exposed correctly without being affected by the background reflection. If the subject is far enough away to cause underexposure, the icon will blink in the viewfinder. Move closer to the subject and repeat steps
95 Using the Built-in Flash Flash Exposure Compensation The EOS D30 camera can adjust the level of the built-in flash or any EX-series Speedlite. The compensation amount can be up to ±2 stops in /2-stop increments. You cannot use flash exposure compensation in the Easy Shooting zone. Press the button. ( 6 ) 2 Set the exposure compensation amount. Set the Quick Control Dial Switch to ON. Look at the LCD panel as you turn the dial. The [+] side indicates positive compensation, and the [-] side indicates negative compensation. Negative compensation Positive compensation Once set, the exposure compensation amount remains in memory after the Main Switch is set to OFF. To cancel, set the compensation amount to the position. 4 Flash Photography The flash Exposure compensation function also operates when you use an EX-series Speedlite. If the camera and EX-series Speedlite are both set for exposure compensation, the EX-series Speedlite setting has priority and the camera setting does not function. You can set the camera to adjust exposure compensation in /3-stop increments. (C.Fn-4 24) You can also disable the Auto reduction of fill flash function. (C.Fn-0 26) 95
 supplies the correct level of flash for the subject in the focusing point selected by AF.")
96 Flash Photography with the EOS-Dedicated 550EX Speedlite The Canon 550EX Speedlite allows you to take high-quality flash pictures easily, in the same way as you would with a built-in flash. E-TTL Autoflash E-TTL autoflash (preflash evaluative metering in memory) supplies the correct level of flash for the subject in the focusing point selected by AF. In dark locations, you can set the camera to aperture-priority AE for automatic slowsync operation, for a natural-looking exposure balanced between the subject and background. High-Speed Sync (FP Flash) ( 98) High-speed sync (FP or focal-plane flash) enables flash synchronization at all shutter speeds from 30 sec. to /4000 sec. FE (Flash Exposure) Lock ( 99) FE lock obtains and locks the correct flash exposure for any part of the subject. This is the flash equivalent of AE lock. Flash Exposure Compensation ( 99) As with normal exposure compensation, you can use flash exposure compensation to adjust the flash output within a range of ±2 stops, in /2-stop increments. FEB (Flash Exposure Bracketing) ( 98) The FEB function is like AEB (autoexposure bracketing) with flash. You can bracket flash exposures by up to ±2 stops, in /2-stop increments. Modeling Flash ( 99) Modeling flash allows you to check shadows and the light balance produced by multi-light settings. Wireless Multi-Light E-TTL Autoflash ( 99) You can implement wireless multi-light E-TTL autoflash, using any or all of the features listed above. This provides the freedom to set up sophisticated lighting effects with no connection cords required. Autoflash functions are not available with EZ, E, EG, ML, or TL-series Speedlites. You can also use the Canon 380EX and 220EX Speedlites. Refer to their respective user s guides for a list of functions that can be used with them. In difficult focusing conditions, the AF-assist light is emitted from the 550EX Speedlite, and automatically linked to the active focusing point. 96
97 Flash Photography with the EOS-Dedicated 550EX Speedlite Full Auto Flash This section describes how to use Full Auto E-TTL flash with (Program AE) mode. For instructions for operating the 500EX Speedlite, see the 550EX User s Guide. Set the Mode Dial to. MODE PILOT H SELEC 2 Make sure the 550EX Speedlite s pilot lamp is on. 3 Focus the subject, and take the picture. Make sure the flash-ready indicator is on, and check the shutter speed and aperture value before taking the picture. Taking Flash Pictures in Each Shooting Mode Even in,, and modes, E-TTL autoflash is as easy as normal picture-taking without flash. () Press the shutter button down halfway to have the camera automatically set the shutter speed or aperture value, just as in normal picture-taking without flash. Mode (Shutter-priority AE) (Aperture-priority AE) (Manual exposure) Shutter speed setting Manual (30 to /200 sec.) Auto (30 to /200 sec.) Manual (30 to /200 sec.) Aperture (flash aperture) setting Auto Manual Manual 4 Flash Photography (2) Press the shutter button down fully for E-TTL autoflash, using preflash evaluative metering based on the aperture value set in (). (3) The background exposure is determined by the shutter speed and aperture value. Flash photography in mode operates the same as in mode. In the Easy Shooting zone ( 20), the 550EX Speedlite operates in Full Auto mode, with the same functions as the built-in flash. You can set the camera to apply a fixed shutter speed of /200 for flash photography in aperture-priority AE mode. (C.Fn-6 26) 97

 When you want to use daylight sync")
 When you want to produce a catchlight in the subject s eyes. (3) When you want to use fill flash to eliminate shadows.")

 FEB is applied from the 550EX Speedlite. For details, see the User s Guide for your Speedlite.")
98 Flash Photography with the EOS-Dedicated 550EX Speedlite High-Speed Sync (FP Flash) When the 550EX Speedlite is set to high-speed sync mode, it can automatically synchronize at any shutter speed of /200 second or faster, thus providing high-speed sync (FP) flash operation. When high-speed sync is On, the icon appears in the viewfinder. High-speed sync is effective for portrait photography in the following situations: () When you want to use daylight sync flash for a portrait, and widen the aperture (reduce the aperture value) to blur the background. (2) When you want to produce a catchlight in the subject s eyes. (3) When you want to use fill flash to eliminate shadows. Normal flash FP flash FEB (Flash Exposure Bracketing) With the 550EX Speedlite, FEB (flash exposure bracketing) automatically shoots three flash shots, bracketing the exposure by as much as ±2 stops in /2-stop increments, without changing the background exposure. Normal exposure (0) Underexposure (-.0) Overexposure (+.0) FEB is applied from the 550EX Speedlite. For details, see the User s Guide for your Speedlite. For best results use (single-image shooting) drive mode. ( 67) You can set the camera to change FEB settings in /3-stop increments. (C.Fn-4 24) 98
99 Flash Photography with the EOS-Dedicated 550EX Speedlite FE Lock Taking FE Lock pictures with the 550EX Speedlite is the same as described in FE Lock ( 94) for the built-in flash. In step, be sure the 550EX Speedlite pilot lamp is on. The flash mode may be either normal flash or high-speed sync. The FE lock operates with either mode. Flash Exposure Compensation For flash pictures with flash exposure compensation, see Flash Exposure Compensation for the built-in flash. ( 95) Modeling Flash Modeling flash allows you to see shadows, light balance, and other effects produced by multilight settings. Check 2 Press that the camera and Speedlite are properly set for flash photography. the camera s depth-of-field preview button. The Speedlite fires at 70Hz for approximately one second. 4 Flash Photography Wireless Multi-Light/E-TTL Autoflash Photography The 550EX Speedlite can be operated as a slave light from a master (550EX or ST-E2) for easy wireless multi-light/e-ttl autoflash photography. The slave 550EX is placed to supplement the master flash, which provides the primary flash for the subject. This is a Type-A camera. For details, refer to the user s guide for your Speedlite. 99
100 Using Non-Canon Flash Units Sync Speed The EOS D30 can synchronize with compact, non-canon flash units at shutter speeds of /200 second or slower. With larger studio flash units, the flash speed is /60 second or slower. Be sure to test the flash you are using beforehand, to make sure it synchronizes properly with the camera. PC Terminal We recommend you use a flash with sync cable connected to the PC contacts. The PC terminal has a locking thread to prevent accidental disconnection. Only the X-sync terminal is used for synchronization at /200 second or slower. If you use the EOS D30 with a flash unit or flash accessory built for another brand of camera, the EOS D30 may not operate properly. Some large studio flash units have a sync cord polarity that is the opposite of the EOS + (plus) D30 s PC terminal. Such flash units will not work with the EOS D30 unless you change the polarity of the sync cord. Consult the manufacturer of the flash unit, or purchase a commercially-available polarity conversion - (minus) cord. The camera s PC terminal polarity is shown in the figure on the right. You can use a flash unit attached to the camera's hot shoe and another flash unit connected to the PC terminal at the same time. We recommend Canon EX-series Speedlites for use with this camera. 00
101 Playing and Erasing Recorded Images 5 This section explains how to view the images you have recorded with the EOS D30, how to erase images, and how to make settings for Digital Print Order Format (DPOF) digital printers or photo lab printing services. This section also describes how to connect the EOS D30 to a television and how to set the date and time. About Image Data Taken or Recorded by Other Devices The EOS D30 may in some cases be unable to accurately display images taken with other cameras, or taken with the EOS D30 but subsequently had image data or file names modified by computer or other means. About DPOF DPOF (Digital Print Order Format) is a standard used to record (on the CF card or other recording media) the image number, number of prints, etc. of images taken by digital camera. You can simply insert the CF card into a DPOF-compatible digital printer to make prints as specified. You will not need to fill out the desired numbers and quantities of prints when ordering prints from a photo printing job.
102 Viewing Recorded Images The EOS D30 can display recorded images on its LCD monitor. You can view these images in single-image format, index format, or enlarged format. Press the button to switch formats. Viewing a Single Image Check the image. Press the button. The most recent single image taken by the camera appears. Press the button again to clear the LCD monitor and exit PLAY. 2 Change the displayed image. Turn the dial counterclockwise to view images in order from newest to oldest. Turn the dial clockwise to view images in order from oldest to newest. Viewing the Index This mode displays 9 images simultaneously on a single screen. 02 Press the button. The most recent single image taken by the camera appears. 2 Display the index. Press the button. The images are displayed in index format. 3 Change the image selection. The selected image is surrounded by a green border. Turn the dial counterclockwise to select images in order from newest to oldest. Turn the dial clockwise to select images in order from oldest to newest. Press the button to enlarge the selected image. To return to single-image display, press the button again. When you finish viewing, press the button.
103 Viewing Recorded Images Viewing Enlarged Images Recorded images can be enlarged approximately 3. Part to be enlarged Select the image you want to enlarge from a single-image or index display. ( 02) 2 Enlarge the image. Press the button twice from a singleimage display, or once from an index display. The selected image is enlarged approximately 3. The central part of the image is displayed first. An icon in the lower right part of the image indicates which part of the picture is currently displayed. 3 Change the display area. Turn the dial clockwise to change the displayed area of the picture from center to center right to lower left. Turn the dial counterclockwise to change the displayed area of the picture from center to center left to top right. When you finish viewing, press the button. 5 JUMP Jumping to Another Image The display can jump directly to another image. Image 0 frames back Jump bar Current image Image 0 frames forward Display a single image or index. ( 02) 2 Change to jump display. Press the JUMP button. The Jump bar appears. 3 Jump to another image. Turn the dial. From a single-image display, turn the dial counterclockwise to go back 0 images, or clockwise to go forward 0 images. From an index display, turn the dial counterclockwise to go back 9 images, or clockwise to go forward 9 images. Press the JUMP button to clear the Jump bar and exit JUMP. When you finish viewing, press the button. 03 Playing and Erasing Recorded Images
104 Viewing Recorded Images INFO. Turning the Information Display On and Off When an image is displayed on the LCD monitor, you can press the INFO. button to view information about that image. Image information is available only for single-image displays. Image Information Displayed During PLAY The following information is displayed: Image ( 44) Aperture value ( 30, 36) Shutter speed ( 32, 36) Camera mode ( 20) Image number/total images recorded Image protect ( 07) Quality ( 54) Date ( 38) Time ( 38) Press the INFO. button File number ( 32) Histogram Exposure compensation ( 95) Flash exposure compensation ( 95) (not displayed when flash not in use) ISO speed ( 55) Metering mode ( 66) White balance ( 68) Pressing the button repeatedly switches the LCD monitor information display On and Off. You can change the displayed image using the dial, just as for a single-image display. 04 For settings displayed while preparing to shoot, see Checking Camera Settings ( 64). You can switch the information display On and Off by pressing the INFO. button, even during automated playback (Auto playback) ( 05), or while rotating ( 06), or protecting images ( 07). Histograms The histogram is a graph showing brightness levels on the horizontal axis, and the number of pixels at each level of brightness on the vertical axis. Darker pixels are towards the left side of the graph, and brighter pixels towards the right. By looking at a histogram you can determine the brightness of a picture after it is recorded. If the histogram is higher towards the dark end, set the exposure compensation ( 8) towards the plus end. If the histogram is higher Sample Histograms towards the light end, set the exposure compensation towards the minus end, then take the picture again. Darker image Normal brightness Lighter image High Brightness Warning When exposure information is displayed for a picture that will be overexposed, the related settings will blink. For better results check the histogram and adjust the exposure compensation towards the minus end ( 8), then take the picture again.


105 Viewing Recorded Images Automated Playback of Recorded Images (Auto playback) This function automatically and continuously displays all images recorded on the CF card. Each image is displayed for approximately 3 seconds. From the menu, select [Auto playback]. Press the MENU button. Turn the dial to select [Auto playback]. 2 Start auto playback. Press the button. The camera loads the images, and after the Loading image screen has been displayed for approximately 2 seconds, the auto playback starts. To pause auto playback, press the button. During the pause, the [ ] indicator appears in the upper left part of the image. To resume, press the button again. To quit auto playback, press the MENU button. During auto playback, the Auto power off function ( 33, 2) does not operate. After you have finished viewing, be sure to press the MENU button to stop the auto playback. Display time may vary depending on the image. 5 Playing and Erasing Recorded Images While auto playback is paused, you can turn the the same way as for single-image display ( 02). dial to change the picture in 05


106 Viewing Recorded Images Rotating an Image The Rotate function can rotate a picture 90 clockwise or counterclockwise. This allows you to play images with the correct orientation. From the menu, select [Rotate]. Press the MENU button. Turn the dial to select [Rotate]. 2 Go to Rotate mode. Press the button. The display goes to Rotate mode. Rotate pictures taken with the camera grip on the bottom 90 clockwise Rotate pictures taken with the camera grip on the top 90 counterclockwise 3 Rotate the image. Turn the dial to display the image you want to rotate, then press the button. Press the button repeatedly to cycle through the rotation: 90 clockwise 90 counterclockwise 0. If you have other images to be rotated, repeat the above steps. Press the MENU button to exit Rotate mode. Rotating images in the display has no effect on the recorded image data. Some software for loading images may not display a rotated image with the correct orientation on a computer screen. Pictures taken with the camera grip on the bottom should be rotated 90 clockwise to be displayed correctly. Pictures taken with the camera grip on the top should be rotated 90 counterclockwise to be displayed correctly. 06
107 Protecting an Image This function lets you protect an image file to keep it from being accidentally deleted from the CF card. You can press the button to switch between single-image and index display in order to protect individual pictures. From the menu, select [Protect]. Press the MENU button. Turn the dial to select [Protect]. The icon 2 Open the Protect Settings screen. Press the button. The display goes to the Protect Settings screen. Press the button to show the Protect Settings screen on an index display, then press the button again to show the Protect Settings screen on a single image display. 3 Protect the image. Turn the dial to select the image you want to protect, then press the button. Protected images are identified with a icon. Press the button again to cancel protection and delete the icon. If you have other images to be protected, repeat the above steps. Press the MENU button to exit Protect mode. Formatting a CF card will erase all information on the card, including protected images. Be sure to carefully review the contents of a CF card before formatting. Once an image is protected, it cannot be removed by the camera s Erase function. To erase a protected image, you must first remove the protection. 5 Playing and Erasing Recorded Images If you protect the images you need and erase all the images at once ( 08), all non-protected images will be erased. This is handy when you want to erase all the images you do not need at once. 07
108 Erasing Images (All Image Erase) You can erase images one image at a time, or you can erase all images on the CF card at once. This section describes how to erase all the images recorded on a CF card in one operation. To erase images one at a time, see Erasing a Recorded Image (Single Image Erase). ( 47) Set the camera to PLAY. ( 02) Press the button. The latest picture taken will be displayed. 2 Press the button. The Erase menu appears. 3 Turn the dial to select [All ], then press the button. The Erase Confirmation message appears. 4 Turn the dial to select [OK], then press the button. The camera erases all unprotected images. Once an image is protected, it cannot be removed by the camera s Erase function. To erase a protected image, you must first remove the protection.( 07). Once an image is erased, it cannot be recovered. Make sure you no longer need the image before erasing it. If you protect the images you need ( 07) and erase all the images at once, all non-protected images will be erased. This is handy when you want to erase all the images you do not need at once. 08
 on the LCD panel when you load a CF card, the CF card may need to be formatted before it can be used. From the Menu, select [Format].")
![Press the MENU button. Turn the dial to select [Format]. 2 Press the button. A message will appear asking you to confirm that you want to format the CF card.](/docs-images/74/70673714/images/109-1.jpg "3 Turn the dial to select [OK], then press the button. The CF card will be formatted. 5 Formatting a CF card will erase all information on the card, including protected images.")
109 Formatting the CF Card The CF card must be formatted before it is used in the EOS D30 camera. Also, if you see the message (CF card error) on the LCD panel when you load a CF card, the CF card may need to be formatted before it can be used. From the Menu, select [Format]. Press the MENU button. Turn the dial to select [Format]. 2 Press the button. A message will appear asking you to confirm that you want to format the CF card. 3 Turn the dial to select [OK], then press the button. The CF card will be formatted. 5 Formatting a CF card will erase all information on the card, including protected images. Be sure to carefully review the contents of a CF card before formatting. Playing and Erasing Recorded Images If a CF card from another manufacturer does not operate correctly, it may be usable after formatting. CF cards formatted on other cameras or computers or peripheral devices may not operate correctly with the EOS D30. In this case, format the card in your EOS D30 camera. 09
 standard.")
110 Print Order You can mark the images on a CF card for printing, as well as specify the number of prints, print type, and the image data (date and file no.). The print specifications for the Canon EOS D30 camera conform to the Digital Print Order Format (DPOF) standard. DPOF DPOF (Digital Print Order Format) is a standard used to record (on the CF card or other recording media) the image number, number of prints, etc. of images taken by digital cameras. You can simply insert the CF card into a DPOF-compatible digital printer to make prints as specified. You will not need to fill out the desired numbers and quantities of prints when ordering prints from a photo printing lab. Order the prints from the camera. 2 Insert the CF card into a digital printer for easy printing. Digital printer 2 Take the CF card to a photo printing service for easy ordering. Precautions for Printing from DPOF-compatible Devices Please note the following when printing from a DPOF-compatible device. The EOS D30 cannot change print order information set by another DPOF-compatible device. Any such changes should be made by the device on which the print order was entered. If the CF card contains image data with print order information from another device, entering new print order information from the EOS D30 may erase the previous print order information. Some DPOF-compatible devices or photo printing services may not use all the recorded print order information. Check the user s guide for the device you are using, or with the photo printing service. 0

 selection is Standard or Both, the Print Quantity screen appears.")
111 Print Order Selecting Images for Printing There are two ways to select images for printing. You can select images one at a time, or select all images. Selecting a Single Image From the menu, select [Print Order]. Press the MENU button. Turn the dial to select [Print Order]. 2 Press the button. The Print Order screen appears. [Order] is selected. 3 Press the button. The Select Image screen appears. If you press the button, 3 images are displayed on the Select Image screen. Press the button again to enlarge the Select Image screen. 4Select the images. Turn the dial to select an image, then press the button. If the Print Type ( 3) selection is Standard or Both, the Print Quantity screen appears. If the Print Type ( 3) selection is [Index], a check mark appears at the upper left. Images in RAW format cannot be marked for printing. If you selected [Index], you can press the button again to delete the mark and cancel the selection. 5 Playing and Erasing Recorded Images
112 Print Order Number of prints of the selected image 5 Select the print quantity. If the Print Type ( 3) is [Index], you do not need to specify the print quantity. Turn the dial to select the quantity, then press the button. The quantity appears next to the icon. To cancel the selection, set the quantity to [0]. To select another image, repeat steps 4 and 5. Press the MENU button to return to the Select Image screen. Selecting All Images You can select all images on a CF card at once, except those in RAW format. Follow steps and 2 of the Selecting a Single Image procedure ( ), to display the Print Order screen. 2 Turn the dial to select [All], then press the button. The Select All Images menu appears. 3 Select [Mark all]. Turn the dial to select [Mark All], then press the button. This orders all the images and the display then returns to the Print Order screen. At this point you can select [Clear all] to delete all images you have ordered. Select [Cancel] to return to the Print Order screen. Images are printed in order from oldest to newest. You can order up to 998 images. If you select images using the Mark All method, one copy of each will be printed. To specify quantities, use the Selecting a Single Image method. ( ) 2
, to display the Print Order screen.")
113 Print Order Print Type You can specify the following print types. Standard: Prints one image to each page. Index: Prints an index of the images in reduced size, on one page. Both: Prints the individual images and an index sheet. Follow 2 Turn steps and 2 of the Selecting a Single Image procedure ( ), to display the Print Order screen. the dial to select [Set up], then press the button. The Print Order Setting screen appears. 3 Turn the dial to select [Print Type], then press the button. 5 4Select the print type. Turn the dial to select the print type, then press the button. Press the MENU button to return to the Print Order screen. Playing and Erasing Recorded Images 3
114 Print Order Specifying Date Printing You can specify printing of the date and time on each image. Follow 2 Turn steps and 2 of the Selecting a Single Image procedure ( ), to display the Print Order screen. the dial to select [Set up], then press the button. The Print Order Setting screen appears. 3 Turn the dial to select [Date], then press the button. 4Specify date printing. Turn the dial to select [On] or [Off], then press the button. Press the MENU button to return to the Print Order screen. If the print type is [Index], you cannot specify both date and file number. Specify one or the other. The date will be printed in the date style set from the menu in the Date/Time function. ( 38) 4
115 Print Order Specifying File Number Printing You can specify printing of file number information on each image. Follow 2 Turn steps and 2 of the Selecting a Single Image procedure ( ), to display the Print Order screen. the dial to select [Set up], then press the button. The Print Order Setting screen appears. 3 Turn the dial to select [File No.], then press the button. 5 4Specify file number printing. Turn the dial to select [On] or [Off], then press the button. Press the MENU button to return to the Print Order screen. Playing and Erasing Recorded Images If the print type is [Index], you cannot specify both date and file number. Specify one or the other. 5
116 Connecting to a TV You can connect the EOS D30 to a television (using the video cable provided with your camera) to display your recorded images. Always turn off the camera and the television before connecting or disconnecting them. Open the cover. 2 Connect the cable. Connect the cable to the VIDEO OUT terminal on the camera and to the video input terminal on the TV. Insert the cable plug all the way, until it clicks into place. 3 Turn the TV on, and set the input switch to Video In. Video input terminal 4Set the Main Switch to ON. 5 Press the button. The image appears on the TV screen. You can use the TV to view images or make menu settings just as you would with the LCD monitor. When you finish, set the Main Switch to OFF, turn the TV off, then disconnect the video cable. When using a TV screen display, we recommend that you connect the EOS D30 to a household power supply using the DC coupler. ( 29) Images and menus do not appear on the LCD monitor while the video cable is connected to the camera. You can also switch the TV video signal to PAL ( 23). The default setting is for the NTSC signal standard. 6

117 Cleaning the CMOS Imaging Element The imaging element corresponds to the film in a film camera. If dirt or foreign matter gets on this imaging element, black spots may be recorded on the corresponding part of the image. If this happens, use the procedure below to clean the imaging element. Because the imaging element is very sensitive, we strongly recommend that you have the cleaning done by Canon service representatives. When cleaning the imaging element, always connect the EOS D30 camera to a household power outlet using the DC coupler. If you try to clean the imaging element while the battery pack is installed in the camera, the cleaning warning message will blink on the LCD panel and you will not be able to clean the imaging element. Before you start cleaning, remove the lens ( 30), attach the DC coupler ( 29), and set the Main Switch to ON. Insert the DC coupler ( 29) and set the Main Switch to ON. ( 3) 2 From the menu, select [C.Fn]. Press the MENU button. Turn the dial to select [C.Fn]. 3 Press the button. The Custom Function Setting screen appears. 4Select [C.Fn-3]. Turn the dial to select C.Fn-3 [Sensor cleaning], then press the button. 5 Playing and Erasing Recorded Images 7
![Cleaning the CMOS Imaging Element 5 Select [: Enable]. Turn the dial to select [: Enable], then press the button. The message appears on the LCD panel.](/docs-images/74/70673714/images/118-0.jpg "If is blinking on the LCD panel, set the Main Switch to OFF and remove the battery pack. Then repeat the procedure from Step. 6Press the shutter button down fully.")
118 Cleaning the CMOS Imaging Element 5 Select [: Enable]. Turn the dial to select [: Enable], then press the button. The message appears on the LCD panel. If is blinking on the LCD panel, set the Main Switch to OFF and remove the battery pack. Then repeat the procedure from Step. 6Press the shutter button down fully. The reflex mirror of the camera then flips up, and the shutter opens. 7 Clean the imaging element. Carefully blow any dust off the imaging element using a commercially available blower. 8Finish cleaning. Set the Main Switch to OFF. The camera power turns off, the shutter closes and the mirror is lowered. Set the Main Switch to ON again, and the camera will be ready to shoot pictures normally. Never disconnect the camera power during cleaning. If the power is cut off, the shutter will close and possibly damage the shutter curtain. Use a blower without a brush attached. Using a brush to remove dust from the image element can damage the element. Do not insert a dust blower into the camera beyond the lens mount. If the power shuts off and the shutter closes, this may damage the shutter curtains. Never use cleaning sprays or blower sprays. The pressure and freezing action of the spray gas may damage the surface of the imaging element. 8
119 Menu Function Settings 6 You can make a variety of settings from the EOS D30 s menu. The menu includes special settings called Custom Functions that are related to camera operation. This booklet indicates these settings with the mark, and provides basic descriptions. This chapter lists the EOS D30 s menu functions and describes the use of the Custom Function settings. For Menu operations and default settings, see Menu Functions and Settings ( 36, 37).
120 List of Menu Functions Item Quality Screen Description Sets the size in pixels of the picture as recorded on the CF card, as well as the compression ratio. Select Large, Large, Small, Small, or RAW. See page 54 Red-eye reduction function Turns on/off a function for reducing the red-eye look caused by using a flash to photograph people at night or in dark settings. 93 AEB to automatically change exposure level Sets the increment steps for underexposure and overexposure in AEB shots. 82 ISO speed Sets the ISO speed. Select ISO 00, 200, 400, 800, or Beep Turns on/off the electronic beep that sounds when the image is in focus. Can also be set to function as the beep that indicates the self timer is operating. Select On or Off Custom WB Selects the image to use as the basis for custom white balance adjustments

121 List of Menu Functions Item Parameters Screen Description Allows the user to set up to three sets of parameters with the included software for processing recorded images, in addition to the standard parameters automatically stored in the camera. See page 56 Protect Allows the user to protect image files against accidental erasure. 07 Rotate Rotates the image display 90 clockwise or counterclockwise. 06 Print Order Lets you order prints of your photos for printing on DPOFcompatible devices. 0 6 Auto playback Auto power off Automatically plays images sequentially on the LCD monitor. To conserve battery power, sets the Auto power off function that automatically switches off power if there is no operation for a given time. Select, 2, 4, 8, 5, or 30 minutes, or Off Menu Function Settings 2
. See page 45 Review time When the Review function has been set to On or On (Info), this determines the time that images are displayed.")
122 List of Menu Functions Item Review Screen Description Determines whether images appear on the LCD monitor after they are taken. Select On, On (Info), or Off. The display time is set by the Review time setting (below). See page 45 Review time When the Review function has been set to On or On (Info), this determines the time that images are displayed. Select 2, 4, or 8 seconds, or Hold. 46 LCD brightness Sets the LCD brightness. Select normal or bright. Date/Time Sets the date and time, and the order of display for year, month, and day. 38 File numbering Sets the pattern for automatically assigning file numbers to each image. Select continuous or auto reset. 32 Language Sets the language used for the Menu screen. Select English, Deutsch, Français, or Japanese. 22
123 List of Menu Functions Item Video system Screen Description Determines the video system format. Select NTSC or PAL. See page 6 Format CF card Formats the CF card in the camera. 09 Custom functions Sets custom functions that can adjust many of the camera functions to meet individual requirements Menu Function Settings 23
124 List of Menu Functions Custom Function Settings You can adjust many of the Canon EOS D30 s functions to meet your particular requirements using the Custom Function settings. To change Custom Functions, select [C.Fn] from the menu. Func. No. 0 Item Long exposure noise reduction Screen Select no. 0 Off On Setting or change 02 Shutter button /AE lock button Press the shutter button down halfway: AE, AF button: AE lock button: AE, AF Press the shutter button down halfway: AE lock Press the shutter button down halfway: AE, AF button: AF lock (no AE lock) button: AE, AF (no AE lock) Press the shutter button down halfway: AE 03 Mirror lockup 0 Disable (normal photography) Enable 04 Tv, Av, and exposure level 0 /2-stop increments /3-stop increments 05 AF-assist light 0 On (auto) Off 24
125 List of Menu Functions Effects, remarks See Page Effective for reducing noise occurring in time exposure or bulb shots longer than one second. However, this requires processing time after the shot approximately equivalent to the exposure time. During processing, the message appears on the LCD panel and in the viewfinder, and no exposures can be made. 87 Effective for determining focus and exposure separately. 84 In AI Servo AF mode, if an object passes between the camera and the subject, you can press the button to pause AF operation and keep the camera from focusing on the obstruction. Exposure is determined when you take the picture. This is useful when photographing subjects that move and stop repeatedly. In AI Servo AF mode you can press the button to start or stop AI Servo AF operation. Exposure is determined when you take the picture. The optimum focus and exposure are thus always ready for the decisive moment. 60 Effective for preventing the effects of camera vibration caused by mirror action in close-up and ultra-telephoto shots. Effective in conditions that require more precise exposure settings Menu Function Settings Effective in conditions where the AF-assist light may not be desirable
126 List of Menu Functions Func. No. 06 Item Shutter speed in Av mode with flash Screen Select no. 0 Setting or change Automatic setting Fixed at /200 second AEB sequence /auto cancellaton when Main Switch is Off Shutter curtain sync /Enabled 0 +/Disabled 0 +/Enabled 0 +/Disabled st-curtain sync. Flash fires immediately after the shutter reaches full-open position. 2nd-curtain sync. Flash fires immediately before 2nd curtain closes. 09 Lens AF stop button Fn. Switch 0 2 Stop AF while button is pressed Operate AF while button is pressed Press button to start exposure timer and lock AE 0 Auto reduction of fill flash 0 Enable Disable 26
127 List of Menu Functions Effects, remarks Effective for using flash at night or in dark locations. See Page Effective when you continue to take AEB shots with the first frame set at the correct exposure. Lets you take AEB shots from the lowest exposure first. Effective when you continue to take AEB shots from the lowest exposure first Effective at filling in shadows at slow shutter speeds. 92 Camera AF does not operate while this button is pressed. 6 Effective for determining focus and exposure separately. Produces natural daylight sync imaging. Prevents underexposure of people photographed against strong backlighting such as sunsets. 95 Menu Function Settings 27


128 List of Menu Functions Func. No. Item Menu button return position Screen Select no. 0 Setting or change Always show first menu item. Show the most recently set menu item. (Set the Main Switch to Off to cancel, or On to show the first menu item.) 2 SET button func. when shooting Show the most recently set menu item. (Retain in memory when the main switch is Set to Off.) Not assigned. Change quality. Change ISO speed. 3 Sensor cleaning 3 0 Select parameters. Disable Enable 28
129 List of Menu Functions Effects, remarks See Page Enables prompt menu selection for items that are frequently changed. Enables prompt menu selection for items that are frequently changed. Convenient when you want to retain function settings, regardless of whether the power is On or Off. Lets you change quality quickly when you are taking photographs. 54 Lets you change ISO speed quickly when you are taking photographs. Lets you change parameters quickly when you are taking photographs. Used when cleaning the imaging element. Effective when dust or small black spots appear on pictures Menu Function Settings 29
130 REFERENCE Basic Terminology for Digital Cameras and Digital Photography AE Auto Exposure is a function that calculates the exposure automatically. The camera has a builtin exposure meter that automatically determines the correct exposure (the combination of shutter speed and aperture value). AF Auto Focus is a function that focuses the camera automatically. Aperture value The lens aperture opens and closes to control the amount of light that reaches the imaging element. The aperture value (or f-number) is equal to the focal length divided by the aperture diameter. The aperture value is displayed on the camera s LCD panel and in the viewfinder, and ranges from.0 to 9, depending on the particular lens mounted on the camera. CF (CompactFlash) Card CompactFlash card is the storage media used to record photo images taken by the EOS D30. Depth of Field When a subject is in focus, a distance in front of and behind the subject is also in focus. This is called the depth of field. The greater the aperture value (that is, the smaller the aperture), the broader the depth of the field. This is called a deeper depth of field. Conversely, the smaller the aperture value (larger aperture), the narrower the depth of field, called a shallower depth of field. The depth of field is affected as described below: q A smaller aperture (larger aperture value) increases the depth of field. Thus, reducing the aperture provides a deeper depth of field. w At a given subject distance and aperture value, a lens with a shorter focal length increases the depth of field. Thus, a wide-angle lens gives a deeper depth of field than does a telephoto lens. e At a given aperture value, a greater distance between the camera and subject increases the depth of field. r When the optimum focus is on the subject, the depth of field behind the point of optimum focus is longer than the depth of field in front of the point of optimum focus. The depth of field is normally twice as deep behind the subject as before the subject (see illustration). 30

131 REFERENCE Depth of field Point of optimum focus 2 Aperture value set to f/22 Aperture value set to f/2 DPOF Digital Print Order Format is a standard format for ordering prints of digital camera images from photo lab printing services, as well as printing from household printers. The Canon EOS D30 is DPOF-compatible. You can specify printing from the camera itself and store the order information on the CF card. Photo printing services or household printers using the DPOF format can then produce prints easily using that information. Exposure Exposure refers to the amount of light striking the imaging element to produce a photograph. The amount of light appropriate for the ISO speed is called the correct exposure. The correct exposure is adjusted by changing the combination of the shutter speed and aperture value. File Numbering and Folders The pictures you take are automatically assigned file numbers from and stored in folders of 00 images each. Each folder is numbered from 00 to 998 and recorded on the CF card. Because pictures taken using continuous shooting must be stored in the same folder, there may in some cases be more than 0 images in a folder. Folders with 99 as their last two digits are not created. Images stored in formats other than RAW format have the file name Img_ and the extension jpg, and images stored in RAW format have the file name CRW_ and the extension crw. Images with the extension thm are thumbnail images for index display. Example: Img_000.jpg ~ ~ ~ ~ 7 REFERENCE File name Extension File number 3
132 REFERENCE Format Formatting a CF card is the process of preparing the CF card to store image data. Be careful when formatting a CF card, because the formatting process erases all data stored on the card. ISO Speed An index number representing the photosensitivity of silver-halide photo film. This sensitivity standard is determined by the International Standards Organization (ISO), and is normally written as ISO 00, etc. The higher the ISO speed, the greater the sensitivity to light. Digital cameras use ISO speeds based on silver-halide photography. JPEG Joint Photographic Experts Group is a file format for compressing and storing color images. The compression ratio can vary, but higher compression results in greater image degradation when the file is expanded (restored). Red-eye Phenomenon In a relatively dark room, where subjects pupils are dilated, the light from a camera flash passes through the pupil, is reflected by the retina, and causes the subjects pupils to appear red. Red-eye is particularly prevalent when the flash is close to the optical axis of the lens. Use the following procedure to minimize red-eye: q Shoot with the Red-eye reduction function turned on. (The red-eye reduction lamp lights before the picture is taken, causing the pupils to contract and thus minimizing red-eye.) w Shoot with an EX-series Speedlite. (The light reflected from the flash will not be directed along the optical axis of the lens, thus minimizing red-eye.) e Shoot from as close as possible (same effect as w). Shutter Speed The camera s shutter opens for a variable length of time to control the amount of light that reaches the imaging element. This length of time is called the shutter speed. 32
133 REFERENCE Function Availability Table Mode Dial AF Focusing point selection Drive : Automatic setting : Selection possible Metering mode ONE SHOT AI SERVO AI FOCUS Auto Manual Single Continuous Evaluative Partial Centerweighted averaging Mode Dial Built-in flash White balance Image size Compression Red-eye Auto Manual Auto Manual Large Small RAW reduction 7 AF Modes and Drive Modes Drive mode Single Continuous ONE SHOT AF Shutter cannot be released until focus is achieved. When focus is achieved, AF is locked. In evaluative metering mode, the exposure (set just before the picture is taken) is also locked. The above conditions apply during continuous shooting. (in Large format, approximately 3 images per second to a maximum of 8 images.) AI Servo AF Autofocus tracks the moving subject, and the exposure is set when the picture is taken. The above conditions apply during continuous shooting. (in Large format, approximately 2.5 images per second, up to a maximum of 8 images.) AI Focus AF Automatically switches between ONE SHOT AF and AI Servo AF according to the subject. 33 REFERENCE
134 REFERENCE Exposure Warnings Mode Blinking warning Description Subject is too dark. Remarks Use flash. Subject is too bright. Use a neutral density filter. Picture will be underexposed. Picture will be overexposed. Picture will be underexposed. Picture will be overexposed. Turn the dial to a slower shutter speed. Turn the dial to a faster shutter speed. Turn the dial to a smaller aperture value. Turn the dial to a larger aperture value. The desired depth of field cannot be obtained. Subject is too dark. Subject is too bright. ) Move farther from the subject and try again. 2) If using a zoom lens, use the shortest focal length. Use a flash (the result will be the same as using Program AE ). Use a neutral density filter. The warnings shown are examples using a lens with a minimum aperture value of f/3.5, and a maximum aperture value of f/22. Actual maximum and minimum aperture values will depend on the particular lens you use. AE Lock Effects for Combinations of Focusing Point Selection and Metering Method Focusing point selection Metering method Evaluative metering Partial metering Center-weighted averaging Auto selection AF AE lock applied to the metered value at the active focusing point. (when using a mode in the Creative zone) Manual selection AF AE lock applied to the metered value at the selected focusing point. AE lock applied to the metered value at the center focusing point. 34
135 REFERENCE Program Line The following program line applies when the camera is in Program AE mode. ISO Lens EF50mm F.4 USM EF24 85mm F USM WIDE24mm EF24 85mm F USM TELE85mm EV Shutter speed Aperture value (f-no.) Program Line Description The lower horizontal axis represents the shutter speed, and the right-hand vertical axis represents the aperture value. The combinations of shutter speed and aperture value automatically determined by Program AE are shown as colored lines with respect to the subject brightness (Exposure Value) gradations on the left and top edges of the graph. Example: Using an EF50 F.4 USM lens with a subject brightness of EV2, the point where the diagonal line from EV2 (on the top edge) intersects the Program AE line represents the corresponding shutter speed (/350 second) and aperture value (f/3.5) that the program sets automatically. The diagonal arrowed lines at the upper left indicate the metering range for the indicated ISO speed. 7 REFERENCE 35
136 REFERENCE Shutter Speed and Aperture Value Readouts Shutter speed readout The shutter speed is normally displayed in /2-stop increments. Numbers from 4000 to 4 denote the denominator of the shutter speed fraction: for example, 25 is /25 seconds. In addition, 0"3 is 0.3 seconds, and 5" is 5 seconds. Aperture value readout The aperture value is normally displayed in /2-stop increments. The larger the number, the smaller the aperture opening. The range of aperture values (f-numbers) displayed depends on the lens used. /2-stop increments Shutter speed Aperture value /3-stop increments Shutter speed Aperture value 36 The shutter speed and aperture value can be set in /3-stop increments. (C.Fn-4 24)
137 Error Codes When a camera error occurs, an error code (Err xx) appears on the LCD panel. When this happens, set the Main Switch to OFF and then set it to ON again. If an error code is displayed frequently, this indicates that a malfunction has occurred. Make a note of the error code and contact your nearest Canon Service Center (see back cover). If an error code is displayed after you take a picture, the picture may not have been recorded. Press the play button and review the image. Message List The following messages are displayed on the LCD monitor. Processing... CF card is missing CF card error A picture is being stored on the CF card, or the camera is loading a recorded image. Attempted to take a picture or play an image with no CF card in the camera. There is a problem with the CF card. CF card full The CF card has stored all the pictures it can hold. No more pictures can be stored. Also no more print orders can be stored. Unable to create file name A file already exists with the file name that the camera is attempting to create. Or the file numbers have already reached the maximum value and no new file numbers can be created. Transfer the necessary number of images to a computer, then use the computer to format the CF card. Note that formatting will erase all images and information on the CF card. No image No images are recorded on the CF card. Image is too large Attempted to play an image having a size larger than pixels. Non-compatible JPEG Attempted to play an image having a JPEG format that is not compatible with the camera. Data is corrupted Attempted to play an image containing corrupted data. Unable to rotate image Attempted to rotate an image recorded by another camera or in another format, or processed by a computer. Unable to identify image Attempted to play an image taken in a special format (such as a format unique to a camera from another manufacturer). Protected Attempted to erase a protected image. Setting is too high Attempted to enter a print order quantity that is too high. Enter a lower quantity. Unable to complete setting Print order or slide show setting could not be stored. 7 REFERENCE 37
138 REFERENCE Troubleshooting If you have a problem with your camera, first refer to this Troubleshooting Guide as you check the camera. Power Unable to charge battery pack. Main switch does not turn the camera ON. Access lamp blinks even when the Main Switch is OFF. Battery loses power quickly Camera switches off by itself Only the icon blinks on the LCD panel An incorrect battery pack is being used. Use a Canon BP-5 battery pack. ( 4) Battery pack is not correctly attached to the compact power adapter. Attach the battery pack correctly. ( 25) The DC coupler is connected to the compact power adapter. Remove the DC coupler plug from the compact power adapter. ( 26) The battery pack is out of power. Charge the battery pack. ( 25) Battery pack is not inserted correctly. Insert the battery pack correctly. ( 27) Battery chamber cover is not closed. Close the battery chamber cover tightly. ( 27) CF card slot cover is not closed. Insert the CF card firmly until the CF card eject button pops out, then close the CF card slot cover tightly. ( 3) If the Main Switch is set to OFF immediately after taking a picture, the access lamp continues flashing for a few seconds until the image is stored on the CF card. After the image has been stored on the CF card the access lamp will go out and the camera will turn off automatically. Battery pack is not sufficiently charged. Charge the battery pack fully. ( 25) Battery pack is beyond its useful life. Obtain a new battery pack. ( 40) Auto power off function is operating. Switch the camera on again with the main switch, or turn off the Auto power off function. ( 2) Battery pack level is very low. Charge the battery pack. ( 25) Camera is not operating properly. Press the shutter button down halfway to reset the camera to normal. ( 33) * If the icon still appears, the camera needs repair. Take it to a Canon Service Center. ( back cover) 38
139 REFERENCE Shooting Unable to shoot or record images LCD monitor displays and images are hard to see Images are blurred CF card is not loaded correctly. Load the CF card correctly. ( 3) CF card is full. Change to a new CF card, or erase unwanted images. ( 3, 47, 08) The battery pack is out of power. Charge the battery pack. ( 25) Image out of focus (In-focus light in the viewfinder blinks). Press the shutter button down halfway to focus again. If this fails, focus manually. ( 33, 63) Dust or foreign matter on the monitor. Clean the monitor with a soft eyeglass cloth. LCD monitor is worn out. Consult the store where you bought your camera, or a Canon Service Center. ( 2, back cover) Lens focusing mode switch set to MF (or M ). Set the focusing mode switch to AF. ( 30) Hand movement when the shutter button is pressed. Press the shutter button carefully so that the camera does not move. ( 33, 40) Unable to use the CF card CF card data is corrupted. Format the CF card. ( 09) Use the specified type of CF card. ( 3, 4) The message The backup battery is out of power. appears on Replace the backup battery. ( 24) the LCD panel 7 Checking and Handling Images Cannot erase images Incorrect date and time displayed Images may be protected. Remove image protection. ( 07) Date/Time setting may be incorrect. Set date/time correctly. ( 38) REFERENCE No image appears on the TV screen Video cable plugs are not inserted fully. Insert the video cable plugs firmly all the way. ( 6) 39
.")
 shots.")

 are 55, 38, and 22. All three Speedlites enable E-TTL autoflash, high-speed sync (FP flash), and FE lock.")
140 REFERENCE Major Accessories (Sold Separately) Battery Pack BP-5 This is a powerful lithium ion secondary battery pack. The rated voltage is 7.4V. You can use the Compact Power Adapter CA-PS400 to charge the BP-5 battery pack, and when fully charged it has enough power for you to take approximately 540 pictures (Normal, with 50% flash use). Charging takes about 90 minutes. Battery Grip BG-ED3 This is a battery grip that holds two BP-5 battery packs. It provides a shutter button, electronic dials, AE lock/fe lock button, and focusing point selection button for use in taking portrait (vertical) shots. (Can also use the DC coupler) E-series Dioptric Adjustment Lenses One of ten E-series dioptric adjustment lenses (-4 to +3 diopters) with eyecup can be attached to the camera s eyepiece to further expand the dioptric correction range. EOS-Dedicated EX-Series Speedlites 550EX, 380EX, 220EX Three EOS-dedicated E-TTL autoflash Speedlites are available: the high-output zoom flash 550EX, the affordable 380EX, and the compact 220EX. The respective guide numbers of these (ISO 00, m/ft.) are 55, 38, and 22. All three Speedlites enable E-TTL autoflash, high-speed sync (FP flash), and FE lock. In addition, the 550EX can operate in an easy-to-use wireless, multi- Speedlite system. Macro Ring Lite MR-4EX This is an EOS-dedicated macro ring flash featuring twin flash tubes, guide no. 4 (ISO 00, m/ft.), and E-TTL autoflash. You can fire one or both flash tubes and control the flash ratio to easily obtain sophisticated lighting effects with E-TTL autoflash. Features include high-speed sync (FP flash) and FE lock. The MR-4EX can operate in a wireless, multi-speedlite system with a 550EX Speedlite as a slave to provide a variety of macro flash effects. 40
 longexposure timer, and (4) shutter release count-setting function.")


141 REFERENCE Timer Remote Controller TC-80N3 The remote controller attaches with an 80-cm cord and includes built-in () self timer, (2) interval timer, (3) longexposure timer, and (4) shutter release count-setting function. You can set the time from second to 99 hours, 59 minutes, 59 seconds, in -second increments. Includes a one-touch locking plug for connecting to the EOS D30. Remote Switch RS-80N3 This is a remote switch with an 80-cm cord to prevent camera shake for super-telephoto shots, macrophotography, and bulb exposures. You can use the remote switch to press the shutter button down halfway or completely. Also includes shutter release lock and a one-touch locking plug for connecting to the EOS D30 s remote control terminal. CF Card Memory media for storing photo images. PC Card Adapter This adapter allows you to use a CF card in a computer s PC card slot. 7 REFERENCE 4
EF-S17-85mm f/4-5.6 IS USM COPY ENG. Instruction
 EF-S17-85mm f/4-5.6 IS USM ENG Instruction Thank you for purchasing a Canon product. The Canon EF-S17-85mm f/4-5.6 IS USM lens Features is a compact and lightweight standard zoom 1. The Image Stabilizer
Camera User Guide. Flowchart and Reference Guide. Shooting with the Camera. Installing the Software. Connecting the Camera to a Computer
 Camera User Guide Flowchart and Reference Guide This Guide Shooting with the Camera Software Starter Guide Installing the Software This Guide Connecting the Camera to a Computer Software Starter Guide
ENGLISH. DIGITAL CAMERA Camera User Guide. Camera User Guide CDI-E XX01XXX.X 2002 CANON INC. PRINTED IN JAPAN CDI-E051
 DIGITAL CAMERA Camera User Guide ENGLISH CDI-E051 Camera User Guide CDI-E051-010 XX01XXX.X 2002 CANON INC. PRINTED IN JAPAN Please read the Read this First section (p. 7). Please refer to the Software
ENGLISH. DIGITAL CAMERA Camera User Guide. Camera User Guide CDI-E XX01XXX.X 2003 CANON INC. PRINTED IN JAPAN CDI-E081
 DIGITAL CAMERA Camera User Guide ENGLISH CDI-E081 Camera User Guide CDI-E081-010 XX01XXX.X 2003 CANON INC. PRINTED IN JAPAN Please read the Read This First section (p. 7). Please refer to the Software
Camera User Guide ENGLISH. DIGITAL CAMERA Camera User Guide
 ENGLISH CDI-E078-010 2003 CANON INC. PRINTED IN CHINA DIGITAL CAMERA Camera User Guide Camera User Guide Please read the "Read this First" section (p. 11). Please refer to the Software Starter Guide for
Owner s Manual BL
 Owner s Manual BL00004854-200 Introduction ii About This Manual This manual contains instructions for the EF-X500, a powerful, multi-functional flash unit from FUJIFILM. When using the flash, refer to
INSTRUCTION MANUAL. E English Edition INSTRUCTION MANUAL
 INSTRUCTION MANUAL CANON INC. 30-2, Shimomaruko 3-chome, Ohta-ku, Tokyo 146-8501, Japan U.S.A. CANADA EUROPE, AFRICA & MIDDLE EAST CENTRAL & SOUTH AMERICA ASIA OCEANIA JAPAN CANON U.S.A. INC. For all inquiries
ENGLISH. DIGITAL CAMERA Camera User Guide Camera User Guide CDI-E XX01XXX.X 2002 CANON INC. PRINTED IN JAPAN CDI-E049
 ENGLISH CDI-E049 CDI-E049-010 XX01XXX.X 2002 CANON INC. PRINTED IN JAPAN DIGITAL CAMERA Camera User Guide Camera User Guide Please read the Read this First section (p. 7). Please refer to the Software
Digital Color Printer
 3-858-635-12 (1) Digital Color Printer Operating Instructions Before operating the unit, please read this manual thoroughly and retain it for future reference. This PRINTER is designed to use PRINT PACK
Camera User Guide ENGLISH
 ENGLISH Camera User Guide Please read the Read this First section (p. 5). Please refer to the Quick Start section for a simple explanation of shooting, replaying and erasing (p. 12). Please refer to the
2.4G Wireless FlashTTL Trigger KR-201
 2.4G Wireless FlashTTL Trigger KR-201 Contents Contents About high performance of KR201 Cautions before use KR201 of remote functions Compatible equipment The name of each part The basic installation instructions
DC155 Digital Visualizer. User Manual
 DC155 Digital Visualizer User Manual Table of Contents CHAPTER 1 PRECAUTIONS... 4 CHAPTER 2 PACKAGE CONTENT... 6 CHAPTER 3 PRODUCT OVERVIEW... 7 3.1 PRODUCT INTRODUCTION... 7 3.2 I/O CONNECTION... 8 3.3
S5-ADU. Front... 4 Rear... 4
 Trantec ANTENNA DISTRIBUTOR INSTRUCTION MANUAL S5-ADU Thank you for purchasing TRANTEC Antenna Distributor. Please carefully follow the instructions in this manual to ensure long, trouble-free use of your
DC162 Digital Visualizer. User Manual. English - 1
 DC162 Digital Visualizer User Manual English - 1 Chapter 1 Precautions Always follow these safety instructions when setting up and using the Digital Visualizer: 1. Please do not tilt the machine while
INSTRUCTION MANUAL DIGITAL STILL CAMERA PDR-M65 PDR-M61
 INSTRUCTION MANUAL DIGITAL STILL CAMERA PDR-M65 PDR-M61 INSTRUCTION MANUAL To ensure that you use the Toshiba PDR-M65 or PDR-M61 Digital Still Camera safely and correctly, read this Instruction Manual
EOS 70D (W) EOS 70D (N)
 EOS 70D (N)") EOS 70D (W) EOS 70D (N) The EOS 70D (N) does not have the Wi-Fi function explained in this manual. E INSTRUCTION MANUAL Introduction The EOS 70D (W/N) is a digital single-lens reflex camera featuring a
EOS 70D (W) EOS 70D (N) The EOS 70D (N) does not have the Wi-Fi function explained in this manual. E INSTRUCTION MANUAL Introduction The EOS 70D (W/N) is a digital single-lens reflex camera featuring a
EOS REBEL T6 (W) EOS 1300D (W)
 EOS 1300D (W)") EOS REBEL T6 (W) EOS 1300D (W) Instruction Manual Instruction manuals (PDF files) and software can be downloaded from the Canon Web site (p.4, 315). www.canon.com/icpd E Introduction The EOS REBEL T6 (W)
EOS REBEL T6 (W) EOS 1300D (W) Instruction Manual Instruction manuals (PDF files) and software can be downloaded from the Canon Web site (p.4, 315). www.canon.com/icpd E Introduction The EOS REBEL T6 (W)
EOS 750D (W) ENGLISH INSTRUCTION MANUAL
 ENGLISH INSTRUCTION MANUAL") EOS 750D (W) ENGLISH INSTRUCTION MANUAL Introduction The EOS 750D is a digital single-lens reflex camera featuring a finedetail CMOS sensor with approx. 24.2 effective megapixels, DIGIC 6, high-precision
EOS 750D (W) ENGLISH INSTRUCTION MANUAL Introduction The EOS 750D is a digital single-lens reflex camera featuring a finedetail CMOS sensor with approx. 24.2 effective megapixels, DIGIC 6, high-precision
Always there to help you. Register your product and get support at AJ3400/37. Question? Contact Philips.
 Always there to help you Register your product and get support at www.philips.com/support Question? Contact Philips AJ3400/37 User manual Contents 1 Important 3 Safety 3 2 Your clock radio 4 What's in
P20 Zoom Flash Zoom Flash P20 P20 Zoomblitz Flash con zoom P20 Flash externo P20 Flash Zoom P20
 P20 Zoom Flash Zoom Flash P20 P20 Zoomblitz Flash con zoom P20 Flash externo P20 Flash Zoom P20 User s Guide Guide d'utilisation Benutzerhandbuch Manuale per l'utente Guía del usuario Guia do usuário 4J6021
CANON EOS REBEL T3I/600D FOR DUMMIES
 Page 1 of 10 PHOTOGRAPHY CAMERAS CANON CAMERA CANON EOS REBEL T3I/600D FOR DUMMIES CHEAT SHEET CANON EOS REBEL T3I/600D FOR DUMMIES From Canon EOS Rebel T3i / 600D For Dummies By Julie Adair King Your
Ricoh Speedlite PX Flash Unit This camera manual library is for reference and historical purposes, all rights reserved.
 Ricoh Speedlite PX Flash Unit This camera manual library is for reference and historical purposes, all rights reserved. This page is copyright by, M. Butkus, NJ. This page may not be sold or distributed
SLR Digital Camera. Operating Manual. For optimum camera performance, please read the Operating Manual before using the camera.
 SLR Digital Camera Operating Manual For optimum camera performance, please read the Operating Manual before using the camera. Thank you for purchasing this PENTAX q Digital Camera. Please read this manual
Auto Flash OPERATING MANUAL
 Auto Flash OPERATING MANUAL Introduction Thank you for purchasing the Auto-flash AF540FGZ II/ AF360FGZ II. In addition to easy daylight sync photography with P-TTL auto, the AF540FGZ II/AF360FGZ II also
Exploring the Nikon D3200
 C HAP T E R 1 AL Exploring the Nikon D3200 T CO PY RI GH TE D MA TE RI he Nikon D3200 is an amazing piece of machinery. It has features and specifications that surpass the top-end professional camera models
impact VC-500LR Monolight INSTRUCTIONS
 impact lighting equipment and accessories VC-500LR Monolight INSTRUCTIONS Congratulations on your purchase of the Impact VC-500LR Monolight. We feel that it will contribute much to your photographic skill
For Your Safety. About the Icons
 For Your Safety Be sure to read these notes before use Safety Notes Thank you for your purchase of this product. For repair, inspection, or internal testing, contact your FUJIFILM dealer. Make sure that
Model S-520 Coin Counter / Sorter Operating Manual
 Model S-520 Coin Counter / Sorter Operating Manual Table of Contents Using the Product Safely... 2 About the Warning Stickers and Points of Warning/... 2 Warning.... 3. 4 Names of the Main Parts......
Instruction Manual. Instruction manuals (PDF files) and software can be downloaded from the Canon Web site (p.4, 315).
 and software can be downloaded from the Canon Web site (p.4, 315).") Instruction Manual Instruction manuals (PDF files) and software can be downloaded from the Canon Web site (p.4, 315). www.canon.com/icpd E Introduction The EOS REBEL T7 or EOS 1500D is a digital single-lens
Instruction Manual Instruction manuals (PDF files) and software can be downloaded from the Canon Web site (p.4, 315). www.canon.com/icpd E Introduction The EOS REBEL T7 or EOS 1500D is a digital single-lens
Ricoh XR Speedlite 300P
 Ricoh XR Speedlite 300P Posted 1-4-04 This manual is for reference and historical purposes, all rights reserved. This page is copyright by mike@butkus. M. Butkus, NJ. This page may not be sold or distributed
Instruction Manual. Instruction manuals (PDF files) and software can be downloaded from the Canon Web site (p.4, 311).
 and software can be downloaded from the Canon Web site (p.4, 311).") Instruction Manual Instruction manuals (PDF files) and software can be downloaded from the Canon Web site (p.4, 311). www.canon.com/icpd E Introduction The EOS REBEL T100 or EOS 3000D is a digital single-lens
Instruction Manual Instruction manuals (PDF files) and software can be downloaded from the Canon Web site (p.4, 311). www.canon.com/icpd E Introduction The EOS REBEL T100 or EOS 3000D is a digital single-lens
On-Line Cardio Theater Wireless Digital Transmitter Installation and Instruction Manual
 On-Line Cardio Theater Wireless Digital Transmitter Installation and Instruction Manual Full installation instructions accompany your Cardio Theater equipment order. This On-Line version of our Installation/Instruction
JJC. Electronic Speedlight SF-33. Instruction Manual
 JJC EN Electronic Speedlight SF-33 Instruction Manual Contents For your safety...1 WARNINGS for flash...2 WARNINGS for batteries...3 Flash parts and their functions...4-6 Installing the batteries...7 Attach
This has given you a good introduction to the world of photography, however there are other important and fundamental camera functions and skills
 THE DSLR CAMERA Before we Begin For those of you who have studied photography the chances are that in most cases you have been using a digital compact camera. This has probably involved you turning the
QUANTUM Qflash T2 / X2 OPERATING INSTRUCTIONS
 QUANTUM Qflash T2 / X2 OPERATING INSTRUCTIONS 1.0 DESIGNATIONS T2 AND X2 1. Removable Reflector, two positions Normal and Wide angle. 2. Flash-tube 2A. Modeling Lamp (for Model X2 only) 3. Bounce Head,
BATTERY GRIP INSTRUCTION MANUAL
 BG-D700 BG-D90 BATTERY GRIP INSTRUCTION MANUAL Product Diagram 1- Contact Cap 2- Holder for Nikon dslr Signal Contact Cover 3- Signal Contacts 4- Auto-Focus Button 5- Main Control Dial 6- Multi-Selector
for Canon/ Nikon digital SLR cameras INSTRUCTION MANUAL
 for Canon/ Nikon digital SLR cameras INSTRUCTION MANUAL Thank you for purchasing a Nissin product Before using this flash unit, please read this instruction manual and refer your camera owner s manual
AF Area Mode. Face Priority
 Chapter 4: The Shooting Menu 71 AF Area Mode This next option on the second screen of the Shooting menu gives you several options for controlling how the autofocus frame is set up when the camera is in
2004 Epson America, Inc. 9/04
 Reference Guide Copyright Notice All rights reserved. No part of this publication may be reproduced, stored in a retrieval system, or transmitted, in any form or by any means, electronic, mechanical, photocopying,
<Motion Panorama> 180 Vertical : 2160 x 9600 Horizontal : 9600 x Vertical : 2160 x 6400 Horizontal : 6400 x 1440
 FUJIFILM X-T10 Spec Sheet Model name FUJIFILM X-T10 Number of effective pixels 16.3 million pixels Image sensor 23.6mm x 15.6mm (APS-C) X-Trans CMOS II with primary color filter Total number of pixels:
E-520. Built-in image stabiliser for all lenses. Comfortable Live View thanks to high speed contrast AF** 100% D-SLR quality
 E-520 Built-in image stabiliser for all lenses Excellent dust reduction system Professional functions 10 Megapixel Live MOS sensor Comfortable Live View thanks to high speed contrast AF** 100% D-SLR quality
INFORMATION FOR YOUR SAFETY!
 INFORMATION FOR YOUR SAFETY! THE FCC REGULATION WARNING (for USA) This equipment has been tested and found to comply with the limits for a Class B digital device, pursuant to Part 15 of the FCC Rules.
audio JCR-332 AM/FM Stereo CD Dual Alarm Clock Radio INSTRUCTION MANUAL
 audio WARNING TO PREVENT FIRE OR SHOCK HAZARD, DO NOT USE THIS PLUG WITH AN EXTENSION CORD, RECEPTACLE OR OTHER OUTLET UNLESS THE BLADES CAN BE FULLY INSERTED TO PRE- VENT BLADE EXPOSURE. TO PREVENT FIRE
Geotagger N3. User Manual (V1.0) Revised by Geosolve.be (Pol F. Gillard) with personal updates and help. Solmeta Technology Co.
 Revised by Geosolve.be (Pol F. Gillard) with personal updates and help. Solmeta Technology Co.") Geotagger N3 User Manual (V1.0) Revised by Geosolve.be (Pol F. Gillard) with personal updates and help Solmeta Technology Co., Ltd Copyright 2011 Solmeta Technology Co., Ltd. All Rights Reserved 1 Contents
Geotagger N3 User Manual (V1.0) Revised by Geosolve.be (Pol F. Gillard) with personal updates and help Solmeta Technology Co., Ltd Copyright 2011 Solmeta Technology Co., Ltd. All Rights Reserved 1 Contents
USER S MANUAL ENGLISH C70EN07Z1
 E C70EN07Z ENGLISH USER S MANUAL This manual explains how to use the SIGMA DP digital camera. Please refer to the SIGMA Photo Pro User Guide, which is available in the PDF format of the supplied CD-ROM,
INSTRUCTION MANUAL INF Fax: (503)
") INSTRUCTION MANUAL INF151 1-800-547-5740 Fax: (503) 643-6322 www.ueiautomotive.com email: info@ueitest.com Introduction Congratulations on your purchase of the INF151 infrared thermometer. Like all UEi
INSTRUCTION MANUAL INF151 1-800-547-5740 Fax: (503) 643-6322 www.ueiautomotive.com email: info@ueitest.com Introduction Congratulations on your purchase of the INF151 infrared thermometer. Like all UEi
(6) Changing the brightness of the illumination. 16 (7) Additional features Power saving mode Checking the battery status...
 Changing the brightness of the illumination. 16 (7) Additional features Power saving mode Checking the battery status...") Table of Contents 1. What is the SenseView LIGHT?... 4 2. Safety precaution... 5 3. Package... 6 4. Configuration... 7 5. After purchasing... 9 (1) Charging... 9 (2) Remove screen protection film... 9
Table of Contents 1. What is the SenseView LIGHT?... 4 2. Safety precaution... 5 3. Package... 6 4. Configuration... 7 5. After purchasing... 9 (1) Charging... 9 (2) Remove screen protection film... 9
E-420. Exceptional ease of use. 100% D-SLR quality. 10 Megapixel Live MOS sensor Shadow Adjustment Technology
 E-420 World's most compact D- SLR* Comfortable viewing with Autofocus Live View 6.9cm / 2.7'' HyperCrystal II LCD Face Detection for perfectly focused and exposed faces Exceptional ease of use 100% D-SLR
2015 RIGOL TECHNOLOGIES, INC.
 Service Guide DG000 Series Dual-channel Function/Arbitrary Waveform Generator Oct. 205 TECHNOLOGIES, INC. Guaranty and Declaration Copyright 203 TECHNOLOGIES, INC. All Rights Reserved. Trademark Information
The Interfit S1. AC/DC Powered TTL/HSS Flash. Instruction Manual.
 The Interfit S1 AC/DC Powered TTL/HSS Flash Instruction Manual www.interfitphotographic.com Interfit S1 Battery Powered TTL/HSS Flash Unit What s cool about the Interfit S1? The S1 is the world s first
Wireless SingStar Microphone Instruction Manual
 Wireless SingStar Microphone Instruction Manual 2008 Sony Computer Entertainment Europe. SingStar is a trademark or a registered trademark of Sony Computer Entertainment Europe. 2, PLAYSTATION and PlayStation
XD-V30 Digital Wireless System
 XD-V30 Digital Wireless System Pilot s Handbook Manuel de pilotage Pilotenhandbuch Pilotenhandboek Manual del Piloto 取扱説明書 See www.line6.com/manuals for Advance Guide 40-00-0286 Advanced Users Guide available
FCC Notice (U.S.A. Only)
") Quick Start Guide Please read this guide before operating this scanner. After you finish reading this guide, store it in a safe place for future reference. Table of Contents Package Contents... 1 Scanning
Quick Start Guide Please read this guide before operating this scanner. After you finish reading this guide, store it in a safe place for future reference. Table of Contents Package Contents... 1 Scanning
COPY INSTRUCTION MANUAL MODE D EMPLOI BEDIENUNGSANLEITUNG MANUALE DI ISTRUZIONI MANUAL DE INSTRUCCIONES INSTRUCTIEHANDLEIDING. English.
 English Français Deutsch INSTRUCTION MANUAL MODE D EMPLOI BEDIENUNGSANLEITUNG MANUALE DI ISTRUZIONI MANUAL DE INSTRUCCIONES INSTRUCTIEHANDLEIDING Italiano Español Nederlands GPS RECEIVER English Introduction
PROGRAM FLASH MAXXUM FLASH 5600HS (D)
") PROGRAM FLASH MAXXUM FLASH 5600HS (D) E INSTRUCTION MANUAL APPENDIX APPLICATIONS BASIC OPERATION FOR PROPER AND SAFE USE Read and understand all warnings and cautions before using this product. WARNING
PROGRAM FLASH MAXXUM FLASH 5600HS (D) E INSTRUCTION MANUAL APPENDIX APPLICATIONS BASIC OPERATION FOR PROPER AND SAFE USE Read and understand all warnings and cautions before using this product. WARNING
CR31. Companion. Instruction Manual
 CR31 Companion Instruction Manual 910-244700-001 IMPORTANT SAFETY INSTRUCTION PLEASE READ CAREFULLY ALL THE FOLLOWING IMPORTANT SAFEGUARDS THAT ARE APPLICABLE TO YOUR EQUIPMENT 1. Read Instructions - All
KODAK PROFESSIONAL DCS Pro SLR/n Digital Camera
 KODAK PROFESSIONAL DCS Pro SLR/n Digital Camera P/N 6B8983_EN User s Guide Eastman Kodak Company 343 State Street Rochester, New York, 14650 Eastman Kodak Company, 2004 Kodak and Kodak Professional are
AM/FM SYNTHESIZER TUNER
 OPERATING INSTRUCTIONS AM/FM SYNTHESIZER TUNER DT-930 UL TABLE OF CONTENTS 1. IMPORTANT SAFETY INSTRUCTIONS... 2 2. SAFETY PRECAUTIONS... 2 3. INFORMATION TO THE USER... 3 4. GENERAL DESCRIPTION... 3 5.
KANEKA OLED Lighting Module SL (LE-01L, LE-02L, LE-03L, LE-01H, LE-02H, LE-03H) Instruction Manual
 Instruction Manual") KANEKA OLED Lighting Module SL (LE-01L, LE-02L, LE-03L, LE-01H, LE-02H, LE-03H) Instruction Manual Safety Information p. 2 1 Product Overview p. 6 2 Connections and Wiring (when dimming is required) p.
KANEKA OLED Lighting Module SL (LE-01L, LE-02L, LE-03L, LE-01H, LE-02H, LE-03H) Instruction Manual Safety Information p. 2 1 Product Overview p. 6 2 Connections and Wiring (when dimming is required) p.
USER GUIDE. Studio Flash Kit NS-DACMSFK/NS-DACMSFK-C. Before using your new product, please read these instructions to prevent any damage.
 USER GUIDE Studio Flash Kit NS-DACMSFK/NS-DACMSFK-C Before using your new product, please read these instructions to prevent any damage. Studio Flash Kit Contents IMPORTANT SAFETY INSTRUCTIONS..............................................................
THANK YOU! Crush Micro PiX. Thank you for choosing Orange. You are now a member of the Legendary British Guitar Amplifier owners club!
 THANK YOU! Thank you for choosing Orange. You are now a member of the Legendary British Guitar Amplifier owners club! Since 1968 when the company was founded, Orange has been a pioneering force in the
Camera User Guide ENGLISH
 Camera User Guide Make sure you read this guide, including the Safety Precautions (= ) section, before using the camera. Reading this guide will help you learn to use the camera properly. Store this guide
MACRO FLASH CONTROLLER MACRO TWIN FLASH 2400 MACRO RING FLASH 1200 INSTRUCTION MANUAL
 MACRO FLASH CONTROLLER MACRO TWIN FLASH 2400 MACRO RING FLASH 1200 E INSTRUCTION MANUAL CONTENTS Names of Parts...10 BASIC OPERATION Installing Batteries...15 Checking Batteries...16 Attaching and Removing
SAFETY INFORMATION IMPORTANT FCC LICENSING INFORMATION
 This device complies with part 15 of the FCC Rules. Operation is subject to the following two conditions: (1) This device does not cause harmful interference, and (2) This device must accept any interference
E-420. Exceptional ease of use. 100% D-SLR quality. 10 Megapixel Live MOS sensor Shadow Adjustment Technology
 E-420 World's most compact D- SLR* Comfortable viewing with Autofocus Live View 6.9cm / 2.7'' HyperCrystal II LCD Face Detection for perfectly focused and exposed faces Exceptional ease of use 100% D-SLR
Connevans.info. DeafEquipment.co.uk. This product may be purchased from Connevans Limited secure online store at
 Connevans.info Solutions to improve the quality of life Offering you choice Helping you choose This product may be purchased from Connevans Limited secure online store at www.deafequipment.co.uk DeafEquipment.co.uk
FOR AVLEX ONLY MT-24A. User Guide. 2.4 GHz Digital Stationary Transmitter
 2.4 GHz Digital Stationary Transmitter User Guide All rights reserved. MN 017/05 Do not copy or forward without prior approvals MIPRO. Specifications and design subject to change without notice. 2 CE5
The Pro Masterpiece with world's fastest AF* and built-in IS.
 E-30 Art Filters, Multi Exposure, Wireless flash, Multiaspect Fully biaxial high-speed 11 point AF system High Speed 12.3 Megapixel Live MOS sensor Live View with multi-angle LCD 5fps sequential shooting
Digital Portable Radio
 II TP620 Digital Portable Radio We are very grateful for your purchasing KIRISUN brand two-way radios produced by Kirisun Communications Co., Ltd. We believe KIRISUN two-way radio, which always incorporates
PROGRAM FLASH MAXXUM FLASH 5600HS (D)
") PROGRAM FLASH MAXXUM FLASH 5600HS (D) E INSTRUCTION MANUAL FOR PROPER AND SAFE USE Read and understand all warnings and cautions before using this product. WARNING Batteries may become hot or explode due
PROGRAM FLASH MAXXUM FLASH 5600HS (D) E INSTRUCTION MANUAL FOR PROPER AND SAFE USE Read and understand all warnings and cautions before using this product. WARNING Batteries may become hot or explode due
SAFETY AND OPERATING MANUAL
 SAFETY AND OPERATING MANUAL Impact drill WX317 WX318 1 3 2 8 7 6 5 4 A1 A2 B C1 2 1 3 3 1 D C2 5 4 E F 2 E F 1 G 4 2 H 1. Keyless Chuck 2. Depth gauge 3. Drill/hammer drill function selector 4. Switch
Tube Facing Tool.
 www.swagelok.com Tube Facing Tool This manual contains important information for the safe and effective operation of the Swagelok TF72 series tube facing tool. Users should read and understand its contents
AM/FM DUAL ALARM CLOCK RADIO WITH DIGITAL TUNING
 AM/FM DUAL ALARM CLOCK RADIO WITH DIGITAL TUNING USER MANUAL KT2051MBY THIS IS NOT A TOY! CAUTION: Electrically Operated Product Please use care when plugging AC adapter into AC outlet. WARNING TO PREVENT
Buzz Lightyear Learn & Go
 Buzz Lightyear Learn & Go Disney/Pixar Slinky Dog is a registered trademark of Poof-Slinky, Inc. Poof-Slinky, Inc. Visit the Disney Website at www.disney.com 2010 VTech Printed in China To learn more about
23070 / Digital Camera Owner s Manual
 23070 / 23072 Digital Camera Owner s Manual 2007 Sakar International, Inc. All rights reserved. 2007 Crayola Windows and the Windows logo are registered trademarks of Microsoft Corporation. All other trademarks
A-16D A-Net Distributor
 A-16D A-Net Distributor For use with the Personal Monitor Mixing System Information in this document is subject to change. All rights reserved. Copyright 2003 Aviom, Inc. Printed in USA Document Rev. 1.03
SwingTracker User Guide. Model: DKST02 User Guide
 SwingTracker User Guide Model: DKST02 User Guide PACKAGE CONTENTS What Comes in the Box USING YOUR SWINGTRACKER SENSOR Attach SwingTracker Sensor to your Bat Turn On your Sensor Pair your Sensor Remove
Digital Wireless Weather System
 Digital Wireless Weather System Thermometer, Hygrometer and Heat Index with Remote Sensor Leading the Way in Accuracy 1458 Instruction Manual C H CHANNEL Congratulations on your purchase of the Taylor
Operating Manual LITEMASTER PRO L-478DR-PX L-478DR-A-PX L-478DR-U-PX. Light Meter
 Light Meter Operating Manual LITEMASTER PRO L-478DR-PX L-478DR-A-PX L-478DR-U-PX This manual is specific for Phottix operation. Please read the operating manual and safety precaution carefully to fully
Digital Camera. Operating Manual. To ensure the best performance from your camera, please read the Operating Manual before using the camera.
 Digital Camera Operating Manual To ensure the best performance from your camera, please read the Operating Manual before using the camera. Thank you for purchasing this PENTAX Q Digital Camera. Please
ProHead. User s Guide
 ProHead User s Guide 2Profoto ProHead Profoto ProHead Thank you for choosing Profoto. Thanks for showing us your confidence by investing in a ProHead unit. For more than four decades we have sought the
Inspiration strikes. VS-210 FLASH. User s Manual
 Inspiration strikes. VS-210 FLASH User s Manual Copyright 2015 Gradus Group. Bolt and other names of Bolt products are trademarks of Gradus Group. Other product and corporate names mentioned herein are
Digital Camera. Operating Manual. To ensure the best performance from your camera, please read the Operating Manual before using the camera.
 Digital Camera Operating Manual To ensure the best performance from your camera, please read the Operating Manual before using the camera. Thank you for purchasing the PENTAX Optio SV Digital Camera. Please
R PROFLAME Instruction Book Collection
 9.956.028 R00 584 PROFLAME Instruction Book Collection 4-17 18-29 584 PROFLAME System 30-39 Appendix: DIP SWITCH NUMBER (0=ON 1=OFF) 40-41 4-17 Fig. 1 The SIT is a device that allows, in conjunction with
VS-570N for Nikon WIRELESS TTL FLASH
 Inspiration strikes VS-570N for Nikon WIRELESS TTL FLASH User s Manual Copyright 2016 Gradus Group. Bolt and other names of Bolt products are trademarks of Gradus Group. Other product and corporate names
XMT Location Flash User Guide
 XMT Location Flash User Guide Bowens.co.uk Congratulations on purchasing your new Bowens product. Thank you for choosing the XMT range flash system. The Bowens XMT monolight has been designed by working
Know what you want to do but don t know the function name? Find it from the question and answer index. The Index See pages
 Where to Find It Find what you re looking for from: The Table of Contents See pages v vi Find items by function or menu name. The Q&A Index See pages vii ix Know what you want to do but don t know the
User guide ProHead Plus
 User guide ProHead Plus For other languages visit: /support ProHead Plus 2 Congratulations on your new Profoto product! Thanks for showing us your confidence by investing in a ProHead unit. For more than
XD-V70 Wireless Receiver
 XD-V70 Wireless Receiver Pilot s Handbook Manuel de pilotage Pilotenhandbuch Pilotenhandboek Manual del Piloto 取扱説明書 See www.line6.com/manuals for Advance Guide Advanced Users Guide available @ www.line6.com/manuals
sher-price.com T4841
 www.fi sher-price.com T4841 IMPORTANT! DANGER To prevent electric shock, do not immerse in water; wipe clean with damp cloth. WARNING To prevent strangulation with power cord, never place transmitter within
C40EN1684 ENGLISH USER S MANUAL
 E C40EN1684 ENGLISH USER S MANUAL Thank you for purchasing the Sigma sd Quattro Digital Camera You will get the greatest performance and enjoyment from your new sd Quattro camera s features by reading
Technical Guide for Radio-Controlled Advanced Wireless Lighting
 Technical Guide for Radio-Controlled Advanced Wireless Lighting En Table of Contents An Introduction to Radio AWL 1 When to Use Radio AWL... 2 Benefits of Radio AWL 5 Compact Equipment... 5 Flexible Lighting...
USER'S GUIDE. EcoQuest International 310 T. Elmer Cox Drive Greeneville, TN (423) Setup. Operation. Specifications.
 Setup. Operation. Specifications.") USER'S GUIDE Setup Operation Specifications Warranty (43) 638-746 CAUTION: Read manual carefully for proper procedures and operation. CONTENTS SPECIFICATIONS Specifications...............................................................3
USER'S GUIDE Setup Operation Specifications Warranty (43) 638-746 CAUTION: Read manual carefully for proper procedures and operation. CONTENTS SPECIFICATIONS Specifications...............................................................3
V6889 IMPORTANT! KEEP INSTRUCTIONS FOR FUTURE REFERENCE. sher-price.com.au
 V6889 IMPORTANT! KEEP INSTRUCTIONS FOR FUTURE REFERENCE. www.fi sher-price.com.au IMPORTANT! DANGER To prevent electric shock, do not immerse in water; wipe clean with damp cloth. WARNING To prevent strangulation
EXAMINER+ Manual V.1. ARROWHEAD FORENSICS Strang Line Road Lenexa, Kansas PHONE FAX
 P A R T O F T H E E L I T E S E R I E S ARROWHEAD FORENSICS 11030 Strang Line Road Lenexa, Kansas 66215 PHONE 913.894.8388 FAX 913.894.8399 www.arrowheadforensics.com EXAMINER+ Manual V.1 CONTENTS: Canon
Digital Camera. Operating Manual. To ensure the best performance from your camera, please read the Operating Manual before using the camera.
 Digital Camera Operating Manual To ensure the best performance from your camera, please read the Operating Manual before using the camera. Thank you for purchasing the PENTAX Digital Camera. Please read
Operating Manual LITEMASTER PRO L-478DR L-478DR-A L-478DR-U. Light Meter
 Light Meter Operating Manual LITEMASTER PRO L-478DR L-478DR-A L-478DR-U This manual is specific for PocketWizard operation. Please read the operating manual and safety precaution carefully to fully understand
Important safety instructions
 MMR-88 Version 1 Important safety instructions 1. 2. 3. 4. 5. 6. 7. 8. 9. Please read these instructions carefully. Please keep these instructions for future reference. Heed all warnings Follow all instructions
SLR Digital Camera. Operating Manual. For optimum camera performance, please read the Operating Manual before using the camera.
 SLR Digital Camera Operating Manual For optimum camera performance, please read the Operating Manual before using the camera. Thank you for purchasing this PENTAX a Digital Camera. Please read this manual
The Interfit S1 Battery Powered TTL/HSS Flash
 The Interfit S1 Battery Powered TTL/HSS Flash Instruction Manual www.interfitphotographic.com Interfit S1 Battery Powered TTL/HSS Flash Unit What s cool about the Interfit S1? The Honey Badger is the perfect