MACHINE INSTALLATION MANUAL KINESIS STATIONS CORE MH650E EQUIPMENT NECESSARY FOR THE INSTALLATION
|
|
|
- Edwin Fields
- 5 years ago
- Views:
Transcription


 The weight of the machine is")

1 1 10/11/2011 MACHINE INSTALLATION MANUAL KINESIS STATIONS CORE MH650E EQUIPMENT NECESSARY FOR THE INSTALLATION - Wrenches T socket wrench/open end wrench 17 knives Electric Phillips-head screwdriver and/or Phillips screwdriver carrier and/or dollies N.B Bolts and nuts are contained in a special blister pack with relative legend The housings are extremely delicate (once unpacked they become dirty very easily) The weight of the machine is top-heavy towards the seat - To fix the machine to the ground, position the plates before closing the housings PEOPLE NECESSARY FOR THE INSTALLATION

 washer 13x24x2,5 3 the ground 0Z183 (no blister) Screw M12x70 8.")
2 2 10/11/2011 General Information HARDWARE COMPONENTS Code Description Quan Letter blister-code Description Quantit 0Z126 Screw M10x35 8,8 Z 2 H AC Seat unit 1 0Z306 washer 10.5x20x2 Z 8 0Z023AA Screw 10X Z 2 0Z306 washer 5x20x2 Z 3 T AC foot unit 1 0Z126 Screw M10x Z 1 0Z415 self-locking nut M10 2 0D004515AC frame unit (housing 1 0Z165 M5x Z 2 0C002209AC rear housing 2 0B G washer well nut M Z216 Screw M6x Z 1 H AA handles unit 2 0N001388AA handle 2 0N001389AB plate 2 0Z208 Screw M8x Z 4 0N001523AB plates for fastening to 2 0Z313 (no blister) washer 13x24x2,5 3 the ground 0Z183 (no blister) Screw M12x Z 1 0Z438 (no blister) lower nut M12 1 Time (minutes) installation standard conditions Code Tot persons T installation T handling T fixing CNC Machine technical data


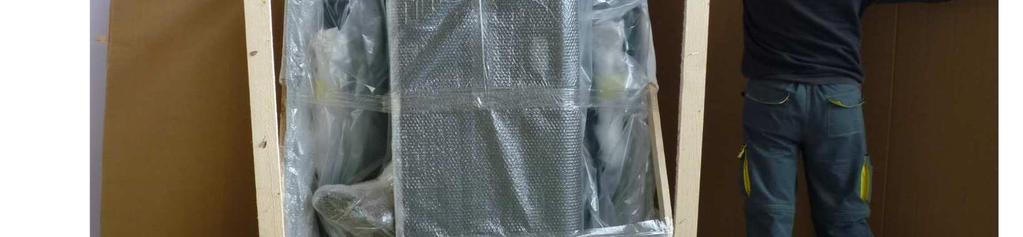


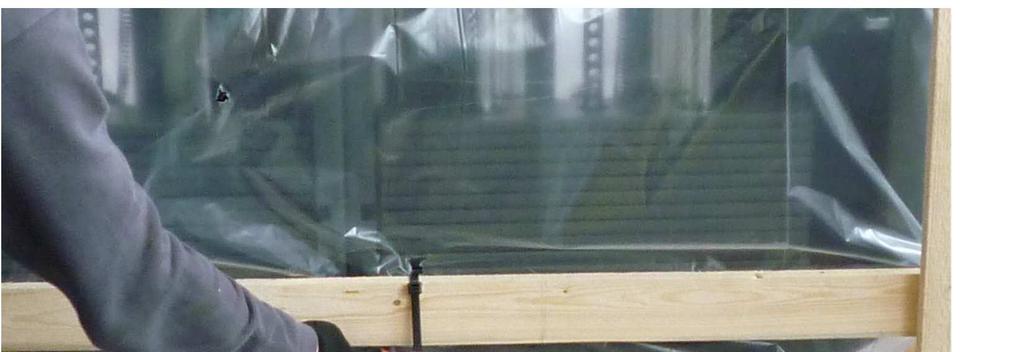
3 3 10/11/2011 UNPACKING MACHINE DO NOT USE KNIFE UNPACKING MACHINE SEQUENCE Phase 1 Remove cardboard packaging box


 Take out")

4 4 10/11/2011 Phase 2 Disassemble the right-left wooden frame (dotted black line) Remove 2+2 screws fixing right-left of wood (detail) Take out and place the machine parts next to the unpacking area

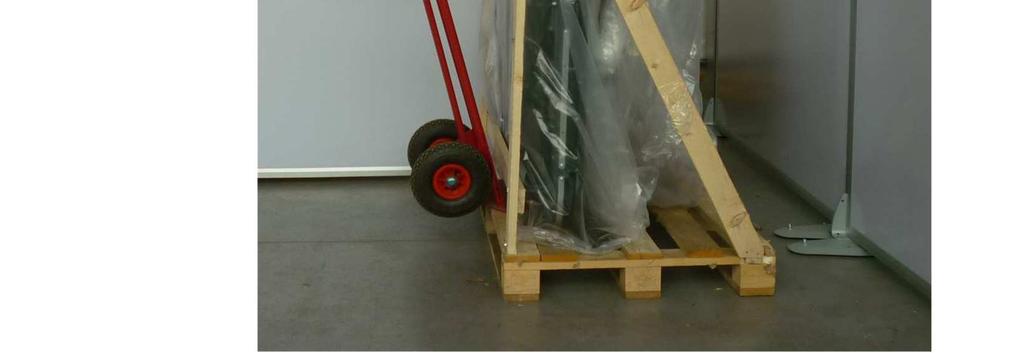

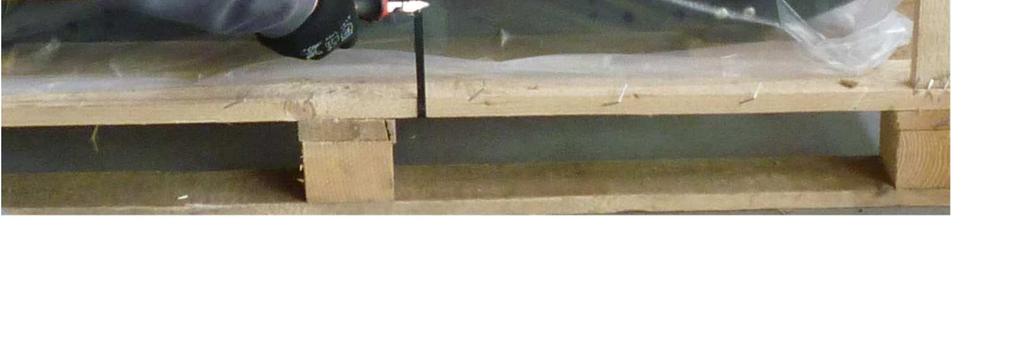


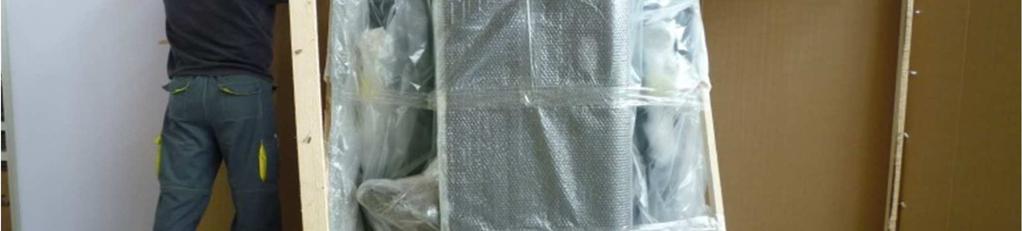
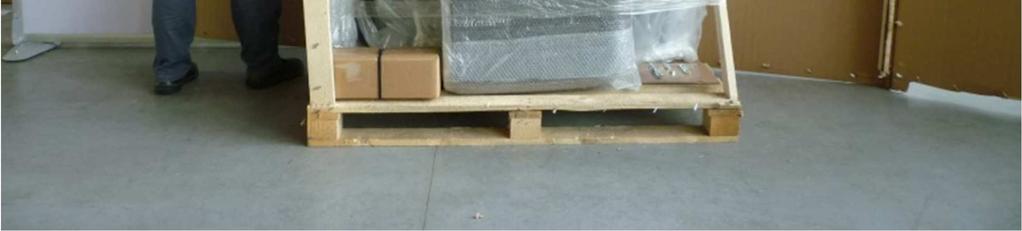
5 5 10/11/2011 Phase 3 Cut the lower blackties (do not cut the 4 upper ones), position the transport carrier, separate the wooden frame from the pallet and transport the machine to an area close to the unpacking N O


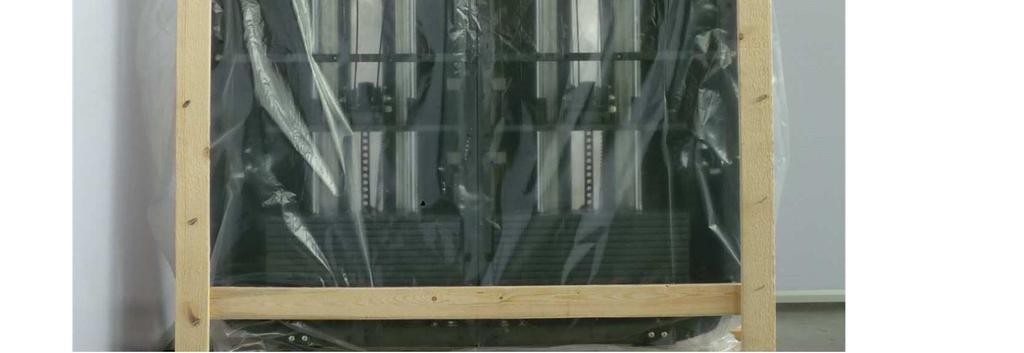
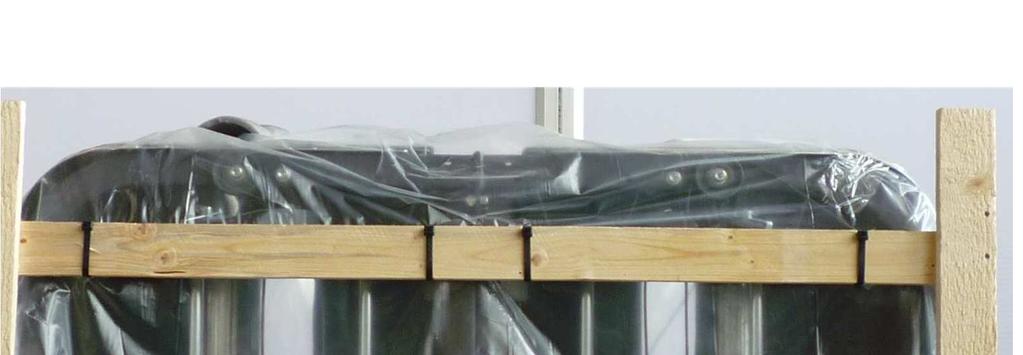
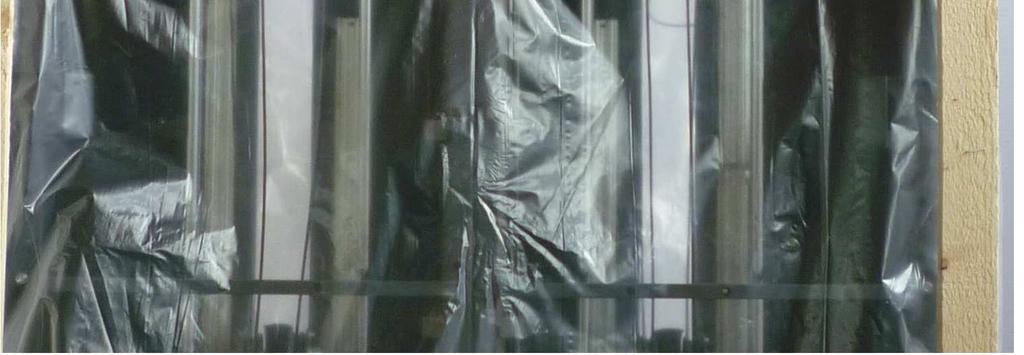
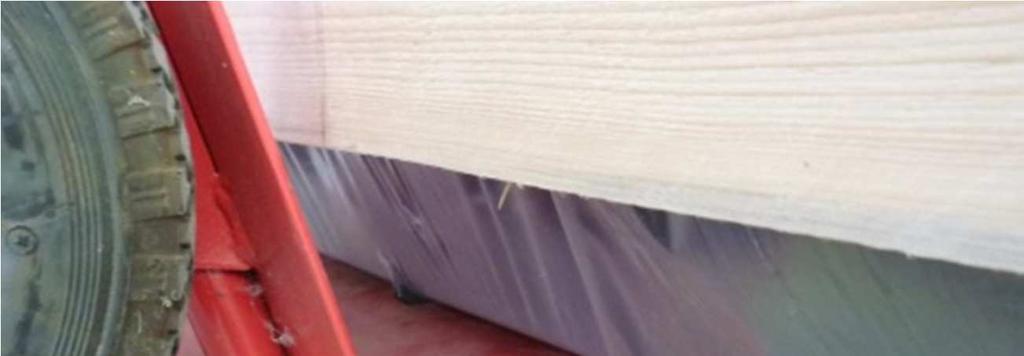
6 6 10/11/2011 Phase 4 Eliminate the wooden frame "A", eliminate the polyethylene bag


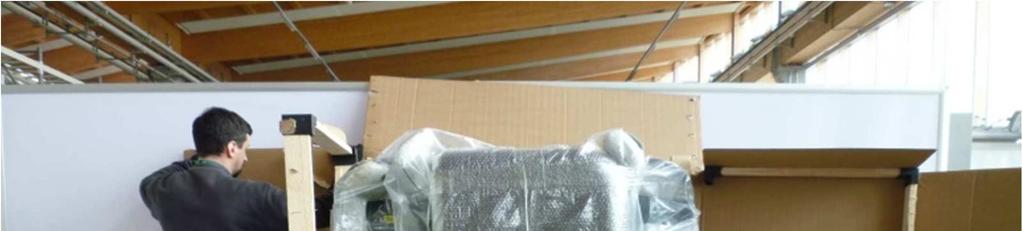
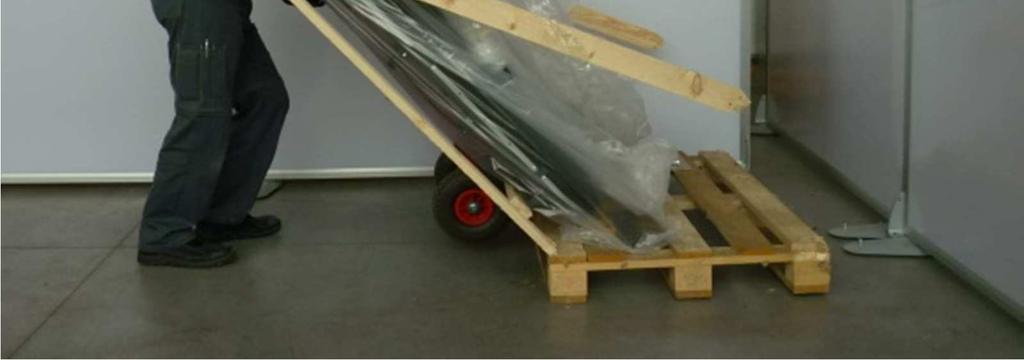
7 8 10/11/2011 Transport the machine +components to the assembly area using the transport trolley or dollies depending on the type of area MACHINE ASSEMBLY SEQUENCE Phase 1 -B Tighten seat unit to frame with 2+2 screws and 2+2 washers, eliminating the support clamp Approved by Andrea Borghesi revision 1/1

8 8 10/11/2011 Phase 2 Insert rear foot to frame unit, tightening the 2 screws K + 1 screw J washers + nut unhook 3 arms D, remove plate F, install the arms in the special housings inserting 2 screws G + 2 washers for each arm tighten all the arms (the screws have already been preset by )


9 9 10/11/2011 Phase 3 Remove the packaging of central frame unit L, slide down the frame in the open slot, tighten with 2 screws M Insert 10 threaded pins (well nut) into the frame unit


10 10 10/11/2011 Phase 4 Remove the packaging, take out the right housing and insert into the frame unit starting from the top and continuing to the bottom, tighten with 5 screws P + 5 washers, insert right handle Q and tighten with 2 screws R Remove the packaging, take out the left housing and insert into the frame unit starting from the top and continuing to the bottom, tighten with 5 screws P + 5 washers, insert right handle Q and tighten with 2 screws R


.")

 between the")
11 11 10/11/2011 Phase 5 Test machine Clean assembly area Deliver documentation and explanation on use of the machine to the customer WARNING If it is necessary to move the machine once the installation is completed, pay attention to the housing of the front and back feet (shown in the illustration). Lift up the foot and remove the feet if needed When transporting the machine (especially up stairs) place a wooden beam (take it from the packaging) between the rods shown in the figure and the transport trolley, to avoid bending the rods


12 12 10/11/2011 TO FIX THE MACHINE TO THE GROUND To FIX the equipment to the ground, proceed in the same way on both sides of the equipment: fasten clamps M with screws C with nuts and washers (bolts and nuts are preassembled on the frame). Mark on the floor the point where to drill the two holes. Drill the floor. Insert the anchoring bolts into the holes of clamps M. ATTENTION: use an anchor bolt with minimum guaranteed weight 50kg
INSTALLATION MANUAL FOR KINESIS STATIONS STEP MH67E EQUIPMENT REQUIRED FOR INSTALLATION
 1 02/02/2012 INSTALLATION MANUAL FOR KINESIS STATIONS STEP MH67E EQUIPMENT REQUIRED FOR INSTALLATION Phillips screwdriver T wrenches size 5-6-8-10 Combination ratcheting wrench 17 and/or open-end wrench
#916 CLASSIC 16 GUN CABINET ASSEMBLY INSTRUCTIONS
 Thank you for purchasing this quality product. A list of PARTS and INSTRUCTIONS is included to assist you. Unpack and identify all parts included on the Parts List and Hardware List. If parts are missing,
Closet Carousel Installation Instructions. Models TKA 5 Through TKA 14 Equipped with Footswitch Controls
 Tools Required: Phillips Screwdriver (#2) Adjustable Wrench Level Tape Measure Utility Knife Electric Drill Drill Bits for Anchors Ladder (4 foot) Models TKA 5 Through TKA 14 Equipped with Footswitch Controls
SINCE 1922 P UBLICATION N O
 SINCE 1922 GARED SPORTS MICRO-Z SET-UP INSTRUCTIONS VERY IMPORTANT! READ INSTRUCTIONS CAREFULLY AND FOLLOW STEP BY STEP SET-UP PROCEDURE P UBLICATION N O. 5 5 1 7 5 2 9 1 6 Recommended tools and accessories.
P a r k c o n s o l e s i n k a s s e m b l y i n s t r u c t i o n s
 P a r k c o n s o l e s i n k a s s e m b l y i n s t r u c t i o n s Before You Begin: Professional installation by two-person crew is required for this fixture. Install water supply and drain piping
Side Mount INSTRUCTION BOOKLET #C122 BED STYLE: PARK CITY
 Side Mount BED STYLE: PARK CITY INSTRUCTION BOOKLET #C1 WARNING! ALL MURPHY/WALLBED SYSTEMS CONTAIN STORED ENERGY. FAILURE TO USE AND FOLLOW THESE INSTRUCTIONS DURING THE INSTALLATION PROCESS COULD RESULT
 Flat Panel TV Cart Instruction Manual SKU: STAND-TV02D Scan the QR code with your mobile device or follow the link for helpful videos and specifications related to this product. https://vivo-us.com/products/stand-tv02d
ASSEMBLY AND ADJUSTMENT
 EDGE MONITOR ARM EDGE Rev A 2/17 Model EDGE-SLV Model EDGE-BLK Model EDGE-WHT ASSEMBLY AND ADJUSTMENT EDGE MONITOR ARM PARTS AND TOOLS PLEASE REVIEW these instructions before beginning the assembly and
F l a t S c r e e n A R M S I n s t a l l a t i o n
 ITEM NUMBERS (1) #TOACAORG16 (2) #TOACAORG20 (3) #TOACATRP24 (4) #TOACATRP30 (5) #TOACATRPDS (6) #TOACATRPSS TOOLS REQUIRED (1) 3/8 Wrench (not provided) (2) Phillips head screwdriver (not provided) (1)
 INSTRUCTION BOOKLET #C10 Watch step by step installation instructions at: https://www.wallbedsbywilding.com/wallbed-installation-studio-series/ WARNING! ALL MURPHY/WALLBED SYSTEMS CONTAIN STORED ENERGY.
ASSEMBLY INSTRUCTIONS JK270
 TOOLS REQUIRED: One knife to open packaging Two ½ wrench or socket (metric 13) One 9/16 wrench or socket (metric 14) One #2 Philips (+) screwdriver NOTE: All bolts are 9/16 (metric 14) and nuts are ½ (metric
Jenny Legs Assembly Instructions
 Jenny Legs Assembly Instructions R EXTENDED PHILLIPS BIT MM ALLEN WRENCH 6MM HEX DRIVE /" 007 Steelcase Inc. Grand Rapids, MI 90 U.S.A. Printed in U.S.A. Page of 6 88000 Rev F Jenny Club Instructions:
MPA-9000 Universal Ceiling Projector Mount Kit
 I N S T R U C T I O N M A N U A L Universal Ceiling Projector Mount Kit The Universal Ceiling Projector Mount provides a unique, simplified method of ceiling mounting your inverted projector. This low
PROFILE Flat Panel Console System Installation Manual
 PROFILE Flat Panel Console System Installation Manual Table of Contents Page Introduction... 2 Important Safety Information...3, 4 Installation Overview... 4, 5, 6 Single Sided/Single Unit... 7 Double
GlideRite Retractable Cover System For Hot Spot Spas (SE & SLX only)
") List of Contents Quantity Description 12 #10 x 1 ½ Flat Head Phillips Screw (see pg. 2) 2 #10 x ½ Pan Head Phillips Screw (see pg. 2) 8 ¼ x 2 ½ Lag Bolt (see pg. 2) 7 ¼ 20 x 5 / 8 Hex Head Bolt (see pg.
List of Contents Quantity Description 12 #10 x 1 ½ Flat Head Phillips Screw (see pg. 2) 2 #10 x ½ Pan Head Phillips Screw (see pg. 2) 8 ¼ x 2 ½ Lag Bolt (see pg. 2) 7 ¼ 20 x 5 / 8 Hex Head Bolt (see pg.
EDGE2 DUAL MONITOR ARM
 EDGE2 DUAL MONITOR ARM EDGE2 Rev A 2/17 Model EDGE2-SLV Model EDGE2-BLK Model EDGE2-WHT ASSEMBLY AND ADJUSTMENT EDGE2 DUAL MONITOR ARM PARTS AND TOOLS PLEASE REVIEW these instructions before beginning
GlideRite Retractable Cover System For HotSpring & Tiger River Spas (except Classic & pre-2000 Landmark Spas)
") List of Contents Quantity Description 12 #10 x 1 ½ Flat Head Phillips Screw (see pg. 2) 2 #10 x ½ Pan Head Phillips Screw (see pg. 2) 8 ¼ x 2 ½ Lag Bolt (see pg. 2) 7 ¼ 20 x 5 / 8 Hex Head Bolt (see pg.
List of Contents Quantity Description 12 #10 x 1 ½ Flat Head Phillips Screw (see pg. 2) 2 #10 x ½ Pan Head Phillips Screw (see pg. 2) 8 ¼ x 2 ½ Lag Bolt (see pg. 2) 7 ¼ 20 x 5 / 8 Hex Head Bolt (see pg.
Triplex Instructions for Packing and Unpacking
 2-8-8-2 Triplex Instructions for Packing and Unpacking It is recommended that you review all these instructions before removing the engine or tender from the poly foam container. www.mthtrains.com Table
Medium HoneyBadger Chase Rack Installation Instructions
 PREPARATION Medium HoneyBadger Chase Rack Installation Instructions 1. Disconnect the negative terminal on the battery. Park the vehicle on level ground and set the emergency brake. 2. We recommend reading
O-Sullivan King 4 Poster Bed O-Sullivan Queen 4 Poster Bed Parts and Hardware List
 Parts and Hardware List A. Left Headboard Post 1 pc B. Right Headboard Post 1 pc C. Left Footboard Post 1 pc D. Right Footboard Post 1 pc E. Headboard Panel 1 pc F. Footboard Rail 1 pc. Spindles 4 pcs
mila-wall (Series100) General Operating Instructions page 1 of 15
 General Operating Instructions page 1 of 15") mila-wall (Series100) General Operating Instructions page 1 of 15 Step #1: Before setting up walls, lower adjustable leveling feet on each panel approximately 1". This will allow access to the threaded
mila-wall (Series100) General Operating Instructions page 1 of 15 Step #1: Before setting up walls, lower adjustable leveling feet on each panel approximately 1". This will allow access to the threaded
L.L.Bean. Wooden Slat Bed
 L.L.Bean Wooden Slat Bed Thank you for purchasing our Slat Bed. Assembly of this product requires A Phillips head screwdriver. We have found it helpful to have a second person present in at least one step
Assembly Instructions
 Assembly Instructions 10 CONTRACTOR TABLE SAW Model No. 351.218330 Sears Brands Management Corporation, Hoffman Estates, IL 60179 U.S.A. www.sears.com/craftsman 31624.00 Draft (10/08/09) UNPACKING The
WILDING WALLBEDS INSTALLATION INSTRUCTION Side Mount
 WILDING WALLBEDS INSTALLATION INSTRUCTION Side Mount For Wallbed models: Do-It-Yourself Insturction booklet C92 WARNING! ALL MURPHY/WALLBED SYSTEMS CONTAIN STORED ENERGY. FAILURE TO USE AND FOLLOW THESE
Projector Ceiling Mount
 INSTALLATION MANUAL Projector Ceiling Mount PID:3010 PID:5466 20kg (44lbs) RATED CAUTION: DO NOT EXCEED RATED LISTED WEIGHT. SERIOUS INJURY OR PROPERTY DAMAGE MAY OCCUR! ISSUED: FEB. 2013 NOTE: Read the
TechBench Installation Manual
 Manual Table of Contents TechBench Overview....2 Bench Assembly Linear,36 (914,4mm) Wide 96 (2438,4mm) Wide 3,4,5,6,7 Bench Assembly Linear,24 (609,6mm) Wide 30 (762mm) Wide..8,9 Bench Assembly Corner
https://www.wallbedsbywilding.com/wallbed-installation-studio-series/
 For Wallbed models: KING SIZE INSTRUCTION BOOKLET #C1 Watch step by step installation instructions at: https://www.wallbedsbywilding.com/wallbed-installation-studio-series/ WARNING! ALL MURPHY/WALLBED
INSTALLATION INSTRUCTIONS FOR FRONT CASTING DECK RAIL Ranger
 INSTALLATION INSTRUCTIONS FOR FRONT CASTING DECK RAIL Ranger TOOLS REQUIRED FOR INSTALLATION: Drill motor, (1) 5/16 inch drill bit, (1) 13/64 drill bit, (1) 3/16 inch hex wrench (1) 3/32 inch hex wrench.
 INSTRUCTION BOOKLET #C0 Watch step by step installation instructions at: https://www.wallbedsbywilding.com/wallbed-installation-studio-series/ WARNING! ALL MURPHY/WALLBED SYSTEMS CONTAIN STORED ENERGY.
Showpiece Cabinet Integrated Stand For 32" - 52" LCD HDTV
 Showpiece Cabinet Integrated Stand For 32" - 52" LCD HDTV Installation and Assembly Instructions 2009 Incredible Technologies Inc. Version 0109 Showpiece Cabinet Integrated Stand for 32" - 52" LCD HDTV
LCD LIFT Flat Panel Display System Installation Manual. Table of Contents
 LCD LIFT Flat Panel Display System Installation Manual Table of Contents Page Installation Overview... 2 Trim Ring Installation... 3 LCD Lift Installation....4 Actuator Switch Installation.5 Top Plate
Mounting a BalanceBox 400 to a brick wall
 Unpack the BalanceBox 400 and remove the Wall frame cover and its bag of screws. Slide the cover out at the top. NOTE: the cover is NOT included with the BalanceBox 400H LOCK SCREW HOLE MOBILE STAND MOUNTING
MITCHELL WREATH RINGS NO-HAMMER ASSEMBLY INSTRUCTIONS
 MITCHELL WREATH RINGS NO-HAMMER ASSEMBLY INSTRUCTIONS METAL STAND WITH WOOD STAND WITH PAGE 2 OF 10 MASTER PARTS LIST HEAD ASSEMBLY LINKAGE ASSEMBLY HOOK LEVER ASSEMBLY FOOT PEDAL ASSEMBLY ALL FASTENERS
M10 x 75mm Sockethead Cap Screws. 5mm Fender Washer (12) Included - (8) Required. #10 x 2.5" PH Wood Screws. (30) Included - (24) Required
 Included - (8) Required. #10 x 2.5 PH Wood Screws. (30) Included - (24) Required") Door System Unit - Hardware Tools Included: (2) 2mm Allen Wrenches, (2) 3mm Allen Wrenches, (2) 4mm Allen Wrenches, (2) 6mm Allen Wrenches, and (1) 8mm T-Handle Allen Wrench Tools Required: Phillips Screwdriver,
Door System Unit - Hardware Tools Included: (2) 2mm Allen Wrenches, (2) 3mm Allen Wrenches, (2) 4mm Allen Wrenches, (2) 6mm Allen Wrenches, and (1) 8mm T-Handle Allen Wrench Tools Required: Phillips Screwdriver,
Contour. Wall Style Adjustable Z Revised 01/30/2017
 Wall Style Adjustable Z000000201 Revised 01/30/2017 Page 2 of 9 Unpacking Your Shipment Unpack and iden fy each component in each box that you received. If your shipment is missing parts, or too many parts
STOP. V00029AC Rev. 04 READ ALL OF THE FOLLOWING INSTRUCTIONS BEFORE REMOVING CABINET FROM SKID TOOL LIST. NET-ACCESS S-Type Network Cabinets
 Rev. 04 STOP READ ALL OF THE FOLLOWING INSTRUCTIONS BEFORE REMOVING CABINET FROM SKID NET-ACCESS S-Type Network Cabinets -Phillips screwdriver -Flatblade screwdriver -22mm socket wrench -15mm socket wrench
Star Trac Turbo Trainer Assembly & Setup
 Star Trac Turbo Trainer Use the following procedures to unpack and assemble your Turbo Trainer manufactured by Star Trac. UNPACKING AND PARTS LIST Position the shipping carton so the Heavy End logo is
Queen Wingback Bed King Wingback Bed
 Parts and Hardware List A. Side Rails with Attachment Hooks 2 pcs B. Foot Rail 1 pc C. Head Rail 1 pc D. Center Support Slat 1 pc E. Leg Supports 3 pcs F. Support Slats 4 pcs G. Flat Washers 8 pcs H. Lock
INSTRUCTION BOOKLET #C21. For Wallbed models: KING SIZE
 For Wallbed models: KING SIZE INSTRUCTION BOOKLET #C1 WARNING! ALL MURPHY/WALLBED SYSTEMS CONTAIN STORED ENERGY. FAILURE TO USE AND FOLLOW THESE INSTRUCTIONS DURING THE INSTALLATION PROCESS COULD RESULT
INSTALLATION INSTRUCTIONS HEAVY DUTY TILT WALL MOUNT Model: PPH-2000
 INSTALLATION INSTRUCTIONS HEAVY DUTY TILT WALL MOUNT Model: PPH-2000 Specifications: Accomodates Akira and Orion 84" displays without interface bracket; accomodates other large flat panel displays with
TITAN2-EDGE Public Access Computer Station Dual Track
 TITAN2-EDGE Public Access Computer Station Dual Track TITAN2-EDGE Rev A 6/17 Model TITAN2-EDGE ASSEMBLY AND ADJUSTMENT TITAN2-EDGE PARTS AND TOOLS PLEASE REVIEW these instructions before beginning the
Important Loading Information. Tools Required. Meridian Lateral Files Instructions
 Y Meridian Lateral Files Instructions! WARNING Failure to observe stated capacities below will result in unsafe usage conditions, causing possible product damage or personal injury. Important Loading Information
Leveling Feet, Base Plates and Casters
 Leveling Feet, Base Plates and Casters 77 Leveling Foot 1 1 Fastening to profile end Fastening in T-slot of profile For leveling tables and light equipment. Ratchet-type height adjustment requires no tools.
 For Wallbed models: KING SIZE INSTRUCTION BOOKLET #C1 Watch step by step installation instructions at: https://www.wallbedsbywilding.com/wallbed-installation-studio-series/ WARNING! ALL MURPHY/WALLBED
BLEACHER ASSEMBLY INSTRUCTIONS
 CROWDPLEASER BLEACHER ASSEMBLY INSTRUCTIONS NOTE: These instructions are generic to all 2 row through 10 row bleachers. The drawings in this instruction sheet generally show assembly for a 21 foot, six
SM-RAZOR-ART2-L / SM-RAZOR-ART2-XL
 SM-RAZOR-ART2-L / SM-RAZOR-ART2-XL Strong Razor Series Articulating Mount for Large and Extra Large Displays INSTRUCTION MANUAL Installation Manual Warnings: Installation of this product should be done
Tuxedo Console Table INSTALLATION INSTRUCTIONS P73037, P73038, P _2_B Page 1 of 5
 P73037, P73038, P73039 Page 1 of 5 THANK YOU FOR CHOOSING KALLISTA We appreciate your commitment to Kallista quality products. Please take a moment to review this manual before you install your Kallista
LEG CURL IP-S1315 INSTALLATION INSTRUCTIONS
 LEG CURL IP-S35 INSTALLATION INSTRUCTIONS Copyright 2009. Star Trac by Unisen, Inc. All rights reserved, including those to reproduce this book or parts thereof in any form without first obtaining written
Heavy Duty Ceiling Tilt Mount Installation Manual
 HD-CTM-5580 Heavy Duty Ceiling Tilt Mount Installation Manual *This Installation requires a minimum of two people. For your safety: Read the complete instruction manual before starting an installation
MAKO TM CASH DISPENSER
 MAKO TM CASH DISPENSER PEDESTAL INSTALLATION GUIDE VERSION 2.0 TDN 0702-000 2/99 CORPORATE HEADQUARTERS: RMA (RETURN MATERIAL AUTHORIZATION) RETURN ADDRESS: 522 E. Railroad Street 2405 B Street Long Beach,
BOOKCASE WARNING. Illustration 1
 Illustration 1 Lower Back Panel Upper Back Panel Cam Connector Illustration 2 Left end Illustration 3 Cam Bolt Adjustable Shelf Left end Left End Panel Bottom/ Center Shelf Connector Cover Right End Panel
Melamine Plastic Laminate. Toilet Partition Installation Manual
 Melamine Plastic Laminate Toilet Partition Installation Manual PHONE: FAX: 1-866-317-2786 ATTENTION DO NOT MIX FASTENER PACKS EACH FASTENER PACK HAS THE NECESSARY BOLTS, BARRELS AND SCREWS TO INSTALL THE
INSTALLATION INSTRUCTION RRU DOUBLE LIGHT POLE MOUNT
 INSTALLATION INSTRUCTION RRU Double Light Pole Mount for installation of two RRU units on mast, towers or other vertical structures. CUE DEE YOUR INNOVATIVE PARTNER 1 CONTENTS 1. PRODUCT COVERED IN THIS
Installation Instruction
 Tools Needed for Assembly Stud finder (for wood stud wall) Pencil Mark Electric drill Wood Stud Wall Installation Step 1. Locate the Wood Studs Installation Instruction Drill bit (for wood stud wall) Masonry
INSTRUCTION BOOKLET #C20
 INSTRUCTION BOOKLET #C0 WARNING! ALL MURPHY/WALLBED SYSTEMS CONTAIN STORED ENERGY. FAILURE TO USE AND FOLLOW THESE INSTRUCTIONS DURING THE INSTALLATION PROCESS COULD RESULT IN SEVERE PERSONAL INJURY TO
Installation Guide 40670
 Installation Guide 40670 Kargo Master Rancho Cordova, CA 95742 800-343-7486 CustomerService@KargoMaster.com DATE: Installation Instructions 40670 *PLEASE READ ALL INSTRUCTIONS AND WARNINGS PRIOR TO ASSEMBLING,
Equilibrium Credenza
 Equilibrium Credenza Cantilevered base & Tapered Credenza Installation Instruction EI0006 Revision A 8/20/18 Equilibrium End User Agreement Enwork Equilibrium credenza bases must be installed directly
Instruction Guide 4A90L
 Instruction Guide 4A90L Kargo Master Rancho Cordova, CA 95742 800-343-7486 CustomerService@KargoMaster.com DATE: *PLEASE READ ALL INSTRUCTIONS AND WARNINGS PRIOR TO ASSEMBLING, INSTALLING, AND USING THIS
INSTALLATION INSTRUCTIONS
 Sheet 1 of 5 General: Upon receipt of fixture thoroughly inspect for any freight damage, which should be brought to the attention of the delivery carrier. Compare the catalog description listed on the
Phone #: (360) Online Tech Support: Web:
 Online Tech Support: Web:") Phone #: (360) 734-3482 Online Tech Support: tech-support@shopfox.biz Web: www.shopfox.biz Your new Model D2058A Super-Heavy Duty Mobile Base () is designed to give you a stable and mobile platform upon
Phone #: (360) 734-3482 Online Tech Support: tech-support@shopfox.biz Web: www.shopfox.biz Your new Model D2058A Super-Heavy Duty Mobile Base () is designed to give you a stable and mobile platform upon
IN 578. Tools Required. Torque Specification: 10mm Socket 7/16 Socket 1/2 Socket 1/2 Wrench 7/16 Wrench 1/8 Allen Wrench.
 Tools Required 2011-C Ford F250/F350 No Drilling into Vehicle is Required 10mm Socket 7/16 Socket 1/2 Socket 1/2 Wrench 7/16 Wrench 1/8 Allen Wrench FL277 x 1 Torque Specification: 1/4 Bolts - 6 Ft Lbs.
Barnside Pantry IMPORTANT NOTE Carefully remove all the parts from the carton and put them individually on a soft cloth to prevent scratch
 88 5516 653 Barnside Pantry IMPORTANT NOTE Carefully remove all the parts from the carton and put them individually on a soft cloth to prevent scratches or other damage occurring to the parts. We have
Equilibrium. Conference Table. Installation Instruction. Revision B 11/07/16
 Equilibrium Conference Table Installation Instruction Revision B 11/07/16 Equilibrium End User Agreement Enwork Equilibrium table bases must be installed directly onto a four inch minimum thickness concrete
Therma-Tru Door Gallery Setup Instructions Swing Unit with Hardware Kit - Hardware Part # MADGSWU15 (Swing Unit) Part # MADGHKSU10 (Hardware Kit)
 Part # MADGHKSU10 (Hardware Kit)") Swing Unit with Hardware Kit - Hardware Tools Included: 4mm Allen Wrench, 6mm Allen Wrench, 8mm T-Handle Allen Wrench (1) 3/4" Drill Bit, (1) 7/32" Drill Bit and Hole Template Guide Tools Required: Phillips
Swing Unit with Hardware Kit - Hardware Tools Included: 4mm Allen Wrench, 6mm Allen Wrench, 8mm T-Handle Allen Wrench (1) 3/4" Drill Bit, (1) 7/32" Drill Bit and Hole Template Guide Tools Required: Phillips
RUN-IN SHED INSTRUCTIONS
 RUN-IN SHED INSTRUCTIONS 14321 5th Line Nassagaweya, Rockwood, ON, N0B 2K0 Phone 519-856-9959 ~ Fax 519-856-4141 Toll Free 1-800-461-3362 ~ Email sales@systemhorse.com Website www.systemfence.com RUN-IN
 Mobile TV Cart Instruction Manual SKU: STAND-TV03E Scan the QR code with your mobile device or follow the link for helpful videos and specifications related to this product. https://vivo-us.com/products/stand-tv03e
CHICKEN COOP & CHICKEN RUN. Tools required for assembly (not included)
") CHICKEN COOP & CHICKEN RUN ASSEMBLY MANUAL SKU# 6839 Tools required for assembly (not included) Distributed by: TRACTOR SUPPLY COMPANY 0 VIRGINIA WAY, BRENTWOOD, TN 3707 For customer support, call: -888-376-960
CHICKEN COOP & CHICKEN RUN ASSEMBLY MANUAL SKU# 6839 Tools required for assembly (not included) Distributed by: TRACTOR SUPPLY COMPANY 0 VIRGINIA WAY, BRENTWOOD, TN 3707 For customer support, call: -888-376-960
Nancy s Knit Knacks LLC 4 Yard Option Upgrade Kit Assembly Instructions and User Manual
 Nancy s Knit Knacks LLC 4 Yard Option Upgrade Kit Assembly Instructions and User Manual Thank you for purchasing our 4 Yard Option (4YO) Upgrade Kit. To install this upgrade you are simply going to assemble
PRINCESS SINGLE BED WITH TRUNDLE
 PRINCESS SINGLE BED WITH TRUNDLE If you have any questions regarding assembly or if you are missing parts, do not return this item to Sam s Wholesale Club Please call our customer service number and have
INSTALLATION GUIDE N5-DS48-4
 INSTALLATION GUIDE N5-DS48-4 Shelving ( steel ) Transit High Roof & Medium Roof Promaster Standard Roof & High Roof Nissan NV High Roof Sprinter Low Roof & High Roof Box Truck / Trailer QUICK START GUIDE
CAB END BEDTRAX (SIDE VIEW)
") Supplied Hardware: (8-14) 1/4-20 Allen head bolts, (12-18) UHMW mount blocks, (4) D-ring tie downs Tools Needed: Allen head wrench GET TO IT. INSTALLATION INSTRUCTIONS STEP 1. INSERT (2) MOUNT BLOCKS INTO
Supplied Hardware: (8-14) 1/4-20 Allen head bolts, (12-18) UHMW mount blocks, (4) D-ring tie downs Tools Needed: Allen head wrench GET TO IT. INSTALLATION INSTRUCTIONS STEP 1. INSERT (2) MOUNT BLOCKS INTO
Kawasaki Teryx 750 Cab Kit* Caution: Before using this product, read this manual and follow all Safety Instructions.
 Owner s Manual Model: Kawasaki Teryx 750 Kawasaki Teryx 750 Cab Kit* Caution: Before using this product, read this manual and follow all Safety Instructions. Safety Instructions Cab Kit Contents Hardware
Pantry IMPORTANT NOTE Carefully remove all the parts from the carton and put them individually on a soft cloth to prevent scratches or oth
 88 5076 691 Pantry IMPORTANT NOTE Carefully remove all the parts from the carton and put them individually on a soft cloth to prevent scratches or other damages occurring to the parts. We have taken great
L.L.Bean. Platform Bed
 L.L.Bean Platform Bed Thank you for purchasing our Platform Bed. Assembly of this product requires a Phillips head and a flat head screwdriver. We have found it helpful to have a second person present
6625 WEST WILSHIRE BLVD. OKLAHOMA CITY, OK (405) FAX (405)
 FAX (405)") INSTALLATION INSTRUCTIONS FOR THE TAILGATE WITH LATCH AND LINK ASSEMBLY 76-87 FORD SHORT & 53-87 FORD LONG FLARESIDES 1. Assemble the bed and make sure the box is square. Measure the distance between the
INSTALLATION INSTRUCTIONS FOR THE TAILGATE WITH LATCH AND LINK ASSEMBLY 76-87 FORD SHORT & 53-87 FORD LONG FLARESIDES 1. Assemble the bed and make sure the box is square. Measure the distance between the
Colonial Classic Bar
 88 5528 991 Colonial Classic Bar IMPORTANT NOTE Carefully remove all the parts from the carton and put them individually on a soft cloth to prevent scratches or other damages occuring to the wood parts.
INSTALLATION GUIDE Ceiling TV Mount MHP-52
 ISTLLTIO GUIDE Ceiling TV Mount MHP-52 Max Load Capacity: 125 lbs (57kg) ote: Read entire instruction sheet before you start installation and assembly. Be sure to read this entire manual thoroughly and
Wooden Frame Type Instruction Manual
 Wooden Frame TypeInstruction Manual Thank you for selecting our product. Before starting installation, please read this manual thoroughly to ensure correct installation. Please keep this manual at hand
Flat Panel Stand FPZ-655. for 32" to 55" Flat Panel Screens FEATURES. Reinforced universal adapter plate for a strong hold
 FPZ-655 Flat Panel Stand for 32" to 55" Flat Panel Screens For a viewing experience that really stands out, Peerless FPZ-655 Universal Flat Panel Stand for 32" 55" flat panel TVs provides a brilliant combination
INSTALLATION INSTRUCTIONS
 INSTALLATION INSTRUCTIONS For Wallbed models: Do-It-Yourself BOOKLET #C90 WARNING! ALL MURPY/WALLBED SYSTEMS CONTAIN STORED ENERGY. FAILURE TO USE AND FOLLOW THESE INSTRUCTIONS DURING THE INSTALLATION
INSTALLATION GUIDE. Flat Panel Arm Mount MLA100-L. VESA 100x100 compatible. Support 10" to 24" Screens Max Load Capacity: 30 lbs (15 kg)
") INSTALLATION GUIDE Flat Panel Arm Mount MLA100-L Support 10" to 24" Screens Max Load Capacity: 30 lbs (15 kg) VESA 100x100 compatible Note: Read entire instruction sheet before you start installation and
INSTALLATION GUIDE Flat Panel Arm Mount MLA100-L Support 10" to 24" Screens Max Load Capacity: 30 lbs (15 kg) VESA 100x100 compatible Note: Read entire instruction sheet before you start installation and
Track Rack. * Track Racks are not lockable
 The Track Rack s unique staggered, sliding hook design creates the greatest parking efficiency while still providing easy access to any particular bike. When adding or removing a bike to the rack, simply
Assembly Instructions for Model: VMPL3
 Assembly Instructions for Model: VMPL3 Thank you for choosing a Sanus Systems VisionMount Wall Mount. The VMPL3 is designed to hold 27-84 Flat Panel LCD or Plasma Displays weighing up to 280 lbs. It will
Replacing the Reciprocator on the SWF Compact Series Machine (601C and 1201C)
") Follow the instructions below to replace the reciprocator in the SWF Compact series machines. The tools required can be found in the tool kit that came with the machine. Preparation 1. First, place the
Follow the instructions below to replace the reciprocator in the SWF Compact series machines. The tools required can be found in the tool kit that came with the machine. Preparation 1. First, place the
Assembly Instructions for model: VMPR1
 Assembly Instructions for model: VMPR1 Congratulations on your purchase! The VMPR1 ceiling mount provides a unique, simplified method of ceiling mounting inverted LCD/DLP projectors. Its low profile design
Bend-Tech Dragon Assembly Manual
 p.1 Bend-Tech Dragon Assembly Manual IMPORTANT: Please read before unpacking. Place shipping container in a wide open area where you will have room to work and assemble this product. Shipping The Dragon
Independent Containment System (ICS)
") Installing the Independent Containment System (ICS) Complete these instructions to install the Independent Containment System (ICS). Prerequisites This installation requires a team of at least two people.
Installing the Independent Containment System (ICS) Complete these instructions to install the Independent Containment System (ICS). Prerequisites This installation requires a team of at least two people.
-- Gym Glide -- (Recreational Game Standard) Installation Instructions
 Installation Instructions") -- Gym Glide -- (Recreational Game Standard) Installation Instructions Call Jaypro Sports Equipment at 1-800-243-0533 during regular business hours for technical support. www.jaypro.com Rev- Page 1 of
-- Gym Glide -- (Recreational Game Standard) Installation Instructions Call Jaypro Sports Equipment at 1-800-243-0533 during regular business hours for technical support. www.jaypro.com Rev- Page 1 of
Brooklyn Drawers Assembly Instructions
 rooklyn rawers ssembly Instructions Thank you for your purchase. Please follow the instructions below for correct assembly. locking nut x30 long screw dowel bolt x16 x46 x30 F G H W Safety Strap X Wall
SMITH STRENGTH TRAINING SYSTEM INSTRUCTION MANUAL MODEL : F410
 SMITH STRENGTH TRAINING SYSTEM INSTRUCTION MANUAL MODEL : F0 QUESTION? As a quality home gym supplier we are committed to your complete satisfaction. If you have questions, or find missing or damaged parts,
Elliptical Unpacking and Installation Instructions
 Elliptical Unpacking and Installation Instructions Use these instructions for the following Ellipticals: ClubStride 5100-LE Receiving When the carrier delivers your order, verify that the number of items
The Derby Magic Company Track Assembly Instructions, revision F page 1 of 13
 The Derby Magic Company Track Assembly Instructions, revision F page 1 of 13 Thank you for purchasing a Derby Magic Pinewood Derby Track. To assemble your track, start with the stand. The parts of the
v1.0 ASSEMBLY GUIDE Mia Wide Bookcase
 v1.0 ASSEMBLY GUIDE Mia Wide Bookcase Components Upon unpacking your bookcase from it s delivery box, you should have the pieces shown. Follow the steps on the next pages to assemble your new bookcase.
Assembly Instructions
 Assembly Instructions Frame Models Lotz (10000), Madison (2644), Vancouver (2710), Boston (2715), San Juan (2717), Marlowe (2719), Arlington (2722), Monticello (2730), Avalon (2750) & Tucson (2770) Tel:
FLAVESCO ELEVATOR GUARDING USER MANUAL
 FLAVESCO ELEVATOR GUARDING USER MANUAL QMF 19 Rev 4.0 May 24 th 2013 WARNINGS GUARDING CAN BE INSTALLED AND REMOVED ONLY BY CERTIFIED ELEVATOR MECHANICS. MACHINE MUST BE SHUT DOWN AND LOCKED OUT BEFORE
INSTALLATION GUIDE. Embedded TV Wall Mount MHAI-700. VESA 500x800 compatible. Support 42" to 63" Screens Max Load Capacity: 200 lbs (91 kg)
") INSTALLATION GUIDE Embedded TV Wall Mount MHAI-700 Support 2" to 63" Screens Max Load apacity: 200 lbs (91 kg) VESA 500x800 compatible Note: Read entire instruction sheet before you start installation
INSTALLATION GUIDE Embedded TV Wall Mount MHAI-700 Support 2" to 63" Screens Max Load apacity: 200 lbs (91 kg) VESA 500x800 compatible Note: Read entire instruction sheet before you start installation
This Folding Shelf Kit will work in conjunction with our Swing Away Carrier Kit allowing you add additional exterior storage space to your Vanagon.
 Rocky Mountain Westy Folding Shelf Kit Assembly & Installation Instructions Introduction Thank you for purchasing the Rocky Mountain Westy Folding Shelf Kit. We pride ourselves in the products we develop
40670 Transit Connect/NV200/City Express/ProMaster City Partition
 40670 Transit Connect/NV200/City Express/ProMaster City Partition Top Panel (1) Bottom Panel (1) Transit Connect (2014) Top Angle (1) TC Top MNT BRKT (2) TC Bottom MNT PLT (2) NV200/City Express Top Mount
Jesse Entertainment Unit Assembly Instructions
 esse ntertainment Unit ssembly nstructions Thank you for your purchase. Please follow the instructions below for correct assembly. bolt x32 dowel x16 D F small screw x16 L + R L + R locking nut x32 cam
Installation and Assembly: In-wall Mount for 32" to 71" Flat Panel Screens
 Installation and Assembly: In-wall Mount for 32" to 71" Flat Panel Screens Model# IM760P, IM760P-S IM760PU, IM760PU-S Screen size range 32" to 71" (81 to 180 cm) 32" to 60" (81 to 152 cm) IM760P IM760P-S