2
|
|
|
- Gwenda Bailey
- 6 years ago
- Views:
Transcription
1 1

2 2

3 3

4 4
5 5

6 6

7 7 of 14 7/11/17, 8:46 AM 7

8 8
9 9
10 10
11 11
12 12

13 13

14 Apply an animation 1. Select the object or text on the slide that you want to animate. An "object" in this context is any thing on a slide, such as a picture, a chart, or a text box. Sizing handles appear around an object when you select it on the slide. (For animation purposes, a paragraph within a text box is also an object, but it won't have sizing handles when you select it; instead the entire text box has sizing handles.) 2. On the Animations tab of the ribbon, click Add Animation, and pick an animation effect. To make sure that animations play when you present your slide show, make sure that when you go to Slide show > Set Up Slide Show that the Show without animation box is cleared. If this box is checked, animations will show when you preview your slide show, but not when you present it. To apply additional animation effects to the same object, see Apply multiple animation effects to one object, or to add a motion path, see Add a motion path animation effect. Some entrance and exit effects (such as Flip, Drop, and Whip) and some emphasis effects (such as Brush Color and Wave) are available only for objects that contain text. If you want to apply an animation effect that isn't available for this reason, try adding a space character inside your object. Change the speed of the animation effect The speed of the effect is determined by the Duration setting. 1. On the slide, select the animation effect that you want to change. 2. On the Animations tab, under Timing options, in the Duration box, enter the number seconds that you want the animation effect to last. 14
15 (Maximum: 59 seconds. Minimum:.01 seconds. You can type a duration or use the up or down arrows to select a standard incremental value.) Change how the animation effect starts 1. On the slide, select the animation effect that you want to change. 2. On the Animations tab, under Timing options, open the Start list, and choose one of the three options described below: To start the animation effect When you click the slide At the same time as the previous animation effect in the list. (One click starts two or more animation effects at the same time.) Immediately after the previous animation effect in the list finishes playing. (No additional click is required to make this animation effect start.) Select On Click With Previous After Previous 3. Set the time between animation effects The Delay option determines how much time elapses before a specific animation effect begins either after you click or after a prior animation effect concludes. Change the order of the animation effects on a slide To reorder a set of animations on a slide: 1. Open the Animation pane: On the Animations tab, in the Advanced Animation group, select Animation Pane. 2. In the Animation pane, select the animation effect that you want to reorder. 3. On the Animations tab of the ribbon, in the Timing group, under Reorder Animation select one of these options: 15
16 o o Select Move Earlier to move the effect up one place in the animation order. Select Move Later to move the effect down one place in the animation order. You can select an option multiple times, if necessary, to move your selected effect to the appropriate place in the animation order. Remove an animation effect When you animate an object (such as a bullet point or a picture), a small numeral appears just to the left of that object. This numeral indicates the presence of an animation effect and its place in the sequence of animations on the current slide. To remove an animation 1. Select the numeral of the animation that you want to remove. 2. Press the Delete key on your keyboard. Animation demonstration For a five-minute video that shows a lot of animation features, see Training: Add animations to slides. More about animating text and objects There are four different types of animation effects: Entrance effects make an object fade gradually into focus, fly onto the slide from an edge, or bounce into view. Exit effects include making an object fly off of the slide, disappear from view, or spiral off of the slide. Emphasis effects include making an object shrink or grow in size, change color, or spin on its center. You can use Motion Paths to make an object move up or down, left or right, or in a star or circular pattern (among other effects). You also can draw your own motion path. You can use any animation by itself, or combine multiple effects. For instance, to make a line of text fly in while it grows, apply a Fly In entrance effect and a Grow/Shrink emphasis effect to it. Click Add Animation to add effects, and use the Animation Pane to set the emphasis effect to occur With Previous. 16
17 The gallery of animation effects on the Animations tab shows only the most popular effects. Get even more possibilities by clicking Add Animation, scrolling down, and clicking More Entrance Effects, More Emphasis Effects, More Exit Effects, or More Motion Paths. 17


18 To insert a SmartArt graphic: 1. Select the slide where you want the SmartArt graphic to appear. 2. From the Insert tab, select the SmartArt command in the Illustrations group. 3. A dialog box will appear. Select a category on the left, choose the desired SmartArt graphic, and click OK. 18

19 4. The SmartArt graphic will appear on the current slide. You can also click the Insert a SmartArt Graphic command in a placeholder to add SmartArt. To add text to a SmartArt graphic: 1. Select the SmartArt graphic. The SmartArt task pane will appear to the left. 19


20 2. Enter text next to each bullet in the task pane. The text will appear in the graphic and will resize to fit inside the shape. 3. To add a new shape, press Enter. A new bullet will appear in the task pane, and a new shape will appear in the graphic. You can delete any bullets you're not using to remove the shapes. 20

21 You can also add text by clicking the desired shape and then typing. This works well if you only need to add text to a few shapes. However, for more complex SmartArt graphics working in the task pane is often faster. To convert existing text to SmartArt: PowerPoint makes it easy to transform traditional bullet points into an eye-catching SmartArt graphic. If you already have text on a slide, you can convert it to SmartArt. In our example below, we'll change the bullet points into SmartArt to help illustrate a process. 1. Right-click the list or paragraph you want to convert to SmartArt. 2. Hover the mouse over Convert to SmartArt, then select the desired SmartArt graphic. 21


22 3. The text will appear as a SmartArt graphic. You can also convert SmartArt back to text. From the Design tab on the right side of the Ribbon, click the Convert command, then select Convert to Text. 22


23 Changing the SmartArt organization To add a shape: 1. Select the SmartArt graphic, then click the Design tab on the right side of the Ribbon. 2. Decide where you want the new shape to appear, then select an adjacent shape. 23


24 3. Click the Add Shape command in the Graphics group. A drop-down menu will appear. 4. Select Add Shape Before or Add Shape After to add a shape on the same level as the selected shape. Select Add Shape Above or Add Shape Below to add a shape above or below the selected shape. 5. The new shape will appear. To promote or demote shapes: 1. Select the SmartArt graphic, then click the Design tab on the right side of the Ribbon. 24


25 2. Select the shape you want to promote or demote. In our example, we'll demote a shape. 3. To move the shape to a higher level, click the Promote command in the Create Graphic group. To move it to a lower level, click Demote. 4. The shape will move one level higher or lower. 25
 to promote a shape. It's a lot like creating an outline with a multilevel list.")
26 You can also demote and promote shapes from within the task pane. With the insertion point in the task pane, press the Tab key to demote a shape. Press the Backspace key (or Shift+Tab) to promote a shape. It's a lot like creating an outline with a multilevel list. For more information, you may want to review our lesson on Indents and Line Spacing. To rearrange shapes on the same level: 1. Select the SmartArt graphic, then click the Design tab. 2. Select the shape you want to move. 26

27 3. In the Create Graphic group, click Move Up or Move Down. 4. The shape will move to a new location on the same level, and any shapes nested below it will also move. Customizing SmartArt After inserting SmartArt, there are several things you might want to change about its appearance. Whenever you select a SmartArt graphic, the Design and Format tabs will appear on the right side of the Ribbon. From there, it's easy to edit the style and layout of a SmartArt graphic. To customize SmartArt PowerPoint provides a variety of color schemes to use with SmartArt. To change the colors, simply select the SmartArt, click the Change Colors command, and choose the desired colors from the drop-down menu. 27

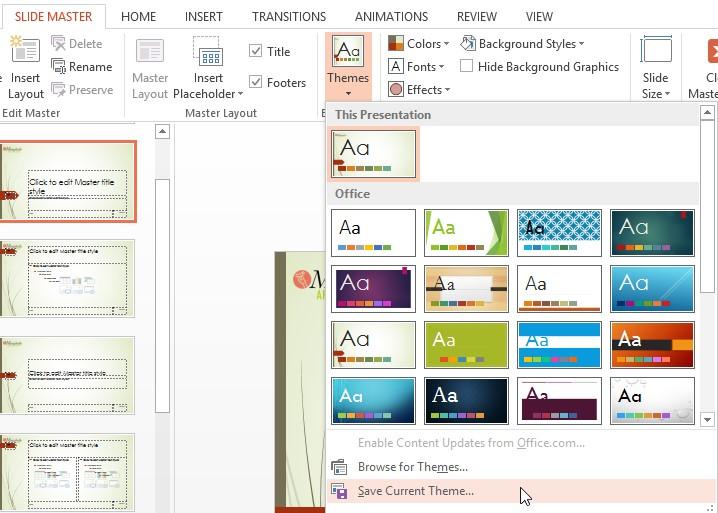
28 Color schemes use theme colors, so they will vary depending on which theme you are using. Visit our lesson on Modifying Themes to learn more about changing and customizing themes in PowerPoint


29 PowerPoint also includes several SmartArt styles, which allow you to quickly modify the look and feel of your SmartArt. To change the style, select the desired style from the SmartArt styles group. 29

30 You can add shape effects to your SmartArt, such as beveling and 3D rotation. Select the entire SmartArt graphic by clicking the border, select the Format tab, and choose the desired Shape Effects. You can also click an individual shape to customize it separately. To change the SmartArt layout: 30


31 If you don't like the way your information is organized within a SmartArt graphic, you can always change its layout to better fit your content. 1. Select the SmartArt graphic, then select the Design tab. 2. In the Layouts group, click the drop-down arrow. 3. Select the desired layout or click More Layouts... to see even more SmartArt options. 4. The selected layout will appear. 31


32 Set the duration of a transition 1. Select the slide that has the transition that you want to modify. 2. On the Transitions tab, in the Timing group, in the Duration box, type the number of minutes that you want. Modify the effect options for a transition Many, but not all, of the transitions in PowerPoint 2010 have customizable properties that you can set. 1. Select the slide that has the transition that you want to modify. 2. On the Transitions tab, in the Transition to This Slide group, click Effect Options and select the option that you want. In this example, a Gallery transition is applied to the slide and the From Right option is selected. A Gallery transition, with the From Right option selected, during a presentation. 32
33 Specify a time to advance to the next slide 1. Select the slide that you want to set the timing for. 2. On the Transitions tab, in the Timing group, under Advance Slide, do one of the following: o To make the slide advance to the next slide when you click the mouse, select the On Mouse Click check box. To specify the time before the slide advances, select the After check box, and then type the number of minutes or seconds that you want into the associated text box. Note: To use the specified timings, on the Slide Show tab, in the Set Up group, make sure that the Use Timings check box is selected. Set a sound to play during a transition 1. Select the slide that has the transition that you want to modify. 2. On the Transitions tab, in the Timing group, in the Sound list, select the sound that you want. Note: If you want to use your own sound, in the Sound list, select Other Sound, and then in the Add Audio dialog box, select the sound that you want and then click OK 33


34 Inserting screenshots Screenshots are basically snapshots of your computer screen. You can take a screenshot of almost any program, website, or open window. PowerPoint makes it easy to insert a screenshot of an entire window or a screen clipping of part of a window in your presentation. To insert screenshots of a window: 1. Select the Insert tab, then click the Screenshot command in the Images group. 2. The Available Windows from your desktop will appear. Select the window you want to capture as a screenshot. 3. The screenshot will appear on the currently selected slide. 34


35 To insert a screen clipping: 1. Select the Insert tab, click the Screenshot command, then select Screen Clipping. 2. A faded view of your desktop will appear. Click and drag to draw the area you want to capture as a screen clipping. 35

36 3. The screen clipping will appear on the currently selected slide. 36
CHAPTER 5: MICROSOFT OFFICE: POWERPOINT 2010
 CHAPTER 5: MICROSOFT OFFICE: POWERPOINT 2010 Quick Summary Microsoft PowerPoint 2010 is software that can be used to effectively present information to an audience. The following objects are parts of the
Microsoft Powerpoint 2013
 Microsoft Powerpoint 2013 Lesson 7 Creating SmartArt Graphics 2014, John Wiley & Sons, Inc. Microsoft Official Academic Course, Powerpoint 2013 1 Objectives 2014, John Wiley & Sons, Inc. Microsoft Official
TECHNOTravel. For Microsoft Word & PowerPoint 2010 Student Workbook. TECHNOeBooks Project-based Computer Curriculum ebooks.
 TECHNOTravel For Microsoft Word & PowerPoint 2010 Student Workbook TECHNOeBooks Project-based Computer Curriculum ebooks www.bepublishing.com Copyright 1993 2010. TechnoKids Inc. in partnership with B.E.
New Perspectives on PowerPoint Module 1: Creating a Presentation
 New Perspectives on PowerPoint 2016 Module 1: Creating a Presentation Objectives, Part 1 Plan and create a new presentation Create a title slide and slides with lists Edit and format text Move and copy
GO! with Microsoft PowerPoint 2016 Comprehensive
 GO! with Microsoft PowerPoint 2016 Comprehensive First Edition Chapter 2 Formatting PowerPoint Presentations Learning Objectives Format Numbered and Bulleted Lists Insert Online Pictures Insert Text Boxes
Learn PowerPoint 2010
 Table of Contents Chapter 1 Introduction Introduction...4 Chapter 2 PowerPoint 2010 Basics Introduction to PowerPoint 2010 Basics...5 Start and Exit...6 PowerPoint 2010 Window...7 The Ribbon...9 The Backstage:
PowerPoint 2016: Formatting Pictures. Introduction
 PowerPoint 2016: Formatting Pictures Introduction There are a variety of ways to format the pictures in your slide show. The picture tools in PowerPoint make it easy to personalize and modify the images
Introduction. Basic Image Formatting. PowerPoint 2010 Formatting Pictures. To Crop an Image: Page 1
 PowerPoint 2010 Formatting Pictures Introduction Page 1 Once you've added pictures to your presentations, you can format them in various ways. The picture tools in PowerPoint 2010 make it easy to incorporate
Table of Contents. Creating Your First Project 4. Enhancing Your Slides 8. Adding Interactivity 12. Recording a Software Simulation 19
 Table of Contents Creating Your First Project 4 Enhancing Your Slides 8 Adding Interactivity 12 Recording a Software Simulation 19 Inserting a Quiz 24 Publishing Your Course 32 More Great Features to Learn
Creating Your Own Ballad of an Eagle Scout Using the Ballad Template. Produced by Scoutworks.weebly.com All Rights Reserved
 Creating Your Own Ballad of an Eagle Scout Using the Ballad Template Produced by Scoutworks.weebly.com All Rights Reserved Please take NOTE: This tutorial has been designed to show you how you can create
In this tutorial you will use Photo Story 3, a free software program from Microsoft, to create digital stories using text, graphics and music.
 In this tutorial you will use Photo Story 3, a free software program from Microsoft, to create digital stories using text, graphics and music. What you will learn: o System Requirements and Recommendations
Lesson 4: Inserting and Modifying Clip Art and Photos
 CNET tech sites: Price comparisons Product reviews Tech news Downloads Site map Home Your Courses Your Profile Logout FAQ Contact Us About Lesson 4: Inserting and Modifying Clip Art and Photos PowerPoint
Explain SAM Capstone Project FOR MORE CLASSES VISIT
 Explain SAM Capstone Project FOR MORE CLASSES VISIT www.tutorialoutlet.com SAM Capstone Project 1a HI FROM HOME ORGANIZING AND ENHANCING MEDIA, AND ANIMATING A PRESENTATION GETTING STARTED Open the file
Photo Story Tutorial
 Photo Story Tutorial To create a new Photo Story Project: 1. Start 2. Programs 3. Photo Story 4. Begin a New Story 5. Next 6. Import Pictures 7. Click on your Flash Drive s name from the window on the
Animating objects 1. We want the graphic we just created to appear in the following sequence.
 Animating objects 1 Normally graphics in PowerPoint appear in one piece when the slide appears. Even if Preset Text Animation has been chosen in the Slide Sorter view, only text created by the Autotemplates
Introduction. Basic Image Formatting. Word 2010 Formatting Pictures. To Crop an Image: Page 1
 Word 2010 Formatting Pictures Introduction Page 1 Once you've added pictures to your documents, you can format them in various ways. The picture tools in Word 2010 make it easy to incorporate images into
Introducing Photo Story 3
 Introducing Photo Story 3 SAVE YOUR WORK OFTEN!!! Page: 2 of 22 Table of Contents 0. Prefix...4 I. Starting Photo Story 3...5 II. Welcome Screen...5 III. Import and Arrange...6 IV. Editing...8 V. Add a
ADD A FILL (SHADING) OR EFFECT TO A SHAPE OR TEXT BOX
 OR EFFECT TO A SHAPE OR TEXT BOX") ADD A FILL (SHADING) OR EFFECT TO A SHAPE OR TEXT BOX Definitions of Fills, Gradients, and Effects You can change the look of a shape or text box by changing its fill or by adding effects to it, such as
ADD A FILL (SHADING) OR EFFECT TO A SHAPE OR TEXT BOX Definitions of Fills, Gradients, and Effects You can change the look of a shape or text box by changing its fill or by adding effects to it, such as
Try what you learned (and some new things too)
") Training Try what you learned (and some new things too) PART ONE: DO SOME MATH Exercise 1: Type some simple formulas to add, subtract, multiply, and divide. 1. Click in cell A1. First you ll add two numbers.
Training Try what you learned (and some new things too) PART ONE: DO SOME MATH Exercise 1: Type some simple formulas to add, subtract, multiply, and divide. 1. Click in cell A1. First you ll add two numbers.
High Speed Motion Trail Effect With Photoshop
 High Speed Motion Trail Effect With Photoshop Written by Steve Patterson. In this Photo Effects tutorial, we'll learn how to add a sense of speed to an object using an easy to create motion blur effect!
Introduction to Parametric Modeling AEROPLANE. Design & Communication Graphics 1
 AEROPLANE Design & Communication Graphics 1 Object Analysis sheet Design & Communication Graphics 2 Aeroplane Assembly The part files for this assembly are saved in the folder titled Aeroplane. Open an
Adding Graphics to a Presentation
 Lesson 8 Page 1 Adding Graphics to a Presentation Lesson Skill Matrix Skill Exam Objective Objective Number Inserting and Formatting Images Insert images. Display alignment tools. Resize and crop images.
iphoto Getting Started Get to know iphoto and learn how to import and organize your photos, and create a photo slideshow and book.
 iphoto Getting Started Get to know iphoto and learn how to import and organize your photos, and create a photo slideshow and book. 1 Contents Chapter 1 3 Welcome to iphoto 3 What You ll Learn 4 Before
Create a Simple Game in Scratch
 Create a Simple Game in Scratch Based on a presentation by Barb Ericson Georgia Tech June 2009 Learn about Goals event handling simple sequential execution loops variables conditionals parallel execution
digitization station DIGITAL SCRAPBOOKING 120 West 14th Street
 digitization station DIGITAL SCRAPBOOKING 120 West 14th Street www.nvcl.ca techconnect@cnv.org DIGITAL SCRAPBOOKING With MyMemories Suite 6 The MyMemories Digital Scrapbooking software allows you to create
MID-LEVEL EXERCISES. Project Management Life Cycle. Project Management
 MID-LEVEL EXERCISES Project Management Life Cycle You have been asked to train the employees of a family-owned company about the life cycle of a m* " project. You begin a slide show by creating an infographic,
Adding Graphics to a Presentation
 8 Adding Graphics to a Presentation LESSON SKILL MATRIX Skill Exam Objective Objective Number Inserting and Formatting Images Adding Shapes to Slides Ordering and Grouping Shapes Insert images. Display
Part 1- Fundamental Functions
 Part 1- Fundamental Functions Note: Alt+Tab will allow you to move between programs in the docker. Shift+Tab removes right pallets Tab removes all pallets Ctrl+1= centers art board Ctrl + 0= fill window
Apple Photos Quick Start Guide
 Apple Photos Quick Start Guide Photos is Apple s replacement for iphoto. It is a photograph organizational tool that allows users to view and make basic changes to photos, create slideshows, albums, photo
Creating Digital Stories for the Classroom
 Using Photo Story 3 to Create a Digital Story Creating Digital Stories for the Classroom When you open Photo Story 3 you have a few options. To begin a new story select the option Begin a New Story and
Creating a Single Page Flyer in PowerPoint
 Creating a Single Page Flyer in PowerPoint Digital Media Commons Fondren Basement B42 (713) 348-3635 dmc-info@rice.edu 1 Creating a Single Page Flyer in PowerPoint Jane Zhao janezhao@rice.edu Director,
Computer Assistive Instruction to Teach Decoding Skills to Students with Physical Disabilities: PowerPoint and the Nonverbal Reading Approach
 1 Computer Assistive Instruction to Teach Decoding Skills to Students with Physical Disabilities: PowerPoint and the Nonverbal Reading Approach David F. Cihak University of Tennessee *Please feel free
CS Problem Solving and Structured Programming Lab 1 - Introduction to Programming in Alice designed by Barb Lerner Due: February 9/10
 CS 101 - Problem Solving and Structured Programming Lab 1 - Introduction to Programming in lice designed by Barb Lerner Due: February 9/10 Getting Started with lice lice is installed on the computers in
SHAPE CLUSTER PHOTO DISPLAY
 SHAPE CLUSTER PHOTO DISPLAY In this Photoshop tutorial, we ll learn how to display a single photo as a cluster of shapes, similar to larger wall cluster displays where several photos, usually in different
Getting Started. with Easy Blue Print
 Getting Started with Easy Blue Print User Interface Overview Easy Blue Print is a simple drawing program that will allow you to create professional-looking 2D floor plan drawings. This guide covers the
Organizing artwork on layers
 3 Layer Basics Both Adobe Photoshop and Adobe ImageReady let you isolate different parts of an image on layers. Each layer can then be edited as discrete artwork, allowing unlimited flexibility in composing
Chapter 4 Adding and Formatting Pictures
 Impress Guide Chapter 4 Adding and Formatting Pictures OpenOffice.org Copyright This document is Copyright 2007 by its contributors as listed in the section titled Authors. You can distribute it and/or
COPYRIGHT NATIONAL DESIGN ACADEMY
 National Design Academy How 2 Guide Use SketchUp with LayOut COPYRIGHT NATIONAL DESIGN ACADEMY Use SketchUp with LayOut In order to be able to produce accurate scale drawings in SketchUp, you must use
Impress Guide. Chapter 4 Adding and Formatting Pictures
 Impress Guide Chapter 4 Adding and Formatting Pictures Copyright This document is Copyright 2005 2012 by its contributors as listed below. You may distribute it and/or modify it under the terms of either
THE OFFICE DRAWING TOOLS
 ESSENTIAL MICROSOFT OFFICE 2013: Tutorials for Teachers Copyright Bernard John Poole, 2013. All rights reserved 3 THE OFFICE DRAWING TOOLS LEARNING OUTCOMES In Lesson 2 you learned how to work with a longer
Generations Automatic Stand-Alone Lace By Bernie Griffith Generations Software
 We are going to create an open Italian lace. Generations software products provide advanced image processing features allowing for the creation of stand-alone lace with just a few simple techniques. A
MS Word Training Formatting Pictures
 Introduction MS Word Training Formatting Pictures There are many ways to format pictures in Word. For instance, you can change the size or shape of an image to better suit your document. You can also enhance
Star Defender. Section 1
 Star Defender Section 1 For the first full Construct 2 game, you're going to create a space shooter game called Star Defender. In this game, you'll create a space ship that will be able to destroy the
Impress Guide Chapter 4 Adding and Formatting Pictures
 Impress Guide Chapter 4 Adding and Formatting Pictures This PDF is designed to be read onscreen, two pages at a time. If you want to print a copy, your PDF viewer should have an option for printing two
Term Definition Introduced in: Tab(s) along the ribbon that show additional programs or features (e.g. Acrobat )
 along the ribbon that show additional programs or features (e.g. Acrobat )") 60 Minutes of Excel Secrets Key Terms Term Definition Introduced in: Tab(s) along the ribbon that show additional programs or features (e.g. Acrobat ) Add-Ins AutoCorrect Module 1 Corrects typographical,
60 Minutes of Excel Secrets Key Terms Term Definition Introduced in: Tab(s) along the ribbon that show additional programs or features (e.g. Acrobat ) Add-Ins AutoCorrect Module 1 Corrects typographical,
Adding Graphics to a Presentation
 8 Adding Graphics to a Presentation LESSON SKILL MATRIX Skill Exam Objective Objective Number Adding a Picture to a Slide Formatting Graphical Elements Resize graphical elements. 3.1.3 Apply styles to
Quick Start for Autodesk Inventor
 Quick Start for Autodesk Inventor Autodesk Inventor Professional is a 3D mechanical design tool with powerful solid modeling capabilities and an intuitive interface. In this lesson, you use a typical workflow
Once you have chosen the water world this is how your screen should look.
 Getting Started t With Alice By Ruthie Tucker under the direction of Prof. Susan Rodger Duke University, July 2008 www.cs.duke.edu/csed/alice/aliceinschools/ Let s Get Started The first step in making
COMPUTING CURRICULUM TOOLKIT
 COMPUTING CURRICULUM TOOLKIT Pong Tutorial Beginners Guide to Fusion 2.5 Learn the basics of Logic and Loops Use Graphics Library to add existing Objects to a game Add Scores and Lives to a game Use Collisions
Autodesk. AutoCAD Architecture Fundamentals. Elise Moss SDC PUBLICATIONS. Schroff Development Corporation
 Autodesk AutoCAD Architecture 2008 Fundamentals Elise Moss SDC PUBLICATIONS Schroff Development Corporation www.schroff.com www.schroff-europe.com Lesson 3 Floor Plans The floor plan is central to any
Excel 2013 Unit A: Getting Started With Excel 2013
 Excel 2013 Unit A: Getting Started With Excel 2013 MULTIPLE CHOICE 1. An electronic is an application you use to perform numeric calculations and to analyze and present numeric data. a. database c. dataform
Engineering Technology
 Engineering Technology Introduction to Parametric Modelling Engineering Technology 1 See Saw Exercise Part 1 Base Commands used New Part This lesson includes Sketching, Extruded Boss/Base, Hole Wizard,
PowerPoint Pro: Grouping and Aligning Objects
 PowerPoint Pro: Grouping and Aligning Objects In this lesson, we're going to get started with the next segment of our course on PowerPoint, which is how to group, align, and format objects. Now, everything
AEROPLANE. Create a New Folder in your chosen location called Aeroplane. The four parts that make up the project will be saved here.
 AEROPLANE Prerequisite Knowledge Previous knowledge of the following commands is required to complete this lesson. Sketching (Line, Rectangle, Arc, Add Relations, Dimensioning), Extrude, Assemblies and
Inserting Images Into Documents
 Inserting Images Into Documents Chapter 11 Microsoft Word has its own library of graphics, called Clip Art, which can be inserted into documents when required. You can also insert graphics created in other
Basics Pictures Media Bar
 Basics 1 The right pictures can make your publication stand out from the crowd. In this tutorial, we ll show you how to: Add and replace pictures. Use the Media Bar. Pan, zoom, and crop pictures. Apply
Introduction to Sheet Metal Features SolidWorks 2009
 SolidWorks 2009 Table of Contents Introduction to Sheet Metal Features Base Flange Method Magazine File.. 3 Envelopment & Development of Surfaces.. 14 Development of Transition Pieces.. 23 Conversion to
A Quick Spin on Autodesk Revit Building
 11/28/2005-3:00 pm - 4:30 pm Room:Americas Seminar [Lab] (Dolphin) Walt Disney World Swan and Dolphin Resort Orlando, Florida A Quick Spin on Autodesk Revit Building Amy Fietkau - Autodesk and John Jansen;
Assignment 6 CAD Mechanical Part 1 Editing Tools Objectives
 Assignment 6 CAD Mechanical Part 1 Editing Tools Objectives In this assignment you will apply the explode and rectangular array commands, as well as skills learned in earlier assignments. Getting Started
Toothbrush Holder. A drawing of the sheet metal part will also be created.
 Prerequisite Knowledge Previous knowledge of the following commands is required to complete this lesson; Sketch (Line, Centerline, Circle, Add Relations, Smart Dimension,), Extrude Boss/Base, and Edit
Introduction to: Microsoft Photo Story 3. for Windows. Brevard County, Florida
 Introduction to: Microsoft Photo Story 3 for Windows Brevard County, Florida 1 Table of Contents Introduction... 3 Downloading Photo Story 3... 4 Adding Pictures to Your PC... 7 Launching Photo Story 3...
Curriculum Department Bristol City Schools Bristol, TN
 Curriculum Department Bristol City Schools Bristol, TN Microsoft Photo Story 3 1 4/4/2013 Table of Contents GETTING STARTED 3 CREATE A NEW STORY 3 IMPORT AND ARRANGE YOUR PICTURES 3 EFFECTS 5 ADD A TITLE
Creating a Slide Show with Background Music in Adobe Lightroom January 2017 Maryann Flick
 Creating a Slide Show with Background Music in Adobe Lightroom January 2017 Maryann Flick Adobe Lightroom is widely used by many photographers for image organization and editing. If you are already using
Photo Within A Photo - Photoshop
 Photo Within A Photo - Photoshop Here s the image I ll be starting with: The original image. And here s what the final "photo within a photo" effect will look like: The final result. Let s get started!
Introduction to Circular Pattern Flower Pot
 Prerequisite Knowledge Previous knowledge of the sketching commands Line, Circle, Add Relations, Smart Dimension is required to complete this lesson. Previous examples of Revolved Boss/Base, Cut Extrude,
1 ImageBrowser Software User Guide 5.1
 1 ImageBrowser Software User Guide 5.1 Table of Contents (1/2) Chapter 1 What is ImageBrowser? Chapter 2 What Can ImageBrowser Do?... 5 Guide to the ImageBrowser Windows... 6 Downloading and Printing Images
QUICKSTART COURSE - MODULE 7 PART 3
 QUICKSTART COURSE - MODULE 7 PART 3 copyright 2011 by Eric Bobrow, all rights reserved For more information about the QuickStart Course, visit http://www.acbestpractices.com/quickstart Hello, this is Eric
Portrait Pro User Manual
 Portrait Pro User Manual Version 17.0 Anthropics Technology Ltd www.portraitpro.com Contents 3 Table of Contents Part I Getting Started 6 1 Quick Start... Guide 7 2 Top Tips... For Best Results 8 3 Portrait...
Adding Graphics to a Presentation
 8 Adding Graphics to a Presentation LESSON SKILL MATRIX Skill Exam Objective Objective Number Inserting and Formatting Images Adding Shapes to Slides Display gridlines. Crop images. Resize images. Apply
Learn how to. Link to Club Penguin. Link to Club Penguin. Link to Club Penguin. Movie Clip
 Quiz Welcome to Learn how to paint! Press one of the tabs on right hand side to play The pallet will be animation that slides on from the left hand side. The colours will be animated onto the screen. The
Next Back Save Project Save Project Save your Story
 What is Photo Story? Photo Story is Microsoft s solution to digital storytelling in 5 easy steps. For those who want to create a basic multimedia movie without having to learn advanced video editing, Photo
Lesson 4 Holes and Rounds
 Lesson 4 Holes and Rounds 111 Figure 4.1 Breaker OBJECTIVES Sketch arcs in sections Create a straight hole through a part Complete a Sketched hole Understand the Hole Tool Use Info to extract information
Drawing Layouts Paper space & Model Space
 Drawing Layouts Paper space & Model Space Users of Bricscad will have seen the tabs at the bottom left of the drawings area labelled: Model, Layout1, Layout2 but may not know how to use them or what they
Revit Structure 2014 Basics
 Revit Structure 2014 Basics Framing and Documentation Elise Moss Authorized Author SDC P U B L I C AT I O N S Better Textbooks. Lower Prices. www.sdcpublications.com Powered by TCPDF (www.tcpdf.org) Visit
Davis Art Images: Create and Share Slideshows
 Davis Art Images: Create and Share Slideshows Davis Art Images, you can create and curate custom sets of images to use in your art room with Tags. Your Tagged Image Sets can then be viewed and presented
Creating a Frame by Frame Animation for PhotoStory
 Creating a Frame by Frame Animation for PhotoStory There are an unlimited number of animation styles that you can create using the PhotoShop Elements software. Depending on the type of animation you want,
HANDS-ON EXER. 3 Object Manipulation. rrr/gls HOE3 Training SIZE AND POSITION CLIP ART
 HANDS-ON EXER rrr/gls HOE3 Training 3 Object Manipulation While you could teach your mini-camp participants how to size, position, align, ungroup, and use other object manipulation techniques using shapes,
Sheet Metal Punch ifeatures
 Lesson 5 Sheet Metal Punch ifeatures Overview This lesson describes punch ifeatures and their use in sheet metal parts. You use punch ifeatures to simplify the creation of common and specialty cut and
Blend Photos Like a Hollywood Movie Poster
 Blend Photos Like a Hollywood Movie Poster Written By Steve Patterson In this Photoshop tutorial, we're going to learn how to blend photos together like a Hollywood movie poster. Blending photos is easy
AP Art History Flashcards Program
 AP Art History Flashcards Program 1 AP Art History Flashcards Tutorial... 3 Getting to know the toolbar:... 4 Getting to know your editing toolbar:... 4 Adding a new card group... 5 What is the difference
Virtual components in assemblies
 Virtual components in assemblies Publication Number spse01690 Virtual components in assemblies Publication Number spse01690 Proprietary and restricted rights notice This software and related documentation
GO! with Microsoft PowerPoint 2010 Introductory Gaskin Vargas Madsen Marucco First Edition
 GO! with Microsoft PowerPoint 2010 Introductory Gaskin Vargas Madsen Marucco First Edition Pearson Education Limited Edinburgh Gate Harlow Essex CM20 2JE England and Associated Companies throughout the
Assemble This! [Part 1]
![Assemble This! [Part 1]](/thumbs/74/69963588.jpg "Assemble This! [Part 1]") 11/30/2006-3:00 pm - 4:30 pm Room:Marcello - 4401 (MSD Campus) Assemble This! [Part 1] Alan Kalameja - Trident Technical College and Kevin Robinson (Assistant); Patrik Chartrand (Assistant) MA34-1L This
11/30/2006-3:00 pm - 4:30 pm Room:Marcello - 4401 (MSD Campus) Assemble This! [Part 1] Alan Kalameja - Trident Technical College and Kevin Robinson (Assistant); Patrik Chartrand (Assistant) MA34-1L This
11 Advanced Layer Techniques
 11 Advanced Layer Techniques After you ve learned basic layer techniques, you can create more complex effects in your artwork using layer masks, path groups, filters, adjustment layers, and more style
SAVING, LOADING AND REUSING LAYER STYLES
 SAVING, LOADING AND REUSING LAYER STYLES In this Photoshop tutorial, we re going to learn how to save, load and reuse layer styles! Layer styles are a great way to create fun and interesting photo effects
Revit Structure 2012 Basics:
 SUPPLEMENTAL FILES ON CD Revit Structure 2012 Basics: Framing and Documentation Elise Moss autodesk authorized publisher SDC PUBLICATIONS www.sdcpublications.com Schroff Development Corporation Structural
Introduction to Turtle Art
 Introduction to Turtle Art The Turtle Art interface has three basic menu options: New: Creates a new Turtle Art project Open: Allows you to open a Turtle Art project which has been saved onto the computer
Lab 3 Introduction to SolidWorks I Silas Bernardoni 10/9/2008
 1 Introduction This lab is designed to provide you with basic skills when using the 3D modeling program SolidWorks. You will learn how to build parts, assemblies and drawings. You will be given a physical
Lesson 6 2D Sketch Panel Tools
 Lesson 6 2D Sketch Panel Tools Inventor s Sketch Tool Bar contains tools for creating the basic geometry to create features and parts. On the surface, the Geometry tools look fairly standard: line, circle,
Quilt Pro 6 Lesson Quilt in a Quilt
 Quilt Pro 6 Lesson Quilt in a Quilt Quilt in a Quilt The Inner Quilt This quilt is a very complex design. We will cover a unique technique not covered in the manual. While any one can master the techniques
Photo Story Instructions!
 Highland Park High School Photo Story Instructions Page 1 of 11 Rev 2, 6/2008 Photo Story Instructions! Before you begin! Write your script first! This is the most important part of your project. Each
Lesson 2 Game Basics
 Lesson What you will learn: how to edit the stage using the Paint Editor facility within Scratch how to make the sprite react to different colours how to import a new sprite from the ones available within
Step 1: Set up the variables AB Design. Use the top cells to label the variables that will be displayed on the X and Y axes of the graph
 Step 1: Set up the variables AB Design Use the top cells to label the variables that will be displayed on the X and Y axes of the graph Step 1: Set up the variables X axis for AB Design Enter X axis label
Module 1C: Adding Dovetail Seams to Curved Edges on A Flat Sheet-Metal Piece
 1 Module 1C: Adding Dovetail Seams to Curved Edges on A Flat Sheet-Metal Piece In this Module, we will explore the method of adding dovetail seams to curved edges such as the circumferential edge of a
Welcome to Corel DESIGNER, a comprehensive vector-based package for technical graphic users and technical illustrators.
 Workspace tour Welcome to Corel DESIGNER, a comprehensive vector-based package for technical graphic users and technical illustrators. This tutorial will help you become familiar with the terminology and
Unit 6.5 Text Adventures
 Unit 6.5 Text Adventures Year Group: 6 Number of Lessons: 4 1 Year 6 Medium Term Plan Lesson Aims Success Criteria 1 To find out what a text adventure is. To plan a story adventure. Children can describe
8 Working Drawings in AutoCAD
 8 Working Drawings in AutoCAD Most engineering designs consist of more than a single part. Usually there are a several or many parts that must fit and work together. When we are creating the drawings of
CREATE A BURNT EDGE EFFECT
 CREATE A BURNT EDGE EFFECT One of the all-time classic effects in Photoshop is the burnt edge, and there s lots of different ways to create it, but in this Adobe Photoshop tutorial, we re going to look
Direct Manipulation. and Instrumental Interaction. CS Direct Manipulation
 Direct Manipulation and Instrumental Interaction 1 Review: Interaction vs. Interface What s the difference between user interaction and user interface? Interface refers to what the system presents to the
SolidWorks 103: Barge Design Challenge
 SolidWorks 103: Barge Design Challenge Note: This tutorial was created using SolidWorks 2009. If you are using another version of SolidWorks, you may notice some variation in display states and configuration.