The author assumes no liability for damages or accidents from the use of the information contained herein.
|
|
|
- Blake Lester
- 5 years ago
- Views:
Transcription
1
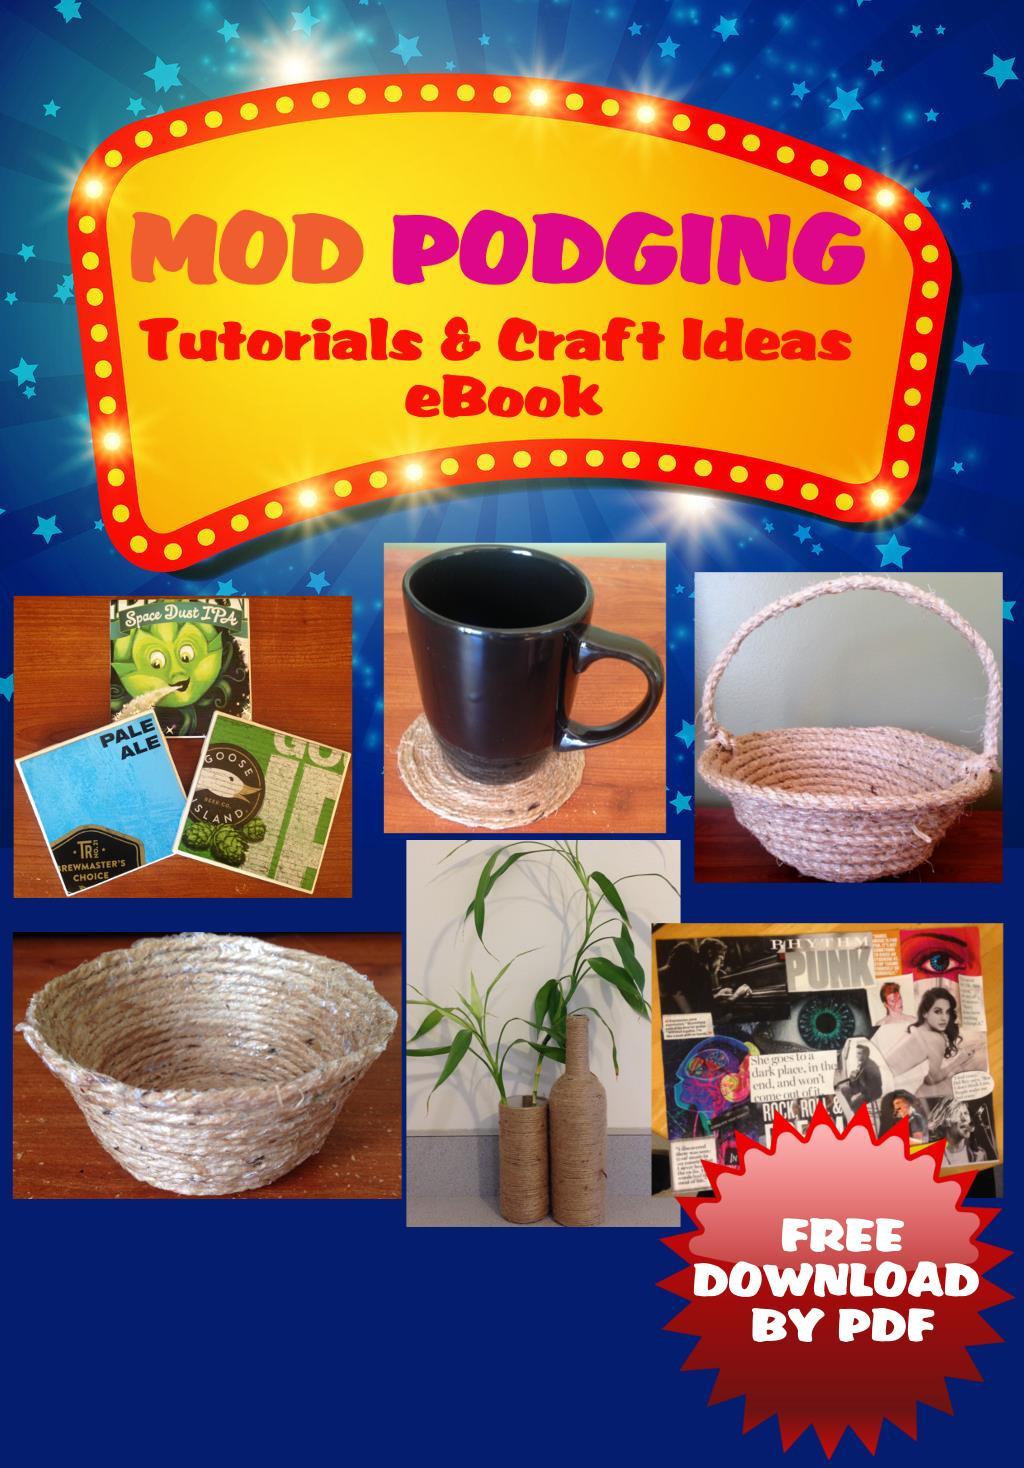
2 Note: I can t say this enough- but thank you so much for your order on Amazon and for downloading the complimentary ebook of Mod Podge crafts. Having you as a customer means more to me than some may imagine and I like you for it! If you had any issues with our ebook or products and aren t satisfied, please give me a chance to make things right before leaving a negative review by letting us know here: I truly care about you as a customer and want the best experience for you. Please feel free to also contact me regarding any questions on the tutorials shown in this ebook. This ebook includes some craft ideas that I hope you will enjoy. At the moment, we have a few projects listed but we plan on continuing to grow this ebook with more tutorials as time goes on, so be sure to check back for updates. Disclaimer: The author assumes no liability for damages or accidents from the use of the information contained herein. Any trademarks, service marks, product names or named features are assumed to be the property of their respective owners, and are used only for reference. Finally, you may not reproduce information in this book without express written permission from the author; exceptions are made for brief excerpts used in published reviews. You may not distribute this e-book to any other person for sale or non-sales.

3 1. Collage The first idea we are suggesting isn t anything new or overly interesting to do with Mod Podge, but I like this idea because you can display things that interest or are special to you. The process basically involves cutting out photos in interesting shapes and glue them out on a board. Some ideas are to: Display photos of family and friends to remind you of good memories with them. You can simply cut them out from old photos or print them out yourself. Display your interests from magazines. Magazines have some great pictures, iconography, inspirational words and cool fonts to display. Display your goals in a dream board from all types of cut outs of magazines, printouts or your own drawings. I really like this idea because creating it helps focus on your goal in life and is one of the keys to success! Substrates to use for this type of project are fairly inexpensive, often less than $1-$2 for a large board. You can use nearly anything with a solid backing such as poster card stock or foam board, but we recommend the following: Canvas Thin Panels o 9 X 12 inch (12 pack): o 11 X 14 inch (12 pack): Canvas Stretched Across Frame o 8 X 10 inch (10 pack): o 11 X 14 inch (5 pack): o 16 X 20 inch (5 pack): In this quick tutorial, we did simple cut outs from magazines of a friend s interest in music and singing. She included quotes from artists and pictures of those that inspire her. Step 1: We looked through magazines and cut out interesting photos. Step 2: You can plan ahead by laying them out on the board to make it look right, take a picture of it for reference or simply improvise while you glue them down.


4 Step 3: Apply a layer of Mod Podge to the canvas and apply pressure. Since magazines use thin paper, it may wrinkle it, so we recommend using a roller. Step 4 (Optional): You may also desire to apply a layer to the top to seal the pictures. Be sure to wait to the bottom layer to dry some first, then you can use a foam brush to spread it over smoothly.

 for small projects that don t need a lot of structure.")
5 2. Decorative Corded Bowls This is a fun and fairly easy project of using any type of corded rope type material to make decorative bowls. You can use all types of materials such as: Rope: or colored Hemp Cord: or colored Nylon Rattail Cord: Ply Jute: Metallic-like Cord: Those are just some ideas of materials to use, but each type also varies in weight, length, whether natural or synthetic, color, etc. Check out the links and search for different types you may want to use. You could even use yarn ( ) for small projects that don t need a lot of structure. Note: as you may know, it is ideal to use a lighter weight cord for small projects. How to Make the Corded Bowl: Step 1: Find a bowl of any desired shape and size as it will be used as a mold. Also, gather the materials: Saran Wrap, a brush, your corded material, and Mod Podge. For demo purpose in the photo below, I simply used a small glass bowl container.


6 Step 2: With the bowl facing down, apply Saran Wrap around the outside of the bowl and fold the excess inside it. Press the wrap onto the glass so it sticks. The wrap will protect your bowl from getting Mod Podge on it and is essential to making it easier to remove the corded. Then apply a liberal coat of Mod Podge all around the bottom. Step 3: Press the corded material into the Mod Podge near the bottom. Hold the end with one hand and turn the cord around with the other. After a few layers of it wrapped around, you won t have to hold the end still anymore. Continue applying Mod Podge around in steps as you work up- this prevents it from drying too much before you get there.


7 Step 4: It can get tougher to keep the cord in place near the top which is the base of the bowl because of the bend. If it isn t staying put at this point, lathering up the cord with Mod Podge before wrapping may help as shown below. Step 5: Cut the end and push it in the center. Let it dry for about 20 minutes.


8 Step 6: To make the bowl stronger, you will need to apply more Mod Podge layers. You can apply them on the outside, inside or both. In this example, I applied two layers to the outside, while letting them dry in between coats. Step 7: Once it is fully dry, you can begin removing the corded bowl. To help loosen it, try to slightly wiggle the corded bowl with Saran Wrap from the glass bowl and slowly pull apart. Then separate the Saran Warp by slowly pulling it off.


, then applying")
9 3. Making Corded Vase or Décor Item from Wine Bottles This idea uses the process of upcycling wine bottles into vases by cutting the top off and decorating it with corded materials with Mod Podge. Although similar to the bowl tutorial, this will involve permanently adhering the corded material to the bottle. Of course, you can still use a bottle as a vase without cutting the top off. Wrapping cord around the whole bottle is often used as a decorative item also. This project just combines two popular craft ideas into one: using Mod Podge and cutting glass bottles to upcycle. Step 1: Cut Wine Bottle If you do decide to cut the wine bottle, you can use this one here: It s fairly simple to do which involves rolling the bottle over a cutter blade to score it, heating it up (such as pouring boiling water over it), then applying cold water to cause it to separate. Instructions are included with each kit. Step 2: Just like the previous project, apply the Mod Podge with a brush around the bottle and wrap the cord around it.

10 Step 3: Cut the end and that s it!


11 4. Corded Coasters Another item you can easily make is a coaster out of the same Jute cord used in the previous projects or rope. I used Jute for this project with the easy steps listed below. Step 1: For purposes of making the coaster to an appropriate size, I used an existing coaster as a template. Coasters are typically about 3 inches wide so you could go off that. I placed Saran Wrap over it just like past projects to protect it. Step 2: Brush a heavy coat of Mod Podge on the surface and curl up the Jute for a starting point.


12 Step 3: I found it easier to turn the Jute rather than the whole coaster. While turning it, you may want to add a coat of Mod Podge in-between layers. I found that once it started getting larger, it isn t as structurally sounds and is a good idea to add more Mod Podge to the outer layers. Also, placing a circular item on top of the coaster helps keep it in place while turning, such as a lid. Step 4: Wait at least 15 minutes for the Mod Podge to set and add a layer on top to give it more structure. Then let dry overnight again before using. And that s it!


13 5. Roped Basket Step 1: Just like the corded bowl project, you select a bowl to use as your mold, wrap it with Saran Wrap or a plastic bag and brush Mod Podge at the starting point. The only difference to this project is I selected a larger bowl and used rope instead of jute. You can use any type of rope, but I decided to use sisal rope since it looks more like traditional baskets. I used ½ rope which can be found here but this starts to get a bit too much on the heavy/thick size. I think most people will enjoy using ¼ rope instead which is found here: Step 2: Neatly wrap the rope around while brushing a coat of Mod Podge both on the glass bowl mold and in-between each strand layer of rope. Then I placed some weight on top such as this roll of duct tape to help hold it in place and waited for it to dry overnight.


14 Step 3: Once dry, you can then lift the basket off the glass mold. Step 4: Now, to make the handle, hold each end of the rope in your fingers and arc it on top of the basket until you get the desired length. Then add on roughly inches for each side (this will be used to tie it to the basket) and cut off that rope piece.


15 Step 5: The rope is made of 2-3 strands that you can unravel on each end. Unravel about inches on each side. Then on the basket, about 2 rope layers down, use the sharp blade of your scissors to poke inbetween the layers and turn to make a small hole. You can then push one strand of your rope through the hole. I used the scissors to push it through. Step 6: Tie the other strands of the rope to the strand you poked through the basket into a tight knot. Then cut off the excess strands from the rope.


16 Step 7: Roughly bend the handle to your desired shape while making sure it is straight and get an item to hold it in place. You could use a balloon or cut out a piece of cardboard and bend it around the inside of the handle s arc, as I have done. Then brush Mod Podge on the handle. Step 8: After the handle is dry, slowly tear the cardboard off. Brush on more Mod Podge to the underside of the handle and add another coat to the top & sides to give it more structure.


17 Step 9: I realized the end of the rope on the basket stuck out too much and didn t look very pleasing. To fix this, I cut the end at a slanted angle and applied Mod Podge to hold it back down. If it doesn t hold together, you can use tape to temporarily hold it in place until dry. And that s it! 6. Ceramic Beer Coasters For this project, you will need four main items: 4 x4 ceramic tile Felt 6 pack of beer container Mod Podge Step 1: Draw a 4 by 4 square onto paper, cardstock or cardboard to create a template. It can be tough getting it perfectly square unless you have a tee-square or simply use a book corner to create perfect 90 degree angles of the square as I have done. Note: cutting out a template first can make it easier to prevent mistakes but isn t required.


18 Step 2: Cut out the square and place it over your ceramic tile to make sure it lines up. Step 3: Tear off the cardboard sections from within the 6 pack container and cut out one of the sides.


19 Step 4: Place your square template over the side until you find a good image and mark around the square. Then cut that out and place on your tile to make sure it lines up. Step 5: Apply an even coat of Mod Podge to the back of the beer container cut out and place onto the coaster. Be sure to press it into place and it is a good idea to use the side of a ruler to squeegee it into place. This will help remove any excess bubbles of Mod Podge and ensure it is smooth.


20 Step 6: Place a non-stick material such as wax paper on top to prevent Mod Podge from sticking to anything and stack up flat, heavy items to keep it in place until dry. I used a book and a stone to keep pressure on it for about 30 minutes. Step 7: Once dry, apply a smooth, light coat of Mod Podge to the top. Wait for it to dry for about 30 minutes and then apply a second coat. Step 8: Apply felt pads to the bottom of the tile. You can use the pads with the adhesive backed lining or use a combination of regular felt and Mod Podge to glue them.

21 7. Photo Transfer to Wood Plaque In this tutorial, I wanted to show you the complete steps I take from resizing, cropping and adjusting the photo until it is completely finished. Most tutorials don t explain the technical part of getting your image to fit exactly the way you want it on a plaque. You can use any image editing software, but I prefer using Photoshop or the free open source version called GIMP. GIMP is a cool, free software that can help scale down the image to your plaque. It can be downloaded free here: Step 1. Open GIMP and Import your image Step 2. Select the crop tool to cut out only the area you want to show. It is a good idea here to measure the dimensions of your wood item and set the aspect ratio to crop it appropriately. Since I have a perfect square plaque, I check marked "Fixed" in the tool settings and selected "Aspect ratio", then typed in "1:1". This means for every 1 width, the crop tool will also size up to 1 height. Then you click and drag over the image, and hit enter to crop. Step 3. Go to Image > Scale Image and set the size to your dimensions so it is in line with your measurement. Since my plaque was inches, I set the height and width to this.


22 Step 4. Save this version of the file by going to File > Export Image and typing in a new file name. Then click "Export" to save it. Step 5. If you have a printer that you can use, simply go to File > Print and Print. If you don't have a printer, upload your exported image to a jump drive, and go to a local library or Kinkos to purchase a print. Step 6. Once it s printed out, it is easier to cut out the excess paper from your image before positioning on the plaque. As you can see below, it lines up on the plaque quite well.


23 Step 7. Apply a thick coat of Mod Podge over the printed side of the image with even strokes. We used the Mod Podge Photo Transfer Medium, but we have found that regular Mod Podge works well too. Step 8. Place the photo copy with the glue/photo side faced down on the plaque. Make sure it is flat with no bubbles or wrinkles. I like to use a squeegee or a ruler s edge to smooth it over from center to the outside. Some of the Mod Podge may squeeze out the sides. If this happens, wipe it up before it dries.


24 Step 9. Wait for it to dry for 24 hours or at least overnight. Step 10. With a wet sponge or rag, dampen the back side of the paper until it absorbs the water and looks something like the below right image. (Note: You want to add just enough water for the paper to become soft, but not too much or else it could soften the photo transfer too.) Let it sit for a few minutes. Step 11. Then lightly rub the back paper with your fingers or with a sponge until it starts rolling off. It is best to rub in one direction (from center to side) rather than rubbing back & forth because it can be aggressive enough to lift the photo transfer off too.

25 Step 12. Once the majority of the paper if removed, there can sometimes be paper fibers still in the image that will need to be removed. To remove these, lightly dampen the photo multiple times and cautiously rub the fibers out in stages until it is all removed. Then you should have a complete photo transfer!
Cardboard Model Buildings
 Cardboard Model Buildings Get more model kits from http://www.modelbuildings.org PRINTING & ASSEMBLY TIPS: These OO designs can easily be resized by reducing the print percentage as follows: OO scale is
MAKE IT YOURS. Digital Photo Decoupage Art. How-2 instruction books for cool projects you can make your own.
 MAKE IT YOURS Digital Photo Decoupage Art How-2 instruction books for cool projects you can make your own. DIGITAL PHOTO DECOUPAGE ART WHAT YOU WILL NEED Computer / Internet Connection Digital photos you
Coat Rack. Materials: Directions:
 Coat Rack 2x2 wooden poplar (foundation of the rack) 3/4 inch diameter wood dowels (5-8 depending on how many arms you want) 1/4 inch dowel screw 1/4 inch drill bit Power drill Ruler Pencil Paint/spray
Building the Bell Tower
 Building the Bell Tower Mold #55 does not contain all of the blocks to build this tower. You will need extra regular blocks (1/2" x 1/2" x 1") and square blocks (1/2" x 1/2" x 1/2"). These blocks can be
Building the Gothic Church
 Building the Gothic Church Mold #54 does not contain all of the blocks to build this church. You will need extra regular blocks (1/2" x 1/2" x 1") and square blocks (1/2" x 1/2" x 1/2"). These blocks can
Do # 11 Tile Message Board
 Do # 11 Tile Message Board Supplies Needed: 6x6 tiles (or larger!), felt scraps, embellishments (feather, copies of the Be you, Bravely logo, ribbon, stickers, scrapbook paper), Mod Podge, 1 dry erase
Pressed Flowers. Materials: Directions: Pressed flowers Heavyweight paper Picture frame Craft glue Small paint brush Tweezers
 Pressed Flowers Pressed flowers Heavyweight paper Picture frame Craft glue Small paint brush Tweezers 1. Pressed flowers can be purchased online or you can easily press them yourself. Begin by folding
TECHNIQUES AND INSPIRATION. Daily Visual Journal KELLY DARKE
 TECHNIQUES AND INSPIRATION Daily Visual Journal KELLY DARKE DAILY VISUAL JOURNAL Introduction On June 5th, 2009 I decided to start creating a visual journal on individual pieces of paper. This gave me
Making Paper. A Wood Magic Show Project for Kids
 Making Paper A Wood Magic Show Project for Kids 2001 Contents: Introduction 1 Before you begin 2 What you will need 3 Instructions Making your frames Making your slurry Making your paper mat Drying your
WHAT TO DO WITH STOCKROOM MATERIAL LEFTOVERS.
 Sidewalk Chalk WHAT TO DO WITH STOCKROOM MATERIAL LEFTOVERS http://www.positivelysplendid.com/2011/05/sidewalk-chalk-paint-ssg-idea-7.html Permanent Chalk Pictures To make your chalk artwork more permanent
Making Homemade Paper
 Making Homemade Paper Summary The art and business of paper-making dates back about 2000 years ago! At that time, a Chinese government official named Ts ai Lun was the first to develop a paper-making method
Meredith Sinclair s DIY Clothespin Xmas Tree
 Meredith Sinclair s DIY Clothespin Xmas Tree Materials: Clothespins of various sizes, old or new Empty paper towel rolls, TP rolls, or craft tubes Glue gun Glue sticks Miniature decorations (optional)
Mini 4-H Arts & Crafts
 Mini 4-H Arts & Crafts Mini 4-H is open to youth who are currently in Kindergarten, first, or second grade at the time of their enrollment on 4HOnline. Enroll in Mini 4-H through the 4HOnline website by
Max Launch Abort System Prod. No *Kevlar is a registered trademark of Dupont
 Flying Model Parts List Max Launch Abort System Prod. No. 3014 A 11820 - Body Tube 3.5 Diam x 5.5" Long B 11824 - Orange Capsule Base Shoulder Ring C 16032 - Laser-cut Ring motor mount rear D 16033 - Laser-cut
Mirrorcraft Project Especially for Dogs
 Mirrorcraft Project Especially for Dogs DIY Customized Pet Mirror Make a mirror photo frame to Display your Pets Photo Irene Jacobs April 2007 Mirrorcraft is a fun craft to easily create you own customized
Building the Circular Tower
 Building the Circular Tower You will need to fill this mold 18 times to have enough blocks to build the circular tower. Be sure the blocks are completely dry before gluing them together. For detailed instructions
Building the Cathedral
 Building the Cathedral Please note that the cathedral is a fairly difficult and time consuming project. I strongly suggest building one or two easier models before tackling this one! Four molds are needed
Wax Resist. Judi Watanabe. Design by: 2007 Craft TV Weekly, Inc.
 Wax Resist Design by: Judi Watanabe 1 Wax on, wax off! Judi is resisting her paper crafting projects with wax! She protects photos and inked items with a little wax and then she gets creative. Judi rubs
Application guidance for Printed Vinyl decals
 Paint Masks - Dry Rub Decals - Waterslides - Printed media Telephone: Website: email: +44(0)7872 181119 (mobile) http://www.flightlinegraphics.com sales@flightlinegraphics.com Application guidance for
Mini 4-H ARTS & CRAFTS
 Mini 4-H ARTS & CRAFTS An Introduction to 4-H For Youth in Grades K - 2 A replacement manual will cost $1.00. Purdue University is an equal access/equal opportunity institution. Developed by Purdue Extension
Drop Spine Box. Tricia Morris. Design by: 2006 Craft TV Weekly, Inc.
 Drop Spine Box Design by: Tricia Morris 1 Think inside the box! In a marathon of gluing, folding and smoothing, Tricia shows how to make a Drop Spine Box. The steps are many, but the reward is great! So
There are three primary units to this box: two three-sided trays (one made to fit over the other) and one case that wraps around the trays.
 and one case that wraps around the trays.") Instructions for Basic Drop-Spine Box by Sandra Liddell Reese There are three primary units to this box: two three-sided trays (one made to fit over the other) and one case that wraps around the trays.
Instructions for Basic Drop-Spine Box by Sandra Liddell Reese There are three primary units to this box: two three-sided trays (one made to fit over the other) and one case that wraps around the trays.
Building the Wizards Tower
 Building the Wizards Tower Building Instructions You will need to fill this mold 18 times to have enough blocks to build the tower. Also, the blocks should be completely dry before gluing them together.
Planner / Journal Tutorial
 Planner / Journal Tutorial Sewing your own planners and journals is so much fun! You get to choose every part of the design, and your new book will delight you every time you open it. This method quickly
Wanderlust Suitcase Vanity
 Wanderlust Suitcase Vanity If you re like me, you re always up for an adventure. When I saw some examples of DIY reclaimed suitcases, paired with the exciting new Wanderlust embroidery design collection,
SEIZE THE CLAY. Shape your success as a sculptor with these six easy projects. TRY IT
 TRY IT SEIZE THE CLAY Shape your success as a sculptor with these six easy projects. PROJECTS JODI MENSING HARRIS PHOTOGRAPHS STEVEN MCDONALD WORDS HEIDI PALKOVIC 8 DO IT YOURSELF Spring 2017 A PRESS TO
Step by Step Wing Bagging
 Step by Step Wing Bagging By Evan Shaw 073 589 9339 evanevshaw@gmail.com Preparing the Leading Edge 1. Cut cores. (Cutting of wing cores is covered in another article elsewhere) 2. Sand the LE to a nice
Hollow metal clay forms are typically built over organic cores like. Coreless Construction: Rethinking the Metal Clay
 PROJECT INTERMEDIATE METAL CLAY Coreless Construction: Rethinking the Metal Clay Build this four-sided pendant using forethought and a 3-D template. by Cindy Ambrose FCT-MWON0216_ART17 Hollow metal clay
A Precision 2000 Mixed Media Project
 Día de los Muertos (Day of the Dead) Panel A Precision 2000 Mixed Media Project PROJECT TITLE: Día de los Muertos (Day of the Dead) Panel DESIGNED BY: Andy Spencer SKILL LEVEL: (Adult 1-5: 1 being the
How to Create a Torn-Paper Collage, by Aisling D Art (Aisling.net) Torn-paper collages are among my favorite ways to illustrate an artist s journal.
 Torn-paper collages are among my favorite ways to illustrate an artist s journal.") 1 How to Create a Torn-Paper Collage, by Aisling D Art (Aisling.net) Torn-paper collages are among my favorite ways to illustrate an artist s journal. I ve created a YouTube video to demonstrate one technique.
1 How to Create a Torn-Paper Collage, by Aisling D Art (Aisling.net) Torn-paper collages are among my favorite ways to illustrate an artist s journal. I ve created a YouTube video to demonstrate one technique.
To receive a service letter, please scan the Volunteer Log and it to:
 Thank you for your interest in helping the animals at San Diego Humane Society! We would not be able to provide the level of care and commitment to our animals without the help of people like you. This
4" Round Fieldstone Tower
 4" Round Fieldstone Tower This page contains instructions on how to use mold #72 to build the round fieldstone tower. You will have to cast the mold 18 times to build the tower. This round tower is slightly
COMPOSITES LAB MANUAL
 COMPOSITES LAB MANUAL Version 1 Lab 3: Surface Preparation, Wet Layup, and Vacuum Bagging The original version of this manual was a one student senior design project written by Katherine White, the Composite
VACATION CHURCH SCHOOL. Crafts
 VACATION CHURCH SCHOOL Crafts 1 TABLE OF CONTENTS Homemade Sidewalk Chalk Cupcake Crayons Artwork Weaving Hut Collection Cans Village Hut Coin Wrapper Twist a Wire Form Papier Mache Bowl Eco-Friendly Multimedia
Holiday Gift Box By Jean Bernard
 Holiday Gift Box By Jean Bernard Please read the entire lesson before you begin to gather your supplies. The supply list holds exactly what I used to create this project. You may not have a particular
Great Escape- Upcycle Cereal Boxes Sue Kohlman September 27, 2015
 Great Escape- Upcycle Cereal Boxes Sue Kohlman September 27, 2015 Drawer Organizers http://iheartorganizing.blogspot.com/2013/01/diy-cereal-box-drawerdividers.html Materials Pretty papers, {both wrapping
Tutorials. To create your antique embroidered book, you'll need:
 Tutorials Part of the beauty in some books is simply how they look, and if we can t find them that way, we ll make 'em! It s a perfect and unusual way to display your favorite literary embroidery designs
Percy Pumpkin Head Light A KraftyBlok project.
 Percy Pumpkin Head Light A KraftyBlok project. DESIGNED BY: Jeanne Baruth for Diamond Tech SKILL LEVEL: (Adult 1-5: 1 being the easiest, 5 being most difficult) 3 TIME TO COMPLETE: 2 hours not including
2016 Summer Reading Program. Let s get wild With Lac La Biche County Libraries
 2016 Summer Reading Program Let s get wild With Lac La Biche County Libraries ***Please Read*** Please remember the schedule on each program isn t to be followed exactly as I have it. The purpose of the
 Supplies WARM AND NATURAL COTTON BATTING FIBER FILL STUFFING COTTON PRINT FABRIC FOR DRESS OLD LIGHT WEIGHT SWEATER TO CUT UP SMALL PIECE OF MUSLIN FOR CANDY RABBIT PLAID-APPLE BARREL NUTMEG BROWN CRAFT
PostIts, and Aleene s are trademarks of their manufacturers and have no affiliation with Real Good Toys
 Instructions for Real Good Toys My Dreamhouse Congratulations on your choice of a Real Good Toys product. Your kit has been precision made with meticulous care by our craftspeople using carefully selected
Engineering Directive
 Thing-a-ma-Jig Finishing To Finish a model means to apply paint and other decorations to complete the look of your model. Meaning to apply a finish. That is what we will discuss in this section. Applying
wiping Varnish Wipe it on for a low-luster look or brush it on for a higher sheen
 wiping Varnish The only Finish You ll Ever Need Wipe it on for a low-luster look or brush it on for a higher sheen B Y M I C H A E L P E K O V I C H For me, the ideal finish for handmade furniture is a
Embroidered Lampshade
 Embroidered Lampshade Everything needs a little sprucing up now and then... I have these green lampshades in my bedroom that the previous owners left behind when we bought the house. The bedroom used to
Isssue # 2. workshop. Beyond the page
 Isssue # 2 KAISER workshop FREE PROJECT MAGAZINE Beyond the page time to get busy Many of you have discovered that going Beyond the Page is just as much fun as scrapbooking. What I think is so special
Monster Marionette ART GRADE LEVEL FOURTH FIFTH MATERIALS
 MATERIALS FOR STUDENT: (one per student unless otherwise noted) FloraCraft Make It: Fun Foam: Rectangular pieces (arms & legs) cut from large Foam Block: Four 1" x 3" x 1" thick, Four 1" x 2 1/2" x 1"
Makes Sense SCIENCE GRADE LEVEL KINDERGARTEN FIRST MATERIALS
 MATERIALS FOR STUDENT: (one per student unless otherwise noted) FloraCraft Make It: Fun Foam Ball, 4" diameter Jar band (from a canning jar lid) (optional) Cardstock paper features (See FOR TEACHER below)
Circular Drawer Storage Unit
 Instructions 1. Take a piece of cardstock and cut down to 3 7/8 x 8 (you will need 4 of these per section) 2. Place this piece on your scoreboard with the long side (8 ) sitting on the top and score at:
MUDGUN Drywall Finishing System
 Watch the demonstration video online at hydetools.com MUDGUN Drywall Finishing System Quick Start Guide Hyde Tools, Inc. / A Hyde Group Company / 800-872-4933 / custrelations@hydetools.com / hydetools.com
Mini 4-H SEWING. An Introduction to 4-H For Youth in Grades K - 2. Credit to Elkhart County Mini 4-H
 Mini 4-H SEWING An Introduction to 4-H For Youth in Grades K - 2 Credit to Elkhart County Mini 4-H Purdue University is an equal access/equal opportunity institution. Leaders Anita Kelley 229-6383 radgal12@hotmail.com
How to make climbing grips. By,
 How to make climbing grips By, Items needed: * Items may be needed depending on your preference. - Carving Foam - Level Table - Cardboard - Pen - Ruler - Straight Edge - Box cutter - Hot melt glue gun
Basic Scrapbook Cover
 A KoalaKat Designs TUTORIAL SKILL LEVEL: BEGINNER Basic Scrapbook Cover 2014 by Geneva Campitelli / Koalakat Designs All Rights Reserved www.koalakat.com This tutorial is about creating a basic chipboard
A How-To by FEATURED BY SWEET PAUL MAGAZINE DOTTED DOGWOOD. thussfarrell.com papertopetal.com marriedtocraft.com
 A How-To by FEATURED BY SWEET PAUL MAGAZINE DOTTED DOGWOOD thussfarrell.com papertopetal.com marriedtocraft.com 2 HOW-TO 1 2 3 4 3 HOW-TO MATERIALS: Single-ply crepe paper in pink and orchid. www.blumchen.com
Binding a Limp-bound Book which make great site tokens or personal largess
 Binding a Limp-bound Book which make great site tokens or personal largess As presented by THLady Jorhildr Hrafnkelsdottir version 1.2 2 Miniature Bookbinding - THLady Jorhildr Hrafnkelsdottir Larger books
Instructions for Wall Chine Collé Using Starched- based Glue Compiled by Sean Caulfield, University of Alberta
 Instructions for Wall Chine Collé Using Starched- based Glue Compiled by Sean Caulfield, University of Alberta 1) Materials/Supplies a) Papers for the paste- up: Generally thin washi (rice paper) papers
Make a Storage Portfolio
 Level: Beginner Flesch-Kincaid Grade Level: 6.3 Flesch-Kincaid Reading Ease: 72.2 Drawspace Curriculum 1.1.A1-8 Pages and 18 Illustrations Make a Storage Portfolio Follow illustrated instructions to make
Turkey Football Panel
 Turkey Football Panel PROJECT TITLE: Turkey Football Turkey Football Panel A Stained Glass Project DESIGNED BY: Jeanne Baruth for Diamond Tech SKILL LEVEL: (Adult 1-5 1 being the easiest, 5 being difficult)
APPLICATION OF JAC FILMS
 1. Important points For reliable results, JAC films are best applied to smooth, dry and clean surfaces (metal, glass, paintwork, plastic etc.). It is essential to ensure that the surface is free from dirt
Wallpaper. the Right Way. Wallpaper is trendy again, both with designers, who are speccing it more often, and
 Wallpaper the Right Way Installed correctly, this wall covering should last a lifetime and come off easily once it has worn out its welcome By John Clift Wallpaper is trendy again, both with designers,
A Proper Gentleman's Board Book
 Designed by ~ Annette Green Graphic 45 Supplies: 1 pack A Proper Gentleman DCE 1 pack 12x12 Chipboard Sheets Black 1 pack G45 Staples Antique Metal Clock Keys 1 pack G45 Staples Regular Tags Black (4501806)
Sky-in-a-Box Instructions
 Strand 1 Activity 7 The Shifting Stars Sky-in-a-Box Instructions Large or Small? The Sky-in-a-Box designs are provided ready to print on A4 or US Letter size paper. Used at this size they will require
Ornament Finishing Techniques
 Ornament Finishing Techniques by Anne Gale The back of the ornament should enhance, not detract from the quality of the finished ornament. There are many ways to finish ornaments depending on type, shape
Print all pieces you require for your party in full colour, ensuring you print to fit so as to not cut off any of the designs.
 NOTES ABOUT MAKING THE ELEMENTS IN THIS PRINTABLES PACK: Print all pieces you require for your party in full colour, ensuring you print to fit so as to not cut off any of the designs. Recommendations will
Rosalina Accessories Tutorial Version March 2011 Martyn
 Rosalina Accessories Tutorial Version 1.0 - March 2011 Martyn Star Brooch Feel free to experiment with these dimensions, you should make a template you are happy with, the method still works. 1) Creating
Jewellery in a concrete look made out of FIMOair light
 Jewellery in a concrete look made out of FIMOair light Urban lifestyle design Concrete is a highly popular material at the moment for furniture, home deco accessories and jewellery. Casting concrete yourself
Collaborative Weaving
 Autumn Anderson - Fall 2013 Student Teaching Pittsburgh Conroy Art Centers Ages: 5-21! Art Centers are created so that the students can move around the classroom and go to various stations that appeal
After printing these plans, several pages will need to be taped together to form a larger plan. Below is a diagram of which pages need assembled.
 Watermill Building Plans For complete building instructions and instructional videos, please visit the main web site at www.hirstarts.com/watermill/watermill.html. Using these plans alone will not give
Real Good Toys 10 Quarry St Barre, VT
 Real Good Toys Special Edition Kit #SE-RR 29 /5 Congratulations on your choice of a Real Good Toys product. Your kit has been precision made with meticulous care by our craftspeople using carefully selected
Repairs. Chapter 10 Repairs 10. 1
 10 Repairs Chapter 10 Repairs 10. 1 Repairs As an installer, you will probably be called upon to repair damage to a resilient floor. Here are some of the most common problems and the recommended repairs
Noville School Diorama Part 4 Making the Floors and Plastering the Walls and Ceilings
 Noville School Diorama Part 4 Making the Floors and Plastering the Walls and Ceilings Moulds and Materials Making the Floors Plastering the Ceiling Plastering the Walls Installing the Ceiling and Floor
GENERAL NOTES: Page 1 of 9
 Laminating A Zia Into A Turning Blank by W. H. Kloepping, Jan. 2009 This describes how a zia (the New Mexico state symbol) can be laminated into a turning blank. Materials needed: Square Turning Block
GrafiWrap Vehicle Wrapping
 GrafiWrap Vehicle Wrapping What is GrafiWrap? GrafiWrap is the registered trade name for a combination of materials used in the wrapping of a vehicle. The GrafiWrap system is a sandwich made up of a cast
Curved Metal Segmenting
 Curved Metal Segmenting A Tutorial by: David Washburn A.K.A djwood1 This tutorial was downloaded from The International Association of Penturners Introduction As I continue to learn about pen turning,
MOVING TO THRIVE: ACTIVITIES FOR AGES 10 TO 18 YEARS
 WHO AM I One pack of post it notes, a timer, and a pen to write. Write down any famous characters or celebrities on a post it note. Stick the post it note on one person s forehead, making sure that everyone
Cobra X Q Construction Tips Construction: Bel y pan
 Cobra X Q Construction Tips : The white plastic in this kit is high impact styrene. It can be painted with most types of coatings if light coats are applied this is necessary due to the thickness of the
Tips & Tricks using Part 24
 Tips & Tricks using Part 24 Finishing the River Sections... 2 Making Tentacles... 4 Making Fish... 6 Adding the Water... 8 Making the Plank Bridge... 13 Making Crystal Piles... 15 Finishing Various Accessories...
Additional Supplies: Tools, Adhesives & Ink: Notes:
 Designed by ~ Annette Green Supplies: 1 ea Imagine 12x12 Collection Pack 1 pk Imagine Chipboard 1 ea Antique Brass Door Plates & knobs 1 ea Decades Dye Pad : Robin's Egg Light Blue (4501717) (4501719)
Unique Glass Colors. Margot Clark and Dr. Saulius Jankauskas present. Unique Glass Colors Products:
 Unique Glass Colors Margot Clark and Dr. Saulius Jankauskas present This lesson is designed to introduce you into the fascinating world of fired glass. We will be Marbling with Metallics, learning to Control
Omarshauntedtrail.com. Obtained from. Merlin's Wall Sconce.
 http://hauntershangout.com/home/wallsconce.asp Plaque Construction Merlin's Wall Sconce Warning: This project uses Electricity! Build at your own risk. Not for children to build. Ever been to a haunt and
Product Features. How to use polymorph
 Specification: Density(g/cm3 25 C) : Approximately 1.10 Extensible and reusable, the melting point is 60-63 and can be shaped in low temperature. Will be released to CO2 and H2O during 6-12 months. When
Poured Paint. Create with Yarn and. Use yarn and poured paint to create a vibrant folk-art style painting
 Level: Beginner to Intermediate Flesch-Kincaid Grade Level: 7.3 Flesch-Kincaid Reading Ease: 69.84 Drawspace Curriculum 8.4.A4-6 Pages and 12 Illustrations Create with Yarn and Poured Paint Use yarn and
MAKING A DRAGON EYE CABOCHON
 Dragon s eyes, especially beaded ones that take many hours to create deserve a great foundation. A good cabochon makes or breaks a design. I have made eyes from Dollar Store glass cabs, I have made them
Snowman Gift Box Tower Designed By: Amanda Corbet December 2011
 Snowman Gift Box Tower Designed By: Amanda Corbet December 2011 This adorable snowman gift box tower is the perfect way to shower someone special with gifts. Finished as shown this box is over 16 inches
Installing Your New Creature From The Black Lagoon Tail Light DMD Panel MOD
 Installing Your New Creature From The Black Lagoon Tail Light DMD Panel MOD A few things before we start: The wooden speaker panel provided in this MOD was manufactured using a Precision CNC machine and
Millefiori Made Easy
 Millefiori Made Easy With Deb Wood Prepared as an addition to the Beauty of the Sea Mermaid Class One Session 21 pages Please read through the whole session before you begin. Deb Wood /Enchanted Hearts
Tips & Tricks using Part 17
 Tips & Tricks using Part 17 Making a Secret Door Using Mold #96...1 Using Cotton Swabs For Antiquing...4 Planning Dungeon Waterways...5 Pouring and Texturing Water...6 Making Water for Fountains...11 Tips
TM TM DOG HOUSE Age 9+
 TM TM DOG HOUSE Age 9+ Safety First! Use eye protection, always! Use ear protection with loud power tools Stay with kids while they work! Follow tool manufacturers safety guidelines This project is recommended
A trip to Normandy with Sally 4th
 A trip to Normandy with Sally 4th Assembling a random building from the Normandy Kick Starter range Having received the envelope from Sally 4 th I quickly ripped it open to reveal its content. I was met
Generations Test Drive Multi Media Project
 Generations Test Drive Multi Media Project A Creative and Inspirational project that incorporates different decoration techniques including a print transfer, embroidery applique, monogramming, and rhinestones.
Freehand Back-Filling: Polymer Clay and Resin Tutorial
 Page 1 of 9 Eugena Topina, 2016 Freehand Back-Filling: Polymer Clay and Resin Tutorial This tutorial is offered for your personal use only. Please do not distribute. Back-filling is a simple and very versatile
jarswe are all familiar with the concept of recycling
 Gifts in jarswe are all familiar with the concept of recycling glass bottles and jars but for thrifty crafters there is also the possibility of upcycling turning plain unwanted items into something beautiful
DIY CROWN MARACAS DISNEY
 DIY CROWN MARACAS YOU WILL NEED: For the crowns: 3 clean tea tins (or hot cocoa tin, seasoning containers, etc. Anything cylindrical with a lid) Gold glitter paper or vinyl Various jewels & gems Filling:
Delightful Miniature Purses! By Karin Buttigieg
 Delightful Miniature Purses! By Karin Buttigieg The idea for this came to me a few months ago when a customer ordered lots of miniature purse frames that I thought were pretty unattractive and I had sold
Surround Yourself. how to. Presented by Willow Wolfe LEARN. By Monica Martin. Level: Beginner. Gather These Supplies
 LEARN how to PAINT Presented by Willow Wolfe Surround Yourself Level: Beginner By Monica Martin with Step-by-Step Instructions Gather These Supplies Brushes and tools Princeton Artist Brush Co. Select
Insulated Water Bottle Carrier
 Insulated Water Bottle Carrier Keep your drink cool with this stylish insulated water bottle carrier. The unique hands-free design is ideal for walking and hiking. Personalize yours with your favorite
Big Oz. Rocket. User Guide V0313
 Big Oz Rocket User Guide 59824 V0313 Materials Included The Big Oz Rocket Kit should include the following materials. If something is missing, contact Customer Service at 800-358-4983. 20-ounce plastic
Part 3 J. Serresseque, 2012
 Part 3 J. Serresseque, 2012 Vellum wings are among my favorite wing media. I get excited when I see a new pattern that can be translated into a potential wing design. The nice thing about Vellum is the
Winter Lantern Designed By: Amanda Corbet January 2012
 Winter Lantern Designed By: Amanda Corbet January 2012 Do you know someone who loves snowflakes? Or just needs a little something to light up their day? This pretty winter lantern will add some sparkle
Javelin Integra Inspired Design Precision Engineering
 Javelin Integra Inspired Design Precision Engineering USER INSTRUCTIONS Thank you for choosing the Keencut Javelin Integra. Every effort has been made to bring you a precision engineered product with the
COMPOSITES LAB MANUAL
 COMPOSITES LAB MANUAL Version 1 Lab 4: Wet Layup of complex shapes The original version of this manual was a one student senior design project written by Katherine White, the Composite lab assistant, during