CPU 1512C-1 PN (6ES7512-1CK00-0AB0) SIMATIC S CPU 1512C-1 PN (6ES7512-1CK00-0AB0) Preface. Documentation guide.
|
|
|
- Grant White
- 6 years ago
- Views:
Transcription
1

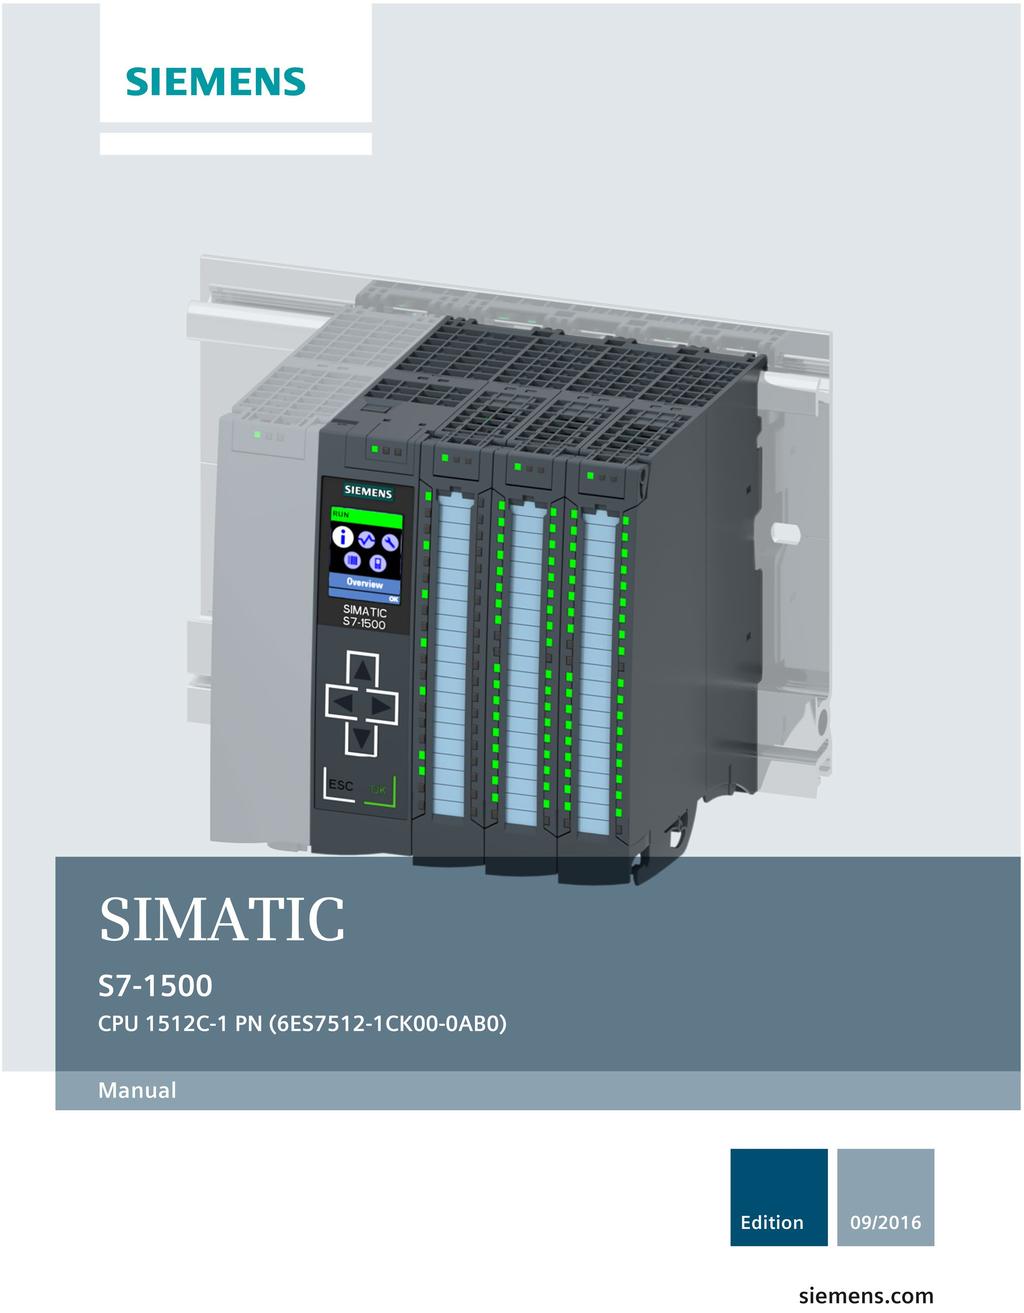
2 CPU 1512C-1 PN (6ES7512-1CK00-0AB0) SIMATIC S CPU 1512C-1 PN (6ES7512-1CK00-0AB0) Manual Preface Documentation guide 1 Product overview 2 Technology functions 3 Wiring 4 Parameters/address space 5 Interrupts/diagnostics alarms 6 Technical specifications 7 A Dimension drawings B Parameter data records C Analog value processing 09/2016 A5E AB
3 Legal information Warning notice system This manual contains notices you have to observe in order to ensure your personal safety, as well as to prevent damage to property. The notices referring to your personal safety are highlighted in the manual by a safety alert symbol, notices referring only to property damage have no safety alert symbol. These notices shown below are graded according to the degree of danger. DANGER indicates that death or severe personal injury will result if proper precautions are not taken. WARNING indicates that death or severe personal injury may result if proper precautions are not taken. CAUTION indicates that minor personal injury can result if proper precautions are not taken. NOTICE indicates that property damage can result if proper precautions are not taken. If more than one degree of danger is present, the warning notice representing the highest degree of danger will be used. A notice warning of injury to persons with a safety alert symbol may also include a warning relating to property damage. Qualified Personnel The product/system described in this documentation may be operated only by personnel qualified for the specific task in accordance with the relevant documentation, in particular its warning notices and safety instructions. Qualified personnel are those who, based on their training and experience, are capable of identifying risks and avoiding potential hazards when working with these products/systems. Proper use of Siemens products Note the following: Trademarks WARNING Siemens products may only be used for the applications described in the catalog and in the relevant technical documentation. If products and components from other manufacturers are used, these must be recommended or approved by Siemens. Proper transport, storage, installation, assembly, commissioning, operation and maintenance are required to ensure that the products operate safely and without any problems. The permissible ambient conditions must be complied with. The information in the relevant documentation must be observed. All names identified by are registered trademarks of Siemens AG. The remaining trademarks in this publication may be trademarks whose use by third parties for their own purposes could violate the rights of the owner. Disclaimer of Liability We have reviewed the contents of this publication to ensure consistency with the hardware and software described. Since variance cannot be precluded entirely, we cannot guarantee full consistency. However, the information in this publication is reviewed regularly and any necessary corrections are included in subsequent editions. Siemens AG Division Digital Factory Postfach NÜRNBERG GERMANY A5E AB P 08/2016 Subject to change Copyright Siemens AG All rights reserved
4 Preface Purpose of the documentation This manual supplements the system manual of the S automation system / ET 200MP distributed I/O system as well as the function manuals. This manual contains a description of the module-specific information. The system-related functions are described in the system manual. Cross-system functions are described in the function manuals. The information provided in this manual and the system manual enables you to commission the CPU 1512C-1 PN. Conventions STEP 7: In this documentation, "STEP 7" is used as a synonym for all versions of the configuration and programming software "STEP 7 (TIA Portal)". Please also observe notes marked as follows: Note A note contains important information on the product described in the documentation, on the handling of the product or on the section of the documentation to which particular attention should be paid. Security information Siemens provides products and solutions with industrial security functions that support the secure operation of plants, systems, machines and networks. In order to protect plants, systems, machines and networks against cyber threats, it is necessary to implement and continuously maintain a holistic, state-of-the-art industrial security concept. Siemens products and solutions only form one element of such a concept. Customer is responsible to prevent unauthorized access to its plants, systems, machines and networks. Systems, machines and components should only be connected to the enterprise network or the internet if and to the extent necessary and with appropriate security measures (e.g. use of firewalls and network segmentation) in place. Additionally, Siemens guidance on appropriate security measures should be taken into account. For more information about industrial security, please visit ( Siemens products and solutions undergo continuous development to make them more secure. Siemens strongly recommends to apply product updates as soon as available and to always use the latest product versions. Use of product versions that are no longer supported, and failure to apply latest updates may increase customer s exposure to cyber threats. 4 Manual, 09/2016, A5E AB
5 Preface To stay informed about product updates, subscribe to the Siemens Industrial Security RSS Feed under ( You can find current information on the following topics quickly and easily here: Product support All the information and extensive know-how on your product, technical specifications, FAQs, certificates, downloads, and manuals. Application examples Tools and examples to solve your automation tasks as well as function blocks, performance information and videos. Services Information about Industry Services, Field Services, Technical Support, spare parts and training offers. Forums For answers and solutions concerning automation technology. mysupport Your personal working area in Industry Online Support for messages, support queries, and configurable documents. This information is provided by the Siemens Industry Online Support in the Internet ( The Industry Mall is the catalog and order system of Siemens AG for automation and drive solutions on the basis of Totally Integrated Automation (TIA) and Totally Integrated Power (TIP). Catalogs for all the products in automation and drives are available on the Internet ( Manual, 09/2016, A5E AB 5
6 Table of contents Preface Documentation guide Product overview New functions in firmware version V Applications of the S CPUs Properties Properties of the CPU part Properties of the analog on-board I/O Properties of the digital on-board I/O Operator controls and display elements Front view with closed front panels Front view without front panel on the CPU Rear view Mode selector Technology functions High-speed counters Functions Counting Measuring Position detection for motion control Additional functions Configuring the high-speed counters General Assignment of the control interface of the high-speed counters Assignment of the feedback interface of the high-speed counters Pulse generators Operating modes Operating mode: Pulse-width modulation (PWM) Operating mode: Frequency output Operating mode: PTO Functions Function: High-speed output Function: Direct control of the pulse output (DQA) Configuring the PWM and frequency output modes Assignment of the control interface Handling the SLOT parameter (control interface) Assignment of the feedback interface Manual, 09/2016, A5E AB
7 Table of contents 4 Wiring Supply voltage PROFINET interfaces Terminal and block diagrams Block diagram of the CPU part Terminal and block diagram of the analog on-board I/O Terminal and block diagram of the digital on-board I/O Addresses of the high-speed counters Addresses of the pulse generators in the Pulse Width Modulation (PWM) and Frequency Output modes Addresses of pulse generators in the PTO mode Interconnection overview of the inputs Interconnection overview of outputs Parameters/address space Address space of the analog on-board I/O Address space of the digital on-board I/O Address space of the pulse generators Measurement types and measuring ranges of the analog on-board I/O Output type and output ranges of the analog on-board I/O Parameters of the analog on-board I/O Parameters of the digital on-board I/O Interrupts/diagnostics alarms Status and error displays Status and error displays of the CPU part Status and error displays of the analog on-board I/O Status and error displays of the digital on-board I/O Interrupts and diagnostics Interrupts and diagnostics of the CPU part Interrupts and diagnostics of the analog on-board I/O Interrupts and diagnostics of the digital on-board I/O Technical specifications A Dimension drawings B Parameter data records B.1 Parameter assignment and structure of the parameter data records of the analog onboard I/O B.2 Structure of a data record for input channels of the analog on-board I/O B.3 Structure of a data record for output channels of the analog on-board I/O B.4 Parameter assignment and structure of the parameter data records of the digital onboard I/O Manual, 09/2016, A5E AB 7
8 Table of contents B.5 Structure of a data record for input channels of the digital on-board I/O B.6 Structure of a data record for output channels of the digital on-board I/O B.7 Parameter data records of the high-speed counters B.8 Parameter data records (PWM) C Analog value processing C.1 Conversion method C.2 Representation of analog values C.3 Representation of input ranges C.3.1 Representation of analog values in voltage measuring ranges C.3.2 Representation of analog values in current measuring ranges C.3.3 Representation of the analog values of resistance-type sensors/resistance-type thermometers C.3.4 Measured values for wire break diagnostics C.4 Representation of output ranges C.4.1 Representation of analog values in the voltage output ranges C.4.2 Representation of analog values in the current output ranges Manual, 09/2016, A5E AB

9 Documentation guide 1 The documentation for the SIMATIC S automation system, the CPU 1516pro-2 PN based on SIMATIC S and the SIMATIC ET 200MP distributed I/O system is arranged into three areas. This arrangement enables you to access the specific content you require. Basic information The System Manual and Getting Started describe in detail the configuration, installation, wiring and commissioning of the SIMATIC S and ET 200MP systems. For CPU 1516pro-2 PN you use the corresponding operating instructions. The STEP 7 online help supports you in the configuration and programming. Device information Product manuals contain a compact description of the module-specific information, such as properties, wiring diagrams, characteristics and technical specifications. Manual, 09/2016, A5E AB 9
10 Documentation guide General information The function manuals contain detailed descriptions on general topics regarding the SIMATIC S and ET 200MP systems, e.g. diagnostics, communication, motion control, Web server, OPC UA. You can download the documentation free of charge from the Internet ( Changes and supplements to the manuals are documented in a Product Information. You can download the product information free of charge from the Internet ( Manual Collection S7-1500/ET 200MP The Manual Collection contains the complete documentation on the SIMATIC S automation system and the ET 200MP distributed I/O system gathered together in one file. You can find the Manual Collection on the Internet ( SIMATIC S comparison list for programming languages The comparison list contains an overview of which instructions and functions you can use for which controller families. You can find the comparison list on the Internet ( "mysupport" With "mysupport", your personal workspace, you make the best out of your Industry Online Support. In "mysupport", you can save filters, favorites and tags, request CAx data and compile your personal library in the Documentation area. In addition, your data is already filled out in support requests and you can get an overview of your current requests at any time. You must register once to use the full functionality of "mysupport". You can find "mysupport" on the Internet ( "mysupport" - Documentation In the Documentation area in "mysupport" you can combine entire manuals or only parts of these to your own manual. You can export the manual as PDF file or in a format that can be edited later. You can find "mysupport" - Documentation on the Internet ( 10 Manual, 09/2016, A5E AB
11 Documentation guide "mysupport" - CAx data In the CAx data area in "mysupport", you can access the current product data for your CAx or CAe system. You configure your own download package with a few clicks. In doing so you can select: Product images, 2D dimension drawings, 3D models, internal circuit diagrams, EPLAN macro files Manuals, characteristics, operating manuals, certificates Product master data You can find "mysupport" - CAx data on the Internet ( Application examples The application examples support you with various tools and examples for solving your automation tasks. Solutions are shown in interplay with multiple components in the system - separated from the focus on individual products. You will find the application examples on the Internet ( TIA Selection Tool With the TIA Selection Tool, you can select, configure and order devices for Totally Integrated Automation (TIA). This tool is the successor of the SIMATIC Selection Tool and combines the known configurators for automation technology into one tool. With the TIA Selection Tool, you can generate a complete order list from your product selection or product configuration. You can find the TIA Selection Tool on the Internet ( Manual, 09/2016, A5E AB 11
12 Documentation guide SIMATIC Automation Tool You can use the SIMATIC Automation Tool to run commissioning and maintenance activities simultaneously on various SIMATIC S7 stations as a bulk operation independently of the TIA Portal. The SIMATIC Automation Tool provides a multitude of functions: Scanning of a PROFINET/Ethernet network and identification of all connected CPUs Address assignment (IP, subnet, gateway) and station name (PROFINET device) to a CPU Transfer of the date and the programming device/pc time converted to UTC time to the module Program download to CPU Operating mode switchover RUN/STOP Localization of the CPU by means of LED flashing Reading out CPU error information Reading the CPU diagnostic buffer Reset to factory settings Updating the firmware of the CPU and connected modules You can find the SIMATIC Automation Tool on the Internet ( PRONETA With SIEMENS PRONETA (PROFINET network analysis), you analyze the PROFINET network during commissioning. PRONETA features two core functions: The topology overview independently scans PROFINET and all connected components. The IO check is a fast test of the wiring and the module configuration of a system. You can find SIEMENS PRONETA on the Internet ( 12 Manual, 09/2016, A5E AB
13 Product overview New functions in firmware version V2.0 New functions of the CPU in firmware version V2.0 This section lists the new features of the CPU with firmware version V2.0. You can find additional information in the sections of this device manual. Table 2-1 New functions of the CPU with firmware version 2.0 compared with firmware version V1.8 New functions Applications Customer benefits Support for pulse generators by digital on-board I/O of the compact CPU Pulse-width modulation (PWM) mode The PWM mode is used when an output module is to control greatest possible outputs with low power loss (heating, size). You use pulse width modulation, for example, to control: the temperature in a heating resistor the force of a coil in a proportional valve and thus the position of valve from closed to completely open the speed of a motor from standstill to full speed With pulse width modulation, a signal with defined cycle duration and variable on-load factor is output at the digital output. The on-load factor is the relationship of the pulse duration to the cycle duration. In PWM mode, you can control the onload factor and the cycle duration. With pulse width modulation you vary the mean value of the output voltage. Depending on the connected load, you can control the load current or the power with this. Frequency output mode Mode Pulse Train Output (PTO) You can implement frequencies up to 100 khz and thus work in ranges that cannot be reached by a CPU with a simple digital output with a frequency up to 100 Hz. Pulse Train Output is a widely used interface for drive control. It is used in many positioning applications, such as for retooling axes and feed axes. You can generate frequencies very precisely. The receiver can reconstruct the information exactly when transmission conditions are less than ideal. In frequency output mode, you assign a frequency value with high frequencies more precisely than by using period duration (PWM). PTO (Pulse Train Output) is divided into four different types of signals. The signal "PTO (pulse (A) and the direction (B))", for example, consists of 2 signals. The frequency of the pulse output represents the speed and the number of output pulses for the route to be traversed. The direction output defines the traversing direction. The position is thus preset increment-precise. The outputs are controlled with S Motion Control via technology objects. PTO is a simple and universal interface between control system and drive. As a result it is supported worldwide by many stepper and servo drives. Manual, 09/2016, A5E AB 13
14 Product overview 2.1 New functions in firmware version V2.0 New functions Applications Customer benefits OPC UA Server PROFINET IO MRPD: Media Redundancy for Planned Duplication for IRT Limitation of the data infeed into the network Display and Web server Backing up and restoring via the display Backing up and restoring via the Web server Data exchange is implemented between various systems, both within the process level and also with systems at the control and company management level: To embedded systems with controllers To controllers with MES systems and systems of the enterprise level (ERP, asset systems) To Siemens controllers with controllers from other manufacturers To intelligent sensors with controllers Supported standard: OPC Data Access, DA. PROFINET IO IRT enables you to realize applications that place particularly high demands on the reliability and accuracy (isochronous mode). You limit the network load for standard Ethernet communication to a maximum value. You can back up and restore the CPU configuration to/from the SIMATIC memory card without a programming device/pc. Among other things, you can backup and restore the configuration of the CPU to the PG/PC on which the Web server is running. OPC UA is a uniform standard for data communication and is independent of any particular operating system platforms. You have integrated safety mechanisms at various automation levels, e.g. with data exchange, at application level, for the legitimation of the user. OPC UA servers provide a wide range of data: Values of PLC tags that clients can access Data types of these PLC tags Information about the OPC UA server itself and about the CPU Clients can thus obtain an overview and read in specific values. By sending the cyclic IO data in both directions in the ring, the communication to the IO devices is maintained even when the ring is interrupted and does not result in device failure even with fast update times. You achieve higher reliability than with MRP. They flatten peaks in the data feed. You share the remaining bandwidth based on demand. You can make a backup copy of an operational project without STEP 7 (TIA Portal). In an "emergency", you can simply use an existing configuration without STEP 7 (TIA Portal), for example, during commissioning or after a program download. Display and Web server provide up to three project languages for comments and message texts Trace via Web server Monitoring of configured technology objects via a Web server Formatting, erasing or converting a SIMATIC memory card via the display When you export your plants worldwide, for example, comments or message texts can be stored on the card in up to 3 languages. For example, German - the language of the author, English - readable internationally, Portuguese - language of the end user. When you enable trace functions via the Web server, you have better service support. You can send your trace recordings to your service partner via Web service, for example. You can monitor states, errors, technological alarms and the current values of technology objects with the Web server. You provide customers with better service. You receive plant/project information for diagnostics and maintenance requirements without STEP 7 (TIA Portal). You can provide trace recordings for each Web server. You save time in troubleshooting. Without the method using STEP 7 (TIA Portal), your SIMATIC memory card is formatted, deleted or converted into a program card directly via the display. You save time. 14 Manual, 09/2016, A5E AB
15 Product overview 2.1 New functions in firmware version V2.0 New functions Applications Customer benefits Motion Control Greater number of axes for Motion Control applications and new technology objects: Output cam, cam track and probe Speed specification for, for example: Pumps, fans, mixers Conveyor belts Auxiliary drives positioning tasks, such as: Lifting and vertical conveyors Feeding and gate control Palletizing equipment Output cams and cam tracks make other applications possible, for example: Glue lines application Triggering switching operations with precise positioning Pin-point processing of products on a conveyor belt Probe operation, e.g.: For measuring products For detecting the position of the product on a conveyor belt You can implement additional Motion Control applications with a CPU. You can implement numerous applications using the scalability in the quantity structure. High machine speeds result in greater productivity with better accuracy. Support of the value status (QI) for digital and analog on-board I/O You can use the value status to evaluate whether the input and output data is correct and react accordingly in the user program in the case of error, for example skip specific program sequences. In the user program you can respond quickly and easily to faults and errors. Manual, 09/2016, A5E AB 15
16 Product overview 2.2 Applications of the S CPUs 2.2 Applications of the S CPUs Application area The SIMATIC S is the modular control system for numerous automation applications in discrete automation. The modular and fanless design, the simple implementation of distributed structures and the user-friendly handling transform the SIMATIC S into a cost-effective and convenient solution for various tasks. Application areas of the SIMATIC S are for example: Special-purpose machines Textile machinery Packaging machines General mechanical engineering Controller engineering Machine tool engineering Installation engineering Electrical industry and crafts Automotive Water/waste water Food & Beverage Application areas of the SIMATIC S7-1500T are for example: Packaging machines Converting application Assembly automation Several CPUs with various levels of performance and a comprehensive range of modules with many convenient features are available. Fail-safe CPUs enable use in fail-safe applications. The modular design allows you to use only the modules that you need for your application. The controller can be retrofitted with additional modules at any time to expand its range of tasks. The high immunity to noise and high resistance to shock and vibration stress make the SIMATIC S suitable for universal use. 16 Manual, 09/2016, A5E AB
17 Product overview 2.2 Applications of the S CPUs Performance segments of the standard, compact, fail-safe and technology CPUs The CPUs can be used for smaller and medium-sized applications, as well as for the highend range of machine and plant automation. Table 2-2 Standard CPUs CPU CPU PN CPU PN CPU PN CPU PN/ DP CPU PN/ DP CPU PN/ DP CPU PN/ DP ODK Performance segment Standard CPU for small- to mediumsized applications Standard CPU for medium-sized applications Standard CPU for small- to mediumsized applications Standard CPU for high-end applications and communication tasks Standard CPU for high-end applications and communication tasks Standard CPU for high-performance applications, demanding communications tasks and very short reaction times PROFIBUS interfaces PROFINET IO RT/IRT interface PROFINET IO RT interface PROFINET basic functionality Work memory Processing time for bit operations MB 60 ns MB 40 ns MB 30 ns MB 10 ns MB 2 ns MB 1 ns Table 2-3 Compact CPUs CPU CPU 1511C-1 PN CPU 1512C-1 PN Performance segment Compact CPU for small to medium applications Compact CPU for medium applications PROFIBUS interfaces PROFINE T IO RT/IRT interfaces PROFINET IO RT interface PROFINE T basic functionality Work memory Processing time for bit operations MB 60 ns MB 48 ns Manual, 09/2016, A5E AB 17
18 Product overview 2.2 Applications of the S CPUs Table 2-4 Fail-safe CPUs CPU Performance segment CPU 1511F-1 PN Fail-safe CPU for smaller to mediumsized applications CPU 1513F-1 PN Fail-safe CPU for medium-sized applications CPU 1515F-2 PN Fail-safe CPU for medium-sized to large applications CPU 1516F-3 PN /DP CPU 1517F-3 PN /DP CPU 1517TF-3 P N/DP CPU 1518F-4 PN /DP CPU 1518F-4 PN /DP ODK Fail-safe CPU for demanding applications and communications tasks Fail-safe CPU for demanding applications and communications tasks Fail-safe CPU for high-performance applications, demanding communications tasks and very short reaction times PROFIBUS interfaces PROFINET IO RT/IRT interface PROFINET IO RT interface PROFINET basic functionality Work memory Processing time for bit operations MB 60 ns MB 40 ns MB 30 ns MB 10 ns MB 2 ns MB 1 ns Table 2-5 Technology CPUs CPU Performance segment CPU 1511T-1 PN Technology CPU for small- to mediumsized applications CPU 1515T-2 PN Technology CPU for small- to mediumsized applications CPU 1517T-3 PN /DP CPU 1517TF-3 PN/DP PROFIBUS interfaces PROFINET IO RT/IRT interface PROFINET IO RT interface PROFINET basic functionality Work memory Processing time for bit operations MB 60 ns MB 30 ns Technology CPU for high-end applications and communication tasks MB 2 ns This CPU is described in the fail-safe CPUs 18 Manual, 09/2016, A5E AB
19 Product overview 2.2 Applications of the S CPUs Performance segments of compact CPUs The compact CPUs can be used for smaller to medium-sized applications and have an integrated analog and digital on-board I/O as well as integrated technology functions. The following table shows the differences in performance between the two compact CPUs. Table 2-6 Performance overview of compact CPUs CPU 1511C-1 PN CPU 1512C-1 PN PROFIBUS interfaces PROFINET interfaces 1 1 Work memory (for program) 175 KB 250 KB Work memory (for data) 1 MB 1 MB Processing time for bit operations 60 ns 48 ns Integrated analog inputs/outputs 5 inputs/2 outputs 5 inputs/2 outputs Integrated digital inputs/outputs 16 inputs/16 outputs 32 inputs/32 outputs High-speed counters 6 6 Pulse generators PWM (pulse-width modulation) PTO (pulse train output) Frequency output 4 (PTOx/PWMx) 4 (PTOx/PWMx) Supported technology functions The CPUs of the SIMATIC S family support Motion Control functions. STEP 7 (TIA Portal) offers PLCopen standardized blocks for configuring and connecting a drive to the CPU. Motion Control supports speed-controlled, positioning and synchronous axes (synchronizing without specification of the synchronous position) as well as external encoders, cams, cam tracks and probes. The CPUs of thesimatic S7-1500T support advanced Motion Control functions in addition to the Motion Control functions offered by the standard CPUs. Additional Motion Control functions are absolute synchronous axes (synchronization with specification of synchronous position) and the cam. For effective commissioning, diagnostics and fast optimization of drives and controls, the SIMATIC S controller family offers extensive trace functions for CPU tags. In addition to drive integration, the SIMATIC S has extensive closed-loop control functions, such as easy-to-configure blocks for automatic optimization of the controller parameters for optimized control quality. Compact CPU 1511C-1 PN and CPU 1512C-1 PN CPUs support technology functions such as fast counting, pulse generators (PWM, PTO and frequency output). Due to the supported technology functions, the compact CPUs are suitable for controlling pumps, fans, mixers, conveyor belts, lifting platforms, gate control systems, building management systems, synchronized axes, etc. SIWAREX is a versatile and flexible weighing module, which you can use as a static scale for operation. Manual, 09/2016, A5E AB 19
20 Product overview 2.2 Applications of the S CPUs Security Integrated In conjunction with STEP 7 (TIA Portal), each CPU offers password-based know-how protection against unauthorized reading out or modification of the program blocks. The copy protection provides reliable protection against unauthorized reproduction of program blocks. With copy protection, individual blocks on the SIMATIC memory card are linked to its serial number so that the block can only be executed if the configured memory card is inserted in the CPU. In addition, four different authorization levels in the CPUs can be used to assign different access rights to various user groups. Improved manipulation protection allows the CPUs to detect changed or unauthorized transfers of the engineering data. The use of an Ethernet CP (CP ) provides the user with additional access protection by means of a firewall and/or the option of secured VPN connections. Safety Integrated The fail-safe CPUs are intended for users who want to implement demanding standard and fail-safe applications both centrally and distributed. These fail-safe CPUs allow the processing of standard and safety programs on a single CPU. This allows fail-safe data to be evaluated in the standard user program. The integration also provides the system advantages and the extensive functionality of SIMATIC for fail-safe applications. The fail-safe CPUs are certified for use in safety mode up to: Safety class (Safety Integrity Level) SIL 3 according to IEC 61508:2010 Performance Level (PL) e and Category 4 according to ISO :2006 or according to EN ISO :2008 Additional password protection for F-configuration and F-program is set up for IT security. Design and handling All CPUs of the SIMATIC S product series feature a display with plain text information. The display provides the user with information on the order numbers, firmware version, and serial number of all connected modules. In addition, the IP address of the CPU and other network settings can be adapted locally without a programming device. Errors messages are immediately shown on the display in plain text, thus helping customers to reduce downtimes. Uniform front connectors for all modules and integrated potential jumpers for flexible formation of potential groups simplifies storage. Additional components such as circuit breakers, relays, etc., can be installed quickly and easily, since a DIN rail is implemented in the rail of the S The CPUs of the SIMATIC S product series can be expanded centrally and modularly with signal modules. Space-saving expansion enables flexible adaptation to each application. The system cabling for digital signal modules enables fast and clear connection to sensors and actuators from the field (fully modular connection consisting of front connector modules, connection cables and I/O modules), as well as the easy wiring inside the control cabinet (flexible connection consisting of front connectors with assembled single conductors). 20 Manual, 09/2016, A5E AB
21 Product overview 2.3 Properties System diagnostics and messages Integrated system diagnostics is enabled by default for the CPUs. The different types of diagnostics are configured instead of programmed. System diagnostics information is shown uniformly and in plain text on the display of the CPU, in STEP 7 (TIA Portal), on the HMI and on the Web server, even for alarms related to drives. This information is available in RUN mode, but also in STOP mode of the CPU. The diagnostics information is updated automatically when you configure new hardware components. The CPU is available as a central interrupt server for 3 languages. The CPU, STEP 7 (TIA Portal) and your HMI guarantee data consistency. You can skip the various engineering steps, just load it into the CPU. The maintenance work is easier. 2.3 Properties The hardware of the CPU 1512C-1 PN consists of a CPU part, an analog on-board I/O (X10) and a digital on-board I/O (X11 and X12). When configured in the TIA Portal, the compact CPU therefore occupies a single shared slot (slot 1). The properties of the CPU part, the analog on-board I/O and the digital on-board I/O can be found in the subsections below. Article number of the compact CPU 6ES7512-1CK00-0AB0 Accessories The following accessories are included in the scope of delivery and can also be ordered separately as spare parts: 3 x front connector (push-in terminals) including cable ties 3 x shield clamp 3 x shield terminal 3 x infeed element (push-in terminals) 3 x labeling strip 3 x universal front cover For more information on accessories, refer to the S7-1500, ET 200MP system manual ( Manual, 09/2016, A5E AB 21

22 Product overview 2.3 Properties Properties of the CPU part View of the CPU The figure below shows the CPU part of the CPU 1512C-1 PN. Figure 2-1 CPU 1512C-1 PN Note Protective film Note that a protective film is attached to the display of the CPU when shipped from the factory. Remove the protective film if necessary. 22 Manual, 09/2016, A5E AB
23 Product overview 2.3 Properties Properties The CPU 1512C-1 PN has the following technical properties: Communication: Interfaces The CPU 1512C-1 PN has a PROFINET interface (X1) with two ports (P1 R and P2 R). It supports not only PROFINET basic functionality but also PROFINET IO RT (realtime) and IRT (isochronous realtime), which means you can configure PROFINET IO communication or realtime settings on the interface. Port 1 and port 2 can also be used as ring ports for configuring redundant ring structures in Ethernet (media redundancy). PROFINET basic functionality supports HMI communication, communication with the configuration system, communication with a higher-level network (backbone, router, Internet) and communication with another machine or automation cell. You can find more information on "PROFINET IO" in the online help of STEP 7 (TIA Portal) and the PROFINET Function Manual ( OPC UA With OPC UA, data is exchanged via an open and vendor-neutral communication protocol. The CPU, as OPC UA server, can communicate with OPC UA clients such as HMI panels, SCADA systems, etc. Manual, 09/2016, A5E AB 23
24 Product overview 2.3 Properties Integrated Web server: A Web server is integrated in the CPU. The Web server enables monitoring and administering of the CPU by authorized users over a network. Evaluations, diagnostics, and modifications are thus possible over long distances. All you need is a web browser. With the Web server, you can read out the following data from the CPU and, in some cases, modify and write back the data to the CPU. Start page with general CPU information Identification information Contents of the diagnostics buffer Querying module information Firmware update Alarms (without acknowledgment option) Information about communication PROFINET topology Variable status, writing variables Watch tables Memory usage User pages Data logs (if used) Online backup and restoration of the CPU configuration Diagnostic information for the Motion Control technology objects Display of trace recordings stored on the SIMATIC memory card Readout service data Basic websites Display of the Web server in 3 project languages, for example, comments and message texts Recipes User pages 24 Manual, 09/2016, A5E AB
25 Product overview 2.3 Properties Supported technology: Counting, measuring, position detection and pulse generators The technology functions high-speed counting, measuring, position detection and pulse generators (PWM/frequency output/pto) are integrated in the compact CPU. For more information on integrated technology functions, refer to the section Technology functions. Motion Control Through technology objects, the Motion Control functionality supports speedcontrolled axes, positioning axes, synchronous axes and external encoders, cams, cam tracks and probes as well as PLC open blocks for programming the motion control functionality. For more information about Motion Control, refer to the section Technology functions. For a detailed description of the use of motion control and its configuration, refer to the S Motion Control ( function manual. You can also use the TIA Selection Tool or the SIZER to create or configure axes. Integrated closed-loop control functionality - PID Compact (continuous PID controller) - PID 3Step (step controller for integrating actuators) - PID Temp (temperature controller for heating and cooling with two separate actuators) Trace functionality: The trace functionality supports troubleshooting and optimization of the user program, especially for motion control and closed-loop control applications. For more information on "Trace", refer to the Using the trace and logic analyzer functions ( function manual. Integrated system diagnostics: The system automatically generates the messages for the system diagnostics and outputs these messages via a PG/PC, HMI device, the Web server or the integrated display. System diagnostics is also available when the CPU is in STOP mode. Manual, 09/2016, A5E AB 25
26 Product overview 2.3 Properties Integrated security: Copy protection Copy protection links user blocks to the serial number of the SIMATIC memory card or to the serial number of the CPU. User programs cannot run without the corresponding SIMATIC memory card or CPU. Know-how protection The know-how protection protects user blocks against unauthorized access and modifications. Access protection Extended access protection provides high-quality protection against unauthorized configuration changes. You can use authorization levels to assign separate rights to different user groups. Integrity protection The system protects the data transferred to the CPU against manipulation. The CPU detects incorrect or manipulated engineering data. Additional supported functions: PROFIenergy For information on "PROFIenergy", refer to the PROFINET ( function manual and the PROFINET specification on the Internet ( Shared Device For information on "Shared Device" refer to the PROFINET ( function book. Configuration control For information on "Configuration control", refer to the S7-1500, ET 200MP system manual ( and the PROFINET ( function manual. Reference You can find more information on the topic of "Integrated security/access protection" in the S7-1500, ET 200MP system manual. 26 Manual, 09/2016, A5E AB

27 Product overview 2.3 Properties Properties of the analog on-board I/O View The following figure shows the analog on-board I/O (X10) of the CPU 1512C-1 PN. Figure 2-2 Analog on-board I/O Manual, 09/2016, A5E AB 27
28 Product overview 2.3 Properties Properties The analog on-board I/O has the following technical properties: Analog inputs 5 analog inputs Resolution 16 bits including sign Voltage measurement type can be set individually for channel 0 to 3 Current measurement type can be set individually for channel 0 to 3 Resistor measurement type can be set for channel 4 Thermal resistor measurement type can be set for channel 4 Configurable diagnostics (per channel) Hardware interrupt on limit violation can be set per channel (two low and two high limits in each case) Support of the value status (Quality Information, QI) Analog outputs 2 analog outputs Resolution: 16 bits incl. sign Voltage output selectable by channel Current output selectable by channel Configurable diagnostics (per channel) Support of the value status (Quality Information, QI) The analog on-board I/O supports the following functions: Reconfiguration in RUN (for more information, refer to the section Parameter assignment and structure of the parameter data records of the analog on-board I/O (Page 150)) 28 Manual, 09/2016, A5E AB

29 Product overview 2.3 Properties Properties of the digital on-board I/O View The following figure shows the digital on-board I/O (X11 and X12) of the CPU 1512C-1 PN. Figure 2-3 Digital on-board I/O Manual, 09/2016, A5E AB 29
30 Product overview 2.3 Properties Properties The digital on-board I/O has the following technical properties: Digital inputs 32 high-speed digital inputs for signals up to max. 100 khz The inputs can be used as standard inputs and as inputs for technology functions. Rated input voltage 24 V DC Suitable for switches and 2-/3-/4-wire proximity switches Configurable diagnostics Hardware interrupt can be set (for each channel) Support of the value status (Quality Information, QI) Digital outputs 32 digital outputs, 8 of which can be used as high-speed outputs for technology functions The outputs can be used as standard outputs and as outputs for technology functions. Rated output voltage 24 V DC Rated output current - as output for standard mode 0.5 A per channel - as output for technology functions, you can select between an output current of up to 0.5 A for an output frequency up to 10 khz (load dependent) and a reduced output current of max. 0.1 A at an increased output frequency of up to 100 khz Suitable for, e.g., solenoid valves, DC contactors and indicator lights or also for signal transmission or for proportional valves Configurable diagnostics Support of the value status (Quality Information, QI) You can find a table showing the output frequencies and output currents through which outputs is available in the section Interconnection overview of outputs (Page 100). The digital outputs feature driver blocks with push-pull outputs. Due to their basic functional design, such driver blocks always contain parasitic diodes, that act as freewheeling diodes when shutting off inductive loads (see figure "Current flow with correct wiring using the digital on-board I/O X11 as an example" in the section Terminal and block diagram of the digital on-board I/O (Page 81)). The shutdown voltage is limited to -0.8 V. Therefore, the demagnetization of inductive loads takes longer and can be approximately calculated using the following formula. tau = L / R (tau= time constant, L = inductance value, R = ohmic resistance value) After the expiration of a period of 5 * tau, the current has decreased in effect to 0 A due to the inductive load. The maximum value is derived from: tau = 1.15H / 48 Ohm = 24ms. After 5 * 24 ms = 120 ms, the current has decreased in effect to 0 A. For comparison: With standard modules, inductive shutdown voltage, for example, is limited to Vcc -53 V (supply voltage 53 V), so that the current has decreased to about to 0 A after 15 ms. The digital on-board I/O supports the following functions: Reconfiguration in RUN You can reconfigure some of the technological functions in the RUN mode of the CPU (for more information, refer to the section Parameter assignment and structure of the parameter data records of the digital on-board I/O (Page 158)). 30 Manual, 09/2016, A5E AB

31 Product overview 2.4 Operator controls and display elements Simultaneous use of technology and standard functions You can use technology and standard functions at the same time, provided the hardware allows this. For example, all the digital inputs not assigned to the counting, measuring or position detection or PTO technology functions can be used as standard DI. Inputs to which technology functions are assigned can be read. Outputs to which technology functions are assigned cannot be written. 2.4 Operator controls and display elements Front view with closed front panels The following figure shows the front view of the CPU 1512C-1 PN LEDs for the current operating mode and diagnostics status of the CPU Status and error displays RUN/ERROR of the analog on-board I/O Status and error displays RUN/ERROR of the digital on-board I/O Control keys Display Figure 2-4 View of the CPU 1512C-1 PN with closed front panels (front) Note Temperature range for display To increase its service life, the display switches off at a temperature below the permitted operating temperature of the device. When the display cools down again, it automatically switches itself on again. When the display is switched off, the LEDs continue to show the status of the CPU. You can find additional information on the temperatures at which the display switches itself on and off in the Technical specifications (Page 128). Manual, 09/2016, A5E AB 31

32 Product overview 2.4 Operator controls and display elements Pulling and plugging the front panel with display You can pull and plug the front panel with display during operation. The CPU retains its operating mode when the front panel is pulled and plugged. WARNING Personal injury and damage to property may occur If you pull or plug the front panel of an S automation system during operation, personal injury or damage to property can occur in zone 2 hazardous areas. Before you pull or plug the front panel in hazardous area zone 2, always ensure that the S automation system is de-energized. Locking the front panel You can lock the front panel to protect your CPU against unauthorized access. You can attach a security seal or a padlock with a hoop diameter of 3 mm to the front panel. Figure 2-5 Locking latch on the CPU In addition to the mechanical lock, you can also block access to a password-protected CPU on the display (local lock) and assign a password for the display. For more information on the display, the configurable protection levels and the local lock, refer to the S7-1500, ET 200MP ( system manual. Reference You will find detailed information on the individual display options, a training course and a simulation of the available menu commands in the SIMATIC S Display Simulator ( 32 Manual, 09/2016, A5E AB

33 Product overview 2.4 Operator controls and display elements Front view without front panel on the CPU The following figure shows the operator control and connection elements of the CPU 1512C-1 PN with the front cover of the CPU open LEDs for the current operating mode and diagnostics status of the CPU Status and error displays RUN/ERROR of the analog on-board I/O Status and error displays RUN/ERROR of the digital on-board I/O Fastening screw Connection for supply voltage 6 PROFINET interface (X1) with 2 ports (X1 P1 and X1 P2) MAC address LEDs for the 2 ports (X1 P1 and X1 P2) of the PROFINET interface X1 Mode selector Slot for the SIMATIC memory card Display connection Figure 2-6 View of the CPU 1512C-1 PN without front panel on the CPU (front) Manual, 09/2016, A5E AB 33

34 Product overview 2.5 Mode selector Rear view The following figure shows the connection elements on the rear of the CPU 1512C-1 PN Shield contact surfaces Plug-in connection for power supply Plug-in connection for backplane bus Fastening screws Figure 2-7 View of the CPU 1512C-1 PN - rear 2.5 Mode selector You use the mode selector to set the operating mode of the CPU. The following table shows the position of the selector and the corresponding meaning: Position of the mode selector Position Meaning Explanation RUN RUN mode The CPU executes the user program. STOP STOP mode The user program is not executed. MRES Memory reset Position for CPU memory reset. 34 Manual, 09/2016, A5E AB
35 Technology functions High-speed counters Properties The technology functions of the compact CPU have the following technical properties: 32 high-speed digital inputs (up to 100 khz), isolated 6 high-speed counters (High Speed Counter/HSC), which can all be used as A/B/N Interfaces 24 V encoder signals of sourcing or push-pull encoders and sensors 24 V encoder supply output, short-circuit-proof Up to 2 additional digital inputs per high-speed counter for possible HSC DI functions (Sync, Capture, Gate) 1 digital output per high-speed counter for fast reaction to the count Counting range: 32 bits Diagnostics and hardware interrupts can be configured Supported encoder/signal types 24 V incremental encoder (with 2 tracks A and B, phase-shifted by 90, up to 6 incremental encoders also with zero track N) 24 V pulse encoder with direction signal 24 V pulse encoder without direction signal 24 V pulse encoder each for forward pulse & reverse pulse The high-speed counters support reconfiguration in RUN. You can find additional information in section Parameter data records of the high-speed counters (Page 162). Manual, 09/2016, A5E AB 35
36 Technology functions 3.1 High-speed counters Functions Counting Counting refers to the detection and adding up of events. The counters acquire and evaluate encoder signals and pulses. You can specify the count direction using encoder or pulse signals or through the user program. You can control counting processes using the digital inputs. You can switch the digital outputs exactly at defined count values, regardless of the user program. You can configure the response of the counters using the functionalities described below. Counting limits The counting limits define the count value range used. The counting limits are selectable and can be modified during runtime by the user program. The highest counting limit that can be set is (2 31 1). The lowest counting limit that can be set is ( 2 31 ). You can configure the response of the counter at the counting limits: Continue or stop counting (automatic gate stop) on violation of a counting limit Set count value to start value or to opposite counting limit on violation of a counting limit Start value You can configure a start value within the counting limits. The start value can be modified during runtime by the user program. Depending on the parameter assignment, the compact CPU can set the current count value to the start value during synchronization, during the Capture function, on violation of a counting limit or when the gate is opened. Gate control Opening and closing the hardware gate and software gate defines the period of time during which the counting signals are acquired. The digital inputs of the digital on-board I/O control the hardware gate. The user program controls the software gate. You can enable the hardware gate using the parameter assignment. The software gate (bit in the control interface of the cyclic I/O data) cannot be disabled. Capture You can configure an external reference signal edge that triggers the saving of the current count value as a Capture value. The following external signals can trigger the Capture function: Rising or falling edge of a digital input Both edges of a digital input Rising edge of signal N at the encoder input You can configure whether counting continues from the current count value or from the start value after the Capture function. 36 Manual, 09/2016, A5E AB
37 Technology functions 3.1 High-speed counters Hysteresis You can specify hysteresis for the comparison values, within which a digital output is prevented from switching again. An encoder may stop at a certain position, and slight movements may make the count value fluctuate around this position. If a comparison value or a counting limit lies within this fluctuation range, the corresponding digital output will be switched on and off often if hysteresis is not used. The hysteresis prevents these unwanted switching operations. Reference For more information on the counter, refer to the S7-1500, ET 200MP, ET 200SP Counting, measurement and position detection function manual ( Measuring Measuring functions The following measuring functions are available: Table 3-1 Overview of available measuring functions Measurement type Frequency measurement Period measurement Velocity measurement Description A measuring interval calculates the average frequency based on the time sequence of the count pulses, and returns this frequency as a floating-point number in units of hertz. A measuring interval calculates the average period duration based on the time sequence of the count pulses, and returns this period duration as a floating-point number in units of seconds. A measuring interval calculates the average velocity based on the time sequence of the count pulses, and returns this velocity in the configured unit. The measured value and count value are both available in the feedback interface. Update time You can configure the interval at which the compact CPU updates the measured values cyclically as the update time. Larger update times smooth uneven measured variables and increase the measuring accuracy. Gate control Opening and closing the hardware gate and software gate defines the period of time during which the count signals are acquired. The update time is asynchronous to the opening of the gate, which means that the update time is not started when the gate is opened. After the gate is closed, the last measured value calculated is still returned. Manual, 09/2016, A5E AB 37
38 Technology functions 3.1 High-speed counters Measuring ranges The measuring functions have the following measuring range limits: Table 3-2 Overview of low and high measuring range limits Measurement type Low measuring range limit High measuring range limit Frequency measurement 0.04 Hz 400 khz * Period measurement 2.5 μs * 25 s Velocity measurement * Applies to 24 V incremental encoder and "quadruple" signal evaluation Depending on the configured number of "increments per unit" and the "timebase for velocity measurement" All measured values are returned as signed values. The sign indicates whether the count value increased or decreased during the relevant time period. For example, a value of - 80 Hz means that the count value decreases at 80 Hz. Reference For more information on measuring, refer to the S7-1500, ET 200MP, ET 200SP Counting, measurement and position detection function manual ( Position detection for motion control You can use the digital on-board I/O, e.g. with an incremental encoder, for position detection with S Motion Control. The position input is based on the counting function, which evaluates the acquired encoder signals and provides them for S Motion Control. In the hardware configuration of the CPU 1512C-1 PN in STEP 7 (TIA Portal), select the "Position input for Motion Control" mode. Reference For a detailed description of the use of motion control and its configuration, refer to the S Motion Control function manual ( In the function module, the interface between the drives and encoders is referred to as a technology module (TM). In this context, a technology module (TM) also refers to the digital on-board I/O of the compact CPU described here. 38 Manual, 09/2016, A5E AB
39 Technology functions 3.1 High-speed counters Additional functions Synchronization You can configure an external reference signal edge to load the counter with the specified start value. The following external signals can trigger a synchronization: Rising or falling edge of a digital input Rising edge of signal N at the encoder input Rising edge of signal N at the encoder input depending on the level of the assigned digital input Comparison values The integrated counter supports 2 comparison values and digital output HSC DQ1. If the counter or measured value meets the set comparison condition, HSC DQ1 can be set in order to trigger direct control operations in the process. Both comparison values can be set in the parameters and can be changed during runtime by the user program. Hardware interrupts If you have enabled a hardware interrupt in the hardware configuration, the counter can trigger a hardware interrupt in the CPU when a comparison event occurs, if there is overflow or underflow, at a zero crossing of the counter, and/or at a change of count direction (direction reversal). You can specify which events are to trigger a hardware interrupt during operation in the hardware configuration. Diagnostics interrupts If you have enabled a diagnostics interrupt in the hardware configuration, the counter can trigger a diagnostics interrupt if the supply voltage is missing, if there is an incorrect A/B count signal or lost hardware interrupt. Manual, 09/2016, A5E AB 39
40 Technology functions 3.1 High-speed counters Configuring the high-speed counters General You configure the high-speed counters (HSC) in STEP 7 (TIA Portal). The functions are controlled by the user program. Reference A detailed description of configuring the counting and measuring functions can be found in: S7-1500, ET 200MP, ET 200SP Counting, measurement and position detection ( function manual in the STEP 7 online help under "Using technology functions > Counting, measuring and position detection > Counting, measuring and position detection (S7-1500)" A detailed description of configuring Motion Control be found in: S Motion Control ( function manual in the STEP 7 online help under "Using technology functions > Motion Control > Motion Control (S7-1500)" Assignment of the control interface of the high-speed counters The user program uses the control interface to influence the behavior of the high speed counter. Note Operation with High_Speed_Counter technology object The High_Speed_Counter technology object is available for high-speed counting mode. We therefore recommend use of the High_Speed_Counter technology object instead of the control interface/feedback interface for controlling the high speed counter. For information on configuring the technology object and programming the associated instruction, refer to the S7-1500, ET 200MP, ET 200SP Counting, measurement and position detection ( function manual. 40 Manual, 09/2016, A5E AB
41 Technology functions 3.1 High-speed counters Control interface per channel The following table shows the control interface assignment: Table 3-3 Assignment of the control interface Offset from start address Parameter Meaning Bytes 0 to 3 Slot 0 Load value (meaning of the value is specified in LD_SLOT_0) Bytes 4 to 7 Slot 1 Load value (meaning of the value is specified in LD_SLOT_1) Byte 8 LD_SLOT_0* Specifies the meaning of the value in Slot 0 Bit 3 Bit 2 Bit 1 Bit No action, idle state Load counter Reserve Load start value Load comparison value Load comparison value Load low counting limit Load high counting limit Reserve to LD_SLOT_1* Specifies the meaning of the value in Slot 1 Bit 7 Bit 6 Bit 5 Bit No action, idle state Load counter Reserve Load start value Load comparison value Load comparison value Load low counting limit Load high counting limit Reserve to Byte 9 EN_CAPTURE Bit 7: Enable capture function EN_SYNC_DN EN_SYNC_UP SET_DQ1 SET_DQ0 TM_CTRL_DQ1 TM_CTRL_DQ0 SW_GATE Bit 6: Enable downward synchronization Bit 5: Enable upward synchronization Bit 4: Set DQ1 Bit 3: Set DQ0 Bit 2: Enable technological function DQ1 Bit 1: Enable technological function DQ0 Bit 0: Software gate Manual, 09/2016, A5E AB 41
42 Technology functions 3.1 High-speed counters Offset from start address Parameter Meaning Byte 10 SET_DIR Bit 7: Count direction (with encoder without direction signal) Bits 2 to 6: Reserve; bits must be set to 0 RES_EVENT RES_ERROR Bit 1: Reset of saved events Bit 0: Reset of saved error states Byte 11 Bits 0 to 7: Reserve; bits must be set to 0 * If values are loaded simultaneously via LD_SLOT_0 and LD_SLOT_1, the value from Slot 0 is taken first internally and then the value from Slot 1. This may lead to unexpected intermediate states. Reference You can find a graphic representation of the processing of the various SLOT parameters in the section Handling the SLOT parameter (control interface) (Page 64) Assignment of the feedback interface of the high-speed counters The user program receives current values and status information from the high speed counter via the feedback interface. Note Operation with High_Speed_Counter technology object The High_Speed_Counter technology object is available for high-speed counting mode. We therefore recommend use of the technology object High_Speed_Counter instead of the control interface/feedback interface for controlling the high speed counter. For information on configuring the technology object and programming the associated instruction, refer to the S7-1500, ET 200MP, ET 200SP Counting, measurement and position detection ( function manual. 42 Manual, 09/2016, A5E AB
43 Technology functions 3.1 High-speed counters Feedback interface per channel The following table shows the feedback interface assignment: Table 3-4 Assignment of the feedback interface Offset from start address Parameter Meaning Bytes 0 to 3 COUNT VALUE Current count value Bytes 4 to 7 CAPTURED VALUE Last Capture value acquired Bytes 8 to 11 MEASURED VALUE Current measured value Byte 12 Bits 3 to 7: Reserve; set to 0 LD_ERROR ENC_ERROR Bit 2: Error when loading via control interface Bit 1: Incorrect encoder signal POWER_ERROR Bit 0: Incorrect supply voltage L+ Byte 13 Bits 6 to 7: Reserve; set to 0 STS_SW_GATE STS_READY LD_STS_SLOT_1 LD_STS_SLOT_0 RES_EVENT_ACK Bit 5: Software gate status Bit 4: Digital on-board I/O started up and parameters assigned Bit 3: Load request for Slot 1 detected and executed (toggling) Bit 2: Load request for Slot 0 detected and executed (toggling) Bit 1: Reset of event bits active Bit 0: Reserve; set to 0 Byte 14 STS_DI2 Bit 7: Reserve; set to 0 STS_DI1 STS_DI0 STS_DQ1 STS_DQ0 STS_GATE STS_CNT STS_DIR Bit 6: Status HSC DI1 Bit 5: Status HSC DI0 Bit 4: Status HSC DQ1 Bit 3: Status HSC DQ0 Bit 2: Internal gate status Bit 1: Count pulse detected within last approx. 0.5 s Bit 0: Direction of last count value change Byte 15 STS_M_INTERVAL Bit 7: Count pulse detected in previous measuring interval EVENT_CAP EVENT_SYNC EVENT_CMP1 EVENT_CMP0 EVENT_OFLW EVENT_UFLW EVENT_ZERO Bit 6: Capture event has occurred Bit 5: Synchronization has occurred Bit 4: Comparison event for DQ1 has occurred Bit 3: Comparison event for DQ0 has occurred Bit 2: Overflow has occurred Bit 1: Underflow has occurred Bit 0: Zero crossing has occurred Manual, 09/2016, A5E AB 43
44 Technology functions 3.2 Pulse generators 3.2 Pulse generators Operating modes Operating mode: Pulse-width modulation (PWM) Properties The pulse-width modulation (PWM) mode of the compact CPU has the following technical properties: Standard output Pulse duration 100 µs with load > 0.1 A 1) 200 µs with load 2m A 1) Minimum High-speed output deactivated 20 µs with load > 0.1 A 1) 40 µs with load 2m A 1) High-speed output activated Period duration 10 ms 2) 100 μs 2) 10 μs Standard output Maximum High-speed output deactivated 2 µs 1) 10,000,000 µs (10 s) High-speed output activated 1) A lower value is theoretically possible but, depending on the connected load, the output voltage can no longer be output as complete rectangular pulse 2) Load dependent 44 Manual, 09/2016, A5E AB
45 Technology functions 3.2 Pulse generators Principle of operation With pulse width modulation, a signal with defined cycle duration and variable on-load factor is output at the digital output. The on-load factor is the relationship of the pulse duration to the cycle duration. In PWM mode, you can control the on-load factor and the cycle duration. With pulse width modulation you vary the mean value of the output voltage. Depending on the connected load, you can control the load current or the power with this. You can specify the pulse duration as one-hundredth of the period duration (0 bis 100), as one-thousandth (0 to 1000), as one ten-thousandth (0 to 10,000) or in S7 analog format. 1 2 Period duration Pulse duration The pulse duration can be between 0 (no pulse, always off) and full-scale deflection (no pulse, period duration always on). The PWM output can, for example, be used to control the speed of a motor from standstill to full speed or you can use it to control the position of a valve from closed to completely open. You configure the pulse width modulation (PWM) mode in STEP 7 (TIA Portal). The pulse width modulation mode has the following functions: When the option "High-speed output (0.1 A)" is activated, you can generate a minimum pulse duration of 2 μs at a current of 100 ma. If the option "High-speed output (0.1 A)" is not activated, you can generate a minimum pulse duration of 20 μs with a load > 0.1 A and a minimum pulse duration of 40 μs with a load of 2 ma and a current of maximum 0.5 A. If a standard output is used, you can generate a minimum pulse duration of 100 µs with a load of > 0.1 and a minimum pulse duration of 200 µs with a load of 2 ma. You can control the pulse output (DQA) of the channel manually via the control and feedback interface. You can configure the reaction to CPU STOP. Upon change to CPU STOP, the pulse output (DQA) is set to the configured state. Manual, 09/2016, A5E AB 45
46 Technology functions 3.2 Pulse generators Controller For the pulse width modulation (PWM) mode, the user program directly accesses the control and feedback interface of the channel. A reconfiguration via the instructions WRREC/RDREC and parameter assignment data record 128 is supported. You can find additional information in section Parameter data records (PWM) (Page 169) You control the on-load factor (pulse-cycle ratio) of the pulse width via the OUTPUT_VALUE field of the control interface. Pulse width modulation generates continuous pulses based on this value. The period duration is adjustable. Figure 3-1 Pulse schematic Starting the output sequence The control program must output the enable for the output sequence with the help of the software enable (SW_ENABLE 0 1). The feedback bit STS_SW_ENABLE indicates that the software enable is pending at the PWM. If the software enable is activated (rising edge), STS_ENABLE is set. The output sequence runs continuously, as long as SW_ENABLE is set. Note Output control signal TM_CTRL_DQ If TM_CTRL_DQ = 1, the technology function takes over the control and generates pulse sequences at the output PWM DQA. If TM_CTRL_DQ = 0, the user program takes over the control and the user can set the output PWM DQA directly via the control bit SET_DQA. 46 Manual, 09/2016, A5E AB
47 Technology functions 3.2 Pulse generators Canceling the output sequence A deactivation of the software enable (SW_ENABLE = 1 0) cancels the current output sequence. The last cycle duration is not completed. STS_ENABLE and the digital output PWM DQA are immediately reset to 0. A renewed pulse output is only possible after a restart of the output sequence. Minimum pulse duration and minimum interpulse period You assign the minimum pulse duration and the minimum interpulse period with the help of the parameter "Minimum pulse duration". A pulse duration determined by the technology function or PWM channel which is shorter than the minimum pulse duration will be suppressed. A pulse duration determined by the technology function or PWM channel which is longer than the cycle duration less the minimum interpulse period will be set to the value of the cycle duration (output switched on permanently) Cycle duration Cycle duration minus minimum interpulse period Minimum pulse duration OUTPUT_VALUE (One tenth of a percent on-load factor) Pulse duration Figure 3-2 Minimum pulse duration and minimum interpulse period Manual, 09/2016, A5E AB 47
48 Technology functions 3.2 Pulse generators Setting and changing the pulse on-load factor OUTPUT_VALUE assigns the on-load factor for the current period duration. You select the range of the field OUTPUT_VALUE of the control interface with the "Output format" parameter. Output format per 100: Value range between 0 and 100 Pulse duration = (OUTPUT_VALUE/100) x period duration. Output format 1/1000: Value range between 0 and Pulse duration = (OUTPUT_VALUE/1 000) x cycle duration. Output format 1/10000: Value range between 0 and Pulse duration = (OUTPUT_VALUE/10 000) x cycle duration. Output format "S7 analog output": Value range between 0 and 27,648 Pulse duration = (OUTPUT_VALUE/27 648) x period duration. You assign OUTPUT_VALUE directly via the control program. A new OUTPUT_VALUE is applied at the output when the next rising edge occurs. Setting and changing the period duration Permanent updating The period duration is permanently controlled via the control interface. The MODE_SLOT bit must be set ("1" means permanent updating); LD_SLOT must be set to value 1 ("1" means period duration). Set the period value in the field SLOT. The unit is always a microsecond. High-speed output activated: between 10 μs and μs (10 s) in the field SLOT High-speed output deactivated: between 100 μs and μs (10 s) in the field SLOT Standard output (100 Hz output): between µs (10 ms) and µs (10 s) in the field SLOT Individual updating Set the period duration in the configuration parameters. Alternatively, execute an individual updating via the control interface. MODE_SLOT must be deleted ("0" means individual updating); LD_SLOT must be set to value 1 ("1" means period duration). Set the period duration value in the field SLOT. The unit is always a microsecond. High-speed output activated: between 10 μs and μs (10 s) in the parameters High-speed output deactivated: between 100 μs and μs (10 s) in the parameters Standard output (100 Hz output): between µs (10 ms) and µs (10 s) in the parameters The new period duration is applied at the next rising edge of the output. 48 Manual, 09/2016, A5E AB
49 Technology functions 3.2 Pulse generators Setting the minimum pulse duration and the minimum interpulse period You assign the minimum pulse duration and the minimum interpulse period as DWORD numerical value between 0 and μs (10 s) with the help of the channel parameter configuration "Minimum pulse duration". Parameters of the pulse width modulation (PWM) mode Category Parameter Meaning Value range Default Reaction to Reaction to Output substitute value CPU STOP CPU STOP Diagnostics interrupt Parameter Substitute value for pulse output (DQA) No supply voltage L+ High-speed output (0.1 A) Output format The parameter "Output substitute value" generates a substitute value upon CPU STOP, which you can define with the parameter "Substitute value for pulse output (DQA)". The parameter "Continue operation" still generates the PWM output signal upon CPU STOP, which was generated before the CPU STOP. If you have set the option "Output substitute value" for "Reaction to CPU STOP", the parameter "Substitute value for pulse output (DQA)" defines the substitute value to be used for the pulse output of the channel. If you have set the option "Continue operation" for "Reaction to CPU STOP", the parameter "Substitute value for pulse output (DQA)" cannot be selected The parameter "No supply voltage L+" activates the diagnostic interrupt of the channel in the case of no supply voltage L+ The "High-speed output (0.1 A)" parameter is used to specify whether you want to use the selected pulse output as high-speed output. Requirement for this is that the selected pulse output supports the operation as high-speed output. Defines the format of the ratio value (on-load factor) in the field "OUTPUT_VALUE" of the control duration of the channel. Continue operation 0 (use substitute value 0) 1 (use substitute value 1) Deactivated Activated Deactivated The output supports frequencies of up to 10 khz (load dependent) and currents of up to 0.5 A or frequencies of up to 100 Hz and currents of up to 0.5 A depending on the performance capability of the selected output. Activated The output supports frequencies of up to 100 khz and currents of up to 0.1 A. S7 analog output Interprets the ratio value in the field OUTPUT_VALUE" of the control interface 1/27648 of the current period duration. Supported value range from 0 to Output substitute value 0 Deactivated Deactivated Per 100 Manual, 09/2016, A5E AB 49
50 Technology functions 3.2 Pulse generators Category Parameter Meaning Value range Default Hardware inputs / outputs Minimum pulse duration Period duration Pulse output (DQA) Defines the minimum pulse duration and the minimum interpulse period of the output signal of the channel. The channel suppresses all pulses and pauses that are below the specified value. Defines the period duration of the output signal of the channel in μs. In RUN, the user program can control the period duration via the control and feedback interface of the channel. The parameter "Pulse output (DQA)" defines the hardware output to use as pulse output channel. Per 100 Interprets the ratio value in the field "OUTPUT_VALUE"of the control interface percentage value of the current period duration. Supported value range 0 to 100 Per 1,000 Interprets the ratio value in the field "OUTPUT_VALUE"of the control interface is a one-tenth percentage point of the current period duration. Supported value range from 0 to Per 10,000 Interprets the ratio value in the field "OUTPUT_VALUE" of the control interface is a one-hundredth percentage point of the current period duration. Supported value range from 0 to μs to μs (10 s) 0 μs x to μs (10 s) at 100 khz hardware output (highspeed output (0.1 A) activated): 10 μs to μs (10 s) at 10 khz hardware output (highspeed output (0.1 A) deactivated): 100 μs to μs (10 s) at 100 khz hardware output (highspeed output (0.1 A) deactivated): μs (10 ms) to μs (10 s) For B: X11, terminal 21 (DQ0 / %Q4.0): 10 khz / 0.5 A or 100 khz / 0.1 A For B: X11, terminal 31 (DQ8 / %Q5.0): 100 Hz / 0.5 A μ s (2 s) Hardware output for the least significant address 50 Manual, 09/2016, A5E AB
51 Technology functions 3.2 Pulse generators Output signals for pulse width modulation (PWM) mode Output signal Meaning Value range Continuous pulse current at the digital output PWM DQA A pulse is output at the digital output PWM DQA for the set on-load factor and cycle duration. Continuous pulse current Operating mode: Frequency output In this operating mode you can assign a frequency value with high frequencies more precisely than by using period duration in PWM mode. A rectangular signal with an assigned frequency and a constant on-load factor of 50 % is generated at the digital output. The frequency output mode has the following functions: When the option "High-speed output (0.1 A)" is activated, you can generate a minimum pulse duration of 2 μs at a current of 100 ma. If the option "High-speed output (0.1 A)" is not activated, you can generate a minimum pulse duration of 20 μs with a load > 0.1 A and a minimum pulse duration of 40 μs with a load of 2 ma and a current of maximum 0.5 A. If you use a standard output, you can generate a minimum pulse duration of 100 µs with a load of > 0.1 A and a minimum pulse duration of 200 µs with a load of 2 ma and a current of max. 0.5 A. Minimum Maximum Standard output High-speed output deactivated High-speed output activated Standard output High-speed output deactivated High-speed output activated Frequency 0.1 Hz 100 Hz 1) 10 khz 1) 100 khz 1) Load dependent You can control the pulse output (DQA) of the channel manually via the control and feedback interface. You can configure the reaction to CPU STOP. Upon change to CPU STOP, the pulse output (DQA) is set to the configured state. Manual, 09/2016, A5E AB 51
52 Technology functions 3.2 Pulse generators Controller For the frequency output mode, the user program directly accesses the control and feedback interface of the channel. A reconfiguration via the instructions WRREC/RDREC and parameter assignment data record 128 is supported. You can find additional information in section Parameter data records (PWM) (Page 169). Figure 3-3 Pulse schematic Starting the output sequence The control program must initiate the enable for the output sequence with the help of the software enable (SW_ENABLE 0 1). The feedback bit STS_SW_ENABLE indicates that the software enable is pending at the pulse generator. If the software enable is activated (rising edge), STS_ENABLE is set. The output sequence runs continuously, as long as SW_ENABLE is set. Note Output control signal TM_CTRL_DQ If TM_CTRL_DQ = 1, the technology function takes over the control and generates pulse sequences at the output PWM DQA. If TM_CTRL_DQ = 0, the user program takes over the control and the user can directly set the output PWM DQA via the control bit SET_DQA. Canceling the output sequence Deactivating the software enable (SW_ENABLE = 1 0) during the frequency output cancels the current output sequence. The last cycle duration is not completed. STS_ENABLE and the digital output PWM DQA are immediately reset to 0. A renewed pulse output is only possible after a restart of the output sequence. 52 Manual, 09/2016, A5E AB
53 Technology functions 3.2 Pulse generators Setting and changing the output value (frequency) You set the frequency with the OUTPUT_VALUE directly with the control program in the control interface. The value is specified in the real format and the unit is always "Hz". The possible range depends on the parameter "High-speed output (0.1 A)" as follows: High-speed pulse output deactivated Frequency (OUTPUT_VALUE) 0.1 Hz to 10,000 Hz High-speed pulse output activated Frequency (OUTPUT_VALUE) 0.1 Hz to 100,000 Hz Standard output (100 Hz output) Frequency (OUTPUT_VALUE) 0.1 Hz to 100,000 Hz The new frequency is applied at the start of the next period. The new frequency has no impact on the falling edge or the pulse-cycle ratio. However, the application can take up to 10 s depending on the previously set frequency. Accuracy of the output frequency The configured output frequency is output with a frequency-dependent accuracy at the digital output PWM DQA. You can find an overview of the accuracy as a function of the frequency used in the section Interconnection overview of outputs (Page 100). Parameters of the frequency output mode Category Parameter Meaning Value range Default Reaction to CPU STOP Reaction to CPU STOP The parameter "Output substitute value" generates a substitute Output substitute value Output substitute value value upon CPU STOP, which you can define with the parameter "Substitute value for pulse output (DQA)". The parameter "Continue operation" still generates the frequency output signal upon CPU STOP, which was generated before the CPU STOP. Continue operation Substitute value for pulse output (DQA) If you have set the option "Output substitute value" for "Reaction to CPU STOP", the parameter "Substitute value for pulse output (DQA)" defines the substitute value to be used for the pulse output of the channel. If you have set the option "Continue operation" for "Reaction to CPU STOP", the parameter "Substitute value for pulse output (DQA)" cannot be selected. 0 (use substitute value 0) 1 (use substitute value 1) 0 Manual, 09/2016, A5E AB 53
54 Technology functions 3.2 Pulse generators Category Parameter Meaning Value range Default Diagnostics No supply voltage The parameter "No supply voltage Deactivated Deactivated interrupt L+ L+" activates the diagnostic interrupt of the channel in the case of no supply voltage L+ Activated Parameter Hardware inputs / outputs High-speed output (0.1 A) Output format Pulse output (DQA) The "High-speed output (0.1 A)" parameter is used to specify whether you want to use the selected pulse output as high-speed output. Requirement for this is that the selected pulse output supports the operation as high-speed output. Defines the value for the frequency output in the field "OUTPUT_VALUE" of the control duration of the channel. The parameter "Pulse output (DQA)" is used to define the hardware output that you want to use as pulse output channel. Deactivated The output supports frequencies of up to 10 khz (load dependent) and currents of up to 0.5 A or frequencies of up to 100 Hz and currents of up to 0.5 A depending on the performance capability of the selected output. Activated The output supports frequencies of up to 100 khz and currents of up to 0.1 A. 1 Hz Interprets the value of the frequency output in the field "OUTPUT_VALUE" as frequency with the unit Hz. For B: X11, terminal 21 (DQ0 / %Q4.0): 10 khz / 0.5 A or 100 khz / 0.1 A For B: X11, terminal 31 (DQ8 / %Q5.0): 100 Hz / 0.5 A Deactivated 1 Hz Hardware output for the least significant address Output signals for frequency output mode Output signal Meaning Value range Continuous pulse current at the digital A pulse for the assigned frequency is output Continuous pulse current output PWM DQA at the digital output PWM DQA. 54 Manual, 09/2016, A5E AB
55 Technology functions 3.2 Pulse generators Operating mode: PTO The PTO (Pulse Train Output) mode can be used to output position information. This allows you to, for example, control stepper motor drives or simulate an incremental encoder. The frequency of the pulses represents the speed, while the number of pulses represents the distance. The direction can also be specified by using two signals per channel. You can use a PTO channel for setpoint output (drive) for an axis technology object. PTO mode is divided into the following four signal types: PTO (pulse (A) and direction (B)): If you select the PTO signal type (pulse (A) and direction (B)), an output (A) controls the pulses and an output (B) controls the direction. B is 'High' (active) when pulses are generated in a negative direction. B is 'Low' (inactive) when pulses are generated in a positive direction. 1 2 Positive direction of rotation Negative direction of rotation PTO (Count Up (A) and Count Down (B)): When you select PTO when you select the PTO signal type (count up (A) and count down (B)), an output (A) outputs pulses for positive directions and another output (B) outputs pulses for negative directions. 1 2 Positive direction of rotation Negative direction of rotation Manual, 09/2016, A5E AB 55
56 Technology functions 3.2 Pulse generators PTO (A, B phase-shifted): When you select the PTO signal type (A, B phase-shifted), the two outputs pulses with the specified velocity, but phase-shifted by 90 degrees. This is a 1x combination in which the pulse shows the duration between two positive transitions of A. In this case the direction is determined based on the output which first changes from 0 to 1. With positive direction, A preceeds B. With negative direction B preceeds A. The number of generated pulses is based on the number of 0-to-1 transitions from phase A. The phase ratio determines the direction of motion: PTO (A, B phase-shifted) Phase A precedes phase B (positive motion) Phase A follows phase B (negative motion) Number of pulses Number of pulses PTO (A, B phase-shifted - quadruple): When you select the PTO signal type (A, B phaseshifted, quadruple), the two outputs transmit pulses with the specified velocity, but phaseshifted by 90 degrees. The quadruple signal type is a 4x configuration in which each edge transition corresponds to an increment. Therefore, a full period of the signal A contains four increments. In this way two outputs, each with 100 khz signal frequency, can be used to output a control signal that supplies 400,000 increments per second. The direction is determined based on the output which first changes from 0 to 1. With positive direction, A preceeds B. With negative direction B preceeds A. PTO (A, B phase-shifted - quadruple) Phase A precedes phase B (positive motion) Phase A follows phase B (negative motion) Number of pulses Number of pulses 56 Manual, 09/2016, A5E AB
57 Technology functions 3.2 Pulse generators Parameters of PTO mode Category Parameter Meaning Value range Default Diagnostics No supply voltage L+ With the parameter "No supply Deactivated Deactivated voltage L+" you activate interrupt the diagnostic interrupt of the Activated channel in the case of no supply voltage L+. Data exchange with the drive Reference speed With the parameter "Reference speed" you define the reference value for the drive velocity. The drive velocity is defined as percentage value of the reference speed in the range from -200 % to +200 %. Floating-point number: 1.0 bis 20,000.0 (rpm) 3,000.0 (rpm) Maximum speed The parameter "Maximum speed" is used to define the required maximum speed for your application. The supported value range depends on: the signal type selected under "Operating mode" the value defined under "Increments per revolution" the value defined under "Reference speed" The low limit of the value range is: for the signal type "PTO (A, B phase-shifted - quadruple)": 0.1 Hz * 60 s/min * 4) / Increments per revolution for the non-quadruple PTO signal types: (0.1 Hz * 60 s/min) / increments per revolution The high limit of the value range is the minimum of the value: 2 * reference speed and of the value: for the signal type "PTO (A, B phase-shifted - quadruple)": ( Hz * 60 s/min * 4) / Increments per revolution for the non-quadruple PTO signal types: ( Hz * 60 s/min) / Increm ents per revolution 3,000.0 (rpm) Increments per revolution The "Increments per revolution" is used to define the number of increments per revolution (also in microstep mode), which is required by the drive for a revolution. 1 to 1,000, Manual, 09/2016, A5E AB 57
58 Technology functions 3.2 Pulse generators Category Parameter Meaning Value range Default Fine resolution Bits in incr. actual value (G1_XIST1) The parameter defines the number of bits for the coding of the fine resolution in the current incremental value of G1_XIST Stop behavior Hardware inputs / outputs Quick stop time Reference switch input Edge selection reference switch Measuring input "Drive ready" input Pulse output A for "PTO (pulse (A) and direction (B))" Direction output B for "PTO (pulse (A) and direction B))" Clock generator forward (A) for "PTO (Count up (A) and Count down (B))" Clock generator backward (B) for "PTO (Count up (A) and Count down (B))" Phase A for "PTO (A, B phase-shifted)" and "PTO (A, B phaseshifted, quadruple)" The parameter "Quick stop time" defines the time interval it should take for the drive to go from the maximum speed to a standstill (OFF3). The parameter "Reference switch input" defines the hardware input of the reference switch. The parameter "Edge selection reference switch" defines the edge type which is to be detected by the reference switch. The parameter "Measuring input" defines the hardware input of the measuring input. The parameter ""Drive ready" input" defines the hardware input of the input "Drive ready". The parameter "Pulse output A" defines the hardware output for PTO signal A. The parameter "Direction output B" defines the hardware output for PTO signal B. The "Clock generator forward (A)" parameter defines the hardware output for PTO signal A. The "Clock generator backward (B)" parameter defines the hardware output for PTO signal B. The "Clock generator output (A)" parameter defines the hardware output for PTO signal A. 1 to (ms) 1,000 (ms) [Input address of the reference switch DI] Rising edge Falling edge [Input address of the measuring input DI] [Input addresses of the inputs "Drive ready" DIn] [Output address DQ for PTO signal A (output frequency 100 khz)] [Output address 1 of the DQ for PTO signal B (output frequency 100 khz)] [Output address 2 of the DQ for PTO signal B (output frequency 100 Hz)] [Output address DQ for PTO signal A (output frequency 100 khz)] [Output address 1 of the DQ for PTO signal B (output frequency 100 khz)] [Output address of the DQ for PTO signal A (output frequency 100 khz)] -- Rising edge grayed out Read only access to the parameter Qn (output frequency 100 khz) grayed out Read only access to the parameter grayed out Read only access to the parameter grayed out Read only access to the parameter 58 Manual, 09/2016, A5E AB
59 Technology functions 3.2 Pulse generators Category Parameter Meaning Value range Default Phase B The "Clock generator output [Output address 1 of the DQ for grayed out for "PTO (A, B (B)" parameter defines the PTO signal B (output frequency Read only phase-shifted)" and hardware output for PTO 100 khz)] access to the "PTO (A, B phaseshifted, signal B. parameter quadruple)" Drive enable output The parameter "Drive enable output" defines the hardware output of the output "Drive enable output". [Output addresses of the enable output DQn (output frequency 100 Hz) -- Reaction of the PTO channel to CPU STOP The PTO channel reacts to a change to CPU STOP with the removal of the drive enable (to the extent that the drive enable output is configured) and with output of the velocity setpoint 0 at the hardware outputs configured for the signal tracks A and B. The CPU STOP reaction of the PTO channels cannot be configured. Note Reaction to CPU STOP Upon CPU STOP, the hardware outputs assigned for the PTO outputs A and B can switch to signal state 'High' (1) and/or remain there. A switching/remaining of the two hardware outputs to/in signal level 'Low' (0) is not guaranteed. Controller The pulse output channels for the four modes of the pulse generators (PTO) are controlled using Motion Control via the technology objects TO_SpeedAxis, TO_PositioningAxis and TO_SynchronousAxis. With these operating modes, the control and feedback interface of the channels is a partial implementation of the PROFIdrive interface "Telegram 3". For a detailed description of the use of motion control and its configuration, refer to the S Motion Control function manual ( and the STEP 7 online help. Manual, 09/2016, A5E AB 59
60 Technology functions 3.2 Pulse generators Functions Function: High-speed output The function "High-speed output (0.1 A)" enhances the signal clock of the digital outputs (DQ0 to DQ7). Less delay, fluctuation, jitter, and shorter rise and fall times, occur at the switching edges. The function "High-speed output (0.1 A)" is suited for generating pulse signals in a more precise clock, but provides a lower maximum load current. For the PWM and frequency output modes, select the high-speed output of the channel in STEP 7 (TIA Portal). You can also change the parameter assignment during runtime with the help of the program via the data record. High-speed pulse output (high-speed output) is available for the following operating modes: PWM Frequency output PTO (the pulse outputs for the PTO mode are always "High-speed output (0.1 A)") High-speed output Pulse duration High-speed output deactivated 20 µs with load > 0.1 A 1) 40 µs with load 2 ma 1) Minimum High-speed output activated 2 µs 1) High-speed output deactivated Maximum 10,000,000 μs (10 s) High-speed output activated Period duration 100 μs 2) 10 μs Frequency 0.1 Hz 10 khz 2) 100 khz 1) A lower value is theoretically possible but, depending on the connected load, the output voltage can no longer be output as complete rectangular pulse 2) Load dependent 60 Manual, 09/2016, A5E AB
61 Technology functions 3.2 Pulse generators Function: Direct control of the pulse output (DQA) Direct control of the pulse output (DQA) In the modes "Pulse width modulation PWM" and "Frequency output", you can set the pulse output (DQA) of a pulse generator directly via the control program. Select the function for the DQ direct control by deleting the output control bit of the PWM channel (TM_CTRL_DQ = 0) in the control interface. The direct control of the pulse output (DQA) can be helpful when commissioning a control system for automation. When you select the direct control of the pulse output (DQA) during a pulse output sequence, the sequence continues to run in the background so that the output sequence is continued as soon as the channel takes control again (by setting TM_CTRL_DQ = 1). You assign the status of the pulse output (DQA) using the control bits SET_DQA. When you set TM_CTRL_DQ = 1, you deselect the direct control of the pulse output (DQA) and the channel takes over the processing. If the output sequence is still running (STS_ENABLE still active), the PWM channel takes over the control of the output again. If TM_CTRL_DQ = 1 and STS_ENABLE is not active, the module's channel also takes over processing, but then outputs "0". Note Output signal TM_CTRL_DQ of the PWM channel If TM_CTRL_DQ = 1, the technology function takes over the control and generates pulse sequences at the output PWM DQA. If TM_CTRL_DQ = 0, the user program takes over the control and the user can set the PWM DQA directly using the control bits SET_DQA. Manual, 09/2016, A5E AB 61
62 Technology functions 3.2 Pulse generators Configuring the PWM and frequency output modes Assignment of the control interface The user program influences the behavior of the PWM channel through the control interface. Control interface per channel The following table shows the control interface assignment: Table 3-5 Assignment of the control interface Byte 0 Byte 1 Byte 2 Byte 3 Byte 4 Byte 5 Byte 6 Byte OUTPUT_VALUE PWM: On-load factor * (Int) In PWM mode, the on-load factor uses only the two least significant bytes (byte 2 and byte 3). Byte 8 Reserved = 0 MODE_SL OT Byte 9 Reserved = 0 Reserved = 0 Frequency output: Frequency in Hz (Real) Reserved = 0 SLOT LD_SLOT Specifies the meaning of the value under SLOT 0000: No action 0001: Period duration (PWM) 0010 to 1111: Reserved SET_DQA Reserved = 0 TM_CTRL_ DQ SW_ENA BLE Byte 10 Reserved = 0 RES_ERR OR Byte 11 Reserved = 0 * The terms "On-load factor", "Pulse duty factor" and "Duty factor" can be used synonymously Use case 1. Transfer the control for the output to the PWM channel. 2. Set SW_ENABLE, in order that the output can be started. 3. Set the required on-load factor using OUTPUT_VALUE. 4. If necessary, change the period duration (cyclic or once). If you do not change the value, the period duration from the hardware configuration will be used. 5. With TM CTRL_DQ and SET_DQ set the output from the user program permanently to 1 or Acknowledge any errors that occur using RES_ERROR. Additional parameters for the output sequence are defined before the start of an output sequence. The data record of the parameter assignment is changed in the device configuration in STEP 7 (TIA Portal) or through WRREC execution. 62 Manual, 09/2016, A5E AB
63 Technology functions 3.2 Pulse generators Control interface parameters OUTPUT_VALUE The interpretation of the value OUTPUT_VALUE depends on the set operating mode. OUTPUT_VALUE is always updated. When an invalid value is detected (outside the permissible range), the error memory bit ERR_OUT_VAL is set until a valid value is detected. During the error condition the invalid value is ignored and the PWM channel continues with the last valid OUTPUT_VALUE. Note that, in the frequency output mode, it is also possible that no last valid value is available. In this case the pulse output returns the value 0, i.e. there is no pulse output. Please note that the on-load factor is not checked in PWM mode. If the on-load factor is greater than the format permits, the PWM channel uses a ratio of 100 %. 0 % in effect for values < 0. SLOT, MODE_SLOT and LD_SLOT Use these control interface fields if you occasionally change the period duration in PWM mode before the start of the output sequence or during operation. You can find a description of the interaction between SLOT, MODE_SLOT and LD_SLOT under Handling the SLOT parameter (control interface) (Page 64) SW_ENABLE If 0 1, activate the output sequence. TM_CTRL_DQ If 1, the output is controlled by the PWM channel and generates the pulse sequences If 0, the output is controlled directly by the program using the SET_DQA assignments SET_DQA If 1, set the output A to 1, if TM_CTRL_DQ is inactive If 0, set the output A to 0, if TM_CTRL_DQ is inactive RES_ERROR Resetting the error bit memory ERR_LD in the feedback interface Manual, 09/2016, A5E AB 63
64 Technology functions 3.2 Pulse generators Handling the SLOT parameter (control interface) SLOT and MODE_SLOT SLOT has the following operating modes. Mode for individual update (MODE_SLOT = 0) Use this mode if you occasionally change the specific parameters (such as period duration) before the start of the output sequence or during operation. The value in SLOT is the always applied when the value changes in LD_SLOT. The acknowledgment bit STS_LD_SLOT in the feedback interface is switched. The value of LD_SLOT defines the interpretation of SLOT (see the table below "Interpretation of the SLOT parameter value"). If the LD_SLOT value is invalid, the setting of the feedback bit ERR_LD indicates a parameter assignment error. The user has to reset the error using the control bit RES_ERROR and enable the SLOT parameter again for the next value. Changes made in this mode can be read back by the channel in the parameter assignment data record. The current changes are entered in the data record 128 during the reading back of the parameter assignment data with RDREC from the user program. These changes are lost during a warm restart of the CPU. Mode for cyclic updating (MODE_SLOT = 1) Use this operating mode if the program is to continuously control another parameter in addition to the main parameter to be controlled. The value in SLOT is transferred with each module cycle. No acknowledgment bit is available. The value of LD_SLOT defines the interpretation of SLOT (see the table below "Interpretation of the SLOT parameter value"). If the value in SLOT is not valid, the error ERR_SLOT_VAL occurs. The error is automatically reset as soon as a valid value is loaded. In this mode the value in the parameter assignment data record is not updated. If LD_SLOT is changed in this mode, the last value applied from LD_SLOT is valid. The mode for permanent updating can be stopped by setting LD_SLOT to 0 and MODE_SLOT to 0. By stopping the mode for permanent updating the changes made at the parameters during the permanent updating are retained until the next changes via SLOT (cyclic or once) or until the next STOP-RUN transition. 64 Manual, 09/2016, A5E AB
65 Technology functions 3.2 Pulse generators Interpretation of the SLOT parameter value The value written in the SLOT parameter is displayed as in the table below depending on the LD_SLOT value and the mode is interpreted. LD_SLOT Meaning of SLOT value Valid modes for using the SLOT data type SLOT value 0 No action / idling All operating modes 1 Period duration PWM UDInt Permissible value range*: Minimum value: 10 µs, 100 µs or µs (10 ms) Maximum value: µs (10 s) * The permissible value range depends on the selected hardware output and sometimes on the high-speed mode (highspeed/standard). Individual updating of the parameter 'Period duration' The following representation illustrates the workflow of the individual updating of the parameter 'Period duration'. The described workflow principle can also be used on the channels of the high-speed counters Figure 3-4 User writes the first parameter in SLOT and specifies the first parameter in LD_SLOT Technology channel applies the first parameter and indicates the application by change in the bit STS_LD_SLOT User writes the second parameter in SLOT and specifies the second parameter in LD_SLOT Technology channel applies the second parameter and indicates the application by change in the bit STS_LD_SLOT User writes 0 in LD_SLOT, (SLOT inactive) Technology channels answers change in LD_SLOT with a change in STS_LD_SLOT Individual updating Manual, 09/2016, A5E AB 65
66 Technology functions 3.2 Pulse generators Note that the following requirements apply to the representation shown above: The value MODE_SLOT must be set to 0 Errors or invalid values are shown in the feedback bit ERR_SLOT_VAL The error must be acknowledged If MODE_SLOT 0 = 1, the following applies (for PWM mode only): The value in SLOT is continuously evaluated according to LD_SLOT STS_LD_SLOT does not change An error is automatically reset as soon as a valid value is set in SLOT Cyclic updating of the parameter 'Period duration' The following representation illustrates the execution of the cyclic updating of the parameter 'Period duration'. The described workflow principle can also be used on the channels of the high-speed counters. 1 User sets SLOT to the required parameter User sets MODE_SLOT to 1 User sets LD_SLOT to the required value (1 for period duration) Figure 3-5 User changes value in SLOT continuously and technology channel evaluates continuously Value in SLOT exceeds permitted limit, technology channel shows this ERR_SLOT_VAL and continues working with the last valid value Value in SLOT again in permitted range, technology channel resets ERR_SLOT_VAL independently and continues working with the value in SLOT User resets LD_SLOT and MODE_SLOT, technology channel continues to work with last value Cyclic updating 66 Manual, 09/2016, A5E AB
67 Technology functions 3.2 Pulse generators Assignment of the feedback interface Feedback interface per channel The user program receives current values and status information from the pulse width modulation via the feedback interface. The following table shows the feedback interface assignment: Table 3-6 Assignment of the feedback interface Byte ERR_SLOT _VAL The valid in SLOT is invalid ERR_OUT_ VAL The value in OUTPUT_V ALUE is invalid Reserved = 0 Byte 1 Reserved = 0 STS_SW_E NABLE SW_ENABL E detected or feedback status SW_ENABL E Reserved = 0 STS_READ Y Channel parameters assigned and ready Byte 2 Reserved = 0 Reserved = 0 ERR_PULS E Reserved = 0 Reserved = 0 Byte 3 Reserved = 0 Reserved = 0 ERR_LD Error during loading via control interface STS_LD_S LOT Load prompt detected and executed for Slot (toggling) Reserved = 0 Reserved = 0 Reserved = 0 STS_DQA ERR_PW R missing supply voltage L+ STS_ENA BLE Manual, 09/2016, A5E AB 67
68 Technology functions 3.2 Pulse generators Feedback parameters Table 3-7 Status feedback Feedback parameters Meaning Value range STS_READY The channel is correctly configured, is operating and supplying valid data. 0: Not ready to run 1: Ready to run STS_SW_ENABLE Current status of the software enable 0: SW_ENABLE is not active 1: SW_ENABLE detected STS_LD_SLOT Acknowledgment bit for each action of the SLOT in the SLOT mode for individual updating (for a description of Each switching of this bit represents a successful LD_SLOT action. the acknowledgment bit, refer to the section Handling the SLOT parameter (control interface) (Page 64)). STS_ENABLE The output sequence is active. (STS_ENABLE always depends on the status of the 0: No output sequence running 1: Output sequence running software enable STS_SW_ENABLE ab) STS_DQA State of the pulse output (DQA) 0: Pulse output is not active 1: Pulse output is active Feedback parameters Meaning Value range ERR_PWR No supply voltage L+ 0: No error 1: Error ERR_LD Error during loading of a parameter value in the operating mode for individual updating 0: No error 1: Error ERR_OUT_VAL The value in OUTPUT_VALUE is invalid 0: No error 1: Error ERR_SLOT_VAL The value in SLOT is invalid, where MODE_SLOT = 1 (permanent updating) 0: No error 1: Error 68 Manual, 09/2016, A5E AB

69 Wiring Supply voltage 24 V DC supply voltage (X80) The connecting plug for the supply voltage is plugged in when the CPU ships from the factory. The following table shows the terminal assignment for a 24 V DC power supply V DC of the supply voltage Ground of the supply voltage Ground of the supply voltage for loop-through (maximum of 10 A permitted) +24 V DC of the supply voltage for loop-through (maximum of 10 A permitted) Spring-loaded NC contact (one spring-loaded NC contact per terminal) Bridged internally: 1 and 4 2 and 3 Figure 4-1 Connection for supply voltage If the CPU is supplied by a system power supply, it is not necessary to connect the 24 V supply. Manual, 09/2016, A5E AB 69
.")
70 Wiring 4.2 PROFINET interfaces 4.2 PROFINET interfaces PROFINET interface X1 with 2-port switch (X1 P1 R and X1 P2 R) The assignment corresponds to the Ethernet standard for an RJ45 plug. When autonegotiation is deactivated, the RJ45 socket is allocated as a switch (MDI-X). When autonegotiation is activated, autocrossing is in effect and the RJ45 socket is allocated either as data terminal equipment (MDI) or a switch (MDI-X). Reference For more information on "Wiring the CPU" and "Accessories/spare parts", refer to the S7-1500, ET 200MP system manual ( Assignment of the MAC addresses The CPU 1512C-1 PN has a PROFINET interface with two ports. The PROFINET interface itself has a MAC address, and each of the two PROFINET ports has its own MAC address. The CPU 1512C-1 PN therefore has three MAC addresses in total. The MAC addresses of the PROFINET ports are needed for the LLDP protocol, for example for the neighborhood discovery function. The number range of the MAC addresses is continuous. The first and last MAC address are lasered on the rating plate on the right side of each CPU 1512C-1 PN. The table below shows how the MAC addresses are assigned. Table 4-1 Assignment of the MAC addresses Assignment MAC address 1 PROFINET interface X1 (visible in STEP 7 for accessible devices) MAC address 2 Port X1 P1 R (required for LLDP, for example) MAC address 3 Port X1 P2 R (required for LLDP, for example) Labeling Front, lasered Right side, lasered (start of number range) Front and right side, not lasered Front, not lasered Right side, lasered (end of number range) 70 Manual, 09/2016, A5E AB

71 Wiring 4.3 Terminal and block diagrams 4.3 Terminal and block diagrams Block diagram of the CPU part Block diagram The following figure shows the block diagram of the CPU part. 1 Display X80 24 V DC Infeed of supply voltage 2 RUN/STOP/MRES mode selector PN X1 P1 R PROFINET interface X1 port 1 3 Electronics PN X1 P2 R PROFINET interface X1 port 2 4 Interface to on-board I/O L+ 24 V DC supply voltage 5 Interfaces to the backplane bus M Ground 6 Backplane bus interface R/S RUN/STOP LED (yellow/green) 7 Internal supply voltage ER ERROR LED (red) 8 2-port switch MT MAINT LED (yellow) X50 SIMATIC Memory Card X1 P1, X1 P2 Link TX/RX LED Figure 4-2 Block diagram of the CPU part Manual, 09/2016, A5E AB 71
72 Wiring 4.3 Terminal and block diagrams Terminal and block diagram of the analog on-board I/O This section contains the block diagram of the analog on-board I/O (X10) and various wiring options. For information on wiring the front connector, establishing the cable shield, etc., refer to the S7-1500, ET 200MP ( system manual. Note You can use and combine the different wiring options for all channels. Note, however, that unneeded terminals of an analog input channel must not be connected. Definition Un+/Un- Mn+/Mn- In+/In- Ic n+/ic n- QVn QIn MANA CHx Voltage input channel n (voltage only) Measuring input channel n (only resistance-type transmitters or thermal resistors (RTD)) Current input channel n (current only) Current output for RTD, channel n Voltage output channel Current output channel Reference potential of the analog circuit Channel or display of the channel status Infeed element The infeed element is inserted on the front connector and serves to shield the analog onboard I/O. Note The analog on-board I/O does not require power to be supplied by the infeed element. The infeed element is, however, necessary for shielding. 72 Manual, 09/2016, A5E AB

73 Wiring 4.3 Terminal and block diagrams Wiring: Voltage measurement The following figure shows the terminal assignment for voltage measurement at the channels available for this measurement type (channels 0 to 3) Analog-to-digital converter (ADC) LED interface Infeed element (for shielding only) Digital-to-analog converter (DAC) Equipotential bonding cable (optional) Voltage measurement Figure 4-3 Block diagram and terminal assignment for voltage measurement Manual, 09/2016, A5E AB 73

74 Wiring 4.3 Terminal and block diagrams Wiring: 4-wire measuring transducer for current measurement The following figure shows the terminal assignment for current measurement with 4-wire measuring transducer at the channels available for this measurement type (channels 0 to 3) Figure 4-4 Analog-to-digital converter (ADC) LED interface Infeed element (for shielding only) Digital-to-analog converter (DAC) Equipotential bonding cable (optional) Connector 4-wire measuring transducer Block diagram and terminal assignment for current measurement with 4-wire measuring transducer 74 Manual, 09/2016, A5E AB
75 Wiring 4.3 Terminal and block diagrams Wiring: 2-wire measuring transducer for current measurement Alternatively to connecting a 4-wire transducer, you can also connect 2-wire transducers to channels 0 to 3. An external 24 V power supply is required to connect a 2-wire transducer to the analog on-board I/O of the compact CPU. Feed this voltage short-circuit proof to the 2-wire transducer. Use a fuse to protect the power supply unit. NOTICE Defective transducers Note that the analog input of the transducer is not protected against destruction in the event of a defect (short circuit). Take the necessary precautions against such cases. The figure below shows an example of the connection of a 2-wire transducer to channel 0 (CH0) of the analog on-board I/O Sensor (e.g. pressure gauge) 2-wire transducer Fuse Equipotential bonding cable (optional) Figure wire transducer at channel 0 Use the measurement type "Current (4-wire transducer)" and the measuring range 4 to 20 ma for the parameter assignment of the 2 wire transducer in STEP 7 (TIA Portal). Manual, 09/2016, A5E AB 75
 The following figure shows the terminal assignment for 4-wire connection of")
76 Wiring 4.3 Terminal and block diagrams Wiring: 4-wire connection of resistance-type sensors or thermal resistors (RTD) The following figure shows the terminal assignment for 4-wire connection of resistance-type sensors or thermal resistors at the channel available for this (channel 4) Analog-to-digital converter (ADC) LED interface Infeed element (for shielding only) Digital-to-analog converter (DAC) Equipotential bonding cable (optional) 4-wire connection Figure 4-6 Block diagram and terminal assignment for 4-wire connection 76 Manual, 09/2016, A5E AB
77 Wiring 4.3 Terminal and block diagrams Wiring: 3-wire connection of resistance-type sensors or thermal resistors (RTD) The following figure shows the terminal assignment for 3-wire connection of resistance-type sensors or thermal resistors at the channel available for this (channel 4). Note 3-wire connection Note that line resistances are not compensated with a 3-wire connection Analog-to-digital converter (ADC) LED interface Infeed element (for shielding only) Digital-to-analog converter (DAC) Equipotential bonding cable (optional) 3-wire connection Figure 4-7 Block diagram and terminal assignment for 3-wire connection Manual, 09/2016, A5E AB 77
78 Wiring 4.3 Terminal and block diagrams Wiring: 2-wire connection of resistance-type sensors or thermal resistors (RTD) The following figure shows the terminal assignment for 2-wire connection of resistance-type sensors or thermal resistors at the channel available for this (channel 4). Note 2-wire connection Note that line resistances are not compensated with a 2-wire connection Analog-to-digital converter (ADC) LED interface Infeed element (for shielding only) Digital-to-analog converter (DAC) Equipotential bonding cable (optional) 2-wire connection Figure 4-8 Block diagram and terminal assignment for 2-wire connection 78 Manual, 09/2016, A5E AB

79 Wiring 4.3 Terminal and block diagrams Wiring: Voltage output The figure below shows the terminal assignment for the wiring of the voltage outputs with: 2-wire connection, no compensation for line resistances Analog-to-digital converter (ADC) LED interface Infeed element (for shielding only) Digital-to-analog converter (DAC) 2-wire connection CH0 and CH1 Figure 4-9 Block diagram and terminal assignment for voltage output Note MANA on terminals 19 and 20 is equivalent. Manual, 09/2016, A5E AB 79
80 Wiring 4.3 Terminal and block diagrams Wiring: Current output The following figure shows an example of the terminal assignment for wiring current outputs Analog-to-digital converter (ADC) LED interface Infeed element (for shielding only) Digital-to-analog converter (DAC) Current output CH0 and CH1 Figure 4-10 Block diagram and terminal assignment for current output Note MANA on terminals 19 and 20 is equivalent. 80 Manual, 09/2016, A5E AB
81 Wiring 4.3 Terminal and block diagrams Terminal and block diagram of the digital on-board I/O This section contains the block diagram of the digital on-board I/O (X11 and X12) with standard inputs and outputs and the encoder supply, as well as the rules for the correct wiring of the ground connections. For information on wiring the front connector, establishing the cable shield, etc., refer to the S7-1500, ET 200MP ( system manual. Infeed element The infeed element is inserted on the front connector and serves to shield the digital onboard I/O. Note The digital on-board I/O is supplied via the front connector terminals and therefore does not require power to be supplied by the infeed element. The infeed element is, however, necessary for shielding. Manual, 09/2016, A5E AB 81

82 Wiring 4.3 Terminal and block diagrams Block diagram and terminal assignment X11 The figure below shows you how to connect the digital on-board I/O X11 and the assignment of the channels to the addresses (input byte a and b, output byte c and d). 1 2 xl+ xm CHx RUN ERROR PWR Figure 4-11 Encoder supply for the digital inputs CPU interface Connection for 24 V DC supply voltage Connection for ground Channel or channel status LED (green) Status display LED (green) Error display LED (red) POWER supply voltage LED (green) Block diagram and terminal assignment of the digital on-board I/O X11 82 Manual, 09/2016, A5E AB
83 Wiring 4.3 Terminal and block diagrams Block diagram and terminal assignment X12 The figure below shows you how to connect the digital on-board I/O X12 and the assignment of the channels to the addresses (input byte a and b, output byte c and d). 1 2 xl+ xm CHx RUN ERROR PWR Figure 4-12 Encoder supply for the digital inputs CPU interface Connection for 24 V DC supply voltage Connection for ground Channel or channel status LED (green) Status display LED (green) Error display LED (red) POWER supply voltage LED (green) Block diagram and terminal assignment of the digital on-board I/O X12 Manual, 09/2016, A5E AB 83
84 Wiring 4.3 Terminal and block diagrams Supply voltage using the digital on-board I/O X11 as an example The inputs and outputs of the digital on-board I/O are divided into two load groups, which are supplied with 24 V DC. The digital inputs DI0 to DI15 form a load group and are supplied via the connections 1L+ (terminal 19) and 1M (terminal 20). The digital outputs DQ0 to DQ7 are supplied via the connection 2L+ (terminal 29). The digital outputs DQ8 to DQ15 are supplied via the connection 3L+ (terminal 39). Please note that the digital outputs DQ0 to DQ15 only have a common ground. In each case, they are led through to the two terminals 30 and 40 (2M/3M) and bridged in the module. The digital outputs form a common load group. NOTICE Polarity reversal of the supply voltage An internal protective circuit protects the digital on-board I/O against destruction if the polarity of the supply voltage is reversed. In the case of polarity reversal of the supply voltage, however, unexpected states can occur at the digital outputs. Response of the digital outputs to a wire break at ground connection of the outputs Due to the characteristics of the output driver used in the module, approx. 25 ma supply current flows out through the outputs via a parasitic diode in the event of a ground wire break. This behavior can lead to non-set outputs also carrying high levels and emitting up to 25 ma output current. Depending on the type of load, 25 ma can be sufficient to control the load with high level. To prevent unintended switching of the digital outputs in the event of a ground wire break, follow these steps: Wire to ground twice Connect ground to terminal 30 and to terminal Route the first ground connection from terminal 30 to the central ground connection of the plant. 2. Route the second ground connection from terminal 40 to the central ground connection of the plant. If terminal 30 or 40 are interrupted by a ground wire break, the outputs will continue to be supplied via the second, intact ground connection. WARNING Wire break at ground connection Never bridge from terminal 30 to terminal 40 in the front connector and never lead only one wire to the central ground connection. Connect terminal 30 and terminal 40 to a common ground point. 84 Manual, 09/2016, A5E AB

85 Wiring 4.3 Terminal and block diagrams As a supplement to the block diagram and terminal assignment, the following figure shows the correct wiring of the outputs in order to prevent switching of the outputs in the event of a ground wire break. Figure 4-13 Correct wiring using the digital on-board I/O X11 as an example The ground is supplied with a first cable from the central terminal block to terminal 30 of the module and additionally with a second cable also from the central terminal block to terminal 40 of the module. At the digital outputs, each of the ground connections of the loads is connected with a separate cable for each load to the central terminal block. Manual, 09/2016, A5E AB 85
86 Wiring 4.3 Terminal and block diagrams The figure below shows the current flow with correct wiring. Figure 4-14 Current flow with correct wiring using the digital on-board I/O X11 as an example With correct wiring, the supply current flows from the power supply 2L+ via terminal 29 to the module. In the module, the current flows via the output driver and exits the module via terminal Manual, 09/2016, A5E AB

87 Wiring 4.3 Terminal and block diagrams The figure below shows the reaction to interruption of the first ground cable. Figure 4-15 Interruption of the first ground cable using the digital on-board I/O X11 as an example If a wire break occurs on the first ground cable from the central terminal block to terminal 30, the module can continue to operate without restrictions, as it is still connected to the ground via the second cable from the central terminal block to terminal 40. Manual, 09/2016, A5E AB 87

88 Wiring 4.3 Terminal and block diagrams The figure below shows the reaction to interruption of the second ground cable. Figure 4-16 Interruption of the second ground cable using the digital on-board I/O X11 as an example If a wire break occurs on the second ground cable from the central block terminal to terminal 30, the module can continue to operate without restrictions, as it is still connected to the ground via the first cable from the central terminal block to terminal Manual, 09/2016, A5E AB

89 Wiring 4.3 Terminal and block diagrams The figure below shows the current flow upon interruption of both ground cables. Figure 4-17 Current flow upon interruption of both ground cables using the digital on-board I/O X11 as an example If a wire break occurs on the first and on the second ground cable from the central terminal block to the terminals 30 and 40 of the module, a malfunction occurs on the module. Both ground connections of the module are interrupted. The supply current flows from the power supply 2L+ via terminal 29 to the module. In the module, the current flows via the output driver into the parasitic diode and exits the module via the output terminal, e.g. as shown in the figure via terminal 27. The supply current therefore flows via the connected load. The internal supply current is typically 25 ma. WARNING Interruption of both ground cables If the ground terminals 30 and 40 are interrupted, the following incorrect response can occur: The activated outputs, which are switched to high, start to switch back and forth between high and low. If the load connected at the output is sufficiently small, the output is continuously activated. Manual, 09/2016, A5E AB 89

90 Wiring 4.3 Terminal and block diagrams Faulty wiring The following figure shows faulty wiring, which has a bridge on the front connector. Figure 4-18 Faulty wiring using the digital on-board I/O X11 as an example: Bridge Terminals 30 and 40 are connected in the front connector and only routed with one cable to the central terminal block. If this cable breaks, terminals 30 and 40 are no longer connected to the ground. The module's supply current flows out via the output terminal. 90 Manual, 09/2016, A5E AB

91 Wiring 4.3 Terminal and block diagrams The figure below shows the current flow when the ground connections of the loads and the ground connection of terminal 30 are routed with a common cable to the central terminal block. 1 Ground connections of other plant parts that can also carry large currents. Figure 4-19 Faulty wiring using the digital on-board I/O X11 as an example: Common cable If a break occurs in the common cable, the current of the outputs flows via terminal 30 to the module and via terminal 40 to the central terminal block. The current flows via the module. WARNING Current flow with faulty wiring If a break occurs in the common cable, the current can be very high, depending on the plant, and lead to the destruction of the module. Manual, 09/2016, A5E AB 91
 2 Grounding point functional earth 2 (FE 2) Figure 4-20 Potential difference using the digital on-board I/O X11 as an example Equipotential bonding occurs")
92 Wiring 4.3 Terminal and block diagrams The figure below shows the current flow with correct wiring when a potential difference exits between the grounding points. 1 Grounding point functional earth 1 (FE 1) 2 Grounding point functional earth 2 (FE 2) Figure 4-20 Potential difference using the digital on-board I/O X11 as an example Equipotential bonding occurs via terminals 30 and 40. When a potential difference exists between the grounding points FE1 and FE2, the compensating current flows via terminals 30 and 40. WARNING Current flow with faulty wiring In the event of a potential difference, the current can be very high, depending on the potential conditions, and lead to the destruction of the module. 92 Manual, 09/2016, A5E AB
93 Wiring 4.3 Terminal and block diagrams Input filter for digital inputs To suppress disruptions, you can configure an input delay for the digital inputs. You can specify the following values for the input delay: None 0.05 ms 0.1 ms 0.4 ms 1.6 ms 3.2 ms (default setting) 12.8 ms 20 ms Note Shielding If you use standard digital inputs with "None" set as the input delay, you must use shielded cables. Shielding and the infeed element are recommended for use of standard digital inputs starting from an input delay of 0.05 ms but are not absolutely necessary Addresses of the high-speed counters You connect the encoder signals, the digital input and output signals and the encoder supplies to the two 40-pin front connectors of the digital on-board I/O. For information on wiring the front connectors, establishing the cable shields, etc., refer to the S7-1500, ET 200MP ( system manual. Manual, 09/2016, A5E AB 93
94 Wiring 4.3 Terminal and block diagrams Encoder signals The 24 V encoder signals are designated with letters A, B and N. You can connect the following encoder types: Incremental encoder with signal N: Signals A, B and N are connected using the correspondingly marked connections. Signals A and B are the two incremental signals, phase-shifted by 90. N is the zero mark signal that supplies a pulse per revolution. Incremental encoder without signal N: Signals A and B are connected using the correspondingly marked connections. Signals A and B are the two incremental signals, phase-shifted by 90. Pulse encoder without direction signal: The count signal is connected to the A connection. Pulse encoder with direction signal: The count signal is connected to the A connection. The direction signal is connected to the B connection. Pulse encoder with up/down count signal: The up count signal is connected to the A connection. The down count signal is connected to the B connection. You can connect the following encoders or sensors to the A, B and N inputs: Switching to P potential: The encoder or sensor switches the A, B and N inputs to 24 V DC. Note External load resistance Note that, depending on the characteristics of the signal source, effective load and height of the signal frequency, you may possibly require an external load resistance to limit the fall time of the signal from high level to low level. The specifications/technical data of the signal source (e.g. sensor) are decisive for the configuration of such a load resistance. Push-pull: The encoder or sensor switches the A, B and N inputs alternately to 24 V DC and to ground M. Digital inputs HSC DI0 and HSC DI1 The digital inputs are logically assigned to the high-speed counters (HSC). For information on the possible assignment of the on-board I/O inputs to the high-speed counters, refer to table Interconnection overview of the inputs (Page 98). Up to two digital inputs are available for each high-speed counter (HSC DI0 and HSC DI1). You can use the digital inputs for the gate control (Gate), synchronization (Sync) and Capture functions. Alternatively, you can use one or more digital inputs as standard digital inputs without the functions mentioned and read the signal state of the respective digital input using the feedback interface. Digital inputs that you do not use for high-speed counting are available for use as standard DIs. 94 Manual, 09/2016, A5E AB
95 Wiring 4.3 Terminal and block diagrams Input addresses of the high-speed counters You set the digital input addresses used by the high-speed counters (HSC) and the assignment of A/B/N, DI0, DI1 and DQ1 signals in STEP 7 (TIA Portal). You can enable and configure each HSC when you configure the compact CPU. The compact CPU assigns the input addresses for the A/B/N signals automatically according to the configuration. You specify the input addresses for DI0 and DI1 according to the table Interconnection overview of the inputs (Page 98). The interconnection produces a direct connection of the HSC to an input of the on-board I/O. The high-speed counter then uses this input as HSC DI0 or HSC DI1 ([DI] symbol). The [DI] symbols in the table identify the input addresses for HSC DI0 and HSC DI1 that are offered for selection in the hardware configuration. Assignment of HSC addresses of inputs You can find an overview of the options for interconnecting the inputs of the front connectors X11 and X12 in the section Interconnection overview of the inputs (Page 98). Note HSC compatibility mode The displayed interconnection options in the section Interconnection overview of the inputs (Page 98) assume that the "Front connector assignment like CPU 1511C" option is disabled. If the option is enabled, the input signals are interconnected the same way as for the CPU 1511C-1 PN. In this case, the interconnection options of the CPU 1511C-1 PN manual apply. Digital outputs HSC-DQ0 and HSC-DQ1 Two digital outputs are available for each high-speed counter. Digital output HSC-DQ0 is a logical output that cannot be interconnected with a digital output of the on-board I/O. Digital output HSC-DQ0 can only be used via the user program. HSC-DQ1 is a physical output that can be interconnected with a digital output of the on-board I/O. The digital outputs are 24 V sourcing output switches relative to M and can be loaded with a rated load current of 0.1 A. The outputs used as standard outputs have a rated load current of 0.5 A. The digital outputs are protected against overload and short-circuit. Note It is possible to directly connect relays and contactors without external wiring. For information on the maximum possible operating frequencies and the inductance values of the inductive loads at the digital outputs, refer to the Technical specifications section. The section Interconnection overview of outputs (Page 100) provides an overview of which digital outputs you can interconnect to which high-speed counters. Digital outputs to which no high-speed counter is interconnected can be used as standard outputs. The maximum output delay of each digital output used as standard output is 500 µs. Manual, 09/2016, A5E AB 95
96 Wiring 4.3 Terminal and block diagrams Shielding Note When you use digital inputs/outputs with technology functions, i.e. interconnect high-speed counters with the inputs/outputs, you must use shielded cables and the infeed element for shielding. Reference For more information on configuring the inputs of the high-speed counters, refer to the S7-1500, ET 200MP, ET 200SP Counting, measurement and position detection ( function manual and the STEP 7 online help Addresses of the pulse generators in the Pulse Width Modulation (PWM) and Frequency Output modes Configuring the outputs as pulse generators If you configure the memory of the outputs of the CPU as pulse generators (for PWM or PTO), the corresponding addresses of the outputs are removed from the memory. You cannot use the addresses of the outputs for other purposes in your user program. When your user program writes a value to an output that you are using as a pulse generator, the CPU does not write this value to the physical output. Assignment of the PWM addresses of the outputs The section Interconnection overview of outputs (Page 100) provides an overview of which digital outputs you can interconnect to which PWM channels. Note The digital inputs and outputs assigned to PWM and PTO cannot be forced. You assign the digital inputs and outputs to the pulse duration modulation (PWM) and the pulse train output (PTO) during the device configuration. If you assign digital inputs and outputs to these functions, the values of the addresses of the assigned digital inputs and outputs cannot be changed by the function for forcing in the watch table. Instead, you can force the output bit TM_CTRL_DQ to 0 and switch the output on or off with the bit SET_DQA (relevant for the PWM and Frequency Output modes). For more information on forcing inputs and outputs, refer to the S7-1500, ET 200MP system manual ( 96 Manual, 09/2016, A5E AB
97 Wiring 4.3 Terminal and block diagrams Addresses of pulse generators in the PTO mode You connect the encoder signals, the digital input and output signals and the encoder supplies to the two 40-pin front connectors of the digital on-board I/O. For information on wiring the front connectors and establishing the cable shield, refer to the S7-1500, ET 200MP system manual ( Encoder signals In addition to supporting its outputs, each PTO channel also supports the three following optional inputs: Reference Switch (RS) Measuring Input (MI) Drive Ready (DR) Input addresses of the pulse generators (PTO) You make the settings of the digital input addresses used by the pulse generators (PTO) in the hardware configuration of STEP 7 (TIA Portal). When you configure the compact CPU you can individually activate and configure the four PTO channels. Assignment of PTO addresses of inputs A direct connection from the PTO to an input of the on-board I/O is established through the interconnection. You can find an overview of the options for interconnecting the inputs (DI0 to DI15) to the available PTO channels (PTO1 to PTO4) in the section Interconnection overview of the inputs (Page 98). Assignment of the PTO addresses of the outputs The section Interconnection overview of outputs (Page 100) provides an overview of which digital outputs you can interconnect to which PTO channels. Manual, 09/2016, A5E AB 97
98 Wiring 4.3 Terminal and block diagrams Interconnection overview of the inputs Combined interconnection of the technology channels In order that you can correctly divide the available inputs between the possible technology channels HSC and PTO, the following table provides you with an overview of the possible interconnections of the front connectors X11 and X12. This overview is a combination of interconnection options of technology channels for HSC and PTO. Front connector Terminal Channel PTO High-speed counter (HSC) PTO1 PTO2 PTO3 PTO4 HSC1 HSC2 HSC3 X11 1 DI0 [DR] [DR] [DR] [DR] A 2 DI1 [DR] [DR] [DR] [DR] [B] 3 DI2 [DR] [DR] [DR] [DR] [N] 4 DI3 [DR] [DR] [DR] [DR] A 5 DI4 [DR] [DR] [DR] [DR] [B] 6 DI5 [DR] [DR] [DR] [DR] [N] 7 DI6 [DR] [DR] [DR] [DR] A 8 DI7 [DR] [DR] [DR] [DR] [B] 11 DI8 [DR] [DR] [DR] [DR] [DI] [DI] [N] [DI] 12 DI9 [DR] [DR] [DR] [DR] [DI] [DI] [DI] 13 DI10 [DR] [DR] [DR] [DR] [DI] [DI] [DI] 14 DI11 [DR] [DR] [DR] [DR] [DI] [DI] [DI] 15 DI12 [DR] [MI] [DR] [DR] [DR] [DI] [DI] [DI] 16 DI13 [DR] [RS] [DR] [MI] [DR] [DR] [DI] [DI] [DI] 17 DI14 [DR] [DR] [RS] [DR] [DR] [DI] [DI] [DI] 18 DI15 [DR] [DR] [DR] [DR] [DI] [DI] [DI] [...] = Use is optional [DR] = Drive Ready; [MI] = Measuring Input; [RS] = Reference Switch [DI] stands for [HSC DI0/HSC DI1] = DI: Is used for the HSC functions: Gate, Sync and Capture The assignment to [B] or [N] takes precedence over the assignment to HSC DI0 or HSC DI1. This means that input addresses that are assigned to count signal [B] or [N] based on the selected signal type cannot be used for other signals such as HSC DI0 or HSC DI1. 98 Manual, 09/2016, A5E AB
99 Wiring 4.3 Terminal and block diagrams Front connector Terminal Channel PTO High-speed counter (HSC) PTO1 PTO2 PTO3 PTO4 HSC4 HSC5 HSC6 X12 1 DI0 [DR] [DR] [DR] [DR] A [...] = Use is optional 2 DI1 [DR] [DR] [DR] [DR] [B] 3 DI2 [DR] [DR] [DR] [DR] [N] 4 DI3 [DR] [DR] [DR] [DR] A 5 DI4 [DR] [DR] [DR] [DR] [B] 6 DI5 [DR] [DR] [DR] [DR] [N] 7 DI6 [DR] [DR] [DR] [DR] A 8 DI7 [DR] [DR] [DR] [DR] [B] 11 DI8 [DR] [DR] [DR] [DR] [DI] [DI] [N] [DI] 12 DI9 [DR] [DR] [DR] [DR] [DI] [DI] [DI] 13 DI10 [DR] [DR] [DR] [DR] [DI] [DI] [DI] 14 DI11 [DR] [DR] [DR] [DR] [DI] [DI] [DI] 15 DI12 [DR] [DR] [DR] [MI] [DR] [DI] [DI] [DI] 16 DI13 [DR] [DR] [DR] [RS] [DR] [DI] [DI] [DI] 17 DI14 [DR] [DR] [DR] [DR] [MI] [DI] [DI] [DI] 18 DI15 [DR] [DR] [DR] [DR] [RS] [DI] [DI] [DI] [DR] = Drive Ready; [MI] = Measuring Input; [RS] = Reference Switch [DI] stands for [HSC DI0/HSC DI1] = DI: Is used for the HSC functions: Gate, Sync and Capture The assignment to [B] or [N] takes precedence over the assignment to HSC DI0 or HSC DI1. This means that input addresses that are assigned to count signal [B] or [N] based on the selected signal type cannot be used for other signals such as HSC DI0 or HSC DI1. Manual, 09/2016, A5E AB 99
100 Wiring 4.3 Terminal and block diagrams Interconnection overview of outputs Combined interconnection of the technology channels The following table provides you with an overview of the possible interconnections of the front connectors X11 and X12 to allow you to correctly divide the available inputs between the possible technology channels HSC, PWM and PTO. This overview is a combination of interconnection options of technology channels for HSC, PWM and PTO. Front connector Terminal Hardware output Standard DQ PWM PTO HSC Channel Output module Configurable as standard DQ for channel Configurable as PWM output for channel Configurable as PTO output A for channel 1) Configurable as PTO output B for channel 2) Configurable as "Drive enable output" for channel Can be used as HSC- DQ1 for channel X11 1 DQ0 High-speed PWM1 PTO1 Standard DQ0 PWM1 [PTO 2/3/4] 2 DQ1 High-speed PTO1 [HSC1] Standard DQ1 [PTO 1/2/3/4] 3 DQ2 High-speed PWM2 PTO2 Standard DQ2 PWM2 [PTO 1/3/4] 4 DQ3 High-speed PTO2 HSC2 Standard DQ3 [PTO 1/2/3/4] 5 DQ4 High-speed PWM3 PTO3 [HSC3] Standard DQ4 PWM3 [PTO 1/2/4] 6 DQ5 High-speed PTO3 [HSC4] Standard DQ5 [PTO 1/2/3/4] 7 DQ6 High-speed PWM4 PTO4 HSC6 Standard DQ6 PWM4 [PTO 1/2/3] 8 DQ7 High-speed PTO4 [HSC5] Standard DQ7 [PTO 1/2/3/4] 11 DQ8 DQ8 PWM1 [PTO 1/2/3/4] 12 DQ9 DQ9 PTO1 * [PTO 1/2/3/4] [HSC1] 13 DQ10 DQ10 PWM2 [PTO 1/2/3/4] 14 DQ11 DQ11 PTO2 * [PTO 1/2/3/4] HSC2 15 DQ12 DQ12 PWM3 [PTO 1/2/3/4] [HSC3] Standard 16 DQ13 DQ13 PTO3 * [PTO 1/2/3/4] [HSC4] 17 DQ14 DQ14 PWM4 [PTO 1/2/3/4] HSC6 18 DQ15 DQ15 PTO4 * [PTO 1/2/3/4] [HSC5] 100 Manual, 09/2016, A5E AB
101 Wiring 4.3 Terminal and block diagrams X12 1 DQ0 DQ0 [PTO 1/2/3/4] 2 DQ1 DQ1 [PTO 1/2/3/4] 3 DQ2 DQ2 [PTO 1/2/3/4] 4 DQ3 DQ3 [PTO 1/2/3/4] 5 DQ4 DQ4 [PTO 1/2/3/4] 6 DQ5 DQ5 [PTO 1/2/3/4] 7 DQ6 DQ6 [PTO 1/2/3/4] 8 DQ7 DQ7 [PTO 1/2/3/4] 11 DQ8 DQ8 [PTO 1/2/3/4] 12 DQ9 Standard DQ9 [PTO 1/2/3/4] 13 DQ10 DQ10 [PTO 1/2/3/4] 14 DQ11 DQ11 [PTO 1/2/3/4] 15 DQ12 DQ12 [PTO 1/2/3/4] 16 DQ13 DQ13 [PTO 1/2/3/4] 17 DQ14 DQ14 [PTO 1/2/3/4] 18 DQ15 DQ15 [PTO 1/2/3/4] * Only supports for PTO direction signal (signal type "pulse A and direction B") 1) "PTOx - Output A" stands for the signal types Pulse Output A or Pulse 2) "PTOx - Output B" stands for the Pulse output B or Direction signal types Manual, 09/2016, A5E AB 101
102 Wiring 4.3 Terminal and block diagrams Technical characteristics of the outputs The following table shows an overview of the technical characteristics of the individual outputs. Accuracy of the pulse duration Minimum pulse duration Frequency range (period duration) 10 to <= 100 khz (100 to > = 10 µs) 100 Hz to <10 khz (10 ms to > 100 µs) 10 to < 100 Hz (0.1 s to > 10 ms) High-speed output (0.1 A) activated DQ0 to DQ7 High-Speed output (0.1 A) deactivated DQ8 to DQ15 Standard output max. 100 khz max. 10 khz max. 100 Hz max. 0.1 A max. 0.5 A max. 0.5 A Switching to P potential / Switching to P potential Switching to P potential sink output ±100 ppm ±2 µs ±100 ppm ±10 µs with load > 0.1 A ±100 ppm ±20 µs with load 2mA 1 to <10 Hz (1 to > 0.1 s) ±150 ppm ±2 µs ±150 ppm ±10 µs with load > 0.1 A ±150 ppm ±20 µs with load 2mA 0.1 to < 1 Hz (10 to >1 s) ±600 ppm ±2 µs ±600 ppm ±10 µs with load > 0.1 A ±600 ppm ± 20 µs with load 2mA µs 20 µs with load > 0.1 A 40 µs with load 2 ma ±100 ppm ±100 µs with load > 0.1 A ±100 ppm ±200 µs with load 2mA ±150 ppm ±100 µs with load > 0.1 A ±150 ppm ±200 µs with load 2mA ±600 ppm ±100 µs with load > 0.1 A ±600 ppm ±200 µs with load 2mA 100 µs with load > 0.1 A 200 µs with load 2 ma 102 Manual, 09/2016, A5E AB

103 Parameters/address space Address space of the analog on-board I/O Address space of the analog input and output channels The addresses are divided into five analog input channels and two analog output channels. STEP 7 (TIA Portal) assigns the addresses automatically. You can change the addresses in the hardware configuration of STEP 7 (TIA Portal), i.e. freely assign the start address. The addresses of the channels are based on the start address. "IB x" stands, for example, for the start address input byte x. "QB x" stands, for example, for the start address output byte x. Figure 5-1 Address space seven-channel analog on-board I/O with value status 103 Manual, 09/2016, A5E AB
104 Parameters/address space 5.1 Address space of the analog on-board I/O Value status (quality information, QI) As of firmware version 2.0, the analog and digital on-board I/O support the value status as diagnostics option. You activate the use of the value status in the hardware configuration of STEP 7 (TIA Portal). Value status is deactivated by default. When you activate the value status, the input area of the analog on-board I/O contains two additional bytes, which provide the QI bits to the five analog input channels and two analog output channels. You access the QI bits through the user program. Value status of input channels Value status = 1 ("Good") indicates that the value of the assigned input at the terminal is valid. Value status = 0 ("Bad") indicates that the read value is not valid. Possible cause for value status = 0: a channel has been deactivated a measured value was not updated after a parameter change a measured value is outside the low/high measuring range (overflow/underflow) Wire break has occurred (only for the "Voltage" measurement type in the measuring range "1 to 5 V" and for the "Current" measurement type in the measuring range "4 to 20 ma") Value status of output channels The value status = 1 ("Good") indicates that the process value specified by the user program is correctly output at the terminal. The value status = 0 ("Bad") indicates that the process value output at the hardware output is incorrect. Possible cause for value status = 0: a channel has been deactivated Outputs are inactive (for example, CPU in STOP) An output value is outside the lower/upper measuring range (overflow/underflow) Wire break has occurred (only for the "Current" output type) Short-circuit has occurred (only for the "Voltage" output type) 104 Manual, 09/2016, A5E AB

105 Parameters/address space 5.2 Address space of the digital on-board I/O 5.2 Address space of the digital on-board I/O Address space of digital input and digital output channels The addresses are divided into 2 x 16 digital input channels and 2 x 16 digital output channels. STEP 7 (TIA Portal) assigns the addresses automatically. You can change the addresses in the hardware configuration of STEP 7 (TIA Portal), i.e. freely assign the start address. The addresses of the channels are based on the start address. The letters "a" to "d" are lasered on the on-board I/O. "IB a", for example, stands for start address input byte a. "QB x", for example, stands for start address output byte x. Figure 5-2 Address space of the submodule X11 of the 2 x 32-channel digital on-board I/O (16 digital inputs/16 digital outputs) with value status Manual, 09/2016, A5E AB 105

106 Parameters/address space 5.2 Address space of the digital on-board I/O Figure 5-3 Address space of the submodule X12 of the 2 x 32-channel digital on-board I/O (16 digital inputs/16 digital outputs) with value status 106 Manual, 09/2016, A5E AB
107 Parameters/address space 5.2 Address space of the digital on-board I/O Value status (quality information, QI) As of firmware version 2.0, the analog and digital on-board I/O support the value status as diagnostics option. You activate the use of the value status in the hardware configuration of STEP 7 (TIA Portal). Value status is deactivated by default. You can activate/deactivate the value status of the digital on-board I/O for X11 and X12 independently of each other. When you activate the value status, the input area of the digital on-board I/O (X11/X12) contains four additional bytes, which provide the QI bits to the 16 digital input channels and 16 digital output channels. You access the QI bits through the user program. Value status of input channels Value status = 1 ("Good") indicates that the value of the assigned input at the terminal is valid. Value status = 0 ("Bad") indicates that no/or too little supply voltage L+ is applied at the terminal and that the read value is therefore not valid. Value status of output channels The value status = 1 ("Good") indicates that the process value specified by the user program is correctly output at the terminal. The value status = 0 ("Bad") indicates that the process value output at the hardware output is incorrect or the channel is used for technology functions. Possible cause for value status = 0: The supply voltage L+ is missing at the terminals or is not sufficient Outputs are inactive (for example, CPU in STOP) Technology functions (HSC, PWM or PTO) use the channel Note Behavior of the value status at the output channels for technology functions The output channels return the value status 0 ("Bad") when a technology channel (HSC, PWM or PTO) is used. It does not matter in this context whether the output value is incorrect or not. Manual, 09/2016, A5E AB 107
108 Parameters/address space 5.3 Address space of the pulse generators Address space of the high-speed counters Table 5-1 Size of the input and output addresses of the high-speed counters Inputs Outputs Size per high-speed counter (6x) 16 bytes 12 bytes You can find a description of the control interface in the section Assignment of the control interface of the high-speed counters (Page 40). You can find a description of the feedback interface in the section Assignment of the feedback interface of the high-speed counters (Page 42). Table 5-2 Size of the input and output addresses in operating mode "Position input for Motion Control" Inputs Outputs Size per high-speed counter (6x) 16 bytes 4 bytes 5.3 Address space of the pulse generators Address space of the pulse generators in the PWM, frequency output and PTO modes Operating mode Feedback interface (inputs) Control interface (outputs) PWM (4x) 4 bytes 12 bytes Frequency output 4 bytes 12 bytes PTO 18 bytes 10 bytes Deactivated 4 bytes * 12 bytes * * In "Deactivated" mode, the control interface is not evaluated and the feedback interface is set to 0 value 108 Manual, 09/2016, A5E AB
109 Parameters/address space 5.4 Measurement types and measuring ranges of the analog on-board I/O 5.4 Measurement types and measuring ranges of the analog on-board I/O Introduction The analog on-board I/O is set to voltage measurement type and measuring range ±10 V by default for the inputs on channels 0 to 3. By default, channel 4 is set to resistance measuring type and measuring range 600 Ω. If you want to use another measurement type or measuring range, change the parameter settings of the analog on-board I/O with STEP 7 (TIA Portal). Disable unused inputs to prevent disturbances that cause incorrect behavior (e.g. triggering of a hardware interrupt). Measurement types and measuring ranges The following table shows the measurement types, the measuring range and the possible channels. Table 5-3 Measurement types and measuring range Measurement type Measuring range Channel Voltage 0 to 10 V 0 to 3 1 to 5 V ±5 V ±10 V Current 4WMT 0 to 20 ma 0 to 3 (4-wire measuring transducer) 4 to 20 ma ±20 ma Resistance 150 Ω Ω 600 Ω Thermal resistor RTD Pt 100 Standard/Climate 4 Ni 100 Standard/Climate Deactivated - - The tables of the input ranges, overflow, underrange, etc. can be found in the appendix. Manual, 09/2016, A5E AB 109
110 Parameters/address space 5.5 Output type and output ranges of the analog on-board I/O 5.5 Output type and output ranges of the analog on-board I/O Introduction The analog on-board I/O is set to voltage output type and output range ±10 V as default for the outputs. If you want to use another output range or output type, you need to change the parameter settings of the analog on-board I/O in STEP 7 (TIA Portal). Output types and output ranges The following table shows the output type and the corresponding output ranges. Table 5-4 Output type and output ranges Output type Output range Voltage 1 to 5 V 0 to 10 V ±10 V Current 0 to 20 ma 4 to 20 ma ±20 ma Deactivated Parameters of the analog on-board I/O Parameters of the analog on-board I/O You specify the properties of the analog on-board I/O during parameter assignment with STEP 7 (TIA Portal). The tables below list the parameters that can be set for inputs and outputs, respectively. When parameters are assigned in the user program, they are transferred to the analog onboard I/O via data records with the WRREC instruction, see section Parameter assignment and structure of the parameter data records of the analog on-board I/O (Page 150). Configurable parameters and default settings for inputs Table 5-5 Configurable "Diagnostics" parameters Parameters 1) Value range Default Reconfiguration in RUN Diagnostics Overflow Yes/No No Yes Underflow Yes/No No Yes Wire break 2) Yes/No No Yes Current limit for wire break diagnostics ma or 3.6 ma ma Yes 1) All parameters can be set channel-selective 2) Only for the "Voltage" measurement type in the measuring range 1 to 5 V and for the "Current" measurement type in the measuring range 4 to 20 ma 110 Manual, 09/2016, A5E AB
111 Parameters/address space 5.6 Parameters of the analog on-board I/O Table 5-6 Configurable "Measuring" parameters Measuring Parameters 1) Value range Default Reconfiguration in RUN Measurement type See section Measurement types and measuring ranges of the analog on-board I/O (Page 109) Voltage (channels 0 to 3) Resistance (channel 4) Measuring range ±10 V Yes (channels 0 to 3) 600 Ω (channel 4) Temperature coefficient Pt: Pt: Pt: Pt: Ni: Ni: Yes Temperature unit Kelvin (K) 2) Fahrenheit ( F) Celsius ( C) C Yes Interference frequency 400 Hz 50 Hz Yes 3) suppression 60 Hz 50 Hz 10 Hz Smoothing None/weak/medium/strong None Yes 1) All parameters can be set channel-selective 2) Kelvin (K) is only possible for the "Standard range" measuring range and not for the "Climatic range" measuring range 3) The interference frequency suppression must have the same value for all active input channels. This value can only be changed through reconfiguration in RUN with single channel parameter assignment (data records 0 to 4) if all other input channels are disabled. Yes Table 5-7 Configurable "Hardware interrupt" parameters Parameters 1) Value range Default Reconfiguration in RUN Hardware interrupts Hardware interrupt low limit 1 Yes/No No Yes Hardware interrupt high limit 1 Yes/No No Yes Hardware interrupt low limit 2 Yes/No No Yes Hardware interrupt high limit 2 Yes/No No Yes 1) All parameters can be set channel-selective You can find an overview of the limits for the hardware interrupts in the section Structure of a data record for input channels of the analog on-board I/O (Page 150). Manual, 09/2016, A5E AB 111
112 Parameters/address space 5.6 Parameters of the analog on-board I/O Configurable parameters and default settings for outputs Table 5-8 Configurable "Diagnostics" parameters Parameters 1) Value range Default Reconfiguration in RUN Diagnostics Wire break 2) Yes/No No Yes Short-circuit to ground 3) Yes/No No Yes Overflow Yes/No No Yes Underflow Yes/No No Yes 1) All parameters can be set channel-selective 2) Only for the "Current" output type 3) Only for the "Voltage" output type Table 5-9 Configurable output parameters Output parameters Parameters 1) Value range Default Reconfiguration in RUN Output type See section Output type and Voltage Yes output ranges of the analog Output range on-board I/O (Page 110) ±10 V Yes Reaction to CPU STOP Turn off Keep last value Output substitute value Turn off Yes Substitute value Must be within the permitted voltage/current output range. See "Valid substitute value for the output range" table in the section Structure of a data record for output channels of the analog on-board I/O (Page 155) 1) All parameters can be set channel-selective 0 Yes Short-circuit detection The diagnostics for short circuit to ground can be configured for the voltage output type. Short-circuit detection is not possible for low output values. The output voltages must therefore be under -0.1 V or over +0.1 V. Wire break detection The diagnostics for wire break can be configured for the current output type. Wire break detection is not possible for low output values; the output currents must therefore be below ma or above +0.2 ma. 112 Manual, 09/2016, A5E AB
113 Parameters/address space 5.7 Parameters of the digital on-board I/O 5.7 Parameters of the digital on-board I/O Parameters of the digital on-board I/O in standard mode You specify the properties of the digital on-board I/O during the parameter assignment with STEP 7 (TIA Portal). The tables below list the parameters that can be set for inputs and outputs, respectively. When parameters are assigned in the user program, they are transferred to the digital onboard I/O via data records with the WRREC instruction, see section Parameter assignment and structure of the parameter data records of the digital on-board I/O (Page 158). The use of a digital input by a technology channel When a digital input is in use by a technology channel (HSC, PTO or PWM) the corresponding digital input channel remains fully usable without any restriction. Use of a digital output by a technology channel When a digital output is in use by a technology channel (HSC, PTO or PWM) the following restrictions apply to the use of the corresponding digital output channel: Output values for the digital output channel are not effective. The output values are specified by the technology channel. The CPU STOP behavior configured for the digital output channel is not effective. The reaction of the output to CPU Stop is specified by the technology channel. With activated value status (Quality Information) for the DI16/DQ16 submodule, the QI-bit for the digital output channel shows the value 0 (= Status "Bad"). The current state of the digital output is not returned to the process image output. In the PTO operating mode, you can only observe the switching operations of the assigned digital outputs directly at the output. In the PWM operating mode and with high-speed counters (HSC), you can observe the current state additionally via the feedback interface. Note, however, that high frequencies may no longer be observed under certain circumstances due to an excessively low sampling rate. Configurable parameters and default settings for inputs Table 5-10 Configurable parameters for inputs Parameters 1) Value range Default Reconfiguration in RUN Diagnostics No supply voltage L+ Yes/No No Yes Input delay Hardware interrupt None, 0.05 ms, 0.1 ms, 0.4 ms, 1.6 ms, 3.2 ms, 12.8 ms, 20 ms 3.2 ms Yes Rising edge Yes/No No Yes Falling edge Yes/No No Yes 1) All parameters can be set channel-selective Manual, 09/2016, A5E AB 113
114 Parameters/address space 5.7 Parameters of the digital on-board I/O Configurable parameters and default settings for outputs Table 5-11 Configurable parameters for outputs Parameters 1) Value range Default Reconfiguration in RUN Diagnostics Missing supply voltage L+ Yes/No No Yes Reaction to CPU STOP When the digital output is controlled by a technology channel (HSC, PTO or PWM), this parameter is not effective. In this case the technology channel specifies the reaction of the digital output to CPU STOP. Turn off Keep last value Output substitute value 1 Turn off Yes 1) All parameters can be set channel-selective 114 Manual, 09/2016, A5E AB
 ERROR LED (red LED) MAINT LED (yellow LED) LINK RX/TX LED for port X1 P1 (yellow/green LED) LINK RX/TX LED for port X1 P2 (yellow/green LED) Figure 6-1 LED")
115 Interrupts/diagnostics alarms Status and error displays Status and error displays of the CPU part LED display The figure below shows the LED displays of the CPU part RUN/STOP LED (yellow/green LED) ERROR LED (red LED) MAINT LED (yellow LED) LINK RX/TX LED for port X1 P1 (yellow/green LED) LINK RX/TX LED for port X1 P2 (yellow/green LED) Figure 6-1 LED display of the CPU 1512C-1 PN (without front panel) 115 Manual, 09/2016, A5E AB
116 Interrupts/diagnostics alarms 6.1 Status and error displays Meaning of the RUN/STOP, ERROR and MAINT LEDs The CPU has three LEDs for displaying the current operating mode and diagnostics status. The following table shows the meaning of the various combinations of colors for the RUN/STOP, ERROR and MAINT LEDs. Table 6-1 Meaning of the LEDs RUN/STOP LED ERROR LED MAINT LED Meaning Missing or insufficient supply voltage on the CPU. LED off LED off LED off An error has occurred. LED off LED flashes red LED off LED lit green LED off LED off LED lit green LED flashes red LED off LED lit green LED off LED lit yellow LED lit green LED off LED flashes yellow CPU is in RUN mode. A diagnostics event is pending. Maintenance demanded for the plant. The affected hardware must be checked/replaced within a short period of time. Active Force job PROFIenergy pause Maintenance required for the plant. The affected hardware must be checked/replaced within a foreseeable period of time. Bad configuration Firmware update successfully completed. LED lit yellow LED off LED flashes yellow LED lit yellow LED off LED off LED lit yellow LED flashes red LED flashes yellow LED flashes yellow LED off LED off LED flashes yellow/green LED flashes yellow/green LED off LED flashes red LED off LED flashes yellow CPU is in STOP mode. The program on the SIMATIC memory card is causing an error. CPU defective CPU is performing internal activities during STOP, e.g. ramp-up after STOP. Download of the user program from the SIMATIC memory card Startup (transition from RUN STOP) Startup (CPU booting) Test of LEDs during startup, inserting a module. LED flashing test 116 Manual, 09/2016, A5E AB
117 Interrupts/diagnostics alarms 6.1 Status and error displays Meaning of LINK RX/TX LED Each port has a LINK RX/TX LED. The table below shows the various "LED scenarios" of the CPU ports. Table 6-2 Meaning of the LED LINK TX/RX LED LED off LED flashes green LED lit green LED flickers yellow Meaning There is no Ethernet connection between the PROFINET interface of the PROFINET device and the communication partner. No data is currently being sent/received via the PROFINET interface. There is no LINK connection. The "LED flashing test" is being performed. There is an Ethernet connection between the PROFINET interface of your PROFINET device and a communication partner. Data is currently being received from or sent to a communications partner on Ethernet via the PROFINET interface of the PROFINET device. Manual, 09/2016, A5E AB 117

118 Interrupts/diagnostics alarms 6.1 Status and error displays Status and error displays of the analog on-board I/O LED displays The figure below shows the LED displays (status and error displays) of the analog on-board I/O. Figure 6-2 LED displays 118 Manual, 09/2016, A5E AB
119 Interrupts/diagnostics alarms 6.1 Status and error displays Meaning of the LED displays The following tables explain the meaning of the status and error displays. Corrective measures for diagnostic alarms can be found in the section Interrupts and diagnostics of the analog on-board I/O (Page 122). Table 6-3 RUN/ERROR status and error displays LEDs Meaning Remedy RUN Off ERROR Off No voltage or voltage too low Turn on the CPU and/or the system power supply modules. Flashes On Off Off Analog on-board I/O starts up and flashes until valid parameter assignment. Parameters have been set for the analog onboard I/O. --- On Flashes Indicates module errors (at least one error is present on one channel, e.g. wire break). Evaluate the diagnostics and eliminate the error (e.g. wire break). Hardware defective. Replace the compact CPU. Flashes Flashes CHx LED Table 6-4 CHx status display CHx LED Meaning Remedy Channel disabled. --- Off Channel parameters set and OK. --- On On Channel parameters set, channel error present. Diagnostics alarm: e.g. wire break Check the wiring. Disable diagnostics. Note Maintenance LED During ramp-up, the firmware of the CPU checks the consistency of the calibration data of the analog on-board I/O stored by the SIEMENS Production. The yellow MAINT LED lights up if the firmware detects an inconsistency (e.g. an invalid value) or missing calibration data. The MAINT-LED is located next the red ERROR-LED on the analog on-board I/O. Note that the MAINT LED on the analog on-board I/O is only intended for troubleshooting by SIEMENS. In normal condition, the MAINT-LED should not light up. However, if the LED is lit up, please contact SIEMENS "mysupport" at Internet ( Manual, 09/2016, A5E AB 119

120 Interrupts/diagnostics alarms 6.1 Status and error displays Status and error displays of the digital on-board I/O LED displays The figure below shows an example of the LED displays (status and error displays) of the first module of the digital on-board I/O. Corrective measures for diagnostics alarms can be found in the section Interrupts and diagnostics of the digital on-board I/O (Page 125). Figure 6-3 LED displays 120 Manual, 09/2016, A5E AB
121 Interrupts/diagnostics alarms 6.1 Status and error displays Meaning of the LED displays The following tables explain the meaning of the status and error displays. RUN/ERROR LED Table 6-5 RUN/ERROR status and error displays LED Meaning Remedy RUN Off ERROR Off No voltage or voltage too low Turn on the CPU. Check whether too many modules are inserted. Digital on-board I/O starts up. Flashes Off Digital on-board I/O is ready for operation. --- On Off On Flashes A diagnostics interrupt is pending. Supply voltage missing. Check supply voltage L+. PWRx LED Table 6-6 PWRx status display PWRx LED Meaning Remedy Supply voltage L+ to module too low or missing Check supply voltage L+. Off Supply voltage L+ is present and OK. --- On CHx LED Table 6-7 CHx status display CHx LED Meaning Remedy 0 = Status of the input/output signal. --- Off 1 = Status of the input/output signal. --- On Manual, 09/2016, A5E AB 121
122 Interrupts/diagnostics alarms 6.2 Interrupts and diagnostics 6.2 Interrupts and diagnostics Interrupts and diagnostics of the CPU part For information on the topic of "Interrupts", refer to the STEP 7 (TIA Portal) online help. For information on "Diagnostics" and "System alarms", refer to the Diagnostics ( function manual Interrupts and diagnostics of the analog on-board I/O Diagnostics interrupt The analog on-board I/O generates a diagnostics interrupt at the following events: Table 6-8 Diagnostics interrupt for inputs and outputs Event Diagnostics interrupt Inputs Outputs Overflow x x Underflow x x Wire break x 1) x 2) Short-circuit to ground --- x 3) 1) Possible for the voltage measuring range (1 to 5 V), current measuring range (4 to 20 ma) 2) Possible for current output type 3) Possible for voltage output type 122 Manual, 09/2016, A5E AB
123 Interrupts/diagnostics alarms 6.2 Interrupts and diagnostics Hardware interrupt for inputs The compact CPU can generate a hardware interrupt for the following events: Below low limit 1 Above high limit 1 Below low limit 2 Above high limit 2 You can find detailed information on the event in the hardware interrupt organization block with the "RALARM" (read additional interrupt information) instruction and in the STEP 7 (TIA Portal) online help. The start information of the organization block includes information on which channel of the analog on-board I/O triggered the hardware interrupt. The figure below shows the assignment to the bits of double word 8 in local data. Figure 6-4 Start information of the organization block Behavior when limits 1 and 2 are reached at the same time If the two high limits 1 and 2 are reached at the same time, the analog on-board I/O always signals the hardware interrupt for high limit 1 first. The configured value for high limit 2 is irrelevant. After processing the hardware interrupt for high limit 1, the compact CPU triggers the hardware interrupt for high limit 2. The analog on-board I/O behaves accordingly when the low limits are reached simultaneously. If the two low limits 1 and 2 are reached at the same time, the analog onboard I/O always signals the hardware interrupt for low limit 1 first. After processing the hardware interrupt for low limit 1, the analog on-board I/O triggers the hardware interrupt for low limit 2. Manual, 09/2016, A5E AB 123
124 Interrupts/diagnostics alarms 6.2 Interrupts and diagnostics Structure of the additional interrupt information Table 6-9 Structure of USI = W#16#0001 Data block name Contents Comment Bytes USI (User Structure Identifier) W#16#0001 The channel that triggered the hardware interrupt follows. Additional hardware interrupt information of the analog on-board I/O Channel B#16#00 to B#16#n Number of the event-triggering channel (n = number of analog on-board I/O channels -1) It is followed by the event that triggered the hardware interrupt. Event B#16#03 Below low limit 1 1 B#16#04 Above high limit 1 B#16#05 Below low limit 2 B#16#06 Above high limit Diagnostics alarms A diagnostics alarm is output for each diagnostics event and the ERROR LED flashes on the analog on-board I/O. The diagnostics alarms can, for example, be read out in the diagnostics buffer of the CPU. You can evaluate the error codes with the user program. Table 6-10 Diagnostics alarms, their meaning and corrective measures Diagnostics alarm Error code Meaning Remedy Wire break 6H Resistance of encoder circuit too high Interruption of the cable between the analog on-board I/O and sensor Use a different encoder type or modify the wiring, for example, using cables with larger cross-section Connect the cable Channel not connected (open) Disable diagnostics Connect the channel Overflow 7H Measuring range exceeded Check the measuring range The output value set by the user Correct the output value program exceeds the valid rated range/overrange Underflow 8H Value below measuring range Check the measuring range The output value set by the user Correct the output value program is below the valid rated range/underrange Short-circuit to ground 1H Overload at output Eliminate overload Short-circuit of output QV to MANA Eliminate the short-circuit 124 Manual, 09/2016, A5E AB
125 Interrupts/diagnostics alarms 6.2 Interrupts and diagnostics Interrupts and diagnostics of the digital on-board I/O Diagnostics interrupt A diagnostics alarm is output for each diagnostics event and the ERROR LED flashes on the digital on-board I/O. You can read out the diagnostics alarms, for example, in the diagnostics buffer of the CPU. You can evaluate the error codes with the user program. Table 6-11 Diagnostics alarms, their meaning and corrective measures Diagnostics alarm Error code Meaning Corrective measures Load voltage missing 11H No supply voltage L+ Feed supply voltage L+ Hardware interrupt lost 16H The digital on-board I/O cannot trigger an interrupt because the previous interrupt was not acknowledged; possibly a configuration error Change the interrupt processing in the CPU and reconfigure the digital onboard I/O. The error persists until new parameters are set for the digital on-board I/O Diagnostic interrupts when using high-speed counters Table 6-12 Diagnostics alarms, their meaning and corrective measures Diagnostics alarm Error code Meaning Corrective measures Illegal A/B signal 500H Time sequence of the A and B signals Correct the process wiring ratio of the incremental encoder do not Check the encoder/sensor meet certain requirements. Check the parameter assignment. Possible causes: Signal frequency too high Encoder is defective Process wiring is incorrect Manual, 09/2016, A5E AB 125
126 Interrupts/diagnostics alarms 6.2 Interrupts and diagnostics Hardware interrupt The compact CPU can generate a hardware interrupt for the following events: Rising edge Falling edge You will find detailed information on the event in the hardware interrupt organization block with the "RALRM" (read additional interrupt information) instruction and in the STEP 7 online help. The start information of the organization block includes information on which channel triggered the hardware interrupt. The figure below shows the assignment to the bits of double word 8 in local data. Figure 6-5 Start information of the organization block Structure of the additional interrupt information Table 6-13 Structure of USI = W#16#0001 Data block name Contents Comment Bytes USI (User Structure Identifier) W#16#0001 Additional interrupt information of the hardware interrupts of the digital on-board I/O 2 The channel that triggered the hardware interrupt follows. Channel B#16#00 to B#16#0F Number of the event-triggering channel (channel 0 to channel 15) 1 The error event that triggered the hardware interrupt follows. Event B#16#01 Rising edge 1 B#16#02 Falling edge 126 Manual, 09/2016, A5E AB
127 Interrupts/diagnostics alarms 6.2 Interrupts and diagnostics Hardware interrupts when using the high-speed counters Table 6-14 Hardware interrupts and their meaning Hardware interrupt Opening of the internal gate (gate start) Closing of the internal gate (gate stop) Overflow (high counting limit violated) Underflow (low counting limit violated) Comparison event for DQ0 occurred Comparison event for DQ1 occurred Event type number Meaning 1 When the internal gate is opened, the technology function triggers a hardware interrupt in the CPU. 2 When the internal gate is closed, the technology functions trigger a hardware interrupt in the CPU. 3 When the count value exceeds the high counting limit, the technology function triggers a hardware interrupt in the CPU. 4 When the count value falls below the low counting limit, the technology function triggers a hardware interrupt in the CPU. 5 When a comparison event for DQ0 occurs due to the selected comparison condition, the technology function triggers a hardware interrupt in the CPU. When the change of the count value for an incremental or pulse encoder was not caused by a count pulse, the technology function does not trigger a hardware interrupt. 6 When a comparison event for DQ1 occurs due to the selected comparison condition, the technology function triggers a hardware interrupt in the CPU. When the change of the count value for an incremental or pulse encoder was not caused by a count pulse, the technology function does not trigger a hardware interrupt. Zero crossing 7 At a zero crossing of the counter or position value, the technology function triggers a hardware interrupt in the CPU. New Capture value present 1) 8 When the current counter or position value is saved as a Capture value, the technology function triggers a hardware interrupt in the CPU. Synchronization of the counter by an external signal 9 At the synchronization of the counter by an N signal or edge at DI, the technology function triggers a hardware interrupt in the CPU. Direction reversal 2) 10 When the count value or position value changes direction, the technology function triggers a hardware interrupt in the CPU. 1) Can only be set in counting mode 2) Feedback bit STS_DIR is preset to "0". When the first count value or position value change occurs in the reverse direction directly after switching on the digital on-board I/O, a hardware interrupt is not triggered. Manual, 09/2016, A5E AB 127
128 Technical specifications 7 Technical specifications of the CPU 1512C-1 PN General information Product type designation Hardware functional status CPU 1512C-1 PN FS03 Firmware version V2.0 Engineering with STEP 7 TIA Portal can be configured/integrated as of version Configuration control Via data record Display Screen diagonal (cm) Operator controls Number of keys 6 Mode selector 1 Supply voltage Type of supply voltage Valid range, low limit (DC) Valid range, high limit (DC) Reverse polarity protection Power and voltage failure backup Power/voltage failure backup time Input current Current consumption (rated value) Inrush current, max. I²t Digital inputs From the load voltage L+ (no load), max. Digital outputs From the load voltage L+, max. Output voltage Rated value (DC) Encoder supply V14 Yes 3.45 cm 24 V DC 6ES7512-1CK00-0AB V; 20.4 V DC for supply of digital inputs/outputs 28.8 V Yes 5 ms; refers to the supply voltage at the CPU unit 0.8 A; digital on-board I/O is supplied separately 1.9 A; rated value 0.34 A²s 20 ma; per group 30 ma; per group, without load Number of outputs 2; a common 24 V encoder supply for each 16 digital inputs 24 V Manual, 09/2016, A5E AB 128
129 Technical specifications 24 V encoder supply 24 V Yes; L+ (-0.8 V) Short-circuit protection Output current, max. Power Power consumption from the backplane bus (balanced) Power delivered to the backplane bus Power loss Power loss, typ. Memory SIMATIC memory card required Work memory integrated (for program) integrated (for data) Load memory Plug-in (SIMATIC Memory Card), max. Buffering maintenance-free CPU processing times for bit operations, typ. for word operations, typ. for fixed point arithmetic, typ. for floating point arithmetic, typ. CPU blocks Number of elements (total) DB Number range Size, max. FB Yes 1 A 9 W 10 W 15.2 W Yes 250 KB 1 MB 32 GB Yes 48 ns 58 ns 77 ns 307 ns Number range Size, max. FC 6ES7512-1CK00-0AB0 2000; blocks (OB/FB/FC/DB) and UDTs ; divided into: Number range available for the user: and number range for DBs generated by SFC 86: MB; the maximum size of the DB is 64 KB with non-optimized block access 250 KB Number range Size, max. OB Size, max. 250 KB 250 KB Number of free cycle OBs 100 Number of time-of-day interrupt OBs 20 Number of time-delay interrupt OBs 20 Number of cyclic interrupt OBs 20; with minimum OB 3x cycle of 500 µs Manual, 09/2016, A5E AB 129
130 Technical specifications Number of hardware interrupt OBs 50 Number of DPV1 interrupt OBs 3 Number of isochronous mode OBs 1 Number of technology synchronization interrupt OBs Number of startup OBs 100 Number of asynchronous error OBs 4 Number of synchronous error OBs 2 Number of diagnostics interrupt OBs 1 Nesting depth per priority class 24 Counters, timers and their retentivity S7 counters Number 2048 Retentivity can be set Yes 2 6ES7512-1CK00-0AB0 IEC counters Number Any (only limited by the work memory) Retentivity can be set Yes S7 timers Number 2048 Retentivity can be set Yes IEC timers Number Any (only limited by the work memory) Retentivity can be set Yes Data areas and their retentivity Retentive data area in total (incl. timers, counters, bit memory), max. Bit memory Number, max. Number of clock memory bits Data blocks Retentivity can be set Retentivity preset Local data per priority class, max. Address area Number of IO modules 128 KB; in total; for bit memory, timers, counters, DBs and technological data (axes), usable retentive memory: 88 KB 16 KB 8; there are 8 clock memory bits, grouped in one clock memory byte Yes No 64 KB; max. 16 KB per block 2048; max. number of modules/submodules 130 Manual, 09/2016, A5E AB
131 Technical specifications I/O address area Inputs Outputs per integrated IO subsystem Inputs (volume) 8 KB Outputs (volume) 8 KB per CM/CP Inputs (volume) 8 KB Outputs (volume) 8 KB Process image partitions Number of process image partitions, max. 32 Hardware configuration Number of distributed IO systems Number of DP masters via CM Number of IO controllers integrated 1 via CM Rack Modules per rack, max. Number of rows, max. 1 PtP CM Number of PtP CMs Time Clock Type Backup duration Deviation per day, max. Operating hours counter Number 16 Time of day synchronization supported in AS, master in AS, slave on Ethernet via NTP 6ES7512-1CK00-0AB0 32 KB; all inputs are within the process image 32 KB; all outputs are within the process image 32; a distributed IO system is understood to mean the integration of distributed I/O via PROFINET or PROFIBUS communication modules as well as the connection of I/O via AS-i master modules or links (e.g. IE/PB link) 6; a total of up to 6 CMs/CPs (PROFIBUS, PROFINET, Ethernet) can be inserted 6; a total of up to 6 CMs/CPs (PROFIBUS, PROFINET, Ethernet) can be inserted 32; CPU + 31 modules The number of connectable PtP CMs is only limited by the number of available slots Hardware clock 6 wk; at 40 C ambient temperature, typ. 10 s; typ.: 2 s Yes Yes Yes Yes Manual, 09/2016, A5E AB 131
132 Technical specifications Digital inputs integrated channels (DI) 32 Configurable digital inputs Yes Sinking/sourcing input Sinking input Input characteristic curve acc. to IEC 61131, type Yes 3 Digital input functions, configurable Gate start/stop Yes Capture Yes Synchronization Yes Input voltage Type of input voltage DC Rated value (DC) 24 V for signal "0" V for signal "1" V Input current for signal "1", typ. 2.5 ma Input delay (for rated value of input voltage) For standard inputs 6ES7512-1CK00-0AB0 Configurable Yes; none / 0.05 / 0.1 / 0.4 / 1.6 / 3.2 / 12.8 / 20 ms at "0" to "1", min. 4 µs; with "none" configuration at "0" to "1", max. 20 ms at "1" to "0", min. 4 µs; with "none" configuration at "1" to "0", max. 20 ms for interrupt inputs Configurable Yes; same as for standard inputs for technological functions Configurable Yes; same as for standard inputs Cable length shielded, max. unshielded, max. Digital outputs 1000 m; 600 m for technological functions; dependent on input frequency, encoder and cable quality; max. 50 m at 100 khz 600 m; For technological functions: No Type of digital output Transistor integrated channels (DO) 32 Sourcing output Yes; push-pull output Short-circuit protection Yes; electronic / thermal Response threshold, typ. 1.6 A with standard output; 0.5 A with high speed output; refer to manual for details Limitation of inductive shutdown voltage to -0.8 V Activation of a digital input Yes Pulse duration accuracy up to ppm +-2 µs with high-speed output; see manual for details Minimum pulse duration 2 µs; with high-speed output 132 Manual, 09/2016, A5E AB
133 Technical specifications Digital output functions, configurable Switch at comparison values PWM output Number, max. 4 6ES7512-1CK00-0AB0 Yes; as output signal of a high-speed counter Yes Configurable cycle duration Yes On-load factor, min. 0% On-load factor, max. 100% Resolution of the on-load factor %; with S7 analog format, min. 40 ns Frequency output Pulse train Switching capacity of outputs with resistive load, max. with lamp load, max. Load resistance range Low limit High limit Output voltage Type of output voltage for signal "0", max. Yes Yes; including for pulse/direction interface 0.5 A; 0.1 A at high-speed output, i.e. when a high-speed output is used; refer to manual for details 5 W; 1 W with high-speed output, i.e. when a high-speed output is used; refer to manual for details 48 W; 240 W with high-speed output, i.e. when a high-speed output is used; refer to manual for details 12 kω for signal "1", min V; L+ (-0.8 V) Output current for signal "1" rated value for signal "1" permissible range, min. for signal "1" permissible range, max. for signal "0" residual current, max. Output delay with resistive load DC 1 V; with high-speed output, i.e. when a highspeed output is used; refer to manual for details 0.5 A; 0.1 A with high-speed output, i.e. when a high-speed output is used; refer to manual for details 2 ma 0.6 A; 0.12 A with high-speed output, i.e. when a high-speed output is used; refer to manual for details 0.5 ma "0" to "1", max. 100 µs "1" to "0", max. 500 μs; load-dependent for technological functions "0" to "1", max. 5 µs; dependent on output used, see additional description in the manual "1" to "0", max. 5 µs; dependent on output used, see additional description in the manual Manual, 09/2016, A5E AB 133
134 Technical specifications Parallel connection of two outputs For logic operations For performance increase For redundant activation of a load Switching frequency with resistive load, max. with inductive load, max. with lamp load, max. Total current of the outputs Current per channel, max. Current per group, max. Current per power supply, max. for technological functions 6ES7512-1CK00-0AB0 Yes; For technological functions: No No Yes; For technological functions: No 100 khz; with high-speed output, 10 khz with standard output 0.5 Hz; acc. to IEC , DC13; note derating curve 10 Hz 0.5 A; see additional description in the manual 8 A; see additional description in the manual 4 A; two power supplies per group, current per power supply max. 4 A, see additional description in the manual Current per channel, max. 0.5 A; see additional description in the manual Cable length shielded, max. unshielded, max. Analog inputs 1000 m; 600 m for technological functions; dependent on output frequency, load and cable quality; max. 50 m at 100 khz 600 m; For technological functions: No Number of analog inputs 5; 4x for U/I, 1x for R/RTD for current measurement 4; max. for voltage measurement 4; max. for resistance/resistance-type thermometer measurement 1 permissible input voltage for voltage input (destruction limit), max. permissible input current for current input (destruction limit), max. Cycle time (all channels), min. Technical unit for temperature measurement, can be set 28.8 V 40 ma 1 ms; dependent on the configured interference frequency suppression, for details see Conversion method in the manual Yes; C / F / K Input ranges (rated values), voltages 0 to +10 V Yes; physical measuring range: ±10 V Input resistance (0 to 10 V) 100 kω 1 V to 5 V Yes; physical measuring range: ±10 V Input resistance (1 V to 5 V) 100 kω -10 V to +10 V Yes Input resistance (-10 V to +10 V) 100 kω -5 to +5 V Yes; physical measuring range: ±10 V Input resistance (-5 to +5 V) 100 kω 134 Manual, 09/2016, A5E AB
135 Technical specifications Input ranges (rated values), currents 6ES7512-1CK00-0AB0 0 to 20 ma Yes; physical measuring range: ±20 ma Input resistance (0 to 20 ma) -20 ma to +20 ma Yes Input resistance (-20 ma to +20 ma) 50 Ω; plus approx. 55 ohm for overvoltage protection by PTC 50 Ω; plus approx. 55 ohm for overvoltage protection by PTC 4 ma to 20 ma Yes; physical measuring range: ±20 ma Input resistance (4 ma to 20 ma) Input ranges (rated values), resistance-type thermometer Ni 100 Input resistance (Ni 100) Pt 100 Input resistance (Pt 100) Input ranges (rated values), resistances 50 Ω; plus approx. 55 ohm for overvoltage protection by PTC Yes; standard/climate 10 MΩ Yes; standard/climate 10 MΩ 0 to 150 ohms Yes; Physical measuring range: 0 to 600 ohm Input resistance (0 to 150 ohms) 10 MΩ 0 to 300 ohms Yes; Physical measuring range: 0 to 600 ohm Input resistance (0 to 300 ohms) 10 MΩ 0 to 600 ohms Yes Input resistance (0 to 600 ohms) Cable length shielded, max. Analog outputs Integrated channels (AO) 2 Voltage output, short-circuit protection Cycle time (all channels), min. Output ranges, voltage 10 MΩ 800 m; with U/I, 200 m with R/RTD Yes 0 to 10 V Yes 1 V to 5 V Yes -10 V to +10 V Yes Output ranges, current 0 to 20 ma Yes -20 ma to +20 ma Yes 4 ma to 20 ma Yes Load resistance (in nominal range of the output) For voltage outputs, min. For voltage outputs, capacitive load, max. For current outputs, max. For current outputs, inductive load, max. 1 ms; dependent on the configured interference frequency suppression, for details see Conversion method in the manual 1 kω 100 nf 500 Ω 1 mh Manual, 09/2016, A5E AB 135
136 Technical specifications Cable length shielded, max. Analog value generation for the inputs Integration and conversion time/resolution per channel Resolution with overrange (bit including sign), max. Integration time configurable Interference voltage suppression for interference frequency f1 in Hz Measured value smoothing Configurable Setting: None Setting: Weak Setting: Medium Setting: Strong Analog value generation for the outputs Integration and conversion time/resolution per channel Resolution with overrange (bit including sign), max. Settling time For resistive load For capacitive load For inductive load Encoders Connection of the signal transmitters For voltage measurement For current measurement as 4-wire transducer For resistance measurement with two-wire connection For resistance measurement with three-wire connection For resistance measurement with four-wire connection Connectable encoders 2-wire sensor Permissible quiescent current (2-wire sensor), max. 200 m 16 bits 6ES7512-1CK00-0AB0 Yes; 2.5 / / 20 / 100 ms, acts on all channels 400 / 60 / 50 / 10 Yes Yes Yes Yes Yes 16 bits 1.5 ms 2.5 ms 2.5 ms Yes Yes Yes Yes Yes Yes 1.5 ma 136 Manual, 09/2016, A5E AB
137 Technical specifications Encoder signals, incremental encoder (asymmetric) Input voltage Input frequency, max. Counting frequency, max. Configurable signal filter Incremental encoder with A/B tracks, 90 phasedshifted Incremental encoder with A/B tracks, 90 phasedshifted and zero track Pulse encoder Pulse encoder with direction Pulse encoder with one pulse signal per count direction Errors/accuracies 24 V 100 khz 6ES7512-1CK00-0AB0 400 khz; with quadruple evaluation Yes Yes Yes Yes Yes Yes Linearity error (relative to input range), (+/-) 0.1% Temperature error (relative to input range), (+/-) Crosstalk between the inputs, max. Reproducibility in steady state condition at 25 C (relative to input range), (+/-) Output ripple (relative to output range, bandwidth 0 to 50 khz), (+/-) 0.005%/K -60 db 0.05% 0.02% Linearity error (relative to output range), (+/-) 0.15% Temperature error (relative to output range), (+/-) Crosstalk between outputs, max. Reproducibility in steady state condition at 25 C (relative to output range), (+/-) Operational limit across the entire temperature range 0.005%/K -80 db 0.05% Voltage, relative to input range, (+/-) 0.3% Current, relative to input range, (+/-) 0.3% Resistance, relative to input range, (+/-) 0.3% Resistance-type thermometer, relative to input range, (+/-) Voltage, relative to output range, (+/-) 0.3% Current, relative to output range, (+/-) 0.3% Basic error limit (operational limit at 25 C) Voltage, relative to input range, (+/-) 0.2% Current, relative to input range, (+/-) 0.2% Resistance, relative to input range, (+/-) 0.2% Resistance-type thermometer, relative to input range, (+/-) Voltage, relative to output range, (+/-) 0.2% Current, relative to output range, (+/-) 0.2% Pt100 Standard: ±2 K, Pt100 Climatic: ±1 K, Ni100 Standard: ±1.2 K, Ni100 Climatic: ±1 K Pt100 Standard: ±1 K, Pt100 Climatic: ±0.5 K, Ni100 Standard: ±0.6 K, Ni100 Climatic: ±0.5 K Manual, 09/2016, A5E AB 137
138 Technical specifications 6ES7512-1CK00-0AB0 Interference voltage suppression for f = n x (f1 +/- 1%), f1 = interference frequency Series-mode interference (peak of the interference 30 db < rated value of the input range), min. Common mode voltage, max. 10 V Common mode interference, min. 60 db; at 400 Hz: 50 db Interfaces Number of PROFINET interfaces 1 1st interface Interface hardware Number of ports 2 Integrated switch Yes RJ45 (Ethernet) Yes; X1 Protocols PROFINET IO controller Yes PROFINET IO device Yes SIMATIC communication Yes Open IE communication Yes Web server Yes Media redundancy Yes PROFINET IO controller Services PG/OP communication Yes S7 routing Yes Isochronous mode Yes Open IE communication Yes IRT Yes MRP Yes; as MRP redundancy manager and/or MRP client; max. number of devices in the ring: 50 MRPD Yes; requirement: IRT Prioritized startup Yes; max. 32 PROFINET devices Number of connectable IO devices, max. 128; a total of up to 512 distributed I/O devices can be connected via AS-i, PROFIBUS or PROFINET of these, IO devices with IRT, max. 64 Number of connectable IO devices for RT, max. 128 of these in a line, max. 128 Number of IO devices that can be enabled/disabled simultaneously, max. Number of IO devices per tool, max. 8 8; in total over all interfaces Update times Minimum value of update time also depends on the communication allocation setting for PROFINET IO, the number of IO devices and the amount of configured user data. 138 Manual, 09/2016, A5E AB
139 Technical specifications Update time with IRT 6ES7512-1CK00-0AB0 with send clock of 250 µs 250 µs to 4 ms; note: with IRT with isochronous mode, the minimum update time of 625 µs of the isochronous OBs is crucial with send clock of 500 µs 500 µs to 8 ms; note: with IRT with isochronous mode, the minimum update time of 625 µs of the isochronous OBs is crucial with send clock of 1 ms 1 ms to 16 ms with send clock of 2 ms 2 ms to 32 ms with send clock of 4 ms 4 ms to 64 ms with IRT and "odd" send clock parameter assignment Update time = set "odd" send clock (any multiple of 125 µs: 375 µs, 625 µs to µs) Update time with RT with send clock of 250 µs 250 µs to 128 ms with send clock of 500 µs 500 µs to 256 ms with send clock of 1 ms 1 ms to 512 ms with send clock of 2 ms 2 ms to 512 ms with send clock of 4 ms 4 ms to 512 ms PROFINET IO device Services PG/OP communication Yes S7 routing Yes Isochronous mode No Open IE communication Yes IRT Yes MRP Yes MRPD Yes; requirement: IRT PROFIenergy Yes Shared device Yes Number of IO controllers with shared device, max. 4 Interface hardware RJ 45 (Ethernet) 100 Mbps Yes Autonegotiation Yes Autocrossing Yes Industrial Ethernet status LED Yes Manual, 09/2016, A5E AB 139
140 Technical specifications Protocols Number of connections Number of connections, max. Number of connections reserved for ES/HMI/Web 10 Number of connections via integrated interfaces 88 Number of S7 routing connections 16 PROFINET IO controller Services PG/OP communication Yes S7 routing Yes Isochronous mode Yes Open IE communication Yes IRT Yes 6ES7512-1CK00-0AB0 128; via integrated interfaces of the CPU and connected CPs/CMs MRP Yes; as MRP redundancy manager and/or MRP client; max. number of devices in the ring: 50 MRPD Yes; requirement: IRT PROFIenergy Yes Prioritized startup Yes; max. 32 PROFINET devices Number of connectable IO devices, max. 128; a total of up to 512 distributed I/O devices can be connected via AS-i, PROFIBUS or PROFINET of these, IO devices with IRT, max. 64 Number of connectable IO devices for RT, max. 128 of these in a line, max. 128 Number of IO devices that can be enabled/disabled simultaneously, max. 8; in total over all interfaces Number of IO devices per tool, max. 8 Update times Minimum value of update time also depends on the communication allocation setting for PROFINET IO, the number of IO devices and the amount of configured user data SIMATIC communication S7 communication, as server S7 communication, as client User data per job, max. Yes Yes See online help (S7 communication, user data size) 140 Manual, 09/2016, A5E AB
141 Technical specifications Open IE communication TCP/IP Yes Data length, max. 64 KB 6ES7512-1CK00-0AB0 Multiple passive connections per port, supported Yes ISO-on-TCP (RFC1006) Yes Data length, max. 64 KB UDP Yes Data length, max bytes DHCP SNMP DCP LLDP Web server HTTP HTTPS OPC UA OPC UA server No Yes Yes Yes Application authentication Yes Yes; standard and user-defined sites Yes; standard and user-defined sites Yes; Data Access (Read, Write, Subscribe), Runtime license required Security Policies Available Security Policies: None, Basic128Rsa15, Basic256Rsa15, Basic256Sha256 User authentication "Anonymous" or with user name and password Additional protocols MODBUS Yes; MODBUS TCP Media redundancy Failover time in the case of cable break, typ. 200 ms; with MRP; bumpless with MRPD Number of devices in the ring, max. 50 Isochronous mode Isochronous operation (application synchronized up to terminal) Constant bus cycle S7 alarm functions Yes; with minimum OB 6x cycle of 625 µs Yes Number of stations that can log in for alarm functions, max. 32 Block-related alarms Yes Number of configurable interrupts, max Number of simultaneously active interrupts in interrupt pool Number of reserved user interrupts 300 Number of reserved interrupts for system diagnostics Number of reserved interrupts for Motion Control technology objects Manual, 09/2016, A5E AB 141
142 Technical specifications Test - commissioning functions 6ES7512-1CK00-0AB0 Joint commissioning (team engineering) Yes; parallel online access possible for up to 5 engineering systems Status block Single step Status/modify Status/modify tag Tags Number of tags, max. Yes; up to 8 simultaneously (in total over all ES clients) No Yes of which status tags, max. 200; per job of which modify tags, max. 200; per job Force Forcing, tags Number of tags, max. 200 Diagnostics buffer available Inputs/outputs, bit memory, DB, peripheral inputs/outputs, timers, counters Peripheral inputs/outputs Yes Number of entries, max of these protected against power failure 500 Traces Number of configurable traces Interrupts/diagnostics/status information Interrupts Diagnostics interrupt Hardware interrupt Diagnostics alarms Monitoring of the supply voltage Wire break Short-circuit A/B transition error with incremental encoder Diagnostics display LED RUN/STOP LED ERROR LED MAINT LED Monitoring of supply voltage (PWR LED) Channel status display For channel diagnostics Connection display LINK TX/RX 4; up to 512 KB data possible per trace Yes Yes Yes Yes; for analog inputs/outputs, see description in manual Yes; for analog outputs, see description in manual Yes Yes Yes Yes Yes Yes Yes; for analog inputs/outputs Yes 142 Manual, 09/2016, A5E AB
143 Technical specifications Supported technology objects Motion Control Number of available motion control resources for technology objects (except cams) 6ES7512-1CK00-0AB0 Yes; note: the number of axes affects the cycle time of the PLC program; selection guide via the TIA Selection Tool or SIZER 800 required Motion Control resources per speed-controlled axis 40 per positioning axis 80 per synchronous axis 160 per external encoder 80 per output cam 20 per cam track 160 per measuring input 40 Controllers PID_Compact Yes; universal PID controller with integrated optimization PID_3Step Yes; PID controller with integrated optimization for valves PID temp Yes; PID controller with integrated optimization for temperature Counting and measuring High-speed counter Yes Integrated functions Number of counters 6 Counting frequency (counter), max. Counting functions Count continuously Configurable counting behavior Hardware gate via digital input Software gate Event-controlled stop Synchronization via digital input Configurable counting range Comparator 400 khz; with quadruple evaluation Number of comparators 2; per counter channel; refer to manual for details Yes Yes Yes Yes Yes Yes Yes Direction dependence Yes Modifiable from user program Yes Position detection Incremental detection Suitable for S Motion Control Yes Yes Manual, 09/2016, A5E AB 143
144 Technical specifications Measuring functions Configurable measurement time Yes Dynamic measurement time configuration Yes Number of thresholds, configurable 2 Measuring range Frequency measurement, min Hz 6ES7512-1CK00-0AB0 Frequency measurement, max. 400 khz; with quadruple evaluation Period measurement, min. 2.5 μs Period measurement, max. 25 s Accuracy Frequency measurement 100 ppm; dependent on measurement interval and signal evaluation Period measurement 100 ppm; dependent on measurement interval and signal evaluation Velocity measurement 100 ppm; dependent on measurement interval and signal evaluation Electrical isolation Electrical isolation of digital inputs Between channels Between channels, in groups of 16 Electrical isolation of digital outputs Between channels Between channels, in groups of 16 Electrical isolation of channels Between the channels and backplane bus Between the channels and load voltage L+ Insulation Insulation tested with Standards, approvals, certificates Suitable for safety functions Ambient conditions Ambient temperature in operation No No Yes No 707 V DC (type test) No Horizontal installation, min. 0 C Horizontal installation, max. Vertical installation, min. 0 C Vertical installation, max. 60 C; Note derating information for on-board I/O in the manual; Display: 50 C, at an operating temperature of typically 50 C, the display is switched off 40 C; Note derating information for on-board I/O in the manual; Display: 40, at an operating temperature of typically 40, the display is switched off 144 Manual, 09/2016, A5E AB
145 Technical specifications Configuring Programming Programming language LAD Yes 6ES7512-1CK00-0AB0 FBD Yes STL Yes SCL Yes GRAPH Yes Know-how protection User program protection Copy protection Block protection Access protection Password for display Protection level: Write protection Protection level: Write/read protection Protection level: Complete protection Cycle time monitoring Low limit High limit Dimensions Width Height Depth Weights Weight, approx. Yes Yes Yes Yes Yes Yes Yes Configurable minimum cycle time Configurable maximum cycle time 110 mm 147 mm 129 mm 1360 g Manual, 09/2016, A5E AB 145
146 Technical specifications Power reduction (derating) to total current of digital outputs (per power supply) The following figure shows the load rating of the digital outputs in relation to the mounting position and the ambient temperature. 1 2 Figure 7-1 Horizontal mounting position Vertical mounting position Loading capacity of the digital outputs per mounting position The following trends shows the load rating of the digital outputs when technology functions are used in dependence on the ambient temperature. 1 Horizontal mounting position Figure 7-2 Load rating of the digital outputs when technology functions are used 146 Manual, 09/2016, A5E AB
147 Technical specifications The following figure shows the load rating of the current for encoder supplies of digital inputs. 1 Horizontal mounting position Figure 7-3 Load rating of the current for encoder supplies of digital inputs when technology functions are used Simultaneity of digital inputs per group If the maximum voltage at the inputs is 24 V, all the digital inputs may be simultaneously at high level (corresponds to 100% of the digital inputs). If the maximum voltage at the inputs is 30 V, only 12 digital inputs of 16 digital inputs of one group may be simultaneously at high level (corresponds to 75% of the digital inputs). General technical specifications For information on the general technical specifications, such as standards and approvals, electromagnetic compatibility, protection class, etc., refer to the S7-1500, ET 200MP system manual ( Manual, 09/2016, A5E AB 147

148 Dimension drawings A This appendix contains the dimension drawings of the compact CPU installed on a mounting rail. You must take the dimensions into consideration for installation in cabinets, control rooms, etc. Figure A-1 Dimension drawing of CPU 1512C-1 PN front and side views Manual, 09/2016, A5E AB 148

149 Dimension drawings Figure A-2 Dimension drawing of CPU 1512C-1 PN side view with front panel open Manual, 09/2016, A5E AB 149
150 Parameter data records B B.1 Parameter assignment and structure of the parameter data records of the analog on-board I/O Parameter assignment in the user program You have the option of reassigning parameters for the analog on-board I/O in RUN (for example, measuring ranges of individual channels can be modified in RUN without affecting the other channels). Changing parameters in RUN The parameters are transferred to the analog on-board I/O via data records with the WRREC instruction. The parameters set with STEP 7 (TIA Portal) are not changed in the CPU, which means the parameters set in STEP 7 (TIA Portal) will be valid again after a restart. The parameters are checked for plausibility by the analog on-board I/O only after the transfer. Output parameter STATUS If errors occur when transferring parameters with the "WRREC" instruction, the analog onboard I/O continues operation with the previous parameter assignment. However, a corresponding error code is written to the STATUS output parameter. You will find a description of the "WRREC" instruction and the error codes in the STEP 7 (TIA Portal) online help. B.2 Structure of a data record for input channels of the analog on-board I/O Assignment of data record and channel The parameters for the 5 analog input channels are located in data records 0 to 4 and are assigned as follows: Data record 0 for channel 0 Data record 1 for channel 1 Data record 2 for channel 2 Data record 3 for channel 3 Data record 4 for channel 4 Manual, 09/2016, A5E AB 150

151 Parameter data records B.2 Structure of a data record for input channels of the analog on-board I/O Data record structure The example in the figure below shows the structure of data record 0 for channel 0. The structure is identical for channels 1 to 4. The values in byte 0 and byte 1 are fixed and must not be changed. You enable a parameter by setting the corresponding bit to "1". Figure B-1 Structure of data record 0: Bytes 0 to 6 Manual, 09/2016, A5E AB 151

152 Parameter data records B.2 Structure of a data record for input channels of the analog on-board I/O Figure B-2 Structure of data record 0: Bytes 7 to Manual, 09/2016, A5E AB
153 Parameter data records B.2 Structure of a data record for input channels of the analog on-board I/O Codes for measurement types The following table contains all measurement types of the inputs of the analog on-board I/O with the corresponding codes. You must enter these codes in byte 2 of the data record for the corresponding channel (refer to the figure Structure of data record 0: Bytes 0 to 6). Table B- 1 Codes for measurement type Measurement type Code Deactivated Voltage (valid for channels 0 to 3) Current, 4-wire measuring transducer (valid for channels 0 to 3) Resistance (valid for channel 4) Thermal resistor linear (valid for channel 4) Codes for measuring ranges The following table contains all measuring ranges of the inputs of the analog on-board I/O with the corresponding codes. You must enter these codes in each case in byte 3 of the data record for the corresponding channel (refer to the figure Structure of data record 0: Bytes 0 to 6). Table B- 2 Codes for measuring range Measuring range Voltage ±5 V ±10 V 1 to 5 V 0 to 10 V Current, 4-wire measuring transducer 0 to 20 ma 4 to 20 ma ±20 ma Resistance 150 Ω 300 Ω 600 Ω Thermal resistor Pt 100 Climate Ni 100 Climate Pt 100 Standard Ni 100 Standard Code Manual, 09/2016, A5E AB 153
154 Parameter data records B.2 Structure of a data record for input channels of the analog on-board I/O Codes for temperature coefficient The following table lists all temperature coefficients for temperature measurement of the thermal resistors along with their codes. You must enter these codes in each case in byte 4 of the data record for the corresponding channel (refer to the figure Structure of data record 0: Bytes 0 to 6) Table B- 3 Codes for temperature coefficient Temperature coefficient Pt xxx Ni xxx Code Hardware interrupt limits The values that can be set for hardware interrupts (high/low limit) must be within the nominal range and overrange/underrange of the relevant measuring range. The following tables list the permitted hardware interrupt limits. The limits depend on the selected measurement type and measuring range. Table B- 4 Voltage limits Voltage ±5 V, ±10 V 1 to 5 V, 0 to 10 V High limit Low limit Table B- 5 Current and resistance limits Current Resistance ±20 ma 4 to 20 ma / (all configurable measuring ranges) 0 to 20 ma High limit Low limit 154 Manual, 09/2016, A5E AB
155 Parameter data records B.3 Structure of a data record for output channels of the analog on-board I/O Table B- 6 Limits for thermal resistor Pt 100 Standard and Pt 100 Climate Thermal resistor Pt 100 Standard Pt 100 Climate C F K C F K High limit Low limit Table B- 7 Limits for thermal resistor Ni 100 Standard and Ni 100 Climate Thermal resistor Ni 100 Standard Ni 100 Climate C F K C F K High limit Low limit B.3 Structure of a data record for output channels of the analog on-board I/O Assignment of data record and channel The parameters for the 2 analog output channels are located in data records 64 and 65 and are assigned as follows: Data record 64 for channel 0 Data record 65 for channel 1 Manual, 09/2016, A5E AB 155

156 Parameter data records B.3 Structure of a data record for output channels of the analog on-board I/O Data record structure The figure below shows the structure of data record 64 for channel 0 as an example. The structure is identical for channel 1. The values in byte 0 and byte 1 are fixed and must not be changed. You enable a parameter by setting the corresponding bit to "1". Figure B-3 Structure of data record 64: Bytes 0 to Manual, 09/2016, A5E AB
157 Parameter data records B.3 Structure of a data record for output channels of the analog on-board I/O Codes for output type The following table contains all output types of the outputs of the analog on-board I/O with the corresponding codes. You must enter these codes in each case in byte 2 of the data record for the corresponding channel (see the previous figure). Table B- 8 Codes for the output type Output type Code Disabled Voltage Current Codes for output ranges The following table contains all output ranges for voltage and current of the outputs of the analog on-board I/O with the corresponding codes. You must enter these codes in each case in byte 3 of the corresponding data record (see previous figure). Table B- 9 Codes for output range Output range for voltage 1 to 5 V 0 to 10 V ±10 V Output range for current 0 to 20 ma 4 to 20 ma ±20 ma Code Code Permitted substitute values The following table lists all output ranges for the permitted substitute values. You must enter these substitute values in each case in bytes 6 and 7 of the data record for the corresponding channel (see the previous figure). You can find the binary representation of the output ranges in the section Representation of output ranges (Page 185). Table B- 10 Output range ±10 V 1 to 5 V 0 to 10 V ±20 ma 4 to 20 ma 0 to 20 ma Permitted substitute value for the output range Permitted substitute value Manual, 09/2016, A5E AB 157
158 Parameter data records B.4 Parameter assignment and structure of the parameter data records of the digital on-board I/O B.4 Parameter assignment and structure of the parameter data records of the digital on-board I/O Parameter assignment in the user program You have the option of reassigning parameters for the digital on-board I/O in RUN (for example, values for input delay of individual channels can be modified in RUN without affecting the other channels). Changing parameters in RUN The parameters are transferred to the digital on-board I/O via data records 0 to 15 with the WRREC instruction. The parameters set with STEP 7 (TIA Portal) are not changed in the CPU, which means the parameters set in STEP 7 (TIA Portal) will be valid again after a restart. The parameters are only checked for plausibility after the transfer. Output parameter STATUS If errors occur when transferring parameters with the "WRREC" instruction, the digital onboard I/O continues operation with the previous parameter assignment. However, a corresponding error code is written to the STATUS output parameter. You will find a description of the "WRREC" instruction and the error codes in the STEP 7 (TIA Portal) online help. B.5 Structure of a data record for input channels of the digital on-board I/O Assignment of data record and channel The parameters per submodule for the 32 digital input channels are located in data records 0 to 15 and are assigned as follows: First submodule (X11): Data record 0 for channel 0 Data record 1 for channel 1 Data record 14 for channel 14 Data record 15 for channel 15 Second submodule (X12): Data record 0 for channel 0 Data record 1 for channel 1 Data record 14 for channel 14 Data record 15 for channel Manual, 09/2016, A5E AB

159 Parameter data records B.5 Structure of a data record for input channels of the digital on-board I/O Data record structure The example in the figure below shows the structure of data record 0 for channel 0. The structure is identical for channels 1 to 31. The values in byte 0 and byte 1 are fixed and must not be changed. You enable a parameter by setting the corresponding bit to "1". Figure B-4 Structure of data record 0: Bytes 0 to 3 Manual, 09/2016, A5E AB 159
160 Parameter data records B.6 Structure of a data record for output channels of the digital on-board I/O B.6 Structure of a data record for output channels of the digital on-board I/O Assignment of data record and channel The parameters per submodule for the 32 digital output channels are located in data records 64 to 79 and are assigned as follows: First submodule (X11): Data record 64 for channel 0 Data record 65 for channel 1 Data record 78 for channel 14 Data record 79 for channel 15 Second submodule (X12): Data record 64 for channel 0 Data record 65 for channel 1 Data record 78 for channel 14 Data record 79 for channel Manual, 09/2016, A5E AB

161 Parameter data records B.6 Structure of a data record for output channels of the digital on-board I/O Data record structure The example in the figure below shows the structure of data record 64 for channel 0. The structure is identical for channels 1 to 31. The values in byte 0 and byte 1 are fixed and must not be changed. You enable a parameter by setting the corresponding bit to "1". Figure B-5 Structure of data record 64: Bytes 0 to 3 Manual, 09/2016, A5E AB 161
Analog input module AI 8xU BA (6ES7134-6FF00-0AA1) SIMATIC. ET 200SP Analog input module AI 8xU BA (6ES7134-6FF00-0AA1) Preface. Documentation guide 1
 SIMATIC. ET 200SP Analog input module AI 8xU BA (6ES7134-6FF00-0AA1) Preface. Documentation guide 1") Analog input module AI 8xU BA (6ES7134-6FF00-0AA1) SIMATIC ET 200SP Analog input module AI 8xU BA (6ES7134-6FF00-0AA1) Manual Preface Documentation guide 1 Product overview 2 Wiring up 3 Parameters/address
Analog input module AI 8xU BA (6ES7134-6FF00-0AA1) SIMATIC ET 200SP Analog input module AI 8xU BA (6ES7134-6FF00-0AA1) Manual Preface Documentation guide 1 Product overview 2 Wiring up 3 Parameters/address
SIMATIC ET 200SP. Digital input module DI 8xNAMUR (6ES7131-6TF00-0CA0) Manual. Answers for industry.
 Manual. Answers for industry.") SIMATIC ET 200SP Digital input module DI 8xNAMUR (6ES7131-6TF00-0CA0) Manual Edition 02/2014 Answers for industry. DI 8xNAMUR HF digital input module (6ES7131-6TF00-0CA0) SIMATIC ET 200SP DI 8xNAMUR HF
SIMATIC ET 200SP Digital input module DI 8xNAMUR (6ES7131-6TF00-0CA0) Manual Edition 02/2014 Answers for industry. DI 8xNAMUR HF digital input module (6ES7131-6TF00-0CA0) SIMATIC ET 200SP DI 8xNAMUR HF
Digital electronic module 4DO DC24V/2A HF (6ES7132-4BD30-0AB0) SIMATIC
 SIMATIC") Digital electronic module 4DO DC24V/2A HF (6ES7132-4BD30-0AB0) SIMATIC Properties 1 Parameters 2 Diagnostics 3 ET 200S distributed I/O Digital electronic module 4DO DC24V/2A HF (6ES7132-4BD30-0AB0) Manual
Digital electronic module 4DO DC24V/2A HF (6ES7132-4BD30-0AB0) SIMATIC Properties 1 Parameters 2 Diagnostics 3 ET 200S distributed I/O Digital electronic module 4DO DC24V/2A HF (6ES7132-4BD30-0AB0) Manual
Analog input module AI 2xI 2/4-wire ST (6ES7134-6GB00-0BA1) SIMATIC. ET 200SP Analog input module AI 2xI 2/4-wire ST (6ES7134-6GB00-0BA1) Preface
 SIMATIC. ET 200SP Analog input module AI 2xI 2/4-wire ST (6ES7134-6GB00-0BA1) Preface") Analog input module AI 2xI 2/4-wire ST Preface (6ES7134-6GB00-0BA1) Documentation guide 1 SIMATIC ET 200SP Analog input module AI 2xI 2/4-wire ST (6ES7134-6GB00-0BA1) Manual Product overview 2 Wiring 3
Analog input module AI 2xI 2/4-wire ST Preface (6ES7134-6GB00-0BA1) Documentation guide 1 SIMATIC ET 200SP Analog input module AI 2xI 2/4-wire ST (6ES7134-6GB00-0BA1) Manual Product overview 2 Wiring 3
SIMATIC. S7-1500/ET 200MP Technology Module TM PTO 4 (6ES7553-1AA00-0AB0) Preface. Documentation guide. Product overview.
 Preface. Documentation guide. Product overview.") Preface Documentation guide 1 SIMATIC S7-1500/ET 200MP Technology Module TM PTO 4 (6ES7553-1AA00-0AB0) Manual Product overview 2 Connecting 3 Configuring/address space 4 Interrupts/diagnostic alarms 5
Preface Documentation guide 1 SIMATIC S7-1500/ET 200MP Technology Module TM PTO 4 (6ES7553-1AA00-0AB0) Manual Product overview 2 Connecting 3 Configuring/address space 4 Interrupts/diagnostic alarms 5
SIMATIC. S7-1500/ET 200MP Analog Input/Output Module AI 4xU/I/RTD/TC/ AQ 2xU/I ST (6ES7534-7QE00-0AB0) Preface. Guide to documentation
 Preface. Guide to documentation") Preface Guide to documentation 1 SIMATIC S7-1500/ET 200MP Analog Input/Output Module AI 4xU/I/RTD/TC/ AQ 2xU/I ST (6ES7534-7QE00-0AB0) Manual Product overview 2 Wiring 3 Parameters/address space 4 Interrupts/diagnostics
Preface Guide to documentation 1 SIMATIC S7-1500/ET 200MP Analog Input/Output Module AI 4xU/I/RTD/TC/ AQ 2xU/I ST (6ES7534-7QE00-0AB0) Manual Product overview 2 Wiring 3 Parameters/address space 4 Interrupts/diagnostics
SIMATIC. ET 200SP Analog Input Module AI 4xI 2-/4-wire ST (6ES7134-6GD01-0BA1) Preface. Documentation guide. Product overview.
 Preface. Documentation guide. Product overview.") Preface Documentation guide 1 SIMATIC ET 200SP Analog Input Module AI 4xI 2-/4-wire ST (6ES7134-6GD01-0BA1) Manual Product overview 2 Wiring up 3 Parameters/address space 4 Interrupts/diagnostics alarms
Preface Documentation guide 1 SIMATIC ET 200SP Analog Input Module AI 4xI 2-/4-wire ST (6ES7134-6GD01-0BA1) Manual Product overview 2 Wiring up 3 Parameters/address space 4 Interrupts/diagnostics alarms
SIMATIC. ET 200SP Analog Input Module AI 4xU/I 2-wire ST (6ES7134-6HD01-0BA1) Preface. Documentation guide. Product overview.
 Preface. Documentation guide. Product overview.") Preface Documentation guide 1 SIMATIC ET 200SP Analog Input Module AI 4xU/I 2-wire ST (6ES7134-6HD01-0BA1) Manual Product overview 2 Wiring up 3 Parameters/address space 4 Interrupts/diagnostics alarms
Preface Documentation guide 1 SIMATIC ET 200SP Analog Input Module AI 4xU/I 2-wire ST (6ES7134-6HD01-0BA1) Manual Product overview 2 Wiring up 3 Parameters/address space 4 Interrupts/diagnostics alarms
SIMATIC. S7-1500/ET 200MP Analog input module AI 8xU/I/RTD/TC ST (6ES7531-7KF00-0AB0) Preface. Documentation guide. Product overview.
 Preface. Documentation guide. Product overview.") Siemens Spares Preface Documentation guide 1 SIMATIC S7-1500/ET 200MP Analog input module AI 8xU/I/RTD/TC ST (6ES7531-7KF00-0AB0) Manual Product overview 2 Wiring 3 Parameters/address space 4 Interrupts/diagnostics
Siemens Spares Preface Documentation guide 1 SIMATIC S7-1500/ET 200MP Analog input module AI 8xU/I/RTD/TC ST (6ES7531-7KF00-0AB0) Manual Product overview 2 Wiring 3 Parameters/address space 4 Interrupts/diagnostics
SIMATIC. S7-1500/ET 200MP Analog Input Module AI 4xU/I/RTD/TC ST (6ES7531-7QD00-0AB0) Preface. Guide to documentation. Product overview.
 Preface. Guide to documentation. Product overview.") Preface Guide to documentation 1 SIMATIC S7-1500/ET 200MP Analog Input Module AI 4xU/I/RTD/TC ST (6ES7531-7QD00-0AB0) Manual Product overview 2 Wiring 3 Parameters/address space 4 Interrupts/diagnostics
Preface Guide to documentation 1 SIMATIC S7-1500/ET 200MP Analog Input Module AI 4xU/I/RTD/TC ST (6ES7531-7QD00-0AB0) Manual Product overview 2 Wiring 3 Parameters/address space 4 Interrupts/diagnostics
Analog input module. AI 2xU/I 2-/4-wire HF (6ES7134-6HB00-0CA1) SIMATIC. ET 200SP Analog input module AI 2xU/I 2-/4-wire HF (6ES7134-6HB00-0CA1)
 SIMATIC. ET 200SP Analog input module AI 2xU/I 2-/4-wire HF (6ES7134-6HB00-0CA1)") Analog input module AI 2xU/I 2-/4-wire HF (6ES7134-6HB00-0CA1) SIMATIC ET 200SP Analog input module AI 2xU/I 2-/4-wire HF (6ES7134-6HB00-0CA1) Manual Preface Guide to documentation 1 Product overview 2
Analog input module AI 2xU/I 2-/4-wire HF (6ES7134-6HB00-0CA1) SIMATIC ET 200SP Analog input module AI 2xU/I 2-/4-wire HF (6ES7134-6HB00-0CA1) Manual Preface Guide to documentation 1 Product overview 2
Manual SIMATIC ET 200SP. Analog input module AI Energy Meter 400VAC ST (6ES7134-6PA01-0BD0) Edition. 10/2017 support.industry.siemens.
 Edition. 10/2017 support.industry.siemens.") Manual SIMATIC ET 200SP Analog input module AI Energy Meter 400VAC ST (6ES7134-6PA01-0BD0) Edition 10/2017 support.industry.siemens.com Preface Documentation guide 1 SIMATIC ET 200SP Analog input module
Manual SIMATIC ET 200SP Analog input module AI Energy Meter 400VAC ST (6ES7134-6PA01-0BD0) Edition 10/2017 support.industry.siemens.com Preface Documentation guide 1 SIMATIC ET 200SP Analog input module
SIMATIC Vision Sensor SIMATIC VS130-2 and VS 130-2vcr
 s SIMATIC Vision Sensor SIMATIC VS130-2 and VS 130-2vcr Getting Started Release 09/2005 First Steps in Commissioning Safety Guidelines This manual contains notices you have to observe in order to ensure
SIMATIC. ET 200SP Analog input module AI 2xU/I 2-/4-wire HS (6ES7134-6HB00-0DA1) Preface. Documentation Guide. Product overview.
 Preface. Documentation Guide. Product overview.") Preface Documentation Guide 1 SIMATIC ET 200SP Analog input module AI 2xU/I 2-/4-wire HS (6ES7134-6HB00-0DA1) Manual Product overview 2 Connecting 3 Parameters/address space 4 Interrupts/diagnostics interrupts
Preface Documentation Guide 1 SIMATIC ET 200SP Analog input module AI 2xU/I 2-/4-wire HS (6ES7134-6HB00-0DA1) Manual Product overview 2 Connecting 3 Parameters/address space 4 Interrupts/diagnostics interrupts
SIMATIC. S7-1500/ET 200MP Analog input module AI 8xU/I/RTD/TC ST (6ES7531-7KF00-0AB0) Preface. Documentation guide. Product overview.
 Preface. Documentation guide. Product overview.") Preface Documentation guide 1 SIMATIC S7-1500/ET 200MP Analog input module AI 8xU/I/RTD/TC ST (6ES7531-7KF00-0AB0) Manual Product overview 2 Wiring 3 Parameters/address space 4 Interrupts/diagnostics alarms
Preface Documentation guide 1 SIMATIC S7-1500/ET 200MP Analog input module AI 8xU/I/RTD/TC ST (6ES7531-7KF00-0AB0) Manual Product overview 2 Wiring 3 Parameters/address space 4 Interrupts/diagnostics alarms
SIMATIC Ident RFID systems ANT 3 Compact Operating Instructions
 SIMATIC Ident RFID systems Compact Operating Instructions Legal information Warning notice system This manual contains notices you have to observe in order to ensure your personal safety, as well as to
SIMATIC ET 200SP. Motor Starter (3RK1308-0**00-0CP0) Manual. siemens.com. Edition 12/2016
 Manual. siemens.com. Edition 12/2016") SIMATIC ET 200SP Motor Starter (3RK1308-0**00-0CP0) Manual Edition 12/2016 siemens.com Preface Product-specific safety instructions 1 Industrial Controls SIMATIC ET 200SP Motor starter (3RK1308-0**00-0CP0)
SIMATIC ET 200SP Motor Starter (3RK1308-0**00-0CP0) Manual Edition 12/2016 siemens.com Preface Product-specific safety instructions 1 Industrial Controls SIMATIC ET 200SP Motor starter (3RK1308-0**00-0CP0)
Technology module TM Pulse 2x24V (6ES7138 6DB00 0BB1) SIMATIC ET 200SP (6ES7138 6DB00 0BB1) Preface. Documentation guide.
 SIMATIC ET 200SP (6ES7138 6DB00 0BB1) Preface. Documentation guide.") Technology module TM Pulse 2x24V (6ES7138 6DB00 0BB1) SIMATIC ET 200SP Technology module TM Pulse 2x24V (6ES7138 6DB00 0BB1) Manual Preface Documentation guide 1 Product overview 2 Modes and Functions
Technology module TM Pulse 2x24V (6ES7138 6DB00 0BB1) SIMATIC ET 200SP Technology module TM Pulse 2x24V (6ES7138 6DB00 0BB1) Manual Preface Documentation guide 1 Product overview 2 Modes and Functions
SIMATIC ET 200SP. Motor Starter (3RK1308-0**00-0CP0) Manual. siemens.com. Edition 04/2016
 Manual. siemens.com. Edition 04/2016") SIMATIC ET 200SP Motor Starter (3RK1308-0**00-0CP0) Manual Edition 04/2016 siemens.com Preface Documentation guide 1 Industrial Controls SIMATIC ET 200SP Motor starter (3RK1308 0**00 0CP0) Manual Product
SIMATIC ET 200SP Motor Starter (3RK1308-0**00-0CP0) Manual Edition 04/2016 siemens.com Preface Documentation guide 1 Industrial Controls SIMATIC ET 200SP Motor starter (3RK1308 0**00 0CP0) Manual Product
Analog Input Module. AI 4xU/I/RTD/TC ST (6ES7531-7QD00-0AB0) SIMATIC. S7-1500/ET 200MP Analog Input Module AI 4xU/I/RTD/TC ST (6ES7531-7QD00-0AB0)
 SIMATIC. S7-1500/ET 200MP Analog Input Module AI 4xU/I/RTD/TC ST (6ES7531-7QD00-0AB0)") Analog Input Module AI 4xU/I/RTD/TC ST (6ES7531-7QD00-0AB0) SIMATIC S7-1500/ET 200MP Analog Input Module AI 4xU/I/RTD/TC ST (6ES7531-7QD00-0AB0) Manual Preface Guide to documentation 1 Product overview
Analog Input Module AI 4xU/I/RTD/TC ST (6ES7531-7QD00-0AB0) SIMATIC S7-1500/ET 200MP Analog Input Module AI 4xU/I/RTD/TC ST (6ES7531-7QD00-0AB0) Manual Preface Guide to documentation 1 Product overview
PROFINET USER S GUIDE ACSI Servo
 PROFINET USER S GUIDE ACSI Servo 3600-4196_06 Tolomatic reserves the right to change the design or operation of the equipment described herein and any associated motion products without notice. Information
SIMATIC. ET 200S distributed I/O 2AI U HF analog electronic module (6ES7134-4LB02-0AB0) Preface. Properties 1. Parameters 2.
 Preface. Properties 1. Parameters 2.") SIMATIC ET 200S distributed I/O SIMATIC ET 200S distributed I/O 2AI U HF analog electronic module (6ES7134-4LB02-0AB0) Manual Preface Properties 1 Parameters 2 Diagnostics 3 Analog value representation
SIMATIC ET 200S distributed I/O SIMATIC ET 200S distributed I/O 2AI U HF analog electronic module (6ES7134-4LB02-0AB0) Manual Preface Properties 1 Parameters 2 Diagnostics 3 Analog value representation
SINAMICS drives SINAMICS DCM. DC converters from 6 kw to 2500 kw for variable-speed direct-current drives
 SINAMICS DCM DC converters from 6 kw to 2500 kw for variable-speed direct-current drives Application: Continuous operation in the case of a pulse encoder error Edition 01-12/2010 SINAMICS drives SINAMICS
Data sheet VIPA CPU 314SC DPM (314-6CG23)
") Data sheet VIPA CPU 314SC DPM (314-6CG23) Technical data Order no. Type 314-6CG23 VIPA CPU 314SC DPM General information Note - Features Powered by SPEED7 Work memory [KB]: 512...2.048 Onboard 24x DI /
Data sheet VIPA CPU 314SC DPM (314-6CG23) Technical data Order no. Type 314-6CG23 VIPA CPU 314SC DPM General information Note - Features Powered by SPEED7 Work memory [KB]: 512...2.048 Onboard 24x DI /
Positioning SIMATIC. ET 200S Positioning. Preface 1 1STEP 5V. 1PosUniversal. Operating Instructions 06/2010 A5E
 Preface 1 1STEP 5V 2 SIMATIC 1PosUniversal 3 ET 200S Operating Instructions 06/2010 A5E00124872-05 Legal information Legal information Warning notice system This manual contains notices you have to observe
SINAMICS drives. SINAMICS DCM as a DC voltage source. Application. Answers for industry. Edition 01/2014
 SINAMICS drives SINAMICS DCM as a DC voltage source Application Edition 01/2014 Answers for industry. Compact User Manual Legal information Warning notice system This manual contains notices you have to
SIMATIC. ET 200S distributed I/O 2AI U HS analog electronic module (6ES7134-4FB52-0AB0) Preface. Properties 1. Parameters 2.
 Preface. Properties 1. Parameters 2.") SIMATIC ET 200S distributed I/O SIMATIC ET 200S distributed I/O 2AI U HS analog electronic module (6ES7134-4FB52-0AB0) Manual Preface Properties 1 Parameters 2 Diagnostics 3 Analog value representation
SIMATIC ET 200S distributed I/O SIMATIC ET 200S distributed I/O 2AI U HS analog electronic module (6ES7134-4FB52-0AB0) Manual Preface Properties 1 Parameters 2 Diagnostics 3 Analog value representation
Application examples for High-Speed Counters (HSC)
") Application Example 11/2016 Application examples for High-Speed Counters (HSC) TIA Portal, S7-1200 V4.2 https://support.industry.siemens.com/cs/ww/en/view/109742346 Warranty and Liability Warranty and
Application Example 11/2016 Application examples for High-Speed Counters (HSC) TIA Portal, S7-1200 V4.2 https://support.industry.siemens.com/cs/ww/en/view/109742346 Warranty and Liability Warranty and
SIMATIC. ET 200S distributed I/O 2AI I 4WIRE HS analog electronic module (6ES7134-4GB62-0AB0) Preface. Properties 1. Parameters 2.
 Preface. Properties 1. Parameters 2.") SIMATIC ET 200S distributed I/O SIMATIC ET 200S distributed I/O 2AI I 4WIRE HS analog electronic module (6ES7134-4GB62-0AB0) Manual Preface Properties 1 Parameters 2 Diagnostics 3 Analog value representation
SIMATIC ET 200S distributed I/O SIMATIC ET 200S distributed I/O 2AI I 4WIRE HS analog electronic module (6ES7134-4GB62-0AB0) Manual Preface Properties 1 Parameters 2 Diagnostics 3 Analog value representation
SINVERT. Technical requirements for medium-voltage transformers for use with SINVERT central inverters. Application manual 04/2012
 Technical requirements for medium-voltage transformers for use with SINVERT central inverters Application manual 04/2012 SINVERT Answers for the environment. Technical requirements for medium- Technical
SIMATIC Ident. RFID systems SIMATIC RF200 IO-Link V1.1. Introduction 1. Description. System overview. Planning an RF200 IO-Link system 4
 Introduction 1 Description 2 SIMATIC Ident RFID systems Operating Instructions System overview 3 Planning an RF200 IO-Link system 4 Commissioning and parameter assignment 5 Readers 6 Service and maintenance
SIMATIC Ident RFID systems SIMATIC RF310R special version Scanmode Compact Operating Instructions
 SIMATIC Ident RFID systems Compact Operating Instructions Legal information Warning notice system This manual contains notices you have to observe in order to ensure your personal safety, as well as to
Data sheet CPU 313SC (313-5BF13)
") Data sheet CPU 313SC (313-5BF13) Technical data Order no. Type 313-5BF13 CPU 313SC General information Note - Features SPEED-Bus - SPEED7 technology 24 x DI, 16 x DO, 4 x AI, 2 x AO, 1 x AI Pt100 128 kb
Data sheet CPU 313SC (313-5BF13) Technical data Order no. Type 313-5BF13 CPU 313SC General information Note - Features SPEED-Bus - SPEED7 technology 24 x DI, 16 x DO, 4 x AI, 2 x AO, 1 x AI Pt100 128 kb
SIMATIC Ident. RFID systems SIMATIC RF615A. Characteristics 1. Ordering data. Installing and mounting. Connecting the antenna 4
 Characteristics 1 Ordering data 2 SIMATIC Ident RFID systems Operating Instructions Installing and mounting 3 Connecting the antenna 4 Antenna parameter assignment 5 Antenna patterns 6 Maximum read/write
13 A. Temperature regulator FM SIMATIC. S7-300 Temperature regulator FM Preface. Product Overview
 SIMATIC S7-300 Operating Instructions Preface Product Overview 1 Structure of the FM 355-2 2 Installing and removing the FM 355-2 3 Wiring the FM 355-2 4 Installing the configuration package 5 How does
Data sheet CPU 314ST/DPM (314-6CF02)
") Data sheet CPU 314ST/DPM (314-6CF02) Technical data Order no. Type 314-6CF02 CPU 314ST/DPM General information Note - Features SPEED-Bus SPEED7 technology, SPEED-Bus 8 x DI, 8 x DIO, 4 x AI, 2 x AO, 1
Data sheet CPU 314ST/DPM (314-6CF02) Technical data Order no. Type 314-6CF02 CPU 314ST/DPM General information Note - Features SPEED-Bus SPEED7 technology, SPEED-Bus 8 x DI, 8 x DIO, 4 x AI, 2 x AO, 1
Analog Inputs and Outputs
 Analog Inputs and Outputs PLCs must also work with continuous or analog signals. Typical analog signals are 0-10 VDC or 4-20 ma. Analog signals are used to represent changing values such as speed, temperature,
Digital Input Output Module 24 V for Ex n Zone 2 Series 9472/35
 www.stahl.de > 16 channels can be adjusted in pairs as digital inputs or outputs > Suitable for NAMUR proximity switches, 3-wire PNP proximity switches, contacts and solenoid valves (24 V / 0.5 A). > Up
6ES7214-1AG31-0XB0. General information Engineering with. Supply voltage 24 V DC Yes permissible range, upper limit (DC)
") 6ES7214-1AG31-0XB0 Page 1 Product data sheet 6ES7214-1AG31-0XB0 SIMATIC S7-1200, CPU 1214C, COMPACT CPU, DC/DC/DC, ONBOARD I/O: 14 DI 24V DC; 10 DO 24 V DC; 2 AI 0-10V DC, POWER SUPPLY: DC 20.4-28.8 V
6ES7214-1AG31-0XB0 Page 1 Product data sheet 6ES7214-1AG31-0XB0 SIMATIC S7-1200, CPU 1214C, COMPACT CPU, DC/DC/DC, ONBOARD I/O: 14 DI 24V DC; 10 DO 24 V DC; 2 AI 0-10V DC, POWER SUPPLY: DC 20.4-28.8 V
Data sheet CPU 013C (013-CCF0R00)
") Data sheet CPU 013C (013-CCF0R00) Technical data Order no. 013-CCF0R00 Type CPU 013C Module ID - General information Note - Features SPEED7 technology 16 x DI, 12 x DO, 2 x AI, from which are 4 input channels
Data sheet CPU 013C (013-CCF0R00) Technical data Order no. 013-CCF0R00 Type CPU 013C Module ID - General information Note - Features SPEED7 technology 16 x DI, 12 x DO, 2 x AI, from which are 4 input channels
Product type designation. General information. Hardware product version 01. Firmware version V2.6. Engineering with. update.
 6ES7313-6CF03-0AB0 SIMATIC S7-300, CPU 313C-2DP COMPACT CPU WITH MPI, 16 DI/16 DO, 3 FAST COUNTERS (30 KHZ), INTEGRATED DP INTERFACE, INTEGRATED 24V DC POWER SUPPLY, 64 KBYTE WORKING MEMORY, FRONT CONNECTOR
MRS ELECTRONIC DATASHEET CAN I/O AND PLC DESCRIPTION TECHNICAL DATA REGULATORY APPROVALS AND TESTING SOFTWARE/PROGRAMMING
 DESCRIPTION The versatile CAN I/O PLC with 14 inputs and outputs impresses with its compact design and its operating voltage range of 9 to 30 volts. It provides 8 I/Os that can be configured as inputs
General information. Supply voltage
 Data sheet SIMATIC S7-300, CPU 314C-2 DP COMPACT CPU WITH MPI, 24 DI/16 DO, 4AI, 2AO, 1 PT100, 4 FAST COUNTERS (60 KHZ), INTEGRATED DP INTERFACE, INTEGRATED 24V DC POWER SUPPLY, 192 KBYTE WORKING MEMORY,
EP-5111, EP-5112, EP-5212, EP-5261, EP-5311, EP-5422, EP-5442
 October 2017 RSTI-EP Slice I/O Specialty Modules EP-5111, EP-5112, EP-5212, EP-5261, EP-5311, EP-5422, EP-5442 Module Status LED Channel Status LED GE provides several RSTi-EP specialty modules, which
This data sheet is only valid in association with the IL SYS INST UM E user manual.
 Inline counter terminal, version for extreme conditions, 1 counter input, 1 control input, 1 output, 24 V DC, 500 ma Data sheet 106148_en_03 PHOENIX CONTACT 2015-11-04 1 Description The terminal is designed
Product type designation. General information. Supply voltage
 Data sheet SIMATIC S7-300, CPU 313C, COMPACT CPU WITH MPI, 24 DI/16 DO, 4AI, 2AO 1 PT100, 3 FAST COUNTERS (30 KHZ), INTEGRATED 24V DC POWER SUPPLY, 128 KBYTE WORKING MEMORY, FRONT CONNECTOR (2 X 40PIN)
3TK28 Safety Relays. General data. 7/70 Siemens LV
 3TK28 Safety Relays General data Overview SIRIUS safety relays are the key elements of a consistent and cost-effective safety chain. Be it EMERGENCY-STOP disconnection, protective door monitoring or the
 Input Delay, Pulse Stretching and Oversampling SIMATIC S7-1200, S7-1500, ET 200 https://support.industry.siemens.com/cs/ww/en/view/109736504 Siemens Industry Online Support This entry originates from Siemens
External brake resistor AX2090-BW5x
 Documentation External brake resistor AX2090-BW5x Accessories for Beckhoff servo drive AX5000 Version: Date: 1.3 2018-03-14 Table of content Table of content 1 Foreword... 5 1.1 Notes on the documentation...
Siemens AG Allows easy and consistent configuration with one series of overload relays (for small to large loads)
") Overview Features Benefits 3RU11 3RB20/3RB21 3RB22/3RB23 Sizes Are coordinated with the dimensions, connections S00...S3 S00... S12 S00... S12 and technical characteristics of the other devices in the
Overview Features Benefits 3RU11 3RB20/3RB21 3RB22/3RB23 Sizes Are coordinated with the dimensions, connections S00...S3 S00... S12 S00... S12 and technical characteristics of the other devices in the
Increasing security. Saving space. Gaining flexibility. Signal Conditioners for Industrial Automation
 Increasing security. Saving space. Gaining flexibility. Signal Conditioners for Industrial Automation The SC-System: Interference-Free Signals, Maximum Performance The SC-System from Pepperl+Fuchs offers
SIMATIC RTLS. Localization systems SIMATIC RTLS PCB OEM AX (6GT2700-8DF00-0AX0) Device manual 10/2018 C79000-G8976-C518-01
 Device manual 10/2018 C79000-G8976-C518-01") SIMATIC RTLS Localization systems (6GT2700-8DF00-0AX0) Device manual 10/2018 C79000-G8976-C518-01 Legal information Warning notice system This manual contains notices you have to observe in order to ensure
SIMATIC RTLS Localization systems (6GT2700-8DF00-0AX0) Device manual 10/2018 C79000-G8976-C518-01 Legal information Warning notice system This manual contains notices you have to observe in order to ensure
SITRANS TH200/TH300 SITRANS T. Temperature transmitter SITRANS TH200/TH300. Introduction 1. Safety information. Description.
 Introduction 1 Safety information 2 SITRANS T Temperature transmitter Operating Instructions Description 3 Installation 4 Connecting 5 Operation 6 Functional safety 7 Commissioning 8 Functions 9 Technical
MU110-8R(K) Digital output module 8 channel. User guide
 Digital output module 8 channel. User guide") MU110-8R(K) Digital output module 8 channel User guide MU110-8R(K)_2019.01_0296_EN All rights reserved Subject to technical changes and misprints akytec GmbH Vahrenwalder Str. 269 A 30179 Hannover Germany
MU110-8R(K) Digital output module 8 channel User guide MU110-8R(K)_2019.01_0296_EN All rights reserved Subject to technical changes and misprints akytec GmbH Vahrenwalder Str. 269 A 30179 Hannover Germany
Cover sheet. Handling the Demo Case. SINAMICS G120 with CU250S-2 Vector. FAQ October Service & Support. Answers for industry.
 Cover sheet Handling the Demo Case SINAMICS G120 with CU250S-2 Vector FAQ October 2013 Service & Support Answers for industry. Question This article originates from the Siemens Industry Online Support.
PHOENIX CONTACT - 03/2007
 Inline Function Terminal for Pulse Width Modulation and Frequency Modulation N AUTOMATIONWORX Data Sheet 6920_en_01 1 Description PHOENIX CONTACT - 03/2007 $ ' ) The terminal is designed for use within
PACSystems* RX3i IC695MDL765
 March 2011 PACSystems* RX3i IC695MDL765 Digital Output Module with Diagnostics 16-Channel The 24/125 volt DC 2A Smart Digital Output module, IC695MDL765, provides 16 discrete outputs in two isolated groups
SIMATIC. ET 200B Distributed I/O Station. Preface, Contents. System Overview. Technical Description. Mechanical and Electrical Installation
 SIMATIC ET 200B Distributed I/O Station Manual Preface, Contents System Overview Technical Description 2 Mechanical and Electrical Installation 3 Address Assignment Parameterization with COM ET 4 200 Startup
Function Manual Basic Positioner SINAMICS. SINAMICS G120 Function Manual Basic Positioner. Introduction. Basic positioner. Appendix.
 Introduction 1 Basic positioner 2 SINAMICS A Appendix SINAMICS G120 Function Manual Edition 06/2013, firmware V4.6 06/2013, FW V4.6 A5E31759509B AB Legal information Warning notice system This manual contains
MU110-16R(K) Digital output module 16 channel. User guide
 Digital output module 16 channel. User guide") MU110-16R(K) Digital output module 16 channel User guide MU110-16R(K)_2016.12_0220_EN All rights reserved Subject to technical changes and misprints akytec GmbH Vahrenwalder Str. 269 A 30179 Hannover Germany
MU110-16R(K) Digital output module 16 channel User guide MU110-16R(K)_2016.12_0220_EN All rights reserved Subject to technical changes and misprints akytec GmbH Vahrenwalder Str. 269 A 30179 Hannover Germany
Analog electronic module SIMATIC. ET 200S distributed I/O Analog electronic module 2AI TC ST (6ES7134-4JB01-0AB0) Preface. Properties.
 Preface. Properties.") Analog electronic module 2AI TC ST (6ES7134-4JB01-0AB0) SIMATIC ET 200S distributed I/O Analog electronic module 2AI TC ST (6ES7134-4JB01-0AB0) Manual Preface Properties 1 Parameters 2 Diagnostics 3 Analog
Analog electronic module 2AI TC ST (6ES7134-4JB01-0AB0) SIMATIC ET 200S distributed I/O Analog electronic module 2AI TC ST (6ES7134-4JB01-0AB0) Manual Preface Properties 1 Parameters 2 Diagnostics 3 Analog
Dynamo Brushless DC Motor and GreenDriveTM Manual
 Dynamo Brushless DC Motor and GreenDriveTM Manual This manual was developed as a guide for use by FIRST Robotics Teams using Controller Part Number 840205-000 in conjunction with the Nidec Dynamo BLDC
Inverter Drive /Vector Drive Motors & Controls
 H2 Inverter/ Encoderless Vector Inverter Drive /Vector Drive & Controls 3/4 thru 50 180-264 VAC 3 Phase - 50/60 Hz 3/4 thru 60 340-528 VAC 3 Phase - 50/60 Hz 3/4 thru 60 515-660 VAC 3 Phase - 60 Hz HVAC
S1 Minor (usually reversible) injury S2 Serious (normally irreversible) injury including death
 injury S2 Serious (normally irreversible) injury including death") General data Application Classification of a machine in categories acc. to EN 954- The 98/3/EG machinery directive stipulates that every machine must comply with the applicable guidelines and standards.
General data Application Classification of a machine in categories acc. to EN 954- The 98/3/EG machinery directive stipulates that every machine must comply with the applicable guidelines and standards.
8V General information. 2 Order data 8V
 8V05.00-8V05.00- General information Modular mechanical design using plug-in modules Integrated line filter Integrated braking resistor All connections are made using plug-in connectors Integrated electronic
Isometrics COMOS. Process Isometrics. Trademarks 1. Introduction 2. Project structure 3. Isometric report 4. Engineering with COMOS Isometrics
 Trademarks 1 Introduction 2 COMOS Process Operating Manual Project structure 3 Isometric report 4 Engineering with COMOS 5 Creating an isometric drawing from existing 3D data 6 IDF import 7 Administration
SIMATIC S7-1200, CPU 1212C, COMPACT CPU, DC/DC/DC, ONBOARD I/O: 8 DI 24V DC; 6 DO 24 V DC; 2 AI 0-10V DC, POWER SUPPLY: DC
 6ES7212-1AD30-0XB0 Page 1 Product data sheet 6ES7212-1AD30-0XB0 SIMATIC S7-1200, CPU 1212C, COMPACT CPU, DC/DC/DC, ONBOARD I/O: 8 DI 24V DC; 6 DO 24 V DC; 2 AI 0-10V DC, POWER SUPPLY: DC 20.4-28.8 V DC,
maxon document number:
 maxon document number: 791272-04 1 Table of contents... 2 2 Table of figures... 3 3 Introduction... 4 4 How to use this guide... 4 5 Safety Instructions... 5 6 Performance Data... 6 6.1 Motor data... 6
SINAMICS DCM. DC converter Application - 12-pulse parallel connection with decoupled interphase transformer. Introduction 1
 Introduction 1 Description of the application 2 SINAMICS DCM DC converter Application - 12-pulse parallel connection with decoupled interphase transformer Application Manual Commissioning 3 Dimensioning
Product Manual SENTRON. Measuring Devices 7KM PAC3200T. siemens.com/lowvoltage
 Product Manual SENTRON Measuring Devices 7KM Edition 04/2017 siemens.com/lowvoltage Introduction 1 Safety notes 2 SENTRON 7KM measuring device Manual Description 3 Mounting 4 Connection 5 Commissioning
SINAMICS. OALINK Open Application Link. Communication between two Control Units via DRIVE-CLiQ. Function Manual. Answers for industry.
 s SINAMICS OALINK Open Application Link Communication between two Control Units via DRIVE-CLiQ Function Manual Edition 07/2014 Answers for industry. s Preface Fundamental safety instructions 1 SINAMICS
PHOENIX CONTACT
 Electronic circuit breaker CLIPLINE Data sheet 102898_en_03 PHOENIX CONTACT 2010-12-17 1 Description The electronic circuit breaker can be used in applications that cover all aspects of the switched-mode
Series 70 Servo NXT - Modulating Controller Installation, Operation and Maintenance Manual
 THE HIGH PERFORMANCE COMPANY Series 70 Hold 1 sec. Hold 1 sec. FOR MORE INFORMATION ON THIS PRODUCT AND OTHER BRAY PRODUCTS PLEASE VISIT OUR WEBSITE www.bray.com Table of Contents 1. Definition of Terms.........................................2
Engineering Guideline. pac-carriers Type for Yokogawa Centum VP
 Engineering Guideline pac-carriers Type 9195 for Yokogawa Centum VP pac-carrier Type 9195 2 Engineering Guideline / Yokogawa Centum VP 26.0.2018 pac-carrier Type 9195 Integrated solutions for Yokogawa
Electronic amplifier type EV1D
 Electronic amplifier type EV1D Product documentation Modular construction Supply voltage UB: Output current IA: 10...48 V DC max. 2 A D 7831 D 09-2015-1.1 by HAWE Hydraulik SE. The forwarding and reproduction
INSTALLATION MANUAL. Model: Smart Analyzer Manufacturer: Smart Impulse. Power meter with consumption breakdown by use 03/12/13
 INSTALLATION MANUAL Model: Smart Analyzer Manufacturer: Smart Impulse Power meter with consumption breakdown by use 03/12/13 Table of contents Table of contents... 2 1. Introduction... 3 2. Installation
SPPA-E3000 Brushless Excitation System (BES, Type RG3)
") / Technical Description / Juni 2014 SPPA-E3000 Brushless Excitation System (BES, Type RG3) Maximum-availability excitation system for synchronous generators with brushless exciters Answers for energy.
/ Technical Description / Juni 2014 SPPA-E3000 Brushless Excitation System (BES, Type RG3) Maximum-availability excitation system for synchronous generators with brushless exciters Answers for energy.
CPU 314C-2 PTP. Function
 CPU 314C-2 PTP Function Password protection; a password concept protects the user program from unauthorized access. Block encryption; the functions (FCs) and function blocks (FBs) can be stored in the
PHOENIX CONTACT
 Selective circuit breaker CLIPLINE Data sheet 100464_en_05 PHOENIX CONTACT 2009-11-17 1 Description The electronic circuit breaker, which has a design width of just 12.5 mm, selectively protects all 24
User s Manual. Model US1000 Digital Indicating Controller Functions. IM 5D1A01-02E 2nd Edition IM 5D1A01-02E
 User s Manual Model US1000 Digital Indicating Controller Functions 2nd Edition Introduction This instruction manual describes the functions of the US1000 Digital Indicating Controller in detail. Read
MANUAL. Textron Motors Diagnostic Tool. This manual is valid for the following Textron Motors Diagnostic Tool:
 MANUAL Textron Motors Diagnostic Tool This manual is valid for the following Textron Motors Diagnostic Tool: 0507 TD0507_HB Rev F 6..05 en_english Read the manual before performing the task on the engine.
6ES BE30-0XB0 6ES AE30-0XB0 6ES HE30-0XB0
 Overview The compact high-performance CPU With 2 integral input/outputs Expandable by: - 1 signal board (SB) or communication board (CB) - 8 signal modules (SM) - Max. 3 communication modules (CM) Technical
MK110-8D.4R. Digital I/O-Module 12 channel 8 DI, 4 DO. User guide
 MK110-8D.4R Digital I/O-Module 12 channel 8 DI, 4 DO User guide MK110-8D4R_2016.12_0219_EN All rights reserved Subject to technical changes and misprints akytec GmbH Vahrenwalder Str. 269 A 30179 Hannover
SIMATIC. ET 200S distributed I/O Analog electronic module 4AI TC ST (6ES7134-4JD00-0AB0) Preface. Properties 1. Parameters 2.
 Preface. Properties 1. Parameters 2.") Preface ET 200S distributed I/O SIMATIC ET 200S distributed I/O Analog electronic module 4AI TC ST (6ES7134-4JD00-0AB0) Manual Properties 1 Parameters 2 Diagnostics 3 Analog value representation 4 Connecting
Preface ET 200S distributed I/O SIMATIC ET 200S distributed I/O Analog electronic module 4AI TC ST (6ES7134-4JD00-0AB0) Manual Properties 1 Parameters 2 Diagnostics 3 Analog value representation 4 Connecting
Digital Input Output Module for Zone 2 Series 9470/33
 www.stahl.de > 16 channels can be adjusted in pairs as digital input or output > Intrinsically safe inputs/outputs Ex ia > For contacts, NAMUR proximity switches and low-power solenoid valves > Up to 8
Instruction manual. art Installation manual
 Instruction manual art. 01521 Installation manual Contents GENERAL FEATURES AND FUNCTIONALITY from page 4 ETS PARAMETERS AND COMMUNICATION OBJECTS from page 6 COMMUNICATION OBJECTS GENERAL FEATURES AND
EPSITRON Electronic Circuit Breakers For Secondary Side DC Protection
 EPSITRON Electronic Circuit Breakers For Secondary Side DC Protection WHY SECONDARY-SIDE PROTECTION? Switched-mode power supplies provide secondary side DC voltage to control circuits and loads such as
Highlights Very compact EtherCAT I/O system in IP 20 for plug-in into a circuit board (signal distribution board)
") 550. Highlights Very compact EtherCAT I/O system in IP 20 for plug-in into a circuit board (signal distribution board). Optimised for high-volume production Application-specific connector interface EtherCAT
550. Highlights Very compact EtherCAT I/O system in IP 20 for plug-in into a circuit board (signal distribution board). Optimised for high-volume production Application-specific connector interface EtherCAT
Trusted Versatile FTA
 PD-T8842 Trusted Product Overview The Trusted Versatile Field Termination Assembly (VFTA) T8842 is primarily designed to act as the main interface between field devices associated with the detection and
CPU 221, CPU 222, CPU 224, CPU 224 XP, CPU 224 XPsi, CPU 226
 Siemens AG 2008 SIMATIC S7-200 Overview CPU 226 The high-performance package for complex technical tasks With additional PPI port for added flexibility and communication options With 40 inputs/outputs
S7-200 SMART Programmable controller Answers for industry.
 s SIMATIC S7-200 SMART S7-200 SMART Programmable controller Answers for industry. Siemens is synonymous with innovation, especially in the domain of industrial automation. Committed to R&D, promotion and
Safe, scaleable and above all integrated.
 Safety technology Safe, scaleable and above all integrated. As easy as that. 1 Developing ideas Are you looking to build the best conveyor possible and already have some initial ideas? Then get these down
OVEN INDUSTRIES, INC. Model 5C7-362
 OVEN INDUSTRIES, INC. OPERATING MANUAL Model 5C7-362 THERMOELECTRIC MODULE TEMPERATURE CONTROLLER TABLE OF CONTENTS Features... 1 Description... 2 Block Diagram... 3 RS232 Communications Connections...
Electronic Circuit Breaker ECONOMY REMOTE
 Electronic Circuit Breaker - Number of available output channels: 2 / 4 / 8 - Each channel has a 2-wire interface for adjusting the rated current - High capacitive loads start up reliably - The channels
Remote Radio Control. WAVE Push button radio control systems
 Remote Radio Control WAVE Push button radio control systems Application Radio Remote Controls have become a key element within a wide range of modern working environments where safety, productivity and
Monitoring at lower speed
 FAQ 09/2016 Monitoring at lower speed SIPLUS CMS2000, SIPLUS CMS1200 SM 1281 https://support.industry.siemens.com/cs/ww/en/view/109740911 Siemens AG 2016 All rights reserved This entry is from the Siemens
100 h; (min. 70 h at 40 C); 200 days (typ.) with optional battery module Memory Number of memory modules (optional)
; 200 days (typ.) with optional battery module Memory Number of memory modules (optional)") CPUs CPU 226 6ES7 216-2AD23-0XB0 Supply voltages Rated value 24 V DC Yes Permitted range, lower limit 20.4 V permissible range, upper limit 28.8 V 120 V AC Yes 230 V AC Yes permissible range, lower limit
CPUs CPU 226 6ES7 216-2AD23-0XB0 Supply voltages Rated value 24 V DC Yes Permitted range, lower limit 20.4 V permissible range, upper limit 28.8 V 120 V AC Yes 230 V AC Yes permissible range, lower limit
SIMATIC S7-300 Function modules
 Overview Technical specifications 6ES7 30-1AH03-0AE0 Supply voltage Aux. voltage 1L+, load voltage 2 L+ Rated value (DC) 24 V Permissible range (ripple included) - dynamic, lower limit (DC) 18. V - dynamic,
Perfectly integrated!
 Servo drive CMMT-AS and servo motor EMMT-AS Simply very functional! Perfectly integrated! Highlights Ideal with CPX-E or controllers from third-party suppliers Quick commissioning of the complete drive
AZ Series. Function Edition. Closed Loop Stepping Motor and Driver Package. Operation. I/O signals. Parameter
 HM-6262 Closed Loop Stepping Motor and Driver Package Operation I/O signals Parameter AZ Series Function Edition Method of control via Modbus RTU (RS-485 communication) Method of control via industrial