INSTRUCTION MANUAL TX3400 UHF TRANSCEIVER
|
|
|
- Myron Carr
- 5 years ago
- Views:
Transcription
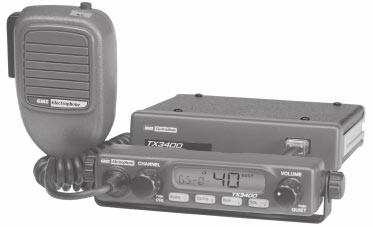

1 INSTRUCTION MANUAL TX3400 UHF TRANSCEIVER
2 CONTENTS Contents Introduction Features Operation Scanning Selective Calling Using the Quiet Mode Group Calls Page Mode CTCSS CTCSS Tone Frequency Chart Disabling Functions Installation s Channel Frequency Chart Specifications Warranty The following items are included with your TX3400 TX3400 Transceiver with Remote Head Unit Microphone Microphone Clip Instruction Manual Mounting Cradle for Main Unit Mounting Bracket for Remote Unit Screw Pack DC Lead If any items are missing or damaged, please contact your dealer or place of purchase. INTRODUCTION Your GME Electrophone TX3400 transceiver is Australian designed and built and is the most advanced UHF Citizen Band radio available. The TX3400 combines the very latest in electronic hardware with the most up-to-date computer aided design and manufacturing techniques to produce an extremely compact mobile radio with outstanding specifications and performance. The TX3400's small size means it can be mounted in almost any convenient location and its strong diecast aluminium chassis makes it the most robust transceiver of its kind. With just two rotary controls and four touch keys, the TX3400 is easy to operate. FEATURES Microprocessor Controlled Frequency Synthesiser: Allows user programmable control of scanning, channel memories and selected feature options. Permanent Memory: Retains all user settings in non-volatile memory even when the power has been removed. Programmable Scan Function: Scans up to 40 user programmable channels with both Group and Open scan functions available. Remote or Local Installation Option: The TX3400 can be mounted either remotely using the separate control head, or locally with the control head attached to the main unit. 2
3 Individually Programmable DUPLEX function: User selectable for only those individual channels in your area that have repeaters, leaving the others free for use as extra simplex channels. Priority Channel: A user programmable priority channel feature allows your working or local repeater channel to be instantly recalled at the press of a button. High Contrast Liquid Crystal Display: Fully detailed LCD provides a visual indication of the selected channel and all selected functions at a glance. Backlit for viewing at night. In-Built Selcall: Selective Calling with four or five digit ANI and fully user-adjustable 5 tone transmitted Selcall Ident. Also allows naming of Idents for easier caller identification. Quiet Mode: Selectable on individual channels, the Quiet mode prevents incoming signals from being heard on selected channels unless preceded by your Selcall code. CTCSS Ready: A built-in Continuous Tone Coded Squelch System option provides quiet channel operation (when approved by the Australian Communications Authority). Feature Disabling Function: Allows Scanning, Squelch, Duplex, Priority, Channel selection and CTCSS (when active) features to be enabled or disabled to make the radio simpler to operate. Overvoltage Protection: Special overvoltage detection circuitry protects the radio and warns of excessive voltage conditions by flashing the display. Surface Mount Technology: The very latest surface mount component types, design and assembly techniques and quality control procedures are used to ensure the highest performance and reliability. Designed and Manufactured in Australia: The TX3400 has been totally designed and manufactured in Gladesville NSW to meet the demanding needs of the Australian community. Unique Page (Transpond) Mode: Allows you to transfer an incoming Selcall to another radio if your radio is unattended. OPERATION Channel Selector Priority Channel Liquid Crystal Display Volume ON/OFF Quiet Mode Selector SCAN CALL TOFROM Q M BUSY DUP T/A Tx QUIET SILENT PUSH PRI OS/GS SQL P PUSH QUIET Microphone Socket Scan Selcall Mem 1. Open Scan / Group Scan Selcall Mem 2. Duplex Selcall Mem 3. Squelch Silent Pager Mem. 3
4 VOLUME Rotate the volume control clockwise past the "click" to turn the TX3400 on. Adjust the volume control for a comfortable listening level. If no sound is heard, temporarily unmute the radio by briefly pressing the SQL key. You can now adjust the volume by listening to the receiver's background noise. When finished, briefly press the SQL key again to re-mute the radio. BACK LIGHTING The Liquid Crystal Display and function keys are backlit for easy viewing at night or in low light situations. The back lighting is on at all times while the TX3400 is turned on. SELECTING CHANNELS Select the required channel by rotating the channel selector knob. Rotate the knob clockwise to select higher channels and counter-clockwise to select lower channels. The selected channel is displayed on the LCD. SQUELCH The squelch is used to eliminate any annoying background noise when there are no signals present. The TX3400 features a preset squelch system. The squelch level has been set to provide optimum performance. The Squelch can be Opened or Closed with the SQL key. When the Squelch is Open, the receiver's background noise can be heard and 'BUSY' is displayed. When the Squelch is closed, the receiver remains quiet when there are no signals present but any incoming signals will override the Squelch and be heard in the speaker. To open the Squelch, briefly press the SQL key. A low beep will be heard. If there are no signals present you will hear the receiver's background noise. To close the Squelch, briefly press the SQL key again. A high beep will be heard and the receiver will become quiet. NOTE: If an incoming signal is very weak and is close to the minimum squelch level, it may become broken or chopped by the squelch action. To prevent this, simply open the squelch to allow the signal to be heard clearly. Alternatively, you can reduce the squelch sensitivity as described below. Setting the Squelch Sensitivity. The sensitivity of the squelch to incoming signals can be set to suit your operating environment. The TX3400 has three preset squelch sensitivity settings which can be selected using a front panel key sequence. SQL1: Maximum Sensitivity. The squelch will open even on very weak signals. This is the best setting for quiet country or rural locations where there are very few weak stations or little locally generated interference. SQL2: Medium Sensitivity. The squelch will open on most signals, but will not be as sensitive to very weak signals or local interference. Suitable for general or suburban use. SQL3: Minimum Sensitivity. The squelch will open on reasonably strong signals and weak signals will not be heard. Suitable for inner city applications or areas of severe interference. To pre-select the squelch sensitivity. 1. Turn the TX3400 OFF at the Volume control. 2. Hold the DUP and SQL keys while turning the unit back on again. 3. Rotate the Channel switch to select SQL1, SQL2 or SQL3. 4. Turn the unit OFF again to store the setting. DUPLEX SWITCH Duplex operation allows the TX3400 to transmit on a different frequency to that which it receives. This allows operation through any repeater stations in your area. s 4
5 automatically re-transmit your signal over a wider area, providing greatly increased range. The Duplex function operates only on channels 1-8. When Duplex is selected on one of these channels, the TX3400 receives on that channel but actually transmits 30 channels higher. E.g. Channel Selected Receive Channel Transmit Channel The TX3400 allows you to select duplex operation on individual channels. This is particularly useful in country areas where there may only be one or two repeaters. Then unused repeater channels can be used for normal simplex or direct radio-to-radio communications. To select Duplex on individual channels: 1. Select the required channel Briefly press the DUP key. DUP will appear on the display accompanied by a high beep. To remove Duplex from a channel: 1. Select the required channel 1-8. DUP will be visible on the display. 2. Briefly press the DUP key. DUP will disappear from the display accompanied by a low beep. PRIORITY CHANNEL The Priority channel feature allows you to store one of the 40 channels in the TX3400 as a priority channel that can be instantly recalled at the press of a key. This can be used to provide instant access to your working channel or your local repeater channel. To store a Priority channel: 1. Select the required channel. 2. Press and hold the Channel Knob. The channel display will flash for a moment then a high beep will be heard as the selected channel is stored. To recall a Priority channel: Briefly press the Channel Knob. The TX3400 will immediately switch to the Priority channel accompanied by a high beep. SCANNING The TX3400 features two scan groups - Open Scan and Group Scan. Open Scan allows any of the fitted channels to be scanned for activity in an ascending sequence (i.e. from the lowest channel to the highest). Channels are scanned at a rate of 20 channels per second. If a busy channel is found, scanning will pause to allow the signal to be heard. Once the channel has been clear for 5 seconds, scanning will resume automatically Group Scan also allows any of the fitted channels to be scanned for activity in an ascending sequence, but in addition, it also inserts your Priority channel into the scan sequence. This means that your Priority channel will be monitored regularly while scanning to ensure that no calls are missed. Any signals received on your Priority channel will have priority over any signals received on the other channels Example showing Group Scan channels 1 to 8 with priority channel 20. 5
6 Selecting a Scan Group. The current scan group is shown on the display as OS for Open Scan or GS for Group Scan. To change the selected scan group: Briefly press the OS/GS key. A beep will be heard and the display will change to reflect the scan group you have selected. Programming Scan Channels. Your TX3400 is supplied with all 40 UHF CB channels programmed into the Open Scan memory. Any channels not required can be removed as necessary. The Group Scan memory is empty by default and you will need to add channels to it before use. To add or remove channels from either scan memory: 1. Check that the radio is not already scanning. If it is, briefly press the SCAN key to cancel the scan function. 2. Select the required scan group by pressing the OS/GS key. 3. Select the required channel using the rotary channel selector switch. If M is displayed to the upper left of the channel number, the selected channel is presently in the scan memory. It can be removed by holding the SCAN key in for a few seconds until a low beep is heard. M will then disappear indicating the channel is no longer in memory. If M is not visible to the upper left of the channel number, then the selected channel is not in the memory. To add it, hold the SCAN key in for a few seconds until a high beep is heard. M will now appear to the upper left of the channel number. 4. Repeat step 3 to add or remove other channels in the scan memory. To Start Scanning: To scan in the selected scan mode, briefly press the SCAN key. A high beep will be heard, SCAN will appear in the display and the radio will begin scanning. NOTE: If there are less than 2 channels programmed in the scan memory in Open Scan or one channel in Group Scan when you press the SCAN key, a long low beep will be heard and the command will be ignored. Scanning in the Open Scan Mode. If a busy channel is found, scanning will pause on that channel to allow the signal to be heard and will remain there for as long as the channel remains busy. Once the channel has been clear for 5 seconds, scanning will resume automatically. If your radio pauses on a busy channel and you don't wish to listen to that conversation, briefly press the CALL button on top of the microphone. The radio will skip over that channel and resume scanning from the next channel in the sequence. To talk while paused on a busy channel, simply press the Push-To-Talk (PTT) button on the microphone. The SCAN mode will be put on hold and the radio will stay on that channel. You can now converse on that channel in the usual way. When you have finished your conversation, briefly press the CALL button to resume scanning. If your radio is paused on a busy channel and you wish to remain there, briefly press the SCAN key. The radio will exit the Scan mode and remain on the busy channel. If your radio is scanning and you need to use your Priority channel (for an urgent call or an emergency), briefly press the channel knob. The Scan mode will be cancelled and the radio will jump straight to the Priority channel. NOTE: Your TX3400 will not allow you to transmit while it is scanning channels in the Open Scan mode. If the PTT button is pressed 6
7 while scanning, the radio will give a low beep and will ignore the command. Your radio will only transmit in the Open Scan mode while it is paused on a busy channel. Ending the Open Scan. To stop scanning, briefly press the SCAN key again. A low beep will be heard and SCAN will disappear from the display. As long as the radio was not on a busy channel, it will return to the last channel you selected, otherwise it will stay on the busy channel. Group Scan Mode. With Group Scan selected, you can transmit and receive normally on your priority (working) channel, but between breaks in the conversation, the radio will scan and listen to several other channels. The receiver will continue to scan the other channels ONLY WHILE THERE ARE NO SIGNALS ON THE PRIORITY CHANNEL. If a signal appears on the priority channel it will override any signals being received on any of the other channels. In addition, if you press the Push-To-Talk switch on the microphone at any time, the radio will transmit on the priority channel in the usual way. Setting up your Group Scan. To setup your radio for Group Scan: 1. Select the Group Scan mode by pressing the OS/GS key so that GS is displayed. 2. Program your Priority channel memory with your preferred working channel. (a) Select the required channel. (b) Press and hold the Channel knob for a couple of seconds. The channel display will flash for a moment then a high beep will be heard as the selected channel is stored. 3. Program the required other channels into your Group Scan memory. (a) Select the required channel. (b) If M is displayed to the upper left of the channel number, the selected channel is presently in the scan memory. It can be removed by holding the SCAN key in for a few seconds until a low beep is heard. M will then disappear indicating the channel is no longer in memory. (c) If M is not visible to the upper left of the channel number, then the selected channel is not in the memory. To add it, hold the SCAN key in for a few seconds until a high beep is heard. M will now appear to the upper left of the channel number. (d) Repeat steps (a) to (c) to add or remove other channels in the scan memory. To Start Scanning. To scan in the Group Scan mode, briefly press the SCAN key. A high beep will be heard, SCAN will appear in the display and the radio will begin scanning. NOTE: If there are no channels programmed in the Group Scan memory when you press the SCAN key, a low beep will be heard and the command will be ignored. Scanning in the Group Scan Mode. When scanning, the Group Scan feature scans all the channels programmed into the scan memory, with the priority channel being scanned after every fourth channel. If a signal is heard on a scan channel, the receiver will "lock" onto it and remain there for as long as the channel is busy, and for 5 seconds after the channel has cleared, as long as there are no signals on the priority channel. During this time the receiver will continue to check the priority channel for signals every 2 seconds, resulting in a series of small 'breaks' in the reception of the 'locked' channel. If no signals are heard after 5 seconds, the radio will resume scanning. If a signal appears on the priority channel at any time (even when locked on a scan channel) the receiver will switch straight to 7
8 the priority channel and will stay there for as long as the channel is busy. During this time you can transmit on the priority channel in the usual way. Once there has been no activity on the priority channel for 5 seconds, the radio will resume scanning the other channels. To talk on the priority (working) channel while scanning, simply press the Push-To- Talk switch on the microphone. The radio will switch straight to the Priority channel. When you have finished your conversation and there has been no further activity on the priority channel for 5 seconds, the radio will resume scanning the other channels. If your radio pauses on a busy channel and you don't wish to listen to that conversation, briefly press the CALL button on top of the microphone. The radio will skip over that channel and resume scanning from the next channel in the sequence. If your radio is paused on a busy channel and you wish to remain there, briefly press the SCAN key. The radio will exit the Scan mode and remain on the busy channel. Note that the radio will no longer be monitoring the Priority channel (unless it is the busy channel). To resume scanning, press the SCAN key again. To go directly to the Priority channel, briefly press the Channel knob. The radio will exit the Scan function. Ending the Group Scan. To cancel the Scan mode, briefly press the SCAN key. A low beep will be heard and SCAN will disappear from the display. If the radio was on a busy channel it will remain on that channel, otherwise it will return to the priority channel. SELECTIVE CALLING GENERAL OVERVIEW What is Selcall. Your TX3400 has a Selective Calling (Selcall) system which operates like your telephone. Your radio has been programmed with its own unique number. When this number is called, your TX3400 will beep to alert you. If you do not want to hear any other activity while on the channel, you can push a QUIET button. The radio will then remain quiet until your number is called. Your radio allows you to store up to four of your most frequently called numbers in memory. Each number can be labelled with a 5 letter name for easy identification. Selcall Identification Number (Ident). others in your area. You will need to make your Ident known to anyone who may need to call you with Selcall. Whenever your TX3400 hears a Selcall signal, it compares the incoming Ident with its own. If the two Idents match, the radio knows it is being called and sounds an alarm to alert you to the call. The Selcall Ident for your radio is printed on the label on the rear panel of the main unit. The Ident is the last 5 digits of the radio s serial number. The Selcall Ident is also displayed in the bottom left of the LCD for a second each time the radio is turned on. NOTE: Although your radio s Selcall Ident is pre-programmed at the factory, you can arrange to have your dealer change it if required. Your TX3400 is factory programmed with its own unique Selcall Identification Number (Ident). This number identifies your radio from 8
9 Naming your Selcall Idents. The TX3400 allows you to name up to four of your most often used Selcall Idents using a 5 character word. The name can then be stored in memory with the Ident. This makes it easier to identify who s Ident you are recalling from the memory. In addition, if an incoming Selcall matches one of the Idents stored in the memory, its name can be displayed to make it easier for you to identify the caller. The QUIET Mode (Q) Your TX3400 can be set to listen on a busy channel but not allow any sound to reach the speaker UNLESS it receives its own Selcall Ident. In this way, your radio can monitor a busy channel without disturbing you, but still let you know when you are being called. The QUIET mode overrides the normal Squelch system to ensure that the radio remains quiet even when the channel is busy or the Squelch is opened with the Squelch key. When QUIET is set, you may see BUSY appear on the display and signal strengths appear on the S meter indicating the channel is being used. However, unless someone transmits your Selcall Ident, nothing will be heard in the speaker. The QUIET mode can be set to work on specific channels i.e. some channels can be set to remain Quiet while others can remain Open to all incoming signals. If a signal containing your Selcall Ident is received, the QUIET mode is deactivated and an alarm sounds to alert you to the call. You can then converse normally on the channel. NOTE: Setting the QUIET mode is not mandatory. You can still use Selcall on any channel whether the QUIET mode is set or not. SENDING SELCALLS Use the following procedure to enter and send Selcalls. To enter a Selcall IDENT. Briefly press the CALL button on top of the microphone. CALL TO will appear on the display along with the last Selcall Ident you sent. You can now either send the Ident that is presently displayed or enter a new Selcall Ident. If you do nothing, the radio will automatically exit the CALL TO mode after 20 seconds and return to normal operation. To enter a new Selcall Ident: The righthand digit of the Selcall Ident will be flashing. This flashing digit indicates the digit to be changed 1. Rotate the Channel knob to select the required number in the flashing digit position. 2. Briefly press the Channel knob to select the next digit to program. A high beep will be heard and the next digit will flash. 3. Repeat steps 1 and 2 to program all 5 digits as required. Once the Ident has been entered you have 20 seconds to send it otherwise the CALL TO mode will be cancelled and the Ident you entered will be lost. To Send the Selcall Ident. With the required Selcall Ident displayed in the CALL TO mode, press and hold the CALL button for a few seconds until the radio beeps. The Selcall Ident will be sent automatically and the radio will return to normal operation. Call Acknowledge. If your Selcall transmission is successful, the radio you called should respond with a call acknowledge signal - usually two quick beeps. This will confirm to you that the radio you called is now alerting its user to your signal. 9
10 STORING SELCALL IDENTS Your TX3400 is fitted with four Selcall Ident memories, allowing you to store up to four frequently used Selcall Idents. The memories are accessed using the four keys beneath the display labelled 1, 2, 3 and P. NOTE: The P key is normally used to store the PAGE Ident for when the radio is used in the PAGE mode, but it can be also be used as a standard Selcall Ident memory if the PAGE mode is not in use. (The PAGE mode operation is described later in this manual). To Store a Selcall Ident in memory. 1. Press the CALL button to select the CALL TO mode. 2. Enter the required Selcall ident as described previously. 3. Now press and hold (for about 2 seconds) one of the four keys directly below the display labelled 1, 2, 3 or P. The Selcall Ident will flash for a few seconds, then the radio will beep as the Ident is stored. To Recall a Selcall Ident from memory. 1. Briefly press the CALL button to select the CALL TO mode. 2. Briefly press the appropriate memory key (1, 2, 3 or P). The Selcall ident stored in that memory will be displayed. 3. Press and hold the CALL button to send the Ident. NAMING YOUR SELCALL IDENTS Your TX3400 allows you to enter a 5 character name for each Selcall Ident you have stored in memory. This makes it easier to remember whose Selcall Ident you are recalling. In addition, if an incoming Selcall matches one of those in your radio s memory, the name can be displayed instead of the Selcall Ident, making it easier to identify the caller. Switching between Ident Mode and Name Mode. The TX3400 can be toggled between the normal Ident mode and the Name mode as follows: 1. Briefly press the CALL button to select the CALL TO mode. 2. Press and hold the Volume knob until the radio beeps. The TX3400 will toggle between the Ident mode and the Name mode. 3. Briefly press the CALL button again to return to normal operation. The radio will remain in the selected mode. Entering and Storing a Selcall Name. NOTE: Before adding a Name to a Selcall Ident, you should first store the required Ident in memory as described above. The steps described below assume that your TX3400 is in the normal Ident mode. 1. Briefly press the CALL button to select the CALL TO mode. 2. Briefly press a memory key (1, 2, 3 or P). If the radio is in Ident mode, the Selcall Ident stored in that memory will be recalled and displayed. 3. Press and hold the Volume knob until a beep is heard. The radio will switch to the Name mode and the displayed Ident number will be replaced with characters. 4. Using the same procedure as used for entering Idents, rotate the Channel knob to select the required letter in the flashing character position, then press the knob to move to the next character position. 5. When all characters have been entered, press and hold the memory key associated with that Ident to store the Name. The radio will beep and the Name will be stored. Repeat the procedure to add Names to any other Selcall Idents stored in memory. 10
11 To exit the CALL TO mode, briefly press the CALL button. The radio will return to normal operation. The radio can now be left in the Name mode so that an incoming Selcall matching one of those in the radios memory will display the name associated with that Selcall Ident instead of the Ident itself. Any Selcalls not matching those in the memory will display the normal Ident in the usual way. The way in which your TX3400 handles an incoming Selcall may vary depending on how it has been programmed. The following section describes receiving Selcalls on the TX3400 when using the standard factory default settings. RECEIVING SELCALLS When your TX3400 receives its own Selcall number, it will beep to alert you to the call. In addition, it will cancel the QUIET mode (if selected) and display the Ident or Name of the caller. Displaying the Callers Ident or Name. Whenever your TX3400 receives its own Selcall Ident, the words CALL FROM will appear on your display above the callers Selcall Ident or Name to inform you of the identity of the person calling. The Selcall Alarm. When your TX3400 receives its Selcall Ident, an alarm will sound in the speaker to alert you to the call. Initially the alarm will beep urgently at 2 beeps per second for around 10 seconds then slow to around 1 beep every 3 seconds if the call is not answered. It will then continue to beep indefinitely until you cancel it. Cancelling the Selcall Alarm. Pressing just about any key or knob on the TX3400 will cancel the Selcall Alarm. However, the following are the recommended methods. If you want to Cancel the Alarm and listen on the channel: Briefly press the Volume/Quiet knob. The alarm will stop beeping and the channel will remain open to any incoming signals. If you want to Cancel the Alarm and talk on the channel: Press the PTT switch on the microphone and talk in the usual way. The alarm will be cancelled and the channel will be open for normal communication. If you want to Recall the Callers Ident and return the call: Briefly press the CALL button on the microphone. The radio will enter the CALL TO mode and will insert the callers Ident or Name ready for sending. Now simply press and hold the CALL button for a few seconds until the radio beeps. The Selcall will be sent to the caller. Call Acknowledge Signal. When your TX3400 receives its own Selcall Ident, it automatically responds by transmitting an acknowledge signal back to the caller. This informs the caller that their Selcall transmission has been successful and that your radio is alerting you to their call. The acknowledge signal is heard at the callers end as two quick beeps. 11
12 USING THE QUIET MODE The QUIET mode prevents any incoming transmissions from being heard in your TX3400 s speaker until your Selcall Ident is received. This allows you to monitor a busy channel for calls without being disturbed by unwanted signals. When your Selcall Ident is received, the QUIET mode is cancelled and all incoming signals will be heard in the speaker. The QUIET mode is setup by first tagging the channels that you want to stay Quiet, then activating the QUIET mode. Once QUIET is activated, the channels you have tagged will remain Quiet to all incoming signals. Channels not tagged will operate normally. To Tag individual channels for QUIET operation. 1. Select the required channel by rotating the Channel knob. 2. Press and hold the Volume/Quiet knob until a high beep is heard. Q will appear to the upper left of the channel number indicating this channel is now tagged for Quiet operation. Repeat steps 1 and 2 to tag all required channels. To Activate the QUIET Mode. 1. Select any channel that has been tagged for Quiet operation. Q will be displayed. 2. Briefly press the Volume/Quiet knob. QUIET will appear on the right of the display. Now all channels tagged for Quiet operation will be operating in the Quiet Mode. (You can test this by opening the squelch using the squelch key and selecting various channels with the Channel knob. The radio s background noise will be heard on normal open channels but will remain quiet on those channels that are set for Quiet operation.) NOTE: You cannot activate the Quiet mode unless you have selected a tagged channel with Q displayed. To De-activate the QUIET Mode. 1. Select any channel that has been tagged for Quiet operation. Q and QUIET will be displayed. 2. Now briefly press the Volume/Quiet knob. QUIET will disappear on the right of the display and all channels tagged for Quiet operation will now operate normally again. To Remove the QUIET Tagging. 1. Select a channel that has been tagged for Quiet operation. Q will be displayed to the upper left of the channel number. 2. Now press and hold the Volume/Quiet knob until a low beep is heard. Q will disappear indicating this channel is no longer tagged for Quiet operation. Receiving Signals in the QUIET Mode. If a normal signal is received on a QUIET channel, the channel will appear busy but no sound will be heard from the speaker. This means you will not be disturbed by the signal. If a normal signal is received on an Open channel (one that is not tagged with Q ) the signal will be heard in the usual way. If a signal containing your Selcall Ident is received on any channel - Open or QUIET - the QUIET mode will be cancelled and the alarm will beep to alert you to the call. In addition, the callers Ident or Name will be displayed. All channels will now be open for normal transmission and reception. 12
13 SCANNING IN THE QUIET MODE The TX3400 will allow you to scan while the QUIET mode is active. You can then monitor a group of Quiet channels or a combination of Quiet and Open channels. To Scan in the QUIET Mode: 1. Press the OS/GS key to select the required Scan group. 2. Select the channels you wish to remain Quiet and tag each one with Q. 3. With a tagged channel selected, briefly press the Volume/Quiet knob to activate the QUIET Mode. 4. Now press the SCAN key. The radio will begin scanning and SCAN will be displayed. If a normal signal is received on an open channel, scanning will pause while the channel is busy and will resume scanning 5 seconds after the channel becomes clear. (If you were scanning in GS mode, the radio may switch between the open channel and the Priority channel. This is normal). If a normal signal is received on a Quiet channel but your Selcall Ident is not detected, the signal will be ignored and scanning will continue. If a signal containing your Selcall Ident is received on any channel - Open or Quiet - both scanning and QUIET modes will be cancelled and the receiver will stay on that channel. In addition, the alarm will beep to alert you to the call and the callers Ident will be displayed. The channel will now be open for normal transmission and reception. NOTE: To ensure reliable Selcall detection when scanning, it is recommended that you restrict the number of channels in the Scan group. In Open Scan Mode: 10 Channels In Group Scan Mode: 8 Channel plus the Priority Channel GROUP CALLS The TX3400 s Selcall system includes a Group Call function which allows you to call up to 10 radios simultaneously. This could be useful in an emergency situation where you may need to transmit a message to a number of radios in your group. The Group Call function works by allowing you to enter a special group code into the last digit position of the Selcall Ident you are sending. The group code appears as an A when displayed in the radio. When this group code is received, it substitutes for any other number in the last digit position. As long as the first 4 digits of the Selcall you are sending match those of the radios you are calling, their Selcall alarms will be activated as if their full 5 digit Selcall Idents had been received. To achieve this, the 10 radios you are calling must be programmed with sequentially numbered Selcall Idents. i.e , 12031, 12032, >, e.g. Transmitting the Selcall Ident will only activate the alarm in the radio with the Selcall Ident of Transmitting 1203A will activate the alarms in all radios with Idents through (a total of 10 radios). If the radios in your fleet do not have sequentially numbered Selcall Idents and you want to make use of this function, you can arrange for your dealer to re-program your radios. 13
14 Programming and Sending Group Calls. Entering a Group call Ident is the same as entering a normal Selcall Ident. 1. Briefly press the CALL button on top of the microphone. CALL TO will appear on the display along with the last Selcall Ident you sent. The righthand digit of the Selcall Ident will be flashing. This flashing digit indicates the digit to be programmed. 2. Rotate the Channel knob to select A in the righthand flashing digit position. This is special code that will create the Group Call. 3. Briefly press the Channel knob to select the next digit to program. A high beep will be heard and the next digit will flash. 4. Rotate the Channel knob to select the required number in the next flashing digit position. 5. Repeat steps 3 and 4 to program all 5 digits as required. When completed, the first 4 digits of the Ident you have entered will match all the radios in the group. The last digit will be set to A. Once the Ident has been entered you have 20 seconds to send it otherwise the CALL TO mode will be cancelled and the Ident you entered will be lost. To Send the Selcall Ident. With the required Selcall Ident displayed in the CALL TO mode, press and hold the CALL button for a few seconds until the radio beeps. The Selcall Ident will be sent automatically and the radio will return to normal operation. Call Acknowledge in Group Mode. There is no call acknowledge when sending group calls. This is to prevent all the radios in your group from trying to respond to your Selcall transmission at the same time. Storing group Call Idents. Group Call Idents can be stored in memory in the same was as a standard Selcall Ident. Simply follow the instructions for storing Selcall Idents in memory as described earlier in this manual. Receiving Group Calls. Receiving a Group call is identical to receiving a normal Selcall except that the alarm sound is a LOW tone beep instead of the normal High tone beep. The Callers Ident or Name appears on the display in the usual way. PAGE MODE The PAGE or transpond feature allows you to leave your radio unattended yet still be informed of any incoming Selcalls. If your Selcall Ident is received while your TX3400 is in the PAGE mode, it will automatically call another UHF radio to alert you to the call. To receive the Paging call, the other UHF radio must be fitted with a CCIR compatible Selcall (such as a TX3400, TX4200, TX4000, TX6000 or TX475S. NOTE: To allow your TX3400 to operate in the PAGE mode when your vehicle is unattended, your radio must be wired so that it has a continuous 13.8 volt power source even when the vehicles ignition is switched off (see installation instructions). Selecting the Paging Channel. Your TX3400 s Paging channel is factory set to UHF CB channel 23. If channel 23 is not suitable for use in your area, you can arrange for your dealer to reprogram it to another of the 40 UHF CB channels. 14
15 Setting the PAGEing Ident. The PAGE Ident is the Ident of the receiver you will use to receive the paging call. It is programmed in the same way as Selcall Idents and is stored in a special Page memory. 1. Press the CALL button to select the CALL TO mode. An Ident will be displayed. 2. Rotate the Channel switch to select the required number in the flashing digit position then briefly press the Channel switch to step to the next digit. Repeat until all 5 digits have been set. 3. Now press and hold the P (Page memory) key below the display until the radio beeps. The ident will be stored in the Paging memory. Naming the Page Ident. A label or name can be applied to the Page Ident to make it easier to identify when the radio is in the Name mode. To add an Name: 1. Briefly press the CALL button. CALL TO will be displayed. 2. Briefly press the P key to display the Page Ident. 3. Press and hold the Volume knob until the radio beeps. The radio will change to Name mode. 4. Rotate the Channel switch to change the character in the flashing character position, then press the Channel switch to select the next character. 5. When all 5 characters have been selected, press and hold the P memory key until the radio beeps. The Name will be stored in the Page Ident memory. Viewing the Page Ident Memory. To view the Ident or Name stored in the page memory: 1. Briefly press the CALL button to select the CALL TO mode. 2. Briefly press the P memory key. The page Ident will be displayed. If the radio is in Name mode, the Name associated with the page Ident will be displayed instead of the Ident. Activating the Page Mode. Select the Page mode by holding down the CALL button then pressing the Volume knob. PAGE will be displayed and the display lighting will extinguish after 10 seconds to conserve power in case the radio is to be left in Page mode for an extended period. This also makes the radio less visible if it is left in an unattended vehicle at night. Deactivating the Page Mode. To de-activate the page mode, briefly press the Volume knob. Receiving your Selcall in Page Mode. If your TX3400 receives its own Selcall Ident while in the PAGE mode, it will temporarily switch to the paging channel, check that the channel is not in use, then transmit the paging Ident to the other receiver. It will then return to the channel on which the original call was received, activate its own Selcall alarm and display the callers Ident. Meanwhile the other receiver will be beeping to tell you that someone has called you. You can then return to your TX3400, identify the callers Ident and return the call. The page mode can be used either while monitoring a single channel or while scanning in open scan or group scan mode. Monitoring a Single channel in the PAGE Mode. To monitor a single channel in the Page mode, simply select the channel you wish to monitor, then select the Page mode by holding the CALL button down and pressing the Volume knob. 15
16 With the Page mode selected, the radio will operate normally and you can transmit and receive on the selected channel. If the selected channel has been tagged for Quiet operation, the QUIET mode will be automatically selected and QUIET will be displayed. In this case, you will not be able to transmit. If your Selcall Ident is received, your TX3400 will send an acknowledge beep back to the caller then change to the Paging channel and transmit the Page Ident. It will finally return to the selected channel, sound the alarm and display the Ident or Name of the caller. Scanning in the Page Mode. To Scan in the Page mode, simply select the required scan group, program the required channels, then briefly press the SCAN key. The radio will begin scanning. Now select the Page mode by holding the CALL button down and pressing the Volume knob. Scanning with QUIET Mode. The radio will scan the selected channels. If any channels have been tagged for Quiet operation, the QUIET mode will be automatically selected and QUIET will be displayed. You will not be able to transmit. Scanning in Open Scan Mode. If the radio is scanning in the Open Scan mode, you will not be able to transmit unless the scan has stopped on a busy channel. Scanning in Group Scan Mode. If the radio is scanning in the Group scan mode, you can transmit on the Priority channel at any time. To Return a Call in the PAGE Mode. If you return to your radio and it is beeping, briefly press the Volume/Quiet button. The radio will exit the PAGE mode and CALL FROM will be displayed along with the Ident or Name of the caller. Briefly press the CALL button. CALL TO will be displayed along with the Ident or Name of the caller. Now press and hold the CALL button for a few seconds until the radio beeps. The callers Selcall Ident will be sent. If the call is successful, you will hear two quick acknowledge beeps in your radio s speaker as the caller s radio responds. CTCSS CTCSS (Continuous Tone Coded Squelch System) is a quieting system that allows a group of radios to talk to each other without hearing other users on the channel. The system applies a continuous low level tone to your transmission, and a matching tone decoder to your receiver's squelch. When CTCSS is enabled the channel remains quiet until someone transmits using the same tone. When the transmission ends, the channel becomes quiet again. By using different tones, several groups of people can share the same channel without disturbing each other. Your TX3400 is CTCSS ready. This means that CTCSS is designed into your TX3400, but disabled at the factory. The Australian Communications Authority does not yet permit the use of CTCSS on CB frequencies. However, when approval for CTCSS is granted, you may contact your dealer to arrange for this feature to be enabled. The following description assumes CTCSS has been enabled by your dealer. The TX3400 allows CTCSS to be enabled or disabled on individual channels. In addition, the 16
17 CTCSS tone frequency used is user programmable. Note that the CTCSS tone you select will be used for all CTCSS enabled channels. To select the required CTCSS tones on your radio, use the following procedure: 1. Switch the TX3400 OFF at the volume control. 2. Press and hold the SQL and SCAN keys while turning the radio on again. SILENT will be flashing and BUSY will be visible. The channel number will now correspond to one of 50 different CTCSS tones as shown in the table below. The factory default is To select the desired receive tone, rotate the channel switch until the required tone number is displayed. 4. Press and hold the SQL key. The display will flash and a high beep will be heard as the receive tone is stored. 5. Now briefly press the SQL key to select the transmit tone. SILENT will be flashing and TX will be visible. 6. Select the desired transmit tone using the channel switch. Press and hold the SQL key to store the tone. 7. Now switch the radio OFF then ON again to return to normal operation. NOTE: To disable the sending or receiving of CTCSS tones, set either tone to 00. If both transmit and receive tones are set to 00, the CTCSS function is disabled and can not be selected. To enable the CTCSS function on a channel: 1. Select the required channel. 2. Press and hold the SQL key until a high beep is heard. SILENT will be displayed. You may activate CTCSS on as many channels as you wish except channels 1-8 (CTCSS is automatically disabled on repeater channels and the emergency channel 5). To de-activate CTCSS, repeat the steps above. A low beep will be heard and SILENT will disappear. CTCSS TONE FREQUENCY CHART Tone No. Frequency Hz Tone No. Frequency Hz Tone No. Frequency Hz Tone No. Frequency Hz
18 DISABLING FUNCTIONS The TX3400 has a number of features that can be disabled individually by the user to allow for much simpler operation. These include the Priority, Scan, Duplex and Squelch/CTCSS functions that are normally accessed via keys on the front of the radio. To disable one of the keys: 1. Turn the radio OFF using the volume control. 2. Press and hold the key you wish to disable while turning the radio back on. A low beep will be heard and the selected key will no longer function. To re-enable the key, repeat the steps above. When the radio is turned on again, a high beep will be heard and the key will function normally again. For example, to disable the SCAN function: 1. Turn the radio OFF using the volume control. 2. Press and hold the SCAN key while turning the radio back on. A low beep will be heard and the SCAN function will no longer be available. Repeat the procedure to re-enable the SCAN function. INSTALLATION The TX3400 main unit is supplied with a slim, slide-on mounting cradle. The cradle can be screwed or bolted in any convenient location in your vehicle (under or above the dash, on the centre console, under the seat, in the boot, etc) using the mounting slots provided in the base. The main unit contains a built-in speaker, and can be installed in a convenient location in the vehicle s cabin as the radio s loud speaker. Alternatively it can be installed out of the way and an extension speaker used instead. The remote head comes complete with a slim mounting bracket and gimbal knobs. Its small size and light weight allows it to be mounted in almost any convenient position accessible to the driver. If necessary, a 3 meter extension cable (LE001) is available to extend the distance between the remote head and the main unit. For reliable operation, the total cable length should not exceed 10 meters. When installing the radio, avoid mounting it close to heaters or air conditioners. Screw the mounting cradle and the remote head bracket to firm surfaces. Slide the TX3400 main unit into the cradle from the front until it clicks into place. Position the remote head in its mounting bracket, adjust it for the correct viewing angle and tighten the gimbal knobs securely. Finally, plug the remote head into the front panel of the TX3400 and the power and antenna leads to the sockets provided on the rear of the radio. Fitting Remote Head Bracket. NOTE: If your installation does not require the use of a remotely mounted control head, you can convert your TX3400 to a compact underdash radio by fitting the remote head front panel directly to the main unit as described later. 18
19 Mounting the Cradle. 2. Gently press the rubber strain relief into the hole surrounding the socket so that the slot around the strain relief fits neatly inside the lip of the hole. Plastic tab Removing the microphone. Fitting the Radio. Slide radio fully into cradle until it clicks into place. 1. Squeeze the rubber strain relief near the front panel to disengage the slot, and slide the strain relief back along the microphone cord. 2. Squeeze the plastic tab on the microphone plug towards the plug to unlock it while gently pulling the plug outwards. If the plug does not come out easily, the tab has not released correctly and should be squeezed again. Converting the TX3400 into an Underdash radio. Removing the Radio. Gently spread tabs If your installation does not require the use of a remotely mounted control head, you can convert your TX3400 to a compact underdash radio by fitting the remote head front panel directly to the main unit as follows. Remote Head Unit Disassembly. Slide radio from cradle Fitting the Microphone. Gently spread tabs The microphone uses a miniature 6 pin telephone style plug and socket. To fit the microphone: 1. Position the microphone plug so the plastic tab faces downwards. Press the plug into the socket until it "clicks". 1. Remove the two black screws from the metal cable-clamp plate at the rear of the remote unit. 2. Remove the 4 screws from the remote unit s rear case and remove the case. 3. Slide the rear case down the connecting cable and carefully unplug the cable from the PCB. Main Unit Disassembly. 1. Remove the top and bottom covers from the main unit. 19
20 2. Pull the dummy front panel away from the chassis and carefully unplug the connecting cable. Din Adaptor MBD001 Reassembly. 1. Plug the connecting cable from the main unit into the remote head front panel. 2. The remote front panel can be oriented so that the speaker in the main unit is facing either up or down. Position the front panel as required and slide it onto the main chassis. If the front panel is oriented so the speaker is facing UP, ensure the connecting cable is not crushed between the front panel PCB and the chassis. Align the holes in the top and bottom of the plastic front panel with the case screw holes in the chassis. 3. Refit the top and bottom covers and install the cover screws. Connect Plug Align Holes DC POWER CONNECTION The TX3400 is designed for 13.8 Volt DC, negative earth installations only (i.e. where the negative terminal of the battery is connected to the chassis or frame of the vehicle). There are two recommended methods of installation. Radio remains on when the ignition switch is off: Connect the radio's negative (black) lead to the vehicle's chassis, or if preferred, directly to the battery's negative terminal. The radio's positive (red) lead should be connected directly to the battery's positive terminal. Alternatively, the positive lead could be connected into the fuse box at a point that has Volts continuously available (preferably the battery side of the ignition switch). Radio turns off with the ignition switch: Connect the radio's negative (black) lead to the vehicle's chassis, or if preferred, directly to the battery's negative terminal. Console Mounting the TX3400 For console mounting, a flush mounting DIN Adaptor MBD001 is available as an optional accessory. The adaptor includes mounting brackets and a specially designed front panel escutcheon to suit most vehicle installations. The console mount is particularly suitable for dashboard mounting TX3400 s that have been converted from remote units to under-dash units (as described above). Installation instructions are provided with the bracket. See your nearest GME dealer for details. The radio's positive (red) lead should connect to an accessory point in the vehicle's fuse box. This point should supply Volts only when the ignition switch is turned ON or in the ACCESSORY position. HIGH VOLTAGE WARNING The TX3400 has a built-in, high voltage detection system to warn you if an overvoltage situation occurs. If the power supply voltage exceeds 18 Volts 20
TX4400 UHF CB RADIO INSTRUCTION MANUAL TX4400 INSTRUCTION MANUAL PAGE 1
 TX4400 UHF CB RADIO INSTRUCTION MANUAL TX4400 INSTRUCTION MANUAL PAGE 1 TABLE OF CONTENTS GENERAL................................... 3 FEATURES.................................. 3 BASIC OPERATION...4 Front
TX3420 REMOTE MOUNT UHF RADIO
 TX3420 REMOTE MOUNT UHF RADIO Introduction........................... 2 Important information concerning uhf cb radio................. 2 Emergency channels.................... 3 telemetry channels.....................
INSTRUCTION MANUAL TX3200 UHF TRANSCEIVER STANDARD COMMUNICATIONS PTY. LTD.
 INSTRUCTION MANUAL TX3200 UHF TRANSCEIVER STANDARD COMMUNICATIONS PTY. LTD. CONTENTS Contents................................... 2 Introduction................................ 2 Features....................................
5 watt super compact UHF CB remote LCD mic INSTRUCTION MANUAL
 5 watt super compact UHF CB remote LCD mic INSTRUCTION MANUAL CONTENTS ACCESSORIES SUPPLIED...3 IMPORTANT INFORMATION...3 EMERGENCY CHANNELS...3 TELEMETRY CHANNELS...3 FEATURES...4 GENERAL OPERATION...5
Super compact 5 watt UHF CB radio with ergonomic speaker control microphone INSTRUCTION MANUAL
 Super compact 5 watt UHF CB radio with ergonomic speaker control microphone INSTRUCTION MANUAL CONTENTS ACCESSORIES SUPPLIED... 3 INTRODUCTION... 3 IMPORTANT INFORMATION... 3 Possible issues... 3 Emergency
Compact 5 watt UHF CB radio
 Compact 5 watt UHF CB radio INSTRUCTION MANUAL ACCESSORIES SUPPLIED...2 INTRODUCTION...2 IMPORTANT INFORMATION...3 Possible Issues...3 Emergency Channels...3 Telemetry Channels...3 FEATURES...4 CONTROLS...5
DC-1122 Compact 5W UHF CB Radio
 DC-1122 Compact 5W UHF CB Radio Instruction Manual Introduction! NOTE Use of the citizen band radio service is licensed in Australia by ACMA Radio communications (Citizen Band Radio Stations) Class Licence
DIN size 4 watt 27 MHz AM CB radio with rugged professional mic INSTRUCTION MANUAL TX2720 INSTRUCTION MANUAL PAGE 1
 DIN size 4 watt 27 MHz AM CB radio with rugged professional mic INSTRUCTION MANUAL TX2720 INSTRUCTION MANUAL PAGE 1 The GME TX2720 is a 27 MHz AM Citizens Band radio. The TX2720 has a number of enhanced
27 MHz CB Radio. Downloaded from INSTRUCTION MANUAL TX2720 INSTRUCTION MANUAL PAGE 1
 27 MHz CB Radio INSTRUCTION MANUAL Downloaded from www.cbradio.nl TX2720 INSTRUCTION MANUAL PAGE 1 Congratulations. You have just purchased one of the most technically advanced 27 MHz radios in the world.
XRS-330C Instruction Manual. Super Compact Hideaway 80 Channel UHF CB Radio
 XRS-330C Instruction Manual Super Compact Hideaway 80 Channel UHF CB Radio CONTENTS INTRODUCTION... 1 Important information concerning UHF CB radio...1 Emergency channels...1 Telemetry channels...1 FEATURES...
UNIDEN uh088sx CB RADIO
 UNIDEN uh088sx CB RADIO Contents Controls/Indicators/Connections Controls... 3 Indicators... 4 Connections... 5 Introduction Features... 6 Preventative Maintenance... 6 Troubleshooting... 6 Memory Backup...
INSTRUCTION MANUAL. DIN size fully featured 5 watt UHF CB radio. ScanSuite. faster, smarter scanning
 INSTRUCTION MANUAL DIN size fully featured 5 watt UHF CB radio ScanSuite faster, smarter scanning CONTENTS SUPPLIED WITH... 2 INTRODUCTION... 3 IMPORTANT INFORMATION CONCERNING UHF CB RADIO... 3 Possible
ScanSuite. faster, smarter scanning INSTRUCTION MANUAL. Compact fully featured 5 watt UHF CB radio
 INSTRUCTION MANUAL Compact fully featured 5 watt UHF CB radio Compact fully featured remote mount 5 watt UHF CB radio Compact fully featured remote mic 5 watt UHF CB radio ScanSuite faster, smarter scanning
477 MHz UHF FIXED MOUNT RADIOS
 UHF fixed mount radios 477 MHz UHF FIXED MOUNT RADIOS > Compact, super compact, LCD mic, remote head and wireless PTT radios Now includes and the THE ONLY AUSTRALIAN MANUFACTURER OF UHF CB RADIOS NO MORE
INSTRUCTION MANUAL VHF FM TRANSCEIVER TK-7102H UHF FM TRANSCEIVER TK-8102H KENWOOD CORPORATION B (M)
") INSTRUCTION MANUAL VHF FM TRANSCEIVER TK-7102H UHF FM TRANSCEIVER TK-8102H KENWOOD CORPORATION B62-1596-00 (M) 09 08 07 06 05 04 03 02 01 00 THANK YOU! We are grateful you chose KENWOOD for your personal
INSTRUCTION MANUAL VHF FM TRANSCEIVER TK-7102H UHF FM TRANSCEIVER TK-8102H KENWOOD CORPORATION B62-1596-00 (M) 09 08 07 06 05 04 03 02 01 00 THANK YOU! We are grateful you chose KENWOOD for your personal
Downloaded from UNIDEN Model uh015sx UHF CB Radio
 Downloaded from www.cbradio.nl UNIDEN Model uh015sx UHF CB Radio Contents Introduction 3 Features 3 Preventive Maintenance 3 Troubleshooting 3 Controls / Connectors 4 Indicators 5 Package Contents 6 Mounting
477 MHz UHF FIXED MOUNT RADIOS
 UHF fixed mount radios 477 MHz UHF FIXED MOUNT RADIOS > Including the new ScanSuite range > Compact, super compact, LCD mic, remote head and wireless PTT radios The only Australian manufacturer of UHF
MobileRadio. Owner'sManual
 EMH MobileRadio Owner'sManual TABLE OF CONTENTS Introduction... 1 Basic Operation... 2 Code Guard Operation... 3 EMH Radio Controls... 4 Button Functions... 4 Built-in Features... 7 Keypad Microphone Operation...
INSTRUCTION MANUAL VHF FM TRANSCEIVER TK-2206 UHF FM TRANSCEIVER TK-3206 B (M,M3 )
") INSTRUCTION MANUAL VHF FM TRANSCEIVER TK-2206 UHF FM TRANSCEIVER TK-3206 B62-1763-00 (M,M3 ) 09 08 07 06 05 04 03 02 01 00 THANK YOU We are grateful you chose KENWOOD for your land mobile radio applications.
INSTRUCTION MANUAL VHF FM TRANSCEIVER TK-2206 UHF FM TRANSCEIVER TK-3206 B62-1763-00 (M,M3 ) 09 08 07 06 05 04 03 02 01 00 THANK YOU We are grateful you chose KENWOOD for your land mobile radio applications.
XRS-370C Compact Hideaway 80 Channel UHF CB Radio
 XRS-370C Compact Hideaway 80 Channel UHF CB Radio INSTRUCTION MANUAL Preface XRS-370C Instruction Manual Preface Copyright Notice Standard Communications Pty Ltd reserves all rights to this document and
UH5040. UHF CB Transceiver. For more exciting new products please visit our website: Australia:
 For more exciting new products please visit our website: Australia: www.uniden.com.au Contents Introduction 3 Features 3 Preventive Maintenance 4 Troubleshooting 4 Controls / Connectors 5 Indicators 6
BX SERIES HANDHELD RADIOS COMMERCIAL INSTRUCTION MANUAL BX SERIES HANDHELD INSTRUCTION MANUAL PAGE 1. Instruction manual includes models:
 COMMERCIAL BX SERIES HANDHELD RADIOS Instruction manual includes models: BX710 BX720 BX730 INSTRUCTION MANUAL BX SERIES HANDHELD INSTRUCTION MANUAL PAGE 1 WARNING - SAFETY INFORMATION The BX Series are
477 MHz UHF CB RADIOS. TRUST AUSTRALIAN MADE The only Australian manufacturer of UHF CB radios UHF RADIOS
 477 MHz UHF CB RADIOS TRUST AUSTRALIAN MADE The only Australian manufacturer of UHF CB radios UHF RADIOS TX3500 SERIES Introducing the TX3500 series & TX4500 Fully engineered and manufactured in Australia
XRS-330C Quick Start Guide
 XRS-330C Quick Start Guide Compact Hideaway 80 Channel UHF CB Radio The full Instruction Manual can be downloaded from www.gme.net.au In the box XRS-330C 5 watt UHF CB radio Mounting cradle (MK031) XRS
SECTION III OPERATION
 SECTION III OPERATION 3.1 INTRODUCTION This section contains information concerning the operation procedures for the BK Radio GPH Flex Mode Series handheld VHF radios. Information on installation and programming
UH043SX-2NB. UHF CB Transceiver. For more exciting new products please visit our website: Australia: New Zealand:
 UH043SX-2NB UHF CB Transceiver For more exciting new products please visit our website: Australia: www.uniden.com.au New Zealand: www.uniden.co.nz Controls & Indicators Included in your Package UH043SX-NB
ML802. Instruction Manual. UHF CB MOBILE RADIO with Remote Speaker Microphone
 ML802 Instruction Manual UHF CB MOBILE RADIO with Remote Speaker Microphone 1 2 CONTENTS Specifications...03 Introduction... 04 What s Included... 05 Emergency/Telecommand Channels... 05 Features... 06
User Guide Oricom UHF Channel UHF CB Radio
 User Guide Oricom UHF050 40 Channel UHF CB Radio Downloaded from www.cbradio.nl Table of contents Important Information 4 Please read before installing or operating your Oricom Radio 4 Safety Warning
UH5040R. UHF CB Transceiver. For more exciting new products please visit our website: Australia:
 For more exciting new products please visit our website: Australia: www.uniden.com.au Contents Introduction 3 Features 3 Preventive Maintenance 4 Troubleshooting 4 Controls / Connectors 5 Indicators 6
2 watt handheld UHF CB radio I N S T R U C T I O N M A N U A L
 2 watt handheld UHF CB radio I N S T R U C T I O N M A N U A L CONTENTS IMPORTANT INFORMATION...3 Possible Issues...3 TELEMETRY CHANNELS...3 FEATURES...4 RADIO CONTROLS...4 LCD Display...5 POWERING THE
477 MHz UHF HANDHELD RADIOS
 UHF handhelds 477 MHz UHF HANDHELD RADIOS > Including the new water and dust proof range > Compact, rugged and reliable Introducing the new TX6500S 5 watt handheld IP67* UHF CB radio, GME s latest powerhouse
ALAN 777 PMR 446 Radio Set User manual
 ALAN 777 PMR 446 Radio Set User manual The all new ALAN 777 represents the very latest and most advanced technology currently available on the PMR446 and LPD market. With its stylish lines and modern design,
477 MHz UHF CB RADIOS
 477 MHz UHF CB RADIOS TRUST AUSTRALIAN MADE The only Australian manufacturer of UHF CB radios UHF RADIOS TX3500 SERIES Introducing the TX3500 series & TX4500 Fully engineered and manufactured in Australia
UH45 Series. UHF CB Transceiver. For more exciting new products please visit our website: Australia:
 UH45 Series UHF CB Transceiver For more exciting new products please visit our website: Australia: www.uniden.com.au Controls & Indicators Included in your Package UH45 Series Radio Operating Guide Belt
RMV25 / RMV50 RMU25 / RMU45
 RMV25 / RMV50 RMU25 / RMU45 Owner's Manual TABLE OF CONTENTS INTRODUCTION... 3 FCC Requirements... 3 SAFETY WARNING INFORMATION... 3 CONTROLS and INDICATORS... 5 FRONT PANEL... 5 LCD Icons and Indicators...
TX4500 DIN size fully featured 5 watt UHF CB radio
 TX4500 TX4500 DIN size fully featured 5 watt UHF CB radio The TX4500 is DIN sized and ideal for installations that require this international size standard. The DIN mounting kit is supplied and its compact
Battery Informationy/Antenna and Other Accessories Charging the Battery
 Thank You Thank you for your purchase of HYT portable two-way radio. HYT portable radios will provide you with clear and reliable communications in high efficiency. Please read this manual before your
DELUXE 18CHANNEL SSB/AM CB TRANSCEIVER OWNER'S GUIDE
 DELUXE 18CHANNEL SSB/AM CB TRANSCEIVER OWNER'S GUIDE General Description The Bush Ranger is a combination transmitter and receiver designed for use in the Australian 27 MHz Citizens radio service. It is
INSTRUCTION MANUAL. Super compact 5 watt UHF CB radio. ScanSuite 5 YEAR WARRANTY
 INSTRUCTION MANUAL Super compact 5 watt UHF CB radio ScanSuite 5 YEAR WARRANTY CONTENTS SUPPLIED WITH...2 Dynamic Volume Control (DVC)...15 INTRODUCTION...3 Voice Scrambler...15 IMPORTANT INFORMATION CONCERNING
TX670 POCKET SIZE UHF CB RADIO INSTRUCTION MANUAL 2 WATT HANDHELD. TX670 Instruction Manual Page 1
 TX670 POCKET SIZE 2 WATT HANDHELD UHF CB RADIO INSTRUCTION MANUAL TX670 Instruction Manual Page 1 Warning: Safety Information The TX670 is a radio frequency transmitting device. When transmitting, keep
User Manual. Specifications...3. Control and Operation Microphone...8. Installation...9. Installation of Main Unit...9
 Contents Specifications...3 Control and Operation...4-7 Microphone...8 Installation...9 Installation of Main Unit...9 Antenna Installation...9 Operational test...9 Frequency Bands Table...10 Frequency
Super compact 5 watt UHF CB radio 5 YEAR WARRANTY INSTRUCTION MANUAL
 Super compact 5 watt UHF CB radio 5 YEAR WARRANTY INSTRUCTION MANUAL INTRODUCTION...3 IMPORTANT INFORMATION...3 TELEMETRY CHANNELS...4 FEATURES...5 GENERAL OPERATION...6 Unique Flip Feature...7 Power...7
OWNER S MANUAL FM HANDHELD TRANSCEIVER
 , OWNER S MANUAL RPU4200A FM HANDHELD TRANSCEIVER NOTE, OWNER S MANUAL RPU4200A FM HANDHELD TRANSCEIVER We are very grateful for your purchasing brand twoway radios produced by Relm Wireless Corporation.
HF SSB transceiver type 9480 Operators handbook
 HF SSB transceiver type 9480 Operators handbook No part of this handbook may be reproduced, transcribed, translated into any language or transmitted in any form whatsoever without the prior written consent
MXT100. GMRS Radio OWNER S MANUAL. midlandusa.com
 MXT100 GMRS Radio OWNER S MANUAL Welcome to the World of Midland electronics Congratulations on your purchase of a high quality MIDLAND product. Your 2-way radio represents state-of-the-art high-tech engineering.
Cat. No OWNER S MANUAL. HTX-212 Two-Meter Mobile Transceiver. Please read before using this transceiver.
 19-1125.fm Page 1 Tuesday, August 3, 1999 9:47 AM Cat. No. 19-1125 OWNER S MANUAL HTX-212 Two-Meter Mobile Transceiver Please read before using this transceiver. 19-1125.fm Page 2 Tuesday, August 3, 1999
VHF Transceiver AR6201
 VHF Transceiver AR6201 Operating Instructions Issue 2 / October 2010 Article No. 0618.764-071 Becker Flugfunkwerk GmbH Baden-Airpark B 108 77836 Rheinmünster Germany Telefon / Telephone +49 (0) 7229 /
Function Key Settings THE TAIT ORCA 5000 CORPORATE HEAD OFFICE NEW ZEALAND. Tait Electronics Ltd CANADA. P O Box 1645, Christchurch
 Custom Settings 5015 CONVENTIONAL TAIT ORCA Function Key Settings Short Press Long Press THE TAIT ORCA 5000 F1: CORPORATE HEAD OFFICE SERIES OF F2: Ext1: Ext2: Handset Mode Volume Keys Volume Up: Volume
PMR446 Radio Instruction Manual
 Tectalk PRO PMR446 Radio Instruction Manual Thank you for purchasing this radio. All our products are built to offer excellent value by combining advanced features, great design and manufacturing quality.
DC Instruction Manual. Professional FM Transceiver
 DC-1074 Professional FM Transceiver Instruction Manual Use of the citizen band radio service is licensed in Australia by ACMA Radiocommunications (Citizen Band Radio Stations) Class Licence and in New
Midland 248XL I NSTRUCTION GUI DE
 Midland 248XL I NSTRUCTION GUI DE INDEX Introduction...2 Function and location of the controls...3 Installation...7 Power supply...7 Installing an antenna...7 How to use your Midland 248XL...8 Frequency
GETTING STARTED. Radio layout. LCD display with icons
 GETTING STARTED Radio layout LCD display with icons 1. Key lock button 2. Battery meter 3. Main channel indicator 4. Scan icon 5. Roger beep indicator 6. CTCSS sub-channel indicator 7. VOX indicator 1
WARNING WELCOME TO USE RESET
 WARNING Please install the antenna (connect to the location B on the back panel of the radio) and set the SWR (Standing Wave Ratio) before transmitting. Failure to do so may result in destruction of the
i410pro ADVANCED MANUAL UHF CB TRANSCEIVER INTRODUCTION 1 ACCESSORIES AND INSTALLATION 2 BASIC OPERATION 3 SET MODE 4 REPEATER OPERATION 5 SCAN
 ADVANCED MANUAL INTRODUCTION 1 ACCESSORIES AND INSTALLATION 2 BASIC OPERATION 3 SET MODE UHF CB TRANSCEIVER i410pro 4 REPEATER OPERATION 5 SCAN 6 TONE SQUELCH AND POCKET BEEP 7 SELCALL (Selective Calling)
TK-D740 TK-D740H TK-D740HV TK-D840 TK-D840H TK-D840HU
 TK-D740 TK-D740H TK-D740HV TK-D840 TK-D840H TK-D840HU VHF DIGITAL TRANSCEIVER UHF DIGITAL TRANSCEIVER USER MANUAL B5A 0925-00/01 Contents PREPARATION... 4 Connecting the power cable... 4 Installing the
9/14/2017. APX 4000 Portable Radio. Before You Begin. APX 4000: Introduction. Rensselaer County Bureau of Public Safety 800 MHz Radio User Training
 9/14/2017 Rensselaer County Bureau of Public Safety 800 MHz Radio User Training Portable Radio Before You Begin View the Operations Training Presentation first, it covers: Overview of Rensselaer County
UH9000. UHF CB Transceiver. For more exciting new products please visit our website: Australia:
 UH9000 For more exciting new products please visit our website: Australia: www.uniden.com.au Contents Introduction 4 Controls & Connectors 6 Indicators 8 Included with your Transceiver 9 Optional Accessories
4W MOBILE CB TRANSCEIVER INSTRUCTION MANUAL
 4W MOBILE CB TRANSCEIVER INSTRUCTION MANUAL www.ttikorea.co.kr CONTENTS 1. Introduction 2. Supplied Accessories 3. Installation 4. Transceiver Controls and Functions 1) Microphone Jack 2) LCD Display 3)
1 watt compact UHF CB radios
 1 watt compact UHF CB radios I N S T R U C T I O N M A N U A L CONTENTS ACCESSORIES SUPPLIED...2 SAFETY INFORMATION...2 IMPORTANT INFORMATION...3 Possible Issues...4 TELEMETRY CHANNELS...5 Features...5
UH-040XR Operating Guide
 UH-040XR Operating Guide WARNING! Do not operate the transmitter of any radio equipment unless all the Radio Frequency (RF) connectors are secured and any open connectors are properly terminated. Do not
Contents Controls / Connections / Indicators Included with your UH The Uniden UH-012 is designed to provide you with years of trouble free ser
 UNIDEN Model UH-012 CB Radio Contents Controls / Connections / Indicators Included with your UH-012 1 1 The Uniden UH-012 is designed to provide you with years of trouble free service. Its rugged components
CON NEX HP. OWNER'S MANUAL Full Channel AM/FM Amateur Mobile Transceiver TABLE OF CONTENTS TUNING THE ANTENNA FOR OPTIMUM S.W.R..
 TABLE OF CONTENTS PAGE SPECIFICATIONS... 2 INSTALLATION... 3 LOCATION... 3 CON NEX - 4300HP MOUNTING THE RADIO... 3 IGNITION NOISE INTERFERENCE... 4 ANTENNA... 4 TUNING THE ANTENNA FOR OPTIMUM S.W.R..
TWO-WAY RADIO MODEL CXR925
 Making Life Easier and Safer Owner s Manual Staying in touch with your family and friends is convenient and easy when using your microtalk radio. Some of the many uses you will discover include: Communicating
APX 6000 Portable Radio
 Montgomery County Emergency Services 800 MHz Rebanding Training Portable Radio Before You Begin View the main training video first, it covers: General Radio Review Overview of Montgomery County s Radio
INSTRUCTION MANUAL MODE D EMPLOI MANUAL DE INSTRUCCIONES MANUALE DI ISTRUZIONI BEDIENUNGSANLEITUNG GEBRUIKSAANWIJZING
 INSTRUCTION MANUAL MODE D EMPLOI MANUAL DE INSTRUCCIONES MANUALE DI ISTRUZIONI BEDIENUNGSANLEITUNG GEBRUIKSAANWIJZING ProTalk TK-320 UHF FM TRANSCEIVER ÉMETTEUR-RÉCEPTEUR FM UHF TRANSCEPTOR DE FM UHF RICETRASMETTITORE
Operating Instructions
 Operating Instructions UHF380 80 Channel UHF 2-Way Citizen Band Radio Keep this user guide for future reference. Always retain your proof of purchase in case of warranty service and register your product
HR MHZ AM-FM AMATEUR RADIO HF TRANSCEIVER OWNER'S MANUAL. Content of the packaging
 HR-2800 28 MHZ AM-FM AMATEUR RADIO HF TRANSCEIVER OWNER'S MANUAL NOTICE! It is recommended to carefully read this owner s manual before using the product. This will also help to prevent illegal use of
Commercial Series. CP140 Portable Radio. User Guide
 Commercial Series CP140 Portable Radio User Guide Issue: October 2003 CONTENTS Computer Software Copyrights... 2 Radio Overview..... 3 Operation and Control Functions..... 3 Radio Controls.... 3 LED Indicator.....
OPERATING GUIDE VHF TRANSCEIVER. Iç-G88
 OPERATING GUIDE VHF TRANSCEIVER Iç-G88 INTRODUCTION PREFACE We appreciate you choosing Icom for your communication needs. The MDC 1200 signaling system is built into your IC-G88 vhf transceiver. IMPORTANT
Instruction Manual. Model: TX-446. Tech Private Mobile Radio (PMR)446MHz
446MHz") Instruction Manual Tech Private Mobile Radio (PMR)446MHz Model: TX-446 TTI TECH CO., LTD. Eundo Bldg, 737-19, Banpo-1dong, Seocho-ku, Seoul, Korea, 137-041 http://www.ttikorea.co.kr TABLE OF CONTENTS 1.
Instruction Manual Tech Private Mobile Radio (PMR)446MHz Model: TX-446 TTI TECH CO., LTD. Eundo Bldg, 737-19, Banpo-1dong, Seocho-ku, Seoul, Korea, 137-041 http://www.ttikorea.co.kr TABLE OF CONTENTS 1.
A WORLD OF LISTENING WARNING: TO PREVENT FIRE OR ELECTRIC SHOCK HAZARD, DO NOT EXPOSE THIS PRODUCT TO RAIN OR MOISTURE.
 DDR-3 FM RDS/DAB digital radio A WORLD OF LISTENING THE LIGHTNING FLASH AND ARROW- HEAD WITHIN THE TRIANGLE IS A WARNING SIGN ALERTING YOU OF DANGEROUS VOLTAGE INSIDE THE RADIO. WARNING: TO PREVENT FIRE
OPERATING GUIDE VHF DIGITAL TRANSCEIVERS. if1000d. series UHF DIGITAL TRANSCEIVERS. if2000d series. The photo shows the VHF transceiver.
 OPERATING GUIDE VHF DIGITAL TRANSCEIVERS if1000d UHF DIGITAL TRANSCEIVERS series if2000d series The photo shows the VHF transceiver. TABLE OF CONTENTS 1. PANEL DESCRIPTION Front, top and side panels 1-2
User Guide For UHF400R 80 Channel UHF 2-WAY Citizen Band Radio
 User Guide For UHF400R 80 Channel UHF 2-WAY Citizen Band Radio Keep this user guide for future reference. Always retain your proof of purchase in case of warranty service and register your product on line
Two-Way Radios. Quick Start Guide. XT460 Display model
 Two-Way Radios Quick Start Guide XT460 Display model CONTENTS Contents..................................... 1 Safety....................................... 2 Batteries and Chargers Safety Information........
Dear Valued Customer,
 Dear Valued Customer, Thank you for choosing Listen! All of us at Listen are dedicated to provide you with the highest quality products available. We take great pride in their outstanding performance because
XTRAK40. UHF CB Transceiver. For more exciting new products please visit our website: Australia:
 XTRAK40 For more exciting new products please visit our website: Australia: www.uniden.com.au Contents Introduction 4 Controls & Connectors 6 Indicators 8 Included with your XTRAK40 Transceiver 9 Optional
UNIDEN Model uh065sx UHF CB Radio. uh065sx uh065sx-2. Owner s Manual
 uh065sx uh065sx-2 Owner s Manual 1 uh065sx OM.indd 1 17/8/07 3:00:26 PM WARNING! The citizen band radio service is licenced in Australia by ACMA Radio-communications (Citizen Band Radio Stations) Class
ic-f1020 ic-f2020 INSTRUCTION MANUAL VHF LAND MOBILE RADIO UHF LAND MOBILE RADIO
 INSTRUCTION MANUAL VHF LAND MOBILE RADIO ic-f1020 UHF LAND MOBILE RADIO ic-f2020 This device complies with Part 15 of the FCC Rules. Operation is subject to the condition that this device does not cause
Content. Maintenance. Features ENGLISH. 1 transceiver 1 antenna 1 battery pack 1 belt clip 1 fast desktop charger User manual
 ENGLISH Content 1 transceiver 1 antenna 1 battery pack 1 belt clip 1 fast desktop charger User manual If any items are missing, contact your dealer. Maintenance Your Two Way Radio is an electronic product
ICS REPEATER CONTROLLERS
 ICS REPEATER CONTROLLERS BASIC CONTROLLER USER MANUAL INTEGRATED CONTROL SYSTEMS 1076 North Juniper St. Coquille, OR 97423 Email support@ics-ctrl.com Website www.ics-ctrl.com Last updated 5/07/15 Basic
Operators Manual (Manual A)
") CD201 SINGLE COLUMN CARD DISPENSER Operators Manual (Manual A) Contents A1 Scope... 1 A2 Specifications... 1 A3 Installation... 2 3.1 Unpacking and inspection... 2 3.2 Opening and closing the door... 2
CD201 SINGLE COLUMN CARD DISPENSER Operators Manual (Manual A) Contents A1 Scope... 1 A2 Specifications... 1 A3 Installation... 2 3.1 Unpacking and inspection... 2 3.2 Opening and closing the door... 2
VHF FM TRANSCEIVER/ UHF FM TRANSCEIVER INSTRUCTION MANUAL ÉMETTEUR-RÉCEPTEUR FM VHF/ ÉMETTEUR-RÉCEPTEUR FM UHF MODE D EMPLOI
 TK-2202/ TK-3202 VHF FM TRANSCEIVER/ UHF FM TRANSCEIVER INSTRUCTION MANUAL ÉMETTEUR-RÉCEPTEUR FM VHF/ ÉMETTEUR-RÉCEPTEUR FM UHF MODE D EMPLOI TRANSCEPTOR DE FM VHF/ TRANSCEPTOR DE FM UHF MANUAL DE INSTRUCCIONES
Digital Portable Radio
 II TP620 Digital Portable Radio We are very grateful for your purchasing KIRISUN brand two-way radios produced by Kirisun Communications Co., Ltd. We believe KIRISUN two-way radio, which always incorporates
INSTRUCTION MANUAL VHF FM TRANSCEIVER TK-6110 B (K,K2)
") INSTRUCTION MANUAL VHF FM TRANSCEIVER TK-6110 B62-1216-20 (K,K2) 09 08 07 06 05 04 03 02 THANK YOU! We are grateful you chose KENWOOD for your land mobile applications. We believe this easy-to-use transceiver
INSTRUCTION MANUAL VHF FM TRANSCEIVER TK-6110 B62-1216-20 (K,K2) 09 08 07 06 05 04 03 02 THANK YOU! We are grateful you chose KENWOOD for your land mobile applications. We believe this easy-to-use transceiver
Important Charging Information
 Custom Settings TAIT ORCA 5020 CONVENTIONAL Function Key Settings Short Press Long Press F1: F2: F3: Ext1: Ext2: Handset Mode Volume Keys Volume Up: Volume Down: Selcall Settings Selcall ID: Commonly Used
SUMMIT DM MULTI-NET MOBILE RADIO OPERATING MANUAL
 SUMMIT DM MULTI-NET MOBILE RADIO OPERATING MANUAL SAFETY INFORMATION Proper operation of this radio will result in user exposure below the Occupational Safety and Health Act and Federal Communication Commission
DJ-MD5 PC Software Guidance
 DJ-MD5 PC Software Guidance Ver, 1.00 2018/08/16 1 Appendix I Public... 4 1. Channel... 4 1 Frequency, call type, power... 4 2 Digital Channel Setting... 5 3 Analog Channel Setting... 6 2. Zone... 7 3.
Montgomery County Emergency Services 800 MHz Rebanding Training. MTS 2000 Type II & III. Portable Radio
 Montgomery County Emergency Services 800 MHz Rebanding Training Portable Radio Before You Begin View the main training video first, it covers: General Radio Review Overview of Montgomery County s Radio
VHF/AM LOW COST BASE STATION MODEL TiL-91-DE
 VHF/AM LOW COST BASE STATION MODEL TiL-91-DE 7 WATT BASE STATION SYSTEM NO 910807 (TLC-150) Installation and Operating Instructions Til Document No. 92RE129 Rev. A October 2002 Technisonic Industries Limited
UBZ-LJ8 FM TRANSCEIVER INSTRUCTION MANUAL EMETTEUR-RECEPTEUR FM MODE D EMPLOI RICETRASMETTITORE FM MANUALE DI ISTRUZIONI
 UBZ-LJ8 FM TRANSCEIVER INSTRUCTION MANUAL EMETTEUR-RECEPTEUR FM MODE D EMPLOI TRANSCEPTOR DE FM MANUAL DE INSTRUCCIONES RICETRASMETTITORE FM MANUALE DI ISTRUZIONI FM-HANDFUNKSPRECHGERÄT BEDIENUNGSANLEITUNG
User manual AWR-8000 / AWR Advanced Wireless Communications
 User manual AWR-8000 / AWR-8001 Advanced Wireless Communications THANK YOU! Thank you for your purchase of Advanced Wireless Communications AWR-8000 / AWR-8001 two-way radio. This portable two-way radio
INSTRUCTION MANUAL UHF C.R.S.TRANSCEIVER. i41s
 INSTRUCTION MANUAL UHF C.R.S.TRANSCEIVER i41s IMPORTANT READ ALL INSTRUCTIONS carefully and completely before using the transceiver. SAVE THIS INSTRUCTION MANUAL This instruction manual contains important
Greaval GV-8S. User Manual
 Greaval GV-8S User Manual Version 2017 A B C D E F G LED Indicator Lights red during transmit, green when receiving a signal Channel Switch Rotate to select a channel. No. 16 is the scanning channel Power
INSTRUCTION MANUAL VHF FM TRANSCEIVER TK-7100 UHF FM TRANSCEIVER TK-8100 B (K,M,M2)
") INSTRUCTION MANUAL VHF FM TRANSCEIVER TK-7100 UHF FM TRANSCEIVER TK-8100 B62-1778-00 (K,M,M2) 09 08 07 06 05 04 03 02 01 00 THANK YOU! We are grateful you chose KENWOOD for your personal mobile applications.
INSTRUCTION MANUAL VHF FM TRANSCEIVER TK-7100 UHF FM TRANSCEIVER TK-8100 B62-1778-00 (K,M,M2) 09 08 07 06 05 04 03 02 01 00 THANK YOU! We are grateful you chose KENWOOD for your personal mobile applications.
UH720SX-NB UH720SX-2NB UH710SX-NB UH710SX-2NB UH710-2TP UH720-2TP
 UH720SX-NB UH720SX-2NB UH710SX-NB UH710SX-2NB UH710-2TP UH720-2TP For more exciting new products please visit our website: Australia: www.uniden.com.au Warning The citizen band radio service is licenced
RX1300 MULTIBAND SCANNING RECEIVER INSTRUCTION MANUAL
 RX1300 MULTIBAND SCANNING RECEIVER INSTRUCTION MANUAL CAUTION Please read these instructions carefully before operating your receiver. Your scanner is a complex and powerful unit with many functions. Please
INSTRUCTION MANUAL FM HANDHELD TRANSCEIVER
 INSTRUCTION MANUAL PT558 FM HANDHELD TRANSCEIVER NOTE INSTRUCTION MANUAL PT558 FM HANDHELD TRANSCEIVER We are very grateful for your purchasing brand twoway radios produced by Kirisun Electronics (Shenzhen)
QUANTUM Qflash T2 / X2 OPERATING INSTRUCTIONS
 QUANTUM Qflash T2 / X2 OPERATING INSTRUCTIONS 1.0 DESIGNATIONS T2 AND X2 1. Removable Reflector, two positions Normal and Wide angle. 2. Flash-tube 2A. Modeling Lamp (for Model X2 only) 3. Bounce Head,
RIDGE ACCESSORIES INTRODUCTION WELCOME FEATURES BOX CONTENTS
 PAGE 1 INTRODUCTION WELCOME Thank you for purchasing the Ridge Ryder RR100A Ultra Compact 80 Channel UHF Radio. Please ensure that you have read the product manual and instructions in full, prior to installation
Downloaded from
 Downloaded from www.cbradio.nl WARNING Please install the antenna (connect to the location B in the back panel of the radio) and set the SWR (Standing Wave Ratio) before transmitting. Otherwise it may