BlopHome Help. How to get started. 1 of 5. If you are not logged in blophome
|
|
|
- Liliana Arnold
- 5 years ago
- Views:
Transcription
1 How to get started New If you are not logged in blophome Open 1 of 5 My site

2 How to get started New If you are logged in blophome Open 1 of 5 My site
3 How to get started 2 of 5 With one click move and modify the wall With 2 clicks we get in and modify the wall When we start working with the application you will find this window as a default object If you want to disconnect click: I do not want this window to appear

4 How to get started 3 of 5 Tabs: The titles of the tabs indicate their main function -- Home: for a new project or to open one -- Walls: to give the room its shape -- Furniture: to insert elements, change textures or properties of the objects -- 3D Project: to focus on perspective, high-quality render -- Save: to save and print or send by and print -- Help: Default parametres, delete temporary files and proxy setup Icons: On each tab you will find the icons that you need to work with. Walls and Platforms: The walls and platforms libraries appear in this window. Drag and drop over the room. Work zone: This is the area in which the room to be decorated appears, in the case of the walls, it allows you to modify the geometry in order to adapt it to your design.
5 How to get started Textures: The textures libraries appear in this window. Drag and drop over the object or the room. List of Materials: All the objects that the room has got appear in this window Search Object: Ayuda de búsqueda textual de objeto 4 of 5 Maker Filter Objects Window Objects: The objects libraries appear in this window. Drag and drop over the room. Maximize and Minimize

6 How to get started What can I do? Window This window will appear when selecting an object in the room. It will indicate which changes we can make to the selected object. 5 of 5


7 1 of 2 Converting geometry Converting the geometry (1) is as easy as placing the mouse on any wall and stretching. If we do this on the interior rectangles (2) we can make shapes. Distort the shapes with the blue squares. Current state Mark the grey zone Stretch with the mouse Current state Two clicks on the gray area Stretch with the mouse
 doble click")


8 2 of 2 Converting geometry In order to shape a wall of the room (1) doble click on the wall and delete (2) and we will be able to modify the lenght of the wall Current state One click Delete wall Current state One click Modify the length of the wall
9 List of icons and what they do Add Wall: Click and a partition wall will automatically appear in the room. We can change it or move it. Add Platform: Click, drag and drop. This allows us to create platforms. Once positioned, we can change its shape, size or height. Views: click to retrieve any view on which has made a perspective Zoom + : Clicking on this will expand the view incrementally. Zoom - : Clicking on this will reduce the view incrementally. Catalogs: click to see the object libraries Object Zoom: click to do a frame on the view of the object selected Textures: click to see the texture libraries Zoom Window : Mark the area we want to see close up with 2 points Items list: click to see all objects standing on the room Zoom Initial : Clicking on this will leave it in initial zoom Elevation: An interchangeable icon for edition the walls coatings to room Duplicate : Duplicates the selected object 3D View / 2D View: An interchangeable icon to see the room in 3D (perspective) or 2D (plan). Magnet On / Magnet Off: This indicates that currently the objects will be attached to the walls by default. If we click on the objects, they will break free and will not be attached to the walls. Realistic render: The icon to obtain a high quality render. Undo : The icon for undoing actions Delete : Delete the selected object Redo : The icon for remake actions.
10 What can I do? Window 1 of 4 Select a simple object Rotation : Editing the number or using the arrows will rotate the object on the coordinates x, y (plan). Height positioned : Editing the number or using the arrows will change the height of placement with respect to the floor. Distance to: Clicking on the arrow will take us to the object and we will choose the distance we want to change. Length : The length can be changed by editing the number or using the arrows Height : The height can be changed by editing the number or using the arrows. Width : The width can be changed by editing the number or using the arrows. Change textures : Here, we can also change the textures. By clicking, textures libraries and object layers will appear. This indicates what texture each layer has. We can also drag and drop from the textures library to the layer. Exchange the drawing: only possible in certain objects Visible/Invisible: Hide objects Lock / Unlock: : Locks the position of the object and its dimensions. Information: Additional information about the object Select a simple object

11 What can I do? Window 2 of 4 Select an object with series and linked and finished objects Rotation : Editing the number or using the arrows will rotate the object on the coordinates x, y (plan). Height positioned : Editing the number or using the arrows will change the height of placement with respect to the floor. Distance to: Clicking on the arrow will take us to the object and we will choose the distance we want to change. Length : The length can be changed by editing the number or using the arrows Height : The height can be changed by editing the number or using the arrows. Width : The width can be changed by editing the number or using the arrows. Series / Option : Three options will appear: Base units: inactive in this case Doors: door styles will be shown Handle: the handle units will be shown Change color: It will appear the finishing options defined by the manufacturer Visible/Invisible: Hide objects Lock / Unlock: : Locks the position of the object and its dimensions. Information: Additional information about the object Select an object with series and linked and finished objects

12 What can I do? Window 3 of 4 Select several objects with series and linked and finished objects Height positioned : Editing the number or using the arrows will change the height of placement with respect to the floor. Series / Option : Three options will appear: Base units: inactive in this case Doors: door styles will be shown Handle: the handle units will be shown Change color: It will appear the finishing options defined by the manufacturer Open /close : This opens and closes the doors. (All selected objects will be changed.) Visible / Invisible: Hide objects Lock / Unlock : Locks the position of the object and its dimensions Group objects: Merge several objects as if they were just one Ungroup objects: Break the group of objects in their native Select several objects (with the Shift key) with series and linked and finished objects


13 What can I do? Window 4 of 4 Combination of modifiers of size Length and depth : by connecting these two switches and change the data in one of them, for example the lenght, proportionally modify the depth, and vice versa Height and depth : By connecting these two switches and change the data in one of them, for example height; proportionally modify the depth, and vice versa Length and Height : By connecting these two switches and change the data in one of them, for example height; modified proportionately length, and vice versa Length, depth and height : By connecting all the switches and change the data in one of them, proportionally modify the remaining two. Double click on the square brackets turns into red; they serve to lock or unlock the length, the depth or the height.


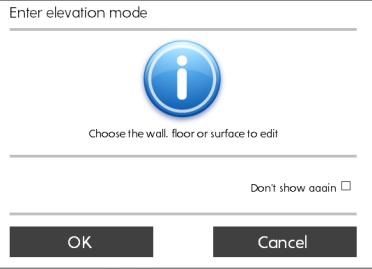
14 Enter and Exit from Elevation Mode Choose a wall on which ever side you want to be and see the elevation The elevation is the best way of working with the ceramic catalogues Drag and drop You can apply the ceramic environment to all the walls, if you want You can also save the ceramic environment so that it can be used later on. State the name to access the ceramic environment object library If you just want to cover one wall and not save the environment, click on Accept to leave the elevation work mode

15 Put Ceramic on Walls or Floors in Elevation Mode 1 of Select Elevation Drag and drop 3 2. Select wall 3. Cover 1 3 Drag and drop 2 1. Select Elevation 2. Select floor 3. Cover


16 Put Ceramic on Walls or Floors in Elevation Mode 2 of 5 What can I do? Window Create a section of the entire wall with ceramic Create a section of a ceramic piece Drag and drop To rotate here To rotate here change size change size Tranche change size Tranche change size To rotate here What I can do? To rotate here


17 Put Ceramic on Walls or Floors in Elevation Mode 3 of 5 What can I do? Window Change thickness of the board Thickness of the board 5 Change color of board Thickness of the board 20 Rotate tranche Color board Ceramic tiles rotate the tranche Angle 0 Angle of rotation 0 Color board Angle of rotation 62 Angle 45


18 Put Ceramic on Walls or Floors in Elevation Mode 4 of 5 What can I do? Window Move tranche Fixing tranche Move ceramic tiles the tranche Tranche Fix tranche Random Uniform sense of ceramic Random on


19 Put Ceramic on Walls or Floors in Elevation Mode 5 of 5 What can I do? Window Scale free Scale to ceramic tranche Scale Scaling free Scale to external ceramic Scaling Scale Scale Scale


20 Put Ceramic on Walls or Floors in Elevation Mode Ceramic Environments If you click on this box, the ceramic environment will be applied to all the walls The ceramic environment can also be saved to be used later on State the name to access the ceramic environment object library If you just want to cover one wall and not save the environment, click on Accept to leave the elevation work mode Environment applied to all the walls of the room Environment applied to just one wall Environment saved in the ceramic object library


21 Insert Objects in Elevation Mode Select wall 1. Select Elevation 3 Drag and drop 3. Furnish


22 Working in 3D 1 of 3 When accessing the 3D Projects folder, the room will be automatically shown in 3D. With the 2D icon, we return to the plan. Add background image Add background image From the room, width a right mouse click, we can focus the perspective for zoom out, approach, rotate Move: each end of the button moves the room in the direction of the arrow Add background image Add background image Zoom in or out: Each end of the button will reduce or expand the view incrementally Add background image Add background image Rotate: Each end of this button makes the room rotate in the direction of the arrow. Inside camera: This positions the camera inside the room. Zoom (pan): With the cursor, indicate which object you want to see close up and move the mouse. Remember to go back and leave it in Normal Zoom.


23 Working in 3D 2 of 3 Realistic Render Realistic Render Fund selection: click on background you want, you will find different types of environments, adding exterior light and landscape to project Choose the part of the day: morning, afternoon or night Choose the solar bent Add background image Click on the sun and move the cursor around the room to set the direction of sunlight to your project Stereo Render STEREO (3D) GLASSES If you have the necessary equipment, you can view photos in 3D like in the cinema. If you have the drivers for JPS format and has a monitor, graphics card and glasses compatibles with this format you can generate stereo perspective and see the result in stereoscopic image.. Add background image


24 Working in 3D 3 of 3 Views (camera position) Camera views related to render Any render that is done, will save the position of the camera, so if desired you could use it again. Add background image Add background image In previous projects, it will not recover views.
25 Save 1 of 2 Save to hard drive Write the Project name. You can, if desired, publish your project on the website of blophome Save to the cloud To change preview image,click over select To change front image of the project click on upload and select the image you want You can publish your project as anonymous If you want the published projects appear with your exclusive nick you must register your Nick You must choose the type of room you want to publish The created quality perspectives will appear here. Check all the ones you want to save.
26 Save 2 of 2 Save to the cloud If desired you can save your project in the cloud, it will be stored in our servers but will not be public if you do not want Save to the cloud To change preview image,click over select To change front image of the project click on upload and select the image you want You can publish your project as anonymous If you want the published projects appear with your exclusive nick you must register your Nick You must choose the type of room you want to publish The created quality perspectives will appear here. Check all the ones you want to save.
27 Recommended Configuration Blophome classic: Operating System: Windows vista, 7,8. PC: Any PC, keeping in mind that the better the graphic card, the more optimally it will work. If you have the card's updated drivers, we recommend disconnecting the graphic motor for software, in order to use the hardware one. NET: Most important for the proper functioning of the Blophome is the Network speed, the more the better, because blophome classic needs to work with all network catalogs. Blophome classic on-line Operating System: Windows, Vista, 7,8. ios (Funciona con el navegador) PC: Any PC, keeping in mind that the better the graphic card, the more optimally it will work. If you have the card's updated drivers, we recommend disconnecting the graphic motor for software, in order to use the hardware one. NET: blophome classic online: a high-speed real network is recommended. 6mb hereinafter recommended.
ARCHICAD Introduction Tutorial
 Starting a New Project ARCHICAD Introduction Tutorial 1. Double-click the Archicad Icon from the desktop 2. Click on the Grey Warning/Information box when it appears on the screen. 3. Click on the Create
Materials Tutorial. Setting Materials Defaults
 Materials Tutorial Materials display on the surfaces of objects in 3D views and can make a 3D view appear highly realistic. When applied to most objects, material quantities will also be calculated in
REVIT - RENDERING & DRAWINGS
 TUTORIAL L-15: REVIT - RENDERING & DRAWINGS This Tutorial explains how to complete renderings and drawings of the bridge project within the School of Architecture model built during previous tutorials.
House Design Tutorial
 Chapter 2: House Design Tutorial This House Design Tutorial shows you how to get started on a design project. The tutorials that follow continue with the same plan. When we are finished, we will have created
Materials Tutorial. Chapter 6: Setting Materials Defaults
 Setting Materials Defaults Chapter 6: Materials Tutorial Materials display on the surfaces of objects in 3D views and can make a 3D view appear highly realistic. When applied to most objects, material
1. Reference Guide and Glossary
 1. Reference Guide and Glossary Design Panel New Click the New Icon at any time to create a new project from scratch. Projects Browse, select, and cut projects from the Projects Tab. This includes your
House Design Tutorial
 House Design Tutorial This House Design Tutorial shows you how to get started on a design project. The tutorials that follow continue with the same plan. When you are finished, you will have created a
House Design Tutorial
 House Design Tutorial This House Design Tutorial shows you how to get started on a design project. The tutorials that follow continue with the same plan. When you are finished, you will have created a
House Design Tutorial
 Chapter 2: House Design Tutorial This House Design Tutorial shows you how to get started on a design project. The tutorials that follow continue with the same plan. When you are finished, you will have
House Design Tutorial
 Chapter 2: House Design Tutorial This House Design Tutorial shows you how to get started on a design project. The tutorials that follow continue with the same plan. When you are finished, you will have
Deck Tutorial. Chapter 8: Decks and Porches
 Decks and Porches Chapter 8: Deck Tutorial Now we ll continue where the Landscaping Tutorial left off and create a deck off the back of the house, connecting it to the terrain with an exterior staircase.
Cricut Design Space App for ipad User Manual
 Cricut Design Space App for ipad User Manual Cricut Explore design-and-cut system From inspiration to creation in just a few taps! Cricut Design Space App for ipad 1. ipad Setup A. Setting up the app B.
Materials Tutorial. Chapter 6: Setting Materials Defaults
 Setting Materials Defaults Chapter 6: Materials Tutorial Materials display on the surfaces of objects in 3D views and can make a 3D view appear highly realistic. When applied to most objects, material
SMALL OFFICE TUTORIAL
 SMALL OFFICE TUTORIAL in this lesson you will get a down and dirty overview of the functionality of Revit Architecture. The very basics of creating walls, doors, windows, roofs, annotations and dimensioning.
Deck Tutorial. Chapter 8: Decks and Porches
 Chapter 8: Deck Tutorial Now we ll continue where the Landscaping Tutorial left off and create a deck off the back of the house, connecting it to the terrain with an exterior staircase. You may want to
Deck Tutorial. Chapter 6: Decks and Porches
 Chapter 6: Deck Tutorial Now we ll continue where the Landscaping Tutorial left off and create a deck off the back of the house, connecting it to the terrain with an exterior staircase. You may want to
Kitchen and Bath Design Tutorial
 Kitchen and Bath Design Tutorial This tutorial continues where the Interior Design Tutorial left off. You should save this tutorial using a new name to archive your previous work. The tools and techniques
Deck Tutorial. Decks and Porches. Drawing Decks
 Deck Tutorial The Deck Tutorial continues where the Landscaping Tutorial left off, and explains how to create a deck off the back of the house and connect it to the terrain with an exterior staircase.
Floorplanner Drawing Manual
 Floorplanner Floorplanner Drawing Manual Drawing Manual Floorplanner lets you easily create interactive floorplans and publish them online. This manual explains the floorplanner drawing tool. For details
ARCHLine.XP Interior Windows. Learning Interior. Learning material for the basics of ARCHLine.XP Interior. ARCHLine.
 ARCHLine.XP Interior 2010 Windows Learning Interior Learning material for the basics of ARCHLine.XP Interior ARCHLine.XP Interior Information in this document is subject to change without notice and does
Kitchen and Bath Design Tutorial
 Kitchen and Bath Design Tutorial This tutorial continues where the Interior Design Tutorial left off. You should save this tutorial using a new name to archive your previous work. The tools and techniques
Floorplanner Editor Manual
 Editor Manual Floorplanner Editor Manual 1 Overview 2 Canvas a 2D view b View Settings 3 3D view a Orbital and walkthrough mode b How to navigate c Adding cameras d Scenery image e Create a render 4 Sidebar
Deck Tutorial. Decks and Porches. Drawing Decks
 Deck Tutorial The Deck Tutorial continues where the Landscaping Tutorial left off, and explains how to create a deck off the back of the house and connect it to the terrain with an exterior staircase.
EG1003 Help and How To s: Revit Tutorial
 EG1003 Help and How To s: Revit Tutorial Completion of this tutorial is required for Milestone 1. Include screenshots of it in your Milestone 1 presentation. Downloading Revit: Before beginning the tutorial,
Kitchen and Bath Design Tutorial
 Kitchen and Bath Design Tutorial This tutorial continues where the Interior Design Tutorial left off. You should save this tutorial using a new name to archive your previous work. The tools and techniques
Adobe Photoshop CC 2018 Tutorial
 Adobe Photoshop CC 2018 Tutorial GETTING STARTED Adobe Photoshop CC 2018 is a popular image editing software that provides a work environment consistent with Adobe Illustrator, Adobe InDesign, Adobe Photoshop,
Kitchen and Bath Design Tutorial
 Adding Cabinets Chapter 5: Kitchen and Bath Design Tutorial This tutorial continues where the Materials Tutorial left off. You should save this tutorial using a new name to archive your previous work.
12. Creating a Product Mockup in Perspective
 12. Creating a Product Mockup in Perspective Lesson overview In this lesson, you ll learn how to do the following: Understand perspective drawing. Use grid presets. Adjust the perspective grid. Draw and
ArchiCAD Easy Start. Ronald Brailsford. Find and double click on the ArchiCAD Icon on your desktop.
 ArchiCAD Easy Start Ronald Brailsford THE CABIN Start to Finish Chapter 1 Welcome to the world of BUILDING INFORMATION MODELING. BIM ArchiCAD was the first software to create the smart intelligent modeling
Revit Structure 2012 Basics:
 SUPPLEMENTAL FILES ON CD Revit Structure 2012 Basics: Framing and Documentation Elise Moss autodesk authorized publisher SDC PUBLICATIONS www.sdcpublications.com Schroff Development Corporation Structural
Silhouette Connect Layout... 4 The Preview Window... 5 Undo/Redo... 5 Navigational Zoom Tools... 5 Cut Options... 6
 user s manual Table of Contents Introduction... 3 Sending Designs to Silhouette Connect... 3 Sending a Design to Silhouette Connect from Adobe Illustrator... 3 Sending a Design to Silhouette Connect from
Managing images with NewZapp
 Managing images with NewZapp This guide is for anyone using the NewZapp Fixed editor as opposed to the Drag and Drop editor. The Image Manager is where images are uploaded and stored in your NewZapp account
lindab comfort Step by step manual DIMcomfort 4.0
 Step by step manual DIMcomfort 4.0 1 Contents Start-up DIMcomfort 4.0 3 Room Setup 4 Room information 4 Dimensions 5 Comfort zone 6 Dimension criteria 7 Selection of air terminal devices 8 Product search
Revit Structure 2014 Basics
 Revit Structure 2014 Basics Framing and Documentation Elise Moss Authorized Author SDC P U B L I C AT I O N S Better Textbooks. Lower Prices. www.sdcpublications.com Powered by TCPDF (www.tcpdf.org) Visit
AreaSketch Pro Overview for ClickForms Users
 AreaSketch Pro Overview for ClickForms Users Designed for Real Property Specialist Designed specifically for field professionals required to draw an accurate sketch and calculate the area and perimeter
Rendering a perspective drawing using Adobe Photoshop
 Rendering a perspective drawing using Adobe Photoshop This hand-out will take you through the steps to render a perspective line drawing using Adobe Photoshop. The first important element in this process
Adobe Photoshop CS5 Tutorial
 Adobe Photoshop CS5 Tutorial GETTING STARTED Adobe Photoshop CS5 is a popular image editing software that provides a work environment consistent with Adobe Illustrator, Adobe InDesign, Adobe Photoshop
Architecture 2012 Fundamentals
 Autodesk Revit Architecture 2012 Fundamentals Supplemental Files SDC PUBLICATIONS Schroff Development Corporation Better Textbooks. Lower Prices. www.sdcpublications.com Tutorial files on enclosed CD Visit
Chapter 14 Inserting Bitmapped Images
 Chapter 14 Inserting Bitmapped Images Introduction This chapter explains how to insert and size bitmapped images in R&R reports. This information is presented in the following sections: Importing an Image
Getting Started. with Easy Blue Print
 Getting Started with Easy Blue Print User Interface Overview Easy Blue Print is a simple drawing program that will allow you to create professional-looking 2D floor plan drawings. This guide covers the
Lab 3 Introduction to SolidWorks I Silas Bernardoni 10/9/2008
 1 Introduction This lab is designed to provide you with basic skills when using the 3D modeling program SolidWorks. You will learn how to build parts, assemblies and drawings. You will be given a physical
After completing this lesson, you will be able to:
 LEARNING OBJECTIVES After completing this lesson, you will be able to: 1. Create a Circle using 6 different methods. 2. Create a Rectangle with width, chamfers, fillets and rotation. 3. Set Grids and Increment
CAD Tutorial. CAD Detail Windows. In this tutorial you ll learn about: CAD Detail Windows Exploding and Modifying a CAD Block
 CAD Tutorial In this tutorial you ll learn about: CAD Detail Windows Exploding and Modifying a CAD Block Creating a New CAD Block CAD Detail from View Creating a Plot Plan CAD Detail Windows CAD Details
Creo Extrude Tutorial 2: Cutting and Adding Material
 Creo Extrude Tutorial 2: Cutting and Adding Material 1. Open Creo Parametric 2. File > Open > extrudeturial (From Creo Extrude Tutorial 1) 3. Cutting Material a. Click Extrude Icon > Select the following
Using Dynamic Views. Module Overview. Module Prerequisites. Module Objectives
 Using Dynamic Views Module Overview The term dynamic views refers to a method of composing drawings that is a new approach to managing projects. Dynamic views can help you to: automate sheet creation;
Creo Revolve Tutorial
 Creo Revolve Tutorial Setup 1. Open Creo Parametric Note: Refer back to the Creo Extrude Tutorial for references and screen shots of the Creo layout 2. Set Working Directory a. From the Model Tree navigate
Autodesk Medical Center
 Autodesk Medical Center Page 1 Contents Autodesk Medical Center... 1 Revit Projects... 3 Exercise 1 Create a new project file... 3 Datum Elements... 4 Exercise 2 Add Grids... 5 Exercise 3 Edit Levels...
Revit Structure 2013 Basics
 Revit Structure 2013 Basics Framing and Documentation Elise Moss Supplemental Files SDC P U B L I C AT I O N S Schroff Development Corporation Better Textbooks. Lower Prices. www.sdcpublications.com Tutorial
Tiling. 1. Overlapping tiles with fixed number of tiles. Tutorial
 Tutorial Tiling Software version: Asanti 3.0 Document version: April 3, 2017 This tutorial demonstrates how to use tiling within Asanti. Download the Asanti Sample Files via the Asanti Client (Help > Asanti
ITEC185 INTRODUCTION TO DIGITAL MEDIA
 1 ITEC185 INTRODUCTION TO DIGITAL MEDIA ADOBE PHOTOSHOP ITEC185 - Introduction to Digital Media ITEC185 - Introduction to Digital Media 2 What is Adobe Photoshop? Photoshop is the leading professional
Share My Design Space Project to Facebook or Pinterest?
 How Do I Share My Design Space Project to Facebook or Pinterest? We love it when our members share the projects they create daily with their Cricut machines, materials, and accessories. Design Space was
Visio 2010 Tutorial. Design of PLS Systems
 Visio 2010 Tutorial ISE 453 Design of PLS Systems This tutorial is designed to teach you to use Visio to draw a facility layout. It was adapted for Visio by Derek Shields and for older Visio versions by
04. Two Player Pong. 04.Two Player Pong
 04.Two Player Pong One of the most basic and classic computer games of all time is Pong. Originally released by Atari in 1972 it was a commercial hit and it is also the perfect game for anyone starting
Table of contents. Table of contents 2 Introduction 4 Overview 4
 Tiling v1.2 TABLE OF CONTENTS Table of contents Table of contents 2 Introduction 4 Overview 4 Global setup 6 Poster size 6 Format 6 Width and Height 7 Margins 8 Frame 8 Scale 9 Tile setup 9 Tile size 10
Training Guide 1 Basic Construction Overview. (v1.1)
") Training Guide 1 Basic Construction Overview (v1.1) Contents Training Guide 1 Basic Construction Overview... 1 Creating a new project... 3 Entering Measurements... 6 Adding the Walls... 10 Inserting Doors
Training Guide 1 Basic Construction Overview (v1.1) Contents Training Guide 1 Basic Construction Overview... 1 Creating a new project... 3 Entering Measurements... 6 Adding the Walls... 10 Inserting Doors
Scanning Setup Guide for TWAIN Datasource
 Scanning Setup Guide for TWAIN Datasource Starting the Scan Validation Tool... 2 The Scan Validation Tool dialog box... 3 Using the TWAIN Datasource... 4 How do I begin?... 5 Selecting Image settings...
4) Click on Load Point Cloud to load the.czp file from Scene. Open Intersection_Demo.czp
 Click on Load Point Cloud to load the.czp file from Scene. Open Intersection_Demo.czp") Intersection 2D Demo 1) Open the Crash Zone or Crime Zone diagram program. 2) Click on to open the CZ Point Cloud tool. 3) Click on 3D/Cloud Preferences. a) Set the Cloud File Units (Feet or Meters). b)
Intersection 2D Demo 1) Open the Crash Zone or Crime Zone diagram program. 2) Click on to open the CZ Point Cloud tool. 3) Click on 3D/Cloud Preferences. a) Set the Cloud File Units (Feet or Meters). b)
The Main Screen. Viewing Area - show the photos that were selected in the Source List.
 iphoto 11 The Main Screen Source List - This is where the Library, Events and Albums are identified. It is the place where photos can be organized and accessed. The Source List can also contain the slideshows,
Sense. 3D scanning application for Intel RealSense 3D Cameras. Capture your world in 3D. User Guide. Original Instructions
 Sense 3D scanning application for Intel RealSense 3D Cameras Capture your world in 3D User Guide Original Instructions TABLE OF CONTENTS 1 INTRODUCTION.... 3 COPYRIGHT.... 3 2 SENSE SOFTWARE SETUP....
Draw IT 2016 for AutoCAD
 Draw IT 2016 for AutoCAD Tutorial for System Scaffolding Version: 16.0 Copyright Computer and Design Services Ltd GLOBAL CONSTRUCTION SOFTWARE AND SERVICES Contents Introduction... 1 Getting Started...
WORD ART - CHANGING LETTERING SPACING
 CHANGING LETTERING SIZE Enter single letters or words and use the icon to rescale the motif. When the Maintaining Proportions (lock) icon is outlined in white, the design will be resized proportionately.
THE BEGINNERS GUIDE TO ELITECAD. EliteCAD12AR. Messerli EliteCAD Version
 Messerli EliteCAD Version 12 25.06.2012 THE BEGINNERS GUIDE TO ELITECAD EliteCAD12AR Austria Messerli Informatik GmbH Hamoderstraße 4 4020 Linz info@messerli.at Tel: +43 732 341 574 CAD Hotline: +43 1
A Quick Spin on Autodesk Revit Building
 11/28/2005-3:00 pm - 4:30 pm Room:Americas Seminar [Lab] (Dolphin) Walt Disney World Swan and Dolphin Resort Orlando, Florida A Quick Spin on Autodesk Revit Building Amy Fietkau - Autodesk and John Jansen;
ImagesPlus Basic Interface Operation
 ImagesPlus Basic Interface Operation The basic interface operation menu options are located on the File, View, Open Images, Open Operators, and Help main menus. File Menu New The New command creates a
Getting Started. Chapter. Objectives
 Chapter 1 Getting Started Autodesk Inventor has a context-sensitive user interface that provides you with the tools relevant to the tasks being performed. A comprehensive online help and tutorial system
Landscaping Tutorial. Chapter 5:
 Chapter 5: Landscaping Tutorial This tutorial was written to help you learn how to use Home Designer Landscape and Deck s Terrain tools. In this tutorial, you will learn how to add elevation information
Assignment 10 Revit CAD Fundamentals I Due March 29 Architecture 411
 Due March 29 Architecture 411 Objectives To learn the basic concepts involved with Building Information Modeling. To become familiar with basic operation of the Revit user interface. To learn techniques
Create a Business Card for World Travel Agency
 Create a Business Card for World Travel Agency In this lesson, students will design and create a business card for their world travel agency, using AppleWorks drawing tools. They will include graphic images
Part 1- Fundamental Functions
 Part 1- Fundamental Functions Note: Alt+Tab will allow you to move between programs in the docker. Shift+Tab removes right pallets Tab removes all pallets Ctrl+1= centers art board Ctrl + 0= fill window
Corel PHOTO-PAINT BERNINA Page 1 DL
 Corel PHOTO-PAINT 2018 BERNINA Page 1 Corel PHOTO-PAINT Corel PHOTO-PAINT is part of BERNINA Embroidery Software and gives users many tools for editing photos or bitmap artwork. Corel PHOTO- PAINT can
AutoCAD Architecture 2018 Fundamentals
 Elise Moss Autodesk AutoCAD Architecture 2018 Fundamentals SDC P U B L I C AT I O N S Better Textbooks. Lower Prices. www.sdcpublications.com Powered by TCPDF (www.tcpdf.org) Visit the following websites
Alibre Design Tutorial: Loft, Extrude, & Revolve Cut Loft-Tube-1
 Alibre Design Tutorial: Loft, Extrude, & Revolve Cut Loft-Tube-1 Part Tutorial Exercise 5: Loft-Tube-1 [Complete] In this Exercise, We will set System Parameters first, then part options. Then, in sketch
Getting Started with Revit
 AUTODESK Autodesk REVIT Revit TRAINING Training TUTORIAL Tutorial Getting Started with Revit FOCUS Focus KUWAIT Kuwait CAD Cad Team 2012-13 Step 01 02 Grid & levels Grid create 5 vertical grid lines grid
Copyright 2014 SOTA Imaging. All rights reserved. The CLIOSOFT software includes the following parts copyrighted by other parties:
 2.0 User Manual Copyright 2014 SOTA Imaging. All rights reserved. This manual and the software described herein are protected by copyright laws and international copyright treaties, as well as other intellectual
USING BRUSHES TO CREATE A POSTER
 11 USING BRUSHES TO CREATE A POSTER Lesson overview In this lesson, you ll learn how to do the following: Use four brush types: Calligraphic, Art, Bristle, and Pattern. Apply brushes to paths. Paint and
University Libraries ScanPro 3000 Microfilm Scanner
 University Libraries ScanPro 3000 Microfilm Scanner Help Guide Table of Contents Getting Started 3 Loading the Film 4-5 Viewing Your Film 6-7 Motorized Roll Film Control 6 Crop Box 7 Using the Toolbar
Digital Design and Communication Teaching (DiDACT) University of Sheffield Department of Landscape. Adobe Photoshop CS5 INTRODUCTION WORKSHOPS
 University of Sheffield Department of Landscape. Adobe Photoshop CS5 INTRODUCTION WORKSHOPS") Adobe INTRODUCTION WORKSHOPS WORKSHOP 1 - what is Photoshop + what does it do? Outcomes: What is Photoshop? Opening, importing and creating images. Basic knowledge of Photoshop tools. Examples of work.
Adobe INTRODUCTION WORKSHOPS WORKSHOP 1 - what is Photoshop + what does it do? Outcomes: What is Photoshop? Opening, importing and creating images. Basic knowledge of Photoshop tools. Examples of work.
PosterArtist Quick Guide
 PosterArtist Quick Guide Create posters in four easy steps STEP STEP STEP STEP Use Auto Design to Create Posters Simply select a poster type and a design image to automatically create high-quality posters.
ScanMate. i920 Scanner. Scanning Setup Guide for TWAIN Applications A-61733
 ScanMate i920 Scanner Scanning Setup Guide for TWAIN Applications A-61733 Scanning Setup Guide for the TWAIN Datasource Starting the Scan Validation Tool... 2 The Scan Validation Tool dialog box... 3 Using
COURSE UNIT 3. Plan Creation. Messerli EliteCAD Version
 Messerli EliteCAD Version 13 27.09.2013 COURSE UNIT 3 Plan Creation Switzerland: Austria: Germany: Messerli Informatik AG Messerli Informatik GmbH Messerli Informatik GmbH Pfadackerstrasse 6 Hamoderstraße
Template: Quilter Title Overview: Traditional Application
 Template: Quilter Title Overview: Traditional Application Subject Launching Topic Quilter Open Steps BERNINA Embroidery Software. Select Steps the Quilter icon in the Applications Toolbox to launch Quilter.
S206E Lecture 6, 5/18/2016, Rhino 3D Architectural Modeling an overview
 Copyright 2016, Chiu-Shui Chan. All Rights Reserved. S206E057 Spring 2016 This tutorial is to introduce a basic understanding on how to apply visual projection techniques of generating a 3D model based
Landscaping Tutorial
 Landscaping Tutorial This tutorial describes how to use Home Designer Essentials s Terrain Tools. In it, you will learn how to add elevation information to your terrain, how to create terrain features,
Create styles that control the display of Civil 3D objects. Copy styles from one drawing to another drawing.
 NOTES Module 03 Settings and Styles In this module, you learn about the various settings and styles that are used in AutoCAD Civil 3D. A strong understanding of these basics leads to more efficient use
Generations Automatic Stand-Alone Lace By Bernie Griffith Generations Software
 We are going to create an open Italian lace. Generations software products provide advanced image processing features allowing for the creation of stand-alone lace with just a few simple techniques. A
Understanding OpenGL
 This document provides an overview of the OpenGL implementation in Boris Red. About OpenGL OpenGL is a cross-platform standard for 3D acceleration. GL stands for graphics library. Open refers to the ongoing,
ADOBE PHOTOSHOP CS 3 QUICK REFERENCE
 ADOBE PHOTOSHOP CS 3 QUICK REFERENCE INTRODUCTION Adobe PhotoShop CS 3 is a powerful software environment for editing, manipulating and creating images and other graphics. This reference guide provides
SolidWorks Navigation
 SolidWorks Basics SolidWorks Navigation Command Bar Feature Tree Model Window Simple Box Select the Front plane Create a new sketch Create a Center Rectangle from the origin Smart Dimension the length
Introduction to Autodesk Inventor for F1 in Schools (Australian Version)
") Introduction to Autodesk Inventor for F1 in Schools (Australian Version) F1 in Schools race car In this course you will be introduced to Autodesk Inventor, which is the centerpiece of Autodesk s Digital
Introduction to Autodesk Inventor for F1 in Schools (Australian Version) F1 in Schools race car In this course you will be introduced to Autodesk Inventor, which is the centerpiece of Autodesk s Digital
GIMP WEB 2.0 ICONS. Web 2.0 Icons: Paperclip Completed Project
 GIMP WEB 2.0 ICONS WEB 2.0 ICONS: PAPERCLIP OPEN GIMP or Web 2.0 Icons: Paperclip Completed Project Step 1: To begin a new GIMP project, from the Menu Bar, select File New. At the Create a New Image dialog
Exploring Photoshop Tutorial
 Exploring Photoshop Tutorial Objective: In this tutorial we will create a poster composed of three distinct elements: a Bokeh, an image and title text. The Bokeh is an effect which is sometimes seen in
Applied Precast Concrete Detailing
 Applied Precast Concrete Detailing Tekla Structures 11.0 August 30, 2005 Copyright 2005 Tekla Corporation Copyright 2005 Tekla Corporation Applied Precast Concrete Detailing i Copyright 2005 Tekla Corporation
Impress Guide. Chapter 4 Adding and Formatting Pictures
 Impress Guide Chapter 4 Adding and Formatting Pictures Copyright This document is Copyright 2005 2012 by its contributors as listed below. You may distribute it and/or modify it under the terms of either
Making Your World - the world building tutorial
 Making Your World - the world building tutorial The goal of this tutorial is to build the foundations for a very simple module and to ensure that you've picked up the necessary skills from the other tutorials.
DESIGN AND MODELLING OF ORPHAN HOME
 DESIGN AND MODELLING OF ORPHAN HOME B.T.Shyamala 1,M.Manoj Kumar 2 1 Asst Professor,CIVIL, Dr.KV Subba Reddy College Of Engineering For Women,Kurnool,Andhrapradesh,India. 2 Asst Professor,CIVIL, Dr.KV
g. Click once on the left vertical line of the rectangle.
 This drawing will require you to a model of a truck as a Solidworks Part. Please be sure to read the directions carefully before constructing the truck in Solidworks. Before submitting you will be required
ILLUSTRATOR BASICS FOR SCULPTURE STUDENTS. Vector Drawing for Planning, Patterns, CNC Milling, Laser Cutting, etc.
 ILLUSTRATOR BASICS FOR SCULPTURE STUDENTS Vector Drawing for Planning, Patterns, CNC Milling, Laser Cutting, etc. WELCOME TO THE ILLUSTRATOR TUTORIAL FOR SCULPTURE DUMMIES! This tutorial sets you up for
Making Standard Note Blocks and Placing the Bracket in a Drawing Border
 C h a p t e r 12 Making Standard Note Blocks and Placing the Bracket in a Drawing Border In this chapter, you will learn the following to World Class standards: Making standard mechanical notes Using the
Go Daddy Online Photo Filer
 Getting Started and User Guide Discover an easier way to share, print and manage your photos online! Online Photo Filer gives you an online photo album site for sharing photos, as well as easy-to-use editing
Architectural Design
 Punch! Pro Dream House Project After completing the tutorial and scale drawing exercises the students will design their dream home using Professional Home Design program, Punch! Home Design. Using Professional