HARVIL 3-IN-1 FLIP TABLE ASSEMBLY INSTRUCTIONS
|
|
|
- April Alaina Owen
- 5 years ago
- Views:
Transcription


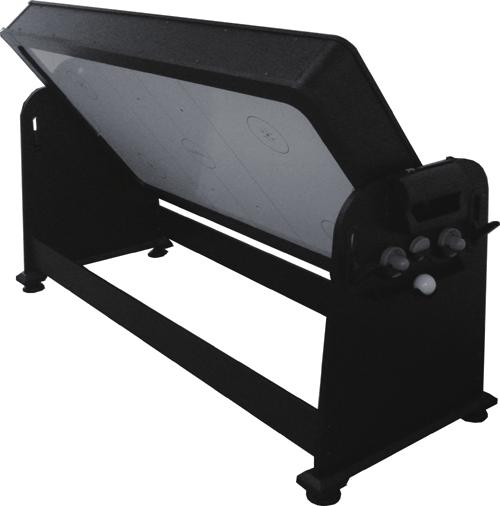

1 HARVIL 3-IN-1 FLIP TABLE ASSEMBLY INSTRUCTIONS NGD1018/1022
2 THANK YOU! Thank you for your purchase of this Harvil product. We work around the clock and around the globe to ensure that Harvil products maintain the highest possible quality. However, in the rare instance that your product is defective or missing parts, contact your retailer to submit parts requests or warranty claims. Please read the warranty information at the back of these assembly instructions for further details. IMPORTANT! PLEASE READ THESE ASSEMBLY INSTRUCTIONS IN ENTIRETY BEFORE ASSEMBLING YOUR PRODUCT. 2

3 PARTS IDENTIFIER (NOT TO SCALE) ADDITIONAL EQUIPMENT REQUIRED: 3
4 ASSEMBLY TIPS 1. Find a clean, level surface to begin the assembly of your game table. The table will be partially assembled upside down and then turned over onto its legs. This is a heavy game and turning it over will require at least two strong adults. 2. Remove all of the contents from box and verify that you have all of the parts shown on the Parts Identifier before you begin assembly. Note: Some parts may be pre-installed or preassembled. 3. Some figures or drawings may not look exactly like your product. Please read and understand the text before beginning each assembly step. 4. When installing parts that have more than one screw or bolt, hand tighten all screws or bolts in place before finishing tightening with screwdriver or hex wrench. 5. Electric screwdrivers may be helpful during assembly; however, please set a low torque and use extreme caution because screws may be stripped or overtightened if the electric screwdriver's torque is set too high. WARNINGS! READ AND FOLLOW ALL ASSEMBLY, OPERATION AND SAFETY INSTRUCTIONS CAREFULLY. CHOKE HAZARD - THIS TABLE CONTAINS SMALL BALLS AND PARTS - NOT SUITABLE FOR CHILDREN UNDER 3 YEARS OF AGE. PINCH HAZARD USE CAUTION WHEN ROTATING TABLE. 4
5 ASSEMBLY INSTRUCTIONS 1. Remove the four 1-1/4 WASHER HEAD SCREWS #32 from TABLE BODY #1 that secure the AIR HOCKEY PLAYFIELD #30 during shipping. DO NOT DISCARD THESE SCREWS They will be used to re -attach the AIR HOCKEY PLAYFIELD. Remove and unpack accessory boxes from inside the TABLE BODY. Attach AIR HOCKEY PLAYFIELD #30 to the bottom of the TABLE BODY #1 with 1-1/4 WASHER HEAD SCREW #32. Note: Feed power cord through the hole in the side of the TABLE BODY.. 2. Attach one PEDESTAL PANEL #12 to each PEDESTAL BASE #13 as shown with 1-1/2 FLAT HEAD SCREW #8. 3. Thread two LEG LEVELERS #27 into the bottom of each PEDESTAL BASE. 4. Attach two TABLE LOCKS #24 to each PEDESTAL PANEL with 5/8 SCREW #34. 5

6 ASSEMBLY INSTRUCTIONS (CONT.) 5. Insert four BARREL NUTS #11 into each SIDE SUPPORT BRACE #15 then attach SIDE SUP- PORT BRACES to each PEDESTAL PANEL as shown with BOLT #4 and 5/16 FLAT WASHER #5. 6. Pull each pre-installed LARGE BOLT #31 outward and tighten the attached nut. Slide one 3/4 FLAT WASHER #2 onto each LARGE BOLT #31. Carefully lift the assembled TABLE BODY and rest it in the center groove on the pedestal panels. Secure TABLE BODY with 3/4 FLAT WASHER #2 and 3/4 HEX NUT #3. 6
7 ASSEMBLY INSTRUCTIONS (CONT.) 7. Attach one PUCK CATCHER #6 to each assembled PEDESTAL PANEL with 1/2 SCREW #7. 8. Attach ACCESSORY RACK B #26 to the PEDESTAL PANEL with corresponding pre-drilled holes using 1/2 SCREW #7. 9. Attach ACCESSORY RACK A #25 to the opposite PEDESTAL PANEL with 1/2 SCREW # To assemble STRIKERS, remove paper backing from adhesive on STRIKER FELT #17. Adhere one STRIKER FELT to the bottom of each STRIKER #16. 7
8 ASSEMBLY INSTRUCTIONS (CONT.) 11. To assemble TABLE TENNIS TOP, place TABLE TENNIS TOP #10A and TABLE TENNIS TOP #10B on top of assembled table. Push halves together. 12. Clip each post of the TABLE TENNIS NET #14 to each side of the assembled TENNIS TABLE TOP at the center line. Attach the net to each post. 8
9 CONGRATULATIONS! You have now assembled your Harvil Game Table. Please note the Care and Use instructions below to ensure years of trouble free use of your game table. CARE AND USE 1. This product is intended for INDOOR use only. 2. Do NOT sit, climb or lean on the table. 3. Do NOT drag the table when moving it as this will damage the legs. 9
HARVIL 3-in-1 FLIP TABLE ASSEMBLY INSTRUCTIONS
 HARVIL 3-in-1 FLIP TABLE ASSEMBLY INSTRUCTIONS CONTACT INFORMATION We work around the clock and around the globe to ensure that Harvil products maintain the highest possible quality. However, in the rare
HARVIL 7 FOOT POOL TABLE WITH TABLE TENNIS TOP ASSEMBLY INSTRUCTIONS
 HARVIL 7 FOOT POOL TABLE WITH TABLE TENNIS TOP ASSEMBLY INSTRUCTIONS CONTACT INFORMATION We work around the clock and around the globe to ensure that Harvil products maintain the highest possible quality.
BOUNCE TABLE TENNIS TABLE & ACCESSORIES ASSEMBLY INSTRUCTIONS
 BOUNCE TABLE TENNIS TABLE & ACCESSORIES ASSEMBLY INSTRUCTIONS NG2325 THANK YOU! Thank you for your purchase of our product. We work around the clock and around the globe to ensure that our products maintain
PRIMO 56" FOOSBALL TABLE ASSEMBLY INSTRUCTIONS
 PRIMO 56" FOOSBALL TABLE ASSEMBLY INSTRUCTIONS NG1035 THANK YOU! Thank you for purchasing this product. We work around the clock and around the globe to ensure that our products maintain the highest possible
HARVIL 9 FOOT DARK CHERRY SHUFFLEBOARD TABLE HARVIL 12 FOOT DARK CHERRY SHUFFLEBOARD TABLE ASSEMBLY INSTRUCTIONS
 HARVIL 9 FOOT DARK CHERRY SHUFFLEBOARD TABLE HARVIL 12 FOOT DARK CHERRY SHUFFLEBOARD TABLE ASSEMBLY INSTRUCTIONS CONTACT INFORMATION We work around the clock and around the globe to ensure that Harvil
HUSTLER 7' & 8' POOL TABLE ASSEMBLY INSTRUCTIONS
 HUSTLER 7' & 8' POOL TABLE ASSEMBLY INSTRUCTIONS Please Do Not Hesitate to Contact Our Consumer Hotline at 800-759-0977 with Any Questions That May Arise During Assembly or Use of This Product! NG2515PB/NG2520PB
8' HOT SHOT SKEEBALL TABLE ASSEMBLY INSTRUCTIONS
 8' HOT SHOT SKEEBALL TABLE ASSEMBLY INSTRUCTIONS NG2015 THANK YOU! Thank you for purchasing this product. We work around the clock and around the globe to ensure that our products maintain the highest
FAX:
 We strive to ensure that our products are of the highest quality and free of manufacturing defects or missing parts. However, if you have any problems with your new product, DO NOT RETURN IT TO THE STORE,
HT281 Dat e Code: 2 - HT WJ Purchase Date: PLEASE RETAIN THIS INSTRUCTION MANUAL FOR FUTURE REFERENCE. All Rights Reserved
 We strive to ensure that our products are of the highest quality and free of manufacturing defects or missing parts. However, if you have any problems with your new product, D O NOT RETURN IT TO THE STORE,
POCKEY 3 IN 1 GAME TABLE
 POCKEY 3 IN 1 GAME TABLE Replacement Parts Order direct at or call our Customer Service department at (800) 225-7593 8 am to 4:30 pm Central Standard Time Publication 64-1046 Rev C October 2014 UPC Code
ASSEMBLY INSTRUCTIONS
 TM MODEL: 44119-1 ASSEMBLY INSTRUCTIONS Blain's Please contact us before returning the product to the store. Toll Free: 877-82-814 Register Now on themdsports.com and Earn a One-Year Warranty for Free!
4-Piece Table Tennis Table
 Item# 45-6074 4-Piece Table Tennis Table Please keep this instruction manual for future reference If you have any problems with your new product, please contact Triumph Sports USA at 1-866-815-4173, or
ASSEMBLY INSTRUCTIONS
 MODEL: FH144119 ASSEMBLY INSTRUCTIONS FINGERHUT ATTENTION DO NOT RETURN TO THE STORE Contact MD Sports Customer Service * For additional resources and Frequently Ask Questions, please visit us at themdsports.com
SURE SHOT DUAL ELECTRONIC BASKETBALL GAME ASSEMBLY INSTRUCTIONS
 SURE SHOT DUAL ELECTRONIC BASKETBALL GAME ASSEMBLY INSTRUCTIONS NG33BL THANK YOU! Thank you for purchasing this product. We work around the clock and around the globe to ensure that our products maintain
MULTI-ACTIVITY PLAY TABLE
 ASSEMBLY INSTRUCTIONS! WARNING: CHOKING HAZARD - Small parts. Not for children under 3 years.! CAUTION: Adult assembly required. C 2006 Melissa and Doug, Inc. All Rights Reserved www.melissaanddoug.com
Double-Swish Electronic Basketball Game
 Double-Swish Electronic Basketball Game Thank you for your purchase of this Harvil product! We work around the clock and around the globe to ensure that Harvil products maintain the highest possible quality.
MAINSTREET 36 INCH TABLE SOCCER
 MAINSTREET 36 INCH TABLE SOCCER Replacement Parts Order direct at or call our Customer Service department at (800) 5-7593 8 am to 4:30 pm Central Standard Time Publication 55-0511 Rev B January 016 UPC
ASPEN OUTDOOR TABLE TENNIS
 ASPEN OUTDOOR TABLE TENNIS Replacement Parts Order direct at or call our Customer Service department at (800) 225-7593 8 am to :30 pm Central Standard Time January 201 UPC Code 7-19265-51830-3 Staple your
MAINSTREET 36 INCH TABLE SOCCER
 Mainstreet 36 Inch Table Soccer MAINSTREET 36 INCH TABLE SOCCER Replacement Parts Order direct at or call our Customer Service department at (800) 5-7593 8 am to 4:30 pm Central Standard Time September
TIRADE MMXI SOCCER TABLE
 TIRADE MMXI SOCCER TABLE Replacement Parts Order direct at or call our Customer Service department at (800) 225-7593 8 am to 4:30 pm Central Standard Time Publication 64-0908 Rev D August 2014 UPC Code
WESTPORT 8' SLATE POOL TABLE ASSEMBLY INSTRUCTIONS
 WESTPORT 8' SLATE POOL TABLE ASSEMBLY INSTRUCTIONS NG2690A THANK YOU! Thank you for purchasing this product. We work around the clock and around the globe to ensure that our products maintain the highest
VANCOUVER 7.5 FOOT AIR POWERED HOCKEY TABLE
 Vancouver Air Powered Hockey Table VANCOUVER 7.5 FOOT AIR POWERED HOCKEY TABLE Assembly videos available at gldproducts.com Vídeos para armar disponible en gldproducts.com Replacement Parts Order direct
Modern Gatherings 60" TV Console Assembly Instructions
 Parts List Page 1 of 6 No. Description Sketch Quantity A Console 1 B Door 1 Thank you for purchasing this quality product. Be sure to check all packing material carefully for small parts that may have
O W N E R ' S M A N U A L
 TABLE TENNIS TABLE MODEL NOS. T861 T861B O W N E R ' S M A N U A L 1. Read this manual carefully before starting assembly. Read each step completely before beginning each step.. Some smaller parts may
Riverside. Oakmont Queen Storage Bed Assembly Instructions
 Queen Storage Bed Page 1 of 7 8 pcs. 8 pcs. 1 pc. 1 pc. 8 pcs. 8 pcs. 8 pcs. 8 pcs. 1 pc. 1 pc. 20270 --5/0 Sleigh Headboard 20274 --5/0-6/6 Bed Rails 20273 -- 5/0 Storage Footboard, Panels, Slats Queen
Riverside. Windhaven Queen Storage Bed Assembly Instructions
 Queen Storage Bed Page 1 of 7 2 pcs. 4 pcs. 4 pcs. 4 pcs. 2 pcs. 5/0 Queen Storage Bed 50773 -- 5/0 Storage Footboard w/platform Note: The 50773 Storage Footboard can be used with the 50770 Panel Headboard
Please Do Not Return This Product To The Store!
 MODEL NOS. T81 TABLE TENNIS TABLE OWNER'S MANUAL 1. Read this manual carefully before starting assembly. Read each step completely before beginning each step.. Some smaller parts may be shipped inside
INSTALLATION INSTRUCTIONS Medium Flat Panel Model MSP-SI1
 INSTALLATION INSTRUCTIONS Medium Flat Panel Model MSP-SI1 IMPORTANT! : The MSP-S11 Mount is designed for use with Sharp 45" LCD displays that have a 200mm x 200mm mounting pattern. IMPORTANT! : The mount
Riverside. Harbor Hill Queen Storage Bed Assembly Instructions
 Queen Storage Bed Page 1 of 7 8 pcs. 8 pcs. 1 pc. 2 pcs. 3 pcs. 3 pcs. 4 pcs. 4 pcs. 4 pcs. 1 pc. 1 pc. 8 pcs. 8 pcs. 8 pcs. 2 pcs. 8 pcs. 1 pc. 25770 -- 4/6-5/0 Panel Headboard (NOTE: the 25775 Leather
MantelMount. TM1A Installation Instructions IMPORTANT SAFETY INSTRUCTIONS - SAVE THESE INSTRUCTIONS
 MantelMount TMA Installation Instructions IMPORTANT SAFETY INSTRUCTIONS - SAVE THESE INSTRUCTIONS TM Thank you for choosing the MantelMount television wall mount. Please read this entire manual before
OWNER S MANUAL Table Tennis Table Patent Pending
 OWNER S MANUAL Table Tennis Table Patent Pending Be sure to write your model number and serial number here for future reference. You can find these numbers printed on the bottom of the table. MODEL # T8266
Riverside. Harbor Hill King Storage Bed Assembly Instructions
 King Storage Bed Page 1 of 7 8 pcs. 8 pcs. 1 pc. 2 pcs. 6 pcs. 3 pcs. 4 pcs. 4 pcs. 4 pcs. 1 pc. 1 pc. 2 pcs. 8 pcs. 8 pcs. 8 pcs. 8 pcs. 25780 -- 6/0-6/6 Panel Headboard (NOTE: the 25785 Leather Headboard
Heavy Duty Ceiling Tilt Mount Installation Manual
 HD-CTM-5580 Heavy Duty Ceiling Tilt Mount Installation Manual *This Installation requires a minimum of two people. For your safety: Read the complete instruction manual before starting an installation
Desk/Wall-Mount Rack
 Desk/Wall-Mount Rack Patent(s) Pending Installation Instructions Post P/N: 119-1752 119-1781 119-1782 119-4014 Frame P/N: 119-1591 119-1754 119-1755 Kit Contents (2) Frames (4) Posts Assembly Hardware
Owner s Manual. FT100X. 4ft Folding Football Table. Manual version 2.1
 Owner s Manual. FT100X 4ft Folding Football Table www.viavito.com Manual version 2.1 Congratulations on purchasing your very own FT100X Folding Football Table You have chosen a high-quality, safe and innovative
Constable Oak Extension Dining Table
 Constable Oak Extension Dining Table Assembly Instructions - Please keep for future reference 176/0325 Dimensions Width - 160/ 200cm Depth - 90cm Height - 75cm Important - Please read these instructions
ASSEMBLY AND ADJUSTMENT
 EDGE MONITOR ARM EDGE Rev A 2/17 Model EDGE-SLV Model EDGE-BLK Model EDGE-WHT ASSEMBLY AND ADJUSTMENT EDGE MONITOR ARM PARTS AND TOOLS PLEASE REVIEW these instructions before beginning the assembly and
STRIKER TABLE FOOTBALL GAME
 STRIKER TABLE FOOTBALL GAME ASSEMBLY INSTRUCTIONS Please keep for future reference Adult Assembly Required (0316) 1 ASSEMBLY INSTRUCTIONS Please keep these instructions for future reference. Adult assembly
Miter Saw Super Stand
 Quality Power Tool Accessories OWNER S MANUAL Miter Saw Super Stand Models 2875/2875XL IMPORTANT Read and understand all safety guidelines and instructions carefully before operating. GENERAL INFORMATION
#709 Magnum Shear Stand
 #709 Magnum Shear Stand Mounting Brackets Sold Separately Operators Manual Assembly Operation Parts List Warnings Bullet Tools 800-406-8998 3390 W. Hayden Avenue, Hayden, ID 83835 www.bullettools.com Congratulations
ELEVEN COLLABORATIVE. CONFERENCE TOPS Assembly Instructions
 ELEVEN COLLABORATIVE Table of Contents SUPPORT BRACE ASSEMBLY.... 3 TABLE BASE FRAME ASSEMBLY.... 4 LEG ATTACHMENT.... 5 TOP JOINING PLATE ASSEMBLY... 6 TOP CLAMP/TOP SPACER INSTALLATION.... 7 TOP PLACEMENT
HONDA RIDGELINE (KIT #601) Installation Instructions (to be used in addition to owners manual)
 Installation Instructions (to be used in addition to owners manual)") HONDA RIDGELINE (KIT #601) Installation Instructions (to be used in addition to owners manual) IMPORTANT NOTE: Read before beginning installation. These instructions replace all of Step 1 of the instructions
HONDA RIDGELINE (KIT #601) Installation Instructions (to be used in addition to owners manual) IMPORTANT NOTE: Read before beginning installation. These instructions replace all of Step 1 of the instructions
Strata. urniture. Adriana Instructions. Parts in the Arm Box: Parts in the Body Box: Watch our assembly videos at
 1A Watch our assembly videos at www.strataf.com/videos Parts in the Arm Box: Arm - Outside View Arm - Inside View 1B Parts in the Body Box: Back Deck x 1 Seat Deck x 1 with the Feet attached Back Panel
GlideRite Retractable Cover System For HotSpring & Tiger River Spas (except Classic & pre-2000 Landmark Spas)
") List of Contents Quantity Description 12 #10 x 1 ½ Flat Head Phillips Screw (see pg. 2) 2 #10 x ½ Pan Head Phillips Screw (see pg. 2) 8 ¼ x 2 ½ Lag Bolt (see pg. 2) 7 ¼ 20 x 5 / 8 Hex Head Bolt (see pg.
List of Contents Quantity Description 12 #10 x 1 ½ Flat Head Phillips Screw (see pg. 2) 2 #10 x ½ Pan Head Phillips Screw (see pg. 2) 8 ¼ x 2 ½ Lag Bolt (see pg. 2) 7 ¼ 20 x 5 / 8 Hex Head Bolt (see pg.
EDGE2 DUAL MONITOR ARM
 EDGE2 DUAL MONITOR ARM EDGE2 Rev A 2/17 Model EDGE2-SLV Model EDGE2-BLK Model EDGE2-WHT ASSEMBLY AND ADJUSTMENT EDGE2 DUAL MONITOR ARM PARTS AND TOOLS PLEASE REVIEW these instructions before beginning
High Rise Sit-Stand Desk Converter
 High Rise Sit-Stand Desk Converter Assembly Instructions for Model DC350 Patent No. 9,332,839 PRE-ASSEMBLY Please read all instructions before beginning assembly. We strongly recommend you watch the video
PLEASE CHECK ALL BOXES FOR HARDWARE BEFORE DISCARDING WARRANTY AND USER INFORMATION CAN BE FOUND AT THE END OF THESE INSTRUCTIONS
 Thank you for purchasing the SleepSafe Safety Bed. With proper care, your bed will provide years of safe use. Carefully unpack all the contents of your bed and verify that all parts are included using
Installation Instructions
 Articulating Dual Monitor Mount Stand Installation Instructions UNPACKING Carefully open the carton, remove contents, and place them on a protected surface to avoid damage. Check the parts and the Supplied
PORTABLE ADJUSTABLE BASKETBALL SYSTEM
 Instruction Manual PORTABLE ADJUSTABLE BASKETBALL SYSTEM P A R T S L I S T 5 1/2 and 8 safe play clearance Item Qty Description Item Qty Description A 1 Portable Base Assembly M 4 1/2 Lock Nut B 2 Front
FORD RANGER Onwards SLIMLINE II RACK (1255MM x 1358MM)
") FORD RANGER - 2012 Onwards SLIMLINE II RACK (1255MM x 1358MM) FAFR001 / KRFM010T INSTALL TIME: 60 mins READ ME FIRST: Thank you for purchasing a Front Runner Slimline II Rack. This Roof Rack consists of
FORD RANGER - 2012 Onwards SLIMLINE II RACK (1255MM x 1358MM) FAFR001 / KRFM010T INSTALL TIME: 60 mins READ ME FIRST: Thank you for purchasing a Front Runner Slimline II Rack. This Roof Rack consists of
SINCE 1922 P UBLICATION N O
 SINCE 1922 GARED SPORTS MICRO-Z SET-UP INSTRUCTIONS VERY IMPORTANT! READ INSTRUCTIONS CAREFULLY AND FOLLOW STEP BY STEP SET-UP PROCEDURE P UBLICATION N O. 5 5 1 7 5 2 9 1 6 Recommended tools and accessories.
RZR 4 Doors Part # Polaris RZR XP & Turbo ( ) Black
 Black") Racing 3191 N Washington St. Suite 2 Chandler, AZ 85225 1 (800) 708-9803 http://www.racing.com RZR 4 Doors Part # 07-1802 Polaris RZR XP 4 1000 & Turbo (2015-2018) Black Revision No: 01 Revision Date:
Racing 3191 N Washington St. Suite 2 Chandler, AZ 85225 1 (800) 708-9803 http://www.racing.com RZR 4 Doors Part # 07-1802 Polaris RZR XP 4 1000 & Turbo (2015-2018) Black Revision No: 01 Revision Date:
INSTALL LOAD BED TRACKS
 Universal LOAD BED TRAY & Load BArs TRBU001 / KRLBUNI1 INSTALL TIME: 2.5 Hours READ ME FIRST: Thank you for purchasing a Front Runner Slimline II Load Bed Rack or Load Bar Kit. Your Kit will contain the
GlideRite Retractable Cover System For Hot Spot Spas (SE & SLX only)
") List of Contents Quantity Description 12 #10 x 1 ½ Flat Head Phillips Screw (see pg. 2) 2 #10 x ½ Pan Head Phillips Screw (see pg. 2) 8 ¼ x 2 ½ Lag Bolt (see pg. 2) 7 ¼ 20 x 5 / 8 Hex Head Bolt (see pg.
List of Contents Quantity Description 12 #10 x 1 ½ Flat Head Phillips Screw (see pg. 2) 2 #10 x ½ Pan Head Phillips Screw (see pg. 2) 8 ¼ x 2 ½ Lag Bolt (see pg. 2) 7 ¼ 20 x 5 / 8 Hex Head Bolt (see pg.
INSTALLATION INSTRUCTIONS HEAVY DUTY TILT WALL MOUNT Model: PPH-2000
 INSTALLATION INSTRUCTIONS HEAVY DUTY TILT WALL MOUNT Model: PPH-2000 Specifications: Accomodates Akira and Orion 84" displays without interface bracket; accomodates other large flat panel displays with
OWNER'S MANUAL. Please Do Not Return This Product To The Store!
 MODEL NO. T8190SA TABLE TENNIS TABLE OWNER'S MANUAL 1. Read this manual carefully before starting assembly. Read each step completely before beginning each step.. Some smaller parts may be shipped inside
FAX:
 We strive to ensure that our products are of the highest quality and free of manufacturing defects or missing parts. Howeve r, you have any problems with your new product, DO NOT RETURN IT TO THE STORE,
User Instructions Multiline Otter Scoreboard Caddy Assembly
 List of parts: User Instructions Multiline Otter Scoreboard Caddy Assembly Single Caddy Double Caddy 1 1 Base assembly with attached wheels 2 4 1 1 2 4 4 8 10 20 12 Uprights (60 or 74 aluminum extrusion)
REC Series Rack Installation Guide
 REC Series Rack Installation Guide 1 REC Series Rack Installation Guide TABLE OF CONTENTS SECTION SAFETY WARNINGS 1 600 WIDE EXPLODED VIEW 2 800 WIDE EXPLODED VIEW 3 SWITCHING DOOR HANDING 4 STABILIZING
FAX:
 We strive to ensure that our products are of the highest quality and free of manufacturing defects or missing parts. However, if you have any problems with your new product, DO NOT RETURN IT TO THE STORE,
RBP-1215B-RX DODGE RAM QUAD CAB RX3
 RBP-1215B-RX3 2002-2017 DODGE RAM 15-3500 QUAD CAB RX3 Passenger side RX-3 Side Step Drill Template Passenger side rear Modular Bracket (6) L Support Brackets Driver side rear Modular Bracket Driver side
EmagiKit. Privacy Pod Plus. Quiet. Easy. Affordable. INSTRUCTIONS ASSEMBLY
 EmagiKit Privacy Pod Plus Quiet. Easy. Affordable. INSTRUCTIONS ASSEMBLY DIMENSIONS AND COMPONENTS 47 47 Ceiling Unit 2-B 2-L 2-R Glass Door Corner Trim Door Handle 90 Adjustable Height Work Surface 1-B
MM340 Installation Instructions IMPORTANT SAFETY INSTRUCTIONS - SAVE THESE INSTRUCTIONS
 MM30 Installation Instructions IMPORTANT SAFETY INSTRUCTIONS - SAVE THESE INSTRUCTIONS Please read this entire manual before you begin. Do not unpack any contents until you verify all requirements on PAGE.
Pedestal Desk IMPORTANT NOTE Carefully remove all the parts from the carton and put them individually on a soft cloth to prevent scratches
 88 5549 181 Pedestal Desk IMPORTANT NOTE Carefully remove all the parts from the carton and put them individually on a soft cloth to prevent scratches or other damage occurring to the parts. We have taken
Topo Freestanding Applications - Private Office
 4 3 2 Topo Freestanding Applications - Private Office Combo Wrench If you have a problem, question, or request, call your local dealer, or Coalesse at 1.800.627.6770 Or visit our website: www.coalesse.com
KIT. Assembly Instructions. HayDay, LLC
 KIT Assembly Instructions HayDay, LLC 1-800-732-1654 www.stablegrazer.com Read completely through the assembly instructions before starting assembly. The Stable Grazer Kit comes in two boxes. Remove all
CABANA / PAVILION ASSEMBLY ALUMINUM FRAME MODELS
 Assembled cabanas are large & heavy. Assemble at place of use. CABANA / PAVILION ASSEMBLY ALUMINUM FRAME MODELS Step 1 CAUTION: To avoid damage to the finish of your Cabana frame, prepare a smooth, non-scratch
F l a t S c r e e n A R M S I n s t a l l a t i o n
 ITEM NUMBERS (1) #TOACAORG16 (2) #TOACAORG20 (3) #TOACATRP24 (4) #TOACATRP30 (5) #TOACATRPDS (6) #TOACATRPSS TOOLS REQUIRED (1) 3/8 Wrench (not provided) (2) Phillips head screwdriver (not provided) (1)
PORTA~TRACE. GAGNE, INC. 41 Commercial Dr. Johnson City, New York Phone: Fax: ASSEMBLY INSTRUCTIONS
 PORTA~TRACE GAGNE, INC. 41 Commercial Dr. Johnson City, New York 13790 Phone: 1-607-729-3366 Fax: 1-607-729-7644 ASSEMBLY INSTRUCTIONS PORTA~TRACE MODEL 2436T LIGHT TABLE PORTA~TRACE MODEL 3648T LIGHT
L.L.Bean. Wooden Slat Bed
 L.L.Bean Wooden Slat Bed Thank you for purchasing our Slat Bed. Assembly of this product requires A Phillips head screwdriver. We have found it helpful to have a second person present in at least one step
IDR assembly instructions:
 IDR assembly instructions: Required Tools: 2 X 12mm Open End Wrench 14mm open end wrench #2 Phillips Head Screw Driver (Drill with adjustable torque clutch recommended) 8mm nut driver (Supplied in IDR-AK)
Installation Instructions
 Installation Instructions Optima LED 8 Double-Sided StretchLite Perimeter Lit Graphic Display Line Voltage Connector Optima LED DS5 (Double-sided StretchLite Graphic Display) with Graphics Corner Bracket
Charlotte Dressing Table & Stool Set L4294
 Thank you for shopping with GLTC, we hope you enjoy having this product in your home. We know assembling furniture, toys or accessories is not everyone s favourite way to spend their time, so we ve tried
O W N E R S M A N U A L
 O W N E R S M A N U A L TABLE TENNIS TABLE MODEL NO. T1 Please Do Not Return This Product to the Store! Contact Escalade Sports customer service department at: Phone: 1-66-73-3 Toll-Free! Fax: 1-66-73-333
Please Do Not Return This Product To The Store!
 MODEL NO. T8176 QUICK SERVE 3000 TABLE TENNIS TABLE OWNER'S MANUAL 1. Read this manual carefully before starting assembly. Read each step completely before beginning each step. 2. Some smaller parts may
Please Do Not Return This Product To The Store!
 MODEL NOS. T8512 TOURNAMENT SERIES 3 TABLE TENNIS TABLE OWNER'S MANUAL 1. Read this manual carefully before starting assembly. Read each step completely before beginning each step. 2. Some smaller parts
#916 CLASSIC 16 GUN CABINET ASSEMBLY INSTRUCTIONS
 Thank you for purchasing this quality product. A list of PARTS and INSTRUCTIONS is included to assist you. Unpack and identify all parts included on the Parts List and Hardware List. If parts are missing,
JSP60617 KIA EXPRESS SERVICE TOOL KIT
 JSP60617 KIA EXPRESS SERVICE TOOL KIT 60617-CAT TABLE OF CONTENTS JSP60617 Cart Inventory List...3 JSP60617 Cart Drawer Layout...4 Top Lid/Drawer Details...5 Drawer #1 Details...6 Drawer #2 Details...7
6' Wide Premium Greenhouse Benches
 6' Wide Premium Greenhouse Benches Premium Greenhouse Bench with Rolling Top 2015 FarmTek All Rights Reserved. Reproduction is prohibited without permission. STK# DIMENSIONS 112416R6X08 6' W x 3' H x 8'
6' Wide Premium Greenhouse Benches
 6' Wide Premium Greenhouse Benches Premium Greenhouse Bench with Stationary Top 2015 FarmTek All Rights Reserved. Reproduction is prohibited without permission. STK# DIMENSIONS 112416S6X08 6' W x 3' H
User Manual. for Azooga 10 in 1 Multi-game table
 User Manual for Azooga 10 in 1 Multi-game table 1 Assembly Manual Parts Pool, foosball/table soccer, table tennis, chess, checkers, shuffle board, backgammon, bowling, deck of cards and dice all together
2 ADULTS REQUIRED FOR ASSEMBLING
 2 ADULTS REQUIRED FOR ASSEMBLING If you have any questions regarding assembly or if you are missing parts, do not return this item to Retailer Store Please call our customer service number and have your
MM540 Installation Instructions IMPORTANT SAFETY INSTRUCTIONS - SAVE THESE INSTRUCTIONS
 MM50 Installation Instructions IMPORTANT SAFETY INSTRUCTIONS - SAVE THESE INSTRUCTIONS Please read this entire manual before you begin. Do not unpack any contents until you verify all requirements on PAGE.
For additional assistance call
 The following pages will help guide you through the process of assembling your new 48 custom prize wheel. Choose an assembly area with plenty of room to lay your pieces on the floor and also a bench or
This manual will aid in the assembly of the FireBall V90 and FireBall X90. The assembly of both machines will be identical, unless specified.
 This manual will aid in the assembly of the FireBall V90 and FireBall X90. The assembly of both machines will be identical, unless specified. Step #1 Lay all parts out to verify quantities. (2) 2 x 25-1/4
Electric Skein Winder
 Electric Skein Winder Assembly and Use Package Contents 1 - Triangular Body (w/ motor) 1 - Cross Arm 1 - Left Foot (w/ yarn guide) 1 - Right Foot 1 - Adjustable Finger (w/ yarn clip) 3 - Adjustable Fingers
F AX: f oo s b al d es p o rt s. com
 W e strive to ensure that our products are of the highest quality and free of manufacturing defects or missing parts. However, if you h av e any p rob l e m s wi t h your ne w p r od u c t, D O NO T RETURN
STEP 1 STEP 2 LEVELER KIT OPTION MOBILE CASTER KIT OPTION
 B SERIES INDUSTRIAL BENCHES TOOLS REQUIRED FOR ASSEMBLY Socket set, Open end wrench set, Cordless drill with 3/8" socket bit (Magnetic recommended). BEFORE ASSEMBLY Read through the assembly instructions
mila-wall (Series100) General Operating Instructions page 1 of 15
 General Operating Instructions page 1 of 15") mila-wall (Series100) General Operating Instructions page 1 of 15 Step #1: Before setting up walls, lower adjustable leveling feet on each panel approximately 1". This will allow access to the threaded
mila-wall (Series100) General Operating Instructions page 1 of 15 Step #1: Before setting up walls, lower adjustable leveling feet on each panel approximately 1". This will allow access to the threaded
https://www.wallbedsbywilding.com/wallbed-installation-studio-series/
 For Wallbed models: KING SIZE INSTRUCTION BOOKLET #C1 Watch step by step installation instructions at: https://www.wallbedsbywilding.com/wallbed-installation-studio-series/ WARNING! ALL MURPHY/WALLBED
 For Wallbed models: KING SIZE INSTRUCTION BOOKLET #C1 Watch step by step installation instructions at: https://www.wallbedsbywilding.com/wallbed-installation-studio-series/ WARNING! ALL MURPHY/WALLBED
 INSTRUCTION BOOKLET #C0 Watch step by step installation instructions at: https://www.wallbedsbywilding.com/wallbed-installation-studio-series/ WARNING! ALL MURPHY/WALLBED SYSTEMS CONTAIN STORED ENERGY.
High Rise Sit-Stand Desk Converter
 High Rise Sit-Stand Desk Converter Assembly Instructions for Model DC300 Patent Pending PRE-ASSEMBLY Please read all instructions before beginning assembly. We strongly recommend you watch the video at
Easy Assembly Instructions & Rules
 Model # 64-0126 Easy Assembly Instructions & Rules 7-Foot Non-Slate Pool Table DO NOT RETURN TO STORE. FOR ALL RETURNS AND WARRANTY COVERAGE PLEASE CALL GLD PRODUCTS: 1-800-225-759 Please provide model
INSTALLATION INSTRUCTIONS LARGE FLAT PANEL IN WALL ENCLOSURE Model: PAC-500
 INSTALLATION INSTRUCTIONS LARGE FLAT PANEL IN WALL ENCLOSURE Model: PAC-500 Specifications: Designed for in-wall installation spanning a minimum of 3 wood studs, 16" on center. Accomodates MWR, PWR and
** Do Not Contact the Store ** For Assistance, including missing or broken parts, Call Customer Service at:
 3/01/2007 VISIT THE LITIME WEB SITE: WWW.LITIME.COM ** Do Not Contact the Store ** For Assistance, including missing or broken parts, Call Customer Service at: 1 (800) 225-3865 Double Shed Doors for Back
Preference Collection 5580 Treatment Console INSTALLATION GUIDE
 Preference Collection 5580 Treatment Console INSTALLATION GUIDE 0 WARNING Failure to install the 5580 as described in this installation guide may cause the unit to collapse, resulting in serious injury
This instruction manual is an in-depth look and explanation of how to assemble and install the Murphy Bed properly and efficiently.
 This instruction manual is an in-depth look and explanation of how to assemble and install the Murphy Bed properly and efficiently. Don t be put off by the size of the instruction manual as the large diagrams
The Mind Project s Iris 1 Robotic Arm. Packing List Assembly instructions
 The Mind Project s Iris 1 Robotic Arm Packing List Assembly instructions Packing list Below you will find pictures and descriptions of each part. It may be helpful to take each piece out of the bag and
Copyright Black Box Corporation. All rights reserved Park Drive Lawrence, PA Fax
 Copyright 2003. Black Box Corporation. All rights reserved. 1000 Park Drive Lawrence, PA 15055-1018 724-746-5500 Fax 724-746-0746 JULY 2003 RM3010A RM315-R2 RM323-R2 RM329 RM451 RM457 RM3020A RM316 RM324-R2