Particleboard Flooring. The tradesman s essential guide
|
|
|
- Coleen Golden
- 5 years ago
- Views:
Transcription


1 Particleboard The tradesman s essential guide


2 Particleboard The tradesman s essential guide even rotten weather can t flaw Trade Essentials Particleboard provides the best protection there is against damage caused by damp or humid conditions. Indeed, it is made to quality standards so high, not even the worst weather can flaw it if the guidelines in this brochure are followed. And, there are two product choices to cover your building requirements: Green Tongue - 19mm for 450mm joists Beige Tongue - 22mm for 600mm joists There is also the option of Termite Treated Particleboard, should the specific situation demand this protection, as well as 25mm Brown Tongue particularly for commercial applications. Superior moisture resistance Unlike many particleboards, Trade Essentials Particleboard is manufactured using extra fine wood particles. This ensures a far better distribution of the water resistant resins across the entire surface. In addition, all edges are coated with a wax edge seal. The result is a level of moisture resistance, which is over two times greater than the required standards for flooring. Even when left exposed to the elements for up to three months Trade Essentials Particleboard is guaranteed to meet the required standards (if guidelines are followed). A safe, solid platform Trade Essentials Particleboard features an easy to use tongue and groove system that gives the flooring remarkable strength in the unsupported joints. This guarantees you a safe and solid platform on which to build your frame, or lay your floor coverings. 2
.")
3 Applications Trade Essentials Particleboard is a three layered particleboard, bonded with moisture resistant resin and wax, specifically formulated for use as interior flooring. It is suitable for all domestic housing as well as commercial installations, provided it is installed to the requirements of AS 1860 (Installation of Particleboard ). Trade Essentials Particleboard can be used for a variety of framed building constructions including fitted floor, upper storey and platform constructions. Moisture resistance - General information Trade Essentials Particleboard is capable of withstanding general weathering for up to 3 months. To maintain best practice, boards must be covered on building sites. It is recommended to avoid where possible, exposure of the panels to severe conditions, such as prolonged exposure to intense sun, cyclic soaking rain etc, as these exposures have the potential to alter the moisture gradient of the panels and may cause dimensional change, similar to natural timber. A moisture level of about 7% is present in the board at the time of despatch from the warehouse. Physical Properties (Typical physical properties when tested to AS/NZS ) Board Thickness Property Unit 19mm 22mm Weight Kg/m Modulus of Rupture MPa 25 av. 25 av. Modulus of Elasticity MPa 3400 av av. Internal Bond MPa 800 av. 700 av. Thickness Swell 24hr % < 5 < 4 Wet Bending Strength MPa 5 5 Surface Water Absorption g/m 2 < 60 < 60 Thickness Stability % < 10 < 9 Glue Bond Quality MPa Fire Hazard Indicies (Typically achieved when tested to AS/NZS ) Indicies Result Range Ignitability Spread of Flame Heat Evolved Smoke Developed Fire Test Results (Results when tested in accordance with AS/NZS 3837) Classification: Group Number 3 (in accordance with specification A2.4 of the BCA) Average 40.2Kg/m 2 Extinction (Refer to specification C1.10a section 3(c) of the BCA) Area: For further information refer: AS/NZS : Particleboard Part 2 Installation. Thermal properties Thermal conductivity W/mk. Dimensionally stability and strength is unaffected over normal temperature range. Acoustic properties Sound transmission loss depends on the building element and its method of installation. Particleboard with thickness over 16mm should achieve 25dB loss. Fire resistance Trade Essentials Particleboard is combustible. Burning is limited by charcoal formed on the board surface. The rate of burning is comparable to that of natural timber of similar density. Particleboard flooring adhesives The following information is provided as an adhesive usage guide and is based on the application of a 5mm bead to joists and tongues as outlined in the installation instructions in this brochure. Adhesive Required per Pack of Green Tongue (19mm to span 450mm joists) 900mm wide sheet 25 x 300 ml cartridge (35 sheets per pack) or 10 x 850 ml cartridge Beige Tongue (22mm to span 600mm joists) 900mm wide sheet 20 x 300 ml cartridge (25 sheets per pack) or 8 x 850 ml cartridge Particleboard 3
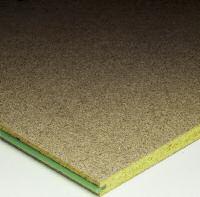
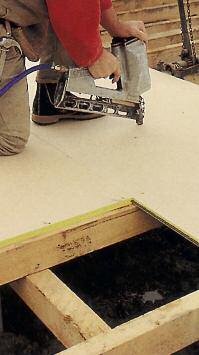
4 Product range Trade Essentials Particleboard has a plain core colour with a yellow wax edge seal to all edges. There are two product thicknesses each identified by the colour of their PVC tongue: Green tongue (19mm) For use with floor joists spaced at 450mm Beige tongue (22mm) For use with floor joists spaced at 600mm Trade Essentials Particleboard is available in different sheet sizes. There is also the option of Termite Treated Particleboard and Brown Tongue (25mm) for commercial applications. For full details contact your nearest branch of The Laminex Group. Install all sheets with the same face upwards, to ensure flush mating of adjoining faces. Butt joints should be staggered in alternative rows to give a rigid floor. Handy hints: The Laminex Group recommends Trade Essentials Particleboard Adhesive for this application. This is a high performance, fast setting synthetic rubber based adhesive, specially formulated for the permanent and speedy installation of structural sheet flooring panels, in conjunction with supplementary mechanical fastenings. If the tongue and grooved profile is changed to a square edge during trimming or cutting of sheet, re-profile the edge with a circular saw and insert a tongue, or alternatively use as square edged Particleboard. Installation instructions 1. Assess the site Ensure correct sub-floor clearance and ventilation as per Australian Standard 1860 Installation of Particleboard, or local building regulations. Particleboard is not suitable under conditions of permanent dampness, i.e. where particleboard moisture content is permanently in excess of 16 per cent moisture content. 2. Positioning and fixing Locate a string line parallel to the perimeter of the floor and at right angles to the joists. Fit the first new row of sheets with the tongued edge to the string line. This will ensure edge straightness. Tongue and grooved edges must run parallel to the span and sheeting must span no less than two floor joist spacings. Fix second sheet in a similar manner inserting plastic tongue into the groove of sheet one. Be sure to apply bead of adhesive to tongue prior to installation. DO NOT cramp or over-tighten. After each row is laid, fully nail or screw the previous row (refer to the fixing pattern). Where Particleboard is used in square edge form, the sheets should be laid with their long edges supported by noggings or trimmers. Sheet butt joints must be staggered. 3. Fixing technique Particleboard may be fixed on the subfloor with hand or power-driven fasteners. For a rigid squeak-free floor system, ensure a continuous 5mm bead of Trade Essentials Particleboard Adhesive is applied to all joists and along the top of the tongue. Two beads of adhesive need to be placed on the joist where the butt joint occurs. DO NOT apply too far ahead as adhesive cures quickly. At all times follow instructions on the adhesive pack. Where gun nailing, nail heads should not penetrate the surface by more than 1.0mm. Adjust air pressure to suit softwood or hardwood joists. Gun nail only in accordance with gun nail specifications. Galvanised nails are recommended. Nails should be punched below the surface of the sheets just before the sanding or laying of floor coverings. This ensures firm seating of the flooring joists. Particleboard that is likely to be subjected to increased levels of traffic vibration should be fixed with spiral or helical shank nails. 4

5 Field nails at 200mm centres 3600mm Butt nails at 150mm centres Stable Footings 400mm Minimum above ground Platform construction Stagger Sheet Butt Joints Do not fit closer than 10mm to base of groove 800mm 600mm for 22mm board 450mm for 19mm board Adhesive 5mm bead Trimmer required when board not under plate Air Vents Stable Footings 10mm Expansion Gap 400mm Minimum above ground Fitted floor Nailing Method Joist Type Nail or Screw Size (mm) Hand Hammer (nails) Hardwood & Cypress Pine 50 X 2.80 Softwood 55 X 3.15 Nail Gun (nails)* All Timber 55 X 2.5 Tee - head or Finished head Screw Timber Type No. 10 X 50mm, Type 17 Countersunk head, Self drilling Screw Steal Type No. 10 X 45mm Countersunk head, Self embedding wing tip 4. Types of construction 4.1 Platform floor construction Platform flooring construction involves flooring laid on the floor joists over the whole floor area prior to the erection of the wall and roof framing. Trade Essentials Particleboard is capable of withstanding general weathering for up to 3 months. Less exposure however, is recommended. To maintain best practice, packs of Particleboard should be protected from the weather before installation. Particleboard will expand and contract as sheets respond to changes in atmospheric moisture. Allowance for the movement must be made throughout the floor area by providing gaps and special joints as appropriate to accommodate sheet expansion. An expansion joint is a 20mm gap in flooring sheets located above a wide (50mm minimum) or double joist. Extra joist area is necessary so that sheet ends can be properly fixed while still allowing the 20mm gap. The joint may be covered by a metal or plastic moulding, screwed into the joist, or partitioning may be located over the joint. Spacing of expansion joints should be between 10 and 20m with the final decision depending upon the assessment of whether: - the floor is elevated or on ground level - the area is air conditioned - it is a tropical region (coastal area, north of 27th parallel) - what moisture variations are likely in the flooring Exposure to very hot sun, particularly after the board has been soaked by rain, may cause panel shrinkage and cupping. If this occurs, then light wetting of the board and shading of the site may help minimise the effect by slowing the rate at which the flooring dries. DO NOT stack heavy concentrated loads on the floor, e.g. bricks, heavy structural materials. DO NOT use the floor as a mixing table and avoid build up of plaster, concrete and paint on the floor. 4.2 Fitted floor construction Fitted floor construction involves construction of the floor after the internal walls. An expansion gap of 1 2 mm per metre of room dimension (10mm minimum) should be left around the room perimeter. This is usually covered by the skirting board. For large floor areas an expansion joint should be provided (see 4.1). Particleboard 5
6 4.3 Upper storey construction Upper storey construction utilises Particleboard laid on timber joists and supported on wall framing/ internal brick work. Green and Beige Tongue Particleboard is ideal for internal upper storey construction and extensions. 5. Surface finishing Australian Standard 1860 Installation of Particleboard provides guidelines for surface finishing. (a) Inspect for dampness especially if board has been weathered before proceeding with finishing operations; if found to be excessively damp it shall be left until its moisture content is 15 percent or less. (b) If the flooring is to be covered with carpet, the surface should be firm and tight with no loose flakes or particles: (i) Nails should be inspected and hammered flush, screws should be flush with the surface. (ii) If the surface has been exposed to the weather, some sanding may be required. Full sanding may not be necessary, but rough or uneven areas should be spot sanded. Nail punching and screw counter sinking will only be necessary in these areas. NOTE: FULL SANDING may be necessary if the Particleboard has been subjected to prolonged rain while being exposed. (iii) Sanding before carpet laying should be with grit sand paper. (c) For other surface finishes, full sanding will usually be required if the particleboard has been exposed to the weather. The surface shall be given a first cut with grit sand paper followed by grit sand paper. (d) Depth of material removed shall not exceed the following except where otherwise specified by the manufacturer: (i) Over the general sheet area 1mm (ii) Within 50mm of any supported edge 2mm (e) All surfaces shall be cleaned to remove dust. Waterproofing clean finish to internal radius of flange Wall lining Waterproof membrane 6. Surface preparation - wet area rooms (Bathrooms, kitchens, laundries) Procedures required by AS 3740 Waterproofing of Wet Areas Within Residential Buildings, should be followed closely. Holes may be required in the floor to accommodate pipes, drains and plumbing wastes. These should be accurately drilled and cut ensuring that excessive material is not removed (rough punching is unacceptable). All edges should be sealed using pink primer, construction adhesive, or another suitable sealer. All building debris, plastic or other building matter should be completely removed and the floor surface sanded clean prior to waterproofing treatments. Joints between sheets should be carefully inspected and prepared. Flashing should be placed over joints. An impermeable membrane is required to seal the floor prior to the overlaying of surface finishes such as ceramic or PVC tiles. The Laminex Group recommends the following for application: (a) Davco Dampfast (b) Bostick Ultraseal The Laminex Group recommends that the respective manufacturer s instructions are followed when applying these products. 7. Resilient sheet and tile The requirements of Australian Standard 1884 Floor Coverings Resilient Sheet and Tiles-Laying and Maintenance Practices should be followed when finishing with materials such as flexible and semi-rigid cork, rubber, linoleum and vinyl. Unsatisfactory results may be obtained if resilient floor coverings are laid directly on to the Green Tongue or Beige Tongue Particleboard, due to movement of the flooring or subfloor structure with changes in moisture content or settling. Use of an underlay will minimise the risk of either failure of the bond between the covering and the floor, or of particleboard flooring sheet joints showing through the coverings. Underlay joins should not coincide with the particleboard flooring joins. 6 Bond breaker to all internal corners prior to waterproofing to act as movement joint
7 Standards & relevant codes Building Code of Australia AS/NZS Particleboard Part 1 Specification. AS SAA Loading Code, Dead and Live Loads and Load Combinations. AS Particleboard Part 2 Installation. AS 1884 Floor Coverings Resilient Sheet and Tiles - Laying and Maintenance Practice. AS 3740 Waterproofing of Wet Areas Within Residential Buildings. Design criteria Industrial Guidelines in Australian Wood Panels Association Design Manual. Obtainable online at Domestic 19mm to span 450mm maximum joist centres 22mm to span 600mm maximum joist centres Hints & tips: Do ensure correct, sub-floor clearance and ventilation. Do lay out all sheets first when fixing a platform floor. Do leave an expansion gap around room perimeters of fitted floors (see positioning & fixing diagram). Do protect sheets from the weather before installation. Do store sheets prior to fixing to allow adjustment to site conditions. Do make sure to follow instructions when using adhesive. Avoid build-up of concrete, plaster and paint on floor. Do not allow water to pool on sheets sweep away as soon as possible. Do not leave butt joints unsupported by joists or noggings. Do not stack heavy concreted loads on floor panels. Do not Bondcrete or otherwise seal floor during construction this will prevent floor drying out properly. Do not use floor as a mixing table. Set out joists to suit sheet size and thickness. Underlay joins should not coincide with particleboard flooring joins. And a final hint screws (rather than nails) produce a better squeak free finish for DIY installers. Storage and exposure of Particleboard Trade Essentials Particleboard should always be stored flat and in a dry area, with timber bearers spaced about 450mm apart to keep it off the floor or ground. Packs of board are best protected from the weather. Covering should allow some air circulation during the storage period. Packs should be protected on the top and sides with waterproof material (such as plastic sheeting). Packing should be used to keep plastic sheeting clear of the flooring pack so that air circulation can occur. To maintain best practice, packs of Particleboard should be protected from the weather before installation. Particleboard should be stored for about 1 week (where possible longer) prior to fixing to allow adjustment to site conditions. Water absorption will cause expansion of the sheets and this will lead to gaps in the floor later when the particleboard sheet dries out. It is recommended to avoid where possible, exposure of the panels to severe conditions, such as prolonged exposure to intense sun, cyclic soaking rain etc, as these exposures have the potential to alter the moisture gradient of the panels and may cause dimensional change, similar to natural timber. Like nearly all timber products, Particleboard may react to changes in humidity and to direct wetting, but if laid in accordance with the required standards and the recommendations outlined in this brochure, Trade Essentials Particleboard will withstand the conditions of platform construction. Once it is laid, Trade Essentials Particleboard may be exposed to the general effects of weather for up to three months and still meet the requirements of AS/NZS Part 1 Specifications for Class 1 flooring. Water should not be allowed to lie on the flooring surface. Sweep it off or drill drain holes in positions that will be covered when the job is completed. It is recommended that protection by roof and walls be provided as soon as possible. Safety and handling Particleboard is a reconstituted wood product containing wood, resin and wax. Machine tools should be fitted with dust extractors and the wearing of a dust mask is recommended. Material Safety Data Sheets for Particleboard are available on request from any branch of The Laminex Group. Particleboard 7
8 Particleboard Trade Essentials Product Range Adhesives Craftwood Particleboard Whiteboard White MDF Particleboard is marketed, distributed and manufactured in Australasia by The Laminex Group For more information visit or call Particleboard is marketed, distributed and manufactured by Laminex Group Pty Limited ABN , trading as The Laminex Group. The information contained in this technical publication is intended to give a general indication of the characteristics of the material. While all possible care has been taken to ensure that the information is correct, the manufacturer cannot accept any liability, nor is any liability on the part of the manufacturer to be implied as a result of the data given. All measurements shown are in millimetres and nominal unless otherwise stated. The information contained in this publication supersedes all previous information and is subject to alteration without notice. Please obtain a copy of the terms and conditions of the Particleboard 7 Year Limited Warranty from This Warranty is in addition to any rights that may exist under the Australian Consumer Law. Trade Essentials, Craftwood 9/12
Craftform. The tradesman s essential guide
 Craftform The tradesman s essential guide Craftform The tradesman s essential guide The Craftwood panel with unlimited possibilities Trade Essentials Craftform is the Craftwood panel with unlimited possibilities
Particleboard. The tradesman s essential guide
 Particleboard The tradesman s essential guide Particleboard The tradesman s essential guide Trade Essentials Particleboard is a three-layered board, with fine particles on the top and bottom surfaces,
The cost effective wood panel choice. Applications
 Particleboard Trade Essentials Particleboard, manufactured in Australia, is a three-layered board, with fine particles on the top and bottom surfaces, and larger wood flakes in the middle. The wood particles
General Installation Instructions
 General Installation Instructions Good web sites to check out that may assist you are: For gluing engineered boards over timber chipboard/particle board/ yellow tongue: https://www.youtube.com/watch?v=bpyfr373tl8
Feature T&G Timber Floor Installation and Finishing Recommendations
 Feature T&G Timber Floor Installation and Finishing Recommendations DATA SHEET 3 RECOMMENDED INSTALLATION PRACTICES Version 1 October 2005 3.0 Introduction This data sheet outlines the recommended practices
Engineered Hardwood Flooring Installation Instructions
 Engineered Hardwood Flooring Installation Instructions 1 Important Information before You Begin 1.1 Installer/Owner Responsibility Carefully inspect all materials before installation. Materials installed
INSTALLATION INSTRUCTIONS FOR QUICK-STEP LAMINATE WITH HYDROSEAL TECHNOLOGY.
 . PREPARATION. INSTALLATION. FINISHING. MAINTENANCE INSTALLATION INSTRUCTIONS FOR QUICK-STEP LAMINATE WITH HYDROSEAL TECHNOLOGY. IN ORDER TO OBTAIN A GOOD RESULT, WE ADVISE TO FOLLOW ALL GIVEN INSTRUCTIONS
FITTING INSTRUCTIONS FOR OFD SOLID OAK FLOORING
 FITTING INSTRUCTIONS FOR OFD SOLID OAK FLOORING SECTION 1 Installers Responsibility Pre-Installation SECTION 2 Glue Down (Solid & Engineered Flooring) SECTION 3 Secret Nailing (Solid & Engineered Flooring)
WHY YOU SHOULD USE TUFFLOOR. components
 Tuffloor DESIGN GUIDE WHY YOU SHOULD USE TUFFLOOR Strong and Easily Installed Tuffloor is a steel floor framing system designed for strength and ease of installation, and is an easy and economical alternative
NewTech - CleverDeck Composite Decking Installation Guidelines
 NewTech - CleverDeck Composite Decking Installation Guidelines Composite decking has unique characteristics and requires specific fixing requirements that differ from timber. We strongly recommend that
installation guide TASMANIAN HARDWOOD OVERLAY FLOORING
 TASMANIAN HARDWOOD OVERLAY FLOORING installation guide These instructions apply to quality Tasmanian strip flooring used as an overlay on a structural substrate in residential applications. nail glue SHEET
AND TECHNICAL SPECIFICATIONS AQ CMNZ
 AND TECHNICAL SPECIFICATIONS AQ-220917-CMNZ kopine.co.nz KOPINE FLOORING SYSTEMS INCLUDE BOTH ULTRALOCK12 AND TONGUE & GROOVE12 HIGH-DENSITY PARTICLEBOARD FLOORING. Codemark compliant 12 week exposure
Loose Lay Luxury Vinyl Plank
 Loose Lay Luxury Vinyl Plank FLEX COLLECTION Installation & maintenance * PLEASE READ CAREFULLY * Installation, maintenance & warranty guideline for loose lay luxury vinyl products. Adherence to This guideline
Install your floor between 18 and 30 C.
 GOLDEN RULES 8-0 C Install your floor between 8 and 0 C. Quick-Step Livyn must be acclimatized in the room of installation between 8-0 C for a period of at least 8 hours before installation. This floor
1INSTALLATION GUIDE: ENGINEERED WOOD FLOORING
 1INSTALLATION GUIDE: ENGINEERED WOOD FLOORING INSTALLATION GUIDELINES FOR ENGINEERED WOOD FLOORING These guidelines are designed to complement the current South African Flooring Standards. Engineered wood
INSTALLATION INSTRUCTIONS FOR QUICK-STEP LAMINATE.
 . PREPARATION. INSTALLATION. FINISHING. MAINTENANCE INSTALLATION INSTRUCTIONS FOR QUICK-STEP LAMINATE. IN ORDER TO OBTAIN A GOOD RESULT, WE ADVISE TO FOLLOW ALL GIVEN INSTRUCTIONS CAREFULLY. - 0-% RH 8h
Installation Instructions for Engineered Wood Flooring
 Installation Instructions for Engineered Wood Flooring PLEASE READ THESE INSTRUCTIONS IN THEIR ENTIERTY BEFORE BEGINNING THE INSTALLATION. Installer s / Owners Responsibility As a natural product, hardwood
TORLYS LEATHER PLANK INSTALLATION INSTRUCTIONS
 ENGLISH INSTRUCTIONS TORLYS LEATHER PLANK INSTALLATION INSTRUCTIONS Dear Customer, You have chosen a high quality TORLYS Leather floor, well suited for all residential application except bathrooms and
WET AREA PANELLING. Designer Walls. Fast
 WET AREA PANELLING Designer Walls. Fast AU/a5 WallART Brochure_ART BUNNINGS.qxp_Layout 1 7/6/18 10:16 am Page 3 LINEAR SERIES WET AREA PANELLING Add a touch of class to your SHEET COLOURS home or workplace
Installation Instructions for Viking Hearth Engineered Wood Flooring
 Installation Instructions for Viking Hearth Engineered Wood Flooring 4.16.15 PLEASE READ THESE INSTRUCTIONS IN THEIR ENTIERTY BEFORE BEGINNING THE INSTALLATION. Installer s / Owners Responsibility As a
Particleboard Flooring System Installation Guide
 1 Particleboard Flooring System Installation Guide KOPINE ULTRALOCK FLOORING SYSTEM CONTENTS System components... 2 Handling... 3 Planning considerations... 3 Storage... 4 Installation - Gluing... 4 Installation
INSTALLATION INSTRUCTIONS FOR ELKALAMINATE. IN ORDER TO OBTAIN A GOOD RESULT, WE ADVISE TO FOLLOW ALL GIVEN INSTRUCTIONS CAREFULLY.
 INSTALLATION INSTRUCTIONS FOR ELKALAMINATE. IN ORDER TO OBTAIN A GOOD RESULT, WE ADVISE TO FOLLOW ALL GIVEN INSTRUCTIONS CAREFULLY. PREPARATION Let the planks acclimatize for 48 hours in the unopened packaging
The Passive Fire Protection Handbook
 Uniclass L5:P:N3 CI/SfB Rf9 EPIC E:X:Y41 (K)+(K3) December 003 NBSPlus The Passive Fire Protection Handbook VICUCLAD VICUCLAD Applications Fire protection of metal ducts Construction of smoke extract ducts
Installation Instructions
 www.marlite.com Effective Date 03/01/2018 ARTIZAN FRP, SYMMETRIX FRP, ENVUE FRP, STANDARD FRP Installation Instructions Statements expressed in this technical bulletin are recommendations for the application
The Passive Fire Protection Handbook
 Uniclass L5:P:N3 CI/SfB Rf9 EPIC E:X:Y41 (K)+(K3) December 003 NBSPlus The Passive Fire Protection Handbook MASTERBOARD MASTERBOARD Applications Partitions Ceilings Wall and roof linings Soffit, porch
pacific build supply ltd
 Product Information ETERPAN is a medium density fibre cement sheet that is used for external cladding, plastered finish, base for stone and brick slips, rigid air barrier, weatherboards, soffits, louvres,
AquaGuard - Water Resistant Flooring Installation guidelines
 AquaGuard - Water Resistant Flooring Installation guidelines Before You Start: Please read all the instructions before you begin the installation. Improper installation will void the warranty. Important
Installation Guide. Versilux Lining INTERIORS
 Installation Guide Versilux Lining INTERIORS Australia June 2018 Make sure your information is up to date. When specifying or installing James Hardie products, ensure that you have the current technical
Timber Flooring. Introduction
 Timber Flooring Introduction Timber floors are suitable for use in a wide range of both commercial and domestic applications. The properties of timber offer qualities unlike any other material flexible
Ulltraclad Aluminium Cladding. Contents. 1.0 General Information Design Information Installation Information 7. 4.
 Ulltraclad Aluminium Cladding Contents 1.0 General Information 2 2.0 Design Information 4 3.0 Installation Information 7 4.0 Maintenance 10 5.0 Health & Safety 10 1 1.0 General Information 1.1 Introduction
Wet Area Panelling. Linear Series
 Wet Area Panelling Linear Series LINEAR SERIES WET AREA Add a touch of class to your home or workplace with the Linear Series, WallART s line of wet area panelling. With a striking range of colours and
Installation Guide. Pionite Decorative Surfaces One Pionite Road, Auburn, Maine PIONITE ( )
") Installation Guide A Subsidiary of Panolam Surface Systems SMPBRO00-012 6/14 Pionite decorative laminates are designed for finished interior surfaces which require high impact, wear and stain resistance
Installation Guide A Subsidiary of Panolam Surface Systems SMPBRO00-012 6/14 Pionite decorative laminates are designed for finished interior surfaces which require high impact, wear and stain resistance
For ANGLE-DROP Styles
 For ANGLE-DROP Styles BEFORE INSTALLATION: 1. READ THESE DETAILED INSTALLATION INSTRUCTIONS. 2. Material and tool requirements: - Estimate square footage and add 10%. - Select underlayment (over concrete
Eaves Lining Installation Guide
 Eaves Lining Installation Guide feb 13 Design Pine Eaves Lining - Installation Like most building products, Design Pine eaves lining has both advantages and limitations therefore a clear understanding
Roll Out Vinyl Installation Guide
 Sub-floor Requirements The contractor performing the installation of the performance vinyl flooring must ensure the proper quality of the sub-floor. The sub-floor must be clean, smooth, permanently dry,
INSTALLATION. GlUElEss CliCK BamBoo installation GUidE. Introduction. Tips for a successful installation
 GlUElEss CliCK BamBoo installation GUidE Introduction Thank you for purchasing a Yanchi Bamboo Floor! Our flooring combines superior technology and the highest quality materials available so that your
WoodWORKS Channeled Plank
 CEILING&WALL SYSTEMS Between us, ideas become reality WoodWORKS Channeled Plank Assembly and Installation Instructions 1. General 1.1 Product Description WoodWorks Channeled acoustical ceiling and wall
HOW TO INSTALL ELITE PANELED WAINSCOTING Using X-Rails with Either Raised, Flat or Beaded Panels
 HOW TO INSTALL ELITE PANELED WAINSCOTING Using X-Rails with Either Raised, Flat or Beaded Panels 1. First, remove the cover plates from all electrical outlets. All baseboards should also be removed; the
INSTALLATION MANUAL STORAGE
 IMVersion 1.1 INSTALLATION MANUAL GENERAL GUIDE: The information in this IM is intended to serve as a general guide to proper installation with no warranties intended or implied. Prime Panels assumes no
Handrail H Series. Product Installation. Instructions. Installation Instructions For. Wall Mounted and Freestanding Round Handrails
 Product Installation Installation Instructions For Instructions Handrail H Series Installation Instructions for Wall Mounted and Freestanding Round Handrails Step Nosing F Series Concrete and Timber Step
Installation of T&G strip floors
 Installation of T&G strip floors Australian Timber Flooring Association ABN 16 524 524 226 11 Oleander Avenue Shelley Beach Qld 4551 Email flierman@ozemail.com.au 3.0 INTRODUCTION This information sheet
The Passive Fire Protection Handbook
 Uniclass L5:P:N3 CI/SfB Rf9 EPIC E:X:Y41 (K)+(K3) December 003 NBSPlus The Passive Fire Protection Handbook SUPALUX SUPALUX Applications Timber and steel frame partitions Single skin solid wall Fire protection
Installation Guide (888)
") BamDeck Installation Guide (888) 788-2254 The Collection Decking Systems BAMDECK 4G 5-7/16 Wide Plank Dims: 192 L x 5-7/16 W x 13/16 H BAMDECK 4G WIDE 8-1/4 Wide Plank Dims: 96 L x 8-1/4 W x 13/16 H BAMDECK
BamDeck Installation Guide (888) 788-2254 The Collection Decking Systems BAMDECK 4G 5-7/16 Wide Plank Dims: 192 L x 5-7/16 W x 13/16 H BAMDECK 4G WIDE 8-1/4 Wide Plank Dims: 96 L x 8-1/4 W x 13/16 H BAMDECK
LP SmartSide Soffit ON SITE STORAGE PREPARATION. Application Instructions Vented and Non-Vented Smooth Finish or Cedar Texture. General Information
 Application Instructions Vented and Non-Vented Smooth Finish or Cedar Texture A B A - Open / Closed (Page 5) B - Vented (Page 6) ON SITE STORAGE Store off the ground well supported, on a flat well-drained
TIMBER FLOORS RECOMMENDED INSTALLATION PRACTICES
 TECHNICAL DATA SHEET ISSUED BY TIMBER QUEENSLAND TIMBER FLOORS RECOMMENDED INSTALLATION PRACTICES 18 RECOMMENDED PRACTICE // MARCH 2014 This information sheet outlines the recommended practices for laying
INSTALLATION INSTRUCTIONS MILLENNIUM DECKING Before Installing Millennium Decking, please read these instructions in their entirety.
 INSTALLATION INSTRUCTIONS MILLENNIUM DECKING Before Installing Millennium Decking, please read these instructions in their entirety. Safety PRE-INSTALLATION Compliance with all applicable local, state
4256HM JAMES HARDIE MONOLITHIC CLADDING
 4256HM JAMES HARDIE MONOLITHIC CLADDING 1. GENERAL This section relates to the supply and fixing of fibre cement flush finish cladding: - James Hardie Monotek Sheet for textured coating systems - James
A. All trim that has been damages, broken, or missing shall be repaired or replaced with material of the same size, shape, and type.
 SECTION 062000 - FINISH CARPENTRY PART 1 - GENERAL 1.1 SECTION REQUIREMENTS A. All trim that has been damages, broken, or missing shall be repaired or replaced with material of the same size, shape, and
FACTS ABOUT PARTICLEBOARD AND MDF
 FACTS ABOUT PARTICLEBOARD AND MDF 1 TABLE OF CONTENTS Standard Particleboard... 4 Mechanical and Physical Properties... 4 Moisture Properties... 5 Absorption and Swelling... 5 Dimensional Changes... 5
INSTALLATION LAMTON INSTALLATION INSTRUCTIONS. Lamton Laminate Flooring with Underlay Attached Glueless Installation. Tools and Accessories
 Lamton quality laminate flooring is manufactured to exacting standards for long life and lasting beauty. Following these simple procedures for installation and it will ensure many years of pride and satisfaction.
Installation Instructions: Urbanline Valchromat MDF Panelling
 Product Description is a Premium coloured wood product. It is a relatively high density wood fibre panel engineered to provide colour right throughout. is a natural product and therefore susceptible to
PANEL INSTALLATION GUIDE
 GUIDE The Manufacturer has provided these instructions as installation guidelines in accordance with ASTM E-330. The manufacturer, however neither installs the panels nor has any control over the installation.
Laminate Flooring Alternative to Hardwood Flooring
 Laminate Flooring Alternative to Hardwood Flooring Laminate flooring is moderately expensive, with a cost generally between that of vinyl and hardwood flooring. It's easier to install than hardwood and
TRIVERSA TRIVERSA ID. Triversa Triversa ID Installation Instructions. Remove the wall base and doorway trim. Always undercut wood door casings
 INSTALL ON ALL GRADE LEVELS Above Grade On Grade Below Grade by CONGOLEUM TRIVERSA TRIVERSA ID Triversa Triversa ID Installation Instructions GENERAL INFORMATION ATTENTION! READ BEFORE INSTALLING! Handle
GREEN WORLD LUMBER GENUINE MAHOGANY DECKING INSTALLATION GUIDE
 GREEN WORLD LUMBER GENUINE MAHOGANY DECKING INSTALLATION GUIDE Genuine Mahogany is among the most durable natural wood decking available. When properly installed and maintained, you should have a beautiful
IMPORTANT NOTES ABOUT YOUR FLOORING PLEASE READ BEFORE INSTALLING INSTALLATION & MAINTENANCE FOR ENGINNERED HERRINGBONE
 IMPORTANT NOTES ABOUT YOUR FLOORING PLEASE READ BEFORE INSTALLING INSTALLATION & MAINTENANCE FOR ENGINNERED HERRINGBONE ACCLIMATIZATION AND STORAGE Your new flooring has to be acclimatized before installation,
INSTALLING YOUR UNICLIC FLOOR - Small planks / 3 sizes
 INSTALLING YOUR UNICLIC FLOOR - Small planks / 3 sizes 1) General The panels must be rotated on both short and long edges to fit into one another. This can be performed by inserting either the tongue into
Installation Guide (888)
") BamDeck Installation Guide (888) 788-2254 The Collection Decking Systems BAMDECK 3G 5-7/16 Wide Plank Dims: 96 L x 5-7/16 W x 13/16 H BAMDECK 3G 16FT. 5-7/16 Wide Plank Dims: 192 L x 5-1/2 W x 13/16 H
BamDeck Installation Guide (888) 788-2254 The Collection Decking Systems BAMDECK 3G 5-7/16 Wide Plank Dims: 96 L x 5-7/16 W x 13/16 H BAMDECK 3G 16FT. 5-7/16 Wide Plank Dims: 192 L x 5-1/2 W x 13/16 H
For best results, it is essential that you follow the installation instructions exactly.
 For best results, it is essential that you follow the installation instructions exactly. PREPRTION Let the planks acclimatize for 48 hours in the unopened packaging at the normal room temperature, in the
INSTALLATION INSTRUCTIONS FOR QUICK-STEP LAMINATE WITH HYDROSEAL TECHNOLOGY.
 . PREPARATION. INSTALLATION. FINISHING. MAINTENANCE INSTALLATION INSTRUCTIONS FOR QUICK-STEP LAMINATE WITH HYDROSEAL TECHNOLOGY. IN ORDER TO OBTAIN A GOOD RESULT, WE ADVISE TO FOLLOW ALL GIVEN INSTRUCTIONS
INSTALLATION GUIDE.
 INSTALLATION GUIDE Hardwood floors are a product of nature and therefore not entirely free of typical timber features such as grain variation and knots. Every piece of wood has different grain, colour
Installation of MagFloor 100
 Installation of MagFloor 100 Prior to any placement of MagFloor panels, ensure the joists are sound, secure, level and clean from any loose dust or debris. This will ensure good adhesion between the underside
STEEL FRAMING WEATHERBOARD SYSTEM
 T A R A NAK IPINE STEEL FRAMING WEATHERBOARD SYSTEM Installation information and technical drawings TIMBER WEATHERBOARDS NATURALLY BETTER FOR MORE THAN A CENTURY www.taranakipine.co.nz T A R ANAKIPINE
How to: Line a masonry fireplace with PROMAFOUR
 How to: Line a masonry fireplace with PROMAFOUR PROMAFOUR fire surround lining systems PROMAFOUR The fire surround lining system If you are installing a new stove, stove surround or updating an existing
Metal & Vinyl, Flush Mount and Recessed Fin Windows Recommended Installation Instructions
 PO Box 480 Ph: 417-235-7821 Monett, MO 65708 Fax: 417-737-7140 Metal & Vinyl, Flush Mount and Recessed Fin Windows Recommended Installation Instructions These installation instructions are recommendations
INSTALLATION INSTRUCTIONS
 VESDURA VINYL PLANKS 3MM PVC GLUE DOWN - OAK COLLECTION Safety First CAUTION Asbestos Warning in existing floor. Do not sand, dry scrape, bead blast or mechanically pulverize existing resilient flooring.
PANELTEK ENGINEERED SIDING/PANELLING INSTRUCTIONS
 PANELTEK ENGINEERED SIDING/PANELLING INSTRUCTIONS This product can be used for interior and exterior installations. Much of this guide refers to exterior installation, however, many of the construction
Laying instructions Installation of multilayer Herringbone / Basket-weave with tongue and groove joint.
 Laying instructions Installation of multilayer Herringbone / Basket-weave with tongue and groove joint. Preparation Store the boards in their packaging and open them as you need them. Read the instructions
Sound insulating floor system
 GypFloor SILENT GypFloor SILENT Sound insulating floor system GypFloor SILENT is specified in residential conversion or improvement work to upgrade an existing timber joist floor. It is also used in new-build
HM OUTDOOR TABLE:HM OUTDOOR TABLE 25/7/08 11:18 AM Page 30
 HM080827 OUTDOOR TABLE:HM080827 OUTDOOR TABLE 25/7/08 11:18 AM Page 30 The treated-pine frames of the table and benches are topped with sturdy blackbutt timber. HM080827 OUTDOOR TABLE:HM080827 OUTDOOR
Adorn Mortarless Stone Veneer Installation Natural Concrete Products
 Adorn Mortarless Stone Veneer Installation Adorn Mortarless Stone Veneer can be used on new or existing construction. Adorn is nailed or screwed onto the wall; therefore no brick ledge is required. Adorn
ENGINEERED STRUCTURAL BRACING
 ENGINEERED STRUCTURAL BRACING www.r6brace.com.au 2 R6 Brace Key Features Complies with BCA Tested & certified by the Engineered Wood Products Association of Australasia (EWPAA) Performs in all weather
HeatBoard Joisted Floor System
 Design HeatBoard Joisted Floor System The Floor Heating Warehouse Underfloor Heating using Heatboard Slotted and Turning Boards is intended for installation on standard wood joist floors of a max. 600mm
DECKING INSTALLATION GUIDE
 STAIR TREAD INSTALLATION GUIDE Step 7: Install the Remaining Treads Repeat steps 2 to 6 for the remaining stair treads. Step 8: Install the Fascia 1. Measure the riser height. 2. Rip the fascia to the
Floor Squeaks: Causes, Solutions and Prevention
 T E C H N I C A L N O T E Floor Squeaks: Causes, Solutions and Prevention Number C468N April 2002 With proper materials and careful installation, wood floors are comfortable and trouble-free. Several key
INSTALLATION GUIDE INSTALLATION GUIDE EKODECK SHOULD NOT: IMPORTANT INFORMATION
 INSTALLATION GUIDE INSTALLATION GUIDE EKODECK SHOULD NOT: To achieve a safe and long lasting Ekodeck installation, it is important to read the following guide in full. Be used as a structural or load bearing
Site Installation Guide
 Site Installation Guide Site Checklist Stop and read this now. Tick box when checked. Floor Joist Layout If a floor joist design/layout was done, was a site copy of the layout provided with the joists,
SECTION CARPENTRY
 SECTION 06100 CARPENTRY PART 1 GENERAL 1.01 SUMMARY A. Section Includes: Carpentry work including grounds, nailers, blocking, miscellaneous framing, plywood backing panels, plywood sheathing, preservative
Plantation Compressed Bamboo Flooring Installation instructions
 Plantation Compressed Bamboo Flooring Installation instructions thinking of our FUTURE Pre-installation FOR BOTH DIRECT STICK & FLOATING FLOORS Prior to installation of any floor, the installer must ensure
Installation Guide. PineRidge Lining INTERIORS
 Installation Guide PineRidge Lining INTERIORS Australia August 2018 Make sure your information is up to date. When specifying or installing James Hardie products, ensure you have the current installation
LUXURY VINYL FLOORING INSTALL INSTRUCTIONS
 PLEASE READ ALL INSTRUCTIONS CAREFULLY BEFORE YOU BEGIN INSTALLATION. IMPROPER INSTALLATION WILL VOID WARRANTY. Installation Preparation: The information on this sheet provides general guidelines. All
LOOKS AND FEELS LIKE TIMBER
 LOOKS AND FEELS LIKE TIMBER SMART COMPOSITE MATERIALS WHAT IS EKODECK AND EKODECK+? A composite decking that looks and feels like natural timber and is naturally weather resistant. Their unique design
GARDEN SHED BRIGHTOLN
 ASSEMBLY INSTRUCTIONS GARDEN SHED BRIGHTOLN Dimensions: 10x10 (1 1/8") IMPORTANT Before beginning the assembly of your garden shed, please read the instructions carefully and follow them closely. By doing
Linear Drain Installation Guide
 Linear Drain Installation Guide Carefully review all installation options and instructions before proceeding. bronte LINEAR DRAIN INCLUDES: Base and Strainer Grate Kits ordered separately. Both are required
INSTALLATION GUIDE
 MASON S BRICK INSTALLATION GUIDE 800.945.4440 WWW.STYLECRESTINC.COM MASON S BRICK INSTALLATION GUIDE INSTALLATION SUMMARY Your new Mason s Brick skirting comes in 4-1/2 foot long panels that are either
INSTALLATION GUIDE FOR MAZAMA MULBERRYWOOD HARDWOOD FLOORING
 INSTALLATION GUIDE FOR MAZAMA MULBERRYWOOD HARDWOOD FLOORING READ COMPLETELY BEFORE STARTING INSTALLATION. Congratulations on choosing Mulberrywood flooring. Please take time to read the following procedures
LVL8 H1.2 GENERAL FRAMING. Eco Friendly Revolutionary H1.2 Treatment Azotek by Zelam
 LVL8 H1.2 GENERAL FRAMING Eco Friendly Revolutionary H1.2 Treatment Azotek by Zelam NPIL/MARCH2015 Introduction to NelsonPine LVL8 H1.2 NelsonPine LVL is an engineered wood composite made from rotary peeled
Pryda Timber Connectors
 Pryda Timber Connectors Pryda Lintel Guide Engineered Steel Wall Lintels March 2014 ESSENTIAL NOTES PRYDA PRODUCT GUIDES INTRODUCTION The information in this Product Guide is provided for use in Australia
Timber Appeal. With Fibre Cement Durability
 Timber Appeal With Fibre Cement Durability ENVIRONMENTAL FRIENDLY Minimises the cutting down of trees for timber. Raw material from managed resources. DIMENSIONALLY STABLE An autoclaved composite material
MOULDINGS DOOR JAMBS AND STAIR STRINGERS HM R -E0. HMR-E0 Mouldings HMR-E0 Door Jambs HMR-E0 Stair Stringers. helping the environment.
 NPIL 44 NOVEMBER 2017 HM R -E0 MOULDINGS DOOR JAMBS AND STAIR STRINGERS Eco Friendly helping the environment HMR-E0 Mouldings HMR-E0 Door Jambs HMR-E0 Stair Stringers E0 Low Emission FURNITURE & FITTINGS
Craftwood. The tradesman s essential guide
 The tradesman s essential guide The tradesman s essential guide - the craftsman s clay Renewable, sustainable resource Designs can be turned out easily with MDF. is a Medium Density Fibreboard (MDF) that
Sound insulating floor system
 Sound insulating floor system is specified in residential conversion or improvement work to upgrade an existing timber joist floor. It is also used in new-build to meet the acoustic requirements of national
Trendwood Flooring Installation Instructions
 Trendwood Flooring Installation Instructions READ ALL OF THESE INSTRUCTIONS THOROUGHLY BEFORE BEGINNING INSTALLATION. Flooring Installation Instructions PRIOR TO INSTALLATION It is the installer's responsibility
Installation Instructions for easy to install Texture Plus faux wall panels
 Installation Instructions for easy to install Texture Plus faux wall panels Questions? Web chat, phone or email us. Easy Instructions For Use We make easy to install faux wall panels that look amazingly
General Installation Guidelines
 g e n e r a l i n s t a l l a t i o n g u i d e l i n e s General Installation Guidelines Although Nutec Building Planks do not contain asbestos fibres, it is nevertheless recommended that when working
INSTALLATION GUIDE. Biowood Outdoor Wall Panel BWWPO20018 Shiplap 8x6 Deep. Green Resources Material Australia Pty Ltd
 Green esources Material Australia Pty Ltd Congratulations on the fine choice you have made in the selection of this product. outdoor wall panels will give you many years of carefree maintenance. When installed
INSTALLATION INSTRUCTIONS of Chevron and Herringbone Engineered Hardwood Flooring
 INSTALLATION INSTRUCTIONS of Chevron and Herringbone Engineered Hardwood Flooring www.tomson-floors.com TABLE OF CONTENTS 3 USING THE PRODUCT 3 YOUR RESPONSIBILITIES 4 PRE-INSTALLATION INSPECTION 5 BASIC
VERSAROC CEMENT BONDED PARTICLE BOARD ROOF SHEATHING VERSAROC CEMENT BONDED PARTICLE BOARD ROOF SHEATHING
 PRODUCT SUBMITTAL SHEET CEMENT BONDED PARTICLE BOARD ROOF SHEATHING A cement bonded particle board roof sheathing that can be combined with other fire resistant materials to create fire-rated roof assemblies.
INSTALLATION. Installation Guide. Installing Bamboo Flooring on Top of a Wood Subfloor
 READ COMPLETELY BEFORE STARTING INSTALLATION. Congratulations on choosing Yanchi bamboo flooring. Please take time to read the following procedures before you begin installation. With the correct installation
Linda Barker Collection Heritage Collection Classic Collection INSTALLATION GUIDE
 Linda Barker Collection Heritage Collection Classic Collection INSTALLATION GUIDE Ruler Pencil Masking tape Measuring tape Silicone sealant & silicone gun Power drill & screwdriver High-grab adhesive Jig