An Introduction to Click Smart
|
|
|
- Nathan Chapman
- 5 years ago
- Views:
Transcription
1
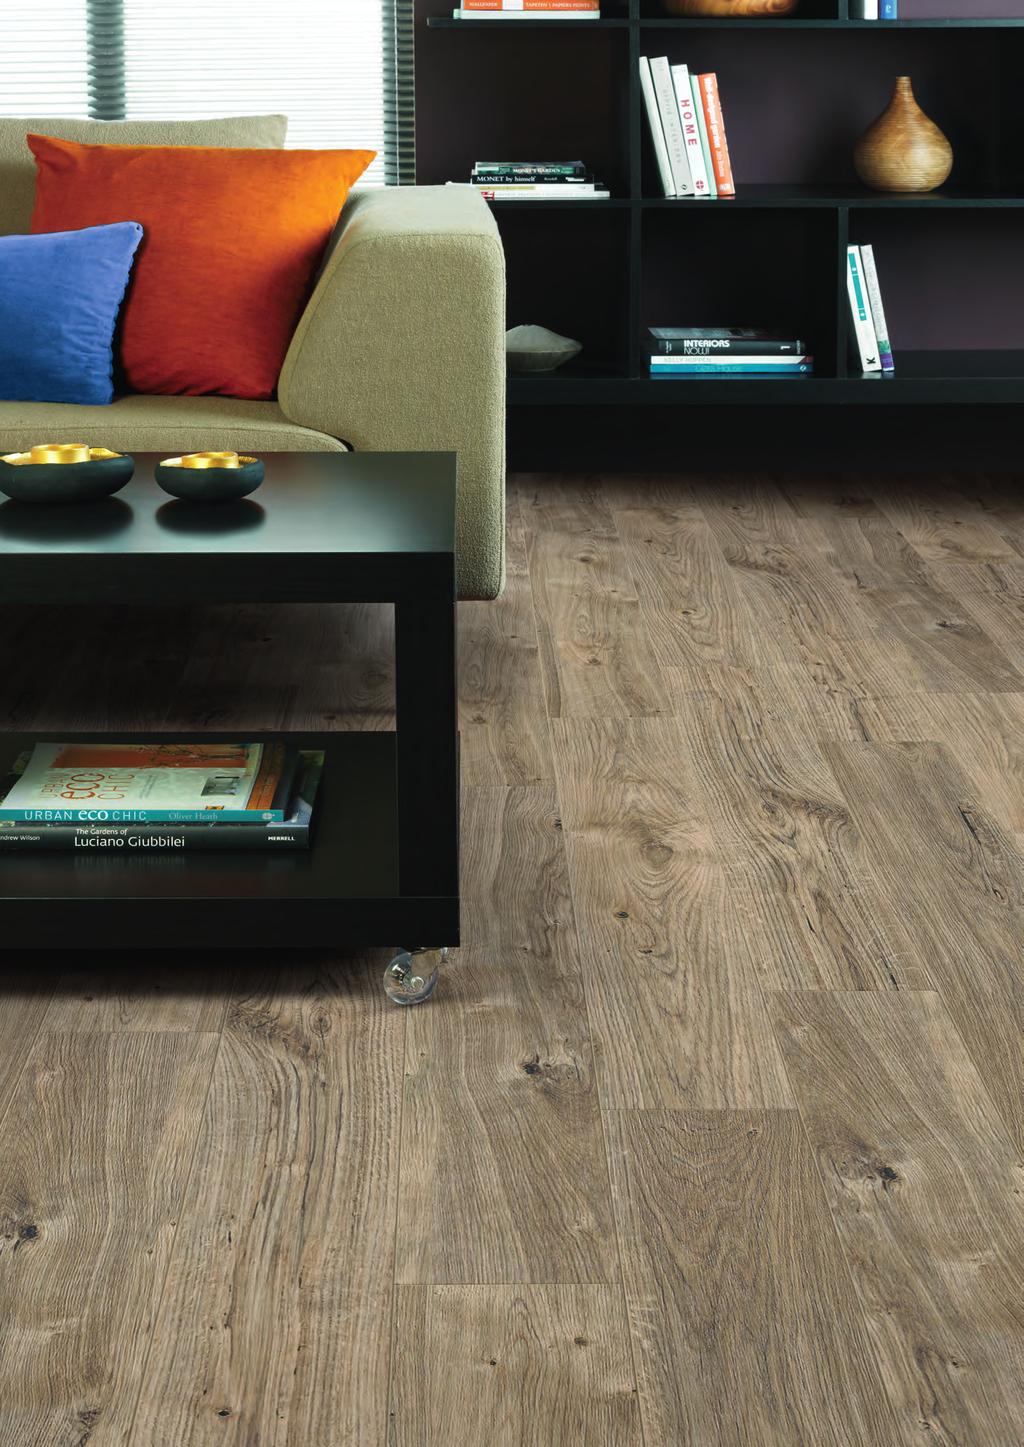
2 2 Amtico Click Smart / An Introduction to Click Smart An Introduction to Click Smart Amtico Click Smart is a simple, straight-forward and versatile click-vinyl that s easy and quick to install. There s no need to use adhesive, making it a really appealing option. There s no compromise on style either. With an authentic range of wood and stone effect products to choose from, a beautiful floor is just a few clicks away. Amtico Click Smart Contents: Why Choose Amtico Click Smart - 4 Wood - 6 Stone - 12 Product Information - 18 Installation - 20 Technical Specification - 22 Looking after your floor - 23 * *Wear-out only. For full warranty details please visit amtico.com Right: New England Oak - SB5W2527

3 Amtico Click Smart / An Introduction to Click Smart 3


4 4 Amtico Click Smart / Why Choose Click Smart? Why Choose Click Smart? Our Click Smart LVT flooring product is integrated with underlay so there's no separate application making it quicker to install than other click LVT products. Backing Layers - provide stability and acoustic benefits - the underlay is included here. High Density Wear Layer - withstands wear and tear and provides impact resistance. Rigid Core Layer - contains up to 20% recycled content and covers subfloor imperfections. Urethane Coating - surface protection making it scuff and stain resistant. Fibreglass Reinforcement - this provides the product with dimensional stability. Aesthetic Layer - our beautiful and realistic wood and stone design print films. Core Layer - the base for the aesthetic layer. With the latest rigid core technology, Click Smart is 100% waterproof and allows for easy installation over existing hard floors. Our backing layers provide a 20dB acoustic rating reducing impact sound insulation and providing an extra level of comfort underfoot. Compatible with underfloor heating. Durable - perfect for homes with kids and pets. Softer underfoot compared to Wood and Ceramic flooring. No need for adhesives - easy to fit click - locking mechanism Low maintenance - easy to clean and look after. Right: Wave Slate Black - SB5S2602

5 Amtico Click Smart / Why Choose Click Smart? 5

6 6 Amtico Click Smart / Wood Whatever your taste and design style, Amtico Click Smart has an authentic looking wooden flooring solution you ll love. Wood


7 Amtico Click Smart / Wood 7 Why we love wood... Perfect for either traditional or contemporary homes, there s an Amtico Click Smart wood flooring for everyone. From deep, dark, dusky shades to bright and pale oak, the colour palette is on-trend and versatile. Left: White Ash - SB5W2540 Above: Dusky Walnut - SB5W2542

8 8 Amtico Click Smart / Wood Perfect for... Creating a simple and elegant finish, light woods work well in contemporary or traditional schemes. In a large space, pair light wood against darker walls or surfaces for a feeling of natural continuity which doesn t look too stark. When used in smaller rooms, light wood will really help to open up the space. Lovely Lights For a traditional finish, try Honey Oak or New England Oak to bring a charm to the space.


9 Amtico Click Smart / Wood 9 1. Featured Oak - SB5W2533 Tick Grain finish 2. New England Oak - SB5W2527 Tick Grain finish 3. Sun Bleached Oak - SB5W2531 Barnwood finish 4. Honey Oak - SB5W2504 Tick Grain finish

10 10 Amtico Click Smart / Wood Perfect for... Bringing a touch of classic elegance, whether smooth and glossy or textured and rustic. While darks may seem the obvious choice for large spaces, they bring cosiness and depth to smaller spaces. Classic Darks Warm darks such as Black Walnut bring a contemporary and clean finish, whereas the authentic, country finish of Dry Cedar adds artisan charm.


11 Amtico Click Smart / Wood Nordic Oak - SB5W2550 Tick Grain finish 6. Black Walnut - SB5W2534 Tick Grain finish 7. Chapel Oak - SB5W3014 Barnwood finish 8. Dry Cedar - SB5W2535 Barnwood finish Need Honey Oak image

12 12 Amtico Click Smart / Stone Stunning stone flooring for the perfect contemporary finish. Stone


13 Amtico Click Smart / Stone 13 Why we love stone... With its effortless style and contemporary finish, stone remains a popular choice for flooring. From a rugged travertine finish to a smooth, sleek slate, easy-to-fit Click Smart has something for everyone. Left: Ceramic Ecru - SB5S3592 Above: Wave Slate Black - SB5S2602


14 14 Amtico Click Smart / Stone Simple Our favourite stones... The soft stone tones of Ceramic Ecru and Crema Travertine are our favourite ways to light up a floor. Bring the dark force home with Wave Slate Black and Monmouth Slate for a sleek and stylish finish. Stones 1. Ceramic Ecru - SB5S3592 Deep Ceramic finish 2. Wave Slate Black - SB5S2602 Riven finish 3. Monmouth Slate - SB5S7501 Riven finish 4. Crema Travertine - SB5S1589 Riven finish

15 Amtico Click Smart / Stone 15

16 16 Amtico Click Smart / Stone A real classic... Fresh, light and bright, these ever-popular floors are timeless and versatile. From the cool, contemporary finish of ceramics to the authentic, rustic appearance of travertine, these classic floors remain steadfast in their beauty and elegance. The Classics


17 Amtico Click Smart / Stone Ceramic Frost - SB5S6100 Deep Ceramic finish 6. Ceramic Ecru - SB5S3592 Deep Ceramic finish 7. Crema Travertine - SB5S1589 Riven finish 8. Noche Travertine - SB5S4590 Riven finish

 planks.")


18 18 Amtico Click Smart / Wood Wood Amtico Click Smart Woods are available in 178 x 1245mm (7 x 49 ) planks. Visit amtico.com for detailed size availability. White Ash - SB5W2540 Barnwood finish Sun Bleached Oak - SB5W2531 Barnwood finish Dry Cedar - SB5W2535 Barnwood finish Featured Oak - SB5W2533 Tick Grain finish Honey Oak - SB5W2504 Tick Grain finish New England Oak - SB5W2527 Tick Grain finish Nordic Oak - SB5W2550 Tick Grain finish Dusky Walnut - SB5W2542 Tick Grain finish Chapel Oak - SB5W3014 Barnwood finish Black Walnut - SB5W2534 Tick Grain finish

 tiles. Visit amtico.")


19 Amtico Click Smart / Stone 19 Stone Amtico Click Smart Stones are available in 303 x 607mm (12 x 24 ) tiles. Visit amtico.com for detailed size availability. Ceramic Frost - SB5S6100 Deep Ceramic finish Ceramic Ecru - SB5S3592 Deep Ceramic finish Crema Travertine - SB5S1589 Riven finish Noche Travertine - SB5S4590 Riven finish Monmouth Slate - SB5S7501 Riven finish Wave Slate Black - SB5S2602 Riven finish

20 20 Amtico Click Smart / Installation Installation Before You Begin Amtico Click Smart is suitable for use in interior residential areas, including kitchens, hallways, living spaces and bathrooms, but not recommended in conservatories or unheated areas. It can be fitted onto all existing hard floor coverings and on to subfloors that are smooth, hard and flat. The flooring should be the last thing installed into the room and after all other works and installation of fitted units, avoiding the risk of accidental damage. This product is extremely stable however, we do require expansion gaps at the perimeter of the room and around all fixed objects. For rooms up to 10m length this gap should be at least 2mm and can be concealed with the skirting or with a cover trim. For rooms 10-20m in length this should be increased to 5mm on all sides. Expansion gaps must be allowed at all doorways. It is suitable for use with electric and water underfloor heating systems (surface floor temperature should be regulated to 27 C max), and can be installed onto damp floors at up to 95% humidity. Always store the boxes of product flat, and leave them in the room to be fitted for 24 hours to acclimatise to the temperature of installation (18-25 C). If tiles have been stored within this temperature range acclimatisation time can be reduced. Preparation Amtico Click Smart can be installed over any existing hard floor surfaces, such as ceramic, vinyl and linoleum provided that it is in a reasonable condition and provides a smooth and level base without undulations. Carpet or damaged floorcoverings should be removed. Ensure the floor is level; any roughness, height changes or deep grout lines should be smoothed using a levelling compound to ensure a good finish. In cases of doubt of subfloor suitability please contact a flooring professional or Amtico directly. Recommended Tools Rubber mallet, pull bar, spacers, laminate cutter, Jigsaw (utility knife or flooring guillotine can also be used). Amtico Click Smart is a tough product. Tiles can be cut with a laminate cutter or a jigsaw fitted with fine tooth blades, which is especially useful for intricate cuts. Tiles can also be cut using a sharp knife and a metal rule. Carefully score several times, and the tile can then be snapped with two hands, the underlay backing will need to be cut through. 200mm Finishing The Room Wood effect: Tiles should be fitted with random staggered joints with a minimum 200mm between short ends. Stone effect: Tiles should be fitted in a brick pattern. A trim can be affixed to cover the expansion gap. Skirtings can be used to cover the expansion gap and doorframes can be undercut before installation to the correct depth to enable a neat finish. Uninstallation Detach the whole row that contains the unwanted tile(s). Always slide the end joints apart horizontally if uninstalling any tiles, pulling them apart in any other way will damage the mechanism. Receiving And Setting Out Your Floor Check the style, colour, quantity of product and inspect for any damage. Installation of flooring implies acceptance of materials. The row that contains the unwanted tile(s). The row that contains the unwanted tile(s) The unwanted tile For a professional appearance a floor should be balanced with even cuts at the edge of a room. This can be done by measuring the width of the room and working out how many full tiles are needed; the remaining measure can be balanced at either end. It is recommended that these cuts are not too small. If so reduce the number of full tiles by one to give a larger cut tile. We suggest 20-30% of a full tile is the smallest cut. Repairs In cases of damage during the life of the floor, repairs can either be made by taking product up from the wall, or alternatively individual tiles can be replaced without removing the entire floor by cutting out the damaged tile. Please consult Technical Services for more details. The tiles should be set out using the plans on the opposite page for best appearance and stability.
21 17 InsTALLATIOn 17 Amtico Click Smart / Installation 21 Installation Step 1 The base should be smooth and flat Step 2 (optional) undercutting of door frames Step 3 Laying of Amtico Step 5underlay-19. Outside of roll Fitting should of be second placed tile facing down. Spacer Tile Orientation Wall 200mm utside o wn. Step 4 st plank with tongue side facing w all using spacer s Step 11 The The base base should be be smooth and and flat flat Step 22 (optional) undercutting of of door door frames Step 33 Laying of of Amtico underlay-19. Outside of of roll roll should be be placed facing down. Tile T Laying fa Spacer Tile Orientation Wall Step 1 The first row of tiles should be Step placed 3 against the wall with the Amtico tongue Under nearest lay-19. the Outside wall working from left to right, cutting tiles to ould be placed g the the correct f acing width do if required. wn. ect w 0mm Spacer Tile Orientation Wall Step 2 Step 5 Step 3 Step 6 The second fitting of second tile should tile be Continue Cutting to and fit this fitting row of final the plank in first row aligned above and tapped Step 4 same manner, cutting the last into place with a mallet. Level tile to size allowing the required end joints indicate st tiles plank are with tongue expansion side gap. correctly connected. facing w all Care using spacer s should be taken to make sure they are exactly aligned and that spacers Step are 5used 5 to allow Step 66 expansion fitting space. of of second tile tile Cutting and and fitting of of final final plank in in first first row row Leave a minimum of 200mm between end joints when laying the 200mm next row to ensure a random effect Step 4 Step Step 7 8(optional) Fitting To begin use of the of additional offcut second from planks row, previous in cut row second r ow the tile to the required length, angle the tongue of the new tile into the groove of the already fitted Leave tile a and a minimum lower of into of 200mm place, while between maintaining end end joints when the layout laying the the illustrated next next row row to previously. to ensure a a random effect Step 77 (optional) use use of of offcut from from previous row row Measu al Step 8 fitting of additional planks in second row Step 9 Measure and cut final row of planks allowing for expansion gap Step 11 Step ting boar 10d with pullbar hidden and expansion rubber mallet g ap can be used for final row of planks, ensuring a expansion gap ve a minimum of 200mm n end joints when laying the Step 5 ed w to ensure The next a r tile should be ect inserted g a at an angle, closely touching Step 7 (optional) the previous tile in the row then f of fcut fr lowered om pr into evious position. rowthe end joint should be firmly tapped with a rubber mallet to lock it into place. Step 6 Step 88 fitting of of additional planks in in If necessary second use a row row tile offcut as a tapping block, gently tap with a rubber mallet to ensure edges are well aligned. Step 11 Refitting of skirting board with hidden expansion gap Step 7 Step 99 Step 8 Step Measure and and cut cut final final row of of planks pullbar and and rubber mallet can can be be used Continue allowing fitting for for expansion full rows gap gap in this A pull for for final bar final row row can of of planks, be useful ensuring for this a a manner, keeping joints correctly final row of expansion tiles. gap gap aligned and ensuring the tiles are all properly connected. The last row of tiles should be cut to size, allowing the correct expansion gap and fitted in the 30540_UK Amtico Click Brochure 2013 Print.indd 17 same manner. Step 12 fixing edge trim to wall Step 12 Step Refitting of of skirting board with with hidden expansion gap gap Step fixing edge trim trim to to wall wall 30540_UK Amtico Click Brochure 2013 Print.indd 17 Step 10 d r ubber mallet can be used ow of planks, ensur ing a expansion g a p 30540_UK Amtico Click Click Brochure 2013 Print.indd /05/ :31
22 22 Technical Specification Click Smart: Wood Amtico Click Smart / Technical Specification Product Name Product Code Surface Finish Bevel Tile Thickness (mm) Wear Layer Thickness (mm) White Ash SB5W2540 Barnwood Y Y Sun Bleached Oak SB5W2531 Barnwood Y Y Dry Cedar SB5W2535 Barnwood Y Y Featured Oak SB5W2533 Tick Grain Y Y Honey Oak SB5W2504 Tick Grain Y Y New England Oak SB5W2527 Tick Grain Y Y Nordic Oak SB5W2550 Tick Grain Y Y Dusky Walnut SB5W2542 Tick Grain Y Y Chapel Oak SB5W3014 Barnwood Y Y Black Walnut SB5W2534 Tick Grain Y Y Size (Straight Grain) 178 x 1245mm / 7 x x 607mm / 12 x 24 Click Smart: Stone Product Name Product Code Surface Finish Bevel Tile Thickness (mm) Wear Layer Thickness (mm) Size (Straight Grain) 178 x 1245mm / 7 x x 607mm / 12 x 24 Ceramic Frost SB5S6100 Deep Ceramic Y Y Ceramic Ecru SB5S3592 Deep Ceramic Y Y Crema Travertine SB5S1589 Riven Y Y Noche Travertine SB5S4590 Riven Y Y Monmouth Slate SB5S7501 Riven Y Y Wave Slate Black SB5S2602 Riven Y Y

23 Looking After Your Floor Avoid using aerosol sprays and other silicone based products, as overspray can leave a residue and make the floor slippery. Use Amtico Entrance Matting at all external doorways. This will help reduce the chance of water, excess grit, dirt, small stones and other debris being walked onto the floor. Some rubber backed matting can cause permanent staining. Spillages should be wiped up immediately. Residues of oils and greases are potential slip hazards. The affected area should be thoroughly cleaned with Amtico FloorCare Maintainer, or our ready to use Amtico FloorCare Spillage Remover. Avoid contact with rubber, asphalt, some paints and shoe polishes, which can potentially stain your floor. Do not allow cigarettes, matches or other hot items to be deposited on the floor as permanent damage is likely to occur. Amtico floors have good scratch resistance properties. However, sharp edges on some items of furniture can damage the floor and care should be taken when using vacuum cleaners as they may scratch your floor. Amtico Click Smart / Wear & Care The use of furniture cups, felt pads or glides is essential to help reduce the risk of scratching your floor. Do not drag heavy items of furniture across the floor as this can result in serious scratch marks. Care should be taken with a brand new floor when furniture and other appliances are being fitted or placed back into the space. Castors, furniture cups and other means of load spreading will help reduce the risk of indentation to the floor when used under heavy load bearing furniture and appliances. Do not use steam mops as these may damage the planks and tiles. Routine Cleaning Amtico FloorCare Maintainer Our concentrated cleaner, with a fresh, citrus aroma for routine cleaning. Amtico FloorCare Spillage Remover A ready to use cleaner with a citrus aroma. Formulated for the convenient removal of spills and other deposits. We do not advocate the use of other cleaning products, as they may not work as efficiently or effectively and may cause damage to the floor or leave the surface with a slippery residue. 23 Amtico Wear & Care Starter Pack Ask your retailer about our Wear & Care kit which contains everything you need to look after your floor - Maintainer 1 x 1 litre (1000ml) bottle Spillage Remover 1 x 0.5 litre (500ml) spray bottle Furniture Felt Pads 1 x pack, mixed sizes Cleaning Pad 1 x red nylon non-abrasive pad Wear & Care Leaflet
24 Amtico International, UK & European Sales Solar Park, Southside, Solihull, West Midlands B90 4SH. +44 (0) *Wear-out only. For full warranty details please visit amtico.com MLIT.BRU.B8.V1.R amtico.com
IMPORTANT NOTES ABOUT YOUR FLOORING PLEASE READ BEFORE INSTALLING INSTALLATION & MAINTENANCE FOR ENGINNERED HERRINGBONE
 IMPORTANT NOTES ABOUT YOUR FLOORING PLEASE READ BEFORE INSTALLING INSTALLATION & MAINTENANCE FOR ENGINNERED HERRINGBONE ACCLIMATIZATION AND STORAGE Your new flooring has to be acclimatized before installation,
For ANGLE-DROP Styles
 For ANGLE-DROP Styles BEFORE INSTALLATION: 1. READ THESE DETAILED INSTALLATION INSTRUCTIONS. 2. Material and tool requirements: - Estimate square footage and add 10%. - Select underlayment (over concrete
Victoria Luxury Flooring
 Victoria Luxury Flooring Our collections of wood, stone and slate effect luxury vinyl flooring for everyday use. As a division of Victoria Carpets Limited, we have aspired to present the very best in high
AquaGuard - Water Resistant Flooring Installation guidelines
 AquaGuard - Water Resistant Flooring Installation guidelines Before You Start: Please read all the instructions before you begin the installation. Improper installation will void the warranty. Important
Why choose laminate flooring?
 Why choose laminate flooring? Laminate flooring is practical and looks fantastic. Modern day print and production processes mean that pretty much any style of flooring can be emulated with a laminate,
The Laneway collection contains 15 authentic timber designs, hand selected for you by a team of experts in Interior Design. Each plank feature knot
 The Laneway collection contains 15 authentic timber designs, hand selected for you by a team of experts in Interior Design. Each plank feature knot and grain detailing, incorporating a mix of modern and
FITTING INSTRUCTIONS FOR OFD SOLID OAK FLOORING
 FITTING INSTRUCTIONS FOR OFD SOLID OAK FLOORING SECTION 1 Installers Responsibility Pre-Installation SECTION 2 Glue Down (Solid & Engineered Flooring) SECTION 3 Secret Nailing (Solid & Engineered Flooring)
INSTALLATION INSTRUCTIONS FOR QUICK-STEP LAMINATE WITH HYDROSEAL TECHNOLOGY.
 . PREPARATION. INSTALLATION. FINISHING. MAINTENANCE INSTALLATION INSTRUCTIONS FOR QUICK-STEP LAMINATE WITH HYDROSEAL TECHNOLOGY. IN ORDER TO OBTAIN A GOOD RESULT, WE ADVISE TO FOLLOW ALL GIVEN INSTRUCTIONS
Install your floor between 18 and 30 C.
 GOLDEN RULES 8-0 C Install your floor between 8 and 0 C. Quick-Step Livyn must be acclimatized in the room of installation between 8-0 C for a period of at least 8 hours before installation. This floor
INSTALLATION INSTRUCTIONS FOR ELKALAMINATE. IN ORDER TO OBTAIN A GOOD RESULT, WE ADVISE TO FOLLOW ALL GIVEN INSTRUCTIONS CAREFULLY.
 INSTALLATION INSTRUCTIONS FOR ELKALAMINATE. IN ORDER TO OBTAIN A GOOD RESULT, WE ADVISE TO FOLLOW ALL GIVEN INSTRUCTIONS CAREFULLY. PREPARATION Let the planks acclimatize for 48 hours in the unopened packaging
Kraus Engineered Luxury Vinyl Plank 5G Insta-Loc Click Installation Instructions
 Kraus Engineered Luxury Vinyl Plank 5G Insta-Loc Click Installation Instructions GENERAL GUIDELINES All instructions and recommendations are based on the most recent information available. They should
Galaxy SPC RIGID-CORE UNICLIC HYBRID PLANK. Installation Guidelines
 Galaxy SPC RIGID-CORE UNICLIC HYBRID PLANK Installation Guidelines ** Read all instructions carefully before installing. Incorrect installation will invalidate and void warranty. ** The planks you are
INSTALLATION INSTRUCTIONS FOR QUICK-STEP LAMINATE.
 . PREPARATION. INSTALLATION. FINISHING. MAINTENANCE INSTALLATION INSTRUCTIONS FOR QUICK-STEP LAMINATE. IN ORDER TO OBTAIN A GOOD RESULT, WE ADVISE TO FOLLOW ALL GIVEN INSTRUCTIONS CAREFULLY. - 0-% RH 8h
TORLYS LEATHER PLANK INSTALLATION INSTRUCTIONS
 ENGLISH INSTRUCTIONS TORLYS LEATHER PLANK INSTALLATION INSTRUCTIONS Dear Customer, You have chosen a high quality TORLYS Leather floor, well suited for all residential application except bathrooms and
Loose Lay Luxury Vinyl Plank
 Loose Lay Luxury Vinyl Plank FLEX COLLECTION Installation & maintenance * PLEASE READ CAREFULLY * Installation, maintenance & warranty guideline for loose lay luxury vinyl products. Adherence to This guideline
General Installation Instructions
 General Installation Instructions Good web sites to check out that may assist you are: For gluing engineered boards over timber chipboard/particle board/ yellow tongue: https://www.youtube.com/watch?v=bpyfr373tl8
WATER AND WOOD DON T MIX KEEPING YOUR TRIÂNGULO HARDWOOD FLOOR BEAUTIFUL SCRATCHES, INDENTATIONS AND GOUGES
 WATER AND WOOD DON T MIX Using any of the following items to maintain your wood floor will void all manufacturer warranties! Water Oil Soap Vinegar, Ammonia Household Detergent Wax Furniture Polish Dust
INSTALLATION. GlUElEss CliCK BamBoo installation GUidE. Introduction. Tips for a successful installation
 GlUElEss CliCK BamBoo installation GUidE Introduction Thank you for purchasing a Yanchi Bamboo Floor! Our flooring combines superior technology and the highest quality materials available so that your
LUXURY VINYL FLOORING INSTALL INSTRUCTIONS
 PLEASE READ ALL INSTRUCTIONS CAREFULLY BEFORE YOU BEGIN INSTALLATION. IMPROPER INSTALLATION WILL VOID WARRANTY. Installation Preparation: The information on this sheet provides general guidelines. All
spacia WOOD NEUTRAL WOOD GOLDEN
 35 37 WOOD NEUTRAL White Oak SS5W2548 White Maple SS5W2654 Bleached Elm SS5W2516 Featured Oak SS5W2533 Rustic Limed Wood SS5W2650 Aged Timber SS5W2651 Smoked Timber SS5W2652 spacia White Ash SS5W2540 Worn
INSTALLATION INSTRUCTIONS
 VESDURA VINYL PLANKS 3MM PVC GLUE DOWN - OAK COLLECTION Safety First CAUTION Asbestos Warning in existing floor. Do not sand, dry scrape, bead blast or mechanically pulverize existing resilient flooring.
Masterfully crafted hickory engineered flooring. Homestead. Cover: WALNUT
 Masterfully crafted hickory engineered flooring. Cover: WALNUT RESIDENTIAL COMMERCIAL www.hickoryfloors.com.au Homestead Homestead Home is where the heart is, Hickory hardwood is where the warmth begins.
INSTALLING YOUR UNICLIC FLOOR - Small planks / 3 sizes
 INSTALLING YOUR UNICLIC FLOOR - Small planks / 3 sizes 1) General The panels must be rotated on both short and long edges to fit into one another. This can be performed by inserting either the tongue into
For best results, it is essential that you follow the installation instructions exactly.
 For best results, it is essential that you follow the installation instructions exactly. PREPRTION Let the planks acclimatize for 48 hours in the unopened packaging at the normal room temperature, in the
INSTALLATION INSTRUCTIONS FOR QUICK-STEP LAMINATE WITH HYDROSEAL TECHNOLOGY.
 . PREPARATION. INSTALLATION. FINISHING. MAINTENANCE INSTALLATION INSTRUCTIONS FOR QUICK-STEP LAMINATE WITH HYDROSEAL TECHNOLOGY. IN ORDER TO OBTAIN A GOOD RESULT, WE ADVISE TO FOLLOW ALL GIVEN INSTRUCTIONS
English Professional Installation Guidelines
 Professional Installation Guidelines General Installation Instructions NOTE: After proper acclimation, open cartons just prior to installation. NOTE: Mannington Laminate Flooring is intended to be installed
Installation Instructions
 Information You will find all illustrations and instructions on the backside of the box and on the inserted instruction folder in the package. General The floor should be a floating installation i.e. not
RECOMMENDED METHOD OF INSTALLATION
 Installation Guide RECOMMENDED METHOD OF INSTALLATION: These notes have been prepared as a guide only, the information is supplied in good faith but without guarantee as site conditions vary and are beyond
Natural hardwood flooring
 Natural hardwood flooring Most of our collections are oak, a highly versatile wood giving floors of light, smooth, even grain but by careful selection different characters and profiles can be created
Stunning. Sustainable. Superior. Introducing
 A Modern Classic Introducing Stunning. You ve Never Seen Hardwood Like This. Long wide planks. With 100% hardwood core for stability and long-lasting performance, finished beautifully with Best-in-Class
DuChâteau Vinyl DeLuxe Grand Collection LuxCor Click Installation Instructions
 DuChâteau Vinyl DeLuxe Grand Collection LuxCor Click Installation Instructions General Information Intended for indoor residential and commercial use only, DuChâteau Vinyl DeLuxe Grand Collection - Luxcor
TRIVERSA TRIVERSA ID. Triversa Triversa ID Installation Instructions. Remove the wall base and doorway trim. Always undercut wood door casings
 INSTALL ON ALL GRADE LEVELS Above Grade On Grade Below Grade by CONGOLEUM TRIVERSA TRIVERSA ID Triversa Triversa ID Installation Instructions GENERAL INFORMATION ATTENTION! READ BEFORE INSTALLING! Handle
CLASSIQUE A truely new and unique range of Hickory Flooring. Hardened by Nature.
 www.hickoryfloors.com.au CLASSIQUE A truely new and unique range of Hickory Flooring. Hardened by Nature. DANEHILL At Australian Select Timbers, we are passionate and motivated by creating the point of
EXQUISITE LUXURY VINYL FLOORING FOR YOUR HOME
 The stunning Elegance Aura collection has been composed by a team of design experts to complement any room in your home. This range of high-design luxury vinyl tiles cleverly spans eleven timber decorations
Repairs. Chapter 10 Repairs 10. 1
 10 Repairs Chapter 10 Repairs 10. 1 Repairs As an installer, you will probably be called upon to repair damage to a resilient floor. Here are some of the most common problems and the recommended repairs
Columbia Laminate Installation Instructions
 Columbia Laminate Installation Instructions 1. General Uniclic is a revolutionary system for installing laminated flooring without using glue. Uniclic uses an ingenious form of tongue and groove to click
15mm Solid European Droploc Oak Fitting Guide & Warranty Information
 15mm Solid European Droploc Oak & Warranty Information Introduction Congratulations on your purchase of your brand new Timba Floor 15mm European Solid Oak Flooring. Prior to installation please examine
Plantation Compressed Bamboo Flooring Installation instructions
 Plantation Compressed Bamboo Flooring Installation instructions thinking of our FUTURE Pre-installation FOR BOTH DIRECT STICK & FLOATING FLOORS Prior to installation of any floor, the installer must ensure
Manufacturer 12mm Laminate Flooring Installation Guidelines
 Manufacturer 12mm Laminate Flooring Installation Guidelines IMPORTANT Do not open immediately. Before opening, acclimatize planks for 48 hours by laying each box horizontally and individually in the center
1INSTALLATION GUIDE: ENGINEERED WOOD FLOORING
 1INSTALLATION GUIDE: ENGINEERED WOOD FLOORING INSTALLATION GUIDELINES FOR ENGINEERED WOOD FLOORING These guidelines are designed to complement the current South African Flooring Standards. Engineered wood
HOW TO TILE A SPLASHBACK
 HOW TO TILE A SPLASHBACK Don t just DO IT YOURSELF DO IT WITH BEAUMONTS! PREPARE & CLEAN A KITCHEN FOR TILING Any tiling job will only be as good as the surface it s laid on. It s important to ensure that,
Wood in all its glory 2017/2018
 Wood in all its glory 2017/2018 EXTRA WIDE BOARDS IN TRENDY DESIGNS HIGHLY SCRATCH, WEAR AND STAIN RESISTANT The Premium Oak range uses character grade European Oak, designed to bring the features of the
Alterna Grouting Tiles & Planks
 Alterna Grouting Tiles & Planks Grouting Alterna Tiles and Planks Armstrong S-693 Premixed Sanded Acrylic Grout Soft rubber float Soft rubber Margin float White 3M pad Tile spacers Gloves Two- 5 Gallon
Unit5EustonStreet FreemensCommon Leicester LE27ST T: F:
 Unit5EustonStreet FreemensCommon Leicester LE27ST T:01162741050 F:01162741046 SECTION 1: INSTALLERS RESPONSIBILITY It is the installers responsibility to carry out the final inspection of the floor to
WETFLOR INSTALLATION GUIDE
 WETFLOR INSTALLATION GUIDE Pre-installation Prior to installation, Multipanel recommend that you visit our video section on www.multipanel.co.uk, where you will find a complete WetFlor animation. A sharp
Classic look, amazing impact! 3 HERRINGBONE & CHEVRON PARQUETRY
 by For centuries, classic residencies and spectacular chateaus have all featured the unique beauty of Oak parquetry. Parquetry formations provide these structures unique character and appeal that has truly
Laminate
 Laminate F L O O R I N G WWW.GODFREYHIRST.COM Laminate The floor of your home is the foundation of your interior style. The sleek, contemporary design of Godfrey Hirst Laminate floors offer an affordable
AMPHORA GROUP. Professional Manufacturer & Supplier VINYL FLOORS
 Professional Manufacturer & Supplier VINYL FLOORS Professional Manufacturer & Supplier VINYL FLOORS PRODUCT SERIES - 1 PRODUCT SERIES - 2 Vinyl Locking series combines beautiful and realistic wood patterns
Roll Out Vinyl Installation Guide
 Sub-floor Requirements The contractor performing the installation of the performance vinyl flooring must ensure the proper quality of the sub-floor. The sub-floor must be clean, smooth, permanently dry,
Adore Touch UK (click-click)
") Adore Touch UK (click-click) 1. GENERAL GUIDELINES BS 8203:2001 +A1:2009 Code of practice for Installation of resilient floor coverings should always be read and followed with the addition of Adore specific
Adore Touch UK (click-click) 1. GENERAL GUIDELINES BS 8203:2001 +A1:2009 Code of practice for Installation of resilient floor coverings should always be read and followed with the addition of Adore specific
Stunning. Sustainable. Superior. Introducing
 A Modern Classic Introducing Stunning. You ve Never Seen Hardwood Like This. Long wide planks. With 100% hardwood core for stability and long-lasting performance, finished beautifully with Best-in-Class
Exterra Installation Guide
 Exterra Installation Guide Installing the foam padding Please review this installation guide before you begin installing the floor. If you have any questions, please call us at 800-428-5306 any time Monday
DESIGNER EDITION L EXINGTON
 DESIGNER EDITION L EXINGTON U.S. GREEN BUILDING COUNCIL R COMMERCIAL GRADE FINISH High performance finish is ideally suited for high traffic commercial areas, thanks to the abrasion resistant and anti-microbial
Wood Molding Installation Guide
 Wood Molding Installation Guide 1 P age Estimating the Quantity of Molding Required for the Job. Calculate the following: 1. Total lineal feet of Wall Base required for the job: Lineal feet 2. Total lineal
Almost Heaven Saunas THE AUTHENTIC SAUNA EXPERIENCE. Patterson Sauna Installation & Owner s Manual
 Almost Heaven Saunas THE AUTHENTIC SAUNA EXPERIENCE Patterson Sauna Installation & Owner s Manual Read this entire manual through to the end before proceeding with the assembly. ELECTRICAL REQUIREMENTS
Engineered Hardwood Flooring Installation Instructions
 Engineered Hardwood Flooring Installation Instructions 1 Important Information before You Begin 1.1 Installer/Owner Responsibility Carefully inspect all materials before installation. Materials installed
Engineered Strand Uniclic Floating Installation
 Engineered Strand Uniclic Floating Installation Introduction Thank you for choosing our Engineered Strand Bamboo Flooring! You have selected one of the highest quality engineered floors available. Our
Laying and maintenance of cement tiles
 Laying and maintenance of cement tiles David&Goliath cement tiles are manufactured under licence in the Far East, according to our standards and specifications concerning colour and dimensional stability;
Curium 19H Installation Instructions & Parts List
 Curium 19H Installation Instructions & Parts List Illustration Curium 19H Right Hand Page 1 of 15 01/07/2016 Revision 2.1 IMPORTANT This shower screen / enclosure must be installed by suitably qualified
DESIGN FLOORS NEXT GENERATION. Primero COLLECTION
 DESIGN FLOORS NEXT GENERATION Primero COLLECTION Primero WOOD CASABLANCA OAK 24234 3 SIZE THICKNESS WEARLAYER 4 SIDED MICRO BEVELLED EDGES DRYBACK 16,3 x 98,8 cm 2,25 mm 0,30 mm microbevel CLICK 19,1 x
Laminate Flooring Alternative to Hardwood Flooring
 Laminate Flooring Alternative to Hardwood Flooring Laminate flooring is moderately expensive, with a cost generally between that of vinyl and hardwood flooring. It's easier to install than hardwood and
Dubnium 11 Installation Instructions & Parts List
 Dubnium 11 Installation Instructions & Parts List Illustration Dubnium, H1 Handle Right Hand: Open Out Page 1 of 25 IMPORTANT This shower screen / enclosure must be installed by suitably qualified individuals.
Contemporary 3 Panel Classic 5 Panel French Panel
 Contemporary 3 Panel Classic 5 Panel French Panel (X) Operating / Lock Panel Left (O) Fixed Panel Right Note : Glazing Beads For All Panel Face To The Exterior 2 Panel XO Left Is Shown Above Opposite =
Laying instructions Installation of multilayer Herringbone / Basket-weave with tongue and groove joint.
 Laying instructions Installation of multilayer Herringbone / Basket-weave with tongue and groove joint. Preparation Store the boards in their packaging and open them as you need them. Read the instructions
Chapter 25 - Flooring
 Chapter 25 - Flooring Contents Chapter 25 - Flooring... 25-1 Timing & Prerequisites... 25-2 Preparation... 25-3 Clean Up the Job Site... 25-3 Clean and Sand the Sub-Flooring... 25-3 Check the Gap under
Choosing and Installing a Laminate Floor
 Choosing and Installing a Laminate Floor Technical essentials for a fabulous floor The process is safe and simple enough that even your kids can help. Laminate flooring floats - it isn t fastened to the
3 Simple Steps to a Beautiful Tile Surface. Tec Skill Set How-To Project Guide Floor Tile 1. PREPARE THE SURFACE 2. SET THE TILE. Reverso en español
 Reverso en español Tec Skill Set How-To Project Guide Floor Tile 3 Simple Steps to a Beautiful Tile Surface 1. PREPARE THE SURFACE 2. SET THE TILE 3. Grout AND CAULK H.B. Fuller Construction Products Inc.
Adhesive Selection. ph Limit Trowel Size Unit Size Coverage per unit. 1/16 x 1/16 x 1/16 V-notch 2.85 Gallon SF 30.
 PVC-Free Tile & Plank Installation Guide CERES Sequioa & Halo Free CBC Flooring Please refer to the CBC Flooring website www.cbcflooring.com for the most current guidance about product application charts,
Please read through the entire document before starting your installation process to better understand what is required.
 1 P a g e How s It Hanging? Step-by-Step Guide for Hanging your Wallpaper Walls Republic offers a richer and wider selection of designs, textures and colours than ever before found in the wallpaper world,
Installation Instructions
 VERsacourt indoor Tile Installation Instructions DRAWN BY: CUSTOMER: COLORS: DATE: SALESMAN: SC INTRODUCTION CONGRATULATIONS ON YOUR NEW VERSACOURT Thank you for purchasing your VersaCourt indoor tile
WET AREA PANELLING. Designer Walls. Fast
 WET AREA PANELLING Designer Walls. Fast AU/a5 WallART Brochure_ART BUNNINGS.qxp_Layout 1 7/6/18 10:16 am Page 3 LINEAR SERIES WET AREA PANELLING Add a touch of class to your SHEET COLOURS home or workplace
[320] LAYING PRINCIPLE: CREATION 30 CLIC
![[320] LAYING PRINCIPLE: CREATION 30 CLIC](/thumbs/95/122609531.jpg "[320] LAYING PRINCIPLE: CREATION 30 CLIC") All floor and wall coverings should be examined prior to installation for any visible defects. If there are any visible defects, please notify GERFLOR and do not begin installation without its prior approval.
All floor and wall coverings should be examined prior to installation for any visible defects. If there are any visible defects, please notify GERFLOR and do not begin installation without its prior approval.
Installation Instructions FOR INTERLOCKING ENGINEERED HARDWOOD (P.1)
") Installation Instructions FOR INTERLOCKING ENGINEERED HARDWOOD (P.1) Glue or Floating Installation: INTERLOCKING ENGINEERED WOODS can be installed over most sub-fl oors, and are engineered to be very dimensionally
Installation Instructions FOR INTERLOCKING ENGINEERED HARDWOOD (P.1) Glue or Floating Installation: INTERLOCKING ENGINEERED WOODS can be installed over most sub-fl oors, and are engineered to be very dimensionally
NATURAL SELECTION. Laminate Engineered Innovative Solid Accessories
 NATURAL SELECTION Laminate Engineered Innovative Solid Accessories 2 11 LAMINATE ENGINEERED INNOVATIVE SOLID ACCESSORIES Introduction Step inside and experience our brand new 2016 Timba Floor collection
Installation Instructions
 Aspex Digitally Printed Wall Art PL PREMIUM HEAVY DUTY ADHESIVE ASPEX WALL ART DOUBLE SIDED FOAM TAPE Installation of Aspex Digitally Printed Wall Art with Foam Tape and PL Premium Adhesive. Maximum size
Installation guide. ROCKFON VertiQ. ROCKFON System T, ROCKFON System HAT. Impact-resistant and high impact-resistant acoustic wall panel solutions
 Installation guide ROCKFON ROCKFON System T, ROCKFON System HAT Impact-resistant and high impact-resistant acoustic panel solutions ROCKFON System T, ROCKFON System HATT Contents System selection...3 Edges
Vinyl is an extremely durable material that is not affected by water, and that requires little maintenance. Our wide planks
 VNYL FLOOR PLANKS PRODUCT DESCRPTON Vinyl is an extremely durable material that is not affected by water, and that requires little maintenance. Our wide planks are bevelled on 4 sides to enhance the look
Almost Heaven Saunas THE AUTHENTIC SAUNA EXPERIENCE. Rainelle Sauna Installation & Owner s Manual
 Almost Heaven Saunas THE AUTHENTIC SAUNA EXPERIENCE Rainelle Sauna Installation & Owner s Manual Almost Heaven Saunas THE AUTHENTIC SAUNA EXPERIENCE Read this entire manual through to the end before proceeding
ARTISTIC FINISHES. The Artistic Touch TM. Installation and Maintenance Guide. Copyright 1999 Artistic Finishes, Inc. All rights reserved.
 ARTISTIC FINISHES The Artistic Touch TM Installation and Maintenance Guide Estimating the quantity of molding required for the job Calculate the following: 1. Total lineal feet of Wall Base required for
Luxe Plank Jatoba Mahogany A6839
 Luxe Plank Luxe Plank Jatoba Mahogany A6839 Admire the beauty The vibrant hardwood colors and textures of Luxe Plank radiate luxury and add instant beauty to any room. Authentic plank lengths, along with
Tackling America s To- Do List: Project Steps
 Tackling America s To- Do List: Installing Shoe Molding Living Room/ Bedroom - Dremel 8200 Rotary Tool - 2500-01 Multi- Vise - 407 Sanding Drum - 430 Sanding Drum (optional) - Wall adhesive - 2500-01 Multi-
F O R M O R E I N F O R M AT I O N, P L E A S E C O N TA C T U S
 F O R M O R E I N F O R M AT I O N, P L E A S E C O N TA C T U S [P] 02 9516 0733 [E] INFO@INDUSFLOOR.COM.AU IndusFloor is an Australian owned and operated company, specialising in the importation of the
Wall Installations. Chapter 16 Wall Installations 16. 1
 16 Wall Installations Chapter 16 Wall Installations 16. 1 Alterna Premium Groutable Tile Create decorative backsplashes, accent walls, or other focal points with any size Alterna 16" x 16", 8" x 16", 8"
MAINTENANCE OF MIKASA FLOORS
 MAINTENANCE OF MIKASA FLOORS CONTENTS MAINTENANCE AND REPAIR OF MIKASA FLOORS IN DOMESTIC ENVIRONMENTS MAINTENANCE AND REPAIR OF MIKASA FLOORS IN PUBLIC ENVIRONMENTS Prevention Cleaning Stain removal Prevention
How to fit wall tiles FREE
 How to fit wall tiles FREE How to fit wall tiles This guide explains how to successfully tile a wall. This is a reasonably involved DIY task that takes some practice and patience. Depending on the size
TILE CARE & MAINTENANCE
 CERAMIC TILE Tile, whether glazed ceramic or porcelain, should be maintained on a regular and frequent basis to prevent build-up of soil, grease, residue, soap detergents, sealers, dampness, liquids, etc.,
2
 2 3 4 5 6 7 8 9 10 11 12 13 14 15 16 17 18 19 20 21 22 23 24 25 26 27 28 29 30 31 32 33 34 35 36 37 38 39 40 41 42 43 44 45 46 47 48 49 50 51 52 53 54 55 56 57 58 59 60 61 62 63 64 65 66 67 68 69 70 71
Product Care & Cleaning Guide
 Product Care & Cleaning Guide /5 CABINETRY CARE, CLEANING & ADJUSTMENT GUIDE AFTER INSTALLATION CARE After your cabinets have been installed, wipe down exteriors with a clean damp cloth. Work on a small
Colosseum and Palace 5G Clic. 01 General guidelines INSTALLATION INSTRUCTIONS
 Colosseum and Palace 5G Clic INSTALLATION INSTRUCTIONS 01 General guidelines All instructions and recommendations are based on the most up-to-date information available and should be followed for an ideal
INSTALLATION GUIDE.
 INSTALLATION GUIDE Hardwood floors are a product of nature and therefore not entirely free of typical timber features such as grain variation and knots. Every piece of wood has different grain, colour
6400, 8400 and 9400 Series Sliding Patio Door
 Contemporary 3 Panel Classic 5 Panel French Panel 6400, 8400 and 9400 Series Sliding Patio Door (O) Fixed Panel Left (X) Operating / Mullion Panel Right (X) Operating / Lock Panel Left (O) Fixed Panel
Curium 19.4H Installation Instructions & Parts List
 Curium 19.4H Installation Instructions & Parts List Illustration Curium 19.4H Right Hand Page 1 of 21 30/06/2016 Revision 1.0 IMPORTANT This shower screen / enclosure must be installed by suitably qualified
Wet Area Panelling. Linear Series
 Wet Area Panelling Linear Series LINEAR SERIES WET AREA Add a touch of class to your home or workplace with the Linear Series, WallART s line of wet area panelling. With a striking range of colours and
WOODLOC STAPLE DOWN INSTALLATION INSTRUCTIONS
 FEBRUARY 2017 WOODLOC STAPLE DOWN INSTALLATION INSTRUCTIONS Applicable to: Kährs Spirit 10mm 3/8 Kährs Avanti 12 & 13mm 1/2 Kährs Original 15mm 5/8 Kahrs Supreme 15mm 5/8 PROTECT YOUR INVESTMENT! Maintain
INSTALLATION LAMTON INSTALLATION INSTRUCTIONS. Lamton Laminate Flooring with Underlay Attached Glueless Installation. Tools and Accessories
 Lamton quality laminate flooring is manufactured to exacting standards for long life and lasting beauty. Following these simple procedures for installation and it will ensure many years of pride and satisfaction.
Please read and review installation instructions completely before proceeding with the actual installation.
 INSTALLATION INSTRUCTIONS Important / Read First Please read and review installation instructions completely before proceeding with the actual installation. Owner / Installer responsibility The installer
SUPA-LOCK TILE. BS EN to 9.24mm +/- 0.15mm BS EN / En Wear Group T (<0.1mm /100 revs)
") SUPA-LOCK TILE Description: Loose lay interlocking floor tile Construction Tile Size VOC Content Sustainability Weight Hardness Thickness Abrasion Wear Mechanical Resistance Test Results: Fire Class Electrical
SUPA-LOCK TILE Description: Loose lay interlocking floor tile Construction Tile Size VOC Content Sustainability Weight Hardness Thickness Abrasion Wear Mechanical Resistance Test Results: Fire Class Electrical
Radon 07 Installation Instructions & Parts List
 Radon 07 Installation Instructions & Parts List Illustration Radon 07, H1 Handle Right Hand: Open Out 14/06/2016 Revision 1.1 Page 1 of 21 IMPORTANT This shower screen / enclosure must be installed by
TONGUE & GROOVE NAIL-DOWN INSTALLATION INSTRUCTIONS
 FEBRUARY 2017 TONGUE & GROOVE NAIL-DOWN INSTALLATION INSTRUCTIONS Applicable to: Kahrs Supreme 20mm 3/4 Grande Collection Only PROTECT YOUR INVESTMENT! Maintain your warranty: Only use Kährs branded underlayments,
INSTALLATION INSTRUCTIONS of Chevron and Herringbone Engineered Hardwood Flooring
 INSTALLATION INSTRUCTIONS of Chevron and Herringbone Engineered Hardwood Flooring www.tomson-floors.com TABLE OF CONTENTS 3 USING THE PRODUCT 3 YOUR RESPONSIBILITIES 4 PRE-INSTALLATION INSPECTION 5 BASIC