CROWN IMPERIAL ASSEMBLY INSTRUCTIONS
|
|
|
- Lester Gallagher
- 5 years ago
- Views:
Transcription
1 CROWN IMPERIAL ASSEMBLY INSTRUCTIONS Standard Drawer Box Page 1 of 14


2 Standard Drawer Box Parts Parts Supplied B C D A E F G Page 2 of 14
3 Part Letter Part Name Quantity Deep Pan A Base Panel 1 2 Gallery Rail B Drawer Side 1 pair 2 pairs C Standard Drawer Runner 1 pair 2 pairs D Back Panel E Drawer Front Fixing Clips 1 pair 2 pairs F Gallery Rail 2 pairs 1 pair G Back Adapter 1 pair 2 pairs 1 pair Page 3 of 14


4 A B C D E F G H J K L M N P Q R S T U V Y Z W Page 4 of 14
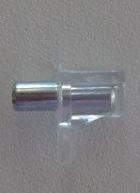
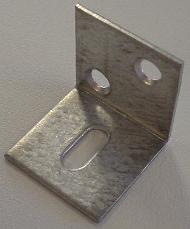
5 Fitting Letter Fitting Name Standard ( ) Quantity Deep Pan (1000) Gallery Rail A Metal Dowel 4 B Metal Cam 4 C D E F G H J K L M N P Wooden Dowel 8 x 40mm Wooden Dowel 5 x 25mm Connecting Screws (M/F) Black Chipboard Screw 8 x 45mm Countersunk Screw 8 x 1 ¼ Countersunk Screw 6 x 5/8 Countersunk Screw 6 x ½ Flange Head Screw 6 x ¾ Flange Head Screw 6 x 5/8 Euro Screw 6 x 11mm Round Head Screw 6 x 5/8 Shelf Stud Q R S T U V W Y Z Rubber Sleeved Shelf Stud Angle Bracket Door Buffer Pad 5mm Plugs 35mm Bung Crown Conceal Cap Hanging Plate Plinth Clip Peg-o-Lock Page 5 of 14


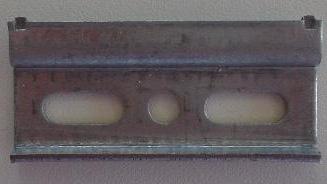
6 Preparation Position of Runners The drawer runners must be fixed to both end panels, before assembling the base unit. Fix the runners, using the holes shown. The positioning of the runners, is as shown: Drawer Line 2 Drawer Pack 3 Drawer Pack 4 Drawer Pack 5 Drawer Pack Page 6 of 14


7 Assembly Instructions Step 1. Fixing the Sides Fit first Side Step 1.1 Take the base panel, and slide it into the groove on one of the metal sides. Step 1.2 Secure using two screws (fitting H) positioned as shown, to fix the side to the base panel. Step 1.3 Repeat this for the other side Repeat for other side H H H H Step 2. Back Panel Step 2.1 Slide the Back Panel into the back of the two sides, as shown. *NOTE: If you are assembling a Standard Pan Drawer, a higher back panel will be supplied. 2.1 Slide back panel in between two drawer sides Page 7 of 14

 as shown, using the same pre-drilled holes locations.")
8 Step 3. Side Two Repeat steps 1 and 2 to attach the second side: Slide the opposite side onto the base and fix using two screws (type 3). Fix on the metal adapter, and insert the back panel. Fix using two screws (type 2) as shown, using the same pre-drilled holes locations. * If assembling deep drawer do not fix gallery rails to drawer box. See Fixing Gallery Rail Instructions on Page Standard Drawer Box 3. Deep Pan Drawer Box Page 8 of 14
 in the")


9 Step 4. Drawer Front Fixing Clips Take the drawer front and lay it face down. Locate the drawer front fixing clips, and fix to the drawer front, using two screws (fitting J) in the pre-drilled holes. 4. Attach Drawer Front Fixing Clips to Drawer Front J Repeat on both sides. * If assembling deep drawer do not fix drawer front yet! Go to Fixing Gallery Rail Instructions on Page 11. * NOTE: The Drawer Front Fixing Clips should be fit, so that there is a larger space at the top, rather than at the bottom. J Drawer Front Fixing Clips on Drawer Front Top Drawer Front Fixing Clips on Deep Drawer Front Bottom Page 9 of 14


10 Step 5. Fix Drawer Front to Drawer Box Take the Drawer Front and push it onto the Drawer Box, sliding the side into the front lock, as shown. Secure by tightening the screw shown, on the front lock, located on the inside of the drawer. 5. Fix Drawer Front Fixing Clips Locks to Drawer Box Step 6. Vertical Adjustment of Drawer Box 6.1 Adjust vertical alignment of the drawer box To adjust the vertical position of the Drawer Box, use a screwdriver to adjust the screw, shown. Page 10 of 14

11 Complete Standard Drawer Box (excluding Drawer Front) * NOTE: Continue with instructions if fitting a Deep Pan Drawer Box Page 11 of 14


12 Fixing Gallery Rail Instructions (For Deep Drawer Boxes) Step 1. Place drawer front so the underside is facing upwards, and hold rail parallel to drawer front. Push white expanding insert into the pre-drilled hole, on the drawer front. 1. Insert Gallery Rail Step 2. Once the rail is clicked in, raise the rail upwards to lock in place 2. Raise Gallery Rail Step 3. Slide the plastic cover to the end as shown, to conceal the fixing mechanism 3. Fix Gallery Rail Page 12 of 14


13 Step 4. Take a back bracket and fix using two screws (fitting H) to the back panel, at the top, as shown. Repeat for the second back bracket. 4. Secure Back Bracket H H Step 5. Proceed with steps 4 to 5 of the Standard Drawer Box Instructions. Step 6. After attaching the drawer front to the drawer box, insert the other end of the rail into the metal adapter as shown, located at the back of the drawer. 6. Fix Gallery Rail to Drawer Back The end of the rail needs to be pushed in, until a click sounds is made. Page 13 of 14

 NOTE: If assembling a Deep Pan Drawer")
14 Step 7. Ensure the drawer front is vertical. 7. Rotate Rail to Align Drawer Front If not vertical, twist the rails to adjust until the drawer front is. Complete Deep Pan Drawer Box (Complete with drawer front) NOTE: If assembling a Deep Pan Drawer Box, a Gallery Rail pack will be supplied, with a 600 back panel. Therefore it may have to be reduced in size for a 300, 400 or 500 as neccessary. Page 14 of 14
Section 1. Kitchen installation. Base cabinets
 Section 1 Kitchen installation Base cabinets Pre-build - Cabinet leg... page 16 Pre-build - Alternative cabinet leg... page 18 Pre-build - Cabinets.... page 19 Pre-build - Corner base cabinet centre upright
WALL UNIT. Assembly Guide For Internal Use: FI.WR.INS.034_WKIN00124_WALL_ _1Dr_Rev4.indd
 WLL UNIT ssembly uide 150 200 350 400 500 300 450 600 or Internal Use: I.WR.INS.034_WKIN00124_WLL_150-600_1Dr_Rev4.indd WLL UNIT ssembly uide EORE YOU STRT INSTLLTION SHOULD E PERORMED Y OMPETENT PERSON
STORAGE & SHELVING SYSTEM - INSTALLATION GUIDE
 STORAGE & SHELVING SYSTEM - INSTALLATION GUIDE If you have ordered storage drawers, shelving, hanging rails or shoe racks this guide will help you install your storage and shelving system, together with
WALL UNIT. Assembly Guide Lift. 288 x x x x 800
 Assembly uide 288 x 600 288 x 800 360 x 600 360 x 800 or Internal Use: I.WR.INS.032_WKIN00121_WALL_600_800_Lift_Rev2.indd Assembly uide EORE YOU START INSTALLATION SHOULD E PERORMED Y A OMPETENT PERSON
v1.0 ASSEMBLY GUIDE Mia Wide Bookcase
 v1.0 ASSEMBLY GUIDE Mia Wide Bookcase Components Upon unpacking your bookcase from it s delivery box, you should have the pieces shown. Follow the steps on the next pages to assemble your new bookcase.
FA968800TX Manchester Fireplace Console - Brown Mahogany Assembly Instructions
 FA968800TX Manchester Fireplace Console - Brown Mahogany Assembly Instructions For assistance with assembly, contact: Southern Enterprises Inc. Customer Service 1-800-633-5096 service@seidal.com www.seidal.com
WALL UNIT. Assembly Guide Tall 1 Door. 200 Tall. 350 Tall. 150 Tall. 300 Tall. 400 Tall. 450 Tall. 500 Tall. 600 Tall
 WLL UNIT ssembly uide 150 Tall 200 Tall 300 Tall 350 Tall 400 Tall 450 Tall 500 Tall 600 Tall or Internal Use: I.WR.INS.045_WKIN00130_WLL_150_600_Tall_1Dr_Rev3.indd WLL UNIT ssembly uide EORE YOU STRT
ASSEMBLY GUIDE. Mia Narrow Bookcase
 ASSEMBLY GUIDE Mia Narrow Bookcase Components: Upon unpacking your bookcase from it s delivery box, you should have the pieces shown. Follow the steps on the next pages to assemble your new bookcase. Step
Display-Top Apothecary Cabinet. Assembly Instructions. Page 1
 Display-Top Apothecary Cabinet Assembly Instructions Page 1 Display-Top Apothecary Cabinet Parts List Please check packaging for all parts and hardware before discarding. Unpack and lay parts on clean,
Vigilant Cigar Humidor Vault. Assembly Instructions
 Vigilant Cigar Humidor Vault Assembly Instructions Models: 1000, 1500, and 2000 Congratulations! You have purchased a superior cigar humidor. These humidors have been specifically designed to properly
Version 1.0. Forbes Credenza File Cabinet.
 Version 1.0 Forbes Credenza File Cabinet www.fantasticfurniture.com.au Enjoy Your purchase from Australia s Best Value Furniture Store www.fantasticfurniture.com.au PAGE 2 Assembly checklist Read through
Ohio Sideboard MADE IN BRITAIN. Assembly Instructions - Please keep for future reference 314/7128
 Ohio - 6+2 Sideboard ssembly Instructions - Please keep for future reference 14/7128 Dimensions Width - 120cm Depth - 9.5cm Height - 78cm MDE IN RITIN Important - Please read these instructions fully before
TOWER UNIT. Assembly Guide. 300 & 600 Pull Out/Swing. 600 Easy Pull Out Swing Pull Out Pull Out 2250 Tall
 Assembly uide 300 Pull Out 2070 600 Easy Pull Out Swing 2070 300 Pull Out 2250 Tall 600 Easy Pull Out Swing 2250 Tall or Internal Use: I.WR.INS.044_WKIN00144_TOWER_300_600_2DrPullSwing_Rev3.indd Assembly
#916 CLASSIC 16 GUN CABINET ASSEMBLY INSTRUCTIONS
 Thank you for purchasing this quality product. A list of PARTS and INSTRUCTIONS is included to assist you. Unpack and identify all parts included on the Parts List and Hardware List. If parts are missing,
Installation Instructions
 by Plato Woodwork Installation Instructions Plato Woodwork, Inc. 200 Third Street SW P.O. Box 98 Plato, MN 55370 www.platowoodwork.com 800.328.5924 SECTION GUIDE GETTING STARTED PAGE # Installation Methods...
Assembly Instructions COMO DESK CORNER
 Assembly Instructions COMO DESK CORNER WARNING NG FAILURE TO FOLLOW THESE BASIC STEPS CAN LEAD TO DAMAGE THAT IS NOT COVERED BY YOUR WARRANTY 2 Read Instructions carefully. Check no parts are missing.
Bathroom Installation Guide
 Bathroom Installation Guide Please read instructions carefully and check products before starting. Products should be fitted/installed by an experienced and competent fitter, failure to do so may invalidate
ASSEMBLY INSTRUCTIONS LYNX 2 DOOR SLIDING ROBE WITH MIRROR
 ASSEMBLY INSTRUCTIONS LYNX 2 DOOR SLIDING ROBE WITH MIRROR IMPORTANT: READ THESE INSTRUCTIONS CAREFULLY BEFORE ASSEMBLING OR USING YOUR LYNX 2 DOOR SLIDING ROBE WITH MIRROR. PLEASE KEEP THESE INSTRUCTIONS
Laminate Cabinet Installation Instructions
 Laminate Cabinet Installation Instructions www.easygaragestorage.com/installation How To Use These Instructions Thank you for your purchase! Please read each step of this manual thoroughly to ensure proper
SAN DIEGO - Corner TV Unit
 SN EGO - orner TV Unit ssembly nstructions - lease keep for future reference 385/8651 imensions Width - 100cm epth - 40cm eight - 50cm mportant lease read these instructions fully before starting assembly
a.k.a. casegoods instructions
 a.k.a. casegoods instructions a a.k.a. workwall installation IMPORTANT NOTES Failure to install product according to installation instruction will result in loss of warranty. Tools required for assembly
White Black Espresso Corner Desk Assembly Instructions
 White Black Espresso Corner Desk Assembly Instructions Page 1 White / Black / Espresso Corner Desk Parts List Please check packaging for all parts and hardware before discarding. Unpack and lay parts on
INSTRUCTION MANUAL MANUAL DE INSTRUCCIONES
 INSTRUCTION MANUAL MANUAL DE INSTRUCCIONES Model Number/ No. de Modelo: WDB101 CLOTHES DRYER STACKING BRACKET CAUTION: BEFORE USE, PLEASE READ AND FOLLOW ALL SAFETY RULES AND OPERATING INSTRUCTIONS. Avanti
Barnside Pantry IMPORTANT NOTE Carefully remove all the parts from the carton and put them individually on a soft cloth to prevent scratch
 88 5516 653 Barnside Pantry IMPORTANT NOTE Carefully remove all the parts from the carton and put them individually on a soft cloth to prevent scratches or other damage occurring to the parts. We have
Northcote Wardrobe with Toy Box Base & Shelf L2988
 Thank you for shopping with GLTC, we hope you enjoy having this product in your home. www.gltc.co.uk Northcote Wardrobe with Toy Box Base & Shelf L2988 We know assembling furniture, toys or accessories
Please read these instructions before use and keep for future reference
 Wardrobe Assembly Guide Allen Key Provided (if required) Philips Screwdriver Required Hammer Required Please read these instructions before use and keep for future reference Caution! Two Person Assembly
Malibu - 3 Drawer 2 Door Robe
 Malibu - 3 Drawer Door Robe ssembly Instructions - Please keep for future reference 7/83 38/3574 58/904 37/187 58/7679 79/1496 6/617 58/803 57/51 79/1960 55/7788 47/766 66/7355 49/661 78/5189 78/0830 Dimensions
LOWLINE SINGLE FOLD DOWN WALL BEDS
 ASSEMBLY INSTRUCTIONS LOWLINE SINGLE FOLD DOWN WALL BEDS Tools Required For Assembly No 2 & No 4 Phillips Head Screwdrivers No 2 Slot Head Screwdriver Hammer Electric Drill (Hammer Drill for Masonry) 6.5mm
Item # Thanks for shopping with Improvements!
 Thanks for shopping with Improvements! Hampshire -Door Cabinet Item #5505 To order, call -800-64- West Chester, OH 45069 Made in China PR-6 If you have questions regarding this product, call -800-64- Mon.-Fri.
Homestead Bar Cabinet IMPORTANT NOTE Carefully remove all the parts from the carton and put them individually on a soft cloth to prevent s
 88 5527 991 Homestead Bar Cabinet IMPRTANT NTE Carefully remove all the parts from the carton and put them individually on a soft cloth to prevent scratches or other damages occuring to the wood parts.
Copyright 2010, by Walker Edison Furniture Co., LLC. All rights reserved.
 General Assembly Guidelines I. Insure that all parts and hardware are available before beginning assembly. II. III. IV. Follow each step carefully to insure the proper assembly of this product. Two people
Closet Wall Drawer Unit
 88 5531 751 Closet Wall Drawer Unit A. B. C. Shelf D. E. F. For assembly see instructions in carton 88 5531 752. 88 5531 752 Closet Wall Drawer Unit G. H. I. Plinth M. Bottom L. N. 2 pc. J. K. O. Drawer
INSTRUCTION FOR WALL-FIXING OF VANITY UNIT GAYA
 INSTRUCTION FOR WALL-FIXING OF VANITY UNIT GAYA Vanity unit Gaya with 2 drawers L.(cm. 60-23 5/8) (cm.70-27 9/) (cm.90-35 7/) Suggested dimensions for wall-fixing of Gaya Vanity units 850-33 15 350-13
J. Base 1 pc. 1 pc. P. Shelf 2 pcs. Gate Leg. 1 pc. Head Cap Bolt 13 pcs. (+1 extra) Cam Lock Screw. Cam Lock. 20 pcs. (+1 extra)
 Cam Lock Screw. Cam Lock. 20 pcs. (+1 extra)") 88 5023 95C Kitchen Island with Breakfast Bar IMPORTANT NOTE Carefully remove all the parts from the carton and put them individually on a soft cloth to prevent scratches or other damages occuring to the
88 5023 95C Kitchen Island with Breakfast Bar IMPORTANT NOTE Carefully remove all the parts from the carton and put them individually on a soft cloth to prevent scratches or other damages occuring to the
In addition to this general mounting and adjustment instruction you need the fitting specification document, where the individual drilling dimensions
 Mounting and Adjustment Instruction for corner carrousel fitting In addition to this general mounting and adjustment instruction you need the fitting specification document, where the individual drilling
MISSION AUDIO STAND GBU
 MISSION AUDIO STAND Thank you for purchasing our Mission Audio Stand. Assembly of this product requires a Phillips screwdriver and a hammer. We have found it helpful to have a second person present in
Mounting Instructions Item No.: /521/522/420/421/422
 Mounting Instructions Item No.: 541.35.520/521/522/420/421/422 Revolving Corner Unit In addition to these general mounting instructions, please refer to the fitting instructions, where the individual drilling
INSTRUCTION BOOKLET #C21. For Wallbed models: KING SIZE
 For Wallbed models: KING SIZE INSTRUCTION BOOKLET #C1 WARNING! ALL MURPHY/WALLBED SYSTEMS CONTAIN STORED ENERGY. FAILURE TO USE AND FOLLOW THESE INSTRUCTIONS DURING THE INSTALLATION PROCESS COULD RESULT
Transition Range Installation, Care & Adjustment Instructions
 Introduction The following instructions will enable you to complete the final assembly and adjustment of your new furniture. Hardware Box Each of the cabinets contains a Hardware box that contains all
v1.0 ASSEMBLY GUIDE Edgar Tall Chest of Drawers
 v1.0 ASSEMBLY GUIDE Edgar Tall Chest of Drawers Components Upon unpacking your tall chest of drawers from it s delivery box, you should have the separate pieces shown below. Follow the steps on the next
Pantry IMPORTANT NOTE Carefully remove all the parts from the carton and put them individually on a soft cloth to prevent scratches or oth
 88 5076 691 Pantry IMPORTANT NOTE Carefully remove all the parts from the carton and put them individually on a soft cloth to prevent scratches or other damages occurring to the parts. We have taken great
FURNITURE HARDWARE & ACCESSORIES - PART 2 : SHELF SUPPORT AND SHELVING SYSTEMS
 www.hafeleindia.com FURNITURE HARDWARE & ACCESSORIES - PART 2 : SHELF SUPPORT AND SHELVING SYSTEMS ABOUT ITALIANA FERRAMENTA ITALIANA FERRAMENTA is specialized in the production of high quality accessories
How to Install Custom Real Wood and Faux Wood Blinds
 Before you begin your installation: READ ALL INSTALLATION INSTRUCTIONS! Make sure that you have all tools and hardware needed for installation. Check the installation surface (wall, ceiling, or window
ED1300/1300F SERIES CONCEALED VERTICAL ROD DEVICE INSTALLATION INSTRUCTIONS
 ED1300/1300F SERIES CONCEALED VERTICAL ROD DEVICE INSTALLATION INSTRUCTIONS Ver.2 1300 SERIES CONCEALED VERTICAL ROD DEVICE Top Strike Latch Screws Strike Screws Release Plunger Top Latch Plunger Screws
SAN DIEGO - TV Unit. Assembly Instructions - Please keep for future reference 389/6620
 SN GO - TV Unit ssembly nstructions - Please keep for future reference 389/6620 imensions Width - 125cm epth - 40cm eight - 50cm mportant Please read these instructions fully before starting assembly f
ASSEMBLY INSTRUCTIONS. enook Pro
 ASSEMBLY INSTRUCTIONS enook Pro Product enook Pro for Monitors, 36w Part# EPM3616zz/xx Anthro Corporation 10450 SW Manhasset Dr. Tualatin, OR 97062 Toll-free: 800.325.3841 Fax: 800.325.0045 email: sales@anthro.com
Sideboard. Assembly Instructions - Please keep for future reference. 041 xx 5535
 Sideboard ssembly Instructions - lease keep for future reference 041 xx 5535 Dimensions Width - 117.2cm Depth - 38.8cm eight - 73.6cm Important - lease read these instructions fully before starting assembly
GROWING BETTER THROUGH DESIGN. 6ft Lean-To LEAN-TO. Assembly Instructions 04/02
 GROWING BETTER THROUGH DESIGN 6ft Lean-To LEAN-TO Assembly Instructions 04/02 6ft Lean-To Greenhouse Base Plan Introduction/Tools/Contents / / Contents This is a copy of our Lean-To greenhouse base plan.
Stuff-Your-Stuff Platform Bed (Twin and Full)
") Stuff-Your-Stuff Platform Bed (Twin and Full) Pre-Assembly: Please read all instructions before beginning assembly. Assembly by two people is a must. Save all packing materials until assembly is complete
Stuff-Your-Stuff Platform Bed (Twin and Full) Pre-Assembly: Please read all instructions before beginning assembly. Assembly by two people is a must. Save all packing materials until assembly is complete
14/08/15 AVAILABLE FROM MIDRAND RANDBURG DURBAN UMHLANGA MARGATE CAPE TOWN GHANA
 4/08/5 AVAILABLE FROM MIDRAND RANDBURG DURBAN UMHLANGA MARGATE CAPE TOWN GHANA PINETOWN BALLITO KRABY DROP DOWN with Kimana Hinges (pg 3) For further information: www.italianaferramenta.com > CATALOGUE
Ohio - TV Unit MADE IN BRITAIN. Assembly Instructions - Please keep for future reference 309/6561
 Ohio - TV Unit ssembly Instructions - Please keep for future reference 09/6561 Dimensions Width - 120cm Depth - 9.5cm Height - 61.5cm MDE IN RITIN Important - Please read these instructions fully before
Copyright Black Box Corporation. All rights reserved Park Drive Lawrence, PA Fax
 Copyright 2003. Black Box Corporation. All rights reserved. 1000 Park Drive Lawrence, PA 15055-1018 724-746-5500 Fax 724-746-0746 JULY 2003 RM3010A RM315-R2 RM323-R2 RM329 RM451 RM457 RM3020A RM316 RM324-R2
D. Middle Panel. C. Middle Panel. 1 pc. B. Side Panel 1 pc. I. Back Stretcher. 1 pc. J. Front Stretcher. 1 pc. S. Door 1 pc. T.
 itchen Cart IMPORTANT NOTE Carefully remove all the parts from the carton and put them individually on a soft cloth to prevent scratches or other damages occuring to the parts. We have taken great care
https://www.wallbedsbywilding.com/wallbed-installation-studio-series/
 For Wallbed models: KING SIZE INSTRUCTION BOOKLET #C1 Watch step by step installation instructions at: https://www.wallbedsbywilding.com/wallbed-installation-studio-series/ WARNING! ALL MURPHY/WALLBED
Brooklyn Change Table & Drawer Set Assembly Instructions
 Brooklyn Change Table & rawer Set ssembly Instructions Thank you for your purchase. Please follow the instructions below for correct assembly. B C 12 mm x20 L + R L + R x28 W Safety Strap X Wall Screw
FURNITURE HARDWARE & ACCESSORIES - PART 3 : LEVELLERS AND HANGERS
 www.hafeleindia.com FURNITURE HARDWARE & ACCESSORIES - PART 3 : LEVELLERS AND HANGERS ABOUT ITALIANA FERRAMENTA ITALIANA FERRAMENTA is specialized in the production of high quality accessories and ironmongery
110 and 555 Markerboard, Chalkboard and Tackboard Mounting
 0 and 555, Chalkboard and Tackboard Mounting 0 # BIT 0 Splined 0 and 555 Tackboard POWER GRIPS 555 If you have a problem, question, or request, call your local dealer, or Steelcase Line at 888.STEELCASE
Thanks for shopping with Improvements! Deluxe 10 Closet Organizer (12 deep) Item #461609
 Item #461609") Thanks for shopping with Improvements! Deluxe 10 Closet Organizer (12 deep) Item #461609 To order, call 1-800-642-2112 West Chester, OH 45069 0114 If you have questions regarding this product, call 1-800-642-2112
Thanks for shopping with Improvements! Deluxe 10 Closet Organizer (12 deep) Item #461609 To order, call 1-800-642-2112 West Chester, OH 45069 0114 If you have questions regarding this product, call 1-800-642-2112
Vanity Installation Instructions
 Vanity Installation Instructions Segments of these instructions will relate to your vanity. Please read these instructions thoroughly and ensure the appropriate instructions are used during the installation
M. Door 1 Pc. 1 Pc. Door 1 Pc. 1 Pc. M3x20 Wood Screw (long) 8 Pcs. (+1 extra) M3x10 Wood Screw for Magnet 8 Pcs. (+1 extra)
 8 Pcs. (+1 extra) M3x10 Wood Screw for Magnet 8 Pcs. (+1 extra)") 88 5516 653 Barnside Pantry IMPORTANT NOTE Carefully remove all the parts from the carton and put them individually on a soft cloth to prevent scratches or other damage occurring to the parts. We have
88 5516 653 Barnside Pantry IMPORTANT NOTE Carefully remove all the parts from the carton and put them individually on a soft cloth to prevent scratches or other damage occurring to the parts. We have
Jesse Entertainment Unit Assembly Instructions
 esse ntertainment Unit ssembly nstructions Thank you for your purchase. Please follow the instructions below for correct assembly. bolt x32 dowel x16 D F small screw x16 L + R L + R locking nut x32 cam
CABINETRY Assembly Instructions
 www.hdicabinetry.com Assembly Instructions TABLE OF CONTENTS Category Page(s) Section 1: Framed Series Base Cabinet Instructions Wall Cabinet Instructions Easy Reach Cabinet Instructions 1.01-1.04 1.05-1.06
L.L.Bean. Wooden Slat Bed
 L.L.Bean Wooden Slat Bed Thank you for purchasing our Slat Bed. Assembly of this product requires A Phillips head screwdriver. We have found it helpful to have a second person present in at least one step
Adjustable Countertop Installation
 Adjustable Countertop Installation Applies to Models: A1, A2, A3, A4, A5, & A6 Required Tools: Stud Finder, Level 1/4 deep well socket, Screwdrivers, Tape Measure, Drill and Drill Bits Language of origin:
Ohio - Bookcase MADE IN BRITAIN. Assembly Instructions - Please keep for future reference 343/2235
 Ohio - ookcase Assembly Instructions - Please keep for future reference 343/35 Dimensions Width - 7cm Depth - 33cm Height - 183cm MADE IN RITAIN Important - Please read these instructions fully before
Star Bright Chest of Drawers L3938
 Thank you for shopping with GLTC, we hope you enjoy having this product in your home. We know assembling furniture, toys or accessories is not everyone s favourite way to spend their time, so we ve tried
Steele TV Stand Stock # BH
 LOT NUMBER: DATE PURCHASED: / / Steele TV Stand Stock # BH46-084-899-02 ADULT ASSEMBLY REQUIRED If you have any questions regarding assembly or if parts are missing, DO NOT return this item to the store
pottery barn kids MADISON CABINET HUTCH
 pottery barn kids MADISON CABINET HUTCH IMPORTANT SAFETY INSTRUCTIONS: Please read all instructions carefully before assembling. For your safety, assembly by two adults is recommended. PRE-ASSEMBLY: Remove
HOMECREST STYLE SLING 3J300 Installation Instructions
 1 HOMECREST STYLE SLING 3J300 Installation Instructions Before beginning, take careful note of how the chaise is assembled, particularly the adjustment hardware. An additional set of hands to help during
How To Measure Your Finished Opening
 3000 Series Bifold Doors How To Measure Your Finished Opening MEASURE FROM RIGHT TO LEFT 2 PLACES (WIDTH) MEASURE FROM TOP TO BOTTOM 2 PLACES (HEIGHT) Tools Required for Assembly: Tools Needed: Phillips
Commercial Wine & Liquor Display. Double Displays
 Commercial Wine & Liquor Display Double Displays Congratulations! You have purchased a superior commercial wine rack kit. These commercial kits have been specifically designed to properly store and display
Kirra Buffet Assembly Instructions
 Thank you for your purchase. lease follow the instructions below for correct assembly. C B dowel screw x x6 wedge x4 screw x4 bolt x locking nut x long screw x F screw slide x6 rail x N wheel x4 G slide
Napoli - Shoe Storage
 apoli - Shoe Storage ssembly Instructions - Please keep for future reference 93/6936 Dimensions Width - 80cm Depth - 33cm Height - 86cm MDE I RITI Important - Please read these instructions fully before
Strata. urniture. Mission Rim Instructions. Parts in the Arm Box: Parts in the Body Box:
 1A Watch our assembly videos at www.strataf.com/videos.html Parts in the Arm Box: Arm - Outside View Arm - Inside View Corbels x 4 1B Parts in the Body Box: Back Deck x 1 Seat Deck x 1 with the Feet attached
Left Unit. G. Shelf 1 pc. Small Cam Lock 6 pcs.(+1 extra) Cam Lock Screw 2 pcs.(+1 extra) Cam Lock Screw 6 pcs.(+1 extra)
 Cam Lock Screw 2 pcs.(+1 extra) Cam Lock Screw 6 pcs.(+1 extra)") 88 5180 181 Art & Craft Computer Desk (Cottage Oak) IMPORTANT NOTE Carefully remove all the parts from the carton and put them individually on a soft cloth to prevent scratches or other damages occuring
88 5180 181 Art & Craft Computer Desk (Cottage Oak) IMPORTANT NOTE Carefully remove all the parts from the carton and put them individually on a soft cloth to prevent scratches or other damages occuring
BALTIC WARDROBE 3 DOORS 3 DRAWERS
 BLTI WRROB OORS RWRS 059mm 50mm 764mm Page of 2 Please check all parts before you begin to assemble the item. This to make sure you always use the correct part. Fittings contained in the box. 6 pcs. am
MANUAL e130. Wallstation
 MANUAL 07.29.13 e130 Wallstation The Enovate Medical e130 Wallstation was designed to set a new standard in quality. Enovate Medical s goal is to provide a wallstation that is ready for years of use,
Hover. Installation Instructions. Raised Panel. Version
 Installation Instructions Version 8-2-17 Raised Panel Table of Contents Page Raised Panel Trough 3-13 Platform Trough 14-20 Platform 120 Degree Trough 21-24 Electrical 25-28 Type A Electric Bases 29-31
This instruction manual is an in-depth look and explanation of how to assemble and install the Murphy Bed properly and efficiently.
 This instruction manual is an in-depth look and explanation of how to assemble and install the Murphy Bed properly and efficiently. Don t be put off by the size of the instruction manual as the large diagrams
Series 1500 Aluminum Door Canopy
 Series 500 Aluminum Door Canopy with Sidewings It is our recommendation that you read instructions carefully prior to assembly and installation. Series 500 with Sidewings mounting bar (A) top trim (B)
 INSTRUCTION BOOKLET #C10 Watch step by step installation instructions at: https://www.wallbedsbywilding.com/wallbed-installation-studio-series/ WARNING! ALL MURPHY/WALLBED SYSTEMS CONTAIN STORED ENERGY.
New Sywell - 2 Door Robe
 New Sywell - 2 Door Robe ssembly Instructions - Please keep for future reference 282/4150 266/3768 267/7606 266/2965 281/8960 Dimensions Width - 70.5cm Depth - 50cm Height - 172cm MDE IN RITIN Important
ACCESSORIES. Wooden Dowels. Fasteners. Miscellaneous. Shelf Supports
 ACCESSORIES ACCESSORIES Fasteners PMI has a variety of Fasteners and Connectors for any application. Euro-Bolts, Spiral Cam Connectors, Screws and Sleeves - we have your solution! Shelf Supports Assorted
1 Door Wall Unit ASSEMBLY GUIDE. Page 1 of 7 14/04/2009 Revision 3. WARNING: Contains small parts, keep out of reach of children.
 ASSEMBLY GUIDE 1 Door Wall Unit IMPORTANT Before Commencing Assembly: Read all instructions COMPLETELY Ensure all listed parts are present If any parts are missing from Parts List 1, please contact 1800
EMPEROR RECTANGULAR DINING TABLE + 4 FOLDING CHAIR. Important - Please read these instructions fully before starting assembly
 EMPEROR RECTAGULAR G TABLE + FOLG CHAR Assembly nstructions - Please keep for future reference 60356 60357 G TABLE x FOLG CHAR x TABLE imensions Width - 39 cm epth - 7 cm Height - 75 cm CHAR imensions
HZ1032A0TX/ HZ1032B0TX Shadowbox Wine/Bar Cabinet Assembly Instructions
 HZ0A0TX/ HZ0B0TX Shadowbox Wine/Bar Cabinet Assembly Instructions For assistance with assembly contact: Southern Enterprises Inc. Customer Service -800--509 service@seidal.com www.seidal.com Due to weight,
WOOD GRAIN 6 SHELF BOOKCASE
 HRDWRE 4 - wood dowels 20 - cam 8 - large 12 - shelf pins 4 - adhesive cam covers 20 - cams 8 - brackets Missing hardware? Please call 800.606.6387 for replacements. WLL MOUNTING HRDWRE 2 - small 2 - large
Anderson - Coffee Table
 Anderson - offee Table Assembly Instructions - Please keep for future reference 290/8021 609/5442 Dimensions Width - 89.5cm Depth - 50cm Height - 33cm MADE IN RITAIN Important - Please read these instructions
TIP FOR GETTING STARTED
 Tip for getting started TIP FOR GETTING STARTED Be careful not to drill into any electrical wires, ductwork, plumbing or other damagable components. If you have any questions on the locations of these
compile system INSTALLATION GUIDE Updated January 2019
 INSTALLATION GUIDE Updated January 09 compile system Table of Contents Panels 0 Quick Connect Clips 0 Lock Clips 0 Panel Trims 0 Privacy Glass 0 Post Base Covers 04 Electrical 04 Power Distribution Harness
HZ104100TX Black Contemporary Bar Cabinet Assembly Instructions PO#:
 HZ104100TX Black Contemporary Bar Cabinet Assembly Instructions For assistance with assembly contact: Southern Enterprises, Inc. customer service 1-800-33-09 service@seidal.com www.seidal.com PO#: Page
Assembly guide. Before you start...check the pack and make sure all the components and fixings are included see. Tools required (Not Supplied)
") M FITT-054 Issue - Issue Assembly guide Soft close 800 LH Pull & Swing Corner Unit Component parts Tools required (Not Supplied) B S O T Spirit level Cross Head Screwdriver Tape measure E&F J P* Allen
M FITT-054 Issue - Issue Assembly guide Soft close 800 LH Pull & Swing Corner Unit Component parts Tools required (Not Supplied) B S O T Spirit level Cross Head Screwdriver Tape measure E&F J P* Allen
Revised
 Indentify Non-powered panels and separate from Powered panels. Non-powered panel shown at left.. Powered panel shown at left has powerway mounted at factory. Also separate panels by surface type, width
 For Wallbed models: KING SIZE INSTRUCTION BOOKLET #C1 Watch step by step installation instructions at: https://www.wallbedsbywilding.com/wallbed-installation-studio-series/ WARNING! ALL MURPHY/WALLBED
Heavy-Duty Bypass Track System
 Heavy-Duty Bypass Track System Please Note: This track system must be installed with the screws going into a solid surface such as studs or a header. Due to the spacing of the holes on these Brackets,
Series 1100 Aluminum Door Canopy
 Series 00 Aluminum Door Canopy with Support Arms It is our recommendation that you read instructions carefully prior to assembly and installation. Series 00 with Support Arms MOUNTING BAR (A) TOP TRIM
PRINCESS SINGLE BED WITH TRUNDLE
 PRINCESS SINGLE BED WITH TRUNDLE If you have any questions regarding assembly or if you are missing parts, do not return this item to Sam s Wholesale Club Please call our customer service number and have
Organisational Kitchen Fittings Kitchen Cabinet Accessories
 Kitchen waste bin systems Single waste bin, capacity 1 litres Carcase width: Min. 400 mm For door mounting: For left and right hand use Installation: Screw fixing to side panel Housing: Steel, plastic
Door window. Front door window, assembly overview
 64-50 Door window Front door window, assembly overview 1 - Window channel Pushed onto flange 2 - Door window Removing Page 64-52 Adjusting Page 64-53 3 - Door 4 - Outer window channel Pushed onto flange
Ripple Hanger ASSEMBLY INSTRUCTIONS
 Ripple Hanger ASSEMBLY INSTRUCTIONS RIPPLE HANGER Recommended Tools Drill with 1/8, 1/4, and 1/2 Drill Bits, 1-1/8 Forstner Bit or 1-1/8 Spade Bit, and Phillips Bit 9/16 and 5/8 Combination Wrench Socket