RECREATIONAL VEHICLE DOOR INSTALLATION INSTRUCTIONS
|
|
|
- Joel Jennings
- 6 years ago
- Views:
Transcription


1 RECREATIONAL VEHICLE DOOR INSTALLATION INSTRUCTIONS
2 Contents General...2 Rough Opening Preparation...3 Door Inspection and Preparation...5 Door Terminology...5 Door Installation...7 For 5055 Series/Rotary Style Doors...9 Optional Installation Procedures Cleaning Limited Warranty Table of Contents
3 General Proper Installation is essential for the acceptable performance of this door. Improper installation will void the warranty. These instructions are for doors manufactured by Dexter. Please read these instructions completely before installing the door. 1. These instructions represent an acceptable installation method. Other methods may be acceptable. Determining the acceptability of alternate installation methods is the sole responsibility of the RV manufacturer. 2. Appropriate personal protective equipment (such as safety glasses, gloves, steel-toed boots, etc.) should be worn during the installation process. CAUTION Weight of products requires proper lifting techniques. Use a reasonable number of people with the required strength to carry, lift, and install the door unit. These instructions are not intended to address all of the safety issues associated with the installation of these doors; it is the responsibility of the RV manufacturer to establish appropriate safety practices. 3. Dexter does not warrant that the products and instructions provided comply with all applicable building codes and regulations. It is the responsibility of the RV manufacturer to ensure the products and methods used in construction and installation conform to all applicable codes and regulations. 4. Do not leave doors in direct sunlight when wrapped. General -2-
4 Rough Opening Preparation 1. The exterior surface must be flat within 1/8". 2. Make certain the rough opening (referred to as R.O. in the remainder of the document) is correctly sized and constructed either for a square corner door or a radius corner door. The R.O. equals the door call size in width and height (example: a 30 x 70 call size = 30" wide x 70" high R.O) unless otherwise noted in the sales literature. For specific door data in Figure 3, see the table in Optional Installation Procedures. If applicable, the radius ( R ) of the door is specific to the system. The R.O. sill must be square to the floor within 1/8" across its width. If the R.O. sill is out of square by a greater amount, it may not be possible to shim and square the door in the opening. 3. For square corner doors, check the squareness with diagonal measurements (see Figure 1). The difference between 1 to 4 and 2 to 3 should not exceed 1/4". If the R.O. does not conform to these requirements, it must be modified so that the sill is square to the floor within tolerance and the diagonals are within the 1/4" allowance. Rough Opening Preparation Figure 1-3-
5 4. For radius corner doors, check the squareness with diagonal measurements (see Figure 2). The difference between 1 to 4 and 2 to 3 should not exceed 1/4". If the R.O. does not conform to these requirements, it must be modified so that the sill is square to the floor within tolerance and the diagonals are within the 1/4" allowance. HEAD 3 X R R 4 X JAMB 1 2 SILL FRAMING SQUARE Rough Opening Preparation Figure 2 5. Inspect the exterior face of the R.O. where the mounting flange of the door will contact. This area must not have gaps or voids in the area where the mounting flange contacts. The sheathing or exterior wall material that the door will be fastened to must be structurally adequate so that the door unit is fully anchored. -4-
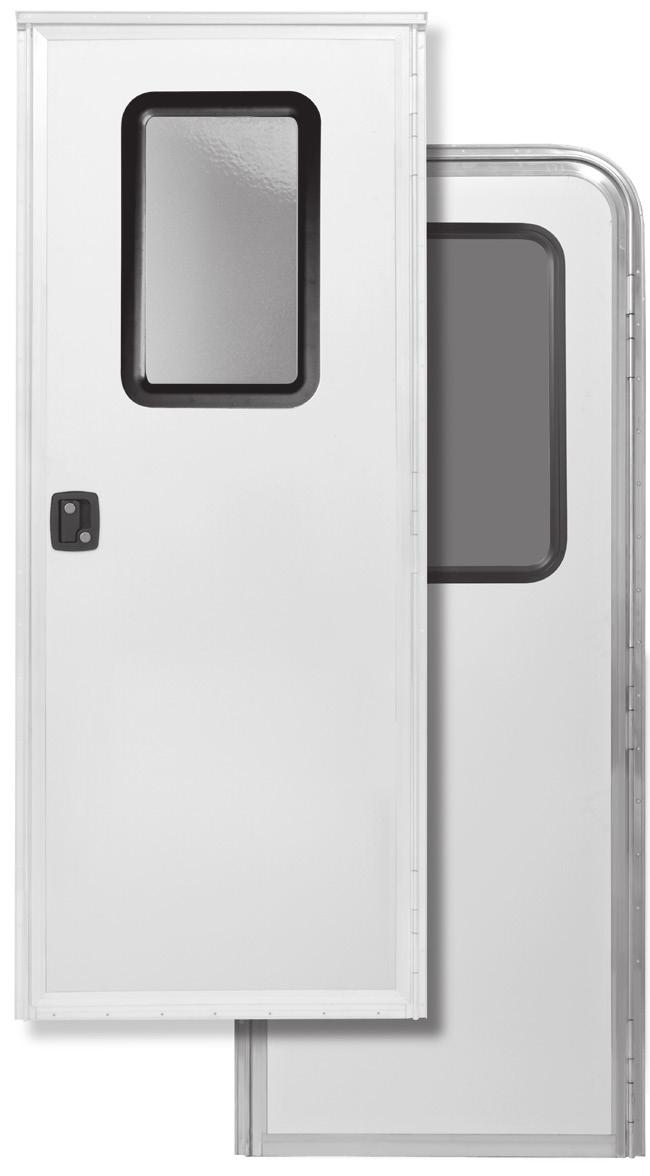
6 Door Inspection and Preparation Door Terminology Become familiar with the terminology used throughout these instructions by studying Figure 3. HINGE JAMB HINGE JAMB CALL HEIGHT = ROUGH OPENING BUCK HEIGHT DOOR LEAF HEAD JAMB OPTIONAL WINDOW OPTIONAL DEAD BOLT RV LOCK LOCK JAMB FRAME/JAMB CLEARANCE Door Inspection and Preparation CLEARANCE THRESHOLD CLEARANCE BUCK WIDTH CALL WIDTH = (ROUGH OPENING) Figure 3 1. Measure the door prior to proceeding with the installation to ensure that it matches the rough opening. 2. Inspect the mounting flanges to ensure they have not been bent, damaged, or distorted during shipping or handling to the extent that they will not seat flat against the exterior perimeter of the R.O. If bent, damaged or distorted, straighten the mounting flange so that it will make contact with the exterior face of the wall or contact Dexter. 3. Doors must always be closed during installation. Dexter doors are shipped with spacer blocks and/or installation clips to assist installation by maintaining a reveal between the frame and door core until the door is fully installed. Fill any gaps or voids between the door mounting flange and the exterior perimeter of the R.O. Gaps or voids in this area may provide a path for water and air to enter. -5-
7 4. Apply a 1" continuous bead of sealant (pumpable caulk or sealant tape) on the floor so that the outside edges (both sides) of the frame sill will be sealed to the floor extending about 6" up the frame/jamb (see Figure 4). Before using sealant, see Caution in item number Apply a 1/4" continuous bead of sealant (pumpable caulk or sealant tape) to the back side of the mounting flange, in line with pre-punched holes in the mounting flange. CAUTION If the door units are pre-sealed with pumpable caulk prior to installation, a skin may form on the sealant caulk causing a potential for failure, however sealant tape does not normally have this problem. Refer to the sealant manufacturers instructions for sealant curing time. Be sure to install the door before the sealant sets up on the mounting flanges. Door Inspection and Preparation SEALANT ROUGH OPENING EXTERIOR Figure 4 INTERIOR FLOOR LINE -6-
8 Door Installation 1. Place the door in the R.O. on the door sill. If the R.O. sill is not square to the floor then remove the door and reconstruct the R.O. sill so that it is square. 2. For all doors except 5055 Radius Corner, center the door from left to right but do not remove the sill from contact with the R.O. sill. If the door type is a 5055 Radius Corner door, butt the shim on the lock side of door to the R.O. jamb. When installing doors, it is required to use corrosion resistant fasteners that produce a minimum of 1" penetration into the framing members. 3. While holding the door frame flat against the exterior of the wall, fasteners should be installed in both jambs and at the head; install screws at the designated mounting locations making sure that you get at least a 1" penetration from the door jamb or head into the wall studs. See Figure 5 for order of placement. Note: If scaffolding is used and interferes with the top of the door, it is acceptable to install these screws later when it is more accessible. Door Installation LOCK SIDE 1 4 HINGE SIDE 3 DOOR LEAF 6 Figure 5-7-
9 CAUTION Do not over drive fasteners. To do so will fracture or unduly deform the mounting flange and compromise the seal. Do not apply fasteners or staples through any other surface of the door other than the Dexter door specified areas and/or the mounting flange. Failure to comply may void any manufacture warranty. 4. After the fasteners have been installed through the midpoint of the mounting flange at the hinges and lock sides, it is recommended that you re-check the door frame to be certain it is centered from side to side in the opening, and that the door frame is square. Measure opposite corners of the door frame in a manner similar to measuring the diagonals of the R.O. (see Figure 1) or the radius corner door (see Figure 2). It should be within 1/8". CAUTION The mounting flange is provided with pre-punched holes. Never leave holes or slots unsealed; water can penetrate. Fasteners should be installed in every hole. Continue installation of the rest of the fasteners starting in the center of each member and progressing out to the corners. Fasteners must be installed close enough together to ensure the sealant on the back of the mounting flange makes full contact with the exterior perimeter of the R.O. 5. Once the door is securely fastened in place, unlock and open the door, remove any pre squaring clips, and install any remaining door hardware. Door Installation 6. Adjust the strike plate as follows so that when testing for proper operation, the door closes and seals properly (for every door except Rotary Lock/5055 Series). A. Loosen strike plate mounting screws only enough to tap the strike to a new position and retighten to eliminate any movement. Note: Over loosening of the strike plate mounting screws will result in interior clips of the strike plate falling down inside the rough opening. B. Two (2) pin style safety lock strikes may only be adjusted up and down on the frame. C. Travel trailer style locksets, knob/knob or knob/lever lock sets may only be adjusted in and out on the frame. -8-
10 For 5055 Series/Rotary Style Doors There is only one adjustment that should be made on this hardware. The striker bolt may be adjusted up, down, in or out to make opening the door easier. The caged nut is fastened to the door frame and will not fall when the strike bolt is removed. For striker bolt adjustment: 1. Operate to make sure the inside and outside handles operate smoothly. 2. Operate the deadbolt to make sure that it extends and retracts smoothly. 3. Check the alignment of the striker bolt and the rotary latch. Adjust the striker bolt up and down if needed. Mark the frame around the top and bottom of the washer on the striker bolt. 4. Close the door and check that the latch engages into the fully latched position. On this latch there are two closed positions; fully latched and a secondary safety catch. Adjust the striker bolt in and out as necessary. Door Installation -9-
11 Cleaning Optional Installation Procedures Do not use abrasive cleaners on the glass as they may permanently scratch or mar the surface. Any cleaners, other than a mild detergent and soft cloth, should be tried in a small corner of the door so as to check whether they damage the finish. Series R.O.** Buck Clearance Width Height Width Height Width per Side Height 6555 Call Call Call-1/4" Call-1/8" 1/8" 1/8" 5055RC Call Call Call-1" Call-1/4" 1/4" on hinge side Shim is tight to R.O. on lock side 1/4" 5050RC Call Call* Call-1/2" Call 1/4" 1/4" 5050SQ Call Call Call-1/2" Call-1/4" 1/4" 1/4" * R.O. height = call height + 1/4" ** R.O. width may be oversized by 1/4" and R.O. height may be oversized by 1/8", but Dexter does not recommend undersizing. Optional Installation Procedures -10-
12 Dexter Door Limited Warranty WHAT PRODUCTS ARE COVERED All Dexter Axle Company doors ( Dexter Door ) purchased after May 4, LIMITED 2 YEAR WARRANTY Dexter Door warrants to the original purchaser that its doors shall be free from defects in material and workmanship for a period of two (2) years from the date of first sale of the trailer incorporating such components. EXCLUSIVE REMEDY Dexter Door will, at its option, repair or replace the affected components of any defective door, repair or replace the entire defective door, or refund the thencurrent list price of the door. In all cases, a reasonable time period must be allowed for warranty repairs to be completed. Allowance will only be made for installation costs specifically approved by Dexter Door. WHAT YOU MUST DO In order to make a claim under these warranties: 1. You must be the original purchaser of the trailer in which the door was originally installed. 2. You must promptly notify us within the warranty period of any defect, and provide us with any substantiation which may include, but is not limited to, the return of part(s) that we may reasonably request. 3. The door must have been installed and maintained in accordance with good industry practice and any specific Dexter Door recommendations, including those specified in Dexter Door s installation instructions. EXCLUSIONS These warranties do not extend to or do not cover defects caused by: 1. Damage to the door caused by impact of foreign objects, acts of God, fire, explosion or other casualty, structural settlement, vibration, excessive heat or moisture, incorrect or unreasonable use (including failure to provide reasonable and necessary maintenance) improper installation, abuse, neglect, negligence or vandalism. 2. Any defects relating to customer/owner applied finishes, films (including use of a sun shade film), sealants or caulking. 3. Defects caused by natural weathering, air pollution or exposure to harmful chemicals. 4. Costs for dismantling, replacing or reinstalling the door. 5. Altered or reinstalled doors. Warranty -11-
13 6. Screens, screen material. Any defects caused by unleveled, twisted, or out of square door openings. 7. Stress cracks due to improper installation. 8. Defects or damage due to improper installation. LIMITATIONS 1. In all cases, Dexter Door reserves the right to fully satisfy its obligations under the Limited Warranties by refunding the then-current list price of the defective door (or, if the door has been discontinued, of the most nearly comparable current product). 2. Dexter Door reserves the right to furnish a substitute or replacement component or product in the event a door or any component of the door is discontinued or is otherwise unavailable. 3. Repair or replacement of a door or any component part thereof or the insulating glass unit will not extend the warranty period for the door. 4. These warranties are nontransferable. GENERAL THE FOREGOING WARRANTIES ARE EXCLUSIVE AND IN LIEU OF ALL OTHER WARRANTIES EXCEPT THAT OF TITLE, WHETHER WRITTEN, ORAL OR IMPLIED, IN FACT OR IN LAW (INCLUDING ANY WARRANTY OF MERCHANTABILITY OR FITNESS FOR A PARTICULAR PURPOSE). These warranties give you specific legal rights, and you may also have other rights which vary from state to state. DEXTER DOOR HEREBY EXCLUDES INCIDENTAL AND CONSEQUENTIAL DAMAGES, INCLUDING LOSS OF TIME, INCONVENIENCE, LOSS OF USE, TOWING FEES, TELEPHONE CALLS OR COST OF MEALS, FOR ANY BREACH OF ANY EXPRESS OR IMPLIED WARRANTY. Some states do not allow limitations on how long an implied warranty lasts, or the exclusion or limitation of incidental or consequential damages, so the above exclusion or limitation may not apply to you. Inquiries regarding these warranties should be sent to: Warranty Dexter Axle P.O. Box 250 Elkhart, Indiana
14 Notes -13-
15 Notes -14-
16 Notes -15-

17 Genuine Dexter components are available from our plant locations listed below or through our network of distributors. Check our web site for the distributor nearest you. Plant 52 Plant 51 Dexter Headquarters Plants 12, 13, 39, 61 Plant 24 Plants 15, 62 Plant 25 Plants 21, 23 Dexter - Headquarters 2900 Industrial Parkway East Elkhart, Indiana Phone: Fax: Dexter - Plt West Pearl Street Fremont, Indiana Phone: Fax: Dexter - Plt South 7th Street Albion, Indiana Phone: Fax: Dexter - Plt Southeast 27th Street El Reno, Oklahoma Phone: Fax: Dexter - Plt Perimeter Road Monticello, Georgia Phone: Fax: Dexter - Plt Bucknell Drive SW Atlanta, Georgia Phone: Fax: Dexter - Plt Sunshine Lane San Marcos, California Phone: Fax: Dexter - Plt Baxter Lane Winchester, Tennessee Phone: Fax: Dexter - Plt South Division Street Bristol, Indiana Phone: Fax: Dexter - Plt King Street West Ingersoll, Ontario N5C 3K6 Phone: Fax: Dexter - Plt Steet SE Calgary, Alberta T2C 3V2 Phone: Fax: Dexter - Plt Protecta Drive Elkhart, Indiana Phone: Fax: Dexter - Plt North Kennedy Street Shawnee, Oklahoma Phone: Fax: NO PART OF THIS CATALOG MAY BE REPRODUCED WITHOUT DEXTER S PERMISSION. ALL PART NUMBERS, DIMENSIONS AND SPECIFICATIONS IN THIS CATALOG ARE SUBJECT TO CHANGE WITHOUT NOTICE.
18 ADVANCED DOOR SOLUTIONS FOR OVER 50 YEARS South Division Street Bristol, Indiana Phone: Fax: ISO 9001:2015 Certified Dexter Axle Company. LIT-850-OO
RECREATIONAL VEHICLE DOOR INSTALLATION INSTRUCTIONS
 RECREATIONAL VEHICLE DOOR INSTALLATION INSTRUCTIONS PHILIPS PRODUCTS PHONE NUMBER: 574/296-0000 LIT-1614 2/01 REV 1 GENERAL ROUGH OPENING PREPARATION PROPER INSTALLATION IS ESSENTIAL FOR THE ACCEPTABLE
Vinyl Windows and Doors Manufactured by Pella Corporation
 Vinyl Windows and Doors Manufactured by Pella Corporation Part Number: V981255 2009 Pella Corporation INSTALLATION INSTRUCTION - INSTRUCCIONES DE INSTALACIÓN FOR BOW WINDOWS WITHOUT HEAD AND SEAT BOARD
Heavy Wall Applied Stop Tube Frame and Door Installation
 INSTALLATION INSTRUCTIONS Heavy Wall Applied Stop Tube Frame and Door Installation Read all instructions before beginning installation. These instructions are provided to help prevent installation problems
Phone # La Jolla Doors. Block Frame Installation Manual Aluminum Frame with either Vinyl or Aluminum Panels
 Phone # 800-440-8785 www.lajolladoors.com La Jolla Doors Block Frame Installation Manual Aluminum Frame with either Vinyl or Aluminum Panels Thank you for choosing La Jolla Doors In this manual you will
Metal & Vinyl, Flush Mount and Recessed Fin Windows Recommended Installation Instructions
 PO Box 480 Ph: 417-235-7821 Monett, MO 65708 Fax: 417-737-7140 Metal & Vinyl, Flush Mount and Recessed Fin Windows Recommended Installation Instructions These installation instructions are recommendations
Installation Instructions Double-Hung, Single-Hung, Casement, Awning, Sliding, Picture & Shapes Non-Impact & Impact Resistant Nailing Fin Windows
 Installation Instructions Double-Hung, Single-Hung, Casement, Awning, Sliding, Picture & Shapes Non-Impact & Impact Resistant Nailing Fin Windows americancraftsmanwindows.com Project Requirements: Read
Please Do Not Return This Product To The Store!
 MODEL NOS. T8512 TOURNAMENT SERIES 3 TABLE TENNIS TABLE OWNER'S MANUAL 1. Read this manual carefully before starting assembly. Read each step completely before beginning each step. 2. Some smaller parts
Vinyl Windows Manufactured by VPI Quality Windows
 Vinyl Windows Manufactured by VPI Quality Windows Part Number: 531&591 Installation 531 & 591 SERIES SLIDING AND HUNG WINDOW INSTALLATION INSTRUCTIONS Installation Instructions for Typical Construction.
Vinyl Windows and Doors Manufactured by VPI Quality Windows
 Vinyl Windows and Doors Manufactured by VPI Quality Windows Part Number: 511_Installation ENDURANCE CASEMENT\AWNING\PW INSTALLATION INSTRUCTIONS Installation Instructions for Typical Construction These
Installation Guide for Architectural Wood Hinged Windows
 Guide for Architectural Wood Hinged Windows Congratulations! You have just purchased one of the many fine Andersen products. Proper assembly, installation and maintenance are essential if the benefits
340 & 350 SERIES DELUXE FRAMELESS BYPASS
 BATH ENCLOSURES An Alcoa Company Tel: 800-643-1514 Fax: 870-234-3181 www.alumaxbath.com INSTALLATION INSTRUCTIONS 340 & 350 SERIES DELUXE FRAMELESS BYPASS BATH ENCLOSURES Copyright Alumax Bath Enclosures
Flashing Materials. Rough Opening Preparation
 Installation Instructions for CertainTeed New Construction Windows Handling vinyl windows CAUTION: Always store vinyl windows and doors in an upright position on a slight angle. Never lay them flat or
Installation Guidelines For ALUMINUM M-SERIES 3 PANEL SLIDING DOOR
 www.quakerwindows.comv www.quakercommercialwindows.com PO Box 128 504 Highway 63 South Freeburg, MO 65035 800-347-0438 573-469-4151 (fax) Installation Guidelines For ALUMINUM M-SERIES 3 PANEL SLIDING DOOR
Thermally Broken Framing and Door Installation
 INSTALLATION INSTRUCTIONS Thermally Broken Framing and Door Installation IMPORTANT: Read all instructions before beginning installation. These instructions are provided to help prevent installation problems
738 SERIES PIVOT SHOWER DOOR
 INSTALLATION INSTRUCTIONS 738 SERIES PIVOT SHOWER DOOR Copyright Alumax Bath Enclosures 1997. All rights reserved. Page 1 of 8 LIMITED WARRANTY AND REMEDY Alumax Bath Enclosures warrants to its dealers,
Sun Windows General Information New Construction Hinged Door Installation Instructions
 A G H F H H A. Apply Weather Resistive Barrier B. Apply Bottom Flashing Tape C. Install Sill Pan End Caps & Pan D. Caulk Sides & Top Nailing Surface, Set Door, Fasten E. Apply Side Flashing Tape F. Apply
340 & 350 SERIES BATH ENCLOSURES
 INSTALLATION INSTRUCTIONS 340 & 350 SERIES BATH ENCLOSURES 800-643-1514 www.alumaxbath.com Copyright Alumax Bath Enclosures 2010. All rights reserved. LIMITED WARRANTY AND REMEDY ALUMAX BATH ENCLOSURES
Installation Guidelines. Next Dimension. Single Hung / Single Hung Fixed / Double Hung / Sliding Window / Fixed Window
 Installation Guidelines Next Dimension Single Hung / Single Hung Fixed / Double Hung / Sliding Window / Fixed Window Windsor Windows & Doors Windsor Windows & Doors 900 S. 19 th St. 2210 Stafford St. Extn
Vinyl Windows and Doors
 Vinyl Windows and Doors Manufactured by Pella Corporation WINDOW REPLACEMENT INSTRUCTIONS FOR SINGLE-HUNG AND SLIDING WINDOWS INTO EXISTING CASEMENT FRAME Part Number: V981203 2009 Pella Corporation USING
INSTALLATION INSTRUCTIONS
 INSTALLATION INSTRUCTIONS Thermally Broken Framing and Door Installation SL-450TB (2" x 4-1/2" with 1" Glazing) & SL-600TB (2" x 6" with 1" Glazing) IMPORTANT: Read all instructions before beginning installation.
The package you received should contain:
 Congratulations on your purchase of a MaxSeal Door by Security Boss. The following is a step by step guide for installing your Security Boss product. A SAFETY REMINDER! Always wear eye protection and gloves
INSTALLATION INSTRUCTIONS for Wood/Clad Wood Windows without Exterior Trim or Nailing Fin (JII025) ImpOrTaNT INFOrmaTION & GlOssary.
 ImpOrTaNT INFOrmaTION & GlOssary.") for Wood/Clad Wood Windows without Exterior Trim or Nailing Fin (JII025) Thank you for selecting JELD -WEN products. Attached are JELD-WEN s recommended installation instructions for metal clad wood windows
for Wood/Clad Wood Windows without Exterior Trim or Nailing Fin (JII025) Thank you for selecting JELD -WEN products. Attached are JELD-WEN s recommended installation instructions for metal clad wood windows
NEW CONSTRUCTION PATIO DOOR INSTALLATION INSTRUCTIONS (WITH NAILING FLANGE)
") NEW CONSTRUCTION PATIO DOOR INSTALLATION INSTRUCTIONS (WITH NAILING FLANGE) Slim Line & Classic French Style Patio Doors Materials included: (2) #10 x 2-1/2" Phillips Pan head keeper s (2) 3/8" Hole plugs
NEW CONSTRUCTION PATIO DOOR INSTALLATION INSTRUCTIONS (WITH NAILING FLANGE) Slim Line & Classic French Style Patio Doors Materials included: (2) #10 x 2-1/2" Phillips Pan head keeper s (2) 3/8" Hole plugs
Balishutters. INSTALLATION guide FOR L-FRAME MOUNT INSTALL OPTIONS B OR C
 Balishutters INSTALLATION guide FOR L-FRAME MOUNT INSTALL OPTIONS B OR C Tools needed for installation Drill Phillips bit 1/8" drill bit 4. Hammer (preferably hard plastic) 5. Level 6. Phillips-head screwdriver
Tools required by installer: Materials required by installer:
 Installation Guidelines For Quaker Window Products Vinyl product line (Single Hung, Double Hung, Sliding Window, Fixed Window, Casement, Awning, and Hopper) Installer: Read these instructions completely
300C6 CONTINUOUS HINGE SEMI-FRAMELESS DOOR KIT
 300C6 CONTINUOUS HINGE SEMI-FRAMELESS DOOR KIT LIMITED WARRANTY AND REMEDY Alumax Bath Enclosures warrants to its dealers, customers, and all subsequent purchasers and users, that the products supplied
Please Do Not Return This Product To The Store!
 MODEL NOS. T81 TABLE TENNIS TABLE OWNER'S MANUAL 1. Read this manual carefully before starting assembly. Read each step completely before beginning each step.. Some smaller parts may be shipped inside
Installation Guide. for Andersen 400 Series Tilt-Wash Picture Windows with Stormwatch Protection (High-Performance Impact Resistant Glass)
") for Andersen 400 Series Tilt-Wash Picture Windows with Stormwatch Protection (High-Performance Impact Resistant Glass) Installation Guide Congratulations! You have just purchased one of the many fine Andersen
for Andersen 400 Series Tilt-Wash Picture Windows with Stormwatch Protection (High-Performance Impact Resistant Glass) Installation Guide Congratulations! You have just purchased one of the many fine Andersen
Chapter 9. Windows and Exterior Doors
 Chapter 9. Windows and Exterior Doors 9.1 INSTALLING WINDOWS 9.2 INSTALLING EXTERIOR HOUSE DOORS 9.3 INSTALLING SHED DOOR 9.4 INSTALLING EGRESS COMPONENTS Tools needed by volunteers: Hammer Nail apron
All Window Installation Instruction
 1 All Window Installation Instruction Hurd Window Installation Instructions for Nail Fin & Wood Brick Mould Units Nail Fin Windows See Pages 2-11 Wood Brick Mould Windows See Pages 2-6, 8 & 12BM - 14BM
INSTALLATION INSTRUCTIONS Scout II - Fast Trac PART #
 INSTALLATION INSTRUCTIONS Scout II - Fast Trac PART #442-210 Thank you for purchasing Specialty s Convertible Top for your Scout vehicle. It has been designed for great fit and long wear. Please read and
Installation Instructions Hard Top Part # , Wrangler 2 & 4 Door
 Please read instructions entirely before installing this product. This accessory is designed and manufactured primarily to augment the vehicles appearance and to protect the occupants from normal weather
Installation Guide for Andersen 400 Series Tilt-Wash Transom Windows with Stormwatch Protection (PG Upgrade) Manufactured After 2006
 Manufactured After 2006") for Andersen 400 Series Tilt-Wash Transom Windows with Stormwatch Protection (PG Upgrade) Manufactured After 2006 Thank you for choosing Andersen. Instructions are for typical, new wood-framed wall construction
for Andersen 400 Series Tilt-Wash Transom Windows with Stormwatch Protection (PG Upgrade) Manufactured After 2006 Thank you for choosing Andersen. Instructions are for typical, new wood-framed wall construction
Installation Materials Required: Tools Required: 6" self-adhesive flashing. Shims. 3-foot level 6-foot level Tape measure 1/8" drill bit
 installation instructions for CUSTOM WOOD & FIBERGLASS EXTERIOR FOLDING DOOR SYSTEMs (JII101) Thank you for selecting JELD-WEN products. Attached are JELD-WEN s recommended installation instructions for
Assembled Patio Door Installation Guide 2-Panel Patio Door with Non-Welded Frame
 Assembled Patio Door Installation Guide 2-Panel Patio Door with Non-Welded Frame americancraftsmanwindows.com American Craftsman and all other marks where denoted are trademarks of Andersen Corporation
INSTALLATION INSTRUCTIONS FOR REPLACEMENT FORGENT WOOD GLASTRA WINDOWS RECOMMENDATIONS FOR COMMON INSTALLATION OF ALL REPLACEMENT WINDOWS.
 INSTALLATION INSTRUCTIONS FOR REPLACEMENT FORGENT WOOD GLASTRA WINDOWS RECOMMENDATIONS FOR COMMON INSTALLATION OF ALL REPLACEMENT WINDOWS. Installer: DO NOT DISCARD Please leave the Installation Guide
Installation Guide for Andersen 200 Series Tilt-Wash Picture, Transom and Circle Top Windows
 for Andersen 200 Series Tilt-Wash Picture, Transom and Circle Top Windows Congratulations! You have just purchased one of the many fine Andersen products. Proper assembly, installation and maintenance
INSTALLATION INSTRUCTIONS for Wood Bay or Bow Windows with Nailing Fin or Exterior Trim (JII032)
") for Wood Bay or Bow Windows with Nailing Fin or Exterior Trim (JII0) Thank you for selecting JELD-WEN products. Attached are JELD-WEN s recommended installation instructions for wood and clad wood bay
for Wood Bay or Bow Windows with Nailing Fin or Exterior Trim (JII0) Thank you for selecting JELD-WEN products. Attached are JELD-WEN s recommended installation instructions for wood and clad wood bay
INSTALLATION INSTRUCTIONS IMPERVIA (Vent and Fixed) AWNING, CASEMENT, and LARGE AWNING WINDOW WITH FINS
 AWNING, CASEMENT, and LARGE AWNING WINDOW WITH FINS") 2012 Pella Corporation Part Number: 80WH0101 INSTALLATION INSTRUCTIONS IMPERVIA (Vent and Fixed) AWNING, CASEMENT, and LARGE AWNING WINDOW WITH FINS Installation Instructions for Typical Wood Frame Construction.
2012 Pella Corporation Part Number: 80WH0101 INSTALLATION INSTRUCTIONS IMPERVIA (Vent and Fixed) AWNING, CASEMENT, and LARGE AWNING WINDOW WITH FINS Installation Instructions for Typical Wood Frame Construction.
Fold-A-Way Patio Door ASSEMBLY & INSTALLATION GUIDE
 Fold-A-Way Patio Door ASSEMBLY & INSTALLATION GUIDE This instruction guide provides the minimum recommended procedures to correctly prepare the rough opening, install a fold-a-way patio door unit and apply
Installation Guidelines For Quaker Window Products Aluminum flange fin sub sill & receptor system using a T mulled twin window unit.
 Installation Guidelines For Quaker Window Products Aluminum flange fin sub sill & receptor system using a T mulled twin window unit. Installer: Read these instructions completely before starting any installation.
Installation Guide for Andersen 400 Series Tilt-Wash Transom and 200 Series Narroline Transom Windows
 for Andersen 400 Series Tilt-Wash Transom and 200 Series Narroline Transom Windows Congratulations! You have just purchased one of the many fine Andersen products. Proper assembly, installation and maintenance
INSTALLATION INSTRUCTION - INSTRUCCIONES DE INSTALACIÓN FOR CLAD CASEMENT & AWNING WINDOW VENTANA DE DOS HOJAS CON REVESTIMIENTO
 2008 Pella Corporation Part Number: 801P0101 INSTALLATION INSTRUCTION - INSTRUCCIONES DE INSTALACIÓN FOR CLAD CASEMENT & AWNING WINDOW VENTANA DE DOS HOJAS CON REVESTIMIENTO Corner Corner Top Fin Corner
Half Door Installation Instructions
 Half Door Installation Instructions For: CJ5 (1955-1975), CJ6 (All), M38-A1 (1955-1971) Part Number: 53025 Congratulations on your purchasing decision. Bestop designed these Doors to give you years of
Chapter 9. Windows and Exterior Doors
 Chapter 9. Windows and Exterior Doors 9.1 INSTALLING WINDOWS 9.2 INSTALLING EXTERIOR HOUSE DOORS 9.3 INSTALLING SHED DOOR 9.4 INSTALLING BASEMENT EGRESS COMPONENTS Tools needed by volunteers: Hammer Nail
WOOD OUT SWING AWNING, CASEMENT, & HOPPER WINDOW
 WOOD OUT SWING AWNING, CASEMENT, & HOPPER WINDOW INSTALLATION GUIDE READ SPECIFIC INSTALLATION INSTRUCTIONS COMPLETELY BEFORE STARTING ANY INSTALLATION Failure to install and maintain our product according
8/7/ HP SWING DOOR INSTALLATION INSTRUCTIONS
 8/7/17 1200 HP SWING DOOR INSTALLATION INSTRUCTIONS Installation Instructions for Typical Construction These instructions were developed and tested for use with typical construction in a wall system designed
UNIT 5: EXTERIOR DOORS AND WINDOWS
 KEY CONCEPTS 1. Identify tools needed for exterior door and window installation 2. Last step to weather proofing the home 3. Steps to installing exterior doors and windows 4. Maintenance and safety of
Access Hatch. Installation Instructions and Operators Manual. PS DOORS Contact Information. Model AH-710 Standard High Neck Radius Cut
 Access Hatch Installation Instructions and Operators Manual Standard Low Profile Frame Model AH-710 Standard High Neck Radius Cut High Neck Frame for special applications. Table of Contents Warranty Information...2
Norwood Windows Permaglass Fiberglass Products Installation Instruction
 Norwood Windows Permaglass Fiberglass Products Installation Instruction Care and storage of fiberglass windows: Fiberglass products purchased from Norwood Windows must be stored in a dry sheltered area
Install Instructions. NewAge Steel Welded Tall Locker
 Kit Contains Full Width Adjustable Steel Shelves (4) Height-Adjustable Steel Leveling Legs (4) Aluminum Door Trim (2) 2.5 x ¼ Cabinet Mounting Lag Bolts (4) Large Zinc Plated Mounting Washers (4) 5/8 x
Finish 1 Year 1 Year Lifetime 9200 Inswing Warranty Painted Plated PVD Vinyl Swinging Door List Price White Chrome S.Nickel H.Duty
 Finish 1 Year 1 Year Lifetime 9200 Inswing Warranty Painted Plated PVD Vinyl Swinging Door List Price White Chrome S.Nickel H.Duty Euro White Tan or Earthtone Black A.Brass Brass Argon 270 366 Rolling
INSTALLATION INSTRUCTIONS IMPERVIA SLIDING PATIO DOOR WITH FINS
 2008 Pella Corporation Part Number: 803V0101 INSTALLATION INSTRUCTIONS IMPERVIA SLIDING PATIO DOOR WITH FINS Installation Instructions for Typical Wood Frame Construction. These instructions were developed
Installation Recommendations for Finless Frame Doors
 Installation Recommendations for Finless Frame Doors These installation recommendations are made available by MI Windows and Doors, LLC (MI) to assist with the integration of finless or flange sliding
Owner s Manual LSP38 38 Lawn Sweeper
 Owner s Manual LSP38 38 Lawn Sweeper Manual Contents Safety Instructions Assembly Operation Maintenance Parts Warranty 2 4-13 2 11 14-15 16 Your Lawn Sweeper Congratulations on your purchase of a new Precision
INSTALLATION INSTRUCTIONS Super Scout PART #
 INSTALLATION INSTRUCTIONS Super Scout 71-80 PART #443-010 Thank you for purchasing Specialty s Convertible Top for your Scout vehicle. It has been designed for great fit and long wear. Please read and
INSTALL INSTRUCTIONS WELCOME TO THE NEWAGE PERFORMANCE CABINETRY SERIES NEWAGE STEEL WELDED CABINETRY
 NEWAGE STEEL WELDED CABINETRY WELCOME TO THE NEWAGE PERFORMANCE CABINETRY SERIES ALL CABINETS MUST BE MOUNTED TO STUDS ON A SECURE WALL, AS PER THESE INSTRUCTIONS. FAILURE TO DO SO MAY RESULT IN SERIOUS
Magnaline Systems Block Frame Installation Manual
 2515 Industry St. Oceanside, CA 92058 Magnaline Systems Block Frame Installation Manual Aluminum top and bottom track with either aluminum or vinyl panels Thank you for choosing Magnaline Systems! Congratulations!
Installation Guide for Andersen 400 Series Gliding Windows
 for Andersen 400 Series Gliding Windows Congratulations! You have just purchased one of the many fine Andersen products. Proper assembly, installation and maintenance are essential if the benefits of your
Stop! Read This Important Information.
 Stop! Read This Important Information. Stop, Do Not Proceed, Read This This door replacement kit is designed for the replacement of doors on a Supertop ONLY! This door will not work on any other style
INSTALLATION INSTRUCTIONS for Wood Patio Doors without Exterior Trim or Nailing Fin (JII027)
") Thank you for selecting JELD-WEN products. Attached are JELD-WEN s recommended installation instructions for wood patio doors without exterior trim or nailing fin. Read these instructions thoroughly before
Thank you for selecting JELD-WEN products. Attached are JELD-WEN s recommended installation instructions for wood patio doors without exterior trim or nailing fin. Read these instructions thoroughly before
INSTALLATION INSTRUCTIONS JEEP SCRAMBLER FAST TRAC TOP PART #108-21X
 INSTALLATION INSTRUCTIONS JEEP SCRAMBLER FAST TRAC TOP PART #108-21X Thank you for purchasing Specialty s Convertible Top for your Jeep vehicle. It has been designed for great fit and long wear. Please
Installation Instructions Kit, Base Rail Bracket Part # 31413
 Installation Instructions Kit, Base Rail Bracket Part # 31413 Dealer / Installer: End User: Provide a copy of these Instructions to the end user of this product. These Instructions provide important operating
INSTALLATION INSTRUCTIONS FOR TEUTONIC ENTRANCE DOOR RECOMMENDATIONS FOR COMMON INSTALLATION OF ENTRANCE DOORS.
 INSTALLATION INSTRUCTIONS FOR TEUTONIC ENTRANCE DOOR RECOMMENDATIONS FOR COMMON INSTALLATION OF ENTRANCE DOORS. Installer: DO NOT DISCARD Please leave the Installation Guide with the owner. Please read
4-lite Patio Door. Installation Instructions
 4-lite Patio Door Installation Instructions IMPORTANT: Read the instructions and familiarize yourself with the door parts and pieces before beginning assembly and installation. Note: Only the 5-0 x 6-8
CURATED CARTESIAN VANITY
 CURATED CARTESIAN VANITY CONTENT Prep the wall - 3 Frame installation - 5 Attaching the side kits - 7 Installing any optional vanity accessories - 7 Sink assembly - 8 Insert the drawer - 10 Attaching glass
Installation Guidelines for all Quaker products with nail fins New Construction nail fin installation with a Zip sheathing system.
 www.quakerwindows.com www.quakercommercialwindows.com PO Box 128 504 Highway 63 South Freeburg, MO 65035 800-347-0438 573-469-4151 (fax) Installation Guidelines for all Quaker products with nail fins New
INSTALLATION INSTRUCTIONS
 INSTALLATION INSTRUCTIONS BRONCO FAST TRAC TOP PART #331-210 BRONCO 1966-1977 Thank you for purchasing Specialty s Convertible Top for your Bronco. It has been designed for great fit and long wear. Please
Instruction Sheet D-CPU. Secure CPU Holder
 Instruction Sheet D-CPU Secure CPU Holder I-00457 Rev A PARTS LIST NOTE: Select Security Components when a more secure application is desired. Mounting Track with Mounting Tape Security Bracket Assembly
Installation of Fiberglass Windows
 Installation of Fiberglass Windows Before you begin please read and understand these installation instructions. The following installation instructions are recommended by Norwood and failure to follow
Please Do Not Return This Product To The Store!
 MODEL NO. T8176 QUICK SERVE 3000 TABLE TENNIS TABLE OWNER'S MANUAL 1. Read this manual carefully before starting assembly. Read each step completely before beginning each step. 2. Some smaller parts may
OWNER'S MANUAL. Please Do Not Return This Product To The Store!
 MODEL NO. T8190SA TABLE TENNIS TABLE OWNER'S MANUAL 1. Read this manual carefully before starting assembly. Read each step completely before beginning each step.. Some smaller parts may be shipped inside
INSTALLATION INSTRUCTIONS CJ-5 M38A PART # With Doors
 INSTALLATION INSTRUCTIONS CJ-5 M38A1 1955-1975 PART #109-011 With Doors Thank you for purchasing Specialty s Convertible Top for your Jeep vehicle. It has been designed for great fit and long wear. Please
limited lifetime warranty
 PRODUCT CARE PACKET bellmont 1900 series limited lifetime warranty At Bellmont Cabinet Company, we are proud of the quality, design and construction of our Bellmont 1900 series. We make every effort to
TARGA 7200 HORIZONTAL ROLLER INSTALLATION INSTRUCTIONS NOTE: Read instructions completely before attempting any installation.
 TARGA 7200 HORIZONTAL ROLLER INSTALLATION INSTRUCTIONS NOTE: Read instructions completely before attempting any installation. These instructions are provided as a general guide in the installation of CGI
INSTALLATION INSTRUCTIONS FOR FORGENT SLIDING PATIO DOORS RECOMMENDATIONS FOR COMMON INSTALLATION OF SLIDING PATIO DOORS.
 INSTALLATION INSTRUCTIONS FOR FORGENT SLIDING PATIO DOORS RECOMMENDATIONS FOR COMMON INSTALLATION OF SLIDING PATIO DOORS. Installer: DO NOT DISCARD Please leave the Installation Guide with the home owner
INSTALLATION GUIDE WOOD PIVOTING CIRCLE/ OVAL
 WOOD PIVOTING CIRCLE/ OVAL READ SPECIFIC INSTALLATION INSTRUCTIONS COMPLETELY BEFORE STARTING ANY INSTALLATION Failure to install and maintain our product according to these instructions will VOID any
694 SERIES NEO-ANGLE PIVOT SHOWER ENCLOSURE
 BATH ENCLOSURES An Alcoa Company Tel: 800-643-1514 Fax: 870-234-3181 www.alumaxbath.com 694 SERIES NEO-ANGLE PIVOT SHOWER ENCLOSURE INSTALLATION INSTRUCTIONS Copyright Alumax Bath Enclosures 1996. All
VYTEX PREMIUM SLIDING GLASS DOOR. Table of Contents. Precautions and Safety 2. Tools Required...3. Inspect and Prepare Door...4
 VYTEX PREMIUM SLIDING GLASS DOOR Table of Contents Precautions and Safety 2 Tools Required...3 Inspect and Prepare Door...4 Hardware and Parts Check List....4 Master Frame Assembly 5 Master Frame Installation..7
INSTALLATION INSTRUCTIONS DOUBLE-HUNG WINDOW WITH FINS
 2012 Pella Corporation INSTALLATION INSTRUCTIONS DOUBLE-HUNG WINDOW WITH FINS Part Number: 802L0105 Installation Instructions for Typical Wood Frame Construction. These instructions were developed tested
th St N Oak Park Heights, MN Phone: Fax:
 12430 55 th St N Oak Park Heights, MN 55082 Phone: 651.342.1756 Fax: 651.342.1293 Email: info@diacro.com SAFETY INFORMATION PG. 3 MAINTENANCE PG. 3 TECHNICAL DATA PG. 3 SET-UP PROCEDURE PG. 4 REMOVING
890 SERIES PIVOT STEAM DOOR
 BATH ENCLOSURES An Alcoa Company Tel: 800-643-1514 Fax: 870-234-3181 www.alumaxbath.com INSTALLATION INSTRUCTIONS 890 SERIES PIVOT STEAM DOOR Copyright Alumax Bath Enclosures 1997. All rights reserved.
2300 BI-FOLD INSTALLATION GUIDE
 2300 BI-FOLD INSTALLATION GUIDE INSTALLATION INSTRUCTIONS OF MAIN FRAME Header #8 x 2½ zinc coated screws 2 1 2 Jamb Jamb 1 1 3 #8 x 2½ zinc coated screws 4 1 4 3 #8 x 2½ zinc coated screws 5 Threshold
PEXTO NO. 137 & NO. 152 FOOT SQUARING SHEAR INSTRUCTIONS AND PARTS IDENTIFICATION
 PEXTO NO. 137 & NO. 152 FOOT SQUARING SHEAR INSTRUCTIONS AND PARTS IDENTIFICATION INSTRUCTIONS FOR ADJUSTING PEXTO FOOT SHEARS -- BEFORE OPERATING -- Remove Shears From Skids and Log in Place 1. This shear
Vinyl Windows and Doors
 Vinyl Windows and Doors Manufactured by Pella Corporation Installation Instructions for Replacement of Aluminum Sliding Doors in Hard Coat Stucco Applications. Part Number: V981555 2009 Pella Corporation
STACKING MULTI-SLIDE DOOR SYSTEM INSTALLATION INSTRUCTIONS
 STACKING MULTI-SLIDE DOOR SYSTEM INSTALLATION INSTRUCTIONS 1290363 Revision 1 12/16 Page 1 Weather Shield Mfg., Inc. NOTICE CAUTION! Failure to install and maintain our product according to these instructions
By SP Partners, LLC. INSTALLATION GUIDE. ProTech-12
 By SP Partners, LLC www.rainbowatticstair.com INSTALLATION GUIDE ProTech-12 IMPORTANT READ THIS FIRST Inspect stair for any damage prior to installation. Stair is NOT to be installed while home is under
Ventilation System. Installation Manual. Hog Slat Inc. Newton Grove, NC USA March
 Installation Manual 1 Tunnel Door Framing Instructions It is import to make sure the Tunnel Door opening is flat and plumb. A maximum variation of +/- ½ throughout the length of the opening is acceptable.
INSTALLATION INSTRUCTIONS - INSTRUCCIONES DE INSTALACION FOR HURRICANESHIELD IMPACT-RESISTANT DOUBLE-HUNG, SINGLE-HUNG AND SIMULATED-HUNG
 2008 Pella Corporation Part Number: 80ED0101 INSTALLATION INSTRUCTIONS - INSTRUCCIONES DE INSTALACION FOR HURRICANESHIELD IMPACT-RESISTANT DOUBLE-HUNG, SINGLE-HUNG AND SIMULATED-HUNG Instrucciones en español
Horizontal Shadings. Installation & Operating Instructions
 Horizontal Shadings Installation & Operating Instructions TABLE OF CONTENTS Getting Started: Mounting Types...3 Installation Components...3 Tools and Fasteners Needed...4 Product View...5 Installation:
Please read and understand all instructions before beginning. These instructions cover impact and non-impact aluminum French Door 650/750.
 The performance and proper operation of a door is only as good as the installation. By following these instructions, the probability of a good installation greatly increases. Please read and understand
ITEM#:DNSW5102J PK IMPORTANT, RETAIN FOR FUTURE REFERENCE: READ CAREFULLY. St. Thomas Swivel Rocking Dining Chair
 ITEM#:DNSW5102J-48019-2PK IMPORTANT, RETAIN FOR FUTURE REFERENCE: READ CAREFULLY St. Thomas Swivel Rocking Dining Chair Customer Service E-Mail : customerservice@foremostgroups.com 8:30a.m. 5:00p.m. EST,
Installation Guide for Andersen Frenchwood Patio Door Sidelights and Transoms
 for Andersen Frenchwood Patio Door Sidelights and Transoms Congratulations! You have just purchased one of the many fine Andersen products. Proper assembly, installation and maintenance are essential if
Installation Manual. Tamarack Solar Products. Top of Pole Mount Edition v1.01. For models:
 Mount Installation Manual 2016 Edition v1.01 For models: UNI-TP/06 UNI-TP/06LL UNI-TP/08 UNI-TP/08LL UNI-TP/10 UNI-TP/10LL UNI-TP/12 UNI-TP/12LL UNI-TP02-MAN Table of Contents 1 Introduction 1 2 Customer
Vinyl Hinged Door Installation Instructions Structure With Weather Resistant Barrier Applied Before Door Installation
 Vinyl Hinged Door Installation Instructions Structure With Weather Resistant Barrier Applied Before Door Installation IMPORTANT: Please read before you begin. Part No. 1221586 Install 262 02/08 Printed
Panoramic Door. Block Frame Installation Manual Aluminum top and bottom track with either aluminum or vinyl panels
 2515 Industry St. Oceanside, CA 92058 760-722-1250 www.panoramicdoors.com Panoramic Door Block Frame Installation Manual Aluminum top and bottom track with either aluminum or vinyl panels Signature Aluminum
Installation Instructions SRC OFF ROAD ROOF RACK Wrangler,97-06 Wrangler,04-06 Unlimited Part # s 76711,76713,76715)
") NOTE: Please read this information entirely before installing. To obtain correct installation, we recommend you follow these step-by-step instructions carefully. Please take care when installing this product
NOTE: Please read this information entirely before installing. To obtain correct installation, we recommend you follow these step-by-step instructions carefully. Please take care when installing this product
INSTALLATION & OWNER S MANUAL
 Rev. O p. 1 of 16 INSTALLATION & OWNER S MANUAL V4213 BALL CAGE KIT INSTALLATION & OWNER S MANUAL The contents of this envelope are the property of the owner. Be sure to leave with the owner when installation
Sun Windows General Information New Construction Sliding Door Installation Instructions H F
 A G B D C H F H E H A. Apply Weather Resistive Barrier B. Apply Bottom Flashing Tape C. Install Sill Pan End Caps & Pan D. Caulk Sides & Top Nailing Surface, Set Door, Fasten E. Apply Side Flashing Tape
Heavy Wall Applied Stop Tube Frame and Door Installation
 INSTALLATION INSTRUCTIONS Heavy Wall Applied Stop Tube Frame and Door Installation IMPORTANT: Read all instructions before beginning installation. These instructions are provided to help prevent installation