FABRICATION & INSTALLATION MANUAL
|
|
|
- Dorcas Lewis
- 6 years ago
- Views:
Transcription


1 FABRICATION & INSTALLATION MANUAL
2 INTRODUCTION PROForms and PROPlate Structural Shapes, PROGrid Molded Grating and PROGrate Pultruded Grating are designed to provide superior mechanical properties and corrosion resistance. This manual presents some of the fabrication techniques that are used when working with fiberglass reinforced polymer (FRP). The content of this manual is general in nature, but should provide you with a variety of useful information. Almost all fabrication methods currently used for wood, aluminum and steel are available for the fabrication of our FRP building materials. CONTENTS Suggested Hand Tools...5 Recommended Fabrication Practices...5 Machining Operations...6 Cutting or Sawing...6 Straight Cuts and Ripping...6 Circular or Curved Cuts...6 Cutting Bar Stock or Rod...6 Drilling...7 Routing...7 Punching...8 Shearing...9 Grinding...9 Sanding...9 Turning...9 Tapping and Threading...9 Mechanical Fastening...10 Adhesive/Bonded Connections...11 Repair Procedure for Mislocated Holes...12 Fabrication Procedures for Grating...13 Suggested Tools...13 Recommended Practices...14 PROGrid /PROGrate Fastening Methods
3 FABRICATION & INSTALLATION 3

4 4 FABRICATION & INSTALLATION

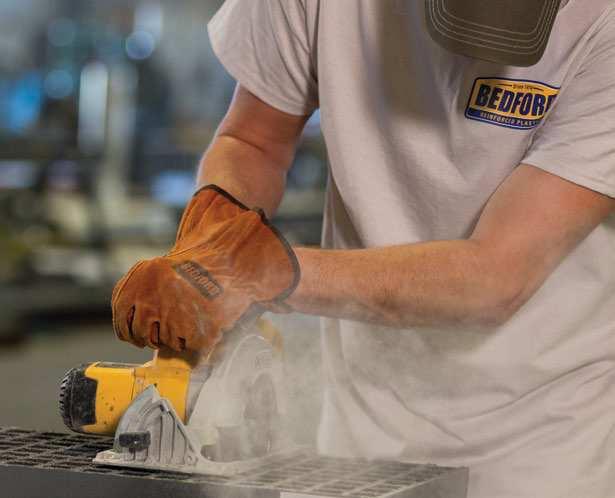
5 SUGGESTED HAND TOOLS Bedford recommends having the following tools on hand when doing light fabrication: DRILL / CIRCULAR SAW / JIG SAW / RECIPROCATING SAW / HAND GRINDER RECOMMENDED FABRICATION PRACTICES 1. Always follow common safety practices. Eye protection is a must. 2. FRP is dusty during fabrication. Wear a dust mask or a respirator and a long-sleeve shirt or coat. 3. FRP is extremely abrasive. Tools will wear rapidly, and frequent tool sharpening is common. 4. Diamond-coated router bits and saw blades are best for this application. 5. Always use appropriate machine speeds for each operation. The greater the thickness, the slower the cutting or drilling speed. 6. Avoid excessive pressure when sawing, drilling, routing, etc. Using too much force can rapidly dull the tool. 7. For adhesive fastening, prepare the surface properly for bonding. 8. Machines should be cleaned frequently. Dust and glass particles will build and become abrasive. 9. Mechanical fasteners and a good adhesive bond will provide the strongest connections. FABRICATION & INSTALLATION 5


6 MACHINING OPERATIONS Cutting or Sawing When performing any cutting operation, use light, evenly applied pressure. Excessive pressure tends to clog the blade with dust particles, and this will shorten the life of the blade. Cutting speed is very important. Cutting too fast will fray the edge of the material and may cause it to turn black. You will need to provide adequate support to keep the material from shifting as you make the cut. If the material is not supported properly, chipping will occur. A common masonry blade will work for small jobs. Straight Cuts and Ripping For small-volume work, a hand-held circular saw is good for on-site fabrication. A table saw is recommended for volume ripping and will provide a more accurate cut when equipped with the proper blade. A diamond-coated blade will produce the best results and helps ensure longer blade life. A radial-arm saw is good for large or thick sections. Circular or Curved Cuts Good results can be obtained using a saber saw or a band saw for small-volume cutting. Diamond-coated blades will increase production and lengthen the life of the blade. A hand router can also be used to cut curves and circles. When properly done, this method can produce excellent results, but it will remove considerably more stock. Carbide grit saw blades are recommended for jig saws or reciprocating saws. Cutting Bar Stock or Rod A hand-variety hacksaw is good for doing a limited number of cuts. A blade with 24 to 32 teeth per inch is effective, and light strokes should be used. A power hacksaw is better for cutting large quantities. Diamond abrasive blades or tungsten carbide blades will provide the best results; however, a chop saw with a diamond abrasive blade will also produce good results. 6


7 MACHINING OPERATIONS Drilling Drilling FRP profiles is an easy, routine operation. Any standard high-speed steel drill bit can be used, but it will require frequent sharpening. Properly sharpened brad-point bits provide excellent results. When drilling FRP, keep these tips in mind: The drill speed should be equivalent to those used for drilling hardwood. Carbide-tipped drills are recommended when drilling large quantities. Holes drilled in FRP are generally.002" under size. For large holes, a wood backup plate will reduce breakout on the back side of the hole. Routing A CNC router is typically used in the fabrication shop to quickly perform highly repetitive standard routing operations. A typical CNC unit can be programmed electronically to produce exact repetitive routing operations. Most routing is done with diamond-coated bits. Routers can be used to make straight cuts and angle cuts, as well as radius cuts. Both hand-held and table routers deliver excellent results, as router cuts tend to be smooth and even. Rotary file bits (either tungsten-carbide or diamond-coated) perform best when routing large quantities. Wood bits can be used, but they will require frequent sharpening and will wear out quickly. Light pressure should be used when making a cut. Forcing the bit causes the FRP to heat and soften, damaging the material. Forcing the cut can also damage the bit. FABRICATION & INSTALLATION 7


8 MACHINING OPERATIONS Punching FRP is an easy material to punch, depending on the thickness of the material. FRP will punch better than metal because it will spring back, whereas metal will bend. The tonnage required for punching FRP will vary depending on the material thickness, the size of the hole being punched, and the number of holes being punched at one time. Procedure It is important to note that dust will clog up the die almost instantly. To prevent this from happening, the clearance between the punch and the die especially on thicker materials will need to be between.010" and.020". It is normal for fibers to spring back after the hole is punched, and this will partially close the hole. For this reason, the hole sizing in FRP is typically oversized by as much as.020" to.030". Due to the abrasiveness of FRP, the punching method must compensate for several things: The punches will need to be sharpened often. The dies will need to be sharpened or replaced. The overall life of the tooling may be shorter than the equivalent for punching metal. It is common practice for punched holes in FRP to be drilled out in a secondary operation when tight tolerances are required. All plastics are NOT the same! It is possible to maintain extremely tight tolerances for some thermoplastics. Vinyl ester, polyester and epoxy thermoplastics are not as predictably tight. Tolerances often have to be generous. Mat-reinforced FRP can be punched to tighter tolerances than those containing high roving. FRP is resilient. The hold-down system will need to be designed to compensate for the resiliency of the material. Strippers may be required. Silicones or graphite are sometimes used to lubricate the punches. Lubrication will gather dust and fiber particles, and this will cause the punches to jam. 8


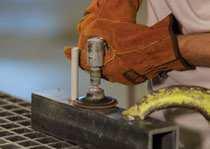
9 MACHINING OPERATIONS Shearing Shearing is possible, but is only recommended on material 3/16" or thinner. The shear blade should be designed so only a small portion of the cutting edge will penetrate the material at any one time. If a precise cut is needed, sawing the material will yield much better results than shearing can provide. All shearing should be done perpendicular to any continuous fibers. Grinding Grinding although not generally recommended is necessary for some operations, such as notching and touching up edges. During grinding operations, the dust tends to load the stone and stop the grinding process. Grinding may be used on any thickness of material, but a medium or coarse carbide grinding wheel will yield the best results. Keep in mind that the grinding wheel will need to be cleaned regularly. Any standard grinder may be used, although air-powered equipment is preferred. Use light pressure when grinding to prevent burning the part. Sanding Sanding works best when using an open-grit sandpaper (40 to 80 grit) on a high-speed sanding wheel. Do not force the sander; simply use light pressure against the FRP surface. Heavy pressure may heat up the FRP to the point where it may soften the resin. Air-powered equipment is readily available and provides good results. Turning FRP can be turned using standard metal working equipment. Carbide tool bits work best for large production runs. Standard tool steel cutters can be used for small-run machining operations. Round-nose lathe tools work best for a good finish. Single-point tools may tear the material. Dimensional tolerances should be comparable to cold-rolled steel tolerances. Feed and speed should compare to that used for aluminum or brass. Climb cutting will give the best-machined finish. Undercutting increases the tearing action when machining FRP. Adjust the surface speed depending on the hardness of the material for the desired finish. A continuous, steady rate of feed will give the best results; stopping and starting will leave the material noticeably marked. Tapping and Threading Threaded connections in FRP are satisfactory only when strength is not an important consideration. Threading is not recommended when high strength is required. An adhesive bond will greatly improve the strength of a threaded connection. Standard taps and dies can be used. When tapping blind holes, be sure to allow adequate clearance at the bottom of the hole to prevent the tap from bottoming out, as this will quickly damage the threads. FABRICATION & INSTALLATION 9


10 MECHANICAL FASTENING There are many ways to fasten FRP to FRP or FRP to other materials. Below are a few examples of the different methods that may be used. 1. Riveted Connections Rivets are available in many sizes, types and head styles. Options include nylon, aluminum, stainless steel, steel, copper, etc. The hole for the rivet must be drilled slightly larger than the rivet itself. 2. Screwed Connections Self-tapping screws work well in conjunction with adhesives. They will hold the material together until the adhesive has time to cure. Screws may be used alone, but will not provide a high-strength connection. 3. Bolt and Nut Connections This is a common method of connecting profiles. It is best to use flat washers on both sides of the bolted connection whenever possible, as this will help distribute the load. The strength of this connection will increase when an adhesive is applied to properly prepared mating surfaces. Threaded FRP rod and molded FRP nuts work well for corrosive applications. 4. Bolts and Threaded Holes FRP threads will wear quickly, so for best results, threaded metal inserts should be bonded in place. 5. Lag Screws These work well for fastening profiles to wood, but are not recommended when attaching FRP to FRP. 10


11 ADHESIVE/BONDED CONNECTIONS Adhesives can provide a very strong bond between two FRP shapes or between FRP shapes and many other structural materials. For best results, the mating surfaces must be properly prepared, and the recommended type of adhesive must be used. Adhesive should also be applied in a controlled environment, as air temperature and humidity can adversely affect the cure. Many types of adhesive work well with FRP materials. When choosing an adhesive, consider the open time and the clamp or fixture time that will work best for your application. Bedford has experienced excellent results with epoxy, methacrylate and urethane adhesives. For additional information, contact Bedford. The Material Safety Data Sheets should always be followed when working with adhesives. Proper preparation of the bonding surfaces is essential to ensure proper adhesion. Contaminated surfaces should be cleaned with a solvent, such as methyl alcohol, and wiped dry with a clean cloth prior to sanding. It is necessary to remove the surface veil by sanding the mating surfaces. An 80-grit sandpaper works well for this process. You will then need to remove any remaining dust from the surfaces to be bonded by wiping them with a clean, dry rag. Do not use a solvent-dampened rag, as this will contaminate your bonding surfaces and may cause your bond to fail. Follow the manufacturer s recommendations when mixing the adhesive. When applying the adhesive, you will need to spread a thin film of adhesive to both surfaces that are to be joined. Make certain the entire surface that is to be bonded is covered with adhesive. It will then be necessary to hold the bonded joints in position until the adhesive has time to cure. The clamp time will vary with the type of adhesive being used. Always follow the manufacturer s recommendations. Mechanical fasteners, such as self-tapping screws, rivets and/or bolts, can be used to maintain the bond pressure and hold freshly bonded joints in place when possible. In some instances, using mechanical fasteners may allow you to proceed with fabrication without waiting for the joint to cure. The use of clamps or weight alone will require you to allow time for the joint to cure before proceeding with fabrication or assembly. FABRICATION & INSTALLATION 11


12 REPAIR PROCEDURE FOR MISLOCATED HOLES One of the most common problems in fabrication is a hole in the wrong location. There are several reasons why this may occur, including an error on the print, a change in the design or shop errors. The following procedure will work well to repair the hole, as long as the new hole or holes do not intersect the plugged holes. Plugging Holes Using FRP Threaded Rod 1. Determine the smallest threaded rod size that will work to plug the hole and tap the hole for that size of threaded rod. In some cases, you may need to drill the mislocated hole larger for the tap to fit. 2. You will then need to apply adhesive to both the threaded rod and the tapped hole. 3. Screw the threaded rod into the hole and cut it off as close to the material as possible. 4. Grind any excess rod off flush to the part. 5. After the adhesive has cured, seal the area with resin Tap Hole Screw In Grind Off 12

 on takeoffs and layouts.")


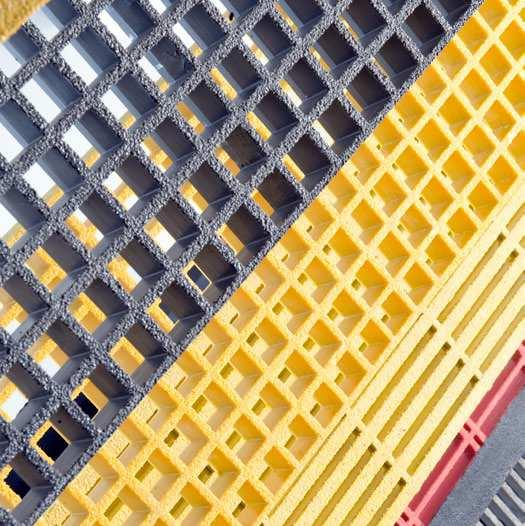
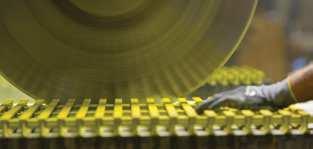
13 FABRICATION PROCEDURES FOR GRATING Working with Bedford PROGrate and PROGrid products is similar to working with wood, metals and plastics when it comes to tasks such as sawing, grinding, drilling and machining. For maximum accuracy, we recommend on-site fabrication. Remember to allow for saw kerf (usually 3/16") on takeoffs and layouts. To ensure the best appearance on your installation, cut panels to align with the bars on adjoining panels and leave a solid bar on all sides. Suggested Tools Power saw with a masonry or diamond blade Circular saw for straight cuts Jig saw for circular cuts Diamond grit blade for large fabrication jobs Sawhorses or platform support for cutting Tape measure Straightedge Chalk-line or felt-tip pen for marking cuts Sealing kit to seal cut edges FABRICATION & INSTALLATION 13


14 FABRICATION PROCEDURES FOR GRATING Recommended Fabrication Practices 1. Allow a minimum of 1-1/2" of support around all edges. 2. Use the recommended hold-down clips (see illustration at the end of this section), with a minimum of four clips per panel spaced a maximum of every 48". 3. Be sure to support the panel securely to prevent flexing or shifting during cutting. 4. Mark cuts clearly and carefully. Avoid splitting 1/4" and 5/16" bars. 5. Cut from the smooth side (bottom) of a grit-top panel. 6. Use steady, even pressure when cutting. Excessive pressure may cause heat and/or ragged edges. Replace dull blades to prevent heat buildup. 7. Use a sealing kit to coat all cut or sanded surfaces to prevent corrosive chemicals from reaching exposed glass fibers. Carefully read and follow the instructions included with the sealing kit. FABRICATION STEPS Marking Cutting Sealing 14


15 FABRICATION PROCEDURES FOR GRATING PROGrid /PROGrate Fastening Methods Support Around Cutout Areas It may be necessary to add additional super-structural supports around the cleanout area to support grating bearing bar ends. If it is not possible to add super-structural supports around the cutout area, the alternate method shown here is recommended. Position hold-downs on two uncut bearing bars beyond the cutout area. (The distance between hold-downs determines the required support bar length.) Secure hold-downs to the support bar. Saddle Clip Washer M Clip T Clip FABRICATION & INSTALLATION 15

16 EXPLORE OUR FULL LINE OF FRP SOLUTIONS Bedford offers a wide variety of structural products made of fiberglass-reinforced polymer, including PROForms shapes, PROGrid molded grating and PROGrate pultruded grating. Our staff of skilled engineering, design and manufacturing professionals is dedicated to helping our customers maximize the benefits of FRP. PRODUCTS Structural shapes Grating Decking Stairs and handrails Ladders and cages Fabricated structures SERVICES Engineering Design and drafting Fabrication, including CNC machining and assembly Secondary coating and painting In-house testing When you receive a ready-to-ship date from Bedford, it s GUARANTEED*. If we miss the promised ship date, we pay significant penalties back to you. We also offer Express Response options with shorter, guaranteed lead times. * Terms and conditions apply. Download our complete guarantee at bedfordreinforced.com or contact us for details. Ship date guarantees available in most areas. Ask Bedford for details. BEDFORD REINFORCED PLASTICS: ONE CORPORATE DRIVE, SUITE 106, BEDFORD, PA USA LOCATIONS NATIONWIDE: BEDFORD, PA CORONA, CA FRESNO, CA HOUSTON, TX TAVARES, FL SALT LAKE CITY, UT BEDFORDREINFORCED.COM Request a quote at bedfordreinforced.com or call /16
SECTION 19 FABRICATION
 Section 19 SECTION 19 FABRICATION Look for this blue line in the left margin of the Design Manual documents. This line shows you where the latest update has been made. 19-1 GENERAL FABRICATION CONSIDERATIONS
MAGNUM BOARD INTERIOR INSTALLATION GUIDELINES
 TECHNICAL BULLETIN No.: 090509-1405 Subject: Issue Date: September 4, 2009 Issue No.: II MAGNUM BOARD INTERIOR INSTALLATION GUIDELINES 1. CUTTING MAGNUM BOARD You can easily cut Magnum Board with carbide
L20500 REPAIR APPENDIX
 L20500 REPAIR APPENDIX Airglas, Inc. created this repair guidance to assist repair technicians in evaluating and repairing the L20500 skis, used on the UH-60 skis. WES LANDES (FOUNDER OF AIRGLAS, INC.
Agricultural Mechanics and Technology Power Tool Safety Rules
 Agricultural Mechanics and Technology Power Tool Safety Rules Name: BAND SAW Use: Cutting curves, circles and irregular shapes. 1. Use clean SHARP blades. 2. The teeth should always point DOWN. 3. Adjust
Extruded sheet (FF) #3 Other Methods of Cutting. Technical information. This brief gives advice for:
 #3 Other Methods of Cutting. Technical information. This brief gives advice for:") Technical information Extruded sheet (FF) WARNING: This product can expose you to chemicals including Ethyl acrylate, CAS 140-88-5, which are known to the State of California to cause cancer. For more
Technical information Extruded sheet (FF) WARNING: This product can expose you to chemicals including Ethyl acrylate, CAS 140-88-5, which are known to the State of California to cause cancer. For more
Traditional Undermount: S Method (Undermount):
:") TOOLS REQUIRED 15.1 TOOLS REQUIRED The installation of Corian shape product must be a precise and exacting process to ensure that a good fit is always created. Using the correct tools is essential. In
TOOLS REQUIRED 15.1 TOOLS REQUIRED The installation of Corian shape product must be a precise and exacting process to ensure that a good fit is always created. Using the correct tools is essential. In
woodworkersjournal.com MATERIAL LIST
 MATERIAL LIST T x W x L 1 Legs (2) 1 1 2" x 3 1 2" x 36 7 16" 2 End Uprights (2) 1 1 2" x 3 1 2" x 32 1 2" 3 Stringers (4) 1 1 2" x 3 1 2" x 42" 4 Top Cladding, Long (2) 3/4" x 7 1 4" x 65 3 4" 5 Side
September 10, 2009 Page 1 PRODUCT DESCRIPTION PRODUCT FEATURES
 September 10, 2009 Page 1 PRODUCT FEATURES BASIC USES/RELATED USES Interior decorative tile. Architectural tile for decorative wall surfaces, backsplashes and other applications. Custom architectural and
Installation Guide. Pionite Decorative Surfaces One Pionite Road, Auburn, Maine PIONITE ( )
") Installation Guide A Subsidiary of Panolam Surface Systems SMPBRO00-012 6/14 Pionite decorative laminates are designed for finished interior surfaces which require high impact, wear and stain resistance
Installation Guide A Subsidiary of Panolam Surface Systems SMPBRO00-012 6/14 Pionite decorative laminates are designed for finished interior surfaces which require high impact, wear and stain resistance
How-to-Install. Laminate Countertops and Sheet Laminate. FREE brochure Reverso en español
 FREE brochure Reverso en español How-to-Install Laminate Countertops and Easy to install instructions provided inside Multiple colors available for unique design options Durable and easy to care for Accessory
FUNDAMENTAL MANUFACTURING PROCESSES Plastics Machining & Assembly NARRATION (VO): NARRATION (VO): NARRATION (VO): INCLUDING: METALS,
: NARRATION (VO): NARRATION (VO): INCLUDING: METALS,") Copyright 2002 Society of Manufacturing Engineers --- 1 --- FUNDAMENTAL MANUFACTURING PROCESSES Plastics Machining & Assembly SCENE 1. CG: Plastics Machining white text centered on black SCENE 2. tape
Copyright 2002 Society of Manufacturing Engineers --- 1 --- FUNDAMENTAL MANUFACTURING PROCESSES Plastics Machining & Assembly SCENE 1. CG: Plastics Machining white text centered on black SCENE 2. tape
Salter Industries Spiral Stair
 Salter Industries Spiral Stair The Leader in Spiral Staircases Continuous Sleeve Stair Installation Instructions TOOLS NEEDED: 1. Electric drill with hex chuck and Phillips bit 2. Drill bits 1/8", 1/4",
Contents. pages 20-24: Installing Edge sinks into. custom laminate countertops page 8: Installing Edge sinks into postform laminate countertops
 Contents pages 2-8: Installing Edge sinks into custom laminate countertops page 8: Installing Edge sinks into postform laminate countertops pages 9-14: Installing Acrylic sinks into custom laminate countertops
Metals can be bought from suppliers in standardized forms and sizes, such as round,
 1.4 METAL CUTTING BAND SAWS: Metals can be bought from suppliers in standardized forms and sizes, such as round, rectangular or square bar stock or in the form of large sheets (plates). Bar stock normally
LuxCore Installation Instructions
 LuxCore Installation Instructions ATTENTION: LuxCore PANELS MUST BE ACCLIMATIZED FOR 24 HOURS BEFORE INSTALLATION PLEASE READ ALL INSTRUCTIONS PRIOR TO INSTALLATION The guidelines provided herein have
Installation Instructions for. Handrail Component System
 Handrail STEP-BY-STEP Installation Instructions for Handrail Component System Rise in Inches Run in Inches 8 8.5 9 9.5 10 10.5 11 11.5 12 12.5 13 13.5 14 14.5 15 8.5 47 45 43 42 40 39 38 36 35 34 33 32
Woodline USA Woodline Spacer Fence System
 Woodline USA Woodline Spacer Fence System MADE IN THE USA Includes: (1) ¼ Spacer Fence (1) 3/8 Spacer Fence (1) ½ Spacer Fence (1) Hardware Package (1) 3 Piece Brass bar set (2) Setup Blocks Visit Us Online
FABRICATION MANUAL CCM Copper Composite You discover why ALPOLIC Copper composite material (CCM) is the building material of the future as soon as
 is the building material of the future as soon as") FABRICATION MANUAL CCM Copper Composite You discover why ALPOLIC Copper composite material (CCM) is the building material of the future as soon as you fabricate it. Our CCM is as easy to fabricate as wood:
FABRICATION MANUAL CCM Copper Composite You discover why ALPOLIC Copper composite material (CCM) is the building material of the future as soon as you fabricate it. Our CCM is as easy to fabricate as wood:
Installation Instructions
 www.marlite.com Effective Date 03/01/2018 ARTIZAN FRP, SYMMETRIX FRP, ENVUE FRP, STANDARD FRP Installation Instructions Statements expressed in this technical bulletin are recommendations for the application
PRODUCT: LOKI INSTALLATION INSTRUCTIONS. Product is covered by U.S. patents. For more information visit
 R INSTALLATION INSTRUCTIONS PRODUCT: LOKI CONFIGURATION: SINGLE DOOR MOUNT: GLASS MOUNT Product is covered by U.S. patents. For more information visit www.krownlab.com . TOOLS + MATERIALS REQUIRED TOOLS
Installation Instructions
 CELEBRATING 50YEARS HIGH PERFORMANCE COMPOSITE SOLUTIONS Installation Instructions DynaRound Guardrail System Building the World to Last Installation Instructions The DynaRound Modular Guardrail System
15 Dovetail Jig. Instruction Manual. Part # 3452
 15 Dovetail Jig Instruction Manual Part # 3452 CAUTION: Please read, understand, and follow all manufacturers instructions, guidelines and owners manuals that come with your power tools. Peachtree Woodworking
BUILDING A STORM DOOR
 BUILDING A STORM DOOR BY NEAL BARRETT Illustrations by George Retseck If you're in the market for a storm door, you probably know that there are many styles and models available. However, most of them
REVISION LIST CHAPTER 25: AFT WINDOWS. The following list of revisions will allow you to update the Legacy construction manual chapter listed above.
 REVISION LIST CHAPTER 25: The following list of revisions will allow you to update the Legacy construction manual chapter listed above. Under the Action column, R&R directs you to remove and replace the
Repairs. Chapter 10 Repairs 10. 1
 10 Repairs Chapter 10 Repairs 10. 1 Repairs As an installer, you will probably be called upon to repair damage to a resilient floor. Here are some of the most common problems and the recommended repairs
12. Wings, Flaps, Ailerons and Struts
 12. Wings, Flaps, Ailerons and Struts Fit Aileron Hinges Reference: Drawing 20270K2 Photo 12.1 Parts Required: 2007092 Aileron LS 200809N Aileron RS 2001394 Hinge 3/16 A1 (4) 2001694 Hinge Pin (4) PH0059N
MANUFACTURE GUIDELINES
 PRE-INSTALLATION CHECKS Ensure cabinets are fitted correctly and level prior to installing the Evostone work surface. It is a condition of the Evostone 10 year limited warranty that before any fabrication
1. TOOLS + MATERIALS REQUIRED
 R INSTALLATION INSTRUCTIONS PRODUCT: BALDUR + ODEN CONFIGURATION: BI-PARTING DOOR MOUNT: TOP MOUNT Product is covered by U.S. patents. For more information visit www.krownlab.com. TOOLS + MATERIALS REQUIRED
Sheet Metal Tools. by:prem Mahendranathan
 Sheet Metal Tools by: SHEET METAL TOOL KIT SHEET METAL TOOLS Rivet Gun 3/32, 1/8, 5/32, 3/16",Cupped Set Mini Bucking Bar Footed Heel-Toe Bucking Bar Air Tool Oil Mechanics Tool Bag High-Speed Air Drill
ANCHOR PLATE ATTACHMENT STEEL STUD FRAMING OR FURRING CONSTRUCTION WITH ACCESS FROM PANEL SIDE ONLY
 ANCHOR PLATE ATTACHMENT STEEL STUD FRAMING OR FURRING CONSTRUCTION WITH ACCESS FROM PANEL SIDE ONLY INSTALLATION MATERIALS No. 8 Phillips Head Tek Screws Glazier's horseshoe shaped shims 1/16 inch, 1/8
HANDRAIL HEIGHT PER LOCAL CODE AUTORITY
 WITH WOOD END CAPS PLEASE READ PLEASE READ THESE INSTRUCTIONS THOROUGHLY PRIOR TO BEGINNING THE INSTALLATION! 3" [77.3mm] THIS INSTRUCTION SHEET IS INTENDED TO PROVIDE A SPECIFIC GUIDE TO FOLLOW FOR THE
ASSIGNMENT 4. Textbook Assignment: The point, edge, face, heel, and tang are the five parts of which of the following tools?
 ASSIGNMENT 4 Textbook Assignment: "Files," "Grinders and Sharpening Stones," "Scrapers," "Awls," "Bolt and Cable Cutters," "Glass Cutters," "Knives,' 'Pipe Cutting and Threading Tools," "Tube Cutting and
Manufacturing Processes (continued)
") Manufacturing (continued) Machining Some other processes Material compatibilities Process (shape) capabilities Manufacturing costs Correct pg 142, question 34i should read Fig 6.18 question 34j should
Manufacturing (continued) Machining Some other processes Material compatibilities Process (shape) capabilities Manufacturing costs Correct pg 142, question 34i should read Fig 6.18 question 34j should
Balustrade Systems / Installation Instructions
 A. PARTS AND SUPPLIES NEEDED FOR INSTALLATION Hardware included for each 10 section of rail: 2 3 x 1-1/2 L-brackets 4 1-3/4 x 3/16 Blue hex-head screws for anchoring the L-brackets to the newel cap, column
Clearview Railing System Installation Instructions
 Clearview Railing System Installation Instructions Disclaimer: AGS Stainless, Inc. has its Clearview Railing Systems designed by a professional engineer to meet the requirements of the latest national
Instructables Butcher Block Top
 Instructables Butcher Block Top Project Overview: This project requires basic woodworking skills and access to woodworking machines. Woodworking machines have sharp cutting edges and are NOT forgiving.
All Terrain Flares 2014 Chevy Silverado
 Page 1/8 Components: 1. Front Flares (2) 2. Rear Flares (2) Tools required: - Utility knife - #2 Phillips driver - Socket wrench - 13 mm Socket - 6 mm Allen Wrench - T-15 Torx bit - Trim Removal Tool -
PRO CYC PRO CYC, INC. SYSTEM SUPER 1.5QS
 Assembly Instructions System Super 1.5QS Congratulations on your decision to use the world s most advanced and user-friendly cyclorama system. We have taken a great deal of care to create and ship your
VIEWpanel Technical Manual
 VIEWpanel Technical Manual VIEWpanel is a prefabricated panel comprising 0.21 aluminium skin (1100 alloy) both sides, apart from our lite grade, which is 0.12 aluminium skin both sides and a polyethylene
TENSILKUT ENGINEERING
 TENSILKUT ENGINEERING For Accurate Test Specimens Manufacturer of equipment for the accurate preparation of physical test specimens since 1955 SIEBURG INTERNATIONAL, INC. 1901 Clydesdale Street, Maryville,
PARTS INCLUDED IN FIXED STAIR CABLE RAIL KIT:
 175 SERIES FIXED STAIR CABLE RAIL - INSTALLATION INSTRUCTIONS PARTS INCLUDED IN FIXED STAIR CABLE RAIL KIT: FIXED STAIR TOP RAIL (1) A FIXED STAIR BOTTOM RAIL (1) B D UPPER SADDLE BRACKET (1) C BRACKET
College of Forestry 610: Power Tools
 College of Forestry 610: Power Tools Safety Policy & Procedure Manual Section 600: Workshops and Shop Tools Effective: 01 January 2007 Revised: August 2014 PURPOSE The purpose of this section is to provide
Guild of Oregon Woodworkers Shop Safety Test
 Guild of Oregon Woodworkers Shop Safety Test You must pass the Test with an 80% or better and self-correct it to 100% Make sure you put the answers under the correct portion of the answer sheet for the
PRODUCT: BALDUR + ODEN
 R INSTALLATION INSTRUCTIONS PRODUCT: BALDUR + ODEN CONFIGURATION: SINGLE DOOR MOUNT: GLASS MOUNT Product is covered by U.S. patents. For more information visit www.krownlab.com . TOOLS + MATERIALS REQUIRED
REINFORCING THE CORNERS OF FLAT FRAMES
 REINFORCING THE CORNERS OF FLAT FRAMES There are a number of different methods that may be used to join flat frame sides together. As most Woodworkers know, end grain glue joints are not nearly as strong
Sandpaper Product Guide. Premium Automotive Aftermarket Quality Complete Selection of Hand & Power Sanding Accessories Excellent Value
 Sandpaper Product Guide Premium Automotive Aftermarket Quality Complete Selection of Hand & Power Sanding Accessories Excellent Value Index Introduction to Abrasives Abrasive Components... 3 Sandpaper
Durabrac Gable Bracket Installation Guide
 Durabrac Gable Bracket Installation Guide Durabrac vinyl gable brackets are manufactured from high quality natural white vinyl with UV inhibitors. There are currently six styles and three sizes to choose
Tripanel Marine Technical Bulletin
 Tripanel Marine Technical Bulletin Figure 1 Cabinet joints can be accomplished by four methods: a) rabbet one panel to the proper thickness of joining panel and epoxy joint b) dado to thickness of joining
Hose Hanger Cold Metal Work
 Hose Hanger Cold Metal Work Name: Date: Description: A cold metal project that gives students practice sheering, bending, drilling, and fastening steel. The hose hanger can be used for proper storage of
BLADE REPAIR INSTRUCTION BOOKLET
 BLADE REPAIR INSTRUCTION BOOKLET Contents Section I: Section II: Section III: Section IV: Section V: Section VI: Removing a Blade Refer to this section if you need to remove the blade from an oar shaft.
7th/8th Grade Industrial Tech General Safety. Give your undivided attention to the machine in which you are using.
 7th/8th Grade Industrial Tech General Safety Wood Lab Safety General Safety Always wear safety glasses. Report all injuries to the instructor. No baggy clothing or open toed shoes. Give your undivided
Endura-Stone Installation Instructions
 Endura-Stone Installation Instructions 1. Measure the total distance from the bottom of the beam to the platform. 2. Using a jack and post, jack up the beam only enough to remove the sting post, no more
Retrofit Apron Front Farm Sink With Dual Mount Capability Installation Instructions
 For Under-Mount Installation please refer to page 14 FOR EXPERIENCED AND PROFESSIONAL INSTALLATION ONLY This installation project is designed for an advanced skill level. Disclaimer: Undermount Application
Lumber Smith. Assembly Manual. If you are having problems assembling the saw and need assistance, please contact us at:
 Lumber Smith Assembly Manual If you are having problems assembling the saw and need assistance, please contact us at: 804-577-7398 info@lumbersmith.com 1 Step 1 Safety Carefully read the Owners Manual.
Installation Instructions for. Before You Begin TOOLS REQUIRED
 Composite Railing System STEP-BY-STEP Installation Instructions for Spectrum Composite Railing Virtually maintenance free 20-year warranty EverNew Spectrum Railing system is designed to work with a number
INSTALLATION INSTRUCTIONS. Level Rail With Cap: Page 2 Level Rail Without Cap: Page 8 Stair Rail: Page 12
 INSTALLATION INSTRUCTIONS Level Rail With Cap: Page 2 Level Rail Without Cap: Page 8 Stair Rail: Page 12 LEVEL RAIL WITH CAP The testing was performed in accordance with procedures and methods referenced
Table saws are not recommended for cutting sheets larger than 4'X4' I size.
 Aluminum Composite Panel (Fabrication) Considerable care should be taken in the layout and handling of Aluminum Composite Panel. The use if coolants or lubricants are not required when sawing. A. Sawing
Extendable Large Dovetail Jig
 Extendable Large Dovetail Jig Instruction Manual Part # 3458 CAUTION: Please read, understand, and follow all manufacturers instructions, guidelines and owners manuals that come with your power tools.
Solid Carbide Tools. Composite Tools. Performance by Design. ISO 9001 Certified Company
 Solid Carbide Tools Composite Tools Performance by Design ISO 9001 Certified Company As one of the world s largest manufacturers of solid carbide rotary cutting tools, SGS Tool Company has pioneered some
SAFETY INFORMATION PACKET
 WILLOWCREEK MIDDLE SCHOOL SAFETY INFORMATION PACKET GENERAL SHOP SAFETY 1 WIDE BELT SANDER 2 BAND SAW 3 MITER SAW 4 UP- CUT SAW 4 PLANER 6 TABLE SAW 7 DRILL PRESS 8 LATHE 8 DISK / VERTICAL BELT SANDER
Fortress Fe Posts must always be secured to the deck framing. Fortress Fe Posts should never be attached to only the deck boards.
 Installation Instructions for Fortress Horizontal Cable Panel System with UB-05 Brackets and Fe Posts It is the responsibility of the installer to meet all code and safety requirements, and to obtain all
10. Wing prep and subassembly
 Date Section Objective: Construct and fabricate the sub-assemblies of the wing panel. Required Parts: Wing left 11gal PN104-300, Wing right 1gal PN104-400, Wing left 15 gal option PN104-322, Wing right
LAMINEX manages to introduce PETG SPECTAR in to domestic and foreign markets, and has become the only extruder in Mexico.
 PetG SPECTAR LAMINEX manages to introduce PETG SPECTAR in to domestic and foreign markets, and has become the only extruder in Mexico. Eastman is a global specialty chemical company that produces a broad
1. VERIFY ALL COMPONENTS
 R INSTALLATION INSTRUCTIONS RAGNAR+ODEN FACE MOUNT, BYPASSING. VERIFY ALL COMPONENTS BASE KIT Track stand-offs Front trolley kit * Rear trolley kit * Allen keys Track fastener kit - wood - Bottom guide
Linear Wood Grille Ceiling Systems
 Linear Wood Grille Ceiling Systems Installation Manual Designed and Engineered by:decoustics www.decoustics.com sales@decoustics.com Linear Wood - Dowel Grille Note: Ceiling shown features a 3/4" (19mm)
Tuf-Lite III Fans 5000K Series Hub
 Tuf-Lite III Fans 5000K Series Hub INSTALLATION MANUAL Hudson Tuf-Lite III fan blades Adjustable Pitch Fan Assembly 20 thru 30 Diameter Hudson Tuf-Lite III fan blades are of single piece fiberglass reinforced
USER MANUAL PRO & HOME SERIES (Radius Shoulder Profile)
") USER MANUAL PRO & HOME SERIES (Radius Shoulder Profile) Dual Blade Tenon Cutters Lumberjack Tools Inc. PO Box 730 Chippewa Falls, WI 54729 www.lumberjacktools.com Email: info@lumberjacktools.com Phone:
USER MANUAL PRO & HOME SERIES (Radius Shoulder Profile) Dual Blade Tenon Cutters Lumberjack Tools Inc. PO Box 730 Chippewa Falls, WI 54729 www.lumberjacktools.com Email: info@lumberjacktools.com Phone:
Additional Parts List:
 THE TIME MACHINE Additional Parts List: In addition to the cast resin parts enclosed in this kit, there should also be a plastic bag containing the following items needed to complete your time machine
#85-2-5A: PAINT STRIPPING AND FINISH ANALYSIS AND CORRECTION - (Aug 7, 1985)
") #85-2-5A: PAINT STRIPPING AND FINISH ANALYSIS AND CORRECTION - (Aug 7, 1985) "Please discard previous bulletin 85-2-5 due to this updated information." The corrosion protection provided by the factory
#85-2-5A: PAINT STRIPPING AND FINISH ANALYSIS AND CORRECTION - (Aug 7, 1985) "Please discard previous bulletin 85-2-5 due to this updated information." The corrosion protection provided by the factory
Makrolon Solid Polycarbonate Sheets
 1. General remarks Tools sheets can be machined using the standard tools commonly used for metal and woodworking. We recommend carbide-tipped tools. Above all, it is important to use sharp cutting tools
PRO CYCTM PRO CYC, INC. SYSTEM 1.5 FS
 ASSEMBLY INSTRUCTIONS Congratulations on your decision to use the world s most advanced and user-friendly cyclorama system. We have taken a great deal of care to create and ship your cyc, so please take
Tuf-Lite III Fans 3000K Series Hub
 Tuf-Lite III Fans 3000K Series Hub INSTALLATION MANUAL Adjustable Pitch Fan Assembly 11 thru 15 Diameter Hudson Tuf-Lite III fan blades Hudson Tuf-Lite III fan blades are of single piece fiberglass reinforced
HANDRAIL HEIGHT PER LOCAL CODE AUTHORITY
 WITH OPTIONAL S.S. S PLEASE READ PLEASE READ THESE INSTRUCTIONS THOROUGHLY PRIOR TO BEGINNING THE INSTALLATION! THIS INSTRUCTION SHEET IS INTENDED TO PROVIDE A SPECIFIC GUIDE TO FOLLOW FOR THE INSTALLATION
Fabrication and Installation
 Fabrication and Installation Fabrication and Installation 1. Processing methods 24 2. Installation procedures 25 3. Precautions on fabrication and installation (Important) 28 4. Examples of installation
TURNING A PEN ORIGINAL BY MIKE RUDE REVISED BY GORDON PATNUDE - AUGUST 2015, OCTOBER 2016 EQUIPMENT AND SUPPLIES NEEDED
 TURNING A PEN ORIGINAL BY MIKE RUDE SEPT 2006 REVISED BY GORDON PATNUDE - AUGUST 2015, OCTOBER 2016 PHOTOGRAPHY BY JIM GOTT AUGUST 2015 EQUIPMENT AND SUPPLIES NEEDED A PEN TURNING TUTORIAL [this document]
Side Winder R o u t e r L i f t.
 Woodpeckers PRECISION WOODWORKING TOOLS Side Winder R o u t e r L i f t. INSTALLATION INSTRUCTIONS The wrench handle must be pointing left in order to fully insert or remove it. Lift Wrench Once fully
Catalog October Speedi-Sleeve The quickest and most economical way to repair worn shafts
 Catalog 457027 October 2005 Speedi-Sleeve The quickest and most economical way to repair worn shafts Table of Contents The Speedi-Sleeve concept...3 SPEEDI-SLEEVE, the quickest and most sensible way to
Tuf-Lite III Fans 5000K Series Hub
 Tuf-Lite III Fans 5000K Series Hub INSTALLATION MANUAL Hudson Tuf-Lite III fan blades Adjustable Pitch Fan Assembly 20 thru 30 Diameter Hudson Tuf-Lite III fan blades are of single piece fiberglass reinforced
PolyCarb has good resistance to many chemicals. Some chemicals may harm the PolyCarb sheets. Contact us when in doubt about any chemical.
 Polycarbonate Panels This manual provides the basic information for working with and installing PolyCarb sheets. Due to their hollow core, prior preparation is needed before the actual installation, with
PORCH RAIL INSTALLATION INSTRUCTIONS. Level Rail... 2 Stair Rail... 8 Care & Maintenance, Finishing... 15
 PORCH RAIL INSTALLATION INSTRUCTIONS Level Rail... 2 Stair Rail... 8 Care & Maintenance, Finishing... 15 COMPONENT LIST LEVEL RAIL KIT Porch Rail was designed to meet the most stringent building codes.
ABRASIVE CATALOGS. Application: Weld dressing Cutting off smoothing of Casting Can be applied on various kind of Steel and non-ferrous materials
 ABRASIVE CATALOGS Reinforced Depressed Centre Grinding Discs are excellently fabricated depressed centre grinding discs that are exclusively available in varying diameters of 4-9 in different thickness.
SlipGrip Data Sheet & Installation Guide
 SlipGrip Data Sheet & Installation Guide Stair Treads Landing Covers Flat Sheets 9/2015 SlipGrip Technical Data Description SlipGrip products are high performance safety stair treads, landing covers and
PRO CYC PRO CYC, INC. SYSTEM SUPER 3EZ
 ASSEMBLY INSTRUCTIONS SYSTEM SUPER 3 EZ Congratulations on your decision to use the world s most advanced and user-friendly cyclorama system. We have taken a great deal of care to create and ship your
INSTALLATION INSTRUCTIONS FOR D'SHANNON AVIATION LEFT AND RIGHT FORWARD SIDE WINDOWS
 INSTALLATION INSTRUCTIONS FOR D'SHANNON AVIATION LEFT AND RIGHT FORWARD SIDE WINDOWS 1. a.) Remove plastic moldings by removing #2 trim screws (Late Model) b.) Remove small #1 trim screws and remove metal
Ball-Joint Scrapers Steel Blade Carbide Blade 05K K21.04
 Ball-Joint Scrapers Steel Blade Carbide Blade 05K21.01 05K21.04 The Veritas Ball-Joint Scraper is based on a tool originally made by L.S. Starrett Tool Company but out of production for many years. Originally
Processing and design Solid Textile Board
 Processing and design Solid Textile Board List of contents Introduction Kerfing Joints and assembly Increasing thickness and stiffness Edges Cutting Milling and drilling Three-dimensional pressing Surface
2. Sanding the Modules Sand the entire surface of each cyc module with 60-grit sandpaper. This will provide for better paint adhesion.
 ASSEMBLY INSTRUCTIONS SYSTEM SUPER 2.5 EZ Congratulations on your decision to use the world s most advanced and user-friendly cyclorama system. We have taken a great deal of care to create and ship your
Make a Portable Hibachi
 Metal Work Description The purpose of this activity plan is to introduce students to the metal shop through a practical activity. Students will gain valuable knowledge in using power tools and equipment
Working with Wood and Wood Materials
 Working with Wood and Wood Materials Excerpt from the Bosch Encyclopedia of Power Tools. Written & Published by ROBERT BOSCH GmbH and Robert Bosch Tool Corporation. The grain direction of the fibers determines
Build a Drill Press Vise
 Youth Explore Trades Skills Introduction This activity plan will develop the student s machining and metalworking skills as they fabricate a multi-piece steel vise. The project will encompass basic lathe
User Manual. CMT650 Kitchen Worktop Jig CMT Part no:
 User Manual CMT650 Kitchen Worktop Jig www.cmtuk.com Part no:200650 www.axminster.co.uk CMT650 Index of Contents... Page No. Index of Contents...02 What s in the Box.........03 What else you will need...
Written by Frank Garcia Ver. 2
 Written by Frank Garcia frankg670@gmail.com 3-18-2017 Ver. 2 Preparing Copper Or Brass inlay wire. The Copper or Brass wire which is used with this inlay technique is flat. The wire can be purchased from
INSTALLATION GUIDE VERSION 11/14
 INSTALLATION GUIDE VERSION 11/14 In this guide we will demonstrate effective techniques and methods for installing EDGE stainless steel sinks seamlessly in both laminate and solid surface. These techniques
SCULL HANDLES AND GRIPS INSTRUCTION BOOKLET
 SCULL HANDLES AND GRIPS INSTRUCTION BOOKLET Contents Section I: Scull Grip Replacement: Fixed Handle or 10 cm Length Adjustment System Refer to this section if you need to replace the grips on your fixed
SINKS AND LAVATORIES. Steps to completion: These items are essential for installing all sinks:
 DUPONT CORIAN SOLID SURFACE FABRICATION/INSTALLATION FUNDAMENTALS NA/ENGLISH SINKS AND LAVATORIES INTRODUCTION This bulletin discusses installing DuPont Corian solid surface sinks and lavatories. OVERVIEW
UNIT No FRAMELESS PIVOT SHOWER DOOR
 INSTALLATION INSTRUCTIONS UNIT No. 3600 FRAMELESS PIVOT SHOWER DOOR NEED INSTALLATION HELP? Call 1-800-45-BASCO (452-2726) Monday - Friday 8:00 A.M. - 4:30 P.M. Eastern Time QCI0020 Rev. 3 Page 1 of 8
Tuf-Lite II Fans 3000H Series Hub
 Tuf-Lite II Fans 3000H Series Hub INSTALLATION MANUAL Adjustable Pitch Fan Assembly 5 through 14 Diameter Hudson Tuf-Lite II Fan Blades Hudson Tuf-Lite II (white, prev. Blue**) are made from fiberglass
*Before starting, please read entire manual *Changes can be made in order for this manual to work for you. 3 x 6 I-Beam
 *Before starting, please read entire manual *Changes can be made in order for this manual to work for you 3 x 6 I-Beam Follow all applicable sections of the attached Manufacturing Plan. Objectives: Understand
Posi-Bend ROTARY BENDING SOLUTIONS
 Lowers tooling costs Reduces setup time Produces bends over 90 Bends UHS steel Eliminates cam tooling to produce over bends Flexible and interchangeable Reduces down time Requires lower tonnage than traditional
Introduction to Manufacturing Processes
 Introduction to Manufacturing Processes Products and Manufacturing Product Creation Cycle Design Material Selection Process Selection Manufacture Inspection Feedback Typical product cost breakdown Manufacturing