INFITTING & OVERLAP HINGED DOORS
|
|
|
- Garry Cain
- 6 years ago
- Views:
Transcription


1 INFITTING & OVERLAP HINGED DOORS INSTALLATION MANUAL


2 INSTALLATION MANUAL HERCULES INFITTING & OVERLAP HINGED DOOR OUR COMPLETE LINE TESTED & APPROVED Vertical Lift Bi-Parting Sliding BUILDING CERTIFICATION & GREEN TARGETS INDOOR ENVIRONMENTAL QUALITY LIFE-CYCLED BENEFITS Hinged-Infit & Overlap Horizontal Sliding 2
3 HERCULES INFITTING & OVERLAP HINGED DOOR INSTALLATION MANUAL CONTENTS I. Important Notice 4 Figure 1: Infitting Door with Flush Sill 5 Figure 2: Infitting Door with High Sill 6 Figure : Overlap Door with Flush Sill 7 Figure 4: Overlap Door with High Sill 8 Figure 5: Double Infitting Door with Flush Sill 9 Figure 6: Double Infitting Door with High Sill 10 II. Installation Procedure 1 1. Installing Door 1 2. Electrical hookup of heat circuits (for freezer applications only) 15. Final Inspection 15 III. General Maintenance 17 IV. Troubleshooting Malfunctions & Problems 19 V. Parts List Parts Figure 1: Heater Details for lnfitting Door with Flush Sill 20 Parts Figure 2: Heater Details for lnfitting & Overlap Door with High Sill 21 Parts Figure : Gasket Assembly for Infitting Doors 22 Parts Figure 4: Gasket Assembly for Overlap Doors 2 Parts Figure 5: Hinge Assembly for Infitting Doors 24 Parts Figure 6: Latch Assembly for Infitting Door 24 Parts Figure 7: Hinge Assembly for Overlap Doors 25 Parts Figure 8: Latch Assembly for Overlap Doors 25 Parts Figure 9: Outside Release Assembly for Overlap Doors 26 Parts Figure 10: Inside Release Assembly for Overlap Doors 27

4 INSTALLATION MANUAL HERCULES INFITTING & OVERLAP HINGED DOOR IMPORTANT I NOTICE Before beginning installation, please read this manual in its entirety. This door has been designed and built to provide years of trouble-free service in heavy duty commercial and warehouse operations. This Installation Manual may be used for all of the following door types: Infitting Door with Flush Sill Infitting Door with High Sill Overlap Door with Flush Sill Overlap Door with High Sill Double Infitting Door with Flush Sill Double Infitting Door with High Sill Reference to the following figures will provide general specifications for your model. Sub-assemblies are provided for rapid installation and adjustment. 4
5 HERCULES INFITTING & OVERLAP HINGED DOOR INSTALLATION MANUAL INFITTING DOOR WITH FLUSH SILL Figure 1 All freezer doors must have separate 120 Volt supply for heater cables Jamb depth Metal clad door Hardware Backing Hinge Buck opening = H.I.C. + 2 Latch Metal clad casing H.I.C. Pull handle Polyiso Insulation Sweeper gasket Buck opening = W.I.C W.I.C. Return Safety jamb release Gasket Wallside Jamb depth Note: Left swing shown, right swing opposite. Note: Heat in three () sides of frame and in bottom of door (freezers only) Hingeside Polyiso Insulation Note: Doors 60 x 84 and over will be required to use a floor roller with non-camlift hinges 5
6 INSTALLATION MANUAL HERCULES INFITTING & OVERLAP HINGED DOOR INFITTING DOOR WITH HIGH SILL Figure 2 All freezer doors must have separate 120 Volt supply for heater cables Jamb depth Metal clad door Hinge Buck opening = H.I.C. + 4 Latch Metal clad casing Hardware Backing H.I.C. Pull handle Polyiso Insulation Sweeper gasket Buck opening = W.I.C. + 4 W.I.C Return Safety jamb release Gasket Wallside Jamb depth Note: Left swing shown, right swing opposite Polyiso Insulation Hingeside 6
7 HERCULES INFITTING & OVERLAP HINGED DOOR INSTALLATION MANUAL OVERLAP DOOR WITH FLUSH SILL Figure All freezer doors must have separate 120 Volt supply for heater cables Jamb depth Hinge Latch Metal clad door Metal clad casing Hardware Backing Buck opening = H.I.C. + 2 Outside handle H.I.C. Pull handle Polyiso Insulation Sweeper gasket Buck opening = W.I.C W.I.C. Gasket Inside Handle Polyiso Insulation Wallside Return jamb Hingeside Jamb depth Note: Left swing shown, right swing opposite. Note: Heat in three () sides of frame and in bottom of door (freezers only) Note: Doors 60 x 84 and over will be required to use a floor roller with non-camlift hinges 7
8 INSTALLATION MANUAL HERCULES INFITTING & OVERLAP HINGED DOOR OVERLAP DOOR WITH HIGH SILL Figure 4 All freezer doors must have separate 120 Volt supply for heater cables Jamb depth Hinge Latch Buck opening = H.I.C. + 4 Metal clad casing Metal clad door Outside handle H.I.C. Polyiso Insulation Buck opening = W.I.C. + 4 = W.I.C. Gasket Inside Handle Return jamb Wallside 9-4 Jamb depth Note: Left swing shown, right swing opposite Polyiso Insulation Hingeside 8
9 HERCULES INFITTING & OVERLAP HINGED DOOR INSTALLATION MANUAL DOUBLE INFITTING DOOR WITH FLUSH SILL Figure 5 All freezer doors must have separate 120 Volt supply for heater cables Jamb depth Hardware Backing Hinge Metal clad casing Latch Pull handle H.I.C. Metal clad door panel Polyiso Insulation Sweeper gasket Buck opening = W.I.C. + 4 W.I.C. Inactive Leaf Active Leaf Buck opening = H.I.C Return jamb Wallside Safety release Gasket Jamb depth Hingeside Polyiso Insulation 9
10 INSTALLATION MANUAL HERCULES INFITTING & OVERLAP HINGED DOOR DOUBLE INFITTING DOOR WITH HIGH SILL Figure 6 All freezer doors must have separate 120 Volt supply for heater cables Jamb depth Header Latch Hinge Latch Metal clad casing Hardware Backing H.I.C. Cane Bolt Metal clad door Polyiso Insulation Buck opening = W.I.C W.I.C. Buck opening = H.I.C. + 4 Inactive Leaf Active Leaf Wallside Safety Release Gasket Jamb depth Polyiso Insulation Hingeside 10

11 HERCULES INFITTING & OVERLAP HINGED DOOR INSTALLATION MANUAL 11

12 INSTALLATION MANUAL HERCULES INFITTING & OVERLAP HINGED DOOR 12
13 HERCULES INFITTING & OVERLAP HINGED DOOR INSTALLATION MANUAL II INSTALLATION PROCEDURE I. Installing Door a ) The opening of the door frame must be plumb, level and square. b) Apply Butyl caulk to the back of the door frame to provide a seal between the frame and the wall before installing the frame in the opening as shown in Figures 8-9 on page 14. c) If the floor slopes, start by setting the high side of the door frame first and shim to raise the other side so that the top of the door frame opening is level. d) Plumb as shown in Figure 7 and attach securely to door bucks. Make sure the inside of the door frame is plumb and square to ensure proper sealing of the door against the frame. e) Before mounting all bolts in frame, hang the door in the frame and check position of latch & strike (Door frame may need to be shifted to the left or right to level the latch to the strike). Note: Ensure the door is level in the opening of the frame. Figure 7 Mounting door in opening Left Side View Wall Shim if not plumb Door frame Top View Shim if not plumb Door frame Wall Door panel Vapor seal with caulking by installer Door panel Plumb line Floor Note: If walls are not plumb and parallel, shim as required. Note: If mounting walls are not on the same surface plane, shim as required. 1
14 INSTALLATION MANUAL HERCULES INFITTING & OVERLAP HINGED DOOR f) Mount frame to wall as shown in Figures 8-9 below for frames with and without an inside casing. g) Once door is securely mounted apply sealant in all seams to provide vapor seal. h) Open door and check for freedom of movement. i) For flush sill doors, trim the neoprene foam gasket running down the sides at the bottom of the door so that it is flush with the floor as shown in Figure 10. Figure 8 Door frame mounting - with inside casing 8 Carriage bolt with nut and washer Inside vertical casing Lumber Sealant Butyl calk (typical) Lumber or channel trim Wall Outside vertical casing Note: All caulking is field applied. Butyl caulk between wall and frame and sealant in seams. Figure 9 Door frame mounting - without inside casing Sealant Butyl calk (typical) Lumber or channel trim Wall Outside vertical casing 8 Lag screw Lumber Note: All caulking is field applied. Butyl caulk between wall and frame and sealant in seams. 14
15 HERCULES INFITTING & OVERLAP HINGED DOOR INSTALLATION MANUAL Figure 10 Neoprene foam gasket trimming Neoprene foam gasket Neoprene sweep gasket Front View Trim Neoprene foam gasket only Side View 2. Electrical hookup of heat circuits (for freezer applications only) 1) Before proceeding, check to see that available power supply (voltage and phase) matches that on name plate located adjacent to junction box on door frame. 2) Consult local electrical codes before proceeding with installation. ) Note: This unit must be properly grounded. A separate power supply (120V) is needed for each door. 4) Connect proper voltage to lead wires provided (Black, White, Green) as stated on name plate to junction box(es) mounted on door frame. (See Parts Figures 1 & 2) 5) If applicable, make sure that jumper cable is installed between door frame and door panel.. Final Inspection 1) Make sure door is plumb, level and square. This is critical for proper seal. If necessary to increase the pressure on the perimeter gasket, adjust the latch strike to the seal. 2) Recheck all steps above. Inspect door and frame. Make sure that door can travel freely (manually) from full closed to full open without obstruction. ) When installation is complete, store this manual in a safe place for future reference. 15
16 16
17 HERCULES INFITTING & OVERLAP HINGED DOOR INSTALLATION MANUAL III GENERAL MAINTENANCE a) Maintenance on door parts should be performed as specified in the table shown below: Door Part Time Frame Maintenance Lubrication Every 6 months The frequency of lubrication is governed by the environmental conditions at the location of the door. The self-lubricating bushings, in normal service, need not be lubricated. However, it is recommended that a few drops of light oil periodically be used on all moving parts. Door gaskets and inner edge of door Latches, strikes, fasteners (includes all hardware) Every months Every months Clean gaskets to allow for smooth contact between door and gaskets. (Soap and water is recommended for cleaning) Check and re-tighten as required. Sealant Every months During the life of the door it is possible for the factory sealant in the seams and joints to come loose, either from abuse or normal use. It is critical that all seams and joints are kept vapor tight at all times Inspect seams and joints (of door, window, and frame) for loose or missing sealant. Approved sealant must be applied if replacement is necessary. Failure to do so will affect watertight integrity and cause deterioration of the door. Failure to maintain sealant will void the warranty. Special care must be taken in areas that are washed down with de-greasing chemicals. Electrical components must be protected and lubricants must be washed from the operator and other moving parts immediately to prevent permanent damage. 17


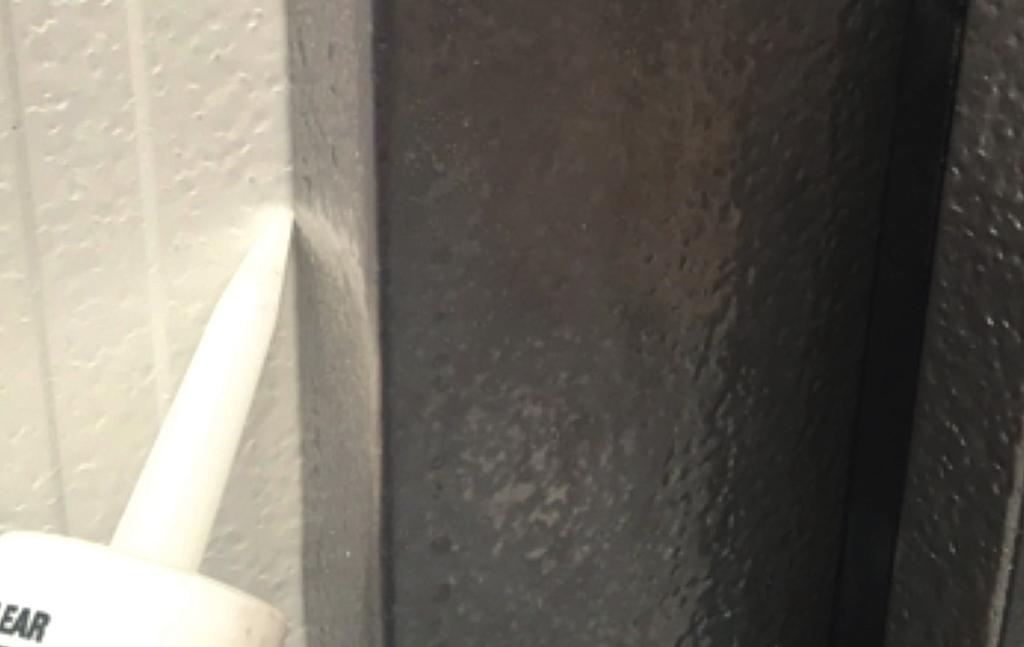
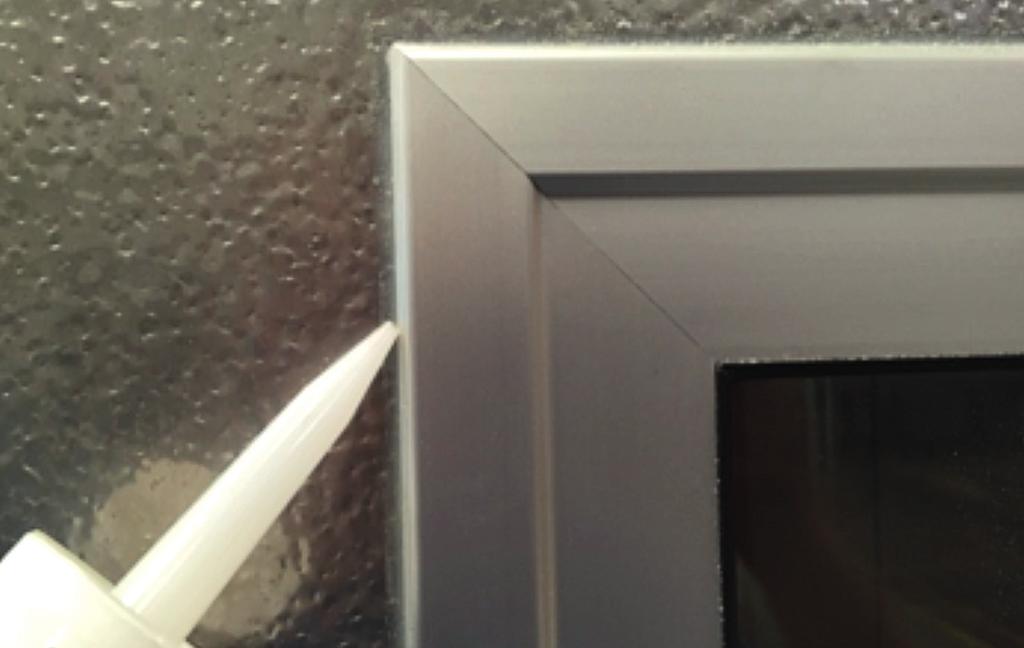
18 INSTALLATION MANUAL HERCULES INFITTING & OVERLAP HINGED DOOR b) R eference pictures 1. Re-tightening latches, strikes etc Sealant replacement

19 HERCULES INFITTING & OVERLAP HINGED DOOR INSTALLATION MANUAL IV TROUBLESHOOTING MALFUNCTIONS & PROBLEMS All door assemblies are thoroughly tested and inspected before leaving our factory. If a problem develops when the door is first installed, it is recommended that the installation manual be read through carefully again to determine whether an error has been made in the installation process. If you require further assistance, please contact us at the address and phone number below: Kingspan Insulated Panels, Inc. 726 Summerhill Drive Deland, FL Phone (86) info@kingspanpanels.us 19
20 INSTALLATION MANUAL HERCULES INFITTING & OVERLAP HINGED DOOR PARTS V LIST The Parts List is provided for your convenience when ordering replacement parts. Please use the model and serial number of your door when ordering parts, as this will expedite shipment of required parts and avoid unnecessary correspondence. Parts Figure 1: Heater for Infitting Door with Flush Sill (Freezer only) Detail: Heat in frame Detail: Heater cable routing Part No Description 1 Aluminum Heater Cover Extrusion 2 Aluminum Foil Tape Heater Wire 4 Heater Wire Channel Extrusion 5 20 Ga. Galv Trim 6 Bell Box (Three Hole) 7 Jumper Cable 8 PVC Tubing 20
21 HERCULES INFITTING & OVERLAP HINGED DOOR INSTALLATION MANUAL Parts Figure 2: Heater for Infitting and Overlap Door with High Sill (Freezer only) Detail: Heat in frame Detail: Heater cable routing Part No Description 1 Aluminum Heater Cover Extrusion 2 Aluminum Foil Tape Heater Wire 4 Heater Wire Channel Extrusion 5 Bell Box (Three Hole) 21
22 INSTALLATION MANUAL HERCULES INFITTING & OVERLAP HINGED DOOR Parts Figure : Gasket Assembly for Infitting Doors Perimeter door gasket Sweep gasket - Flush sill only 2 1 Part No Description 1 Neoprene Sweep Gasket x 2 2 Hollowcore Neoprene Gasket x Note: Double sweep gasket for freezer doors only. 22
23 HERCULES INFITTING & OVERLAP HINGED DOOR INSTALLATION MANUAL Parts Figure 4: Gasket Assembly for Overlap Doors Perimeter door gasket Sweep gasket - Flush sill only 2 1 Part No Description 1 Neoprene Sweep Gasket x 2 2 Neoprene Foam Gasket x 2
24 INSTALLATION MANUAL HERCULES INFITTING & OVERLAP HINGED DOOR Parts Figure 5: Hinge Assembly for Infitting Doors 1 Part No Description 1 Hinge Base 2 Hinge Butt 2 4 #14 x Phillips Head Screw 4 #14 x 1 4 Phillips Head Screw Parts Figure 6: Latch Assembly for Infitting Doors 2 1 Part No Description 1 Latch Base 2 Latch Strike #14 x 1 4 Phillips Head Screw 24
25 HERCULES INFITTING & OVERLAP HINGED DOOR INSTALLATION MANUAL Parts Figure 7: Hinge Assembly for Overlap Doors Part No Description 1 Hinge Base 2 Hinge Butt 8 x Cap Bolt 4 8 Flange Nut Parts Figure 8: Latch Assembly for Overlap Doors 1 2 Part No Description 1 Latch Strike 2 Latch Base #14 x 1 4 Phillips Head Screw 4 Bolt Lock 4 25
26 INSTALLATION MANUAL HERCULES INFITTING & OVERLAP HINGED DOOR Parts Figure 9: Outside Release Assembly for Overlap Doors 1 2 Part No Description 1 Outside Release Handle 4 2 Outside Release Handle Bracket #14 x 1 4 Phillips Head Screw 4 Outside Handle Pin 26
27 HERCULES INFITTING & OVERLAP HINGED DOOR INSTALLATION MANUAL Parts Figure 10: Inside Release Assembly for Overlap Doors Part No Description 1 Inside Release Handle 2 Inside Release Handle Bracket #14 x 2 Phillips Head Screw 4 Plastic Block - Freezer Doors only 27
28 Kingspan Insulated Panels 726 Summerhill Drive Deland, FL Phone (86) /17
EXTRUTECH PLASTICS, INC. Custom Extruder of Close Tolerance Profiles
 PVC SINGLE DOOR INSTALLATION INSTRUCTIONS Single Pre-Hung Doors are shipped assembled in most cases ready for installation. Check the sill; in some cases you may want a sill in this door or if not requested
Pocket Door Installation Instructions
 Installation Instructions Before getting started: Read instructions thoroughly. Be sure that you have the necessary tools and materials before starting the installation. Consult your local building code
ICU TRACKLESS SLIDING DOOR
 Interior View 0 Installation Instructions Tools Required: Screwdrivers Small Straight (Flat Blade) - for Terminal Block wiring # Phillips (Crosspoint) - for various #8, #0, and #4 screws Wrenches / Sockets
INSTALLATION INSTRUCTIONS KK-K9-F14-K K9 KIT FOR FORD EXPEDITION
 INSTALLATION INSTRUCTIONS KK-K9-F14-K-32 32 K9 KIT FOR 2003-2016 FORD EXPEDITION TOOLS REQUIRED: Power Drill Drill Bit Set Standard & Metric Socket Sets Phillips Screw Driver Open End Wrench Set Wire Cutters
INSTALLATION INSTRUCTIONS KK-K9-C12-K CHEVY IMPALA
 INSTALLATION INSTRUCTIONS KK-K9-C12-K 2000-2005 CHEVY IMPALA READ ALL INSTRUCTIONS PRIOR TO INSTALLATION TOOLS REQUIRED: Power Drill Drill bits1/4 and 5/32 7/l6 wrench and socket 15,18 and\or 19mm socket
Acoustical Surfaces, Inc.
 RECEIVING 1. Immediately inspect shipment for damage during transit, for example: damage caused by fork lifts, stacking, water stains etc. and disclose to delivery driver prior to signing for receipt.
INSTALLATION INSTRUCTIONS IMPERVIA SLIDING PATIO DOOR WITH FINS
 2008 Pella Corporation Part Number: 803V0101 INSTALLATION INSTRUCTIONS IMPERVIA SLIDING PATIO DOOR WITH FINS Installation Instructions for Typical Wood Frame Construction. These instructions were developed
STACKING MULTI-SLIDE DOOR SYSTEM INSTALLATION INSTRUCTIONS
 STACKING MULTI-SLIDE DOOR SYSTEM INSTALLATION INSTRUCTIONS 1290363 Revision 1 12/16 Page 1 Weather Shield Mfg., Inc. NOTICE CAUTION! Failure to install and maintain our product according to these instructions
Fold-A-Way Patio Door ASSEMBLY & INSTALLATION GUIDE
 Fold-A-Way Patio Door ASSEMBLY & INSTALLATION GUIDE This instruction guide provides the minimum recommended procedures to correctly prepare the rough opening, install a fold-a-way patio door unit and apply
INSTALLATION INSTRUCTIONS and OPERATIONS & MAINTENANCE MANUAL for SUPER SIMPLEX DISAPPEARING STAIRWAYS
 INSTALLATION INSTRUCTIONS and OPERATIONS & MAINTENANCE MANUAL for SUPER SIMPLEX DISAPPEARING STAIRWAYS Precision Ladders, LLC P. O. Box 2279 Morristown, TN 37816-2279 Phone: (423) 586-2265 Fax: (423) 586-2091
FOLDING DOOR - FOR FACTORY ASSEMBLED JAMBS WITH APPLIED SILL
 FOLDING DOOR - FOR FACTORY ASSEMBLED JAMBS WITH APPLIED SILL READ SPECIFIC INSTALLATION INSTRUCTIONS COMPLETELY BEFORE STARTING ANY INSTALLATION Failure to install and maintain our product according to
Phone # La Jolla Doors. Block Frame Installation Manual Aluminum Frame with either Vinyl or Aluminum Panels
 Phone # 800-440-8785 www.lajolladoors.com La Jolla Doors Block Frame Installation Manual Aluminum Frame with either Vinyl or Aluminum Panels Thank you for choosing La Jolla Doors In this manual you will
INS A KSCR INSTALLATION INSTRUCTIONS STANDARD PROCEDURE. 1. Unpacking the KSCR Splicing the KSCR (If Required)...
...") INS-88.500-0A KSCR INSTALLATION INSTRUCTIONS STANDARD PROCEDURE 1. Unpacking the KSCR... 2 2. Splicing the KSCR (If Required)... 4 3. Assemble Curb and Rail Corners... 5 4. Install Cross Bracing (If Required)...
INS-88.500-0A KSCR INSTALLATION INSTRUCTIONS STANDARD PROCEDURE 1. Unpacking the KSCR... 2 2. Splicing the KSCR (If Required)... 4 3. Assemble Curb and Rail Corners... 5 4. Install Cross Bracing (If Required)...
INSTALLATION INSTRUCTIONS
 TOOLS REQUIRED: Level Square Phillips Screw Driver Slot Screw Driver Pliers Clamp PARTS PROVIDED: Frame Installations Screws. 4 per door. (#8 x 1-3/4 ) Sex Bolt. 4 per frame joint. Torque Lever 2 Shelf
WPS crew Doors Installation instructions
 WPS-132-133 crew Doors Installation instructions ORDER OF INSTALLATION FOR A COMPLETE ENCLOSURE OF A CREW WPS (Weather Protection System) IS AS FOLLOWS: 1. Heater 2. Rear Thresholds - Right Hand & Left
Heavy Wall Applied Stop Tube Frame and Door Installation
 INSTALLATION INSTRUCTIONS Heavy Wall Applied Stop Tube Frame and Door Installation Read all instructions before beginning installation. These instructions are provided to help prevent installation problems
Chapter 12 - Windows and Doors
 Chapter 12 - Windows and Doors Contents Chapter 12 - Windows and Doors... 12-1 Timing & Prerequisites... 12-2 Verifying Windows and Doors Orders... 12-3 Windows... 12-4 Prepare the Window Openings... 12-4
Sun Windows General Information New Construction Hinged Door Installation Instructions
 A G H F H H A. Apply Weather Resistive Barrier B. Apply Bottom Flashing Tape C. Install Sill Pan End Caps & Pan D. Caulk Sides & Top Nailing Surface, Set Door, Fasten E. Apply Side Flashing Tape F. Apply
Swing Door Installation Manual
 Manual 20D/35D/50D 20DH/35DH 40M/50M 25FD 35XT 50XT 01-4000-03 2010 YKK AP America Inc. is a subsidiary of YKK Corporation of America. TABLE OF CONTENTS Installation Notes.......................................
Senior Swing. Caution
 *740132* 740132 2800 Overhead Concealed Series 9500 Surface Applied Series Senior Swing Installation Instructions Caution LCN Senior Swing The Senior Swing Power Operator System is a low energy product
ESA-300 Full Breakout
 Interior View 0 Installation Instructions For use with ESA II Controler DORMA AUTOMATICS, Inc. 94 Sherwood Drive Toll-Free: 877-67-6 DL844-00 Lake Bluff, IL 60044 Fax: 877-4-7999 Rev. /07 Tools Required:
INSTALLATION GUIDE. TRANZFORM Sound TRANZFORM Space
 INSTALLATION GUIDE TRANZFORM Sound TRANZFORM Space Cornell Iron Works, Inc. 100 Elmwood Ave. Crestwood Industrial Park Mountain Top, PA 18707 Phone: 800.233.8366 or 570.474.6773 Fax: 800.526.0841 INSTALLATION
Installation Guide. Evolve bi-fold. 8. Door restrictor- optional p9. 1. Before you start p2. 9. Adjustment. 2. Measuring and surveying p2
 Evolve bi-fold Installation Guide 1. Before you start p2 8. Door restrictor- optional p9 2. Measuring and surveying p2 3. Configuration details p4 4. Installation p5 5. Glazing p5 6. Glazing packer details
INSTALLATION INSTRUCTIONS RH 412 STEEL DOORS
 By following the steps outlined below, the assembly, installation and adjustment of the steel doors, will be a simple process. Let s start with the Driver Side. Note: Having the hood open makes the job
IMPACT DOOR 3000 SERIES. This Manual Covers All Doors Shipped To Date, Except For Revised Jamb Guards.
 IMPACT DOOR 3000 SERIES This Manual Covers All Doors Shipped To Date, Except For Revised Guards. PRINTED IN U.S.A. PUBLICATION NO. 3400C EMAIL: PRINTSHOP@RITEHITE.COM JANUARY 2010 INTRODUCTION TABLE OF
INS A KSR INSTALLATION INSTRUCTIONS STANDARD PROCEDURE. 1. Verify Curb Installation Required Installation Tools...
 INS-88.300-0A KSR INSTALLATION INSTRUCTIONS STANDARD PROCEDURE 1. Verify Curb Installation... 2 2. Required Installation Tools... 2 3. Unpacking the KSR... 3 4. Attach KSR Bottom Rail to Curb... 5 5. Attach
Installation Manual For ToddPod Outdoor Shower Enclosures
 Installation Manual For ToddPod Outdoor Shower Enclosures Contact us at 888-545-9763 or email us at office@toddpod.com with any questions during the installation process. Our service team is available
Shetland Stalls Installation Instructions
 Shetland Stalls Installation Instructions RAMM Horse Fencing and Stalls 13150 Airport Hwy. Swanton, OH 43558-9615 1-800-434-8456 Rev. 1/9/18 Before you start Kit can accommodate up to 12 wide stall front
K9 KIT INSTALLATION INSTRUCTIONS CROWN VIC KK-K9-F7-K
 K9 KIT INSTALLATION INSTRUCTIONS 1998-2011 CROWN VIC KK-K9-F7-K TOOLS REQUIRED: Power Drill (Cordless preferable) Drill Bit Set Standard Wrench and Socket Set Metric Socket Set Screwdriver Set Torx Bit
Atrium Patio Door Field Service Manual
 Atrium Patio Door Field Service Manual December 2005 Table of contents Service Agreement Pg 2 Release Agreement Pg 5 Inspection form Pg 6 Warranty Pg 8 Replacing swing panel Pg 12 Replacing sliding panel
ICU TRACK SLIDING DOOR
 Interior View 0 Installation Instructions Tools Required: Screwdrivers Small Straight (Flat Blade) - for Terminal Block wiring # Phillips (Crosspoint) - for various #8, #0, and # screws Wrenches / Sockets
VYTEX PREMIUM SLIDING GLASS DOOR. Table of Contents. Precautions and Safety 2. Tools Required...3. Inspect and Prepare Door...4
 VYTEX PREMIUM SLIDING GLASS DOOR Table of Contents Precautions and Safety 2 Tools Required...3 Inspect and Prepare Door...4 Hardware and Parts Check List....4 Master Frame Assembly 5 Master Frame Installation..7
Series 7600 Installation Instructions Aluminum Multi-Slide Door (Pocketing)
") Series 7600 Installation Instructions Aluminum Multi-Slide Door (Pocketing) Things to Know Before You Start Things to Know Before You Start Removal of Old Fenestration Products Ensure any old fenestration
Series 7600 Installation Instructions Aluminum Multi-Slide Door (Pocketing) Things to Know Before You Start Things to Know Before You Start Removal of Old Fenestration Products Ensure any old fenestration
2300 BI-FOLD INSTALLATION GUIDE
 2300 BI-FOLD INSTALLATION GUIDE INSTALLATION INSTRUCTIONS OF MAIN FRAME Header #8 x 2½ zinc coated screws 2 1 2 Jamb Jamb 1 1 3 #8 x 2½ zinc coated screws 4 1 4 3 #8 x 2½ zinc coated screws 5 Threshold
Thermally Broken Framing and Door Installation
 INSTALLATION INSTRUCTIONS Thermally Broken Framing and Door Installation IMPORTANT: Read all instructions before beginning installation. These instructions are provided to help prevent installation problems
INSTALLATION INSTRUCTIONS
 INSTALLATION INSTRUCTIONS Thermally Broken Framing and Door Installation SL-450TB (2" x 4-1/2" with 1" Glazing) & SL-600TB (2" x 6" with 1" Glazing) IMPORTANT: Read all instructions before beginning installation.
Sliding Glass Door Assembly and Installation Guide
 Sliding Glass Door Assembly and Installation Guide Index Door System Components and Hardware The following components are needed to complete the installation of your Sliding Patio Door unit. Check all
FIG. #1 - ASD-90 & USD-90 Shower Door Assembly
 Installation Instructions for the Accent/Euro Collection FIG. #1 - ASD-90 & USD-90 Shower Door Assembly #1021 #1021 1 23 25 2 #1020 6 5 12 #1020 9 24 9 8 Hinge Assembly 2109, 2201, 2212, 2213, 2220 7 Please
Frameless Inline Door With Return QCI5263
 INSTALLATION INSTRUCTIONS Frameless Inline Door With Return QCI5263 WALL MOUNT HINGES FRAMELESS DOOR / PANEL / RETURN PANEL QCI5263 REV. 0 Page 1 Certified 06/17/2016 Parts List with wall mount hinges
RH-412 STEEL DOORS INSTALLATION INSTRUCTIONS
 RH-412 STEEL DOORS INSTALLATION INSTRUCTIONS By following the steps outlined below, the assembly, installation and adjustment of the steel doors, will be a simple process. Let s start with the Driver Side.
INSTALLATION INSTRUCTIONS K9-C20-32 & K9-C CHEVROLET 4 DOOR TAHOE, GMC YUKON, SUBURBAN and YULON XL
 INSTALLATION INSTRUCTIONS K9-C20-32 & K9-C21-32 2007-2014 CHEVROLET 4 DOOR TAHOE, GMC YUKON, SUBURBAN and YULON XL TOOLS REQUIRED: Power drill Drill bit set Standard & metric socket sets Phillips screwdriver
Metal & Vinyl, Flush Mount and Recessed Fin Windows Recommended Installation Instructions
 PO Box 480 Ph: 417-235-7821 Monett, MO 65708 Fax: 417-737-7140 Metal & Vinyl, Flush Mount and Recessed Fin Windows Recommended Installation Instructions These installation instructions are recommendations
2. Skid should contain the following: A door & jamb B casing C seal cover kit & D extension jamb set (if ordered), E hardware box.
, E hardware box.") RECEIVING 1. Immediately inspect shipment for damage during transit, for example: damage caused by fork lifts, stacking, water stains etc. and disclose to delivery driver prior to signing for receipt.
RECEIVING 1. Immediately inspect shipment for damage during transit, for example: damage caused by fork lifts, stacking, water stains etc. and disclose to delivery driver prior to signing for receipt.
Vinyl Windows and Doors Manufactured by Pella Corporation
 Vinyl Windows and Doors Manufactured by Pella Corporation Part Number: V981255 2009 Pella Corporation INSTALLATION INSTRUCTION - INSTRUCCIONES DE INSTALACIÓN FOR BOW WINDOWS WITHOUT HEAD AND SEAT BOARD
Motorized or Crank Operated Fortress Zipper Track Shade with Housing and Side Track Installation Instructions
 Motorized or Crank Operated Fortress Zipper Track Shade with Housing and Side Track Installation Instructions Tools Needed Drill 3/8 Metal Drill Bit ¼ Masonry Drill Bit Measuring Tape Pencil 4 Level Phillips
K9 KIT INSTALLATION INSTRUCTIONS CROWN VIC with Fire Suppression System Model KK-K9-F7-K-FS
 K9 KIT INSTALLATION INSTRUCTIONS 2005-2011 CROWN VIC with Fire Suppression System Model KK-K9-F7-K-FS TOOLS REQUIRED: Power Drill (Cordless preferable) Drill Bit Set Standard Wrench and Socket Set Metric
4-lite Patio Door. Installation Instructions
 4-lite Patio Door Installation Instructions IMPORTANT: Read the instructions and familiarize yourself with the door parts and pieces before beginning assembly and installation. Note: Only the 5-0 x 6-8
FIB-R-MAX STANDARD SINGLE DOOR
 FIB-R-MAX STANDARD SINGLE DOOR Style 1, 4, 4.4 and 11 Unitized Single Door Assembly By Fib-R-Max for Existing Openings 1. Set the crate, which will be marked with the specific opening location, at the
1200 SERIES 2 PANEL DOOR rev.1 DETAILED INSTALLATION INTRUCTIONS
 1200 SERIES 2 PANEL DOOR 10.2013 rev.1 DETAILED INSTALLATION INTRUCTIONS GENERAL: Door elevations shown in these instructions are as viewed from the outside. X denotes the active or moving panel(s). O
Aluminum Clad Wood Window 1/2 Reinforced Field Mulling and Stacking Supplement
 Aluminum Clad Wood Window 1/2 Reinforced Field Mulling and Stacking Supplement 1 Aluminum Clad Wood Window 1/2 Reinforced Field Mulling and Stacking Supplement The following instructions are a supplement
SLIDING GLASS DOOR ASSEMBLY INSTRUCTION Series 680/780
 10/07 M0200030 GENERAL NOTICE READING THESE INSTRUCTIONS FIRST AND FOLLOWING THE PROCEDURES IN PROPER SEQUENCE WILL REDUCE FRUSTRATION, COSTLY MISTAKES AND WASTED TIME. Protect main frame only with light
TRUE TECHNICAL SERVICE MANUAL - ALL MODELS. DOORS/DRAWERS/LIDS
 DOORS/DRAWERS/LIDS 55 56 NOTES DOORS/DRAWERS/LIDS Swing s 73 74 NOTES INSTALLATION OF A GDM-SWING DOOR Phillips Head Screwdriver (2) - 1/8" Drift Punches (forged) Top Bracket NOTE: It may be necessary
Chapter 12 - Windows and Doors
 Chapter 12 - Windows and Doors Contents Chapter 12 - Windows and Doors... 12-1 Timing & Prerequisites... 12-2 Verifying Windows and Doors Order... 12-3 Windows... 12-4 Prepare the Window Openings... 12-4
DROPTRAC INSTALLATION INSTRUCTIONS
 DROPTRAC INSTALLATION INSTRUCTIONS SLIDING FLOOR GUIDE SLIDING WALL GUIDE BIPARTING WALL GUIDE BIPARTING FLOOR GUIDE DOOR COMPANY 413 HOWARD BLVD. NEWPORT, NC 28570 1.888.833.3667 FAX 252.223.1116 WWW.FRANKDOOR.COM
Contemporary 3 Panel Classic 5 Panel French Panel
 Contemporary 3 Panel Classic 5 Panel French Panel (X) Operating / Lock Panel Left (O) Fixed Panel Right Note : Glazing Beads For All Panel Face To The Exterior 2 Panel XO Left Is Shown Above Opposite =
1/4 FRAMELESS DOOR WITH INLINE PANEL 1413A-1713A-1813A
 1/4 FRAMELESS DOOR WITH INLINE PANEL 1413A-1713A-1813A F AB GLASS AND MIRROR www.fabglassandmirror.com Call: +1 888-474-2221 Fax: (614)-334-4919 Office Timing: 8:30-18:00 EST info@fabglassandmirror.com
Installation Instructions for Vista Air Vertically Folding Walls
 Installation Instructions for Vista Air Vertically Folding Walls Use these instructions in conjunction with your shop drawings to see the specifics that are particular to the model you are installing.
Frameless Inline Door QCI5250
 INSTALLATION INSTRUCTIONS Frameless Inline Door QCI5250 FRAMELESS PANEL / DOOR / PANEL QCI0249 REV. 3 Page 1 Certified 10/12/12 Parts List with pivot hinges *Quantities may vary. QCI0249 REV. 3 Page 2
Vinyl Sliding Glass Door Assembly Instructions
 Vinyl Sliding Glass Door Assembly Instructions SERIES SGD 5470/5570 Para instrucciones en español, visite: http://bit.ly/pgtassemblyinstructions Parts List ITEM 4 5 6 7 8 9 0 4 5 6 7 8 SGD 5470/5570 PARTS
Installation Recommendations for Finless Frame Doors
 Installation Recommendations for Finless Frame Doors These installation recommendations are made available by MI Windows and Doors, LLC (MI) to assist with the integration of finless or flange sliding
MULTISLIDE DOORS INSTALLATION GUIDE & SITE PREPARATION
 MULTISLIDE DOORS INSTALLATION GUIDE & SITE PREPARATION TOOLS AND SUPPLIES 1 TOOLS CHECK LIST 1. laser level 2. hammer 3. pry bars 4. ladders 5. utility knife 6. screw gun 7. applicator foam gun 8. "j"
Installation Instructions. Oakmont Folding Doors
 Before You Start For quick and easy installation of your Oakmont folding door, read these instructions thoroughly. A few minutes of prior planning will make the job easier and ensure years of trouble-free
Please read and understand all instructions before beginning. These instructions cover impact and non-impact aluminum French Door 650/750.
 The performance and proper operation of a door is only as good as the installation. By following these instructions, the probability of a good installation greatly increases. Please read and understand
Lightline Movable Wall Installation Manual. Preliminary Draft #
 Installation Manual Preliminary Draft #3 9-0-3 Table of Contents Parts Identification Tools Aluminum Extrusions Layout Typical Panel Installation Ceiling Channel Ceiling Corner Bracket Hard Floor Securing
Retractable Screen Installation Instructions For Vinyl and Aluminum Clad and Wood In-Swing Hinged Doors (See separate instructions for sliding doors)
") Retractable Screen Installation Instructions For Vinyl and Aluminum Clad and Wood In-Swing Hinged Doors (See separate instructions for sliding doors) IMPORTANT: Please read before you begin. Table of Contents
Retractable Screen Installation Instructions For Vinyl and Aluminum Clad and Wood In-Swing Hinged Doors (See separate instructions for sliding doors) IMPORTANT: Please read before you begin. Table of Contents
40mm Thermoclick. Type II Class 1 Clear Satin Anodize - 201R1 (Mid Grade Commercial)
") http://www.sundancesupply.com 40mm Thermoclick Type II Class 1 Clear Satin Anodize - 201R1 (Mid Grade Commercial) U-Profile 12' Lengths $39 Out System offers a complete set of extrusions and accessories
http://www.sundancesupply.com 40mm Thermoclick Type II Class 1 Clear Satin Anodize - 201R1 (Mid Grade Commercial) U-Profile 12' Lengths $39 Out System offers a complete set of extrusions and accessories
101B, 210X, ELM, VSTB Installation Manual
 101B, 210X, ELM, VSTB Installation Manual 99-16105-I001 Copyright 2010 by ALL rights reserved. Information in this document is subject to change without notice. Companies, names and data used in examples
VINYL REPLACEMENT WINDOW INSTALLATION STANDARDS
 VINYL REPLACEMENT WINDOW INSTALLATION STANDARDS BEFORE you start to remove the existing windows Place clean drop cloths in all work areas. Re-measure the opening to ensure the new window will fit. Remove
PREHUNG DOOR SYSTEM INSTALLATION INSTRUCTIONS: FIBRECOMP COMBINATION UNITS
 PREHUNG DOOR SYSTEM INSTALLATION INSTRUCTIONS: FIBRECOMP COMBINATION UNITS Read all instructions before starting. Calgary Toll Free: 1-866-664-7664 Saskatoon Toll Free: 1-800-667-6977 Winnipeg Toll Free:
KS SERIES - VERTICAL INSTALLATION
 CS-DS-01-KSV CS DISCLAIMER CS-PJ-01-KSV KS42SL EXPANDED PANEL JOINT CS-PJ-02-KSV KS42SL ENGAGED PANEL JOINT CS-PJ-03-KSV KS45SL EXPANDED PANEL JOINT CS-PJ-04-KSV KS45 FLAT ENGAGED PANEL JOINT CS-PJ-05-KSV
LEGENDS RETRACTABLE DOOR SCREENS
 LEGENDS RETRACTABLE DOOR SCREENS MAGNETIC LATCHING DESIGN SYSTEM 42 I N S T A L L A T I O N I N S T R U C T I O N S 1 MOUNTING OPTIONS Recess : Mount the Screen Cassette using Recess Mounting Clips Recess
Double Frameless Swing Door QCI5247
 INSTALLATION INSTRUCTIONS Double Frameless Swing Door QCI5247 WALL MOUNT HINGES QCI5247 REV. 0 Page 1 Certified 06/16/2016 Parts List with wall mount hinges *Quantities may vary **Quantities double where
Mira Premium Series Bi-Parting French Sliding Patio Door Installation Instructions
 PREMIUM SERIES W I N D O W S Mira Premium Series Bi-Parting French Sliding Recommended Tools & Accessories Tape Measure Level (3 or longer) Hammer Power Screwdriver Load bearing Shims Flashing (recommended)
INSTALLATION INSTRUCTIONS FOR FORGENT SLIDING PATIO DOORS RECOMMENDATIONS FOR COMMON INSTALLATION OF SLIDING PATIO DOORS.
 INSTALLATION INSTRUCTIONS FOR FORGENT SLIDING PATIO DOORS RECOMMENDATIONS FOR COMMON INSTALLATION OF SLIDING PATIO DOORS. Installer: DO NOT DISCARD Please leave the Installation Guide with the home owner
GIRTS ON BACK OF BUILDING
 GIRTS ON BACK OF BUILDING ALL GIRTS ARE 1 1/2 SQUARE TUBE. GIRT LENGTHS FOR 12, 20, 24, AND 30 WIDE BUILDINGS: ON 12 WIDE BUILDINGS GIRTS ARE 67 3/4 LONG ON 20 WIDE BUILDINGS GIRTS ARE 56 3/4 LONG ON 24
INSTALLATION GUIDE WOOD PIVOTING CIRCLE/ OVAL
 WOOD PIVOTING CIRCLE/ OVAL READ SPECIFIC INSTALLATION INSTRUCTIONS COMPLETELY BEFORE STARTING ANY INSTALLATION Failure to install and maintain our product according to these instructions will VOID any
UNIT 5: EXTERIOR DOORS AND WINDOWS
 KEY CONCEPTS 1. Identify tools needed for exterior door and window installation 2. Last step to weather proofing the home 3. Steps to installing exterior doors and windows 4. Maintenance and safety of
Windows Installed into Walls with Polyiso and Wood Framing. Installation Instructions Picture Frame Method Revised 10/24/2016
 Windows Installed into Walls with Polyiso and Wood Framing Installation Instructions Picture Frame Method Revised 10/24/2016 Background There are many acceptable ways to mount and detail windows for support
I n s t a l l a t i o n I n s t r u c t i o n s S E N T I N E L S E R I E S 1 50 SLIDING GLASS DOORS
 I n s t a l l a t i o n I n s t r u c t i o n s S E N T I N E L S E R I E S 1 50 SLIDING GLASS DOORS Page 2-9: Installation Instructions, Figures 1, 2, & 3 Page 10-12: Figures A-1, A-2, & A-3: Installation
INSTALLATION INSTRUCTION INSTRUCCIONES DE INSTALACIÓN FOR CLAD HINGED PATIO DOOR PUERTA DE BISAGRA PARA PATIO
 2008 Pella Corporation Part Number: 801V0101 INSTALLATION INSTRUCTION INSTRUCCIONES DE INSTALACIÓN FOR CLAD HINGED PATIO DOOR PUERTA DE BISAGRA PARA PATIO REMEMBER TO USE APPROPRIATE PERSONAL PROTECTIVE
western series 9500 f loor load The Volume Program window systems westernwindowsystems.com bi fold installation instructions
 series 9500 f loor load bi fold The Volume Program Note: This is a bottom hung product. Provide adequate structure at threshold. Continuous threshold support is required. Right Jamb Head Deflection (+0.12
3-LITE PATIO DOOR INSTALLATION INSTRUCTIONS
 3-LITE PATIO DOOR INSTALLATION INSTRUCTIONS IMPORTANT: Read the instructions and familiarize yourself with the door parts and pieces before beginning assembly and installation. TOOLS NEEDED: Tape Measure
series 9500 top load bi4fold installation instructions
 instructions Head Deflection (+0.12 / -0.00 ) Right Jamb Note: This is a top hung product. Provide adequate structure at head. Continuous threshold support is required. Left Jamb Head 4Lay bed of sealant
WOOD OUT SWING AWNING, CASEMENT, & HOPPER WINDOW
 WOOD OUT SWING AWNING, CASEMENT, & HOPPER WINDOW INSTALLATION GUIDE READ SPECIFIC INSTALLATION INSTRUCTIONS COMPLETELY BEFORE STARTING ANY INSTALLATION Failure to install and maintain our product according
ESA-200 Fixed Sidelite
 Exterior View Installation Instructions For use with ESA II Controller 1 Tools Required: Suggested Fasteners Required - (Not supplied) Screwdrivers Small Straight (FlatBlade) - for Terminal Block wiring
I n s t a l l a t i o n I n s t r u c t i o n s
 HInged PAtio Door Systems I n s t a l l a t i o n I n s t r u c t i o n s IMPORTANT: Read the instructions and familiarize yourself with the door parts and pieces before beginning assembly and installation.
INSTALLATION INSTRUCTIONS FOR CECO DOOR FLOOD RESISTANT DOOR AND FRAME ASSEMBLIES
 INSTLLTION INSTRUCTIONS FOR CECO DOOR FLOOD RESISTNT DOOR ND FRME SSEMBLIES GENERL The installation of flood resistant door and frame assemblies differs significantly from that of standard door and frame
WINDOW REPLACEMENT INSTRUCTIONS FOR CASEMENT, DOUBLE-HUNG AND CLAD FRAME WINDOWS USING FRAME SCREWS
 WINDOW REPLACEMENT INSTRUCTIONS FOR CASEMENT, DOUBLE-HUNG AND CLAD FRAME WINDOWS USING FRAME SCREWS These instructions were tested developed for replacing windows in wood-frame wall construction systems
Instructions for the installation of Ellison Bronze balanced door models #137 & 138
 1. A packing list will be found in crate No. 1 of each shipment. The parts in the crates should be checked with this list. If there is any discrepancy, notify Ellison Bronze at once. 2. All parts are numbered.
Weatherfold 4s 50, 75 & 100
 Codes Weatherfold 4s 50, 75 & 100 Brio Australia P: +61 2 87186718 W: brio.com.au E: sales@brio.com.au Brio RMD UK Ltd. P: +44 191 2291224 W: briouk.com E: sales@briouk.com INSTBWS1 REV D - NOV 2011 Brio
tile redi redi DOOR Redi Redi Swing Slide g TM TM...Opening Doors to Stunning Showers! TM TM SERIES: CONFIGURATION: MOUNTING PACKAGE:
 redi DOOR INSTALLATION INSTRUCTIONS tile redi Redi Redi Swing Slide g TM TM...Opening Doors to Stunning Showers! TM TM SERIES: CONFIGURATION: MOUNTING PACKAGE: 1100 Door-Door Framed sliding doors RDQCI5023
Oxford Stalls Installation Instructions
 Oxford Stalls Installation Instructions RAMM Horse Fencing and Stalls 13150 Airport Hwy. Swanton, OH 43558-9615 1-800-434-8456 Rev. 8/15/17 Before You Start Typical stall sizes are 10 x 10, 12 x 12 or
INSTALLATION INSTRUCTIONS. Thermal Entrances AA 250/AA 425 THERMAL DOOR WITH TRIFAB 601/601T FRAMING
 JANUARY, 2014 1 INSTALLATION Thermal Entrances AA 250/AA 425 THERMAL DOOR WITH TRIFAB 601/601T FRAMING INSTRUCTIONS 2 FRAME ASSEMBLY JANUARY, 2014 601442 SHEAR BLOCK BALL BEARING NRP BUTT (FACTORY APPLIED
Frameless Heavy Glass Door with Wall Mount Hinges
 INSTALLATION INSTRUCTIONS Frameless Heavy Glass Door with Wall Mount Hinges QCI-5245 QCI5245 REV. 0 Page 1 Certified 06/16/16 Frameless Door with Wall Mount Hinges ITEM NUMBER DESCRIPTION QUANTITY 1 DOOR
POCKETING MULTI-SLIDE DOOR SYSTEM
 PMSD POCKETING MULTI-SLIDE DOOR SYSTEM INSTALLATION INSTRUCTIONS READ THESE INSTRUCTIONS COMPLETELY BEFORE STARTING ANY INSTALLATION! CAUTION Lead-based paint may be present in older homes, and the removal
FRAMELESS DOOR / PANEL WITH WALL MOUNT HINGES QCI5274
 FRAMELESS DOOR / PANEL WITH WALL MOUNT HINGES QCI5274 QCI0274 QCI5274 REV. Rev. 1 0 Page Page 1 1 Date Certified: Certified 06/16/2016 10/01/10 Parts List with wall mount hinges ITEM NO. Part # DESCRIPTION
IMPORTANT INSTALLATION GUIDE VALENCIA SQUARE CORNER SHOWER READ ALL INSTRUCTIONS CAREFULLY BEFORE STARTING THE
 INSTALLATION GUIDE VALENCIA SQUARE CORNER SHOWER NOTE: Acrylic wall, tray and tapware not included. Supplied handles may differ from image. SEALANT REQUIRED TO COMPLETE THIS INSTALLATION: (Not supplied)
INSTALLATION INSTRUCTIONS
 INSTALLATION INSTRUCTIONS BUILDERS CHOICE FRAMED Shower Height Swing Door Model: L533 Rev. 09.03.13 MAINTENANCE: Two primary materials are used to manufacture your new Aquatic enclosure; tempered glass
Frameless Inline Door QCI5254
 INSTALLATION INSTRUCTIONS Frameless Inline Door QCI5254 FRAMELESS DOOR / PANEL QCI5254 REV. 0 Page 1 Cer fied 06/16/2016 Parts List with wall mount hinges *Quanes may vary QCI5254 REV. 0 Page 2 Cer fied
Steel Reinforced Joining Guide (Horizontal / Vertical)
") (Horizontal / Vertical) for Andersen Patio Door and/or Elliptical Top Window Combinations Congratulations! You have just purchased one of the many fine Andersen products. Proper assembly, installation
(Horizontal / Vertical) for Andersen Patio Door and/or Elliptical Top Window Combinations Congratulations! You have just purchased one of the many fine Andersen products. Proper assembly, installation