About Everite and Nutec 2. Nutec Slate Roofing 4. Nutec Roof Slates Mechanical and Physical Properties 5
|
|
|
- Regina Lamb
- 6 years ago
- Views:
Transcription
1
2
3 c o n t e n t s About Everite and Nutec 2 Nutec Slate Roofing Nutec Roof Slates Mechanical and Physical Properties 5 Nutec Roof Slates Product Range and Dimensions 7 Accreditation 7 General Design Criteria 8 Safety, Storage and Handling Instructions 9 Recommended Slating Tools 11 General Installation Guidelines 12 Supporting the waterproofing membrane 12 Preparing the roof for Fixing Battens 1 Fixing and levelling of Battens 15 Squaring the Roof 16 Marking out the Battens for Slating 16 Trimming of Battens 18 Laying of Slates 19 Fixing the Ridge 21 Constructing an Open Valley 22 Construction of a Closed Valley 23 Constructing a Raised Boston Hip 25 Flashing around a Chimney 27 Special Flashing Details 28 To replace a damaged Roof Slate 29 Nutec Slate Fixing Accessories 30 Estimating Quantities 31 Everite National Offices and Contact Details 36 Slate Roofing
4 a b o u t e v e r i t e a n d n u t e c Catalogue Information The information contained in this catalogue serves as a general guide only and should not be accepted as the standard for all construction. EVERITE can assist in designs of a special nature, however, architects, engineers and specifiers must finally approve the acceptability in terms of the design and construction criteria, as well as other implications. About Everite and Nutec Everite Building Products Everite Building Products, wholly owned by JSE listed Group Five, has been associated with the South African building industry since 191. Producing a wide range of materials that satisfy the needs of the commercial, industrial and residential market sectors, Everite is renowned for its comprehensive range of Nutec Roofing and Cladding Solutions and includes fibre-cement roofing, cladding, ceilings and building columns amongst others. Nutec fibre-cement high performance properties and added benefits include: the use of safe renewable fibres; considerable tensile strength with enhanced dynamic load bearing properties; excellent thermal properties; water and wind resistance; hail resistance; fire resistance and resistance to fungus, rodents and acid. A programme of quality assurance in accordance with the requirements of the International Standards Organisation (ISO 9001:2008) is entrenched in Everite s process and management systems. Quality of all products is continuously monitored as specified by the South African National Standards and recognised international bodies. Everite s 5 hectare manufacturing facility near Johannesburg is well located and has immediate access to all major road and rail links to national destinations and major ports. The company has branches located at major centres throughout South Africa. Nutec products are distributed through leading stockists countrywide and an established export market further endorses the international acceptance of the Nutec Roofing and Cladding Solutions range of products. Nutec Nutec is the registered name for products manufactured without asbestos as a raw material. Nutec fibre cement products are manufactured using a mixture of cellulose fibre, cement, silica and water. Through ongoing research and development, Everite Building Products are committed to provide product of world-class quality. 2 Slate Roofing 2012
5 a b o u t e v e r i t e a n d n u t e c Accordingly, the Nutec product range is continuously reviewed not only in the interests of the end-user and superior product performance, but also with respect to its impact on the environment. Everite Building Products has over the years established a reputation for producing a variety of outstanding quality products which have been used in a wide range of external and internal applications. Environmental benefits of Nutec Fibre Cement Environmental costs incurred by using fibre cement are measurably less than for other building materials. (Low embodied energy per m 2 ). Requires less energy in assembly and construction than all other wall materials except timber. 1 Low energy consumption in transportation and installation. Environmental costs relating to ozone layer depletion, carcinogenic substances and solid waste emissions are almost negligible. Low environmental impact in relation to ozone layer depletion, carcinogenic substances, and solid waste emissions. 1 No pesticides are involved in the manufacture or use of fibre cement. The benefits of Nutec Fibre Cement 1 The use of safe fibres. 1 Considerable tensile strength with enhanced dynamic load bearing properties. 1 Cost competitive. 1 Excellent thermal properties. 1 Water tight and wind resistant. 1 Hail resistant. 1 Fire-resistant. 1 Fungus and rodent resistant. 1 Acid resistant. 1 Complies with SABS ISO ISO 9001 : 2008 Quality Management System. The environmental benefits in the manufacturing process of Nutec Fibre Cement 1 Recycling the water used in production many times. 1 Recycling solid wastes. 1 Using sustainable raw materials in production. Embodied Energy Definition Embodied energy is the energy consumed by all of the processes associated with the production of a building, from the mining and processing of natural resources to manufacturing, transport and product delivery. Embodied energy does not include the operation and disposal of the building material. This would be considered in a life cycle approach. Embodied energy is the upstream or front-end component of the lifecycle impact of a home. Fibre cement is one of the most energy efficient materials on the market and it has one of the lowest embodied energy contents per square metre of cover of any building product. Slate Roofing
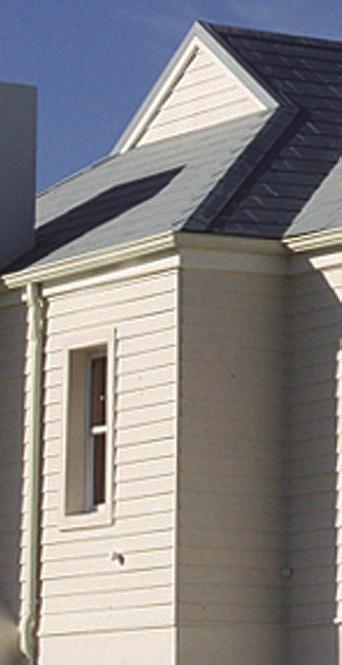
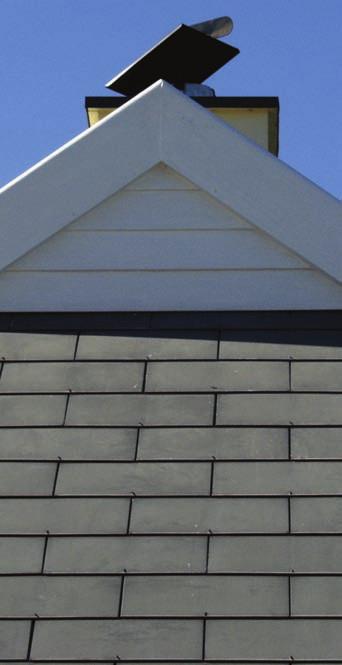
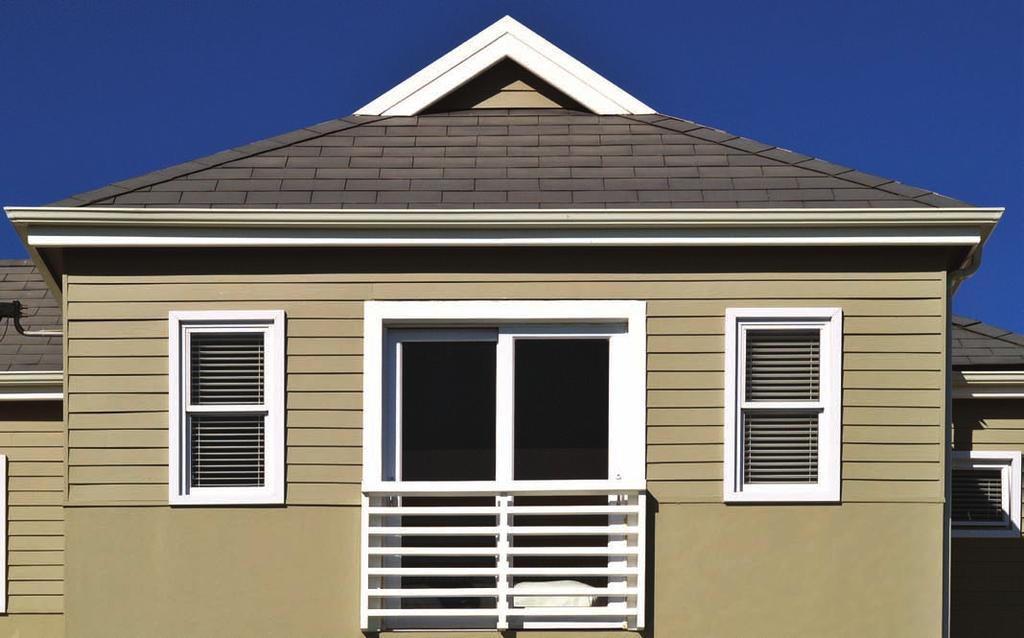
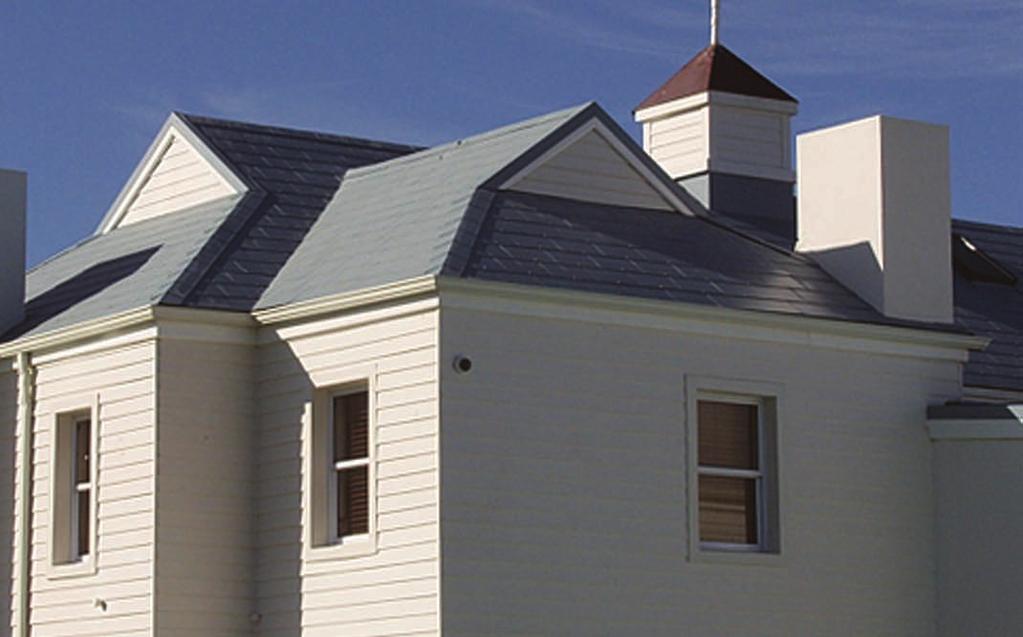
6 f e at u r e s Nutec Slate Roofing Nutec Roof Slates form part of the Nutec roofing range which includes the Nutec Bigsix and Nutec Victorian roofing profile. Favoured for more than seven decades in all sectors of the building industry, the range is renowned for years of trouble free roofing and offers designers and specifiers freedom and flexibility when functional, aesthetic and cost criteria need to be met. Nutec Roof Slates are the ideal roofing or cladding material to use on any project where class, character and individuality are of prime importance. The precise detail of the application and consistent appearance ensure an excellent finish. Features Finish and Colour Nutec Roof Slates are available in a plain or textured finish and a range of standard roofing colours. This provides designers creativity and individuality of expression, whether recreating old-world charm or meeting today s critical architectural design criteria. Nutec Roof Slates are factory coated with a specially developed paint system. Natural weathering will cause the paint coating to fade over time. Inspection and re-coating of the roof recommended after seven (7) years. Economical Their light mass requires a correspondingly light supporting structure, thereby offering an economical alternative to other slate and roofing materials and can be used for vertical cladding applications. Nutec Roof Slates by nature do not corrode and are unaffected by ultraviolet light. Thermal Insulation Nutec Roof Slates have excellent thermal properties. Thermal Conductivity (K-Value) of the Nutec material is approximately 0.3 W/m.K or 0.3 W/m. C. (Test method ASTM C518) Fire Resistant Nutec Roof Slates are Non-Combustible and have a Class 1 Spread of Flame Index when evaluated in accordance with SANS 10177: Parts V and II respectively. The product can be used in applications with continuous temperature not exceeding 150 C. Rodent and Termite Resistance Nutec Roof Slates have been tested in accordance with SANS 519 for Rodent Resistance and awarded a rating of Class B1. No damage was recorded when tested for Termite Resistance in accordance with SANS 571. Water Tightness Nutec Roof Slates in their natural state pre coating are non-permeable when tested in accordance with SANS 685. Darkening is normal because of moisture absorption but no droplets form. Slate Roofing 2012
7 m e c h a n i c a l a n d p h y s i c a l p r o p e r t i e s Nutec Roof Slates Mechanical and Physical Properties Parameter Unit Plain & Textrata Slates Test Method DIMENSIONS Thickness Tolerance: mm ± 0.8 SANS 803 Length Tolerance: mm ± 3 SANS 803 Width Tolerance: mm ± 3 SANS 803 Squareness mm 3 SANS 803 Edge Trueness mm/m 3 SANS 803 PHYSICAL PROPERTIES Minimum MOR : With Grain MPa 7.0 (1) SANS 803 Minimum MOR : Across Grain Mpa (1) SANS 803 Target Density g/cm ISO 8336 Maximum Hygral Linear Expansion mm/m 2.7 SANS 803 Thermal Conductivity W/m.K - ASTM C518 Thermal Expansion Coefficient (20-70) C-1 Negligible SANS Document 722/W 1009 Moisture Movement With Grain % 0.06 ASTM C1185 Across grain % 0.06 ASTM C1185 Moisture Content % 6.3 ASTM C1185 Water Absorption % ASTM C1185 Permeability - No droplets formed SANS 685 ph - 12 MECHANICAL PROPERTIES MOR: With Grain Mpa.20 (2) ASTM C1185 Mpa 7.50 (3) ASTM C1185 MOR: Across Grain Mpa 7.75 (2) ASTM C1185 Mpa (3) ASTM C1185 Classification in accordance to ASTM C1186 Compressive Strength parallel to Surface of Board With Grain Mpa (2) ASTM D1037 Mpa (3) ASTM D1037 Across Grain Mpa 11.5 (2) ASTM D1037 Mpa (2) ASTM D1037 Tensile Strength Perpendicular to Surface of Board Mpa 0.83 (2) ASTM D1037 Mpa 1.02 (3) ASTM D1037 Young s Modulus (E.Mod) With Grain Mpa 5337 (3) ASTM C120 Mpa 397 (2) ASTM C120 Across Grain Mpa 67 (3) ASTM C120 Mpa 681 (2) ASTM C120 Block Shear Strength Mpa 1.60 (2) ASTM D13 Mpa 1.32 (3) ASTM D13 (1) Dried till constant weight (2) Saturated with water (3) Equilibrium conditions Slate Roofing
8 m e c h a n i c a l a n d p h y s i c a l p r o p e r t i e s Nutec Roof Slates Mechanical and Physical Properties Parameter Unit Plain & Textrata Slates Test Method OTHER PROPERTIES Fire Properties Fire Index Class 1 SANS 10177: Part II, BS 76: Part 7 Non-Combustibility Non combustible BS 76: Part, SANS 10177:Part V Continuous Temperature C Frost Resistance Cycles Completed - 50 ASTM C1185 Strength Ratio % 78.5 ASTM C1185 Biological Resistance Rodent Resistance Class B1 SANS 519 Termite Resistance - No Damage SANS 571 (1) Dried till constant weight (2) Saturated with water (3) Equilibrium conditions 6 Slate Roofing 2012
9 p r o d u c t r a n g e a n d d i m e n s i o n s Nutec Roof Slates Product Range and Dimensions SLATES Rectangular Plain Mitred and Un-Mitred Size 610 mm x 06 mm Thickness 7 mm Slates per m 2 10 Mass per Unit 2 kg Mass per m 2 ± 21 kg Product No. Colour / Mitred Black Charcoal Cloud Grey Product No. Colour / Un-Mitred Black Charcoal Cloud Grey All dimensions in mm. Non Stock Items Rectangular Textrata Un-Mitred Size 610 mm x 06 mm Thickness 7 mm Slates per m 2 10 Mass per Unit 3 kg Mass per m 2 ± 2 kg Product No. Colour / Un-Mitred Black Charcoal Pressed Slates (610 mm x 06 mm x 5 mm thick) are available on request for replacement purposes only. Accreditation: SABS, SANS & ISO Nutec Slates carry the SABS Mark under specification SANS 803. Everite is an accredited ISO 9001:2008 Quality Management System listed company. Slate Roofing
10 d e s i g n c r i t e r i a General Design Criteria High Wind Conditions The information presented in this catalogue is a guide for wind loading conditions. A structural engineer should be used for design purposes to ensure that spans, fixing details and roof pitches meet the requirements for the particular conditions. Ventilation Climatic conditions in certain parts of Southern Africa are such that condensation may occur on the underside of the roofing slates. It is therefore recommended that the space between the ceiling and the roofing slates is adequately ventilated. Purpose-made ventilating slates can be manufactured for situations where no other form of ventilation can be accommodated. Roof Pitch Nutec Roof Slates are designed for a minimum roof pitch of 17,5. In high wind areas the slates may no longer provide a waterproof covering and a waterproof underlay must be installed. Refer Fig. 2, for more details. It is recommended that the pitch be increased as specified by the structural engineer or architect. Substructure A high standard of finish can be achieved if the supporting structure is accurate and level. Warped, twisted or poor quality battens or sagging roof trusses will reflect adversely in the finished plane of the roof. Use only well seasoned graded structural timber. To ensure that lines are true and the laps uniform, battens must be fixed exactly to the spacing specified. The batten sizes required for the various rafter/truss spacing and for the different slate sizes are given in Table 1. Fixing Accessories Fixing accessories in the form of galvanised and copper clout nails as well as copper disc rivets have been specially developed for Nutec Roof Slates. Full details are scheduled under Fixing Accessories. Do not allow the use of non-approved, and often inferior, fixing accessories. EVERITE reserves its right to withdraw its guarantees if non approved fixing accessories are used. Contact EVERITE sales office if in doubt. Site Service Service personnel are available on request to provide assistance on recommended storage, handling and erection of the EVERITE s products, before and during installation. 8 Slate Roofing 2012
11 s a f e t y a n d h a n d l i n g Safety and Handling Instructions General Manufactured from Nutec fibre-cement, Nutec Roof Slates do not contain asbestos fibre and are therefore excluded from the following: Asbestos Regulations of 2001, which forms part of the Act No. 85: Occupational Health and Safety. South African Code SANS 10229: Packaging of dangerous goods for road and rail transportation in South Africa. Nutec Roof Slates do not pose any adverse effects on the environment. Off-cuts and dust created during site work may be disposed off on any non-hazardous waste landfill site. Safety Installation and maintenance Although the Nutec Roof Slates are manufactured without asbestos fibres, it is nevertheless recommended that tools which do not create excessive dust are used when working with the product. Ordinary carpenters hand tools can be used effectively. Use duckboards as walking areas on the roof to avoid damage to slates and injury to workers. Wear soft soled shoes for better grip. Do not carry heavy loads over completed areas of the roof or use these as staging posts for the next section. During loading of roof, do not stack more than 3 bundles (30 slates) in any one position on the roof. Do not exceed recommended purlin spacing. Storage and Handling Instructions General Handling Nutec Roof Slates are manufactured from a composite material containing cement and may be damaged under excessively high shock loads. Reasonable care should therefore be taken to ensure that the products are not dropped or subjected to rough handling. This is particularly important to avoid damage to the coated surface and chipping of the edges. Slate Roofing

12 s t o r a g e a n d h a n d l i n g Storage 1 Prior to Installation Nutec Roof Slates must remain on pallets and kept under cover until installed. 1 Strict stock rotation should be adhered to. Storage On-site: A suitable level compacted area must be made available where Nutec Roof Slates can be stored safely so that they cannot be damaged or soiled by passing traffic. They must be stacked clear off the ground on suitable timber supports to a maximum height of 25 bundles (10 slates per bundle). Preplanning: Adequate preplanning of deliveries should be made to ensure that Nutec products are not stored on site for excessive periods. If this is unavoidable, they should be kept under cover until installed. Handling When removing strapping from bundled slates, care should be taken that snips are used. On no account must the strapping be levered off, as this may damage the slates. Refer to Fig 1 for Cutting Slate Tiles For straight cutting of Nutec Roof Slates, a scriber or any other sharp object is all that is required to scribe the surface of the slate. The slate will break on this line if held firmly on a flat surface with a straight edge and the surplus part snapped off. See schedule of Recommended Slating Tools. Fig 1 : Straight cutting of Nutec Roof Slates SCRIBING THE SLATE SNAPPING OFF SURPLUS SLATE Flat surface Flat surface Slate Snap off surplus Scribe Slate Secure firmly 10 Slate Roofing 2012
13 i n s t a l l a t i o n p r o c e d u r e s Recommended Slating Tools Product Size L Sketch of Article No. Description Scriber Slater s Hammer Slater Ripper Parallel Shears Slate Cutter Kwiksnip Slate Guuillotine Slate Roofing
14 i n s t a l l a t i o n p r o c e d u r e s General Installation Guidelines TABLE 1 Batten Requirements for Nutec Roof Slates Rafter spacing mm Batten Sizes required mm Batten spacing x x x Approximate linear metres of battens required per m 2 of roof laid. 610 x 06 mm slates =,12 lin. m Minimum Roof Pitch Nutec Roof Slates are designed for a minimum roof pitch of 17,5. In high wind areas the slates may no longer provide a waterproof covering and a waterproof underlay must be installed. To support the waterproofing membrane, the following work is essential. Refer Fig. 2A and Fig. 2B Install suitable boarding or chicken wire mesh over the the rafters. Fix counter battens directly above the rafters on top of the boarding or chicken wire. Install waterproofing membrane over the counter battens, allowing it to sag onto the boarding or chicken wire between the counter battens. Fix slating battens over waterproofing membrane and nail through counter battens into rafter. 12 Slate Roofing 2012
15 i n s t a l l a t i o n p r o c e d u r e s Fig 2A : Installation of Waterproof Underlay SECTION OF ROOF WITH UNDERLAY ILLUSTRATING UNDERLAY OVER RAFTERS Fig 2B : Installation of Waterproof Underlay PLAN SHOWING CORRECT INSTALLATION OF UNDERLAY KEY 1 Full Slate 2 Starter Slate 3 Tilter Batten Metal Flashing 5 Gutter 6 Gutter Bracket 7 Fascia Board 8 Rafter 9 Boarding or Chicken Wire 10 Counter Batten 11 Waterproofing 12 Batten Slate Roofing
16 i n s t a l l a t i o n p r o c e d u r e s Nutec Roof Slates laid and fixed in accordance with recommendations will provide many years of troublefree protection from the elements. It is however important to be aware of the fact that any distortion or unevenness in the roof structure and battens will reflect in the final appearance of the application. Time spent to ensure that the structure and battens are accurate and sound is therefore a small investment in the process of achieving an excellent result. The step by step erection procedure which follows will assist in this regard. Step 1 Preparing the Roof for Fixing Battens Check that the trusses are properly lined up, correctly secured to the wallplates and that the bracing is fixed in positon. Trim the rafter ends to overhang required to accommodate Nutec Fascia Boards where applicable. Install fascia boards. Refer to catalogue Fascias and Barge Boards for installation instructions. Install gutter brackets and gutters. Step 2 Marking out the Roof for Fixing Battens Refer Fig.5. Nail tilter batten in position at feet of rafters on every roof slope. NB: Tilter batten must be 5mm higher than other battens. Using a slate, determine the overhang required from the tilter batten into the gutter for proper drainage of rainwater. Recommended overhang is 50mm measured from the inside edge of the gutter. Mark the rafter at the top of the slate. This will be the centre line for the third batten. From this line up towards the ridge, mark the rafter at 250 mm centres. Using the third batten centre line down towards the gutter, measure 250 mm for the centre line of the second batten. Repeat this procedure for every end rafter on every roof slope. Using a chalk line, mark all rafters accordingly. 1 Slate Roofing 2012
17 i n s t a l l a t i o n p r o c e d u r e s Fig 3: Section through Roof BATTEN SPACING FOR SLATES To suit 610 Overhang into Gutter KEY 1 Starter slate cut to suit 2 Full slate 3 Timber rafter Batten 5 Under-ridge slate 6 Ridge slate 7 Ridge beam 8 Ridge soaker (Malthoid and Sisalation) 9 Under-ridge soaker (Malthoid) 10 Tiler batten 11 Fascia board Step 3 Fixing and Levelling of Battens Refer Fig. 3. Skew nail battens to rafters at centre lines marked, allowing adequately for the overhang required at both gable ends. Batten butt-joints must be staggered on rafters. Nail centre ridge batten in position. Check evenness of roof plane by spanning a fish line across the roof in various positions. Level battens where necessary by using wooden wedges. NB: For normal wind loading conditions nail length should be batten height plus 0 mm minimum. Where hips and valleys are encountered battens should be mitred and aligned at the intersection of the battens. Refer Fig. 10, Fig. 11 and Fig. 12. Slate Roofing
18 i n s t a l l a t i o n p r o c e d u r e s Step Squaring the Roof Refer Fig. Mark the centre of the roof slope on the tilter batten - position A. Mark position C and D which are equal distances on either side of position A. Select position B on the ridge batten. Move position B until distances BC and BD are equal. Strike a chalk line from A to B, which will be at 90 to the tilter and ridge battens. Fig : Squaring the Roof B D A C Step 5 Marking out the Battens for Slating Refer Fig.5. Starting from the centre line, mark tilter batten on either side of the centre line at equal distances of 206 mm for the 610 x 06 slate, finishing with equal spacings at both gable ends of the roof slope. Repeat this procedure along the ridge batten. Strike chalk lines from the tilter batten to the ridge batten to mark remaining battens. 16 Slate Roofing 2012

19 i n s t a l l a t i o n p r o c e d u r e s Fig 5 : Marking the Battens for Slating KEY All dimensions in mm. 1 Battens at 250 mm centres for 610 x 06 slate 2 Rafters 3 Centre line of roof slope Tilter batten Slate Roofing
20 i n s t a l l a t i o n p r o c e d u r e s Step 6 Trimming of Battens Refer Fig. 6 From the last chalk line at the gable end, mark back on the tilter batten the width of a batten plus the thickness of the barge board for the barge board option chosen. Mark the ridge batten in the same way. Strike a chalk line to mark the remaining battens. Trim all battens on these marks. Nail gable trimmer batten in position. Fig 6 : Barge Board Options SLATES FINISHING AGAINST BARGE BOARDS SLATES OVERHANGING BARGE BOARDS USING A 90º L-SHAPED BARGE BOARD KEY 1 Roof Slate 2 Trimmer batten 3 Batten Barge board 5 Masonry wall 18 Slate Roofing 2012

21 i n s t a l l a t i o n p r o c e d u r e s Step 7 Laying of Slates. Refer Fig.8 IMPORTANT GUIDELINES Copper nails should be used throughout in all corrosive areas, and also on all exposed areas, e.g. ridges and hips. Fixing holes. 610 mm x 06 mm slates are pre-drilled with 3 holes. The 2 holes on the side of the slate are for nailing the slate to the batten, while the third hole at the bottom centre is for the disc rivet. Refer Fig. 7. The nails securing the slates must be driven firmly but not too hard as this will tilt the slate. The top of slates should not extend above the centre line of the battens, as this will interfere with the nailing of the next row of slates. Cut starter slates to size required. For cutting of slates Refer Fig.1. Retain offcuts for use at the ridge. The length of the starter slate is measured from the overhang into the gutter to the centre line of the second batten. Starting at one end of the roof, fix starter slates between chalk lines with 0mm galvanised or copper clout nails, to tilter batten. Ensure that the top of starter slate is not above the centre of the second batten. For the next row cut a standard slate in half down its length. Fix the cut slate and drill the additional hole for the second fixing nail. Insert a copper disc rivet in positon B. Refer Fig. 8. Drill a second hole in this half slate through the starter slate in position A (centred on the slate and on the centre line of the tilter batten) and fix with a 50 mm clout nail. Next to the cut slate use a full slate and fix with 0 mm clout nails. Insert a copper disc rivet under the leading edge in position D, before placing the next slate. Insert a copper disc rivet in position C between the two starter slates and through the hole provided in the full slate and bend it over. Continue in this manner until the second row has been completed. For the third row, place a full slate in position over disc rivet B and nail to the third batten. Bend over the disc rivet and proceed with full slates according to chalk lines. Continue fixing full and cut slates to the ridge of the roof in accordance with previous instructions. Fig 7 : Fixing Holes for Roof Slates SLATES NB: The last slate at the ridge has to be cut to suit. Refer Fig.9. All dimensions in mm. 203 Slate Roofing

22 i n s t a l l a t i o n p r o c e d u r e s Fig 8 : Laying of Slates LAYING OF STARTER SLATE - FIRST ROW LAYOUT OF SECOND ROW D C B A LAYOUT OF THIRD ROW MM X 06 MM SLATES KEY 1 Starter slate 2 Cut slate 2nd row 3 Nailing position Full slate 2nd row 5 50 mm Copper clout nail 6 Copper disc river 7 Full slate 3rd row 8 Rafters 9 Battens 10 3rd Batten 11 2nd Batten 12 Tilter batten 20 Slate Roofing 2012
23 r o o f i n g a c c e s s o r i e s Step 8 Fixing the Ridge Refer Fig.9. To obtain a straight ridge, lay slates to chalk line marking the position of the bottom edge of the ridge slates. Ensure that the centre ridge batten is fixed in position. Cut under-ridge slates to suit, ensuring that these butt at the apex of the roof and that the overlap onto the previous row is the same as for the rest of the roof. Cut and lay a continuous bitumen-impregnated soaker to fit under under-ridge slate (100 mm on both sides). Nail under-ridge slates in position over bitumen-impregnated soaker. Cut ridge slate to suit, allowing them to butt-join at the apex. Cut and fit continuous ridge soaker made up of one layer of bitumen-impregnated membrane and a layer of sisalation or aluminium foil, which is required to protect the membrane from UV deterioration. In the case of mitred ridge, the offcut retained form the starter slate is cut to suit. Drill and nail in position using 50 mm copper clout nails. NB: For the Boston type ridge the offcut retained from the starter slate is cut to suit, half lapped, drilled and nailed using 50 mm copper clout nails. Fig 9 : Ridge Options BOSTON RIDGE MITRED RIDGE KEY 1 Ridge slate 2 Ridge batten 3 Ridge soaker Under-ridge slate 5 Under-ridge soaker 6 Full slate 7 Rivet Slate Roofing
24 i n s t a l l a t i o n p r o c e d u r e s Fig 9 (continued) : Ridge Options SECTION THROUGH RIDGE KEY 1 Ridge slate 2 Ridge batten 3 Ridge soaker Under-ridge slate 5 Under-ridge soaker 6 Full slate 7 Batten 8 Rafter Valleys There are two options for valley construction i.e. open valleys and closed valleys. As a general rule, galvanised metal flashing will be used in inland areas while copper or lead is recommended for coastal or corrosive areas. Step 9 Constructing an Open Valley Refer Fig.10. Check that valley battens are positioned as close as possible to the channel of the valley flashing piece to provide for nailing of small cut slates where they occur. Position the valley flashing. Sections to lap a minimum of 150 mm. Cut at gutter to suit. Commence slating by fixing starter slates. Mitre and cut to fit valley. Complete the slating along the same lines with full slates, cutting each slate adjoining the valley to fit. Fig 10: Open Valley Details BATTEN CONSTRUCTION FOR OPEN VALLEY FLASHING WITH STARTER SLATES IN POSITION 22 Slate Roofing 2012

25 i n s t a l l a t i o n p r o c e d u r e s Fig 10 (continued) : Open Valley Details COMPLETED OPEN VALEY SECTION THROUGH COMPLETED OPEN VALLEY KEY 1 Full slate 2 Cut slate 3 Metal valley flashing Battens Step 10 Construction of a Closed Valley Refer Fig. 11. Ensure that battens are neatly mitred and aligned where they intersect on the valley rafter. Place continuous metal valley flashing 50 mm wide in position. Sections must be lapped 150 mm minimum. Mitre and fix starter slate in position. Cut and position individual 50 mm wide bitumen-impregnated soakers. Cut and fix first row of full slates in the valley. Cut the second soaker and position with the lower edge just above the disc rivet for the subsequent row of slates. Fig 11 : Closed Valley Details BATTEN DETAIL FOR CLOSED VALLEY FLASHING WITH STARTER SLATES IN POSITION Slate Roofing

26 i n s t a l l a t i o n p r o c e d u r e s Fig 11 (continued) : Closed Valley Details POSITION OF INDIVIDUAL SOAKERS POSITIONING AND MITRING OF FULL SLATES SECOND SOAKER IN POSITION COMPLETED CLOSED VALLEY SECTION THROUGH COMPLETED CLOSED VALLEY KEY 5 1 Full slate 2 Bitumen-impregnated membrane 3 Slates to be cut on site Metal flashing 5 Battens 2 Slate Roofing 2012
27 i n s t a l l a t i o n p r o c e d u r e s Step 11 Constructing a Raised Boston Hip Refer Fig.12. Check that the battens fit neatly against the hip rafter. To raise the hip, nail a batten on top of the rafter. Mitre cut and fix starter slate to meet at hip. For the next row onwards repeat with full slates and mitre to suit. Position a 380 mm wide continuous bitumen-impregnated soaker centrally over full length of hip. Cut and fix Boston starter slates. NB: Slates used for Boston hip are standard slates, halved longitudinally. They are fixed in such a way that the lower corners of the hip slates line up with the lower edge of normal roof slates, the upper end of the hip slate being cut. Fig 12 : Details of Raised Boston Hip BATTEN LAYOUT FOR BOSTON HIP BOSTON HIP STARTER SLATES IN POSITION POSITIONING AND MITRING OF FULL SLATES HIP READY FOR COVER SLATES Slate Roofing

28 i n s t a l l a t i o n p r o c e d u r e s Fig 12 (continued) : Details of Raised Boston Hip CONTINUOUS SOAKER ON POSITION CUTTING AND FIXING OF THE HIP STARTER SLATE COMPLETED RAISED BOSTON HIP FIXING POSITIONS FOR THE BOSTON HIP SECTION THROUGH RAISED BOSTON HIP KEY 5 1 Hip slates 2 Bitumen-impregnated membrane 3 Standard slates Batten 5 Hip rafter 26 Slate Roofing 2012
29 i n s t a l l a t i o n p r o c e d u r e s Step 12 Flashing around a Chimney Refer Fig. 13. The standard procedure, which is commonly used, is quite satisfactory for normal pitch roofs. Ensure that battens are properly finished off around the chimney so that the flashing and slates have a proper support. Slate the lower side of the stack and where necessary trim the last full row of roofing slates around the chimney. Fix metal apron flashing in position on the lower side of the chimney stack. Nail the following row of roofing slates in position, covering the apron flashing and trim where necessary around the stack. Place the first pair of metal soakers in position on the side of the stack. (For dimensions of apron soaker refer to Fixing Accessories ). Fix the next row of slates to butt against the vertical leg of the flashing. Install the next metal soaker and repeat this procedure. Position the back flashing and continue with slating. Complete slating and trim around upper end of stack over back flashing where required. Fix counter flashing by wedging into raked out brick joints. The counter flashing should be evenly stepped on chimney sides. Fig 13: Details of Chimney Flashing BATTEN LAYOUT AROUND CHIMNEY SLATING TO CHIMNEY APRON FLASHING TO CHIMNEY SLATING AROUND CHIMNEY Slate Roofing
30 i n s t a l l a t i o n p r o c e d u r e s Fig 13 (continued) : Details of Chimney Flashing POSTIONING ODF INDIVIDUAL METAL SOAKERS SLATING AROUND CHIMNEY CONTINUED BACK FLASHING IN POSITION SLATING COMPLETED COUNTER FLASHING IN POSITION 28 Slate Roofing 2012
31 i n s t a l l a t i o n p r o c e d u r e s Step 13 Special Flashing Details Refer Fig. 1. In certain instances, special flashing methods may be necessary and a few examples are detailed below. Fig 1 : Fixing Details for Special Flashing Situations APEX DETAIL ON MONO-PITCH ROOF ROOF ONTO FACADE FLASHING DETAIL ABUTMENT FLASHING DETAIL KEY 1 Ridge slate 2 Soaker 3 Under-ridge slate Batten 5 Timber truss 6 Window 7 Window sill 8 Metal flashing 9 Slate cut to suit 10 Full slate 11 Wall Slate Roofing

32 i n s t a l l a t i o n p r o c e d u r e s Step 1 To replace a damaged roof slate Refer Fig. 15. Open the copper disc rivet of the damaged slate. Insert the slate ripper under the damaged slate. Hook the slate ripper onto the first nail. Withdraw the slate ripper by tapping it with a hammer. Repeat for second nail. Remove broken slate. Hammer a nail halfway into the exposed batten in the centre of the opening. Tie a length of copper wire to this nail. Hammer the nail in until the head is flush with the slate. Push the new slate into position. Insert new copper disc rivet. Tie the wire around the copper disc rivet. Cut off the excessive wire. Complete the replacement of the slate by bending the pin of the copper disc rivet over. Fig 15 : Replacing a damaged Slate REMOVING BROKEN SLATE FIXING WIRE TIED TO NAIL INSERTING REPLACEMENT SLATE FASTENING REPLACEMENT SLATE 30 Slate Roofing 2012
33 fixing a c c e s s o r i e s Nutec Slate Fixing Accessories Product Size / Description Diameter Sketch of Article No. mm Copper Disc Rivets 30 x * * Copper Clout Nails 50 x 2,5 * * All copper and galvanised clout nails have serrated shanks. * * Longer nails are used for hip and valley construction. Slate Roofing
34 e s t i m at i n g q u a n t i t i e s Estimating Quantities There are various simple methods for extracting quantities for slate roofs and one such method is detailed below. Information required to calculate quantities are: Dimensions of flat roof area (overall wall dimensions plus eaves and gable overhang). Roof pitch (either as detailed on the drawing or by measurement with a protractor). Example To calculate the flat roof area it is usually necessary to divide the roof into easy to calculate rectangular sections, see Fig.16. NB: The whole roof area, including eaves and gable overhang must be included. In the example the roof is divided into four convenient areas. Area 1: 0,0 m x 10,0 m = 00,0 m Area 2: 10,0 m x 7,0 m = 70,0 m Area 3: 3,0 m x,0 m = 12,0 m Area : 10,0 m x 8,0 m = 80,0 m Total flat roof area = 562,0 m 2 The developed roof area is obtained by dividing the flat roof areas by the cosine of the roof angle. In the example the flat roof area was calculated as 562 m 2 and the roof pitch is given as 30º. The cosine for 30º is 0,866. Refer to Table 2. The developed roof area is therefore 563 m 2 0,866 = 68,961 m 2 NB: This method applies equally to roofs with gable ends and hips as well as mono-pitch roof areas. Where different roof pitches are encountered on the same roof, the flat roof areas have to be calculated separately for each different roof pitch area. To obtain the number of roofing slates and fixing accessories required, multiply the developed roof area by the number of units per m. Refer Estimating Roofing Quantities. NB: Allowance must be made for extras in the roofing slates and fixing accessories where ridges and hips are involved, as well as for cutting wastes. 50 mm copper clout nails must be used at all exposed fixing points, e.g. ridges and hips. These should be allowed for as per Table 3. Copper nails should be used throughout in all corrosive areas. 32 Slate Roofing 2012
35 e s t i m at i n g q u a n t i t i e s Fig 16 : Extracting Quantities for Slate Roofs Section area = m ,0 x 0,0 = 0,0 m 2 2 7,0 x 10,0 = 70,0 m 2 30º 3,0 x 3,0 = 12,0 m 2 10,0 x 8,0 = 80,0 m 2 Eaves overhang Total = 562,0 m 2 Overall wall dimention Roof area 562,0 m 2 Cos 30º (0,866) = 68,961 m 2 TABLE 2 Natural Cosines Roof Pitch Cosine Roof Pitch Cosine Roof Pitch Cosine 16 0, , , , , , , , , , , , , , , , , , , , , , , , , , , , , , , , , , , , , , ,876 0, , , , ,5000 Slate Roofing
36 e s t i m at i n g q u a n t i t i e s TABLE 3 Slate Fixing Accessories - Numbers Required Application and Product Description Units Slate sizes 160 x 06 Roof area Roof slates Number per m mm galvanised/copper clout nails Number per m 2 20 Copper disc rivets Number per m 2 10 Eaves Starter Slate Roof slates Number per lin. m mm galvanised/copper clout nails Number per lin. m 5.0 Copper disc rivets Number per lin. m 2.5 Mitred ridge Roof slates Number per lin. m 10 50mm copper clout nails Number per lin. m 20 Copper disc rivets Number per lin. m - Boston ridges and hips Roof slates Number per lin. m 10 50mm copper clout nails Number per lin. m 20 Valleys Included in cutting wastes - Cutting wastes 3%-5% of base quantity. To be calculated 3 Slate Roofing 2012
37 e s t i m at i n g q u a n t i t i e s Estimating Roofing Slate Quantities The following guide can be used for estimating quantities of EVERITE Nutec roof slates and fixing accessories required. a) Calculating the flat roof area. Refer Fig. 16. Area 1: m x m = m 2 Area 2: m x m = m 2 Area 3: m x m = m 2 Area : m x m = m 2 Area 5: m x m = m 2 Area 6: m x m = m 2 Total roof area : m 2 Where textured slates (7 mm) are used, fixing accessories will differ slightly, ie: 0 mm galvanised nail becomes 50 mm on main roof area, on hips and ridges 50 mm copper nail becomes 63 mm. b) Calculating developed (actual) roof area. Roof pitch Cosine Refer Table 2. Flat roof area m 2 cosine of roof pitch Developed roof area m 2 c) Calculating material quantities. 1. Roof slates Slate size to be used mm x mm Developed roof area m 2 x Number of slates per m 2 2. Extras required Eaves lin. m x Number of slates per lin. m Ridges mitred lin. m x Number of slates per lin. m Boston type ridges and hips lin. m x Number of slates per lin. m Hips mitred lin. m x Number of slates per lin. m Cutting waste 3%-5% of base quantity depending on the complexity of the roof %= Number of slates: Number of slates: Number of slates: Number of slates: Number of slates: Number of slates: d) Fixing accessories 1. 0mm galvanised/copper clout nails Galvanised per kg. Copper per kg. NB: Copper clout nails are recommended for corrosive areas such as coastal areas. Number of slates: x 2 Number per kg 2. Disc rivets 1 per slate Each : 3. 50mm copper clout nails NB: To be used at all exposed fixing points ridges and hips Mitred ridge/hip lin. m x Number per lin. m Number per kg Each : Boston ridge/hip lin. m x Number per lin. m Number per kg Each : Slate Roofing
38 c o n t a c t d e t a i l s Everite National Offices Call Centre Sales Support Office Telephone Telefax Bloemfontein Mobile Telefax Cape Town Telephone Telefax Middelburg (Mpumalanga) Mobile Polokwane Telephone /62 Telefax Port Elizabeth Telephone Mobile Telefax Durban Telephone Telefax Worcester Mobile Telefax East London Mobile Telefax Botswana (Gaborone) Telephone Telefax George Telephone Mobile Telefax Namibia Mobile (0026) Telefax (0026) Slate Roofing 2012
39
40
Recommended Slating Tools
 Recommended Slating Tools Product Size L Sketch of Article No. Description 60-070 Scriber 60-00 Slater s Hammer 60-00 Slater Ripper 60-080 Parallel Shears 60-0 Slate Cutter Kwiksnip Slate Guuillotine Slate
About Everite and Nutec 2. Nutec Bigsix Tiles : Compsition and Product Quality 4. Installation Guide 5. Support Structure 6
 c o n t e n t s About Everite and Nutec 2 Nutec Bigsix Tiles : Compsition and Product Quality 4 Installation Guide 5 Support Structure 6 Light Weight Steel Sections 4 Timber Supports 5 Mitre Details 5
About Everite and Nutec 2. Nutec Bigsix Roofing Sheets : Features and Product Range 4. Accreditation 7. General Design Criteria 8
 c o n t e n t s About Everite and Nutec Nutec Bigsix Roofing Sheets : Features and Product Range 4 Accreditation 7 General Design Criteria 8 Safety, Handling and Storage 9 Installation Procedures Substructure
Introduction 1. Nutec fascias and barge boards are ideal to cover up or replace weathered or rotten timber fascias and boards on old buildings.
 Introduction 1 EVERITE s comprehensive range of Nutec fascias and barge boards have been designed to suit virtually any roof, whether slates, tiles or sheeting. They provide a functional finish by protecting
General Installation Guidelines
 General Installation Guidelines The following basic safety rules and work practices should be observed when working with the product. Although Nutec Ceiling Boards are manufactured without asbestos as
Nutec Slate Rooing 4. Nutec Roof Slates Mechanical and Physical Properties 5. Accreditation 7. General Design Criteria 8. Recommended Slating Tools 11
 c o n t e n t s A 2 Nutec Slate Rooing Nutec Roof Slates Mechanical and Physical Properties 5 Nutec Roof Slates Product Range and Dimensions 7 Accreditation 7 General Design Criteria 8 Safety, Storage
Shingle Installation Guide
 Installation Guide Roof Framing Information Installation Installation Accessory Installation Estimating Data General Information Roof Framing Information It is the responsibility or roofers, building contractors
ROOF FRAMING INFORMATION BATTEN INSTALLATION CORONA SHAKE INSTALLATION ACCESSORY INSTALLATION ESTIMATING DATA GENERAL INFORMATION
 ROOF FRAMING INFORMATION BATTEN INSTALLATION CORONA SHAKE INSTALLATION ACCESSORY INSTALLATION ESTIMATING DATA GENERAL INFORMATION ROOF FRAMING INFORMATION It is the responsibility or roofers, building
Installation guide for 20/20
 Introduction The following installation instructions are recommended minimum requirements for the 20/20. The designer and fixer should ensure that tiles are installed in accordance with BS 5534; The British
Nutec Bigsix Roofing Accessories
 Nutec Bigsix Roofing Accessories Nutec Bigsix Close Fitting Adjustable Ridge Capping (Grey) Adjustable for 0º - 0º pitches 70-000 87 mm 70-00 87 mm Nutec Bigsix Close Fitting Adjustable Ridge Capping (Terracotta)
GLOSSARY. A useful collection of definitions for commonly used terms in tile roofing.
 A useful collection of definitions for commonly used terms in tile roofing. Abutment Where the roof tiles meet a structure rising above the roof. Accessory A concrete or terracotta product used to finish
General Installation Guidelines
 g e n e r a l i n s t a l l a t i o n g u i d e l i n e s General Installation Guidelines Although Nutec Building Planks do not contain asbestos fibres, it is nevertheless recommended that when working
BUILDERS RESPONSIBILITY
 BUILDERS RESPONSIBILITY August 2015 Key Builder Responsibilities Before roof tiles can be loaded onto the roof frame, the following must be completed unless otherwise specified in the roof contract: 1.
ROOFING APPLICATION STANDARD (RAS) No. 115 STANDARD PROCEDURES FOR ASPHALTIC SHINGLE INSTALLATION
 No. 115 STANDARD PROCEDURES FOR ASPHALTIC SHINGLE INSTALLATION") ROOFING APPLICATION STANDARD (RAS) No. 115 STANDARD PROCEDURES FOR ASPHALTIC SHINGLE INSTALLATION 1. Scope 4. Underlayment 2. 1.1 This roofing application standard has been developed to provide a responsive
ROOFING APPLICATION STANDARD (RAS) No. 115 STANDARD PROCEDURES FOR ASPHALTIC SHINGLE INSTALLATION 1. Scope 4. Underlayment 2. 1.1 This roofing application standard has been developed to provide a responsive
Installation Procedures
 Installation Procedures Nutec Bigsix Roofing sheets properly laid and fixed in accordance with recommendations will provide many years of trouble-free protection from the elements. Failure to follow these
South African Code SANS 10229: Packaging of dangerous goods for road and rail transportation in South Africa.
 EVERITE s Nutec Bigsix and Eyethu Roofing sheets are durable lightweight sheets that can be used in all sectors of the building industry for roofing and side cladding. Composition The roofing sheets, fittings
Slate Shingle Specifications
 Slate Shingle Specifications California Slate is a proud member of the Slate Roofing Contractors Association of North America, Inc. (SRCA) which publishes Section 07310 Slate Shingles setting forth architectural
REDLAND DRY VALLEY. Installation Instructions for Redland Dry Valley. Version: 6. Date: May Redland Technical Solutions
 REDLAND DRY VALLEY Installation Instructions for Redland Dry Valley Version: 6 Date: May 2013 Author: Department: Redland Technical Solutions Redland Technical Solutions 1 Introduction 1.1 TECHNICAL DATA
AIA Specification. Section Slate Shingles PART 1 GENERAL
 AIA Specification Section 07315 Slate Shingles PART 1 GENERAL 1.1 RELATED DOCUMENTS A. Drawings and general provisions of the Contract, including General and Supplementary Conditions and Division 1 Specification
CURVED ROOF ASSEMBLY INSTRUCTIONS ATTACHED VERANDAH. Your supplementary guide to building an ATTACHED CURVED ROOF VERANDAH or PATIO BEFORE YOU START
 ROOF ATTACHED VERANDAH ASSEMBLY INSTRUCTIONS Your supplementary guide to building an ATTACHED ROOF VERANDAH or PATIO This set of instructions should be used in conjunction with the Stratco instruction
DUTCH GABLE FREESTANDING CARPORT
 DUTCH GABLE FREESTANDING CARPORT STRATCO OUTBACK ASSEMBLY INSTRUCTIONS. Your complete guide to building a FREESTANDING Outback DUTCH GABLE CARPORT BEFORE YOU START Carefully read these instructions. If
BARDOLINE INSTALLATION INSTRUCTIONS
 BARDOLINE INSTALLATION INSTRUCTIONS www.onduline.com CONTENTS General conditions Material requirements Terms Estimating shingle requirements Roof preparation Shingle application 9 GENERAL CONDITIONS ONDULINE
technical bulletin Roofline Installation Details No.7 Fascia Installation Details Typical Eaves Details K16 Fascia & 9mm Vented Soffit
 Roofline Installation Details This is intended to provide you with a brief overview of the popular products in Kestrel s Roofline range, where they can be used and the main criteria for installation. Typical
Shingle Installation Guidelines
 Shingle Installation Guidelines General Guidelines Materials to be used Key definitions Cost of roofing Preparation of the roofing deck Materials used for roofing should conform to approved norms and regulations
Global Roofing Solutions Klip-Tite
 GRS Klip-Tite Global Roofing Solutions Klip-Tite www.globalroofs.co.za marketing@globalroofs.co.za GRS Klip-Tite GRS Klip-Tite 09/18 Typical Specification Materials The roofing shall be Klip-Tite profile,
COMPONENTS OF THE CLICKFAST FASCIA AND GUTTER SYSTEM 5: INTERNAL MITRE
 INTRODUCING THE CLICKFAST FASCIA AND GUTTER SYSTEM The Clickfast Fascia and Gutter System was originally designed by Stratco and has proven to be the most successful fascia and gutter system in Australia
About Everite and Nutec 2. Nutec Flat Sheets Features 4. Safety, Handling and Storage 5. General Design Criteria 6. Nutec Flat Sheet Product Range 8
 c o n t e n t s About Everite and Nutec Nutec Flat Sheets Features Safety, Handling and Storage General Design Criteria 6 Nutec Flat Sheet Product Range 8 Application Possibilities 9 General Installation
Global Roofing Solutions Klip-Lok 700
 GRS Klip-Lok 700 Global Roofing Solutions Klip-Lok 700 www.globalroofs.co.za marketing@globalroofs.co.za GRS Klip-Lok 700 GRS Klip-Lok 700 09/18 Typical Specification Materials The roofing shall be Klip-Lok
BRACING BRACING SECTION 7 SECTION 7
 If we are to learn from the past, it is clear that there is generally a lack of understanding of the purpose of roof bracing and who should be responsible for it. This has led to disputes, claims and,
Global Roofing Solutions Brownbuilt
 GRS Brownbuilt Global Roofing Solutions Brownbuilt www.globalroofs.co.za marketing@globalroofs.co.za GRS Brownbuilt GRS Brownbuilt 09/18 Typical Specification Materials The roofing / side cladding shall
HOW TO Fix Onduline Corrugated Bitumen Sheets
 HOW TO Fix Onduline Corrugated Bitumen Sheets BBA BRITISH BOARD OF AGREMENT CERTIFICATE NO. 87 / 1823 W ROOFING PLAN IT Roofing components: Ridge Roof decking Apex Verge Barge board Purlins / battens Rafters
Roll-Fix Kit The complete dry hip kit RFIG
 H I P Roll-Fix Kit The complete dry hip kit RFIG.045-0906-1 Roll-Fix is a quick and simple dry-fix roofing kit for hips. l Quick and easy to install no special tools required l Universal application fits
installation guide Villa
 installation guide Villa Table of Contents Introduction............................. 2 Safety................................... 2 Tools.................................... 2 Codes & Requirements....................
Special Roofs and Vertical Slating
 Special Roofs and Vertical Slating Roofs falling into the category of "special" roofs have the following characteristics: (a) any roof slope equal to or greater than the minimum pitch for the size of slate
1 Exam Prep NRCA Roofing Manual: Steep-Slope Roof Systems 2013 Tabs and Highlights
 1 Exam Prep NRCA Roofing Manual: Steep-Slope Roof Systems 2013 Tabs and s These 1 Exam Prep Tabs are based on the National Roofing Contractors Association (NRCA) manual listed below: Steep-Slope Roof Systems
Stone coated steel roof tile INSTALLATION GUIDE
 Stone coated steel roof tile INSTALLATION GUIDE Ⅰ. Introduction These installation details are provided to demonstrate recommended installation methods for KD One roof products and accessories. Consult
TRADITIONAL GABLE ATTACHED PATIO AND CARPORT. Your complete guide to building an ATTACHED Outback TRADITIONAL GABLE PATIO or CARPORT
 TRADITIONAL GABLE ATTACHED PATIO AND CARPORT STRATCO OUTBACK ASSEMBLY INSTRUCTIONS. Your complete guide to building an ATTACHED Outback TRADITIONAL GABLE PATIO or CARPORT BEFORE YOU START Carefully read
INSTALLATION GIUDE.
 INSTALLATION GIUDE INTRODUCTION The instructions and drawings included here are intended only as a guide for the installation of ECO Roofing Systems Spanish and Modern profiles. The materials and methods
Unless otherwise directed, traditionally cast lead sheet is required.
 LEAD ROOFING 1.0 SPECIFICATION OF LEAD SHEETING Unless otherwise directed, traditionally cast lead sheet is required. 2.0 STRIPPING Carefully strip old defective lead and existing coverings from roofs
Table of Contents. Fasteners... 4 Venting Preparation Installation with Battens - DECRA Tile & DECRA Shake 1
 Table of Contents DECRA Tile & Shake Roof Overview... 2 Introduction... 3 Safety... 3 Tools.... 3 Estimating Sheets... 4 Codes & Requirements... 4 Roof Slope... 4 Underlayment... 4 Deck Preparation....
Acceptable Standards of Domestic Construction
 Truss or Rafter Roof Batten Triple grip fastener (for roof trusses) Foil lined Insulation blanket Top plate Sprocket Brick tie Top plate strapping at 1200mm max. cts. Note: Holding down straps should be
FOREWORD HARMONY TECHNICAL SPECIFICATIONS
 FOREWORD Harmony Roof Tiles has great pleasure in presenting this Technical Manual to the industry and take this opportunity to explain a little more about its background. For a number of years, our company
Installation Guide. Guardian Slate Roof System. England, Scotland & Wales
 Installation Guide Guardian Slate Roof System England, Scotland & Wales March 2016 Product Information Construction: Manufactured from resin bonded crushed limestone Size (slate): 445 x 294mm (ridgecap):
Five Star Panel Installation Instructions
 Five Star Panel Installation Instructions How to Store Five Star Panels You will need to store FIVE STAR PANELS in dry place to prevent staining, deterioration and possibly void all warranties. Stand the
BBA BRITISH BOARD OF AGREMENT CERTIFICATE NO. 87 / 1823 / C
 Fixing Guide BBA BRITISH BOARD OF AGREMENT CERTIFICATE NO. 87 / 1823 / C Onduline Fixing Guide Introduction Onduline is the world s largest manufacturer of bituminous corrugated sheets. Onduline roofing
Installation Guide. Step 3. Valley Flashing. Step 7. Transition Flashings and Accessories. Step 6. Hip and Ridge Installation
 Step 7. Transition s and Accessories Step 3. Valley Step 6. Hip and Ridge Installation Step 2. Rake Trim Step 5. Installing the Shingles Step 1. Eave Starter Installation Step 4. Endwall s Installation
eco-shake INSTALLATION INSTRUCTION
 1 eco-shake INSTALLATION INSTRUCTION NOTE: Shuffling the eco-shakes during installation may be necessary to obtain a uniform color throughout the roof. Due to the natural wood content in the ecoshakes,
MULTISPAN GABLE WITH HIP END ATTACHED PATIO
 MULTISPAN GABLE WITH HIP END ATTACHED PATIO STRATCO OUTBACK ASSEMBLY INSTRUCTIONS. Your supplementary guide to building an ATTACHED MULTISPAN GABLE VERANDAH or PATIO WITH HIP END This set of instructions
TECHNICAL BULLETIN 28
 November 2015 TECHNICAL BULLETIN 28 INCLINED PREFORMED GRP VALLEY TROUGHS 1. BACKGROUND 1.1 Preformed GRP (Glass Reinforced Polyester) Valley Troughs have been used successfully in the roofing industry
Asphalt Shingle Roofing NZ PO Box , Royal Oak Auckland
 Asphalt Shingle Roofing NZ PO Box 24-676, Royal Oak Auckland 1345 09 636 7051 0800261116 www.asphaltshingle.co.nz TECHNICAL & INSTALLATION MANUAL This information is provided by Asphalt Shingle Roofing
REGAL. Installation Manual
 REGAL Installation Manual General Information The details shown on the following pages are suggestions or guidelines for installing the Regal system. The installation details shown here are proven methods
ROOFING DESIGN AND FIXING GUIDE
 CUPA PIZARRAS leads the world in slate production. Our 16 quarries and 22 processing plants combine the latest technology with our traditional know-how and craftsmanship. Using cutting-edge production
EASY SLATE FIXING GUIDE
 EASY SLATE FIXING GUIDE July 2017 Product Information No Special Tools Required Hand fastened (hammered) or fastened with a pneumatic nail gun. Sharp utility blade or a standard circular saw. Tape measure,
Polytegola N. Bitumen Roof shingles. Application guide
 Polytegola N Bitumen Roof shingles Application guide Application manual POLYTEGOLA N CONTENT 1. Foreword - General conditions 3 2. POLYTEGOLA N designs 4 3. Roof pitches 5 4. Storage 5 5. Roof decking
Tuff-Rib Install Guide
 Install Guide bestbuymetalroof.com Page 2 of 27 Page 3 of 27 1. Page 4 2. a. Installation Guide b. Panel Squaring Pages 5, 6 Pages 7, 8 3. Pages 9, 10 4. a. Fascia (optional) b. Eave / 1.5x3.5 Angle c.
Installation Manual. Future Roof Shingle / Slate Products
 Installation Manual Future Roof Shingle / Slate Products REVISED 14/09/2010 Future Roof Shingle Installation Manual is a component of Future Roof, Inc. and as such is intended to be used with Future Roof
COMPOSITE SIDING INSTALLATION GUIDE
 CENTURY HOME LIVING COMPOSITE SIDING INSTALLATION GUIDE Read all instructions prior to installing any siding product. Failure to install and finish this product in accordance with all local building codes,
Talk to us, THE SMART ROOF PEOPLE Visit or Global Roofing Solutions Brownbuilt
 Talk to us, THE SMART ROOF PEOPLE Visit www.globalroofs.co.za or email info@globalroofs.co.za Global Roofing Solutions Brownbuilt Typical specification Materials The roofing / side cladding shall be Brownbuilt
SECTION SLATE SHINGLES. 1.1 SUMMARY A. Section Includes: 1. Slate shingles over underlayment nailed to roof sheathing.
 SECTION 07 31 26 SLATE SHINGLES SPEC WRITER NOTES: Delete text between // // not applicable to project. Edit remaining text to suit project. PART 1 - GENERAL 1.1 SUMMARY A. Section Includes: 1. Slate shingles
PROFESSIONAL PITCHED ROOFING ANCILLARIES
 PROFESSIONAL PITCHED ROOFING ANCILLARIES MADE IN BRITAIN Before installing the Easy Roof System, please be aware of the following guidelines: The roof should be installed in the traditional way, with the
Measuring Timber Pitched Roofs in Accordance with ARM4
 Dublin Institute of Technology ARROW@DIT Other Resources School of Surveying and Construction Management 2015-02-10 Measuring Timber Pitched Roofs in Accordance with ARM4 Tony Cunningham Dublin Institute
Installation Guide. Please read before installing SIPs Kit. 1 Method Statement for the erection of a SIPS Industries Kit Materials...
 30a Renewable Chase Bibra Lake WA 6163 Tel: (08) 9494 2211 Fax: (08) 9494 2202 Email: info@sipsindustries.com.au Web: www.sipsindustries.com.au Installation Guide Please read before installing SIPs Kit.
Western Red Cedar Shingles Product Guide
 Western Red Cedar Shingles Product Guide Western Red Cedar Shingles & Shakes from John Brash are a truly renewable and sustainable roofing and cladding material; with one of the lowest carbon footprints
ROOFING City of Grand Rapids Building Safety Division
 ROOFING City of Grand Rapids Building Safety Division 218-326-7601 www.cityofgrandrapidsmn.com This handout is intended only as a guide and is based in part on the 2015 Minnesota State Building Code, Grand
Chapter 16: Roof Steel
 Chapter 16: Roof Steel Most Common Mistakes: 1. Roof purlins not checked for alignment. 2. Failure to properly square roof. 3. Reversing steel laps. 4. Using not enough or too many screws. 5. Over or under
Turada Hardwood Shingles and Shakes Installation instructions
 1. General 1.1 Maximum Exposure: Maximum exposure for wood shingles and shakes shall comply with Table 1 herein, unless specifically specified in the roof assemblies Product Approval. 1.2 Solid and Spaced
British Columbia Carpenter Apprenticeship Program
 British Columbia Carpenter Apprenticeship Program Level 3 Line H Competency H-7 Build Intersecting Roofs 7960003573 Ordering Crown Publications, Queen s Printer PO Box 9452 Stn Prov Govt 563 Superior St.
Installation Manual. Future Shingle Products
 Installation Manual Future Shingle Products TITLE REVISED 7/4/2011 Future Shingle Installation Manual is a component of Future Roof, Inc. and as such is intended to be used with Future Roof products only.
How-To-build guide Garden shed
 How-To-build guide Garden shed What you can build using this guide This guide will show you how to build a re-locatable garden shed. Before you begin building Contact your local territorial authority to
CSR ROOFING ARCHITECTURAL MANUAL INTRODUCTION
 FOREWORD This manual has been prepared by CSR Roofing to assist the architect, builder and installer to specify, prepare and install roof tiles. While it is not possible to detail every condition that
Stratco Sanctuary INSTALLATION BEFORE YOU START TOOLS REQUIRED GUIDE
 INSTALLATION GUIDE Stratco Sanctuary Verandahs, Patios and Carports BEFORE YOU START It is important to check with your Local Government Authority prior to the installation of your new Stratco Sanctuary
NEW equinox INSTALLATION GUIDE Issue
 NEW equinox INSTALLATION GUIDE Issue 2 CONTENTS 1. Preparing the ring beam 2 2. Installing the framework 3 3. How to install structural support posts 7 4. Insulation and waterproofing 8 5. Tile application:
2 Fibre cement slates fixing guide
 Tegral are the market leader in the design and manufacture of roofing products in Ireland. With over 80 year s experience, we have developed a deep understanding of the roofing requirements for the Irish
Barrel Vault Counter Batten and Batten
 Barrel Vault Counter Batten and Batten INSTALLATION GUIDE www.gerardusa.com INSTALLATION NOTIFICATION The installation procedures demonstrated in this manual are recommended methods for the installation
BARRELL VAULT BATTENLESS
 i BARRELL VAULT BATTENLESS INSTALLATION GUIDE INSTALLATION NOTIFICATION The installation procedures demonstrated in this manual are recommended methods for the installation of the Gerard Barrel Vault battenless
CLEARSPAN GABLE STRATCO OUTBACK ASSEMBLY INSTRUCTIONS. WITH GAZEBO END ATTACHED PATIO
 CLEARSPAN GABLE WITH GAZEBO END ATTACHED PATIO STRATCO OUTBACK ASSEMBLY INSTRUCTIONS. Your supplementary guide to building an ATTACHED CLEARSPAN GABLE VERANDAH or PATIO WITH GAZEBO END This set of instructions
LVL8 H1.2 GENERAL FRAMING. Eco Friendly Revolutionary H1.2 Treatment Azotek by Zelam
 LVL8 H1.2 GENERAL FRAMING Eco Friendly Revolutionary H1.2 Treatment Azotek by Zelam NPIL/MARCH2015 Introduction to NelsonPine LVL8 H1.2 NelsonPine LVL is an engineered wood composite made from rotary peeled
GLOSSARY OF TERMS SECTION 8
 GLOSSARY OF TERMS SECTION 8 Anchor Bolt Angle Base Plate Bay Blocking CCB Centerline Chord Cladding Clip Closure Strip An A-307 steel bolt embedded in the concrete footing to anchor the base plate of the
1 Roof Substrate (Deck) OWENS CORNING BERKSHIRE SHINGLES INSTALLATION INSTRUCTIONS
 OWENS CORNING BERKSHIRE SHINGLES INSTALLATION INSTRUCTIONS") General This Installation Instruction document for Owens Corning Berkshire roofing shingles is to be read in conjunction with the Installation information printed on each packet of shingles along with
General This Installation Instruction document for Owens Corning Berkshire roofing shingles is to be read in conjunction with the Installation information printed on each packet of shingles along with
NEW equinox INSTALLATION GUIDE Issue
 NEW equinox INSTALLATION GUIDE Issue 1 CONTENTS If in doubt at any stage 1. Preparing the ring beam 2 2. Installing the framework 3 3. Insulation and waterproofing 7 4. Tile application: Steel tiles 9
3-Tab Shingle Instructions DURA-SEAL 20 DURA-SEAL 25
 3-Tab Shingle Instructions DURA-SEAL 20 DURA-SEAL 25 1 Directions For Applying Malarkey 3-Tab Shingles GENERAL INSTRUCTIONS Install Malarkey 3-tab shingles according to building code and local amendments.
Inspire Aledora Slate Application Guidelines
 July 2014 Inspire Aledora Slate Application Guidelines Only Basic Roofing Tools Required Hand fastened or fastened with a pneumatic nail gun Utility knife or a standard circular saw Tape measure, pry bar,
Inspire Slate Starter Piece Hip and Ridge. 13 1/2" Height: 13 ½" Width: 12" Squares/ Pallet. Bundles/ Square
 December 2017 Classic Slate Application Guidelines Only Basic Roofing Tools Required Hand fastened or fastened with a pneumatic nail gun Utility knife or a standard circular saw Tape measure, pry bar,
Viva Synthetic Thatch Installation Instructions
 Viva Synthetic Thatch Installation Instructions Overview Structure This instruction manual is for the installation of VIVA on an open battened roof frame. Structure should be framed with weatherable wood
Installation Guide (888)
") BamDeck Installation Guide (888) 788-2254 The Collection Decking Systems BAMDECK 3G 5-7/16 Wide Plank Dims: 96 L x 5-7/16 W x 13/16 H BAMDECK 3G 16FT. 5-7/16 Wide Plank Dims: 192 L x 5-1/2 W x 13/16 H
BamDeck Installation Guide (888) 788-2254 The Collection Decking Systems BAMDECK 3G 5-7/16 Wide Plank Dims: 96 L x 5-7/16 W x 13/16 H BAMDECK 3G 16FT. 5-7/16 Wide Plank Dims: 192 L x 5-1/2 W x 13/16 H
Egger Roofing Board Fast, Easy, Safe: With this board you can reach the top.
 Egger Roofing Board Fast, Easy, Safe: With this board you can reach the top. 1 2 Content Content 1 2 Roof Sheathing 4 Importance 4 EGGER Roofing Board 5 Benefits 5 Principles of the EGGER Roofing Board
TOPSPAN 22 / 40 LYSAGHT TOPSPAN 22 / 40. Steel roof and ceiling battens for non cyclonic applications
 TOPSPAN 22 / 40 LYSAGHT TOPSPAN 22 / 40 Steel roof and ceiling battens for non cyclonic applications Our TOPSPAN 22 ceiling batten and TOPSPAN 40 roof battens are the economical alternative to timber battens.
Installation Guide (888)
") BamDeck Installation Guide (888) 788-2254 The Collection Decking Systems BAMDECK 4G 5-7/16 Wide Plank Dims: 192 L x 5-7/16 W x 13/16 H BAMDECK 4G WIDE 8-1/4 Wide Plank Dims: 96 L x 8-1/4 W x 13/16 H BAMDECK
BamDeck Installation Guide (888) 788-2254 The Collection Decking Systems BAMDECK 4G 5-7/16 Wide Plank Dims: 192 L x 5-7/16 W x 13/16 H BAMDECK 4G WIDE 8-1/4 Wide Plank Dims: 96 L x 8-1/4 W x 13/16 H BAMDECK
Global Roofing Solutions Klip-Lok 406 Aluminium
 GRS Klip-Lok 406 Global Roofing Solutions Klip-Lok 406 Aluminium www.globalroofs.co.za marketing@globalroofs.co.za GRS Klip-Lok 406 GRS Klip-Lok 406 Alum. 09/18 Typical Specification Materials The roofing
15 YEAR GUARANTEE. Tough and long lasting Guaranteed waterproof for 15 years Economical and easy to fix AVAILABLE IN A RANGE OF COLOURS
 INSTALLATION GUIDE AVAILABLE IN A RANGE OF COLOURS 15 YEAR GUARANTEE Tough and long lasting Guaranteed waterproof for 15 years Economical and easy to fix Coroline corrugated bitumen sheet is a tough lightweight
Roofing Training - Basics. Sandy Wesch
 Roofing Training - Basics Sandy Wesch Tools Hammer Measuring Tape Chalk Line & Chalk Speed Square Framing Square Utility Knife Metal Snips Extension Ladder(s) 2 Safety Any tools or material up on the roof
INSTALLATION GUIDE LEARN MORE AT DECRA.COM
 Villa Tile INSTALLATION GUIDE LEARN MORE AT DECRA.COM Table of Contents DECRA Villa Tile Roof Overview... 2 Introduction... 3 Safety... 3 Tools.... 3 Estimating Sheet... 3 Codes & Requirements... 3 Roof
DIRECTIONS FOR APPLICATION
 Instructions 1 General NOTICE: THESE SHINGLES MUST BE APPLIED TO CONFORM WITH ALL APPLICABLE BUILDING CODES. THESE DIRECTIONS REPRESENT COMMON AND ACCEPTED ROOFING PRACTICES. DEVIATIONS FROM THESE DIRECTIONS
RED DIAMOND SHINGLES Roof Installation Introduction:
 RED DIAMOND SHINGLES Roof Installation Introduction: The guidelines set forth in this manual are intended for use with the application of Red Diamond shingles. Wallaba specie (Eperua Falcata) shingles
Storing, Handling, and Cutting Steel Panels
 Storing, Handling, and Cutting Steel s Storing Specifically check your quantities, colors, and lengths All materials should be used as soon as possible Steel bundles should be stored indoors with enough
Installation Instructions Split Shake, Staggered Shake, Shingle, Perfection Shingle, and Shapes
 Installation Instructions Split Shake, Staggered Shake, Shingle, Perfection Shingle, and Shapes General Guidelines These instructions show one type of installation and are intended for the professional
Brava Old World Slate Installation Guide
 Brava Old World Slate Installation Guide Brava Roof Tile Phone: 844-290-4196 www.bravarooftile.com This document includes the recommended and suggested installation procedures for Brava Old World Slate
PREMIUM LAMINATED ASPHALT SHINGLES Dallas, TX Tuscaloosa, AL Phillipsburg, KS
 Application Instructions for FORMERLY 50 THESE ARE THE MANUFACTURER S APPLICATION INSTRUCTIONS FOR THE ROOFING CONDITIONS DESCRIBED. TAMKO BUILDING PRODUCTS, INC. ASSUMES NO RESPONSIBILITY FOR LEAKS OR