O W N E R S M A N U A L
|
|
|
- Horatio Harrington
- 6 years ago
- Views:
Transcription

1 OWNERS MANUAL

2 EXCLUSIVE U.S. DISTRIBUTOR
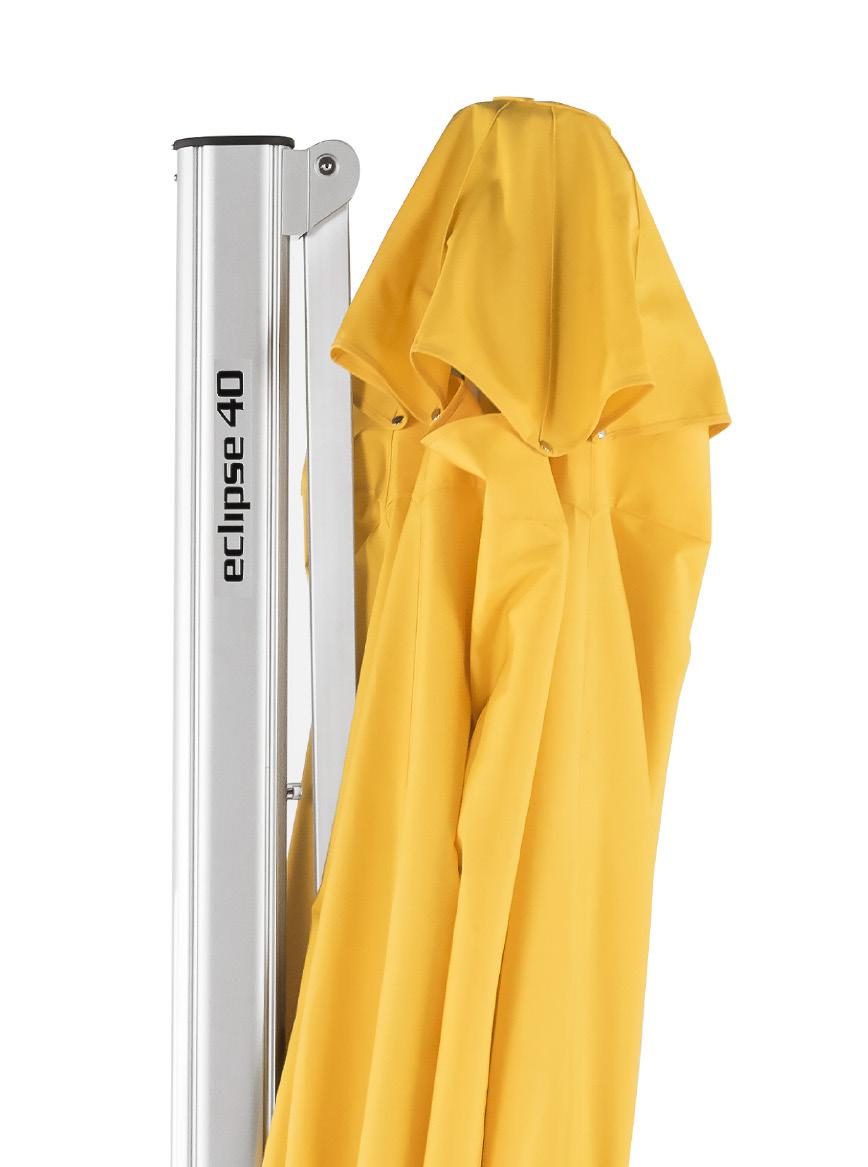
3 Congratulations on purchasing your Eclipse Cantilever Umbrella. The Eclipse is manufactured using the highest standard materials and fabrics on the market, and is perfectly designed to give you many years of enjoyment. The following information is to inform you how to operate your Eclipse Cantilever Umbrella to ensure trouble free use and ease of operation. Please follow these instructions as they are designed to assist operation and prolong the life of your umbrella. General Information Your Eclipse Umbrella is principally intended for use in low to moderate wind conditions and will provide you with many hours of protection from sun and light rain. You will get maximum benefit from your umbrella when you use it in accordance with our instructions and in the weather condition for which it was designed. Do not leave umbrella open when unattended, particularly in windy conditions. Your Eclipse Umbrella should be closed and securely strapped in strong winds and adverse weather conditions. Always secure your umbrella to an appropriate base. Please avoid any modifications to your umbrella, except those made by an authorized Frankford Umbrellas customer service agent. Some modifications may void the warranty. Make sure your Eclipse is dry and clean prior to storing away for extended periods of time to prevent mold from developing. Be careful when closing to ensure the canopy does not get caught or pinched by the umbrella arms. This is particularly important before storing the umbrella away for extended periods of time or if the umbrella is to be laid horizontally for storage. Damage to the fabric caused by pinching is not covered by the warranty. Inspect the installation Fitting/Base on a regular basis and tighten as necessary. 1
4 Simple Maintenance Procedures In coastal or metropolitan environments, frequent washing (spray hose) of the complete unit is very beneficial. Particularly the slider car, slider car guide tracks, and rotating mechanism. Should the 16 rotating mechanism stop pin holes become filled with sand or dust etc., lifting your umbrella up off the spigot by 1 will allow the dust cover to be lifted and the 16 holes can be cleaned. This will be a two man operation. Silicon spray in the slide car guide tracks will assist operation if required. Fold acrylic canvas as mentioned in Closing The Eclipse (Page 8). This will prolong the new look of the canvas and prevent marking caused by pinching in the alloy frame. If you have a cover bag it is advisable to use if the umbrella is not to be used for an extended period of time. All parts are virtually maintenance free e.g. aluminum, stainless steel, fiberglass etc. However, it is recommended that if the umbrella is not to be used for a period of time (winter months) then it is a good idea to place the umbrella in storage. You may even remove the spigot when the umbrella is not in use, as it can be a tripping hazard. The acrylic canvas may be cleaned or mold removed by using a mild mixture of an approved mold remover and warm soapy water with a soft bristle brush. Test first on the securing strap to ensure no damage will be caused to the umbrella canopy fabric. Do not use bleach based detergents to clean the umbrella canopy. 2

5 FABRIC CARE RECacril Marine Grade Acrylic Fabric Infinity Process is a highly technological finish, providing RECacril with long lasting protection against mold and mildew, excellent water and oil repellency and protection from both sun and water. However, the accumulation of dust, pollution particles, foreign organic materials and general dirt can damage this protection, shortening the life of the RECacril, so they should be removed. The most effective method for maintaining RECacril is to clean the canvas once a month with water using a low pressure hose. It is very important that after cleaning with water, the canvas be allowed to completely dry before rolling or storing your umbrella. If for any reason you have to roll and/or store a wet umbrella, it must be unrolled and opened as soon as possible to let it dry. In times of continuous rain it is advisable to keep the umbrella rolled and stored. If periodic washing with water is done, in most environments, you should only need to do a more thorough cleaning every 2-3 years. 3
6 Casual Care & Cleaning Brush off dust and dirt with a soft brush. NEVER brush with stiff brushes since this can damage the fabric finish. Spray the umbrella with clean water. If a hose is used, avoid high pressure. Prepare a solution of solvent-free soap in warm water (no more than 100 F) and apply it to the fabric and stitching. Scrub with a soft brush, allowing the solution to penetrate the fabric. Rinse with water to remove all traces of soap. Let air dry and do not close the umbrella until the canvas is completely dry. Intensive Care & Cleaning RECacril is highly resistant to the growth of fungus, mold, and mildew, however these can grow on embedded dirt. To clean these stains, follow these more intensive cleaning procedures. Brush off dust and dirt with a soft brush. NEVER brush with stiff brushes as this can damage the fabric finish. Prepare a solution with 10% household bleach, 20% solvent-free neutral detergent (Free & Clear detergents) and 70% water. Apply the solution to the fabric, allowing to remain between 15 and 20 minutes maximum. Rinse with clean water several times. Any singular bleach residues remaining on the canvas, combined with the sun, could damage the fabric and stitching. Let air dry and do not close the umbrella until the canvas is completely dry. Repeat the process if necessary. 4
7 ECLIPSE PARTS IDENTIFICATION NOTE: When the ECLIPSE is closed, the swivel pulley is near the top inside of the mast. When the ECLIPSE is open, the swivel pulley is lower down inside the mast
8 ARMS SMALL END FITTINGS SMALL STROPS STOP CLOSURE BUTTON ON 4 ARMS ONLY STRUTS BUTTON HUB TUBE LOCATER STAINLESS STEEL CABLE HUB TUBE TUBE HOLDER TOP HUB CORD GUIDE PLUG TOP HUB PULLEY MAIN ARM SMALL END FITTING LARGE STROPS (ALLOY) BARREL COUPLER TOP STAY ARM SLIDE CAR SLIDE CAR WING INCLINATION PIN DUST COVERS TOP BRACKET MAST CAP MAST WALL PULLEY P FITTING SWIVEL PULLEY MAST MAIN ARM/MAST PULLEYS 4MM MARINE CORD WINDER HANDLE WINDER HOUSING WINDER DRUM SPIGOT NYLON INDEXING SHIELD ROTATING/LIFT HANDLE ROTATING LOCK PIN LIFT OFF PIN 6
 Insert the Winder Handle (30) into the winder housing (31) on the mast and rotate in a clockwise direction.")
 FIGURE A Continue winding until the slider car (19) has attained the maximum height (don t force it, it will stop when fabric tension reaches maximum tautness) and the canopy is fully open.")
9 OPENING THE ECLIPSE Remove the strap from the canopy. Gently spread the canopy arms open with your hand. (Figure A) Insert the Winder Handle (30) into the winder housing (31) on the mast and rotate in a clockwise direction. Ensure the slider car wing shaped inclination stop pin (20) is disengaged (pulled out) and in a vertical position with the steel pin lying horizontal in the slot. (Figure B) FIGURE A Continue winding until the slider car (19) has attained the maximum height (don t force it, it will stop when fabric tension reaches maximum tautness) and the canopy is fully open. The Bottom Hub (6) will be seated into the Hub Tube (9) and the edge of the canopy should be taut. (Figure C) NOTE: The Winder Handle will become a little harder to wind as the umbrella nears fully open. This is normal particularly when the acrylic canvas is new. FIGURE B The Winder Handle may be removed if desired as a safety and security feature. FIGURE C 7
 in a counter-clockwise direction.")
10 CLOSING THE ECLIPSE Ensure the Slider Car wing shaped inclination stop pin (20) is disengaged (pulled out) and in a vertical position with the steel pin lying horizontal in the slot (Figure A). You may need to take some tension off the umbrella canopy to set the pin to vertical. Do this by rotating the Winder Handle (30) in a counter-clockwise direction. Rotate the Winder Handle (30) in a counter-clockwise direction. First the canopy will collapse and then the slider car (19) will descend down the mast. FIGURE A The lowering of the slider car may be assisted manually if required. Fold the canopy neatly to safeguard any pinching of the canvas within the umbrella frame. This is easily done by pulling the canvas to the outside of the frame using your hands to pull the excess in each of the 8 sections of the frame. Then fold each section of fabric left over right etc. Put the canopy strap securely around both the mast and canopy frame. Fit the cover bag over the mast and frame and zip up (Figure B). FIGURE B 8
 by turning it to the horizontal position. You will feel it spring into the mast (Figure B).")

 out and continue to wind the winder handle clock-wise.")

11 TO TILT THE CANOPY Start with the umbrella almost completely closed (i.e. wind down to almost folded position - Figure A). Engage the slider car wing shaped inclination stop pin (20) by turning it to the horizontal position. You will feel it spring into the mast (Figure B). Wind the winder handle (30) in a clockwise direction. The slider car inclination stop pin (20) will engage in a pre-drilled hole in the mast. Continue winding and the canopy will open fully in the desired position. (Approx. 30 of tilt - Figure C) To progress to the second tilt position, unwind the winder handle several full revolutions to release tension until the canopy starts to sag. FIGURE A FIGURE B Pull the slider car wing shaped inclination stop pin (20) out and continue to wind the winder handle clock-wise. As the slider car (19) begins to ascend, release the wing shaped inclination stop pin still in the horizontal position. FIGURE C Continue to wind the umbrella open and inclination stop pin will engage in the next pre-drilled hole. This is tilt position 2 (approx. 60 of tilt - Figure D). NOTE: There are 2 positions of tilt in each of the Eclipse models. Additional tilt position holes may be drilled but this should be done with extreme caution as there is a winder mechanism inside the mast. FIGURE D 9
 which acts as a dust cover for the holes not in use.")
. By using the rotating lift handle (35) as a lever you may rotate the umbrella on the base until you arrive at your desired position (Figure B).")

12 TO ROTATE THE ECLIPSE UMBRELLA There are 16 pre-determined rotation positions in the spigot. These positions are found every 22.5 interval around the spigot base. They are located where indicated with notches on the spigot base. The position holes are under the nylon indexing shield (34) which acts as a dust cover for the holes not in use. Pull the rotation lift handle (35) out from the mast cavity (Figure A). Lift up on the handle and feel the resistance from the spring that houses the rotating lock pin (36). (WARNING: THIS IS NOT USED TO LIFT THE UMBRELLA). By using the rotating lift handle (35) as a lever you may rotate the umbrella on the base until you arrive at your desired position (Figure B). Each position is marked by a notch on the spigot. Align the indicator arrow with a notch (Figure C). Lower the rotating lift handle sufficiently to locate the rotating lock pin. FIGURE A FIGURE B NOTE: There is some resistance to rotation as the weight and friction of the umbrella needs to be overcome. Also, the rotating lift handle will set back into place if the umbrella is not in a pre-determined position. Rotate counter or clock-wise to find the nearest lock position. FIGURE C 10
 stabilizer bars.")


13 INSTALLING YOUR WIND STABILIZER KIT Your Eclipse Cantilever Umbrella comes with a Wind Stabilizer Kit to assist its performance in a wider range of wind conditions. This Stabilizer Kit consists of two (joined) stabilizer bars. NOTE: The Eclipse Cantilever Umbrella does not need to fitted with the Stabilizer Kit for normal everyday operation in calm to moderate wind conditions. However for higher wind strengths or for commercial applications it is advised to use. FIGURE A To Install Stabilizer Kit: Slide the stay block (38) up the internal mast housing to a height roughly the same as the height of the stabilizer bars when standing vertical (Figure A). Attach the threaded stainless screw with the two aluminum stays attached to the stay block and tighten the screw sufficiently for the stay block to remain in position without sliding down the mast (Figure B). Swing either aluminum stay arm off the ground and attach to the umbrella using the T-Lock or Star Screw. Position the T-Lock vertical and slide the hole in the plastic fitting at the end of the stabilizer bar over (Figure C). Set the T-Lock to horizontal to lock the bar in place (Figure C). FIGURE B FIGURE C 11

14 CONTINUED - STABILIZER KIT Attach the remaining arm to the other side. NOTE: There is an adjustment to the outer end of the stays so as to align the knob/ screw connection with the umbrella arms. You may need to loosen the central threaded stainless steel screw and adjust up or down the mast until you have applied a little upward tension on the umbrella arms. Tighten this screw in position (Figure D for umbrella with stabilizer kit correctly fitted). FIGURE D CAUTION: Do not over tension as this may distort the umbrella arms. Reverse the process to remove the stabilizer kit. The stabilizer kit must be removed to close the umbrella or tilt the canopy. Important: Your Eclipse Cantilever Umbrella, even when fitted with the stay kit, is not a permanent, all-weather structure. The umbrella should be closed and folded when not in use and never left open when unattended or in strong winds. 12
15 installation procedure Your Eclipse Cantilever Umbrella is delivered fully assembled. There are three different ways to install your Eclipse Cantilever Umbrella: 1. Installing on a wooden deck using a Deck Plate. 2. Installing on an existing concrete slab or pavers using a Deck Plate. 3. Installing into the ground (i.e. into a lawn, garden or paved patio) using the In-Ground fitting. Prior to installing your installation fittings please read the important information below. Your Eclipse Cantilever Umbrella can rotate 360 and be locked in 16 different locations. This means that every 22.5 of rotation there is provision to lock the umbrella. In most situations there will be a preferred area over which you will predominantly want shade. To ensure you have the ability to shade your preferred location you must have one of the 22.5 rotation locking holes in line with this position. Please have a look at the underside of your spigot to see these 16 locking holes. There is a locking hole in line with each of the 4 spigot bolt holes in the spigot plate. There are also three intermediate holes between each of the spigot bolt holes and these are marked with an indicator mark on the top of the spigot plate. To point your umbrella in the perfect direction or to have a symmetrical installation (especially when installing square umbrellas) it is very important to make sure you install the Base Plate or In-Ground fitting square to the direction that you predominantly want the umbrella to point. PREFERRED STARTING POSITIONS ECLIPSE TO POINT DECK PLATE IN-GROUND MOUNT There are three different ways to install your Eclipse umbrella. Select the installation method from the following pages for the relevant instructions. 13

16 14
17 IN-GROUND MOUNT INSTALLATION OPTIONS Your umbrella comes with a spigot. Once you have installed the In-Ground Mount according to the instructions below, attach the spigot to the In-Ground Mount using the supplied Allen key and bolts. Once the concrete has fully cured, lift the umbrella on to the top of the spigot. This is recommended as a two man operation. The In-Ground Mount is a galvanized steel fitting that must be concreted into position. Because terrain differs from thick dirt to fine soil, a different sized hole must be prepared and a different volume of concrete is used. As a guide, a 19 x 19 x 27 deep hole is a minimum requirement for heavy dirt terrain. A post hole borer can be used to deepen the center of the footing. When pouring the concrete it is advisable to drop a few lengths of reinforcing steel bar into the hole to prevent the concrete from cracking. Remember that the depth of the hole is better than the width and it is much easier to make the hole oversized than to try to re-stabilize the In-Ground fitting should it shift over time. If applicable, patio tiles or pavers have to be removed to facilitate this In-Ground mount and then cut to suit when replaced. If installing through a thin layer of concrete or asphalt, a core drill should be used to drill a 6 diameter hole in the concrete/asphalt. The remainder of the hole below can then be dug out by hand or post hole digger. Important: Align one of the screw holes in the top of the spigot with your desired 12 o clock position on the umbrella. Ensure that the In-Ground fitting is level in the concrete. Allow adequate time for the concrete to cure before erecting the umbrella. Tip: The In-Ground Mount comes with four grub-screws pre-installed in the threaded holes. This is to prevent concrete slurry working its way up into the threaded holes. As an added precaution it is a good idea to place tape on the underside of the holes. Once the In-Ground Mount has been installed, remove the grub-screws with an Allen key. 15
18
19 DECK/CONCRETE INSTALLATION OPTIONS Your umbrella comes with a spigot. Once you have installed the Deck Plate according to the instructions below, attach the spigot to the Deck Plate using the supplied Allen key and bolts. Once the Deck Plate is fully secured, lift the umbrella on to the top of the spigot. This is recommended as a two man operation. DECK PLATE INSTALLATION ALTERNATIVES Installing on wooden deck: Your deck plate must be bolted to the frame of the deck and not only to the deck planking. You need to fasten 1 or 2 braces between the deck joists or bearers that form the structural frame of the deck. It is suggested that 2 pieces of wood of 8 W x 2-4 thick be secured under the deck planking and between the deck bearers and fasten these braces to the joists/bearers with suitable fastenings. These may be large galvanized nails, brackets or similar. The Deck Plate should now be set in the required position and bolted through the deck planking and the fixed braces by using 1/2 x6 stainless steel bolts and nuts with a large washer on the underside. Installing to a concrete slab: When installing your umbrella on a concrete surface, fix the Deck Plate to the concrete using 4 concrete screws, Dyna-Bolts or similar fastenings. The diameter of the countersunk holes in the Spigot is.5, use M10/M12 bolts included with your umbrella. The length of the fastenings will depend on the depth of the concrete and whether there are any tiles or pavers above the concrete. As a minimum, 3 of fastening in concrete is required. IMPORTANT: Align one of the countersunk holes in the Deck Plate with your desired 12 o clock position on the umbrella. TIP: The Deck Plate comes with four grub-screws pre-installed in the threaded holes. Remove the grub-screws with an Allen key. 17
20 COUNTER SUNK BOLTS DECK PLATE 1/4 DECK PANELS 2 THICK CROSS BEAMS DECK BEARERS 12.4 DIAMETER DECK PLATE M10 CONCRETE SCREW OR DYNA BOLT MINIMUM LENGTH 3 Concrete slab minimum depth 4. No screw or fixing to be within 6 of closest edge of concrete slab 18
21 WEIGHTED BASE INSTALLATION Your umbrella comes with a spigot. Once you have assembled the base according to the instructions below, attach the spigot to the base using the supplied Allen key and bolts. Once the base is fully secured, lift the umbrella on to the top of the spigot. This is recommended as a two man operation. TWO UMBRELLA BASE INSTALLATION ALTERNATIVES Installing to the 550NGU: Galvanized Steel Base ships ready to use. The Spigot must be bolted to the universal deck plate already installed on the aluminum lid with the hardware supplied. Match threaded holes on the Spigot with the corresponding holes on the universal deck plate. Installing to 40G+40+40: When installing your umbrella on a Galvanized Plate Stack, rotate the Spigot to match the threaded holes through the top and bottom plates. The diameter of the countersunk holes in the Spigot is.5, use M10/M12 bolts included with your umbrella. Important: All plates are stackable. There are 2 sets of holes on each plate - naked holes and threaded holes. Be sure to use the threaded holes on the bottom plate ONLY. Line up the naked holes on the upper plates and bolt your Stem through to the threaded holes on the bottom plate. Note: The 40G three stack is the maximum stack available at 555 lbs. This is required for the Eclipse Cantilever Umbrella. 19
22 SPIGOT Bolts through to the aluminum lid to galvanized steel box frame lbs. GAVANIZED BASE Base stores (8) 50lb. pavers (400lbs.) in galvanized box frame. 40G-PLATE: 185lbs 40 Round. 40G-PLATE: 185lbs 40 Round. 40G-PLATE: 185lbs 40 Round. MINIMUM WEIGHT RECOMMENDED *MAXIMUM PLATE STACK AVAILABLE 555lbs. 20
23 21
24 WARRANTY UMBRELLA FRAME AND FABRIC 7 YEAR WARRANTY Frankford uses Marine Grade 9 ounce solution-dyed acrylic fabric from several mills, including Sunbrella, Outdura, and Recasens. All Marine Grade acrylic fabrics we use carry a minimum warranty of 7 years against fading. All Furniture Grade fabrics we use carry a minimum warranty of 5 years against fading. This warranty does not cover damage to the fabric related to extreme weather, abuse, or misuse by our customers. This warranty does not cover improper cleaning techniques or chemicals used in cleaning the umbrellas, and does not cover damage caused by the storage method or location used by our clients. Replacement fabric canopy is covered for the time remaining in the original warranty and does not activate a new 7 or 5 year warranty. 7YR FABRIC WARRANTY 2 M E C H A N I C A L WARRANTY 1 YEAR WARRANTY OUR 1 YEAR WARRANTY COVERS ALL POWDER COAT FINISHES (CHIPPING, PEELING, FLAKING, BUBBLING, FADING) OF ALUMINUM POLES (1) YEAR FROM THE DATE OF PURCHASE OF THE FOLLOWING: 3YR FRAME WARRANTY 1 YR YR FRAME FINISH WARRANTY Aurora Series, Eclipse Series, Nova Series, Monaco Series, Greenwich Series, Monterey Collection, and Catalina Collection. The frame structure of the Laurel 3 YEAR WARRANTY OUR 3 YEAR WARRANTY COVERS THE FRAME STRUCTURE FOR THE FOLLOWING: ECLIPSE SERIES, NOVA SERIES, MONACO SERIES, GREENWICH SERIES, MONTEREY COLLECTION, and CATALINA COLLECTION. This warranty includes manufacturer defects to the notch, runner, center pole and skeleton structure. It does not cover damage to the umbrellas related to extreme weather, abuse, or misuse by our customers. If warrantable damage occurs, Frankford will replace or repair any item in this category at its own discretion. Collection is covered by a 1 year warranty. This warranty does not cover damage to the umbrellas related to extreme weather (including rust), abuse, or misuse by our customers. If warrantable damage occurs, Frankford will send parts, replace or repair any item in this category at its own discretion. RUST RUST IS A NATURAL PART OF THE AGING PROCESS OF ALL STEEL OR IRON BASED MATERIALS AND IS THEREFORE NOT CONSIDERED A DEFECT. STEEL BASES AND MOUNTS ARE DESIGNED TO REQUIRE MINIMUM MAINTENANCE. THEY SHOULD BE KEPT CLEAN. 22
25
26 Exclusive U.S. Distributor NORTH AMERICAN HEADQUARTERS FRANKFORD UMBRELLAS 110 GAITHER DR. MOUNT LAUREL NEW JERSEY, (856)
ECLIPSE Cantilever Umbrella OWNER MANUAL.
 ECLIPSE Cantilever Umbrella OWNER MANUAL www.instantshadeumbrellas.com.au 1 ECLIPSE CANTILEVER UMBRELLA Congratulations on purchasing your Eclipse cantilever umbrella. The Eclipse is manufactured using
NOVA HD UMBRELLA OWNER MANUAL
 Congratulations on purchasing your Nova HD umbrella. The Nova HD is manufactured using the best materials and fabrics and is designed to give you many years of trouble free use and enjoyment. The following
13401 Brooks Drive Baldwin Park, CA p f shademakerusa.com
 13401 Brooks Drive Baldwin Park, CA 91706 p 626.338.8810 f 626.338.8816 info@shademakerusa.com shademakerusa.com 2018 Shademaker. All rights reserved. SMOM-ORION-0718 W A R R A N T Y : Upon receipt of
Our Limited Warranty is outlined below by individual styles. Please note, wind damage is not covered under any manufacturer s warranty
 WARRANTY: Upon receipt of your Galaxy, please check to ensure you have received all of the Shademaker manufacturers all its shade styles from the finest aluminum alloys to ensure the strength, durability
AG19 10 OC Cantilever. Assembly and Operation Guide
 AG19 10 OC Cantilever Assembly and Operation Guide Thank you for your purchase of Treasure Garden s AG19 Cantilever Umbrella. Please remove all contents from the package, inspect and review checklist.
AG25T/AG25TSQ 11.5 OC/10 SQ Cantilever. Assembly and Operation Guide
 AG25T/AG25TSQ 11.5 OC/10 SQ Cantilever Assembly and Operation Guide Thank you for purchasing Treasure Garden s AG25T Cantilever Umbrella. Please remove all contents from the package, inspect and review
AKZ13 13 OC Cantilever. Assembly and Operation Guide
 AKZ13 13 OC Cantilever Assembly and Operation Guide Thank you for your purchase of Treasure Garden s AKZ13 Cantilever Umbrella. Please remove all contents from the package, inspect and review checklist.
Bali. I n s t r u c t i o n M a n u a l. Cantilever. 11 Octagon / SSAD Square / SSAD45-10SQ
 Bali Cantilever 11 Octagon / SSAD45-11 10 Square / SSAD45-10SQ I n s t r u c t i o n M a n u a l Thank you for your purchase of SimplyShade s Bali Cantilever Umbrella. Please remove all contents from the
Santorini. Instruction Manual. Cantilever. 10 Round / SSAG9-10
 Santorini Cantilever 10 Round / SSAG9-10 Instruction Manual Thank you for purchasing SimplyShade s Santorini Cantilever Umbrella. Please remove all contents from the package, inspect and review checklist.
Capri. I n s t r u c t i o n M a n u a l. Balcony Umbrella x 6.93 Rectangle / SSBU-5X7RT5T
 Capri Balcony Umbrella 4.95 x 6.93 Rectangle / SSBU-5X7RT5T I n s t r u c t i o n M a n u a l Thank you for your purchase of SimplyShade s Capri Balcony Umbrella. Please remove all contents from the package,
10ft. Square Side Mount Item # 64443
 10ft. Square Side Mount Item # 64443 A S S E M B L Y A N D O P E R A T I O N Thank you for your purchase of Frontgate s 10 Square Side Mount umbrella. Please remove all contents from the package, inspect
FLEX UMBRELLA INSTRUCTIONS FOR ASSEMBLY AND RECOMMENDATIONS FOR USE
 FLEX UMBRELLA INSTRUCTIONS FOR ASSEMBLY AND RECOMMENDATIONS FOR USE READ THIS HANDBOOK IMMEDIATELY These instructions have to be handed over to the end-user of the product who has to read and keep them.
The Capri & Capri II. ShadeTree Canopy Systems Assembly Instructions
 2012 Using ShadeTree Aluminum Overhead Tracks supported by a aluminum vertical support structure. The Capri & Capri II Dear Customer: Thank you for purchasing our ShadeTree Canopy System. We trust these
Please Do Not Return This Product To The Store!
 MODEL NOS. T8512 TOURNAMENT SERIES 3 TABLE TENNIS TABLE OWNER'S MANUAL 1. Read this manual carefully before starting assembly. Read each step completely before beginning each step. 2. Some smaller parts
ITEM#:DNSW5102J PK IMPORTANT, RETAIN FOR FUTURE REFERENCE: READ CAREFULLY. St. Thomas Swivel Rocking Dining Chair
 ITEM#:DNSW5102J-48019-2PK IMPORTANT, RETAIN FOR FUTURE REFERENCE: READ CAREFULLY St. Thomas Swivel Rocking Dining Chair Customer Service E-Mail : customerservice@foremostgroups.com 8:30a.m. 5:00p.m. EST,
Hip Roof Canopy Instructions
 Hip Roof Canopy Instructions - PUT SAFETY FIRST. NOT COMPLYING WITH THE PROCEDURES AND PRECAUTIONS OUTLINED IN THIS MANUAL MAY RESULT IN PERSONAL INJURY AND WILL INVALIDATE THE WARRANTY.. Before attempting
The Pergola. ShadeTree Canopy Systems Assembly Instructions. ShadeTree Deluxe or Basic Pergola supported by a vinyl free-standing support structure.
 ShadeTree Canopy Systems Assembly Instructions ShadeTree Deluxe or Basic Pergola supported by a vinyl free-standing support structure. 2012 The Pergola Dear Customer: Thank you for purchasing our ShadeTree
INSTALLATION INSTRUCTIONS Super Scout PART #
 INSTALLATION INSTRUCTIONS Super Scout 71-80 PART #443-010 Thank you for purchasing Specialty s Convertible Top for your Scout vehicle. It has been designed for great fit and long wear. Please read and
INSTALLATION INSTRUCTIONS
 INSTALLATION INSTRUCTIONS BRONCO FAST TRAC TOP PART #331-210 BRONCO 1966-1977 Thank you for purchasing Specialty s Convertible Top for your Bronco. It has been designed for great fit and long wear. Please
INSTALLATION INSTRUCTIONS CJ-5 M38A PART # With Doors
 INSTALLATION INSTRUCTIONS CJ-5 M38A1 1955-1975 PART #109-011 With Doors Thank you for purchasing Specialty s Convertible Top for your Jeep vehicle. It has been designed for great fit and long wear. Please
Arla WOODEN CARE GUIDE BY DIRECT OUTDOOR LIVING
 Arla WOODEN GUIDE BY DIRECT OUTDOOR LIVING This care guide will guide you on how to get the best from your Direct Outdoor Living garden furniture. Acacia Care The Acacia used in our products is highly
INSTALLATION INSTRUCTIONS JEEP SCRAMBLER FAST TRAC TOP PART #108-21X
 INSTALLATION INSTRUCTIONS JEEP SCRAMBLER FAST TRAC TOP PART #108-21X Thank you for purchasing Specialty s Convertible Top for your Jeep vehicle. It has been designed for great fit and long wear. Please
INSTALLATION INSTRUCTIONS Scout II - Fast Trac PART #
 INSTALLATION INSTRUCTIONS Scout II - Fast Trac PART #442-210 Thank you for purchasing Specialty s Convertible Top for your Scout vehicle. It has been designed for great fit and long wear. Please read and
400A 40113V, 401A 40120V, & 401AL 40120VL ALUMINUM VERTICAL 4000 LB LIFT INCLUDES SCREW LEG ASSEMBLY INSTRUCTIONS
 12/11/07 PAGE 1 OF 12 400A 40113V, 401A 40120V, & 401AL 40120VL ALUMINUM VERTICAL 4000 LB LIFT INCLUDES SCREW LEG ASSEMBLY INSTRUCTIONS Thank you for purchasing our product! *Please read these instructions
IMPORTANT, RETAIN FOR FUTURE REFERENCE: READ CAREFULLY For Outdoor Use Only
 ITEM#: FG-SNP4272TBL17 San Paulo 42 x72 Oval Dining Table IMPORTANT, RETAIN FOR FUTURE REFERENCE: READ CAREFULLY For Outdoor Use Only Customer Service E-Mail : customerservice@foremostgroups.com 8:30a.m.
S E L E C T I O N. Arm Curl. User manual
 S E L E C T I O N T H E S T R E N G T H E V O L U T I O N User manual The identification plate of the and manufacturer, affixed behind the seat, gives the following details: A Name and address of the manufacturer
Liberty Repair Catalogue
 Liberty Repair Catalogue Manual # Replacement part L 01 L02 L 03 L 04 L 05 L 06 L 07 L 08 L 09 L 10 L 11 L 12 L 13 L 14 Replace arm end fitting Replace arm strop Replace canopy arm Replace canopy strut
Tilting & Swiveling Plasma/LCD Flat Panel Wall Mount Installation Guide Model: A380SM
 Tilting & Swiveling Plasma/LCD Flat Panel Wall Mount Installation Guide Model: A380SM Easy installation Built-in level for easy positioning Corrective leveling adjustments after installation Forward /
SB-WM-ART2-L-BL SB-WM-ART2-XL-BL
 SB-WM-ART2-L-BL SB-WM-ART2-XL-BL Weatherproof Universal Dual-Arm Articulating Mount for Large TVs INSTALLATION MANUAL WARNING The maximum weight of this wall mount is 150 lbs (68.04 kg). Use with heavier
Installing A Carver Bimini Top
 Installing A Carver Bimini Top How To Prolong The Life Of Your Bimini Top Carver Bimini Tops are a classy way to protect yourself and your boat from the elements. They also add style and color to your
Dual Arm Tilt LCD Mount
 Installation Manual model # 51324 M o u n t i n g S y s t e m s Dual Arm Tilt LCD Mount Fits Displays 13 to 32 Supports Up to 50 lbs (23 kgs) Projection from Wall from 3 to 17 Meets VESA Standards 50/75/100,
SETUP INSTRUCTIONS If you would like to tell us about your experience with your setup instructions please us at
 207 VK-964 General Layout 0 0 Plan View www.classicexhibits.com SETUP INSTRUCTIONS If you would like to tell us about your experience with your setup instructions please email us at info@classicexhibits.com
How to operate (folding)
") How to operate (folding) LEFT HAND STACKING OUTWARD OPENING How to operate (folding) RIGHT HAND STACKING OUTWARD OPENING LOCK BOTH LEVER HANDLE AND FLAT HANDLE UTILISING THE D-HANDLE LOCATED ABOVE THE
How to operate (folding) LEFT HAND STACKING OUTWARD OPENING How to operate (folding) RIGHT HAND STACKING OUTWARD OPENING LOCK BOTH LEVER HANDLE AND FLAT HANDLE UTILISING THE D-HANDLE LOCATED ABOVE THE
= Furniture Solutions =
 = Furniture Solutions = INSTRUCTION MANUAL TOULON RECLINER CHAIR ITEM CODE: 17TOUHE Imported by Furniture Solutions (Aust) Pty Ltd New South Wales, Australia. For any assistance with assembly or for missing
OWNER S MANUAL. Sears Kendall 6PC Dining Set * Swivel Rocker. Product Code:D71 M80917 UPC Code: Date of Purchase: / /
 OWNER S MANUAL Sears Kendall 6PC Dining Set * Swivel Rocker Product Code:D71 M80917 UPC Code: 7-22938-07967- Date of Purchase: / / If you have any problems with this product, DO NOT RETURN IT TO THE STORE.
KD Table Base Assembly and Top Attachment Instructions
 KD Table Base Assembly and Top Attachment Instructions 4011xx 5000xx 7014xx 8001xx 8206xx Congratulations on the purchase of your Tropitone furniture. Read through all steps before starting assembly. CAUTION:
PAT installation of a Sun Dome over a in-ground
 PAT. 3766573 Installation of Sun Domes for in-ground pool GENERAL INSTRUCTIONS: STEP 1. Read thru the entire instructional materials before beginning any installation. You will find that the installation
FENCE INSTALLATION GUIDE 8 HIGH WALLS
 FENCE INSTALLATION GUIDE 8 HIGH WALLS 1.866.648.9336 www.simtekfence.com INSTALLATION GUIDE These instructions are designed to assist both professional installers and do-it-yourselfers of SimTek decorative
Assembly Instructions. Funbrella Palm
 Assembly Instructions Funbrella Palm Please read all assembly/installation instructions before the installation or removal of this product. EVANSVILLE, IN Sold by Aquatic Technology, Inc. Phone: 800-446-646
Basic Spring Motor Roller Shades
 Basic Spring Motor Roller Shades ATTENTION!!! READ CAREFULLY! This shade has a reliable long-lasting Spring Motor. The Spring Motor must have proper tension in order to function as intended. Handling in
Installation and Assembly: Articulating Swivel Arm for 37" - 60" Flat Panel Displays
 Installation and Assembly: Articulating Swivel Arm for 37" - 60" Flat Panel Displays Models: PLA60, PLA60-S, PLAV60, PLAV60-S Max UL Load Capacity: 175 lb (79 kg) 2300 White Oak Circle Aurora, Il 60502
SB-WM-ART1-M-BL. Weatherproof Universal Single-Arm Articulating Mount for Medium Displays INSTALLATION MANUAL
 SB-WM-ART1-M-BL Weatherproof Universal Single-Arm Articulating Mount for Medium Displays INSTALLATION MANUAL WARNING The maximum weight of this wall mount is 90 lbs (41 kg). Use with heavier than the maximum
KEEP FOR FUTURE REFERENCE STOWAWAY TILT TABLE READ ALL INSTRUCTIONS AND WARNINGS BEFORE USING THIS TABLE
 KEEP FOR FUTURE REFERENCE INSTRUCTIONS International Version P.O. Box 368 908 West Main Laurel, MT USA 59044 phone 800-548-7341 phone 406-628-8231 fax 406-628-8354 MODEL NUMBER: STT1 SERIAL NUMBER: (please
Electric Skein Winder
 Electric Skein Winder Assembly and Use Package Contents 1 - Triangular Body (w/ motor) 1 - Cross Arm 1 - Left Foot (w/ yarn guide) 1 - Right Foot 1 - Adjustable Finger (w/ yarn clip) 3 - Adjustable Fingers
LifeGear G1 /HOME GYM ITEM NO.: 63100
 LifeGear G1 /HOME GYM ITEM NO.: 63100 OWNER S MANUAL IMPORTANT: Read all instructions carefully before using this product. Retain this owner s manual for future reference. The specifications of this product
Stop! Read This Important Information.
 Stop! Read This Important Information. Stop, Do Not Proceed, Read This This door replacement kit is designed for the replacement of doors on a Supertop ONLY! This door will not work on any other style
HOME GYM Owner s Manual
 HOME GYM Owner s Manual Content Content-------------------------------------------------------------1 Safety precautions----------------------------------------------------2 Assembly instruction-------------------------------------------------3-12
installation guide 1 GUIDE#: pwb-assault-001
 assault WAKEBOARD tower installation guide INSTALLATION SUPPORT 1 important information This Aerial wakeboard tower fits motor boats with 76-108 inch wide beam widths. This measurement is taken from the
Installation Instructions. Tools Needed. Tape measure. Level. Shovel or Post hole digger. Concrete. Drill. Stakes. Mallet or hammer.
 Installation Guide EcoStone Fence 1330 West 400 North Orem, UT 84057 Toll Free 1.866.648.9336 Tel. 1.801.655.5236 Fax 1.801.655.5240 www.ecostonefence.com Installation Instructions Introduction. These
FENCE INSTALLATION GUIDE 6 HIGH FENCE
 FENCE INSTALLATION GUIDE 6 HIGH FENCE 1.866.648.9336 www.simtekfence.com INSTALLATION GUIDE These instructions are designed to assist both professional installers and do-it-yourselfers of SimTek decorative
Installing A Carver Bimini Top
 Installing A Carver Bimini Top How To Prolong The Life Of Your Bimini Top Avoid letting water or snow stand on the top. Always travel with top in the stored position. Allow Bimini Top to dry thoroughly
E N G L I S H GARDEN SHED. Assembly Instructions. Suitable for Models WITH VARYING DEPTHS
 GARDEN SHED Assembly Instructions Suitable for Models 6' Wide 8' Wide 0' Wide WITH VARYING DEPTHS GI0003 November 0 INSTALLATION ADVICE It's Not That Difficult! The construction of your shed isn't as complicated
OWNER S MANUAL. Sears Peyton 5PC Bar Set. * Balcony Chair. Product Code: D71 M80911 UPC Code: Date of Purchase: / /
 OWNER S MANUAL Sears Peyton 5PC Bar Set * Balcony Chair Product Code: D71 M80911 UPC Code: 7-22938-07962-9 Date of Purchase: / / If you have any problems with this product, DO NOT RETURN IT TO THE STORE.
RAMPAGE P R O D U C T S. BRONCO ZIPPER FASTRACK TOP PART #984xx BRONCO TOOLS REQUIRED
 RAMPAGE P R O D U C T S 84 (+/- 1/4 ) BRONCO ZIPPER FASTRACK TOP PART #984xx BRONCO 1966-1977 TOOLS REQUIRED 3/8 WRENCH 7/16 WRENCH ½ WRENCH #2 PHILLIPS SCREWDRIVER 1/8 DRILL BIT 9/64 DRILL BIT 5/32 DRILL
The Heritage Pergola
 Eye Level Corporation One Trefoil Drive Trumbull, CT 06611 USA Phone: 888.782.1760 Fax: 888.782.1761 www.@eyelevelliving.com The Heritage Pergola Installation Instructions ARBORS COLUMNS HOSE REELS MAILBOX
installation guide 1 GUIDE#: pwb-wwtowv1-pol-003
 g300 WAKEBOARD tower installation guide INSTALLATION SUPPORT 1 important information This WakeWorks wakeboard tower fits motor boats with 76-108 inch wide beam widths. This measurement is taken from the
installation guide 1 GUIDE#: pwb-assault-004
 assault WAKEBOARD tower installation guide INSTALLATION SUPPORT 1 important information This Aerial wakeboard tower fits motor boats with 76-108 inch wide beam widths. This measurement is taken from the
INSTALLATION AND CARE INSTRUCTIONS
 INSTALLATION AND CARE INSTRUCTIONS Skylight Manually Operated Honeycomb Shades 20 C8-10-1806 2/15 1 INTRODUCTION Thank you for purchasing our product. Your new shade has been custom built for you from
ABSL Model Background Stand
 ABSL Model Background Stand Product Overview: The Ravelli ABSL model background stand is adjustable up to 13' tall by 15' wide. It is comprised of two tripod stands and five 3 cross bar sections and includes
Vertical Honeycomb Shades
 Step by Step Installation Instructions Vertical Honeycomb Shades Customer Service 800.248.8888 or visit us online at smithandnoble.com Thank you for purchasing from Smith+Noble. Your new shades have been
OWNER S MANUAL. Sears Peyton 3PC Bar Set. * Balcony Chair. Product Code: D71 M80033 UPC Code: Date of Purchase: / /
 OWNER S MANUAL Sears Peyton 3PC Bar Set * Balcony Chair Product Code: D71 M80033 UPC Code: 7-22938-07961-2 Date of Purchase: / / If you have any problems with this product, DO NOT RETURN IT TO THE STORE.
COMPETITOR CB-610 STANDARD BENCH
 NOTE: Please read all instructions carefully before using this product Table of Contents Safety Notice COMPETITOR CB-610 STANDARD BENCH Hardware Identifier Assembly Instruction Exploded Diagram Parts List
SUMMERHOUSE PERGOLA ASSEMBLY INSTRUCTIONS. Toll-free: MODEL NO
 SUMMERHOUSE PERGOLA MODEL NO. 088-1759-2 INSTRUCTIONS Toll-free: 1-888-670-6684 IMPORTANT: Please read this manual carefully before beginning assembly of this product. Keep this manual for future reference.
Spiral Slide
 IMPORTANT Page 1 PLEASE READ THESE INSTRUCTIONS BEFORE COMMENCING ASSEMBLY. All equipment must be installed in accordance with these instructions. Check your shipment against Bill of Lading and Parts list.
SAVE THESE INSTRUCTIONS
 SAVE THESE INSTRUCTIONS SONOMA 10.5 FT CANTILEVER UMBRELLA ASSEMBLY INSTRUCTIONS ASSEMBLE ON A FLAT, PROTECTED SURFACE. PART LIST FIGURE QUANTITY DESCRIPTION A LOWER BRACKET B UPPER BRACKET C BASE POLE
S E L E C T I O N. Upper Back. User manual
 and S E L E C T I O N T H E S T R E N G T H E V O L U T I O N User manual and and The identification plate of the and manufacturer, affixed to the frame on the side opposite the padded rest, gives the
Basic Assembly For Conventional Series 9000 Structural Panels
 Steelcase, Inc. Grand Rapids, MI 49501 U.S.A. 1-888-783-3522 Basic Assembly For Conventional Series 9000 Structural Panels NOTE: Assembly directions for curved panels are the same as standard panels. Tools
2-Door EXO-Top Roof Rack System
 Page 1/29 Part 13516.01 2-Door EXO-Top Roof Rack System! WARNING The EXO-Top Roof Rack System is rated to a dynamic 300 lb, evenly distributed load. Further loading could result in serious injury or death.
MODEL 83 Pail Handler
 MORSE MFG. CO., INC. 727 West Manlius Street P.O. Box 518 East Syracuse, NY 13057-0518 Phone: 315-437-8475 Fax: 315-437-1029 Email: service@morsemfgco.com Website: www.morsemfgco.com COPYRIGHT 2005 MORSE
Hollywood Swing Away 2 and 4 Bike Racks Assembly and Installation Guide
 Hollywood Swing Away 2 and 4 Bike Racks Assembly and Installation Guide Tools Required: two adjustable wrenches, pliers, ¾ socket wrench recommended Note: please do assembly near your vehicle as you Can
 GENERAL OPERATIONAL PRECAUTIONS WARNING! When using electric tools, basic safety precautions should always be followed to reduce the risk of fire, electric shock and personal injury, including the following.
Transcend Overbed Table - Assembly, Maintenance and Parts Manual
 Transcend Overbed Table - Assembly, Maintenance and Parts Manual Your table may vary from this illustration 45 Goodrich Drive, Kitchener, Ontario, Canada N2C 0B8 tel 1.877.395.2623 fax 1.877.395.6270 www.stancehealthcare.com
MERRY GO ROUND ITEM NO: 8030
 MERRY GO ROUND ITEM NO: 8030 OWNER S MANUAL CAUTION: This unit is designed to be used safely by up to 4 children between the ages of 3 years to 8 years old with a maximum weight of 00 pounds (45.4 kgs)
INFINITE RANGE - CENTRE FOLDING DOOR
 INFINITE RANGE - CENTRE FOLDING DOOR CENTRE FOLDING DOOR ONLY ( RECESS) Please read these instructions before installing, as incorrect fitting will invalidate the guarantee-carry out each stage before
OWNER S MANUAL. Sears Peyton 4pc seating Set. * Fixed Arm Rocker. Product Code: D71 M80900 UPC Code: Date of Purchase: / /
 OWNER S MANUAL Sears Peyton 4pc seating Set * Fixed Arm Rocker Product Code: D71 M80900 UPC Code: 7-22938-07945-2 Date of Purchase: / / If you have any problems with this product, DO NOT RETURN IT TO THE
PFT CABLE GYM INSTRUCTION MANUAL
 PFT CABLE GYM INSTRUCTION MANUAL QUESTION? As a quality home gym supplier we are committed to your complete satisfaction. If you have questions, or find missing or damaged parts, we will guarantee your
Installation Operation Care
 Installation Operation Care Applause Honeycomb Shades LiteRise Operating System with TrimKit Contents GETTING STARTED Product View... 1 Tools and Fasteners Needed... 2 INSTALLATION Installation Overview...
Installation Instructions for. Before You Begin TOOLS REQUIRED
 Composite Railing System STEP-BY-STEP Installation Instructions for Spectrum Composite Railing Virtually maintenance free 20-year warranty EverNew Spectrum Railing system is designed to work with a number
INSTALLATION AND CARE INSTRUCTIONS
 INSTALLATION AND CARE INSTRUCTIONS Vertical Applications Honeycomb Shades CONTENTS Introduction...2 Before You Begin...3 Vertical Application Parts Overview...4 Materials Required...5 Tools Required...6
4-Door EXO-Top Roof Rack System
 Page 1/31 4-Door EXO-Top Roof Rack System 13516.02! WARNING The EXO-Top Roof Rack System is rated to a dynamic 300 lb, evenly distributed load. Further loading could result in serious injury or death.
INSTALLATION AND CARE INSTRUCTIONS
 INSTALLATION AND CARE INSTRUCTIONS Vertical Applications Honeycomb Shades 52 C8-10-3401 Rev 2/14 CONTENTS Introduction...2 Before You Begin...3 Vertical Application Parts Overview...4 Materials Required...5
Pleated Shades with Corded Top Down / Bottom Up Option
 Pleated Shades with Corded Top Down / Bottom Up Option Installation Instructions Email: customerservice@blindster.com Call us: (888) 256-8672 Mon - Fri 8am - 7pm (CT) Congratulations on purchasing Pleated
INFINITE RANGE - HINGE DOOR
 INFINITE RANGE - HINGE DOOR HINGE DOOR + 1 SIDE RETURN PANEL (CORNER) Please read these instructions before installing, as incorrect fitting will invalidate the guarantee-carry out each stage before moving
Installation Instructions Free-Standing Pergola
 Outdoor Distinctions 303 W. Carmel Drive Carmel, IN 46032 844.345.2424 www.outdoordistinctions.com Free-Standing Pergola Harmony Series (14 x 10, 14 x 12, 14 x 14, 14 x 16, 14 x 18, 14 x 20) 1 (14 x 10,
SawStop. T-GlideTM. Fence System- Professional Series II OWNER S MANUAL
 SawStop T-GlideTM Fence System- Professional Series II OWNER S MANUAL Warranty SawStop warrants to the original retail purchaser of a new T-Glide Fence System - Professional Series II from an authorized
US RACK, Inc Falcon Drive, Madera, CA
 US RACK, Inc. - 2850 Falcon Drive, Madera, CA 93637-559-661-3050 INSTRUCTIONS for MOTORCYCLE RACK with Cradling Wheel Chocks WARNING: Do NOT attempt to install or use this rack without following all instructions.
200A FLB VERTICAL 22113V LIFT W/CHAIN DRIVE WINCH
 PG. 1 OF 11 PORTA-DOCK, INC. 200A FLB VERTICAL 22113V LIFT W/CHAIN DRIVE WINCH STEP 1. Separate and group like parts and fasteners together. Locate the winch side member with the longer upright tube and
Sawn Baluster Sizing and Installation Guide
 Sawn Baluster Sizing and Installation Guide Welcome to the Durabrac sizing and installation guide for Sawn Balusters. This guide has been prepared to answer any questions you may have about our Sawn Balusters
The Queen Quilter Professional Quilters Kit Frame
 The Queen Quilter Professional Quilters Kit Frame Assembly Instructions Table of Contents: Before you begin......................... Pg. 2 Wood parts............................. Pg. 3 Hardware..............................
Assembly and Operation Guide
 MK-C MK-G MK-W Mount Kits ssembly and Operation Guide Thank you for your purchase of Treasure Garden s MK Mount Kit.. Please remove all contents from the package, inspect and review checklist. MK MOUNT
MODERN PERGOLA INSTALLATION GUIDE. When only the best will do.
 MODERN PERGOLA INSTALLATION GUIDE When only the best will do. TOOLS LIST Drill(s) 3/8" Magnetic Driver (s) 12" Drill Extension #2 Square Drive bit for Drill or Driver Level Tape Measure Hammer Drill if
N. 15th Street, Middlesboro, KY FLIP TARP DUMP BODY INSTALLATION INSTRUCTIONS
 1-800-248-7717 1002 N. 15th Street, Middlesboro, KY 40965 FLIP TARP DUMP BODY INSTALLATION INSTRUCTIONS Congratulations on your purchase of a Mountain Flip Tarp Dump Body tarping system. With tarping systems
St. Tropez Canopy Assembly Instructions
 Before assembly We recommend that time is taken to read the instructions before starting assembly, then follow the easy step by step guide. The instruction sheet is only a guide to the assembly. Certain
v1.0 ASSEMBLY GUIDE Mia Wide Bookcase
 v1.0 ASSEMBLY GUIDE Mia Wide Bookcase Components Upon unpacking your bookcase from it s delivery box, you should have the pieces shown. Follow the steps on the next pages to assemble your new bookcase.
EASY-IN POOL STEP SYSTEM NE132
 EASY-IN POOL STEP SYSTEM NE132 This instruction manual features multiple guides for the step unit components. 7939 EASY POOL STEP (NE113) FOR USE WITH: EASY-IN POOL STEP (NE126) 6492 PARTS & HARDWARE FOR
CertainTeed INSTALLATION GUIDE SIMTEK FENCE PRODUCTS. Fence Installation Guide 3', 4' & 6' High
 CertainTeed INSTALLATION GUIDE SIMTEK FENCE PRODUCTS Fence Installation Guide 3', 4' & 6' High INSTALLATION GUIDE These instructions are designed to assist both professional installers and do-it-yourselfers
Installation And Care Instructions. Vertical Honeycomb Shades
 Installation And Care Instructions Vertical Honeycomb Shades Rev 5/2013 Table Of Contents Getting Started... 3 Parts Overview... 4 Materials Required... 5 Tools Required... 6 Outside Mount Installation...
ABM International, Inc.
 ABM International, Inc. Lightning Stitch required 1 1.0: Parts List head and motor assembly (Qty. 1) Reel stand (Qty. 1) Needle bar frame clamp (Qty. 1) Motor drive (Qty. 1) 2 Cable harness with bracket
May 14, Installation Manual
 May 14, 2012 Installation Manual Contents MAG TRACKER Components...1 Mount Installation...7 Module Installation & Grounding...11 Maintenance...14 Warranty......14 Contact Information......14 May 14, 2012
Installation Operation Care. Duette Honeycomb Shades EasyRise Lifting System
 Installation Operation Care Duette Honeycomb Shades EasyRise Lifting System CONTENTS Getting Started: Product View... 1 Tools and Fasteners Needed... 2 Installation: Installation Overview... 3 Mount the