How to Build a Tactical Wall to Hide Your Guns
|
|
|
- Anabel Simon
- 6 years ago
- Views:
Transcription

1
2 Table of Contents Why Do You Need a Tactical Wall?... 3 Designing the Hidden Box for Your House... 4 Here is the list of materials needed:... 4 Here is a list of tools that you might need:... 4 Step 1: Preparing the Pieces... 5 Step 2: Build the Box and the Sliding Door Step 3: Fix the Drawer Rails Step 4: Affix the Mirror Step 5: Affix the Magnetic Lock Step 6: Cover the Screws

3 Why Do You Need a Tactical Wall? If you have something to hide from someone but you aren t sure how to do it, this hidden box with a magnetic locker is the perfect solution for your problem. This Tactical Wall can be useful because the authorities will confiscate all weapons in case of a disaster, and you won t be able to protect your property and supplies. 3
4 Designing the Hidden Box for Your House Before I started building it, I thought a lot about the dimensions. In the end, I decided to make it large enough for some weapons to fit in without any problems, but I also considered, as I said, that I wanted it to fit in any room. So the dimensions I used were 39 3/8 in. X 23 5/8 in X 4 ¾ in., as seen in the image on page 3. So after I determined the dimensions, I made a list of the materials needed if you decide to use the same dimensions. If you choose other dimensions, you should scale to fit. Here is the list of materials needed: Veneer Wood panel Screws Emery (sand paper) Drawer rails 21 5/8 in. Screw cover stickers The magnetic locker Here is a list of tools that you might need: Electric jigsaw Electric screwdriver Iron Cutter Ruler 4

5 Step 1: Preparing the Pieces We will start by cutting the wood to obtain the pieces we need by using the electric jigsaw, as you will see in the photos. You can skip this step if you can buy the wood already cut. 5

6 Here you have a photo with the final result after we finish with the electric jigsaw: There are: 4 pieces of 23 5/8 in. X 3 15/16 in. 2 pieces of 39 3/8 in. X 4 ¾ in. 2 pieces of 39 3/8 in. X 23 5/8 in. 6
.")
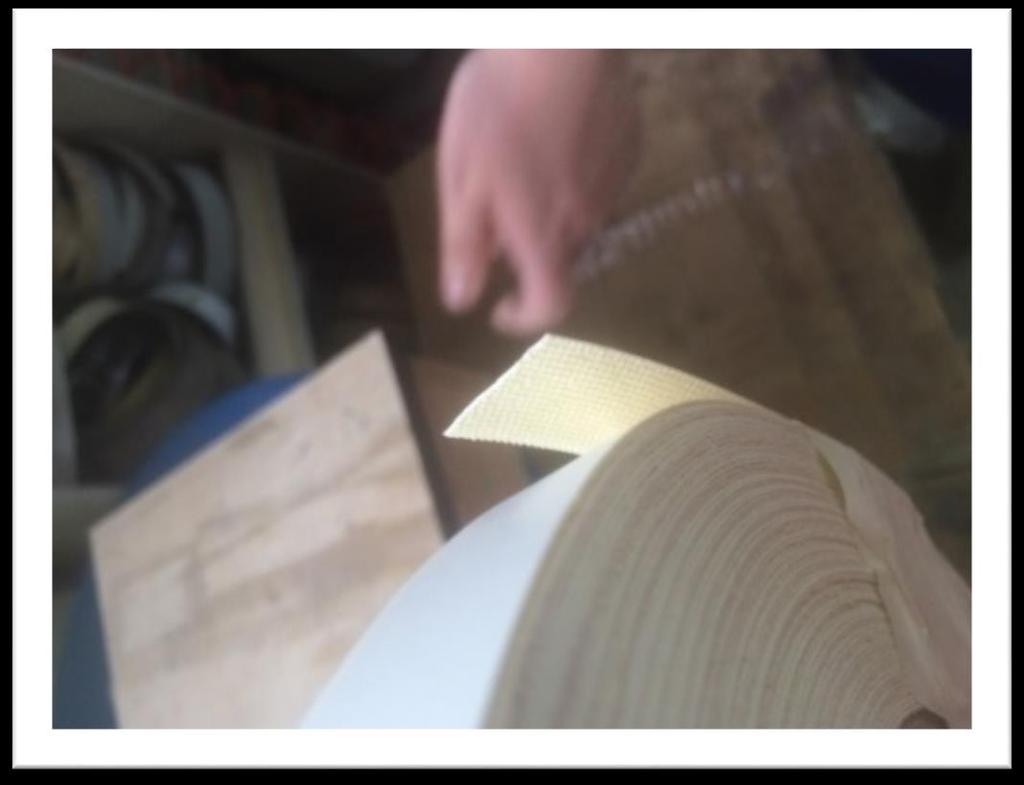
7 After that, we have to put a veneer on every edge with a special tool, but if you do it yourself, you have to do it with an iron. You just place the veneer on the edge and heat it using the iron. You have to apply this veneer on every edge that doesn t already have this on it (initial wood panel may have some edges already done). After that, because the veneer is thicker than the wood, you have to use the cutter to remove the parts that are not applied on the edges. You have to be careful with this because the veneer is very sensitive; also, don t scratch the wood. You can see the pictures below: 7
8 8

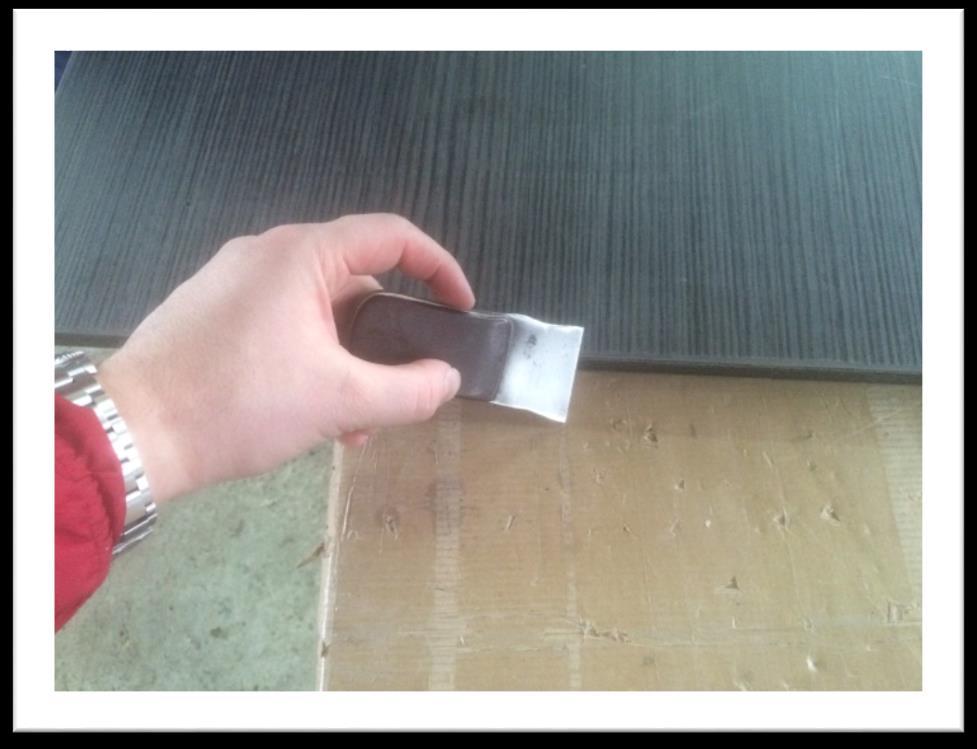
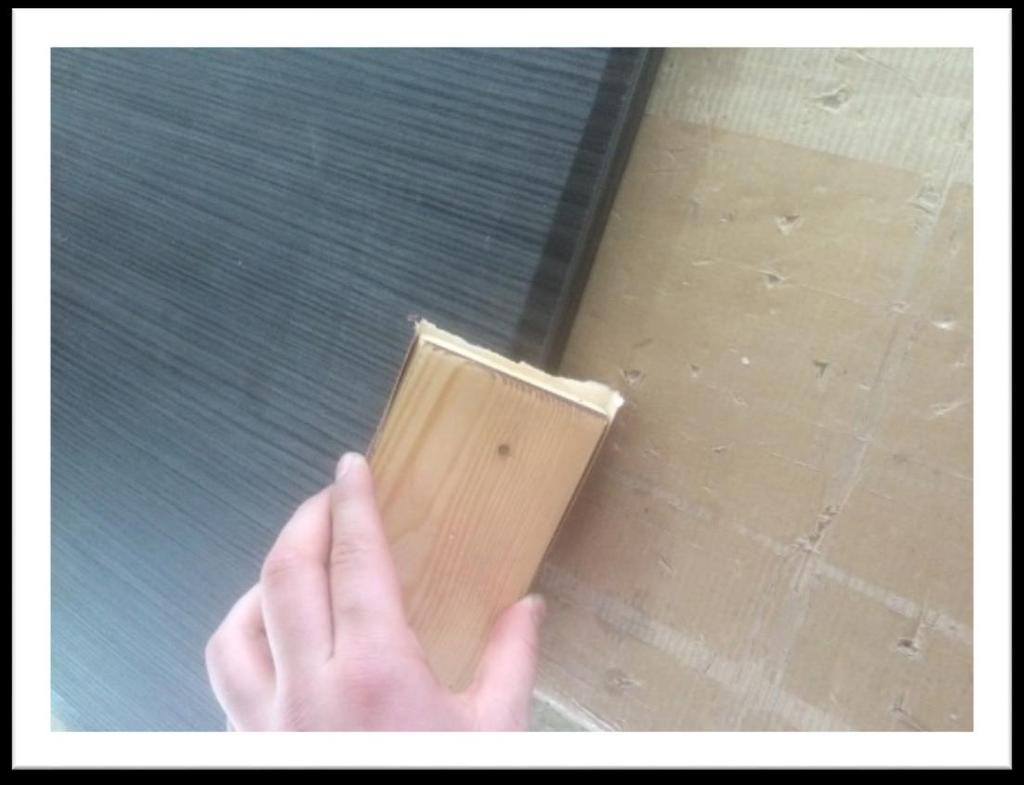
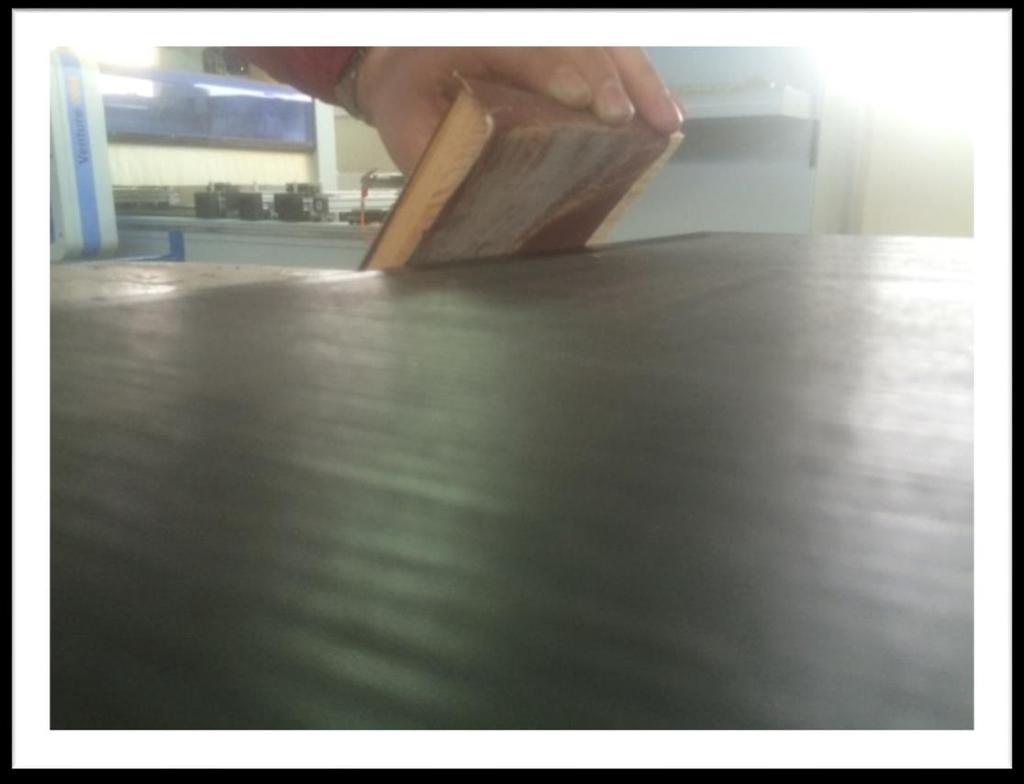
9 After you finish cutting the extra veneer from the edges, you have to round all the edges where you just applied the veneer with some emery because you can t cut it perfectly, and I am sure that you ll also get some extra veneer, which doesn t look nice. For this action, you don t need any special tool, as you can see; you just have to put the emery (sand paper) on a piece of wood: 9
10 10

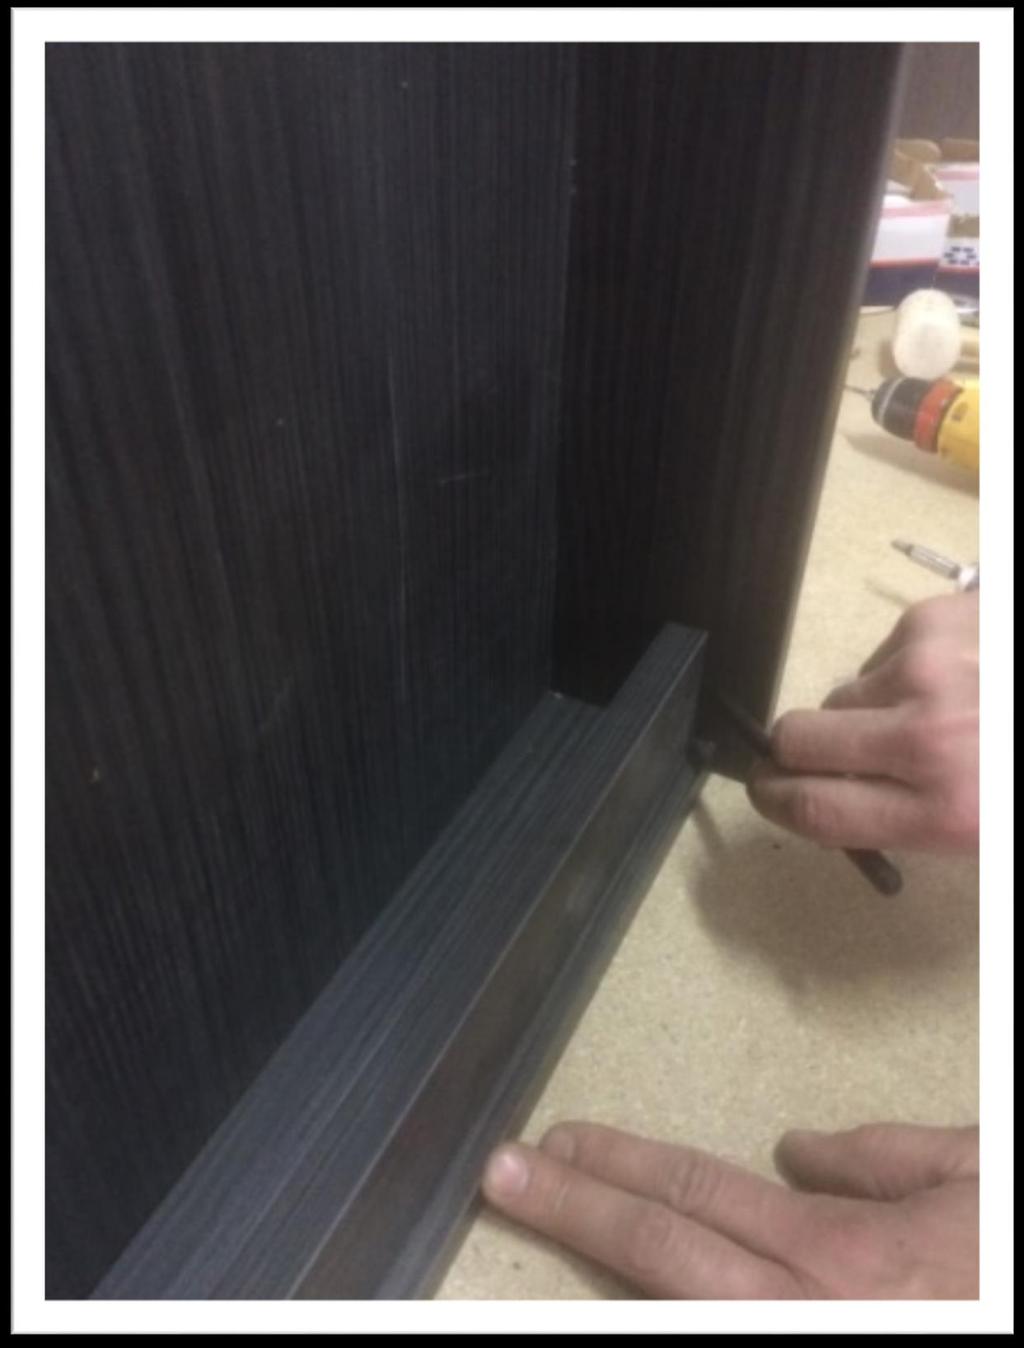
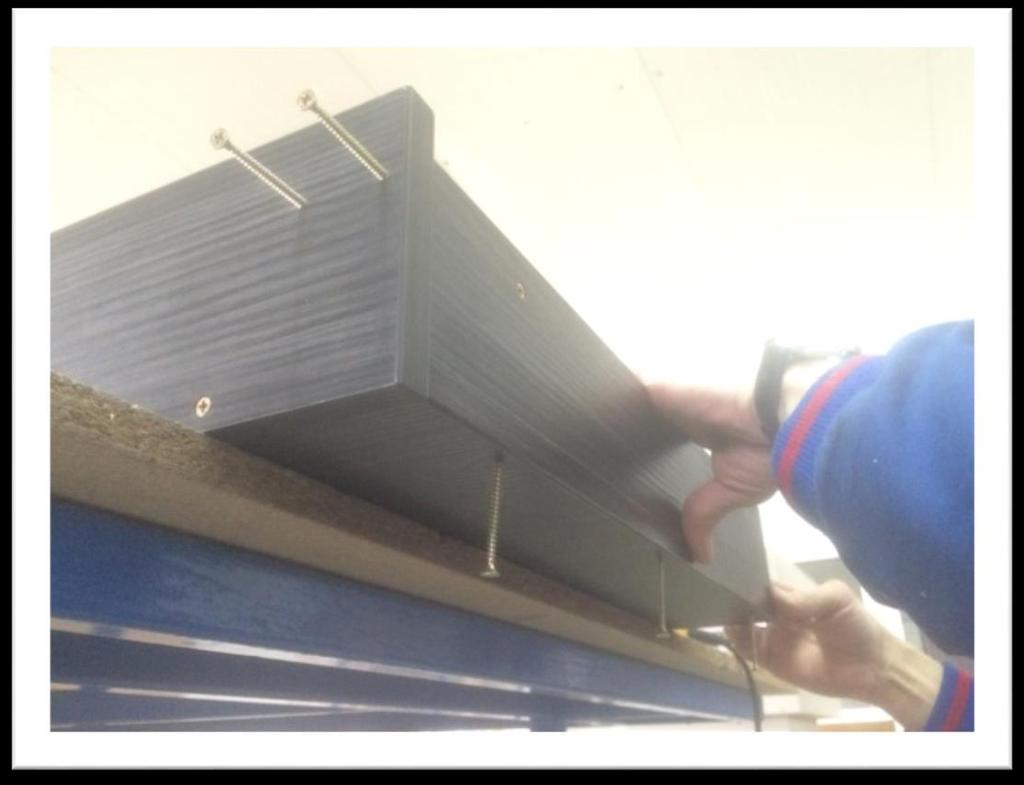
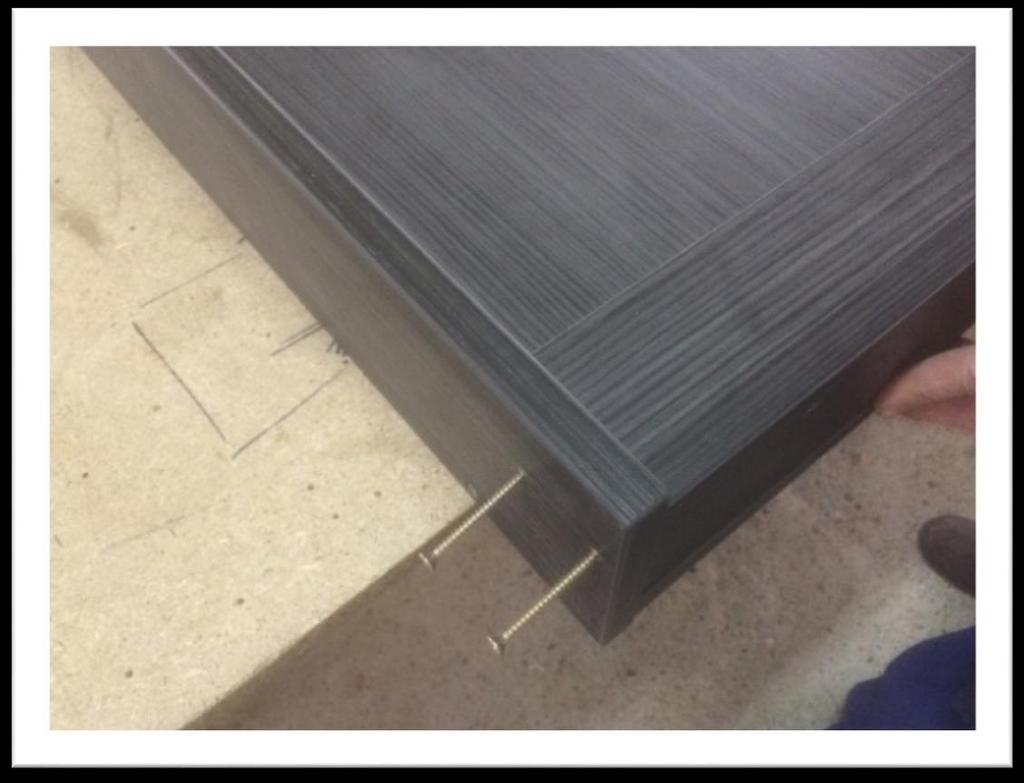
11 Step 2: Build the Box and the Sliding Door First you have to build the box by taking the wood pieces and sticking them together, following the drawing, and using screws and the electric screwdriver like in the pictures below: 11
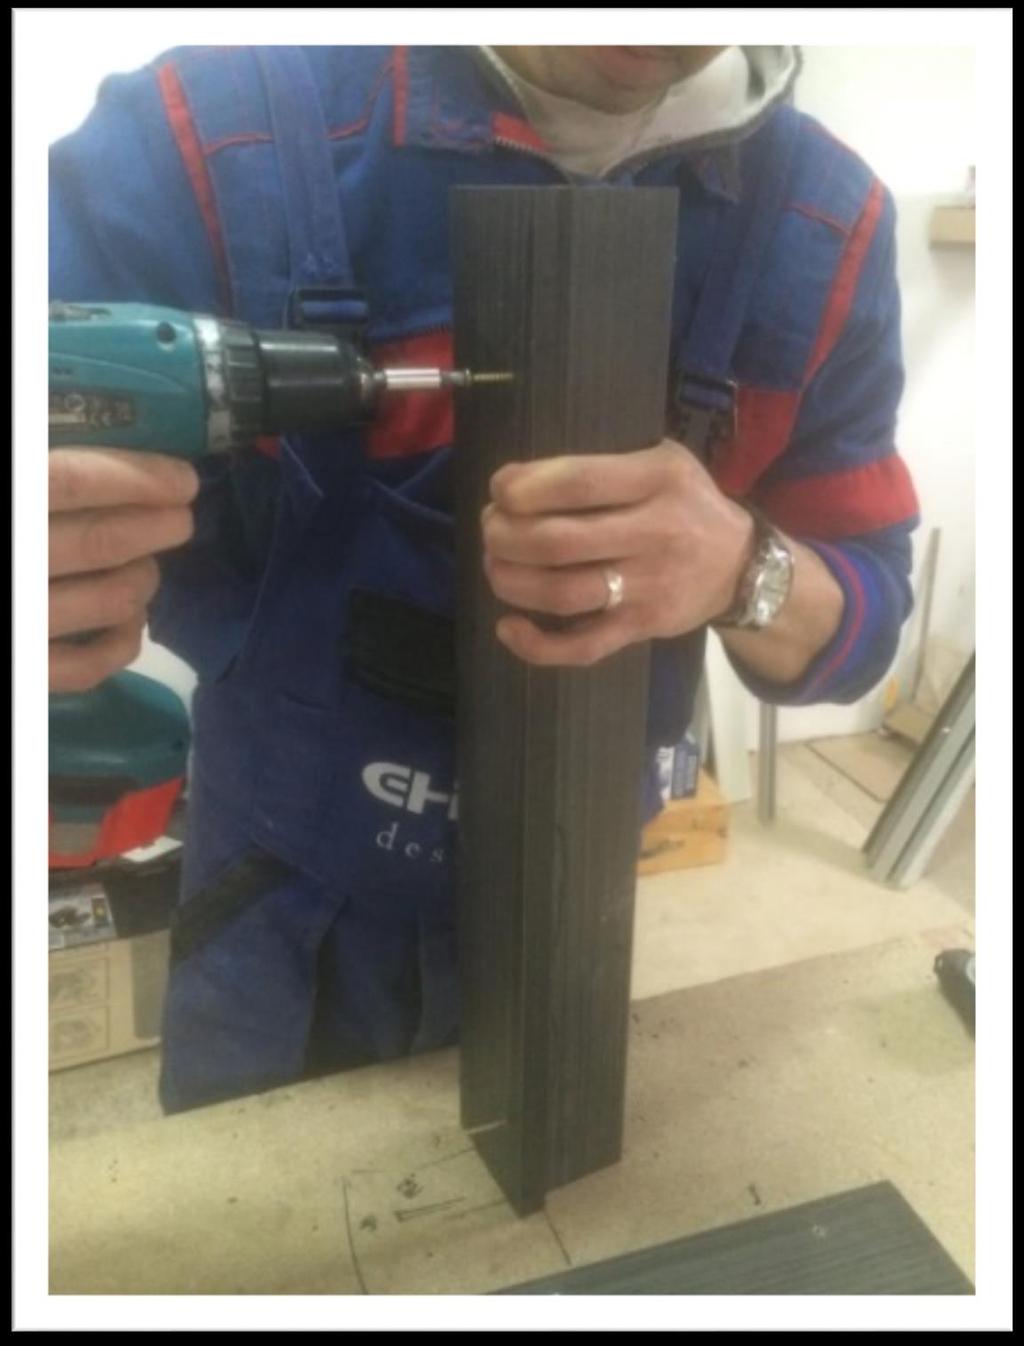
12 12
13 13
14 14

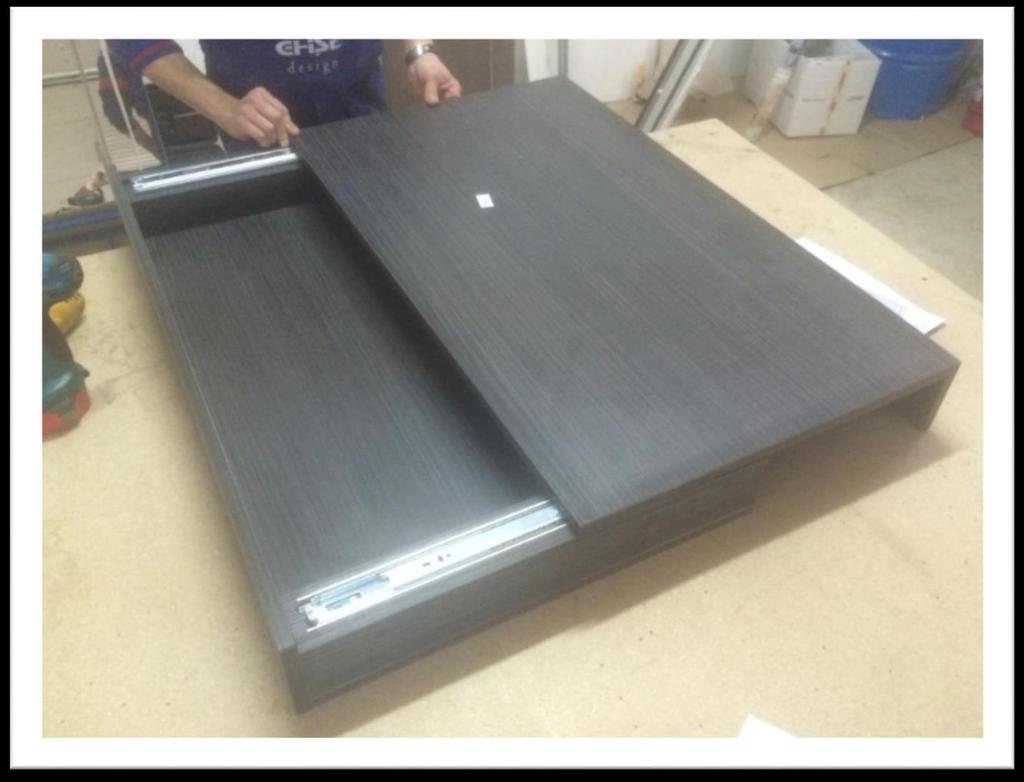
15 Step 3: Fix the Drawer Rails After we have the panels ready, it s time to put on the drawer rails. First of all, you fit them on the box using the electric screwdriver; then, after you make sure they fit perfectly, you can affix them on the sliding door. Please use the ruler to check that it fits before you affix it; it s easier if you don t have to work twice on the same thing because this is as important as building the two bodies. You should know that the rails are also of two bodies, and you separate them and then affix them on your two wood bodies. You can see this in the pictures more exactly: 15
16 16

17 Step 4: Affix the Mirror After we have the panels and the drawer rails are working so that the door is sliding on the box, we can put the mirror on the door. At this stage, we will use the double adhesive tape, using it like in the pictures. First we stick it to the mirror and then affix it to the door. You can put however many rows of double adhesive tape you want but not less than four; it s better to be safe than sorry. 17

18 18

19 19


20 Step 5: Affix the Magnetic Lock For this step, you just have to affix the magnetic lock, first on the box and then on the sliding door, as you can see in the pictures: 20

 and your")
21 Step 6: Cover the Screws Finally, in the last step, we use the screw cover stickers. It is very easy; just unfold the stickers and place them over the screws (as you will see in the pictures) and your box will be perfect and ready to use. 21
Barnside Pantry IMPORTANT NOTE Carefully remove all the parts from the carton and put them individually on a soft cloth to prevent scratch
 88 5516 653 Barnside Pantry IMPORTANT NOTE Carefully remove all the parts from the carton and put them individually on a soft cloth to prevent scratches or other damage occurring to the parts. We have
Left Unit. G. Shelf 1 pc. Small Cam Lock 6 pcs.(+1 extra) Cam Lock Screw 2 pcs.(+1 extra) Cam Lock Screw 6 pcs.(+1 extra)
 Cam Lock Screw 2 pcs.(+1 extra) Cam Lock Screw 6 pcs.(+1 extra)") 88 5180 181 Art & Craft Computer Desk (Cottage Oak) IMPORTANT NOTE Carefully remove all the parts from the carton and put them individually on a soft cloth to prevent scratches or other damages occuring
88 5180 181 Art & Craft Computer Desk (Cottage Oak) IMPORTANT NOTE Carefully remove all the parts from the carton and put them individually on a soft cloth to prevent scratches or other damages occuring
Under Seat Storage Drawer Installation Instructions
 Under Seat Storage Drawer Installation Instructions Parts List: 1) Drawer Assembly 8) Self Tapping Screws 1) Instructions 1) Template Tools Needed: Drill and/or Bit Driver Tape Measure Jigsaw or metal
how to design and make a skirt in any size
 how to design and make a skirt in any size introduction Here s how to make a skirt, like one you d find in a shop, that s finished nicely, and is guaranteed to fit you if you follow the instructions properly.
M. Door 1 Pc. 1 Pc. Door 1 Pc. 1 Pc. M3x20 Wood Screw (long) 8 Pcs. (+1 extra) M3x10 Wood Screw for Magnet 8 Pcs. (+1 extra)
 8 Pcs. (+1 extra) M3x10 Wood Screw for Magnet 8 Pcs. (+1 extra)") 88 5516 653 Barnside Pantry IMPORTANT NOTE Carefully remove all the parts from the carton and put them individually on a soft cloth to prevent scratches or other damage occurring to the parts. We have
88 5516 653 Barnside Pantry IMPORTANT NOTE Carefully remove all the parts from the carton and put them individually on a soft cloth to prevent scratches or other damage occurring to the parts. We have
Pantry IMPORTANT NOTE Carefully remove all the parts from the carton and put them individually on a soft cloth to prevent scratches or oth
 88 5076 691 Pantry IMPORTANT NOTE Carefully remove all the parts from the carton and put them individually on a soft cloth to prevent scratches or other damages occurring to the parts. We have taken great
Thanks for shopping with Improvements! Wall Mounted Cabinet with Hanging Bar Item #579693
 Thanks for shopping with Improvements! Wall Mounted Cabinet with Hanging Bar Item #579693 Note: Read these instructions carefully before assembling. Tools required: Philips screwdriver (not included).
INSTALLA- INSTALLATION. A guide to install a new IKEA kitchen
 A guide to install a new IKEA kitchen INSTALLA- INSTALLATION TION GUIDE GUIDE This guide provides you with tips and step-by-step instructions on how to install your kitchen on your own. Printed on: 06/2018
About.com :
 http://woodworking.about.com/gi/dynamic/offsite.htm?sit...//www.popularwoodworking.com/features/fea.asp%3fid=1088 (1 of 8)1/28/2004 12:05:01 AM Modern Storage Tower The last thing I want to do when starting
D. Middle Panel. C. Middle Panel. 1 pc. B. Side Panel 1 pc. I. Back Stretcher. 1 pc. J. Front Stretcher. 1 pc. S. Door 1 pc. T.
 itchen Cart IMPORTANT NOTE Carefully remove all the parts from the carton and put them individually on a soft cloth to prevent scratches or other damages occuring to the parts. We have taken great care
Homestead Bar Cabinet IMPORTANT NOTE Carefully remove all the parts from the carton and put them individually on a soft cloth to prevent s
 88 5527 991 Homestead Bar Cabinet IMPRTANT NTE Carefully remove all the parts from the carton and put them individually on a soft cloth to prevent scratches or other damages occuring to the wood parts.
Thanks for shopping with Improvements! Rolling Kitchen Storage Cart with Wood Top Item #583649
 Thanks for shopping with Improvements! Rolling Kitchen Storage Cart with Wood Top Item #58349 Note: Read these instructions carefully before assembling. Tools required: Philips screwdriver (not included).
Thanks for shopping with Improvements! Louvered Pedestal Sink Cabinet Item #512042
 Thanks for shopping with Improvements! Louvered Pedestal Sink Cabinet Item #512042 Note: Read these instructions carefully before assembling. Tools required: Philips screwdriver (not included). Find a
For assembly see instructions in carton
 88 5523 943 Kitchen Island IMPORTANT NOTE Carefully remove all the parts from the carton and put them individually on a soft cloth to prevent scratches or other damages occurring to the parts. We have
Hampshire Buffet Cabinet with Glass Doors
 Thanks for shopping with Improvements! Hampshire Buffet Cabinet with Glass Doors Item #55919 Note: Read these instructions carefully before assembling. Tools required: Philips screwdriver (not included).
Thanks for shopping with Improvements! Dover Rolling Cart Item #583244
 Thanks for shopping with Improvements! Dover Rolling Cart Item #58344 Note: Read these instructions carefully before assembling. Tools required: Philips screwdriver (not included). Find a clean, smooth
A. Top Unit 1 Pc. For assembly see instructions in carton:
 88 5005 9441 Kitchen Island IMPRTANT NTE Carefully remove all the parts from the carton and put them individually on a soft cloth to prevent scratches or other damage occurring to the parts. We have taken
KITCHEN INSTALLATION GUIDE
 KITCHEN INSTALLATION GUIDE The step-by-step guide to installing your new kitchen right The materials and tools you ll need This brochure is your guide to preparing and installing your new kitchen. Inside
KITCHEN INSTALLATION GUIDE
 KITCHEN INSTALLATION GUIDE The step-by-step guide to installing your new kitchen right This brochure is your guide to preparing and installing your new kitchen. Inside you ll find tips and ideas, clear
Eco Office File Base. Materials and Tools: Free Plans to build an office file cabinet base
 Materials and Tools: Materials: 1 - Sheet 3/4 PureBond Hardwood Plywood (Available at the Home Depot) 1 - Sheet 1/4 PureBond Hardwood Plywood (Available at the Home Depot) 3-21 Drawer Slides, Euro Style
 America s leading woodworking authority To download these plans, you will need Adobe Reader installed on your computer. If you want to get a free copy, visit: http://adobe.com/ reader. Having trouble downloading
C PART LIST HARDWARE LIST. Kitchen Cart IMPORTANT NOTE
 88 9200 006C Kitchen Cart IMPORTANT NOTE Carefully remove all the parts from the carton and put them individually on a soft cloth to prevent scratches or other damages occuring to the parts. We have taken
C Cuisine Cart IMPORTANT NOTE
 88 9001 001C Cuisine Cart IMPORTANT NOTE Carefully remove all the parts from the carton and put them individually on a soft cloth to prevent scratches or other damages occuring to the parts. We have taken
Thanks for shopping with Improvements! Weatherby Corner Storage Cabinet Item #511676
 Thanks for shopping with Improvements! Weatherby Corner Storage Cabinet Item #57 Note: Read these instructions carefully before assembling. Tools required: short Philips screwdriver (not included). Find
Brick Challenge. Have fun doing the experiments!
 Brick Challenge Now you have the chance to get to know our bricks a little better. We have gathered information on each brick that you can use when doing the brick challenge: in case you don t know the
Materials and Tools: Printer s Triple Console Cabinet. Free Plans to build a Triple Console Cabinet
 Materials and Tools: Materials: 3 sets euro style bottom corner mount drawer slides, 16 length 3 sets inset hinges 24 cup style handles 8 2x2 @ 8 feet long 6 1x3 @ 8 feet long 6 1x2 @ 8 feet long 1 sheet
Thanks for shopping with Improvements! Louvered Space Saver Cabinet Item #512059
 Thanks for shopping with Improvements! Louvered Space Saver Cabinet Item #512059 Note: Read these instructions carefully before assembling. Tools required: Philips screwdriver (not included). Find a clean,
Thanks for shopping with Improvements! Serena File Cart with Charging Station Item #513376
 Thanks for shopping with Improvements! Serena File Cart with Charging Station Item #513376 Note: Read these instructions carefully before assembling. Tools required: Philips screwdriver (not included).
Thanks for shopping with Improvements! Laundry Folding Table with 3 Clothes Hampers Item #
 -- Thanks for shopping with Improvements! Laundry Folding Table with 3 Clothes Hampers Item # 568376 Note: Read these instructions carefully before assembling. Tools required: Philips screwdriver (not
Pedestal Desk IMPORTANT NOTE Carefully remove all the parts from the carton and put them individually on a soft cloth to prevent scratches
 88 5549 181 Pedestal Desk IMPORTANT NOTE Carefully remove all the parts from the carton and put them individually on a soft cloth to prevent scratches or other damage occurring to the parts. We have taken
129 KITCHEN BASE CABINET 480
 129 KITCHEN BASE CABINET 480 There are two sorts of kitchen cabinets: base cabinets, which sit on the floor, and wall cabinets. Base cabinets provide both storage space and work surfaces. They often house
(1) 2x4 Ft. Sheet of ¼-inch Plywood. 1 ¼-inch Wood Screws. 1 ¼-inch Brad Nails ¾-inch Brad Nails Wood Glue CUT LIST:
 2x4 Ft. Sheet of ¼-inch Plywood. 1 ¼-inch Wood Screws. 1 ¼-inch Brad Nails ¾-inch Brad Nails Wood Glue CUT LIST:") MATERIALS: (5) 1x3x8 Ft. Boards (3) 2x4x8 Ft. Boards (10) 1x4x8 Ft. Boards (1) 1x2x10 Ft. Board (1) 2x2x4 Ft. Board (2) 1x6x8 Ft. Boards (1) 4x8 Ft. Sheet of ¾-inch Plywood (1) 2x4 Ft. Sheet of ¼-inch
MATERIALS: (5) 1x3x8 Ft. Boards (3) 2x4x8 Ft. Boards (10) 1x4x8 Ft. Boards (1) 1x2x10 Ft. Board (1) 2x2x4 Ft. Board (2) 1x6x8 Ft. Boards (1) 4x8 Ft. Sheet of ¾-inch Plywood (1) 2x4 Ft. Sheet of ¼-inch
Be Crafty. Technique Tutorial. How To Apply a Flip Lock PAGE 1
 PAGE 1 Totes, handbags and other accessories often need a secure closure. Something more than a hook & eye or snap, yet something that is visually appealing. Consider a flip lock for quick and easy access,
Thanks for shopping with Improvements! Mandarin Tansu Step Cabinet Item #512735
 Thanks for shopping with Improvements! Mandarin Tansu Step Cabinet Item #512735 This unit can be assembled so the top and middle cabinets are on the left or on the right. Use these instructions for a right-sided
Colonial Classic Bar
 88 5528 991 Colonial Classic Bar IMPORTANT NOTE Carefully remove all the parts from the carton and put them individually on a soft cloth to prevent scratches or other damages occuring to the wood parts.
Heartboard PCB Assembly Instructions
 Heartboard PCB Assembly Instructions Thanks for purchasing a Heartboard! These instructions will guide you through assembling and testing the Heartboard. Let s get started! Stuff you need Soldering iron
metal sided pot drawer soft close
 Follow these instructions to install your parts and accessories. Things you need to know lways read the full instructions prior to installation. Make sure you leave plumbing and electrical work to qualified
135 ROLLTOP DESK 515
 135 ROLLTOP DESK 515 For the person who hates to clear off a desk, who wants to leave everything where it is overnight yet still have the clutter hidden, a rolltop desk is a godsend. The tambour hides
Closet Wall Drawer Unit
 88 5531 751 Closet Wall Drawer Unit A. B. C. Shelf D. E. F. For assembly see instructions in carton 88 5531 752. 88 5531 752 Closet Wall Drawer Unit G. H. I. Plinth M. Bottom L. N. 2 pc. J. K. O. Drawer
Nantucket Buffet
 88 5022 611 Nantucket Buffet IMPORTANT NOTE Carefully remove all the parts from the carton and put them individually on a soft cloth to prevent scratches or other damages occuring to the wood parts. We
USS Enterprise Instructions
 USS Enterprise Instructions If things don t fit right, double check the placement. Because all lasers are different, you may have to sand or file for a perfect fit. Clamp these pieces together and glue
Congratulations on purchasing the Spirit Rails Magnetic Attach that allows easy wand to pack removal and reattachment by just getting close!
 Introduction Congratulations on purchasing the Spirit Rails Magnetic Attach that allows easy wand to pack removal and reattachment by just getting close! The Spirit Rails Magnetic Attach Kit is designed
J. Shelf 4 pcs. L. Door. K. Door. 1 pc. Magnet. 2 pcs. Adjustable Pin. 16 pcs. (+1 extra)
") 88 5523 61 Buffet IMPORTANT Carefully remove all the parts from the carton and place them individually on a soft cloth to prevent scratches or other damage. Carefully and strictly follow these assembly
88 5523 61 Buffet IMPORTANT Carefully remove all the parts from the carton and place them individually on a soft cloth to prevent scratches or other damage. Carefully and strictly follow these assembly
Installing Your New Creature From The Black Lagoon Tail Light DMD Panel MOD
 Installing Your New Creature From The Black Lagoon Tail Light DMD Panel MOD A few things before we start: The wooden speaker panel provided in this MOD was manufactured using a Precision CNC machine and
IMPORTANT NOTE Do not tighten up all the screws until each part is properly assembled. You should keep Hex Wrench in the safe place as you may need to
 88509995 C Kitchen Center Dear Our Valuable Customers, Please follow our assembly instructions in every step, we guarantee that you will get the perfect merchandise. Thank you so much for purchasing our
J. Base 1 pc. 1 pc. P. Shelf 2 pcs. Gate Leg. 1 pc. Head Cap Bolt 13 pcs. (+1 extra) Cam Lock Screw. Cam Lock. 20 pcs. (+1 extra)
 Cam Lock Screw. Cam Lock. 20 pcs. (+1 extra)") 88 5023 95C Kitchen Island with Breakfast Bar IMPORTANT NOTE Carefully remove all the parts from the carton and put them individually on a soft cloth to prevent scratches or other damages occuring to the
88 5023 95C Kitchen Island with Breakfast Bar IMPORTANT NOTE Carefully remove all the parts from the carton and put them individually on a soft cloth to prevent scratches or other damages occuring to the
HOW TO ASSEMBLE THE NANOCADE KIT
 KIT HOW TO ASSEMBLE THE NANOCADE KIT v 1.1 10 STEPS Second Edition 1.10 Work in progress COPYRIGHT NANOCADE.COM 2011 1 INDEX The Nanocade KIT parts... 3 SPECIFICATION AND INFORMATION... 4 IMPORTANT INFORMATION...
600mm 3 drawer base cabinet
 Follow these instructions to build and attach your cabinet. Things you need to know ase cabinets come with different positions for attaching your. If you are choosing the rebated back option make sure
Prima Diva. .Style, function and loads of compliments That s what the Stella Sling Bag brings!!
 .Style, function and loads of compliments That s what the Stella Sling Bag brings!! Supplies: 1/2 Yard Main Print (Outside of wallet, Outside of pockets, optional strap, etc..) 5/8 Yard Accent Print (Lining
Thanks for shopping with Improvements! Wellesley Cart with Gate Leg Desk Extension Item #504992
 Thanks for shopping with Improvements! Wellesley Cart with Gate Leg Desk Extension Item #504992 To order, call 1-800-642-2112 West Chester, OH 45069 Made in China PR-1015 If you have questions regarding
AUDI A8 D3 REPLACING THE OUTSIDE DRIVER DOOR HANDLE
 AUDI A8 D3 REPLACING THE OUTSIDE DRIVER DOOR HANDLE The keyless entry system in the D3 is a great feature. If you have the car key fob in your pocket, putting your hand under the door handle will unlock
Bushwacker Jeep Flat Style Fender Flares Front Pair
 Bushwacker Jeep Flat Style Fender Flares Front Pair Note: These instructions involve cutting parts of your vehicle. Please read all instructions prior to starting. Installation Time: 3-4 Hours Tools Required:
IMPORTANT NOTES ABOUT YOUR FLOORING PLEASE READ BEFORE INSTALLING INSTALLATION & MAINTENANCE FOR ENGINNERED HERRINGBONE
 IMPORTANT NOTES ABOUT YOUR FLOORING PLEASE READ BEFORE INSTALLING INSTALLATION & MAINTENANCE FOR ENGINNERED HERRINGBONE ACCLIMATIZATION AND STORAGE Your new flooring has to be acclimatized before installation,
Router Table. In a recent article, I wrote about the router table I built for the Center. 5 Essential Jigs for the
 5 Essential Jigs for the Router Table Great fixtures and fences offer better control and new possibilities BY PETER SCHLEBECKER In a recent article, I wrote about the router table I built for the Center
Carcase Construction. Choosing and making the right joints. by Tage Frid
 Carcase Construction Choosing and making the right joints by Tage Frid Furniture construction is broken down into two main categories: frame and carcase. In frame construction, relatively narrow boards
How to Build a Can Rotation System
 The Only Disclaimer That You Might Actually Read because it s probably the shortest. When you use woodworking tools, sharp object, drills, nails, screwdrivers, etc., accidents can happen. The author of
The Useless Machine. DIY Soldering Edition. Instruction Guide v0004
 The Useless Machine DIY Soldering Edition Instruction Guide v0004 TM For the best outcome, follow each step in order. We recommend reading this guide entirely before you get started. Tools required: Soldering
How to add a push power button to your XBOX S-Type controller
 26.10.2006 Page 1 of 5 http://synapse.wordpress.com How to add a push power button to your XBOX S-Type controller - By Synapse Required Items - XBOX S-Type controller (Wireless ones won t work) Soldering
Pivot-Door Downdraft Cabinet Plans
 Pivot-Door Downdraft Cabinet Plans Finished Cabinet Closed Open Exploded View Introduction This simple downdraft-style dust collection cabinet is a great way to keep your shop cleaner and keep your router
Single Mirror Cabinet
 Single Mirror Cabinet Assembly Instructions - please keep for future reference YO886 464/3944 Dimensions Width - 35.5cm Depth - 16.5cm Height - 60cm Important Please read these instructions fully before
QRPGuys Iambic Mini Paddle
 QRPGuys Iambic Mini Paddle First, familiarize yourself with the parts and check for all the components. If a part is missing, please contact us and we will send one. You must use qrpguys.parts@gmail.com
Precision Steel Car s 100 T Steel Coil Car
 Precision Steel Car s 100 T Steel Coil Car Precision Steel Car www.precisionsteelcar.com info@precisionsteelcar.com Paul Vernon: (513) 571-5739 Revised 4/30/2009 Contents of Kit Main Tube Side Frame 2
Thanks for shopping with Improvements! Item #553027
 Thanks for shopping with Improvements! Hampshire File Ottoman #55307 Note: Read these instructions carefully before assembling. Tools required: Phillips screwdriver, flat screwdriver. Find a clean, smooth
Kitchen Island IMPORTANT Carefully remove all the parts from the carton and place them individually on a soft cloth to prevent scratches o
 88 5170 943 Kitchen Island IMPORTANT Carefully remove all the parts from the carton and place them individually on a soft cloth to prevent scratches or other damage. Carefully and strictly follow these
Colori. Part I Geometry
 Colori Part I Geometry 1 2 Determine the size of your cane. TOOLS & MATERIALS FOR BUILDING A CANE: - photocopy paper - ruler - pen or a black marker - color markers (optional) - pasta machine - clay of
B. Side Panel. E. Middle Panel 1 pc. 1 pc. 1 pc. S. Side Rack. 1 pc. T. Base Rack. U. Pipe 3 pcs. M6x35 Head Cap Bolt 14 pcs.
 IMPORTANT 88 5089 95C Kitchen Cart Carefully remove all the parts from the carton and place them individually on a soft cloth to prevent scratches or other damage. Carefully and strictly follow these assembly
FACTORY CAT TOMCAT CORPORATION
 FACTORY CAT RPS TOMCAT CORPORATION Artificial Turf and Carpet Sweeping Install Kit #349-641 & #349-642 1. Detach batteries so that there is no power running through the machine before starting. 2. Start
Whalen Furniture Mfg. Factory No. 5 Page # 1
 If you have any questions regarding assembly or if you are missing parts, do not return this item to Sam s Wholesale Club Please call our customer service number and have your instructions and parts list
SwingSafe Swing-Away Mailbox Support Diagram
 SwingSafe Swing-Away Mailbox Support Diagram Wood Mounting Plates Top Arm (B) Muffler Clamps (A) Carriage Bolts and Nuts Bottom Arm 4-Foot U-Channel Post USPS Recommended 42-44 Height Ground Slope Hex
Empire Dresser Plans
 1 Empire Dresser Plans Materials 1 sheet 3/4" plywood (cabinet grade 4' x 8') 1 sheet 5 mm (3/16") underlayment plywood 4'x 8', buy another 1/2 sheet if you want to put a back on the dresser. 1-2" x 4"
The easy way to an affordable kitchen
 quality, affordable, pre-assembled The easy way to an affordable kitchen In association with All Insta-Cupboard carcass units are supplied pre-assembled to simplify installation Choose the colour of your
BUYING GUIDE BEKANT. Professional office
 BUYING GUIDE BEKANT Professional office Furniture for every office We have furniture for every kind of office from the small to the fully staffed. And everything to make a modern company run smoothly and
Thanks for shopping with Improvements! Hamper Cabinet with Drawer Item #512188
 Thanks for shopping with Improvements! Hamper Cabinet with Drawer Item #512188 IMPORTANT: Since the bin pivots forward, this unit must sit on the floor for safety reasons. Other items of the same width
Print template tiles and put together with clear tape to complete template.
 Print template tiles and put together with clear tape to complete template. Cut each pattern out with scissors or use a razor and strait edge ruler. Use the ruler as a guide for the razor to get nice strait
Tools: Drill/Driver Kreg Jig Miter Saw Jigsaw Circular Saw Adjustable Square Tape Measure Veneer Trimmer Sandpaper and Sander
 R PROJECT PLANS DROP-FRONT DESK Create a workspace almost anywhere with this drop-front desk. Mounted to a wall, it doesn t take up any floor space, which means you can hang it wherever you need to work.
WILSHIRE BED. Bed Assembly Instructions. Page 1of 5. LIFESTYLE SOLUTIONS The Fusion Of Function And Comfort With Style
 WILSHIRE BED Bed Assembly Instructions. Shorter Canopy Rail Left & Right Head Board Posts Longer Canopy Rail Head Board Panel Metal Pin Slat Support Left & Right Foot Board Posts Slats Foot Board Panel
Thanks for shopping with Improvements! Stafford Entryway Bench Item #547396
 Thanks for shopping with Improvements! Stafford Entryway Bench Item #547396 Note: Read these instructions carefully before assembling. Tools required: Philips screwdriver (not included) Find a clean, smooth
Kitchen Base Cabinet: Single Drawer with Double Doors Cabinets from Scratch
 Kitchen Base Cabinet: Single Drawer with Double Doors by Cabinets from Scratch Our Home from Scratch LLC Page 1 Disclaimer Our Home from Scratch LLC and its legal owners cannot be held responsible for
pottery barn kids MADISON CABINET HUTCH
 pottery barn kids MADISON CABINET HUTCH IMPORTANT SAFETY INSTRUCTIONS: Please read all instructions carefully before assembling. For your safety, assembly by two adults is recommended. PRE-ASSEMBLY: Remove
Thanks for shopping with Improvements! Providence Magazine End Table Item #547337
 Thanks for shopping with Improvements! Providence Magazine End Table Item #547337 Note: This table can be assembled: with the Door pivoting from the right side or the left side (instructions show pivot
T-Top Headliner Repair Guide With detailed instructions
 T-Top Headliner Repair Guide With detailed instructions Supplies: Fabric: 1 ¼ yards will do -You can use any kind of fabric you want. Some fabrics will be harder to install than others. I d highly recommend
Damask Pillow. Damask.
 Damask Pillow Damask. Classic or contemporary, this patterning works for all eras. It s classic in black and white, and wonderfully trendy in bold new colors. Like all hot new trends, though, it can come
STEP 1 STEP 2 LEVELER KIT OPTION MOBILE CASTER KIT OPTION
 B SERIES INDUSTRIAL BENCHES TOOLS REQUIRED FOR ASSEMBLY Socket set, Open end wrench set, Cordless drill with 3/8" socket bit (Magnetic recommended). BEFORE ASSEMBLY Read through the assembly instructions
Hardware Installation. Do this first:
 1 Do this first: Hardware Installation Need some help? Here s what you ll need: 4 AA Batteries Phillips screwdriver Visit us online. support.remotelock.com We re here to help. 1 (877) 254 5625 support@remotelock.com
Tools Needed 3/32 Allen Wrench which is located in your accessory kit Masking Tape
 Beam Alignment Overview Proper alignment of the beam is an important part of laser preventive maintenance. If the beam is out of alignment it is possible to lose power on the table, which will yield poor
ining Table Materials *Notes on Materials
 D ining Table We looked around for the perfect table for the dining room. Some were too big, some too small, and most were just too expensive. So we built this one, and we are happy with the result. It
Princess Peyote Bracelet by Jill Wiseman 2015
 Princess Peyote Bracelet by Jill Wiseman 2015 Materials List 1 4 colors of size 11 Delicas, for a total of 16.5 grams 136 148 small accent beads (3 6mm) Slide Clasp Fireline, or beading thread of your
Hinge Mortising Jig. One of the make it or break it parts of building a. 6 ShopNotes No. 74
 Hinge Mortising Jig A Mortise for a Hinge. Quick, clean, and accurate that s the only way to describe the mortise you get with a trim router and this hinge mortising jig. One of the make it or break it
Sliding Strip Door Hardware and Types of Mounting
 Sliding Strip Door Hardware and Types of Mounting Installation Instructions WALL MOUNT SINGLE TRACK with Single Side End Extension WALL MOUNT SINGLE TRACK with Double Side End Extension Right Side Extension
Weatherly Pergola [1]
![Weatherly Pergola [1]](/thumbs/94/118488824.jpg "Weatherly Pergola [1]") [1] Submitted by Ana White [2] on Sat, 2011-04-09 18:06 [1] Additional Photos [3] The big reason I've resisted putting up plans for a pergola is not the Page 1 of 20 building of the pergola, but creating
[1] Submitted by Ana White [2] on Sat, 2011-04-09 18:06 [1] Additional Photos [3] The big reason I've resisted putting up plans for a pergola is not the Page 1 of 20 building of the pergola, but creating
4. A spool of red Coats and Clark All-purpose thread
 Decorative Thread Amber wants to use the fancy stitches on her sewing machine to decorate her denim vest and skirt. She will need to purchase some thread that will look nice and work best for the sewing
Installing your new Bevella Top. L Shaped Countertop with Joints No Finished Ends (Fits Between Four Walls)
") Installing your new Bevella Top L Shaped Countertop with Joints No Finished Ends (Fits Between Four Walls) Bevella RTI Countertops are engineered and manufactured to the highest quality standards, built
Installing your new Bevella Top L Shaped Countertop with Joints No Finished Ends (Fits Between Four Walls) Bevella RTI Countertops are engineered and manufactured to the highest quality standards, built
Mini Cooper Lock Actuator
 2001-2006 Mini Cooper Lock Actuator Replacement This guide is on how to remove the lock actuator from the cars door. Written By: Jem ifixit CC BY-NC-SA www.ifixit.com Page 1 of 13 INTRODUCTION In order
How to Build a Raised Bed Cold Frame
 How to Build a Raised Bed Cold Frame Protect your plants from frost with a cold frame that sits right on top of your existing 4' x 4' raised bed. The lid is held open with screen door closers, and the
PROJECT PLANS MULTIPURPOSE WORK CENTER
 R PROJECT PLANS MULTIPURPOSE WORK CENTER This handy project can provide the work space you need anywhere in your home. Whether you need that work space in the shop, the garage, the basement, or in a laundry
Castle loft bed [1] Additional Photos. Castle loft bed Published on Ana White (http://www.ana-white.com)
![Castle loft bed [1] Additional Photos. Castle loft bed Published on Ana White (http://www.ana-white.com)](/thumbs/76/73086219.jpg "Castle loft bed [1] Additional Photos. Castle loft bed Published on Ana White (http://www.ana-white.com)") [1] Submitted by fsmumford [2] on Tue, 2011-10-18 21:51 [1] Additional Photos [3] [4] Page 1 of 31 [5] [6] [7] Summary: I stumbled upon Ana s blog about a year ago. Since, like many of you, I have become
[1] Submitted by fsmumford [2] on Tue, 2011-10-18 21:51 [1] Additional Photos [3] [4] Page 1 of 31 [5] [6] [7] Summary: I stumbled upon Ana s blog about a year ago. Since, like many of you, I have become
Thanks for shopping with Improvements! Item #553001
 Thanks for shopping with Improvements! Hampshire Wrapping Paper Hutch #00 Note: Read these instructions carefully before assembling. Tools required: Phillips screwdriver, flat screwdriver. ind a clean,
Kitchen Base Cabinet: Multiple Drawers Cabinets from Scratch
 Kitchen Base Cabinet: Multiple Drawers by Cabinets from Scratch Our Home from Scratch LLC Page 1 Disclaimer Our Home from Scratch LLC and its legal owners cannot be held responsible for any loss, damage,
Get the benefits of oil with the ease of latex
 One of the most rewarding home improvement projects is putting a fresh coat of paint on your kitchen cabinets. A new color brightens up your kitchen, and can give it a complete updated look. But at the
Jorunn s Big Book of War Garb Volume Clan Yama Kaminari. Hakama for Swedes
 Jorunn s Big Book of War Garb Volume 1 2005 Clan Yama Kaminari Hakama for Swedes OK, before the Anachro narcs come for me, let me say right at the outset that these are wrong. I know they re wrong. But