HORIZONTAL/VERTICAL BANDSAW INSTRUCTIONS. Item #20650
|
|
|
- Piers Ford
- 6 years ago
- Views:
Transcription


1 HORIZONTAL/VERTICAL BANDSAW INSTRUCTIONS Item #20650

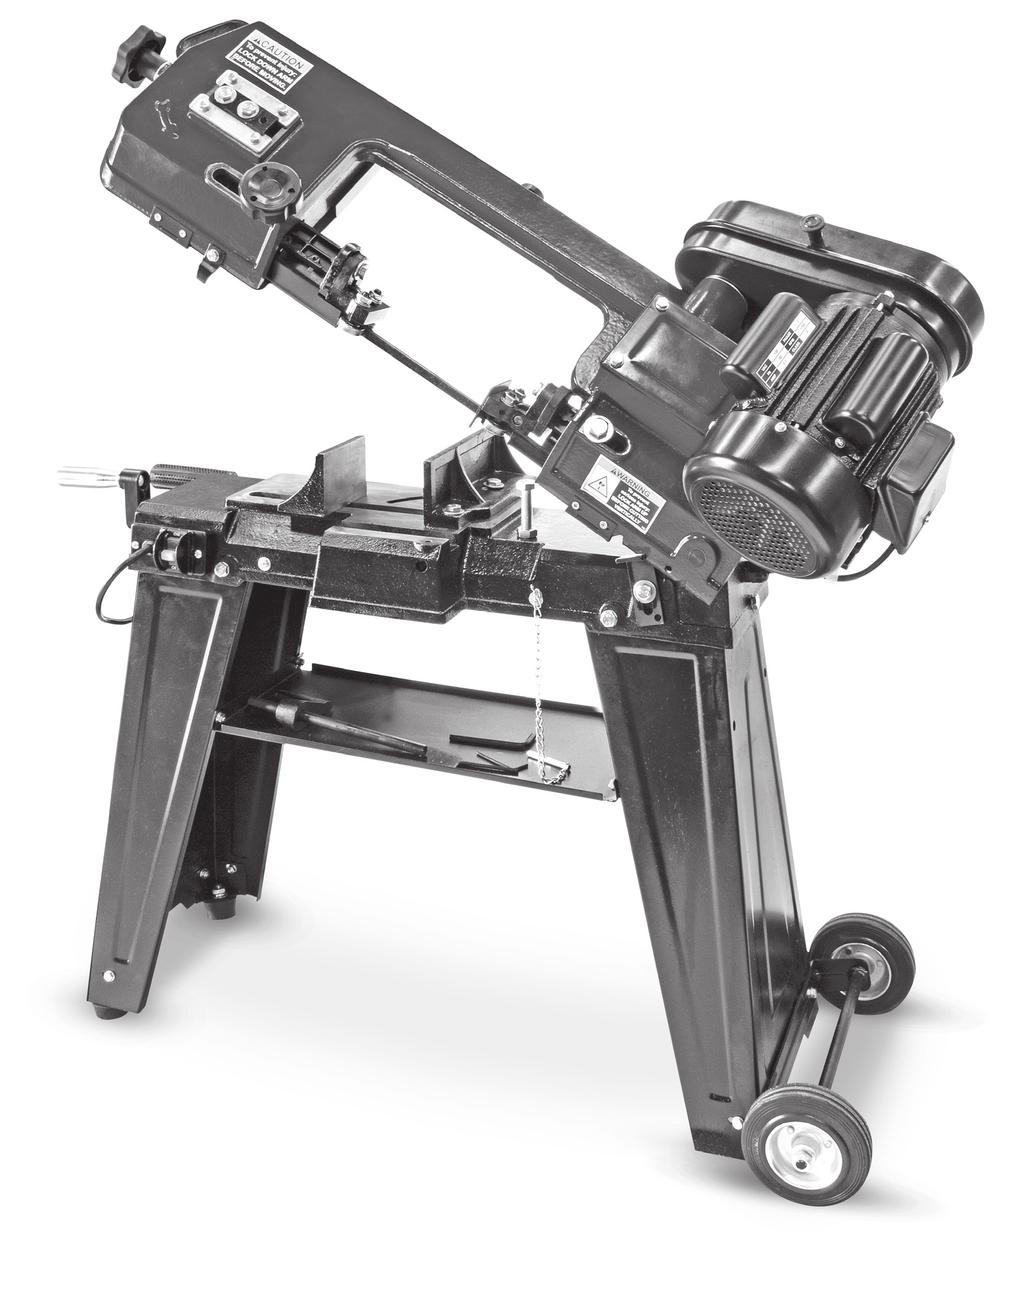
2 The EASTWOOD HORIZONTAL/VERTICAL BANDSAW is a heavy-duty professional quality tool ruggedly designed for many years of reliable service. This versatile Bandsaw has the capability to be operated in both a horizontal and vertical position while cutting tubing up to 4.5 in diameter. CONTENTS (1) Saw Assembly (2) Leg Assemblies (4) Stand Corner Supports (1) Pull Handle (2) Wheels (2) Drive Pulleys (1) Drive Belt (1) Drive Pulley Cover (1) Work Stop (1) Tool Tray (1) Axle Assembly (1) Vertical Cutting Table (1) Vertical Cutting Table Support (6) M8 X 24 Bolts (12) M8 Flat Washers (6) M8 Lock Washers (6) M8 Nuts (10) M6X12 Bolts (2) M6X16 Bolts (24) M6 Flat Washers (12) M6 Lock Washers (12) M6 Nuts (1) 3mm Hex Key (1) 4mm Hex Key (1) 5mm Hex Key SPECIFICATIONS Input Voltage: 120 VAC, 60 Hz Input Amperage: 6.5A Plug Type: 3-prong Cord Length: 6-6 Certification: CSA Blade Size: 64.5 X.5 X.025, 14 TPI Blade Speeds: (ft./min.): 80, 120, 200 Cutting Capacity: 4.5 Round, 4 X 6 Rectangular Maximum Cutting Angle: 55 V-Belt Type: Eastwood Technical Assistance: >> techelp@eastwood.com
3 SAFETY INFORMATION The following explanations are displayed in this manual, on the labeling, and on all other information provided with this product: DANGER indicates a hazardous situation which, if not avoided, will result in death or serious injury. WARNING indicates a hazardous situation which, if not avoided, could result in death or serious injury. CAUTION used with the safety alert symbol, indicates a hazardous situation which, if not avoided, could result in minor or moderate injury. NOTICE is used to address practices not related to personal injury. GENERAL SAFETY RULES Read all instructions. Failure to follow all instructions listed below may result in electric shock, fire and/or serious injury. The term power tool in all of the warnings listed below refers to your mains-operated (corded) power tool or battery-operated (cordless) power tool. SAVE THESE INSTRUCTIONS 1) WORK AREA SAFETY a) Keep work area clean and well lit. Cluttered or dark areas invite accidents. b) Do not operate power tools in explosive atmospheres, such as in the presence of flammable liquids, gases or dust. Power tools create sparks which may ignite the dust or fumes. c) Keep children and bystanders away while operating a power tool. Distractions can cause you to lose control. 2) ELECTRICAL SAFETY a) Power tool plugs must match the outlet. Never modify the plug in any way. Do not use any adapter plugs with earthed (grounded) power tools. Unmodified plugs and matching outlets will reduce risk of electric shock. b) Avoid body contact with earthed or grounded surfaces such as pipes, radiators, ranges and refrigerators. There is an increased risk of electric shock if your body is earthed or grounded. c) Do not expose power tools to rain or wet conditions. Water entering a power tool will increase the risk of electric shock. d) Do not abuse the cord. Never use the cord for carrying, pulling or unplugging the power tool. Keep cord away from heat, oil, sharp edges or moving parts. Damaged or entangled cords increase the risk of electric shock. e) When operating a power tool outdoors, use an extension cord suitable for outdoor use. Use of a cord suitable for outdoor use reduces the risk of electric shock. NOTE: Use a minimum 14 gauge insulated cord, no longer than 25 in length. To order parts and supplies: >> eastwood.com 3
4 GENERAL SAFETY RULES 3) PERSONAL SAFETY a) Stay alert, watch what you are doing and use common sense when operating a power tool. Do not use a power tool while you are tired or under the influence of drugs, alcohol or medication. A moment of inattention while operating power tools may result in serious personal injury. b) Use safety equipment. Always wear eye protection. Safety equipment such as dust mask, non-skid safety shoes, hard hat, or hearing protection used for appropriate conditions will reduce personal injuries. c) Avoid accidental starting. Ensure the switch is in the off-position before plugging in. Carrying power tools with your finger on the switch or plugging in power tools that have the switch on invites accidents. d) Remove any adjusting key or wrench before turning the power tool on. A wrench or a key left attached to a rotating part of the power tool may result in personal injury. e) Do not overreach. Keep proper footing and balance at all times. This enables better control of the power tool in unexpected situations. f) Dress properly. Do not wear loose clothing or jewelry. Keep your hair, clothing and gloves away from moving parts. Loose clothes, jewelry or long hair can be caught in moving parts. g) If devices are provided for the connection of dust extraction and collection facilities, ensure these are connected and properly used. Use of these devices can reduce dust-related hazards. 4) POWER TOOL USE AND CARE a) Do not force the power tool. Use the correct power tool for your application. The correct power tool will do the job better and safer at the rate for which it was designed. b) Do not use the power tool if the switch does not turn it on and off. Any power tool that cannot be controlled with the switch is dangerous and must be repaired. c) Disconnect the plug from the power source and/or the battery pack from the power tool before making any adjustments, changing accessories, or storing power tools. Such preventive safety measures reduce the risk of starting the power tool accidentally. d) Store idle power tools out of the reach of children and do not allow persons unfamiliar with the power tool or these instructions to operate the power tool. Power tools are dangerous in the hands of untrained users. e) Maintain power tools. Check for misalignment or binding of moving parts, breakage of parts and any other condition that may affect the power tools operation. If damaged, have the power tool repaired before use. Many accidents are caused by poorly maintained power tools. f) Keep cutting tools sharp and clean. Properly maintained cutting tools with sharp cutting edges are less likely to bind and are easier to control. g) Use the power tool, accessories and tool bits etc., in accordance with these instructions and in the manner intended for the particular type of power tool, taking into account the working conditions and the work to be performed. Use of the power tool for operations different from those intended could result in a hazardous situation. 5) SERVICE a) Have your power tool serviced by a qualified repair person using only identical replacement parts. This will ensure that the safety of the power tool is maintained. 4 Eastwood Technical Assistance: >> techelp@eastwood.com
5 ADDITIONAL SAFETY INFORMATION SHOCK HAZARD! Never operate or store the Bandsaw in damp or wet conditions. Plug into a minimum 15 amp circuit. If using an extension cord, it must be AWG 16 or greater, no longer than 25. HEALTH AND INJURY HAZARD! Saw Blade will cut and cause injury. Always keep hands away from the cutting area and Saw Blade. Do not remove jammed cut off pieces until blade has stopped. To prevent injury, always use the Clamp to hold the material being cut in place. Inspect tool before each use for loose or broken components. Maintain proper blade tension, blade tracking, and blade bearing adjustment at all times. Do not use tool if any components are not adjusted correctly or damaged. Turn saw off and unplug when not in use to avoid accidental starts! Do not force the machine when cutting material. Excessive force applied to the saw can cause the blade to break! Always wear ANSI approved eye protection while operating this tool. This tool can emit excessive noise while operating. Wear hearing protection while in use. Fine dust can be created by the cutting process. Wear NIOSH approved respiratory protection while operating. Always support the entire length of a large work piece to prevent the Bandsaw from tipping while cutting Moving parts can be dangerous! Do not operate with any Guard disabled, damaged, or removed. Do not wear loose clothing, jewelry, etc. & tie back long hair. Do not put fingers near moving parts! Exercise caution when unpacking and replacing the Bandsaw Blade. The Blade can be under tension and suddenly un-coil causing injury. Metal may have sharp edges before and after cutting. Handle with gloves and avoid sharp edges. For optimal performance and safety, always adjust Blade Guide to just clear work piece. Excessive gap between Blade Guides can cause un-necessary stress and potential damage. To order parts and supplies: >> eastwood.com 5


6 ASSEMBLY FIG. 1 Always wear ANSI-approved eye protection while assembling this tool. This Bandsaw is heavy. To prevent injury, lift heavy components with the help of an assistant. 1. Unfold the two Leg Assemblies 2. Install the two Stand Corner Supports without feet and the Axle Assembly onto a Leg Assembly. Fasten the Axle Assembly with M6 X 16 Bolts, Washers, and Nuts and the Corner Supports with M6 X12 Bolts Washers and Nuts (FIG. 1). 3. Slide Wheels onto the Axle Assembly and fasten with the pre-installed nuts 4. Install the two Stand Corner Supports with feet onto the other Leg Assembly and fasten with M6 X 12 Bolts, Washers, and Nuts (FIG. 2). 5. Insert Handle into the holes located at the top of the Leg Assembly without wheels. 6. With the help of an assistant, place the Bandsaw assembly on to a pair of sawhorses or on the corner of a sturdy workbench. 7. Attach Leg Assemblies to the Bandsaw with M8 X 24 Bolts, Washers, and Nuts. Do not fully tighten. 8. With the help of an assistant, place the Bandsaw with Legs back on ground. 9. Install Tool Tray and fasten with M6 X 12 Bolts, Washers, and Nuts. 10. With the Bandsaw in a flat and level location, fully tighten all fasteners. 11. Install the Pulley Motor Cover over the Motor and Gear shafts and fasten with the pre-installed fasteners (FIG. 3). FIG. 2 FIG. 3 Use caution to prevent loss of Shaft Keys. 12. Install the larger Pulley onto the Motor shaft with the largest pulley closest to the motor. 13. Install the smaller Pulley onto the Worm Gear Shaft with the smallest Pulley closest to the gear box. 6 Eastwood Technical Assistance: >> techelp@eastwood.com


7 1. Using a straight edge align the top of both Pulleys with one another to ensure optimum performance.( Fig. 4) 2. With the Pulleys aligned, tighten Set Screws. 3. Loosen Motor Tension Bolt, pivot Motor up and install V-belt onto Pulleys. 4. Release the motor, allowing its weight to tension the V-belt, and tighten the motor lock bolt. 5. Slide work stop into place and tighten set screw (FIG. 5). 6. Before operating Bandsaw, it is recommended to square the vise and table bed to the blade. Use a machinist s square to ensure that the blade is perpendicular to both the back side of the vise and the bed of the table. Adjust as necessary. FIG. 4 FIG. 5 To order parts and supplies: >> eastwood.com 7
8 CLAMPING MATERIAL Pieces to be cut must be properly clamped in the jaws of the saw. Review Fig 6 for references as how to clamp different shapes of material stock. FIG. 6 Knock Off Sharp Edge Here With A File Flats/Strips Rounds Channels Angles Knock Off Sharp Edge Here With A File Squares/Rectangles I-Beams Hexagonals Tees DETERMINING BLADE SPEED FIG. 7 The Eastwood Horizontal / Vertical Bandsaw is capable of operating at blade speeds of 80, 120 and 200 feet per minute. The best way to determine if the cutting speed is correct is to examine the chips from the cut. The following rules apply for examining the cutting chips: Burned heavy chips = Reduce Feed and Speed Powder like chips = Increase Feed Curled silver chips = Ideal Feed and Speed FIG 7 provides a good reference to determine the necessary speed for material being cut. Material Tool Steel, Stainless Allow Steels, Bearing Bronze Medium to High Carbon Steels, Hard Brass or Bronze Speed (RPM) Pulley Groove Spindle Motor Low to Medium Carbon Steels, Soft Brass, Aluminum, Plastic Eastwood Technical Assistance: >> techelp@eastwood.com
9 HORIZONTAL OPERATION Thoroughly read and understand these product instructions before using the Bandsaw. Always use the Clamp to hold the material in place. Inspect tool before each use for loose or broken components. Do not use tool if any components are damaged. Turn saw off and unplug when not in use to avoid accidental starts! Do not force the machine when cutting material. Excessive force applied to the saw can cause the blade to break! Always wear ANSI approved eye protection while operating this tool. This tool can emit excessive noise while operating. Wear hearing protection while in use. Fine dust can be created by the cutting process. Wear NIOSH approved respiratory protection while operating. Moving parts can be dangerous! Do not wear loose clothing, jewelry, etc. & tie back long hair. Do not put fingers near moving parts! Metal may have sharp edges before and after cutting, handle with gloves and avoid sharp edges. 1. Raise Bandsaw Head. 2. Adjust Vise to the desired angle and securely clamp workpiece in the Vise. 3. Ensure that the work piece and Bandsaw are stable and there are no obstructions in the path of the cut. 4. Adjust spring tension for the proper feed rate. 5. Adjust Blade Guides so that they are as close to the work piece as possible without coming in contact with the work piece. 6. Start Bandsaw and wait for the blade to achieve full speed. 7. Lower Bandsaw Head onto the work piece and allow the spring tension to control the feed rate of the Bandsaw Head. 8. Upon the completion of a cut, the saw will automatically shut off. At this time it is safe to raise the Bandsaw Head and remove the work piece. To order parts and supplies: >> eastwood.com 9
. 3. Remove the two screws fastening the blade guide cover and remove cover. 4.")

10 VERTICAL SETUP FIG. 8 To setup the Bandsaw for vertical cutting operations the following steps must be taken. 1. Unplug Bandsaw. 2. Raise Bandsaw Head to the Vertical position and lock in place with the latch and safety pin (FIG. 8). 3. Remove the two screws fastening the blade guide cover and remove cover. 4. Install Vertical Cutting Table and fasten with previously removed screws (FIG. 9). 5. Install the table support bracket with pre-installed hex bolt and a M6X12 flat head screw, washer, and nut. 6. Use the adjustment bolt to level the cutting surface as needed. VERTICAL OPERATION Thoroughly read and understand these product instructions before using the Bandsaw. Inspect tool before each use for loose or broken components. Do not use tool if any components are damaged. Turn saw off and Unplug when not in use to avoid accidental starts! Do not force the machine when cutting material. Excessive force applied to the saw can cause the blade to break! Always wear ANSI approved eye protection while operating this tool. This tool can emit excessive noise while operating. Wear hearing protection while in use. Fine dust can be created by the cutting process. Wear NIOSH approved respiratory protection while operating. FIG. 9 Moving parts can be dangerous! Do not wear loose clothing, jewelry, etc. & tie back long hair. Do not put fingers near moving parts! Metal may have sharp edges before and after cutting, handle with gloves and avoid sharp edges. 1. Ensure that the work piece and Bandsaw are stable and there are no obstructions in the path of the cut. 2. While keeping both hands on the work piece in a safe location, gradually feed the workpiece into the blade while applying downward pressure. Do not force the tool. 3. Turn saw off immediately after each cut. 10 Eastwood Technical Assistance: >> techelp@eastwood.com
11 MAINTENANCE Exercise caution when unpacking and replacing the Bandsaw Blade. The Blade can be under tension and suddenly un-coil causing injury. Inspect tool before each use for loose or broken components. Maintain proper blade tension, blade tracking, and blade bearing adjustment at all times. Do not use tool if any components are not adjusted correctly or damaged. Thoroughly read and understand these product instructions before maintaining the Bandsaw. IMPORTANT NOTE: The following maintenance should be performed before each use: Check tightness of all hardware. Inspect Saw Blade for damage and proper alignment with vise. Inspect for damaged power cords or connections. Check belt condition and tension. Inspect for broken parts or components. PERIODIC MAINTENANCE Lubricate Vise Screw. Lubricate Gear Box. BLADE REPLACEMENT 1. Unplug Bandsaw from power. 2. Raise Bandsaw Head to the vertical position and insert the locking pin to prevent rotation. 3. Raise lower blade cover and remove thumb screw to open access cover. 4. Loosen the tension knob located on top of the Bandsaw Head and slip the blade off the upper and lower wheels. 5. Install the new blade through both blade guide bearings and around both wheels. The teeth should face downwards between the guide bearings. 6. Ensure the back of the blade is against the shoulder of the upper and lower wheels. 7. Tighten tension knob to optimum blade tension (See section: Blade Tension). 8. Close access cover. To order parts and supplies: >> eastwood.com 11


12 BLADE TRACKING FIG. 10 Blade tracking has been preset at the factory and under normal conditions will rarely need to be adjusted. If the blade tracking does need to be adjusted, follow the steps below. 1. Unplug Bandsaw from power. 2. Raise Bandsaw Head to the vertical position and insert the locking pin to prevent rotation. 3. Raise lower blade cover and remove thumb screw to open access cover. 4. Loosen, but do not remove the lowest hex bolt on the blade tracking mechanism. 5. Adjust the tracking set screw while considering the following recommendations: Tightening the tracking set screw will move the blade closer to the shoulder of the upper wheel. Loosening the tracking set screw will move the blade away from the shoulder of the upper tracking wheel (FIG.10). 6. Tension the blade (see section: Blade Tension). 7. Reconnect power and ensuring that all objects are away from the blade, turn on the Bandsaw. The blade should track along the shoulder of the wheel without rubbing against the shoulder. Adjust as necessary. BLADE TENSION Blade Tension has been preset for the blade included from the factory but must be reset after each blade replacement. To set blade tension follow the steps below. 1. Unplug Bandsaw from power. 2. Ensure blade is tracking properly against the shoulder of the wheel without rubbing (see section: Blade Tracking). 3. Adjust blade guides as far apart as possible. 4. Tighten adjustment knob so that the blade is just tight enough to complete a cut without slipping. Measurable blade deflection should be.004 or less. BLADE GUIDE BEARING ADJUSTMENT FIG. 11 Blade Guide bearings must be adjusted properly to ensure a square cut. Each Blade Guide Assembly has one bearing with an eccentric bushing to allow for adjustment. 1. Unplug Bandsaw from power. 2. With the vise perpendicular to the blade, place a machinists square against the face of the vise and the blade (FIG.11). 3. If the machinists square does not evenly contact the blade while against the vise, adjust the eccentric bushings as needed so that the square evenly contacts the blade while the blade is in contact with the guide bearings. 12 Eastwood Technical Assistance: >> techelp@eastwood.com
13 TROUBLESHOOTING PROBLEM CAUSE CORRECTION Bandsaw Slows Down Excessively During Cut Feed Rate is Too High Incorrect Blade for Material Being Cut Tighten Spring Tensioner to reduce feed rate. Follow material guidelines for each specific saw blade. Blade is Becoming Dull at a Rapid Pace Overheating Excessive Blade Breakage Cutting Speed is Too Fast Incorrect Blade for Material Being Cut Blade has Too Little Tension Forcing Machine to Complete Cut Saw Blade is Dull or Damaged Excessive Blade Tension Excessive V-Belt Tension Incorrect Blade for Material Being Cut Improper Blade Tension Improper Blade Speed Work Piece is Not Secured in Vise Blade is Not Tracking Properly Incorrect Blade for Material Being Cut Saw is Starting While Blade is Resting on Workpiece Blade Guides Need Adjusting Adjust blade speed to match the material being cut. Follow material guidelines for each specific saw blade. Increase Blade tension (see section: Blade Tension). Allow the Spring Tensioner to feed material into the saw. Do not push down on the Saw Head. Replace Saw Blade. Decrease Blade tension (see section: Blade Tension). Allow the weight of the Motor to set V-Belt tension. Follow material guidelines for each specific saw blade. Adjust Blade tension (see section: Blade Tension). Adjust blade speed to match the material being cut. Workpiece must be securely clamped in the vise. Adjust Wheel alignment so that thew Blade tracks along the shoulder of the Wheel (see section: Blade Tracking). Follow material guidelines for each specific saw blade. Saw must be started and then slowly lowered onto the workpiece. Adjust Blade Guides (see section: Blade Guide Bearing Adjustment). To order parts and supplies: >> eastwood.com 13
14 NOTES 14 Eastwood Technical Assistance: >>
15 NOTES To order parts and supplies: >> eastwood.com 15
16 ADDITIONAL AVAILABLE ITEMS #20651 Replacement Blade #11797 Throatless Bench Shear # Straight Shear #14042 Versa-Bend Sheet Metal Brake #28187 Bead Roller Kit with Mandrels #20257 Sheet Metal Layout Kit 5 Piece Kit #21115 High Capacity Tubing Bender #20447 Professional Tubing Notcher # Metal Bender #20638 Expander Wheel If you have any questions about the use of this product, please contact The Eastwood Technical Assistance Service Department: >> techelp@eastwood.com PDF version of this manual is available online >> eastwood.com/20650manual The Eastwood Company 263 Shoemaker Road, Pottstown, PA 19464, USA US and Canada: Outside US: Fax: eastwood.com Copyright 2016 Easthill Group, Inc. 8/16 Instruction Item #20650Q Rev. 0
ATBG280/6 Bench Grinder Bench Grinder ATBG280/6 230V-50Hz 280 Watt 150mm x 25mm Wheel size
 Bench Grinder ATBG280/6 230V-50Hz 280 Watt 150mm x 25mm Wheel size SPECIFICATIONS Model Number : ATBG280/6 Nominal Voltage Power Consumption No load speed Wheel size Weight 230Volt 50Hz 280 Watts 2880
Impact Wrench MODEL TW1000. WARNING: For your personal safety, READ and UNDERSTAND before using. SAVE THESE INSTRUCTIONS FOR FUTURE REFERENCE.
 ENGLISH Impact Wrench MODEL TW000 00605 DOUBLE INSULATION I N S T R U C T I O N M A N U A L WARNING: For your personal safety, READ and UNDERSTAND before using. SAVE THESE INSTRUCTIONS FOR FUTURE REFERENCE.
Drill INSTRUCTION MANUAL. WARNING: For your personal safety, READ and UNDERSTAND before using. SAVE THESE INSTRUCTIONS FOR FUTURE 1 REFERENCE.
 ENGLISH (Original instructions) INSTRUCTION MANUAL Drill 6411 6412 6413 007894 DOUBLE INSULATION WARNING: For your personal safety, READ and UNDERSTAND before using. SAVE THESE INSTRUCTIONS FOR FUTURE
Impact Wrench. 19 mm (3/4 ) MODEL 6906
 MODEL 6906") Impact Wrench 9 mm (3/4 ) MODEL 6906 002290 DOUBLE INSULATION I N S T R U C T I O N M A N U A L WARNING: For your personal safety, READ and UNDERSTAND before using. SAVE THESE INSTRUCTIONS FOR FUTURE REFERENCE.
Impact Wrench 9 mm (3/4 ) MODEL 6906 002290 DOUBLE INSULATION I N S T R U C T I O N M A N U A L WARNING: For your personal safety, READ and UNDERSTAND before using. SAVE THESE INSTRUCTIONS FOR FUTURE REFERENCE.
ENGLISH (Original instructions) INSTRUCTION MANUAL. Drill DOUBLE INSULATION. IMPORTANT: Read Before Using.
 INSTRUCTION MANUAL. Drill DOUBLE INSULATION. IMPORTANT: Read Before Using.") ENGLISH (Original instructions) INSTRUCTION MANUAL Drill 64 642 643 007894 DOUBLE INSULATION IMPORTANT: Read Before Using. ENGLISH (Original instructions) SPECIFICATIONS Model 64 642 643 Capacities Steel
ENGLISH (Original instructions) INSTRUCTION MANUAL Drill 64 642 643 007894 DOUBLE INSULATION IMPORTANT: Read Before Using. ENGLISH (Original instructions) SPECIFICATIONS Model 64 642 643 Capacities Steel
Circular Saw MODEL MT581. WARNING: For your personal safety, READ and UNDERSTAND before using. SAVE THESE INSTRUCTIONS FOR FUTURE REFERENCE.
 ENGLISH Circular Saw MODEL MT58 005337 DOUBLE INSULATION I N S T R U C T I O N M A N U A L WARNING: For your personal safety, READ and UNDERSTAND before using. SAVE THESE INSTRUCTIONS FOR FUTURE REFERENCE.
ENGLISH (Original instructions) INSTRUCTION MANUAL. Drill DS4012 DOUBLE INSULATION. IMPORTANT: Read Before Using.
 INSTRUCTION MANUAL. Drill DS4012 DOUBLE INSULATION. IMPORTANT: Read Before Using.") ENGLISH (Original instructions) INSTRUCTION MANUAL Drill DS402 05402 DOUBLE INSULATION IMPORTANT: Read Before Using. ENGLISH (Original instructions) SPECIFICATIONS Model DS402 Capacities Steel 3 mm Wood
ENGLISH (Original instructions) INSTRUCTION MANUAL Drill DS402 05402 DOUBLE INSULATION IMPORTANT: Read Before Using. ENGLISH (Original instructions) SPECIFICATIONS Model DS402 Capacities Steel 3 mm Wood
ENGLISH (Original instructions) INSTRUCTION MANUAL. Drill MT600 MT601 DOUBLE INSULATION. IMPORTANT: Read Before Using.
 INSTRUCTION MANUAL. Drill MT600 MT601 DOUBLE INSULATION. IMPORTANT: Read Before Using.") ENGLISH (Original instructions) INSTRUCTION MANUAL Drill MT600 MT60 003635 DOUBLE INSULATION IMPORTANT: Read Before Using. ENGLISH (Original instructions) SPECIFICATIONS Model MT600 MT60 Capacities Steel
ENGLISH (Original instructions) INSTRUCTION MANUAL Drill MT600 MT60 003635 DOUBLE INSULATION IMPORTANT: Read Before Using. ENGLISH (Original instructions) SPECIFICATIONS Model MT600 MT60 Capacities Steel
SAFETY AND OPERATING MANUAL. Hedge Trimmer WG205E WG206E WG207E WG208E
 SAFETY AND OPERATING MANUAL 2 PRODUCT SAFETY GENERAL Power Tool Safety Warnings WARNING: Read all instructions. Failure to follow all instructions listed below may result in electric shock, fire and/or
Operating Manual 6 Industrial Bench Grinder ATBG280/
 Operating Manual 6 Industrial Bench Grinder ATBG280/6 804531 40 Year Australian Heritage The reputable name in bench grinders for 40 years Protect yourself and others by observing all safety information,
Handling instructions
 Hand Shear Model CE 16SA Handling instructions Note: Before using this Electric Power Tool, carefully read through these HANDLING INSTRUCTIONS to ensure efficient, safe operation. It is recommended that
SAFETY AND OPERATING MANUAL
 SAFETY AND OPERATING MANUAL 2 General Power Tool Safety Warnings WARNING: Read all safety warnings and all instructions. Failure to follow the warnings and instructions may result in electric shock, fire
VARIABLE SPEED WOOD LATHE
 MODEL MC1100B VARIABLE SPEED WOOD LATHE INSTRUCTION MANUAL Please read and fully understand the instructions in this manual before operation. Keep this manual safe for future reference. Version: 2015.02.02
ENGLISH (Original instructions) INSTRUCTION MANUAL. Shear Wrench 6922NB DOUBLE INSULATION. IMPORTANT: Read Before Using.
 INSTRUCTION MANUAL. Shear Wrench 6922NB DOUBLE INSULATION. IMPORTANT: Read Before Using.") ENGLISH (Original instructions) INSTRUCTION MANUAL Shear Wrench 69NB 00498 DOUBLE INSULATION IMPORTANT: Read Before Using. ENGLISH (Original instructions) SPECIFICATIONS Model 69NB Bolt size M6, M0, M
ENGLISH (Original instructions) INSTRUCTION MANUAL Shear Wrench 69NB 00498 DOUBLE INSULATION IMPORTANT: Read Before Using. ENGLISH (Original instructions) SPECIFICATIONS Model 69NB Bolt size M6, M0, M
OPERATION & MAINTENANCE
 DOUBLE HEADED METAL NIBBLER MODEL NO: DHC-2 PART NO: 6500233 OPERATION & MAINTENANCE INSTRUCTIONS LS0609 INTRODUCTION Thank you for purchasing this CLARKE Double Headed Metal Nibbler. Before attempting
4.0MM METAL CUTTING NIBBLER
 596702 4.0MM METAL CUTTING NIBBLER Read through carefully and understand these instructions before use N3570 SAFETY INSTRUCTIONS PLEASE READ & UNDERSTAND THESE INSTRUCTIONS! STORE THESE INSTRUCTIONS IN
2-Speed Hammer Drill HP2000 HP2020
 2-Speed Hammer Drill HP2000 HP2020 SPECIFICATIONS Model HP2000 HP2020 Speed High Low High Low Capacities Concrete 20 mm 20 mm Steel 6.5 mm 13 mm 6.5 mm 13 mm No load speed (min 1 ) 0 2,300 0 900 2,300
Nibbler MODEL JN1601. WARNING: For your personal safety, READ and UNDERSTAND before using. SAVE THESE INSTRUCTIONS FOR FUTURE REFERENCE.
 ENGLISH Nibbler MODEL JN60 00477 DOUBLE INSULATION I N S T R U C T I O N M A N U A L WARNING: For your personal safety, READ and UNDERSTAND before using. SAVE THESE INSTRUCTIONS FOR FUTURE REFERENCE. SPECIFICATIONS
High Speed Drill MODEL WARNING: For your personal safety, READ and UNDERSTAND before using. SAVE THESE INSTRUCTIONS FOR FUTURE REFERENCE.
 ENGLISH High Speed Drill MODEL 6501 003002 DOUBLE INSULATION I N S T R U C T I O N M A N U A L WARNING: For your personal safety, READ and UNDERSTAND before using. SAVE THESE INSTRUCTIONS FOR FUTURE REFERENCE.
Handling instructions
 Nibbler Model CN 16SA Handling instructions Note: Before using this Electric Power Tool, carefully read through these HANDLING INSTRUCTIONS to ensure efficient, safe operation. It is recommended that these
Impact Wrench WR 22SA HANDLING INSTRUCTIONS. Read through carefully and understand these instructions before use.
 Impact Wrench WR 22SA HANDLING INSTRUCTIONS Read through carefully and understand these instructions before use. 1 1 2 2 3 4 5 3 6 7 8 9 5 3 4 kg-m 80 N m 800 M22 70 (F 10T) 0 C 70 700 60 50 600 500 40
SAFETY AND OPERATING MANUAL
 SAFETY AND OPERATING MANUAL Impact drill WX317 WX318 1 3 2 8 7 6 5 4 A1 A2 B C1 2 1 3 3 1 D C2 5 4 E F 2 E F 1 G 4 2 H 1. Keyless Chuck 2. Depth gauge 3. Drill/hammer drill function selector 4. Switch
Impact Wrench MODEL 6905B MODEL 6906
 ENGLISH Impact Wrench MODEL 6905B MODEL 6906 005305 DOUBLE INSULATION I N S T R U C T I O N M A N U A L WARNING: For your personal safety, READ and UNDERSTAND before using. SAVE THESE INSTRUCTIONS FOR
ENGLISH (Original instructions) INSTRUCTION MANUAL. Curved Planer 1002BA DOUBLE INSULATION. IMPORTANT: Read Before Using.
 INSTRUCTION MANUAL. Curved Planer 1002BA DOUBLE INSULATION. IMPORTANT: Read Before Using.") ENGLISH (Original instructions) INSTRUCTION MANUAL Curved Planer 00BA 0059 DOUBLE INSULATION IMPORTANT: Read Before Using. ENGLISH (Original instructions) SPECIFICATIONS Model 00BA Planing width 0 mm Planing
ENGLISH (Original instructions) INSTRUCTION MANUAL Curved Planer 00BA 0059 DOUBLE INSULATION IMPORTANT: Read Before Using. ENGLISH (Original instructions) SPECIFICATIONS Model 00BA Planing width 0 mm Planing
VARIABLE SPEED WOOD LATHE. Model DB900 INSTRUCTION MANUAL
 VARIABLE SPEED WOOD LATHE Model DB900 INSTRUCTION MANUAL 1007 TABLE OF CONTENTS SECTION...PAGE Technical data.. 1 General safety rules....1-3 Specific safety rules for wood lathe.....3 Electrical information.4
ROTARY HAMMER OWNER'S MANUAL
 ROTARY HAMMER OWNER'S MANUAL WARNING: Read carefully and understand all INSTRUCTIONS before operating. Failure to follow the safety rules and other basic safety precautions may result in serious personal
ENGLISH (Original instructions) INSTRUCTION MANUAL. Hammer Drill MHP161 DOUBLE INSULATION. IMPORTANT: Read Before Using.
 INSTRUCTION MANUAL. Hammer Drill MHP161 DOUBLE INSULATION. IMPORTANT: Read Before Using.") ENGLISH (Original instructions) INSTRUCTION MANUAL Hammer Drill MHP6 0088 DOUBLE INSULATION IMPORTANT: Read Before Using. ENGLISH (Original instructions) SPECIFICATIONS Model MHP6 Concrete 6 mm Capacities
ENGLISH (Original instructions) INSTRUCTION MANUAL Hammer Drill MHP6 0088 DOUBLE INSULATION IMPORTANT: Read Before Using. ENGLISH (Original instructions) SPECIFICATIONS Model MHP6 Concrete 6 mm Capacities
Finger Jointer. Operating and Safety Instructions FJA300
 Finger Jointer FJA300 Operating and Safety Instructions www.tritontools.com Thank you for purchasing this Triton tool. These instructions contain information necessary for safe and effective operation
ENGLISH (Original instructions) INSTRUCTION MANUAL. Straight Shear JS1660 JS1670 DOUBLE INSULATION. IMPORTANT: Read Before Using.
 INSTRUCTION MANUAL. Straight Shear JS1660 JS1670 DOUBLE INSULATION. IMPORTANT: Read Before Using.") ENGLISH (Original instructions) INSTRUCTION MANUAL Straight Shear JS660 JS670 004666 DOUBLE INSULATION IMPORTANT: Read Before Using. ENGLISH (Original instructions) SPECIFICATIONS Model JS660 JS670 Steel
ENGLISH (Original instructions) INSTRUCTION MANUAL Straight Shear JS660 JS670 004666 DOUBLE INSULATION IMPORTANT: Read Before Using. ENGLISH (Original instructions) SPECIFICATIONS Model JS660 JS670 Steel
PRODUCT MANUAL 5-IN-1 MITER SAW STATION *SAVE THIS MANUAL FOR FUTURE REFERENCE
 PRODUCT MANUAL 5-IN-1 MITER SAW STATION *SAVE THIS MANUAL FOR FUTURE REFERENCE 92778 1 GENERAL SAFETY INFORMATION For your safety, please read these instructions carefully before use and keep them in the
Jigsaw Kit. Operating and Safety Instructions AJA300
 Jigsaw Kit AJA300 Operating and Safety Instructions www.tritontools.com Thank you for purchasing this Triton tool. These instructions contain information necessary for safe and effective operation of this
ENGLISH (Original instructions) INSTRUCTION MANUAL. Impact Wrench 6904VH 6905H DOUBLE INSULATION. IMPORTANT: Read Before Using.
 INSTRUCTION MANUAL. Impact Wrench 6904VH 6905H DOUBLE INSULATION. IMPORTANT: Read Before Using.") ENGLISH (Original instructions) INSTRUCTION MANUAL Impact Wrench 6904VH 6905H 005299 DOUBLE INSULATION IMPORTANT: Read Before Using. 1 ENGLISH (Original instructions) SPECIFICATIONS Model 6904VH 6905H
ENGLISH (Original instructions) INSTRUCTION MANUAL Impact Wrench 6904VH 6905H 005299 DOUBLE INSULATION IMPORTANT: Read Before Using. 1 ENGLISH (Original instructions) SPECIFICATIONS Model 6904VH 6905H
ENGLISH (Original instructions) INSTRUCTION MANUAL. Hammer Drill HP1630 HP1631 DOUBLE INSULATION. IMPORTANT: Read Before Using.
 INSTRUCTION MANUAL. Hammer Drill HP1630 HP1631 DOUBLE INSULATION. IMPORTANT: Read Before Using.") ENGLISH (Original instructions) INSTRUCTION MANUAL Hammer Drill HP630 HP63 008892 DOUBLE INSULATION IMPORTANT: Read Before Using. ENGLISH (Original instructions) SPECIFICATIONS Model HP630 HP63 Concrete
ENGLISH (Original instructions) INSTRUCTION MANUAL Hammer Drill HP630 HP63 008892 DOUBLE INSULATION IMPORTANT: Read Before Using. ENGLISH (Original instructions) SPECIFICATIONS Model HP630 HP63 Concrete
MINI RECIPROCATING SAW MODEL NO: CRS350M
 CRS350M - Mini Reciprocating saw.fm Page 1 Thursday, November 22, 2012 9:41 AM MINI RECIPROCATING SAW MODEL NO: CRS350M PART NO: 6462550 OPERATION & MAINTENANCE INSTRUCTIONS LS1112 CRS350M - Mini Reciprocating
18V CORDLESS STAPLER/NAILER
 18V CORDLESS STAPLER/NAILER MODEL NO: CONSN18LIC PART NO: 6487058 OPERATION & MAINTENANCE INSTRUCTIONS ORIGINAL INSTRUCTIONS LS0717 ISS2 2 INTRODUCTION Thank you for purchasing this CLARKE product. Before
8" BENCH SHEAR INSTRUCTIONS. Item #20198
 8" BENCH SHEAR INSTRUCTIONS Item #20198 Your EASTWOOD 8 BENCH SHEAR for metal cutting is designed for quickly and cleanly cutting mild steel, aluminum and other metals. Torque-amplifying, compound linkage
Recipro Saw MODEL JR3000V. WARNING: For your personal safety, READ and UNDERSTAND before using. SAVE THESE INSTRUCTIONS FOR FUTURE REFERENCE.
 ENGLISH Recipro Saw MODEL JR3000V 00477 DOUBLE INSULATION I N S T R U C T I O N M A N U A L WARNING: For your personal safety, READ and UNDERSTAND before using. SAVE THESE INSTRUCTIONS FOR FUTURE REFERENCE.
2-Speed Hammer Drill HP2030 HP2031 INSTRUCTION MANUAL
 ENGLISH (Original instructions) INSTRUCTION MANUAL 2-Speed Hammer Drill HP2030 HP203 002466 DOUBLE INSULATION WARNING: For your personal safety, READ and UNDERSTAND before using. SAVE THESE INSTRUCTIONS
4" METAL BENDER INSTRUCTIONS. Part #20521
 4" METAL BENDER INSTRUCTIONS Part #20521 The EASTWOOD 4 METAL BENDER is a high quality, industrial style tool capable of generating a powerful 2-1/2 tons of pressing force to create 90 or lesser repeatable
Impact Wrench WR 16SA
 Impact Wrench WR 16SA HANDLING INSTRUCTIONS Read through carefully and understand these instructions before use. 1 1 2 2 3 4 5 6 3 7 8 9 5 3 0 4 (kg-m) 30 20 C 10 M16 55 (F10T) A 0 0 2 4 6 8 10 (s) B 5
Instructions for Stone Cutting Machine
 Technical data Kg. Instructions for Stone Cutting Machine SCM600 3HP 2800rpm IP55 SCM800 3HP 2800rpm IP55 SCM1000 2800rpm IP55 SCM1200 2800rpm IP55 L=600 B=85(165) L=800 B=85(175) 500x510 0 or 45 600lt/h
Auto Feed Screwdriver
 ENGLISH Auto Feed Screwdriver MODEL 6833 MODEL 6834 MODEL 6836 002607 DOUBLE INSULATION I N S T R U C T I O N M A N U A L WARNING: For your personal safety, READ and UNDERSTAND before using. SAVE THESE
12 Slip Roll. Model Assembly & Operating Instructions
 12 Slip Roll Model 36698 Assembly & Operating Instructions Diagrams within this manual may not be drawn proportionally. Due to continuing improvements, actual product may differ slightly from the product
Angle Drill MODEL DA3000R MODEL DA3000V
 ENGLISH Angle Drill MODEL DA3000R MODEL DA3000V 003004 DOUBLE INSULATION I N S T R U C T I O N M A N U A L WARNING: For your personal safety, READ and UNDERSTAND before using. SAVE THESE INSTRUCTIONS FOR
KR703-XE KR704-XE KR705-XE KR753-XE KR754-XE KR755-XE Australia New Zealand
 6 5 4 www.blackanddecker.com.au 3 7 2 1 8 KR703-XE KR704-XE KR705-XE KR753-XE KR754-XE KR755-XE Australia New Zealand 7 8 A 12 13 10 9 10 B C 11 7 8 D E 2 Intended use Your Black & Decker hammer drill
Handling instructions
 Router Model M 2SC Handling instructions Note: Before using this Electric Power Tool, carefully read through these HANDLING INSTRUCTIONS to ensure efficient, safe operation. It is recommended that these
ENGLISH (Original instructions) INSTRUCTION MANUAL. Metal Shear JS1602 DOUBLE INSULATION. IMPORTANT: Read Before Using.
 INSTRUCTION MANUAL. Metal Shear JS1602 DOUBLE INSULATION. IMPORTANT: Read Before Using.") ENGLISH (Original instructions) INSTRUCTION MANUAL Metal Shear JS60 0076 DOUBLE INSULATION IMPORTANT: Read Before Using. ENGLISH (Original instructions) SPECIFICATIONS Model JS60 Steel up to 400 N/mm.6
ENGLISH (Original instructions) INSTRUCTION MANUAL Metal Shear JS60 0076 DOUBLE INSULATION IMPORTANT: Read Before Using. ENGLISH (Original instructions) SPECIFICATIONS Model JS60 Steel up to 400 N/mm.6
GENERAL OPERATIONAL PRECAUTIONS PRECAUTIONS ON USING DISC GRINDER
 GENERAL OPERATIONAL PRECAUTIONS WARNING! When using electric tools, basic safety precautions should always be followed to reduce the risk of fire, electric shock and personal injury, including the following.
BB Inch Double Cut Saw Assembly & Operating Instructions READ ALL INSTRUCTIONS AND WARNINGS BEFORE USING THIS PRODUCT.
 BB07552 5 Inch Double Cut Saw Assembly & Operating Instructions READ ALL INSTRUCTIONS AND WARNINGS BEFORE USING THIS PRODUCT. This manual provides important information on proper operation & maintenance.
Drill MODEL 6013B MODEL 6013BR. WARNING: For your personal safety, READ and UNDERSTAND before using. SAVE THESE INSTRUCTIONS FOR FUTURE REFERENCE.
 ENGLISH Drill MODEL 6013B MODEL 6013BR 004618 DOUBLE INSULATION I N S T R U C T I O N M A N U A L WARNING: For your personal safety, READ and UNDERSTAND before using. SAVE THESE INSTRUCTIONS FOR FUTURE
ENGLISH (Original instructions) INSTRUCTION MANUAL. Drill MDP303 MDP304 DOUBLE INSULATION. IMPORTANT: Read Before Using.
 INSTRUCTION MANUAL. Drill MDP303 MDP304 DOUBLE INSULATION. IMPORTANT: Read Before Using.") ENGLISH (Original instructions) INSTRUCTION MANUAL Drill MDP303 MDP304 0876 DOUBLE INSULATION IMPORTANT: Read Before Using. ENGLISH (Original instructions) SPECIFICATIONS Model MDP303 MDP304 Capacities
ENGLISH (Original instructions) INSTRUCTION MANUAL Drill MDP303 MDP304 0876 DOUBLE INSULATION IMPORTANT: Read Before Using. ENGLISH (Original instructions) SPECIFICATIONS Model MDP303 MDP304 Capacities
Impact Wrench 6904VH 6905H INSTRUCTION MANUAL
 ENGLISH (Original instructions) INSTRUCTION MANUAL Impact Wrench 6904VH 6905H 005299 DOUBLE INSULATION WARNING: For your personal safety, READ and UNDERSTAND before using. SAVE THESE INSTRUCTIONS FOR FUTURE
Drill 13 mm (1/2 ) MODEL 6302H
 MODEL 6302H") Drill 3 mm (/2 ) MODEL 6302H 3 mm (/2 ) MODEL 6303H INSTRUCTION MANUAL Variable speed / Reversing Variable speed / Reversing DOUBLE INSU LATlO N SPECIFICATIONS Steel Wood (RPM) 6302H I 3 mm (/2 ) I 36
Drill 3 mm (/2 ) MODEL 6302H 3 mm (/2 ) MODEL 6303H INSTRUCTION MANUAL Variable speed / Reversing Variable speed / Reversing DOUBLE INSU LATlO N SPECIFICATIONS Steel Wood (RPM) 6302H I 3 mm (/2 ) I 36
Quick Set Dovetail Jig
 Quick Set Dovetail Jig FOR HELP OR ADVISE ON THIS PRODUCT PLEASE CALL OUR CUSTOMER SERVICE HELP LINE : 01509 500359 THE MANUFACTURER RESERVES THE RIGHT TO ALTER THE DESIGN OR SPECIFICATION TO THIS PRODUCT
 GENERAL OPERATIONAL PRECAUTIONS WARNING! When using electric tools, basic safety precautions should always be followed to reduce the risk of fire, electric shock and personal injury, including the following.
Automatic Screwdriver Model W 4YD. Handling instructions
 Automatic Screwdriver Model W 4YD Handling instructions Note: Before using this Electric Power Tool, carefully read through these HANDLING INSTRUCTIONS to ensure efficient, safe operation. It is recommended
Handling instructions
 Orbital Sander Model SV 12SG Handling instructions Note: Before using this Electric Power Tool, carefully read through these HANDLING INSTRUCTIONS to ensure efficient, safe operation. It is recommended
SAFETY AND OPERATING MANUAL. 750W/13mm IMPACT DRILL JM750ID
 SAFETY AND OPERATING MANUAL 750W/13mm IMPACT DRILL JM750ID GENERAL POWER TOOL SAFETY WARNINGS WARNING! Read all safety warnings and all instructions. Failure to follow the warnings and instructions may
ENGLISH (Original instructions) INSTRUCTION MANUAL. Router 3600H. IMPORTANT: Read Before Using.
 INSTRUCTION MANUAL. Router 3600H. IMPORTANT: Read Before Using.") ENGLISH (Original instructions) INSTRUCTION MANUAL Router 300H 00507 IMPORTANT: Read Before Using. ENGLISH (Original instructions) SPECIFICATIONS Model 300H Collet chuck capacity or /" No load speed (min
ENGLISH (Original instructions) INSTRUCTION MANUAL Router 300H 00507 IMPORTANT: Read Before Using. ENGLISH (Original instructions) SPECIFICATIONS Model 300H Collet chuck capacity or /" No load speed (min
HP2050 HP2050F HP2051 HP2051F
 ENGLISH (Original instructions) INSTRUCTION MANUAL -Speed Hammer Drill HP050 HP050F HP05 HP05F 00989 DOUBLE INSULATION IMPORTANT: Read Before Using. ENGLISH (Original instructions) SPECIFICATIONS Model
Horizontal and Vertical. Metal Cutting Band Saw MODEL: BS-115
 Horizontal and Vertical Metal Cutting Band Saw MODEL: BS-5 SAFETY. Know your band saw. Read the operator s Manual carefully. Learn the operations, applications and limitation.. Use recommended accessories.
18 GAUGE ELECTRIC METAL SHEAR
 241-9895 18 GAUGE ELECTRIC METAL SHEAR Operator s Manual SAVE THIS MANUAL You will need this manual for safety instructions, operating procedures and warranty. Put it and the original sales receipt in
ENGLISH (Original instructions) INSTRUCTION MANUAL. Nibbler JN1601 DOUBLE INSULATION. IMPORTANT: Read Before Using.
 INSTRUCTION MANUAL. Nibbler JN1601 DOUBLE INSULATION. IMPORTANT: Read Before Using.") ENGLISH (Original instructions) INSTRUCTION MANUAL Nibbler JN60 0077 DOUBLE INSULATION IMPORTANT: Read Before Using. ENGLISH (Original instructions) SPECIFICATIONS Model JN60 Steel up to 00 N/mm.6 mm /
ENGLISH (Original instructions) INSTRUCTION MANUAL Nibbler JN60 0077 DOUBLE INSULATION IMPORTANT: Read Before Using. ENGLISH (Original instructions) SPECIFICATIONS Model JN60 Steel up to 00 N/mm.6 mm /
GENERAL OPERATIONAL PRECAUTIONS
 GENERAL OPERATIONAL PRECAUTIONS WARNING! When using electric tools, basic safety precautions should always be followed to reduce the risk of fire, electric shock and personal injury, including the following.
Instruction Manual. Manual de instrucciones. Guide d utilisation ET PMET Rev 808
 Instruction Manual Manual de instrucciones Guide d utilisation ET2025 PMET2025-8 Rev 808 www.arrowfastener.com GENERAL SAFETY RULES WARNING! Read all instructions. Failure to follow all instructions listed
Handling instructions
 Impact Drill Model DV 8V Handling instructions Note: Before using this Electric Power Tool, carefully read through these HANDLING INSTRUCTIONS to ensure efficient, safe operation. It is recommended that
12mm (Max) 6mm (Max) 82mm (Max) 12mm (Max) 6mm (Max)
 6mm (Max) 82mm (Max) 12mm (Max) 6mm (Max)") 1 1 2 2 3 3 82mm (Max) 12mm (Max) 12mm (Max) 6mm (Max) 4 4 5 6 8 6mm (Max) 0.5 0mm 1 5 6 7 7 8 9 9 A = B 10 11 12 D B 1 13 14 15 0 C A D E 16 17 18 F G D B N H J G I K 19 A 20 G L 21 C K 1mm L M 1mm 22
1 1 2 2 3 3 82mm (Max) 12mm (Max) 12mm (Max) 6mm (Max) 4 4 5 6 8 6mm (Max) 0.5 0mm 1 5 6 7 7 8 9 9 A = B 10 11 12 D B 1 13 14 15 0 C A D E 16 17 18 F G D B N H J G I K 19 A 20 G L 21 C K 1mm L M 1mm 22
20V CORDLESS RECIPROCATING SAW MODEL NO: CRS20Li
 20V CORDLESS RECIPROCATING SAW MODEL NO: CRS20Li PART NO: 6487020 OPERATION & MAINTENANCE INSTRUCTIONS LS1013 INTRODUCTION Thank you for purchasing this CLARKE 20V Cordless Reciprocating Saw. Before attempting
GENERAL OPERATIONAL PRECAUTIONS PRECAUTIONS ON USING CUT-OFF MACHINE
 GENERAL OPERATIONAL PRECAUTIONS WARNING! When using electric tools, basic safety precautions should always be followed to reduce the risk of fire, electric shock and personal injury, including the following.
INSTRUCTION BOOKLET AND WARRANTY INFORMATION 6 BENCH GRINDER
 INSTRUCTION BOOKLET AND WARRANTY INFORMATION 6 BENCH GRINDER Part No.: SW1250 PLEASE READ CARE AND SAFETY INSTRUCTIONS BEFORE USE SPECIFICATIONS Part No.: SW1250 Input Voltage: 240V Frequency: 50Hz Rated
Drill MODEL DP3002/DP3003 MODEL DP4000/DP4001 MODEL DP4002/DP4003
 ENGLISH Drill MODEL DP3002/DP3003 MODEL DP4000/DP400 MODEL DP4002/DP4003 DP3002 DP4000 DP4002 DP3003 DP400 DP4003 003006 DOUBLE INSULATION I N S T R U C T I O N M A N U A L WARNING: For your personal safety,
SAFETY AND OPERATING MANUAL
 SAFETY AND OPERATING MANUAL BladeRunner X2 WX572 9 10 8 11 5 7 12 6 20 1 2 4 3 14 13 15 A2 A1 17 18 B2 B1 1 2 1 2 19 B3 3 4 2 C 1 D1 D1 C 2 1 E1 D2 1 2 E2 1 2 F G1 G1 F OFF ON G2 G3 H1 H2 I1 I2 I1 I2 J
PAN AND BOX BRAKE INSTRUCTIONS. Item #20649
 PAN AND BOX BRAKE INSTRUCTIONS Item #20649 The EASTWOOD 12 & 24 PAN AND BOX BRAKES are precision engineered metal working tools designed to produce accurate, variable length bends in angles up to 135 in
ENGLISH (Original instructions) INSTRUCTION MANUAL. Drill 6402 DP4700 DP4700 DOUBLE INSULATION. IMPORTANT: Read Before Using.
 INSTRUCTION MANUAL. Drill 6402 DP4700 DP4700 DOUBLE INSULATION. IMPORTANT: Read Before Using.") ENGLISH (Original instructions) INSTRUCTION MANUAL Drill 6402 DP4700 6402 DP4700 00465 DOUBLE INSULATION IMPORTANT: Read Before Using. ENGLISH (Original instructions) SPECIFICATIONS Model 6402 DP4700 Capacities
ENGLISH (Original instructions) INSTRUCTION MANUAL Drill 6402 DP4700 6402 DP4700 00465 DOUBLE INSULATION IMPORTANT: Read Before Using. ENGLISH (Original instructions) SPECIFICATIONS Model 6402 DP4700 Capacities
ENGLISH (Original instructions) INSTRUCTION MANUAL. Finishing Sander BO4553 BO4561 BO4563 DOUBLE INSULATION. IMPORTANT: Read Before Using.
 INSTRUCTION MANUAL. Finishing Sander BO4553 BO4561 BO4563 DOUBLE INSULATION. IMPORTANT: Read Before Using.") ENGLISH (Original instructions) INSTRUCTION MANUAL Finishing Sander BO4553 BO456 BO4563 00449 DOUBLE INSULATION IMPORTANT: Read Before Using. ENGLISH (Original instructions) SPECIFICATIONS Model BO4553
ENGLISH (Original instructions) INSTRUCTION MANUAL Finishing Sander BO4553 BO456 BO4563 00449 DOUBLE INSULATION IMPORTANT: Read Before Using. ENGLISH (Original instructions) SPECIFICATIONS Model BO4553
SAFETY AND OPERATING MANUAL
 SAFETY AND OPERATING MANUAL 2 GENERAL POWER TOOL SAFETY WARNINGS WARNING! Read all safety warnings and all instructions. Failure to follow the warnings and instructions may result in electric shock, fire
MULTI-PURPOSE SAW MODEL NO. OZMPS500A OPERATING INSTRUCTIONS
 MULTI-PURPOSE SAW 500watt MODEL NO. OZMPS500A OPERATING INSTRUCTIONS To view our entire range visit www.ozito.com.au SPECIFICATIONS - MODEL NO. OZMPS500A Motor: Input: No load speed: Length of stroke:
Tapping Screw (W/Flange) 46 Cord Armor 47 Tube (D) 48 Cord. 45 Cord Clip. Tapping Screw (W/Flange) 10 Gear Cover Ass'y. 12 Socket (B) Ass'y
 46 Cord Armor 47 Tube (D) 48 Cord. 45 Cord Clip. Tapping Screw (W/Flange) 10 Gear Cover Ass'y. 12 Socket (B) Ass'y") W8VB The exploded assembly drawing should be used only for authoized service center. W8VB Item No. Part time 1 Magnetic Hex. Socket 2 Sub Stopper 3 O-Ring (S-16) 4 Locator (A) 5 Lock Sleeve (A) 6 O-Ring
W8VB The exploded assembly drawing should be used only for authoized service center. W8VB Item No. Part time 1 Magnetic Hex. Socket 2 Sub Stopper 3 O-Ring (S-16) 4 Locator (A) 5 Lock Sleeve (A) 6 O-Ring
Instruction Manual 13MM DRILL PRESS. Model SROM1199. Our tool range has you covered for DIY. Whatever the job, make light work of it with MAKO tools.
 Instruction Manual 13MM DRILL PRESS Model SROM1199 Our tool range has you covered for DIY. Whatever the job, make light work of it with MAKO tools. PRODUCT FEATURES: 1. Pulley Cover 9. Feed Handle 2. Motor
OPERATION & MAINTENANCE INSTRUCTIONS
 FOOT OPERATED 1.5 TONNE LOG SPLITTER MODEL NO: LOGBUSTER 10 PART NO: 3402046 OPERATION & MAINTENANCE INSTRUCTIONS LS0815 INTRODUCTION Thank you for purchasing this CLARKE Foot Operated 1.5 Tonne Log Splitter.
10" Wet Tile Cutting Saw
 8035735 10" Wet Tile Cutting Saw Owner s Manual Read and understand all instructions before operation. Keep this manual for future reference pg. 2 SPECIFICATIONS ITEM DESCRIPTION Overall Dimensions (saw
18 PIECE HOLE SAW SET
 18 PIECE HOLE SAW SET 94665 ASSEMBLY AND OPERATING INSTRUCTIONS Due to continuing improvements, actual product may differ slightly from the product described herein. 3491 Mission Oaks Blvd., Camarillo,
Angle Grinder MODEL 9553B MODEL 9555B
 ENGLISH Angle Grinder MODEL 9553B MODEL 9555B 006649 DOUBLE INSULATION I N S T R U C T I O N M A N U A L WARNING: For your personal safety, READ and UNDERSTAND before using. SAVE THESE INSTRUCTIONS FOR
Auto Feed Screwdriver
 ENGLISH (Original instructions) INSTRUCTION MANUAL Auto Feed Screwdriver 684 6843 6844 6846 0080 DOUBLE INSULATION IMPORTANT: Read Before Using. ENGLISH (Original instructions) SPECIFICATIONS Model 684
Cut-Off Machine Model CC 14SE
 Cut-Off Machine Model CC 14SE Handling instructions NOTE: Before using this Electric Power Tool, carefully read through these HANDLING INSTRUCTIONS to ensure efficient, safe operation. It is recommended
Power Planer 1900B/N1900B/1902
 Power Planer 1900B N1900B 1902 SPECIFICATIONS Model 1900B/N1900B/1902 Planing width... 82 mm Planing depth... 1 mm Shiplapping depth... 9 mm No load speed (min -1 )...16,000 Overall length... 290 mm Net
Circular Saw M583 INSTRUCTION MANUAL
 ENGLISH INSTRUCTION MANUAL Circular Saw M583 005337 DOUBLE INSULATION WARNING: For your personal safety, READ and UNDERSTAND before using. SAVE THESE INSTRUCTIONS FOR FUTURE REFERENCE. ENGLISH SPECIFICATIONS
SAFETY AND OPERATING MANUAL 700W JIGSAW JM700JS
 SAFETY AND OPERATING MANUAL 700W JIGSAW JM700JS GENERAL POWER TOOL SAFETY WARNINGS WARNING! Read all safety warnings and all instructions. Failure to follow the warnings and instructions may result in
Handling instructions
 Impact Drill Model DV 20VB2 Handling instructions Note: Before using this Electric Power Tool, carefully read through these HANDLING INSTRUCTIONS to ensure efficient, safe operation. It is recommended
6 BENCH GRINDER. Model ASSEMBLY AND OPERATING INSTRUCTIONS
 6 BENCH GRINDER Model 90003 ASSEMBLY AND OPERATING INSTRUCTIONS 3491 Mission Oaks Blvd., Camarillo, CA 93011 Visit our Web site at: http://www.harborfreight.com Copyright 2003 by Harbor Freight Tools.
Dust Collector. Model No: DC2200 (FM300S)
") Dust Collector Model No: DC2200 (FM300S) GENERAL SAFETY INSTRUCTIONS Before attempting to operate this machine, it is important that you read, understand and follow these instructions very carefully. They
Dust Collector Model No: DC2200 (FM300S) GENERAL SAFETY INSTRUCTIONS Before attempting to operate this machine, it is important that you read, understand and follow these instructions very carefully. They
12 SHEAR, PRESS BRAKE &SLIPROLL
 12 SHEAR, PRESS BRAKE &SLIPROLL OPERATION MANUAL SPECIFICATION Cpacity: Roller : Die set sizes: Weight: 1mm thick (20gauge), 305 mm (12 ) width 38mm(1-1/2 ) 101.6mm(4 ), 76.2mm(3 ), 50.8mm (x2)[2 9x2]],
8 TONNE LOG SPLITTER
 8 TONNE LOG SPLITTER MODEL NO: LOGBUSTER 9 PART NO: 3402043 OPERATION & MAINTENANCE INSTRUCTIONS LS03/16 INTRODUCTION Thank you for purchasing this CLARKE 8 Tonne Log Splitter. Before attempting to use
2-Speed Hammer Drill
 ENGLISH 2-Speed Hammer Drill MODEL HP2032 MODEL HP2033 MODEL HP2034 DOUBLE INSULATION 002466 I N S T R U C T I O N M A N U A L WARNING: For your personal safety, READ and UNDERSTAND before using. SAVE
Angle Drill DA4000LR INSTRUCTION MANUAL
 ENGLISH (Original instructions) INSTRUCTION MANUAL Angle Drill DA4000LR 003009 DOUBLE INSULATION WARNING: For your personal safety, READ and UNDERSTAND before using. SAVE THESE INSTRUCTIONS FOR FUTURE
HANDLING INSTRUCTIONS
 Demolition Hammer Model: XP-G55VA HANDLING INSTRUCTIONS Before using this demolition hammer, please carefully read though these HANDLING INSTRUCTIONS. Ensure that you know how the machine works, and how
SDS+ ROTARY HAMMER DRILL
 SDS+ ROTARY HAMMER DRILL MODEL NO: CON400RHD PART NO: 6479510 OPERATION & MAINTENANCE INSTRUCTIONS LS0812 INTRODUCTION Thank you for purchasing this CLARKE SDS+ Rotary Hammer Drill. Before attempting to
MULTI FUNCTION SHARPENER
 WHAT S IN THE BOX MULTI FUNCTION SHARPENER 65W INSTRUCTION MANUAL SPECIFICATIONS Motor: 65W No Load Speed: 6,700/min Wheel Diameter: 49mm (2 ) Sharpening Capacity Drill bit: 3-10mm Blade: 6-51mm Weight:
INSTRUCTION MANUAL MODEL JN1601 SPEC I FI CAT1 0 N S DOUBLE INSULATION
 MODEL JN60 INSTRUCTION MANUAL DOUBLE INSULATION SPEC I FI CAT 0 N S Max. cutting capacities Mild steel Stainless Aluminum.6 mm. mm.5 mm (lil6") 3/64") (33") Min. cutting radius I I I Strokes Overall Net
Rotary Hammer HR4501C HR4510C HR4511C INSTRUCTION MANUAL
 ENGLISH INSTRUCTION MANUAL Rotary Hammer HR450C HR450C HR45C 00864 DOUBLE INSULATION WARNING: For your personal safety, READ and UNDERSTAND before using. SAVE THESE INSTRUCTIONS FOR FUTURE REFERENCE. ENGLISH