8' x 10' OUTDOOR SHED
|
|
|
- Annabella Lang
- 6 years ago
- Views:
Transcription


1 8' x 10' OUTDOOR SHED Owner s Manual with Assembly Instructions
2 Level Surface Notice: Lifetime 8 x 10 Outdoor Shed MODEL #6440 You could win $200! 1. You automatically will be entered to win $200 in our monthly drawing! 3. You may choose to receive Preferred Customer Announcements and promotions regarding new Lifetime products. Surface must be leveled before installation. We recommend building a level work space with a cement or patio style surface. If the surface is not properly leveled, the Outdoor Shed will not assemble correctly. Proper surface leveling will save you time in the long run, so please do not ignore this step. Building Code Notice: Consult all local building codes, as well as city and county ordinances, to ensure that the construction of the Outdoor Shed does not require a building permit. Proper building permit documentation may be required in your neighborhood, and it would be unfortunate to learn this after constructing the Shed. Notice: There is a 1/2 Phillips head screwdriver bit included with the shed hardware. This bit can be used with any power screwdriver or drill. The plastic pieces of your shed can be damaged by overtightening of screws. To avoid damage we strongly recommend the use of a low-powered power screwdriver or a drill that has an adjustable clutch that is set on a low torque setting. If neither is available, use a hand screwdriver. In any case, use caution to avoid overtightening the screws. Floor Puncture Notice: Congratulations on your Lifetime Outdoor Shed purchase. By following the instructions below, your new Lifetime shed should provide you with years of service and enjoyment. Cleaning and Care The polyethylene walls and shelves are stain- and solvent resistant. To clean, use a mild soap and a soft-bristled brush. Abrasive cleaning materials may scratch the plastic and are not recommended. Repair scratches or rust spots on the metal by sanding placing a direct heat source on or near surfaces unless using a heat barrier. SAFETY INSTRUCTIONS FAILURE TO FOLLOW THESE WARNINGS MAY RESULT IN SERIOUS INJURY OR PROPERTY DAMAGE AND WILL VOID WARRANTY. To ensure safety, do not attempt to assemble this shed without following the instructions carefully. Check entire box and inside all packing material for parts and/or additional instruction material. Before beginning assembly, read the instructions Proper and complete assembly, use and supervision are essential for proper orientation and to reduce the risk of accident or injury. Do not use or store hot objects such as grills, blowtorches, welding equipment, etc. in the shed. If using a ladder during assembly, use extreme caution. Two capable adults are required for shed assembly. (It is also recommended that a third adult function as an instruction reader.) Most injuries are caused by misuse and/or not following instructions. Use caution when using this shed. 2 INSTRUCTION N B 5/07/2008
 225-3865 Hours: 7:00 a.m. to 5:00 p.m. Monday-Friday (Mountain Standard Time) **Call, or visit our Web site for Saturday hours** **Customers outside of the U.")
3 Read This First! Before Beginning Assembly: A. Read the Congratulations letter on pages 4-5. B. Remove Parts List from the center of these instructions and make sure all parts are present and in good condition. C. **Do Not Contact the Store!** For Assistance, including missing or broken parts, Call Customer Service at: 1 (800) Hours: 7:00 a.m. to 5:00 p.m. Monday-Friday (Mountain Standard Time) **Call, or visit our Web site for Saturday hours** **Customers outside of the U.S. or Canada, please contact the store for assistance.** KEY Indicates a helpful hint or important note. Indicates that a hand screwdriver is required for a step. step in the full-color Caution: If more than 6 of snow accumulate on the roof of the shed, carefully remove the snow to avoid possible roof collapse. While standing on the ground, remove the snow from the roof with a broom or snow shovel. Do not stand on the roof to remove snow. Suggested Tools & Materials (Not Included): 7/16 3/8 Adjustable Rubber Mallet Box Knife Phillips Head Two Adults Required for Assembly (+ one Adult suggested as an instruction reader) (2) (1) (1) (1) (1) (1) Step Ladder Power Drill * Work Light Pliers Flashlight Safety Glasses (2) (1) (1) (1) (1) (1) *See Notice on page 2 3
4 IMPORTANT! Please Read Dear Valued Customer, We would like to congratulate you on your purchase of a Lifetime Outdoor Storage Shed! We storage solution. Lifetime or degrade outdoors. Outdoor Storage Shed, please preparation tips to help you get started! Outdoor Storage Shed will surely last for years if you are patient, and take - 1-4

5 FOLLOW THE INSTRUCTIONS IN ORDER! YOUR SHED MUST BE BUILT ON A LEVEL SURFACE! Thanks for choosing Lifetime - 2-5


6 1 Site Selection 1a The actual dimensions of your shed (at its widest and longest points) are 8 x 10. Be sure to select a site that will accommodate these measurements. The base of the shed is slightly smaller than this, so you will need to create a level surface that is at least 93.5 x We recommend using a level cement or patio style surface. This will provide the best long-term performance for your shed NOTICE: Shed Extension Kits are available for this shed. Please consider possible shed expansion when planning the site for your shed. See inside the back cover of this manual for information on ordering Extension Kits. 8 Surface must be leveled before installation. If the surface is not properly leveled, the outdoor shed will not assemble or function correctly. Proper surface leveling will save you time in the long run, so please do not ignore this step. Alternate Site Preparation Wherever possible you should use the surfaces described above. When this is not possible, we recommend you use one of the following options: Note: Any platform or similar structure should be built above ground in order to avoid water pooling inside shed. OPTION 1: Wood Platform Be sure you use lumber that is treated and approved for outdoor use. Build outside frame to 93 1/2 x 118 1/4 outside dimensions: 118 1/4 Item Qty. * All lumber must be rated for outdoor use. ** Trim 4 x 8 sheets to this size. 93 1/ To be sure to have studs in the correct location to nail plywood in the next step, start measuring here & measure from center to center. Place the 2 x 4 x 90 1/2 boards on the inside of the frame. Nail each board in place with the 16d nails. 6


7 A B Line up a large sheet of outdoor rated plywood (48 x 93.5 ) with the end of the frame (same end you measured from). Nail plywood in place. Square up the frame by measuring from corner to corner. Measurement A should equal Measurement B. Place next large sheet. Cut remaining space (22 1/4 x 93 1/4 ) on frame. Nail plywood in place. Place platform in the desired location. If platform does not rest level on the ground, build up low points with loose dirt until platform is stable. Drill 3 evenly spaced 1/2 drain holes in plywood between each 2 x 4 joist. OPTION 2: Filled Wood Frame Be sure you use lumber that is treated and approved for outdoor use. Cut outside frame to 8 x 10 outside dimensions: 10 Be sure that frame is level. Item Qty. * Must be rated for outdoor use B A 8 Nail an L-bracket on each corner of the frame with 8d nails. Square up the frame by measuring from corner to corner. Measurement A should equal Measurement B. Place platform in the desired location. If platform does not rest level on the ground, build up low points with loose dirt or Pea gravel, until platform is stable. Use aprox. 9.8 cu. ft. of pea gravel. Once all boards are level and do not wobble, pack Pea gravel or dirt around the outside of the frame, and slope away from frame. gravel. Use a leveling board to scrape off extra 7

 Hold a Center Floor Panel (110) at an angle (as shown) Center")

 and slide Window into slot on the Window Wall Panel")
, Ensure the Window Latches slide freely. 13.2: Do not overtighten.")
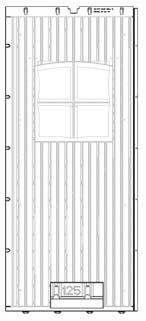
8 Before Beginning! Remove the Parts List from the center of this manual, and locate color Construction Tips insert in box. 2 Assemble Floor 2.1: Lay Outer Floor Panel (109) Hold a Center Floor Panel (110) at an angle (as shown) Center Floor Panel Add next Center Panel (110) and last Outer Panel (109) CAUTION Sharp objects may damage your floor. If resting sharp, heavy block of wood between the sharp Assemble Window 3.1: Remove plastic sheeting from Window (AA) and slide Window into slot on the Window Wall Panel (125). Attach a Window Latch (HQ) above each corner of the Window as shown. When tightening Screws (SS), Ensure the Window Latches slide freely. 13.2: Do not overtighten. Insert Screw (TC) into the hole in the Window. Set panel aside. Hardware Bags: SS (4) HQ (2) TC (1) SS HQ SS HQ Insert Window with bent edge at top and pointing away from the Wall. Place Screw (TC) in this hole to keep window from sliding up window 8
 directly under the tab you are inserting. Snap tabs into place one at a time. 4.")
 Hardware Bags: 121 Top holes Corner Shelf should only be placed in top set of holes.")
9 4 Assemble Front Corner 4.1: Fold Left Front Corner Panel (105). Fit tabs of panel into the front left Wood Block (BC) Corner Panel until tab snaps into place. Move block under the next tab and repeat. 105 Place Wood Block (BC) directly under the tab you are inserting. Snap tabs into place one at a time. 4.2: Fold up edges of Corner Shelf (121). Line-up holes in Corner Shelf with top set of pre-made holes in Left Front Corner Panel and secure with Screws (SS). SS (4) Hardware Bags: 121 Top holes Corner Shelf should only be placed in top set of holes. See inside the back cover for information on purchasing additional shelves. 9
 into place along the long")
 can be inserted into any side")

 Place Wood Block (BC) directly under the tab")


10 5 Assemble Left Wall 5.1: Snap Wall Panels (108) into place along the long side of shed. Window Wall Panel (125) can be inserted into any side Wall Panel position. Ensure holes line up and then fasten panels together with Screws (SS). SS (20) Place Wood Block (BC) directly under the tab you are inserting. Snap tabs into place one at a time. Second person should apply pressure on opposite side of the wall for easy insertion of screws. Do Not Over-Tighten Screws : Fold Left Back Corner Panel (107). Snap into place and fasten with Screws (SS). 107 Place Wood Block (BC) directly under the tab you are inserting. Snap tabs into place one at a time. 10
 along back side of shed.")
 Do Not Over- Tighten Screws Second person should")

.")
11 6 Assemble Back Wall 6.1: Insert two Wall Panels (108) along back side of shed. Ensure holes line up and fasten panels with Screws (SS). SS (15) Do Not Over- Tighten Screws Second person should apply pressure on opposite side of the wall for easy insertion of screws : Fold Right Back Corner Panel (106). Snap into place and fasten with Screws (SS). Place Wood Block (BC) directly under the tab you are inserting. Snap tabs into place one at a time
 into slots on back")
 beginning at the bottom of the Channels.")


12 7 Install Back Shelf 7.1: Insert two Shelf Support Channels (AF) into slots on back wall (align with Truss Notches as shown) and secure with Screws (SS) beginning at the bottom of the Channels. Set a Shelf Support Bracket (AE) into the top location of each of the Shelf Support Channels. SS (8) AF Insert Bracket at an angle. AE Truss Notch Truss Notch Start at the bottom of the Channel to insert Screws. AE 7.2: 8 Long Shelf (120). Set shelf on brackets with indentations toward wall, and Screw (SS) into place. SS (6) There are only holes for Screws along front side of the shelf (front is labeled Front on underside of shelf) 12
 into place along long side of shed.")
.")

.")


13 Assemble Right Wall 8.1: Snap Wall Panels (108) into place along long side of shed. Window Wall Panel (125) can be inserted into any side Wall Panel position. Ensure holes line up and fasten panels together with Screws (SS). SS (20) Do Not Over- Tighten Screws Second person should apply pressure on opposite side of the Wall for easy insertion of Screws : Fold Right Front Corner Panel (104). Snap into place and fasten with Screws (SS). Place Wood Block (BC) directly under the tab you are inserting. Snap tabs into place one at a time Install Corner Shelf 9.1: Fold up edges of Corner Shelf (121). Line-up holes in Corner Shelf with top set of pre-made holes in Right Front Corner Panel and secure with Screws (SS). Top holes SS (4) 121 Corner Shelf should only be placed in top set of holes. See inside the back cover for information on purchasing additional shelves. 13
 (Not Actual Size) Rubber Mallet (1) 1033168 TOP HM Door End Channel side up (facing the Dead bolt Latches). HM 10.")
 to the Strike Plate with two (2) Carriage Bolts (HB) and two (2) Cap Nuts (HL). HP PB (3) HB (2) 1033168, 1033418 7/16 Wrenches (2) 10.")
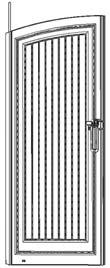
14 10 Left Door Assembly 10.1: Rest Left Door (118) with front side down. Position Deadbolt Latches (HM) in slots at top and bottom of door then slide Door End Channel (AG) onto the door. AG Back of Door HM (2) (Not Actual Size) Rubber Mallet (1) TOP HM Door End Channel side up (facing the Dead bolt Latches). HM 10.2: Slip the Strike Plate (HT) over the Left Door and align the holes. BOTTOM HL (2) VC (3) HT 10.3: Attach the Left Door Latch (HP) to the Strike Plate with two (2) Carriage Bolts (HB) and two (2) Cap Nuts (HL). HP PB (3) HB (2) , /16 Wrenches (2) 10.4: Attach the Left Door Handle (BB) using three (3) Washers (VC) and three (3) Screws (PB). CAUTION Do not overtighten. Overtightening may damage parts and void warranty. HB WARNING Do not overtighten the Cap Nut. If the end of the Bolt breaks through the plastic cap, call our Customer Service Department at the number on Page One. Exposed threads on the end of the Bolt may cause serious injuries. HL BB You may need to nudge the Door End Channel to make the holes line up with the gap in the door. VC VC PB PB 14
 PB (3) Groove Knob HG 1033072 1033168, 1033418 11.4: Attach the Handle and Thumb Lever to the Door.")
15 11 Right Door Assembly 11.1: Rest Right Shed Door (119) with front side down, then slide Door End Channel (AG) onto the door. AG Back of Door 11.2: Fit Thumb Lever Knobs into Handle Grooves. 11.3: Rotate the Thumb Lever into the handle. Slide forward until the Knobs handle. VC (3) PB (3) Groove Knob HG , : Attach the Handle and Thumb Lever to the Door. HG Knobs snap into Holes BA PB HG BA VC PB VC BA CAUTION Do not overtighten. Overtightening may damage parts and void warranty. 15
 HR HI HA HH HU HR (2) HH (2) HU (2) HB 1033168 7/16 Wrenches (2) HN You may need to nudge the Door End Channel to make the")
 HD (1) (Not Actual Size) WARNING HD HI HA 1033168, 1033072 Pliers Safety Glasses When pulling on spring, use protective")
 with the hole in the Thumb Lever (HG) and Screw (PB) into place.")
16 11.3: Install Handle Latch assembly onto the Right Shed Door. HB (2) HR HI HA HH HU HR (2) HH (2) HU (2) HB /16 Wrenches (2) HN You may need to nudge the Door End Channel to make the holes line up with the gap in the door. 11.4: Attach Door Spring (HD) to handle assembly. Set the door aside. XX (1) HD (1) (Not Actual Size) WARNING HD HI HA , Pliers Safety Glasses When pulling on spring, use protective eye glasses to help prevent serious eye injury. Use pliers to pull spring down and hook into bottom hole. 11.5: Line up the hole in the Latch Block (XX) with the hole in the Thumb Lever (HG) and Screw (PB) into place. Note: The Spring is not shown in this illustration in order to better show the correct placement of the Latch Block. PB HG XX 16
, and secure with Screws (GA).")
 and Screen (VB) into the Front Gable, using Screws (PB) and Washers (VC).")
17 12 Front Gable Assembly 12.1: Insert End Plugs (GB) into ends of Gable Support Square Tube (AH). Attach Gable Support Square Tube to Front Gable (111), and secure with Screws (GA). Only use a hand screwdriver on this step HH12100 GA (6) GB GA AH GB GA The Square Tube must be facing away from the gable. 12.2: Install Vent (VA) and Screen (VB) into the Front Gable, using Screws (PB) and Washers (VC). PB (5) VA HH11900 VC (5) VB VC PB Second person should apply pressure on opposite side of the wall for easy insertion of screws. 17
 1033168 (Not actual size) HO One person should hold Doors in place until they are secured with the front Gable. 13.")
 HO (1) (Not actual sizes) 1033168 HO One person should hold Doors in place until they are secured with the front Gable. 13.")
 after they have been inserted.")
18 Install Doors and Front Gable 13.1: Push a Door Hinge Bushing (HO) and hang the Left Door on the left front corner. 13.2: Ensure bottom of the Hinge Pin Bushing. HO (1) (Not actual size) HO One person should hold Doors in place until they are secured with the front Gable. 13.3: Push a Door Hinge Bushing (HO) 13.4: Hang the Right Door on the right front corner. Ensure bottom of the Hinge pin Bushing. HS (2) HO (1) (Not actual sizes) HO One person should hold Doors in place until they are secured with the front Gable. 13.5: Insert the Door Hinge Cotter Pin (HS) through the Bushings and Hinges on both Doors. Use pliers to bend back the ends of the Cotter Pins (HS) after they have been inserted. HS Ensure these two holes line up, so that the Cotter Pin (HS) can be inserted. 18
19 Before Beginning Assembly from the Instructions and take an inventory of all parts in both boxes. Box 1 (Larger Box) Parts List Two Adults Required for Assembly ( + one Adult suggested as an instruction reader) ID Reorder # Part # Description Qty Main Hardware Box 2 (Smaller Box) Shed Parts Box [ ] Main Hardware Door Handle Bag [ ] Truss Support Hardware Bag [ ] Skylight Hardware Bag [HH11600] Pegboard Hardware Bag [ ] Butyl Tape Hardware Bag [ ] Vent Hardware Bag [HH11900] x2 Thumb Lever Hardware Bag [ ] Door Handle Hardware Bag [ ] Front Gable Hardware Bag [HH12100] Truss Hardware Bag [ ] Shed Screw Hardware Bag [] Tool Clip Assortment [ ] Door Gap Flap Hardware Bag [ ] Domed Skylight Hardware Bag [ ] *Part Numbers are listed when different from the Reorder Number. The Part Number will appear on most of the plastic parts. 19


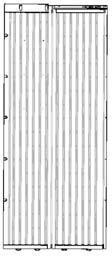
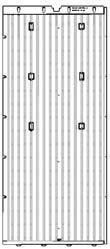


20 Shed Parts (Not Actual Size) PULL OUT THIS PAGE Back view Front view AA Front view AL 118 Back view AC AD AE AM AG AH AI AF 20
:")
 TF Safety Glasses SA PULL OUT THIS")


21 AJ AK BA BB HA HD HG HI HM HN HP VA VB FA Step Ladder 7/16 3/8 (2) (1) TA FB Power Drill * Suggested Tools & Materials (Not Included): Adjustable (1) HT Work Light Rubber Mallet (1) GB Pliers Box Knife (1) HQ Flashlight Phillips Head (1) TF Safety Glasses SA PULL OUT THIS PAGE FOR EASY REFERENCE (2) (1) (1) (1) (1) (1) *See Notice on page 2 **U.S. and Canada customers ONLY** IF ASSISTANCE IS NEEDED, DO NOT CONTACT THE STORE!!! CALL OUR CUSTOMER SERVICE DEPARTMENT at 1 (800) HOURS: 7:00 a.m. to 5:00 p.m. Monday through Friday (Mountain Standard Time) **Call or visit our Web site for Saturday hours** **For customers outside the U.S. or Canada, please contact the store for assistance.** 21
22 Shed Hardware (Actual Size) LA TD LB HH PULL OUT THIS PAGE FOR EASY REFERENCE DA HU PB HB XX HK HL VC GA SS TE TC HO HC HS HR 22


23 13.6: Install Front Gable. Top Hinge Pins holes on underside of Front Gable. 13.7: Secure both sides of Front Gable with Screws (SS). SS (6) 23
 VC (5) VB HH11900 VC PB Second person should apply pressure on opposite side of the wall for easy insertion of Screws.")
24 14 Assemble Rear Gable 14.1: Assemble two halves of the Rear Gable (112 and 113). SS (4) 14.2: Install Vent (VA) and Screen (VB) into the Rear Gable. Set aside until later. VA PB (5) VC (5) VB HH11900 VC PB Second person should apply pressure on opposite side of the wall for easy insertion of Screws. 24
 TC (20) HK (20) 1033422 3/8 Wrench (1) AC The nut goes on outside of the truss. Follow picture above to connect Brace to a Truss Channel at each end of the Brace.")
25 15 Assemble Truss 15.1: Attach Brace (AC) to two Roof Truss Channels (AD) (one on each side of Brace). Secure Brace with Screws (TC) and Nuts (HK). AD TD (1) TC (20) HK (20) /8 Wrench (1) AC The nut goes on outside of the truss. Follow picture above to connect Brace to a Truss Channel at each end of the Brace. HK TC HK Use L-key (TD) to hold Screw (TC) in place while tightening Nut (HK). AD AC TD WARNING Do not overtighten the Cap Nut. If the end of the Bolt breaks through the plastic cap, call our Customer Service Department at the number on Page One. Exposed threads on the end of the Bolt may cause serious injuries. 15.2: Use Truss Connector (TA) to attach Roof Truss Channels at top. Secure with Screws (TC) and Nuts (HK). Before completely tightening, lay assembly on its side to be sure Channels and Brace are parallel. Completely tighten all hardware. Ensure Truss Connector is aligned with the Truss Channels. TC WARNING Do not overtighten the Cap Nut. If the end of the Bolt breaks through the plastic cap, call our Customer Service Department at the number on Page One. Exposed threads on the end of the Bolt may cause serious injuries. TC TA HK 25
26 15.3: Slide a Threaded Rod (SA) through the Truss Support Brace and the top of the Truss Connector. SA (3) HL (6) /16 Wrenches (2) SA 15.4: Secure the top and bottom of the Threaded Rod with a 1/4 Cap Nut (HL) using two 3/8 Wrenches. HL SA Repeat Steps for each Truss. SA WARNING Do not overtighten the Cap Nut. If the end of the Bolt breaks through the plastic cap, call our Customer Service Department at the number on Page One. Exposed threads on the end of the Bolt may cause serious injuries. HL 26
 in half (about 6.25 ft). Lay the half-piece of Butyl Tape along the groove (grayed area) of the Roof Panel for Domed Skylight with the sticky side down.")
27 Domed Skylight Assembly : Remove any excess plastic from the holes in the Roof Panel for Domed Skylight (AM) by inserting a screwdriver through the each hole. Cut the Butyl Tape (BT) in half (about 6.25 ft). Lay the half-piece of Butyl Tape along the groove (grayed area) of the Roof Panel for Domed Skylight with the sticky side down. Remove the paper backing from the top of the Butyl Tape. Top AM , DA (24) Note: Remove any excess plastic from all holes. Exterior View 16.2: both sides of the Domed Skylight (AL). Position the Domed Skylight over the Roof Panel for Skylight so the angled edge is at the top, then place the Domed Skylight on the Roof Panel. Press down and verify there are no bubbles between the Butyl Tape and the Domed Skylight. Top Top Angled Edge AL AL Straight Edge Note: The sticker indicates the top and exterior side of the Domed Skylight. Exterior View 16.3: Insert one (1) #10 x 5/8 Carriage Bolt (DA) through each hole in the Domed Skylight and through the Roof Panel for Skylight. Top DA Exterior View 27


28 16.4: Secure the Domed Skylight to the Roof Panel with a #10 Washer (VC) and #10-24 Cap Nut (HK) for each Carriage Bolt. Repeat steps for second Domed Skylight. Set Skylight/ Panel Assembly aside. VC (24) HK (24) /8 Wrench HK VC Interior View WARNING Do not overtighten the Cap Nut. If the end of the Bolt breaks through the plastic cap, call our Customer Service Department at the number on Page One. Exposed threads on the end of the Bolt may cause serious injuries. 17 Truss & Roof Installation 17.1: Place a Truss Front Gable. 28


 AI (1) SS (7) Only use a hand screwdriver on this step A second person on")
. 17.")
29 Be sure to carefully read and follow the roof installation instructions and notes. Following each step in the order listed will minimize potential complications during installation. 17.2: Place a Roof Panel (114) onto the Truss and the Front Gable. Be sure the alignment nub in the roof panel Roof Panel Top of Roof Panel Nub Truss Channel Bottom of Roof Panel Be sure the nub in the Roof Panel into the notch in the Truss. 17.3: Secure the Roof Panel to the Front Gable and Truss Channel with all but the very top Screws (SS). that holes line-up before inserting Screws (SS). (Not actual size) AI (1) SS (7) Only use a hand screwdriver on this step A second person on a ladder should apply downward pressure while attaching roof parts. AI The Roof Support the notches in the Roof Panel (as shown). 17.4: Slide the metal Roof Support (AI) into place between the Roof Panel and Gable/Truss. Insert top Screws (SS). 29

.")


30 17.5: Bottom lip of Roof Panel the top of the wall. Secure the Roof Panel along the bottom edge with Screws (SS). SS (4) Be sure the ridge in the bottom of the Roof Panel Wall Panel. Roof Panel Ridge Roof Panel Wall 17.6: Follow steps and install a Roof Panel and Roof Support on opposite side. (Not actual size) AI (1) SS (11) 30
 as shown.")
. SS (4) 17.")

 and insert")

 AI AI Note: Roof Panels")

31 17.7: Position the Front Roof Cap (115) as shown. Secure to Front Gable with Screws (SS). SS (4) 17.8: Install next Truss. 17.9: Follow steps but with the Roof Panel for Skylight (AM) and insert two Roof Supports (AI). Repeat for other side. (Not actual size) AI (4) SS (20) AI AI Note: Roof Panels for Skylights require two Roof Supports (AI). One above and one below the Domed Skylight. 31
. SS (4) 17.")
 with Screws (SS).")

 and")
32 17.10: Position Roof Cap (117) next to Front Roof Cap. Attach to Truss with Screws (SS). SS (4) 17.11: Connect centers of Front Roof Cap (115) and Roof Cap (117) with Screws (SS). SS (2) Only use a hand screwdriver on this step CAUTION Only hand tighten screws in Roof Caps. Do not overtighten. Overtightening may damage Roof Caps and void warranty : Install the next Truss, two Roof Panels (114) and Roof Cap (117). (Not actual size) AI (2) SS (20) 32


")


 AI")
33 17.13: Install Rear Gable Assembly. SS (14) 17.14: Install next Roof Panel and Roof Support. (Not actual size) AI (1) SS (11) 33
 AI (1) SS (11) 17.")
 17.17: Connect centers of Roof Caps (117).")

34 17.15: Install last Roof Panel and Roof Support. (Not actual size) AI (1) SS (11) 17.16: Position and Secure Center Roof Cap (117) along Truss. SS (4) 17.17: Connect centers of Roof Caps (117). SS (2) Only use a hand screwdriver on this step #2 (1) CAUTION Only hand tighten screws in Roof Caps. Do not overtighten. Overtightening may damage Roof Caps and void warranty. 34
 #2 (1) Skylight Installation 18.1: Pre-fold Skylights (AJ) before installing. LA (24) LB (24) 18.")
 and Screws (LA) (pull on tabs while inserting screw to provide resistance).")
35 17.18: Position and Secure Rear Roof Cap (116) along Rear Gable. SS (4) #2 (1) 17.19: Connect Rear & Center Roof Caps. SS (2) #2 (1) Skylight Installation 18.1: Pre-fold Skylights (AJ) before installing. LA (24) LB (24) 18.2: Push folded Skylight up through opening; open Skylight; use tabs to pull Skylight down into place. 18.3: Fasten skylight in place with Washer (LB) and Screws (LA) (pull on tabs while inserting screw to provide resistance). Note: Repeat for all Skylights. HH11600 LB LA #2 (1) Only use a hand screwdriver on this step 35
 in the desired locations.")
 Hardware Bags: 1011398, Level The Pegboard Strips are screwed directly into the plastic.")


36 19 Pegboard Installation 19.1: Use a Level, and position both 16 Pegboard Strips (BA) in the desired locations. Screw the Pegboards to the wall using #10 x 3/4 Screws (PB). See Note. PB (10) Hardware Bags: , Level The Pegboard Strips are screwed directly into the plastic. Line up Strip anywhere on Wall so that holes are over plastic (and not over a groove in the Wall). PB Be sure that the Pegboard Strip is level before inserting screws. 20 Align Doors 20.1: identify which side is higher and use a Wooden Shim (BD) to slightly raise the back corner of the high side between the back and front shims. High Side High side Low side Fig. 1 wall. Wooden Shim (BD) should be placed at the corner, running directly under one First Shim Fig. 2 Second Shim 20.2: After Doors are aligned, cut off any portion of Wood Shim (BD) that is still exposed. From inside the shed, 36

 into the back Wall Panel as shown.")
37 21 Anchor the Shed 21.1: After assembling your shed, you will need to anchor it to the ground through the four hardware to use for anchoring your shed. 8 WARNING Failure to anchor your shed may result in property damage and/or personal injury Insert Gable Clips in Back Wall 22.1: Insert the Gable Clips (TF) into the back Wall Panel as shown. TF (2) Hardware Bags: , Level TF Gable Clip can only be inserted with the arrow pointing up. 37
, slide Flap up until it covers any gap between the")
 Hardware #2 Bags: (1) 1004034 FB FA LA LA Additional Shelf Locations Additional")


38 Install Gap Flaps on Doors 23.1: Install the Gap Flaps (FA & FB) inside each Door as shown. Before completely tightening Screws (LA), slide Flap up until it covers any gap between the top of the Door and the Gable. LA (4) Hardware #2 Bags: (1) FB FA LA LA Additional Shelf Locations Additional Shelves and Support Channels can be purchased from Customer Service. These shelves and Support Channels can be installed on any wall containing a truss notch and a column of screw holes. Shelf Support Channels can also be installed in the Window Wall Panel, as shown. Additional Shelves and parts can be purchased from Customer Service: 1 (800) ** Customers outside of the U.S. or Canada, please contact the store for assistance. ** 38
 Two 10 radius Shelves with hardware.")


39 Enhance your Lifetime Outdoor Shed by purchasing the following Shed Accessories: Model # 0110 Corner Shelf (2 pack) Two 10 radius Shelves with hardware Shelf Kit w/ hardware (3 pack) Three 32 x 10 Steel-Reinforced Shelves with shelf brackets and hardware Shelf Kit w/ hardware One 96 x 9 Steel-Reinforced Shelf with shelf bracket and hardware Pegboard w/ hardware One 22.5 x 22.5 Pegboard Panel with hooks. Great for hanging large and small items such as: rakes, shovels, and hand tools Shelf Support Channel Two Shelf Support Channels that allow the 32 shelves on either of the side walls of your shed Shed Extension Kit Extend your shed two and a half feet for the ultimate storage building To purchase shed accessories, visit us at: Or call: 1 (800)
40 LIFETIME OUTDOOR SHED EQUIPMENT 10-YEAR LIMITED FACTORY WARRANTY THE MANUFACTURER RESERVES THE RIGHT TO MAKE SUBSTITUTIONS TO WARRANTY CLAIMS IF PARTS ARE UNAVAILABLE OR OBSOLETE. 1. Lifetime outdoor sheds are warranted to the original purchaser to be free from defects in material or as imperfections that impair the use of the product. Defects resulting from misuse, abuse or negligence will void this warranty. This warranty does not cover defects due to improper installation, alteration or accident. This warranty does not cover damage caused by vandalism, rusting, acts of nature or any other event beyond the control of the manufacturer. 2. This warranty is nontransferable and is expressly limited to the repair or replacement of defective product. If the product is defective within the terms of this warranty, Lifetime Products, Inc. will repair or replace defective parts at no cost to the purchaser. Shipping charges to and from the factory are not covered and are the responsibility of the purchaser. Labor charges and related expenses for removal, installation or replacement of the shed or its components are not covered under this warranty. addition, defects resulting from intentional damage, negligence, unreasonable use or hanging from the truss will void this warranty. 4. Liability for incidental or consequential damages is excluded to the extent permitted by law. While every attempt is made to embody the highest degree of safety in all equipment, freedom from injury cannot be guaranteed. The user assumes all risk of injury resulting from the use of this product. All merchandise is sold on this condition, and no representative of the company may waive or change this policy. 5. This warranty is expressly in lieu of all other warranties, expressed or implied, including warranties of liability in connection with this product. ALL WARRANTY CLAIMS MUST BE ACCOMPANIED BY A SALES RECEIPT. REPORT PRODUCT DEFECTS IN WRITING TO: or call (800) M-F 7 a.m. to 5 p.m. MST. Please include your dated sales receipt and photographs of damaged parts. To register the product, visit our Web site at R Lifetime Products, Inc. T: F:
OWNER S MANUAL with Assembly Instructions
 OWNER S MANUAL with Assembly Instructions VISIT E LIFETIME WEB SITE: WWW.LIFETIME.COM ** Do Not Contact the Store ** For Assistance, including missing or broken parts, Call Customer Service at: 1 (800)
** Do Not Contact the Store ** For Assistance, including missing or broken parts, Call Customer Service at:
 3/01/2007 VISIT THE LITIME WEB SITE: WWW.LITIME.COM ** Do Not Contact the Store ** For Assistance, including missing or broken parts, Call Customer Service at: 1 (800) 225-3865 Double Shed Doors for Back
Copy OWNER S MANUAL MODEL N OUTDOOR STORAGE. Keep this Identification Number in case you need to contact our Customer Service Department.
 OUTDOOR STORAGE MODEL N 60002 OWNER S MANUAL Copy Keep this Identification Number in case you need to contact our Customer Service Department. IMPORTANT! PLEASE READ BEFORE BEGINNING ASSEMBLY DCopy Dear
MODEL N OWNER S MANUAL COPY. Keep this Product ID Number and use when contacting Customer Service:
 MODEL N 90056 OWNER S MANUAL COPY Keep this Product ID Number and use when contacting Customer Service: REGISTER YOUR LIFETIME PRODUCT TODAY! as NEW product notifications and special closeout promotions!
PRIMO 56" FOOSBALL TABLE ASSEMBLY INSTRUCTIONS
 PRIMO 56" FOOSBALL TABLE ASSEMBLY INSTRUCTIONS NG1035 THANK YOU! Thank you for purchasing this product. We work around the clock and around the globe to ensure that our products maintain the highest possible
BOUNCE TABLE TENNIS TABLE & ACCESSORIES ASSEMBLY INSTRUCTIONS
 BOUNCE TABLE TENNIS TABLE & ACCESSORIES ASSEMBLY INSTRUCTIONS NG2325 THANK YOU! Thank you for your purchase of our product. We work around the clock and around the globe to ensure that our products maintain
OWNER S MANUAL with Assembly Instructions. 11'x 11x8.5' Storage Building
 OWNER S MANUAL with Assembly Instructions 11'x 11x8.5' Storage Building Crage Copypy R Level Surface Notice: Lifetime 11 x 8.5 Outdoor Shed MODEL #60010 Surface must be leveled before installation. We
HUSTLER 7' & 8' POOL TABLE ASSEMBLY INSTRUCTIONS
 HUSTLER 7' & 8' POOL TABLE ASSEMBLY INSTRUCTIONS Please Do Not Hesitate to Contact Our Consumer Hotline at 800-759-0977 with Any Questions That May Arise During Assembly or Use of This Product! NG2515PB/NG2520PB
INSTALL INSTRUCTIONS WELCOME TO THE NEWAGE PERFORMANCE CABINETRY SERIES NEWAGE STEEL WELDED CABINETRY
 NEWAGE STEEL WELDED CABINETRY WELCOME TO THE NEWAGE PERFORMANCE CABINETRY SERIES ALL CABINETS MUST BE MOUNTED TO STUDS ON A SECURE WALL, AS PER THESE INSTRUCTIONS. FAILURE TO DO SO MAY RESULT IN SERIOUS
Models 2230 and 2240
 Models 2230 and 2240 Overview... 2 Tools Needed... 2 Hardware...3 Assembly... 4-13 Installation... 14 Drawer Removal... 15 Operation... 15 Maintenance... 15 Accessories... 16 Limited Warranty... 16 Perform
ASPEN OUTDOOR TABLE TENNIS
 ASPEN OUTDOOR TABLE TENNIS Replacement Parts Order direct at or call our Customer Service department at (800) 225-7593 8 am to :30 pm Central Standard Time January 201 UPC Code 7-19265-51830-3 Staple your
GRANDIO GRANDIO ASCENT BACK WALL TRANSFORMATION KIT GRA-ASC-BD BACK WALL TRANSFORMATION USER MANUAL
 GRANDIO G R E E N H O U S E S GRANDIO ASCENT BACK WALL TRANSFORMATION KIT GRA-ASC-BD BACK WALL TRANSFORMATION USER MANUAL 2013 Grandio Greenhouses, Backyard Living Source Inc. All rights reserved August
MAINSTREET 36 INCH TABLE SOCCER
 Mainstreet 36 Inch Table Soccer MAINSTREET 36 INCH TABLE SOCCER Replacement Parts Order direct at or call our Customer Service department at (800) 5-7593 8 am to 4:30 pm Central Standard Time September
Models 2130 and 2140
 Models 2130 and 2140 Overview... 2 Tools Needed... 2 Hardware... 2 Assembly... 3-10 Installation...11 Operation... 11 Maintenance... 12 Accessories...12 Limited Warranty... 12 Printed in USA 2007 Perform
DRIVEWAY SERIES D554 D560
 DRIVEWAY SERIES D554 D560 Version ' Keep this instruction manual in case you have to contact the manufacturer for replacement parts. 2 FAILURE TO FOLLOW THESE WARNINGS MAY RESULT IN SERIOUS INJURY AND/OR
Base Cabinet w/drawers
 Base Cabinet w/drawers WSBC-4C Dark Cherry finish WSBC-4W White finish ADULT ASSEMBLY REQUIRED DUE TO THE PRESENCE OF SMALL PARTS, SHARP POINTS, SHARP EDGES AS RECEIVED Pacific Standard Time: 8:30 a.m.
Shetland Stalls Installation Instructions
 Shetland Stalls Installation Instructions RAMM Horse Fencing and Stalls 13150 Airport Hwy. Swanton, OH 43558-9615 1-800-434-8456 Rev. 1/9/18 Before you start Kit can accommodate up to 12 wide stall front
Models 2130 and 2140
 Models 2130 and 2140 Overview... 2 Tools Needed... 2 Hardware... 2 Assembly... 3-10 Installation...11 Operation... 11 Maintenance... 12 Accessories...12 Limited Warranty... 12 Perform the following sequence
Models 2030 and 2040
 Models 2030 and 2040 Overview... 2 Tools Needed... 2 Hardware... 2 Assembly... 3-8 Installation... 9 Operation... 9 Maintenance... 10 Accessories... 10 Limited Warranty... 10 Document # 101290 0607 Printed
10-PIECE. Garage Storage Set OWNER'S MANUAL. Patent pending
 10-PIECE Garage Storage Set OWNER'S MANUAL Patent pending IMPORTANT When you open the cartons, carefully check the units and make sure there IS NO damage. If you have any problems with the units or with
GRANDIO G R E E N H O U S E S. Model GRA-88-GR Shown In Image GREENHOUSE USER MANUAL
 GRANDIO G R E E N H O U S E S Model GRA-ASC-88 / GRANDIO 8X8 ASCENT Model -GR Shown In Image GREENHOUSE USER MANUAL 013 Grandio Greenhouses, Backyard Living Source Inc. All rights reserved August 1, 01
Laminate Cabinet Installation Instructions
 Laminate Cabinet Installation Instructions www.easygaragestorage.com/installation How To Use These Instructions Thank you for your purchase! Please read each step of this manual thoroughly to ensure proper
High End Residential In-Ground Basketball System Owners Manual
 High End Residential In-Ground Basketball System Owners Manual Customer Service Center N53 W24700 South Corporate Circle Sussex, WI 53089 U.S.A. Write Model Number From Box Here: READ AND UNDERSTAND OPERATOR'S
Stop! Read This Important Information.
 Stop! Read This Important Information. Stop, Do Not Proceed, Read This This door replacement kit is designed for the replacement of doors on a Supertop ONLY! This door will not work on any other style
VAN STORAGE SOLUTIONS FOR THE WAY YOU WORK
 WWW.WEATHERGUARD.COM VAN STORAGE SOLUTIONS FOR THE WAY YOU WORK Weather Guard / KNAACK 420 E. Terra Cotta Ave. Crystal Lake, IL 60014 USA 800-456-7865 (Toll Free) 800-334-2981 (Fax) Knaack.OrderEntry@wernerco,.com
Steele TV Stand Stock # BH
 LOT NUMBER: DATE PURCHASED: / / Steele TV Stand Stock # BH46-084-899-02 ADULT ASSEMBLY REQUIRED If you have any questions regarding assembly or if parts are missing, DO NOT return this item to the store
Kawasaki Teryx 750 Cab Kit* Caution: Before using this product, read this manual and follow all Safety Instructions.
 Owner s Manual Model: Kawasaki Teryx 750 Kawasaki Teryx 750 Cab Kit* Caution: Before using this product, read this manual and follow all Safety Instructions. Safety Instructions Cab Kit Contents Hardware
Balishutters. INSTALLATION guide FOR L-FRAME MOUNT INSTALL OPTIONS B OR C
 Balishutters INSTALLATION guide FOR L-FRAME MOUNT INSTALL OPTIONS B OR C Tools needed for installation Drill Phillips bit 1/8" drill bit 4. Hammer (preferably hard plastic) 5. Level 6. Phillips-head screwdriver
Owner's Manual & Assembly Instructions
 Owner's Manual & Assembly Instructions VQ0 Model No. LM09 7460 Missing Parts, Questions on Assembly? Call: -800-85-085 or assist@arrowsheds.com Do not return to dealer, they are not equipped to handle
W1209 1/2 10 X 12 SOLARIUM ASSEMBLY INSTRUCTIONS
 W09 / 0 X SOLARIUM ASSEMBLY INSTRUCTIONS Assembly by more than one person is suggested. Base Dimensions x 8, Largest Dimensions x (see pg.3) L:\WP5\Instructions\SOLARIUMS INSTRUCTION BOOKS\W09\ZZZ-09.W09.GP.EN.doc
Owner s Manual & Safety Instructions
 Owner s Manual & Safety Instructions Save This Manual Keep this manual for the safety warnings and precautions, assembly, operating, inspection, maintenance and cleaning procedures. Write the product s
MAINSTREET 36 INCH TABLE SOCCER
 MAINSTREET 36 INCH TABLE SOCCER Replacement Parts Order direct at or call our Customer Service department at (800) 5-7593 8 am to 4:30 pm Central Standard Time Publication 55-0511 Rev B January 016 UPC
Please Do Not Return This Product To The Store!
 MODEL NOS. T8512 TOURNAMENT SERIES 3 TABLE TENNIS TABLE OWNER'S MANUAL 1. Read this manual carefully before starting assembly. Read each step completely before beginning each step. 2. Some smaller parts
W1610 1/2 10 X 16 SOLARIUM ASSEMBLY INSTRUCTIONS Assembly by more than one person is suggested.
 adlonco@hotmail.com W60 / 0 X 6 SOLARIUM ASSEMBLY INSTRUCTIONS Assembly by more than one person is suggested. Requires 96 clearance at the wall Base Dimensions 90 x 8, Largest Dimensions 90 x (see pg.3)
8' HOT SHOT SKEEBALL TABLE ASSEMBLY INSTRUCTIONS
 8' HOT SHOT SKEEBALL TABLE ASSEMBLY INSTRUCTIONS NG2015 THANK YOU! Thank you for purchasing this product. We work around the clock and around the globe to ensure that our products maintain the highest
Install Instructions. NewAge Steel Welded Tall Locker
 Kit Contains Full Width Adjustable Steel Shelves (4) Height-Adjustable Steel Leveling Legs (4) Aluminum Door Trim (2) 2.5 x ¼ Cabinet Mounting Lag Bolts (4) Large Zinc Plated Mounting Washers (4) 5/8 x
INSTALLATION INSTRUCTIONS CJ-5 M38A PART # With Doors
 INSTALLATION INSTRUCTIONS CJ-5 M38A1 1955-1975 PART #109-011 With Doors Thank you for purchasing Specialty s Convertible Top for your Jeep vehicle. It has been designed for great fit and long wear. Please
10' W x 8' H or 10' H Round Style Shelter Assembly Instructions
 10' W x 8' H or 10' H Round Style Shelter Assembly Instructions Description 10' x 8' x 8' Round Style Shelter - Gray 10' x 8' x 10' Round Style Shelter - Gray Recommended Tools Please read instructions
Please Do Not Return This Product To The Store!
 MODEL NOS. T81 TABLE TENNIS TABLE OWNER'S MANUAL 1. Read this manual carefully before starting assembly. Read each step completely before beginning each step.. Some smaller parts may be shipped inside
WESTPORT 8' SLATE POOL TABLE ASSEMBLY INSTRUCTIONS
 WESTPORT 8' SLATE POOL TABLE ASSEMBLY INSTRUCTIONS NG2690A THANK YOU! Thank you for purchasing this product. We work around the clock and around the globe to ensure that our products maintain the highest
Owner's Manual & Assembly Instructions
 Owner's Manual & Assembly Instructions M0 Model No. WH09-A 708670608 BUILDING DIMENSIONS * Size rounded off to the nearest foot CAUTION: SOME PARTS HAVE SHARP EDGES. CARE MUST BE TAKEN WHEN HANDLING THE
Owner's Manual & Assembly Instructions SY01
 Owner's Manual & Assembly Instructions SY0 Model No. VD0-D 697.6869-A 745407 BUILDING DIMENSIONS * Size rounded off to the nearest foot CAUTION: SOME PARTS HAVE SHARP EDGES. CARE MUST BE TAKEN WHEN HANDLING
Owner's Manual & Assembly Instructions
 Owner's Manual & Assembly Instructions D0 Model No. CO08-A DK08 LB08-B LX08-A RV08 VS08-A WV08-A YT08-A 697.6860 697.6869 7090400 Missing Parts, Questions on Assembly? Call: -800-85-085 Do not return to
EASY-IN POOL STEP SYSTEM NE132
 EASY-IN POOL STEP SYSTEM NE132 This instruction manual features multiple guides for the step unit components. 7939 EASY POOL STEP (NE113) FOR USE WITH: EASY-IN POOL STEP (NE126) 6492 PARTS & HARDWARE FOR
Owner's Manual & Assembly Instructions
 Owner's Manual & Assembly Instructions WR0 Model No. 697.68 75508 BUILDING DIMENSIONS * Size rounded off to the nearest foot CAUTION: SOME PARTS HAVE SHARP EDGES. CARE MUST BE TAKEN WHEN HANDLING THE VARIOUS
INSTALLATION INSTRUCTIONS
 INSTALLATION INSTRUCTIONS BRONCO FAST TRAC TOP PART #331-210 BRONCO 1966-1977 Thank you for purchasing Specialty s Convertible Top for your Bronco. It has been designed for great fit and long wear. Please
2 ADULTS REQUIRED FOR ASSEMBLING
 2 ADULTS REQUIRED FOR ASSEMBLING If you have any questions regarding assembly or if you are missing parts, do not return this item to Retailer Store Please call our customer service number and have your
Copy OWNER S MANUAL MODEL N OUTDOOR STORAGE. Keep this Identification Number in case you must contact our Customer Service Department.
 OUTDOOR STORAGE MODEL N 6008 OWNER S MANUAL Copy Keep this Identification Number in case you must contact our Customer Service Department. REGISTER YOUR LIFETIME PRODUCT TODAY! There are benefits to registering
TRUE TECHNICAL SERVICE MANUAL - ALL MODELS. DOORS/DRAWERS/LIDS
 DOORS/DRAWERS/LIDS 55 56 NOTES DOORS/DRAWERS/LIDS Swing s 73 74 NOTES INSTALLATION OF A GDM-SWING DOOR Phillips Head Screwdriver (2) - 1/8" Drift Punches (forged) Top Bracket NOTE: It may be necessary
HOUSE PARTS PACKED IN HOUSE BOX PARTS IN PLASTIC BAG (HARDWARE) PARTS IN SMALL PLASTIC BAG (FLOOR CLIPS) PARTS PACKED IN BUNDLE
 PARTS IN SMALL PLASTIC BAG (FLOOR CLIPS) PARTS PACKED IN BUNDLE") Check parts against this list before starting assembly. Refer to illustrations on pages 6 and 7 to view house parts. If any shortages are found, refer to Packing Slip for claim instructions. Item 3 5 6
Check parts against this list before starting assembly. Refer to illustrations on pages 6 and 7 to view house parts. If any shortages are found, refer to Packing Slip for claim instructions. Item 3 5 6
Performance 2.0 Series
 Performance. Series Warning: Excessive weight hazard! Warning: Excessive weight hazard! Use two or more people to move, assemble, or install cabinets and locker to avoid back injury. Do not leave children
Owner's Manual & Assembly Instructions
 Y0 Owner's Manual & Assembly Instructions Model No. VD08-A 697.6868 7088507 BUILDING DIMENSIONS * Size rounded off to the nearest foot CAUTION: SOME PARTS HAVE SHARP EDGES. CARE MUST BE TAKEN WHEN HANDLING
GB-AVSTOR5 Ceiling Equipment Storage Box with Pipe Coupler
 Ceiling Equipment Storage Box with Pipe Coupler INSTALLATION INSTRUCTIONS CREATING POSITIVE CUSTOMER EXPERIENCES 9534-500-021-00 Contents Weight Limit... 2 Warning Statements... 2 Installation Tools...
INSTRUCTION BOOKLET #C21. For Wallbed models: KING SIZE
 For Wallbed models: KING SIZE INSTRUCTION BOOKLET #C1 WARNING! ALL MURPHY/WALLBED SYSTEMS CONTAIN STORED ENERGY. FAILURE TO USE AND FOLLOW THESE INSTRUCTIONS DURING THE INSTALLATION PROCESS COULD RESULT
Owner's Manual & Assembly Instructions
 Owner's Manual & Assembly Instructions SS0 Model No. RH04-B 697.6865 7770405 BUILDING DIMENSIONS * Size rounded off to the nearest foot CAUTION: SOME PARTS HAVE SHARP EDGES. CARE MUST BE TAKEN WHEN HANDLING
PATRIOT DOCKS ASSEMBLY INSTRUCTIONS
 6/1/2008 PATRIOT DOCKS ASSEMBLY INSTRUCTIONS Congratulations on your new Patriot Dock purchase. This manual contains instructions to assemble basic dock configurations for use at typical shoreline application.
Door Hardware Installation Instructions. Version A No Interior on an Un-prepped Door Step 1 Select the Position of the Handleset
 For Assistance Call: 1-800-522-7336 8 am - 5 pm, Monday - Friday, MST or visit our Website at: www.grandeur-nw.com Door Hardware Installation Instructions Dummy Handleset Optional Rosette (Round) Interior
Owner's Manual & Assembly Instructions D01
 Owner's Manual & Assembly Instructions D0 Model No.CO08-A DK08 LB08-B LX08-A RV08 VS08-A WV08-A YT08-A 697.6860 697.6869 7090407 BUILDING DIMENSIONS * Size rounded off to the nearest foot CAUTION: SOME
Owner's Manual & Assembly Instructions
 Owner's Manual & Assembly Instructions W0 Model No. VD86 697.6866 705340 Missing Parts, Questions on Assembly? Call: -800-85-085 or assist@arrowsheds.com Do not return to dealer, they are not equipped
TITAN INDUSTRIAL RACK 6-FOOT TALL / 4-SHELF
 TITAN INDUSTRIAL RACK 6-FOOT TALL / 4-SHELF DXST10000 IMPORTANT: Please read this manual carefully before assembling this storage rack and save it for reference INSTRUCTION MANUAL 3 TABLE OF CONTENTS
Owner's Manual & Assembly Instructions
 Owner's Manual & Assembly Instructions WP0 Model No. 697.68 7550009 BUILDING DIMENSIONS * Size rounded off to the nearest foot CAUTION: SOME PARTS HAVE SHARP EDGES. CARE MUST BE TAKEN WHEN HANDLING THE
Owner's Manual & Assembly Instructions
 Owner's Manual & Assembly Instructions XN0 Model No. EDA0 76009 Storage Area: Sq. Ft. 74 Cu. Ft. 0,7 m 0,8 m BUILDING DIMENSIONS * Size rounded off to the nearest foot CAUTION: SOME PARTS HAVE SHARP EDGES.
Owner's Manual & Assembly Instructions X01
 Owner's Manual & Assembly Instructions X0 Model No. VD06-A 697.6867 70887207 BUILDING DIMENSIONS * Size rounded off to the nearest foot CAUTION: SOME PARTS HAVE SHARP EDGES. CARE MUST BE TAKEN WHEN HANDLING
Owner's Manual & Assembly Instructions
 Owner's Manual & Assembly Instructions ST0 Model No. WH04-C 7780505 BUILDING DIMENSIONS * Size rounded off to the nearest foot CAUTION: SOME PARTS HAVE SHARP EDGES. CARE MUST BE TAKEN WHEN HANDLING THE
VISIT THE LIFETIME WEB SITE: **U.S. and Canada customers ONLY** IF ASSISTANCE IS NEEDED, DO NOT CONTACT THE STORE!!!
 VISIT THE LIFETIME WEB SITE: WWW.LIFETIME.COM **U.S. and Canada customers ONLY** IF ASSISTANCE IS NEEDED, DO NOT CONTACT THE STORE!!! CALL OUR CUSTOMER SERVICE DEPARTMENT at 1 (800) 225-3865 HOURS: 7:00
Video Wall Installation Instructions 2W X 3H, 3W X 3H
 Video Wall Installation Instructions 2W X 3H, 3W X 3H www.microndisplaysolutions.com Table of Contents Important Safety Instructions... 3 Configuration... 4 Package Contents, included and optional items...
Owner's Manual & Assembly Instructions
 Owner's Manual & Assembly Instructions XZ0 Model No. GSA83 76300 Storage Area: 3 Sq. Ft. Cu. Ft., m 3,5 m 3 BUILDING DIMENSIONS * Size rounded off to the nearest foot CAUTION: SOME PARTS HAVE SHARP EDGES.
POCKEY 3 IN 1 GAME TABLE
 POCKEY 3 IN 1 GAME TABLE Replacement Parts Order direct at or call our Customer Service department at (800) 225-7593 8 am to 4:30 pm Central Standard Time Publication 64-1046 Rev C October 2014 UPC Code
Owner's Manual & Assembly Instructions
 Owner's Manual & Assembly Instructions SO0et Model No. CO04-C DK04-B LX04-C VS04-C VY04-A WV04-C YT04-C 697.68604-A 697.6860-A 75800 Missing Parts, Questions on Assembly? Call: -800-85-085 Do not return
W1610 1/ X 16 SOLARIUM ASSEMBLY INSTRUCTIONS Two or more adults required for assembly
 adlonco@hotmail.com W60 /-3 0 X 6 SOLARIUM ASSEMBLY INSTRUCTIONS Two or more adults required for assembly Requires 96 clearance at the wall Base Dimensions 90 x 8, Largest Dimensions 90 x (see pg.4) ZZZ-0.W60-3.4-5.GP.EN.HER.doc
Owner's Manual & Assembly Instructions
 Owner's Manual & Assembly Instructions C0 Model No. EN65-A ENB65 HM65-A HM65S NW65 SA65-A 7093207 BUILDING DIMENSIONS * Size rounded off to the nearest foot CAUTION: SOME PARTS HAVE SHARP EDGES. CARE MUST
Please read and understand all instructions before beginning. These instructions cover impact and non-impact aluminum French Door 650/750.
 The performance and proper operation of a door is only as good as the installation. By following these instructions, the probability of a good installation greatly increases. Please read and understand
INSTALLATION INSTRUCTIONS
 INSTALLATION INSTRUCTIONS Universal Short Throw Projector Arm Model: UNI-STA/UNI-EXT NORTH AMERICA 3130 East Miraloma Avenue Anaheim, CA 92806 USA USA and Canada Phone: 1-800-368-9700 Fax: 1-800-832-4888
Octagon Vinyl Gazebo Assembly Instructions For 10 & 12 Models
 Octagon Vinyl Gazebo Assembly Instructions For 10 & 12 Models Toll Free: 866.768.8465 Hours: 9-5 Monday-Friday EST www.homeplacestructures.com Package ships as shown revised 04/29/09 Vinyl Gazebo Assembly
INSTALLATION INSTRUCTIONS
 INSTALLATION INSTRUCTIONS SPORTSMAN WINCH MOUNT GRILLE GUARD APPLICATION: 2016-2018 Toyota Tacoma PART NUMBER: 40-93885, 45-93880, 46-23885 ITEM QUANTITY DESCRIPTION TOOLS NEEDED 1 1 WINCH TRAY 15MM SOCKET
Owner's Manual & Assembly Instructions
 Owner's Manual & Assembly Instructions B0 Model No. EN86-A HM86-A HM86M MN86-A NP86 NW86-A SA86-A VN86-A 70930506 BUILDING DIMENSIONS * Size rounded off to the nearest foot CAUTION: SOME PARTS HAVE SHARP
Owner's Manual & Assembly Instructions
 Owner's Manual & Assembly Instructions WO0 Model No. 697.680 7549009 BUILDING DIMENSIONS * Size rounded off to the nearest foot CAUTION: SOME PARTS HAVE SHARP EDGES. CARE MUST BE TAKEN WHEN HANDLING THE
Owner's Manual & Assembly Instructions SW01
 Owner's Manual & Assembly Instructions SW0 Model No. VM0-B 7830307 BUILDING DIMENSIONS * Size rounded off to the nearest foot CAUTION: SOME PARTS HAVE SHARP EDGES. CARE MUST BE TAKEN WHEN HANDLING THE
Owner's Manual & Assembly Instructions
 Owner's Manual & Assembly Instructions SR0 Model No. AR0-B 7760 BUILDING DIMENSIONS * Size rounded off to the nearest foot CAUTION: SOME PARTS HAVE SHARP EDGES. CARE MUST BE TAKEN WHEN HANDLING THE VARIOUS
Peak Style Shelter Assembly Instructions
 6' x 10' x 6'6" Shed-in-a-Box Peak Style Shelter Assembly Instructions Description Model # 6' x 10' x 6'6" Shed-in-a-Box - Gray 70403 Recommended Tools Please read instructions COMPLETELY before assembly.
MODEL N 1306 OWNER S MANUAL
 MODEL N 1306 OWNER S MANUAL Keep this Product ID Number and use when contacting customer service: REGISTER YOUR LIFETIME PRODUCT TODAY! there are benefits to registering your Lifetime product. With our
W X 12 SOLARIUM ASSEMBLY INSTRUCTIONS Two or more adults required for assembly
 adlonco@hotmail.com W07-3 8 X SOLARIUM ASSEMBLY INSTRUCTIONS Two or more adults required for assembly Requires 96 clearance at the wall Base Dimensions x 9 /, Largest Dimensions x98 / (see pg.) ZZZ-87.W07-3.7-5.GP.EN.HER.doc
GearBoss AirPro Locker
 Installation and Owner s Instructions GearBoss AirPro Locker Wall Installation Island Installation Contents Important User Information...........................2 General...2 Manufacturer...2 Intended
Owner's Manual & Assembly Instructions A01
 Owner's Manual & Assembly Instructions A0 Model No.EN08-A HM08-A MN08-A NP08 NW08-A PD08-A SA08-A VN08-A 709907 BUILDING DIMENSIONS * Size rounded off to the nearest foot CAUTION: SOME PARTS HAVE SHARP
Owner's Manual & Assembly Instructions
 Owner's Manual & Assembly Instructions P0 Model No. EH86-A EH86S LM86 ML86-A SA866-A VL866-A WL86-A 709400 Missing Parts, Questions on Assembly? Call: -800-85-085 Do not return to dealer, they are not
SURE SHOT DUAL ELECTRONIC BASKETBALL GAME ASSEMBLY INSTRUCTIONS
 SURE SHOT DUAL ELECTRONIC BASKETBALL GAME ASSEMBLY INSTRUCTIONS NG33BL THANK YOU! Thank you for purchasing this product. We work around the clock and around the globe to ensure that our products maintain
12'W x 20'L x 10'H Run-in-Shed Assembly Instructions
 12'W x 20'L x 10'H Run-in-Shed Assembly Instructions Description Model # 12'W x 20'L x 10'H Run-In-Shed 51351 Recommended Tools Please read instructions COMPLETELY before assembly. This shelter MUST be
ADULT ASSEMBLY REQUIRED DUE TO THE PRESENCE OF SMALL PARTS, SHARP POINTS, SHARP EDGES
 ADULT ASSEMBLY REQUIRED DUE TO THE PRESENCE OF SMALL PARTS, SHARP POINTS, SHARP EDGES If you have any questions regarding assembly or if you are missing parts, do not return this item to the Sam s Wholesale
Copy OWNER S MANUAL MODEL N OUTDOOR STORAGE. Keep this Identification Number in case you must contact our Customer Service Department.
 OUTDOOR STORAGE MODEL N 60058 OWNER S MANUAL Copy Keep this Identification Number in case you must contact our Customer Service Department. REGISTER YOUR LIFETIME PRODUCT TODAY! There are benefits to registering
INSTALLATION INSTRUCTIONS
 CREATING POSITIVE CUSTOMER EXPERIENCES INSTALLATION INSTRUCTIONS Universal Low Profile Tilt Mount for 42 to 63 Flat Panels NORTH AMERICA 3130 East Miraloma Avenue Anaheim, CA 92806 USA USA and Canada Phone:
Half Door Installation Instructions
 Half Door Installation Instructions For: CJ5 (1955-1975), CJ6 (All), M38-A1 (1955-1971) Part Number: 53025 Congratulations on your purchasing decision. Bestop designed these Doors to give you years of
GroundControl. Follow instructions contained in this manual. Incorrect installation could result in serious injury or damage to property.
 GroundControl TM use supplied hardware Use only hardware supplied in your GroundControl kit or supplied by an authorized YAKIMA dealer. Use of unauthorized parts in the GroundControl system could result
Owner s Manual LSP38 38 Lawn Sweeper
 Owner s Manual LSP38 38 Lawn Sweeper Manual Contents Safety Instructions Assembly Operation Maintenance Parts Warranty 2 4-13 2 11 14-15 16 Your Lawn Sweeper Congratulations on your purchase of a new Precision
Owner's Manual & Assembly Instructions
 Owner's Manual & Assembly Instructions W Model No. VD86 VR86 697.6866 705340805 BUILDING DIMENSIONS * Size rounded off to the nearest foot CAUTION: SOME PARTS HAVE SHARP EDGES. CARE MUST BE TAKEN WHEN
E N G L I S H GARDEN SHED. Assembly Instructions. Suitable for Models WITH VARYING DEPTHS
 GARDEN SHED Assembly Instructions Suitable for Models 6' Wide 8' Wide 0' Wide WITH VARYING DEPTHS GI0003 November 0 INSTALLATION ADVICE It's Not That Difficult! The construction of your shed isn't as complicated
FOR PROFESSIONAL GARAGE DOOR INSTALLERS
 Composite Garage Doors Installation Instructions FOR PROFESSIONAL GARAGE DOOR INSTALLERS Tools required Screwdriver Claw Hammer Locking Pliers Power Drill Level with a 3/32" Drill Bit Utility Knife 9/16",
Congratulations! You are now on your way to enriching your life with!
 C) Using the base point as your reference, measure up 8-1/32 and mark a horizontal line. Measure in from the edge of the door the distance of your backset and mark where the two lines cross. This will
Copy OWNER S MANUAL MODEL N OUTDOOR STORAGE. Keep this Identification Number in case you must contact our Customer Service Department.
 OUTDOOR STORAGE MODEL N 60012 OWNER S MANUAL Copy Keep this Identification Number in case you must contact our Customer Service Department. REGISTER YOUR LIFETIME PRODUCT TODAY! There are benefits to registering
INSTALLATION INSTRUCTIONS Scout II - Fast Trac PART #
 INSTALLATION INSTRUCTIONS Scout II - Fast Trac PART #442-210 Thank you for purchasing Specialty s Convertible Top for your Scout vehicle. It has been designed for great fit and long wear. Please read and
INSTALLATION INSTRUCTIONS
 INSTALLATION INSTRUCTIONS Premier Mounts Tilting Wall Mount Model: TWM-085 For use with Panasonic 85 Flat Panel NORTH AMERICA 3130 East Miraloma Avenue Anaheim, CA 92806 USA USA and Canada Phone: 1.800.368.9700