Composition of kit SC3140 SC3110 SC3100 SC3140 SC3120. KF-SC31-R0_EN PAGE 2 of 15. max mm. max. 100 kg. 10 mm
|
|
|
- Loraine Haynes
- 5 years ago
- Views:
Transcription


1


2 Composition of kit SC3140 SC3100 SC3140 SC3120 max. 100 kg 10 mm max mm KF-SC31-R0_EN PAGE 2 of 15
3 important information KF-SC31-R0_EN PAGE 3 of 15
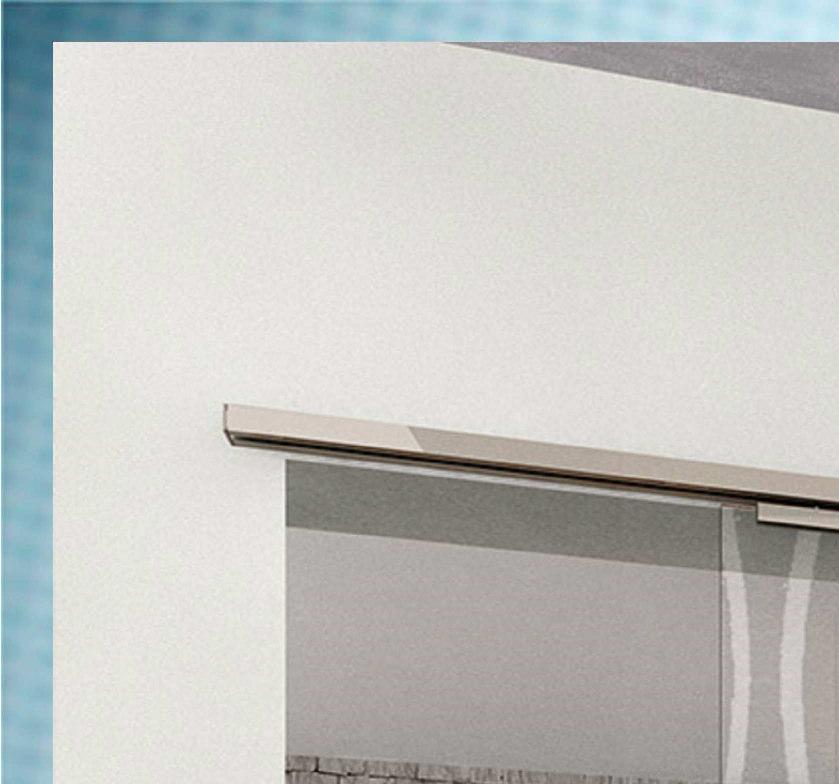
4 DIAGRAM OF WALL OPENING AND CROSS-SECTION Lv LG principles of planning RECOMMENDED GLASS: 10 mm TEMPERED H VM Sliding door with handle H=opening height flush with wall hv=h LG = Track length H = Opening height Lv = Opening width 35 KF-SC31-R0_EN PAGE 4 of 15
5 OPENING DIAGRAMS principles of planning LV LV LG Overlap on handle side S = 20 mm recommended VM VM = LV S LV LG = 2 (LV + S) + 50 LV = LG S LG LV Floor guide width 50 mm to be positioned flush with the door VM = LV VM VM Floor guide width 50 mm to be positioned flush with the door VM = LV Floor guide width 50 mm to be positioned flush with the door VM = Glass door with handle LV = Opening width LG = Track length S = Overlap on handle side Lv H KF-SC31-R0_EN PAGE 5 of 15
6 1. Measure the width Lv of the wall opening. 2. Mark profile bars and SC3120 for cutting to size at the distance of 2Lv mm. 3. Cut the profile bars to size using specific cutting tools and suitable personal protective equipment. Take care to avoid bending the profile bars during cutting operations. preparation and cutting of components 1 2Lv mm AVVERTENZA: verificare che il supporto orizzontale superiore sia a livello. Lv 2 IMPORTANT: Cutting with a diamond disc blade reduces profile bar length by about 4-5 mm due to the thickness of the blade itself. This must be taken into consideration when making measurements. SC3120 KF-SC31-R0_EN PAGE 6 of 15
7 4 drilling of support surface 4. Place the profile bar at a height of min. H+59 mm, keeping it pressed firmly against the fixing surface (masonry or other materials). 5. Mark the support surface through the holes in the profile bar to indicate the position of the holes to be drilled. 6. Drill the support surface and insert the fixing accessories (expansion plugs or other fixings depending on the type of support surface). Lv i i 5 i 6 WARNING! The expansion plugs shown in the diagram are only one of the possible fixing methods. The installer must use the most appropriate fixing accessories for the material from which the support surface is made. N.B: If necessary, drill additional holes in the profile bar using the groove provided as a guide (e.g. weight limit!!) KF-SC31-R0_EN PAGE 7 of 15
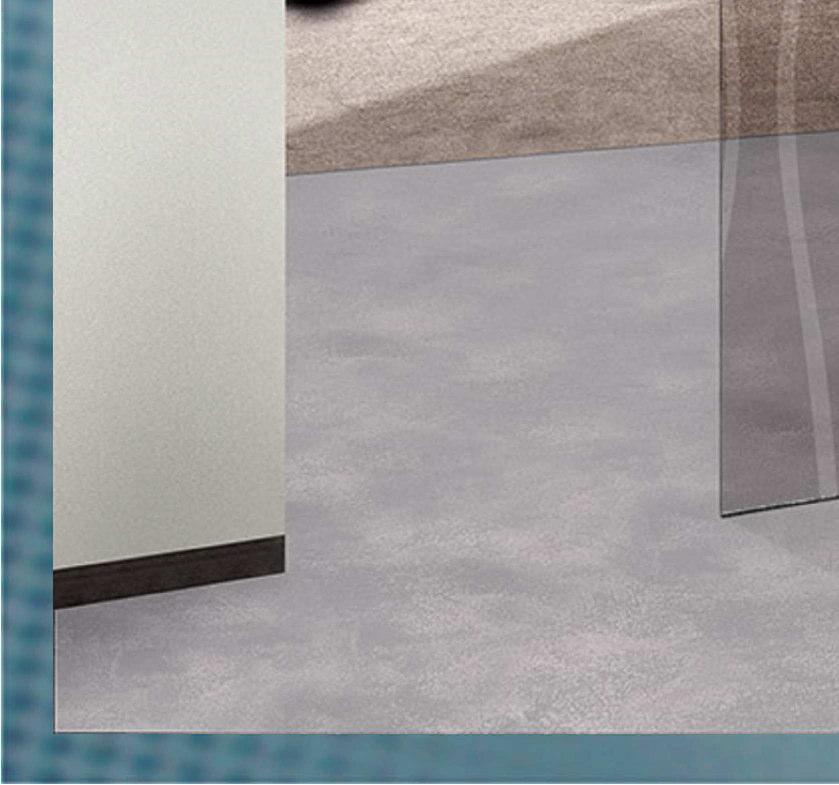
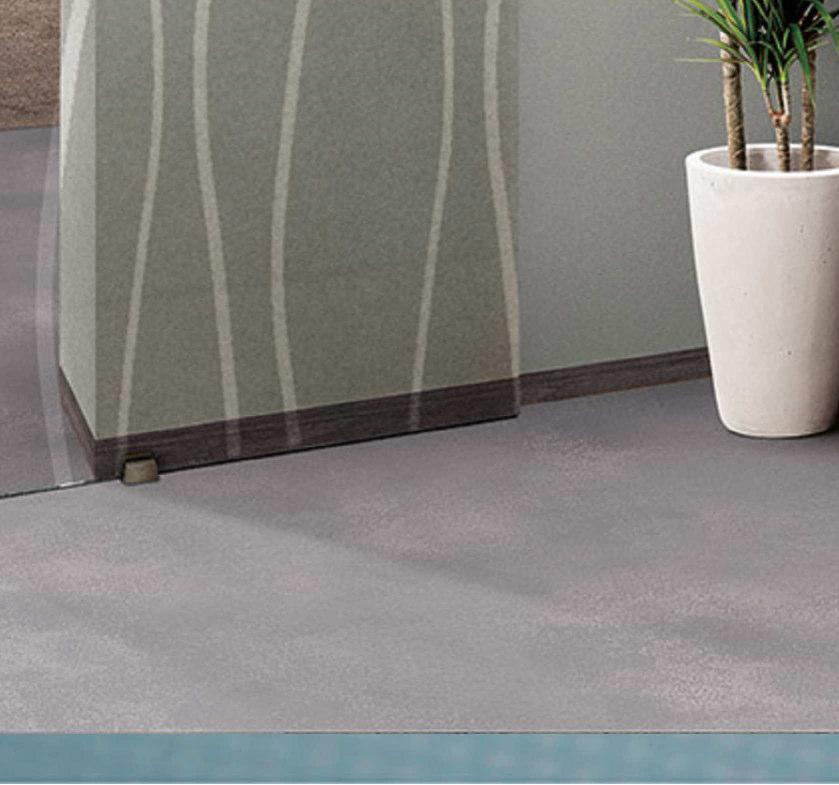
8 7. Fix the profile bar to the wall using suitable fixing accessories. 8. Check that the screws are correctly tightened to ensure that their heads do not project, which would prevent smooth sliding of the runners. 9. Fix the floor guide at a distance of 20 mm from the line between the fixing hole centres and the wall. Align the short side flush with the inner side of the wall opening. installation of track and floor guide 38 Ø5,5 Ø After fixing, clean the inside of the track using a pressurized air jet or a vacuum cleaner. Remove all residues of dust and dirt from the track KF-SC31-R0_EN PAGE 8 of 15
9 assembly of hangers and end stops Insert the hangers and end stops* into the profile bar without fixing them in their final positions, leaving them free to slide inside the profile bar. 12. Respect the sequence shown in the diagrams, ensuring that the hangers are on the interior with respect to the end stops. * If shock absorber Art is envisaged (for use of the shock absorber consult the specific instructions) + KF-SC31-R0_EN PAGE 9 of 15
10 assembly of glass door and accessories Thoroughly clean the contact surfaces between the glass and the accessories. 14. Assemble the CERPOS170 clamps onto the glass door as indicated in the diagram, taking care to follow the correct order of components as shown. As a check, the countersunk heads of the clamp tightening screws must be facing the wall. Use the appropriate spacers between the seals supplied in the accessories pack according to glass thickness (e.g. for 10 mm glass use two 1 mm seals). 15. Check that the upper edge of the clamp is flush with the edge of the glass. VM min. 100 ALIGNMENT OF CLAMP WITH UPPER EDGE OF GLASS R R GLASS DRILLING DIAGRAM KF-SC31-R0_EN PAGE 10 of 15

. 18. Slide the hangers along the track until they meet the slots in the clamps. 19. If necessary, rotate the hanger slightly inside the track to allow the screw to be inserted in the clamp. 20.")
11 assembly of sliding door 16 min 5 mm mm Unscrew the hanger adjustment screw so that it remains inserted into the hanger for about 5 mm, and then turn the upper locknut until it reaches a distance of about mm from the lower nut. 17. Position the glass door beneath the sliding track and keep it in a vertical position (take care to protect the glass against accidental chipping by using protective materials when resting it on the floor). 18. Slide the hangers along the track until they meet the slots in the clamps. 19. If necessary, rotate the hanger slightly inside the track to allow the screw to be inserted in the clamp. 20. Slightly raise the glass door to allow the screw to enter the slot in the clamp. Then release the door, and it will remain suspended. KF-SC31-R0_EN PAGE 11 of 15

12 adjustment of sliding doors! 10 Nm! WAF13 Screw with hexagonal head WAF10 22 WAF10 WAF Position the sliding door in the maximum opening position. 22. Adjust door height by turning the adjustment nut at the bottom of the clamp, using an open-ended 10 mm wrench. 23. Tighten the upper nut to lock the fixing position, using an open-ended 13 mm wrench. KF-SC31-R0_EN PAGE 12 of 15
13 positioning the end stop 25 24! CLICK!! CLICK! 28 A B b! CLICK! 26 a 27! CLICK! 24. Position the door in the closure position 25. Slide stop A along the track until it is above the hanger wheels, so that the spring presses down onto the hanger. Then mark the position with a pencil to provide a reference mark on the end stop and the track. 26. Slide the door to allow access to the stop fixing screws. 27. Tighten the stop fixing screws (a) so as to secure them in the desired stop position. 28. Turn the stop adjustment screw (b) to correctly tension the hanger retention spring. Repeat the previous operations for the stop B, with the door in the position of complete opening. KF-SC31-R0_EN PAGE 13 of 15
14 finishing cover and end caps 30. Install the SC3140 end caps and secure them with the screws supplied, fitting them using the recesses provided on the track and the cover. SC ! CLICK! 30 SC After cutting the SC3130 cover to length Lv, rest it against the track, pressing it home and listening for it to click correctly into place. KF-SC31-R0_EN PAGE 14 of 15
15 final assembly KF-SC31-R0_EN PAGE 15 of 15
INS T A L L A TIO N INS T R U C TIO N S. Ceiling Mount Track System
 Ceiling Mount Track System 10.26.2016 Specifications Ceiling Post: Unassembled 2-7/8 Assembled 1-11/16 7/8 7-9/16 5-7/8 3/8 2 Tubes 1/2 2-3/8 5 Parts and Tools Tools Needed Tape Measure Pencil Drill with
Installation Instructions
 Supafold Slide Aside System Three Fold Room Divider Installation Instructions Distinctive Doors Ltd Supafold Slide Aside Internal Folding System IMPORTANT: Before proceeding with the installation, and
XL-GC03 Sliding Door Lock Installation Manual PAT XL-GC06 Sliding Door Hanger Installation Manual XL-GC08 Sliding Door Lock Guide Installation Manual
 XL-GC0 Sliding Door Lock Installation Manual PAT XL-GC0 Sliding Door Hanger Installation Manual XL-GC0 Sliding Door Lock Guide Installation Manual Read all instructions carefully before installation. Before
BARN DOOR HARDWARE KIT
 INSTALLATION GUIDE Main Components x1 Rail x5 Wall Spacer x2 Anti-jump Block x2 Bent Strap x1 Right Stopper x1 Left Stopper x5 5/16 (8mm x 60mm) Carriage Bolt x5 5/16 (8mm x25mm) Anchor x5 5/16 (8mm x
INSTALLATION INSTRUCTIONS VENETIAN 84" SLIDING SHOWER DOOR SYSTEM (180º INSTALLATION)
") INSTALLATION INSTRUCTIONS VENETIAN 84" SLIDING SHOWER DO SYSTEM (180º INSTALLATION) 28539 Industry Drive, Valencia, CA 91355 Toll Free Phone: (877) 728-3874 Toll Free Fax: (888) 440-9567 Phone: (661) 775-1675
INSTALLATION INSTRUCTIONS VENETIAN 84" SLIDING SHOWER DO SYSTEM (180º INSTALLATION) 28539 Industry Drive, Valencia, CA 91355 Toll Free Phone: (877) 728-3874 Toll Free Fax: (888) 440-9567 Phone: (661) 775-1675
Fig. 2 DORMA-Glas Stand/Issue 02/03 Seite/Page 1/7
 FSW Installation instructions Track rail 75 x 72 mm 1. Ceiling substructure and installation of the track rail (Fig. 1): The track rail must be bolted over its entire length (including the stacking track
Ripple Hanger ASSEMBLY INSTRUCTIONS
 Ripple Hanger ASSEMBLY INSTRUCTIONS RIPPLE HANGER Recommended Tools Drill with 1/8, 1/4, and 1/2 Drill Bits, 1-1/8 Forstner Bit or 1-1/8 Spade Bit, and Phillips Bit 9/16 and 5/8 Combination Wrench Socket
FD50-H SLIDING DOOR SYSTEM Installation Manual (Ceiling Mount Type for Pocket Door, with Dual Soft Close) Part No.FD50DHCP-PD
 Part No.FD50DHCP-PD") FD50-H SLIDING DOOR SYSTEM Installation Manual (Ceiling Mount Type for Pocket Door, with Dual Soft Close) Part No.FD50DHCP-PD Thank you for purchasing Sugatsune products. Read the instructions carefully
FD50-H SLIDING DOOR SYSTEM Installation Manual (Ceiling Mount Type for Pocket Door, with Dual Soft Close) Part No.FD50DHCP-PD Thank you for purchasing Sugatsune products. Read the instructions carefully
86-1/2" TRACK INSTALLATION GUIDE
 BARN TRACK 86-1/2" TRACK INSTALLATION GUIDE READ ALL INSTRUCTIONS AND REVIEW DIAGRAMS BEFORE BEGINNING THE INSTALLATION TO GET A THOROUGH UNDERSTANDING OF THE PROCESS. BEFORE YOU BEGIN This kit comes with
Privacy Wall Glass Selections - Polished Edge Slider Door
 Privacy Wall Glass Selections - Polished Edge Slider Door 3/6" HEX BIT PUTTY KNIFE #2 ACR BIT SUCTION CUP HOLDERS DOOR LEAF: Satin Tempered Clear Tempered LOCTITE 425 SIDE LIGHT ETCHED GLASS STYLES: Satin
Frameless Fixed Panel Slider
 INSTALLATION INSTRUCTIONS Frameless Fixed Panel Slider QCI-5279 SINGLE ROLLER WITH ANTI-JUMP DOUBLE ROLLERS QCI5279 Rev Page Certified 08/09/6 Tools: To install your New Shower Enclosure, you may need
x2 1/4 (6mm) Floor Anchor
 Floor Anchor") Main Components x1 Rail x5 Wall Spacer x2 Anti-jump Block x2 Bent Strap x1 Right Stopper x1 Left Stopper x5 5/16 (8mm x 60mm) Carriage Bolt x5 5/16 (8mm x25mm) Anchor x5 5/16 (8mm x 90mm) Wall Screw x2
Main Components x1 Rail x5 Wall Spacer x2 Anti-jump Block x2 Bent Strap x1 Right Stopper x1 Left Stopper x5 5/16 (8mm x 60mm) Carriage Bolt x5 5/16 (8mm x25mm) Anchor x5 5/16 (8mm x 90mm) Wall Screw x2
Deauville Installation Guide
 vjul16 (for 17 or 24 mm Surface Wall Profiles) DO NOT ASSEMBLE WITHOUT FULLY READING THESE INSTRUCTIONS Page 2 Thank you for purchasing this Deauville shower enclosure. Please study these instructions
ASOLA - THETA ISTRUZIONI DI MONTAGGIO FITTING INSTRUCTIONS INSTRUCTIONS DE MONTAGE INSTRUCCIONES DE MONTAJE MONTAGEANLEITUNG. IMPBAT Rev.
 ASOLA - THETA I F E D ISTRUZIONI DI MONTAGGIO FITTING INSTRUCTIONS INSTRUCTIONS DE MONTAGE INSTRUCCIONES DE MONTAJE MONTAGEANLEITUNG IMPBAT08-2 - Rev. 00 "THETA" FITTING INSTRUCTIONS SUB-FRAME Correct
RIPPER PEDAL. Bearing / Axle Replacement. ( Disassembly )
") RIPPER PEDAL Bearing / Axle Replacement ( Disassembly ) 1 1. Use good quality tools to avoid stripping screw sockets. 2. When servicing your pedals, work on one side at a time to prevent parts from mixing
RIPPER PEDAL Bearing / Axle Replacement ( Disassembly ) 1 1. Use good quality tools to avoid stripping screw sockets. 2. When servicing your pedals, work on one side at a time to prevent parts from mixing
x2 1/4 (6mm) Floor Anchor
 Floor Anchor") INSTALLATION GUIDE Main Components x1 Rail x5 Wall Spacer x2 Anti-jump Block x2 Straight Strap x1 Right Stopper x1 Left Stopper x5 5/16 (8mm x 60mm) Carriage Bolt x5 5/16 (8mm x25mm) Anchor x5 5/16 (8mm
INSTALLATION GUIDE Main Components x1 Rail x5 Wall Spacer x2 Anti-jump Block x2 Straight Strap x1 Right Stopper x1 Left Stopper x5 5/16 (8mm x 60mm) Carriage Bolt x5 5/16 (8mm x25mm) Anchor x5 5/16 (8mm
INSTALLATION INSTRUCTIONS REPLACING EXISTING DEADBOLT ASSEMBLY
 INSTALLATION INSTRUCTIONS REPLACING EXISTING DEADBOLT ASSEMBLY A B C L M N D E F G O P Q H I J Tools provided in Amesbury installation kit: (A) door router fixture, (B) doorframe router fixture, (C) ½
VERDERA T01-A INSTALLATION INSTRUCTIONS MIRRORED CABINET K-99003T-R/K-99003T-L K-99005T-R/K-99005T-L K-99009T
 VERDERA INSTALLATION INSTRUCTIONS MIRRORED CABINET K-99003T-R/K-99003T-L K-99005T-R/K-99005T-L K-99009T BEFORE YOU BEGIN Please read these instructions carefully to familiarize yourself with the required
Pocket Door Kit PD1 / PD2 Installation Instructions. Kit Contents.
 Pocket Door Kit PD1 / PD2 Installation Instructions Kit Contents. 1, Create Rough Opening In Stud Wall Construct rough opening ensuring all sides are square and level. Rough opening should be; Height =
LOFT DOOR HANGER BARN DOORS & HARDWARE. Hardware Installation Instructions. Page
 LOFT DOOR HANGER Page 1 Specifications 2 7/16" 3/8" 1-1/2 1-3/4 Ø3 3 7/8" 11-1/16 Page 2 Parts and Tools Tools Needed Tape Measure Pencil Drill with 1/8, 1/4 and 3/8 bits, 1 spade bit and Phillips bit
LOWLINE SINGLE FOLD DOWN WALL BEDS
 ASSEMBLY INSTRUCTIONS LOWLINE SINGLE FOLD DOWN WALL BEDS Tools Required For Assembly No 2 & No 4 Phillips Head Screwdrivers No 2 Slot Head Screwdriver Hammer Electric Drill (Hammer Drill for Masonry) 6.5mm
Barn Door & Hardware Installation Guide
 Barn Door & Hardware Guide INTRODUCTION Thank you for purchasing our hardware. Our barn door and hardware will add a stunning accent to your living environment and maximize its space. This manual covers
Portofino Installation Guide
 vjul16 (for 17 or 24 mm Surface Wall Profiles) DO NOT ASSEMBLE WITHOUT FULLY READING THESE INSTRUCTIONS Page 2 Thank you for purchasing this Portofino shower enclosure. Please study these instructions
Installation Instruction
 Tools Needed for Assembly Stud finder (for wood stud wall) Pencil Mark Electric drill Wood Stud Wall Installation Step 1. Locate the Wood Studs Installation Instruction Drill bit (for wood stud wall) Masonry
Box Track INSTALLATION INSTRUCTIONS
 Box Track INSTALLATION INSTRUCTIONS BOX TRACK Recommended Tools Level Tape Measure Pencil Drill with 1/8, and 1/4, Drill Bits, Phillips Bit and Slotted Bit Socket Wrench with 9/16 Socket 9/16 and 5/8 Wrench
WINDLOAD POST WayneMark 8000, 8100 INSTALLATION INSTRUCTIONS
 WINDLOAD POST WayneMark 8000, 8100 INSTALLATION INSTRUCTIONS Wayne Dalton, a division of Overhead Door Corporation P.O. Box 67, Mt. Hope, OH 44660 www.wayne-dalton.com See garage door owner s manual for
OPERATOR'S MANUAL RULES FOR SAFE OPERATION
 OPERATOR'S MANUAL #4950300 ROUTER AND JIG SAW MOUNTING KIT (FOR USE WITH THE BT3000 TABLE SAW) CONGRATULATIONS AND THANK YOU FOR BUYING THIS RYOBI ROUTER AND JIG SAW MOUNTING KIT. Your new #4950300 Router
CROWN IMPERIAL ASSEMBLY INSTRUCTIONS
 CROWN IMPERIAL ASSEMBLY INSTRUCTIONS Standard Drawer Box Page 1 of 14 Standard Drawer Box Parts Parts Supplied B C D A E F G Page 2 of 14 Part Letter Part Name Quantity 300-600 Deep Pan A Base Panel 1
NEWS Part. N /0 MINITEC NEWS
 NEWS 2009 Part. N 95.0423/0 MINITEC NEWS 2009 1 TABLE OF CONTENT INTRODUCTION CONTENTS 3 END CAP Z WITH HAMMER TAPS 3 END CAP 45X45 VA 4 ANGLE 25 GD-Z 4 ANGLE 45X90 GD-Z 5 ANGLE 90 GD-Z 5 HINGE 19 S 6
SAM. Model: STV-C65 LCD Mobile Visualized Stand Instruction Manual. Weight Capacity: 1251bs / 56.7kg Suits LCD Flat Panel Display: 42"-55" Page 20
 SAM Model: STV-C65 LCD Mobile Visualized Stand Instruction Manual Weight Capacity: 1251bs / 56.7kg Suits LCD Flat Panel Display: 42"-55" 20 Step 6 LCD Mobile Lift Stand Model: STV-C65 Cable management
Frameless Fixed Panel Slider QCI5279
 Frameless Fixed Panel Slider QCI5279 F AB GLASS AND MIRROR www.fabglassandmirror.com Call: +1 888-474-2221 Fax: (614)-334-4919 Office Timing: 8:30-18:00 EST info@fabglassandmirror.com Frameless Fixed Panel
Deauville Installation Guide
 vjul16 (for Recessed Wall Profiles) DO NOT ASSEMBLE WITHOUT FULLY READING THESE INSTRUCTIONS Page 2 Thank you for purchasing this Deauville shower enclosure. Please study these instructions carefully before
Windload Post 9100/9600/9900 Installation Instructions
 Windload Post 9100/9600/9900 Installation Instructions Wayne Dalton, a division of Overhead Door Corporation P.O. Box 67, Mt. Hope, OH 44660 www.wayne-dalton.com Wayne-Dalton Corp. P.O. Box 67 Mt. Hope,
Installation Instructions. Walk-in Shower Screen. with 180 Return Panel
 Installation Instructions Walk-in Shower Screen O with 180 Return Panel Installation Instructions Important Information Please read these instructions carefully before starting installation and keep for
INSTALLATION INSTRUCTIONS
 www.marwincompany.com Kit Number Door Height Rough Opening Height KD200BB68 80 84 ½ KD200BB70 84 88 ½ KD200BB80 96 100 ½ INSTALLATION INSTRUCTIONS 200BB SERIES KD POCKET DOOR FRAME FOR 2 X 4 STUD WALLS
How to Install Custom Real Wood and Faux Wood Blinds
 Before you begin your installation: READ ALL INSTALLATION INSTRUCTIONS! Make sure that you have all tools and hardware needed for installation. Check the installation surface (wall, ceiling, or window
SINGLE TRACK BYPASS (patent pending) barn door hardware
 barn door hardware") SINGLE TRACK BYPASS (patent pending) barn door hardware Installation Manual What is included in your kit: Part number Part name Quantity 1 Inner door hanger 2 2 Outer door hanger 2 3 5/16 x 1.5 lag bolts
SINGLE TRACK BYPASS (patent pending) barn door hardware Installation Manual What is included in your kit: Part number Part name Quantity 1 Inner door hanger 2 2 Outer door hanger 2 3 5/16 x 1.5 lag bolts
FEET, WHEELS, FLOOR FASTENINGS, SUPPORTS
 SYSTEM COMPONENTS FEET, WHEELS, FLOOR FASTENINGS, SUPPORTS s t r oppu S, s gn i n e t s af r oo l F, s l eehw, t e ef FEET, WHEELS, FLOOR FASTENINGS, SUPPORTS 136 MINITEC PROFILE SYSTEM BASE AND TRANSPORT
SLIDING DOOR for CORNER installation ONLY - this door closes to side panel -
 by KUDOS INSTALLATION INSTRUCTIONS SLIDING DOOR for CORNER installation ONLY - this door closes to side panel - Please read these instructions throughout before installing as incorrect fitting will invalidate
935 RODA VINESSE NEED INSTALLATION HELP? DOUBLE ROLLERS FRAMELESS DOOR INSTALLATION INSTRUCTIONS QCI XX/XX/XXXX. Call BASCO ( )
") INSTALLATION INSTRUCTIONS 935 RODA DOUBLE ROLLERS FRAMELESS DOOR NEED INSTALLATION HELP? Call 1-800-45-BASCO (452-2726) Monday - Friday VINESSE QCI0286 1 XX/XX/XXXX 935 Roda Parts List With double rollers
INSTALLATION INSTRUCTIONS 935 RODA DOUBLE ROLLERS FRAMELESS DOOR NEED INSTALLATION HELP? Call 1-800-45-BASCO (452-2726) Monday - Friday VINESSE QCI0286 1 XX/XX/XXXX 935 Roda Parts List With double rollers
PRODUCT: LOKI INSTALLATION INSTRUCTIONS. Product is covered by U.S. patents. For more information visit
 R INSTALLATION INSTRUCTIONS PRODUCT: LOKI CONFIGURATION: SINGLE DOOR MOUNT: GLASS MOUNT Product is covered by U.S. patents. For more information visit www.krownlab.com . TOOLS + MATERIALS REQUIRED TOOLS
INSTALLATION INSTRUCTIONS FOR INSTALLING T-SERIES EXTRA HEAVY DUTY LEVER LOCKSET
 HIGH EDGE 2 1/4"(57mm) 03079400070 INSTALLATION INSTRUCTIONS FOR INSTALLING T-SERIES EXTRA HEAVY DUTY LEVER LOCKSET IMPORTANT: THIS LOCK IS NON-HANDED. LOCK IS FACTORY PACKED PREADJUSTED FOR 1³ ₄" (45mm)
Portofino Case2 Installation Guide
 Portofino Case2 Installation Guide vjun16 (for 17 or 24 mm Surface Wall Profile) DO NOT ASSEMBLE WITHOUT FULLY READING THESE INSTRUCTIONS Page 2 Thank you for purchasing this Portofino Case 2 shower enclosure.
R.J.W. LTD. Hand CNB USER MANUAL. PLEASE VIEW OUR WEBSITE for consumables & spare parts
 6 A. Fitting the Broach 1 Raise the rack & insert the support pin 2 Loosen the top clamp retaining screws and withdraw the top clamp a small amount 3 4 Note: top clamp can be removed and rotated 180 for
FD35EV SLIDING DOOR SYSTEM Installation Manual (One-Way Soft Close, Recessed Mount Roller) Part No.FD35EVHCP
 Part No.FD35EVHCP") FD35EV SLIDING DOOR SYSTEM Installation Manual (One-Way Soft Close, Recessed Mount Roller) Part No.FD35EVHCP Thank you for selecting our product. Before starting installation, please read this manual thoroughly
FD35EV SLIDING DOOR SYSTEM Installation Manual (One-Way Soft Close, Recessed Mount Roller) Part No.FD35EVHCP Thank you for selecting our product. Before starting installation, please read this manual thoroughly
INS T A L L A TIO N INS T R U C TIO N S HORSESHOE W/ BAR HANGER
 INS T A L L A TIO N INS T R U C TIO N S HORSESHOE W/ BAR HANGER 6-1/2" 5" 2-7/16" 3-7/16" Ø2-7/8" 4-7/8" 11" 2" 3/16" 1/2" HORSESHOE W/ BAR S P ECIFICATIONS PARTS AND TOOLS Tools Needed Tape Measure Pencil
SLIDING MECHANISM TROLLEY CATCH TROLLEY ASSEMBLY FLOOR GUIDE
 Set A Set B PFD30 Fire Door Kit FITTING INSTRUCTIONS For use with 44mm thick doors only For Single and Double doors IF INSTALLING A TOUCH LATCH, PLEASE READ THE CORRESPONDING FITTING INSTRUCTIONS FIRST
MSR/MSB Mechanical Setting Tool
 Tech Unit No: 0620000004 Revision: B Approved By: Quality Engineer Date: 2014-12-16 MSR/MSB Mechanical Setting Tool FEATURES: Special designed Bow Spring provides positive control and allows one size Mechanical
JELD-WEN DesignGlide Barn Door Hardware System Installation (JII-90003)
") JELD-WEN DesignGlide Barn Door Hardware System Installation IMPORTANT INFORMATION CONTACT US For questions, feel free to contact us by phone or email: Phone: 1-(800)-JELD-WEN/1-(800)-535-3936 Email: customerserviceagents@jeldwen.com
JELD-WEN DesignGlide Barn Door Hardware System Installation IMPORTANT INFORMATION CONTACT US For questions, feel free to contact us by phone or email: Phone: 1-(800)-JELD-WEN/1-(800)-535-3936 Email: customerserviceagents@jeldwen.com
Required Tools: Suggested Additional Tools: 1 Cordless Drill with Robertson Bits 1 Ratchet Wrench 1 7/16 or 11mm socket 1 7/16 or 11mm Gear Wrench
 Thank you for your recent purchase of a Cabinets by Hayley garage cabinet system. You are about to experience the best made cabinets that you can purchase. Cabinets by Hayley are designed for beauty and
Sliding Door Enclosure. Telephone Cleaning. Please retain this manual after installation for future reference and maintenance.
 Cleaning All chrome surfaces should be cleaned using a clean damp cloth. No abrasive cleaning agents or materials should be used. General glass cleaner can be used for the screen, but ensure that this
3.2.3 Rear Door Window and Quarter Window Carrier Assembly
 Tighten all bolts. Tighten bolts marked -1- and -2- in specified sequence. Tightening torque: 8 Nm Remaining bolts can be tightened in any sequence. Insert door window -3- through window recess without
FIXED PANEL SLIDER QCI5241
 INSTALLATION INSTRUCTIONS FIXED PANEL SLIDER QCI5241 FRAMELESS PANEL / DOOR / PANEL FRAMELESS DOOR / PANEL QCI5241 REV. 0 Page 1 Certified 06/16/2016 Parts List *Quantities may vary QCI5241 REV. 0 Page
LINK OPENING SYSTEMS FOR FLAP AND DROP DOWN DOORS. click 2 INSTALLATION UNHANDED MECHANISM COVER CAP INSERTION
 INSTALLATION Recommended fi xing countersunk head wood screws Ø 4 x 18 mm for door 18 mm min. thick. Pre-inserted screw Ø 3,5 x 16 mm - PZ2. The door bracket has to be placed with the narrow part of the
Installation and Assembly: Flat Video Wall Mount For 40" to 65" Flat Panel Displays
 Installation and Assembly: Flat Video Wall Mount For 40" to 65" Flat Panel Displays Model: DS-VW665 Maximum Load Capacity: 125 lb (57 kg) 1 of 11 ISSUED: 03-22-12 SHEET #: 125-9288-4 06-25-13 NOTE: Read
Cable Railing Kit Application Guide
 Cable Railing Kit Application Guide January 2019 Nationwide Industries 10333 Windhorst Rd. Tampa, FL 33619 813.988.2628 Fax: 813.988.3465 Photo courtesy of FabWorx Framework You Will Need for Cable Railing
Bulkhead Model Number and
 Bulkhead Model Number 96141-3-01 and 96142-3-01 Installing your ProMaster bulkhead is very clear cut following these instructions. Before cutting or drilling in the floor, verify the location of you gas
Stage 2: Preparing the door (read in conjunction with Hole Drilling Options on back of Template).
.") There are three stages to fitting the CL100 mortise case: Stage 1: Marking out the position of the lock. Stage 2: Preparing the door by mortising and drilling holes. Stage 3: Fitting lock, door furniture,
There are three stages to fitting the CL100 mortise case: Stage 1: Marking out the position of the lock. Stage 2: Preparing the door by mortising and drilling holes. Stage 3: Fitting lock, door furniture,
OPERATING INSTRUCTIONS FOR MODEL SPR-25 Manual Stencil Printer
 OPERATING INSTRUCTIONS FOR MODEL SPR-25 Manual Stencil Printer TABLE OF CONTENTS I. INSTALLATION...3 II. SET-UP...4 III. Z AXIS ADJUSTMENT (Screen Height)...6 IV. X, Y AND Ø ADJUSTMENTS...6 V. SQUEEGEE
Table and Furniture Base Fittings Plinth Adjusting Fittings
 Adjusting screw with M8 or M thread Rigid, for glide inserts, steel thread Finish/Colour: Black, thread galvanized Version: With acceptance Ø30 mm Thread M8 650.22.381 M 650.22.382 Packing: 1 or 0 pcs.
Installation Manual Flat Track Series
 Manual Flat Track Series Contents Safety...1 Parts...2 Hardware.......................................... 2 Tools Required..................................... 4.............................................
ALLORA SWING PANEL INSTALLATION INSTRUCTIONS
 ALLORA SWING PANEL INSTALLATION INSTRUCTIONS Before Installation Please check that your Allora Swing Panel is undamaged SEQUENCE OF INSTALLATION These instructions are also available from the Athena website:
Assembly guide. Before you start...check the pack and make sure all the components and fixings are included see. Tools required (Not Supplied)
") M FITT-054 Issue - Issue Assembly guide Soft close 800 LH Pull & Swing Corner Unit Component parts Tools required (Not Supplied) B S O T Spirit level Cross Head Screwdriver Tape measure E&F J P* Allen
M FITT-054 Issue - Issue Assembly guide Soft close 800 LH Pull & Swing Corner Unit Component parts Tools required (Not Supplied) B S O T Spirit level Cross Head Screwdriver Tape measure E&F J P* Allen
Installing the Profile Privacy Panel. Assemble top mounting bracket. Prerequisites. Tools
 Installing the Profile Privacy Panel Complete these instructions to install the Profile Privacy Panel. Privacy panels are available in various heights to match tiers and include mounting hardware for slat
adaptivemechanical adaptive
 Mechanical clamping elements mechanical 6 Content Product group 6 Sliding clamp, mechanical 6.2210 Clamping block, mechanical 6.2212 High-pressure spindle, mechanical with integral wedge system 6.2270
BD101K / BD101K INSTALLATION GUIDE BARN DOOR HARDWARE TOP OF DOOR STRAP KIT
 Common Components x1 Right Stopper x1 Left Stopper x2 Top of Door Strap x2 Anti-jump Block x2 #8 (4.2mm x 25mm) Floor Screws x2 1/4 (6mm) Floor Anchor x1 Internal Floor-Mounted Door Guide BD850-BR/MB/SS
Frameless Bypass Slider
 INSTALLATION INSTRUCTIONS Frameless Bypass Slider QCI-5301 Heavy Glass Bypass Slider with Exposed Rollers QCI5301 Rev 0 Page 1 Certified 11/1/2016 Tools: To install your New Shower Enclosure, you may need
Heavy-Duty Bypass Track System
 Heavy-Duty Bypass Track System Please Note: This track system must be installed with the screws going into a solid surface such as studs or a header. Due to the spacing of the holes on these Brackets,
WHISPER Cellular EasyRise Shades. Installation Operation Care
 WHISPER Cellular EasyRise Shades Installation Operation Care 05/2013 CONTENTS Getting Started: Product View... 1 Tools and Fasteners Needed... 2 Installation: Installation Overview... 3 Mounting Types
METAL BLINDS. Deluxe GETTING STARTED OPTIONAL HARDWARE. A few simple tools are required: STANDARD HARDWARE
 METAL BLINDS Deluxe GETTING STARTED OPTIONAL HARDWARE A few simple tools are required: Steel Tape Measure Pencil Level Hold Down Brackets with Screws Extension Bracket Power Drill and Drill Bits Flathead
INSTALLATION MANUAL FORTRESS SERIES
 Guardian Security Structures TEL 1-406-212-2334 EMAIL rg@gssdoors.com WEB www.gssdoors.com FORTRESS SERIES GENERAL INSTALLATION GUIDELINES 1. The door frame is installed using 16 bolt screws 7,5 mm in
VINYL CLASSIC FREESTANDING PERGOLA ASSEMBLY INSTRUCTIONS
 P a g e 1 VINYL CLASSIC FREESTANDING PERGOLA ASSEMBLY INSTRUCTIONS Shown: 8' x 12' Vinyl Classic Pergola with 12" Top and Main Runner Spacing The design of this pergola is based on all posts being installed
Installation and Assembly - Universal Articulating Swivel Double-Arm for 42" - 60" Plasma Screens
 Installation and Assembly - Universal Articulating Swivel Double-Arm for 42" - 60" Plasma Screens Models: PLAV 70-UNL, PLAV 70-UNL-S PLAV 70-UNLP, PLAV 70-UNLP-S R This product is UL Listed. It must be
Thank you for your order
 Installation Guide Thank you for your order Ph: 09-9133110 Fax: 09-9133113 5 Smales Road. East Tamaki, Manukau PO Box 58031 Greenmount, Manukau 2013 AUCKLAND // WELLINGTON // CHRISTCHURCH www.bathroomdirect.co.nz
1/4 FRAMELESS SLIDING DOOR FOR TUB OR SHOWER 4400A-4500A
 1/4 FRAMELESS SLIDING DOOR FOR TUB OR SHOWER 4400A-4500A F AB GLASS AND MIRROR www.fabglassandmirror.com Call: +1 888-474-2221 Fax: (614)-334-4919 Office Timing: 8:30-18:00 EST info@fabglassandmirror.com
GEZE SLIDING DOOR SYSTEMS
 GEZE Perlan 140 Multi-faceted uses with individual accessories The discrete design supports every required room effect and makes the sliding door system with its accessories a guarantee for elegant and
Greenhouse Assembly Instructions
 Greenhouse Assembly Instructions Our Help Line provides support and advice to customers of Summer Garden Buildings after ordering. For advice before you buy you can phone us free 7 days a week on 0800
3/16 FRAMELESS SERIES BY-PASS TUB AND SHOWER ENCLOSURES #3344, 3345, 3037
 / FRAMELESS SERIES BY-PASS #, 5, 07 PLEASE READ THOROUGHLY BEFORE STARTING INSTALLATION Item 5 7 8 9 0 5 7 8 Part # 09/050 0 05 A05 8 0 0 0 70 0 09 5 5 0 0 7 0 Description Tub Header Stay Clean Sill Tub
Projector Flush Mount
 Projector Flush Mount ABtUS SIGAPORE PTE LTD Model: AV819 www.abtussingapore.com Patent Pending Revision 21/05/2012 ABtUS SINGAPORE PTE LTD www.abtussingapore.com User Operation Guide IMPORTANT NOTES Thank
 www.hafeleindia.com www.hafeleindia.com INTRODUCTION Intuitive furniture is the need of the hour. In times like these where every extra square meter is considered as good as gold, installing versatile
INSTALLATION INSTRUCTIONS DANUBE ACRYLIC NEO ANGLE
 INSTALLATION INSTRUCTIONS DANUBE ACRYLIC NEO ANGLE March 2013 DOOR 2 Page 1 of 5 INSTALLATION INSTRUCTIONS NEO ANGLE 6MM FRAMELESS AND 4MM FRAMED SHOWER DOOR DANUBE, DELTA, SIGNATURE, OCEANIA, CASCADE
Heavy Duty I-Beam Trolley
 Heavy Duty I-Beam Trolley ASSEMBLY INSTRUCTIONS I-BEAM TROLLEY Recommended Tools Level Tape Measure Pencil Drill with 1/8, 1/4, and 3/8, Drill Bits and Phillips Bit Socket Wrench with 9/16 Socket I-BEAM
JEEP JK ( 5 DOOR ) SLIMLINE II - FULL TRAY EXTREME RACK KIT
 SLIMLINE II - FULL TRAY EXTREME RACK KIT") JEEP JK ( 5 DOOR ) SLIMLINE II - FULL TRAY EXTREME RACK KIT FAJK001 / KRJW014T INSTALL TIME: 2.5 Hours NOTE: Your Jeep JK (5 Door) Extreme Roof Rack Kit consists of four boxes. (1) the Tray, (2) the Roll
JEEP JK ( 5 DOOR ) SLIMLINE II - FULL TRAY EXTREME RACK KIT FAJK001 / KRJW014T INSTALL TIME: 2.5 Hours NOTE: Your Jeep JK (5 Door) Extreme Roof Rack Kit consists of four boxes. (1) the Tray, (2) the Roll
Versa Lift AS24 - Auto-Shutter Installation Guide
 1 These instructions apply to all Versa Lift Models 24 with lift openings dimensioned 22½ x 46½. If your model number or opening size is different from this, contact US for assistance before proceeding.
Sales & Service. JFK - Just For Kids. sasportonline.com. 135 Forestview Road 7879 Will Rogers Blvd.
 Sales & Service sasportonline.com SA Sport (Canada) SA Sport (U.S.A.) 135 Forestview Road 7879 Will Rogers Blvd. P.O. Box 40 Fort Worth, Texas Orillia, Ontario USA 76140 Canada L3V 6H9 Telephone: (705)
Quick Fit Installation Guide Retractable Screen - Single Door
 Quick Fit Installation Guide Retractable Screen - Single Door 1 REMOVE KIT PARTS FROM SHIPPING TUBE 15 Mounting screws 1 Housing end cap screw 2 Handles 1 Housing end cap 1 Bushing 1 Pull bar end cap 2
Vanity Installation Instructions
 Vanity Installation Instructions Segments of these instructions will relate to your vanity. Please read these instructions thoroughly and ensure the appropriate instructions are used during the installation
Wooden Frame Type Instruction Manual
 Wooden Frame TypeInstruction Manual Thank you for selecting our product. Before starting installation, please read this manual thoroughly to ensure correct installation. Please keep this manual at hand
#916 CLASSIC 16 GUN CABINET ASSEMBLY INSTRUCTIONS
 Thank you for purchasing this quality product. A list of PARTS and INSTRUCTIONS is included to assist you. Unpack and identify all parts included on the Parts List and Hardware List. If parts are missing,
Installation Instructions
 Installation Instructions Walk-in Shower Screen with 180 o Return Panel (700 + 350mm & 900 + 350mm) Installation Instructions Parts supplied A B C D Wall Channel (x1) Wall fixing screw (x6) Return Straight
ESSENCE. Shower / Tub Door Installaion Instructions
 ESSENCE Shower / Tub Door Installaion Instructions IMPORTANT DreamLine reserves the right to alter, modify or redesign products at any time without prior notice. For the latest up-to-date technical drawings,
Aluminum Frame Type Instruction Manual
 Aluminum Frame TypeInstruction Manual Thank you for selecting our product. Before starting installation, please read this manual thoroughly to ensure correct installation. Please keep this manual at hand
LOCKN LOAD FIRST TIME INSTALLATION
 LOCKN LOAD TM TRACK MOUNTING KIT ISUZU MU-X 2013+ LS-M & LS-U MODELS ONLY 3 BAR TRACK HEAVY DUTY ROOF RACK SYSTEM MAX VEHICLE ROOF LOAD RATING: 100KG TOTAL LOAD EQUALS WEIGHT OF ROOF RACKS + ACCESSORIES
SLIDING DOORS DIRECT ROLLER
 SLIDING DOORS Single door fixed to wall NFK s Direct Sliding Door system, for installation to a solid wall. Height adjustable track supports can be quickly mounted to a wall allowing the glass to pass
WAREHOUSE HANGER INSTALLATION INSTRUCTIONS R H INS T A L L A TIO N INS T R U C TIO N S
 INS T A L L A TIO N INS T R U C TIO N S WAREHOUSE HANGER NOTE: Due to the size and weight of the Warehouse Hanger it is recommended that this Hanger be installed on 3 4 or wider doors. 10.11.2016 2-3/16"
Router Table. Construction
 Router Table A router table is an invaluable tool. The problem, however, is that ready-built router tables are usually relatively expensive and too narrow for many projects. This router table provides
INFINITE RANGE - CENTRE FOLDING DOOR
 INFINITE RANGE - CENTRE FOLDING DOOR CENTRE FOLDING DOOR ONLY ( RECESS) Please read these instructions before installing, as incorrect fitting will invalidate the guarantee-carry out each stage before
Installation, Operation and Care Instructions. Continuous Cord Loop Operating System
 Installation, Operation and Care Instructions Continuous Cord Loop Operating System CONTENTS Getting Started: Product View... 1 Tools and Fasteners Needed... 2 Installation: Installation Overview... 3
CREW REAR DOOR KIT P/N APPLICATION BEFORE YOU BEGIN KIT CONTENTS. Verify accessory fitment at Polaris.com.
 CREW REAR DOOR KIT P/N 2883437 APPLICATION Verify accessory fitment at Polaris.com. BEFORE YOU BEGIN Read these instructions and check to be sure all parts and tools are accounted for. Please retain these
ROBOT KR 350. Installation, Connection, Exchange. Ro/Me/03/ en. 1of 26
 ROBOT KR 350 Installation, Connection, Exchange 1of 26 e Copyright KUKA Roboter GmbH This documentation or excerpts therefrom may not be reproduced or disclosed to third parties without the express permission