Ready To Go SimpleSpec tm. Installation Manual. For more information, please visit 3-form.com or call
|
|
|
- Sherman Fletcher
- 5 years ago
- Views:
Transcription
1
2 Contents Overview ( 1) 3/8" Varia Panel = Cable Tensioner with Cover Plate KIT Stainless Steel: K Black Oxide: K Cable Tensioner with Cover Plate SS: BO: M8 Thread Rod, 25mm mm Cable Stainless Steel: Black Oxide: " Shelf Holder KIT Stainless Steel: K Black Oxide: = 1" Shelf Holder SS: BO: M6 12mm Set Screw ( 6) Single Panel Connector for 3/8" Stainless Steel: Black Oxide: Cable Coupler KIT Stainless Steel: K Black Oxide: K = Cable Coupler with Cover Plate SS: BO: M8 Thread Rod, 25mm = Suspend Anchoring KIT K + M8 Toggle Bolt Anchor M8 Threaded Wood Insert M8 Concrete Anchor A + M8 Threaded Rod, 50mm A M8 Thread Rod, 25mm
3 Contents Overview cont... For Each Additional Panel ( 1) Varia Panel ( 1) 3mm Cable (SS: ; BO: ) ( 1) Cable Coupler KIT (SS: K; BO: K) ( 1) Cable Tensioner with Cover Plate KIT (SS: K; BO: K) Suspend Anchoring KIT K ( 1) 1" Shelf Holder KIT (SS: K; BO: ) ( 3) Double Panel Connector for 3/8" Stainless Steel: Black Oxide:
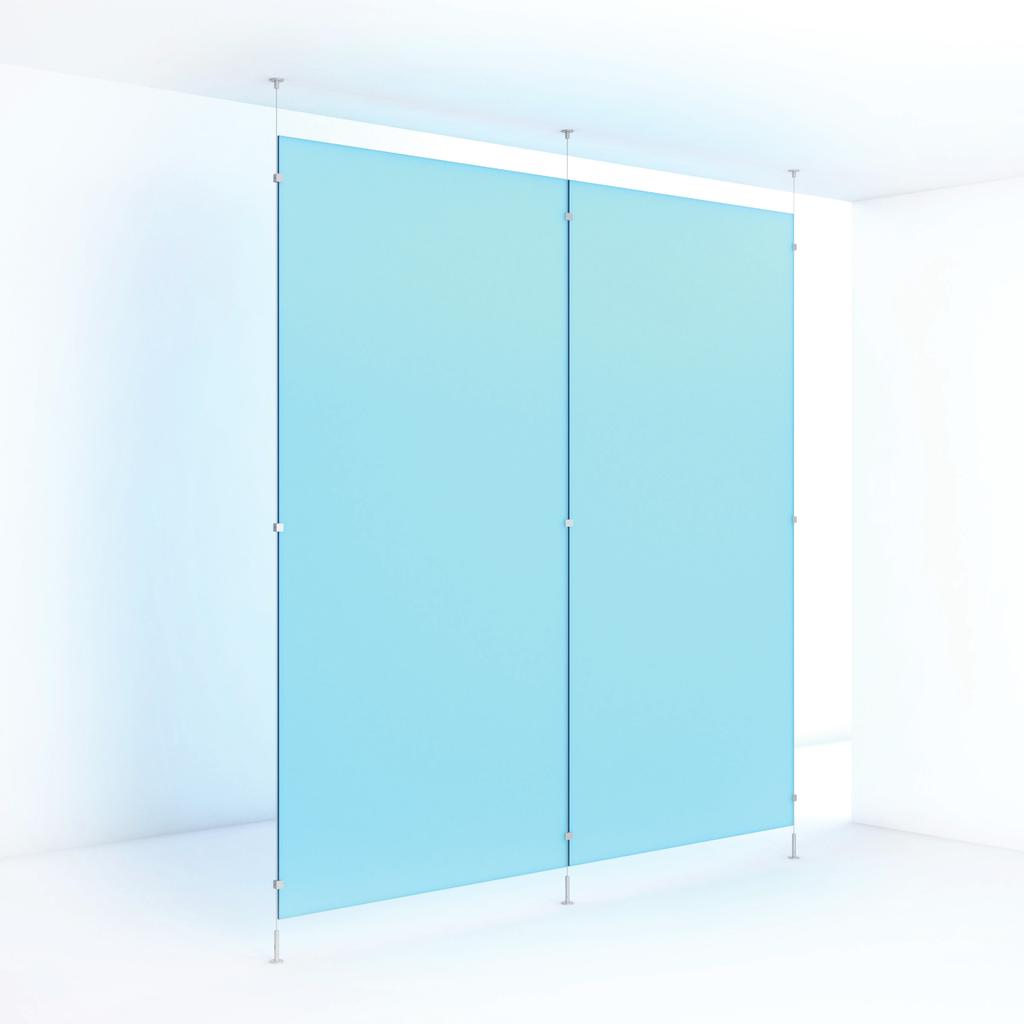
4 Overview The partition comes from the 3form Suspend Hardware System. This is a suspended side-fastening partition for concrete and wood with smooth connectors and a Drop Ceiling cover. This elegant solution would be a great addition to any space. 50⅜" (1280mm) Cable Coupler KIT SS: K BO: K 48" (1219mm) 1" Shelf Holder KIT SS: K BO: mm Cable SS: BO: max 14' floor to ceiling 96" (2439mm) Single Panel Connector for ⅜" SS: BO: Cable Tensioner with Cover Plate KIT SS: K BO: K 48" 96" max Varia Panel ⅜" Gauge *1 Panel is standard and additional panels are optional 4

5 Required Tools Drill Concrete or Wood Bit Metric Allen Wrenches Cable Cutters Super Glue Plumb-bob 1 Install Ceiling Anchor for the First Cable Assembly *If anchoring in concrete follow Steps 1a-f, if anchoring in drywall follow Steps 1g-l. if anchoring in wood follow Steps 1m-n. a Concrete b c Drill Ø10mm hole, minimum 65mm deep. Remove drilling debris with a blowout bulb or with compressed air. With screw in anchor ( A), use a hammer to insert anchor. 5
6 1 Install Ceiling Anchor for the First Cable Assembly cont... d e f Place a washer under the screw head. Torque the screw to 15 Nm. Remove screw. g Hollow Substrate h i Metal Studs Metal Studs Drill Ø3/4" (19mm) hole. Minimum clearance behind wall = 17/8" (48mm) Position the metal channel parallel with the plastic legs. Insert the metal channel through the drilled hole into the wall cavity. Pull the metal channel firmly against the inner wall cavity by tugging the plastic pull ring. 6
7 1 Install Ceiling Anchor for the First Cable Assembly cont... j k l Slide the plastic cap forward along the legs until it is seated flush to the work surface. Snap the plastic legs off flush at the plastic cap by pushing outward. Note: Maximum torque on screw or rod is 5 ft-lb. m Wood n o SS: BO: Drill Ø7/16" (Ø11.1mm) hole, minimum 20mm deep. Use an Allen wrench to install the M8 Threaded Insert ( ). 7

8 A SS: BO: Install Floor Anchor for the First Cable Assembly a Hang plumb-bob to mark anchoring point on floor. b If anchoring in concrete follow Steps 1a-f, if anchoring in wood follow Steps 1g-h. c Attach the Cable Tensioner (SS: ; BO: ) to the floor anchor with the included M8 Threaded Rod ( ). 8
9 3 Attach First Cable Assembly a b c SS: BO: SS: BO: SS: BO: x Do not tighten yet! d e f max weight per cable SS: BO: lbs lbs Unscrew the cap. Pull excess cable through the side exit on the tensioner. Maximum Weight = 225 lbs Maximum Tension = 400 lbs Hollow Substrate: Max Tension + Weight < 70lbs 9
10 4 Dry-Fit Panel and Measure a Do not tighten set screws! b Do not tighten set screws! (x2) Set Screws SS: BO: Set Screws 10
11 4 Dry-Fit Panel and Measure cont... c Do not tighten set screws! d SS: BO: Set Screws Set Screws 11
12 4 Dry-Fit Panel and Measure cont... e Remove Panel Set Screws 12
13 5 Anchor Second Cable Assembly a Repeat Steps 1-3 for the Second Cable Assembly. b Repeat Step 4 and then Steps 1-3 for each additional panel. 6 Attach the Panel a Position the top Side Brackets (SS: ; BO: ) 6" below the desired location of the top of the panel. Tighten set screws to the cable (top side brackets only). b Position the panel to desired location and ensure it is level. Tighten set screws to the panel on top side brackets only. 6" max Set Screws 13
14 6 Attach the Panel cont.. c Critical Tensioning Step! Wait to re-tension the cables as weight of the panel is applied. Re-tension the cables, pulling excess cable through the tensioner, and tighten using Allen wrench through tensioner as shown in 6c. d Tighten set screws on lower side brackets once cables have been tensioned. This will prevent gapping in tension on the cables. Set Screws Set Screws SS: BO: " 14
15 7 Finish Tensioner Assembly a Cut cable and put a drop of super glue at end of cut cable to keep from fraying
Original Gallery System
 GAllery System Art Displays Original Gallery System a Gallery System product Here s everything you need to know to get started with your Gallery System Art Hanging System GS getting started To install
Shetland Stalls Installation Instructions
 Shetland Stalls Installation Instructions RAMM Horse Fencing and Stalls 13150 Airport Hwy. Swanton, OH 43558-9615 1-800-434-8456 Rev. 1/9/18 Before you start Kit can accommodate up to 12 wide stall front
Mount to the Wall INSTALLATION MANUAL
 Mount to the Wall 15 Locate the Wooden Studs This step applies to wooden stud wall installation only. Determine and mark the exact locations of two stud centers on the wall. Wooden studs should be spaced
PHTM200 - Phantom 200 Flat Screen Wall Mount with Wafer Thin Projection Fits Screens up to 50 lbs with 200mm Mounting Patterns
 PHTM200 - Phantom 200 Flat Screen Wall Mount with Wafer Thin Projection Fits Screens up to 50 lbs with 200mm Mounting Patterns Features: Durable high quality gloss black baked on powder coat finish Fits
Assembly and installation help
 Assembly and installation help A supplement to the directions The Purpose of this tutorial is to expand (not replace) upon the directions that come with the system and to help provide shortcuts, the first
Dublin Stalls Installation Instructions
 Dublin Stalls Installation Instructions RAMM Horse Fencing and Stalls 13150 Airport Hwy. Swanton, OH 43558-9615 1-800-434-8456 Rev. 9/13/17 Part Identification Round Track Bracket (4) (Not Painted) Round
TIP FOR GETTING STARTED
 Tip for getting started TIP FOR GETTING STARTED Be careful not to drill into any electrical wires, ductwork, plumbing or other damagable components. If you have any questions on the locations of these
1. VERIFY ALL COMPONENTS
 R INSTALLATION INSTRUCTIONS RAGNAR+ODEN FACE MOUNT, BYPASSING. VERIFY ALL COMPONENTS BASE KIT Track stand-offs Front trolley kit * Rear trolley kit * Allen keys Track fastener kit - wood - Bottom guide
Oxford Stalls Installation Instructions
 Oxford Stalls Installation Instructions RAMM Horse Fencing and Stalls 13150 Airport Hwy. Swanton, OH 43558-9615 1-800-434-8456 Rev. 8/15/17 Before You Start Typical stall sizes are 10 x 10, 12 x 12 or
Installation Instruction
 Tools Needed for Assembly Stud finder (for wood stud wall) Pencil Mark Electric drill Wood Stud Wall Installation Step 1. Locate the Wood Studs Installation Instruction Drill bit (for wood stud wall) Masonry
NX8 SERIES 6-1/4 HANDRAIL W/ VINYL HANDGRIP
 6-1/4 HANDRAIL W/ VINYL HANDGRIP TYPICAL ASSEMBLY 5 2 BUTT JOINT 12 10 9 1 8 11 6 3 7 4 BUTT JOINT COMPONENT LIST 1 LEFT RETURN 7 UPPER IMPACT ABSORBER 2 RIGHT RETURN 8 LOWER IMPACT ABSORBER 3 OUTSIDE
SLIDE 06 Solutions Document/Installation Manual
 SLIDE 06 Solutions Document/Installation Manual 1 The Slide 06 door system from 3form is a completely unframed panel door that uses the same sophisticated, tried-and-true rollers and track as Slide 05.
Installation and Assembly: Flat \ Tilt Wall Mount for VESA 400x400
 Installation and ssembly: Flat \ Tilt Wall Mount for VES 400x400 Model: T642-003 Max Load Capacity: 100 lb (45.4 kg) 3215 W. North ve. Melrose Park, IL 60160 (800) 729-0307 or (708) 865-8870 Fax: (708)
MX8 SERIES 6-1/4 HANDRAIL W/ VINYL HANDGRIP
 6-1/4 HANDRAIL W/ VINYL HANDGRIP TYPICAL ASSEMBLY 5 2 BUTT JOINT 12 10 9 1 8 11 6 3 7 4 BUTT JOINT COMPONENT LIST 1 LEFT RETURN 7 UPPER IMPACT ABSORBER 2 RIGHT RETURN 8 LOWER IMPACT ABSORBER 3 OUTSIDE
SURFACE CLIP MOUNT. 1 Insert lens into channel, measure, and cut to length. Remove lens cover from channel. surface. Attach lens cover and end caps
 SURFACE CLIP MOUNT 1 Insert lens into channel, measure, and cut to length Remove lens cover from channel Screw mounting clips into mounting Snap channel into mounting clips Attach lens cover and end caps
Sliding Door Hardware Installation Instructions ROB ROY
 Sliding Door Hardware Installation Instructions ROB ROY Installation Instructions Structural Information For standard systems and most custom single door opening systems. General Overview All Krown Lab
OB1U INSTALLATION INSTRUCTIONS. Interactive Flat Panel Over White Board Mount
 INSTALLATION INSTRUCTIONS Interactive Flat Panel Over White Board Mount Spanish Product Description German Product Description Portuguese Product Description Italian Product Description Dutch Product Description
x2 1/4 (6mm) Floor Anchor
 Floor Anchor") Main Components x1 Rail x5 Wall Spacer x2 Anti-jump Block x2 Bent Strap x1 Right Stopper x1 Left Stopper x5 5/16 (8mm x 60mm) Carriage Bolt x5 5/16 (8mm x25mm) Anchor x5 5/16 (8mm x 90mm) Wall Screw x2
Main Components x1 Rail x5 Wall Spacer x2 Anti-jump Block x2 Bent Strap x1 Right Stopper x1 Left Stopper x5 5/16 (8mm x 60mm) Carriage Bolt x5 5/16 (8mm x25mm) Anchor x5 5/16 (8mm x 90mm) Wall Screw x2
x2 1/4 (6mm) Floor Anchor
 Floor Anchor") INSTALLATION GUIDE Main Components x1 Rail x5 Wall Spacer x2 Anti-jump Block x2 Straight Strap x1 Right Stopper x1 Left Stopper x5 5/16 (8mm x 60mm) Carriage Bolt x5 5/16 (8mm x25mm) Anchor x5 5/16 (8mm
INSTALLATION GUIDE Main Components x1 Rail x5 Wall Spacer x2 Anti-jump Block x2 Straight Strap x1 Right Stopper x1 Left Stopper x5 5/16 (8mm x 60mm) Carriage Bolt x5 5/16 (8mm x25mm) Anchor x5 5/16 (8mm
INSTALLATION INSTRUCTIONS
 INSTALLATION INSTRUCTIONS SOLID PHENOLIC TOILET PARTITIONS 1080 DuraLine Series 1180 DuraLine Series Class-A Fire Rated IMPORTANT: Review these instructions thoroughly prior to installation. FLOOR ANCHORED
86-1/2" TRACK INSTALLATION GUIDE
 BARN TRACK 86-1/2" TRACK INSTALLATION GUIDE READ ALL INSTRUCTIONS AND REVIEW DIAGRAMS BEFORE BEGINNING THE INSTALLATION TO GET A THOROUGH UNDERSTANDING OF THE PROCESS. BEFORE YOU BEGIN This kit comes with
Line volt rail & fixtures. Low volt quick connect fixtures with transformers
 INSTRUCTIONS: Line Volt Flexrail2 Safety Instructions: A qualified electrician must install system only. System is intended for installation in accordance with National Electric Code, local and Federal
NX7 SERIES 5-1/2 HANDRAIL
 STORAGE & HANDLING The handrails are shipped unassembled. Upon receipt, immediately check all material for any damage that may have occurred in transit and verify that all of the items and quantities are
Installation and Assembly: Flat Video Wall Mount For 40" to 65" Flat Panel Displays
 Installation and Assembly: Flat Video Wall Mount For 40" to 65" Flat Panel Displays Model: DS-VW665 Maximum Load Capacity: 125 lb (57 kg) 1 of 11 ISSUED: 03-22-12 SHEET #: 125-9288-4 06-25-13 NOTE: Read
Sentinel Electronic Safe Installation Guide
 Sentinel Electronic Safe Installation Guide by Rev 07/12/2004 P/N 100020 Table of Contents 1. OVERVIEW...3 2. SAFE INSTALLATION...3 2.1. TOOLS REQUIRED...3 2.2. SELECTING THE MOUNTING LOCATION...3 2.3.
Installation and Assembly: Mount - Wall/Ceiling Mount
 Installation and ssembly: Mount - Wall/Ceiling Mount Model: DST360 Max oad Capacity: 150 lb (68. kg) 3215 W. North ve. Melrose Park, I 60160 (800) 729-0307 or (708) 865-8870 ax: (708) 865-2941 www.peerlessmounts.com
Desk/Wall-Mount Rack
 Desk/Wall-Mount Rack Patent(s) Pending Installation Instructions Post P/N: 119-1752 119-1781 119-1782 119-4014 Frame P/N: 119-1591 119-1754 119-1755 Kit Contents (2) Frames (4) Posts Assembly Hardware
RBP-1215B-RX DODGE RAM QUAD CAB RX3
 RBP-1215B-RX3 2002-2017 DODGE RAM 15-3500 QUAD CAB RX3 Passenger side RX-3 Side Step Drill Template Passenger side rear Modular Bracket (6) L Support Brackets Driver side rear Modular Bracket Driver side
LC200DS1 Double Stud Articulating Wall Mount for Flat Panel Screens up to 32" with up to 200mm x 200mm VESA Mounting Patterns
 Page 1 of 6 LC200DS1 Double Stud Articulating Wall Mount for Flat Panel Screens up to 32" with up to 200mm x 200mm VESA Mounting Patterns A multi-position dual articulating arm for flat screens up to 60
Mast Solutions Document/Installation Manual
 Mast Solutions Document/Installation Manual The Mast family from Veritas is the perfect answer to movable and stationery partitions and room dividers, and hinged doors. This system is extremely versatile
ēno one Adjustable Wall Mount and Adjustable Mobile Stand Installation Guide
 Installation Guide Part number 2002105-001 Rev B 2011 PolyVision Corporation All rights reserved Table of contents Overview... 3 Important considerations... 3 Adjustable Wall Mount considerations... 3
INSTALLATION INSTRUCTIONS
 INSTALLATION INSTRUCTIONS 1350 COMBAT SERIES TOILET PARTITIONS IMPORTANT: Review these instructions thoroughly prior to installation. In the United States: BOBRICK WASHROOM EQUIPMENT INC. 200 Commerce
LEG CURL IP-S1315 INSTALLATION INSTRUCTIONS
 LEG CURL IP-S35 INSTALLATION INSTRUCTIONS Copyright 2009. Star Trac by Unisen, Inc. All rights reserved, including those to reproduce this book or parts thereof in any form without first obtaining written
Installation and Assembly: Full Service Video Wall Mount
 Installation and Assembly: Full Service Video Wall Mount Model: DS-VW765-LAND Max UL Load Capacity: 125 lb (57 kg) 1 of 12 ISSUED: 05-13-11 SHEET #: 145-9011-5 05-21-12 Note: Read entire instruction sheet
ROOFSAFE ANCHOR & CABLE
 Installation Instructions ROOFSAFE ANCHOR & CABLE THE ULTIMATE IN FALL PROTECTION MANUAL Contents Guidelines for Installation 3 Top Bolt Installation 4 Toggle Installation 5 Concrete Installation 6 Component
TOOLS REQUIRED Metal Wood Wood and Metal Screws. #16 Drill #12-24 Tap. 1/8 Drill
 DEVICES COVERED IN THIS DOCUMENT: 4700S Surface Vertical Rod Device 4700SF Fire Exit Surface Vertical Rod Device TOOLS REQUIRED Metal Wood Wood and Metal Screws Sex Bolts #7 Drill ¼ -20 Tap #16 Drill #12-24
Installation and Assembly - Universal Articulating Swivel Double-Arm for 42" - 60" Plasma Screens
 Installation and Assembly - Universal Articulating Swivel Double-Arm for 42" - 60" Plasma Screens Models: PLAV 70-UNL, PLAV 70-UNL-S PLAV 70-UNLP, PLAV 70-UNLP-S R This product is UL Listed. It must be
BARN DOOR HARDWARE KIT
 INSTALLATION GUIDE Main Components x1 Rail x5 Wall Spacer x2 Anti-jump Block x2 Bent Strap x1 Right Stopper x1 Left Stopper x5 5/16 (8mm x 60mm) Carriage Bolt x5 5/16 (8mm x25mm) Anchor x5 5/16 (8mm x
Installation Manual for Metal Toilet Partitions Elite & Elite Plus Series
 P a g e 1 Table of Contents Page General Notes and Tools Required 3 STEP 1: Establish Floor Bracket Locations 4 STEP 2: Fasten Floor Brackets 4 & 5 STEP 3: Erect Panels 6 STEP 4: Erect Wall Pilaster 7
INSTALLATION INSTRUCTIONS
 INSTALLATION INSTRUCTIONS HIGH PRESSUE LAMINATE (HPL) TOILET PARTITIONS 1030 TrimLineSeries 1040 DesignerSeries Includes continuous hardware option.65. IMPORTANT: Storage and Handling Information on last
INSTALLATION INSTRUCTIONS
 INSTALLATION INSTRUCTIONS Universal Low Profile Tilt Mount Model: U.S. Toll Free: 1-866-752-6271 Outside N. America: 1-503-748-5799 E-mail: ts@planar.com FRANCE Phone: +33 5 6378 3810 E-mail: emeats@planar.com
Elo Touch Solutions Wallmounting Kit for the 7001L IDS Touchmonitors
 Installation Manual Elo Touch Solutions Wallmounting Kit for the 7001L IDS Touchmonitors SW602083 Rev E Table of Contents Chapter 1: Safety Warning... 3 Chapter 2: Kit Contents... 4 Included in Kit...
Steel Solutions USA 602 E. Walnut Street Watseka, IL p: (888) f: (815)
 f: (815)") Steel Solutions USA 602 E. Walnut Street Watseka, IL 60970 p: (888) 875-5004 f: (815) 432-3364 sales@steelsolutionsusa.com Published February 2011 2011 Steel Solutions USA. All rights reserved. version
Steel Solutions USA 602 E. Walnut Street Watseka, IL 60970 p: (888) 875-5004 f: (815) 432-3364 sales@steelsolutionsusa.com Published February 2011 2011 Steel Solutions USA. All rights reserved. version
P a r k c o n s o l e s i n k a s s e m b l y i n s t r u c t i o n s
 P a r k c o n s o l e s i n k a s s e m b l y i n s t r u c t i o n s Before You Begin: Professional installation by two-person crew is required for this fixture. Install water supply and drain piping
Installation and Assembly - Universal Articulating Swivel Double-Arm for 42" - 60" Plasma Screens
 Installation and Assembly - Universal Articulating Swivel Double-Arm for 42" - 60" Plasma Screens Models: PLAV 70-UNL, PLAV 70-UNL-S PLAV 70-UNLP, PLAV 70-UNLP-S R This product is UL Listed. It must be
INSTALLATION INSTRUCTIONS
 INSTALLATION INSTRUCTIONS SOLID PHENOLIC TOILET PARTITIONS 1080 DuraLineSeries Class-A Fire Rated Includes Institutional Hardware Option.67 IMPORTANT: Storage and Handling Information on last page. Review
MOTORIZED STANDARD SHADE WITH CABLES Installation Instructions
 Tools Needed Drill Measuring Tape Pencil 2 Level Plumb Line ¼ Masonry Drill Bit Hammer Linesmans Pliers Cable Cutters Phillips & Flat-Head Screw Driver 11/32 Socket or Open End Wrench 5/32 Allen Wrench
Panel & Shelf Identification
 4 to 8 Aromatic Cedar Closet Model # 801 1 PLEASE READ INSTALLATION INSTRUCTIONS BEFORE ASSEMBLING Rev. C IF YOU ARE MISSING PARTS OR HAVE QUESTIONS PLEASE CONTACT: customerservice@cedargreen.net Tools
Adjustable Wall Mount and Adjustable Mobile Stand for the PolyVision PJ920 Ultra-Short Throw Projector. Installation Guide
 Adjustable Wall Mount and Adjustable Mobile Stand for the PolyVision PJ920 Ultra-Short Throw Projector Installation Guide Part number 2002553-001 Rev A 2011 PolyVision Corporation All rights reserved Table
Track Rack. * Track Racks are not lockable
 The Track Rack s unique staggered, sliding hook design creates the greatest parking efficiency while still providing easy access to any particular bike. When adding or removing a bike to the rack, simply
Installation and Assembly: Ceiling mount for LCD screens up to 29"
 Installation and Assembly: Ceiling mount for LC screens up to 29" Models: LCC 18, LCC 18-S, LCC 36, LCC 36-S Patent Pending Features: Comes in two adjustable height ranges (in 1" increments): 18"-30" and
TIRE RACK INSTALLATION INSTRUCTIONS Dodge Sprinter
 Aluminess Products Inc 9402 Wheatlands Ct. #A Santee, CA 92071 619-449-9930 TIRE RACK INSTALLATION INSTRUCTIONS 07-11 Dodge Sprinter Please read before beginning Stainless steel hardware may bind together
TITAN2-EDGE Public Access Computer Station Dual Track
 TITAN2-EDGE Public Access Computer Station Dual Track TITAN2-EDGE Rev A 6/17 Model TITAN2-EDGE ASSEMBLY AND ADJUSTMENT TITAN2-EDGE PARTS AND TOOLS PLEASE REVIEW these instructions before beginning the
COMPARE #01-12 OCTOBER 11, Original Vroom. Vroom Garage Ceiling Bracket #9547. Installation. (with L-Brackets) Ease of.
 Ease of.") #01-12 OCTOBER 11, 2012 The new Vroom Garage Ceiling Bracket makes it simple to attach Vroom to garage ceiling joists, meaning less installation time is needed. It only takes a third of the time just 30
#01-12 OCTOBER 11, 2012 The new Vroom Garage Ceiling Bracket makes it simple to attach Vroom to garage ceiling joists, meaning less installation time is needed. It only takes a third of the time just 30
Insolroll Clutch Operated Shades Installation Instructions Installation Instructions
 All clutch operated shades are shipped fully assembled and ready for installation. Mounting screws are not provided. Screws for chain guide installation to meet the child safety standards are provided.
Office Partitions WARNING. Assembly Instructions. Customer Service A S S E M B LY HARDWARE H1 H2 H3 H4 H5 H8 H9 H10 H11 H12
 Customer Service 1-800-645-2986 Assembly Instructions WARNING In order to prevent structural failure, instability, t i p - o v e r, and/or serious injury, please follow i n s t ructions care f u l l y.
INSTALL INSTRUCTIONS WELCOME TO THE NEWAGE PERFORMANCE CABINETRY SERIES NEWAGE STEEL WELDED CABINETRY
 NEWAGE STEEL WELDED CABINETRY WELCOME TO THE NEWAGE PERFORMANCE CABINETRY SERIES ALL CABINETS MUST BE MOUNTED TO STUDS ON A SECURE WALL, AS PER THESE INSTRUCTIONS. FAILURE TO DO SO MAY RESULT IN SERIOUS
Installation Instructions
 Column & Beam Units with Debris Netting Installation Instructions Laminated Wood Systems, Inc. Seward, Nebraska 800-949-3526 2015 LWS, INC. AVR-NET INSTALL 05-12-16 AVR Installation Notes 1 Safety The
Installation Manual for Metal Toilet Partitions Standard Series
 For Video instructions http://www.hadrian-inc.com/tech-data/installation/toilet-partitions.aspx P a g e 1 Table of Contents Page General Notes and Tools Required 3 STEP 1: Establish Floor Bracket Locations
PFW Installation Guide Installationsanleitung, Guía de Instalacíon, Guida de Installazione, Guide d Installation, Installatie gids
 Maximum Flat Panel Weight: 100 lb. / 45.35 kg. Included Components Wall Mount (Qty 1) Extension Bracket (Qty 1 Pair) Bracket (Qty 1 Pair) 5/16 Flat Washers (Qty 4) Universal Spacers (Qty 8) M5 Allen Driver
Midmark Care Exchange 6282 Standard Duty Wall Mounted Workstation
 INSTALLATION MANUAL Midmark Care Exchange 6282 Standard Duty Wall Mounted Workstation Weight Capacity 5-20 lbs 1210180MD Rev. C TABLE OF CONTENTS Tools Required / Installation Warnings / Disclaimer / Safety
INSTALLATION INSTRUCTIONS
 INSTALLATION INSTRUCTIONS Universal Low Profile Flat Mount Model: U.S. Toll Free: 1-866-752-6271 Outside N. America: 1-503-748-5799 E-mail: ts@planar.com FRANCE Phone: +33 5 6378 3810 E-mail: emeats@planar.com
Melamine Plastic Laminate. Toilet Partition Installation Manual
 Melamine Plastic Laminate Toilet Partition Installation Manual PHONE: FAX: 1-866-317-2786 ATTENTION DO NOT MIX FASTENER PACKS EACH FASTENER PACK HAS THE NECESSARY BOLTS, BARRELS AND SCREWS TO INSTALL THE
Versatrac Bypass Door Units, Conventional and Top Track, 300 and 400 Series
 Versatrac Bypass Door Units, Conventional and Top Track, 300 and 400 Series TM Rough opening width (finished opening width plus 9/16") Notch for top track units (used as frame header) Rough opening height
PRE-ENGINEERED HORSE STALL SYSTEMS SDFD SLIDING DOOR c/w FOLD-DOWN GRILL. & Assembly. Installation Instructions
 PRE-ENGINEERED HORSE STALL SYSTEMS 4800 SDFD SLIDING DOOR c/w FOLD-DOWN GRILL & Assembly Installation Instructions 4800 SDFD Sliding Door c/w Fold-Down Grill Components - 1 3 /4" x 2" x 88" channels (2)
ULTRA SPACE SAVER Installation Instructions
 Installation Instructions The Ultra Space Saver has several steps for installation. Note that the single and double sided setups and parts are different. Make sure you follow the instructions according
PFW 6875 Installation Guide Installationsanleitung, Guía de Instalacíon, Guida de Installazione, Guide d Installation, Installatie gids
 Maximum Flat Panel Weight: 160 lb. / 72.57 kg. Included Components Wall Mount (Qty 1) Extension Brackets (Qty 2) Bracket (Qty 1 Pair) 5/16 Flat Washers (Qty 4) Universal Spacers (Qty 8) M5 Allen Driver
SINGLE TRACK BYPASS (patent pending) barn door hardware
 barn door hardware") SINGLE TRACK BYPASS (patent pending) barn door hardware Installation Manual What is included in your kit: Part number Part name Quantity 1 Inner door hanger 2 2 Outer door hanger 2 3 5/16 x 1.5 lag bolts
SINGLE TRACK BYPASS (patent pending) barn door hardware Installation Manual What is included in your kit: Part number Part name Quantity 1 Inner door hanger 2 2 Outer door hanger 2 3 5/16 x 1.5 lag bolts
1. TOOLS + MATERIALS REQUIRED
 R INSTALLATION INSTRUCTIONS PRODUCT: BALDUR + ODEN CONFIGURATION: BI-PARTING DOOR MOUNT: TOP MOUNT Product is covered by U.S. patents. For more information visit www.krownlab.com. TOOLS + MATERIALS REQUIRED
Installation and Assembly: In-wall Mount for 32" to 71" Flat Panel Screens
 Installation and Assembly: In-wall Mount for 32" to 71" Flat Panel Screens Model# IM760P, IM760P-S IM760PU, IM760PU-S Screen size range 32" to 71" (81 to 180 cm) 32" to 60" (81 to 152 cm) IM760P IM760P-S
SMARTfit Functional and Brain Fitness Training Multi-Station Trainer Installation for Stud and Concrete Walls (US)
") SMARTfit Functional and Brain Fitness Training Multi-Station Trainer Installation for Stud and Concrete Walls (US) 2017 SMARTfit, Inc. www.smartfitinc.com 1 Unlike other fitness equipment which may require
SMARTfit Functional and Brain Fitness Training Multi-Station Trainer Installation for Stud and Concrete Walls (US) 2017 SMARTfit, Inc. www.smartfitinc.com 1 Unlike other fitness equipment which may require
L182 - Installation Sheet Modular Wine Rack ( Wall Mount )
") Modular Wine Rack ( Wall Mount ) 1A 1B 2B 2A Cross Bar Options: 1A 2A 1B 2B Modular Wine Rack ( Wall Mount ) Parts Rail LED arm modules Wine bottle cross bars Rail cover Setscrew cover 1) Drill holes and
Modular Wine Rack ( Wall Mount ) 1A 1B 2B 2A Cross Bar Options: 1A 2A 1B 2B Modular Wine Rack ( Wall Mount ) Parts Rail LED arm modules Wine bottle cross bars Rail cover Setscrew cover 1) Drill holes and
Installation Manual Flat Track Series
 Manual Flat Track Series Contents Safety...1 Parts...2 Hardware.......................................... 2 Tools Required..................................... 4.............................................
PREPARATION & TOOL CHECK LIST
 INSTRUCTION MANUAL RAILING PRODUCTS BEGIN TO AGE AS SOON AS THEY ARE EXPOSED TO NATURE. BUILDINGS EXPERIENCE AGING FACTORS DIFFERENTLY, SO IT IS DIFFICULT TO PREDICT HOW LONG RAILING PRODUCTS WILL LAST.
Open Up Your View With CABLE SYSTEMS
 Open Up Your View With CABLE SYSTEMS PRESENTED BY CROWN HERITAGE Our Cable Multiple options to accomodate any deck or stair design Marine Grade 316 stainless steel Swaging is the term used for attaching
FOR WALL MOUNT WORKSTATION
 INSTALLATION MANUAL FOR WALL MOUNT WORKSTATION Weight Capacity 5-20 lbs. 1210180 Rev. C TABLE OF CONTENTS Tools Required / Installation Warnings / Disclaimer / Safety Warning / Adjustment Notification...3
INSTALLATION GUIDE. Flat Panel Arm Mount BTAR2/37. VESA 200x200 compatible. Support 24" to 37" Screens Max Load Capacity: 80 lbs (36 kg)
") INSTALLATION GUIDE Flat Panel Arm Mount BTAR2/37 Support 2" to 37" Screens Max Load Capacity: 80 lbs (36 kg) VESA 200x200 compatible Note: Read entire instruction sheet before you start installation and
INSTALLATION GUIDE Flat Panel Arm Mount BTAR2/37 Support 2" to 37" Screens Max Load Capacity: 80 lbs (36 kg) VESA 200x200 compatible Note: Read entire instruction sheet before you start installation and
Installation and Assembly: Universal Projector Wall Arm
 Installation and ssembly: Universal Projector Wall rm Models: PST-2955, PST-2955-W, PST-2955, PST-2955-W Max UL Load Capacity: 35 lb (5.8 kg) 2300 White Oak Circle urora, Il 60502 (800) 865-22 Fax: (800)
ULTRA SPACE SAVER SQUARED Installation Instructions
 Installation Instructions The Ultra Space Saver Squared has several steps for installation. Note that the single and double sided setups and parts are different. Make sure you follow the instructions according
Adjustable Countertop Installation
 Adjustable Countertop Installation Applies to Models: A1, A2, A3, A4, A5, & A6 Required Tools: Stud Finder, Level 1/4 deep well socket, Screwdrivers, Tape Measure, Drill and Drill Bits Language of origin:
Assembly Instructions
 InTandem Table System November 20 InTandem Table System - Worksurface #4 x/" 4 wood screw power beam Tools Provided T-0 Extended Torx Driver T-25 Torx Driver Additional Tools Required Soft protective
INSTALLATION INSTRUCTION
 INSTALLATION INSTRUCTION Soild Phenolic Series contents page 1080 DuraLineSeries...2-21 1180 DuraLineSeries...2-21 2080 DuraLineSeries Maximum Privacy...22-41 2180 DuraLineSeries Maximum Privacy...22-41
Sliding Barn Door Hardware Installation Instructions Baldur and Oden
 Sliding Barn Door Hardware Installation Instructions Baldur and Oden INSTALLATION INSTUCTIONS Structural Information For standard systems and most custom single door opening systems. General Overview All
Mounting Accessories. Installation Guide. VIVOTEK SD83XXE Speed Dome
 VIVOTEK SD83XXE Speed Dome Mounting Accessories AM-116/117 Pendant Pipe AM-118 Pendant Head AM-221 Gooseneck AM-231 Parapet Mount AM-519 Pendant Adaptor Installation Guide Corresponding part numbers: AM-116:
Hawko Zhaga Systems Installation Instructions
 Hawko Zhaga Systems Installation Instructions Contents Wire Suspension Installation 4 Recessed Brackets 6 Fixed Suspension Rods 8 Swivel Suspension Rods 10 Surface Mount Ceiling 12 Surface Mount Wall
Kiosk Solution W1000. Installation and Assembly Instructions July 2015 Edition
 Kiosk Solution W1000 Installation and Assembly Instructions July 2015 Edition All product names mentioned in this document are the trademarks, brands or registered trademarks of their respective owner.
PRODUCT: LOKI INSTALLATION INSTRUCTIONS. Product is covered by U.S. patents. For more information visit
 R INSTALLATION INSTRUCTIONS PRODUCT: LOKI CONFIGURATION: SINGLE DOOR MOUNT: GLASS MOUNT Product is covered by U.S. patents. For more information visit www.krownlab.com . TOOLS + MATERIALS REQUIRED TOOLS
The Phoenix. Professional Quilting Frame. Copyright January 1, 2016 Jim M. Bagley, GraceWood, Inc (Reproduction Prohibited) Version 2.
 Version 2.") The Phoenix Professional Quilting Frame Copyright January 1, 2016 Jim M. Bagley, GraceWood, Inc (Reproduction Prohibited) Version 2.1 1 The Phoenix Professional Quilting Frame Parts List Box 1...3 Box
The Phoenix Professional Quilting Frame Copyright January 1, 2016 Jim M. Bagley, GraceWood, Inc (Reproduction Prohibited) Version 2.1 1 The Phoenix Professional Quilting Frame Parts List Box 1...3 Box
WG-4 Wall Guard Installation Instructions
 WG-4 Wall Guard Installation Instructions Architectural Products Division Step 1: Determine top of wall guard and snap a chalk line 1/8 below to locate top of aluminum retainer, see fig 1. Store material
ANCHORS SLEEVE ANCHORS BOLT DIAMETER
 SLEEVE ANCHORS No hole spotting. No mis-alignments. Simply drill through the fixture into concrete, insert and tighten. Preassembled for fast, easy installation. No special tools necessary; meets federal
ED1300/1300F SERIES CONCEALED VERTICAL ROD DEVICE INSTALLATION INSTRUCTIONS
 ED1300/1300F SERIES CONCEALED VERTICAL ROD DEVICE INSTALLATION INSTRUCTIONS Ver.2 1300 SERIES CONCEALED VERTICAL ROD DEVICE Top Strike Latch Screws Strike Screws Release Plunger Top Latch Plunger Screws
SMARTfit High Intensity Cognitive Training. SMARTfit Trainer Installation Manual for Stud and Concrete Walls Revision 1.3
 SMARTfit High Intensity Cognitive Training SMARTfit Trainer Installation Manual for Stud and Concrete Walls Revision 1.3 2015 Unlike other fitness equipment which may require additional insurance, SMARTfit
CIC 200 PLASTIC SCREW ANCHOR ASSORTMENT WITH PHILLIPS BINDING HEAD METAL SCREWS. 6 x 3/4 P/N x 1 METAL SCREW P/N x 3/4 METAL SCREW
 A21-1 1160 CIC 200 PLASTIC SCREW ANCHOR ASSORTMENT WITH PHILLIPS BINDING HEAD S For light duty applications in solid materials Color coded diameters for easy identifi cation Acid resistant NYLON FLANGED:
Inde-Pendants Family. 32L Ring Plaster Trim, Grid and Drywall Ceiling Types. Document No Installation instructions for 32L-Rxx-P
 Inde-Pendants Family 32L Ring Plaster Trim, Grid and Drywall Ceiling Types Installation instructions for 32L-Rxx-P Document No. Supplied by Litecontrol 32L Inde-Pendants: Ring (Plaster Trim, Grid and Drywall
INSTALLATION INSTRUCTION Solorail - Low Voltage Starter Kit
 IMPORTANT SAFETY INSTRUCTIONS: Read all instructions. Turn off power at main switch before installing or modifying the system. Do not install the system: - Within six inches of any curtain or combustible
Preference Collection and Treatment Console INSTALLATION GUIDE
 Preference Collection 5580.69 and 5580.96 Treatment Console INSTALLATION GUIDE WARNING Failure to install the 5580 as described in this installation guide may cause the unit to collapse, resulting in serious
Top Closure Kit Accessory for Music Library System
 Assembly Instructions Top Closure Kit Accessory for Music Library System Contents Required Tools.....................................2 Installation Requirements............................2 Fasteners -
Modern Gatherings 60" TV Console Assembly Instructions
 Parts List Page 1 of 6 No. Description Sketch Quantity A Console 1 B Door 1 Thank you for purchasing this quality product. Be sure to check all packing material carefully for small parts that may have
For installation assistance, contact SARGENT at DOORS SHOWN HERE SWING IN FOR ILLUSTRATION PURPOSES ONLY.
 SARGENT Installation Instructions for LP8600 x LR8600 & 12-LP8600 x 12-LR8600 Series Low Profile Panic and Fire Exit Devices on Double Egress & Double Doors or LS8600 & 12-LS8600 Low Profile Exit Device
CAB END BEDTRAX (SIDE VIEW)
") Supplied Hardware: (8-14) 1/4-20 Allen head bolts, (12-18) UHMW mount blocks, (4) D-ring tie downs Tools Needed: Allen head wrench GET TO IT. INSTALLATION INSTRUCTIONS STEP 1. INSERT (2) MOUNT BLOCKS INTO
Supplied Hardware: (8-14) 1/4-20 Allen head bolts, (12-18) UHMW mount blocks, (4) D-ring tie downs Tools Needed: Allen head wrench GET TO IT. INSTALLATION INSTRUCTIONS STEP 1. INSERT (2) MOUNT BLOCKS INTO