Cam Handle Service Guide
|
|
|
- Elwin Blair
- 5 years ago
- Views:
Transcription
1 Cam Handle Service Guide Page 2. Introduction Page 3. Troubleshooting guide Page 4-5. Adjusting the clamp force Page 6-7. Disassembling, greasing and replacing components Page 8-9. Replacing the post bearings Document # Revision 01 07/22/2008
2 How the cam handle works The head of the dipped handle has an eccentric surface. As the handle is pushed down, the head forces the post plunger assembly inwards. The post is clamped between the post plunger assembly and the post bearing. The post handle pin can be rotated to adjust the clamping force of the handle. STRONG HOLDING FORCE FREE 90 PARALLEL (0 ) Fully down = locked position Fully up = un-locked, able to slide post up and down Parts breakdown (same mechanism for both seat and handlebar clamps) POST 2X - DOME SCREW (M4 X 10) CASTING CAP POST BEARING W/ ADHESIVE SLEEVE RETAINER LOCK WASHER DOME SCREW (M6 X 15) POST PLUG POST HANDLE INDICATOR POST HANDLE PIN POST PLUNGER ASSEMBLY POST HANDLE LIMITER DIPPED HANDLE Document # Revision 01 07/22/2008 Page 2
3 Troubleshooting guide Symptom Possible Cause Solution Post slips down with handle Adjust (increase) clamp force Clamp force adjusted too light clamped down completely(0 ) (see pages 4-5) Post slips down with handle clamped down completely (0 ) Post slips down and handle will not close completely Handle feels rough to open and close Grinding or squeaking sound from handle during opening and closing Clamping assembly loosens after several uses Broken or missing post bearing Clamp force adjusted too tight and clamp is not locking down Needs lubrication, excess wear on parts Needs lubrication, excess wear on parts Dome screw backs due to the post handle pin being rough and rotating with the handle. Replace post bearing (see pages 8-9) Adjust (decrease) clamp force (see pages 4-5) Add grease, replace rough parts as necessary (see pages 6-7) Add grease, replace rough parts as necessary (see pages 6-7) Replace post handle pin, regrease and reassemble (see pages 6-7) Document # Revision 01 07/22/2008 Page 3
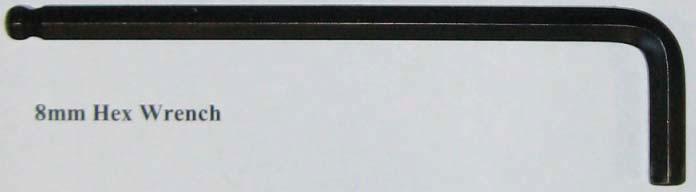
4 Adjusting handle clamping force (From the factory the clamp should be set around lbs to open and close) 1. Lift handle up (90 ) to fully release clamping force. 2. Using a 3mm hex wrench, loosen the M6x15 dome screw to free the post handle pin. Loosen the screw about 2-3 full turns, do not remove completely. Push on dome screw to disengage teeth on opposite side. 3. Using a 6mm hex wrench, turn the head of the post handle pin. Turn the indicator point on the head of the pin towards the plus sign to add clamp force, or towards the minus sign to remove clamp force. There are each tooth represents a change in clamp force. NOTE: Do not rotate head while teeth are still engaged. Document # Revision 01 07/22/2008 Page 4
5 4. Tighten the M6x15 dome screw to secure pin position. 5. Be sure that teeth are fully engages g to prevent the post handle pin from losing its position. 6. Test clamping force by closing handle. The clamp should be set strong enough to hold the user s weight, yet be easy enough for all users to close. Repeat steps 1-6 until desired clamp force is set. NOTE: Proper adjustment should require about lbs of force to close handle. Document # Revision 01 07/22/2008 Page 5
6 Replacing and re-greasing parts 1. Disassemble handle assembly. Tools needed (1) 6mm hex, (1) 3mm hex DOME SCREW (M6 X 15) LOCK WASHER POST HANDLE PIN POST HANDLE INDICATOR POST PLUNGER ASSEMBLY POST HANDLE LIMITER DIPPED HANDLE Step 2 Keep: handle indicator, handle, handle limiter Replace: pin, plunger assembly, washer, fastener Document # Revision 01 07/22/2008 Page 6

")
 Step 3")


7 NEW PIN (ALL AROUND CENTER AREA) NEW PLUNGER (CENTER OF PLATE) HANDLE (CAM SURFACE) Step 3 Add grease to surfaces shown Step 4 Reassemble set clamp force as shown in pages 4-5. Document # Revision 01 07/22/2008 Page 7
8 Replace post bearings POST CASTING CAP ADHESIVE SLEEVE RETAINER POST BEARING POST PLUG Step 1 - Disassemble Undo post plug - Remove post - Remove cap and retainer Discard old post bearing and adhesive RELEASE PAPER NEW ADHESIVE NEW POST BEARING Note: the post bearing and adhesive for the handlebar are longer than for the seat Step 2 Prepare new post bearing Remove release paper and apply new adhesive to the back of the new post bearing Document # Revision 01 07/22/2008 Page 8
9 POST BEARING W/ ADHESIVE Step 3 Install new post bearing Put new post bearing in aligning the tabs. Press bearing with adhesive against inside wall to secure in place. (Steps 1-4 will be the same for both the seat and the handlebar post bearings) Step 4 Reassemble Put parts back together, clamp force should be set from before but if needed, follow instructions on pages 4-5. Document # Revision 01 07/22/2008 Page 9
10 15540 Woodinville-Redmond Rd NE #A100 Woodinville, WA Technical Support (425) ext. 107 or 109 Service Bulletin RevMaster Pro Post Bearing & Plug Upgrade Reason for service: Replace plastic post bearings with overmolded bearings with metal holding tabs. Replace existing post plug assembly with updated post plug assembly. Action Steps: Remove post plug Remove handlebar or seat post Replace plastic bearing with overmolded bearing Reassemble with updated post plugs Doc Rev 01 Sept

11 Tools / Parts List 5mm Hex Wrench 2.5mm Hex Wrench Handlebar Post Bearing Seat Post Bearing Post Plug (2X)
 Tools Required: M5 hex wrench (a) Step 2: (a) Lift handle (b) Remove post (b) Tools Required: None")
12 Replacement Steps Step 1: (a) Loosen fastener at bottom of post plug (b) Remove and discard the old post plug (b) Tools Required: M5 hex wrench (a) Step 2: (a) Lift handle (b) Remove post (b) Tools Required: None (a)
 (a) Step 4: (a) Rotate cap to one side to expose the bearing (b) Remove and discard the old bearing Tools Required: A flathead screwdriver may be necessary to")
13 Replacement Steps (a) (b) Step 3: (a) Remove fastener closest to the bearing (b) Loosen other fastener 1-2 turns Tools Required: M2.5 hex wrench (b) (a) Step 4: (a) Rotate cap to one side to expose the bearing (b) Remove and discard the old bearing Tools Required: A flathead screwdriver may be necessary to free the adhesive on the back of the bearing

 Tighten remaining fastener **Note** Do not over tighten, fastener heads")
14 Replacement Steps (a) (b) Step 5: (a) Insert overmolded sheetmetal bearing (b) Rotate cap back into place **Note** The handlebar uses the longer bearing. Also it is not necessary to reapply the adhesive strip Tools Required: None (a) (b) Step 6: (a) Tighten the fastener that covers the bearing (b) Tighten remaining fastener **Note** Do not over tighten, fastener heads should not push through rubber Tools Required: M2.5 hex wrench
15 Replacement Steps (b) Step 7: (a) Lift handle (b) Reinstall post **Note** Make sure the plunger inside the casting is in place. It may be necessary to push it in by hand from inside the casting while sliding the post down (a) Tools Required: None Step 8: (a) Install the replacement post plug (b) Tighten fastener at bottom of post plug Tools Required: M5 hex wrench (a) (b)
16 Replacement Steps Repeat Steps 1-8 for the seat post **Note** The seat post uses the shorter bearing (a) (b) Step 10: (handlebar and seat) (a) Test handle tension (b) Apply load to test clamping force **Note** The handle should be easy enough to close completely. The clamp force should be strong enough to hold users weight. If the clamp needs to be adjusted see document #300142

17 15540 Woodinville-Redmond Rd NE #A100 Woodinville, WA Technical Support (425) ext. 107 or 109 Service Bulletin RevMaster Pro Bottom Bracket Rework Reason for service: There has been cases where the bottom bracket has come loose and the cranks can potentially shift over to rub the belt cover. Action Steps: Disassemble Belt cover, belt, cranks, bottom bracket Wipe parts clean Add Loctite to bottom bracket cups Reassemble Doc Rev 02 Dev


18 Tools / Parts List Crank Puller Multi-Purpose Grease 8mm Hex Wrench 5mm Hex Wrench Loctite 242 3mm Hex Wrench Bottom Bracket Tool Crank Bolt 2
 Remove Belt Tool 5mm Hex Wrench Remove bolts (4x).")


19 Disassembly Steps (1) Remove Belt Cover Tool 3mm Hex Wrench Remove screws (3x). (2) Remove Belt Tool 5mm Hex Wrench Remove bolts (4x). Wrap towel around belt and pull away from pulley. Rotate crank clockwise as you continue to pull towel away from pulley. * Special Note: Using the towel to help pull the belt off will keep fingers away from pinch points. The high tension of the belt and the sharp pulley teeth may cause serious injury. Rotate crank until belt comes free. 3


20 Disassembly Steps (3) Remove Crank Bolts Left Side Right Side Tool 8mm Hex Wrench Counter-Clockwise to loosen bolts. (4) Remove Cranks Tool 8mm Hex Wrench Counter-Clockwise to loosen bolts. Right Crank Tool Crank Puller Thread puller all the way into crank. Turn puller clockwise to remove crank. * Special Note: Be sure to thread puller tool all the way into the crank threads. More thread engagement will improve the life of the puller tool and help prevent stripping the threads in the cranks. (continued on next page) 4


21 Disassembly Steps Left Crank Remove crank form bike. Repeat steps on other side. * Special Note: Pay attention to the wear on the puller tool. If the teeth start to wear it is best to throw away and use a new puller. This will help avoid stripping the threads on the cranks. (5) Remove Bottom Bracket Right Cup Left Side Tool Bottom Bracket Tool Rotate Clockwise to remove right side cartridge. * right cup is reverse threaded Tool Bottom Bracket Tool Rotate Counter-Clockwise to remove left side cup. 5


22 Cleaning Steps (1) Clean Bottom Bracket Cups and Frame Shell Wipe Bottom Bracket Cartridge with towel to remove any oil. Repeat for left cup. (2) Clean Frame Shell Wipe Shell threads with towel to remove any oil. Repeat for left side. 6


23 Re-installing Bottom Bracket Steps (1) Start threading in cups Install Right Side Cartridge 1-2 threads. Install Left Side Cup 1-2 threads. (2) Add Loctite and finish installing Bottom Bracket Apply a solid bead of Loctite threads in width all around cup. * Apply closer to the frame so as you install the cup the Loctite will spread across all threads. * Loctite will drip so it is best to place paper towels below to catch falling drops. Thread in right side completely (counter-clockwise) and torque to 175 in*lbs. * Special Note: Always install right side all the way to the shoulder before installing left side. (continued on next page) 7


 and torque to 175 in*lbs Wipe away")
 Check Spindle for smooth rotation Turn")

24 Re-installing Bottom Bracket Steps Wipe away excess Loctite. Apply Loctite 242 to Left Cup. * Again, apply closer to the frame so as you install the cup the Loctite will spread across all threads. Thread in left cup completely. (clockwise) and torque to 175 in*lbs Wipe away excess Loctite. (3) Check Spindle for smooth rotation Turn spindle back and forth to make sure spindle rotates freely. If rough feeling then the bearings are damaged and a new bottom bracket is needed. 8


25 Re-assembling the bike (1) Install the cranks Right Side Left Side Grease both sides of the spindle to help the cranks go on completely. 90 Put the cranks on the spindle. Be sure the cranks are 90 from each other. 9


.")
26 Re-assembling the bike (2) Install the crank bolts Insert crank bolts. * Check that the blue nylok patch is present. If the patch is missing, either use a new crank bolt or add a drop of liquid Loctite 242. Install crank bolt (clockwise). Torque to minimum 410 in*lbs. Repeat on other crank. Torque to 410 in*lbs. 10

 to walk belt onto")


27 (3) Install belt Re-assembling the bike Wrap belt around flywheel pulley and idler. Start belt on upper part of crank pulley. Rotate crank pulley (counter-clockwise) to walk belt onto crank pulley. * Special Note: Keep fingers clear of belt and pulley. The high tension of the belt and the sharp pulley teeth may cause serious injury. Continue until belt is completely on the pulley. (4) Re-install belt cover Tool 5mm Hex Wrench Install screws (4x). Tool 3mm Hex Wrench Install screws (3x). 11
 If the pad is new and making noise and very little oil is visible on the")

28 LeMond Fitness Inc Woodinville-Redmond Rd. Suite A-100 (425) Fax: (425) LEMOND REVMASTER PRO LEATHER BRAKE PAD LUBRICATION PROCEDURE Tools Required: 4mm Allen Key 5mm Allen Key INSTRUCTIONS A) If the pad is new and making noise and very little oil is visible on the pad. 1. Remove fender assembly Use 4mm and 5mm Allen Keys to remove the fender pivot bolts. Remove fender assembly from the bike. 2. Oil brake pad leather Place fender assembly with leather pad facing up. Apply brake pad oil supplied with the bike to the leather pad, enough to cover pad evenly, and allow oil to soak into leather. Repeat several times until the leather is saturated and is no longer absorbing oil. Wipe away excess oil that may have run off of the pad. 3. Reinstall fender assembly Use 4mm and 5mm Allen Keys to re-install the fender pivot bolts. Document Revision 01 12/29/2008 1

29 B) If the pad has been used (maintenance) 1. Apply oil to maintain leather brake pad Apply oil directly to the front of the flywheel and rotate the flywheel backward so the oil lubricates the leather pad. Apply as necessary to eliminate noise and improve smooth operation. Regular maintenance checks will improve performance and help increase the life of the leather pad. Suggested check frequency is weekly. For telephone assistance, please contact your local distributor or the Customer Service Department of LeMond Fitness Inc. at from 0800AM 1700PM PST Monday through Friday LeMond Fitness Inc., RevMaster, and LeMond are registered trademarks Document Revision 01 12/29/2008 2


 Use 3mm Allen Key to remove transmitter. (two fasteners) 2. Remove battery cover door Use 2.")
30 LeMond Fitness Inc Woodinville-Redmond Rd. Building B, Suite 888 (425) Fax: (425) LEMOND REVMASTER PRO MAGNET ORIENTATION CHANGE PROCEDURE Tools Required: 2.5mm Allen Key 3mm Allen Key INSTALLATION INSTRUCTIONS Only bikes prior to serial number: LF must follow this procedure. Bikes after this serial number already have the magnet in the correct position/orientation. 1. Remove transmitter (if present) Use 2.5mm Allen Key to remove transmitter door. (one fastener) Use 3mm Allen Key to remove transmitter. (two fasteners) 2. Remove battery cover door Use 2.5mm Allen Key to remove battery cover door. (one fastener) Document Revision 01 12/23/2008 1


31 3. Remove magnet, change orientation and re-install Use 3mm Allen Key to loosen the fastener holding the magnet housing to the pulley. Only loosen enough to allow the magnet to slide out freely. Change from original orientation to the orientation shown below. The new positions will depend on which pulley configuration you have. Pay close attention to the pictures. Sheet Metal Bracket Configuration: BEFORE AFTER \ Die Cast Bracket Configuration: BEFORE AFTER When in new position, use the 3mm Allen Key to tighten the fastener. Tighten enough to secure the magnet but not enough to crack the plastic housing. Document Revision 01 12/23/2008 2


32 Rotate the crank slowly by hand to test and make sure the magnet does not contact any other components through the full rotation. 4. Install covers and transmitter Reinstall covers and transmitter in the reverse order that they were removed. Pay attention to the length of the fasteners to use the correct length on the magnet door (short), and transmitter door (long). Refer to picture for reference. For telephone assistance, please contact your local distributor or the Customer Service Department of LeMond Fitness Inc.. at x109 from 0800AM 1700PM PST Monday through Friday LeMond Fitness Inc., RevMaster, and LeMond are registered trademarks Document Revision 01 12/23/2008 3


33 LeMond Fitness Inc Woodinville-Redmond Rd. Building B, Suite 888 (425) Fax: (425) LEMOND REVMASTER PRO FRONT AND REAR STABILIZERS INSTALLATION PROCEDURE Tools Required: 6mm Allen Key INSTALLATION INSTRUCTIONS 1. Setup Place front stabilizer at the front of the bike. (with wheels forward) Place rear stabilizer at the rear of the bike. Note hole positioning. 2. Attach front and rear stabilizers TOP BOLTS ONLY Set the frame up on the front and rear stabilizers. Attach the top four M8 fasteners with star washers. Install most of the way, do not tighten. WARNING: START BY HAND, IF POWER TOOLS USED TO START THREADS, THEN THE TAPPED HOLE CAN BE STRIPPED AND THE STABILIZER WILL HAVE TO BE REPLACED. Document Revision 01 12/23/2008 1


34 3. Tilt bike and install bottom bolts Tilt bike forward to access the bottom bolt holes. A box may be needed to rest the bars or track on to protect more fragile items such as the water bottle holder, cadence meter or handles. Attach the bottom four M8 fasteners. Depending on the accessory kit, there may be star washers or curved solid washers available. The stabilizer may need to be rotated to get the holes to align. This is the reason for not fully tightening the top bolts in Step 2. If using the curved washers, align the curve of the washer to match the curve of the frame. WARNING: START BY HAND, IF POWER TOOLS USED TO START THREADS, THEN THE TAPPED HOLE CAN BE STRIPPED AND THE STABILIZER WILL HAVE TO BE REPLACED. Once all 8 bolts are threaded in, follow up with a 6mm Allen Key and torque to in*lbs. Document Revision 01 12/23/2008 2

35 4. Attach stretch pad Place stretch pad over the rear stabilizer/frame junction. Install two M8 fasteners. Secure but do not over tighten to the point that the rubber is pinched. For telephone assistance, please contact your local distributor or the Customer Service Department of LeMond Fitness Inc.. at x109 from 0800AM 1700PM PST Monday through Friday LeMond Fitness Inc., RevMaster, and LeMond are registered trademarks Document Revision 01 12/23/2008 3
Service Bulletin RevMaster Pro Bottom Bracket Rework
 15540 Woodinville-Redmond Rd NE #A100 Woodinville, WA 98027 Technical Support (425) 482-6773 ext. 107 or 109 Service Bulletin RevMaster Pro Bottom Bracket Rework Reason for service: There has been cases
The Bowflex Revolution XP Home Gym Assembly Instructions. P/N: Rev ( /0 )
") P/N: 001-7057 Rev ( /0 ) The Bowflex Revolution XP Home Gym Assembly Instructions 2 Table of Contents Before You Start... 2 Tools You Will Need / Hardware Contents... 3 Box Contents... 6 Assembling Your
P/N: 001-7057 Rev ( /0 ) The Bowflex Revolution XP Home Gym Assembly Instructions 2 Table of Contents Before You Start... 2 Tools You Will Need / Hardware Contents... 3 Box Contents... 6 Assembling Your
Inventory (Figure 2)
") MODEL T10127 12" SPIRAL CUTTERHEAD INSTRUCTIONS The Model T10127 indexable insert spiral cutterhead is designed to replace the straightknife cutterhead from the Grizzly jointer Model G0609. The total procedure
MODEL T10127 12" SPIRAL CUTTERHEAD INSTRUCTIONS The Model T10127 indexable insert spiral cutterhead is designed to replace the straightknife cutterhead from the Grizzly jointer Model G0609. The total procedure
MODEL H " BYRD SHELIX CUTTERHEAD INSTRUCTIONS
 MODEL H9291 12" BYRD SHELIX CUTTERHEAD INSTRUCTIONS The Model H9291 12" Byrd Shelix cutterhead is designed to replace the straight-knife cutterhead on the Grizzly jointer Model G0609. The total procedure
Installation Instructions
 The IMS ETERNAL FIX PATENT PENDING Installation Instructions EPS recommends professional installation for the Eternal IMS Fix. Please take all precautionary safety measures. We also recommend putting the
LEG CURL IP-S1315 INSTALLATION INSTRUCTIONS
 LEG CURL IP-S35 INSTALLATION INSTRUCTIONS Copyright 2009. Star Trac by Unisen, Inc. All rights reserved, including those to reproduce this book or parts thereof in any form without first obtaining written
Chin Strap, Sealed Pull Pins and Swing Catch for Fiberglass Helmets. Contents
 Chin Strap Chin Strap, Sealed Pull Pins and Swing Catch for Fiberglass Helmets Contents BTM-1 1.1 Chin Strap BTM-4 1.2.3.1 Preparation BTM-1 1.1.1 Chin Strap Removal BTM-4 1.2.3.2 Disassembly BTM-1 BTM-2
DO35 MAINTENANCE INSTRUCTIONS
 CUSTOMER INFORMATION SHEET NO. 038 DO35 MAINTENANCE INSTRUCTIONS (DO35 V3 LAUNCHED PRODUCTION JUNE 2017) Table of Contents 1.0 Replacing Spindle Bushes V3... 22 2.0 Replacing Locking Mechanism V3... 6
REPAIR INSTRUCTIONS. Cat. No Cat. No MILWAUKEE ELECTRIC TOOL CORPORATION. SDS Max Demolition Hammer. SDS Max Rotary Hammer
 Cat. No. 9-0 SDS Max Demolition Hammer Cat. No. -0 SDS Max Rotary Hammer MILWAUKEE ELECTRIC TOOL CORPORATION W. LISBON ROAD BROOKFIELD, WISCONSIN 00-0 8-9-0 d 000 8-9-0 d Special Tools Require Forcing
RTI TECHNOLOGIES, INC.
 RTI TECHNOLOGIES, INC. BRC500 & BRC550 Arbor/Spindle Mechanism Adjustment & Service Technical Instructions The arbor/spindle mechanism of the BRC500/550 is designed to be robust for long life. Occasionally
Hollywood Swing Away 2 and 4 Bike Racks Assembly and Installation Guide
 Hollywood Swing Away 2 and 4 Bike Racks Assembly and Installation Guide Tools Required: two adjustable wrenches, pliers, ¾ socket wrench recommended Note: please do assembly near your vehicle as you Can
Nancy s Knit Knacks LLC 4 Yard Option Upgrade Kit Assembly Instructions and User Manual
 Nancy s Knit Knacks LLC 4 Yard Option Upgrade Kit Assembly Instructions and User Manual Thank you for purchasing our 4 Yard Option (4YO) Upgrade Kit. To install this upgrade you are simply going to assemble
400A 40113V, 401A 40120V, & 401AL 40120VL ALUMINUM VERTICAL 4000 LB LIFT INCLUDES SCREW LEG ASSEMBLY INSTRUCTIONS
 12/11/07 PAGE 1 OF 12 400A 40113V, 401A 40120V, & 401AL 40120VL ALUMINUM VERTICAL 4000 LB LIFT INCLUDES SCREW LEG ASSEMBLY INSTRUCTIONS Thank you for purchasing our product! *Please read these instructions
OPERATION & MAINTENANCE MANUAL
 OPERATION & MAINTENANCE MANUAL AUTOMATIC PECAN CRACKER Food Processing Equipment and Machinery Specializing in the Pecan Industry Mailing: PO Box 817, Mansfield, Louisiana 71052 Located: 280 Independence
C a r r i a g e A s s e m b l y R e p l a c e m e n t
 E1 TF-CR C a r r i a g e A s s e m b l y R e p l a c e m e n t October 2007 Software Version 5.0 and higher IMPORTANT! TigerStop must be enabled with a code that must be obtained from TigerStop Customer
Inventory (Figure 2)
") MODEL T10130/T10126 6" & 8" SPIRAL CUTTERHEAD INSTRUCTIONS The Model T10126/T10130 indexable insert spiral cutterheads are designed to replace straightknife cutterheads from the Grizzly jointer Models
MODEL T10130/T10126 6" & 8" SPIRAL CUTTERHEAD INSTRUCTIONS The Model T10126/T10130 indexable insert spiral cutterheads are designed to replace straightknife cutterheads from the Grizzly jointer Models
Lumber Smith. Assembly Manual. If you are having problems assembling the saw and need assistance, please contact us at:
 Lumber Smith Assembly Manual If you are having problems assembling the saw and need assistance, please contact us at: 804-577-7398 info@lumbersmith.com 1 Step 1 Safety Carefully read the Owners Manual.
MEC Auto-Mate Assembly Manual. For MEC 9000G/GN and 8567 Grabber Series
 MEC Auto-Mate Assembly Manual For MEC 9000G/GN and 8567 Grabber Series Thank you We really appreciate your support of our product line. But our commitment to you hardly ends here. We won't be satisfied
Assembly Instructions
 P/N 8650/8655 Assembly Instructions NOTE: Your Sherline CNC Cam Grinder is double boxed and secured to a wooden shipping frame. Upon delivery, check the outer box for damage. If the box is damaged, take
MODEL T " SPIRAL CUTTERHEAD INSTALLATION INSTRUCTIONS
 MODEL T27449 8" SPIRAL CUTTERHEAD INSTALLATION INSTRUCTIONS The Model T27449 indexable insert spiral cutterhead is designed to replace the straightknife cutterhead on the Grizzly jointer Model G0490W/G0490XW
OPERATIONAL MANUAL V1.0. Removing/Replacing Blades
 OPERATIONAL MANUAL V1.0 BLUEROCK WS-212 Wire Stripper Removing/Replacing Blades CAUTION!! IMPORTANT!! DANGER!! WARNING!! DISCONNECT MACHINE FROM POWER BEFORE PROCEEDING!! Estimated Completion Time: 90
MAG-CONV Basic, 48, 48R & Midline Front Mount
 Parts Required: Tools Used: Mag Wheels Brakes Brake Rods Mounting Bracket Anti Tippers 7/16" Wrench Screw Driver Rubber Mallet 5/8 Wrench 5mm Allen Wrench Step Execution Figures 1 Remove front 5" total
DUAL ADJUSTABLE PULLEY IP-D9302 INSTALLATION INSTRUCTIONS
 DUAL ADJUSTABLE PULLEY IP-D9302 INSTALLATION INSTRUCTIONS Copyright 2010. Star Trac by Core Industries, Inc. All rights reserved, including those to reproduce this book or parts thereof in any form without
Small Block Ford. 289 / 302 / 351W / 5.0 Installation Manual For Systems with A/C #13600 / #13620
 Small Block Ford 289 / 302 / 351W / 5.0 Installation Manual For Systems with A/C #13600 / #13620 Billet Specialties, Inc. 500 Shawmut Avenue. La Grange, Illinois 60526 Tech Line (708) 588-0505 Fax (708)
ELECTRIC TOOL CORPORATION
 Cat. No. -0 / Hex Demolition Hammer Cat. No. 0-0 Spline Rotary Hammer MILWAUKEE ELECTRIC TOOL CORPORATION W. LISBON ROAD BROOKFIELD, WISCONSIN 00-0 -9-00 d 000 -9-00 d SpecialTools Require Forcing discs
Removing and Replacing the Y-truck
 Service Documentation Removing and Replacing the Y-truck To remove and replace the Y-truck you will need the following tools: 4mm Allen wrench 12mm stamped flat wrench #2 Phillips screwdriver (magnetic
Assembly Instructions: AM-10 Hand & Foot Cycle Early Intervention Part #: 50-HFC-0105
 Assembly Instructions: AM-10 Hand & Foot Cycle Early Intervention Part #: 50-HFC-0105 Refer to the following instructions on how to assemble your tryke. Study the instructions carefully before beginning
Astro-Physics Inc. 400QMD Lubrication/Maintenance Guide
 Astro-Physics Inc. 400QMD Lubrication/Maintenance Guide The following guidelines should be followed to lubricate the three main parts of the 400QMD mount. The QMD stands for Quartz Micro-Drive controller.
SAVE THIS FOR FUTURE REFERENCE THIS PRODUCT IS FOR PROFESSIONAL LABORATORY USE ONLY USER'S MANUAL
 DENTAL, INC. TECHNICAL BULLETIN G801-022510 5860 FLYNN CREEK ROAD READ ALL INSTRUCTIONS P.O. BOX 106 BEFORE PROCEEDING COMPTCHE, CALIFORNIA, U.S.A. 95427-0106 SAVE THIS FOR FUTURE REFERENCE www.wellsdental.com
SERVICE PARTS LIST. M18 FUEL SAWZALL Reciprocating Saw F56A BULLETIN NO CATALOG NO
 47(5x) 46 45 00 44 0 59 43 42 84 51 57 46 47 48 59 83 64 77 48 47(2x) 49(2x) 40 58 See service note on page 5 41 82 51 40 41 42 43 44 45 87 52 27 28 34 57 29 (6x) 60 28 EXAMPLE: Component Parts (Small
H8508 Impact Wrench SERVICE MANUAL. Model (Serial Code FWN) Model (Serial Code FWP)
 Model (Serial Code FWP)") SERVICE MANUAL H8508 Impact Wrench Model 48755 (Serial Code FWN) Model 48760 (Serial Code FWP) Read and understand all of the instructions and safety information in this manual before operating or servicing
SERVICE MANUAL H8508 Impact Wrench Model 48755 (Serial Code FWN) Model 48760 (Serial Code FWP) Read and understand all of the instructions and safety information in this manual before operating or servicing
OWNERS MANUAL MODEL F660 HIP SLED
 OWNERS MANUAL MODEL F HIP SLED QUESTION? As a quality home gym supplier we are committed to your complete satisfaction. If you have questions, or find missing or damaged parts, we will guarantee your complete
Elimination of Elevator Bounce
 For the Agilent Archon Autosampler Rework Instructions CAUTION This kit is intended for use by Agilent Service personnel only. Elevator Removal 1 Open top cover. 2 Open front lower door. 3 Remove vial
Model: SCD430 SCD640. Installation & Operation Guide P/N SCD640-95
 Model: SCD430 SCD640 Installation & Operation Guide P/N SCD640-95 Model SCD430 and SCD640 Kurt has two Self-Centering vises, a four-inch jaw width (SCD430) and a six-inch jaw width (SCD640). Jaw opening
MS25 OPERATION MANUAL
 SAFETY INSTRUCTIONS SPECIFICATIONS OPERATING INSTRUCTIONS MAINTENANCE ADJUSTMENTS REPLACEMENT OF PARTS MS25 DIAGRAM MS25 PARTS LIST MS25 OPERATION MANUAL SAFETY INSTRUCTIONS Please read these instructions
1904, 1904Pg, 1904PgSB, and 1906SB High Capacity Ratchet Knockout Drivers
 INSTRUCTION MANUAL 1904, 1904Pg, 1904PgSB, and 1906SB High Capacity Ratchet Knockout Drivers Read and understand all of the instructions and safety information in this manual before operating or servicing
Maintenance & Parts list for:
 Maintenance & Parts list for: Industrial gun GB 2 Juni 2017 This Maintenance & Parts list for industrial gun is prepared by : Winchester Europe Service V. Parbst & Søn as a comprehensive maintenance guide
STRINGING MACHINE OWNER'S MANUAL. Copyright 1998 GAMMA Sports - All Rights Reserved
 6002 STRINGING MACHINE OWNER'S MANUAL Issue 3 - June 20, 1998 Copyright 1998 GAMMA Sports - All Rights Reserved 6002 OWNER'S MANUAL TABLE OF CONTENTS PAGE 1... WARRANTY PAGE 2... FEATURES PAGE 3... ASSEMBLY
Bearing Overhaul Instructions for: Tallboy (.1) 2009
 2009") Bearing Overhaul Instructions for: Tallboy (.1) 2009 Tools Needed: 7900 Removal Tool 7902 Removal Tool 7900/7902/6902 Press Tool Grease Gun (included with frame) (2) ll/16" or adjustable wrenches 9/16"
Bearing Overhaul Instructions for: Tallboy (.1) 2009 Tools Needed: 7900 Removal Tool 7902 Removal Tool 7900/7902/6902 Press Tool Grease Gun (included with frame) (2) ll/16" or adjustable wrenches 9/16"
LPK1550 Hydraulic Crimping Tool 15-ton
 SERVICE MANUAL LPK1550 Hydraulic Crimping Tool 15-ton Serial Code FYF Read and understand all of the instructions and safety information in this manual before operating or servicing this tool. Register
Serial Number Location
 GL/GLX STRENGTH TRAINING SYSTEM OWNERS MANUAL Serial Number Location SERIAL 3 4 5 7 8 Record your Serial number and purchase date here: S/N DATE: DEALER: Model No. BCG-GL BODYCRAFT is a division of Recreation
HDL(M)6 Nut/Screw Assembly
6 Nut/Screw Assembly") HDL(M)6 Nut/Screw Assembly Remove, repair, and reassemble the nut and screw assembly in your HDL series double lock vise. In these instructions when we refer to the front of the vise or nut/screw assembly,
HDL(M)6 Nut/Screw Assembly Remove, repair, and reassemble the nut and screw assembly in your HDL series double lock vise. In these instructions when we refer to the front of the vise or nut/screw assembly,
N. 15th Street, Middlesboro, KY FLIP TARP DUMP BODY INSTALLATION INSTRUCTIONS
 1-800-248-7717 1002 N. 15th Street, Middlesboro, KY 40965 FLIP TARP DUMP BODY INSTALLATION INSTRUCTIONS Congratulations on your purchase of a Mountain Flip Tarp Dump Body tarping system. With tarping systems
TITAN2-EDGE Public Access Computer Station Dual Track
 TITAN2-EDGE Public Access Computer Station Dual Track TITAN2-EDGE Rev A 6/17 Model TITAN2-EDGE ASSEMBLY AND ADJUSTMENT TITAN2-EDGE PARTS AND TOOLS PLEASE REVIEW these instructions before beginning the
ABM International, Inc.
 ABM International, Inc. Lightning Stitch required 1 1.0: Parts List head and motor assembly (Qty. 1) Reel stand (Qty. 1) Needle bar frame clamp (Qty. 1) Motor drive (Qty. 1) 2 Cable harness with bracket
3.2.3 Rear Door Window and Quarter Window Carrier Assembly
 Tighten all bolts. Tighten bolts marked -1- and -2- in specified sequence. Tightening torque: 8 Nm Remaining bolts can be tightened in any sequence. Insert door window -3- through window recess without
Hardware and Components:
 Hardware and Components: (A) 5/16 x 2 Hex Bolt (B) 5/16 x 2-1/4 Hex Bolt (C) 5/16 x 2-1/2 Hex Bolt (D) 4X 5/16 x 3/4 Hex Bolt (E) 4X 5/16 x 1-1/4 Hex Bolt (F) 11X 5/16 Flat Washer (G) 12X 5/16 Nylock Nut
Hardware and Components:
 Hardware and Components: (A) 4X 5/16 x 1 Carriage Bolt (B) 2X 5/16 x 2-1/4 Carriage Bolt (C) 2X 5/16 x 3-1/4 Hex Bolt (D) 2X 5/16 x 3/4 Hex Bolt (E) 2X 5/16 x 1-1/4 Hex Bolt (F) 5/16 x 2-1/4 Hex Bolt (G)
INSTALLATION OF WELLS SUPER QUICK CHUCK LEFT HAND ON RED WING LATHE
 DENTAL, INC. TECHNICAL BULLETIN Q824-022510 5860 FLYNN CREEK ROAD READ ALL INSTRUCTIONS P.O. BOX 106 BEFORE PROCEEDING COMPTCHE, CALIFORNIA, U.S.A. 95427 SAVE THIS FOR FUTURE REFERENCE www.wellsdental.com
re3d Assembling Gigabot: "Flatpack"
 re3d Assembling Gigabot: "Flatpack" Your Gigabot was assembled, calibrated, tested, and taken apart for shipping purposes. All you need to do is reassemble it, and you're ready to go! Written By: Chris
MODEL SK61732 COMPRESSOR SERVICE KIT
 MODEL SK61732 COMPRESSOR SERVICE KIT For use on 607 and 617 Model Compressors with.32 Stroke WARNING: Unplug the compressor before beginning disassembly. CAUTION: Improper assembly or use of damaged parts
TABLE OF CONTENTS CHAPTER 1: IMPORTANT SAFETY INSTRUCTIONS
 TABLE OF CONTENTS CHAPTER 1: IMPORTANT SAFETY INSTRUCTIONS PAGES 1.1 Read and Save These Instructions... 02 1.2 Proper Usage... 02 1.3 Setting up the Krankcycle... 02 CHAPTER 2: KRANKCYCLE SPECIFICATIONS,
Technical Procedure. HIITMill (X) Push/Pull Brake Cable Install
 Push/Pull Brake Cable Install") HIITMill (X) Push/Pull Brake Cable Install Applies to: HIITMill and HIITMill X Required Tools: 2.5mm Allen Key 3mm Allen Key 4mm Allen Key 5mm Allen Key 6mm Allen Key 10mm Wrench 10mm Socket Ratchet Needle
HIITMill (X) Push/Pull Brake Cable Install Applies to: HIITMill and HIITMill X Required Tools: 2.5mm Allen Key 3mm Allen Key 4mm Allen Key 5mm Allen Key 6mm Allen Key 10mm Wrench 10mm Socket Ratchet Needle
Removing the Z-Axis lead screw
 Page 1 of 8 TITLE: Sabre Z-Axis Lead Screw Replacement Procedure Gerber FastFact #: 5048 Supplied by: Gerber Hardware Support Last Modified: June 14, 2007 Summary: Tools used: The following procedure explains
DRIVE COMPONENTS REMOVAL. 9. FXCW/C: see Figure Remove bolt (9), sprocket retainer (8), and thrust washer (7). NOTE PRIMARY DRIVE LOCKING TOOL
, sprocket retainer (8), and thrust washer (7). NOTE PRIMARY DRIVE LOCKING TOOL") DRIVE COMPONENTS REMOVAL PART NUMBER HD-7977 TOOL NAME PRIMARY DRIVE LOCKING TOOL S To remove the primary chain, remove compensating sprocket, clutch assembly and primary chain as an assembly:. Remove
DRIVE COMPONENTS REMOVAL PART NUMBER HD-7977 TOOL NAME PRIMARY DRIVE LOCKING TOOL S To remove the primary chain, remove compensating sprocket, clutch assembly and primary chain as an assembly:. Remove
Maintenance Information
 16601023 Edition 2 January 2014 Air Impact Wrench 2705P1 Maintenance Information Save These Instructions Product Safety Information WARNING Failure to observe the following warnings, and to avoid these
SERIES I MILLING MACHINES
 INSTALLATION, OPERATION, MAINTENANCE, AND PARTS LIST SERIES I MILLING MACHINES TP5260 Revised: August 29, 2005 Manual No. M-450 Litho in U.S.A. Part No. M -0009500-0450 June, 2003 MAINTENANCE PROCEDURES
WARNING Indicates a hazardous situation which, if not avoided, could result in death or serious injury. WARNING. Ranger XP Door Kit
 REVISION 04 November, 20 2018 Ranger XP Door Kit Prior to installation, please verify if a revised version of this instruction sheet is available on Knowledge Center. The following symbols may be used
FLIP TARP SINGLE & DOUBLE UNDERBODY TRAILERS
 1-800-248-7717 1002 N. 15th Street, Middlesboro, KY 40965 FLIP TARP SINGLE & DOUBLE UNDERBODY TRAILERS INSTALLATION INSTRUCTIONS Congratulations on your purchase of a Mountain Flip Tarp Trailer system.
Crestline Dampening System. Installation Instructions. Hamada RS34 & VS34 Parent Unit DU34 Upper Unit. For Presses Originally Equipped With
 Crestline Dampening System Installation Instructions Hamada RS34 & VS34 Parent Unit DU34 Upper Unit For Presses Originally Equipped With Molleton Dampeners X88-78 01/2001 Rev-A GENERAL INFORMATION ATTENTION
2300 Series DustPruf End Drive Conveyors
 00 Series DustPruf End Drive Conveyors Installation, Maintenance and Parts Manual Featuring: DORNER MFG. CORP. INSIDE THE USA OUTSIDE THE USA P.O. Box 0 975 Cottonwood Ave. TEL: -800-97-866 TEL: 6-67-7600
Important Loading Information. Tools Required. Meridian Lateral Files Instructions
 Y Meridian Lateral Files Instructions! WARNING Failure to observe stated capacities below will result in unsafe usage conditions, causing possible product damage or personal injury. Important Loading Information
STENCIL MACHINE OPERATION uline.com H-259, H-347 H-408 CUTTING THE OIL BOARD INSERTING THE OIL BOARD
 H-259, H-347 H-408 π STENCIL MACHINE 1-800-295-5510 uline.com OPERATION NOTE: No assembly is necessary after you unpack your machine. INSERTING THE OIL BOARD 1. Move the release lever to the right. This
Usage and Assembly Instructions
 Instructions #1037447 Product #795234 Revision D Usage and Assembly Instructions Rear Fork (Buttstock) Rear Fork Lock Knob Rail Lock Knob Front Fork (Forend) Rails Tilt Friction Knob Rail Extension Locks
Assembly & Disassembly Guide
 Carvable Jaw Block Assembly & Disassembly Guide quincy\prod. Setup info\jawkits\jawkit setup guide P/N CARV-95, REV C 02/18/03 Index: Page Revision History... 1 Sec. Carvlock/ Fixture Vise 1.0 Jaw Block
MODEL T " HELICAL CUTTERHEAD INSTALLATION INSTRUCTIONS
 MODEL T27696 12" HELICAL CUTTERHEAD INSTALLATION INSTRUCTIONS For questions or help with this product contact Tech Support at (570) 546-9663 or techsupport@grizzly.com Introduction The Model T27696 indexable
Warnings. Description. Prior to Installation Tools Needed
 Warnings Failure to act in accordance with the following may result in death or personal injury. The JT Strong Arm Stabilizer System is intended to eliminate chassis movement in travel trailers and fifth
It is highly recommended that you use a thread lock compound such as Loctite brand on all threads to keep them from vibrating loose.
 Installation instructions for FC12 Forward Controls for Kawasaki Vulcan 750 It is highly recommended that you use a thread lock compound such as Loctite brand on all threads to keep them from vibrating
Star Trac Turbo Trainer Assembly & Setup
 Star Trac Turbo Trainer Use the following procedures to unpack and assemble your Turbo Trainer manufactured by Star Trac. UNPACKING AND PARTS LIST Position the shipping carton so the Heavy End logo is
INSTALLATION MANUAL FRONT. See pages 2 and 3 of this manual for configuration options. Level of Difficulty. Product Photo (center section only)
") INSTALLATION MANUAL FRONT Level of Difficulty Moderate Product Photo (center section only) All hardware listed below will be provided with the bumpers center section. Additional hardware will be supplied
INSTALLATION MANUAL FRONT Level of Difficulty Moderate Product Photo (center section only) All hardware listed below will be provided with the bumpers center section. Additional hardware will be supplied
ABM International, Inc. Navigator Assembly Manual
 ABM International, Inc. 1 1.0: Parts List Tablet (Qty. 1) Tablet mount (Qty. 1) NOTE: Mount may appear and operate different then image below Control Box (Qty. 1) Motor Power Supply (Qty. 1) 2 X-axis motor
Jenny Legs Assembly Instructions
 Jenny Legs Assembly Instructions R EXTENDED PHILLIPS BIT MM ALLEN WRENCH 6MM HEX DRIVE /" 007 Steelcase Inc. Grand Rapids, MI 90 U.S.A. Printed in U.S.A. Page of 6 88000 Rev F Jenny Club Instructions:
2200 Series End Drive Conveyors
 00 Series End Drive Conveyors Installation, Maintenance & Parts Manual DORNER MFG. CORP. INSIDE THE USA OUTSIDE THE USA P.O. Box 0 975 Cottonwood Ave. TEL: -800-97-866 TEL: 6-67-7600 Hartland, WI 509-000
TRAILMATE METEOR ASSEMBLY MANUAL
 TRAILMATE METEOR ASSEMBLY MANUAL The Trailmate Meteor recumbent has been designed for easy assembly. This means more time to enjoy the smooth ride with single speed, 3 speed coaster brake and 21 speed
SAVE THIS FOR FUTURE REFERENCE THIS PRODUCT IS FOR PROFESSIONAL LABORATORY USE ONLY USER'S MANUAL
 DENTAL, INC. TECHNICAL BULLETIN Q827-022510 5860 FLYNN CREEK ROAD READ ALL INSTRUCTIONS P.O. BOX 106 BEFORE PROCEEDING COMPTCHE, CALIFORNIA, U.S.A. 95427 SAVE THIS FOR FUTURE REFERENCE www.wellsdental.com
Assembly Guidelines for Matrix Strength Equipment
 Assembly Guidelines for Matrix Strength Equipment For use at Assembly, Installation & Service Key: Axle Arm 180 N-m / 133 ft.lb. M10 Bolt & Nut 77 N-m / 57 ft.lb. M10 Bolt & Frame Rivnuts 40 N-m / 30 ft.
Ford FE Installation Manual For Systems with A/C #14700 / #14720
 Ford FE Installation Manual For Systems with A/C #14700 / #14720 Billet Specialties, Inc. 500 Shawmut Avenue. La Grange, Illinois 60526 Tech Line (708) 588-0505 Fax (708) 588-7181 PLEASE READ ALL INSTRUCTIONS
200A FLB VERTICAL 22113V LIFT W/CHAIN DRIVE WINCH
 PG. 1 OF 11 PORTA-DOCK, INC. 200A FLB VERTICAL 22113V LIFT W/CHAIN DRIVE WINCH STEP 1. Separate and group like parts and fasteners together. Locate the winch side member with the longer upright tube and
Ringblaster Mark IV Maintenance Guide. Version 1.5
 Ringblaster Mark IV Maintenance Guide Version 1.5 WARNING Winchester Industrial Equipment and Loads must be properly stored, handled and maintained for safe and proper function. Mishandling or failure
ULTRAFEED INDUSTRIAL TABLE PACKAGES Set-up Guide for #120931, # & #121091
 120932*1 Instructions for Sailrite Ultrafeed Industrial Table Packages ULTRFEE INUSTRIL TBLE PKGES Set-up Guide for #120931, #120934 & #121091 2 Ultrafeed Industrial Table Packages The Ultrafeed Industrial
Inventory MODEL H7937 TAPER ATTACHMENT FOR THE G0600 LATHE INSTRUCTIONS. Inventory (Figure 1) Needed Items
 Needed Items") MODEL H7937 TAPER ATTACHMENT FOR THE G0600 LATHE INSTRUCTIONS Inventory The Model H7937 taper attachment was carefully packed when it left our warehouse. If you discover it is damaged after you have signed
MODEL H7937 TAPER ATTACHMENT FOR THE G0600 LATHE INSTRUCTIONS Inventory The Model H7937 taper attachment was carefully packed when it left our warehouse. If you discover it is damaged after you have signed
Assembly. Item G7 Qty 1. Item D4. M10 x 55 mm Allen Bolt. Item D5. Qty 2. Item E13 Qty 4 M10 Flat Washer. Item B18. M8 x 30 mm Allen Bolt (Black)
") ACCESSORY FITMENT LIST These are all the accessories you will need to complete the assembly of your product. The following accessories are supplied in a pack and should be checked before attempting assembly
ACCESSORY FITMENT LIST These are all the accessories you will need to complete the assembly of your product. The following accessories are supplied in a pack and should be checked before attempting assembly
M2 Assembly. M2 Sub-Assemblies mm Belt Sub-Assembly mm Belt Sub-Assembly Spider Sub-Assembly... 4
 M2 Assembly Table of Contents M2 Sub-Assemblies... 3 630mm Belt Sub-Assembly... 3 702mm Belt Sub-Assembly... 3 Spider Sub-Assembly... 4 Idler Bolt Sub-Assembly... 8 Y Motor Sub-Assembly... 9 X Motor Sub-Assembly...
WEIGHT ADJUSTABLE ESPREE. Model 2ESP-WA-C48- Model 2ESP-WA-C60- 2ESP-WA Rev B 8/17 ASSEMBLY AND OPERATION
 WEIGHT ADJUSTABLE ESPREE PNEUMATIC TABLE BASE 2ESP-WA Rev B 8/17 Model 2ESP-WA-C48- Model 2ESP-WA-C60- = SLV, BLK or WHT ASSEMBLY AND OPERATION PARTS AND TOOLS PLEASE REVIEW these instructions before beginning
3200 Series Modular Belt Straight Conveyors
 00 Series Modular Belt Straight Conveyors Installation, Maintenance and Parts Manual Flat Modular Belt Conveyor Modular Belt Z-Frame Conveyor Available with: DORNER MFG. CORP. INSIDE THE USA OUTSIDE THE
TABLE OF CONTENTS CHAPTER 1: IMPORTANT SAFETY INSTRUCTIONS. 1.1 Read and Save These Instructions Proper Usage... 02
 Krankcycle_091021.indd 1 TABLE OF CONTENTS CHAPTER 1: IMPORTANT SAFETY INSTRUCTIONS PAGES 1.1 Read and Save These Instructions... 02 1.2 Proper Usage... 02 1.3 Setting up the KRANKcycle... 02 CHAPTER 2:
OPERATOR'S MANUAL 46" SNOW BLADE. Model Numbers OEM IMPORTANT: READ SAFETY RULES AND INSTRUCTIONS CAREFULLY
 OPERATOR'S MANUAL 46" SNOW BLADE Model Numbers 190-833-OEM IMPORTANT: READ SAFETY RULES AND INSTRUCTIONS CAREFULLY MTD PRODUCTS INC. P.O. BOX 368022 CLEVELAND, OHIO 44136-9722 PRINTED IN U.S.A. FORM NO.
Side Winder R o u t e r L i f t.
 Woodpeckers PRECISION WOODWORKING TOOLS Side Winder R o u t e r L i f t. INSTALLATION INSTRUCTIONS The wrench handle must be pointing left in order to fully insert or remove it. Lift Wrench Once fully
TorqueMaster Replacement Spring
 TorqueMaster Replacement Spring Installation Instructions NOTE: Use these installation instructions in conjunction with the TorqueMaster Repair / Replacement Spring Program literature. Copyright 999 Wayne-Dalton
Cut-True 16M Manual Paper Cutter
 Cut-True 16M Manual Paper Cutter 2/2013 OPERATOR MANUAL FIRST EDITION TABLE OF CONTENTS TOPIC PAGE Specifications 1 Safety Guidelines 1 Assembly 2 Overview 3 Description of Equipment Parts 3-4 Operation
1 of 2 3/3/2017 4:49 PM
 1 of 2 3/3/2017 4:49 PM Front Door Window, Assembly Overview 1 - Window guide - Inserted on flange 2 - Door 3 - Inner window recess seal - Inserted on flange 4 - Bolt - 20 Nm 5 - Carrier assembly - Window
Inventory MODEL T10096 TAPER ATTACHMENT FOR G0509 & G0509G LATHE INSTRUCTIONS. Inventory (Figure 1) Needed Items
 Needed Items") MODEL T10096 TAPER ATTACHMENT FOR G0509 & G0509G LATHE INSTRUCTIONS Inventory The Model T10096 taper attachment was carefully packed when it left our warehouse. If you discover it is damaged after you
MODEL T10096 TAPER ATTACHMENT FOR G0509 & G0509G LATHE INSTRUCTIONS Inventory The Model T10096 taper attachment was carefully packed when it left our warehouse. If you discover it is damaged after you
Z14 MANUAL TÉCNICO TECHNICAL MANUAL
 Z14 MANUAL TÉCNICO TECHNICAL MANUAL Z14 TECHNICAL INSTRUCTIONS CONTENTS: 1.- Opening the machine 2.- Changing the bridge 3.- Checking if cleaning and greasing is needed 4.- Puller runner bolts 5.- Tray
Power Train Lift Max. Capacity: 1,250 lbs.
 655 EISENHOWER DRIVE OWATONNA, MN 55060 USA PHONE: (507) 455-7000 TECH. SERV.: (800) 533-6127 FAX: (800) 955-8329 ORDER ENTRY: (800) 533-6127 FAX: (800) 283-8665 INTERNATIONAL SALES: (507) 455-7223 FAX:
southpaw enterprises, inc.
 southpaw enterprises, inc. Instruction Sheet C-STAND 7100 Store these instructions in a safe place or with the enclosed maintenance checklist Take time to familiarize yourself with the use and maintenance
INSPECTION AND CORRECTION OF BELLHOUSING TO CRANKSHAFT ALIGNMENT
 INSPECTION AND CORRECTION OF BELLHOUSING TO CRANKSHAFT ALIGNMENT BACKGROUND Proper alignment of the transmission input shaft to the crankshaft centerline is required in order to achieve the best results
VARIABLE SPEED WOOD LATHE. Model DB900 INSTRUCTION MANUAL
 VARIABLE SPEED WOOD LATHE Model DB900 INSTRUCTION MANUAL 1007 TABLE OF CONTENTS SECTION...PAGE Technical data.. 1 General safety rules....1-3 Specific safety rules for wood lathe.....3 Electrical information.4
BOLT ON LONG TRAVEL FOR E-Z-GO
 INSTALLATION INSTRUCTIONS BOLT ON LONG TRAVEL FOR E-Z-GO 1994 2000 Model E-7-04 E-7-06 TABLE OF CONTENTS Progressive Supension Kit... 2 Kit Contents...3-4 Disassembly...5-10 Frame Assembly...11-14 Frame
4. Z-axis assembly. 4. Z-axis assembly. Written By: Josef Prusa manual.prusa3d.com Page 1 of 18
 4. Z-axis assembly Written By: Josef Prusa 2017 manual.prusa3d.com Page 1 of 18 Step 1 Get the necessary tools 13/17mm spanners 3.6mm flathead screwdriver Needle-nose pliers 2.5 and 1.5mm Allen key Step
MODEL T27451/T " & 20" SPIRAL CUTTERHEAD INSTRUCTIONS
 MODEL T27451/T27452 15" & 20" SPIRAL CUTTERHEAD INSTRUCTIONS For questions or help with this product contact Tech Support at (570) 546-9663 or techsupport@grizzly.com The T27451 15" & T27452 20" indexable