SCENARIO SELECTION. Start Panzer Battles Kursk, if you haven t already and you will be taken to the File Selection Dialog.
|
|
|
- Jesse Pitts
- 5 years ago
- Views:
Transcription
1 Page 1


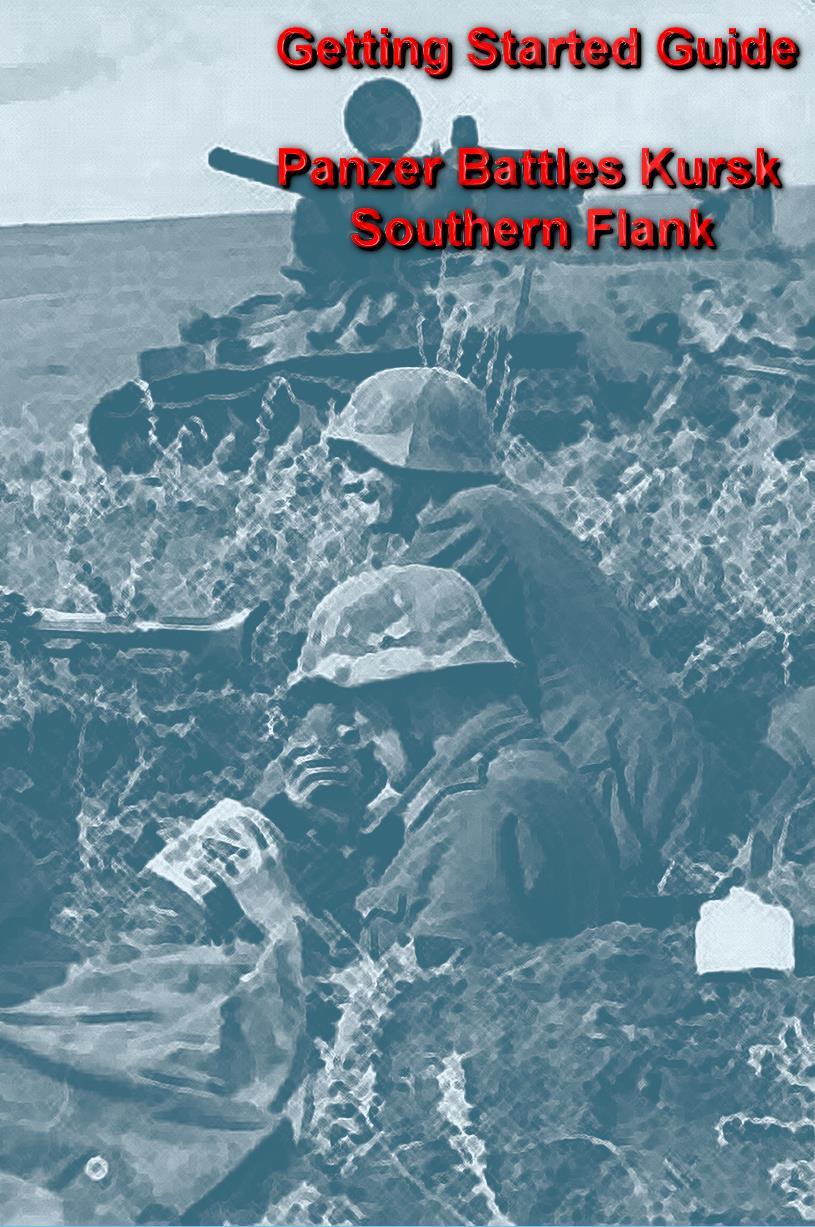
2 Welcome to Panzer Battles: Kursk Southern Flank. On July 4, 1943, Germany launched its summer offensive with an initial aim of destroying the Soviet salient around Kursk. After a week of fighting, German forces have breached two of the three Russian defensive lines and were in a position to break through the third and final fortified line. Success in the next twenty four hours would see the Axis forces in open terrain and able to advance at a much quicker pace. SS Panzer Grenadier Division Totenkopf had crossed the Psel River in the last 24 hours. The Psel was the last natural barrier before Page 2

3 Kursk and was being fanatically defended. Soviet counterattacks continued to try and push the Germans back but it was time to stop them once and for all. This scenario represents the left most flank of Totenkopf s bridgehead and an attempt on July 11 th 1943 to take the Klyuchi army barracks the most significant location in the sector. This scenario uses SS-Sturmbannführer Karl Ullrich's III Battalion, Regiment Totenkopf. They are opposed by the weakened 2 nd & 3 rd Guards Rifle battalions from Major Petr Grigorievich Moskovskiy's 153rd Guards Rifle Regiment. As this is a new game series it is suggested that players both play through this getting started scenario and also check out the Designer Notes & FAQ for a list of features implemented in Panzer Battles. You can open the Notes from the main game by pressing F3 or by using the Menu Help Campaign Notes. Players who own either Squad Battles or Panzer Campaigns will see where Panzer Battles lineage has come from. Just be aware this is a different game system and that some habits learned playing these other titles may not be successful in Panzer Battles. Page 3


4 SCENARIO SELECTION Start Panzer Battles Kursk, if you haven t already and you will be taken to the File Selection Dialog. Click the scenario #00_Getting_Started and then OK. This takes you to the AI Selection Dialog where you choose the side you wish to play. For the purposes of this tutorial select Axis AI "Manual" for yourself and "Automatic with Fog of War"(FOW) for the Russians. Do not click OK now, but rather the button called Rules Ensure that the tick box next to Low Visibility Air Effects is not selected. We have one air unit to support our attack and with this selected it would not fly due to the current early morning mist (current visibility is 4 hexes). Click OK to move back to the AI dialog. Page 4

5 Click OK to get the game underway - you are now the German commander. The map should now appear along with your first Command Report with information relevant to the first turn. You should see that you have both air units available and six salvos of smoke. Air units could be available every turn. Smoke availability is the number of shots for the whole scenario. Once used, it s gone. Note the Command Reports contents and click OK to close it. It s important to tailor the game to give you the information you need during play. Firstly, let s turn map labels on. Hit Shift Alt at the same time and the location names should appear (and stay) on the map. If you want to turn them off, just tap shift again. If you want to look at the names temporarily, just hold Shift and then release when done. For this getting started scenario we want to play at the highest zoom level. Either press the number 3 or click on the + on the Menu Bar will give a zoomed in view of both the map and units. Click on the white and yellow square on the Menu Bar and formation identification colors will appear. Page 5


6 OBJECTIVE OF THE GAME Click Info and then Victory on the Menu Bar. This shows how many points the first side must earn for each level of victory. As you can see, to obtain a major victory in this battle you must earn 75 Victory Points by the scenario s end. Click OK to close the Victory Dialog. If you look at the map, you ll see a there is an oval shape with the value 50 at the Barracks. We have circled this below for clarity. To win a minor victory, you will need to take and hold this objective and inflict casualties on the Soviet forces. As you incur losses, points are taken away from you. Click Info and then Objectives on the Menu Bar to see a list of the objectives in the scenario. As you can see, there is only 1 objective worth 50 points for the Germans, currently controlled by the Soviet side. Click OK to close the Objectives Dialog. Page 6

 are panzer grenadier with the following units; Three panzer grenadier (PzG)")
7 TURN 1 In this scenario the Germans move first. Before we move anything or fire a shot let s look at the forces we command and a possible plan. The III Battalion, Regiment Totenkopf has four kompanies (Kp). Three kompanies (9 th, 10 th & 11 th ) are panzer grenadier with the following units; Three panzer grenadier (PzG) platoons and two machine gun sections The fourth kompanie (12 th ) is a Heavy Weapons (HW) formation. It has the following units/batteries; Page 7


8 The HW kompanie is spread across the other three kompanies to provide fire support. The four mortar sections will be combined into an eight tube battery and used at battalion level to either fire high explosive rounds or more importantly lay smoke. Our plan is a simple one. We aim to try and destroy the Russian Guards longer range weapons (Anti-tank & infantry guns) and use smoke to mask the advance of panzer grenadiers from 9 th & 10 th kompanies. Smoke will be important as there is between meters of clear terrain to traverse. The first thing to remember with Panzer Battles is to use your air and artillery early. This is important because a unit cannot spot once it moves. Looking at the map there are a number of spotted units both at the Barracks and the hills behind it. Let s look now at what air & artillery assets are available to us. By clicking on the Artillery Dialog, we can see the following; We have three artillery units supporting our attack. The first two are off board while the third is the eight tubes of 8cm Mortars that are currently stacked with our Battalion HQ. Please note that the first artillery unit is selected in the Artillery dialog. Looking at the map shows a number of highlighted units. These appear as the highlight Targets button is selected. These are targets that the artillery unit can currently shoot at. If the Spotters button is clicked all friendly units that are currently acting as spotters for that artillery unit will be highlighted. Please try clicking either field now. Moving the cursor over a spotted unit will show a crosshair and allow the artillery to fire at that unit. Move over the unit stack indicated by the red arrow on the right and right click to fire. Page 8
. Artillery in Panzer Battles uses the Alternate Indirect Fire Resolution rule as standard.")
 do not use this rule and can fire a number of times in a turn. Don t fire the mortars (the final unit on the artillery dialog) yet!")
9 You should see a combat result in hex. In our example to the left we have destroyed two defending guns. Don t worry if your outcome is different. Fire the second artillery piece at the other hex with a gun in it (north of the barracks). Artillery in Panzer Battles uses the Alternate Indirect Fire Resolution rule as standard. In simple terms, you can only fire once but that fire is doubled in strength and will impact all defending units in hex proportional to their strengths. Mortars and direct fire artillery (infantry guns) do not use this rule and can fire a number of times in a turn. Don t fire the mortars (the final unit on the artillery dialog) yet! We need them to fire smoke a little later in the turn. Hit OK to close the Artillery dialog now. We don t want to fire smoke yet as we have some direct fire units capable of shooting at the Russians. If we drop smoke prematurely it will protect our units from Soviet fire, but it will also stop us from firing ourselves. Panzer Battles is all about timing. Page 9


10 Let s call in our air units. Air units are different to artillery in that they need to be plotted. You select the target hex this turn and they will only resolve their attack at the start of the players next turn. This delay reflects the time needed to co-ordinate a World War 2 airstrike. First, let s click on the original target hex that contained the Soviet guns. Click the Airplane button, (see example to the left). That will open the Air Mission Dialog, which will look like the below; If the air unit is greyed out then a valid target hex hasn t been selected. Just hit Cancel, select the target hex and open the Air Mission Dialog again. Once you have the target you want, click on the air unit so that it is highlighted like below. Click Ok and a plane symbol should appear over the target hex. It s important to realize that once placed air units cannot be moved or canceled. As mentioned, air missions are not resolved till the start of the player s next turn. This delay may mean that the target hex is empty or may have different units in it. If the hex is empty there is a chance the airstrike will hit units in one of the six adjacent hexes. The player has no control over the air unit once a strike request has been placed. Air units may not always be available every turn. Many factors such as the time of day, visibility, previous losses or disruption all effect whether an air mission is present and available. Your Command Report will indicate whether any air units are available this turn. Page 10


11 With our heavy artillery fired and our airstrikes called in, we can now use some of our direct fire units to try and disrupt the defenders. Click once on the hex just south of the barracks as indicated by the red arrow to the right. You should see all the friendly units in the hex appear in the unit box as per below. Click only on the top two gun units and they should now be lighter in color and highlighted with a yellow border once selected (see units to the left). These are the only units we are going to fire out of the stack. We plan to move the others two units towards the objective later in the turn. It s important to know what targets you can see. Press the Visible Hexes button. This will highlight all the hexes that can be seen from the current location. Our guns can see the enemy guns on the hill behind the barracks. Page 11


 Click the stack indicated by the red arrow.")
12 We want to continue to shoot up the Soviet guns on the hill. With our two gun units selected, press & hold the Ctrl key so the cursor changes to a crosshair. Move it over the gun units we have been shelling and calling an airstrike on. Right Click you should see a Target Dialog appear as there are two units in the hex. Select the top gun and click Ok. Our guns can fire up to three times separately or by holding Ctrl-Alt simultaneously and then Right Click will fire at the same target multiple times without needing to use the Target Dialog again. Shot One Shot Two Shot Three As you can see we managed to destroy a gun as well as disrupt our target. When a unit is disrupted by fire the On Map Combat Results are shown in yellow. Your fire results may be different but hopefully you will have started to wear down the defenders. There is also a reasonable chance that the defenders won t let you shoot at them without shooting back. This defensive fire is normal and may be either direct or indirect fire. Lets use an infantry stack to provide further covering fire. Double (Left) Click the stack indicated by the red arrow. Using the same Ctrl, Right Click method take three shots at the Soviet unit indicated by the yellow circle. As there are two units the Target Dialog will appear shoot at either target. In our example we managed to get a few hits, like the ones shown to the right. The defenders fired back at our firing stack and we took a few casualties as well. Page 12


13 We are finished firing for the moment and are preparing to move our assault teams forward. To protect them as they advance over open ground we are going to drop a smoke screen that will hopefully reduce the chance of our troops being seen. Click on the Artillery Dialog again. As we want to fire smoke, click next to Smoke as indicated by the red arrow. Our mortar battery is automatically selected as it s the only remaining indirect fire formation. The mortar unit can fire twice. This will use up two of our six salvos of smoke. Shoot once at the hex directly south of the Barracks and then the hex south of that. The cursor should be an O and to fire you just Right Click over the target hex. Our smoke screen will stay in place for both our current turn and our opponents next turn. Smoke is twenty meters high (i.e. one height level) and in hilly terrain can be seen over if carelessly placed. Take the time to work out where it is most effective as it will help you close with the enemy. Importantly, smoke only blocks sight through the hex. Any unit in a smoke hex can be seen and fired upon. Page 13
 to become larger formations.")


 but that increases the chance of us taking heavy casualties.")
14 Click on the hex indicated by the red arrow. Select both the machinegun and panzer grenadier unit. These two units are the assault elements of 9 th Panzer Grenadier Kp. Both have combined two units (usually platoons) to become larger formations. The benefit of this is that they will fire and assault better, the downside is that there are negative modifiers if there are over 125 men in the hex. These modifiers will see the target unit take higher casualties. Click Reachable Hexes in the tool bar to see how far the selected units can move. The light area indicated is reachable, the darker area is not. Leaving the gun behind, we want to move our two units along the valley and to the brush hex as indicated by the red arrow to the left. Our units are deployed and are walking to their destination. We might be able to move faster by mounting our trucks (changing to Travel Mode) but that increases the chance of us taking heavy casualties. We won t risk that this close to the enemy. To move our selected units, just right click in an adjacent hex. Repeat, if you have movement points left. Our assault force force from 9 th Panzer Grenadier Kp manages to move the two hexes without loss. Fortunately the enemy doesn t fire on them while in transit. Maybe the smoke and suppressive fire has helped? It s time now to move our second assault group from 10 th Panzer Grenadier Kp. Page 14


15 10 th Panzer Grenadier Kp is going to use the same detachment type as 9 th Panzer Grenadier Kp. The units are in the hex indicated by the red arrow on the left. You can see the two guns that we fired earlier are also here. A few of our Machine Gunners have been lost to earlier Soviet defensive fire but we ll still use them to advance. Clicking reachable hexes again shows where our selected infantry can move to. We want to move up adjacent to the Barracks while using the smoke to mask our movement. The slope in front of us will also provide cover as we start our approach march. Our units move north and then north east. As we enter the smoke hex, the defending Russians manage to cause a few more casualties, but the damage is slight. We are out of movement points and can t move any further or fire. It s time to hunker down and see if we survive the Soviet turn and the expected blizzard of fire. Page 15

16 We ve moved and fired all the units that we want to this turn. Before we end the turn, let s review what we have learned and done. The phasing of actions in Panzer Battles is critical. We did the following actions in order; artillery bombardment, airstrike requests, direct & suppressive fire, smoke bombardment & finally movement. It is good discipline for players to try and complete each of these stages before progressing to the next. Spotting & masking of movement are important concepts and actions done out of order may expose units to additional casualties or worse still an inability to fire or fight. In this first turn we have learned how to both move and fire our units. We have fired all our artillery and mortar batteries available under the Artillery Dialog as well as called in an airstrike that will hopefully arrive in our next turn. Finally, we have dropped a smoke screen and moved our two assault groups forward without taking too many casualties. Now that we re finished moving and firing all our units, click the Next Turn Button on the Toolbar and click OK if prompted. The Soviets will now move and fire their forces. Your units may fire automatically in reply using Opportunity Fire. Some enemy movement may be spotted. Your next turn will be announced once the Axis Command Report appears. Page 16


17 TURN 2 The Soviet AI moves and fires its units. Our friendly forces fire back in defense. Your play through will diverge from the examples given for turn 2. Try and emulate these moves where applicable following the same order of actions. Just before the Axis turn starts, the airstrike we requested last turn arrives and attacks the targeted hex. There is a chance that an airstrike will be intercepted and fail to arrive, but we were fortunate that that wasn t the case this time. The results of the strike showed that we destroyed four guns. The X shown reports that a unit was completely eliminated, in this case the anti-tank guns. The Soviet infantry guns in the hex are still operational though. Immediately after the airstrike the Axis Command Report appears. It contains three messages. The first is that visibility has improved by one to five hexes. The second confirms that air units are again available for ground support. The third message confirms that we have four salvos of smoke left to fire. This is after we fired two salvos last turn. As it is the start of a new turn, it is appropriate to look at how we are performing against the victory conditions. Selecting Info and then Victory from the Menu Bar shows that losses have been heavy on both sides, but the loss of guns has tipped the victory points slightly in the Axis favor. The bulk of the men lost by the Axis have come from the units we advanced adjacent to the Barracks. It looks like we need to soften the defenders up further before attempting to take the objective. Our units have taken over 20% losses in the last turn. Advancing on undisrupted enemy forces can be very costly. Page 17


18 We start turn two like the last calling in artillery. Hidden units have been revealed at the barracks. Panzer Battles uses Persistent Concealment. Persistent Concealment will only reveal units when they spend movement points if they are in a hex with cover. Opening the Artillery Dialog, fire is requested on the barracks and immediately rewarded with a disruption result on the defending Guards Infantry. This result was unexpected, but welcomed. The second artillery unit is ineffective only killing two men when fired at the barracks. We will again hold our mortars back to either fire smoke later in the turn or to hit targets of opportunity that may appear. With a unit disrupted at the barracks there is an opportunity to storm the objective if the other defender (Maxim machinegun team) can be suppressed. Using Direct Fire, the hexes with guns in them shoot at the Soviet guns on the hill. The units and their targets are shown by blue line in the graphic to the left. The fire group from 11 th Panzer Grenadier Kp shifts fire to the barracks in an attempt to disrupt the Maxim. Casualties (ten) are created, but the Maxim remains resolute. Page 18


19 The adjacent panzer grenadiers fire once and manage to incapacitate a further five men, but the Maxim remains undisrupted. In desperation the second assault group from 9 th Panzer Grenadier Kp moves one hex north rather than the planned two hexes north east. It s hoped that its firepower from 500 meters might just tip the balance. Firing from its new position, it s rewarded with a disruption result. When the turn began it was planned only to try and further weaken the defenders around the barracks. The disruption of the units at the objective opened the opportunity for the adjacent panzer grenadiers to assault them out. The Germans waste no time. An Assault is initiated by selecting the attacking units and right clicking on an adjacent enemy unit. With fog of war (FOW) on the odds for an assault are not revealed to either player. Fortunately the SS panzer grenadiers were successful, but at a steep price. Losses for both sides were heavy, in the graphic to the left the attacker (German) lost seven men to the defenders sixteen. Also significantly the retreating Soviets end in a position that isolates the Germans for the next turn. 9 th Panzer Grenadier Kp were meant to be adjacent this turn, but had been called to provide the additional direct fire. Page 19


 use the Combine selection from the Menu Bar. You should now see a single unit with the combined total of men of the previously separate formations.")
20 There are two final actions for the turn. With the capture of the barracks by the panzer grenadiers, suppressive fire of adjacent Soviets is more important than smoke screens. The battalion mortar fires twice and creates a few more Russian losses. With the assault teams from 10 th Panzer Grenadier Kp probably isolated at the barracks, 11 th Panzer Grenadier Kp consolidates all three platoons into a single kompanie. This will increase firepower but also the formations vulnerability due to stacking limits. The kompanie will be available to move forward from next turn. Move the panzer grenadier platoon indicated to the left to the other members of the kompanie. Once in the same hex highlight the two panzer grenadier units. To combine (and uncombined) use the Combine selection from the Menu Bar. You should now see a single unit with the combined total of men of the previously separate formations. One final note, the fatigue value has dropped (from thirteen to eight) for the combined unit as it averages the value based upon the starting fatigue and size of unit. If there are any other units you want to move or fire do it now. Now that we re finished moving and firing all our units, click the Next Turn Button on the Toolbar and click OK if prompted. The Soviets will now move and fire their forces. Your units may fire automatically in reply using Opportunity Fire. Some enemy movement may be spotted. Your next turn will be announced once the Axis Command Report appears. Page 20


21 TURNS 3 to 5 Play through the remaining turns, keeping in mind what you have done through the first two. You may have to fight off a counterattack by the Soviets as they try and recapture their lost Barracks. Here are a few additional tips to help you learn the game quicker. To check any units statistics, chain of command and special unit abilities, right click the Hex Info Area while the desired hex with the unit(s) is selected. You will see the chain of command for a unit on the left; on the right appear its various combat factors, speed, and special abilities, if any. The Hard, Soft & AA values are Attack/Range respectively. The Assault value is used both when attacking and defending in Assault combat. The Defense value is used when fired upon while Speed is modified by the type of unit and whether it is deployed or in Travel mode. The Terrain Information box provides a lot of information on the currently selected hex. In the example to the left, the hex is predominantly scattered buildings at an elevation of 180 meters with Russian owned improved positions. It is also an objective (worth fifty points) and in supply. Local visibility is up to four hexes. Right Clicking on the Terrain Information box will show both hex side information and the current stacking in hex. White numbers means road movement is possible, yellow numbers no road movement, while red digits are over the road limit and accruing penalties for over-stacking. Page 21


22 Units can move in Travel mode. In the case of the panzer grenadier platoon shown here this represents the infantry moving in trucks rather than walking. Note the differences - movement points have increased substantially and a T has been appended to indicate Travel mode. In addition the unit counter has a white stripe across the bottom. When a unit is selected other members of its organization can be highlighted. An organization can be anywhere in the hierarchy. For example selecting a Regimental HQ and Highlight Org will show all members of that Regiment. In our graphic to the left one unit in 11 th Panzer Grenadier Kp has been selected and all members of the kompanie highlighted. It s easy to keep track of which units have already fired and moved. Click on Used Movement points on the tool bar shows the player all the units that have expended at least one movement point. In our example it is easy to see which two German units have not moved or fired yet. If players do not like the yellow highlight a white highlight is available. Click Settings Alternative Highlighting to enable this function. Page 22


23 There are three different conter sets included in Panzer Battles Kursk The Southern Flank. The default set uses the unit side art graphics to show the different types of units and weapons systems. A small NATO symbol is included and if Divisional Markings is turned on this symbol will be colour coded to the appropriate formation. The alternative unit counters have top down views for each unit. Like the default graphics a small NATO symbol is included that will be coloured when Divisional Markings is used. To select the alternative counters click on Settings Use Alt Unit Graphics. More traditional NATO symbols are available. A description of the primary function or weapon system is included on the counter. When Divisional Markings is enabled the NATO symbol is appropriately coloured. To select the NATO counters click on Settings Use NATO Symbols. These three graphics sets can be changed in game and work at both zoom level two and three. Page 23
24 FINISHING THE GAME You now know how to move your units, fire, and assault with your forces. With the victory conditions in mind, keep maneuvering your forces in the manner you see fit. The end of the game will be announced at the conclusion of the enemy s final turn, at which time, final Victory Points will be shown. To restart the scenario, click File and Selection in the Menu Bar. A list of scenarios will appear and you may select any by double clicking on its entry. FURTHER INFORMATION This Guide is designed to make you feel comfortable with what s going on in Panzer Battles, but it is no substitute for reading the Game Help files. You can access Help from the Game Help Menu. The Game rules are really in two parts: Part 1 in the User Manual, which is the series rulebook. You can see this while playing by pressing F2. The Main Program Manual discusses the various elements of the interface in helpful detail such as each Menu or Dialog. There is even a list of HOT KEYS Show in the Other Features section of this manual. You can view this program guide while playing by pressing F1 Pressing F3 opens the Campaign Notes, which include both the historical background for the battle and the Designers notes. This is a good place to start when you want to understand why the designers included certain features and the historical situations they were trying to emulate. Pressing F4 invokes a feature called the Parameter Data Table. It provides a host of information including movement costs, terrain benefits, and stacking limits amongst other things. Lastly, documentation for the game s editors may be found in help files accessed from the Help Menu when you open each editor. Page 24
25 Page 25
Getting Started with Panzer Campaigns: Budapest 45
 Getting Started with Panzer Campaigns: Budapest 45 Welcome to Panzer Campaigns Budapest 45. In this, the seventeenth title in of the Panzer Campaigns series of operational combat in World War II, we are
Getting Started with Modern Campaigns: Danube Front 85
 Getting Started with Modern Campaigns: Danube Front 85 The Warsaw Pact forces have surged across the West German border. This game, the third in Germany and fifth of the Modern Campaigns series, represents
Getting Started with Panzer Campaigns: Stalingrad 42
 Getting Started with Panzer Campaigns: Stalingrad 42 Welcome to Panzer Campaigns Stalingrad 42. As winter began to close, the instruction came forward from OKH to von Paulus and the Sixth Army capture
This getting started scenario guide uses a mini scenario to teach various game functions;
 Page 1 Page 2 Welcome to Battles of North Africa 1941. On December 9, 1940, the British Empire launched a raid to push the invading Italians out of Egypt. The planned five-day raid was to become a two-month
Panzer Campaigns DEMO: Mius 43 Getting Started
 Panzer Campaigns DEMO: Mius 43 Getting Started WELCOME to the Panzer Campaigns Demo: Mius 43. It is the summer of 1943 on the Russian Front. The Germans last gasp attack in the East, the Kursk Offensive,
SHILOH GETTING STARTED. Welcome to Civil War Battles Shiloh. It is April 1862 and on the shores of the
 SHILOH GETTING STARTED Welcome to Civil War Battles Shiloh. It is April 1862 and on the shores of the Tennessee River, at the site of a church from which the action will take its name, the fate of the
Unit List Hot Spot Fixed
 Getting Started This file contains instructions on how to get started with the Fulda Gap 85 software. If it is not already running, you should run the Main Program by clicking on the Main Program entry
GETTYSBURG GETTING STARTED
 GETTYSBURG GETTING STARTED Welcome to Civil War Battles Gettysburg. It is the summer of 1863. The Confederate Army of Northern Virginia under General Robert E. Lee has for the second time invaded the North.
Getting Started with First World War Campaigns: France 14
 Getting Started with First World War Campaigns: France 14 Welcome to First World War Campaigns: France 14. In this, the first title in of the First World War Campaigns series of operational combat in World
GETTING STARTED. For veterans of the Modern Campaigns system, be sure to check out the "What s New in North German Plain 85" section of this manual.
 GETTING STARTED Soviet armor, mechanized infantry and special forces surge across the frontiers of the northern Federal Republic of Germany under the blazing fire of helicopter gunships and the swarming
ARMY COMMANDER - GREAT WAR INDEX
 INDEX Section Introduction and Basic Concepts Page 1 1. The Game Turn 2 1.1 Orders 2 1.2 The Turn Sequence 2 2. Movement 3 2.1 Movement and Terrain Restrictions 3 2.2 Moving M status divisions 3 2.3 Moving
RANDOM MISSION CONTENTS TAKING OBJECTIVES WHICH MISSION? WHEN DO YOU WIN THERE ARE NO DRAWS PICK A MISSION RANDOM MISSIONS
 i The 1 st Brigade would be hard pressed to hold another attack, the S-3 informed Bannon in a workman like manner. Intelligence indicates that the Soviet forces in front of 1 st Brigade had lost heavily
RESERVES RESERVES CONTENTS TAKING OBJECTIVES WHICH MISSION? WHEN DO YOU WIN PICK A MISSION RANDOM MISSION RANDOM MISSIONS
 i The Flames Of War More Missions pack is an optional expansion for tournaments and players looking for quick pick-up games. It contains new versions of the missions from the rulebook that use a different
Getting Started Tutorial for Modern War
 Getting Started Tutorial for Modern War Welcome to the latest edition to the Squad Battles series of games, Modern War (MW). This title covers the two recent conflicts in Afghanistan and Iraq. You will
Civil War Battles Main Program Help File
 Civil War Battles Main Program Help File Introduction This help file is a common help file for the main programs of the Campaign Series of Civil War games. All menus and dialogs associated with the Main
Getting Started Tutorial for Red Victory
 Getting Started Tutorial for Red Victory Welcome to the latest edition to the Squad Battles series of games, Red Victory (RV). This title covers the last half of the Eastern Front conflict where Advance
Getting Started 000 Getting Started.scn
 Getting Started This file will help you get started quickly with Campaign Antietam. If you have just installed the game, then the Main Program should be running. Otherwise, to run the Main Program, click
Panzer Battles User Manual
 Page 1 Panzer Battles User Manual Table of Contents [1.0] Introduction... 9 [2.0] How to Play the Game... 10 Sides... 10 Hexes... 10 Time Scale... 10 End of Game... 10 [3.0] Game Equipment...11 [3.1] The
Game Turn 11 Soviet Reinforcements: 235 Rifle Div can enter at 3326 or 3426.
 General Errata Game Turn 11 Soviet Reinforcements: 235 Rifle Div can enter at 3326 or 3426. Game Turn 11 The turn sequence begins with the Axis Movement Phase, and the Axis player elects to be aggressive.
Campaign Introduction
 Campaign 1776 Introduction Campaign 1776 is a game that covers the American Revolutionary War. Just about every major battle of the war is covered in this game, plus several hypothetical and "what-if"
Henry Bodenstedt s Game of the Franco-Prussian War
 Graveyard St. Privat Henry Bodenstedt s Game of the Franco-Prussian War Introduction and General Comments: The following rules describe Henry Bodenstedt s version of the Battle of Gravelotte-St.Privat
Getting started tutorial for Soviet-Afghan War
 Getting started tutorial for Soviet-Afghan War Welcome to the latest edition to the Squad Battles series of games, Soviet-Afghan War (SAW). This title will take you into a little known or explored conflict
World at War. Blood and Bridges, Death of First Panzer, Eisenbach Gap COMBINED SCENARIO: A RACE FOR VICTORY. Robert Holzer, 2010
 World at War Blood and Bridges, Death of First Panzer, Eisenbach Gap Robert Holzer, 2010 COMBINED SCENARIO: A RACE FOR VICTORY In a sudden blitz attack a detachment of the 2 nd Soviet Airborne Division
Open General. Basic Tutorial. By Guillermo Bores Guille
 Open General Basic Tutorial By Guillermo Bores Guille 1. BASIC CONCEPTS... 3 2. BASIC TUTORIAL CAMPAIGN... 3 2.1. SCENARIO 1... 5 2.2. SCENARIO 2... 15 2.3. SCENARIO 3... 27 3. LINKS... 41 4. ACKNOWLEDGEMENTS...
Sequence of Play This rulebook is organized according to this Sequence of Play.
 Introduction...1 Sequence of Play...2 Campaign Set-Up...2 Start of Week...10 Pre-Combat...11 Combat...14 Post-Combat...19 End of Week...20 End of Campaign...22 Optional Rules...22 Credits...22 Sample Game...23
22.0 Extended Examples of Play
 Last Hundred Yards ~ Playbook 11 22.0 Extended Examples of Play 22.1 Infantry and Mortars Situation: Early dawn, October 1944, southwest of Kohlscheid, Germany. A German outpost, dug-in on Hill 192, has
Frontier/Modern Wargames Rules
 Equipment: Frontier/Modern Wargames Rules For use with a chessboard battlefield By Bob Cordery Based on Joseph Morschauser s original ideas The following equipment is needed to fight battles with these
Command Phase. Setup. Action Phase. Status Phase. Turn Sequence. Winning the Game. 1. Determine Control Over Objectives
 Setup Action Phase Command Phase Status Phase Setup the map boards, map overlay pieces, markers and figures according to the Scenario. Players choose their nations. Green bases are American and grey are
I-95 GAMERS. Domination Missions
 I-95 GAMERS Domination Missions I-95 GAMERS Domination Missions Design notes Domination special rules Domination Frontline Domination Blind Domination Blitzkrieg Domination Early war Blitzkrieg Domination
Battle of Prokhorovka
 Perform Action Move/Fire according to action chosen Fire machine Guns (tanks only) Fire all eligible machine guns Rally (infantry only) Leader stand may attempt to rally pinned units Rifle stand - 1 die
DIGITAL. Manual. Copyright 2017 Lock n Load Publishing, LLC. All Rights Reserved
 DIGITAL Manual Copyright 2017 Lock n Load Publishing, LLC. All Rights Reserved Introduction on, Digital edition is a low-complexity, Second World War armored combat game, modeled after the Lock n Load
HEXBLITZ GENERAL INFORMATION
 GENERAL INFORMATION SCALES: The following time and ground scales are used in battles fought with 20mm or 15mm scale figures and models: Time scale: Each daylight turn represents approximately 2 hours of
CONTENTS. A WWII tactical and operational strongpoint defense game. PAGE 1 Introduction. PAGE 2 Setup minutes ages: players
 CONTENTS A WWII tactical and operational strongpoint defense game PAGE 1 Introduction PAGE 2 Setup PAGE 3 Counters and Cards PAGE 4 Playing the Game PAGE 5 Soviet Card Phase PAGE 9 Wehrmacht Card Phase
DESCRIPTION. Mission requires WOO addon and two additional addon pbo (included) eg put both in the same place, as WOO addon.
 eg put both in the same place, as WOO addon.") v1.0 DESCRIPTION Ragnarok'44 is RTS mission based on Window Of Opportunity "The battle from above!" mission mode by Mondkalb, modified with his permission. Your task here is to take enemy base. To do so
v1.0 DESCRIPTION Ragnarok'44 is RTS mission based on Window Of Opportunity "The battle from above!" mission mode by Mondkalb, modified with his permission. Your task here is to take enemy base. To do so
Introduction. Nothing can be done contrary to what could or would be done in actual war. Revised Rules for the NAVAL WAR GAME (1905) Fred T.
 Fred T.") Design Parameters Introduction These rules have been developed so that it is possible to fight small World War II Ostfront battles between Axis and Soviet forces. The battles last about an hour or two
Design Parameters Introduction These rules have been developed so that it is possible to fight small World War II Ostfront battles between Axis and Soviet forces. The battles last about an hour or two
Airborne Landings For WWII MicroArmour :The Game
 Airborne Landings For WWII MicroArmour :The Game by Leif Edmondson. The WWII rulebook presents some parachute landing rules in scenario #3 A Costly Setback and in the Modern MicroArmour rule book as well.
Montelimar: Anvil of Fate Scenario 1 -Opening Blows - The Feint
 Montelimar: Anvil of Fate Scenario 1 -Opening Blows - The Feint Introduction This is an after action report of a play test game of Monlimar: Anvil of Fate. Please note that the Vassal module and graphics
Portable Wargame. The. Rules. For use with a battlefield marked with a grid of hexes. Late 19 th Century Version. By Bob Cordery
 The Portable Wargame Rules Late 19 th Century Version For use with a battlefield marked with a grid of hexes By Bob Cordery Based on some of Joseph Morschauser s original ideas The Portable Wargame Rules
The counters. BULL RUN VaeVictis 89 The first battle of the Civil War
 BULL RUN 1861 - VaeVictis 89 The first battle of the Civil War A game by Laurent MARTIN Bull Run, 1861 is a simulation of the First Battle of Bull Run (or the First Battle of Manassas for the Confederates),
Solitaire Rules Deck construction Setup Terrain Enemy Forces Friendly Troops
 Solitaire Rules Deck construction In the solitaire game, you take on the role of the commander of one side and battle against the enemy s forces. Construct a deck, both for yourself and the opposing side,
A game by Wei Cheng Cheng. - Graphics: Olivier Revenu - Translation: Noël Haubry. Growling Tigers The Battle For
 BATTLES MAGAZINE #7 A game by Wei Cheng Cheng. - Graphics: Olivier Revenu - Translation: Noël Haubry Growling Tigers The Battle For Changde, 1943 is a two player wargame simulating the final stage of the
TUTORIAL DOCUMENT. Contents. 2.0 GAME OBJECTIVE The Overall Objective of the game is to:
 TUTORIAL DOCUMENT Contents 1.0 INTRODUCTION 2.0 GAME OBJECTIVE 3.0 UNIT INFORMATION 4.0 CORE TURN BREAKDOWN 5.0 TURN DETAILS 5.1 AMERICAN MOVEMENT 5.2 US COMBAT 5.3 US MOBILE MOVEMENT 5.4 US MOBILE COMBAT
Legends of War: Patton Manual
 Legends of War: Patton Manual 1.- FIRST STEPS... 3 1.1.- Campaign... 3 1.1.1.- Continue Campaign... 4 1.1.2.- New Campaign... 4 1.1.3.- Load Campaign... 5 1.1.4.- Play Mission... 7 1.2.- Multiplayer...
command efficiency table
 sequence of play 0. PRE-GAME ORGANIZATION PHASE. 1. POSTURE DETERMINATION PHASE 2D6 + Cohesion. Highest total has initiative in this phase. Mark required stands or groups in movement posture. [6.01.01]
Red Parachutes. Extended Player Aid Sheet by Richard J. Vohlers. Includes advanced rules; optional rules in italics.
 Red Parachutes Extended Player Aid Sheet by Richard J. Vohlers Includes advanced rules; optional rules in italics. S = Soviet; G = German; B = Both; P = Phasing; NP = Non-phasing; OOS = Out of Supply;
Introduction. Your Commanders gain Experience with every battle, but they also gain Stress. Each Week, you must decide how hard to push your men.
 Introduction...1 Sequence of Play...2 Campaign Set-Up...2 Start of Week...9 Pre-Combat...10 Combat...12 Post-Combat...16 End of Week...17 End of Campaign...19 Optional ules...19 Credits...19 Sample Game...20
1.0 INTRODUCTION FORTRESSES COMPONENTS REPLACEMENTS GAME TERMS SEQUENCE OF PLAY VICTORY CONDITIONS
 RULES OF PLAY INDEX 1.0 INTRODUCTION... 2 2.0 COMPONENTS... 2 3.0 GAME TERMS... 3 4.0 SEQUENCE OF PLAY... 4 5.0 SET UP... 5 6.0 REINFORCEMENTS... 5 7.0 LOGISTICS AND INITIATIVE... 5 8.0 COMMAND... 5 9.0
Road Junction 278-Historical Overview
 Road Junction 278-Historical Overview During the Mortain counteroffensive, Sturmbannfuhrer Weidinger of the 2 nd SS Panzer Division left the reinforced II Abteilung to hold the important road junction
Gazala: The Cauldron Table of Contents
 Gazala: The Cauldron Table of Contents 1.0 Introduction... 1 2.0 Components... 1 2.1 Game Scale... 1 2.2 Playing Pieces... 1 2.2.1 Action Chits (see 4.0)... 1 2.2.2 Tactical Chits (see 4.0)... 1 2.2.3
Under fire: If a unit or vehicle has been hit in the previous turn, whether the hit caused damage or not, that unit is under fire.
 Featherstone Like WW2 Rules These rules are very similar to the Featherstone/Bath mass combat rules you can find for Ancient and 18 th Century combat. They have been adapted for a massed skirmish game
PROFILE. Jonathan Sherer 9/30/15 1
 Jonathan Sherer 9/30/15 1 PROFILE Each model in the game is represented by a profile. The profile is essentially a breakdown of the model s abilities and defines how the model functions in the game. The
Axis & Allies Europe FAQ
 Second Edition Rules Axis & Allies Europe FAQ November 17, 2005 Q. Did any rules change from the first to second editions of the rule book? A. Only two: 1. A destroyer taking part in an amphibious assault
CEDAR CREEK BY LAURENT MARTIN Translation: Roger Kaplan
 CEDAR CREEK BY LAURENT MARTIN Translation: Roger Kaplan Cedar Creek 1864 simulates the Civil War battle that took place on October 19, 1864 and resulted in a Union victory. It uses many of the rules of
Maida 1806: Stuart vs. Reynier
 Table of contents. 1.0 Introduction... 2.0 Components... 3.0 Gameplay... 4.0 Leaders... 5.0 Infantry in Column... 6.0 Infantry in Line... 7.0 Square... 8.0 Skirmish order... 9.0 Cavalry... 10.0 Artillery...
Fields Of Fire Quick Start Guide V 1.2
 Fields Of Fire Quick Start Guide V 1.2 Fields Of Fire Quick Start Guide... 1 Introduction... 2 What To Do First... 2 Terrain... 3 LOS... 3 Elevation... 4 Preparing Your Armies... 5 Unit VOF, Ammo, and
XENONAUTS QUICKSTART GUIDE
 XENONAUTS QUICKSTART GUIDE GEOSCAPE BASICS: The Geoscape is made up of ten funding regions that provide your monthly income. Protect them from the aliens and they will increase funding, but fail to do
CONTENTS INTRODUCTION Compass Games, LLC. Don t fire unless fired upon, but if they mean to have a war, let it begin here.
 Revised 12-4-2018 Don t fire unless fired upon, but if they mean to have a war, let it begin here. - John Parker - INTRODUCTION By design, Commands & Colors Tricorne - American Revolution is not overly
Remember the Alamo!* By George Knapp Version 6, 31 Jan 2000
 Remember the Alamo!* By George Knapp Version 6, 31 Jan 2000 *Please accept my apologies for the title. I do not mean to infringe upon any copyrighted material using the same name. These rules are for home
VIII Corps: The Somme 1916
 VIII Corps: The Somme 1916 A Card Wargame of World War I Neal Reid 2016 Published by Vexillia Limited www.vexillia.com Contents 1. Introduction 3 2. Historical Background 3 3. Game Overview 5 4. Setting
2.0 The Battlefield. 2.1 Terrain Hexes. 2.2 Terrain Types. 3.0 Command Cards (10 each) 3.1 Order Cards (7 each)
 3.1 Order Cards (7 each)") Advanced Vive l Empereur Introduction Advanced Vive l Empereur is a Histo Command Dice System Game and allows you to simulate on a grand-tactical level the battles of the Napoleonic era. The player is
Advanced Vive l Empereur Introduction Advanced Vive l Empereur is a Histo Command Dice System Game and allows you to simulate on a grand-tactical level the battles of the Napoleonic era. The player is
and a view from the Confederate lines which gives a better impression of the contours:
 The Battle of Bull Run Feeling the need to get away from painting and preparation for a day and to play a quick game with stuff that I already have prepared, and coincidentally next in my project list,
Primo Victoria. A fantasy tabletop miniatures game Expanding upon Age of Sigmar Rules Compatible with Azyr Composition Points
 Primo Victoria A fantasy tabletop miniatures game Expanding upon Age of Sigmar Rules Compatible with Azyr Composition Points The Rules Creating Armies The first step that all players involved in the battle
7:00PM 12:00AM
 SATURDAY APRIL 5 7:00PM 12:00AM ------------------ ------------------ BOLT ACTION COMBAT PATROL Do not lose this packet! It contains all necessary missions and results sheets required for you to participate
IWO JIMA RAGE AGAINST THE MARINES 1. INTRODUCTION 2. COMPONENTS 2.1 COUNTERS. Operations Special Issue #1
 1. INTRODUCTION Iwo Jima. The only battle of World War Two that saw the United States Marines suffer more casualties than they inflicted on the enemy. It was a battle that would define a war and would
11.6 Victory Conditions...10
 TABLE OF CONTENTS Introduction...4 Glossary...4 Support...4 1.0 Components...4 1.1 Anatomy of a Combat Unit...4 1.2 Organization of Brigades and Regiments...5 2.0 Impulse System...5 2.1 Activation Roll...5
Armour Battles. Introductory World War Two Wargame Rules. Jim Bambra
 1 Armour Battles Introductory World War Two Wargame Rules Jim Bambra First published in 2015 by Wargames Design. 2015 Jim Bambra. All rights reserved. Jim Bambra has asserted his right under the Copyright,
Stargrunt II Campaign Rules v0.2
 1. Introduction Stargrunt II Campaign Rules v0.2 This document is a set of company level campaign rules for Stargrunt II. The intention is to provide players with the ability to lead their forces throughout
LATE 19 th CENTURY WARGAMES RULES Based on and developed by Bob Cordery from an original set of wargames rules written by Joseph Morschauser
 LATE 19 th CENTURY WARGAMES RULES Based on and developed by Bob Cordery from an original set of wargames rules written by Joseph Morschauser 1. PLAYING EQUIPMENT The following equipment is needed to fight
COMPONENT OVERVIEW Your copy of Modern Land Battles contains the following components. COUNTERS (54) ACTED COUNTERS (18) DAMAGE COUNTERS (24)
 ACTED COUNTERS (18) DAMAGE COUNTERS (24)") GAME OVERVIEW Modern Land Battles is a fast-paced card game depicting ground combat. You will command a force on a modern battlefield from the 1970 s to the modern day. The unique combat system ensures
GAME OVERVIEW Modern Land Battles is a fast-paced card game depicting ground combat. You will command a force on a modern battlefield from the 1970 s to the modern day. The unique combat system ensures
LATE 19 th CENTURY WARGAMES RULES Based on and developed by Bob Cordery from an original set of wargames rules written by Joseph Morschauser
 LATE 19 th CENTURY WARGAMES RULES Based on and developed by Bob Cordery from an original set of wargames rules written by Joseph Morschauser 1. PLAYING EQUIPMENT The following equipment is needed to fight
Gettysburg 77 Errata. 1 of 5 RULES CORRECTIONS. Advanced Union Order of Appearance
 RULES CORRECTIONS 1) p.1 Object of Game Culp s hill is U40 not U41. 2) p. 7 Combat Qualifications Rule 3 is (.see 5) not ( see 6) 3) p.8 Retreat rule 2. Change to read: If the retreating unit is adjacent
BF2 Commander. Apply for Commander.
 BF2 Commander Once you're in the game press "Enter" unless you're in the spawn screen and click on the "Squad" tab and you should see "Commander" with the option to apply for the commander, mutiny the
On the day you also need to bring :
 In this pack you will find everything you will need to do and know, to prepare for and play in the OMG Bolt Action Tournament. Tournament Organiser: Jeff Black Players Pack/ Tournament Rules writer: Jeff
Napoleon s Triumph. Rules of Play (draft) Table of Contents
 Table of Contents") Rules of Play (draft) Table of Contents 1. Game Equipment... 2 2. Introduction to Play... 2 3. Playing Pieces... 2 4. The Game Board... 2 5. Scenarios... 3 6. Setting up the Game... 3 7. Sequence of Play...
Rules of Play (draft) Table of Contents 1. Game Equipment... 2 2. Introduction to Play... 2 3. Playing Pieces... 2 4. The Game Board... 2 5. Scenarios... 3 6. Setting up the Game... 3 7. Sequence of Play...
IV. TROOPS FAQ SPECIALIZED UNITS 2
 IV. TROOPS FAQ STANDARD UNITS 1 7 8 8 Infantry Move 0-1 and battle, or move 2 no battle May Take Ground on successful Close Assault Armor Move 0-3 and battle May Overrun on successful Close Assault Artillery
Field of Glory - Napoleonic Quick Start Rules
 Field of Glory - Napoleonic Quick Start Rules Welcome to today s training mission. This exercise is designed to familiarize you with the basics of the Field if Glory Napoleonic rules and to give you experience
2.0 game components support Units. color to make them easier to pick out. Each player has two types of game units: Combat Units Support units
 basic rules Somme 1918 - Bloody Spring is a wargame that simulates the German spring offensive of 1918 that was aimed at separating the British and French armies. Players will find themselves in the role
Fleet Engagement. Mission Objective. Winning. Mission Special Rules. Set Up. Game Length
 Fleet Engagement Mission Objective Your forces have found the enemy and they are yours! Man battle stations, clear for action!!! Mission Special Rules None Set Up velocity up to three times their thrust
Aperitif Game for Gentlemen, By Pierre Laporte
 Belle Epoque Aperitif Game for Gentlemen, By Pierre Laporte Belle Epoque Aperitif Game for Miniature Battles in the Victorian Era and Early 20 th Century EQUIPEMENT NEEDED Small coloured counters, ordinary
Down In Flames WWI 9/7/2005
 Down In Flames WWI 9/7/2005 Introduction Down In Flames - WWI depicts the fun and flavor of World War I aerial dogfighting. You get to fly the colorful and agile aircraft of WWI as you make history in
PROFILE. Jonathan Sherer 9/10/2015 1
 Jonathan Sherer 9/10/2015 1 PROFILE Each model in the game is represented by a profile. The profile is essentially a breakdown of the model s abilities and defines how the model functions in the game.
ARMOR DIAGRAM ARMOR DIAGRAM. Mech Data. Mech Data BATTLEMECH RECORD SHEET BATTLEMECH RECORD SHEET. Weapons Inventory.
 BATTLEMECH RECORD SHEET Left Torso Head Right Torso ARMOR DIAGRAM Type: HER-2S Hermes II Tonnage: 40 Points: Walking: 6 Running: 9 Weapons Inventory Mech Data Type Location Damage Short Med. Long 1 Autocannon
RULES OF PLAY Living Rules
 Ukraine 43 2nd Edition 2ND EDITION RULES OF PLAY Living Rules 7-4-5 TABLE OF CONTENTS. Introduction... 2 2. Contents... 2 3. Sequence of Play... 3 4. Stacking... 4 5. Movement... 4 6. Zones of Control...
Introduction to Combat and Ranged Attacks. Introduction. Anatomy of a Combat Unit
 Most units have two step strengths, with their CS (especially) and RAS somewhat reduced on their reduced strength side. Reduced infantry units may attempt to recover to full strength by using the Recovery
For 2 to 6 players / Ages 10 to adult
 For 2 to 6 players / Ages 10 to adult Rules 1959,1963,1975,1980,1990,1993 Parker Brothers, Division of Tonka Corporation, Beverly, MA 01915. Printed in U.S.A TABLE OF CONTENTS Introduction & Strategy Hints...
BOLT ACTION COMBAT PATROL
 THURSDAY :: MARCH 23 6:00 PM 11:45 PM BOLT ACTION COMBAT PATROL Do not lose this packet! It contains all necessary missions and results sheets required for you to participate in today s tournament. It
A Marvellous Victory! Copyright. Trevor Raymond. November 2015 (Exodus 20:15 - Thou shall not steal.") Version 2
 Version 2") Page 1 of 30 A Marvellous Victory! Copyright. Trevor Raymond. November 2015 (Exodus 20:15 - Thou shall not steal.") Version 2 The first abstraction: A Marvellous Victory are an abstract set of wargame
Page 1 of 30 A Marvellous Victory! Copyright. Trevor Raymond. November 2015 (Exodus 20:15 - Thou shall not steal.") Version 2 The first abstraction: A Marvellous Victory are an abstract set of wargame
Operation Shingle The Battle for the Beachhead January 22 nd - March 1 st 1944
 Operation Shingle The Battle for the Beachhead January 22 nd - March 1 st 1944 Table of Contents 1.0 Introduction 2.0 Components 3.0 Sequence of Play 4.0 Weather Phase 5.0 Supply Phase 6.0 Reinforcement
The Glory that was GREECE. Tanagra 457 BC
 The Glory that was GREECE Tanagra 457 BC TCSM 2009 The Glory that Was Vol. I: Greece Rulebook version 1.0 1.0 Introduction The Glory that was is a series of games depicting several different battles from
Game Rules. The Great Battles of the Napoleonic Era. Giovanni Crippa. version October v.1.1. A game by: GIOGAMES
 The Great Battles of the Napoleonic Era Game Rules v.1.1 version 1.2 - October 2013 GIOGAMES A game by: Giovanni Crippa 23900 LECCO (Italy) Introduction Advanced Vive l Empereur is a game system that allows
The Official FAQ ERRATA FAQ 1. Version 1.6 November 2, 2012
 Read this FAQ thoroughly and keep it secure it may save lives The description for the Stimulant Kit special ability from Operation Cerberus is incorrect. It should read as follows: The Official FAQ Version
A Thunderbolt + Apache Leader TDA
 C3i Magazine, Nr.3 (1994) A Thunderbolt + Apache Leader TDA by Jeff Petraska Thunderbolt+Apache Leader offers much more variety in terms of campaign strategy, operations strategy, and mission tactics than
WARHAMMER 40K COMBAT PATROL
 9:00AM 2:00PM ------------------ SUNDAY APRIL 22 11:30AM 4:30PM WARHAMMER 40K COMBAT PATROL Do not lose this packet! It contains all necessary missions and results sheets required for you to participate
FORCE ON FORCE QUICK START RULES
 FORCE ON FORCE QUICK START RULES Welcome to today s training mission. is exercise is designed to familiarize you with the basics of Force on Force and give you experience in commanding troops on the tabletop.
An analysis of Cannon By Keith Carter
 An analysis of Cannon By Keith Carter 1.0 Deploying for Battle Town Location The initial placement of the towns, the relative position to their own soldiers, enemy soldiers, and each other effects the
Empires at War. 2. Win conditions Your main objective is destroy all unit cards of the opposing player. You can recognize unit
 Empires at War 1. About game Empires at War is a competitive card game set during I World War. Players create unique decks and take control over armies of conflicted nations. To win, you have to break
FRIDAY APRIL 1 ST 8:00AM - 6:00PM
 FRIDAY APRIL 1 ST 8:00AM - 6:00PM Do not lose this packet! It contains all necessary missions and results sheets required for you to Participate in today s tournament. It is your responsibility to hold
Unofficial Bolt Action Scenario Book. Leopard, aka Dale Needham
 Unofficial Bolt Action Scenario Book Leopard, aka Dale Needham Issue 0.1, August 2013 2 Chapter 1 Introduction Warlord Game s Bolt Action system includes a number of scenarios on pages 107 120 of the main
SERIES RULEBOOK. Game Design by Mark S. Miklos. Version: June 2017 TABLE OF CONTENTS. Great Battles of the American Revolution
 1 SERIES RULEOOK Game Design by Mark S. Miklos Version: June 2017 TALE OF CONTENTS 1. Introduction... 2 2. Components... 2 3. Game Scale and Terminology... 2 4. How To Win... 3 5. Sequence of Play Outline...
Airplane. Estimated Casualty Statistics for the Battle of Tannenberg Allied Powers: 267,000 Central Powers: 80,000
 Airplane The Battle of Tannenberg in 1914 was an important victory for the Germans. They stopped the Russian army from advancing into German-controlled territory. Prior to the outbreak of fighting, both