ADMIRAL EDITION. Primary Writers Derek Sinclair James Flack Franco Sammarco. Rules Proofing Team Leaders Ross MacKenzie Jon Graef
|
|
|
- Sherilyn Anthony
- 6 years ago
- Views:
Transcription

1
2 ADMIRAL EDITION Primary Writers Derek Sinclair James Flack Franco Sammarco Rules Proofing Team Leaders Ross MacKenzie Jon Graef Senior Testers Michael Hetherington John Smith Damien Quinn Mark Guz and the D-Wars Online Beta Group Photography: Christopher Worth Digital Sculpting Christopher Peacey Christopher Drew Model Painting Ben MacIntyre Golem Studios Book Layout Neil Fawcett Christopher Worth Supplemental Typesetting Richard Gale Supplemental Artwork Sally Taylor The contents of this book are Copyright Spartan Games All rights reserved. January 2015 Digital Admiral Edition. This digital edition is for personal use only and may not be reproduced or distributed in part or in whole without the prior written consent of Spartan Games. We would like to thank our External Playtest Groups and our Online Community for their invaluable feedback, all of which has contributed to making DYSTOPIAN WARS 2.0 an even better game.
3 CONTENTS SECTION A GAME BASICS What You Will Need To Play 6 General Principles of Dice 8 Types of Dice Roll 8 The Scrapyard 9 Range Bands 10 Measuring to Models 10 Height Bands and Height Levels 10 Anatomy of a Model Profile 13 Statistic Details 14 The States of a Model 16 SQUADRONS Mixed Squadrons 18 Attachments 18 Combat Patrols 19 Squadron Activation Order 19 GAME SET-UP Common Agreements 20 Building a Force List 20 Summary of Force Contents 22 Muster for War! 24 Prepare to Engage! 24 Engage! 28 TACTICAL ACTION CARDS Types of Tactical Action Card 30 Building your TAC-Deck 30 TAC-Hand Size 30 Choosing the Cards in Your TAC-Hand 32 Playing Tactical Action Cards 32 TACs in Multi-Player Games 33 SECTION B ORDER OF PLAY The Anatomy of a Game Turn 36 The Pre-Turn Phase 36 Activation Phase 37 The End Phase 37 ATTACKS & DAMAGE Types of Attack 38 Damage 38 Applying Damage 38 Critical Effects Without Suffering a Critical Hit 39 Support Aircraft Damage 39 Hull Points & Attack Dice 39 DISORDER Disorder Test Resolution 40 Taking a Disorder Test 41 Disordered Squadrons 41 Rallying From Disorder! 41 SECTION C COMMAND SEGMENT Command Coherency 44 Command and Control 44 Command Consolidation 44 MOVEMENT SEGMENT Movement Declarations 45 Movement and Manoeuvre 45 Movement Consolidation 47 Special Movement Actions 47 LINE OF SIGHT Fire Arcs 52 Weapon Mountings 54 Obstructing Models and Terrain 54 In The Open, Partially Blocked, and Blocked 55 FIRING SEGMENT Declaring Attacks 58 The Attack Sequence 60 Firing Options 63 Weapons and Munitions 66 Other Weapons 67 Specialised Weapons 68 Auxiliary Weapons 71 Special Munitions 72 Mines and Nodes 74 BOARDING SEGMENT Boarding Action Limitations 76 Boarding Procedure 76 Nominate Targets and Assault Groups 76 Anti-Boarding Declarations 77 Anti-Boarding Fire 77 Close Quarters Battle (CQB) 78 Crew Types 79 Determine the Victor! 79 END PHASE Compulsory Actions 84 Damage Repairs 84 Persistent Damage 84 Restore Order 85 End of Game 85 End Phase Consolidation 85


4 SECTION D What is a Model Assigned Rule (MAR)? 88 Generators 96 Basic Terrain 104 Advanced Terrain 110 Support Aircraft, Carriers, and Drone Launchers 112 Robots 120 Infantry 123 Combat Patrols 126 Model Classifications 127 National Commodore Rules 132 Using Allied Battle Groups 134 Multi-Player Games 137 SECTION E Quick Reference 140 Game Markers 144 Templates 145 Index 146 General Mathias Corvinus Freiherr von Sturm, a prominent German-Hungarian officer who achieved immense fame from his masterminding of the Prussian Empire s London Raid of 1870.
5 5 INTRODUCTION


6 SECTION A1 GAME BASICS WHAT YOU WILL NEED TO PLAY When playing Dystopian Wars you will require the following: Welcome, my name is Lord Barnabus Draynes Sturgeon and I have the honour to be your guide throughout the pages of this tome. For those who do not know me, I am custodian of a new nation that we have elected to call the Covenant of Antarctica.. My scientists and soldiers are embroiled in a world conflict that is ripping nations apart, but I am ever confident that science will prevail over the weaknesses of man. As you move through these pages various characters from this world will help reinforce key information for you. Enjoy your journey... and welcome to the world of Dystopian Wars. DYSTOPIAN WARS 2.0 is designed to be a fun game that can be played in just a couple of hours using a selection of our finely detailed Models. The rules are perfect for small-scale sorties into enemy territory, border skirmishes involving thirty or so vessels a side, and huge, history-defining battles that have the potential to warp the very fabric of the known World. The rules are also ideal for large multi-player encounters, with players constantly involved in the game, activating their groups of Models or reacting to an enemy Activation. So are you ready to take command of one of the great nations in Dystopian Wars? You can choose to defend your territories from foreign incursion, or you can strike out with your forces and conquer the world. The choice really is yours... Models to represent the forces of the Dystopian World! A Tape Measure. A Tabletop or other suitable gaming area. Game Markers to identify the various effects and conditions that can apply in the game. Activation Markers to show players which Squadrons have activated and which have not. Templates such as the Large Explosion Template, Random Determination Template etc. A good number of 6-sided Dice (about 30 or so should do it!). A Force List that shows the Squadrons and infantry formations you are taking into battle. A copy of the Force Book with the rules for your Models. A deck of Tactical Action Cards that allow players to represent the important choices and risks that many commanders face during their campaigns.... and a sense of Imagination and Wonder helps too! Models Dystopian Wars uses high quality 1:1200 scale Models, produced by Spartan Games. The Models are available from and many retailers. Some Models, mainly Flying and Armoured, come with bases. These are either separate or sometimes an integral part of the Model. Important Note: Models that are supplied with a base MUST be mounted upon it. This is important for consistency regarding movement and ranges during play. Measuring and Pre-Measuring All measurement in Dystopian Wars is done in Inches, and distances are often shown as X where X is the number of inches being measured. A tape measure is the easiest way to measure distances. If you don t have access to a tape measure marked in inches, use the conversion of: 1 Inch = 2.5cm 6


7 SECTION A1 GAME BASICS Pre-Measuring is allowed at any time, for any reason you like. This is a game of tactical skill, not a game of who can estimate distances by eye the best! The Tabletop Dystopian Wars is played on a Tabletop and the easiest way to make a Tabletop battlefield is to place a blue or green cloth on the table, for sea or land battles respectively. A stiff board painted blue on one side and green on the other is perfect for both. You will also want some Terrain. See Page 104 for descriptions of Terrain types, and the Spartan Games website for lots of tips on making Terrain. Many clubs and other gaming venues will have boards and terrain already prepared, which is much easier than making your own! Game Markers In the tumult of combat anything is liable to happen to your vessels: from crippling engine damage and shredded defences to wild-fires or even simply losing crew. To keep track of this damage, Game Markers and Tokens are supplied with force boxes, and are also available as PDF downloads from our website. See Page 144 for a full list of Game Markers. Activation Markers In every Game Turn players get to Activate each of their Squadrons in an alternating fashion, and as such it can be difficult to remember of what has gone, and what has yet to activate. To help keep track of which Squadrons have acted in a Game Turn, at the end of their Activation, place an Activation Marker by the Squadron, to show it cannot activate again this Game Turn. A Model or Squadron that has not yet Activated in a Game Turn and has no Activation Marker is considered Ready to Activate. There are also some rare circumstances in which a Model can acquire an Activation Marker without having been Activated, in which case it will not get to activate at all that Game Turn! Activation Markers are supplied in Battle Group Boxes, and on our website. Templates Templates allow the game to execute in-game effects that affect multiple Models within an area, or allow complex gaming mechanics to be visually explained for ease of play. The following Templates are used in the game: Large Effect Template This 4" diameter Template is most commonly used when Mines detonate, or when certain Generators affect parts of the Tabletop. Energy Template This 2" diameter Template is most commonly used when Energy Blast Weapons fire, or when a Portal is created. Small Effect Template This 1.5" diameter Template is most commonly used with Area Bombardment attacks. Random Determination Template This strange Template is used to allow players to randomly determine in-game effects. Its use is explained in the diagram below. The use of Templates is fully explained in the specific sections of the Rulebook that concern their use. A sheet of Templates is included in the rulebook on Page 145 and is also available from the Spartan Games Website at RANDOM DETERMINATION TEMPLATE There are times in Dystopian Wars when you need to move a Model completely randomly. So using this Template and your trusty D6 you can randomly determine where it lands on a gaming table! Simply place the Template over the centre of the model with the 1 pointing forwards and roll a D6. The number rolled will indicate the randomised direction. 7
8 SECTION A1 GAME BASICS Pen and Paper Players will need a pen and some paper so that they may record their Victory Points scored during the Activations of the game. This is important as it will allow them to track how close they are to completing their Orders: see Page 28 for more details. GENERAL PRINCIPLES OF DICE Dice are a major part of playing Dystopian Wars. They introduce an element of chance, and chance is always fair: what was a lucky escape for you was an unexpected disappointment for your opponent! In Dystopian Wars we refer to two types of dice: D6 and D3. A D6 is a standard six-sided die, as seen in many board-games or games of chance. To roll a D3, roll a D6, as normal, but read the result of a 1 OR 2 on the die as if it had come up as a 1, a 3 OR 4 as a 2, and a 5 OR 6 as a 3. Rolling of a Natural 1 Regardless of all modifiers, a roll of a 1 never hits. Rolling of a Natural 6 Regardless of all modifiers, a roll of a Natural 6 always results in a Hit, however the severity of the Hit may be mitigated by other factors. Important Note: A Natural 6 is when the die s face shows a 6, rolling a 5 when you have a +1 modifier does not make it into a Natural 6. Initial Dice There are many effects in the game that determine the number of dice that are to be rolled. Whenever we mention Initial Dice in this book, we are referring to your total number of dice BEFORE adding any extra dice from other sources or effects, such as the Exploding Dice mechanic, described below. To Hit Numbers and Dice Modifiers Often in the rules a situation will occur where the player needs a certain number To Hit. This will commonly be described as X+, where X is the minimum Hit Number required on the dice roll. Unless otherwise stated, all To Hit Numbers begin needing 4+ To Hit, using the Exploding Dice mechanic. To Hit Numbers can also be referred to as a target number, especially when it is referring to a roll not related directly to combat. So, for example if a player were firing at a target without modifiers, any dice roll would be commonly referred to as causing a hit on a 4, 5, OR (RED) 6. Modifiers There are many effects in Dystopian Wars that modify the target number of a dice roll. These will be commonly listed as a positive or negative modifier, such as +1 or -1. All modifiers are cumulative and are applied to the Hit Number required on each die in the roll. For example, you may have a +1 and -2 modifier on the same shot, resulting in a final modifier of -1, ensuring that a situation whereby a Model required a To Hit Number of 4+ would instead require a To Hit Number of 5+. It is possible in some situations to have a single roll using multiple dice that include different target To Hit Numbers for different dice. These should be rolled separately so that each target number can be easily tracked, although the eventual number of Hits generated as a result of the entire Dice Roll may be a combination of results that are created by the separate rolls. Important Note: The physical number on the face of a die (1, 4, 6 etc.) NEVER changes through modification, only the To Hit Number required. Needing 7s or More to Hit If modifiers take the required To Hit Number to 7 or more, a (RED) 6 is still considered a Hit but all dice used in the roll change from Exploding (RED) to Heavy (BLUE). See below. TYPES OF DICE ROLL Exploding Dice (RED D6) Most dice rolls in Dystopian Wars will use the Exploding Dice mechanic as a means of generating Hits. If the target number listed for a successful roll is listed as a (RED) 6, anywhere in the rules, you know the Exploding Dice mechanic is in use. This means that a roll of a SIX from any Exploding Dice results in TWO successes, AND an additional roll of the dice! Additional rolls use the same Exploding Dice mechanic, so they may result in even more additional rolls, and so on. 8
9 SECTION A1 GAME BASICS The Exploding Dice Mechanic works as follows: 1. Roll your Initial Dice. 2. Set aside all dice that resulted in a Hit and count the total number of (RED) 6s that were rolled. 3. The Exploding Step: Roll an additional die for each (RED) 6 that was rolled above. Repeat the process in steps 2 and 3 until there are no additional rolls to be made. 4. Count up the total number of hits from all dice rolled. Each (RED) 6 counts as TWO Hits instead of one. In some rare circumstances, a special rule may modify how many Exploding Dice you get from a (RED) 6, allow numbers other than (RED) 6 to Explode, or otherwise vary this common mechanism. Heavy Dice (BLUE D6) There will be occasions in-game where the rules will note that a dice roll must use the Heavy Dice mechanic. If the target number listed for a successful roll is listed as a (BLUE) 6, anywhere in the rules, you know the Heavy Dice mechanic is in use. If the target number is listed as a (BLUE) 6, a roll of SIX still results in TWO successes but NO Exploding roll is permitted. Basic Dice (BLACK D6) There will be occasions in-game where the rules will note that a dice roll must use the Basic Dice mechanic. The use of this mechanic is kept for simple dice rolls that do not use the Heavy or Exploding dice mechanics. If the target number is listed as a (BLACK) 6, neither the Heavy nor the Exploding dice mechanic is to be used and a roll of a six results only in ONE success with NO additional roll. For dice examples see Page 10. XD6 Rolls In some parts of the rules you may be asked to roll a number of dice in one go to give you a combined result, normally when rolling on tables like the Critical Hit Table. The term XD6 means rolling the number of dice listed in the X using Basic Dice, and adding the scores, or in some cases the number of hits, on these dice together, to give a result. Opposed Dice Tests These are most often used when determining important matters, such as the Game Turn Initiative. The number of dice required to be rolled in an Opposed Dice Test is normally two per player but this may vary depending on circumstance. Both players roll using the XD6 method and compare the results. If two players roll the same result, they both re-roll all their dice, and, unless otherwise specified, will apply the same modifiers to the roll: a tie is not a possible outcome. Arguments Whilst we would never expect players in Dystopian Wars to have arguments over rules or situations that occur in the game, ambiguities may arise that simply cannot be rectified without bringing the game to a halt. If this does happen, we suggest both players take an Opposed 2D6 Dice Test with the winner deciding upon the course of action to be taken. The rules can then be checked more thoroughly after the game! Re-Rolls and Initial Dice In many circumstances, a player may be permitted (or even forced to) re-roll a certain number of dice from their Initial Dice. This simply means you pick them up and roll them again, discounting what had previously been rolled! Multiple re-rolls are resolved in the order they are declared. The particular rule granting the re-roll will make it clear when it can be used. If a rule simply says reroll the Initial Dice that means re-roll all the dice BEFORE rolling any extra dice from sources such as the Exploding Dice mechanic. Other rules specify how many dice may be re-rolled. A Re-rolled die may NEVER be re-rolled again under any circumstances. Rounding Up If, for any reason, the rules state that a value is to be reduced by HALF, the original number is always Rounded Up to the nearest whole number. THE SCRAPYARD During the course of the rules, there will be many references to something called the Scrapyard. Put simply, this is an area next to the Tabletop where Models that have been removed from play are placed. Also kept inside the Scrapyard are any Tactical Action Cards that have been used, and any other Scrapped Model that has Victory Points attached to it. The Scrapyard should be kept reasonably tidy to assist both players in keeping a running score of their Victory Points scored. It s also a good idea to keep paper and pens in this area to record scored Victory Points. 9
 6 results. The result of this second roll is 2, 6.")
10 SECTION A1 GAME BASICS DICE EXAMPLES: Example 1: Player A has 6 Initial Dice to roll with a target number of 4, 5, (RED) 6. The results of the roll are 1, 3, 4, 6, 6. Player A sets the 4, 6 and 6 aside, and then picks up and rolls two additional dice one for each of his Exploding (RED) 6 results. The result of this second roll is 2, 6. Setting this 6 aside again, Player A rolls another dice, scoring a 5. The final number of successes are counted on all of the dice that Player A set aside: 6, 6, 6, 4, 5. This results in 2 successes for each of the Exploding (RED) 6, and one succcess each for the 4 and the 5; for a final total of 8 successes. Example 2: Player B has 5 initial dice to roll with a target number of 4, 5, (BLUE) 6. The roll has a -1 modifier applied to it, so the target number becomes 5 or HEAVY (BLUE) 6. Player B rolls 1, 4, 4, 5, 6. This nets 1 success for the 5, and 2 successes for the Heavy (BLUE) 6, for a final total of 3 successes. Example 3: Player A has 4 initial dice with a target number of 4, 5, (BLACK) 6. This roll has two separate -1 modifiers applied to it, so the target number is reduced to just a (BLACK) 6. Rolling a 1, 3, 5, (BLACK) 6, Player A scores only a single success. ROUNDING UP: Example 4: A Linked Dice Pool numbering 13 Attack Dice (AD) is halved, taking the number to 6.5. This is Rounded Up to 7 Attack Dice (AD). Custodian-Commander Lord Argyle of Ross RANGE BANDS Range is the distance, in inches, along which Line of Sight is measured between the Firing weapon and the target. There are FOUR Range Bands, each of which is Eight Inches in length and follows on directly from the Range Band before it. The Range Bands are therefore: 0-8" (referred to as Range Band 1 or RB1) 8.1"-16" (referred to as Range Band 2 or RB2) 16.1"-24" (referred to as Range Band 3 or RB3) 24.1"-32" (referred to as Range Band 4 or RB4) This means that Range Band 4 (or 32") is the theoretical Maximum Range, unless a Model Assigned Rule or other caveat applies. If the distance between the Firing weapon and its target is 8" or less, then the target is in Range Band 1. If the distance is greater than 8", but not further than 16", the target is in Range Band 2. The same then follows for Range Band 3 and Range Band 4. MEASURING TO MODELS You will often have to measure to Models, such as when determining what range a weapon is at. When measuring to a Model, you always measure to the nearest point of a Model, unless otherwise specified. If a Model is on a base, the area of the base represents the Model, so you measure to the base. HEIGHT BANDS AND HEIGHT LEVELS In Dystopian Wars, Models can navigate across the turbulent seas, take to the smog-filled skies, or lurch over the broken land. Some Models can even dive into the murky depths or burrow deep beneath the earth. Others can skim the surface of the land or sea, and even disappear into the dense cloud layers that coalesce above this industrial world. In order to allow all this to happen, the game divides the levels at which Models can exist into different Height Bands: Aerial, Surface, and Diving. 10


11 SECTION A1 GAME BASICS Aerial This Height Band refers to the part of the game where Models exist in the air. The Models that inhabit this band will most commonly be referred to as Flyers by players. The Aerial Height Band is subdivided into three different Height Levels that stack on top of each other: Stratospheric This Height Level is as close to the edge of the Earth s upper atmosphere as it is possible to get! Only Models with the Stratospheric Flyer Model Assigned Rule can occupy this Height Level. Obscured This Height Level represents an altitude that encompasses clouds, where Models can exist in relative safety from surface-level gunnery attacks. Flying This Height Level should be considered the Ground Attack level where Flyers engage Surface Models with their weapons, firing at optimum efficiency. It is also the only Height Level available to Support Aircraft Squadrons (SAS) see Page 112. Surface This Height Band refers to the area of the game where the majority of Models exist. Be it Battleships, Tanks, Surface Skimmers or Infantry, they all move and operate at this Height Band. The Surface Height Band is subdivided into two different Height Levels that operate parallel to each other: Water The Water Surface Height Level allows ships to move, shoot and execute Boarding Actions against their targets. Models with Naval designation are most likely to be found operating at this Height Level. Diving This Height Band refers to the part of the game where Models exist either beneath the waves of the ocean or burrowing under the ground. The Models that inhabit this band will most commonly be referred to as or Drilling Models by many players. The Diving Height Band is subdivided into two different Height Levels that stack on top of each other: Submerged This Height Level is reserved for Models capable of lurking just beneath the waves or by burrowing beneath the ground. Deep Diving This Height Level is as deep in the ocean as it is possible to get! Only Models with the Deep Diving Model Assigned Rule can occupy this Height Level. The Height Band/Level diagram on the next page illustrates the Height Levels that exist within the game. As a general rule Aerial Models inhabit the Aerial Height Band, and all Naval or Armoured Models inhabit the Surface Height Band. Diving or Drilling Models inhabit the Surface Height Band OR the Diving Height Bands as desired; see Changing Height Levels on Page 45. The Height Band and Height Levels a Model occupies, especially relative to another Model, can be very important when determining To Hit Numbers and modifiers. Important Note: All range in Dystopian Wars is measured horizontally between each Model s base (or footprint), regardless of any Height Band or Height Level differences between the Models. Land The Land Surface Height Level allows tanks and land-based walkers to move, shoot, and execute Boarding Actions against their targets. Models with Armoured designation are most likely to be found operating at this Height Level. 11


12 SECTION A1 GAME BASICS HEIGHT BAND HEIGHT LEVEL OCCUPIED BY: Stratospheric Aerial Models Aerial Obscured Aerial Models Flying Aerial Models and Support Aircraft Squadron (SAS) Surface Water or Land Naval and Armoured Models Diving Submerged Deep Diving Diving and Burrowing Models Diving Models 12

 7 6 - - Points Cost: 220 DR CR Mv HP 6 11 7\" 9 AP AA CC IR 11 7 6 7 LARGE NAVAL CAPITAL MODEL Minimum Move: 2\" Turning Template: Large Turn Limit:")
 Generator.")
 have a 270 degree Fore Arc of Fire.")
13 SECTION A1 GAME BASICS ANATOMY OF A MODEL PROFILE In this section we look at a Model s Profile, a term used to signify the Model s statistics and values that allow it to manifest itself on the Tabletop. KAISER KARL Heavy Battleship RANGE BAND Main Turret (P) P/S Broadsides (S) Heavy Speerschleuder (S) Aft Tesla Coils (S) Points Cost: 220 DR CR Mv HP " 9 AP AA CC IR LARGE NAVAL CAPITAL MODEL Minimum Move: 2" Turning Template: Large Turn Limit: 0" Squadron Size: 1 Model Crew Type: Regular Model Assigned Rules (MARs): Rugged Construction (2), Specialised Defences (2) Options and Upgrades: This Model has an Internal Shield (2) Generator. This Model may replace ONE of its Turrets with an External Calcification (12") OR External Tesla (8") Generator for no additional cost. This Model may change its Crew Type from Regular to Elite for +15 points Weapon Arcs TWO Main Turrets (P) have a 270 degree Fore Arc of Fire. ONE Main Turret (P) has a 270 degree Aft Arc of Fire. The P/S Broadsides (S) have a Broadside Arc of Fire. ONE Heavy Speerschleuder (S) has a 270 degree Fore Arc of Fire. The Aft Tesla Coils (S) have a 90 degree Aft Arc of Fire. 13
14 SECTION A1 GAME BASICS The followfing is a more detailed explanation of the elements that make up a Model s Profile. MODEL FUNDAMENTALS Flag These tell you which nation the Model belongs to. Some nations may lend some of their units to particularly close allies. Model Name The name of the Model, in this case a Kaiser Karl. Model Title The type of Model, in this case a Heavy Battleship. Points The initial points cost of the Model, before you add any upgrades. Crew Type The quality of the crew on board the vessel. These have a major impact when the ship is involved in a Boarding Action. Weapon Name The Name of the weapon. The name is important, as certain weapons have special rules attached to them. In the case of Gunnery weapons, the name will be followed by a (P), (S) or (T), denoting a Primary, Secondary or Tertiary weapons respectively. Profile Attack Dice These numbers are the Attack Dice a weapon has in a given Range Band (RB). If a weapon has a dash (-) that means it cannot attack at this Range Band. MAJOR STRUCTURE STATS DR The Model s Damage Rating (DR) is its ability to ignore light damage. An attack that equals or exceeds the Model s DR, but not its CR, will remove a Hull Point (HP) from the Model. CR The Model s Critical Rating (CR) is its ability to ignore heavier, more debilitating damage. An attack that equals or exceeds the Model s CR causes Critical Hit to a Model. This normally results in the Model losing TWO Hull Points (HP) and the enemy rolling on the Critical Hit Table. Some very small Models have no CR, only DR. These puny Models are most often obliterated when they take any Damage! Mv The Movement (Mv) value of the Model in inches. This is the maximum distance the Model can normally move in an Activation. HP The number of Hull Points (HP) the Model has. If a Model loses all of its Hull Points, it is Scrapped. The number of HP on a vessel can range from as little as 1 for some Tiny Models to a staggering 12 or more on some of the truly Massive Models. SUPPORT STATS AP The number of Assault Points (AP) a Model has. This represents the quantity of the Marines on board a ship, and is used both to defend the Model from boarding, and to launch Boarding Actions. AA The Ack Ack (AA) value of the vessel. AA is a weapon system used to attack or defend against Aerial Models and clear Airburst Mines, shoot down incoming Rockets, and defend against Aggressive Boarding Actions. CC The Concussion Charges (CC) value of the Model. CC is a weapon system used to attack Diving and Burrowing Models, defend against Torpedoes, clear Surface Mines and defend against Aggressive Boarding Actions by Models from below the Surface. IR The Impact Rating (IR) of the Model. This is used when a Model is involved in a Collision or when a Model elects to execute a Ram. GENERAL STATS Model Classification The Classification of the Model (in this case Large Naval Capital). This tells you about what size the Model is, which Height Levels and surface it exists on, and many other important aspects of how the 14

15 SECTION A1 GAME BASICS Model acts in the game. See Page 127 for more on Model Classifications. Minimum Move This is the Minimum distance a Model must move in a straight line before the Model may execute any Turns. Turning Template This is the type of Turning Template used by the Model. A Model with 360-degree in this entry can Turn freely to face in any direction at any point during their movement. Models that cannot move, such as Bunkers or Towers, cannot Turn and, as such, do not have a Turning Template listed. Turn Limit A Model may also have a Turn Limit. This is the distance it must move in a straight line before making a Turn. If a Model has no Turn Limit listed, or the limit is 0", it does not need to move in a straight line before making a Turn. Squadron Size The number of these Models that you may have in a single Squadron. Some Models, such as Escorts, may have a Squadron size of Attachment Only. They can only be bought as an Attachment in the numbers noted in the bracket for another Squadron, and may not be bought on their own, unless a specific condition or Model Assigned Rule applies. See Page 18 for more on Attachments. Other Models have a Squadron Size of Squadron Support Only. They are deployed by a Squadron with the Squadron Support Model Assigned Rule, and may not be deployed on their own unless a specific condition applies. Model Assigned Rules This section lists the Model Assigned Rules (MARs) that apply to the Model. See Page 88 for more on Model Assigned Rules. When designing the most deadliest of weapons it is always important to understand exactly where the weapon can fire, explains Lord Leonidas, chief scientist for the Covenant of Antarctica s Advanced Weaponry Division. It greatly helps a Commander to learn their weapon systems, understand what they can and, perhaps more importantly, cannot do. These machines of war are truly destructive, but they all have their inherent limitations. Options This lists any options the Model has, such as, in the case of the Kaiser Karl Heavy Battleship on Page 13, the Model may change its Crew Type and replace a turret of its choice for either a Tesla or Calcification Generator. Any points paid for Upgrades are added to the initial points cost of the Model and will be clearly noted in the entry. 15

16 SECTION A1 GAME BASICS Weaponry Arcs These are the Fire Arcs of the various weapons on the Model. In some cases, it will also list how many of a given weapon a Model has. If no number is given, it is always ONE weapon irrespective of how many weapon systems appear to be on the Model. THE STATES OF A MODEL A Model can exist in a number of States: Ready to Activate, Activated, or Lost. Ready to Activate Models that are ready to Activate are identified by their lack of an Activation Marker. These Models are yet to Activate in the Game Turn. All Models start a Game Turn in the Ready to Activate State unless a specific condition of Model Assigned Rule applies. Throughout the process of the Game Turn, however, they may change their State to one of the others mentioned below as they Activate, become Prized, Scrapped, etc. Activated Models that have Activated MUST have an Activation Marker allocated to them at the end of their Activation. Models existing in an Activated State may not execute an Activation/Action in the current Game Turn unless a specific condition of Model Assigned Rule applies. Lost Models that enter this State may NEVER leave it: they are effectively wrecked hulks/ghost ships, etc. Models that are considered to be Lost can exist in 2 sub-sets of Gaming State: Scrapped or Drifting. Scrapped Models that have been destroyed during the battle and removed from the Tabletop or have left it involuntarily. Scrapped Models are placed in the Scrapyard for easy totalling in the End Phase (see Page 84). Scrapped Models may not return to the Tabletop unless a specific condition or Model Assigned Rule applies. Drifting Models that have been effectively destroyed but have not entered the Scrapyard. These include Derelict, Prized and Salvaged Models. Drifting Models do not have an Activation and so can never take an Activation Marker. Drifting Models will often be required to perform certain Actions in the End Phase (see Page 84). SUMMARY In this section we have covered the core mechanics of the game. Although it might seem a lot to take in initially, in order to fully understand the rest of the game, it s important to be familiar with the principles explained above: so don t be afraid to read this section again, especially if you are new to Dystopian Wars! 16

17 17 SECTION A1 GAME BASICS
18 SECTION A2 SQUADRON RULES SQUADRONS Each Force in Dystopian Wars will contain a number of Squadrons that make up the Force under the overall command of a Commodore. A standard Squadron normally contains only one type of Model designated by its Model Name. Additionally, Models will often be referred to by a Mark (often denoted as MkI, or MkII, or be a letter such as A or B, etc...) in its Model Name. It is often possible for players to build Squadrons with Models that are identified as having different Marks provided the Squadron contents are of the same overall Model Name. Any Squadron with mixed Marks must be clearly identified in their Force List and on the Models themselves. The minimum and maximum number of Models per Squadron and the Points Cost of the Model, including any upgrades are detailed on the Model s Profile. Where possible, any upgrade taken for a Model must be clearly identified on the Model. This will be most commonly achieved by replacing a Turret or droppedin Generator for the chosen upgrade. From this information the number of points required to field a particular Squadron of Models can be calculated. MIXED SQUADRONS A Mixed Squadron is a Squadron containing Models with different Model Names, such as Escorts around a bigger Model. These can be specialised support units or units that directly enhance the combat effectiveness of the parent Models. There is more than one way of building a mixed Squadron, but all of them follow the same rules. A Mixed Squadron can be built via: The Attachment Model Assigned Rule (MAR). Specialised Group Squadrons. Combat Patrols. A Scenario dictating your Force List. The rules that cover a Mixed Squadron are: The basic Squadron before any Attachments are added is known as the Parent Squadron, and the Attached Model or Models are the Attachment Group. An Attachment Group may not have an Attachment Group itself. A Parent Squadron may only ever have ONE Attachment Group, unless Multiple Attachment Groups are listed in a Specialist Group Squadron. A Parent Squadron may not have an Attachment Group with the same Model Name as itself, regardless of Mark. The points cost of every Model in a Mixed Squadron comes from the normal allowance for their individual Size. The Mixed Squadron is a standard Squadron for the purposes of Command, and performing ALL relevant actions during any Squadron Activation. Unless specified otherwise, a Mixed Squadron may only contain Models from the same Force. ATTACHMENTS Attachments are the most flexible way of building a Mixed Squadron. When a Model has the Attachment MAR it specifies which Models it can be Attached to, as well as the maximum size of the Attachment Group. For further information on the Attachment MAR see Page 88. Escorts Escorts are smaller craft tasked to protect their parent vessel with additional Ack Ack (AA) and Concussion Charges (CC), and their guns often have far less difficulty in engaging small, fast threats than those of their parent vessels. An Escort, as designated in the Model Classification section of its Profile, can be attached to a Parent Squadron via the Attachment Model Assigned Rule. Escort Groups function as a standard Attachment Group in most ways, except that the Mixed Squadron does not take a Disorder Test if an Escort is Lost. Specialist Group Squadrons Specialist Group Squadrons are another unusual formation that allow a Squadron to punch above its weight against far heavier foes. A Specialist Group Squadron DOES NOT count towards the minimum requirement for ONE Large/ 18

19 SECTION A2 SQUADRON RULES Massive Squadron, ONE Medium Squadron and ONE Small Squadron. They may only be taken after the minimum Squadron Requirements are met. A faction s Force Guide will detail the composition of any Specialist Group Squadrons available to it and how many may be taken as part of any force. A Specialist Group Squadron must adhere to all parts of Force Organization and Force Building including Maximum Percentages. COMBAT PATROLS Combat Patrols may consist of either a Support Aircraft Squadron of Fighter Planes, referred to as a Combat Air Patrol (or CAP), or a formation of Line Infantry referred to as a Combat Infantry Patrol (or CIP). Unlike Attachments in Mixed Squadrons, Combat Patrols may attach & detach to and from any eligible Parent Model during the course of the Game. The squadrons are only considered to be a Combat Patrol when currently attached to a Parent Model. A single Large or Massive Model, or a Model with the Combat Patrol Model Assigned Rule, that is not Disordered may have one Combat Patrol (CP) Attached. Combat Air Patrols may attach to Models on the Surface or Aerial Height Bands, Combat Infantry Patrols may only attach to Armoured Models. A Parent Model CAN have an Attachment Group and a CP Attached at the same time. For more information on Combat Patrols, see Page 126. SQUADRON ACTIVATION ORDER Players use the order of Initiative for the current Game Turn to alternate performing a single Squadron Activation each, until ALL players have Activated ALL of their Squadrons ONCE during the Game Turn, at which point the current Game Turn enters the End Phase. During a Squadron Activation a player MUST perform ALL actions with ALL of the relevant Models in the Squadron in the correct Order of Activation before the next Squadron is Activated. Possible actions include those related to movement, combat, and boarding. Players may use specific Tactical Action Cards and resolve specific Disorder or Collision actions as required. It is likely that one player will have more Activations than their opponent as the game progresses, because of a higher number of Squadrons that they control in their Force in a given Game Turn. Once a player has finished activating all of their Squadrons for that Game Turn, the opposing player will finish ALL of their remaining Activations consecutively without the need for the Squadron Activation Order returning to the opponent. Embarked Models Models Embarked upon a Parent Model do not activate until they are Disembarked onto the Tabletop via their Model Assigned Rules or in the case of Landing Craft, their Model Function. They are not yet Disembarked, and so may NOT use make use of any Generators, MARs, weapons, etc, unless a specific MAR or condition applies: An Embarked Model is Lost if its Parent Model is Lost. An Embarked Model may not Disembark if its Parent Model is Disordered. General de la Légion Marielle Vieux 19
20 SECTION A3 GAME SET-UP CALL TO BATTLE! In this section players are expected to agree upon their preferred engagement theatre and design their list. It s best if the list creation aspect is done in isolation so as to ensure players can spring traps, fool opponents with unusual compositions, and otherwise deflect and deceive! The process for Call to Battle is divided into two distinct Segments: Common Agreements and List Building. 1. Common Agreements: Players must agree upon the Core Force Types, Maximum Force Value, Use of Allies and Theatre of Engagement 2. List Building: Build your Force List and Tactical Action Card Deck COMMON AGREEMENTS When setting up a game it is important to agree with your opponent the following parameters: The Core Force Type A Force MUST be Armoured, Naval, or Aerial in Core Force Type (often referred to as simply Core Force or Core Type). This refers to the main body of the Force and its likely constituents. This agreement allows players to predict with a certain amount of surety the kind of Force they are expecting to play against. Although it is possible to play an Aerial Force against an Armoured or Naval Force, it is unlikely to be as good a game as if two Forces of the same Core Force Type were playing against each other. The Maximum Force Value (MFV) A Force must be chosen with its individual Models organised into appropriate Squadrons, so that the total amount of points spent in the creation of the Force does not exceed the pre-agreed Maximum Force Value (MFV). Players may not spend more than their MFV unless their opponent agrees. Players should also agree upon the Complexity of Composition (see later), they wish to play when deciding their preferred MFV. The Use of Allies A Force may contain Allies using the rules found on Page 134, however neither side may take Allies (not even Close Allies) unless their opponent agrees. Theatre of Engagement Both players must agree on the dominant Theatre Type, either Land or Water, which will represent the majority of the Surface Height Level. See Page 104 for further details. BUILDING A FORCE LIST After players have agreed upon their Core Force Type, Maximum Force Value and Theatre of Engagement, all players must now set about constructing their Force Composition. Each player builds a Force in secret up to the Maximum Force Value with the following Rules for Force Composition: 1. Minimum Force Requirements. 2. All Forces must include a Commodore. 3. Core Force Percentage and Non-Core Force Percentages. 4. Maximum Percentages for Size within the Force. 5. Main Forces and Strategic Forces. 6. Local Support (Air and Infantry). 7. Build your Tactical Action Card Deck. 1. Minimum Force Requirements ALL Forces must purchase at least ONE Large or Massive Squadron, ONE Medium Squadron and ONE Small Squadron of the Core Force Type. Complexity of Composition Not every player wishes to compete at the highest level possible in Dystopian Wars. Some players simply just want to put some Models on a table and get at each other! This is entirely acceptable! The game is yours to play as you choose. In the early stages of playing Dystopian Wars we suggest players simply start with Force Composition Rule #1 (Minimum Force Requirements) and play a few games, before adding the next Force Composition Rule #2 (Commodore Requirement), and so on. Over a few games, the other Composition Rules should be slowly added at a pace players are happiest with. Equally if players want a simple, quick game, they might decide beforehand how many Force Composition Rules they wanted to play. 20
21 SECTION A3 GAME SET-UP Although Models taken as Attachments are paid for from their own Size (see below), they do not count towards the ONE Minimum Squadron Requirement if they are Attached to a Squadron of a different Size (see Page 18 for more information on Attachments). 2. All Forces must include a Commodore The Commodore must be placed on a Large or Massive Capital Class Model in your Force. The Model used as the Commodore s Flagship must be clearly noted in the Force List. 3. Core Force Percentage and Non-Core Force Percentages This ensures that a Force is representative of the likely components that should be within it. For example, an Aerial Core Force with an MFV of 1000 points must have at least 600 points of Models with the Aerial designation included. The Non-Core Models of the Force must not contain more than 40% of the MFV for the Force. For example, a Naval Core Force with an MFV of 1000 points may not have more than 400 points of Non- Naval Models included. Certain Models are ALWAYS treated as Non-Core: Infantry (of any type), Fortifications and Allied Battle Groups (see later). 4. Maximum Percentages for Size within the Force To represent the Force as a whole and to encourage Game Balance, Forces must be organised into percentages to allow players to play with Forces that are both balanced and fun. These percentages pertain to the Maximum Force Value (MFV) of the Force. So an Armoured Core Force totalling 1000 points may not spend more than 600 points on Large or Massive Models, or 600 points on Medium Models, or 400 points on Small or Tiny Models. All points paid for a Model, including any optional upgrades, come from the percentages for Model Size. Large and Massive Models 60% Maximum Medium Models 60% Maximum Small and Tiny Models 40% Maximum 5. Main Forces and Strategic Forces The term Main Force refers to the bulk of the troops arrayed against the enemy. These will include the critical assets in the Force and MUST always contain the Commodore s Model. This force MUST contain at least 60% of the Maximum Force Value (MFV) available to the Force. The term Strategic Force refers to the creation of strike elements within the Force that are tasked with specific engagement orders: Advance, Flank, and Reserve. This will affect their Deployment and arrival on the Tabletop and are governed by the following rules for composition: No more than 40% of the total MFV may be allocated to Models that are part of the Strategic Forces. Local Support may only ever be allocated to the Main Force, never to the Strategic Forces. Unless otherwise stated, Strategic Forces may never contain Large or Massive Models as they are far too cumbersome to react to specialised orders. Important Note: Fortifications ARE permitted as part of the Advance Force and so ignore the above limitation. When building a list it s important to ensure that Squadrons are allocated to one of these forces (Main, Advance, Flanking or Reserve) and that the minimum and maximum percentages are met. 6. Local Support (Air and Infantry) These are free Models and may NOT receive any costed upgrades of any type (such as Aces). All Forces gain 10 free Wings of Support Aircraft which may be organised as per the Local Air Support rules (see Page 113). The type of aircraft (Dive Bomber, Torpedo Bombers, Fighters, Reconnaissance Wings, etc.) taken as Local Air Support must be recorded in the Force List. Also, all Armoured Core Forces gain 2 free additional Line Infantry Companies which may be combined to form into a larger Formation if desired. See Page 123 for more details. Local Support (Air and Infantry) may only ever be allocated to be part of the Main Force. Certain nations Force Lists, or some scenarios, may alter the Local Support available to a Force. 7. Build your Tactical Action Card Deck At this point players should select their 16 Tactical Actions Cards they intend to have available to their Force in the upcoming game. For more information on Tactical Action Cards see Page

22 SECTION A3 GAME SET-UP Summary of Force Contents At the end of this process a player's Force should have: At Least ONE Large or Massive Squadron, ONE Medium Squadron and ONE Small Squadron. ONE Large or Massive Model in the Force should be clearly identified as the Commodore's Flagship, denoting his or her presence on-board. At least 60% of the Maximum Force Value should be taken up by Core Force Models No more than 40% of the Maximum Force Value is taken up by Non-Core Force Models. The Force's Size Maximum Percentage Allowances were not exceeded. Notations have been made next to Squadrons regarding whether they are part of the Main and Strategic Forces (Advance, Flank or Reserve). Remember the TOTAL percentage allowed for ALL Strategic Forces is 40% of the MFV. Free Local Support Models have been specified by their Squadron Type. The 16-Card Tactical Action Card Deck has been created. The Force List to the right shows an FSA Armoured Core List with an MFV of 1500 Points. The Parent Squadrons are in normal font,whilst any Attachments or other included Models are shown in italics. The coloured 1 shows at Least ONE Large or Massive Squadron, ONE Medium Squadron, and ONE Small Squadron is present. The 2 shows the Commodore has been identified on a Large or Massive Model in the Force The 3 shows Core Force Models, making it clear at least 60% of the Maximum Force Value is taken up by them. The 4 shows Non-Core Force Models, and they do not exceed 40% of the Maximum Force Value. 5 The Force s Size Maximum Percentage Allowance was not exceeded. 6 shows whether the Squadrons are in the Main, Advance, Flank or Reserve Forces. 7 shows that Free Local Support Models have been specified. 22
 Tiny 7 Armoured No Free Main 6 Tennessee Land Ship Large 3")
23 SECTION A3 GAME SET-UP FSA Armoured Core 1500 Points Name Size Type Core? Cost Force? Philadelphia Land Ship Commodore 2 Large 1 Armoured Yes 165 Main 6 2 Line Infantry Companies (deployed via the Philadelphia Land Ship) Tiny 7 Armoured No Free Main 6 Tennessee Land Ship Large 3 Armoured Yes 135 Main 6 Reno Heavy Tanks x 3 Medium 1 Armoured Yes 255 Main 6 Jackson Medium Tanks x 3 Medium 3 Armoured Yes 120 Main 6 Jackson Medium Tanks x 3 Medium 3 Armoured Yes 120 Flanking 6 Yorktown Bombards x 3 Medium 3 Armoured Yes 195 Main 6 Pioneer Small Tanks x 5 Small 1 Armoured Yes 125 Main 6 Defiance Robot x 5 Small 3 Armoured Yes 125 Main 6 Savannah Sky Fortress Massive 4 Aerial No 165 Main 6 9x Air Support Wings - Aerial No Free Main 6 Freedom Robot Escorts x3 (attached to Savannah Sky Fortress) Small 4 Aerial No 90 Main 6 Local Support 2 x Line Infantry Companies Tiny 7 Armoured No Free Main 6 5 x Dive Bombers 7 Aerial No Free Main 6 5 x Fighters 7 Aerial No Free Main 6 Points Totals Large 5 5 Small 5 Strategic Medium Non-Core & Massive & Tiny Forces
24 SECTION A3 GAME SET-UP MUSTER FOR WAR! Muster For War! is divided into two distinct Segments: Compare Forces and Rolling for Advantage. 1. Compare Forces This Step allows player to gain an insight into the composition of the enemy forces arrayed against them and ensures that all players have legal Forces. All players present their Force Lists to their opponents. In rare cases where Models have hidden rules or upgrades, players should refer to the specific scenario condition or relevant Model Function. Force Lists should be as neat as possible to allow for easy reading. 2. Rolling for Advantage Both players roll 2D6 and add the number of Squadrons in their Force with the Spotter Model Assigned Rule to the result. The player with the highest result is considered to have gained the Strategic Advantage. The player who rolled the lowest is considered to have the Operational Advantage. PREPARE TO ENGAGE! This is designed to bring players to the Tabletop and allow them to create their battlefield and is split into the following six Segments: 1. Board Size Decide the size of Tabletop to be played upon. 2. Terrain Placement Determine Terrain Areas Determine Amount of Terrain Placing the Terrain 3. Board Edges Pick Edges and organise Deployment Zones 4. Deployment of Models Advance Deployment Main Deployment Flanking Forces Reserve Forces Order of Deployment 5. Draw Field Orders 6. Choose your Tactical Action Card Hand 1. Board Size To create a good game, the Tabletop size should match the Maximum Force Values being played. If Models are too crowded there will not be enough space to manoeuvre; equally, if there is too much space, the game will drag on. Below you will find a table that suggests the sizes of boards that we would recommend for playing Dystopian Wars. Up to 999 pts pts 48" long x 48" wide 72" long x 48" wide pts Each extra 500 pts 96" long x 48" wide + 24" length 2. Terrain Placement The placement of Terrain follows a process explained below: 2.1: Determine Terrain Sectors The game board is divided into Terrain Sectors measuring 24" x 24" (or as close as possible). 2.2: Determine Amount of Terrain Both sides roll a single D6 in each Terrain Sector. If a player rolls a 5 or 6, place an Activation Marker (AM) for their Force in the Terrain Sector. This means the minimum amount of Activation Markers that may be placed in a Terrain Sector is 0, and the maximum number is : Placing the Terrain The Player with the Strategic Advantage chooses which player places terrain first. The player removes one of their Activation Markers from a Sector, and MUST replace it with a piece of Terrain in that Sector. Their opponent then chooses one of their Activation Markers, and MUST replace it with a piece of Terrain in that Sector. This process is repeated until all Activation Markers have been removed. No piece of Terrain may be larger than 9" x 9" and no smaller than 3" x 3". All Terrain must be placed entirely within the Terrain Sector, and no piece of Terrain may be deployed within 4" of another or within 4" of a Flanking Edge (see Page 26). For more information in the Types of Terrain and how they affect the Tabletop, see Page 104. This system is designed to create diverse battlefields in a random fashion in order to keep the game-play balanced and interesting. However, in non-competitive game-play, players are free to choose as much Terrain as 24

25 SECTION A3 GAME SET-UP Here is a simple diagram of a 6' by 4' gaming table, divided into SIX 24" by 24" Sectors. Such a Tabletop would be ideal for a 1000 to 1500 points game. they like, of any size preferred and deploy their Terrain as they choose: provided both players agree of course! 3. Board Edges Firstly, the player with Strategic Advantage picks a Main Deployment Zone (green-shaded) and their opponent must take the opposite Main Deployment Zone. Secondly, the player with Operational Advantage chooses a Flanking Zone (red-shaded), and their opponent must take the opposite Flanking Edge. The Centre Line of the table (denoted in the diagram as the Dotted Line) is the starting point from which the other Areas and Zones are measured. The No Man s Land is an area of the table 8" from the Centre Line in both directions. The Advance Deployment Zone is an area of the table that is between 8" and 16" from the Centre Line in both directions. The Main Deployment Zone is the remainder of the Tabletop: in some cases where players are playing on oddly shaped boards or even lengthways, this area may be larger or smaller. This means that on a standard gaming space with 48" between each player s Board Edges, there should be a 16" No Man s Land Area, TWO 8" Advance Deployment Zone Areas, and TWO 8" Deployment Zone Areas. Example of Terrain Placement and Declarations During the Terrain Placement Step, two players playing a Naval Game both have the opportunity to place Terrain, each on the Water Major Surface. After rolling, both players may place up to three pieces of Terrain each. Having Strategic Advantage, Player B dictates that Player A must place the first piece of Terrain. Player A elects to place an Island that is 6" x 3" in footprint and Player A nominates it as being Large, due to the fact that this Terrain Feature can exist as either Large or Massive in Size. Player B chooses to place a Reef that is 8" x 4" in footprint and it is automatically considered to have NO Size. Player A then elects to place another Island, this time with a 4" x 4" footprint, nominating it as Massive in Size, despite its smaller footprint compared to the first Island placed. Player B chooses to place a Sandbar that is 6" x 2" in footprint and it is automatically considered to be Tiny in Size. Player A chooses to place a Mountain with a 4" x 5" footprint. Player B chooses to place a Sandbar that is 6" x 6" in footprint and it is automatically considered to be Tiny in Size. 25

26 SECTION A3 GAME SET-UP 4. Deployment of Models The Deployment of Models Segment is divided in order into 4 Key Steps, with each Step being completed according to the Order of Deployment before moving on to the next Step: 4.1: Advance Deployment The player with Strategic Advantage dictates who deploys a Squadron from their Advance Force first. Players then alternate the deployment of Squadrons until all Squadrons are deployed from their Advance Forces. Models allocated to the Advance Force may choose to deploy in their Advance Deployment Zone or in the Main Deployment Zone. 4.2: Main Deployment The player with Operational Advantage dictates who deploys a Squadron from their Main Force first. Players then alternate the deployment of Squadrons until all Squadrons are deployed from their Main Forces. Models allocated to the Main Force must deploy in their Main Deployment Zone. The Commodore MUST deploy as part of the Main Force, with the Commodore Game Marker clearly visible. 4.3: Flanking Forces The speed with which Flanking Forces can enter the battlefield is determined by whether players have the Operational or Strategic Advantage. The die roll to determine when the Flanking Forces arrive is made after the Main Deployment Stage. Each player openly rolls a D3 and places it near to the edge of the table where their Flanking Force is set to arrive. The number rolled on the Flanking Dice denotes the Game Turn the Flanking Forces will arrive in their entirety! These forces are a smaller Battle Group, tasked with this flanking manoeuvre and are out of contact with the Commodore for the duration of their absence from the battlefield. The player with Operational Advantage may choose to re-roll their initial Flanking Dice if desired. The player must accept the second result, even if it was the same! All Squadrons deploying onto the Tabletop in this way do so following the rules for Moving Onto the Tabletop found in the Movement Section on Page

27 SECTION A3 GAME SET-UP 4.4: Reserve Forces The reliability with which Reserve Forces can enter the Tabletop is determined by whether players have the Operational or Strategic Advantage. The die roll to determine when the Reserve Forces arrive is made after the Flanking Forces arrival time has been determined. Each player openly rolls a D3 and places it near to the edge of the Tabletop where their Reserve Force is set to arrive. The number rolled on the Reserve Dice denotes the Game Turn the Reserve Forces will arrive in their entirety! These forces are a smaller Battle Group, tasked with this supportive manoeuvre and are out of contact with the Commodore for the duration of their absence from the battlefield. The player with Strategic Advantage may choose to re-roll their initial Reserve Die if desired. The player must accept the second result, even if it was the same! All Squadrons deploying onto the Tabletop in this way do so during the Late Arrivals Segment of the Pre- Turn Phase and follow the rules for Moving Onto the Tabletop found in the Movement Section on Page : Order of Deployment Each player must deploy Squadrons within each Force in the following order: most time to manoeuvre into position, then the Large Models and so on... So it s only reasonable in the abstracted nature of alternating deployment that they would be radioing back the location of such assets in that order! Deployment is done in an alternating fashion using the order above. Models may elect to Deploy at any Height Level that they might otherwise occupy in-game. In the case of Flanking and Reserve Forces, the entire Force is Deployed during the Late Arrivals Step of the Game Turn they enter, using the rules for Moving Onto the Tabletop found in the Movement Section on Page 47. Any Models or Support Aircraft Squadrons deployed with a Parent Squadron as part of a Model Assigned Rule (MAR) deploy at the same time as the Parent Squadron, using their MAR as a guide. Fortifications must always be allocated to the Advance Force, but may choose if they deploy in the Advanced or Main Deployment Zones as normal. Aerial Models may elect to deploy in either the Flying or Obscured Height Levels. Diving and Burrowing Models may elect to deploy in the Surface or Submerged Height Levels. No Models may choose to deploy in either the Stratospheric or Deep Diving Height Levels. Any Fortifications (including any Infantry or Mines that might be part of the Fortification's purchase cost). Any Massive Models (Or Models with an Altered Silhouette (Massive) Model Assigned Rule). Any Large Models (Or Models with an Altered Silhouette (Large) Model Assigned Rule). Any Medium Models (Or Models with an Altered Silhouette (Medium) Model Assigned Rule). Any Small Models. Any Tiny Models. Any Local Support. Permanency then Size A good rule of thumb when remembering the order in which players should deploy their forces is to think from the point of view of their opponent s Reconnaissance, elements which would have scouted the battlefield before the battle was joined. The first Models they would have spotted would have been the permanent structures such as Fortifications, next would have been the Massive Models as they take the 27
28 SECTION A3 GAME SET-UP 5. Field Orders Field Orders are the way players determine the winner of their game. They represent the orders from high command, as filtered through creative misunderstanding and the necessity of circumstances! Field Orders are determined in secret by drawing a card from their own Field Order Deck. These should not be revealed to other players. A player may choose to reject their drawn Field Order, and instead choose the Free to Engage Order. However should the player choose to do this, they must reveal their intention to their opponent(s) IMMEDIATELY, the drawn Field Order is discarded and the player looks through their Orders Deck for the Free to Engage order, placing it face up at the side of the table. To complete Field Order 1, you must score 70% of the agreed MFV in Victory Points. This is achieved most commonly by Scrapped enemy Models, capturing enemy Models as Prizes or forcing your opponent to fight to Salvage their own Models. To complete Field Orders 2, 3, and 4, you must Scrap or Prize or force the Salvage of ALL enemy Models of the relevant Size, and score 50% of the agreed MFV in Victory Points. To complete Field Order 5, you must Scrap or Prize or force the Salvage of your opponent s Commodore Model and score 50% of the agreed MFV in Victory Points. All players MUST keep a running tally of their scored Victory Points at all times. This is critical if players are to determine who is winning, and how close they are to achieving their Victory Conditions. The game will finish at the End of Game Step of the current Game Turn s End Phase provided the Victory Conditions are still met. (see Page 85). Important Note: Should your opponent s Commodore escape on his personal transport and seek refuge on another model using a certain Tactical Game Card, you CANNOT be considered to complete this Field Order until the new Commodore s Model is also Lost! 6. Choose Tactical Action Cards Tactical Action Cards form an important part of Dystopian Wars, giving players a chance to respond to the forces presented before them with a series of tactical ploys and stratagems that will help steer a wily commander to eventual victory! The specific Cards a player wishes to choose should be taken from their pre-prepared Tactical Action Cards Deck in secret and kept face down at the side of the table, ready to be played when required. The number of TACs a player can choose from to build their TAC Hand is determined by the MFV decided upon by the players. For more information on Tactical Action Cards, deck composition and their in-game use, see Page 30. ENGAGE! Players are now free to unleash their guns and rush into the maelstrom of fire and steel that is Dystopian Wars! Move on to the next Section. Field Order Victory Conditions 1. Free to Engage Score at least 70% of the enemy MFV in Victory Points. 2. Vital Asset Destruction Score at least 50% of the enemy MFV including ALL Large and Massive Models. 3. Break their Backs Score at least 50% of the enemy MFV including ALL Medium Models. 4. Thin Their Ranks Score at least 50% of the enemy MFV including ALL Small Models. 5. Go for their Leader Score at least 50% of the enemy MFV including the Commodore s Model. 6. Commodore s Discretion Show this card to your opponent then choose a new order, placing it face up at the side of the table as normal. 28


29 29 SECTION A3 GAME SET-UP
30 SECTION A4 TACTICAL ACTION CARDS TACTICAL ACTION CARDS These cards introduce themed elements of Force tactics and weird science to the action. The Tactical Action Card Deck (TAC-Deck) is chosen during Force List creation and the player then uses this deck to choose a number of TACs to form their Hand. The Tactical Action Cards in the player s Hand (TAC- Hand) are designed to represent the various schemes, stratagems, tactics and ploys available to Dystopian Wars Commanders who are striving forwards to victory! TYPES OF TACTICAL ACTION CARD The Tactical Action Cards Deck is divided into 5 Key Types: Generic Cards These Tactical Action Cards are usable by all players and provide a wide range of abilities and benefits. As you would expect they do not favour any one Nation s game-play or tactics but instead are more diverse. Squadrons from any Allied Battle Groups may make use of these cards as their ubiquitous nature allows general play. Players can substitute Generic Cards for preferred Factional, Battle Group, National Focus, or Heroic Force Commodore Tactical Action Cards (using the rules stated below): Factional Cards These Tactical Action Cards are heavily restricted and represent the overall allegiance of the Force to one of the three key factions in Dystopian Wars: Grand Coalition, Imperial Bond or Free Nations. Members of any Allied Battle Groups (except Mercenaries) may always make use of these cards as to have allied with the Parent Nation they had to also be a member of the relevant Faction. Battle Group Cards These Tactical Action Cards are only available to players who have chosen specific formations identified in the Force Lists for their Nations. These Battle Groups are designed to represent strike forces that complement each other, and by taking them, the player opens up the possibility of taking a new Tactical Action Card as a result. Only Squadrons listed as part of the relevant Battle Group may make use of these cards. National Focus Cards These Tactical Action Cards are only available to players who are playing a particular Nation. National Focus Cards are designed to allow players to tailor their tactics to better suit the expected play-style of their chosen Nation. Members of any Allied Battle Groups may NOT make use of these cards. Heroic Commodore Cards Some Commodores will allow players to take Tactical Action Cards as part of their rules. These heroic individuals are able to direct special operations on the battlefield and, by taking them the player opens up the possibility of taking a new Tactical Action Card as a result. Members of any Allied Battle Groups may NOT make use of these cards. BUILDING YOUR TAC-DECK The TAC-Deck MUST number 16 Cards, taken initially from the Generic Card Type. Cards that are Generic can be replaced for Non- Generic cards such as Factional, Battle Group, National Focus, and Heroic Commodore cards as desired, however the Non-Generic card replacing the Generic Card within the deck MUST have the same VP Points Cost as the Generic card it is replacing, and no Card may be repeated in the TAC-Deck. This ensures that players tailor their TAC-Deck rather than overpower it, and encourages more consideration of the cards they are likely to need based upon their Force Composition and gaming strategy. TAC-HAND SIZE Unless otherwise stated, the number of Tactical Action Cards available to players to form their TAC- Hand is dictated by the size of MFV that was agreed upon during the Call to Arms Segment of Pre- Game Set Up. Each player starts with TWO Tactical Action Cards in their Hand by default. For each FULL block of 250 points allocated as MFV, the TAC-Hand increases by one additional Tactical Action Card. So, for example, in a 800pts Game, each player would have the ability to choose 5 Tactical Action Cards (TAC) to form their TAC-Hand, with the other cards in the Deck unusable and so are discarded. The maximum number of Tactical Action Cards that any one player may hold as part of their 30


31 SECTION A4 TACTICAL ACTION CARDS Default Cards = 750pts * = 5 TAC Hand Size * The game would have to be 1000 pts to allow for another card to be taken. TITLE All Cards have a Title that should be read aloud when played. FLAVOUR TEXT Each Card will have a small amount of flavour text in Italics that sets the scene for its use. RULES The Card will have its rules of play and when it can be utilised. TYPE Each Card has an identifying label showing which Type of Action Card it is. VALUE Each Card has an associated Victory Points (VP) cost attached to it. This cost does not come into play until a player chooses to use the card. 31
32 SECTION A4 TACTICAL ACTION CARDS TAC-Hand is 10 (up to the 2000pt MFV level). Should players play Games with larger MFVs the limit is still 10, unless otherwise decided upon by both sides. CHOOSING THE CARDS IN YOUR TAC-HAND The use of Tactical Action Cards is NOT random. Players are free to choose which TACs they would like in their Hand for use in the game, taking their preferred Cards from their Tactical Action Cards Deck created during the List Building Segment of the Pre-Game Set-up (see Page 20). There are no limitations to the amount of Victory Points (VP) a player may hold in their TAC-Hand, beyond the substitution requirement of initial Deck Building and the required Hand Size based upon the MFV being played. The amount of VP in the TAC-Hand only becomes important when the cards are used. The Tactical Action Cards in the player s Hand are SECRET and are chosen from the TAC-Decks once players have reached the Tabletop, after Force Lists are exchanged, and Models have been deployed, AFTER Field Orders are drawn. An opponent should not know the TACs a player has taken! Equally neither player knows their opponent s Field Order at the point of TAC choosing either, so players should be mindful of taking the TACs that complement their Force and preferred strategies based upon the situations they might find themselves confronted with on the battlefield during the encounter, rather than simply choosing the best cards on first inspection of their own Field Order. Players should also be aware that once they choose their preferred TACs for the upcoming engagement, they may NOT re-draw cards from the remainder of their TAC-Deck unless a specific scenario or gaming condition applies. Essentially, the Cards that make up the TAC-Hand are a finite set of tactical options available to a commander, designed to assist in the prosecution of their Field Orders and Engagement Protocols. Long-term, Spartan Games will be releasing many Tactical Action Cards both as part of new product releases and for campaign supplements, so don t forget to keep a close eye on the Spartan Games website at FOR THOSE WHO LIKE A CHALLENGE... The Tactical Action Cards Deck available to players should always number 16 Cards, although certain Generic Numbered Cards are often swapped out for preferred Cards from the other Card Types. This Deck should be shuffled well then, players should then deal out the number of cards that would ordinarily be in their starting Hand face down on the table in front of the opponent and plays with this random assortment for the duration of the Game. This is much more challenging as players cannot guarantee their Hand as they can in the method above, and playing this way should be considered to represent the Fog of War, clouding the best laid plans of even the most accomplished commander. It is also important for players to note that Cards generated in this manner are SECRET, and so your opponent will not know which cards you have drawn (and vice-versa!). PLAYING TACTICAL ACTION CARDS The conditions surrounding a TAC s use is always noted on the Card itself; however a number of persistent rules are always in effect when using TACs: A Force that has Lost its Commodore may not play TACs, but may use them to Cancel opponent s TACs as normal. A TAC that has been played CANNOT be retracted unless it was played incorrectly. A TAC may not be played on a Squadron that began its Activation Out of Coherency. A player may not play more than ONE TAC during any single Squadron Activation or Pre-Turn Tactical Actions Cards Segment. Once a TAC has been played, it should remain face up nearby until the end of the Activation/ Pre-Turn Segment as a visual reminder. If a situation specifies that you must Discard a Card, the Card is removed from the game without being played and so would not enter the Scrapyard. The playing of TACs on Allied Squadrons is limited and may only be done if certain conditions apply (see Allies Rules on Page 134) A played TAC is always placed in the player s Scrapyard, as are cards used to Cancel cards played by your opponent. Cancelled TACs are considered to be Discarded as they are unplayed and do not enter the Scrapyard as a result. 32

33 SECTION A4 TACTICAL ACTION CARDS Victory Points Using the tactical power of a Nation s best and brightest isn t free, and Commodores must be careful not to fritter away their resources too cheaply. In game terms, this is represented by a cost that is always found at the bottom of the Card. This cost is added to your opponent s running Victory Points Total when the Card is played and the used TAC is placed in your Scrapyard for ease of totalling during the End Phase (see Page 85) Cancelling Tactical Action Cards The effects of Tactical Action Cards can often be catastrophic if played at just the right time. So much so that is essential that players have a means at their disposal whereby they can Cancel particularly devastating Cards played against them. To Cancel a TAC played by an opponent, a player must sacrifice a Card or a combination of Cards of an equal or higher Victory Points cost than the TAC that is being played. If a player manages to Cancel the Card played by an opponent, the Cancelled Card is Discarded and the Cancelling player must add the Card used to Cancel to their own Scrapyard, adding to their opponent s running VP total. FOR THOSE WHO LIKE LONGER GAMES... Using Tactical Action Cards aggressively may speed up the arrival of either player s Victory Point total and thus end the game sooner than anticipated! If both players agree, an alternate method of scoring TACs is to take away the cost of TACs from a player s own Victory Point total, instead of adding the cards to your opponent s Scrapyard. TACs IN MULTI-PLAYER GAMES Although it is preferable for everyone to have their own deck of Tactical Action Cards, it is possible share a deck. Each player will need to put any played TAC into their OWN Scrapyard. You may not play Cards on allied players Models unless the Card text specifically allows you to. In games with more than two players per side you may ONLY play cards to benefit Models you control or to hinder enemy Models. You may NOT Cancel a Card used against a Model belonging to an allied player (for more information on Multi-Player Games see Page 137). I have always enjoyed a good game of cards. They say you need a poker face to be a great player, to give nothing away, explains Lady Agnes Fitzwallace, one of the greatest spies to ever come out of the fair shores of England. I think the same applies to TAC Cards. I mean, it s always a good thing to surprise your enemy with something they weren t expecting. So never let your face give you away! 33

34
35 35 INTRODUCTION

36 SECTION B1 ORDER OF PLAY ORDER OF PLAY As you might expect, in a game of Dystopian Wars, there must be a structure through which the game must be played. This allows for the game to flow, and provides suitable signposts for players to understand when relevant Actions, or Steps must take place. The Game breaks down into: Game g Game Turns g Phase THE ANATOMY OF A GAME TURN During the Late Arrivals Segment, ALL Models in the Strategic Force MUST be placed so their Aft 90-degree arc is touching the relevant edge of the Tabletop. No Model may be deployed in Terrain that is Impassable to it. Any Squadrons which do not have a facing, such as Support Aircraft Squadrons, must be placed so any part of the Squadron is touching the relevant Tabletop edge 3. Determine Initiative Segment Using an Opposed 2D6 test, players determine the Initiative Order. The Player who rolls highest is first in the Initiative Order, the second highest is second in the Initiative Order, and so on. A Game of Dystopian Wars is commonly divided into Game Turns, during which time forces will clash in apocalyptic Land, Sea and Air battles! A Game Turn is divided into: Pre-Turn Phase g Activation Phase g End Phase Phases subsequently break down into: Phase g Segment (if required) g Step g Action THE PRE-TURN PHASE During the Pre-Turn Phase, players execute the playing of Tactical Action Cards that affect the upcoming Game Turn, bring on Reserves and Flanking Forces, and determine who has the Initiative for the Game Turn. The Pre-Turn Phase is divided into the following Segments, which must be resolved in order: 1. Tactical Action Cards (TAC) Segment Any players wishing to play TACs in this Segment announce their intention by placing a single Card face down on the table in front of them. The player with Strategic Advantage determines the order in which these face-down cards are turned over and resolved. 2. Late Arrivals Segment Models that are scheduled to arrive this turn do so in the following way. The player with Operational Advantage may decide which player must deploy a Squadron from their Strategic Forces first. Squadrons are placed alternately, using the Standard Order of Deployment. As any chemist will tell you, there is a right sequence of doing things, and a wrong sequence the results of which can be potentially catastrophic explains Yoshiro Nagsumi, Chief Alchemist for the Empire of the Blazing Sun. 36
37 SECTION B1 ORDER OF PLAY 4. First Activation Segment The player who is first in the Initiative Order Activates their first Squadron. Other players activate Squadrons in Initiative Order. Once all players have activated one Squadron, refer back to the Initiative Order to activate other Squadrons in the players respective Force Lists. (see Page 19 for more details). ACTIVATION PHASE THE END PHASE The End Phase is divided into the following Segments and Steps: THE END PHASE TABLE Segment Compulsory Actions Step Derelict HP Loss Drifting Models During the Activation Phase, players execute the Command and Control, Movement, Firing, Boarding, and Disorder Segments. The Activation Phase breaks down into: Phase g Segment g Step g Action Each Segment in this Phase concludes with a Consolidation Step to allow players to check they have completed their Actions successfully and recorded all necessary events on the Tabletop and on their Victory Points totals. ACTIVATION PHASE TABLE Segment Command Step Command Coherency Command and Control Command Consolidation Damage Repair Persistent Effects Restore Order Check for End of Game Move on to the Next Turn Critical Repair Tests Persistent Effects Repair Tests Resolve Persistent Effects on Models Remove In-Game Generator Effects Bring Disordered Squadrons under control Compare Victory Points to Force Orders Return to Pre-Turn Phase Movement Firing Movement Declarations Movement and Manoeuvre Movement Consolidation Declaring Attacks Declaring Counter Attacks Resolve Auxiliary Fire Resolve Ordnance Fire Firing Consolidation General of the Sword Ryuchi Konomake Boarding Nominate Targets and Assault Groups Anti-Boarding Declarations Anti-Boarding Fire Close Quarters Battle Determine the Victor! Boarding Consolidation Disorder Disorder Test Resolution 37
38 SECTION B2 CRITICAL HIT TABLE, ATTACKS AND DAMAGE TYPES OF ATTACK All damage in Dystopian Wars originates from one of TWO sources: Indiscriminate Attacks or Targeted Attacks! Indiscriminate Attacks Indiscriminate Attacks are just as the name implies Indiscriminate! Shield Generators protect Models from gunfire, not a Battleship at ramming speed, and being hard To Hit does not protect against Artillery blanketing the whole area. Attack Dice originating from any of the following sources are considered to be Indiscriminate Attacks: Collisions or Rams Magazine Explosion Critical Effects Ordnance Attacks resolved using a Template Mine Explosions Any other Attacks identified as Indiscriminate Attacks. Indiscriminate Attacks ignore all of the following: Armour Model Assigned Rules (MARs) All Defensive Generator Effects. All To Hit modifiers, Positive AND Negative. To Hit Number for Indiscriminate Attacks Most sources of Indiscriminate Attacks will specify the To Hit Number they use. If they do not, they use the Basic To-Hit Number as determined by the Height Level (see table on Page 61). Targeted Attacks All other forms of Attacks not listed above are considered to be Targeted Attacks, and are susceptible to any Armour MARs, To-Hit modifiers, and Defensive Generators as applicable. DAMAGE Loss of Hull Points (HP) in Dystopian Wars manifests itself in two key forms: Damage and Critical Hits. If a Model suffers multiple Attacks in the SAME STEP (most often as being the target of multiple ordnance attacks from the same Squadron), it may sustain several points of Damage or even several Critical Hits. All Attacks in a single Step are effectively SIMULTANEOUS. However, for ease of play, we resolve the Attacks in the order in which they were declared. APPLYING DAMAGE Damage is applied using the following process: 1. Determine form of Damage from all Attacks 2. Apply Damage HP Loss, if applicable 3. Apply Critical Hit(s) and HP Loss, if applicable 1. Determine Form of Damage Damage is applied to a Model when the number of Hits from a single Attack is equal to or greater than the Model s Damage Rating (DR) or Critical Rating (CR). The type and amount of damage applied depends on the total number of successful Hits from the Attack, after all Defensive Counter Attacks, Defensive Generators, Tactical Action Cards, MARs and any other applicable effects have been taken into account. A Model can suffer either Damage or Critical Hit(s), but never both as a result of the same Attack. Damage If the total number of Hits against a Model in a single Attack equals, or exceeds, its Damage Rating, but NOT its Critical Rating, the Model has suffered Damage, and loses 1 Hull Point (HP). Critical Hits If the total number of Hits against a Model in a single Attack equals, or exceeds, its Critical Rating, the Model has not suffered Damage, instead it has suffered a Critical Hit. If the total number of hits equals, or exceeds, TWICE the Critical Rating, the Model has suffered TWO Critical Hits, and so on.the Model loses a number of Hull Points (HP) indicated by the Critical Hit that is rolled (see the Table on Page 143). With the exception of the loss of Hull Points (HP), Assault Points (AP), gaining additional Persistent Damage Markers the effects of multiple instances of the same Critical Hit DO NOT stack. However, each instance of the effect will need to be individually repaired by a successful Damage Repair Test in the Game Turn s End Phase, before the effect is removed from the Model. 2. Apply Damage HP Loss For each Damage result inflicted upon a Model, place ONE Hull Point (HP) Loss Game Marker next to it to represent the point of Damage. If Damage reduces the Model to ZERO remaining Hull Points (HP) it is IMMEDIATELY Scrapped and removed from the Tabletop. 38
39 SECTION B2 CRITICAL HIT TABLE, ATTACKS AND DAMAGE If the Attack inflicting the Damage has the Piercing MAR and the Model survives, make the roll on the Critical Hit Table now; see Critical Effects without Suffering a Critical Hit (see below). 3. Apply Critical Hits If the Model has suffered a single Critical Hit, make a roll on the Critical Hit Table and apply the corresponding Hull Point loss and the Critical Hit Effect in full. If the Model is reduced to ZERO Hull Points as a result of the Critical Hit, it is Scrapped and is removed from the Tabletop. However, the Critical Hit must still be rolled as it is possible to score a Double 1 and generate a Magazine Explosion! If the Model suffered multiple Critical Hits, the next is applied in the same way. This is continued until there are no further Critical Hits to apply, or the Model is Scrapped in which case no further Critical Hit Table rolls are made. See Page 143 for the Table. Important Note: Any Model with an Initial Hull Point value of 2 or less is immediately Scrapped if the number of Hits against it equals, or exceeds, its Critical Rating, without rolling on the Critical Hit Table. CRITICAL EFFECTS WITHOUT SUFFERING A CRITICAL HIT This may sound odd, but often through the rules there will be mention of situations whereby a gaming effect causes a Model to suffer a specific Critical Effect without actually having suffered a Critical Hit brought on by the Model having its CR reached. Examples of this might be Calcification Generators causing Hard Pounding Effects, Glacier Generators causing Navigational Lock/Engine Failure Effects, or Models Colliding with Terrain suffering Engine Failures. In these cases, the Result column, the Effect column and the Repairable column of the Critical Hit Table is used, but the 2D6 Dice Roll and HP Loss columns are ignored. In other cases, a Model Assigned Rule or Munitions might allow for a roll to be made on the Critical Hit Table with various conditions applying. In these cases, as above, the Result column, the Effect column and the Repairable column of the Critical Hit Table is used, but the HP Loss column is ignored. SUPPORT AIRCRAFT DAMAGE See the Carriers, Drone Launchers and Support Aircraft section on Page 112. HULL POINTS & ATTACK DICE The Hull Point (HP) value of a Model is a measure of how much punishment it can take before it is Scrapped. Hull Points are reduced during the game as a result of Damage and Critical Hits. If a Model has suffered a loss of Hull Points equal to, or exceeding, its Initial Hull Point value, then the Model is Scrapped and should be immediately removed from the Tabletop and placed in the Scrapyard. The current Hull Point (HP) value of a Model is not only a measure of how much Damage it can take before being Scrapped, it is also a measure of the health of a Model s own weapon systems. If the Model s current HP value is less than its Initial HP value, the Model subtracts 1 Attack Die (AD) from every Gunnery Ordnance and Auxiliary weapon for each lost Hull Point, unless a specific condition applies, such as the Redoubtable MAR. Attack Dice from any weapon system can never fall below 1. Repaired Hull Points also repair lost AD in this way (see Repair on Page 84). For example, a Battleship is targeted by two separate Attacks from the same Squadron. One attack scores a Damage, whilst the other scores a Critical Hit. Regardless of which attack was rolled first, the Damage result is applied first, then the Critical Hit is applied. Important Note: This means that the Model suffering the Critical Effect(s) in these ways MAY NOT lose any HP, depending on how the Critical Effect(s) was inflicted. 39


40 SECTION B3 DISORDER AIR POWERS! Although the Russian Coalition has focussed much of its attention on land superiority, the vast distances it must wage war over has led to the military strategists demanding a powerful Aerial Fleet be assembled. Here you can see three of its key flying machines of war in formation: the Tunguska Class Large Skyship, Saransk Class Medium Skyship, and Suyetka Class Small Skyships. DISORDER The men and women that crew the Sturginiumpowered vessels that take to the oceans, cover the landmasses and fill the skies of Dystopian Wars are hardy souls, often too heroic, zealous or world-weary to be fazed by the nearby destruction of one of their own. But there will be times when morale has been broken, and the brave few that remain find themselves sorely tested. Disorder Test Resolution Any number of events may occur that cause a Squadron to take a Disorder Test to check if they will become Disordered. Squadrons that are already Disordered are not required to take any further Disorder Tests, and Disorder will automatically be removed during the appropriate Segment of the End Phase of every Game Turn, as the officers present move to restore order. 40


41 SECTION B3 DISORDER A Disorder Test is required for the Squadron during the Disorder Segment of any Activation where the following events occured. These events DO NOT trigger a Disorder Test if the Squadron is already Disordered. A Model in the Squadron has been Lost. This does NOT apply to Attached Escorts or Combat Patrols that are Lost. The player s Commodore is Lost. Every Squadron in the Force must take an IMMEDIATE Disorder Test. A Squadron is Out of Command Coherency during the Disorder Segment of its own Activation. A specific scenario condition has been met. An applicable Model Assigned Rule is in play. A Squadron is only required to make a maximum of ONE Disorder Test per Squadron Activation. Important Note: A Model is considered to be Lost if it s been Scrapped, made a Derelict, a Prize, a Salvage, or has been moved off the Tabletop, unless a specific Scenario Condition applies. Command Coherency All Models in the same Squadron should remain within Command Coherency of at least ONE other Model in their Squadron to perform at their effective best. In Dystopian Wars, Command Coherency is 8", and is measured from any point on one Model to any point on another. To be in Command Coherency, a Model should be within 8" of a second member of the squadron, and this Model should be within 8" of a third Model, and so on until the entire squadron is in Coherency. If any Model is not in Command Coherency with the rest of it's squadron during the Disorder Segment of its Activation, the entire Squadron is considered to be Out of Command Coherency. A squadron consisting of only one Model is never considered to be Out of Command Coherency. If the Squadron is Out of Command Coherency, the test requires an ADDITIONAL success to pass. If the Commodore has been Lost, the test requires an ADDITIONAL success to pass. Important Note: Any additional successes required to pass a Disorder Test are cumulative. Commodore Command Radius Bonus If the Squadron has a Model within 8" of the Commodore, an extra (RED) 1D6 is rolled for the Disorder Test. Disordered Squadrons If a Disorder Test is Failed, the Squadron is Disordered. Models that are Disordered CANNOT: Perform ANY Firing Options other than Standard Fire. Have Tactical Action Cards played upon them by their controlling player. Initiate a Boarding Action. Perform Carrier Actions or Launch Drones. Have a Combat Patrol. Disembark any units Embarked upon them. Rallying From Disorder! All Squadrons that are Disordered will automatically Recover from their Disorder during the Restore Order Segment of a Game Turn s End Phase (see Page 85), losing either Assault Points (AP) or Hull Points (HP) in the process (see Page 85). Admiral Julian St. James Taking a Disorder Test When performing a Disorder Test, the Squadron must roll 3D6 requiring a 4, 5 or (RED) 6 for a success, unless a specific Model Assigned Rule applies. The test requires ONE success to pass, and the result effects all Models in the Squadron. If the Squadron has Lost HALF OR MORE of its initial Squadron Size, the test requires an ADDITIONAL success to pass. 41
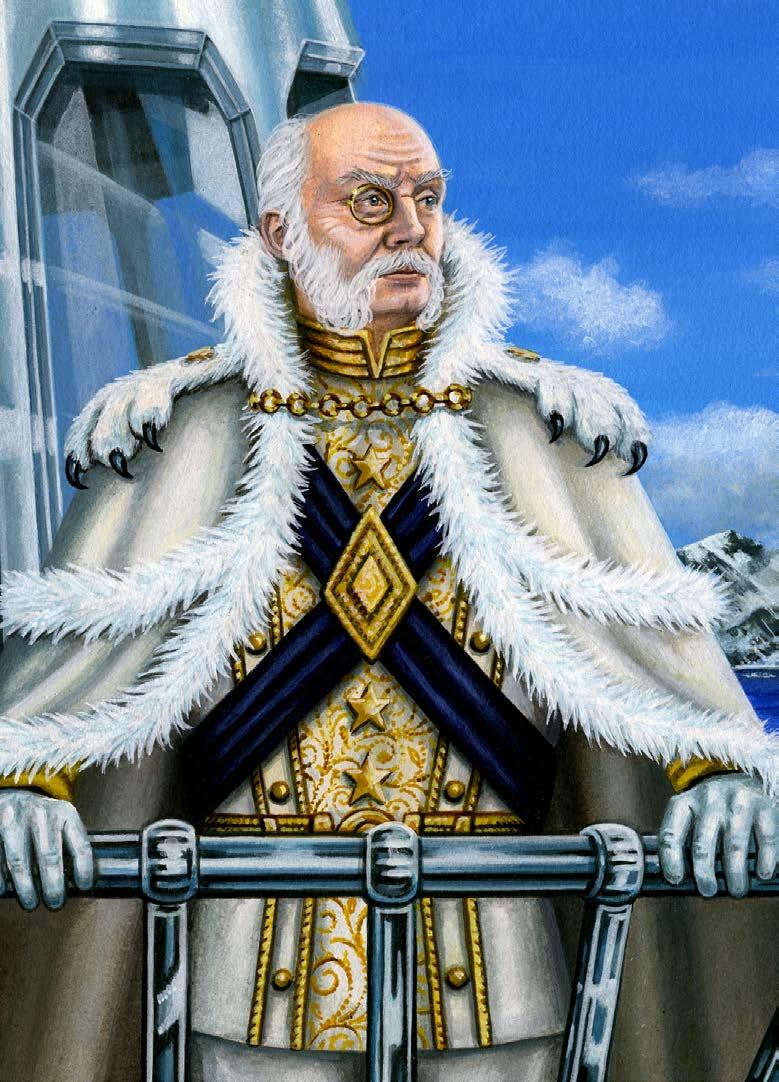
42
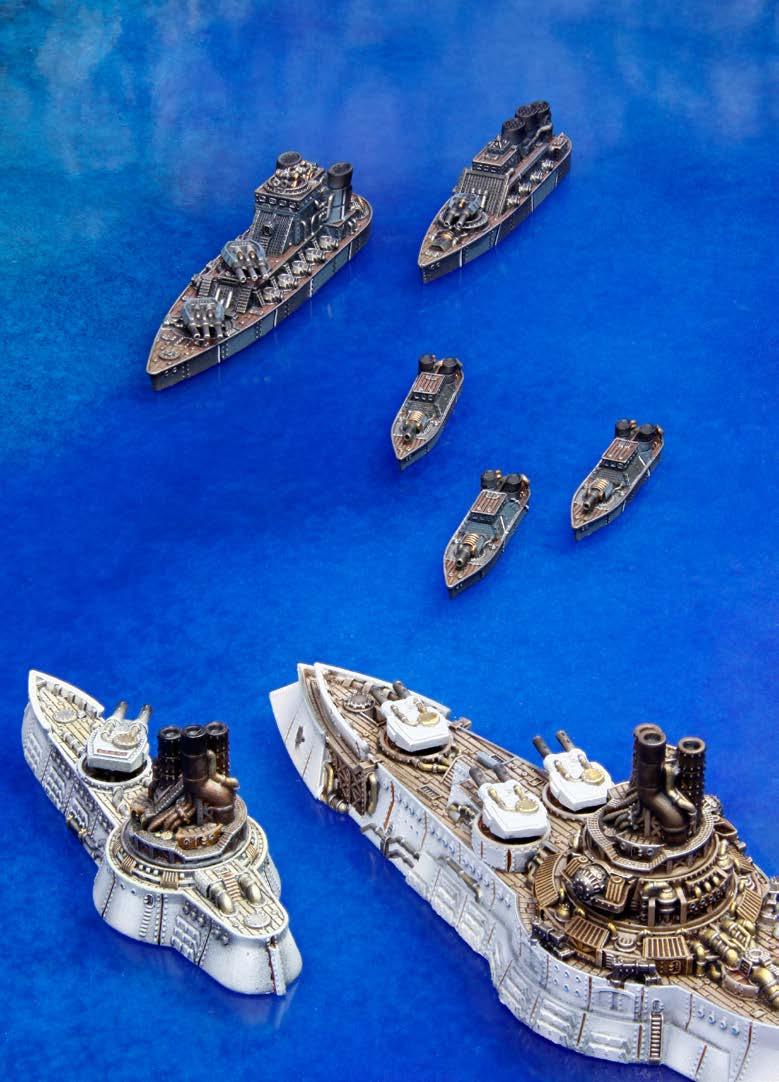
43 INTRODUCTION

44 SECTION C1 COMMAND SEGMENT COMMAND SEGMENT The Command Segment is divided into 3 Steps: 1. Command Coherency 2. Command and Control 3. Command Consolidation 1. Command Coherency During this Step, a player must announce whether the Squadron they are Activating has started the Activation within Command Coherency. Command Coherency All Models in the same Squadron should begin and end their Game Turn within Command Coherency of at least ONE other Model in their Squadron to perform at their effective best. In Dystopian Wars Command Coherency is 8", and is measured from any point on one Model to any point on another. Models that are out of Command Coherency should make every effort to end their activation within 8" of another model in their Squadron... or suffer the consequences of a possible Disorder Effect at the end of the Activation! 2. Command and Control During this Step, players have an opportunity to initiate certain game effects that take place before the Activation continues into the Movement Segment. These include playing any applicable Tactical Action Cards, performing various dice rolls related to Model Assigned Rules, activating certain Generator effects, or other Actions that are part of specific scenario conditions. 3. Command Consolidation During this Step, players will ensure that Game Markers are clearly attached to the correct Squadrons. Certain Generators may activate in this Step too (see Generators on Page 96). 44
.")
45 SECTION C2 THE MOVEMENT SEGMENT THE MOVEMENT SEGMENT The Movement Segment is divided into three Steps: 1. Movement Declarations 2. Movement and Manoeuvre 3. Movement Consolidation 1. Movement Declarations In this Step, the Squadron must declare if any Models are intending to change Height Levels or make any Special Movement Actions during its Movement Segment (see later). It is possible to make more than one Special Movement Action in an Activation, although it is far from common to do so! This is also when any Tactical Action Cards affecting movement are played, and any Generators or Model Assigned Rules affecting a Squadron s movement are Activated. 2. Movement and Manoeuvre During the Movement and Manoeuvre Step, all Models in the Squadron move. Each Model is moved individually and must complete its movement before continuing on to other members of its Squadron. Important Note: All Moves made on the Tabletop are FINAL and may not be taken back because Models got themselves in a muddle! A Model that moves an inch has MOVED that inch. Period. Changing Height Levels If a Model is capable of changing Height Levels, it must first declare which Height Level it will be occupying during the Movement Declarations Step. Unless other conditions apply, this Model may only ascend or descend ONE Height Level from its original position. This Model is now considered to be occupying the new Height Level, and executes the rest of its Movement Segment (including Minimum Move) on its newly declared Height Level. Different Models in a Squadron can occupy different Height Levels at the same time. Appropriate Game Markers, such as Obscured or Submerged, should be placed on each Model s base to indicate its current Height Level. Unless otherwise noted, Models that are classified as Diving or Burrowing Models may occupy either the Surface or Submerged Height Levels, and Models that are classified as Aerial Models may occupy either the Flying or Obscured Height Levels. Important Note: Not all flyers can occupy the Stratospheric Height Level and not all submersibles can occupy the Deep Diving Height Level. Those capable of travelling at those heights (or depths!) are given an appropriate Model Assigned Rule to signify their unique capabilities. Minimum Movement Each Model has a Minimum Movement listed in its Profile. Unless a special condition applies, the Model MUST move this many inches straight forward before it is allowed to make a Turn or stop moving. Any Model with a Minimum Movement of 0" does not have to move straight forward, or at all! Commanders should be careful to position their Models where this minimum movement will not cause unwanted collisions, carry them into a minefield, or otherwise ruin their plans. Once a Model has completed its Minimum Movement, it is free to stop at any time, at which point it moves no further in the Movement Segment. Turning a Model Most Models capable of moving use a Turning Template when they Turn. Generally, this is the Small, Medium or Large Turning Template for Naval Models and a 45 Degree Template for Armoured or Aerial Models. A Model with 360 degree movement does not use Turning Templates, but instead rotate about the centre of the Model to change facing. This does not use any movement. Castellan-Commander Kwang Hyun-OK 45

46 SECTION C2 THE MOVEMENT SEGMENT Using a Turning Template The small pips around the edge of a Turning Template are called Navigation Points, and are 1" apart. To use a Turning Template, the Turning Template is placed next to the side of the Model, with a feature of the Model, called the Turning Point, lined up with a Navigation Point. The Model is advanced 1" round the Turning Template so the Turning Point is lined up with the next Navigation Point. Each advance reduces the remaining Movement (Mv) of a Model by 1". Important Note: A Model can always Turn LESS than the angle between two Navigation Points. Minor Turning Corrections There will be times when a Model might wish to make a small correction during its move to avoid contact with other Models or Terrain. It is perfectly acceptable, so long as both players agree. This can help speed up a potentially complex situation, but remember fair play and never use it to increase a Model s Turn capability or movement. 360 Degree Movement A Model with 360 degree movement can normally move in ANY direction and change facing as required. It is important to note which way a Model with 360 degree movement is facing, as there are several circumstances in which they may only move straight forward without turning. 0" Movement A Model with 0" Movement in its Profile cannot ever move, be moved, or be Rotated. If this Model is forced to Teleport, it does not move but is instead instantly Scrapped. Turning Limits Some Models, mainly those using the 45 degree Turning Template, have a Turning Limit. A Turning Limit means the Model must move the specified number of inches in a straight line before making a Turn. It must then move in a straight line again before it is allowed to make another Turn, and so on. A Model with no Turning Limit specified is free to make turns one after the other. Snaking If a Model using the 45-degree Turning Template changes the side from which it makes a Turn, without moving at least 1" directly ahead between each of those turns, it is considered to be Snaking. Once a Model is considered to be Snaking, it must take a Treacherous Terrain Test EACH time it turns. If it fails the Treacherous Terrain Test, it is considered to have Collided with a Terrain Classification that is Hazardous to it and resolves the Collision IMMEDIATELY (see Page 106). Maximum Movement This is the maximum distance a Model can move in an Activation. Once a Model has completed its Minimum Movement, it can make turns or carry on moving in a straight line, until it has reached its Maximum Movement. A Model can make any combination of straight moves and turns it wishes, and does not have to use its full Movement Value. Models in a Squadron are free to move independently of each other, and can move different distances and in different directions. Moving Support Aircraft Squadrons and Infantry Formations Support Aircraft Squadrons (SAS) and Infantry Formations have 360 degree movement, but must maintain a Valid Formation at all times (See Support Aircraft Squadrons Formations on Page 112 or Infantry Formations on Page 123). During the Movement Segment, both SAS and Infantry Formations move as a single entity with the other members of their Squadron/Formation. Players should treat these Squadrons as single Models. 46
47 SECTION C2 THE MOVEMENT SEGMENT The Path of Least Disturbance On a physical terms it might be argued it could be possible to have various Models occupy the same footprint on the Tabletop, but at different Height Levels. However, for ease of play in gameplay terms, a Model CANNOT end its move occupying the same footprint space as another Model or base. If a Model has NO option but to end its move on top of another Model or base, the Models involved must be readjusted until they are clear of each other. The non-active Model should be adjusted in whichever way causes the LEAST possible disturbance. NO Model should gain ANY immediate advantage from this readjustment. Both players MUST agree to the new placement. Moving Backwards Other than those Models with 360 degree Movement, Models may only move backwards by making a Low Speed Manoeuvre (see below). Moving Off the Tabletop Unless a specific Victory Condition allows it, if any part of a Model or base leaves the Tabletop, it is counted as Lost and is removed from the game and added to the Scrapyard. Moving Onto the Tabletop When Squadrons moves onto the Tabletop from Reserve, as part of a Flanking Force, or as specified by a scenario, they do so in the following fashion: During the Pre-Turn Phase, during the Late Arrivals Segment, the Squadron(s) are placed in the specified area of the board. All Models must be placed so their aft 90 degree arc is touching the relevant edge of the board. Any Squadrons which do not have a facing, such as Support Aircraft Squadrons, must be placed so any part of the Squadron is touching the relevant Board Edge. IMPORTANT NOTE: Any Models deployed using Squadron Support or Launched through the Carrier Model Assigned Rules (MAR) are deployed using the rules listed in their respective entry. 3. Movement Consolidation During this Step, players review the results of the Movement and Manoeuvres Phase, verifying that all Collisions and Disengagements (see below) have been resolved, and appropriate Height Level Markers have been attached or removed from each Model. Models that currently have a Low Speed Manoeuvre Marker (see the next page) may choose to remove, or to keep it, and Models that wish to make a Low Speed Manoeuvre in their next Game Turn must elect to add this Marker now. In addition, Models taking Spotting Tests do so at this point. SPECIAL MOVEMENT ACTIONS These are special actions that players may wish to perform during the Movement Segment. They must always be declared during the Movement Declaration Step. Disembarking There are many instances where Models may wish to Disembark, be it tanks storming ashore during an amphibious landing, or robots descending from above to rip apart a defence line, or infantry pouring out of their APCs to secure the objective. All of these use the same fundamental rules. During the Movement Declarations Step of its Activation, a Parent Model that is not Disordered declares that it is Disembarking ALL of the Models it currently has aboard. For an explanation regarding Embarked Models, see the Squadron Section on Page 19. A Squadron may never be finish its Activation partially Embarked, it must always be Disembarked fully. Models Disembarking must be placed entirely within 4" of the Parent Model (or Models), on Terrain that is not Impassable to them. Any Squadron Disembarked MUST form a single Squadron or Infantry Formation under their Squadron Size limitations when Disembarked. Any Squadron or Infantry Formation that is Disembarked may perform its own Squadron Activation on the Game Turn they are Disembarked as normal, unless a specific MAR or condition applies. Low Speed Manoeuvres If a Model wishes to cut the engines and perform various tasks that require a slower than normal speed, they may execute Low Speed Manoeuvres. The decision to cut the engines during battle is not one to take lightly and must be planned in advance. 47

48 SECTION C2 THE MOVEMENT SEGMENT During the Movement Consolidation Step of its Activation, a Model may choose to gain a Low Speed Manoeuvre Marker. The Model may then ONLY perform Low Speed Manoeuvres during the Movement and Manoeuvre Step of subsequent Game Turns, for as long as the player wishes to keep the Marker. Any Model may elect to remove its Low Speed Manoeuvre Marker during the Movement Consolidation Step of a Game Turn, in which case it moves at normal speed during the Movement and Manoeuvre Step of subsequent Game Turns. Any Model can make a Low Speed Manoeuvre unless a specific Model Assigned Rule or condition applies. It is possible for some Models in a Squadron to have Low Speed Manoeuvre Markers while others do not. A Model making a Low Speed Manoeuvre may ignore any Minimum Move requirements it normally has, and is considered to be moving at Half Speed if moving through Treacherous Terrain (see Page 105). A Model making a Low Speed Manoeuvre may execute ONE of the following actions in its Movement and Manoeuvre Step: Dead Slow: Move forward or backwards up to 2", making any turns it would normally be allowed to make. Static Turn: Rotate about its centre point, up to 90 degrees. Burrow beneath the Ground. Unless specifically stated otherwise, a Model CANNOT begin the game with a Low Speed Manoeuvre Game Marker. All Weapons targeting a Model with a Low Speed Manoeuvre Game Marker receive a +1 To Hit modifier. Collisions and Rams The commander of a vessel in Dystopian Wars is sometimes prepared to risk their ship to sink another vessel in a deliberate Ramming Action, or battle damage and tight manoeuvring may make makes a collision inevitable. If a Model or base makes contact with another Model, piece of terrain or base, the possible outcomes are: A Collision (or Ram if applicable) The inactive Model manages to Evade the Collision, or The execution of a Controlled Contact. Collisions On the Surface Height Level, a player can Collide with a Model, although this is not always desirable! On all other Height Levels, a Model can never Collide with another Model (but may Ram, see the next Page). The Model that is currently moving will always be referred to as the Moving Model. Should the Moving Model contact another Model, the other Model is called the Static Model. 48
49 SECTION C2 THE MOVEMENT SEGMENT Ramming On any Height Level a player can declare a single Ramming Action per Activation, directed against a Model during the Movement Declarations Step. The Model executing the Ramming Action will always be referred to as the Ramming Model. Should the Ramming Model make contact with another Model, the other Model is called the Static Model and the Ramming Model must check to see if a Ram occurs. A Ram only occurs if ALL the following conditions are met: A Ramming Action has been declared by the Player controlling the Ramming Model. The Ramming Model has an Impact Rating (IR) greater than 0. Both the Ramming Model and the Static Model occupy the same Height Level. The Ramming Model (or its base) makes contact with the Static Model in its Fore 90 degree Arc. The Ramming Model has moved at least it s Minimum Move. Important Note: A Ram is a special type of Collision, and is the same in ALL respects, except for how Damage is determined. Evading a Collision or Ram If a Moving or Ramming Model makes contact with a Static Model on the same Height Level during its Movement, this should automatically result in a Collision (or Ram). However, if the Static Model is capable of changing Height Levels, the Static Model MAY try to Evade the Collision (or Ram) by making a Swift Manoeuvre Test (see below), unless a specific condition or MAR applies. If the Model passes the test, it succeeds in making a Swift Manoeuvre, changing Height Levels to avoid the Collision (or Ram). If the Model fails the test, it does not change Height Levels, and the Collision (or Ram) occurs. Collision Damage Between Models All Models involved in a Collision use their respective Impact Ratings (IR) to generate the amount of Attack Dice used to roll against the other Model. Any Collision uses the Exploding Dice mechanic and requires a 4, 5 or (RED) 6 To Hit, unless a specific condition or Model Assigned Rule applies. Collisions are Indiscriminate Attacks. A Model involved in a Collision suffers Damage as normal. See the Damage Section, Page 38 for more information. Ram Damage Between Models A Ramming Model uses its Impact Rating (IR) to generate the amount of Attack Dice used in the Ram. Any Ram uses the Exploding Dice mechanic and requires a 4, 5 or (RED) 6 To Hit, unless a specific condition or Model Assigned Rule (MAR) applies. Rams are Indiscriminate Attacks. All Attack Dice are resolved with the Crushing Impact (Ram Action) Model Assigned Rule. The Static Model resolves a Collision against the Ramming Model simultaneously with the Ram being resolved. Colliding With Terrain If ANY Model or base makes contact with Terrain Impassable to it, this will result in a Collision (or Ram) (see Page 106). Model Collisions via Teleports In any circumstance where a Model is Teleported into contact with another Model on the same Height Level, this will result in a Ram, regardless of Declaration, Minimum Move, and 90-degree Front Arc requirements. The Ramming Action is resolved with BOTH players considered to be the Ramming Models and BOTH having the Crushing Impact (Ram Action) Model Assigned Rule! NO Model involved may try to Evade the Rams, caused by Teleportation, by changing Height Levels: there simply isn t time as the Model literally appears out of thin air! Multiple Collisions During any particular Collision (or Ram), ALL Collisions (or Rams) between two or more Models are worked out SIMULTANEOUSLY. No Models sent to the Scrapyard are removed until after ALL Collisions (or Rams) involving them have been resolved. If the moving Model moves off and causes further Collisions, these are resolved as they occur. Following a Collision or Ram After a Collision (or Ram), any Models that survive can move off without a further Collision occurring between them: this is called Disengaging (see below). 49
 for the rest of the current Activation. This is designed to represent the Model s commander struggling to clear the danger area.")
50 SECTION C2 THE MOVEMENT SEGMENT Model Suffers No Damage Any Model involved in a Collision or Ram that suffered NO Damage is not seriously hampered by the contact, but after Disengaging, may only move in a straight line (see below) for the rest of the current Activation. This is designed to represent the Model s commander struggling to clear the danger area. Model Suffers Damage Any Model involved in a Collision or Ram that suffered Damage may have its ability to function severely impaired, with assault marines scattering to safety, gunnery crews thrown into disarray and command elements struggling to restore order. For each Model that suffered Damage in a Collision (or Ram), roll a D6 and consult the Table below: Result Rolled Effect on Model 1, 2, or 3 No Effect 4 Model Suffers Weapon Damage Critical Effect 5 Model Suffers Engine Failure Critical Effect 6 Model Suffers Chaos and Disarray Critical Effect Disengaging Following a Collision or Ram, unless BOTH Models can move off without a further Collision between them, the Model or Models involved must Disengage. If a Model Collides with Terrain, or a Model with a Movement Value of 0", then the Moving Model must Disengage. If TWO Models Collide, then the smaller Model must Disengage. If both Models of the same Size collide, then the Static Model must Disengage. To Disengage, the Model that is Disengaging MUST make ONE immediate Low Speed Manoeuvre (see above). This may be done out of sequence if required, and the Model does not take a Low Speed Manoeuvre Game Marker as a result of this compulsory action. When Disengaging, a Model is ALWAYS allowed to Rotate or Turn, as the force of the Collision may change it s heading without any help from the steering system as the Models literally bounce off each other! A Model may ignore a Navigational Lock Critical Effect whilst Disengaging. After Disengaging, Models involved should be in a position where a further Collision between Models is NOT inevitable. This may require both players to reach 50

51 SECTION C2 THE MOVEMENT SEGMENT a mutual agreement on the placement of Models. If a Disengaging Model is unable to avoid contact another Model whilst Disengaging, resolve a further Collision. It is perfectly possible for a Model to deliberately Collide with several other Models during a single Activation, if it remains able to keep moving. Controlled Contact Certain vessels may perform functions that require base to base contact with another Model or Major Surface. Such vessels are able to perform Controlled Contact; manoeuvring into close contact without resulting in a collision or ram. To perform a Controlled Contact, a Model must have already moved its Minimum Movement requirement. Small Adjustments to angles and distances are permitted so that the Model ends up in base to base contact with another Model or Major Surface. Controlled Contact is NOT considered a Collision, and therefore no Collision Damage or need for will Disengaging occur. Models capable of making a Controlled Contact are identified by having the Controlled Contact Model Assigned Rule (see Page 90). Swift Manoeuvres Sometimes a flying craft may wish to swoop down to make an attack run, and then retreat to the relative safety of the clouds, or a Submarine may have to crash dive to avoid a Battleship about to run it down. A Non-Burrowing Model capable of changing Height Level in normal game-play that is about to suffer a Collision (or Ram) may try and Evade the Collision (or Ram) by changing Height Levels (see above). Alternatively, during a Model s Shooting Consolidation Segment, it may attempt to make a Swift Manoeuvre after attacking. In either case, if the Model passes the Swift Manoeuvre Test, it may immediately change Height Levels up or down ONE level where permitted. For each Model wishing to make a Swift Manoeuvre, roll a single D6 and consult the Table below: Important Note: A Model may only ever attempt a Swift Manoeuvre ONCE per Activation. Model Size Score needed to make a Swift Manoeuvre. Large and Massive 6 Medium 5 or 6 Small and Tiny 4, 5, or 6 51

. 1. The Fire Arc of a weapon. 2.")


52 SECTION C3 LINE OF SIGHT LINE OF SIGHT The Line of Sight is an imaginary straight line between a Model/weapon system such as a Turret, and its Target. This is used to determine if a Model can Fire at a Target, Spot it, or Target it with certain Generators, etc. When drawing Line of Sight to a Model, we need to consider: 90, 180 and 270 Degree Fire Arc A 90, 180 or 270 degree Fire Arc is centred on the appropriate point on the Model or Base for Range and Line of Sight, and with the correct orientation (Fore, Aft, Port or Starboard). 1. The Fire Arc of a weapon. 2. How the weapon is mounted. 3. Any obstructing Terrain or Models. From this, we can determine if a Target is in the Open, Partially Blocked, or Blocked. Important Note: In addition to Line of Sight and Arc of Fire, other conditions may apply to a specific weapon that could prevent it from firing at certain Targets. See the Declaring Attack Step on Page 58 for a full list of exceptions. 1. Fire Arcs A weapon s Fire Arc is the area into which it has the ability to fire its shots. A Fire Arc can be 90, 180, 270 or 360 degrees, Broadside or Fixed Channel. A 90, 180 or 270 degree Fire Arc has a Fore, Aft, Port, Starboard or Offset orientation. Fore is the front facing, Aft the rear, Port the left, and the Starboard the right facing of the Model or Base. 52


53 SECTION C3 LINE OF SIGHT Offset Fire Arc An Offset Fire Arc is a Fire Arc of 90, 180 or 270 degrees, skewed 45 degrees outwards and centred on the appropriate point on the Model or Base for Range and Line of Sight, and with the correct orientation (Fore Port, Aft Port, Fore Starboard, and Aft Starboard). Broadside Fire Arc A Broadside extends out 45 degrees from both ends of the Model or Base, and is aligned along the entire length of its relevant side. All Ranges are measured from the Middle Key Point on the Model. 360 Degree Fire Arc A 360 degree Fire Arc is centred on the appropriate point on the Model or Base for Range and Line of Sight extends in a circle around the entire Model. Fixed Channel Fire Arc A Fixed Channel is the entire width or length of the Model or Base, and extends directly out from the Model or Base, with the correct orientation (Fore, Aft, Port or Starboard). 53
54 SECTION C3 LINE OF SIGHT 2. Weapon Mountings Different weapons determine Range and Line of Sight from different points on the Model as described below: Guns Guns are mainly cannon or artillery and are often mounted in an armoured Barbette. This provides a degree of protection to the weapon and crew, but at the cost of limited traverse compared to a turret-mounted weapon. Range and Line of Sight is determined from the centre of the relevant side of the Model. Turrets Turrets provide fully enclosed armoured protection for any cannon or artillery and, because they rotate, give a wide field of fire. Often Models will have multiple turrets. Turrets will always have a listed facing and Fire Arc. Range and Line of Sight is determined from the centre of the turret itself. Broadsides Broadsides are deployed along the entire length of a Model, and fire through embrasures into a wide firing area. Broadside weapons are usually mounted along Port and Starboard sides of a Model. Broadsides use the Broadside Fire Arc. Range and Line of Sight is determined from the centre of the Broadside. Batteries Batteries can be one large or several smaller mountings of the same weapon firing together as one weapons system. Range and Line of Sight is determined from the centre of the firing Model. Mortars and Bombards Mortars and Bombards are powerful weapons with a high trajectory that lets them effectively lob explosive shells over almost any Obstruction, provided they have a designated Spotter with Line of Sight to the Target. Range and Line of Sight is determined from the centre of the weapon itself. A weapon with Bombard or Mortar in its name is capable of Indirect Fire (see Page 64). Fixed Channel Weapons Any weapon may be a Fixed Channel Weapon, but they are most commonly used by Rockets and Torpedoes, or when a Model is outfitted with a weapon simply too large to mount in a turret. The Range and Line of Sight for a Fixed Channel Weapon is determined from the centre of the appropriate side of the Model or Base. Bombs Bomb Ordnance from Models has a 360 degree Fire Arc. It has a 2" range, measured from any point of the Base. Bomb Ordnance from Support Air Squadrons requires at least one Dive Bomber SAW to be in Base to Base contact with the Target. Other Ordnance Weapons There are some weapons that do not fall into easy categories. For any other ordnance weapon that does not fall into one of the above categories, Range and Line of Sight is determined from the weapon. Auxiliary Weapons Auxiliary weapons always have a 360 Degree Fire Arc. You may measure from ANY point of the Model, Base or Flight Stand, in ANY direction, for all Auxiliary weapons. Generators Any Ranges and Fire Arcs are ALWAYS noted in the relevant Generator entry (see Generators on Page 96). Spotting Line of Sight for Spotting purposes is measured from the centre of the Spotting Model to any point on the Target Model. 3. Obstructing Models and Terrain Ordnance weapons generally need Line of Sight (LOS) to their intended Target to be able to fire directly at it: Terrain and Models with a Surface Height may block Line of Sight between Models on the Surface Height Level: this is termed Obstructing. Other Height Levels are not affected by intervening Models, but certain types of Terrain may block Line of Sight at certain Height Levels (see Terrain on Page 104). Auxiliary weapons ignore Models when drawing Line of Sight, but not Obstructing Terrain. 54
55 SECTION C3 LINE OF SIGHT Primary Gunnery and Spotting Primary Gunnery and Spotters can draw Line of Sight over intervening Models and Terrain TWO sizes or more smaller than the Firing, Spotting OR Target Models. Primary Gunnery can also draw Line of Sight over intervening Models and Terrain ONE size smaller than the Firing OR Target Models, but if it does so, it is considered to be Partially Blocked. Secondary Gunnery, Tertiary Ordnance and Auxiliary Weapons Secondary Gunnery, Tertiary weapons, and Generators can draw Line of Sight over intervening Models and Terrain TWO sizes or more smaller than the Firing OR Target Models. Auxiliary weapons can draw Line of Sight over intervening Terrain TWO sizes or more smaller than the Firing OR Target Models, and ignore intervening Models. Obstructing Terrain Terrain that occupies an entire Height Level, (i.e. a Mountain occupies the entire Surface Height Level) is always Obstructing Terrain at that Height Level. Terrain with a Surface Height that occupy the Surface Height Level use the above rules to determine if it is obstructing terrain for Models that occupy the Surface Height Level. Important Note: Line of Sight in Dystopian Wars is automatically reciprocal between units with the SAME weapon type (Primary, Secondary, or Tertiary). Line of Sight between units with different weapon types is NOT automatically reciprocal. In The Open, Partially Blocked, and Blocked A Target has three Key Points for determining Line of Sight: Fore Point, Middle Point, and Aft Point. Targets In the Open A weapon firing at a Target in the Open can fire at full effect, rolling the FULL amount of Attack Dice unless a condition or Model Assigned Rule applies. For a Target to be in the Open: The firing weapon can draw Line of Sight to the Middle Key Point and either End Key Points on the proposed Target within its Fire Arc. OR The Firing of a weapon with a Fixed Channel Fire Arc must have BOTH edges of the Fire Arc passing through the Target, and NO Obstructions to the proposed Target. Targets Partially Blocked If the firing weapon is Partially Blocked, it may only fire at the Target with the Attack Dice generated by the weapon being halved (rounding up). For a Target to be Partially Blocked: The Firing weapon can draw Line of Sight to only the Middle Key Point, OR only BOTH End Key Points on the proposed Target within its Fire Arc. OR The Firing of a weapon with a Fixed Channel Fire Arc must have one unobstructed edge of the Fire Arc passing through the proposed Target. Any Model occupying the Surface or Aerial Height Bands is always counted as being Partially Blocked when firing an Ordnance Weapon at a Model occupying the Diving Height Band in Water, unless a specific Model Assigned Rule applies. Blocked Targets If a Target is Blocked the weapon may NOT fire at it. For a Target to be Blocked: The firing weapon CAN draw Line of Sight to NO Key Points or ONLY ONE End Key Point, on the proposed Target within its fire arc. OR The Firing weapon has NO edges of the Fire Arc passing through the Target. 55


56 SECTION C3 LINE OF SIGHT Aft Point Middle Point Important Note: One part of a Target Model does NOT block Line of Sight to another part of it. This means a Model facing directly towards the weapon firing at it cannot claim to be blocking Line of Sight to it! Fore Point Line of Sight is worked out in a simple Top Down fashion: If either of the In the Open conditions apply, the Target is in the Open. If either of the In the Open conditions apply, but either of the Partially Blocked conditions apply, the Target is Partially Blocked. If neither the In the Open nor Partially Blocked conditions apply, then the Target is Blocked. Line Of Sight, Key Points Needed and Edges of Fire Arcs Summary Table Key Points Needed Edges of Fire Arc Needed Open Centre and One End OR 2 Partially Blocked Centre Only or Both Ends OR 1 Blocked One End or less! OR 0 Any Model occupying the Surface or Aerial Height Bands is always counted as being Partially Blocked when firing an Ordnance Weapon at a Model occupying the Diving Height Band in Water; unless a specified Model Assigned Rule applies. 56


 is firing Fixed Channel weapons at Enemy Corvettes (Blue) in both its Fore Channel and Starboard Channel.")
57 SECTION C3 LINE OF SIGHT The Battleship (Red) has a selection of Enemy (Blue) models to fire at: Against Frigate B, it may fire any Weapons as there are no Obstructions of any kind. Against Cruiser C, as the Firing model is TWO Sizes larger than any Obstruction, it may fire any Weapon (except Torpedoes, as they regard all interventing Models, regardless of Size as an Obstruction, see Page 67) Against Cruiser D, as the Battleship is only ONE Size larger than the Obstruction, it may NOT fire any Secondary or Tertiary Weapons at it. It may Fire Primary Weapons at Cruiser D, but will be considered to be Partially Blocked. Against the Carrier E, as the Target Model is TWO Sizes larger than any Obstruction, the Battleship may fire any weapons (except Torpedoes) at it. The Gunship (Red) is firing Fixed Channel weapons at Enemy Corvettes (Blue) in both its Fore Channel and Starboard Channel. Both edges of the Fore Fixed Channel pass though Corvette A, so it is considered to be In The Open. One edge of the Starboard Fixed Channel passes through Corvette B, so it is Partially Blocked. Corvette C is fully within the Starboard Fixed Channel, so is In The Open. Corvette D is not in either channel, so is Blocked. A Kingdom of Britannia Medium Tank A (Red) has a number of enemy Prussian Empire Medium Tanks (Blue) in front of it. Its Fore Guns have a 90 degree Fire Arc, and the player is deciding which Enemy tank to fire at: Tank 1 has all three Key points visible and in its Fire Arc, so it is In The Open for Tank A. Tank 2 has only it s centre Key point visible, so will be Partially Blocked from Tank A. Tank 3 has all three Key points visible, but one end is not within the fire Arc. However, being able to hit the Centre and an End Key points means it is considered to be In The Open for Tank A. Tank 4 has No Key Points in its Fire Arc so is Blocked for Tank A. 57
58 SECTION C4 FIRING THE FIRING SEGMENT The Firing Segment is composed of the following five Steps which must be executed in order: 1. Declaring Attacks 2. Declaring Counter Attacks 3. Resolve Auxiliary Fire 4. Resolve Ordnance Fire 5. Firing Consolidation 1. Declaring Attacks In this Step, the Active Squadron declares ALL the Attacks it wishes to make during this Activation. The following consistencies govern ALL Attacks: Each Ordnance and Auxiliary weapon on a Model can only declare a maximum of ONE Attack during its Activation. All declared Attacks must specify their Target, and any Firing Options they are using. A player should make their opponent aware of anything that may affect their choices in declaring an Attack or Counter Attacks, such as any Generators, MARs or other effects. Players should agree if a Target has an Open, Blocked, or Partially Blocked Line of Sight from any firing Models (see Page 52 for more on Line of Sight). Squadrons declaring an Attack are governed by the following restrictions, unless a specific condition or MAR applies: A Squadron CANNOT deliberately Target a Derelict, Prized or Salvaged Model. A Model on the Surface Height Level CANNOT Target a Model occupying the Aerial Height Band with a Gunnery Ordnance Attack in Range Band 1. A Model on the Surface Height Level CAN ONLY Target a Model occupying the Diving Height Band in Water at Range Band 1 with Torpedoes or Concussion Charges (CC). Support Aircraft Squadrons may ONLY be targeted by Ack Ack (AA). A Model occupying the Diving Height Band can ONLY use its Concussion Charges, Torpedoes, or a Particle Accelerator. A Model occupying the Deep Diving Height Level can ONLY be targeted by Concussion Charges, Torpedoes, or a Particle Accelerator. Any Model occupying the Submerged Height Level on Land may ONLY be targeted with Concussion Charges or Concentrated Bombing. Weapons declaring an Attack are governed by the following restrictions, unless a specific condition or MAR applies: Torpedoes can ONLY Target Models occupying the Water Surface. Bombs can ONLY Target Models on the Surface or Submerged Height Levels. Flamethrower Weaponry may not Target Models occupying the Diving Height Band Ack Ack can ONLY Target Models occupying the Aerial Height Band or Airburst Mines. Concussion Charges can ONLY Target Models occupying the Diving Height Band or Surface Mines. All Weapons, unless firing Indirectly, can only Target Models within its Line of Sight. 2. Declaring Counter Attacks Counter Attacks are divided into TWO Types: Aggressive or Defensive. Both are covered by the same general rules: A Model may only make a Counter Attack if it is Targeted itself, or if it is Linking/Combining Fire with a Model in its Squadron that has been Targeted. Any Targeted Model MUST LEAD a Counter Attack to defend itself. (see Page 63). Each Model may only make ONE Counter Attack with Ack Ack and ONE Counter Attack with Concussion Charges during an Activation s Firing Segment. No other weapon may make a Counter Attack. The range for all Counter Attacks is 4" unless otherwise specified. A Model occupying the Diving Height Band may not make any Counter Attack using AA. A Counter Attack cannot provoke a Counter- Counter Attack! 58

59 SECTION C4 FIRING Aggressive Counter Attack These are Counter Attacks using Ack Ack or Concussion Charges against an Attacking Model. Any Linking/Combined Fire measures its range from the Linking Models to the Model they are attacking. Aggressive Counter Attacks with AA are always targeted against attacking Models in the Aerial Height Band. Aggressive Counter Attacks with CC are always targeted against attacking Submerged Models. Defensive Counter Attacks These are Counter Attacks using Ack Ack or Concussion Charges against incoming Ordnance. Any Linking/Combined Fire measures its range from the Linking Models to the Model they are defending. Defensive Counter Attacks with AA are always targeted against incoming Rocket Ordnance. Defensive Counter Attacks with CC are always targeted against incoming Torpedo Ordnance. 3. Resolving Auxiliary Fire Squadrons resolve Ack Ack and Concussion Charge Attacks or Counter Attacks between each other first, and apply any Damage, before any Ordnance Attacks are resolved. This sequence means that Models or Squadrons may be Scrapped or Damaged before they can resolve any of their Ordnance Attacks. All attacks at this stage are considered to be SIMULTANEOUS, so it is entirely possible for two Models to Scrap each other. Auxiliary Attacks and Counter Attacks are resolved using the Attack Sequence below. 4. Resolve Ordnance Attacks Any Ordnance Attacks from the Active Squadrons are now resolved. Damage is applied only once ALL attacks have been resolved. Attacks are resolved using the Attack Sequence in the next section. 5. Firing Consolidation This Step is used as a tidying step where certain Manoeuvres, Model Assigned Rules and Generators may activate. 59
60 SECTION C4 FIRING THE ATTACK SEQUENCE Each Attack or Counter Attack against a Model contains the following actions: 1. Determine the Initial Attack Dice. 2. Roll Attack Dice and determine Hits. 3. Compare the total number of Hits to the Damage Rating (DR) and Critical Rating (CR) of the Target Model (see Damage Section on Page 38) This is the same for ALL Attacks or Counter Attacks, regardless of their source. It is explained in this section as Firing, as this is the most common source of Damage. 1. DETERMINE INITIAL ATTACK DICE (AD) Many Attacks specify the number and type of any Attack Dice (AD) used, however there are many instances whereby the number of Attack Dice (AD) are generated through the use of Pools : Leading Pool and Linking Pool. To calculate the Initial AD of a Firing Attack, we use the following procedure. 1a: Profile Attack Dice (AD) All Ordnance weapons will have an Attack Dice value listed in the Model s Profile for each of the four Range Bands. The Profile Attack Dice for each weapon is determined from this value for the range to the Target. Gunnery, Torpedo, and Rocket Ordnance have a specific Attack Dice (AD) value listed in the Model s Profile in each Range Band that they can fire into. If any Ordnance weapon does not have an AD value listed in a particular Range Band, then it may not fire at that Range Band. The AD value for Bomb Ordnance and Mines is listed in Range Band 1 box on the Model s Profile, however these have their own Ranges: they are simply put there to keep weapon systems all in one place (see Page 67 and Page 74 for more on Bombs and Mines respectively)! Ack Ack and Concussion Charges do not use Range Bands. Instead their Profile Attack Dice is the value listed in the AA and CC sections of the Model s Profile. The Attack Dice value listed in the relevant Range Band or section is the weapon s Profile Attack Dice. 1b: Effective Attack Dice (AD) The Effective Attack Dice available to a weapon takes into account all Attack Dice modifiers, including Line of Sight penalties, Model Assigned Rules, or any Damage the Model has suffered. Effective Attack Dice is the term for the number of Attack Dice a weapon can direct against a given Target, after taking into account any modifiers that alter the Profile Attack Dice. Damage Taken The amount of Hull Points (HP) a Model has lost will impact the effectiveness of some of its weapons. This simulates crew being killed, wreckage on the decks, and any physical damage done to the weapon itself: The Damage Reduction from lost Hull Points reduces the Profile Attack Dice for all individual instances of Gunnery Ordnance and Auxiliary weapons by 1 for each Hull Point a Model has lost. Damage Reduction from lost Hull Points has NO effect on Tertiary Ordnance. Damage Reduction from lost Hull Points has NO effect on Mines. Damage Reduction from lost Hull Points CANNOT reduce the Effective Attack Dice of any Gunnery Ordnance or Auxiliary weapons to LESS than 1. Important Note: Hull Points regained through the use of Model Assigned Rules, Models with the Repair Function, Tactical Action Cards, or other conditions negate the reduction to Attack Dice previously suffered. Half Attack Dice (AD) Effects A weapon can be subject to a half AD penalty for TWO reasons: By having Weapon Damage Critical Effect Game Markers OR by having its Line of Sight considered to be Partially Blocked. If a Model has one or more Weapon Damage Critical Hit Markers, you HALVE the Model s AD on any applicable weapons, rounding up. If a weapon is considered to be Partially Blocked for one or more reasons, you HALVE the weapon s AD, rounding up. Line Of Sight is explained in its own section (see Page 52). If BOTH the above conditions are met, the weapons AD is halved TWICE, rounding up each time. Unless specifically mentioned otherwise, this is the only situation where AD is halved more than once. 60
61 SECTION C4 FIRING Important Note: If a weapon has both Damage Reduction and Half AD effects, apply the Damage reduction first. 1c: Effective Attack Dice (AD) The result of the previous Steps is the weapon s Effective Attack Dice. In many circumstances, as Models will not have suffered any damage, and there are no obstructions to Line of Sight, the weapon s Effective Attack Dice will be the same as the Profile Attack Dice. Effective Attack Dice (AD) must be calculated individually for EACH WEAPON involved in a single Attack (see Firing Options, below), as it is possible that modifiers will apply to one weapon and not to others. 1d: Firing Options, MARs, TACs, etc. The Initial Attack Dice in an attack is determined by the Effective Attack Dice of any weapons contributing to the attack, any Firing Options used, and other modifications, such as the Pack Tactics MAR or Tactical Action Cards, etc. Firing Options may allow a Model to make better use of the resources they have available, allowing units of smaller vessels to act together to Scrap larger ones, or allowing multiple weapons on a ship to act together in a single, more powerful attack. The most common Firing Options available to a Model are Standard and Linked Fire. All Ordnance and Auxiliary weapons are capable of using these Firing Options unless otherwise noted. Combined Fire is only available when specific weapons or Model Assigned Rules apply. Indirect Fire is available to Models equipped with Primary Gunnery, Bombards, and/or Mortars. Concentrated Bombing is available to Models with Bomb Bays and ignores Shield Dice. Area Bombardment is only available to Models with the Area Bombardment Model Assigned Rule. 2. ROLL ATTACK DICE & DETERMINE HITS This Step uses the following procedure: a. Determine the Basic To Hit Value b. To Hit Modifiers c. Roll Attack Dice d. Defensive Actions e. Determine Hits 2a: Determine the Basic To Hit Value The Basic To Hit value depends on the Height Level the Target or Firer is occupying. If they are not at the same Height Level, use whichever To Hit value is most beneficial for the Target. BASIC TO HIT VALUES Stratospheric RED (6) Obscured 5 or RED (6) Surface or Flying 4, 5 or RED (6) Submerged 5 or RED (6) Deep Diving RED (6) The following To Hit caveats apply: Infantry downgrade all Exploding Dice to Heavy Dice. Support Aircraft Squadrons (SAS) follow their own set of modifiers (See Support Aircraft Squadrons on Page 112) Most Ordnance Weapons also are Partially Blocked when firing at the Submerged Height Level. (See Diving Model Function on Page 128). Most Ordnance Weapons CANNOT target the Deep Diving Height Level. (See Diving Model Function on Page 128). 2b: To Hit Modifiers The To Hit Modifiers are explained in the Table overleaf. For the rules on how each of these are calculated see the Firing Options Section below. Do not forget to take into account MARs like Pack Tactics or to play appropriate TACs at this point! 61

62 SECTION C4 FIRING TO HIT MODIFIERS TABLE Negative Elusive Target (From Non-Capital Models) -1 Difficult Target (From Capital Models) -2 Small Target (From Capital Models) -1 Primary Weapon at Range Band 1-1 Primary Weapon Firing Indirectly -2 Bombard or Mortar Firing Indirectly -1 Target covered by Cloud Generator -1 Firing through a Storm Template -1 Target is 'Wave Lurking' -1 Positive Target Painter Hit on Target Model +N Firer has Hunter (Target Model) +N Firing at a Fortification +1 Target has Low Speed Manoeuvre Game +1 Marker Target is Spotted (IDF only) +N 2c: Roll Attack Dice Once it has been determined what To-Hit value is needed, the player making the Attack rolls their Initial Attack Dice. As most Attacks are made using Exploding Dice, it is important to keep rolling until the attacking player has rolled all their Attack Dice. Note there are a number of conditions and MARs that may increase or decrease the number of Exploding Dice rolled, or even change them to Heavy Dice or even Basic Dice! 2d: Defensive Actions Once all the Attack Dice in a Targeted Attack have been rolled, the player controlling the Target Model may have a chance to cancel some of them out, if needed. This is accomplished using Defensive Counter Attacks and Defensive Generators. Defensive Counter Attacks If a Targeted Squadron declared it was using Defensive Counter Attack AA against a Rocket Attack, this Defensive Action is now resolved. Roll the Initial Attack Dice of AA, worked out as normal, using any relevant Firing Options. Defending AA Hits on a 5 or (RED) 6. Each Hit cancels a Hit from the Rocket attack. If a targeted Squadron declared it was using Defensive Counter Attack CC against a Torpedo Attack, this is now rolled. Roll the Initial Attack Dice of CC, worked out as normal, using any relevant Firing Options. Defending CC Hits on a 5 or (RED) 6. Each Hit cancels a Hit from the Torpedo attack. Defensive Generators Defensive Generators that exist in the game can lower or even remove remaining Hits. These forms of Defensive Generator will note in their entry that they activate during this Step. For a full explanation of how Defensive Generators work, see Page DETERMINE HITS The number of Hits remaining are measured against the Target Model s Damage Rating (DR) and Critical Rating (CR) to determine the level of Hull Point (HP) loss inflicted, if any! See the Damage Section on Page 38 for more information. 62


.")
63 SECTION C4 FIRING FIRING OPTIONS Firing Options may allow a Model to make better use of the resources they have available, allowing units of smaller vessels to act together to Scrap larger ones, or allowing multiple weapons on a ship to act together in a single, more powerful attack. 1. Standard Fire Standard Fire is when a single weapon on a Model fires without any assistance from others. Building Initial Attack Dice for Standard Fire: Take the Effective AD Value from ONE weapon in the attack. This is the Lead Weapon Pool. Add any further dice from conditions, Model Assigned Rules and Tactical Action Cards, etc. This is the Initial Attack Dice. Standard Fire 2. Linked Fire Linked Fire allows Ordnance and Auxiliary weapons to Pool their available Attack Dice (AD) into a single, more powerful Attack, or Counter Attack, against the SAME Target. In addition, Linked Fire may be used to bring Mines deployed in the current Activation together into a potentially devastating Mine Effect (see Page 75). Important Note: In certain rare occasions, the Link Pool may contain different weapons with differing To Hit values. When halving the Link Pool, the firing player must remove as close to as possible, the same number of dice from each group of dice with the same To Hit value. Where an odd number exists, the firing player may choose which odd dice is discarded. Rules for Linked Fire Only Models in the SAME Squadron can perform Linked Fire with their weapons. For a weapon to perform Linked Fire it must be the same Type: Gunnery with Gunnery, Rockets with Rockets, Torpedoes with Torpedoes, Bombs with Bombs, Ack Ack with Ack Ack and Concussion Charges with Concussion Charges. Additionally, for Gunnery weapons, Primary weapons can only perform Linked Fire with other Primary weapons and Secondary weapons can only perform Linked Fire with other Secondary weapons. ANY Model participating in a Linked Fire Attack is deemed an Attacking Model. Linked Fire Building the Initial Attack Dice for Linked Fire The number of AD available to a Linked Fire attack is calculated in the following way: Take the Effective AD Value from ONE weapon in the attack. This is the Lead Weapon Pool. Place these dice to the side for now. Total the Effective AD of all other weapons in the attack: this is referred to as the Linking Pool. Half (rounding up) of the Linking Pool AD and then add these dice to the Lead Weapon Pool. Add any further dice from conditions, Model Assigned Rules and Tactical Action Cards, etc. This is the Initial Attack Dice. 63
 into a single, incredibly powerful Attack or Counter Attack against the SAME Target, and for")

64 SECTION C4 FIRING 3. Combined Fire Combined Fire allows Ordnance and Auxiliary weapons to Pool their available Attack Dice (AD) into a single, incredibly powerful Attack or Counter Attack against the SAME Target, and for Auxiliary weapons to Pool their available Attack Dice against Rocket or Torpedo Attacks when making a Defensive Counter Attack. Combined Fire follows all the same rules as Linked Fire as seen above. Building Initial Attack Dice for Combined Fire Take the Effective AD Value from ALL weapons in the attack. This is the Lead Weapon Pool. Add any further dice from conditions, Model Assigned Rules and Tactical Action Cards, etc. This is the Initial Attack Dice. Important Note: This Firing Option is not available normally and, as such, can only be used with specific Models, weapon systems, or MARs that explicitly state it is an available option. 4. Indirect Fire (IDF) Certain Ordnance may be eligible to fire at a Target, even if it doesn t have Line of Sight from the weapon. This is achieved by using Indirect Fire and Spotting Models from the same Force. The following conditions apply: A Model may only be the Target of Indirect Fire if it has one or more Spotted! Game Markers (see Page 93) on it. The Target MUST be in the firing weapon s Fire Arc AND in Range, but any Obstructing Models or Obstructing Terrain is ignored. For every Spotted! Game Marker after the first on a Target, any Indirect Fire against it gains +1 To Hit. This modifier ONLY ever applies to Indirect Fire. Regardless of how well directed it is, Indirect Fire may never have a better To Hit roll than 4+, as there is a limit to how accurate firing can be when a Model cannot see its Target. ANY modifiers, be they excess Spotted! Game Markers, Target Painter Hits, the Hunter MAR or anything else that would improve an Indirect Fire attack to hitting on 3+ or 2+ are simply ignored! Squadrons may use the Indirect Fire option with Standard, Linked, Combined and Area Bombardment Firing Options, presuming that these Firing Options were already available to the weaponry used. The weapons in the table on Page 65 are the only weapons that may fire INDIRECTLY and are subject to the Range stipulations and modifiers listed: ABOVE: The Infantry are firing Ack Ack at the Scout Gyro. They use Combined Fire, and are are treated as one combined entity, so all of the Squadron is considered to be in range, even though some parts of it are over 8" from the target. RIGHT: The Bombards may fire on the Land Ship as it has been Spotted by the Recon planes. 64
 may not be used against Concentrated Bombing.")
 6, and may only ever Target the Surface Height Level.")
65 SECTION C4 FIRING 5. Concentrated Bombing This is an Attack made by models with Bomb Bays, and may use the Standard, Linked, and Combined Firing options, if they are available to the weaponry used. It may only Target Models on Surface and Submerged Height levels Shield Dice (see Page 100) may not be used against Concentrated Bombing. Dive Bomber Support Aircraft Wings are ALWAYS considered to execute Concentrated Bombing Attacks. Any Concentrated Bombing Attack is considered to have the Sub-Killer Model Assigned Rule. of 5 or (RED) 6, and may only ever Target the Surface Height Level. When performing an Area Bombardment, an Initial Aiming Point is chosen within Range, Fire Arc and Line of Sight (unless using Indirect Fire) of all weapons making the Attack. A Squadron may only have ONE Initial Aiming Point, any weapons unable to reach the Initial Aiming Point cannot make an Area Bombardment this Activation. A Small Effect Template must be placed, centred on the Initial Aiming Point. Any other weapons in the Attack place Small Effect Templates touching, but not overlapping the Initial Small Effect Template, on a side determined by the Random Direction Template. Resolve ONE Area Bombardment Attack against any Model on the Surface, fully or partly within the area of a Small Effect Template, using the Initial Attack Dice value of the firing weapon. If a Model is partially within several Small Effect Templates, it is Hit by EACH Small Effect Template independently. All Attacks made are resolved SIMULTANEOUSLY. ABOVE: Three Bombers are in range to Bomb the Land Ship using Concentrated Bombing, but the fourth is not. 6. Area Bombardment This special Firing Option is only open to a Model with the Area Bombardment Model Assigned Rule. When making an Area Bombardment attack, the Linked and Combined Firing Options are unavailable; however Indirect Fire may be available. Area Bombardment is considered to be an Indiscriminate Attack, with a To Hit Number ABOVE: The Sky Fortress is making an Area Bombardment Attack of the tanks. Template 1 was placed first, and the others randomly scattered from it. IDF TABLE Weapon Range Bands Available for IDF To Hit Modifier Primary Gunnery (Not Bombard or Mortar) Range Bands Bombard Range Bands Mortar Range Bands IMPORTANT NOTE: This Table is only ever used for IDF firing options. 65
66 SECTION C5 WEAPONS AND MUNITIONS WEAPONS AND MUNITIONS Dystopian Wars features a wide variety of different weapons, the speed of their development greatly accelerated as a result of the increase in scientific research since the discovery of Element 270. The most powerful Weapons in a Force are designed to destroy any enemy by direct action, while several simpler Weapon systems are available to provide protection from particular types of threat. The relevant Profile will specify all of the weapons available to a particular Model. The classes of weapon found in Dystopian Wars are: Primary Gunnery Ordnance, Secondary Gunnery Ordnance, Tertiary Ordnance, and Auxiliary Weapons. Most Primary and Secondary Weapons are guns of various sizes, and assorted exotic Weapons; whilst Tertiary Weapons are most often Rockets, Bombs, and Torpedoes. Mines are not used for direct attacks in the same way as other Weapons, but do have many of the same attributes as the other weapons. See Page 74 for more on Mines. Primary Gunnery Ordnance (P) Primary Ordnance is normally the most powerful in the Fleet and generally includes any Gunnery weapons greater than 10" in calibre. Because of their sheer size, Primary weapons are normally found on larger vessels. These weapons typically have a slow rate of fire, allowing each Salvo to be carefully directed by fire control from the bridge, or when the Model mounts a particularly large weapon, orientating the whole vessel! This allows Primary weapons to fire over obstruction better than other weapons, both when firing directly, or choosing to fire indirectly. However, it often struggles to effectively engage targets close in, as the firing solutions change so rapidly! All Primary Gunnery Ordnance are governed by the following rules: All Primary Gunnery suffers a -1 To Hit modifier if targeting a Model in Range Band 1 unless a Model Assigned Rule applies. Primary Gunnery gains benefits in Line of Sight (see Page 52). Primary Gunnery can fire using the Indirect Fire Firing Option at Range Bands 3 and 4, and will suffer a -2 To Hit modifier when it does so (see Page 65). Secondary Gunnery Ordnance (S) Secondary Weapons are typically, but not always smaller than Primary Weapons, and are often found as batteries of many smaller Weapons firing together. This high rate of fire makes up for the smaller guns, and means they do not have the same difficulties tracking nearby targets, but also makes it impossible for most Secondary Weapons to fire indirectly. Many of the more exotic Weapons tend to be Secondary Weapons, as their nature either makes them travel in straight lines, so be unable to fire indirectly, or simply be impossible to aim accurately enough to do so effectively! Secondary Gunnery such as Broadsides, Fore/Aft Guns, and Port/Starboard Guns have no particular rules or exceptions as standard but may be affected by Model Assigned Rules (see Page 88) or Special Munitions (see Page 72). Tertiary Ordnance (T) All Tertiary Ordnance are unaffected by Hull Points (HP) lost by the Model. Below we have the types of Weapons that are most commonly found in the Tertiary Weapons bracket: Rocket Ordnance Rockets are steel tubes tipped with an explosive warhead that are propelled through the air at great speed. Some Models carry a bank of Rockets that have a limited field of fire; others use Rocket Turrets but most mount rockets in a single large, or several smaller Batteries. Models can use Ack Ack to try and defend themselves against Rockets. For more information see Page 62. If an Attack with Rockets Hits the Target Model, any Shield Generators (including Guardian Generators) no longer use Exploding Dice and instead are treated as using Heavy Dice. 66
67 SECTION C5 WEAPONS AND MUNITIONS Torpedo Ordnance Torpedoes are self-propelled missiles that can only be used against Models in the water. Although normally fired in a limited channel, a few ships mount flexible Torpedo Turrets. Support Aircraft Torpedo Bombers are also capable of launching these deadly weapons. Torpedoes are one of the few weapons capable of targeting a Submerged Model effectively: Torpedoes can ONLY Target Models occupying the Water Major Surface (or other Water Terrain as identified in the Advanced Terrain Section, see Page 110). Torpedoes can ONLY travel from Firer to Target through the Water Major Surface. Any other Terrain between the Firer and Target will Obstruct Torpedoes. When Torpedo Ordnance from any Height Level targets a Model occupying the Surface Height Level, any intervening Models on the Surface Height Level are always Obstructing Models for determining Line of Sight, regardless of their Size. Torpedo Ordnance from any Height Level targeted at Models occupying the Diving Height Band draw Line of Sight as normal. Torpedoes always have the Sub Killer Model Assigned Rule. Models can use Concussion Charges in a Defensive Counter Attack to try and defend themselves against Torpedoes (Page 62). If an Attack with Torpedoes Hits the Target Model, any Shield Generators (including Guardian Generators) no longer use Exploding Dice and instead are treated as using Heavy Dice. Bomb Ordnance Bombs are canisters filled with explosive materials and fitted with a detonator. Incendiary, Corrosive or other more exotic contents are occasionally used, but the ruthless economics of war means the cheap and always useful explosive filling is the most common. The descent of Bombs is controlled by gravity, aerodynamics, the skill of the Bomb aimer, and sometimes a rudimentary drone system. Just like other weapons, they are harder to aim if used from high altitude, so accuracy increases if the bombers descend, but so does the accuracy of any return fire. Dive Bombers make the closest attack run of all, and are rightly feared for their ability to put a bomb in a pickle barrel. Bombs can be set to impact fuses, where their blasts spread damage across a wide area, ideal for destroying a number of smaller targets, or use delayed fuses in a concentrated attack, allowing them to punch through armour and shields for a devastating attack against a single larger target. Bomb Ordnance is only used by Aerial Models with Bomb Bays, and by Support Aircraft Dive Bombers. Bombs always use the Concentrated Bombing Firing Option (see Page 64), except when Models with the Area Bombardment MAR choose the Area Bombardment Firing Option (see Page 64). OTHER WEAPONS Bombards Bombards are weapons capable of firing both Indirectly and Directly. Bombards are governed by the following universal rules: Bombards are identified by having Bombard in the title. Bombards may be Primary, Secondary or Tertiary weapons. Bombards may choose to fire Indirectly at Range Bands 2, 3, and 4. When Firing Indirectly, Bombards may use any viable Firing Options and suffer a -1 To Hit Number modifier. Mortars Mortar Weapons are generally short ranged weapons designed solely to fire indirectly, and may range from those carried by Infantry, all the way up to huge Demolition Mortars designed to smash apart the toughest Fortifications and vessels. They are governed by the following special rules. Mortars are identified by having Mortar in the title Mortars may fire Indirectly at all Range Bands, and have a -1 To Hit modifier when doing so. 67

68 SECTION C5 WEAPONS AND MUNITIONS SPECIALISED WEAPONS Specialised Weaponry is a category of weapon where the creative innovation of inventors and scientists across the globe have been turned to create esoteric instruments of slaughter! Specialised Weaponry are governed by the following universal rules: Specialised Weaponry may only use Firing Options with other Specialised Weapons of the same Type. Unlike other weapons, Specialised Weaponry is always permitted to use viable Firing Options with other Specialised Weaponry of the same type, enabling them to perform Firing Options with a combination of Primary, Secondary, or Tertiary Weapons. Energy Weaponry Energy Weaponry is governed by the following special rules: Energy Weaponry is identified as having Energy or Particle Accelerator in the title. All Energy Weaponry, whether Turret, Broadside, Blast Weapon, or Particle Accelerator have the Redoubtable Model Assigned Rule. Energy Weapons can sometimes replace Conventional Gunnery mounted on a Model. If they do so, the Energy Weapons retain the same Fire Arc as the Conventional Weapon they replaced. Energy Blast Energy Blasts are governed by the following rules: Energy Blasts always use the Standard Fire Option. Energy Blasts always use a To Hit Number of 4, 5 or (RED) 6 regardless of modifiers and are always considered to be Indiscriminate Attacks. Energy Blasts may only Target Models on the Surface Height Level. An Energy Blast Weapon generates its Profile Attack Dice each time it fires by rolling D6 equal to the number of D6 listed in the Model s Profile with the total reduced by Damage as normal. An Energy Blast Weapon places the Energy Template centred on an enemy Model within Range and Line of Sight. Any Model touched (even partially) by the Template is hit at full Attack Dice (AD) effect. Due to the incredible drain on power that comes from firing an Energy Blast, a Model may NOT activate any Generator during an Activation in which it has used an Energy Blast Weapon. LEFT: The Time Dilation Orb fires its Energy Blast Weapon on an encroaching Squadron of Terrier Tanks. The Weapon s Profile states the Attack has 3D6 AD Value, so the Covenant player rolls 3D6 and add the total together each time the Weapon fires. In this case the score is 3+2+6=11AD! This means that each Small Tank touched by the Energy Template suffers an 11AD Attack which is Indiscriminate, hitting on a 4, 5 or a (RED) 6. 68

69 SECTION C5 WEAPONS AND MUNITIONS ABOVE: The Covenant Prometheus Class Dreadnought lines up its Particle Accelerator and fires at the Britannian Cruisers and Battleship. With a terrifying AD Spread of 14/12/8/6, the effects are bound to be catastrophic. The Energy Template is placed touching the Dreadnought s Weapon and a point is marked at the extremity of the Weapon s Range (in this case 32" away!). The player then draws the line, moving the Template along it until it touches a Model. Resolving the Attack each time with the AD Value listed in the Profile at that Range until the Template reaches its termination point. In this case, the Tribal A is struck at Range Band 2 and suffers a 12AD Attack, Tribal B is struck at Range Band 3 and suffers an 8AD Attack and the Battleship, despite straddling the Range Bands between Range Bands 3 and 4, is also struck by an 8AD Attack because the Template itself is at Range Band 3 at the moment of impact.. Each Attack is Indiscriminate and hits on a 5 or (RED) 6 regardless of other modifiers. Particle Accelerators Particle Accelerators are governed by the following rules: Particle Accelerators always use the Standard Fire Option. Particle Accelerators DO NOT declare an Attack against any specific Model or Squadron, and so no Counter Attacks are permitted. Particle Accelerators only affects Models on the same Height Level. Particle Accelerators use a To Hit Number of 5 or (RED) 6 regardless of the Height Level and are treated as Indiscriminate Attacks. Due to the incredible drain on power that comes from firing a Particle Accelerator, a Model may NOT activate any Generator during an Activation in which it has used the Weapon. When a Particle Accelerator is fired, draw a straight line that remains within the Weapon s Fire Arc until the line reaches either the edge of the Tabletop or moves into a Range Band where it has no Attack Dice listed. Place the Energy Template touching the firing Model, with the centre of the Template on the line: this represents the massive blast of energy discharged by the Weapon. The Energy Template moves down the line, hitting each Model it touches in turn, resolving all Damage for each Model in order, until the line reaches either the edge of the Tabletop, moves into a Range Band where it has no Attack Dice listed, or any part of the Template makes contact with a piece of intervening Terrain with an Elevation Bonus: this represents the blast of energy as it travels through its targets. The amount of AD rolled against each Target Model is determined by the Range Band the Target Model occupies relative to the Firing Model. 69

70 SECTION C5 WEAPONS AND MUNITIONS Flamethrower Weaponry Flamethrower Weaponry is governed by the following special rules: Flamethrower Weaponry is identified as having Flamethrower in the title. Attacks from Flamethrowers do NOT cause Critical Hits, and instead use the Damage mechanic noted below. Flamethrower Weaponry has the Deadly To Infantry and Redoubtable MARs. Flamethrower Weaponry uses Incendiary and Lethal Munitions. Flamethrower Weaponry may use either the Standard Fire, or Combined Fire Firing Options with other Flamethrower Weaponry when performing an Attack. Flamethrower Weaponry may not target Models occupying the Diving Height Band. Flamethrower Weaponry does not cause normal Damage to its target. If the total number of Hits against a Target Model equals or exceeds its Damage Rating (DR), but not its Critical Rating (CR). the target loses ONE Hull Point (HP) and receives ONE Raging Fire Game Marker due to its Incendiary Munitions as normal. If the total number of Hits against a Target Model equals or exceeds its Critical Rating, the Model still only loses ONE Hull Point, but receives ONE Raging Fire Game Marker due to its Incendiary Munitions, and an additional ONE Raging Fire Game Marker, taking the total amount of Raging Fire Game Markers received to TWO. If the total number of Hits against a Target Model equals or exceeds its Critical Rating, the Model still only loses ONE Hull Point, but receives ONE Raging Fire Game Marker due to its Incendiary Munitions, and an additional D3 Raging Fire Game Markers, making the total amount of Raging Fire Game Markers received D3+ONE. Heat Weaponry Heat Weaponry is governed by the following special rules: Heat Weaponry is identified as having Heat in the title. Heat Weaponry uses the Incendiary and Piercing Munitions Types. Heat Weaponry always has the Redoubtable and Pinpoint Attack Model Assigned Rules. Tesla Weaponry Tesla Weaponry is governed by the following special rules: Tesla Weaponry is identified as having Tesla or Speerschleuder in the title. Tesla Weaponry uses Lethal Strike Munitions. Tesla Weaponry has the Redoubtable Model Assigned Rule. Heavy Flamethrowers Heavy Flamethrowers are simply larger, more powerful Flamethrowers. This allows them to project far more fuel onto a target, creating a larger fire that will often overwhelm vessels. Heavy Flamethrowers follow all the same rules as regular Flamethrower Weaponry except that, if the total number of Hits against a Target Model equals or exceeds its Damage Rating, but not its Critical Rating, the target loses ONE Hull Point and receives ONE Raging Fire Game Marker due to its Incendiary Munitions, and an additional ONE Raging Fire Game Marker, taking the total amount of Raging Fire Game Markers received to TWO. 70
71 SECTION C5 WEAPONS AND MUNITIONS Speerschleuder If the number of Hits from ANY attack including a Speerschleuder equals or exceeds the Damage Rating (DR) of a Target Model, the Target gains a Lightning Rod Persistent Effect Game Marker. Any Attacks, in subsequent Activations, made by Tesla Weapons against a Target with one or more Lightning Rod Persistent Effect Game Markers on it are resolved as if the Tesla Weaponry had Devastating Munitions equipped. All Speerschleuders are considered to have the Sub Killer and High Angle Model Assigned Rules. Volley Guns Volley Guns are robust, rapid firing, high angle weapons used by various nations to defend against both smaller surface targets and more importantly flyers. Volley Guns are governed by the following special rules: Volley Guns are identified as having Volley Gun in the title. Volley Guns have the High Angle and Redoubtable Model Assigned Rules. AUXILIARY WEAPONS Ack Ack (AA) Normally low-calibre, rapid firing and deployed in great numbers, Ack Ack can put a curtain of fire into the sky that is capable of damaging or driving off any Aerial Model or threat. When used in the ways noted below, AA has a range of 8" unless otherwise specified below: Ack Ack used to Attack Models in the Aerial Height Band. Ack Ack used to mount an Interception Attack against Support Aircraft Squadrons (see Page 115). Ack Ack used to attack Air-Burst Mines in an attempt to remove the Mine in a Controlled Detonation (see Page 74). Defensive Counter Attack Ack Ack used to defend against Rockets (see Page 62). Aggressive Counter Attack Ack Ack used to Counter Attack Models in the Aerial Height Band that have targeted the Model. Anti-Boarding Ack Ack used to defend against an Aggressive Boarding Action from Models on the Surface or above Height Levels during the Boarding Segment (see Page 77). Ack Ack Attacks made by Support Aircraft both when executing Attack Runs and in Dogfights (see Page 115). Concussion Charges (CC) Packed with explosives these devices can be set to explode on, or just below, the surface. The shock wave they produce is often deadly to any Submerged Model or threat. All Concussive Charge Attacks directed towards Models are considered to have the Crushing Impact and Sub Killer MARs. When used in the ways noted below, CC has a range of 8" unless otherwise specified below: Concussion Charge Attacks against Models in the Diving Height Band. Attacks against Surface Mines in an attempt to remove the Mine in a Controlled Detonation (see Page 75). When used in any of the below ways, CC has a range of 4" unless otherwise specified: Defensive Counter Attacks using Concussion Charges used to defend against Torpedoes (see Page 62) Aggressive Counter Attack Concussion Charges used to Counter Attack Models in the Diving Height Band that have targeted the Model. Anti-Boarding Concussion Charges can be used to defend against an Aggressive Boarding Action from Models in Diving Height Band during the Boarding Segment (see Page 77). When used in the ways noted below, AA has a range of 4" unless otherwise specified: 71

72 SECTION C5 WEAPONS AND MUNITIONS SPECIAL MUNITIONS Most weapons in the game use High Explosive munitions, and this is often highly effective. However, certain factions and commanders make great use of munitions with special effects. If a Model or weapon can be equipped with Special Munitions this will be listed in the Model s Profile, or in a Faction s Forces Guide. If an Auxiliary weapon has one of these Munition types, the effect of the Special Munitions also apply to any Counter Attack made with the Auxiliary weapon, where applicable. Unless otherwise specified in order to benefit from the Special Munition rules below, the Lead Weapon used in an Attack must have the relevant Special Munition. Attacks using the Combined Fire Firing Option require ALL weapons used in the Attack to have the relevant Special Munition. Concussive If the number of Hits from an Attack with Concussive Munitions equals or exceeds the Critical Rating (CR) of the Target Model, the target loses ONE additional Assault Point (AP). Corrosive If the number of Hits from an Attack with Corrosive Munitions equals or exceeds the Damage Rating (DR) of the Target Model, place ONE Corrosive Marker on the target. If the number of Hits equals or exceeds the Critical Rating (CR) of the Target Model, place TWO Corrosive Markers on it. Devastating Provided ALL weapons in the Attack have Devastating Munitions, ANY (RED) 6 on the INITIAL roll from the Attack results in TWO D6 being rolled in the Exploding Dice Step rather than just ONE. Any subsequent (RED) 6s will result in ONE extra D6 as normal. High Payload ALL Hits from a High Payload will result in TWO successes. In cases where the Exploding Dice mechanic is permitted a (RED) 6 will STILL result in TWO successes AND a chance to roll the dice again. Incendiary If the number of Hits from an Attack with Incendiary Munitions equals or exceeds the Damage Rating (DR) of the Target Model, place ONE Raging Fire Marker on the target. 72
 of the Target Model, the target loses ONE additional Assault Point (AP).")
73 SECTION C5 WEAPONS AND MUNITIONS Weapons equipped with Incendiary Munitions are considered Flame Weapons for the purposes of Defensive MARs such as Flame Retardant Armour. Lethal Strike If the number of Hits from an Attack with Lethal Strike Munitions equals or exceeds the Damage Rating (DR) of the Target Model, the target loses ONE additional Assault Point (AP). Piercing If the number of Hits from an Attack with Piercing Munitions equals or exceeds the Damage Rating (DR), but NOT the Critical Rating (CR), of the Target Model it will lose 1 Hull Point (HP), and then roll on the Critical Hit Table, for the Critical Hit Effect only, ignoring any HP Lost result. Important Note: Any result of a 2 or 12 must be rerolled. If the number of Hits equals or exceeds the Critical Rating (CR) then roll as normal for a Critical Hit. Weapons with the Piercing Munition Type CANNOT use the Indirect Fire Firing Option. Sturginium If an Attack with Sturginium Munitions Hits the Target Model, any Shield Generators (including Guardian Generators) no longer use Exploding Dice and instead are treated as using Heavy Dice. Limited Use Munitions Most Weapons have sufficient ammunition for the whole battle, but some Models, normally those carrying very large weapon loads for their size, have Limited Use Weapons. As the name implies, these weapons may only be used in a finite or limited fashion. Limited Use Munitions are denoted by Limited, X Number in brackets after the weapon name. Each time a Model with Limited Use Munitions has used the munition, place an Ordnance Away Game Marker on the Model. When the Model has as many Ordnance Away Markers as the Number in the bracket, it may no longer use the Weapon. Magnetic Mines This Mine Marker may be moved up to 2" in any direction chosen by the controlling player during the Drifting Step of the End Phase. This may allow the Mine to meet its Detonation Criteria immediately (see Mines, Page 74). 73
74 SECTION C6 MINES AND NODES MINES Mines are explosive devices often placed onto the Surface of the Water or Land, or more unusually, at other Height Levels. They are triggered by the approach of a Model and can inflict great damage. Mines are mainly unsophisticated devices, normally unable to differentiate between friend and foe. As a result of this, their placement has to be carefully considered. Mines are represented on the Tabletop as Mine Markers. Once placed, Mine Markers will remain in play until they are Detonated or Cleared. Any Model capable of laying Mines will have Mines listed in their Profile. The Attack Dice (AD) of the Mines are listed in the Range Band 1 section of a Model s Profile. A Model s Profile will also list how many Mines it can place during an Activation. Most Mines will use fairly standard munitions for its payload; however certain types of Mine may be unusual and have additional effects. These will be listed as a Munitions Type in the Options Section of their Profile. A Model with Mines can place the listed number of Mines in the Aft 90-degree Fire Arc, within 2" of the rear of the Model during any point of the Movement Segment of the Squadron Activation. All measurement to Mines is to the centre of the Mine Marker. A Mine may NOT be placed within 1" of any other Model. A Mine may NOT be placed within 1" of any other Mine Marker, unless a Squadron is Linking Mines (see below). When a Mine is placed, place a Mine Marker to show its position. Mines become Armed only at the END of the Activation of the Squadron that placed them. A Model may not place Mines and drop Bombs in the same Activation. Detonating a Mine An Armed Mine will explode when its Detonation Criteria are met. The Detonation Criteria will differ depending on the type of Mine deployed. Surface Mine Detonation Criteria An Armed Surface Mine will Detonate if a Model occupying the Surface or Submerged Height Levels moves, or is moved, to within 1" of the centre of a Mine Marker. If an Armed Surface Mine is moved to within 1" of a Model occupying the Surface or Submerged Height Levels, it IMMEDIATELY Detonates. Tiny Models DO NOT Detonate Surface Mines. Air Burst Mine Detonation Criteria An Armed Air Burst Mine will detonate if a Model occupying the Surface or Flying Height Levels moves, or is moved, to within 1" of the centre of a Mine Marker. If an Armed Air Burst Mine is moved to within 1" of a Model occupying the Surface or Flying Height Levels, it IMMEDIATELY Detonates. Tiny Models DO NOT Detonate Air Burst Mines. Surface Mine Detonation When a Surface Mine Detonates, place the Large Effect Template over the centre of the Detonating Mine: all Models on the Surface or Submerged Height Levels under the Template are hit by the ensuing explosion. Air Burst Mine Detonation When an Air Burst Mine Detonates, place the Large Effect Template over the centre of the Detonating Mine: all Models on the Surface or Flying Height Levels under the Template are hit by the ensuing explosion. General Detonation Effects Mines use the Exploding Dice mechanic, and require a 4, 5, or (RED) 6. Roll ONCE for each Mine and apply the hits to ALL affected Models hit by the explosion. ALL Mine Explosions are resolved separately. ALL Mine Explosions are Indiscriminate Attacks! If a Mine explodes, remove the Mine Marker that was representing it. If an Armed Mine Marker is under a Large Effect Template placed due to a Mine Explosion, roll a D6: on a (BLACK) 5 or 6, the Mine Marker Detonates, regardless of which Force dropped it. This can result in a cascade of Detonating Mines, so be careful how you place them on the Tabletop! 74

75 SECTION C6 MINES AND NODES Clearing Mines If a Model is within 8" of the centre of a Mine Marker, it can attempt to remove the Mine in a Controlled Detonation Attack. Surface Mines may only be attacked by Concussion Charges and Air Burst Mines may only be attacked by Ack Ack. This Attack is declared and resolved using any applicable Firing Options, in the Firing Segment as normal and uses the following To Hit Numbers modified by any applicable Model Assigned Rules: A 4, 5 or (RED) 6 is required for a Hit. If the number of Hits equals, or exceeds, the Mine s Attack Dice (AD) Value, the Mine Marker is removed from play without Detonating. If the Mine Marker is NOT removed it DOES NOT take any Damage from the Controlled Detonation Attack. Linking Mines To create a Linked Mine, a Squadron places several Mine Markers in the same location during the same Activation. The Mine Markers are stacked on top of each other, and become a Linked Mine. This is the ONLY way a Linked Mine can be created. When a Linked Mine Detonates, calculate the AD using the Linked Fire mechanic (see Firing Options on Page 115) with all the Mines in the stack. Unless a specific condition applies, a Linked Mine may not be MOVED for any reason. Important Note: When attempting to clear a Linked Mine, total the amount of hits rolled during a Controlled Detonation Attack and compare these hits to the AD Value of the Mine Markers that make up a Linked Mine. For every multiple of the Mine Markers AD Value scored, remove ONE Mine Marker from the Linked Mine. Node Projector Nodes are one use devices that allow Generators to project their effects to much great ranges than normally possible. They do so by placing a Node at some distance from the Model using the Generator, and then channelling the effect of the Generator through the Node. During the Auxiliary Weapon Step this weapon places a Node Marker within Line of Sight and in the Range Bands indicated by an X in the Model s Profile. It may only be used if the Model is occupying the Surface or Flying Height Levels. The Marker may NOT be placed in contact with a Model or Mine Marker. Once the Marker is placed, the Generator listed in the brackets of the Node Projector controlled by the Parent Model activates (even if this would mean it does so out of sequence), channelling the power of the Generator though the Node. All Models touched by a Large Effect Template, placed over the centre of the Marker, are considered to have been attacked by the Generator Type listed in the brackets. The Generator Type must roll separately for each affected Model to ascertain if it has been successfully targeted, using the rules listed in the stated Generator entry. Unless otherwise stated in the individual Generator entry, the Generator affects Models occupying all Height Levels. A Model may only use their Node Projector if the on-board Generator of the same type is functional. The use of the Node counts as the Offensive Generator s Activation for the Game Turn. Once all Generator attacks have been resolved, the Node Marker is removed from play. Commodore Roger Barnes-Thorpe 75
76 SECTION C7 THE BOARDING SEGMENT BOARDING ACTION SEGMENT In a Boarding Action, marines, often equipped with rocket packs to leap aboard, can cause severe damage to an enemy Model. In some cases they are even able to overwhelm the Model s defences completely and take it as a Prize. Most Models have some marines on board, represented by an appropriate Assault Points (AP) value in their Profile. Unlike other Models, the AP values of Robots do not represent a complement of marines; instead, it is their physical form allowing them to inflict damage to an enemy Model when close. A Non-Robotic Model s Assault Point value can be reduced due to Boarding Actions, certain types of Damage, or if the Model places marines on board another Model as a Prize Crew or Salvage Crew. A Model reduced to 0 Assault Points cannot initiate any Boarding Actions and is very vulnerable, as its crew lack the specialists needed to fight off enemy boarding parties. Boarding Action Limitations During boarding, the parties involved are divided into two key elements: the Target Model and the Initiating Model (or Models in the case of grouped boarding actions!). A Boarding Action CANNOT be attempted in the following circumstances: An Initiating Non-Robot Model fired ANY Primary, Secondary, Tertiary or Auxiliary weapons at the Target Model during the current Squadron Activation. The Models are out of range! The Initiating Model is Disordered. An Initiating Model suffered Damage as a result of a Collision during the current Game Turn. The Target Model is a Support Aircraft Squadron. An Initiating Model is TWO or more Height Levels away from the Target Model. Either Target or Initiating Models occupy the Diving Height Band, unless a Model Assigned Rule applies. A Model may only ever nominate ONE Target Model to be the subject of a Boarding Action during the Boarding Segment of its Activation. Boarding Procedure The Boarding Action Segment has SIX steps, which are resolved in the following order: 1. Nominate Targets and Assault Groups 2. Anti-Boarding Declarations 3. Anti-Boarding Fire 4. Close Quarters Battle (CQB) 5. Determine the Victor! 6. Boarding Consolidation 1. Nominate Targets and Assault Groups During this Step, a Model must announce the intention to execute a Boarding Action during the Phase. ALL Models initiating a Boarding Action in the current Squadron Activation MUST nominate the Target Model they are planning to board before ANY Boarding Action can be resolved across affected Squadrons. Each Initiating Model MUST then state how many Assault Personnel (AP) they are planning to commit from their Model s current AP to the assault: this is called the Model s Assault Group. A Model may only ever create ONE Assault Group in the Phase and it must comprise of at least 1 AP. Important Note: An Initiating Model is not compelled to allocate their entire Assault Personnel (AP) to their Attack Group. A Boarding Action can be made against a valid Target Model within 4". Measurement for any Boarding Action is taken from the closest point on the Initiating Model or its base to the closest point on the Target Model or base. Line of Sight is NOT required to make a Boarding Action. Obstructing Terrain has no effect. The Two Types of Boarding Action are: Friendly Boarding Actions Aggressive Boarding Actions 76
77 SECTION C7 THE BOARDING SEGMENT Friendly Boarding Actions Efforts to Repair or Re-crew a friendly Model. These are further sub-divided into TWO types: Repair Boarding Actions (see Repair Function on Page 130). Re-Crew Boarding Actions: Models within a Squadron may elect to initiate a Boarding Action against another member of the Squadron, using their Attack Group to Re- Crew the Target Model. The Initiating Model loses the AP from their Attack Group and the Target Model gains the AP. No Model may exceed its starting AP value and the Target Model retains its Crew Type. Important Note: A Squadron that initiates a Re- Crewing Boarding Action may NOT attempt any other form of Boarding Action during the Activation. Aggressive Boarding Actions These are an attempt to Sabotage, Derelict, Salvage or Prize an enemy Model. If a Target Model is targeted by more than one enemy Assault Group during the current Squadron Activation, the forthcoming Boarding Action is resolved as a Joint Assault with the defenders battling against two or more groups of attackers! 2. Anti-Boarding Declarations With the enemy marines already in the air and soaring towards their targets, the defensive systems on-board the assaulted Models kick in, filling the air with small calibre weaponry, debilitating concussive blasts or some other inventive form of defensive counter-measure devised by the Nations. When using any form of Anti-Boarding Fire against an Aggressive Boarding Action, all Anti-Boarding Fire must be allocated to one or more of the Assault Groups attempting the Aggressive Boarding Action BEFORE any dice are rolled. Each Assault Group can only be the target of ONE Anti-Boarding Fire Action. If targeted by an Aggressive Boarding Action a Model MUST attempt to defend itself and may ONLY allocate Anti-Boarding Fire to Assault Groups targeting it. If one or more Initiating Models in the Boarding Action are in the Diving Height Band, the Target Model must allocate their Concussion Charges (CC) to defend themselves. In all other instances, Ack Ack (AA) is used. Important Note: A Salvaged or Prized Model uses the Ack Ack or Concussive Charges statistic of the Model, modified by the damage sustained on the Model, when defending against an incoming Boarding Action. Members of the Model s Squadron or Combat Patrols (see Page 126) measure their Range to the Target Model to ascertain whether or not they can perform Linked/Combined Anti-Boarding Fire. Models must be within 4" of the Target Model to assist in the Anti-Boarding Fire action. Unless otherwise stated, the other members of the Squadron MUST use the Linked Fire Firing Option and the Target Model MUST Lead the Anti-Boarding Fire action. Important Note: Players should remember that a Model may NOT provide Supporting Fire to defend another Model if they are themselves targets of a Boarding Action. 3. Anti-Boarding Fire During this Step, the Target Model resolves their allocated Anti-Boarding Fire determined in the Step above. Roll the allocated Anti-Boarding Fire against the incoming Assault Groups, noting losses to the Initiating Models Assault Personnel (AP). Anti-Boarding Fire is resolved against Assault Groups in any order chosen by the Target Model. Anti-Boarding Fire rolls a number of D6 equal to the weapon s Attack Dice (AD), taking into account Firing Options, Damage Reduction and Collisions, where appropriate. Anti-Boarding Fire uses the Exploding (RED) Dice mechanic and has the following To Hit numbers against any Boarding Action, modified by any Model Assigned Rules that may apply. A 5 or (RED) 6 is required To Hit. Anti-Boarding Fire Damage Any non-robot Initiating Model will lose 1 Assault Point (AP) per Hit from Anti-Boarding Fire. Any lost Assault Points from Assault Groups are removed IMMEDIATELY, are no longer involved in the Boarding Action and must be noted near the Model. Important Note: Should the Anti-Boarding Fire generate more Hits than the Assault Group it was directed against, the excess is lost and does not carry on to other Assault Groups taking part in the same action. 77
78 SECTION C7 THE BOARDING SEGMENT 4. Close Quarters Battle (CQB) With the attacking marines on-board the target and running amok against the line-crew, it falls to the troops on-board to muster a defence in order to repel the boarders. The remaining Assault Groups from the Initiating Models that have survived the Anti-Boarding Fire are now considered to have reached the enemy Model and proceed to engage the defenders in Close Quarters Battle. It now falls to the Target Model to create its own Assault Group(s) to repel the enemy by allocating from its own current Assault Point (AP) value. If only one Initiating Assault Group is on board, the Target Model allocates its entire AP value into one defending Assault Group. If more than one Initiating Assault Group is on board, the Target Model creates one or more Assault Groups that are individually assigned to engage a specific Initiating Assault Group. The total amount of Assault Points (AP) allocated into these multiple Assault Groups MUST not exceed the total amount of Defending Assault Points available. ALL of the Assault Points on the Model MUST be allocated to at least one of their own created Assault Groups; the marines on board are not going to just stand aside while the enemy s about after all! Important Note: In some cases the Target Model may wish (or be forced) to allocate their AP against just a single Initiating Assault Group, even if there are more than one Initiating Assault Groups on board. Once allocation is done, SIMULTANEOUSLY resolve each Boarding Action between the Target Model s Assault Groups and the Initiating Model s Assault Groups. The number of Assault Points in each Attack Group is then converted into Attack Dice (AD) which in turn may be modified by any Model Assigned Rules (MARs) that may apply. The Attack Dice for all parties are dependent on the Crew Type on the relevant Models involved. Each Hit will cause the opposing non-robot Model s Assault Group (and by extension the Model itself) to lose 1 Assault Point. This reflects casualties to any marine complement, either attackers or defenders. The total number of AP lost from each Model is noted to provide a total for each side in the engagement. The To Hit Numbers required to Hit in an Aggressive Boarding Action are determined by the Crew Types involved, below is a summary table of the available Crew Types, with full details opposite. Important Note: Should the Attack Dice rolled by the Target Model generate more Hits than the Assault Group it was directed against, the excess is lost and does not carry on to other Assault Groups taking part in the same action. The Initiating Models are not governed by this limitation as it is assumed their forces are able to use the victory to run amok onboard the enemy Model, striking in ambush against additional Target Model Assault Groups who are sworn to defend key positions on-board. CLOSE QUARTERS BATTLE TO HIT TABLE Crew Type Initiates a Boarding Assault To Hit Number Defends Against a Boarding Assault To Hit Number Elite 3, 4, 5, (RED) 6 3, 4, 5, (RED) 6 Aggressive 3, 4, 5, (RED) 6 4, 5, (RED) 6 Reckless 3, 4, 5, (RED) 6 Opposing Model gains a +1 Hit Modifier 3, 4, 5, (RED) 6 Opposing Model gains a +1 Hit Modifier Regular 4, 5, (RED) 6 4, 5, (RED) 6 Stoic 4, 5, (RED) 6 3, 4, 5, (RED) 6 Defensive 5, (RED) 6 4, 5, (RED) 6 Conscripted 5, (RED) 6 5, (RED) 6 Non-Combatant (RED) 6 (RED) 6 78

79 SECTION C7 THE BOARDING SEGMENT 5. Determine the Victor! Determine whether the Target Model has Routed the Attack, Repelled the Attack, has suffered a Sabotage result or if the boarders were Victorious! Once all Boarding Action Attack Dice have been rolled, compare the number of AP Hits inflicted by both sides (not including excess Hits that were lost) and consult the Boarding Success table on Page 80: Sabotage A Sabotaged Model IMMEDIATELY suffers a Critical Hit and the Attacker must roll on the Critical Hit Table. This roll occurs AFTER the Attackers have left the Sabotaged Model during the Boarding Consolidation Step. CREW TYPES Each Profile in Dystopian Wars includes a Crew Type entry taken from the following list: Elite This Crew Type represents the very best each faction can offer as regards close combat troopers. Aggressive Some factions are predisposed to aggressive and hard hitting boarding assaults. These troopers epitomise this ethos in their attitude. Stoic These troops are dogged defenders, capable of fighting on against all odds under relentless enemy assaults. Regular This Crew Type represents the standard Assault Personnel tasked with combat actions in the world of Dystopian Wars. Reckless Every faction has its share of headstrong and gungho individuals keen to cause havoc amongst their foes. Such troops are difficult to control however, and are often simply unleashed upon the enemy! Defensive Not all Assault Crews are capable of launching cohesive assaults and this Crew Type is designed to represent those who favour a more passive engagement style. Conscripts These Assault Personnel represent the poorly trained elements of assault cadres. Whilst not as gifted in their ability to inflict damage, they often make up for this shortfall with pure numbers! Non-Combatant The general Merchant Seaman is not equipped or trained to engage the enemy in the terrifying and often fatal Dystopian World. This Crew Type is most commonly given to Crew who would prefer never to get involved in a Boarding Assault if they can help it! 79
80 SECTION C7 THE BOARDING SEGMENT RESULT EFFECT DESCRIPTION Defender rolls more hits and the Defender's AP is not wiped out. Attack Routed The Target Model may make an out-ofsequence Ack Ack/Concussive Charge Anti-Boarding Fire Attack (depending on the nature of the boarding action) against the Attacker s Assault Personnel remnants as they attempt to escape the Model. Important Note: ONLY the Target Model may engage in this attack. Other Squadron Members or Combat Patrols may NOT. Both Attacker and Defender roll the same number of Hits but the Defender s AP is not wiped out. Attack Repelled The Initiating Model's AP remnants return to their Models without further penalty, using the smoke and confusion to escape. Attacker rolls more hits, but does not wipe out the Defender's AP. OR Both sides have been wiped out. Sabotage * The Attacker s AP places explosive charges on-board the Model and return to their Model in the chaos of the resulting explosion, if any survived! The Target Model suffers a Critical Hit and where relevant, the Attacker must roll on the Critical Hit Table applying any damage and effects immediately. Defender AP is wiped out and Attacker AP remains. Victorious! The Attacker AP on-board may Prize the Model if able. The Model takes a Prized Game Marker. Only Capital Non-Robot Models may be taken as a Prize/Salvage. OR The Attacker may choose to downgrade this result to a Sabotage Effect* see above. OR The Attacker may leave the Model as a Derelict is they wish to. The Model takes a Derelict Game Marker. Derelict Models with an Initial HP of 2 or less are removed from play. 80
81 SECTION C7 THE BOARDING SEGMENT Prize Models ANY Model that initiated an Aggressive Boarding Action that resulted in the Target Model being able to be taken as a Prize, can allocate an amount of their current Assault Group to form a Prize Crew before returning to their Parent Model and re-joining its APcontingent. A Model s Assault Group value is reduced by 1 for each 1 point of Prize Crew they supply to the Model being taken as a Prize. The size of any Prize Crew on a Model must be clearly shown. A Model MUST contribute any Prize Crew during the Boarding Consolidation Step and CANNOT do so in any subsequent Squadron Activation. A Prize Model is effectively Lost and (unless otherwise stated) CANNOT perform ANY Actions in the Activation Segment of the game, other than compulsory Drift movement, unless a specific condition or Model Assigned Rule applies. However, a Prize Model CAN be the subject of a later Aggressive Boarding Action in an attempt to recapture the Model by the opposing fleet in an attempt to Salvage the Model instead. Should a Prize Model be subject to an Aggressive Boarding Action, the Prize Crew may use the captured Model s Auxiliary Weapons as part of an Anti-Boarding Fire Action. If, for any reason, a Prize Crew is reduced to 0, without the original owner placing a Salvage Crew on-board, the Prize Model automatically becomes a Derelict Model. Important Note: The size of any Prize/Salvage Crew may never exceed the Prized Model s Initial Assault Points (there just isn t the space to hold more!) and is used as the current Assault Point value of the Model during any attempt to re-capture the Model. Salvaged Models A Model that had been taken as a Prize by the enemy may be taken later in the game as part of a Boarding Action by the previous owner s fleet. A successful boarding action that wipes out the Prize Crew will allow the boarding Models to deploy a Salvage Crew on-board, or may force the boarders to leave the Model as a Derelict. The Aggressive Boarding Action resolves normally with the Attacker and Defender functioning as above, except the Attacker does not Prize their own Model, rather they Salvage it instead. A Model s Assault Point value is reduced by 1 for each 1 Salvage Crew they supply to the Model being taken as a Salvaged Model. The size of any Salvage Crew on a Model must be clearly shown. A Model MUST contribute any Salvage Crew immediately after the Aggressive Boarding Action has been won and CANNOT do so in any subsequent Squadron Activation. Should a Salvaged Model be subject to an Aggressive Boarding Action, the Salvage Crew may use the re-captured Model s Auxiliary Weapons as part of an Anti-Boarding Fire Action. A Salvaged Model is effectively Lost and CANNOT perform ANY Actions in the game, other than compulsory Drift movement, unless a specific condition or Model Assigned Rule applies. However, a Salvaged Model CAN be the subject of an Aggressive Boarding Action in an attempt to re-capture the Model by the opposing fleet in an attempt to Prize the Model again! If, for any reason, a Salvage Crew is reduced to 0, without the previous Prizing player placing a Prize Crew on-board, the Salvage Model automatically becomes a Derelict Model. Prize/Salvage Crews and Crew Type All Prize and Salvage Crews are considered to be the Regular Crew Type. Derelict Models A Derelict Model is effectively Lost and CANNOT perform ANY Actions in the game, other than the compulsory Drift movement. It CANNOT be the subject of ANY further Boarding Actions and CANNOT be taken as a Prize or as a Salvage Model later in the game. In the End Phase, a Derelict Model will automatically lose ONE point of HP and CANNOT execute any Repair Actions. 6. Boarding Consolidation Derelicts, Salvaged Models and Prize Models affect players Victory Points Totals and so need to recorded in this Step. Models that have been taken as a Prize or as Salvage should be clearly marked with the appropriate Game Marker and their Crew Numbers must be clearly shown. Robots and the Boarding Phase For more information on how Robots interact in this Segment, see the Robot Designation Section on Page
82 SECTION C7 THE BOARDING SEGMENT EXAMPLE 1: A Squadron of three Prussian Uhlan Class Cruisers (A+B+C) announce an Aggressive Boarding Action against a Squadron of three Britannian Tribal Class Cruisers (X+Y+Z), of which Tribal Z is heavily Damaged having taken 3 points of Damage earlier in the game. Two of the Prussian Cruisers B+C each have 5AP available and the remaining Uhlan A, having suffered a Hard Pounding Critical Hit previously, has only 3AP available. The Uhlan Cruiser B builds its Assault Group with 4AP (leaving 1AP on-board). The Uhlan Cruiser C builds its Assault Group with 4AP (leaving 1AP on-board). The damaged Uhlan Cruiser A throws caution to the wind and allocates all 3 of its remaining AP to its Assault Group. The Prussian Player now nominates the targets of the upcoming Aggressive Boarding Actions. Tribal Y has two Assault Groups allocated towards it from Uhlan A+B (4AP from one Uhlan and 3AP from the damaged Uhlan) this forms a Joint Assault. Tribal X has one Assault Group allocated towards it from Uhlan C (4AP from the remaining undamaged Uhlan). The third heavily damaged Tribal Z has no Assault Group allocated towards it. EXAMPLE 1: EXAMPLE 2: EXAMPLE 2: Tribal Y has two Assault Groups allocated towards it (5AP from one Uhlan and 3AP from the Damaged Uhlan) Tribal X has one Assault Group allocated towards it (5AP from the remaining undamaged Uhlan). The heavily Damaged Tribal Z has no Assault Groups allocated towards it and is within 4" of the Tribal Y, so is free to add its Supporting Fire to the Linking Pool for Tribal Y. Tribal Y MUST defend itself with its Ack Ack pool of 4 (3 of its own Ack Ack and +1 from the Supporting Tribal Z) which it chooses to allocate 2AD worth of Anti-Boarding Ack Ack at the larger Assault Group of 4, and 2AD to the smaller incoming Assault Group of 3. The Tribal X MUST also defend itself and so allocates its 3 Ack Ack to the incoming Assault Group from Uhlan C. EXAMPLE 3: EXAMPLE 3: Tribal Y allocated 2 Ack Ack against the Uhlan B Assault Group and has 2 Ack Ack allocated to Uhlan A s Assault Group. Rolling the 2AD against Uhlan B, the Tribal scores 4, 5 = 1 Hit! This reduces the Assault Points of the Uhlan B by 1 and means the Uhlan has managed to get on-board the Tribal Y with 3 Assault Points remaining in their Assault Group. Rolling 2AD against Uhlan A, the Tribal scores 2, 6, 6, 5 = 5 Hits! This reduces the Assault Points of the Damaged Uhlan A by just 3, as all the remaining AP directed towards the Tribal was eliminated! The excess hits are LOST. Tribal X allocated its own 3 Ack Ack against the Uhlan C Assault Group. Rolling the 3D6, the Tribal scores 1, 3, 6, 4 = 2 Hits! This reduces the Assault Points of the Uhlan C by 2 and means the Uhlan has managed to get on-board the Tribal with 2 Assault Points remaining in its Assault Group. 82

83 SECTION C7 THE BOARDING SEGMENT EXAMPLE 4: EXAMPLE 5: EXAMPLE 4: Uhlan A did not reach the Tribal Y with any Assault Points remaining in its Assault Group. Uhlan B managed to reach Tribal Y with 3 Assault Points remaining in their Assault Group! Uhlan C managed to reach Tribal X with 2 Assault Points remaining in their Assault Group! Given the Assault Group from Uhlan A was wiped out, the AP of Tribal Y creates a single Assault Group with their entire AP, giving them an Assault Group of 5 with which to try to beat back the Prussians. Both players now roll their Attack Dice. Neither Model is subject to any Model Assigned Rules, but the Prussian Uhlan DOES have Aggressive as its Crew Type which means they cause a hit on a 3+ with their Close Quarters Battle dice when it initiates an Aggressive Boarding Assault (See Page 79). Uhlan B Attack Group rolls 4, 6, 3... then 4 = 5 Hits. Tribal Y Attack Group rolls 1, 2, 2, 4, 5 = 2 Hits. This means that the Tribal s starting 5 AP has been eliminated and the Uhlan has 1 AP remaining! Uhlan C has managed to get on-board the second Tribal with 3 Assault Points remaining. Tribal X creates a single Assault Group with their entire AP, giving them an Assault Group of 5. Both players now roll their Attack Dice. Neither Model is subject to any Model Assigned Rules, but the Prussian Uhlan DOES have Aggressive as its Crew Type which means they cause a hit on a 3+ with their Close Quarters Battle dice when it initiates a Boarding Assault (See Page 79). Uhlan C Attack Group rolls 1, 2, 4 = 1 Hit. Tribal X Attack Group rolls 1, 2, 2, 4, 5 = 2 Hits. This means that the Tribal X has 4 AP remaining and has 1 AP remaining! EXAMPLE 5: Uhlan B scored 5 Hits and Tribal Y scored 3 Hits. Tribal Y s starting AP has been eliminated and the Uhlan B has 1 AP from its Assault Group remaining on-board the Tribal! This causes a Victorious! result and the Tribal s fate is in the Prussian player s hands. They can choose to Prize the Model with the remaining 1 AP, Sabotage the Model, or simply foul its systems and leave it as a Derelict to drift until it eventually sinks. Uhlan C scored 1 Hit and Tribal Y scored 2 Hits. Tribal X has 4 AP remaining and the Uhlan C has 1 AP remaining! This causes an Attacker Routed result, forcing the remaining 1 AP from the Prussian Assault Group to flee, through the vengeful Defensive Fire of the Tribal once more! IN CONCLUSION: Following the boarding assault, the Prussian player elects to Prize the defeated Tribal. This modifies the Prussian Victory Points Total by +160pts, as the Tribal Class Cruiser costs 80pts. Should the Prussian player have elected to make the Tribal Derelict, the Prussian Victory Points Total increases by +80pts. Given that the Prussian player has chosen to Prize the Model, should the Brittanian player later capture back the Tribal and place a Salvage Crew on-board, the Prussian player s Victory Points Total would change to just +40pts rather than the +160pts it is when Prized! 83
84 SECTION C8 THE END PHASE THE END PHASE The End Phase of the Game Turn is used to tidy up and prepare for the next. The End Phase has SIX Steps, which are performed in the following order. 1. Perform any Compulsory Actions 2. Execute any Damage Repairs 3. Persistent Damage 4. Restore Order 5. Check for End of Game 6. End Phase Consolidation 1. Compulsory Actions Compulsory Actions are executed in the following order: Derelict Models lose 1 Hull Point (HP) Important Note: Salvaged and Prized Models do NOT lose HP. ALL Derelict, Prize, and Salvaged Models Drift: moving directly forward a number of inches equal to their listed Minimum Move value. ALL Drifting Models are resolved in the current Order of Initiative. Without a crew to keep them in the air, all Derelict Aerial Models Crash once they have made their Drift Move. The Crashing Model falls out of the sky, and resolves a Ram Action against any Model on the Surface Height Level in base contact with it when it Crashes. After Crashing, the Model is Scrapped. Important Note: Derelict, Salvaged and Prized Models are still moved by their original owners. 2. Damage Repairs Players MUST attempt to repair any Damage Effect Game Markers that have been inflicted upon Models which are not a Derelict by making a Damage Repair Test. Important Note: Salvaged and Prized Models may also attempt Repair Attempts. This becomes especially important should the Model be affected by Persistent Effects such as Corrosion or Raging Fires. This Step is divided into TWO parts that must be resolved in the following order, starting with Critical Repairs and then Persistent Effects Repairs. 2.1: Critical Repair Tests Players MUST roll separately for each Critical Effect Game Marker that they are attempting to repair, and can only attempt to repair each Critical Effect Game Marker once per turn. Unless otherwise stated by a Model Assigned Rule, roll a D6 for each Critical Repair attempt and consult the table below: D6 RESULT EFFECT 1, 2, 3 Critical Hit Effect Marker Remains 4, 5, 6 Critical Hit Effect Marker Removed Important Note: It is not possible to repair Hull Point (HP) damage with a Damage Repair roll, just the Critical Hit effect. 2.2: Persistent Effects Repair Tests Following any Critical Repair Tests, players MUST roll separately for each Persistent Effect Game Marker that they are attempting to repair, and can only attempt to repair each Persistent Effect Marker once per turn. Unless otherwise stated by an Assigned Rule, roll a D6 for each Persistent Effect Repair attempt and consult the table below: D6 RESULT EFFECT 1, 2, 3 Persistent Effect Marker Remains 4, 5, 6 Persistent Effect Marker Removed 3. Persistent Damage Game Markers are used to indicate both Damage and key information. Some may be time-bound, some may be repairable and others are more permanent in nature such as loss of Hull Points, Assault Points, etc. During the Persistent Damage Step, Players should ensure that every Model has the correct Game Markers placed next to them on the Tabletop. Any Game Markers that are no longer relevant should be removed. 84
85 SECTION C8 THE END PHASE Raging Fires If a Model has a Raging Fire Marker on it at this point, the Model immediately loses 1 Assault Point (AP) for each Raging Fire Marker on the Model. Should a Model (including Derelicts) with 0AP suffer the effects of further AP loss due to a Raging Fire, it loses 1 Hull Point (HP) instead as the fire spreads to affect hull integrity. Corrosion If a Model has a Corrosion Marker on it at this point, the Model immediately loses 1 Hull Point for each Corrosion Marker on the Model. 4. Restore Order At the start of this Step, if a Squadron is Disordered, it MUST roll a D3 with the resulting number being removed, in any combination, from the Squadron s Assault Points or Hull Points. The owning player may choose how this is divided across the Squadron as desired and must ensure all losses are correctly recorded. After which, Disordered Squadrons remove their Disordered Game Marker. Important Note: A Disordered Squadron that suffers casualties as a result of Disorder Damage does NOT need to take a further Disorder Test, as they are already Disordered at the time Damage is assigned. 5. End of Game Players should keep a running total of their accumulated Victory Points. At this point in the End Phase, both players must check these totals against their Victory Conditions detailed in their Force Orders. If either player has achieved the required parameters and percentage of the Game s Maximum Force Value (MFV) in Victory Points, the Game ENDS at this point and the players refer to the chart at the bottom of this page: Important Note: Players who DON T keep running totals are very likely to slow the game down considerably at this point as one or more players have failed to keep adequate records whereas others have. In the interests of faster gameplay and good manners, we would encourage players to ALWAYS keep a running total of their own Victory Points scored! Victory Points (VP) Awarded: Double VP For Any Prized Models. Half VP For Any Salvaged Models. * Full VP For Any Lost Models. Full VP for All played TAC Cards in your opponent s Scrapyard. Full VP for any Strategic Objective or other scenario-based achievement. +25VPs for any Ace shot down in a Duel. * Players should remember that all numbers in Dystopian Wars are rounded up, so should a Model cost end in a 5, the Half VP awarded for the Model is rounded up too! 6. End Phase Consolidation Assuming no player has achieved Victory, players should remove the Activation Markers from their Squadrons and prepare themselves for another Game Turn! CRUSHING VICTORY NARROW VICTORY DRAW If one side has achieved their Field Orders, and the other has not. If both sides have achieved their Field Orders, and one side has a Victory Points margin of 10% or greater of the MFV. Any other outcome! 85
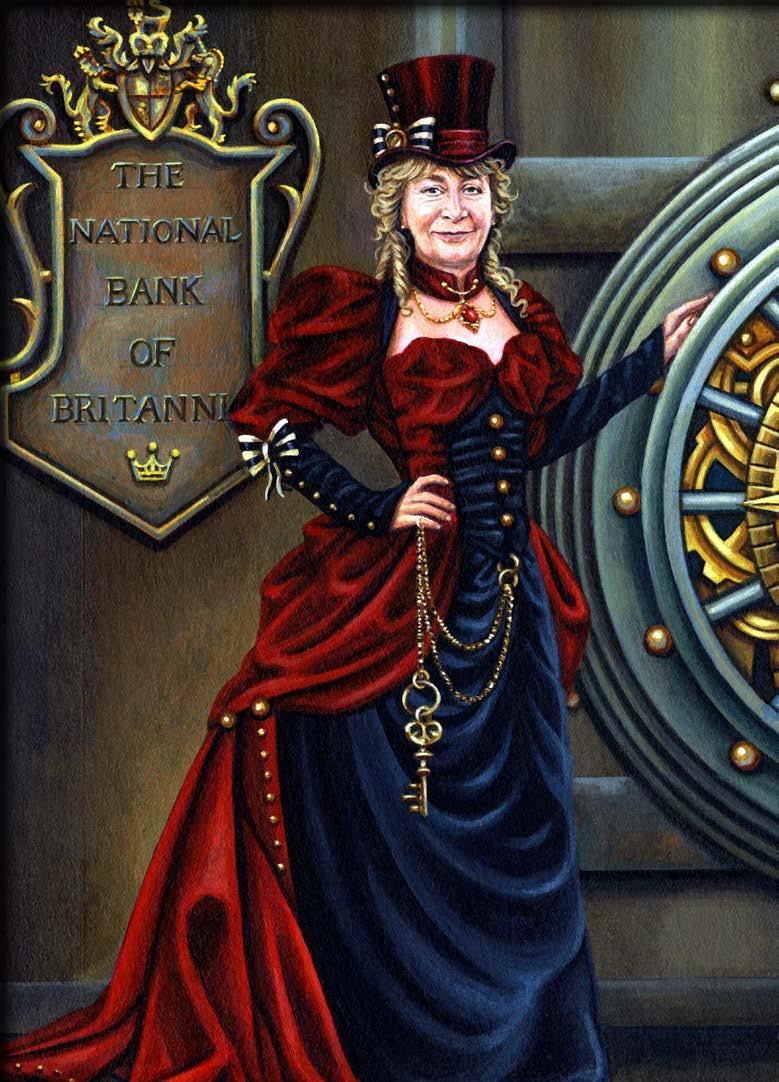
86 86
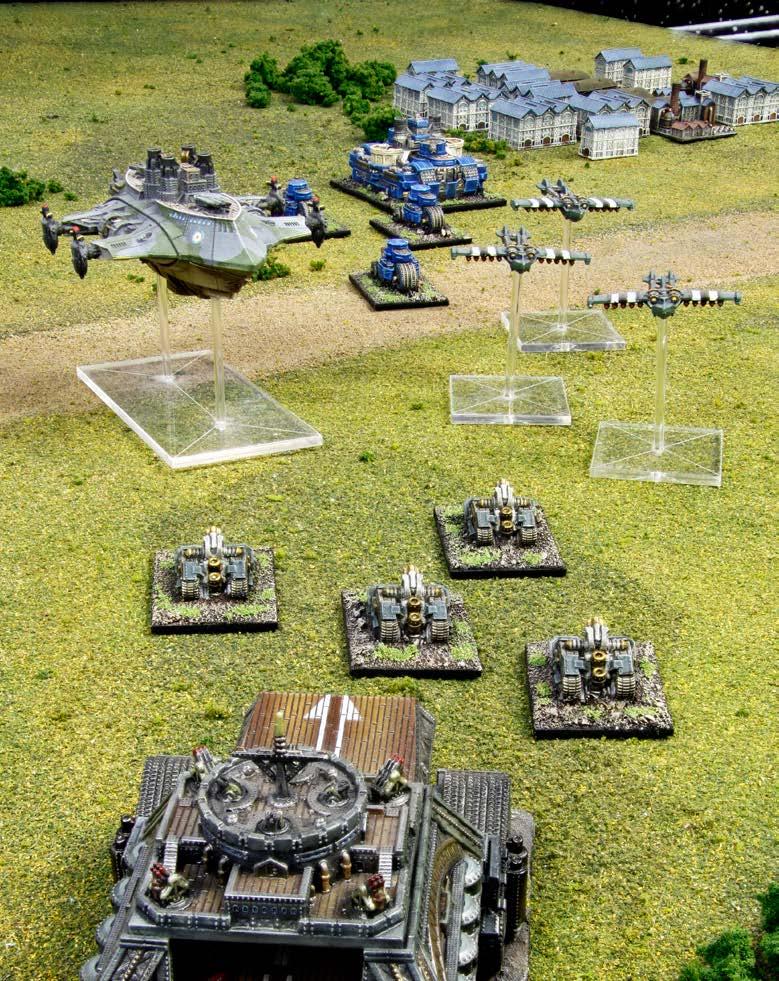
87 87 INTRODUCTION
88 SECTION D1 MODEL ASSIGNED RULES WHAT IS A MODEL ASSIGNED RULE (MAR)? A Model Assigned Rule is often abbreviated to MAR in the game rules. It is most commonly attached to Models to give them additional rules or abilities beyond the set of statistics presented on their Profile. Model Assigned Rules (MARs) do not need to be specific to Models however, as they can also be attached to Support Air Squadrons, Weapons mounted on Models and even specific to actions executed ingame. Model Assigned Rules (MARs) are a catch-all method of giving all these diverse Models and actions a framework of common rules to allow players to follow their use on the Tabletop. In any case where a Model Assigned Rule (MAR) would change or conflict with a standard rule, the MAR takes precedence and overrides the standard rule. There are two sub-types of MAR that exist which function in exactly the same manner as other MARs except as follows: Coherency MARs: These MARs are only applicable if all Models involved in the action have the MAR. Armour MARs: These MARs only provide defence against Targeted Attacks (see Page 38). Ablative Armour (+Value) Armour MAR: If this Model has HALF or more of its Initial Hull Points (HP) remaining its Damage Rating (DR) AND Critical Rating (CR) are increased by the Value listed in the bracket. If this Model is reduced to LESS than HALF of its Initial Hull Points (HP) its Damage Rating (DR) and Critical Rating (CR) return to the Value listed in its Profile AND the Model is now considered to have the Vulnerable MAR. Should a Model with this MAR return to HALF or more of its Initial Hull Points (HP) the Model regains the bonus to its Damage Rating (DR) and Critical Rating (CR) AND is no longer considered to have the Vulnerable MAR. Acrobatic Pilots During a Dogfight Engagement, the Support Aircraft Wings within the Support Aircraft Squadron have a Damage Rating (DR) of 3 rather than Damage Rating (DR) 2. Advanced Engines (+Value ) If this Model does not make any turns at any point during its Squadron Activation, its Movement (Mv) allowance is increased by the Value in inches listed in the bracket. Altered Silhouette (Size, Surface) This Model counts as being the Size listed in the bracket for the purpose of determining Line of Sight only. In certain cases this MAR will only apply when a Model is occupying a specified Major Surface. All-Terrain This Model may re-roll ONE Treacherous Terrain Test per Game Turn but the new result MUST be accepted. Aquatic Assault Assuming all other Boarding conditions are met, this Model MAY initiate an Aggressive Boarding Action against a Model occupying the Submerged Height Level. Equally a Model with this MAR occupying the Submerged Height Level MAY initiate an Aggressive Boarding Action against a Model occupying the Surface Height Band. Area Bombardment (Weapon) This Model may use the Area Bombardment Firing Option when using the Weapon listed in the bracket (See Page 65). Attachment (Nation, Type/Name, Value) During Force Organisation this Model may be ADDED to a Parent Squadron of the Nation listed in the bracket with the Type/Name of Model s making up the Parent Squadron is listed in the bracket. Any number of Models up to the listed maximum Value in brackets can be ADDED to a Parent Squadron in this way. No Parent Squadron may ever contain more than ONE Attachment Group. 88
 2. Carrier (Value) This Model is a Carrier Model and has a designated complement of Support Aircraft Wings (SAWs) equal to the Value listed in the bracket.")
89 SECTION D1 MODEL ASSIGNED RULES Big Fuel Tanks During an Interception Attack, the Support Aircraft Wings within the Support Aircraft Squadron have a Damage Rating (DR) of 3 rather than Damage Rating (DR) 2. Carrier (Value) This Model is a Carrier Model and has a designated complement of Support Aircraft Wings (SAWs) equal to the Value listed in the bracket. A Model with the Carrier Model Assigned Rule follows the rules in the Support Aircraft Squadrons and Carriers Section on Page 112. Close Quarters Gunnery A Model with the Close Quarters Gunnery MAR ignores the -1 To Hit modifier for firing Primary Gunnery (P) when targeting a Model located in Range Band 1. Important Note: While this particular modifier is ignored, other negative modifiers, such as from Small Target or Difficult Target, still apply. Combat Coordinator (Model, Range", MAR) This Model allows all specified friendly Models within the stated Range to temporarily gain the Model Assigned Rule listed in the bracket. If either this Model or an affected Model moves out of Range, the MAR is lost. Combat Deployment (Models, Value, Insertion Method) This Parent Model has a number of Models, equal to the bracketed Value, Embarked on-board the Parent Model during Force Selection. The Insertion Method Ponderous, Standard, or Rapid refers to how the Embarked Models can be used in the Activation in which they are Deployed. At any point during the Movement Segment of the Parent Model s Squadron Activation, any Embarked Models can Disembark and may be Deployed on the Tabletop anywhere within 4" of the Parent Model. Any Squadron with models Embarked MUST deploy all their Embarked Models at the same time, and these Models MUST form a single Squadron on the Tabletop. Ponderous Insertion Any Squadron that is Disembarked may NOT perform a Squadron Activation on the Game Turn they are Deployed. 89
90 SECTION D1 MODEL ASSIGNED RULES Standard Insertion Any Squadron that is Disembarked may perform a Squadron Activation on the Game Turn they are Deployed. Rapid Insertion Any Squadron that is Disembarked MUST perform a Squadron Activation on the Game Turn they are Deployed IMMEDIATELY after their Parent Model has completed its Activation. Important Note: The points cost of the Models gained through Combat Deployment are included in the overall cost of the Parent Model, however their points cost ARE used for Victory Points calculations in the End Phase. Combat Patrol This Model may have a Combat Patrol attached. See Page 126. Combustible Cargo When a Model with the Combustible Cargo Model Assigned Rule suffers a Critical Hit, roll TWICE on the Critical Hit Table and choose ONE of the results rolled. Controlled Contact This Model may perform a Controlled Contact Special Movement Actions (see Page 51). Crushing Impact (Weapon/Action) Coherency MAR: Weapons or Actions with this MAR only use the Target Model s Damage Rating (DR) when determining Damage. If the number of hits taken by a Model equals or exceeds its Damage Rating, the Model is considered to have suffered a Critical Hit. If the number of hits is DOUBLE the Damage Rating the Model is considered to have suffered TWO Critical Hits, and so on. Deep Running This Model may occupy the Deep Diving Height Level. Models without this MAR may NOT occupy the Deep Diving Height Level under any circumstances. Diehard Attitude Coherency MAR: This Model rolls an additional 1D6 when resolving a Disorder Test. Difficult Target Capital Models suffer a -2 To Hit modifier when targeting this Model with Targeted Attacks. Directed Fire (Weapon) ONE Attack or Counter Attack during each of this Model s Squadron Activations that includes any Weapon type listed in the bracket, may use the Combined Fire Firing Option. Drone Launcher (Value) This Model is a Drone Launcher and has a designated complement of Drone Support Aircraft Wings (SAWs) equal to the Value listed in the bracket. A Model with the Drone Launcher Model Assigned Rule follows the rules in the Drone Launchers and Drones Section on Page 119. All Models with the Drone Launcher MAR are automatically considered to have the Drone Relay MAR. Drone Relay See the rules in the Drone Launchers and Drones Section on Page 119. Elusive Target Non-Capital Models suffer a -1 To Hit modifier when targeting this Model with Targeted Attacks. Deadly To Infantry (Weapon) Coherency MAR: This weapon uses the Exploding (RED) Dice mechanic when attacking Infantry. Engineers (Type) Engineers on board a Model are divided into 2 types: Experienced and Inept. Models with Experienced Engineers successfully perform a Damage Repair attempts on a 3, 4, 5 or 6. Models with Inept Engineers successfully perform a Damage Repair attempts on only a 5 or 6. 90

91 SECTION D1 MODEL ASSIGNED RULES Evasive Manoeuvres (Modifier) If this Model makes a Swift Manoeuvre test, apply the modifier listed in the bracket to any roll it makes for the test. Fearless This Model automatically passes all Disorder Tests and CANNOT be affected by Disorder in any way. Faster Torpedoes Coherency MAR: A Model targeted by Faster Torpedoes may only use its own Concussive Charges when defending against the Torpedo Attack. No Supportive Defensive Counter Attack using Concussion Charges may be allocated to defend the Model. Flame Retardant Armour (Value) Armour MAR: A Model subject to any Targeted Attack or Counter Attack by Incendiary Munitions, treats a number of the INITIAL Exploding (RED) 6 s rolled against it (up to the value listed in the brackets) as Heavy (BLUE) 6s. Fuel Reserves If this Model suffers a Critical Hit roll 1D6. On a 5 or 6 place a Raging Fire Marker on the Model. Heavy Ack Ack Coherency MAR: This Model attacks Support Aircraft Squadrons using Exploding (RED) Dice. High Angle (Weapon) This Ordnance weapon CAN target Aerial Models in Range Band 1. If no weapon is listed, the High Angle Model Assigned Rule is applied to ALL Ordnance weapons on the Model. Hit and Run Coherency MAR: During the Movement Declarations Step, the Model must declare it is using this Model Assigned Rule. This Model may move up to HALF of its Movement (Mv) during the Firing Consolidation Segment of its Squadron Activation, but only if it has moved no more than HALF of its Movement during the Movement Segment. A Model that used the Hit and Run MAR during their Activation may not make a Boarding Action later in that Activation. Hull Breaker (Weapon/Action, Value) If this Model performs the Action or an Attack using the Weapon listed in the bracket and causes a Critical Hit on its target, the target loses additional Hull Points (HP) equal to the Value listed in the bracket as well as suffering the full effect of the Critical Hit. Hunter (Height Levels, Weapon System, + Modifier) Coherency MAR: This Model gains a positive To Hit Modifier to its Attack Dice (AD) when using the Weapon against a Target Model that occupies the Height Level or Band listed in the bracket. Inert A Model with this Model Assigned Rule cannot have rolls on the Critical Hit Table made against it. Instead, should a Critical Hit be suffered, the Model suffers D3 HP loss. Inventive Scientists If this Model uses a Generator, you can re-roll ONE of the INITIAL D6 rolled, but must accept the new result. If a 1 is rolled as a result of using the Inventive Scientists Model Assigned Rule, this Model gains a Raging Fire Game Marker, which can be repaired as normal during the End Phase. 91
92 SECTION D1 MODEL ASSIGNED RULES Isolated Systems (Value) Some Models are equipped to insulate themselves from debilitating critical damage. When a Model with the Isolated Systems MAR suffers any Critical Hit, roll 1D6. The Critical Hit Effect is IGNORED if the roll equals or exceeds the value in brackets. The Model takes the HP loss indicated in the relevant Critical Hit Result entry as normal. Long Range Assault This Model can initiate a Boarding Action against a target within 8". In addition, this Model may initiate a Boarding Action at a target that is TWO Height Levels away, rather than just ONE. Rear Echelon A Squadron containing only Models with this MAR does NOT perform any Squadron Activation during any Game Turn. A Squadron does not take Disorder checks for Models with this MAR that are Lost or Out of Coherency. Redoubtable (Weapon/Statistic) This Model only reduces its Attack Dice (AD) by 1 for every 2 Hull Points (HP) of Damage taken when using the Weapon/Statistic listed in the bracket. If NO Weapon/Statistic is listed, the Redoubtable MAR is applied to ALL weapons and statistics on the Model where relevant. Minefields (Number, AD) A player with this Model in their Force can also place a number of Mines with the AD listed in the bracket. Each Mine MUST be Deployed within 8" of the centre line of the Tabletop during the Model s Deployment. The Mine Markers CANNOT be placed within 4" of a Model or other Mine Marker and may not be Linked. Momentum This Model CANNOT gain a Low Speed Manoeuvre Game Markers. Any Model with the Momentum MAR that collides with Terrain is automatically Scrapped. Pack Tactics (Weapon) Coherency MAR: Any Attack or Counter Attack that includes at least TWO Models using the weapon system listed in the bracket receives +1 Attack Dice (AD) for each additional Model after the first. These extra AD are added to the Lead Weapon Pool. Pinpoint Attack (Weapon) Coherency MAR: If an Attack from a Weapon with the Pinpoint Attack MAR causes a roll on the Critical Hits Table, any result rolled on the Critical Hit Table may be increased by 1 after the dice are rolled. Reinforced Bulkheads When Submerged, this Model ignores the requirement to surface when it suffers a Critical Hit. Retardant Armour (Value) Armour MAR: A Model subjected to any Targeted Attack or Counter Attack treats the number of the INITIAL Exploding (RED) 6s rolled against it (up to the value listed in the bracket) as Heavy (BLUE) 6s. Rugged Construction (Value) Armour MAR: Any Targeted Attack or Counter Attack against a Model with the Rugged Construction Model Assigned Rule must reduce the number of Attack Dice (AD) to be rolled by the Value listed in the bracket. These Attack Dice (AD) are removed from the Total Attack Dice Pool. Security Posts (Value) If this Model is the target of an Aggressive Boarding Action it ignores the number of Hits, noted in the bracket, scored against it during the Close Quarters Battle Step. This MAR has no effect during a Robot Boarding Action. 92
93 SECTION D1 MODEL ASSIGNED RULES Sharpshooters During the Firing Segment, a Model with this MAR that is occupying the Surface or Flying Height Level can target one enemy Model within 4" of it, on the Surface or Flying Height Level that is not a Robot or Support Aircraft Squadron. Roll a D6: For each 5 or (RED) 6 rolled, the target loses 1 Assault Point (AP). Despite being resolved in the Firing Segment, this DOES NOT count as an Attack. Sharp Turn This Model does NOT need to move directly straight ahead during its Minimum Move. The Model must still make its Minimum Move. Small Target Capital Models suffer a -1 To Hit modifier when targeting this Model with Targeted Attacks. Squadron Support (Model, Value) A Model with the Squadron Support MAR enters the battlefield with additional Models designed to support the combat effectiveness of the Force. Models with the Squadron Support MAR may field a number of Models of the type listed in their bracket entry, equal in number to the Value listed in the bracket entry. All additional Models must be Deployed at the same time as the Parent Squadron, and within 4" of one of the Parent Models, but are free to act separately as a Squadron in their own right during the Game. Multiple instances of Squadron Support have a combined effect, and MUST be used to create a single Squadron. A Parent Squadron may only ever create ONE Recon Plane. The points cost of the Models gained through Squadron Support are included in the overall cost of the Parent Model, however their points cost ARE used for Victory Points calculations in the End Phase. Specialised Defences (Value) If this Model is the target of an Aggressive Boarding Action, the Model gains a bonus to its Ack Ack (AA) and Concussion Charges (CC) listed in the bracket. Spotter (Inept/Regular/Expert) During the Movement Consolidation Step, this Model may make a single Spotting Action against a Capital Model or Fortification, within 32" and in Line of Sight. To perform a Spotting Action roll a Basic D6 and compare your result to the table below: Spotter Type Inept Regular Expert SCORE NEEDED TO SPOT 6 4, 5, 6 2, 3, 4, 5, 6 On a successful Spotting Action, the Target Model is Spotted, and gains a Spotted! Game Marker. The Target Model retains the Spotted! Game Marker until the Consolidation Step of the current Game Turn s End Phase. Stratospheric Flyer This Model may occupy the Stratospheric Height Level. Strategic Value (Victory Points) If this Model is Lost, the opposing player adds an additional number of Victory Points to their Total equal to the Value listed in the bracket. This modification to the VP score is done AFTER a Model s VP are doubled or halved by Prize or Salvage conditions. Sturginium Boost At the start of the Movement Segment of this Model s Squadron Activation, roll 1D6. On a roll of 5 or 6 the Model s Movement (Mv) is increased by 2". If this Model is part of a Squadron, the Squadron only rolls once, and applies the result to ALL Models in the Squadron with the Sturginium Boost Model Assigned Rule. Sub Killer (Weapon) The Weapon listed in the bracket does not suffer the automatic Partially Blocked penalty when firing at a target occupying the Diving Height Band and may also target Submerged or Deep Diving Models at Range Band 1. 93
 up to the Value listed in the bracket. The second roll MUST be accepted.")
94 SECTION D1 MODEL ASSIGNED RULES Sustained Assault (Value) Coherency MAR: If this Model initiates a an Aggressive Boarding Action, during the Close Quarter Battle Step of the Boarding Segment, the Model s Assault Group can re-roll any of the INITIAL Attack Dice (AD) up to the Value listed in the bracket. The second roll MUST be accepted. Sustained Fire (Weapon, Value) Coherency MAR: If this Model makes an Attack using the Weapon listed in the bracket, it can re-roll any INITIAL Attack Dice (AD) up to the value listed in the bracket. The second roll MUST be accepted. Multiple instances of Sustained Fire in a Squadron do not have a cumulative effect to the Attack Dice (AD) totals used in any single Attack. Swarm Tactics Coherency MAR: Any Attack or Counter Attack using Combined Fire increases its Attack Dice Total (AD) by 2. Telescopic Zoom (Weapon, Value) Any Weapon with the Telescopic Zoom Model Assigned Rule can increase its range by a number of inches equal to the value in brackets. If this MAR is applied to a Primary, Secondary or Tertiary Weapon, the increased range is always added to the extreme limit of Range Band 4. Terror Tactics (Value) If this Model successfully places Assault Points on board an enemy Model during the Close Quarters Battle Step of an Aggressive Boarding Action, their Assault Group generates additional Attack Dice (AD) up to the Value listed in the bracket. 94

95 SECTION D1 MODEL ASSIGNED RULES Terrifying (Weapon/Action) Coherency MAR: If the number of Hits the Weapon/Action listed in the brackets equals or exceeds the Damage Rating (DR) the Squadron containing the Target Model must IMMEDIATELY take a Disorder Test. If the Weapon/Action equals or exceeds the Critical Rating (CR) the Squadron must IMMEDIATELY take a Disorder Test that requires an additional success. Troop Reinforcement This Model may initiate a Re-Crew Boarding Action against any friendly Non-Robot Model in the same Force. Unstoppable If this Model performs a Ram Action, and equals or exceeds the Damage Rating (DR) of its Target, place this Model with its Aft touching the opposite side of the Target Model, as if it had just passed underneath it in a straight line: even if it would not have had enough Movement to do so. This Model cannot be touching any other Model or solid Terrain at the end of this movement. If there is not enough room to place this Model, you cannot use the Unstoppable Model Assigned Rule. Vertical Dive During an Attack Run, the Support Aircraft Wings within the Support Aircraft Squadron have a Damage Rating (DR) of 3 rather than Damage Rating (DR) 2 as would normally be the case. Vulnerable If this Model suffers a Critical Hit, the INITIAL Critical Hit Result may be re-rolled by your Opponent, but the second result MUST be accepted. 95
96 SECTION D2 GENERATORS GENERATORS One of the great advances in technology has been the discovery and utilisation of Element 270 in the development of machinery, weaponry and energy manipulation. It has led to the creation of huge Generators that can be fitted to many Models. Generator Effects There are several different types of Generator and each is able to confer a specific ability to the Model it is attached to. However, unless otherwise stated, certain rules apply consistently to all Generators: Unless otherwise stated a Generator will activate during the Consolidation Step of the Command Segment of a Model s Activation. The effects of a Generator are NOT reduced by Damage. Unless it has a Continuous Effect, a Generator may only be Activated once per Activation. Generators with a Continuous Effect are considered to be ALWAYS Active unless the Model suffers the Generators Offline Critical Effect, or is in some other way disabled. A Model CAN initiate an Aggressive Boarding Action against a Model it has targeted with an Offensive Generator in the current Activation, unless otherwise specified. A Model CAN use a Generator AND fire both Ordnance and Auxiliary weapons in its current Activation. A Model CANNOT fire an Offensive Generator against a Support Aircraft Squadron. The Range in inches (Range ") of all Generators is made from the Centre of the Model. Important Note: If a Model has been captured as a Prize, Salvaged, or left Derelict, any Generators on the Model CANNOT be used. Generator Mounting On a Model Generators can be mounted on Models in one of three ways: External, Internal and Convertible. External A Generator listed as External is mounted on the outside of a Model and will often find itself in a prominent location to better assist its operations and range. This is not without peril, however, as the enemy will often target these important systems in an effort to weaken the Model for subsequent attacks. Ordnance Attacks may only be directed against an External generator if the Target Model is considered to be In the Open for all weapons contributing to the Attack. This kind of Attack is called a Generator Strike. Generator Strikes An Attacker must nominate they are attempting a Generator Strike during the Declare Attacks Step of the Firing Segment and may NOT target a Model with a Generator Strike using any Indiscriminate, Tertiary or Auxiliary Weaponry. All attacks suffer a -1 To Hit modifier when attempting a Generator Strike. If the Target suffers a Critical Hit from a Generator Strike Attack, do not roll on the Critical Damage Table when applying Critical Hits; instead, apply the Generators Offline result. The affected Model suffers the 2 Hull Point loss of the Critical Hit as normal. Internal A Generator listed as Internal in its Profile is considered to be enclosed and may not be the subject of a Generator Strike. Convertible This Generator may act in two different ways. During the Command and Control Step of the Model s Activation, the Generator may be nominated to be operating Internally or Externally. The choice of Generator setting is fixed until the Model s next Activation. A Model with a Convertible Generator mounting begins the Game with the Generator in the Internal setting. Important Note: A Model with a Convertible Generator set Externally can be the target of a Generator Strike Attack. A Model with all its Convertible Generators set Internally cannot. 96
97 SECTION D2 GENERATORS TYPES The plethora of Generators available to the nations in the Dystopian World is divided into three categories: Standard, Defensive and Offensive. STANDARD GENERATORS Generators are neutral in their aspect, providing support to the Force in neither an offensive or defensive capacity. Glacier Generator (Range", Value) Each Glacier Generator has a Value listed in the brackets that represents the Ice Points available to the Model. Any Ice Points generated from various Squadron members are added together to form a total for the Squadron. Ice Points may be used in one of two ways: Iceberg Creation A Model with a functioning Glacier Generator may spend ONE Ice Point to place ONE Medium Iceberg (2" by 1" footprint) Terrain Feature anywhere within the Range" listed in the bracket. This Terrain Feature MUST be placed entirely on the Water Major Surface, no closer than 4" to an enemy Model. All Icebergs placed in this manner are removed during the Persistent Effects Step of the End Phase. The Grip of Winter A Model with a functioning Glacier Generator may spend TWO Ice Points to roll a D6 targeting an enemy Model within the Range" listed in brackets and then consult the table below: D6 Result Critical Effect Suffered 1-2 No Effect 3-5 Navigational Lock 6 Engine Failure AND Navigational Lock Important Note: These effects are not mutually exclusive, and a functional Glacier Generator may use both any number of times provided the Squadron has sufficient Ice Points to spare. Kinetic Generator The Kinetic Generator may be activated during the Movement Declarations Step of a Model s Activation. The Kinetic Generator gives a boost to a Model s Total Movement (Mv). When a Model fitted with a Kinetic Generator is activated, the controlling player can choose to roll for it to gain +1D6" of Total Movement, with the boost applied to its Minimum Move. If a Squadron of Models is fitted with Kinetic Generators, roll for each Model independently. A Model that activates a Kinetic Generator increases its Turn limit by 1" during that Activation. GNE Boost Generator (Range") This Generator, when it activates, may target a Squadron within Line of Sight that has the Surface Skimmer Model Function and is Ready to Activate. All Models in the Target Squadron within the Range" listed in the brackets are affected. The affected Models gain an additional 2D3" Movement which is added to their Movement Value (Mv) when they Activate this turn. A Model may only benefit from ONE GNE boost per Game Turn. Mimic Generator (Range") A Model with a Mimic Generator can select ANY other Model within the Range" listed in the bracket and attempt to copy the abilities of ONE Generator on that Model that is NOT Offline. The Model may not attempt to Mimic a Generator they already possess. Roll a D6 and consult the table below: D6 Result Effect Suffered 1-2 No Effect 3-6 Target Generator is Copied The abilities of the Copied Generator CAN be used by the Model with the Mimic Generator in the current Squadron Activation, if appropriate. These abilities remain until the Model with the Mimic Generator suffers a Generators Offline Critical Result or it copies a new Generator. The Targeted Model does NOT lose the use of a Copied Generator. 97

98 SECTION D2 GENERATORS Mine Controller Generator (Range") The Mine-Controller Generator may move any number of Mines within the Range listed in the brackets that were placed by the controlling player, up to D3" in a straight line. If the Mine Marker is moved so that its Detonation Criteria are met, the Mine Explosion is resolved immediately. A Force with multiple Mine-Controller Generators may cause Mines to move MULTIPLE times in a Game Turn. Important Note: Any Attempt to move a Linked Mine results in the Mines Detonating IMMEDIATELY. Teleport Generator (Size, Range") A Model may not use Primary or Secondary Weapons in the same turn as activating its Teleport Generator, such is the incredible energy required to produce these phenomena. The Generator automatically places a pair of Energy Templates: One Energy Template is placed within 8" and within Line of Sight of the Model. A second Template is then placed within the Range" listed in the brackets, and also within Line of Sight of the Model. These Templates are referred to as Energy Portals. No Energy Portal may be placed within 4" of a Model or other Energy Portal. Once placed, a Template remains in play until the Compulsory Actions Step of the End Phase. These Energy Portals are considered to exist at the Surface Height Level, and have no effect on any Models occupying the other Height Levels. All Models fully within, or any Firing that passes through, an Energy Portal is considered to be Partially Blocked. Once the Portals are in play, any Model equal to or smaller than the Size listed in the bracket that makes contact with a Portal MUST move between the two Portals. They are IMMEDIATELY removed from play and roll a D6 and consult the table below: D6 Result Effect Suffered The Model is placed with the aft of the Model in contact with the other Portal, facing a random direction (using the Random Determination Template), and may continue its Movement Segment as normal. However, the Model suffers D3 AP Loss and may not execute a Boarding Action in the Boarding Segment of its current Activation. The Model is placed with the aft of the Model in contact with the other Portal, facing a random direction (using the Random Determination Template), and may continue its Movement Segment as normal. However, the Model may not execute a Boarding Action in the Boarding Segment of its current Activation. The Model is placed with the aft of the Model in contact with the other Portal, facing any direction it chooses, and may continue its Movement Segment as normal. 98
99 SECTION D2 GENERATORS Time Flow Generator (Range") The Time Flow Generator may be activated during the Consolidation Step of the Command Segment of the Model s Activation. Place a Large Effect Template within the listed Range" of the Model Activating the Generator. All Models regardless of Height Level, that make contact with the Template will have their Maximum Movement (Mv) value increased OR decreased by D3+1", with the player Activating the Generator deciding. The effect of this Generator lasts until the Consolidation Step of the End Phase at which point the Template is removed. OFFENSIVE GENERATORS Offensive Generators are used by nations to aggressively target enemy Models, causing all manner of command and control effects, damage and chaos! Disruption Generator (Range") The Disruption Generator has the power to take all localised Generators Offline. It affects ALL Models equipped with a Generator within the Range" listed in the bracket of the centre of the Activating Model, including your own Models. The effects of the Disruption Generator do not affect the Model using the Generator. Roll a D6 and consult the table below: D6 Result Effect Suffered 1-3 No Effect 4-5 Target suffers a Generators Offline Critical Effect 6 Target gains a Generators Offline Game Marker AND loses 1 AP Fury Generator (Range") The Activating Model may target a single Model within the Range" listed in the bracket. Roll a D6 and consult the table below: D6 Result Effect Suffered 1-2 No Effect 3-5 D3 Raging Fire Markers 6 D3 Raging Fire Markers AND 1 AP Lost Pulse Generator (Range") The Model places one Energy Template touching the controlling Model and then places another within the Range" listed in the bracket: this represents the range of the Pulse. The Pulse operates in a Fixed Channel originating from the Template touching the controlling Model and terminating at the other Template. Any Mines, both Surface and Airburst, within the Fixed Channel of the Pulse AUTOMATICALLY Detonate. Target Painter Generator (Weapon, Range") When activated, the Generator can target ONE Model within the Range" listed in the bracket. Roll a D6 and consult the table below: D6 Result Effect Suffered 1-3 No Effect 4-6 Model gains a Target Painted Game Marker Any Attack made by Models in the controlling player s Force, using the Weapon listed in the bracket against a Target Painted Game Marker, receives a +1 bonus to hit on their Attack Dice (AD) rolls. The Target Model remains Painted until the end of the current Game Turn, or until the Target Painter Generator is taken Offline. Multiple instances of this Generator DO NOT have a cumulative effect. Sonic Generator (Range") When activated, the Generator can target ONE Model within a Squadron occupying the Surface or Aerial Height Bands that is within the Range" listed in the bracket. Roll a D6 and consult the table in the column below: D6 Result Effect Suffered 1-2 No Effect Squadron containing the Target Model 3-4 must take an immediate Disorder Check Squadron containing the Target Model must take an immediate Disorder 5-6 Check, requiring an additional Success. The effects of a Sonic Generator do not affect any other Model equipped with a Sonic Generator as these Models are considered to have defences against the debilitating effects. 99
100 SECTION D2 GENERATORS Tesla Generator (Range") The Tesla Generator may be activated during an Activation in TWO different ways: Boost or Surge. A Model Boosting with a Tesla Generator must Activate the Generator during the Movement Declarations Step of the Model s Movement Segment. A Model Surging with a Tesla Generator must do so during the Consolidation Step of the Model s Movement Segment. Boost A Tesla Generator that elects to Boost changes the designation of the Generator to a Standard Generator for the Game Turn. When Boosting, the Model gains 1D3" of Movement. If a Squadron of Models are fitted with Tesla Generators, roll for each Boosting Model independently. Any Model that Boosted with a Tesla Generator MUST move at least its Minimum Move AND its bonus Boost Movement during the Movement Segment. Surge A Tesla Generator Activating on its Surge setting can attempt to short-circuit the vital systems of another Model. It affects ONE Model within the Range" listed, regardless of their Height Level. If the Generator is present on a Node, the Generator effect is applied IMMEDIATELY to a single Model within the Range" listed, measured from the Node s location. Roll a D6 and consult the table below: D6 Result Effect Suffered 1-3 No Effect 4-6 Roll on the Critical Hit Table Should a Target Model have one or more Lightning Rod Game Markers, the Model Surging the Tesla Generator may elect to re-roll the result of the INITIAL roll, if desired. but MUST accept the second roll. Important Note: The Targeted Model suffers a single Critical Effect, re-rolling any results of Double 1 or Double 6, and ignoring the HP Loss usually suffered from taking a Critical Hit. Calcification Generator (Range") A Model Activating a Calcification Generator must do so during the Consolidation Step of the Model s Movement Segment. The Activating Model may target a single Model within the Range" listed in the bracket. Roll a D6 and consult the table below: D6 Result Critical Effect Suffered 1-2 No Effect 3-5 Target suffers a Shredded Defences Critical Effect 6 Target suffers a Shredded Defences & Hard Pounding Critical Effect DEFENSIVE GENERATORS These Generators protect and defend the Model that owns the Generator, or in some cases provides a degree of protection to Models that are nearby. Cloud Generator The Cloud Generator has a Continuous Effect. Targeted Attacks against a Model with this Generator suffer a -1 to hit modifier. This does not apply to Indiscriminate Attacks. The Cloud Generator has no effect at Range Band 1. Dilation Field Generator (Range") The Dilation Field Generator is Activated during the Consolidation Step of the Movement Segment in a Model s Activation, allowing the placement of a Large Effect Template, the Centre of which must be within Line of Sight and the Range" listed. Any Model firing into, through, or out of the Template at ANY Height Level, is considered to be Partially Blocked. The effect of this Generator lasts until the Compulsory Actions Segment of the End Phase of the current Game Turn. Shield Generator (Value) This Generator has a Continuous Effect. Shield Generators allow a Model to try and deflect any hits from Gunnery Weapons, Rockets, Torpedoes, Ack Ack and Concussion Charges, including those originating from Support Aircraft Squadrons. Shield Generators have no effect against Indiscriminate Attacks, Aggressive Boarding Actions, Bombs, or other Generators. 100
101 SECTION D2 GENERATORS Roll a number of Shield Dice equal to the Value listed in the bracket for each Shield Generator: A 4, 5 or (RED) 6 is required to succeed against Gunnery Attacks. For each Hit scored, reduce the amount of incoming Hits by 1. A 4, 5 or (BLUE) 6 is required to succeed against Rocket or Torpedo Attacks. For each Hit scored, reduce the amount of incoming Hits by 1. Important Note: Some Attacks will reduce the effectiveness of Shields, affecting the Hit Number required, the Colour of Dice used etc. Guardian Shield Generator (Value, Range", Protection Value) The Guardian Shield Generator grants the Model to which it is fitted, ALL of the effects of a Shield Generator (see above). In addition, Guardian Shield Generators also grant ALL Models from the same Force within Range", on ANY Height Level, a number of Shield Dice equal to the Protection Value listed in the bracket. Nearby Models must NOT have their own Shield Generator of any type and to gain benefit of a Guardian Shield Generator. Support Aircraft Squadrons may not benefit from the Guardian Generator s protection. A Model can only gain the benefit of ONE Guardian Shield Generator of any type at any one time and must choose the highest Protection Value within range. Nullification Generator This Generator has a Continuous Effect. The Nullification Generator can cancel the effects of an Offensive Generator. It AUTOMATICALLY Activates AFTER an Offensive Generator has successfully targeted the Model. Roll a D6 and consult the table below: D6 Result Effect 1-2 No Effect 3-5 Enemy Generator Effect Ignored Enemy Generator Effect Ignored 6 & the attacking Model gains a Generators Offline Game Marker Important Note: A result will only cancel the effect on the Model itself. Rampart Generator This Generator has a Continuous Effect. The Generator provides a wall of energy that blocks the targeting systems of weapons. The Generator s effect ONLY works against Attacks originating from Models on the Surface Height Level that are directed against targets occupying the Surface Height Level. Two functional Rampart Generators within 8" of each other will cause any Attack, NOT using the Indirect Fire Firing Option, passing between them to use Heavy (BLUE) Dice. Important Note: A Model with a Rampart Generator does not gain any benefit from its own Generator. Target Jammer Generator (Weapon System, Value) This Generator has a Continuous Effect. This Generator resolves the instant an enemy Squadron targets the Model with the Generator using the Weapon noted in the bracket. Roll the number of Dice equal to the Value, with a To Hit Number of 4, 5, or (RED) 6 and determine the number of Hits. The resulting number of Hits then REMOVED from the firer s Initial Attack Dice Pool BEFORE it is rolled. Weather Manipulation Generator (Value, Range") Each functioning Weather Manipulation Generator (WM-Generator) has a Value listed in the brackets that represents the Storm Points available to the Model. Any Storm Points generated from various Squadron members are added together to form a total for the Squadron. Storm Points may be used in one of two ways, transforming the Generator s purpose from defensive to area denial with one flick of a switch. These two modes are known, respectively, as Cloud Effect and Storm Effect. These effects are not mutually exclusive, and a functional WM-Generator may use both, provided the Squadron has sufficient Storm Points to spare. Cloud Effect A Model with a functioning WM-Generator is considered to have a functioning Cloud Generator (see above) with IMMEDIATE effect. Each Cloud Effect costs ONE Storm Point to maintain. A Model may only ever place a Cloud Effect upon itself, never on other Models. 101

102 SECTION D2 GENERATORS Storm Effect A Model with a functioning WM-Generator may spend Storm Points to place a number of Storm Templates, represented by the Large Effect Template on the Tabletop. Each Storm Template costs TWO Storm Points to maintain and may be placed anywhere on the Tabletop within the Range" listed in the bracket. If a Squadron for any reason does not have sufficient Storm Points to maintain a Storm Template, the Template must be removed IMMEDIATLEY. If a Squadron maintains multiple Storm Templates, the controlling player may decide which Templates should be removed. Multiple Storm Templates placed by a Squadron must be placed touching, but not overlapping. The effect of the Templates are as follows: All Attack Dice (AD) from Surface and Aerial Models firing into, through, or out of a Storm Template, suffer a -1 To Hit modifier. Storm Templates may never overlap under any circumstances but the effects of multiple Templates ARE cumulative. The effect of this Generator (be it Cloud Effects or Storm Effects) lasts until the Compulsory Actions Segment of the End Phase of the current Turn, at which time Storm Templates are removed and Cloud Effects dissipate. All Surface and Aerial Models that touch a Storm Template at any point during their Movement Segment suffer a -1" Movement Penalty. 102

103 103 SECTION D2 GENERATORS

104 SECTION D3 BASIC TERRAIN BASIC TERRAIN A Tabletop can be as simple as a blue or green cloth, or as complex as textured tiles with detailed islands and coastline scenery. In Dystopian Wars it is critical for Commanders to be able to delineate between the Land Surface and the Water Surface. These are known as Major Surfaces. Major Surfaces The TWO Major Surfaces which are present in the world of Dystopian Wars are the Land Surface and Water Surface. Both are considered to exist in isolation, making up the base of the Surface Height Level, and have no influence on Line of Sight. The following are the only MANDATORY rules for Major Surface placement: Major Surfaces are defined during the Common Agreements Segment of Game Set-Up (see Page 20). Major Surfaces CANNOT overlap other Major Surfaces. ALL areas of the Tabletop are REQUIRED to have a Major Surface assigned to them. In Competitive Play the entire table should be declared as a single continuous Major Surface. However, in non-competitive play, provision can be made for players to mutually agree on their preferred Major Surface arrangement. This allows players to create unusual tables, befitting of scenario driven games, such as Amphibious Landings! Vice-Admiral Paul von Liebewitz TERRAIN Terrain has NO Profile, and as a result CANNOT be targeted, damaged, moved or manipulated for any reason once placed. Although the industrial capabilities of the Dystopian Wars world are staggering, they are not yet able to make any lasting impact on Indestructible Terrain in the space of a battle. INDESTRUCTIBLE TERRAIN CLASSIFICATIONS In order to accommodate the wide variety of different Terrain pieces that can exist on the battlefield, Indestructible Terrain is broken down into main Classifications as follows: Major Surfaces Terrain Features Minor Surfaces Major Surfaces Although not placed per say, Major Surfaces function very much in the same way as other Indestructible Terrain in that they are Impassable to some game Models, but not to others. Terrain Features Unless the battle is taking place in the middle of an ocean or desert, it is very unlikely that the Major Surfaces selected will not be populated by Terrain Features. These help to keep the game exciting, providing a diverse array of opportunities for Commanders who know how to exploit them fully. Terrain Features normally occupy the Surface Height Level, unless otherwise stated, and are capable of interfering with Line of Sight and in some extreme cases may even exist in multiple Height Levels. Terrain Features are areas that represent abnormalities or inconsistencies in the Major Surface, such as Forests, Swamps, Reefs, Islands or even Mountains! It is during the Terrain Placement Step of Game Set-Up (see Page 24) that players will exchange each of their Activation Markers for a single Terrain Feature of their choice. 104
105 SECTION D3 TERRAIN The following are the TWO MANDATORY RULES for Terrain Feature placement: Terrain Features may ONLY be placed COMPLETELY on their appropriate Major Surface. All Terrain Features MUST have a clearly defined perimeter, allowing players to determine the dimensions of the Feature. During Competitive Play the following rules ALSO apply to Terrain Features and their placement: A Terrain Feature MUST be at least 3"x3" in Tabletop footprint, unless both players agree to using a different size. A Terrain Feature may NOT exceed 9"x9" in Tabletop footprint, unless both players agree to using a different size. A Terrain Feature may NOT be placed within 4" of any Flanking Edge or another Terrain Feature. The particular influence and effects of Terrain Features can vary, depending on whether a Naval, Armoured or Aerial Model is interacting with it, and the Height Level the Model currently occupies. Important Note: Models are only ever influenced by Terrain Classifications that occupy the SAME Height Level as themselves. Minor Surfaces Minor Surfaces are used exclusively in Scenario or Friendly Games and, as a result, we recommend that players only include them once they are familiar with the basic rules of Terrain. For more information please see the Advanced Terrain Rules on Page 110. Terrain Quality All Terrain has an associated Quality, which is used to represent how readily various troops can traverse it. The three Qualities of Terrain are denoted as follows: Clear Treacherous Impassable Clear A piece of Terrain that is denoted as being Clear means that appropriate Models will encounter no problems when moving within it, regardless of their speed, such as an Armoured Model moving across the Land Surface. Treacherous During the Movement Declarations Step, if a Model Activates within, or during its Movement will then touch, a piece of Terrain that is defined as Treacherous to it, then the Model must declare if it intends to move at Full Speed OR Half Speed during its current Movement and Manoeuvre Step. A Model declared to be moving at Half Speed can only move up to HALF of its Movement (Mv), listed in its Profile, and may not increase its Movement by any Game effect. Important Note: A Model may be affected by various MARs, Generators and other effects that will modify their overall Movement (Mv). These instances have NO EFFECT with regard to Treacherous Terrain Tests: a Model may ONLY move up to half of its Initial Movement Value (Mv), as listed in its Profile. During the Activation, the Half Speed Model does NOT need to perform a Treacherous Terrain Test (see below) during its Movement and Manoeuvre Step. A Model with a Low Speed Manoeuvre Marker does NOT need to perform a Treacherous Terrain Test. A Model declared to be moving at Full Speed may move normally but MUST perform ONE Treacherous Terrain Test each time either of the following conditions applies: Activation begins within a piece of Terrain that is deemed Treacherous to it: the test is taken IMMEDIATELY after the Full Speed declaration is made. Moving into contact with a piece of Terrain that is deemed Treacherous to it: the test is taken IMMEDIATELY upon making contact. Important Note: Drifting Models are ALWAYS considered to be moving at Full Speed. These are normally dependent on the characteristics of the Model that is interacting with the Terrain: most commonly Model Classification, Size, and MARs. 105
106 SECTION D3 TERRAIN Performing a Treacherous Terrain Test In order to perform a Treacherous Terrain Test, each Model rolls a (BLACK) D6 requiring a 4, 5 or 6 to pass. Models that FAIL their Treacherous Terrain Check are considered to have Collided with the piece of Terrain in question, and MUST therefore IMMEDIATELY stop and resolve a Collision (see Page 48). Impassable A Model CANNOT move into or through a piece of Terrain that has been nominated as Impassable to it. If a Model comes into contact with any Terrain deemed Impassable, other than as part of a Controlled Contact, it must IMMEDIATELY stop and resolve a Collision with the piece of Terrain. If, for ANY reason, a Model is placed wholly or partly within a piece of Terrain that is deemed Impassable to it (through Teleportation for example), the Model is IMMEDIATELY Scrapped and placed in the appropriate Scrapyard unless a specific condition or Model Assigned Rule (MAR) applies. Resolving a Collision with Terrain Having Collided with a piece of Terrain, a Model will likely suffer a degree of damage. This can range from scratched paint to catastrophic hull breaches. The severity of this damage is determined by using the relative bulk of the vessel as represented by the Model s Hull Points (HP) and the Terrain Collision Properties involved. Terrain Collision Properties In order to resolve the Collision with Terrain, refer to the Terrain Collision Properties of the piece of Terrain involved. The number of Attack Dice (AD) rolled against the Model involved is calculated as follows in the table below: Terrain Collision Properties Difficult Terrain Hazardous Terrain Number of Attack Dice (AD) Rolled 2x Initial Hull Points (HP) of the Colliding Model 4x Initial Hull Points (HP) of the Colliding Model These Attack Dice are considered to be an Indiscriminate Attack, requiring a 4, 5 or Exploding (RED) 6 To Hit ; unless a specific condition or Model Assigned Rule applies. For further rules regarding the aftermath of a Collision see Page 50. Terrain Size Every Model in Dystopian Wars has its Size defined in its Profile. Likewise Terrain has an assigned Size. Terrain with a Size blocks Line of Sight in exactly the same way as Models, for example, a Hill declared as being Medium in Size would block Line of Sight as if it were a Medium Model (see Line of Sight on Page 52 for more). Elevation Bonus Certain pieces of Terrain possess an Elevation Bonus, which will alter the Size of any Model ENTIRELY within its confines. This provides those Models with a vantage point from which to rain down some serious firepower! This is the most common method by which Models will find themselves exceeding the Massive Size! If a Model finds itself PARTIALLY within the confines of a Terrain Feature which has an Elevation Bonus, they still gain the benefit of the Elevation Bonus BUT any Firing by the Model against a target In The Open is considered to be Partially Blocked. The Modified Size of a Model is determined by adding the Elevation Bonus of the Terrain occupied, to the Size of the Model involved. If a Model possesses the Altered Silhouette MAR, then the Elevation Bonus of the Terrain should be applied to the Size listed in the Altered Silhouette MAR INSTEAD of the Size listed in its Profile. Important Note: For the purposes of Field Orders, Scenario Special Rules, MARs etc., these ALWAYS refer to the Size present on a Models Profile, and NEVER to its Modified Size due to Elevation Bonus. 106
107 SECTION D3 TERRAIN Model Size Elevation Bonus Tiny Tiny Small Medium Large Massive Massive +1 Small Small Medium Large Massive Massive +1 Massive +2 Medium Medium Large Massive Massive +1 Massive +2 Massive +3 Large Large Massive Massive +1 Massive +2 Massive +3 Massive +4 Massive Massive Massive +1 Massive +2 Massive +3 Massive +4 Massive +5 Massive +X Massive+X Massive +X+1 Massive +X+2 Massive +X+3 Massive +X+4 Massive +X+5 MAJOR SURFACES The following rules apply to Major Surfaces unless otherwise specified: Major Surfaces do NOT influence Line of Sight. All Major Surfaces occupy the Surface and Diving Height Bands. WATER SURFACE TERRAIN FEATURES The following rules apply to Water Surface Terrain Features unless otherwise specified: All Water Surface Terrain Features occupy the Surface and Diving Height Levels. Water Surface Terrain Features with multiple Available Sizes must have their Size declared by the player when they place it. Upon placing an Island, the Water Major Surface directly beneath its footprint changes to become the Land Major Surface. Name Island WATER SURFACE TERRAIN FEATURES TABLE Available Elevation Terrain Quality Size Bonus Clear Treacherous Impassable Massive +5 Aerial Armoured Large +4 Burrowing Reef N/A +0 Aerial Sandbar Tiny +0 Aerial N/A Diving Naval Armoured Naval (Surface) Diving Naval Armoured Burrowing Burrowing Diving Terrain Collision Property Hazardous Hazardous Difficult Iceberg Large +4 Medium +3 Aerial Diving (Deep Diving) Armoured Burrowing Diving (Other) Naval Hazardous 107
108 SECTION D3 TERRAIN Name Terrain Quality Clear Impassable Terrain Collision Property Water Surface Aerial Diving Naval Armoured Burrowing Hazardous Land Surface Aerial Armoured Burrowing Diving Naval Hazardous LAND SURFACE TERRAIN FEATURES UNIVERSAL TERRAIN FEATURES The following rules apply to Land Surface Terrain Features unless otherwise specified: All Land Surface Terrain Features occupy the Surface Height Levels. Swamps also occupy the Submerged Height Level. Land Surface Terrain Features with multiple Available Size must have their Size declared by the player when they place it. Swamps, Forests/Jungles and Ruins/Rocky Outcrops provide Cover for Infantry (See Page 125). The following rules apply to Universal Terrain Features unless otherwise specified: Mountains occupy ALL Height Levels EXCEPT Stratospheric. Line of Sight CANNOT be drawn through a Mountain, unless the Target or Firer occupy the Obscured or Stratospheric Height Levels. The Indirect Fire Option CANNOT be used to fire over a Mountain. Minor Surfaces CANNOT be placed within the confines of a Mountain. LAND SURFACE TERRAIN FEATURES TABLE Name Available Size Elevation Bonus Terrain Quality Clear Treacherous Impassable Terrain Collision Property Hill Massive +5 Large +4 Aerial Burrowing Armoured Diving Naval Hazardous Swamp N/A +0 Aerial Armoured Burrowing Diving Naval Hazardous Forest / Jungle Small +0 Aerial Burrowing Armoured Diving Naval Difficult Ruins/Rocky Outcrop Tiny +0 Aerial Burrowing Armoured Diving Naval Hazardous 108
 Aerial (Other) Armoured Burrowing Diving Naval Hazardous 109")
109 SECTION D3 TERRAIN Name UNIVERSAL TERRAIN FEATURES TABLE Available Elevation Terrain Quality Size Bonus Clear Treacherous Impassable Terrain Collision Property Mountain See Rules N/A N/A Aerial (Obscured) Aerial (Other) Armoured Burrowing Diving Naval Hazardous 109
110 SECTION D4 ADVANCED TERRAIN ADVANCED TERRAIN The rules in the Basic Terrain Section provide players with the ability to build an arena in which to join in battle, and are excellent for Competitive gaming and Tournament play. However, players may wish to craft a much more in-depth arrangement of scenery, perhaps to provide them with a fresh challenge or to enact a historical event from the Dystopian Wars timeline. The rules in this section are designed to create rich and inspiring battlefields, allowing for a more complex build of Tabletop. This can manifest itself in the shape of Minor Surfaces, such as winding roads and the various lakes and rivers that criss-cross the lands in the form of shallow water. Minor Surfaces This is the third Classification of Indestructible Terrain, the initial two having been explained fully in the Basic Terrain Section (see Page 104). Minor Surfaces are meant to represent an array of changes to the battlefield, up to and including some of the more extreme devastation wrought by the gigantic machines of war that roam the Dystopian Wars world! The placement of Minor Surfaces occurs once the Major Surfaces and Terrain Features have been established and placed, as Minor Surfaces are laid down on top of this foundation. Minor Surfaces differ from other Terrain Classifications because they are used to overwrite the Terrain Quality and Collision Properties of any Terrain beneath them, but leave their Elevation Bonus unaffected. Examples of Minor Surfaces are Roads, Shallow Water, and Cliffs. The following are the only MANDATORY rules for Minor Surfaces and their placement: A Minor Surface CANNOT overlap a different Minor Surface. If this occurs, the most recent Minor Surface REPLACES the original. If a Minor Surface is placed within the confines of a Major Surface for which it is not deemed appropriate, it is IMMEDIATELY removed from play BEFORE any of its effects are resolved. The Surface Height and Elevation Bonus of any Terrain that Minor Surfaces are placed on remains UNAFFECTED. Also, unless both players agree otherwise (or a Scenario Special Rule states otherwise), the following also applies for Minor Surfaces and their placement: A Minor Surface may NOT be placed such that it overlaps multiple Terrain Classifications. A Minor Surface must be at least 3x3" in area. As you can imagine, these rules allow Commanders to build long and winding Roads to provide a safe highway through Swamps and other Terrain Features, or represent long flowing rivers of Shallow Water to hamper and channel the opponent! Land Minor Surfaces The world is a dynamic place, full of change, and with the power of Sturginium firmly in his grip, mankind is more able than ever to leave his mark upon the world for better or worse. Extreme examples of prolonged warfare can result in Killing Fields; vast wastelands of barbed wire, unexploded bombs and lingering clouds of lethal gas which can stop an Infantry advance in its tracks. The following rules apply to Land Minor Surfaces unless otherwise specified: Land Minor Surfaces do not influence Line Of Sight. Massive Armoured Models may not use Roads All Land Minor Surfaces occupy the Surface Height Level. Trench Networks provide Cover to Infantry (see Page 125). Roads provide Armoured Models an increase in their Profile Movement (Mv) of +3". A Model that uses a Road to gain this bonus may not make any Attacks in the subsequent Firing Segment, and MUST spend their ENTIRE Movement Segment on the Road. Water Minor Surfaces As battles continue to rage around the world, Commanders can find themselves visiting the aftermath of a battle, be it to pick through the wreckage looking for survivors or to salvage what they can from the colossal hulls that now rest at the bottom of the ocean. The following rules apply to Water Minor Surfaces unless otherwise specified: 110
111 SECTION D4 ADVANCED TERRAIN Water Minor Surfaces do not influence Line Of Sight. Ice Sheet/Floating Wreckage occupies the Surface Height Level. Ship Graveyards occupy the Diving Height Band. Universal Minor Surfaces Although Commanders may prefer to engage their foe in the open sea, there is every chance that they will be called to defend their coastline from a looming threat. In such proximity to land, these naval forces may encounter Shallow Water in the form of coves and bays, and the very same body of water may trouble their Armoured comrades on land as a river winds its way towards the sea. The following rules apply to Universal Minor Surfaces unless otherwise specified: Universal Minor Surfaces do not influence Line Of Sight. Cliffs and Shallow Water occupy the Surface and Diving Height Bands. Cliffs MUST be placed adjacent to Hills/ Islands or the boundaries of the Water Major Surface and Land Major Surface. Cliffs may not extend more than 4" away from these Terrain Features and/or the Major Surface boundary. Models with the Multi-Purpose function may ignore Shallow Water. Name Killing Fields Trench Network Roads LAND MINOR SURFACES TABLE Terrain Quality Clear Treacherous Impassable Aerial, Armoured Burrowing Aerial, Armoured Burrowing Aerial, Armoured Burrowing N/A Diving, Naval Infantry Terrain Collision Property Difficult N/A Diving, Naval Difficult N/A Diving, Naval Difficult Name Ice Sheet/Floating Wreckage WATER MINOR SURFACES TABLE Terrain Quality Clear Treacherous Impassable Aerial, Naval (Massive/Large) Diving, Naval (Other) Ship Graveyard N/A Diving Armoured Burrowing Aerial, Armoured, Burrowing, Naval Terrain Collision Property Difficult Difficult Name Shallow Water UNIVERSAL MINOR SURFACES TABLE Terrain Quality Clear Treacherous Impassable Aerial Armoured (Large/Massive) Naval (Small/Tiny) Diving (Small/Tiny) Cliffs Aerial Diving Armoured (Other) Burrowing Diving (Other) Naval (Other) Armoured, Burrowing, Diving, Naval Terrain Collision Property Hazardous Hazardous 111

112 SECTION D5 SAW AND SAS SUPPORT AIRCRAFT, CARRIERS AND DRONE LAUNCHERS In this section you will find the rules for Support Aircraft Wings, the different kinds of Squadrons available, and how they interact on the Tabletop. In addition there are rules for Carriers and Drone Launchers, and how they interact. Support Aircraft Wings are commonly abbreviated as SAWs and Support Aircraft Squadrons are commonly abbreviated as SAS. Support Aircraft Squadrons Aeroplanes are a lethal addition to the military arsenal of a Nation. Since their invention, scientists and engineers alike have been refining this new method of destruction. In Dystopian Wars any type of small aeroplane is referred to using the generic name of Wing and will commonly have three very small aircraft on its square base. Groups of Support Aircraft Wings (SAW) form a Squadron when Deployed, referred to as a Support Aircraft Squadron (or SAS). Each Support Aircraft Wing in a Squadron MUST remain in contact with at least one other SAW from the same Squadron at ALL times, if able. Support Aircraft Squadrons are considered to be Models that exist outside the normal Size Classifications. They are even smaller than Tiny Models! (see Model Classifications on Page 127) Types of Support Aircraft Squadrons are: Fighter Planes, Dive Bombers, Torpedo Bombers, and Reconnaissance Planes. They are governed by the following rules for composition: A Support Aircraft Squadron MAY only contain ONE type of Support Aircraft Wing. When created, a Fighter Plane, Dive Bomber or Torpedo Bomber Squadron MUST contain between 3 and 5 Support Aircraft Wings. When created, a Reconnaissance Plane Squadron may contain ONLY ONE Support Aircraft Wing. Once created, a Squadron of Support Aircraft is treated as a single entity for Line of Sight, measuring Ranges and Firing. Important Note: Support Aircraft Squadrons created by Carriers or through Squadron Support declare the type and number of Air Support Wings they contain when Deployed, and are NOT required to be denoted prior to the battle in the same way as Local Air Support (see later). Deployed Strength Unlike other Squadrons in the game, it is important to have a record of the size of an SAS at the moment of their Deployment. The pilots within the Squadron are adept at operating in set formations, be they small Strike Squadrons or larger Heavy Squadrons. These pilots spend hours of flight time training to operate effectively depending on their intended engagement roles under battlefield conditions. Each SAS is deployed with a die or marker next to it that notes their starting Squadron Size, which is referred to as their Deployed Strength. This does not change in-game and is important for determining how large the Squadron can be when benefiting from an Replenishment Action. The die is also useful for allowing players to view at a glance which type of SAS the Squadron is: this becomes particularly important when playing with Forces that are not yet painted, or where the player has chosen to paint their SAWs identically. If you are using dice to help denote your SAS, it s a good idea to decide which colour of dice will denote which type of SAS at the start of the battle to avoid confusion later. Using the convention of White for Fighters, Green for Dive Bombers and Blue for Torpedo Bombers is a good method. You can also choose to paint your Wings different colours to represent different types, or even paint the band of the base for the same reason, whatever works best for you and your opponent! Reconnaissance SAWs do not require a Deployment Strength Dice as they can never be the target of a Carrier Action (see later). Local Air Support Each Force may ordinarily contain 10 Support Aircraft Wings for NO extra Points Cost. These free Support Aircraft Wings represent Local Air Support that is called in from outlying air bases to assist in the prosecution of the enemy. 112

113 SECTION D5 SAW AND SAS The Local Air Support can be organised into any legal Squadron sizes desired, however a maximum of ONE Reconnaissance Plane Squadron can be selected as part of this free Local Air Support allowance. Unless otherwise stated, any free Local Air Support Wings in a Force are always noted in the Force List, both in terms of Squadron Size and Squadron Composition. (See Page 18) Combat Air Patrols It is possible to Attach Fighter Plane SAS as Combat Air Patrols to protect valuable Models in a player s Force. For more information on this, see the Combat Patrols Section on Page 126. Ordnance Away! Marker This Game Marker is placed next to an SAS that has dropped its Bombs or Torpedoes. The Ordnance Away! Game Marker provides an important reminder to both players on the Tabletop differentiating between which SAS can still drop their Ordnance, and those who must Re-arm at a Carrier. Squadron Formations Support Aircraft Squadrons (SAS) MUST always maintain a valid Squadron Formation, as shown in the diagram below. The Squadron is treated as a COMBINED entity for the purposes of rules. Should an Ace be present, an appropriately identifiable Wing must be placed as close to the middle of the formation as possible at all times. This allows players to identify the heroic individual s presence for the purposes of re-rolls and Dogfights (see below). Valid Squadron Formations for SAS 113
114 SECTION D5 SAW AND SAS SAW Consistencies and Interactions A number of consistencies are present throughout all SAWs, although any modifiers used may change depending on national characteristics: ALL Attacks and Counter Attacks by Support Aircraft Squadrons use the Combined Fire Firing Options calculated by adding together ALL the Ordnance or Ack Ack Attack Dice (AD) of the SAWs in the Squadron. Fighters will usually have the Hunter (Aerial, +1) MAR, giving them the edge against all Models that occupy the Aerial Height Band, be they other Support Aircraft Squadrons or larger Models such as Interceptors, Scoutships and Sky Fortresses! Torpedo Bombers excel at engaging targets beneath the waves and normally have the Hunter (Diving, +2) MAR. This means that Torpedo Bombers often hit Models occupying the Submerged Height Level on a 3 or higher and may even strike at targets occupying the Deep Diving Height Level on the roll of a 4 or higher! Dive Bombers are adept at engaging targets on the Surface Height Level and normally gain the Hunter (Surface, +1) MAR. This means that Dive Bombers will tend to hit Models occupying the Surface Height Level on a 3 or higher. In some rare occasions Dive Bombers will also gain a bonus against Submerged Models too: these exceptions will always be listed in the relevant Force List. Finally, Recon Planes normally have the Spotter (Regular) MAR, allowing them to effectively call down fire upon targets that are out of sight to the rest of the Force, although in the case of Ace Recon Planes, in some cases this becomes Spotter (Expert) MAR. Anatomy of a SAW Profile Below we have an example of statistics for Support Aircraft Wings in a Kingdom of Britannia Force SAW Move AD AA MARs DR HP Fighter Plane 16" 0 2 Hunter (Aerial, +1), Big Fuel Tanks 2 1 Torpedo Bomber 12" 3 1 Hunter (Diving, +2) 2 1 Dive Bomber 12" 3 2 Hunter (Surface, +1) 2 1 Reconnaissance Plane 16" 0 2 Spotter (Regular) This shows the types of Support Aircraft Wing available to the Force. Ordinarily the Forces will have the option for four types of SAW: Fighter Plane, Torpedo Bomber, Dive Bomber, and Reconnaissance Plane (often abbreviated as Recon Plane). SAWs move using their listed Movement Value in the same way as other Models in the game. All SAWs are considered to Move using the 360-degree Turning method and have no Minimum Move or Turn Limits. Some SAWs have the ability to fire Ordnance at the enemy. This will be determined by the value listed in Attack Dice (AD) SAWs are all considered to have a measure of light and heavy machine guns, capable of being used both aggressively or defensively as desired. Fighters usually have a higher Ack Ack value than their counterparts, although in the case of the Britannian Force above, their Dive Bombers DO have an increased AA score, making them very powerful indeed. In this box, players will be able to identify any Model Assigned Rules (MARs) that the SAW may have. The full rules for these are found on Page 88. A SAW will normally have a Damage Rating (DR) of 2, however this need not always be the case! The Hull Points of a SAW normally this is
115 SECTION D5 SAW AND SAS SAS and Movement Support Aircraft Squadrons (SAS) have 360 degree Movement. These aircraft are not equipped to operate safely at the Obscured or Stratospheric Height Levels and so may only ever occupy the Flying Height Level of the Aerial Height Band. In addition, no SAS may be subject to a Collision or Ram with another Model. SAS and Boarding Actions SAS may NEVER be the target of a Boarding Action under any circumstances! SAS and Disorder SAS are always considered to have the Fearless Model Assigned Rule. (see Page 91) Attacks Against SAS SAS require the use of low-calibre, rapid-firing Weaponry to engage them. This is represented by a Model s Ack Ack (AA) statistic. All Ack Ack fired against SAS uses the Heavy (BLUE) Dice mechanic unless a specific condition or Model Assigned Rule applies. The Maximum Range for Aggressive Counter Attacks and Dogfights against SAS is always 4" (unless a Model Assigned Rule applies). The Maximum Range for Interception Attacks against SAS is always 8" (unless a Model Assigned Rule applies) SAS are targeted as a single entity, and Ack Ack (AA) against SAS is always measured to the closest point of the Squadron and any casualties are applied across the entire SAS. After all Attacks on the SAS have been resolved in an Activation, casualties are removed so that the Squadron remains in a valid Wing Formation (see diagram on Page 113). Non-SAS Models targeting SAS Squadrons always hit with Ack Ack on a To Hit Number of 4, 5 or (BLUE) 6. During Dogfight Attacks between two Squadrons of SAS, Ack Ack has a starting To Hit number of 5 or (BLUE) 6. Unlike other Models, when attacking SAS, if the number of Hits equals the Damage Rating (DR), a single SAW is removed. If the number of Hits equals TWICE the Damage Rating, TWO SAWs are removed, and so on. Types of SAS Engagement The methods of engagement for Support Aircraft Squadrons are divided into three types: Attack Runs, Interceptions and Dogfights. Each of these Attacks will often involve different To Hit Numbers, Attack Ranges and Model Assigned Rules. Attack Runs All Attacks made by Support Aircraft Squadrons that are directed against larger enemy Models are called Attack Runs. These Attacks occur when the SAS engages the enemy during their own Activation. Attack Runs are often subject to enemy Counter Attack Actions. SAS Squadrons may only ever execute ONE Attack Run per Activation. A Support Aircraft Squadron may use either Ordnance or Ack Ack where appropriate when making an Attack Run. SAS Squadrons may only ever target ONE Model during an Attack Run. All Attack Runs made using AA have a Maximum Range of 4", unless a MAR applies. A Squadron of Torpedo Bombers fires its Torpedoes using the Fore Fixed Channel Fire Arc, with the combined width of the Squadron used to determine the width of the Fire Arc, and have a Maximum Range of 4" A Squadron of Dive Bombers must have at least ONE SAW touching their intended target when using their bombs. The Squadron mounting an Attack Run has a To Hit number of 4, 5 or (RED) 6, using the standard To Hit mechanics and is affected by modifiers as normal. Once an Attack Run by Torpedo Bombers or Dive Bombers has been resolved, place an Ordnance Away! Game Marker on the Squadron. Dogfight Attacks All Attacks or Aggressive Counter Attacks made by Support Air Squadrons against enemy Support Aircraft Squadrons are called Dogfights. Interception Attacks All Attacks made by Models (other than SAS) against a Support Aircraft Squadron are called Interception Attacks. These occur when Models or Squadrons of Models engage an enemy Support Aircraft Squadron with their Ack Ack weaponry during the Model/ Squadron s Activation. 115


116 SECTION D5 SAW AND SAS Aces Each Force has the provision for adding Aces to their Squadrons. The additional points cost for adding these heroic individuals is listed in the relevant entry in the National Force Guide. An SAS that includes an Ace must replace one of their number with an appropriately identifiable SAW (it s enough to simply paint it differently!). The Ace is placed as close to the centre of the Squadron formation as possible. Unless killed as part of a Dogfight Duel, an Ace in a Squadron is always removed last! An Ace can often give a Squadron the decisive edge it needs when engaging in Dogfights or during Attack Runs. Each time a Squadron that includes an Ace is called upon to make an Attack Run, fight a Duel or fight a Dogfight Attack, the Ace may re-roll ONE INITIAL die rolled in the Dice Pool. Duelling Should a situation occur where an SAS that includes an Ace engages in a Dogfight Attack against an enemy SAS that also contains an Ace, the two heroes of the skies will duel it out, performing acts of incredible bravery as they strive to cement their legend and kill their bitter rival. Should two Aces meet in a Dogfight Attack, their Ack Ack dice should be separated from the other members of the Squadron and only rolled against the other Ace. No other Ack Ack can affect the Aces as they Duel, effectively creating two engagements: the Dogfight and the Duel. Each Ace killed in a Duel is worth +25VPs and should be added to the Scrapyard as a scoring Model. Carrier Models Carriers operate a critical role in the replenishment, rearming and redistribution of Support Aircraft Wings within the Dystopian World. Without Models capable of performing these tasks, the power of many a Nation s air forces would dwindle to the point of uselessness. A Carrier is identified as having the Carrier Model Assigned Rule. The Value listed in the brackets is used for both Support Aircraft Wing Numbers and Carrier Actions. The Carrier Value of a Model is by no means fixed, and can be reduced as the Model suffers damage. This represents the decks of the Model becoming too damaged to allow planes to land, the hangar bays becoming blocked with debris, or the magazines of the Model catching fire! Support Aircraft Wing (SAW) Numbers Firstly, each Carrier Model generates a number of SAWs equal to the value listed in the bracket of their Carrier Model Assigned Rule. These SAWs must be organised into legal Squadrons and must adhere to the rules for Squadron composition noted above. However unlike Local Air Support, this can be done AFTER comparing Forces during the Game Setup Phase. The Carrier is restricted to a maximum of ONE Reconnaissance Plane Squadron. Support Aircraft Wings created by a Carrier Model must be Deployed using the standard Deployment rules, within 4" of their Carrier Model during its Deployment, after which they are free to operate independently. Squadrons of aircraft that were upgraded to have an Ace must have the Ace clearly marked. Important Note: This is the ONLY time SAWs can be worth Victory Points! Six-Star General Alexandra LeForet 116

117 117 SECTION D5 SAW AND SAS

118 SECTION D5 SAW AND SAS Carrier Actions Models with the Carrier Model Assigned Rule use the Value listed in the brackets to determine the extent to which they can execute the three different types of Carrier Action during Command and Control Step of their Activation. A Carrier Action may be directed towards any SAS within 4" except Reconnaissance Planes: once Reconnaissance Planes are deployed they are on their own! Each Action costs a portion of the Carrier s remaining Carrier Value for that Activation. A Model s Carrier Value is replenished at the end of every Game Turn, but the maximum it can be replenished to is reduced by Damage. The Model s current Carrier Value during its Activation is the initial Carrier Value minus the amount of Damage the Model has sustained. A Carrier (or Drone Launcher) may not execute Carrier Actions if they are Disordered. A Carrier (or Drone Launcher) may only perform Carrier Actions with SAS from their own Nation unless a specific Model Assigned Rule or condition applies. A Squadron containing two or more Carriers CAN pool their Carrier Values to perform Carrier Actions, providing they are ALL in range of the target Support Aircraft Squadron(s). Types of Carrier Action Action Cost Replenish 1 Carrier Value per Wing recovered Re-Arm 2 Carrier Value for the Squadron Re-Task 3 Carrier Value for the Squadron Rearming Ordnance Each time a Dive Bomber or Torpedo Bomber SAS is Deployed, it is fully Armed with sufficient munitions to execute a single Attack Run. Since these SASs are only capable of carrying minimal payloads of munitions, it is often vital to create the environment whereby they may be Re-Armed. In order for a Carrier to Re-Arm an SAS, the Carrier must announce it is spending 2 Points of its remaining Carrier Value to Re-Arm the Squadron. If the cost is paid, the Squadron removes any Ordnance Away! Game Marker it has, and is free to rain high explosive death once more! Replenishing a Squadron In order to execute a Replenish Carrier Action, a Carrier Model must spend Carrier Points Replenishing a Squadron. This costs 1 Point from the Carrier Value per SAW replaced and MAY NOT take the Squadron above its Initial Deployed Strength. Re-Tasking a Squadron In order to execute a Re-Tasking Carrier Action, a Carrier Model must spend Carrier Points Re-Tasking a Squadron. This costs 3 Points from the Carrier Value. The Squadron of SAWs would immediately change its designation to be a different type of SAW. A SAS with an Ace that is Re-Tasked loses their inspirational leader, but the Ace is not placed in the Scrapyard. The Ace may not re-launch for the rest of the battle, as they are far too busy in the Officers Mess regaling their fellow comrades with tall-tales of their heroism! 118

119 SECTION D5 SAW AND SAS Drone Launchers and Drones Not all Carriers deploy aircraft manned by human beings. Some more advanced factions are able to deploy drones that are controlled remotely via a link to a network broadcast over the battlefield. These Drones are often capable of performing exceptional feats of acrobatics unfettered by the limitations of a human pilot s physiology. They are not without drawbacks however as the automata lack the critical edge that comes from the instincts of an expert pilot. Drone Launchers do not launch conventional aircraft and must launch Drones instead. All Drone Launchers are considered to have the Drone Relay Model Assigned Rule. Should the Commodore be deployed on a Model WITHOUT the Drone Relay MAR, the Model gains the Drone Relay MAR automatically, meaning that, whilst the Model cannot Re-Launch Drones, the Commodore s Model is still able to maintain the Network should no other Drone Relays be present. Drone Launchers may not make use of Standard Carrier Actions, and are instead able to perform their own Carrier Action called a Re-Launch Action. The Relaunch Action costs 1 Point of Carrier Value per Drone Relaunched. A Drone Launcher may perform multiple Re-Launch Actions per Activation, but may NEVER Re-launch Reconnaissance SAS. Air Marshal Hanna Spiegel A Re-Launch Action must be announced during the Command and Control Step of their Activation, in the same way as other Carriers. The Re-launch Action allows a Drone Launcher to Deploy a single legal Squadron of SAWs within 4" of the Drone Launcher, using the Drones within the Scrapyard as a resource. All Re-Launched Drone SAS are Deployed with an Activation Marker. The Re-launched Drone Squadron may not exceed the Value noted in the Model s Drone Launcher (Value) MAR. For every 2 Points of Hull Points (HP) lost, the number of Drones the Launcher can Re-Launch reduces by 1. Important Note: A Carrier may not Re-Launch SAS Drones unless there are sufficient Drones in the Scrapyard to form a legal Support Aircraft Squadron! Drone Relays All Models with the Drone Relay Model Assigned Rule form a Drone Network, whereby they control the Drones active on the Tabletop. Any Critical Hit suffered by a Model that is part of the Drone Network causes a single friendly Drone Wing, chosen by the controlling player, to be removed: this Drone Wing is NOT placed in the Scrapyard, and is instead removed from the game entirely and may not be used in a Re-Launch Carrier Action. Models in the Drone Network that are Lost as part of an Aggressive Boarding Action are considered to have taken sufficient Critical Hits to Scrap the Model, forcing the controlling player to remove a number of Drone Wings from the game equal to half the Model s remaining Hull Points (HP). If all Drone Relays on the Tabletop are destroyed, ALL Drones in the Force are forced to Ditch. Drones Drones are treated in the same way as conventional Support Aircraft for the purposes of the general rules of the game with the following exceptions: All Drones that perform an Attack Run are considered to Ditch after the Attack is resolved. Ditching removes the Drone Squadron from the Tabletop into the Scrapyard, ready to be Re-Launched later. Drone Squadrons may NEVER contain an Ace. 119
120 SECTION D6 ROBOTS ROBOTS The term Robot refers to such vehicles that are manned by relatively few personnel but are able to dominate and control the battlefield by virtue of their massive bulk, raw durability and of course the feeling of invincibility that inevitably infuses itself into the psyche of any crew within the metallic monstrosity! Models with the Robot Classification are considered to have the Controlled Contact and Fearless Model Assigned Rules as standard. Robot Boarding Actions In a Robot Boarding Action, the Robot attacks as a physical entity, using its mass and stature to carve through its target. Equally a Robot must be brought low by attacking its critical systems, requiring herculean efforts from assaulting marines to bring the target down. Robots do not have a complement of marines with which to mount Boarding Actions, instead they rely on their own physical form to inflict damage on an enemy Model. In turn, when a Robot is boarded, enemy Assault Marines must attack the Robot s superstructure to inflict damage, targeting the DR and CR values in the hope of causing damage against the Robot itself instead of reducing the Robot s AP. A Robot Model reduced to 0 Assault Points cannot initiate any Boarding Actions. However, unlike during normal Boarding Actions, a Robot Model s Assault Point value can never be reduced by enemy Boarding Actions, ensuring other means are necessary to stop these fearsome machines! Robotic Boarding Action Limitations During a Boarding Action, the parties involved are divided into two key groups: the Target Model and the Initiating Model (or in the case of multiple Boarding Actions, Models). The Initiating Robot Model is more than ONE HEIGHT LEVEL away from the Target Model (For example, a Metzger on the Surface Height Level cannot attempt to board a Savannah Sky Fortress on the Obscured Height Level.) Robots may NEVER initiate a Friendly Boarding Action: they simply aren t that friendly! Robot Boarding Procedure All Boarding Actions initiated by Robots are resolved in the following order: 1. Nominate Targets 2. Anti-Boarding Declarations 3. Anti-Boarding Fire 4. Close Quarters Battle 5. Determine Damage! 1. Nominate Targets In order to initiate an Aggressive Boarding Action during the Boarding Segment against a specified Target, a Robot must have completed a Controlled Contact manoeuvre during the Movement Segment to bring into base contact with its intended Target, touching the Fore 90 degree Arc of the Robot s base. A Robot may still perform Attacks in the Firing Segment, provided any Attack it makes is directed towards the Target of their forthcoming Boarding Action. No other Attacks may be nominated. If the Robot s Attack results in their Target being Scrapped, then no Boarding Action can be executed, even if another Model is in base-contact. Castellan-Commander Arturo Sforza A Boarding Action initiated by a Robot CANNOT be attempted in the following circumstances: During its Activation, the Initiating Robot Model was involved in ANY Collision or Ram, or failed a Treacherous Terrain Test for Snaking (see Page 46). An Initiating Robot Model fired ANY weapons at any Model EXCEPT the Target Model during the current Squadron Activation. 120
121 SECTION D6 ROBOTS Important Note: This is contrary to normal Firing and Boarding procedure which prohibits a Model from Firing at and Boarding the same target in the same Activation. A Robot initiating an Aggressive Boarding Action must commit ALL its Assault Points (AP). Their Assault Group is always the current AP of the Model. 2. Anti-Boarding Declarations All Anti-Boarding Fire Declarations against Robots follow the same rules as those in the Anti- Boarding Fire Boarding Step of the Boarding Rules (see Page 77). 3. Anti-Boarding Fire During this Step, the Target Model resolves their allocated Anti-Boarding Fire declared in the Step above. Roll the declared Anti-Boarding Fire against the Robot, noting Damage to the Robot s Hull Points (HP). Damage from Anti-Boarding Fire is resolved against Robots is resolved as normal, in any order required by the Target Model (see Page 38). Anti-Boarding Fire has the following to Hit Numbers against any Robot initiating an Aggressive Boarding Action, modified by any Model Assigned Rules (MARs) that apply. A 4, 5 or Exploding (RED) 6 is required To Hit a Robot Model. Admiral Lawford P. Granger Compare the number of Hits generated against the Robot s Damage Rating (DR) and Critical Rating (CR), with Damage applied as normal. If the number of Hits equals or exceeds its Critical Rating, the Robot has suffered a Critical Hit and a roll must be made on the Critical Hit Table with any effects applied IMMEDIATELY. Important Note: Should the Anti-Boarding Fire Scrap the Robot it was directed against, the excess is lost and does not carry on to other other Robots taking part in the same action. 4. Close Quarters Battle Unlike combats against other foes, Robots do not target the enemy marines on-board a Model directly, instead they tear into the target Model itself with appendages of steel and iron. Robots use their current Assault Points (AP) as Attack Dice (AD) to roll against the Target Model, measuring the amount of hits scored against the Damage Rating and Critical Rating of the Target. Squadrons of Robots Combine their Attack Dice when Initiating an Aggressive Boarding Action. The Target Model s AP does NOT participate in the Close Quarters Battle Step. The Attack Dice for Robots have the following To Hit Numbers, modified by their Crew Type as normal and Robot Assaults ignore any Armor MARs or Defensive Generators. All Robots require 4, 5 or Exploding (RED) 6 is required To Hit. Important Note: Robots that initiate an Aggressive Boarding Action are not themselves targeted in the Close Quarters Battle Step by non-robot Models. The crew of the assaulted Model must cower before the wrath of iron and steel that is assailing them! 121


122 SECTION D6 ROBOTS 5. Determine Damage! In this Step the amount of Damage inflicted against the Target Model s Hull Points (HP) is determined. Compare the number of Hits generated by the Robot with the Target Model s Damage Rating and Critical Rating with Damage applied as normal. Important Note: In many cases Robots have Model Assigned Rules that will greatly affect the Damage caused during this Step. Boarding Actions against Robots Aggressive Boarding Actions directed against Robots by Non-Robot Models follow the same procedure as standard Boarding EXCEPT that, during the Close Quarters Battle Step, all Hits by the Initiating Model(s) against the Robot are combined and counted against the Robot s Damage Rating (DR) and Critical Rating (CR). The Target Robot DOES NOT participate in the Close Quarters Battle Step. Assaults made against Robots ignore any Armour MARs and Defensive Generators. All Assault Points directed against a Robot require 4, 5 or Exploding (RED) 6 is required To Hit. This may be modified by Crew Types and Model Assigned Rules. Also, in the Determine Victor! Step, Initiating Models that have been Victorious do not consult the Boarding Success Table. Assault Marines may ONLY inflict Damage on the Target Robot Models: Robots may never be Sabotaged, Prized, Derelict, or Salvaged. Robot versus Robot Boarding Actions On some occasions, Robot Models may find themselves engaged in an Aggressive Boarding Action with an enemy Robot! The Boarding Action is resolved in the same manner as any other Robot Boarding Actions EXCEPT that during the Close Quarters Battles Step ALL Robots fight! All Robots involved in a Robot vs Robot Boarding Action roll their AP against the DR and CR of their enemy SIMULTANEOUSLY, as they literally try to hammer their foes into submission. 122


123 SECTION D7 INFANTRY INFANTRY Military historians have long cursed the huge variety of names used by commanders for the formations they lead. The Infantry, with the longest history of all troop types, have accumulated the most names: Regiments, Cohorts, Columns, Battalions, Legions, Banners, Brigades, Files, Battery, Troop, Group, Sonita, Abteilung... Even within the same language, the same name does not always describe the same size or type of unit, as various FSA and Britannian Commanders have found to their surprise. In the world of Dystopian Wars, a Base of Infantry represents one Company, with each Hull Point representing a single Platoon. Purchasing Infantry Remember that Infantry are not an unlimited resource on the battlefield. Although Line Infantry are relativity common, the other, more specialised types are only deployed in a planned fashion. Dystopian Wars is a game of massed Tank and Robot battles, and Infantry are often used to supplement these monolithic behemoths, although the average life expectancy of a grunt trooper is considerably less! Infantry of any Type may NOT be bought directly. Instead, they are obtained through one of the following means: The Squadron Support or Combat Deployment MARs A Specialist Group Squadron including them. A Scenario condition dictating their inclusion in the Force. Armoured Core Forces gaining Free Local Infantry Support see Page 21. Infantry Bases Each Infantry Base Model contains two square spaces moulded into the surface to each hold a mini six-sided die. These dice can be used as an alternative to the Hull Point (HP) and Assault Point (AP) Game Markers that other Models use. A white die represents the Company s current Hull Point value. The second die, usually a green die or another available colour, represents the Company s current AP value. As the Company s HP and AP values change during the game, the mini dice should be rotated to show the appropriate number face up. An Infantry Formation is composed of between ONE and THREE (unless otherwise specified) Companies of Infantry, and performs a normal Squadron Activation as a single entity. It is simply a larger Company in game play terms. All Infantry Formations have the following rules: Infantry Formations are identified by having the Infantry Classification and are treated as a Model with the exceptions noted below. Infantry Formations must always be made up of the same type of Infantry. Targeted Attacks against Infantry use Heavy (BLUE) Dice, NOT Exploding (RED) Dice. Infantry always have the Controlled Contact, Difficult Target (unless Mechanised), Elusive Target, and Inert MARs. Infantry may NEVER have any Persistent Damage Markers on them. Infantry Formations are considered to be a single entity for the purposes of Range and Measurement. Infantry MUST use the Combined Fire option with ALL Ordnance and Auxiliary Weapons, unless another condition applies. Infantry NEVER collide with any form of Terrain. Infantry that find themselves on Impassable Terrain for any reason are automatically Lost. When engaging in a Boarding Action, an Infantry Formation must allocate all of their AP as a single Assault Group. 123

124 SECTION D7 INFANTRY Mechanised Infantry Any type of Infantry (except Reconnaissance Infantry) may be upgraded to a Mechanised Infantry Formation during Force List Creation, lending greater mobility to the formation by way of Armoured Personnel Carriers and other vehicle transports. This is represented in the Infantry Formation s Profile in the following ways: Mechanised Infantry add an additional 3" to their Movement (Mv). Mechanised Infantry have the Small Target MAR INSTEAD of the Difficult Target MAR. Mechanised Infantry does NOT gain benefits of Cover. Collisions Infantry Formations NEVER take Damage from a Ram or Collision with another Model. If a Non-Infantry Model Collides with or Rams Infantry, DO NOT resolve a Collision or Ram. Instead the Infantry MAY initiate an IMMEDIATE, out of sequence, Aggressive Boarding Action. This is carried out in the same sequence as a standard Aggressive Boarding Action (see Page 77) with the following exceptions: An Infantry Formation may only Assault the Model that Collided or Rammed it. There is NO Anti-Boarding Fire possible against this Assault. Following this Collision, the Infantry Formation must IMMEDIATELY Disengage, see Page 50. Boarding Actions In order to initiate a Boarding Action during the Boarding Segment against a specified Target: An Infantry Formation must have finished a Controlled Contact manoeuvre during the Movement Segment in base contact with its intended Target, unless a specific condition or MAR applies. Infantry may only perform Boarding Actions against Models on the Surface Height Level, unless a specific condition or MAR applies. In all other respects they perform Boarding Actions as normal (see Page 76). Infantry Companies may NEVER be taken as a Prize, Sabotaged or left Derelict. If any Boarding Action result would leave an Infantry Company Prized or Derelict, it is Scrapped instead. Infantry Formations may Prize or Salvage Models as normal. If sufficient AP is allocated as Prize Crew, Salvage Crew, or to a Friendly Boarding Action to remove an Infantry Base from play, then the Infantry Base is Scrapped as normal, but the rest of the Infantry Formation is NOT required to take a Disorder Check. This Boarding Assault represents our Infantry taking the opportunity to fire on the enemy at point blank range, and then swarm all over a Model, rather than be run down by it! explains Line Infantryman Christopher Jones-Frye of the Kingdom of Britannia, 33rd Royal Anglian Battalion. 124

125 SECTION D7 INFANTRY Applying Damage to Infantry Infantry Formations do not take Damage in the same way as other Models. If a Formation takes Damage, all Damage MUST be applied to one Company until it is removed, at which point Damage is applied to another Company in the Formation. Once a Company of Infantry has been Scrapped it CANNOT be returned to the Tabletop for any reason whatsoever. If an Infantry Formation loses a point of Assault Personnel (AP) for any reason, it also loses 1 Hull Point (HP) IMMEDIATELY. Important Note: This also applies to Infantry who are removed from a Formation to become part of a Prize or Salvage Crew. Infantry in Cover If Non-Mechanised Infantry start their Activation in certain types of Terrain, they are considered to benefit from the Cover afforded to them by it, as long as they remain fully within the confines of the Terrain Feature. If in Cover, they gain the Rugged Construction (1) and Security Posts (2) Model Assigned Rules. Any Terrain that provides Infantry with Cover will state it provides Infantry Cover in its entry in the Advanced Terrain Rules (Page 110). Infantry Bunkers These Fortifications allow commanders to deploy their Infantry in advance of their Main Force, closer to the likely engagement areas where the weight of the infantry might be used to tip the balance. For the Profiles and Points for Infantry Bunkers, players should consult their own National Force Guide. Infantry and Combat Patrols Infantry will often find themselves tasked with the defence of strategically important assets, ranging from Land Ships to Forward Landing Fields. This is achieved by forming a Combat Patrol. For more information regarding Combat Patrols, see Page
126 SECTION D8 COMBAT PATROLS COMBAT PATROLS Strategically important Models will often have Wings of aircraft or Infantry Companies assigned to them, in order to protect these critical assets from the depredations of incoming enemy aircraft or boarders. These Models provide a Combat Patrol around their Parent Model, ever watchful for attacks. A single Large or Massive Model, or a Model with the Combat Patrol Model Assigned Rule, that is not Disordered may have one Combat Patrol (CP) Attached. A Combat Patrol may be a Support Aircraft Squadron (SAS) of the Fighter Plane Type (known as a Combat Air Patrol or CAP), or an Infantry Formation of the Line Infantry Type (known as a Combat Infantry Patrol or CIP). In a Game Turn, during the Command and Consolidation Step of an eligible Model s Activation, the Model may elect to Attach a Ready to Activate Squadron of Fighter SAS or a Line Infantry Formation within 4" into its CP. After this point, the Model is referred to as the Parent Model. The Combat Patrol then becomes part of the Parent Model s Squadron, taking a position in base-to-base contact with the Parent Model. The CP remains in contact until such time as it is Detached. Universal Rules for a Combat Patrol (CP) A Parent Model CAN have an Attachment Group and a CP Attached at the same time. A CP is assumed to move at the same speed as the Parent Model at all times. ALL Ranges for CPs may be measured to and from the Parent Model. If a Parent Model is the target of an Aggressive Boarding Action, a CP can use the Linked Fire Firing Option when the Parent Model uses Anti-Boarding Ack Ack. An SAS acting as a CAP CANNOT benefit from Carrier Actions. CIPs may only be Attached to Armoured Models. If a Parent Model is the target of an Attack by Models occupying the Aerial Height Band, a CP may Link with its Parent Model when making an Aggressive Counter Attack. Detaching a CP A CP will detach under the following circumstances, gaining an Activation Marker: During the Command and Consolidation Step of the Parent Model, it may elect to detach the CP voluntarily. If the Parent Model becomes Disordered. If the Parent Model is not occupying the Surface or Flying or Obscured Height Levels. The Parent Model is Lost. The Parent Model is Teleported for any reason. Any Model CANNOT be Attached and voluntarily Detached as a CP during the same Game Turn. Admiral of the Sword Akira Nomura 126
127 SECTION D9 OTHER MODEL FUNCTIONS MODEL CLASSIFICATIONS Model Classifications are the way Models have their Core Force, and other fundamental aspects of how they behave in-game, designated. A Model will always have one Size, one Type listing and one Designation listed. It may also be listed as Capital, and may have any number of Functions, or none at all. The Classification Line will be shown in the Profile of any Model in the game. Size g Type g Capital g Function g Designation For example, a Covenant of Antarctica Aronnax Assault Worm has the following Classification: Large Armoured Capital Burrowing Multi-Purpose Robot This means that it is a Large Size Model. It is of the Armoured Type, making it part of an Armoured Core Force. It is a Capital Model, suggesting that it has a degree of importance in the Force. It can burrow beneath the ground and so has the Burrowing Function. It can swim on the sea like a Naval Model and so has the Multi-Purpose Function. And, of course it is a Robot! Size (Tiny, Small, Medium, Large and Massive) The Size is important for Line of Sight (see Page 52), interaction with Terrain (see Page 104), Force Composition (see Page 20) and many other in game matters. Type This denotes the Core Force the Model belongs to. Aerial These are flying Models that move through the air, and can range from sleek interceptors to huge sky fortresses. Flying Models are normally capable of occupying a number of Height Levels; this is them dropping low to make a devastating attack, or climbing high into the clouds to take cover. Armoured These are Tanks, Land Ships, Walkers and various other Land-based Models. They move over the Land Surface Height Level. The difficulty of moving a house or factory size vehicle over land means Armoured Models are typically slightly smaller than the equivalent Naval Models. Naval These are Frigates, Cruisers, Carriers, and other ships. They move on the Water Surface Height Level. Capital Capital is the designation given to Capital Models. These are mainly larger Models, and have significant command and control facilities. They will be commanded Below is a table listing the breakdown of the elements that make up a Model Classification and how they are represented in the Classifications Line of a profile: Size Type Capital Functions Designation Tiny Aerial Capital Burrowing Fortification Small Armoured Diving Infantry Medium Naval Escort Model Large Landing Craft Robot Massive Low Level Flyer Multi-Purpose Repair Surface Skimming Wave Lurker 127
128 SECTION D9 OTHER MODEL FUNCTIONS by an experienced officer capable of running a smaller force by themselves. However, they are not without disadvantages, including the enemy regarding them as a valuable prize! Any Model that does not have the Capital designation is Non-Capital. The following rules apply to all Capital Models. unless a specific condition or MAR applies: Only Capital Models may be the target of Spotting Actions (see Page 93) Only Capital Models may be Prized or Salvaged (see Page 81). FUNCTIONS Burrowing A Burrowing Model will often be a large monstrosity, capable of churning through the earth s crust and moving towards the enemy in relative safety. Burrowing Models may only use a limited selection of weapons, but are next to impossible to hit with standard weaponry, instead requiring concerted bombing or concussive attacks to damage. Similarly, few Models can launch Boarding Actions from or against a Model below the surface. A Burrowing Model is capable of occupying the Submerged Height Level on Land. Burrowing Models abide by the following rules, unless otherwise specified: Burrowing Models may choose to occupy either the Surface Height Level or the Submerged Height Level while occupying the Land Major Surface; see Changing Height Levels (Page 45). A Model with the Burrowing Model Function that is on the Land Major Surface can Surface or Submerge during the Movement Declarations Segment of its Activation. However, a Burrowing Model may ONLY Submerge if it has a Low Speed Manoeuvre Game Marker, and may NOT attempt a Swift Manoeuvre under any circumstances! A Model occupying the Diving Height Band on the Land Major Surface that suffers any Critical Hit must IMMEDIATELY move to the Surface Height Level. Any Model occupying the Submerged Height Level can ONLY use its Concussion Charges (CC) to mount Attacks and may ONLY be targeted with Concussion Charges or Concentrated Bombing (see Page 65). A Burrowing Model occupying the Submerged Height Level on the Land Major Surface can ONLY use its Concussion Charges. No Boarding Actions may be launched by, or against, a Model occupying the Submerged Height Level unless a specific condition or MAR applies. When determining Terrain Quality, a Model with the Burrowing Model Function refers to the Burrowing entry and ignores the Armoured Entry in Terrain Tables. Diving A Diving Model is a Submarine or other Model capable of occupying the Diving Height Band in Water. Whilst underwater, a Diving Model may only use a limited selection of weapons, but is far harder to hit. Similarly, few Models can launch Boarding Actions from or against a Model underwater. Diving Models abide by the following rules, unless otherwise specified: Diving Models may choose to occupy either the Surface Height Band or the Diving Height Band while occupying the Water Major Surface: see Changing Height Levels (Page 45). Surface Models may not use an Ordnance Weapon to target a Model occupying the Diving Height Band in Water at Range Band 1, unless a specific Model Assigned Rule applies. Any Model occupying the Surface or Aerial Height Bands is always counted as being Partially Blocked (see Page 55) when firing an Ordnance Weapon at a Model occupying the Diving Height Band in Water unless a specific Model Assigned Rule applies. A Model occupying the Diving Height Band in the Water Major Surface can ONLY use its Concussion Charges, Torpedoes, or a Particle Accelerator. A Model occupying the Diving Height Band in the Water Major Surface that suffers any Critical Hit must IMMEDIATELY move to the Surface Height Level. No Boarding Actions may be launched by or against a Model occupying the Submerged Height Level unless a specific condition or MAR applies. Models attacking from the Diving Height Band in Water may be subject to an Aggressive Counter Attack from Concussion Charges. 128
129 SECTION D9 OTHER MODEL FUNCTIONS When determining Terrain Quality, a Model with the Diving Model Function refers to the Diving Entry and ignores the Naval Entry in the Terrain Tables. Escort This Model may be included into any Squadron that is indicated in its Profile s Attachment Model Assigned Rule: Escort Models attached to a Parent Model count as the ONE allowed Attachment Group under the Mixed Squadron rules. The Parent Models of this Mixed Squadron do not need to test for Disorder if any of the Escort Models are Scrapped. In ALL other respects, the Escort Models function as normal members of the Squadron. Landing Craft During an Amphibious Landing Scenario, a player MUST take a Landing Craft Model in the Force for all Armoured Squadrons in the Landing Force that lack the Multi-Purpose or Surface Skimming Model Functions. The Landing Craft Model MUST be used to transport the Squadron for which it has been purchased. Landing Craft are governed by the following special rules: All Landing Craft have the Controlled Contact Model Assigned Rule (MAR). If a Landing Craft has no Models Embarked (see Page 19) upon it, it gains the Rear Echelon Model Assigned Rule (MAR). A Landing Craft MAY NOT initiate Attacks or Boarding Actions. A Landing Craft is considered to have Ack Ack (AA) and Concussion Charge (CC) Values determined by Linking the AA and CC Values of the Embarked Models on-board, with the Landing Craft being the LEAD Model. The Assault Points (AP) Value of a Landing Craft is determined by combining the Assault Points of the Embarked Models. When the Embarked Models are Deployed, any Assault Personnel losses suffered by the Landing Craft are distributed as evenly as possible amongst them. Multi-Purpose A Multi-Purpose Model ALWAYS treats ALL Major/ Minor Surfaces as having a Terrain Quality of Clear. This Model always refers to its listed Type (or Diving/ Burrowing Function if applicable) for the purposes of Terrain interaction. Surface Skimming A Surface Skimming Model is treated as having the Multi-Purpose Model Function, with the additional rules below: Surface Skimming Models treat any Terrain Features occupying the Surface Height Level as Clear, unless the Terrain is Impassable to both Naval and Armoured Models, in which case the Model treats the Terrain as Impassable. Surface Skimming Models MAY move over other Models occupying the Surface Height Level without causing a Collision or Ram, providing it does not finish its move on top of any Model. This has no effect on other Models Colliding with or Ramming the Surface Skimming Model. A Model with the Surface Skimming Model Function does not Detonate Armed Surface Mines if the Model passes by them, but will Detonate them if it finishes its Activation within 1" of ANY Armed Mine Marker. A Model with the Surface Skimming Model Function is considered to have an Elevation Bonus of +1 (see Basic Terrain on Page 104). Low Level Flyer A Model with the Low Level Flyer Model Function is able to fly so low that it is considered to occupy the Surface Height Level rather than Aerial Height Levels. Whilst choosing to fly at this Height Level the Model is considered to have the Surface Skimmer Model Function and the Vulnerable MAR. Whilst occupying the Surface Height Level, Low Level Flyers may not drop Bombs, may not be targeted by Ack Ack, and they may NOT make a Swift Manoeuvre. To enter or leave the Surface Height Level, the Low Level Flyer changes Height Level in the same way as changing between Aerial Height Levels (see Page 45). The Type, Size and Number of Models that may count as an Embarked Squadron will depend on the Size of the Landing Craft, and is listed in the Landing Craft s Profile. 129

130 SECTION D9 OTHER MODEL FUNCTIONS Repair Models with this Function may choose to perform a Friendly Boarding Action (see Page 77) against a Target Model at the same Height Level as the Initiating Model. A Model can only be the target of ONE Repair attempt per Squadron Activation, but multiple Models may attempt to Repair the same Model as part of a single Repair attempt. Each Model in any single Repair attempt allocates its entire current Assault Point (AP) value to the Repair attempt. The total number of AP allocated to each Target Model is the number of AP-Focused Repair Dice rolled for the target Model. Repair Dice require a 4, 5 or (RED) 6 To Hit. If the number of Hits is equal to, or exceeds the Damage Rating (DR) value of the Target Model, remove 1 Hull Point (HP) of Damage from the Target Model. If the number of Hits is equal to, or exceeds, the Critical Rating (CR) value of the Target Model, recover 2 lost Hull Points of Damage suffered from the Target Model, AND automatically remove one Critical Effect or Persistent Effect Marker present on the Model. Wave Lurker Models with this Function exist at a point half-way between a normal ship and a true submarine, capable of partially submerging. Wave Lurker Models are designed so the bridge section of the Model can lift off, and be placed in a hole in the Perspex outline. Doing so denotes the Model has chosen to activate the Wave Lurker Function. Except where specified below, Wave Lurkers are considered to occupy the Surface Height Level all respects: A Wave Lurker can move between being fully on the Surface Height Level and Wave Lurking in the same way as a Diving Model moves between the Surface and Submerged Height Levels, including using Swift Manoeuvres (see Page 51). A Wave Lurking Model uses AA, CC and any weapons listed as Raised in their Profile normally. For a Wave Lurking Model, any Lower weapons are ALWAYS considered to be Partially Blocked (see Page 55) unless otherwise specified. 130
131 SECTION D9 OTHER MODEL FUNCTIONS A Wave Lurking Model uses Torpedoes and Particle Accelerators as if it were occupying the Submerged Height Level, and for these weapons only, is governed by the targeting rules, To Hit rolls and modifiers as if were occupying the Submerged Height Level. Any Model occupying the Surface or Aerial Height Bands targeting a Wave Lurking Model suffers a -1 To Hit modifier, unless using a weapon with the Sub Killer MAR. A Wave Lurking Model counts as a Small Size Model on the Surface Height Level for the purposes of Line of Sight (see Page 52). For the purposes of ALL measurements, Rams, and Collisions, the Perspex Template is considered to be part of the Model. DESIGNATIONS Fortifications Fortifications are designed and built to withstand the rigors of a combat environment and are armed with significant offensive firepower. Full Profiles for Fortifications will be listed in each Nation s Force Guide and may be selected normally during Force Composition. Universal Fortifications may be deployed on either Land or Water Major Surface, as desired, on top of Terrain Features that are NOT Impassable to Armoured Models (if deployed on the Land Major Surface), or Naval Models (if deployed on the Water Major Surface). Land Fortifications may only be deployed on the Land Major Surface, on Terrain Features that are NOT Impassable to Armoured Models. Water Fortifications may only be deployed on the Water Major Surface and may NEVER be placed upon Terrain Features. All Attacks against Fortifications have a +1 To Hit modifier. Fortifications cannot move or be moved; if a Fortification would be Teleported it is instead automatically Scrapped. Infantry Infantry differ from standard Assault Personnel, in that that form into Companies, that may even be organised into larger formations. Where the Assault personnel on Models are equipped with jetpacks, infantry are purely ground based. However, this is offset by their large numbers! Infantry Rules are found on Page 123. Model This is the standard designation for the majority of Models in the game. Robot Robots are mechanical constructions with very few crew, being heavily automated. They are normal Models in most respects, but behave very differently when involved in Boarding Actions. For all other information regarding Robots and how they differ from other Models in Dystopian Wars, see the Robots section on Page 120. Below are rules universal to ALL Fortifications: Fortifications are ALWAYS considered to be Non-Core for purposes of Force Composition. ALL Fortifications are part of your Advance Force, so can be deployed anywhere in your Main or Advance Deployment Zones on any Permitted Terrain Type. Fortifications CANNOT be Damaged by Rocket or Torpedo Ordnance Attacks, or any Model Assigned Rule associated with them. If left Derelict, Fortifications do not lose any Hull Points in the End Phase. 131
132 SECTION D10 NATIONAL FLEET COMMODORES NATIONAL COMMODORE RULES Throughout the rulebook so far, we have talked about Commodores and their interaction with the Force via Force Orders and Disorder Tests. However there is another area where the Commodore can affect the Tabletop: National Commodore Rules. The National Commodore, Force Commodore or simply Commodore, is the Commander of your Force and must be stationed on any friendly Large or Massive Capital Class Model. This Model is the Commodore s Model and must be recorded accordingly in the Force List. National Commodores have TWO sets of abilities, Command and Doctrine, which they can execute ONCE per Game Turn. In most cases this means that a Commodore can execute a single Command Ability and a single Doctrine Ability during the Game Turn, but this is not always the case: sometimes the Doctrine Abilities for some Nations/Factions are reserved for Pre-Game effects or, when they are particularly powerful, Once per Game Effects. Important Note: Unless otherwise stated, Command Abilities and Doctrine Abilities may NOT be applied to enemy Models or Squadrons. Command Abilities Each Game Turn a player can have their Commodore perform ONE of the following Command Abilities: Safe Passage: One Model within 8" of the Commodore s Model may re-roll a failed Treacherous Terrain Test. Pass the Tools: One Model within 8" of the Commodore s Model may re-roll a single failed Repair attempt. Stand up and be Counted!: A Squadron may re-roll a single failed Disorder Test provided a member of the Squadron is within 8" of the Commodore s Model. Doctrine Abilities In addition to their Command Abilities, all National Commodores can perform ONE of the following Doctrine Abilities specific to their Nation/Faction, ONCE per Game Turn. These Abilities are designed to reflect the various combat doctrines of the certain nations or factions. Kingdom Of Britannia For Queen and Country! This Ability may be activated during the Command Segment of a Squadron s Activation provided a member of the Squadron is within 8" of the Commodore s Model. The Squadron in question may remove any Disorder Marker from themselves, before they activate this Game Turn. Perfect Plotting This Ability may be activated during the Command Segment of a non-disordered Squadron s Activation provided a member of the Squadron is within 8" of the Commodore s Model. The Squadron gains an additional +1 To Hit Modifier when firing using the Indirect Fire Firing Option. Prussian Empire Over-Charge the Coils! This Ability may be activated during the Command Segment of a non-disordered Squadron s Activation provided a member of the Squadron is within 8" of the Commodore s Model. The Squadron may elect to re-roll ALL of the INITIAL Attack Dice from an Attack using Tesla Weaponry. Only INITIAL Dice are rerolled and the second result MUST be accepted. Wrath of the Hussars! This Ability may be activated during the Command Segment of a Commodore s Activation. For the remainder of the Activation, the Commodore s Model gains the Terror Tactics (3) Model Assigned Rule. Federated States of America Punishing Gunnery This Ability may be activated during Declaring Attacks Step of the Firing Segment of a non- Disordered Squadron s Activation provided a member of the firing Squadron is within 8" of the Commodore s Model. ALL Attacks executed with Primary Gunnery from the Squadron that cause a Critical Hit cause the target to lose an additional Hull Point (HP). 132
133 SECTION D10 NATIONAL FLEET COMMODORES Take Aim! This Ability may be activated during the Command Segment of a Commodore s Activation. From this point onwards until the end of the current Game Turn, all Models in the FSA Force using the Sharpshooters MAR kill AP on a roll of 4, 5 or (RED) 6, rather than the 5 or 6. Empire of the Blazing Sun Shadow Tactics This Ability may be activated during the Command Segment of a Commodore s Activation. Until the end of the Turn, no Tactical Action Cards played by either side may be used on any Squadron with a member within 8" of the Commodore s Model (including the Commodore)! Coordinated Attack This Ability may be activated during the Command and Control Step of the Command Segment in a Squadron s Activation, provided a member of the Squadron is within 8" of the Commodore s Model. The Squadron may ignore the restrictions for being Disordered when determining Firing Options with Targeted Gunnery or initiating Boarding Actions. Covenant of Antarctica A Man on the Inside This Ability may be activated as the first action, before any cards can be played in the Tactical Action Cards Segment of the Game s FIRST Game Turn. The Covenant player chooses TWO TACs held by the opponent at random and forces those cards to be placed face up on the table, at the side. The cards can still be used by the opponent and may be cancelled by the Covenant player as normal. Overload the Generator! This Ability may be activated at any time during a Squadron s Activation provided a member of the Squadron is within 8" of the Commodore s Model. The player may choose to modify the actual result of an INITIAL Die Roll of a Generator by +/-1. This could allow the Die to move from a 5 result to being an Exploding (RED) 6! Important Note: This is the ONLY time in the game where the actual result of a Die Roll can be modified! République of France Tight Grouping This Ability may be activated during the Command Segment of a Squadron s Activation provided a member of the Squadron is within 8" of the Commodore s Model. Until the End Phase of the current Game Turn, the Squadron may elect to re-roll ALL the INITIAL Attack Dice in any SINGLE Attack, Counter Attack, or Anti-Boarding Fire roll using Ack Ack. INITIAL dice are re-rolled and the second result MUST be accepted. Hurried Repair This Ability may be activated at the beginning of the Compulsory Actions Segment of the End Phase. ONCE per game, the Commodore s Model can automatically remove ANY Critical Effect Markers or Persistent Effect Markers affecting it. Roll a D6 for each Marker removed by the Ability. For each roll of a 1, the vessel loses one Hull Point (HP). Russian Coalition For Mother Russia! This Ability may be activated during the Command and Control Step of a Squadron s Activation provided a member of the Squadron is within 8" of the Commodore s Model. The Crew Type that applies to the Squadron changes to Reckless for the duration of the Game Turn. Sturginium Overload This Ability may be used ONCE per game and is activated during the Command and Control Step of the Commodore s Activation. All Models in the Russian Force attempting to use the Sturginium Boost MAR in the current Game Turn automatically count as passing their Sturginium Boost roll. ALL Models WITHOUT the Sturginium Boost MAR gain +1" Movement (Mv) for the duration of the Game Turn. 133
134 SECTION D11 ALLIED BATTLE GROUPS USING ALLIED BATTLE GROUPS Unless otherwise stated, all Allied Battle Groups are governed by the following rules: Allied Battle Groups are divided into FOUR sub-types: Close Allies, Factional Allies, Allied Mercenaries, and Operational Assets. Any Allied Squadrons are always formed into Battle Groups where the minimum allowance permitted is ONE Capital Squadron and ONE Non-Capital Squadron. Non-Capital Models Deployed through the Squadron Support or Combat Deployment MARs are not considered to be part of the Allied Battle Group minimum. This ensures a degree of game balance and narrative focus. Allied Battle Groups are treated as Battle Groups for the purposes of playing Battle Group Tactical Action Cards (TAC) and so may benefit from the special abilities these cards confer. Unless otherwise stated, the points for all Allied Battle Groups are taken from the 40% Non- Core Allowance of a Force s MFV. No Tactical Action Card Decks may include National Cards taken from Allies. Close Allies These Forces are well suited to adapting their communications, battle tactics and engagement strategies. Close Allies are still governed by ONE Capital Squadron and ONE Non-Capital Squadron BUT are not taken from the 40% Non-Core part of the MFV, PROVIDED the Models used are of the same Type as the Core Force. Close Allies may gain the benefit of Command Abilities but MAY NOT gain the benefit of Doctrine Abilities. Close Allies are permitted to have Tactical Action Cards of any type played upon them as normal. Factional Allies Members of the Factions are often brought together to engage in large scale operations where the ends of all those joining forces are met. These forces are not entirely trusting however as all know that an alliance formed is but a stroke of a pen away from being worthless! Factional Allied Battle Groups are always taken from the 40% Non-Core part of the MFV. Factional Allied Battle Groups may not gain the benefit of Command OR Doctrine Abilities. Unless otherwise stated no Factional Allies are permitted to have Tactical Action Cards played upon them unless they are Generic, Battle Group or Factional Cards. At the end of this section is a summary table that shows the Major Powers, and the Minor Powers they can take as Close Allies. Minor Powers Minor Powers are not blessed with the towering industrial and economic might of the Major Powers. They do not hold the power and influence to coerce Allies into fighting for them and as such they never gain from Close Allies in the same way as the Major Powers. Although they may still call upon the aid of their Faction, such Alliances are often bought with concessions or bribes far beyond the normal diplomacy surrounding such agreements. On the next page is a summary table that shows the Minor Powers and the Faction Allies they may call upon: Mercenary Forces Many of the Major Powers view the existence of Mercenaries as distasteful. Men who fight for money are unlikely to conform to the the idea of National Patriotism that many Powers seek to cultivate. As such the use of mercenaries is often seen as a last resort by those who have the luxury of holding such lofty ideas. However, for the Minor Powers, the use of Mercenaries is very much common practice, as these powers are often called upon to defend their interests against overwhelming forces brought forth by the Major Powers. 134
135 SECTION D11 ALLIED BATTLE GROUPS MAJOR POWERS ALLEGIANCE TABLE Major Powers Faction Minor Power Close Allies Kingdom of Britannia Prussian Empire Federated States of America Empire of the Blazing Sun Covenant of Antarctica Grand Coalition Imperial Bond Grand Coalition Imperial Bond Free Nations Dominion of Canada Indian Raj Royal Australia Teutonic Order Kingdom of Denmark League of Italian States Dominion of Canada Royal Australia Chinese Federation Free Chilean Republic The Wani Commonwealth of Free Australia Ottoman Separatists République of France Imperial Bond Ottoman Traditionalists Russian Coalition Grand Coalition Polish-Lithuanian Commonwealth MINOR POWERS ALLEGIANCE TABLE Minor Powers Faction Minor Power / Close Allies Free Chilean Republic Imperial Bond No Close Allies Chinese Federation Imperial Bond No Close Allies Kingdom of Denmark Imperial Bond No Close Allies Ottomans Traditionalists Imperial Bond No Close Allies Teutonic Order Imperial Bond No Close Allies The Wani Imperial Bond No Close Allies Commonwealth of Free Australia Free Nations No Close Allies League of Italian States Traditionalists Free Nations No Close Allies Ottomans Separatists Free Nations No Close Allies Socialist Union of South America Free Nations No Close Allies Royal Australia Grand Coalition No Close Allies Dominion of Canada Grand Coalition No Close Allies Polish-Lithuanian Commonwealth Grand Coalition No Close Allies Free Hellenic Kingdom Grand Coalition No Close Allies Republic of Egypt Grand Coalition No Close Allies Portuguese Empire Grand Coalition No Close Allies Spanish Republican Confederacy Grand Coalition No Close Allies Indian Raj Grand Coalition No Close Allies 135
136 SECTION D11 ALLIED BATTLE GROUPS Mercenary Combined Forces Mercenaries are also known to use other Mercenary Factions, particularly if their patron has paid for an extensive operation that exceeds their own resources. A Mercenary Core Force may take any other Mercenary Battle Groups from their Factional Alignment as Close Allies. Allied Mercenaries When all else fails and a nation has nowhere else to turn, money can buy the loyalties of a few good men... at least for a time. Nations have the chance to hire Mercenaries to assist in their operations but should always be mindful that these forces are often little better than brigands, willing to hire themselves out to the highest bidder and as such should never be trusted! Allied Mercenary Battle Groups may only be taken by Core Forces that follow the same Factional Alignment. Unless part of a Mercenary Combined Force, Allied Mercenary Battle Groups are always taken from the 40% Non-Core part of the MFV. Allied Mercenary Battle Groups do not gain the benefit of Command Abilities or Doctrine Abilities. Unless otherwise stated, no Mercenary Battle Groups are permitted to have Tactical Action Cards played upon them. Allied Mercenary Battle Groups never gain a bonus die for the Commodore s presence when resolving Disorder Tests. OPERATIONAL ASSETS These are elements of the game that exist outside of the standard Order of Battle for all Powers and Factions. They may be elements such as landing barges, support carriers, reconditioned escorts, oil rigs, factories, and any other myriad of esoteric things that find their way into the Dystopian Wars world! Operational Assets are always taken from the 40% Non-Core part of the MFV, but do not require the creation of a Battle Group, and so do not follow the stipulation of requiring ONE Capital Squadron and ONE Non- Capital Squadron to be present. Operational Assets do not gain the benefit of Command Abilities or Doctrine Abilities. Unless otherwise stated, Operational Assets are not permitted to have Tactical Action Cards played upon them. Operational Assets never gain a bonus die for the Commodore s presence when resolving Disorder Tests. MERCENARY FORCES TABLE Mercenaries Faction Factional Alignment Black Wolf Mercenary Any (except Russian Coalition) Commonwealth of Free Australia Mercenary Imperial Bond East India Merchant Company Mercenary Grand Coalition/Free Nations The Honourable Eclipse Company Mercenary Any Garibaldi s Legion Mercenary Grand Coalition/Free Nations The Order of Honourable Gentlemen Mercenary Imperial Bond League of Crimson Mercenary Any League of Italian States Separatists Mercenary Any OPERATIONAL ASSETS TABLE Operational Assets Faction Factional Alignment Landing Barges Any Any Merchant Fleet Any Any Scenario Buildings Any Any 136
137 SECTION D11 ALLIED BATTLE GROUPS MULTI-PLAYER GAMES One of the great things about Dystopian Wars is the ability to play the game with lots of friends all at the same time. Whilst it is possible to play games using the alternating activation mechanic where multiple players are acting to achieve their own ends, it is far better to have players join forces in order to bring the fight to the enemy! This has the benefit of allowing the game to flow faster and encourages the use of narrative storytelling for larger, more impressive games! Of course we wouldn t want to get in the way of any creativity from players, but here are a few suggested rules to use when deciding to play a huge multiplayer game: Divide the Players into 2 Sides As mentioned in the introduction, it IS possible to for players to simply play the alternating activation mechanic but it is much better to divide the players into equal numbers as much as is possible and face the two Sides off against each other. This can usually be achieved by use of the Factional divisions in the game, but in some cases this might not be possible given the Forces present: players are simply encouraged to divide their players and their forces as best they can! Predetermine the Total MFV The Total amount of MFV should be set ahead of time to allow players to divide up the Total MFV amongst themselves, so that each player knows how big their own MFV is for the upcoming game. This helps get players to the table quickly with their Forces ready to go! As much as is possible each player should have the same MFV to draw upon, however in cases where an odd number of players exist, the MFV available to each player should be altered to accommodate. Use Strategic Forces if agreed upon Both Sides should agree if they are planning to use Strategic Forces (see Page 21) before the players arrive to play; so someone does not pick their forces with Flanking, Advance or Reserves in mind only to find they can t use them! Local Support is NOT used No players gain the use of either Local Air Support or Local Infantry Support. Use the Side Activation Mechanic In games where players might wish to use thousands of points worth of Models, having each player take a turn one after another would simply take far too long! Instead of this we suggest players take the following steps: Each Side totals their number of players This is their Side Activation Number. When a side is called upon to Activate, each player on the Side takes at least ONE Activation. If a side has less players than the other then they must nominate another Squadron in their Side to Activate so that the number of Side Activations are even where possible. This process continues until all Activations are completed. A player on a Side cannot target an enemy Model with Gunnery or Boarding if it has already been targeted by another player from the same side during the current Activation. TAC Cards Distribution In large Multiplayer games, players will have access to their own Tactical Action Cards as normal, with the number available to each player depending on the size of their individual MFV. Remember that no TAC can be played on an Ally unless otherwise stated. Set a Victory Point Target for each Side Rather than each player attempt to achieve a personal Fleet Order in the game, it is usually better to set a predetermined Victory Point (VP) Target at the start of the game for each side to aim for. One player on each side should be nominated to keep their own side s VP Total and should be notified if VPs are scored by their Side so that the total can be amended! Be Generous With so many Models on the Tabletop, and lots of munitions flying about, it s important to be generous when opponents are trying to do things like setting up Fixed Channel Weapons, Ranges, and Measurements: you might not be invited back if you are nit-picking everything! 137
138 SECTION D12 MULTI-PLAYER GAMES USING THE OBJECTIVE MARKERS One of the great ways to differentiate the Multiplayer Game from a Standard Game is the use of Objectives. The resin Objective Markers are intended for use when playing Multiplayer Games, in certain Scenarios such as those found within the various Dystopian Wars Campaign Guides, or those Scenarios you have devised yourself. These markers are used in conjunction with the Event Deck as described below, to make any Scenario or game type more fun and unpredictable. This is achieved by placing a number of the Objective Markers on the Tabletop as Secondary Objectives, representing the bonus goals your Force can achieve whilst they fulfill their principal Victory Conditions. Using the Event Deck If both sides have agreed to use the Event Deck to spice up your game, you first need to determine how many Secondary Objective Markers you are going to place. This is determined randomly, based on the size of game you are playing: Important Note: the table below is intended as a guide. Feel free to modify the contents for your own Scenarios as you see fit. Once you know how many Secondary Objectives have been generated, you need to place them on the Tabletop. This is performed after setting up the Terrain, but before any player begins Deployment. Both sides should agree upon one of the following two methods for Secondary Objective placement: Method 1: Player Determined Starting with the player who rolled highest on a single D6, players alternate placing Objectives anywhere on the Tabletop until all have been placed. An Objective CANNOT be placed within 8" of another Objective or within any area of Terrain that would be considered Impassable to either player s Core Force. This method is the quickest and simplest. However, it is less likely to create dynamic Scenarios than the second method. Method 2: Central Grouping Starting with the player who rolled highest on a single D6, players alternate placing Objectives on the Tabletop until all have been placed. What makes this different from Method 1, however, is that the first Objective must be placed entirely within D6" of the centre of the Tabletop, the second must be placed entirely within 2D6" of the centre of the Tabletop, the third within 3D6" and so on. An Objective CANNOT be placed within any area of Terrain that would be considered Impassable to either player s Core Force. This method is fairer than Method 1, whilst still allowing some tactical placement. However it is a little more time consuming. Once all Secondary Objectives have been placed, thoroughly shuffle the Event Deck, and place it to one side before moving on to Model Deployment. Capturing Secondary Objectives If a Squadron finishes its movement with one or more of its Models with any part of it within 2" of an Objective Marker, the controlling player can choose to attempt to capture the Objective. To do so, they must roll 3D6, scoring successes on rolls of 4, 5 or (RED) 6 as normal. If they roll two or more successes, the Objective has been captured, remove the Objective Marker from the Tabletop and draw a Card from the Event Deck. Important Note: to keep track of which Model captured the Secondary Objective, it may be helpful to place the Marker adjacent to the Model for the remainder of the game. Playing Event Cards There are two kinds of Event Cards: Instantaneous Banked. Any Event Cards which state This card is instantaneous MUST be played as soon as they are drawn. Reveal the card and resolve the stated effects IMMEDIATELY. Any Event Cards which state This card can be Banked are instead added to your hand of Cards, and may be played just like a Tactical Action Card. An Event Deck and Resin Objectives can be purchased from the Spartan Games Web Store at www. spartangames.co.uk Alternatively players can download the Event Deck for free from and make some of their own themed objectives! 138

139 SECTION D12 MULTI-PLAYER GAMES MFV Size per Side Number of Secondary Objectives 1500 Points or less D to 2000 Points D to 3000 Points 2D Points 2D
140 DYSTOPIAN WARS 2.0 REFERENCE SHEET SET UP 1: Strategic Advantage Opposed 2D6 Test Winning Player has Strategic Advantage, other has Operational. 2: Board Size 48" x 24" width for each 500 Game Points per Side. 3: Terrain Placement Divide Board into 24" x 24" section, each player has a piece of terrain there on a die roll of 5 or 6. Player with Strategic Advantage determines who places a terrain piece first. 4: Board Edges Player with Strategic Advantage picks long Board edge, Operational Advantage picks Flank. Advance Deployments Player with Strategic Advantage picks who places a Squadron first. 5: Deployment Main Deployment Player with Operational Advantage picks who places a Squadron first. Flanking Units Arrives on Turn D3 Player with Operational Advantage may re-roll D3. Reserve Units Arrives on Turn D3 Player with Strategic Advantage may re-roll D3. 6: Field orders Draw Field Order and make any necessary announcements. 7: Choose TACs Hand is 2 Cards plus 1 Card per full 250 Game Points, up to a maximum of 10 Cards. ORDER OF PLAY AT THE START OF EACH TURN. 1: TAC Segment. 2: Late Arrivals Segment. 3:Determine Initiative. 4: First Activation. SQUADRON ACTIVATIONS EACH SQUADRON GOES THROUGH THESE SEGMENTS. 1: Command Segment. 2: Movement Segment. 3: Firing Segment. 4: Boarding Segment. 5: Disorder. END PHASE AT THE END OF EACH TURN 1: Compulsory Actions 2: Damage Repair 3: Persistent Effects 4: Restore Order 5: Check End of Game 6: Next turn - Derelicts lose HP or Crash - Derelicts, Prized and Salvaged models drift - Attempt to fix Critical Hit Effect Markers. 4+ required unless MAR applies. - Attempt to fix Persistent Effect Markers. 4+ required unless MAR applies. Any Disordered squadron Lose D3 AP or HP (any mixture) and regain Order. Check if either player has met their victory conditions. If no Victory achieved, move on to next turn. MOVEMENT SEGMENT 1: Movement declarations 2: Movement and Manoeuvre 3: Movement Consolidation Special Movement Actions Must be declared. - Low Speed Manoeuvres - Must have Low Speed marker. Deploying Embarked Models Ramming Changing Height Levels - Dead Slow - Up to 2" move, making any allowed turns. - Static Turn - Rotate around centre point up to 90 degrees. 140
 5, RED (6) 4, 5, RED (6) 5, RED (6) RED (6) Infantry Downgrade")

141 DYSTOPIAN WARS 2.0 REFERENCE SHEET THE FIRING SEQUENCE 1: Declare Attacks Declare Attacks. 2: Declare Counter attacks. 3: Resolve Auxiliary Fire. 4: Resolve Ordnance Fire. 5: Firing Consolidation. Height Level of Target/ Firer BASIC TO HIT NUMBERS Stratospheric Obscured Surface or Flying Submerged Deep Diving To-Hit Value RED (6) 5, RED (6) 4, 5, RED (6) 5, RED (6) RED (6) Infantry Downgrade RED 6's to BLUE 6's. Support Aircraft have their own modifiers. Most Ordnance cannot fire to or from Deep Diving. Most Ordnance Weapons are Partially Blocked when Firing at the Submerged Height Level. NEGATIVE TO HIT MODIFIERS. POSITIVE Elusive Target (Non-Capital Models) -1 Target Painter Hit on Target Model +N Difficult Target (From Capital Models) -2 Firer has Hunter (Target Model) +N Small Target (From Capital Models) -1 Target is Spotted (IDF only, 4+ at best) +N Primary Weapon at Range Band 1-1 Firing at a Structure +1 Primary Weapon Firing Indirectly -2 Target has Low Speed Manoeuvre Game Marker +1 Bombards or Mortars Firing Indirectly -1 Target covered by Cloud Generator -1 Target is Wave Lurking -1 Important Note: This is a summary table, each modifier is explained in full in the relevant section of the rules. INDISCRIMINATE ATTACKS They are: They Ignore: Attacks using templates. All To-Hit Modifiers. Collisions and Rams. Armour MARs. Mines. Defensive Generators. They use Basic To Hit values, or as noted for weapon. CARRIER ACTIONS Action Carrier points Re-Arm 2 per Squadron Re-Task 3 per Squadron Replenish 1 per Wing Recovered Relaunch (Drones only) 1 per Wing Launched 141
142 DYSTOPIAN WARS 2.0 REFERENCE SHEET 1: Nominate Targets and Assault Groups 2: Anti Boarding Declarations THE BOARDING SEQUENCE 3: Anti Boarding fire 4: Close Quarters Battle 5: Determine Victors Each Model forms ONE Assault group, which may be Aggressive, Re-crewing, or Repair if allowed 6: Boarding Consolidation BOARDING TO HIT TABLE Crew Type Attackers To Hit Number Defenders To Hit Number Elite 3, 4, 5, (RED) 6 3, 4, 5, (RED) 6 Aggressive 3, 4, 5, (RED) 6 4, 5, (RED) 6 Reckless 3, 4, 5, (RED) 6 * Opposing AP gain a +1 To Hit Modifier 3, 4, 5, (RED) 6 * Opposing AP gain a +1 To Hit Modifier Regular 4, 5, (RED) 6 4, 5, (RED) 6 Stoic 4, 5, (RED) 6 3, 4, 5, (RED) 6 Defensive 5, (RED) 6 4, 5, (RED) 6 Conscripted 5, (RED) 6 5, (RED) 6 Non-Combatant (RED) 6 (RED) 6 BOARDING SUCCESS TABLE Result Effect Description Defender rolls more Hits and the Defender's AP is not wiped out. Both Attacker and Defender roll the same number of Hits and both sides have AP remaining. Attacker rolls more Hits, but does not wipe out the Defender's AP. OR Both sides have been wiped out Defender AP is wiped out and Attacker AP remains. Attack Routed Attack Repelled Sabotage * Victorious! Target Model AA's /CC's attack Retreating AP before they return to their models Remaining Attacking AP return to their Models. Remaining Attacking AP return to their Models, and Sabotage their Target Attackers may Sabotage/Derelict their Target and return to their Models, or may Prize capital, non Robot Models * Sabotage: Attacking AP retreat, and target model takes a Critical hit during Boarding Consolation. ROBOT BOARDING - Robot Attacking - Anti Boarding AA/CC against Attacker s DR/CR Attacker s AP rolls against Target s DR/CR Defender s AP Does not Fight! - Robot Defending - Defender s AA/CC as Normal Attacker s AP rolls against Target s DR/CR Defender s AP Does not Fight! Robot vs Robot AA/CC is directed against the Attacker s DR/CR. Both roll AP vs Opposing DR/CR simultaneously. APPLYING DAMAGE 1: Determine form of damage, if any. 2: Apply all DR damage results. 3: Apply CR damage results, one at a time. DISORDER TESTS: In Disorder segment, no more than one per activation. Roll 3 RED D6, requiring 1+ pass initially. Disorder Test needed if: Extra pass needed if: Modifications to disorder test Model in squadron is Lost Squadron at or under Half Strength Fearless MAR Auto Pass Commodore Lost Commodore Lost Die Hard MAR: +1 die for test Out of Coherency in Disorder Segment Out of Coherency In Commodore Range: +1 die for test MARs/Scenario Condition Disordered Squadrons CANNOT have TACs played upon them by their controlling player, initiate ANY Boarding Action, use ANY Firing Options other than Standard Fire, perform Carrier Actions, have a Combat Patrol or Disembark Units. 142
143 DYSTOPIAN WARS 2.0 REFERENCE SHEET CRITICAL HIT TABLE 2D6 Dice Roll Result HP Loss Critical Effect Repair? 2 Magazine Explosion D3+2 If this Model is Scrapped as a result of the HP loss from this Critical Hit, any Models within 4" of any point of the Model, regardless of Height Level, are subjected to an Indiscriminate Attack, with a To Hit roll of 4, 5, or (RED) 6. The number of Attack Dice (AD) is equal to DOUBLE the initial Hull Points (HP) value of the Scrapped Model. NO 3 Raging Fire 2 4 Shredded Defences 2 This Model loses 1 Assault Point (AP), and gains D3 Raging Fire Persistent Effect Markers. This Model has its Ack Ack (AA) and Concussive Charges (CC) reduced to 0. Place the Shredded Defences Critical Effect Marker on the Model. YES YES 5 Generators Offline 2 This Model cannot use any of its Generators. Place the Generators Offline Critical Effect Marker on the Model. YES 6 Weapons Damage 2 The Attack Dice (AD) Value of all Primary and Secondary Weapons on this Model are reduced by HALF. Place the Weapons Damage Critical Effect Marker on the Model. YES 7 8 Hard Pounding Engine Failure 2 This Model loses D3 Assault Points (AP) NO 2 The Movement (Mv) of the Model is reduced by HALF. Place the Engine Failure Critical Effect Marker on the Model. YES 9 Navigational Lock 2 This Model can only move DIRECTLY ahead. Place the Navigational Lock Critical Effect Marker on the Model. YES 10 Chaos and Disarray 11 Fusion Leak 2 2 This Model cannot use Tertiary Weaponry, deploy Mines, Initiate any Boarding Actions, or perform Carrier Actions. Place the Chaos and Disarray Critical Effect Marker on the Model. This Model gains D3 Corrosion Persistent Effect Markers. The Model Teleports in a random direction using the Random Displacement Template, moving the Model 3D6" in the direction indicated. The Model is then placed facing in a random direction using the Random Displacement Template once more. YES YES 12+ Sturginium Flare D3+1 A Model automatically Collides if, as part of a Teleportation, it is placed touching a Model, or touching Terrain that is considered to be Treacherous to it. A Model is automatically Scrapped if, as part of a Teleportation, it is placed touching Terrain that is considered to be Impassable to it. NO A Model that is Scrapped due to HP Loss does not Teleport, and is removed from play instead. 143
144 GAME MARKERS IN DYSTOPIAN WARS Assault Points (AP) Loss Green Numbers denote the APs that have been Lost by a model. A Model must use multiple Game Markers to represent higher levels of Crew loss! Should a Model lose ALL of its APs, the Green Zero should be used to denote the Model s vulnerability to a Boarding Assault! Hull Points Loss The Red Numbers on this Game Marker denote Hull Points Loss that a Model has suffered. Under extreme levels of damage, a model must use multiple Game Markers to represent debilitating levels of hull Damage. Raging Fire This Game Marker is used to denote the Raging Fire Persistent Effect. Fires that rage unchecked across a model will eliminate Crew and structural integrity at a terrifying rate. Corrosion This Game Marker is used to denote the Corrosion Persistent Effect. This effect can cause a Model to quite literally fall apart! Lightning Rod This Game Marker is used to denote the Lightning Rod Persistent Effect, applied most commonly using Speerschleuder Tesla Weapons! Target Painted This Game Marker exists until the End Phase of the Game Turn it is applied. Until that time firing Models will gain bonuses to hit with Targeted Attacks when directing against the Marked Model. Very often a Model that has been Target Painted is easy meat for enemy gunners! Spotted This Game Marker exists until the End Phase of the Game Turn it is applied. This Game Marker denotes a target that has been successfully Spotted using a Spotting Test, allowing the Model to be targeted by Indirect Fire. Multiple Spotted Game Markers may be applied to a Model from multiple successful Spotting Tests. Disordered This Game Marker is used to denote a Model/Squadron that is suffering from Disorder. Prized This Game Marker is used to denote a Model that has been successfully Prized by an Aggressive Boarding Action. Salvaged This Game Marker is used to denote a previously Prized Model that has been successfully recaptured/salvaged by an Aggressive Boarding Action. Derelict This Game Marker denotes a Model that has been taken out of action, but is neither a Prize or a Salvage. Such Models are prone to self destruction as their critical systems are left unattended, and as such will decay over time. Commodore This Game Marker denotes the Model in the Force your Force Commodore has elected to use as their Flagship. Using this Game Marker allows both players to remember who is really in charge as battle is joined! Mines This Game Marker is used to denote the presence of a Mine on the Tabletop. Vulnerable This Game Marker is used to denote Models that have developed a fault in their superstructure or are inherently unstable anyway! Low Speed Manoeuvre This Game Marker denotes a Model that is executing a Low Speed Manoeuvre. Ordnance Away! This Game Marker is used to denote Models that have deployed their munitions and are unable to fire them again! In the case of Support Aircraft Squadrons this can be alleviated by rearming with a Carrier Model. Shredded Defences This Game Marker denotes a Model that is suffering from a Shredded Defences Critical Effect. The Model is unable to use Ack Ack or Concussion Charges, counting both as being 0. Generators Offline This Game Marker is used denote a Model that is suffering from a Generators Offline Critical Effect. 144


145 Navigational Lock This Game Marker is used denote a Model that is suffering from a Navigational Lock Critical Effect. Engine Failure This Game Marker is used denote a Model that is suffering from an Engine Failure Critical Effect. Weapons Damage This Game Marker is used denote a Model that is suffering from a Weapons Damage Critical Effect. Chaos and Disarray This Game Marker is used denote a Model that is suffering from a Chaos and Disarray Critical Effect. Submerged This Game Marker is used to denote Models that inhabit the Submerged Height Level. Models that occupy the Deep Diving Height Level should be given TWO Submerged Game Markers. Obscured This Game Marker is used to denote models that inhabit the Obscured Height Level. Models that occupy the Stratospheric Height Level should be given TWO Obscured Game Markers. Activation Marker This Game Marker is used to denote Squadrons that have completed their Activation. GAME TEMPLATES IN DYSTOPIAN WARS Large Effect Template Large Turning Template Medium Turning Template RandomDetermination Template Energy Template Small Turning Template Small Effect Template 45 Degree Turning Template 145
146 INDEX Action 36 Activation Marker 7, 16, 24, 85, 104, 119, 126 Activation Phase 37 Ack Ack 71 Allies 20, 134 Attachments 15, 18, 21 Attack Sequence 60 Attacks Generator Strikes 96 Indiscriminate Attack 38, 49, 65, 68-9, 74, 96, 100, 106 Targeted Attack 38, 62, 88, 90-3, 100, 123, 144 Battle Group 21, 26-7, 30, 134, 136 Boarding Action Segment Aggressive Boarding Action 14, 71, 76, 77-8, 81, 88, 92-4, 96, 100, , 124, 126 Friendly Boarding Action 77, 120, 124, 130 Re-Crew Boarding Action 77, 95 Repair Boarding Action 77, 130 Robot Boarding Action 92, Bomb Ordnance 67 Bombards 67 Capital 21, 62, 80, 90, 93, 127-8, 132, 134, 136 Carrier Actions 118 Re-Arm 113, 118 Replenish 112, 118 Re-Task 118 Carrier Model 116 Crew Types 79 Collisions 14, 19, 38, 48, 45-51, 76-7, , 115, 120, 124, 129, 131 Disengaging 49, Evading 49 Ram 14, 38, 48, 49-51, 84, 95, 115, 120, 124, 129, 131 Combat Patrols 18-19, 41, 77, 80, 90, 113, 125 Command Segment Command Coherency 37, 41, 44 Command and Control 37, 44, 96, 118-9, 133 Command Consolidation 37, 44 Commodore 18, 20-2, 26, 28, 30, 32, 41, 119, , 136, 144 Command Abilities 132, 134 Doctrine Abilities 132, 134 Concussion Charges 71 Damage 38, 124 Critical Effects 39 Critical Hit 14, 38-9, 79-80, 96, 119, 121, 128 Critical Hit Table 9, 14, 79, 143 Critical Rating (CR) 14, 38 Damage Rating (DR) 14, 38 Damage Repair 84 Persistent Damage 84 Designation Fortification 21, 27, 62, 67, 93, 125, 127, 131 Infantry 19-21, 27, 46-7, 61, 70, 90, 108, 110, 123-7, 131, 137 Model 6, 127, 131 Robot 76-81, 92-3, 120-2, 127, 131 Deployment 21, 24, 25-7, 36, 112, 116, 131, 138 Advance Deployment 26 Flanking Force 21, 24, 26-7, 36, 47 Main Deployment 26 Order of Deployment 27 Reserve Force 22, 27 Derelict Models 81 Dice Basic 9, 93 D6 8 D3 8 Exploding 8-10, 49, 61-2, 66-7, 72-4, 77, 90-92, 106, 121-3, 133 Heavy 8-9, 61-2, 66-7, 73, 115, 123 Initial 8-10 Modifiers 8, Opposed 9, 36 Re-Roll 9 XD6 9 Disorder 18-19, 37, 40-1, 44, 47, 76, 85, 115, 126, 129, 132, 136, 144 Drones 119 End Phase 16, 19, 28, 33, 36-8, 40-1, 73, 81, 84-5 Raging Fires 85 Corrosion 85 Energy Blast 68 Energy Weaponry 68 Field Orders 24, 28, 32, 85, 106 Fire Arcs 52 Firing Aggressive Counter Attack 58-59, 71, 115, 126, 128 Defensive Counter Attack 38, 58-59, 62, 64, 67, 71, 91 Effective Attack Dice 60-1 Initial Attack Dice 60-65, 94, 101 Profile Attack Dice 14, 60-1, 68 Firing Segment 58 Firing Options 41, 58, 61-62, 63-8, 70, 72-3, 75, 77, 114, 126 Area Bombardment 7, 61, 64-65, 67, 88 Combined Fire 58-59, 61, 64, 70, 72, 90, 94, 114, 123 Concentrated Bombing 58, 61, 65, 67, 128 Indirect Fire (IDF) 54, 61, 64-6, 73, 101, 108 Linked Fire 58-9, 61, 63-4, 75, 77, 126 Standard Fire 41, 63, Flamethrower Weaponry 70 Force List 18, 20-22, 24, 30, 32, , 124, 132 Functions Burrowing 14, 27, 45, 127, Diving 14, 27, 45, 61, 90, 127, 128-9, 131 Escort 15, 18, 41, 127, 129 Landing Craft 19, 127, 129 Low Level Flyer 127, Multi-Purpose 111, 127, 129 Repair 60, 77, 127, 130 Surface Skimming 127, Wave Lurker 127, Game Marker 7, 44, 84-5, 143, Critical Effect 84, 143, Persistent Effect 37, 71, 84, 97, 130, 133 Game Set-Up Advance Forces 21, 26-7 Board Edges 24-5, 47 Board Size 24 Common Agreements 20, 104 Complexity of Composition 20 Core/Non-Core Force 20-23, 123, 127, 134, 136, 138 Deployment 21, 24, 25-7, 36, 112, 116, 131, 138 Field Orders 24, 28, 32, 85, 106 Flanking Force 21, 24, 26-7, 36, 47 Force Composition 20-21, 30, 127, 131 Force List 18, 20-22, 24, 30, 32, , 124,

147 INDEX Local Support (Air and Infantry) 20, 21-22, 27, 112-3, 116, 123, 137 Main Force 20-21, 26, 125 Maximum Force Value (MFV) 20-22, 24, 85 Operational Advantage 24-27, 36 Reserve Force 22, 27 Strategic Advantage 24-27, 36 Strategic Force 20, 21-22, 36, 137 Tactical Action Card Deck 20-22, 30 Terrain Placement 24-25, 104 Theatre of Engagement 20 Game Turn 36 Generators 54, Defensive 62, 100 Offensive 99 Standard 97 Heat Weaponry 70 Height Bands Aerial Surface Diving Height Level Stratospheric 11-12, 27, 45, 61, 93, 108, 115, 141, 145 Obscured 11-12, 27, 45, 61, 108, 115, 120, 126, 141, 145 Flying 11-12, 17, 45, 61, 74-5, 93, 115, 126 Surface 11-12, 19-20, 27, 45, 48, 54-55, 58, 61, 75, 94, 98, 101, 104, 111 Submerged 11-12, 27, 45, 58-9, 61, 65, 74, 88, 92-3, 108, 114, 128-9, 131, 141, 145 Deep Diving 11-12, 27, 45, 56, 58, 61, 90, 93, 114, 141, 145 Infantry Hull Points (HP) 39 Initiative 9, 19, 36-7, 84 Line of Sight 10, 52-8, 60-1, 64-8, 75-6, 88, 93, 97-98, 100, 104, 106-8, 110-2, 127, 131 Model Assigned Rules 15, Model Profile Model State 16 Activated 7, 16, 19 Drifting 16, 37, 73, 84, 105 Lost 16, 18-9, 28, 32, 41, 47, 81, 85, 119, 123, 126 Ready to Activate 7, 16, 97, 126 Scrapped 9, 14, 16, 28, 39, 41, 46, 59, 84, 92, 106, 120, 124-5, 129, 131, 143 Movement 0" Movement 46 Changing Height Levels 45, 49, 128 Collisions and Rams Controlled Contact 48, 51, 90, 106, 120, 123-4, 129 Disembarking 19, 41, 47, 89-90, 142 Infantry and SAS Movement 46 Low Speed Manoeuvres 47 Maximum Movement 46 Minimum Movement 45 Moving Backwards 47 Moving Off the Tabletop 47 Moving Onto the Tabletop 47 Path of Least Disturbance 47 Snaking 46 Swift Manoeuvres 49, 51, 91, 128, Turning 45-6 Mortars 67 Movement Segment 45 Multi-Player Games 33, Objective Markers 138 Operational Assets 136 Order of Play 36 Particle Accelerators 69 Pre-Turn Phase 36 Prize Models 81 Range Bands 10 Robots See Designation, Robot Rocket Ordnance 66 Salvage Models 81 Scrapyard 9, 16, 32-3, 39, 47, 49, 85, 106, 116, Squadrons 7, 11, Disordered Squadrons 41 Mixed Squadrons 18 Squadron Activation Order Squadron Size 15 Speerschleuder 71 Support Aircraft Squadrons Interception Attack 71, 115 Dogfight 71, 113, Aces 21, 85, 113-4, 116, Duelling 85, 116 Tactical Action Cards 9, 19-22, 24, 28, 30-3, 36, 38, 41, 44-5, 60-1, 63-4, 134, Templates 7 Tesla Weaponry 70 Terrain Elevation Bonus 69, , 129 Indestructable Terrain 104 Major Surfaces 25, 51, 67, 104-5, 107, 110-1, 128, 131 Minor Surfaces , 108, 110-1, 129 Terrain Features 104-5, 107-8, 110-1, 125, 129, 131 Terrain Quality 105, , Terrain Size 106 Torpedo Ordnance 67 Volley Guns 71 Weapon Mounting 54 Weaponry Auxiliary 39, 54-5, 58-61, 63-4, 66, 71-2, 75-6, 81, 96, 123 Mines 14, 27, 38, 58, 60, 63, 66, 71, 73, 74-5, 92, 98-9, 129, 141 Node Projectors 75, 100 Primary 14, 55, 61-3, 65, 66, 67-8, 76, 141 Secondary 14, 55, 63, 66, 67-8, 76, 143 Special Munitions 72-3 Specialised Tertiary 14, 55, 60, 66-8, 76, 96, 143 The contents of this book are Copyright Spartan Games All rights reserved. January 2015 Digital Admiral Edition 147
148
GAME SETUP. The contents of this book are Copyright Spartan Games All rights reserved.
 This booklet is intended for owners of Edition 1.0 of the MASTER Rulebook and details the changes, clarifications and amendments found in Edition 1.1 of DYSTOPIAN WARS. Using this booklet, owners of Edition
Dystopian Wars 2.0 Summary Tables
 1: Strategic / Operational Advantage Dystopian Wars.0 Summary Tables SET UP Opposed D6 test + # of Squadrons in players Force with the Spotter Model Assigned Rule. Winner has Strategic Advantage during
Version 1.5 Last Updated April 7 th 2015
 This document contains Model statistics for the Covenant of Antarctica. The statistics are compatible with the Dystopian Wars 2.0 Game Engine. These statistics have been made available as a free download
This document contains model statistics for the Empire of the Blazing Sun. The statistics are compatible with the Dystopian Wars 2.0 Game Engine.
 This document contains model statistics for the Empire of the Blazing Sun. The statistics are compatible with the Dystopian Wars 2.0 Game Engine. These statistics have been made available as a free download
BETA TEST Revision Sep-18 Page 1
 Page 1 GLOSSARY OF TERMS ACTION DICE: Dystopian Wars uses six-sided custom die known as an Action Die. Each side on the Action die has a special symbol which relates to a result. For those who do not have
ANTARCTICA COVENANT OF. ARISTOTLE CLASS BATTLESHIP: Multi-Part Resin Hull, Acrylic Submerged Template, Resin Turrets, Stat Card
 COVENANT OF ANTARCTICA ARISTOTLE CLASS BATTLESHIP: Multi-Part Resin Hull, Acrylic Submerged Template, Resin Turrets, Stat Card ARISTOTLE CLASS BATTLESHIP DWCA02 (above) The Aristotle Class Battleship is
RESERVES RESERVES CONTENTS TAKING OBJECTIVES WHICH MISSION? WHEN DO YOU WIN PICK A MISSION RANDOM MISSION RANDOM MISSIONS
 i The Flames Of War More Missions pack is an optional expansion for tournaments and players looking for quick pick-up games. It contains new versions of the missions from the rulebook that use a different
Conflict Horizon Dallas Walker Conflict Horizon
 Conflict Horizon Introduction 2018 Dallas Walker Conflict Horizon Welcome Cadets. I m Sargent Osiren. I d like to make it known right now! From that moment you stepped foot of the shuttle, your butts belonged
Introduction. Index. 1. Introduction & Index 2. Core Rules 3. Ship Components 4. Advanced Ship Components 5. Special Fleets
 Introduction From the creative mind of Austin Peasley we bring you Orion s Gate, a single-page ruleset played with papercraft miniatures that was designed to be fast to learn and simple to play. Gameplay
The Emperor Titan is the largest type of Imperial Titan, consisting of two classes: the Imperator and Warmonger.
 The Warmonger Titan Table of Contents Introduction...4 Points Cost:...4 Set Up...5 Warmonger Titan Weapons...5 Sensorium Guns...5 Secondary Weapons...5 Point Defence...5 Flak Batteries (4):...5 Doom strike
Halo Ground Command GT Missions
 Halo Ground Command GT Missions For More info visit: www.thewaygate.blogspot.com The Battle for Reach HGC GT at Adepticon 2017 Mission Pack 1.3 Written 1/29/17 OVERVIEW The Battle For Reach Halo Ground
Fleet Engagement. Mission Objective. Winning. Mission Special Rules. Set Up. Game Length
 Fleet Engagement Mission Objective Your forces have found the enemy and they are yours! Man battle stations, clear for action!!! Mission Special Rules None Set Up velocity up to three times their thrust
Command Phase. Setup. Action Phase. Status Phase. Turn Sequence. Winning the Game. 1. Determine Control Over Objectives
 Setup Action Phase Command Phase Status Phase Setup the map boards, map overlay pieces, markers and figures according to the Scenario. Players choose their nations. Green bases are American and grey are
PROFILE. Jonathan Sherer 9/10/2015 1
 Jonathan Sherer 9/10/2015 1 PROFILE Each model in the game is represented by a profile. The profile is essentially a breakdown of the model s abilities and defines how the model functions in the game.
On the day you also need to bring :
 In this pack you will find everything you will need to do and know, to prepare for and play in the OMG Bolt Action Tournament. Tournament Organiser: Jeff Black Players Pack/ Tournament Rules writer: Jeff
PROFILE. Jonathan Sherer 9/30/15 1
 Jonathan Sherer 9/30/15 1 PROFILE Each model in the game is represented by a profile. The profile is essentially a breakdown of the model s abilities and defines how the model functions in the game. The
SCENARIO LIST. (In no particular order) SEIZE GROUND. - As per page #91 of the Warhammer 40,000 Rulebook -
 SEIZE GROUND. - As per page #91 of the Warhammer 40,000 Rulebook -") The following is the complete list of scenarios that may be played at the 2011 Ultimate Warhammer 40K tournament. Four of these will be used by all players in the first four rounds of the tournament (pre-determined
The following is the complete list of scenarios that may be played at the 2011 Ultimate Warhammer 40K tournament. Four of these will be used by all players in the first four rounds of the tournament (pre-determined
CONTENTS INTRODUCTION Compass Games, LLC. Don t fire unless fired upon, but if they mean to have a war, let it begin here.
 Revised 12-4-2018 Don t fire unless fired upon, but if they mean to have a war, let it begin here. - John Parker - INTRODUCTION By design, Commands & Colors Tricorne - American Revolution is not overly
Primo Victoria. A fantasy tabletop miniatures game Expanding upon Age of Sigmar Rules Compatible with Azyr Composition Points
 Primo Victoria A fantasy tabletop miniatures game Expanding upon Age of Sigmar Rules Compatible with Azyr Composition Points The Rules Creating Armies The first step that all players involved in the battle
Primary Writers: Neil Fawcett Derek Sinclair. Photography & Layout: Neil Fawcett. From an original game idea by Neil Fawcett
 What is Firestorm: Taskforce? 03 Game Basics 04 Anatomy of a Statistic Card 08 How to Build a Fleet 10 Terrain 12 The Sequence of Play 14 Movement Segment 16 Attack Segment - Weapon Attacks 17 The Damage
Introduction. Victory. Solitaire Decisions. Campaigns
 Introduction...2 Campaigns...2 Victory...2 Solitaire Decisions...2 Components...3 Force Counters...4 Force Descriptions...5 Ship Forces...5 Set-Up...7 Sequence of Play...7 Battle...11 Battle Set-Up...11
RU L E S REFERENCE USING THIS RULES REFERENCE
 TM TM RU L E S REFERENCE USING THIS RULES REFERENCE This document is a reference for all Star Wars: Armada rules queries. Unlike the Learn to Play booklet, the Rules Reference booklet does not teach players
Solitaire Rules Deck construction Setup Terrain Enemy Forces Friendly Troops
 Solitaire Rules Deck construction In the solitaire game, you take on the role of the commander of one side and battle against the enemy s forces. Construct a deck, both for yourself and the opposing side,
RANDOM MISSION CONTENTS TAKING OBJECTIVES WHICH MISSION? WHEN DO YOU WIN THERE ARE NO DRAWS PICK A MISSION RANDOM MISSIONS
 i The 1 st Brigade would be hard pressed to hold another attack, the S-3 informed Bannon in a workman like manner. Intelligence indicates that the Soviet forces in front of 1 st Brigade had lost heavily
Sample file TABLE OF CONTENTS
 CHAPTER 1 - THE BASICS 4 The Ship Data Card 5 Setup 6 Selecting and Organizing Forces 6 Flagships 6 Operating Independently 7 Deploy Forces 7 Turn Order 8 Movement Phase Overview 9 Shooting Phase Overview
I-95 GAMERS. Domination Missions
 I-95 GAMERS Domination Missions I-95 GAMERS Domination Missions Design notes Domination special rules Domination Frontline Domination Blind Domination Blitzkrieg Domination Early war Blitzkrieg Domination
Component List. Game Overview. How to Use This Rulebook. This Rulebook. 1 Quick-Start Rules Booklet. 3 Painted Plastic Ships.
 Game Overview Welcome to X-Wing, an exciting, fast-paced dogfighting game set in the Star Wars universe. In X-Wing, two players take control of X-wings, TIE fighters, and other ships from the Star Wars
Fleet Engagement. Mission Objective. Winning. Mission Special Rules. Set Up. Game Length
 Fleet Engagement Mission Objective Your forces have found the enemy and they are yours! Man battle stations, clear for action!!! Mission Special Rules None Set Up velocity up to three times their thrust
Lights in the Sky: War among the stars
 Introduction A long time ago, in a galaxy not so far away... Some of the most exciting and compelling moments from movies and books are the space battles. Whether a dogfight between a handful of star fighters
Play with good sportsmanship and have fun!
 Rules of the High Seas Here are some game concepts important to the Pirates Constructible Strategy Game (CSG) rules: Six-sided dice are abbreviated d6. Ability text (found on the fronts of cards) overrules
FIRE FROM THE SKIES. Leonard R. Heinz
 FIRE FROM THE SKIES 1. INTRODUCTION 1.1. "Fire from the Skies" ("FFTS," for short) is a naval warfare simulation portraying naval air warfare in World War II. The simulation presents aspects of this warfare
Miniatures 800 Point
 www.alphastrike.com.au Presents A Miniatures 800 Point 2 nd Edition One Day Tournament TGAPERTH.COM Version 1.0 WHAT YOU WILL NEED The following event will use the rules taken from either the standard
Axis & Allies Pacific FAQ
 Setup Axis & Allies Pacific FAQ December 11, 2003 Experienced players sometimes find that it s too easy for Japan to win. (Beginning players often decide that it s too hard for Japan to win it s all a
ARMY COMMANDER - GREAT WAR INDEX
 INDEX Section Introduction and Basic Concepts Page 1 1. The Game Turn 2 1.1 Orders 2 1.2 The Turn Sequence 2 2. Movement 3 2.1 Movement and Terrain Restrictions 3 2.2 Moving M status divisions 3 2.3 Moving
PRE-DEPLOYMENT ORDERS Complete the following pre-deployment orders prior to deploying forces and beginning each game:
 WARHAMMER 40K TEAM TOURNAMENT ORDERS SHEET PRE-DEPLOYMENT ORDERS Complete the following pre-deployment orders prior to deploying forces and beginning each game: 1. Terrain is not fixed; teams dice off
The 2nd Schaumburg Beach Head
 The 2nd Schaumburg Beach Head For More info visit: www.thewaygate.blogspot.com Adepticon 2017 Mission Pack 1.1 Written 1/10/2017 OVERVIEW The Tournament rounds are 2.5 hours in length Armies are to be
COMPONENT OVERVIEW Your copy of Modern Land Battles contains the following components. COUNTERS (54) ACTED COUNTERS (18) DAMAGE COUNTERS (24)
 ACTED COUNTERS (18) DAMAGE COUNTERS (24)") GAME OVERVIEW Modern Land Battles is a fast-paced card game depicting ground combat. You will command a force on a modern battlefield from the 1970 s to the modern day. The unique combat system ensures
GAME OVERVIEW Modern Land Battles is a fast-paced card game depicting ground combat. You will command a force on a modern battlefield from the 1970 s to the modern day. The unique combat system ensures
Rules: Axis and Allies 1942
 Page 1 of 22 Page 2 of 22 Rules: Axis and Allies 1942 NOTE: Although mostly the same as the tabletop rules, these rules have been modified to reflect the online version of the game. The rules themselves
40k Rules at Invasion 2018
 40k Rules at Invasion 2018 1) Legal Army Lists / Army Specifics / Points Sizes (2000) / Painting At Invasion we are going to be playing with 2000 point armies. Please bring at least 7 printed copies of
Operation Blue Metal Event Outline. Participant Requirements. Patronage Card
 Operation Blue Metal Event Outline Operation Blue Metal is a Strategic event that allows players to create a story across connected games over the course of the event. Follow the instructions below in
Thunderbolt & Lightning Fast Play Aerial Combat Rules Version 1.1
 Thunderbolt & Lightning Fast Play Aerial Combat Rules Version 1.1 By Mark Cleaver Editor Martin Cook Playtesters Andrew Crittell, Martin Cook & Christopher Knight Copyright Raiden Miniatures 2007,2008
EPIC VARIANT REGULATIONS
 EPIC VARIANT REGULATIONS SUMMARY OF CHANGES IN THIS VERSION VERSION 1.0 / EFFECTIVE 01.17.2018 All changes and additions made to this document since the previous version are marked in red. The Epic variant
CREDITS. Game Design Harry Pratt. Sample file
 CREDITS Game Design Harry Pratt Editor/Layout Leslie Pratt Playtesters Stuart Darraugh Michael Doty Aaron Feit Eric Gustafson Matt Heid Tom Jaggard Lt. Col. (Ret) Harry D.A. Pratt Leslie Pratt Tom Sibley
Combat Air Patrol. Kevin White. (This article was originally published in Lone Warrior 187)
") Combat Air Patrol Kevin White (This article was originally published in Lone Warrior 187) This is a WW2 air and naval game inspired by the Carrier campaigns in the Pacific. Situation Somewhere in the Pacific
Combat Air Patrol Kevin White (This article was originally published in Lone Warrior 187) This is a WW2 air and naval game inspired by the Carrier campaigns in the Pacific. Situation Somewhere in the Pacific
X-Wing Epic Variant Regulations
 X-Wing Epic Variant Regulations Version 1.0 / Effective 01.17.2018 All changes and additions made to this document since the previous version are marked in red. The Epic variant supported by the Organized
BATTLEFIELD TERRAIN STC RYZA-PATTERN RUINS
 BATTLEFIELD TERRAIN In this section you will find expanded terrain rules for the STC Ryza-pattern Ruins included in Moon Base Klaisus. You do not need to use these rules to enjoy a battle using the models,
These rules are intended to cover all game elements from the following sets. Pirates of the Spanish Main
 These rules are intended to cover all game elements from the following sets. Pirates of the Spanish Main Pirates of the Mysterious Islands Pirates of the Crimson Coast Pirates of the Frozen North Pirates
Range Example. Cards Most Wanted The special rule for the Most Wanted objective card should read:
 Range Example FAQ Version 1.2 / Updated 9.30.2015 This document contains frequently asked questions, rule clarifications, and errata for Star Wars: Armada. All changes and additions made to this document
Sequence of Play This rulebook is organized according to this Sequence of Play.
 Introduction...1 Sequence of Play...2 Campaign Set-Up...2 Start of Week...10 Pre-Combat...11 Combat...14 Post-Combat...19 End of Week...20 End of Campaign...22 Optional Rules...22 Credits...22 Sample Game...23
IV. TROOPS FAQ SPECIALIZED UNITS 2
 IV. TROOPS FAQ STANDARD UNITS 1 7 8 8 Infantry Move 0-1 and battle, or move 2 no battle May Take Ground on successful Close Assault Armor Move 0-3 and battle May Overrun on successful Close Assault Artillery
Mythic Battles: Pantheon. Beta Rules. v2.5
 Mythic Battles: Pantheon Beta Rules v2.5 Notes: Anything with green highlighting is layout notes, and is NOT FOR PRINT. Anything with yellow highlighting is not yet finished. 1 Game Terms & General Rules
IMPERIAL ASSAULT-CORE GAME RULES REFERENCE GUIDE
 STOP! This Rules Reference Guide does not teach players how to play the game. Players should first read the Learn to Play booklet, then use this Rules Reference Guide as needed when playing the game. INTRODUCTION
Larsson's A&A50 House Rules
 Larsson's A&A50 House Rules 2009-03-17 House Rule 1 Black Sea - Official optional rule In order to maintain its neutrality, Turkey closed the narrow straights linking the Black Sea and the Mediterranean,
Field of Glory - Napoleonic Quick Start Rules
 Field of Glory - Napoleonic Quick Start Rules Welcome to today s training mission. This exercise is designed to familiarize you with the basics of the Field if Glory Napoleonic rules and to give you experience
SPACE EMPIRES Scenario Book SCENARIO BOOK. GMT Games, LLC. P.O. Box 1308 Hanford, CA GMT Games, LLC
 SPACE EMPIRES Scenario Book 1 SCENARIO BOOK GMT Games, LLC P.O. Box 1308 Hanford, CA 93232 1308 www.gmtgames.com 2 SPACE EMPIRES Scenario Book TABLE OF CONTENTS Introduction to Scenarios... 2 2 Player
Wings of Glory campaign
 Wings of Glory Campaign Tyneside Wargames Club June 2016 Wings of Glory campaign All players start on the same side, and are to use planes which historically flew together (IE no DH-2 flying with a Sopwith
Axis & Allies Europe FAQ
 Second Edition Rules Axis & Allies Europe FAQ November 17, 2005 Q. Did any rules change from the first to second editions of the rule book? A. Only two: 1. A destroyer taking part in an amphibious assault
16.0 OPTIONAL RULES These rules may be introduced to add variety to your games. WWII on the High Seas
 16.0 OPTIONAL RULES These rules may be introduced to add variety to your games. 16.1 Linked Games This rule links several battles to determine the overall winner. Set-up and play each battle as normal.
Notes about the Kickstarter Print and Play: Components List (Core Game)
") Introduction Terminator : The Board Game is an asymmetrical strategy game played across two boards: one in 1984 and one in 2029. One player takes control of all of Skynet s forces: Hunter-Killer machines,
Introduction Terminator : The Board Game is an asymmetrical strategy game played across two boards: one in 1984 and one in 2029. One player takes control of all of Skynet s forces: Hunter-Killer machines,
40k Rules at Invasion 2018
 40k Rules at Invasion 2018 1) Legal Army Lists / Army Specifics / Points Sizes (2000) / Painting At Invasion we are going to be playing with 2000 point armies. Please bring at least 7 printed copies of
You Can t Come In Without A TIE (v.1.2)
") You Can t Come In Without A TIE (v.1.2) Simple Star Wars fighter battles for Micromachines etc by Gary Mitchell. For free. No copyright violations. Thanks for input: Mick Allan, STaB, Tom Wightman. SHIP
You Can t Come In Without A TIE (v.1.2) Simple Star Wars fighter battles for Micromachines etc by Gary Mitchell. For free. No copyright violations. Thanks for input: Mick Allan, STaB, Tom Wightman. SHIP
WARHAMMER 40K COMBAT PATROL
 9:00AM 2:00PM ------------------ SUNDAY APRIL 22 11:30AM 4:30PM WARHAMMER 40K COMBAT PATROL Do not lose this packet! It contains all necessary missions and results sheets required for you to participate
TUMULT NOVEMBEr 2017 X-WINg DOUBLES TOUrNAMENT. Lists need to be submitted by 14 November 2017 V 1.1. Sponsored by
 TUMULT 2017 18 NOVEMBEr 2017 X-WINg DOUBLES TOUrNAMENT players pack Lists need to be submitted by 14 November 2017 V 1.1 Sponsored by 1 GENErAL INFOrMATION WHEN: Saturday 18 November 2017. Check in is
Frontier/Modern Wargames Rules
 Equipment: Frontier/Modern Wargames Rules For use with a chessboard battlefield By Bob Cordery Based on Joseph Morschauser s original ideas The following equipment is needed to fight battles with these
Emperor s Children. V3.5.2 Play Document
 Emperor s Children V3.5.2 Play Document 1 Emperor s Children Army List EC1.0 The Emperor s Children Version 3.5.2 EC1.1 Emperor s Children Special Rules The following special rules apply to Emperor s Children
Portable Wargame. The. Rules. For use with a battlefield marked with a grid of hexes. Late 19 th Century Version. By Bob Cordery
 The Portable Wargame Rules Late 19 th Century Version For use with a battlefield marked with a grid of hexes By Bob Cordery Based on some of Joseph Morschauser s original ideas The Portable Wargame Rules
Size. are in the same square, all ranges are treated as close range. This will be covered more carefully in the next
 Spacecraft are typically much larger than normal vehicles requiring a larger scale. The scale used here is derived from the Starship Types from D20 Future. All ship types larger than ultralight would normally
Down In Flames WWI 9/7/2005
 Down In Flames WWI 9/7/2005 Introduction Down In Flames - WWI depicts the fun and flavor of World War I aerial dogfighting. You get to fly the colorful and agile aircraft of WWI as you make history in
Range Example. CARDS Most Wanted The special rule for the Most Wanted objective card should read:
 Range Example FAQ Version 1.1.1 / Updated 7.24.2015 This document contains frequently asked questions, rule clarifications, and errata for Star Wars: Armada. All changes and additions made to this document
WARHAMMER FANTASY REGIMENTS OF RENOWN
 WARHAMMER FANTASY REGIMENTS OF RENOWN FRIDAY MARCH 20 TH :00PM 1:00AM Do not lose this packet! It contains all necessary missions and results sheets required for you to participate in today s tournament.
GLOSSARY USING THIS REFERENCE THE GOLDEN RULES ACTION CARDS ACTIVATING SYSTEMS
 TM TM USING THIS REFERENCE This document is intended as a reference for all rules queries. It is recommended that players begin playing Star Wars: Rebellion by reading the Learn to Play booklet in its
Summary of changes in this version VERSION / EFFECTIVE
 TM TM Tournament FAQ Summary of changes in this version VERSION 2.1.1 / EFFECTIVE 4.2.2016 Movement, Page 3 Card Clarifications, Pages 5-7 All changes and additions made to this document since the previous
WARHAMMER 40K. SYSTEM RULES PACK Highlander
 WARHAMMER 40K Event Format: SYSTEM RULES PACK Highlander The all comers event will run alongside a Highlander event, both will run a separate draw and award separate trophies. The event will follow the
ARMOR DIAGRAM ARMOR DIAGRAM. Mech Data. Mech Data BATTLEMECH RECORD SHEET BATTLEMECH RECORD SHEET. Weapons Inventory.
 BATTLEMECH RECORD SHEET Left Torso Head Right Torso ARMOR DIAGRAM Type: HER-2S Hermes II Tonnage: 40 Points: Walking: 6 Running: 9 Weapons Inventory Mech Data Type Location Damage Short Med. Long 1 Autocannon
Mythic Battles: Pantheon. Beta Rules. v2.8
 Mythic Battles: Pantheon Beta Rules v2.8 Notes: Anything with green highlighting is layout notes, and is NOT FOR PRINT. Anything with yellow highlighting is not yet finished. 1 Appearance There are many
Campaign Notes for a Grand-Strategic Game By Aaron W. Throne (This article was originally published in Lone Warrior 127)
") Campaign Notes for a Grand-Strategic Game By Aaron W. Throne (This article was originally published in Lone Warrior 127) When I moved to Arlington, Virginia last August, I found myself without my computer
Campaign Notes for a Grand-Strategic Game By Aaron W. Throne (This article was originally published in Lone Warrior 127) When I moved to Arlington, Virginia last August, I found myself without my computer
WARHAMMER LEGENDARY BATTLES
 WARHAMMER LEGENDARY BATTLES Welcome Most games of Warhammer are two player games between armies with equal points values of anywhere from 500 to 3000 points. However, while games like these are great fun,
Game Turn 11 Soviet Reinforcements: 235 Rifle Div can enter at 3326 or 3426.
 General Errata Game Turn 11 Soviet Reinforcements: 235 Rifle Div can enter at 3326 or 3426. Game Turn 11 The turn sequence begins with the Axis Movement Phase, and the Axis player elects to be aggressive.
Fast Play Game Rules plus NEW 2-player Battle Box APRIL 2016 RELEASE
 Fast Play Game Rules plus NEW 2-player Battle Box APRIL 2016 RELEASE DWRB05 Dystopian Wars: Fleet Action Fast Play Rulebook A CALL TO ARMS! Calling all Commodores and Generals Dust off your Dystopian Wars
Venue and times. What players will need to bring. Fleet Lists. Prizes
 1 Venue and times The Tournament will be held on Saturday June 3rd 2017 at the UK Games Expo (NEC Birmingham). Players should arrive for registration at 9am. Each round will last a maximum of 3 hours and
The Esoteric Order of Gamers
 The Esoteric Order of Gamers www.orderofgamers.com High quality materials for the dedicated devotee of immersive, thematic tabletop games. Game rules summaries, foamcore box plans, articles, interviews,
Warhammer 40K Golden Rhino Tournament
 CREATED BY IAN PIETILA FOR USE AT THE HIGHLAND PUBLIC LIBRARY Warhammer 40K Golden Rhino Tournament JULY 28TH 1ST ANNUAL List Requirements and Structure INSIDE YOU LL FIND Army list requirements and structure.
AXIS AND ALLIES 1914 OPTIONAL RULE: RESEARCH AND DEVELOPMENT
 AXIS AND ALLIES 1914 OPTIONAL RULE: RESEARCH AND DEVELOPMENT Using this rule, you may attempt to develop improved military technology. If you decide to use Research & Development, it becomes the new phase
FRIDAY APRIL :00PM 10:00PM 8:00AM 8:00PM :00AM 3:00PM
 FRIDAY APRIL 19 ------------------ 4:00PM 10:00PM 8:00AM 8:00PM ------------------ 9:00AM 3:00PM WARHAMMER 40K GLADIATOR TOURNAMENT Do not lose this packet! It contains all necessary missions and results
Introduction. Fleet Lists. Venues
 1 Introduction Welcome to The 2017 Dropfleet Commander Tournament Pack! This Pack is designed to allow players to run fun, competitive, tournaments with Dropfleet Commander, and gives information to tournament
DOMINATION PLAYER A PLAYER B
 DOMINATION The battlefield will provide a distinct tactical advantage for whoever holds it for many years to come. Victory can be achieved by forcing the enemy back and securing the key points on the battlefield,
Mythic Battles: Pantheon. Beta Rules. v2.4
 Mythic Battles: Pantheon Beta Rules v2.4 Notes: Anything with green highlighting is layout notes, and is NOT FOR PRINT. Anything with yellow highlighting is not yet finished. 1 Game Terms & General Rules
Imperial-class Star Destroyer
 Imperial-class Star Destroyer At the height of the Galactic Civil War, the Imperial-class Star Destroyer was the commanding cornerstone of the Imperial Navy. Measuring 1,600 meters in length, a single
SATURDAY APRIL :30AM 5:00PM 7:00PM :00AM
 SATURDAY APRIL 20 ------------------ 8:30AM 5:00PM 9:00AM 7:00PM ------------------ 9:00AM 5:00PM WARHAMMER ANCIENTS SINGLES TOURNAMENT Do not lose this packet! It contains all necessary missions and results
Wings of war campaign. All players start on the same side, and are in the same scout squadron on the Western front in Late August 1917.
 Wings of War Campaign Tyneside Wargames Club June 2011 Wings of war campaign All players start on the same side, and are in the same scout squadron on the Western front in Late August 1917. Players may
Air Deck Rules and Use
 Air Deck Rules and Use Note: This is a first draft of the Air Deck rules. Any problems or suggestions can be posted in the forum thread or mailed to PanzerRunes on the Days of Wonder site. Suggestions
Game Components - Sheets
 Game Components...2 Campaign Set-Up...12 Sequence of Play...17 Pre-Flight...18 Target-Bound...20 Over-Target...22 Dogfighting...24 Air to Ground Attacks...28 Home-Bound...31 Debriefing...32 Aces Expansion
Operation Deep Jungle Event Outline. Participant Requirements. Patronage Card
 Operation Deep Jungle Event Outline Operation Deep Jungle is a Raid event that concentrates on a player s units and how they grow through upgrades, abilities, and even fatigue over the course of the event.
FULL RULEBOOK GAME FLOW TABLE OF CONTENTS. Playing Scenarios... 17
 T FULL RULEBOOK his book includes the complete rules for the game, followed by the Scenario section on page 17. This rulebook is not intended as a method for learning the game, and especially not as a
Buck Rogers Battle For The 25 th Century 1. 4 Turn Phases Complete each phase in order Definitions
 Buck Rogers Battle For The 25 th Century 1 OBJECT 1) Control 15 Territorial Zones at the end of any turn 2) Control the last Leader on the board at any time 3) Convince everyone else to surrender 4) Control
Components Locked-On contains the following components:
 Introduction Welcome to the jet age skies of Down In Flames: Locked-On! Locked-On takes the Down In Flames series into the Jet Age and adds Missiles and Range to the game! This game includes aircraft from
dreadnoughts & battlewagons folio STANDARD RULES
 dreadnoughts & battlewagons folio STANDARD RULES 1.0 INTRODUCTION 1.1 Map & Time Scale 2.0 COMPONENTS 2.1 Inventory 2.2 Map 2.3 Counter Types & Colors 2.4 Ships 2.5 Counting Range 2.6 Effective Range 2.7
The Glory that was GREECE. Tanagra 457 BC
 The Glory that was GREECE Tanagra 457 BC TCSM 2009 The Glory that Was Vol. I: Greece Rulebook version 1.0 1.0 Introduction The Glory that was is a series of games depicting several different battles from
WARHAMMER FANTASY IT s HOW YOU USE IT TOURNAMENT
 9:00AM 2:00PM FRIDAY APRIL 20 ------------------ 10:30AM 4:00PM ------------------ FRIDAY APRIL 20 ------------------ 4:30PM 10:00PM WARHAMMER FANTASY IT s HOW YOU USE IT TOURNAMENT Do not lose this packet!
TAC MYTHOS. Byakhee Attack. 0 CP Any. Mythos Influence Level increases by one. always attacking the nearest unit. The
 TAC Flash of Inspiration Play during the TAC Step of the Pre-Turn Phase. An Officer of your choice gains D3 additional Command Points this Turn. 0 CP Any MYTHOS Byakhee Attack One or more Byakhee models